Category Archives: Review

The Men Who Would Be Kings – Some Observations

I refrained from any review-type comments about this rule set in my initial post.

Changed my mind.

This is a good set of rules.  Easy to digest and fun to play.  The general structure is very similar to “Pikeman’s Lament”, but provides excellent historical context.

The temptation here is to start layering on house rules to increase rule “realism”.  Then it becomes something it is not.  I’m sure the author considered anything  I thought about and, after careful consideration, declined to add another layer of complexity and/or chrome.

This result is a rule set placing an interesting burden on the players – a different sand box so to speak –  to construct interesting scenarios with interesting smaller forces with interesting mixes of troop-types.

What a relief!  No longer are colonial battles limited to big games with small,  highly disciplined, regular units decimating wave-after-wave of native hordes.  Rorke’s Drift is so boring.

Here are some thoughts based on my initial play-throughs and formulaic scenario described in my previous posts.

  1.  Make the majority, if not all,  of your Askari units Irregulars.  As Irregulars, their musketry and hand-to-hand capabilities will make them far more vulnerable.
  2. Upgrade at least one (1) Tribal unit to “well armed”.  Longer range will  increase their ability to inflict casualties and pin opposing forces.  A pinned unit is very vulnerable in melee.
  3. Use “Go To Ground” for native units in the open and waiting to assault.
  4. “On The Double” is one way to allow your Tribal units to remain out of deadly short-range weapons fire (especially when delivered by Regulars), and have decent chance of attacking into melee.  All you have to do is roll a D6x5 or D6x6 to get the extra move distance.  Try it with multiple units.
  5. Vary the leader rating of your Native units to avoid a cycle of pin/rally/pin.

Fifth Corps

I have each of the four games comprising SPI’s Central Front Series covering a hypothetical Warsaw Pact versus NATO conflict in the 1980s.

The system has a following, and has evolved.  Here’s a link to some downloads.

Finally set this up after some 40 years of procrastination.  And then, procrastinated another two months before I sat down to actually do more than stare.  Plenty of rules reading during the interim – isn’t that a good substitute for action? – but no pushing of cardboard.

I would characterize the game as operational, but a far, far more granular approach then, let’s say, The Third World War.  So, Grand Tactical?

This thread at BGG does a great job of describing the game’s characteristics, warts (with that emphasized) and all.  Each of the perspectives is valid.

The thought that really resonated with me is Jason Cawley’s comments about “Analysis Paralysis”.

On a macro level, my entire involvement with this game reflects this.  I intended to use the updated and comprehensive rules.  Too much of a slog.  My compromise was to use the rules as updated after the publication of BAOR.  Too much of slog, especially given my manic habit of having about three games set up at any one time (yes, any vacant horizontal space is at risk at The Pine Cone Lodge).  Finally decided “Just use the original rules and play the damn game.  It’s a helluva lot easier to flip through five pages of rules than thirty.”

Sage Self Advice.

After getting on it, I discovered  I couldn’t manage all of the map and so focused on one section and its units. This reduced scope allowed me to play out the initial turn and grasp the rules.

Yes, the friction points mechanic is a bitch.  Yes, the Combat Results Table (CRT) is a bitch.  Yes, the stacking limits and pesky NATO “Ants” are a bitch.

The turns do seem endless. There are any number of courses of action for the Soviets.

But that’s all part of the system’s charm.

After all, beauty is in the eye of the beholder.

But, it isn’t love and I don’t know if I will finish the game much less play the other ones in the series.  Who knows, maybe I’ll put them up for sale, or consign them to even more time in Box Purgatory.

But, the process has not been a waste of time.

Leaning In – Husaria Initial Impressions

Had enough of WRG 6th for the time being.  Still have to finish the game today, but I’ve started reading a  new set of late Renaissance rules.

Husaria was written by Ian Wilson, and published by The Pike and Shot Society in 2003. Past tense is used because Husaria is no longer in print.  The exact circumstances are now fuzzy, but I snagged a copy some months ago after reading complimentary reviews, and thinking that they could work well for my 25mm Ottomans, Russians, Cossack, Poles and Transylvanians.

The rule set addresses combat in Eastern Europe from 1558 to 1699.  It is specific in that regard because, according to the author’s introduction,  combat in that region differed from Western Europe (and I paraphrase), in that the Military Revolution had stalled;  the predominant cavalry was still lance armed and prepared to charge home, with gunpowder weapons extensively used, but unable to dominate the battlefield.

Troops are categorized as Elite, Veteran, Professional, Experienced and Raw.  Fanatics can be added to the troop mix when deemed appropriate.

The turn sequence is straight-forward:  Roll for who moves first, movement, combat, second side movement, simultaneous firing, response, and new orders (dispatched by messenger).

Initiative and Response Checks are used to reflect morale.  Initiative is checked when a unit must do something “different”, and Response as a result of an action taken against the unit.  There are many, many, many circumstances for which a check of some type is necessary.  One circumstances that promises to be interesting is the Initiative Check required for the first time a unit attempts to move or fire during the game.   Chaos!

Each unit has a Firing Ability Rating (FAR) as well as Close Combat Rating (CCR).  These ratings are applied, along with modifiers and 2xD6 roll, with results determined by a Combat Results Table (CRT).

There are also rules to reflect unit orders,  risk to the general, disorder, and terrain effects.  In short, the usual suspects.

The rules set includes army lists.  Each army has a core group of 6-8 units.  Additional army capabilities and units are added through die rolls.  This promises some variety for each army.  My hope is that this variety does not lead to additional lead purchases.  I’ve started lead mountain again (on that in another post), and I want it to remain a foothill.

There is one glaring omission!  Each unit is assigned a CCR reading something like this:  CCR 4/3/3, with dividing slashes.  There is nothing in the rules that explain these slashes.  I’ve read the bloody rules about ten times (only 24 pages) and cannot find a bloody explanation.  Ugh!  Will probably wind up sending a bloody message to the bloody Pike and Shot Society to see if someone can explain it.  My guess is that each number refers to a round of close combat.

These rules seem to occupy the middle ground between Gush’s Renaissance Wargaming’s super detailed approach and the more abstracted De Bellis Renationis (DBR).  Should be interesting.

Byzantium Reborn Review

This “mini-game” published by Fiery Dragon covers the 1920-21 fighting between Greece and Turkey.  The game was originally published by Micro Game Design Group.  Here’s link to the BGG page:  https://boardgamegeek.com/boardgame/13290/byzantium-reborn

This interesting R. Ben Madison design  lends itself to solitaire play.  Small footprint, not many counters, but real breadth to the rules.  Well, maybe not breadth as much as layers of chrome.  But it is good chrome.  The examples of play are done in a narrative style.  I prefer procedural examples.

It is a different type of system, and although the rules are laid out in game turn squence, there is quite a bit of page flipping early on to get comfortable with terminology, minor pieces of chrome, and general game flow.

The game isn’t as much about combat, but resource and allies management.  Combat is a means to increase your resources through occupying regions (Vilayets), but the real challenge is to gain allies that will intervene in the conflict and/or deny your opponent this support.  Your allies provide Equipment Points (EPs) used for the purchase of combat units/assets.

Each turn consists of a Random Events Phase, Political Phase, Greek Player Phase – which includes Battlegroup Step, Strategic Movement Step, Movement Step, Combat Step and Recovery Step.  There is a Second Random Events Phase, Strategic Phase, and then the Turkish Player Phase, which repeats the Greek Player’s steps.

Random events influence potential Ally behavior and the ability to gain/lose Political Support Points (PSPs) and EPs.  During the Political Phase, players can expend PSPs to “buy” increased support, or reduce their opponents political support.  Again, this support influences the ability to gain EPs which can be used to build or rebuild ground units, or bid for Asset Points (APs), represented by air and artillery units which serve as force multipliers during combat.

This purchase of APs is done on a bidding basis which I initally had trouble with. Likewise, the increased allocation of PSPs can be used to enhance the chances of moving one of the European powers involved in the conflict (Italy, Great Britain, France, Soviet Union and, to a much lesser extent, The United States), from Neutrality to Support and finally to Intervention.  Support and Intervention generate different levels of EPs 

The Battlegroup step is simply organizing one’s forces for combat in each of the Vilayets (regions) controlled.  Strategic movement involves rail or naval movement, and Movement is between Vilayets to either occupy for resources or to set up combats.  Combat is a dice fest, without the use of a Combat Results Table (CRT).  The Recovery step involves rallying unit disrupted in combat.

As pointed out in an earlier review, the game does involve a significant amount of luck, as embodied in the Random Events table.  But, the events are based on historical actions or probabilities/possibilities, and for solitaire play that’s not a bad thing.

As you might sense from my description of the game, it took some time to grasp the differences between PSPs, APs, and EPs as well as the methods for their use.  The bidding for assets and use of dice for combat also involved a learning curve.

However, the effort was worth it.  This is a good game, with an interesting system, that provides an enjoyable gaming experience.  

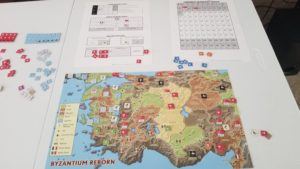
Here’s a picture of it on a card table.  Gives a sense of size.

Another New System

The Sun Never Sets (TSNS) has been languishing on the shelf for a number of years. Tried its Gallic Brother In Arms – French Foreign Legion – a few years back, but that effort didn’t even make it to the punch counters phase.

Some 45 Minutes later……

Did some quick checking and there are a number of games in this series. Not only French Foreign Legion, but also The Sun Never Sets II and First Afghan War. Each of the games was published in Strategy & Tactics magazine. After rummaging through  boxes stashed under the gaming table, I discovered the latter two. So, I have the entire set. At times like this I feel like an aging acid-addled rock star who, when an interviewer plays an obscure track, mutters “Did I play on that”?

To continue this digression, I’m now faced with a standard gaming conundrum. Since I’m immersed in the common rule set, do I start working through the entire set of games? Or, will this only result in a feeling of obligation and avoidance, with a yearning to try something else?

TSNS has an interesting system. It can’t be considered a hex and counter simulation, but it has more depth than initially meets the eye. The campaigns covered appear to be push-overs for the British Empire. But distances, logistics and objectives can make each campaign a challenge.

Units are categorized by weapon type and morale. Weapons include five different types of artillery (rockets!), two types of machine guns, and four different types of rifles. For morale, units are classified as Veteran, Line, Fanatic and Rabble. The first three receive positive die roll modifications for both fire and melee combat.

Individual units can be organized into Forces. Headquarters (Leaders) can be assigned to Forces. A Headquarters has a tactical rating effecting Battle (combat) and Rally, with a strategic rating influencing Movement. Larger forces have a greater combat strength, which is reflected in the Combat Results Table (CRT). Force organization also effects Logistics.

The basic turn sequence is straight-forward, even though I’ve had some real problems keeping the mechanics straight. These Turn Segments are:

  1. Events
  2. Reinforcement/Replacement
  3. Movement
  4. Battle
  5. Logistics
  6. Rally

Events are randomly generated by 2xD6 rolls applied to a chart. Some results are campaign specific, others generic for the colonial period. Reinforcements and Replacements are game specific and involve either the deployment of specific units or strength factors by unit type.

While movement rates are printed on the counters, the ability to move and length of move is determined by a D6 roll for each Force at the beginning of the segment. Possibilities include no movement allowed, regular movement, forced march with an increased movement allowance, forced march with attrition (elimination of one unit in the force) and “Mad Dash” with even greater maximum movement. A Headquarter’s strategic rating may be added to modify the die roll.

The Battle Segment is somewhat involved. Tactical Initiative (comparing each side’s D6 roll modified by tactical rating of the Headquarters) determines which side proceeds first. This is important since results are applied immediately. Battle has three rounds, two of which involve fire combat. The third round is melee. During fire combat, units with the same morale rating, weapon and unit type are grouped to fire a “Volley”. Artillery fires during the first round, with rifles (all small arms) during the second round. Many native units do not have small arms, and can only “volley” during melee combat. Units with small arms also “volley” during melee. Specific modifiers are applied to the D6 rolls for results on a CRT specifying the number of units eliminated and/or demoralized. The side with the greater losses during a Battle may have to retreat if those losses exceed fifty percent. Forces retreating through an enemy controlled Zone of Control take additional losses.

Forces are supported by either Supply Trains or Foraging. Foraging Forces must roll to determine if they suffer demoralization. Supply Trains are expended after providing support. The number of trains is limited, and their staging/sequencing is important for a steady advance with minimal attrition.

Demoralized Forces may Rally. The ability to rally is influenced by their morale and Headquarters.

I’ve started the March To Peking scenario, covering the 1860 Arrow War. The basic game and scenario specific rules have provided a good experience, and after a number of fits and starts I am getting comfortable with the game’s flow.

I am looking forward to incorporating the optional rules in this and other scenarios. These include Engineering operations, Sieges, Fog of War, Attack From March, Ambush, Evasion, Atrocity and Fair Play, Negotiations, and Civillians.

My next post will offer an After Action Report (AAR).
Destruction of Force Z – Wrap Up

My immediate interest in the game was triggered while reading The Royal Navy in Eastern Waters:  Linchpin of Victory, 1935-1942 by Andrew Boyd.  This is a very interesting and well researched examination of the events leading up to the Force Z debacle.  The author dispels many of the convenient myths surrounding the event.  Well worth the time and effort, especially if you can pick it up when on Kindle sale for $1.99 or so.

The game reminds me of In Magnificent Style, where you have to push your luck to the limit in order to achieve the intent of Force Z’s sortie.  I did this, especially when I reversed course and sailed towards the Japanese battleships, rather than “game” the system and eek out a minimal victory of just a few points.

To compound the British player’s problems, the chances of sinking the Japanese battleships is fairly low, and seemingly not worth the risk, despite the lucrative victory points.  Also, the odds of fighter cover actually materializing is relatively low, and anti-aircraft fire is fairly ineffective.  In this regard the game reflects the operational and tactical  factors leading to Force Z’s destruction.

The optional rules allow the British player some relief; limiting Japanese bomber availability on a per day basis, increasing the Repulse’s capability to avoid torpedoes, and including the carrier Indomitable to provide available and increased air cover.  I would consider a house rule making British surface attacks more effective and, perhaps, increasing the victory points awarded for bombarding the Japanese landing sites, since this was the mission of Force Z.

The rules are comprehensive and structured to guide the player.  This is good as there are simply too many charts and die rolls to remember.  This also enhances replayability because the player can just break out the game, dial up the rules, and start grinding through each turn’s eleven phases.  On the other hand, this grinding slows game play.  But, a typical game will probably not last too long if Japanese searches are effective.  In my instance, the British enjoyed ideal conditions (overcast weather, radio silence, and poor search rolls) and still had little success.

I like the random events and movement charts, and plan to use  variations  in other gaming situations.  The tactical display was fun because it reminded me of playing Midway back in (as it was called then) Junior High.

I’m now thinking about breaking out Avalanche Press’ Strike South and work through the scenario with more detail to reflect the different operational options historically explored by the British before 1942.  A comparison of the two systems will be interesting.

In summary, this is an engaging game providing excellent value and replayability.


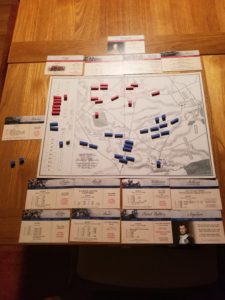
W1815 – First Impression*

Woke up very early this morning.  After a round of depressing internet reading, I decided to get W1815 (The W is for Waterloo) up and running.   I was having problems comprehending the rules, so it seemed to be one of those cases where the only way to learn the game was to fumble and stumble through a session.

And fumble and stumble I did…….but I had some help.

W1815 has a real following over at Boardgamegeek.  The comments and reviews are positive and I  liked the Kriegsspiel/Table Battles blocks, quick-play and period topographic map.  So, I pre-ordered the 2nd Printing.  Forgot all about it, until I received an email in January that it was shipping.

The “help” was significant card errata.  Cards drive the game, so these errors changed the game. Still, I had fun playing, unaware at first that there might be problems.  But, the game played wasn’t the game as designed.

I hope to receive the replacement cards in the mail sometime soon.   Until then, I’ll make do with these.

* Is it “impression” or “impressions”?  Re-reading this I think it should be “impression”, because I really limit any opinion about the game to a product of deep thinking of the deepest type “fun”.

Der Weltkrieg – World War I Operational Combat

Since World War One is no longer trending, the contrarian in me says it’s safe to start playing this operational series.

I’ve purchased several of the titles, and have been waiting for some time to engage with, get comfortable with the rules, and play a bunch of them.  What initially attracted me to the series was the number of East Front games (now consolidated into a single package) and its coverage of the Ottomans.  I also picked up the Italian Front game (really cheap on E-Bay) for when I feel like just bogging down in attritional nihilism.

Each game comes with a copy of the basic rules, along with scenario(s) specific rules

At first glance, this appears to be a typical hex and counter operational series.  Railroads enhance movement, headquarters effect supply, supply and supply lines effect combat, units have zones of control, fortresses and trenches aide the defender, and artillery units have special rules.   Turns are monthly, with each month starting with a trench completion and initiation phase, and then four phases per side.  Both players have reinforcement arrival, movement, combat, and replacement/recombination phases.  Reinforcement schedules are shown along with the initial orders of battle.

But, there are two major and one minor differences from other operational games.

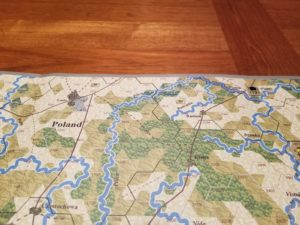
The first involves terrain.  Each hex side can have multiple types of terrain.  The defender is allowed to choose the terrain through which he is attacked. For example, if the  attack hex side has both clear and rough terrain, the defender can choose the rough terrain, and enjoy the appropriate combat modifier.  Terrain also effects movement, in that the player can “weave” his way through clear or lower cost hex sides.  To me, this non-linear “weaving” is like following a valley that twists between hillsides.

Closeup Showing Multiple Terrain Types Per Hex Side

The second difference involves combat.  The attacker uses a standard means of calculating attack strength; adding attack points and modifying for (defender chosen) terrain.  A single die is rolled and cross referenced with the Combat Results Table (CRT) Before any losses are taken, the defender can choose to retreat one hex and reduce his losses by 1/3.  If not, the defender counterattacks.  The defender totals his strength points, multiplies them by three (artillery only doubled), and makes the appropriate adjust for terrain (that he initially picked).  The effects are again cross referenced on the CRT.  The triple strength counterattacks can really give the attacker a bloody nose.

The minor difference is how replacements are handled.  Replacement points are received, but must be formed into “battalions of march” and either marched or railroaded to a headquarters for integration into a co-located unit.  Recombination is simply combining two co-located below strength units into one.

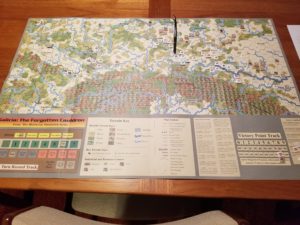
I’ve set up Galicia: The Forgotten Cauldron  twice now.  Both times on surfaces that had to be cleared to accommodate guests.  This time it’s going up in “my” room and it will be completed.  It is also to enjoyable and educational to follow the narrative of both Collision of Empires and Written In Blood on the maps.  I was able to pick up both titles on Kindle for $1.99 each last Fall.  The only problem is that some of the towns in the narrative are not represented in the game battle maps.

Initial Set Up. Pre-Mobilization August 1914.

I really like what Designer David Schroeder has done.  He still maintains a website, but the series is now distributed by Decision Games.

PGG – Another Thought.

It’s a point-and-shoot.  Part of the appeal.  Germans barely stoppable, and the Soviet body count just grows and grows.  But they just keep coming…..and that changes the German commander’s view about four turns in.  How In The Hell do I stop them?  So you keep looking at the table twice a day.

That’s the other part of the appeal.  You appreciate Heinz G’s Quandry.

Here’s an excellent link.  I wish they had kept at it.

https://grognard.com/zines/sr/spi_no1.pdf


Another Fistful

Want to take a minute to extoll the virtures of this ruleset.  Is it the greatest ever……well, no.  But, it is what it is and an excellent value.

The rules are just a part of what you get.  There is a whole series of stand-alone scenarios, characters to develop, diagrams of buildings, and another set of scenarios that can be combined in a campaign game.

Everyone has there preferences, but I have no desire to try another of western skirmish rules.