Category Archives: Sessions

Old Business

After a truly abortive first turn of the Thunder At Cassino campaign, decided to regroup by playing a DBA (2.2) game that’s been set up for…well maybe…six months.  Late Swiss vs. Some Mutant Army With Lots of Crossbows and Knights.  Hell….can’t find anything like it in the lists.

Hammered it out Sunday afternoon during boring NFL action.

DBA is what it is.  Simple, Quick and Generic.  I’d like to see some chrome…. like Swiss having an extra bound to simulate their speed/audacity in the attack, or range differentials between bow types.  But, for that, I need to try DBM, or some other system.

For The Quick and Dirty, You Go With The Devil You Know.  Never played it FTF, and that is how it should be played.  Ugh…..cut-throat tournament action….guys with rulers down to the eighth of an inch…..all that facing stuff……Ugh.

It was fun.  I’ll set up again, but with  Cavalry/Light Horse armies to stretch things out.

Here’s a semi-lucid photo summary of the game.

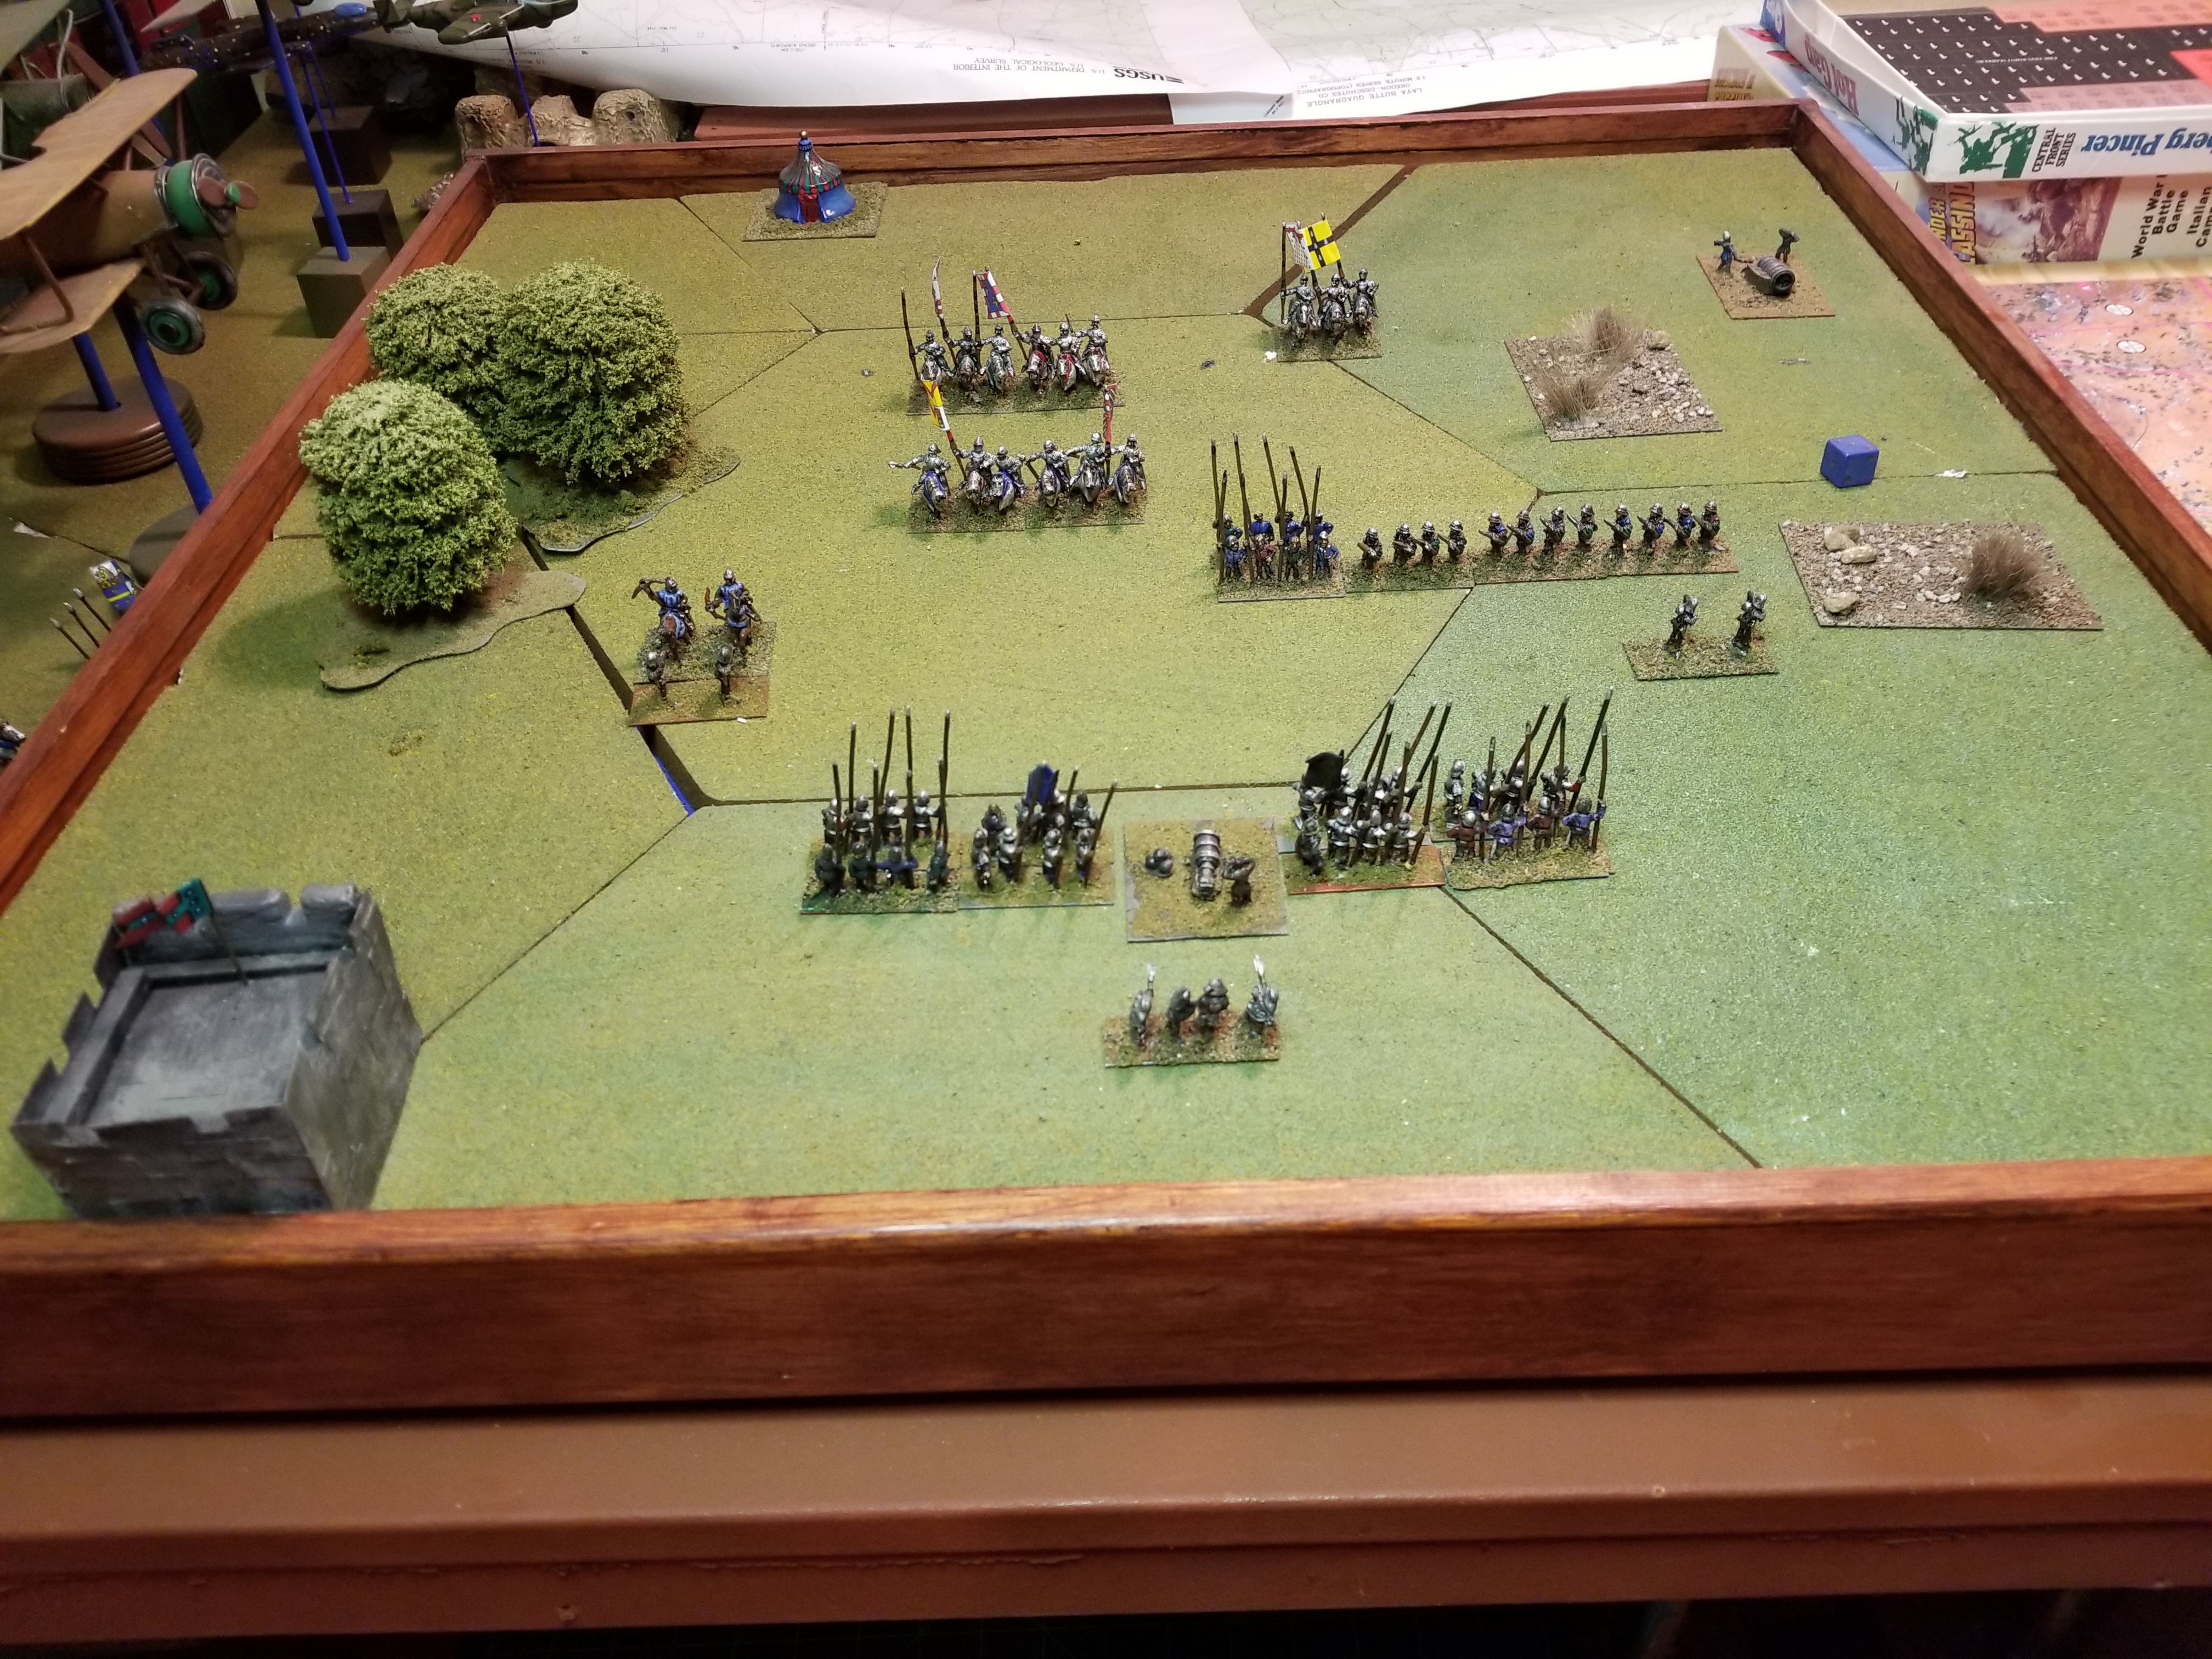
Turn One.  Light units Deploy. Swiss In Foreground.

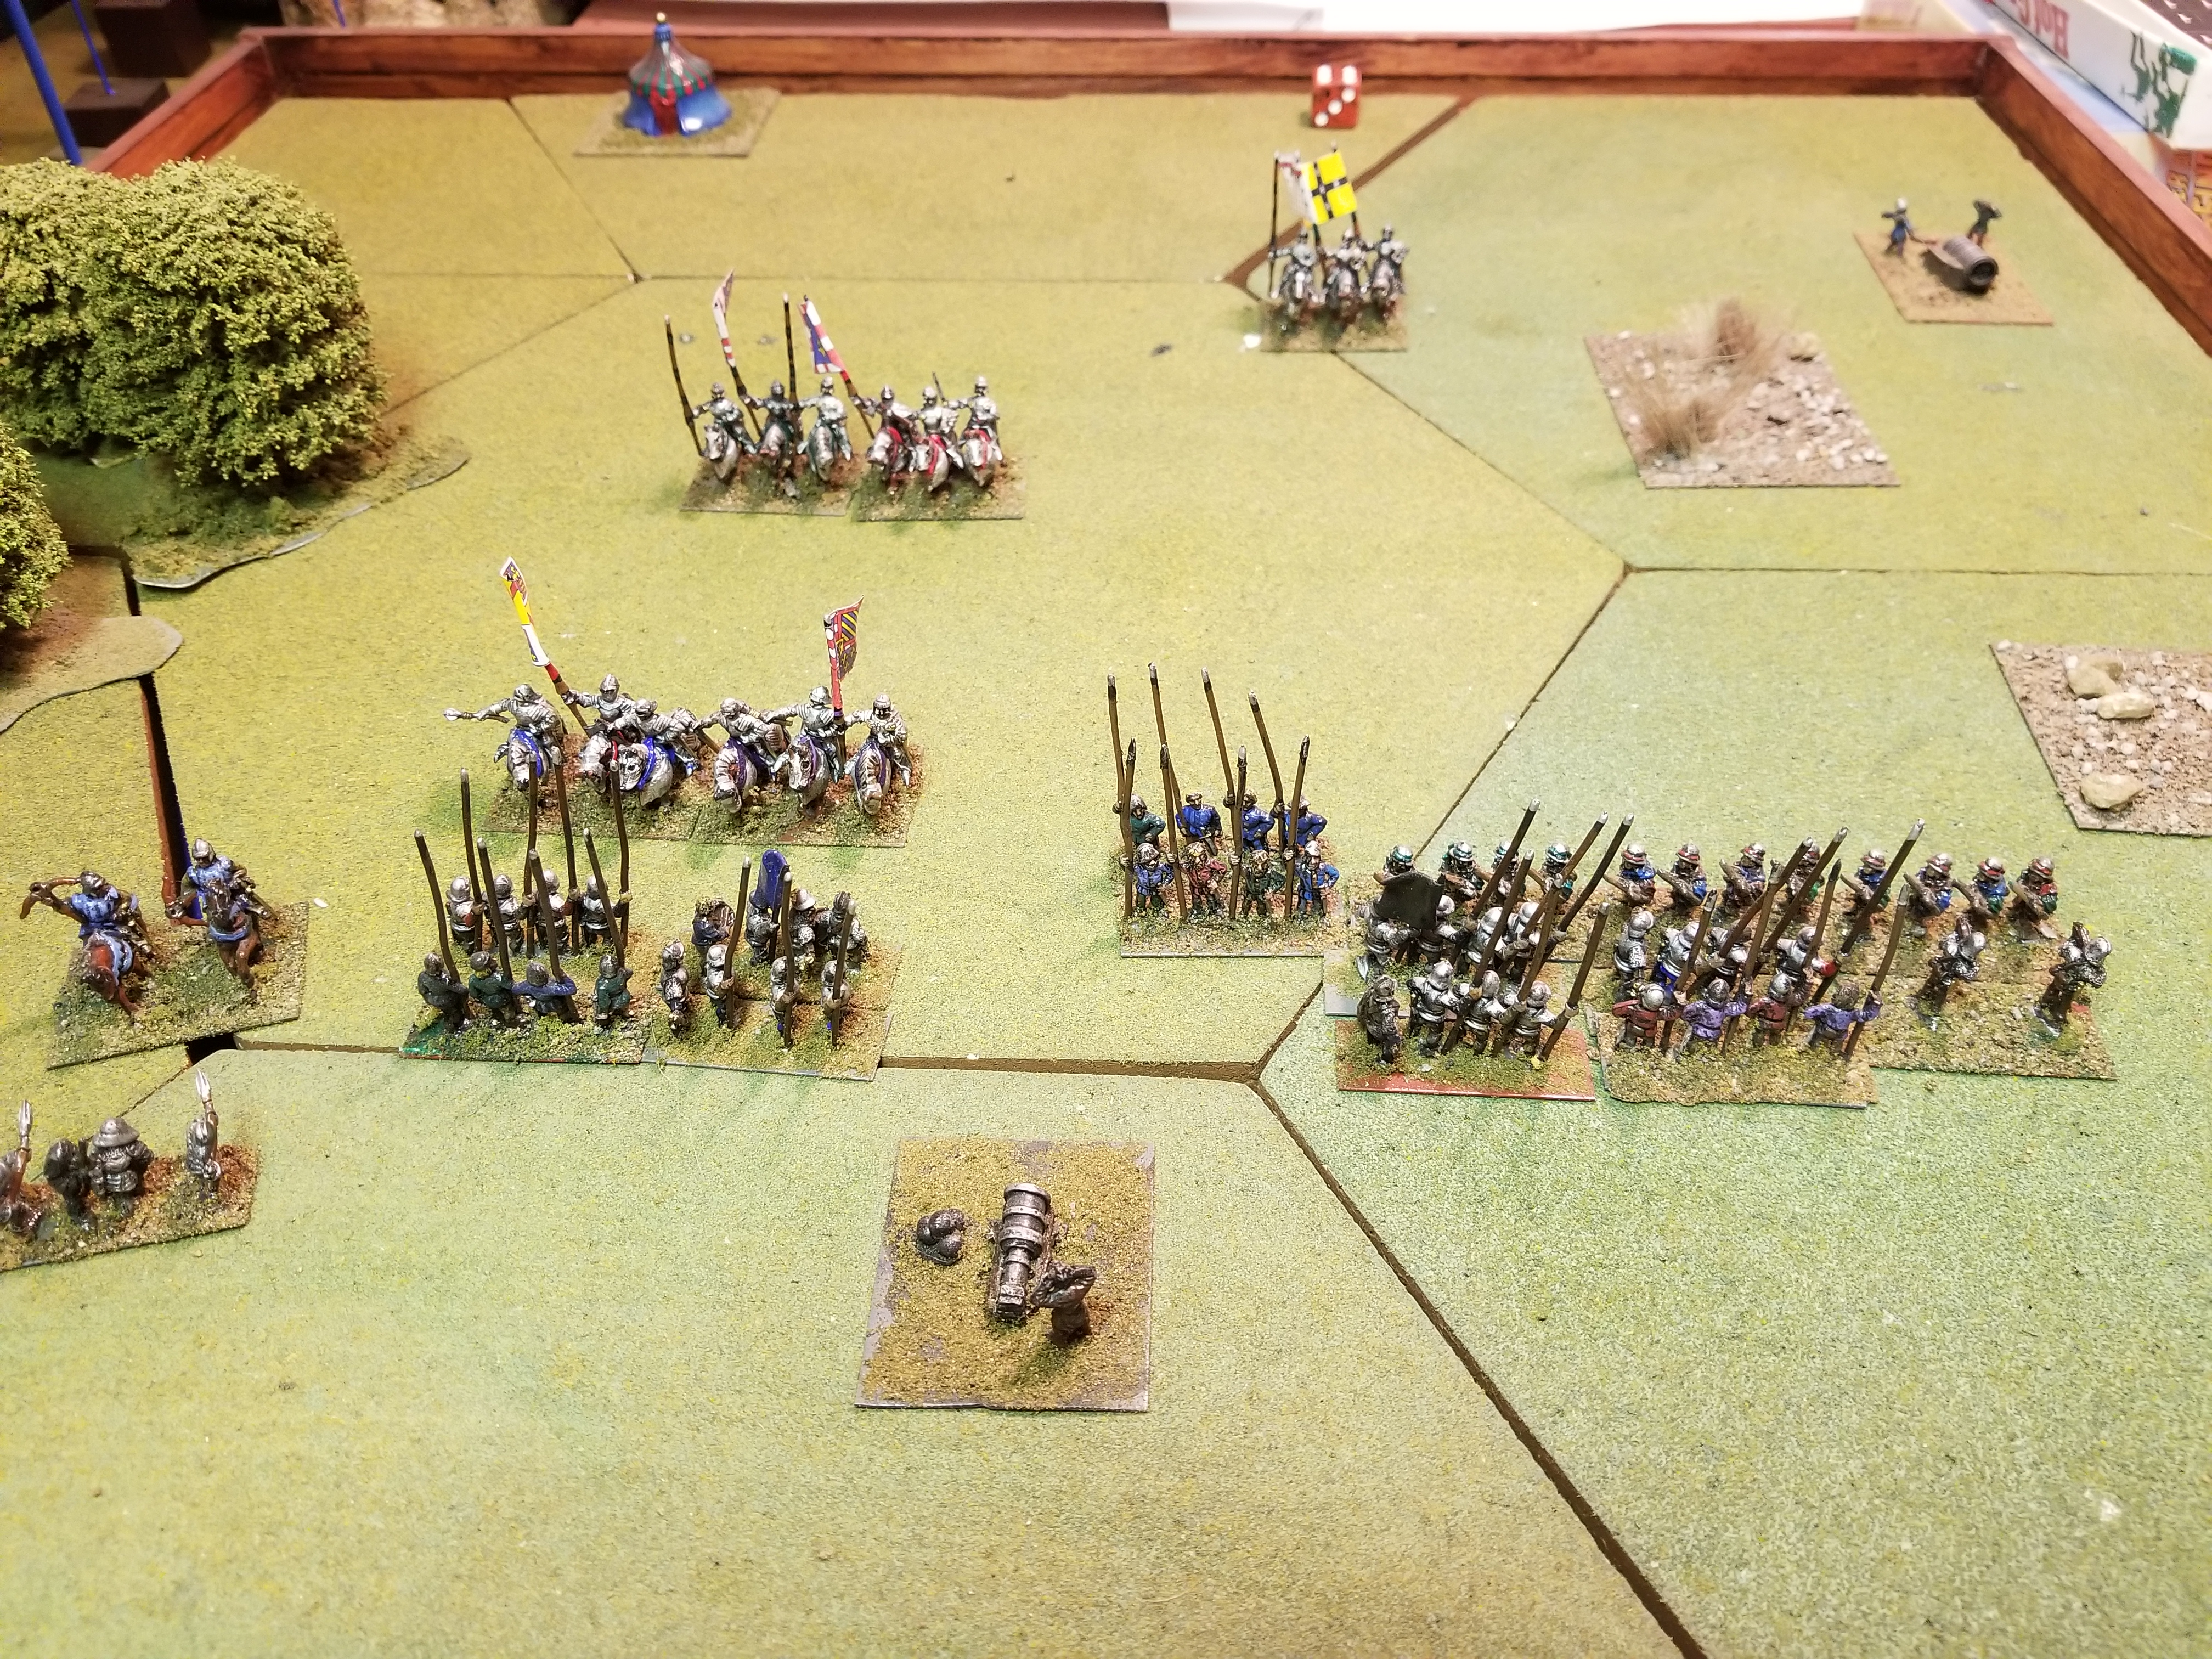
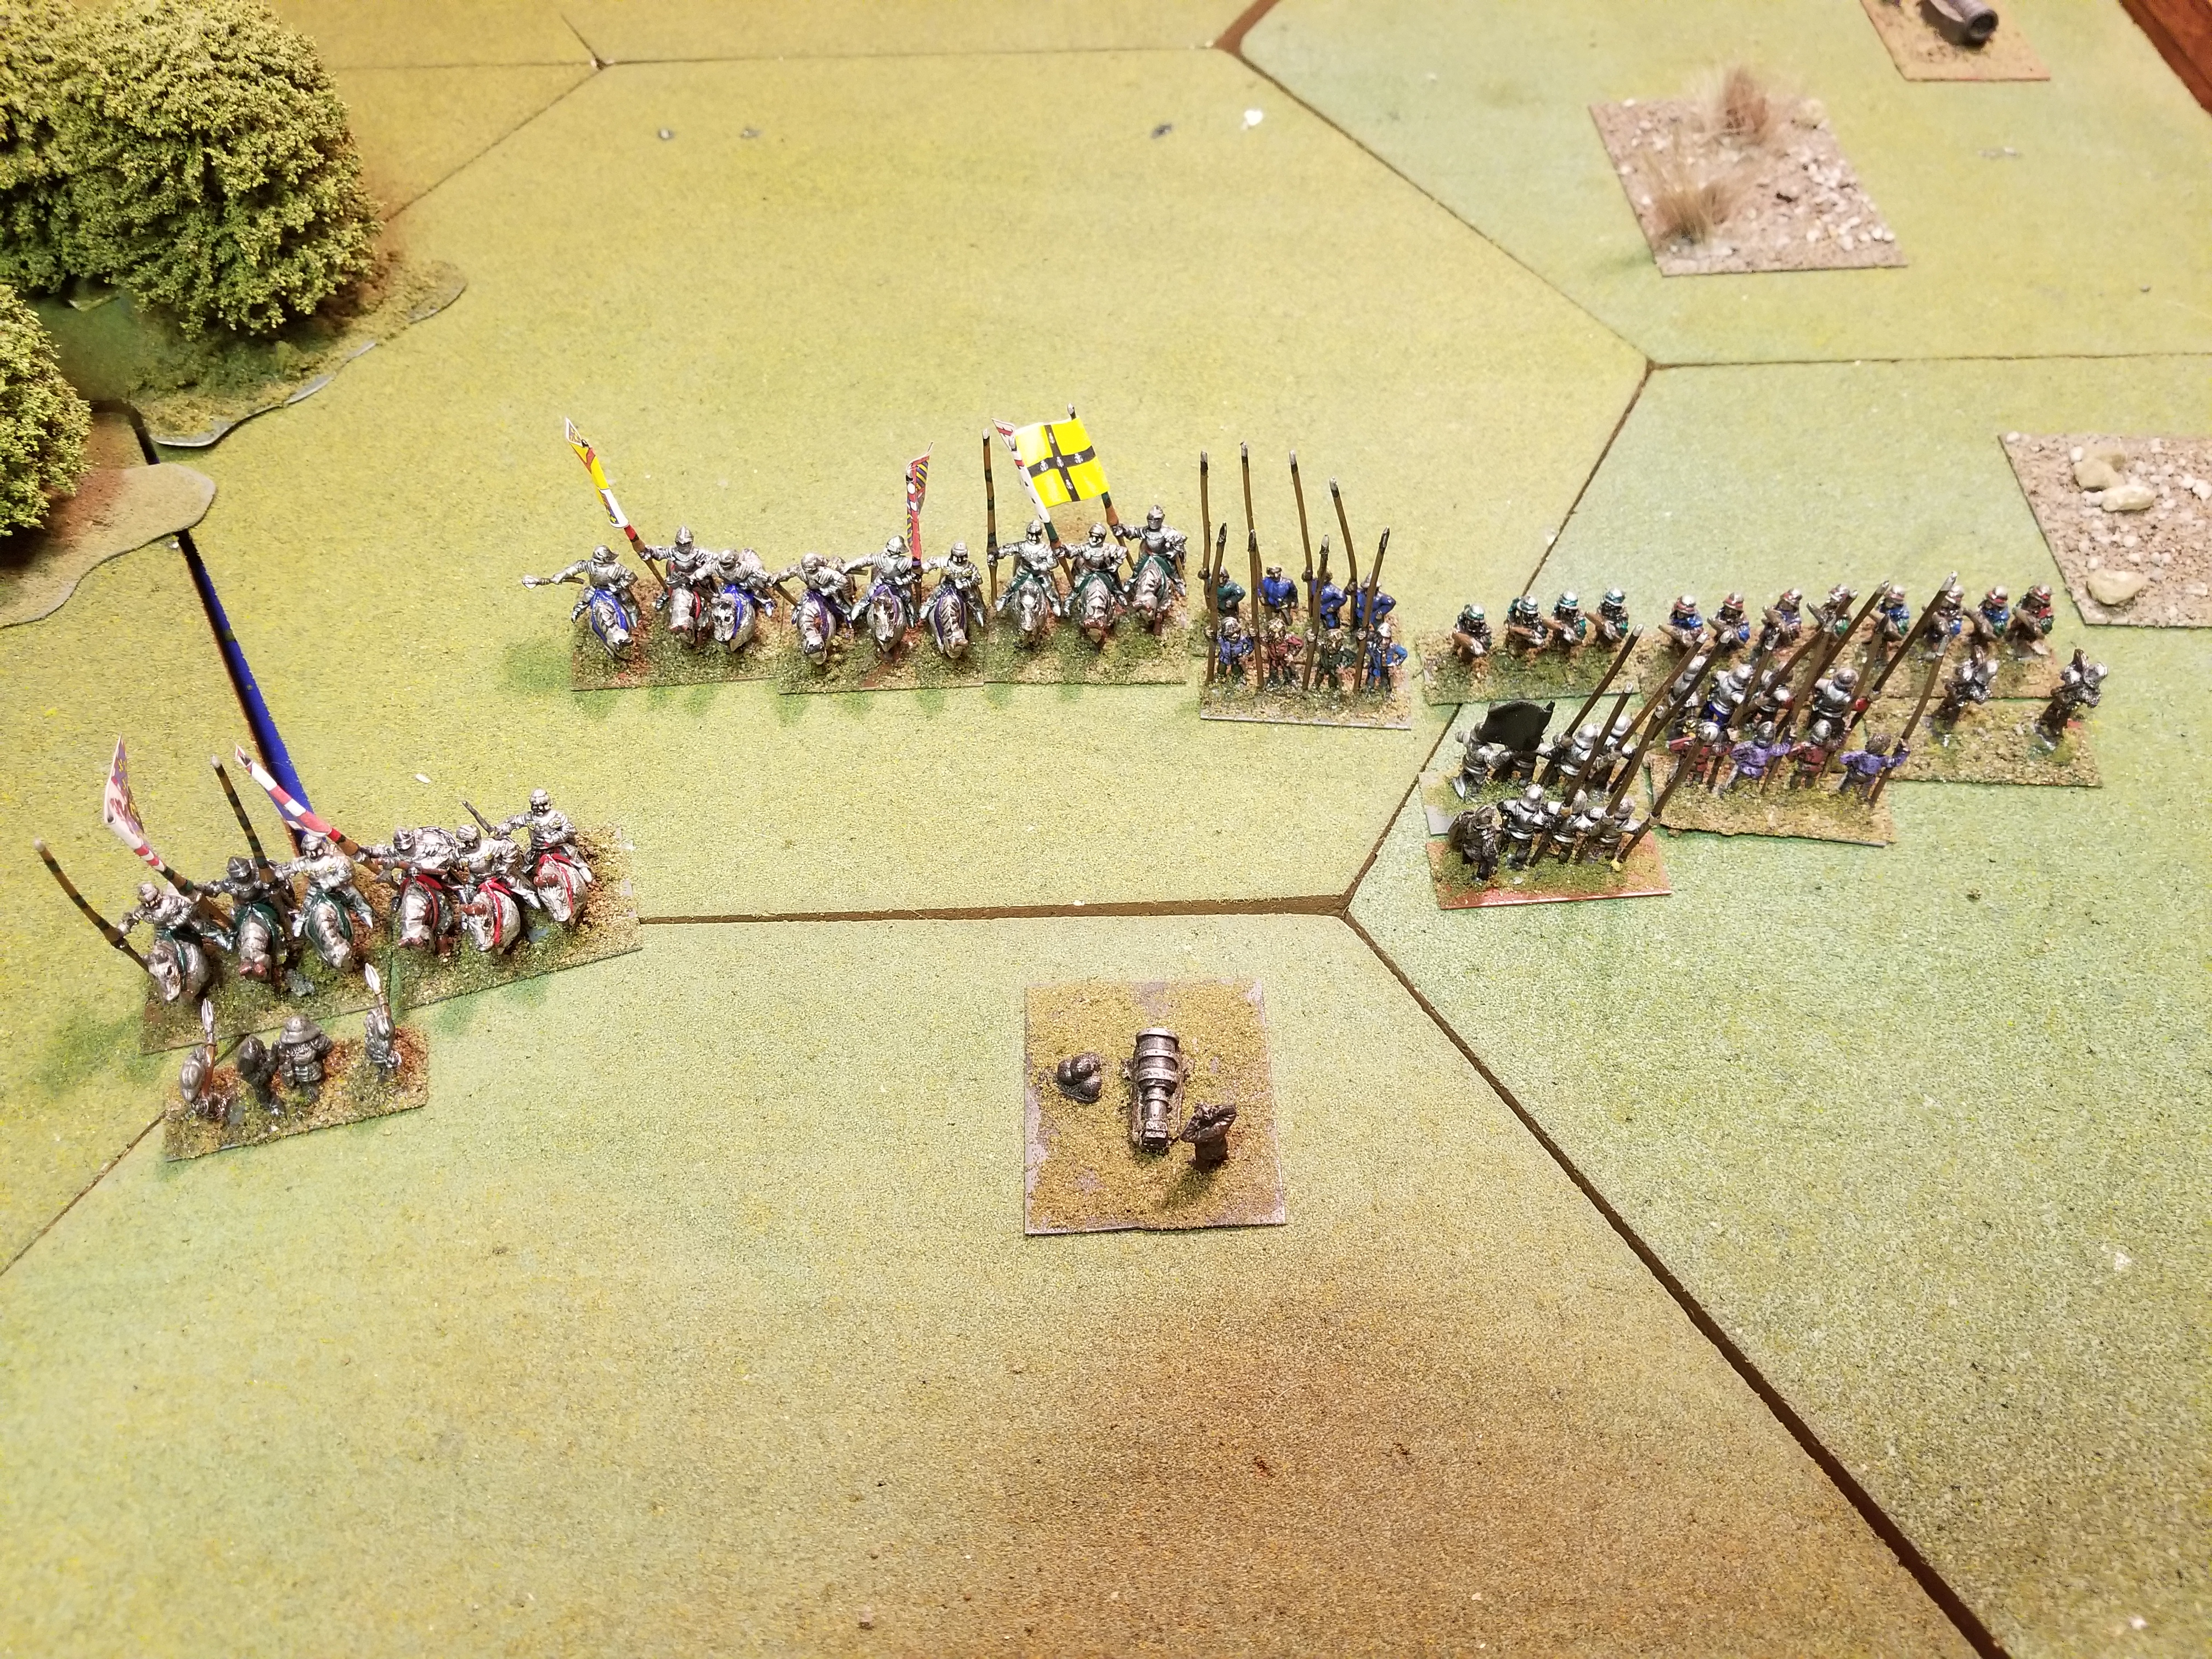
Mid-Turn 5.  Things Get Interesting.

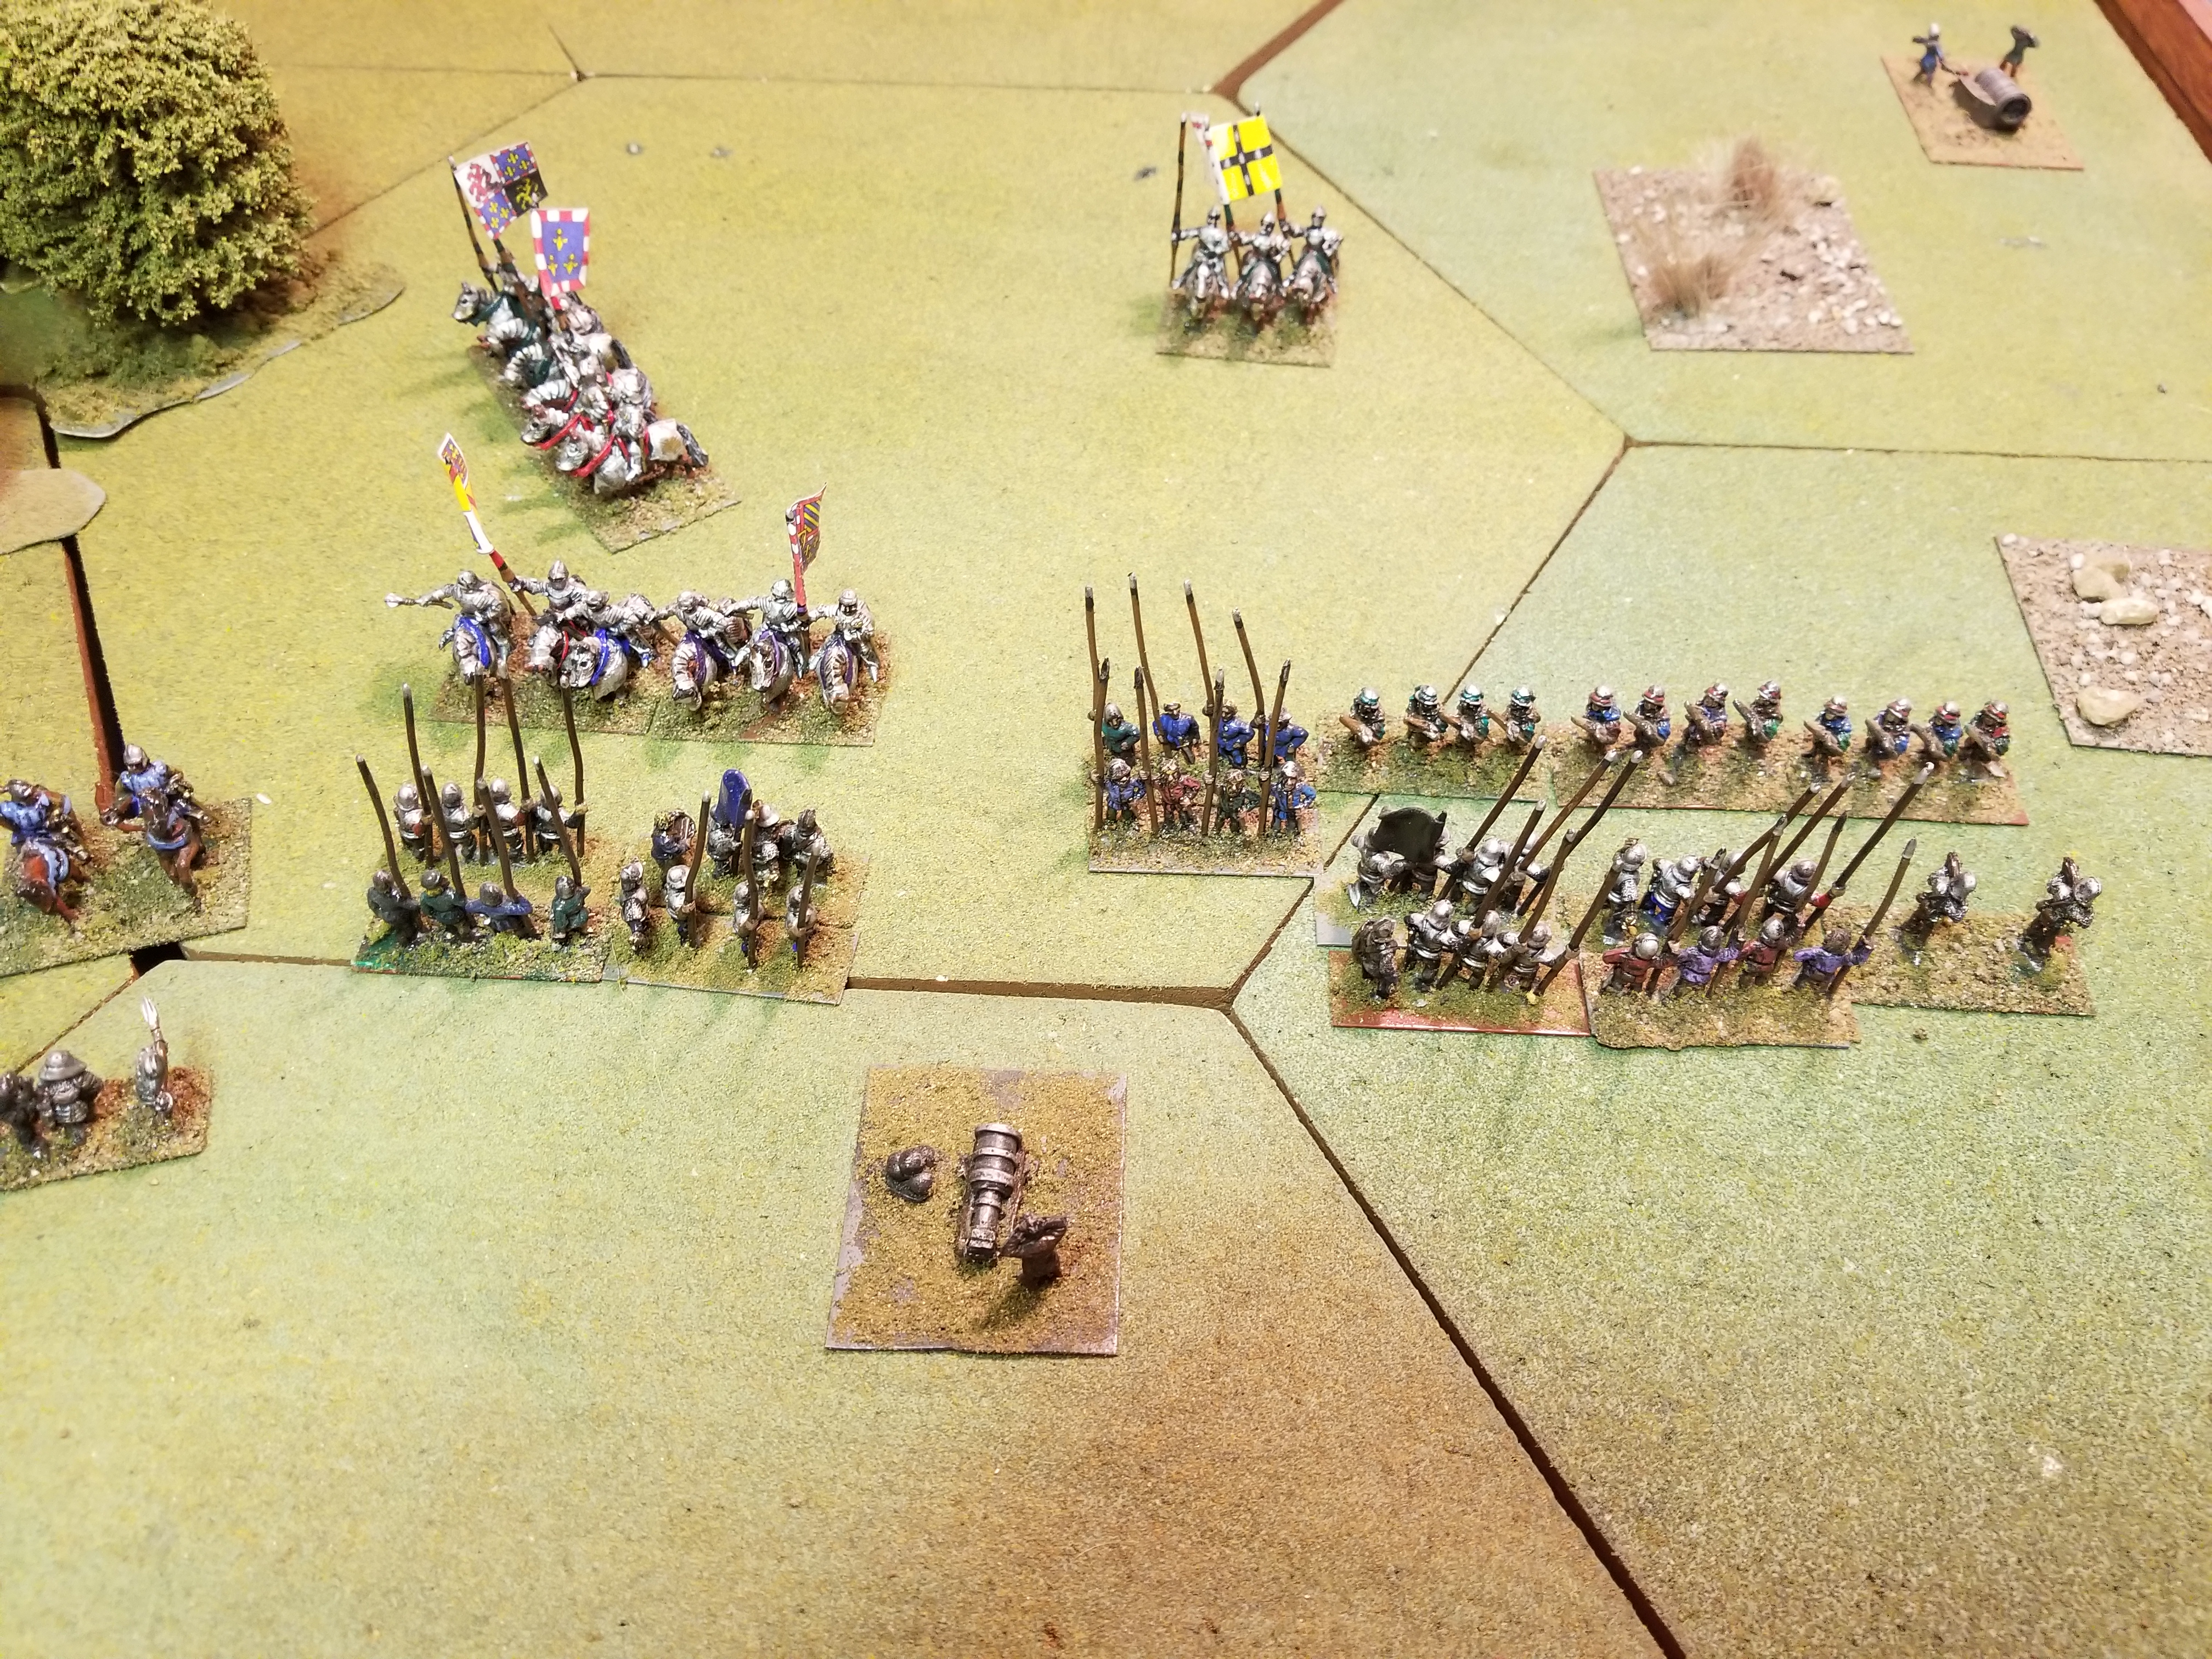
End Turn 5.  Pikes Struggling Against Bows(?!?)  While Knights’ Attack Develops.

End Game.  Knights Quick Kill Pike, Swiss Left Wing Shattered.


Grinding Pt. 2

Decided to go with the other mini-introductory scenario, Assault on Castle Hill.

Probably missing something, but the tactical options are limited.  After three play-thrus came to the conclusion that the only option for the Germans was to  kill the outpost units using a first impulse artillery attack.  Second impulse then into the outpost units’ area, with the rest of the turn involved taking fire from the adjacent hex.   Turn 2, move-in to Objective Area 9, take the beating and hopefully win the close combat.

Big lesson learned…..one  attack can finish things.  Take a look at this photo of a Artillery Bombardment dice roll.  Yikes.  Game Over….BLAMMO.

The scenario does serve its purpose as valuable learning tool.

Going to continue the grind and now, yes today, set up one of the two longer scenarios.

Grinding

Been working up for a solo play of  Thunder at Cassino.    It’s one of the heirs to Storm Over Arnhem, but with more chrome.

Machine Gun Units and Rubble  impede movement, while terrain regularly effects combat.   The player with Tactical Advantage can designate a Night Turn at any time, using fire and movement modifiers favoring the attacker.

I decided to set-up one of the Introductory (2 Turn) Scenarios – Counterattack At The Roundhouse.  Knowing quite well my excessive problems with a first play-thru, I downloaded the Series Replay from The General Volume 24, Number 6 as a guide to RAW.  These back issues can be found at View From The Trenches.  This is also an ASL site.  Ahhhh…..come on, give ’em a couple of quid.

The positive of all of this programmed stumbling is that one actually learns about the game.  The negative is that it’s not fun by any means (I’d suggest some type of alteration to take the edge off), but it does help you come to grips with RAW, and also offers insights into game play.

Now that this grinding is over, I’ll set up the other introductory scenario and try it on my own.  Grinding is, after all, very appropriate for an Italian Campaign game.

Wrong First Impression?

Mine was, well, OK.  But, I’ve more than come to terms with The Chosin Few’s rules and appearance.

Really, really, really like the game system.  Situation fraught with peril all the time, especially with the shell-game of interdiction to stop ChiCom movement, or hoard for DRM on attacks.  Oh yes, you have to spend the chit before rolling…..took awhile to get that one right.

Well, the other thing I didn’t get right was ChiCom movement priorities.  This was a significant (in that bold and italics mood), error.

I was defaulting to white, as per rules.  Result was hordes of ChiComs stooging around South, far from the battle.  Figured it would get really bad during the Third (Breakout) Mission.  Hell, I made it easily through the first mission (despite not discarding cards!), and was hammering the Godless Red Hordes during the second (Retreat In Another Direction) mission.

Ahhhhhh… but for that buzzkill that is RAW.  Multiple routes out of a space, check the color of the arrows against US positions.  If they match, they will follow.  Default to white only occurs if there is no match.  Well, that changes everything……

Still really, really like this and it has given me some ideas about working on this thread.

Trying To Win

This post is more in the “notes to myself”category for the next time I pick up either Hapsburg Eclipse (HE) or Ottoman Sunset (OS).

  • Use actions to provide resources to other theaters.  Easier to do early in OS as there seems to be less pressure early.  You have to have those victories in other theaters for a chance.
  • Always keep the Hungarians happy.  The die roll for them much easier than Croats or Czechs. (HE only).
  • Husband your stop advance chits (Yilidrim (OS) and Radio Intercepts (HE) ) as long as you can.  This is especially true given the horrific effects of the -1 DRM for weakening of National Will.
  • Likewise with the Mackensen chits.  The higher of two roles should be saved for when disaster truly looms.  And disaster is always looming by the third deck.
  • Don’t close down the Polish front if it will cost you a loss in National Will.  Only try it when you have the luxury of spending the two actions.
  • Oh, yeah…..and roll either real high or real low whenever the occasion demands.


Tim’s Take

Here are Tim’s thoughts:

  • As the German, I’m not sure it if is better to do overruns before combat or afterwards.  More than once, I had a stack stopped and left out of position for the combat phase when it received an adverse result on the CRT.  Maybe overruns are best used to disrupt a key soviet unit (most likely a headquarters unit).  I tried that once and it seemed to work well.
  • I forgot that ZOC’s don’t extend across the Don (even though you reminded me…probably the beer had an impact…).  That explains why I put so much time and effort into that area.  I was trying to extricate a couple of motorized divisions that had gotten ZOC’d up and that I wanted to use elsewhere.  Just like Hougomont at Waterloo, a subsidiary battle took on a life of its own.
  • I belatedly realized that I’d captured Voronezh on turn 2.  There are three hexes of Voronezh and I thought you had to capture all of them to get the VPs for the city…I only needed the two I had captured right away.
  • The Hitler directives do play a role.  I lost a motorized division when I had too many motorized/panzer units in the north and I was reluctant to move units across the Don as I was afraid that a bad die roll would result in them being taken away and sent somewhere else.
  • I enjoyed playing the game and I definitely want to try it again.

Turns 2-5

During Turn 2, the Germans advanced in the north and south, cleaning up Soviet delaying units in the center.  The Soviets pushed reinforcements to conform with the requirement for a continuous line along the Don, as well as in the center.  For the Soviets, the initial crisis has seemed to pass.

End Soviet Turn 2

The Axis continues to develop its attacks in the north and south, while cautiously advancing in the center.

End Axis Turn 3

Soviet reinforcements continue to arrive, with some deploying on the south map anticipating the Axis will “turn the corner” at Rostov.

End Soviet Turn 3

Heavy combat takes place in the north and south, with Axis units now advancing in the center,

End Soviet Turn 4

Intense fighting continues.  The Germans take Rostov and begin moving south.  Soviet forces tenaciously defend in the north, but gaps are appearing in the center.  Fortunately, the bulk of the Axis armor is deployed elsewhere.

End Axis Turn 5

As usual, we had to pick it up just when things were getting interesting.  BTW, this is a 27 turn game…..


Opinions, Rules & Playability

Lots of mixed opinions on this game, with the negative a little on the harsh side.

Special rules make Drive on Stalingrad different from its PGG predecessors. For the Axis player, these rules reflect the overarching goal of securing oil resources in the south, Hitler’s operational interference, and competing manpower requirements at Leningrad. For the Soviets, the rules reflect Stalin’s directives and political considerations. Failure to adhere to these special rules results in either a loss of victory points or units.

Most of the on-line discussion centers around the “Hitler Directives” rules. At the beginning of each turn, the German player roles a single die. On an “odd” result, the Directive Table is consulted. These directives involve operational priorities and troop dispositions. A directive remains in effect until it is superceded by another directive.

Hitler’s impact is also reflected in “No Retreat” orders, and the imperative to capture cities. Failure to adhere to these guidelines results in a loss of victory points.

Another Axis operational constraint is “Divisions Across The Don”. If the number of divisions exceeds those called for by the current Hitler Directive, then those divisions are removed for use on other fronts.

The Axis Commander is also limited in the number of mechanized divisions allowed on the north map. If this number is exceeded, these excess divisions are removed.

Both Soviet and Axis players must maintain “Continuous Fronts” on the South map, in which each hex must be occupied by a unit or a zone of control. If not, victory points are lost.

The Soviet player may withdraw from enemy zones of control during a turn, but loses victory points. And, the Soviet player must defend East of the Don River, or lose victory points.

Sure, these rules effect how the game is played; but they are part of the game. Without these rules, the game wouldn’t exist within any historical context. Frustrating, yes. Maybe in this regard, it can be considered a simulation. Axis and Soviet commanders were influenced by higher leadership, and these influence/interference directly effected operations.

Flawed? That’s always a matter of perspective and, even, taste. For me, its flaws are fewer than many games I’ve played.

Drive On Stalingrad – Getting Started

Had a great experience with Drive On Stalingrad (DOS) this weekend over at Tim’s.  Of course, there was football to view, but we were able to get several turns in after our late Friday afternoon setup and initial play-thru.  As always, the first turn was brutal, so it was a quick re-set for Saturday’s action.

The basic system is taken from Panzergruppe Guderian.  However, there are important differences.  I’ll discuss these as the game narrative progresses.

Victory is determined by cities controlled, each of these has point value.  The Axis player (yes, there are Romanians and Hungarians) automatically wins if his victory point total is three times greater than his opponent.

Each side has constraints to their initial dispositions.  The Soviet player must remain on or within a ZOC of an initial defense line stretching across the northernmost of the two game maps.  The Axis player cannot use all of his units during the first turn.

Here’s the initial setup.  North is to the left.  Only the ten or so hexes to the right are in the South map.

The Soviet player has a very limited ability to start with a defense in depth.  On the other hand, the inability to leave ZOCs slows progress for the Axis player, unless a Soviet unit is eliminated or forced to withdraw two hexes.  However, the CRT is relatively bloodless up to 10:1 odds, with most results requiring the choice between withdrawal or a step loss(es).  Punching big holes for the second movement phase (armor/mechanized units only), takes time.

Tim concentrated his armor in the North and South, aggressively advancing in the North.

The Soviets receive 27 (!) units as reinforcements in Turn 1.  A total of three can be placed in a major city, with one each in smaller cities.  Eleven units can move up to 40 hexes by rail.  All I could do was patch up some type of defense in the North, and start pushing reinforcements eastward as fast as possible, using every city I could.

One terrible mistake was to allow the German SS unit to cut my rail line at Voronezh.  Any reinforcements coming by rail from the north had “to take the long way around.”  As a result, three Soviet units were left as a “forlorn hope” to hopefully slow down an Axis infantry advance in the center.


More Rostov

Cranked out another couple of turns.

Axis was able to make good their deep penetration in the center, as well as develop a flanking attack northwest towards Kharkov. However, the Soviets have built up a defense to counter the panzers, as well as using the rules to “ZOC Up” Axis infantry attacks in the south.

This is the real challenge faced by the Axis Commander.  Soviet units buy time through engaging German units that are unable to exploit tactical success due to the Soviet ability to retreat, perhaps with a one-step loss, but maintain zones of control that limit Axis advances.  Even when there is the possibility for a “ZOC Kill”, a result of less than “2” steps, stops the Axis for an additional turn.  And, in the case of Soviet units with a defense strength greater than “6”, the placement of a step reinforcement.

End German Turn 3
End Soviet Turn 3
End German Turn 4
End Soviet Turn 4

Will develop Axis attack towards Kharkov.

But, for now, off to PDX for Drive On Stalingrad with Tim.