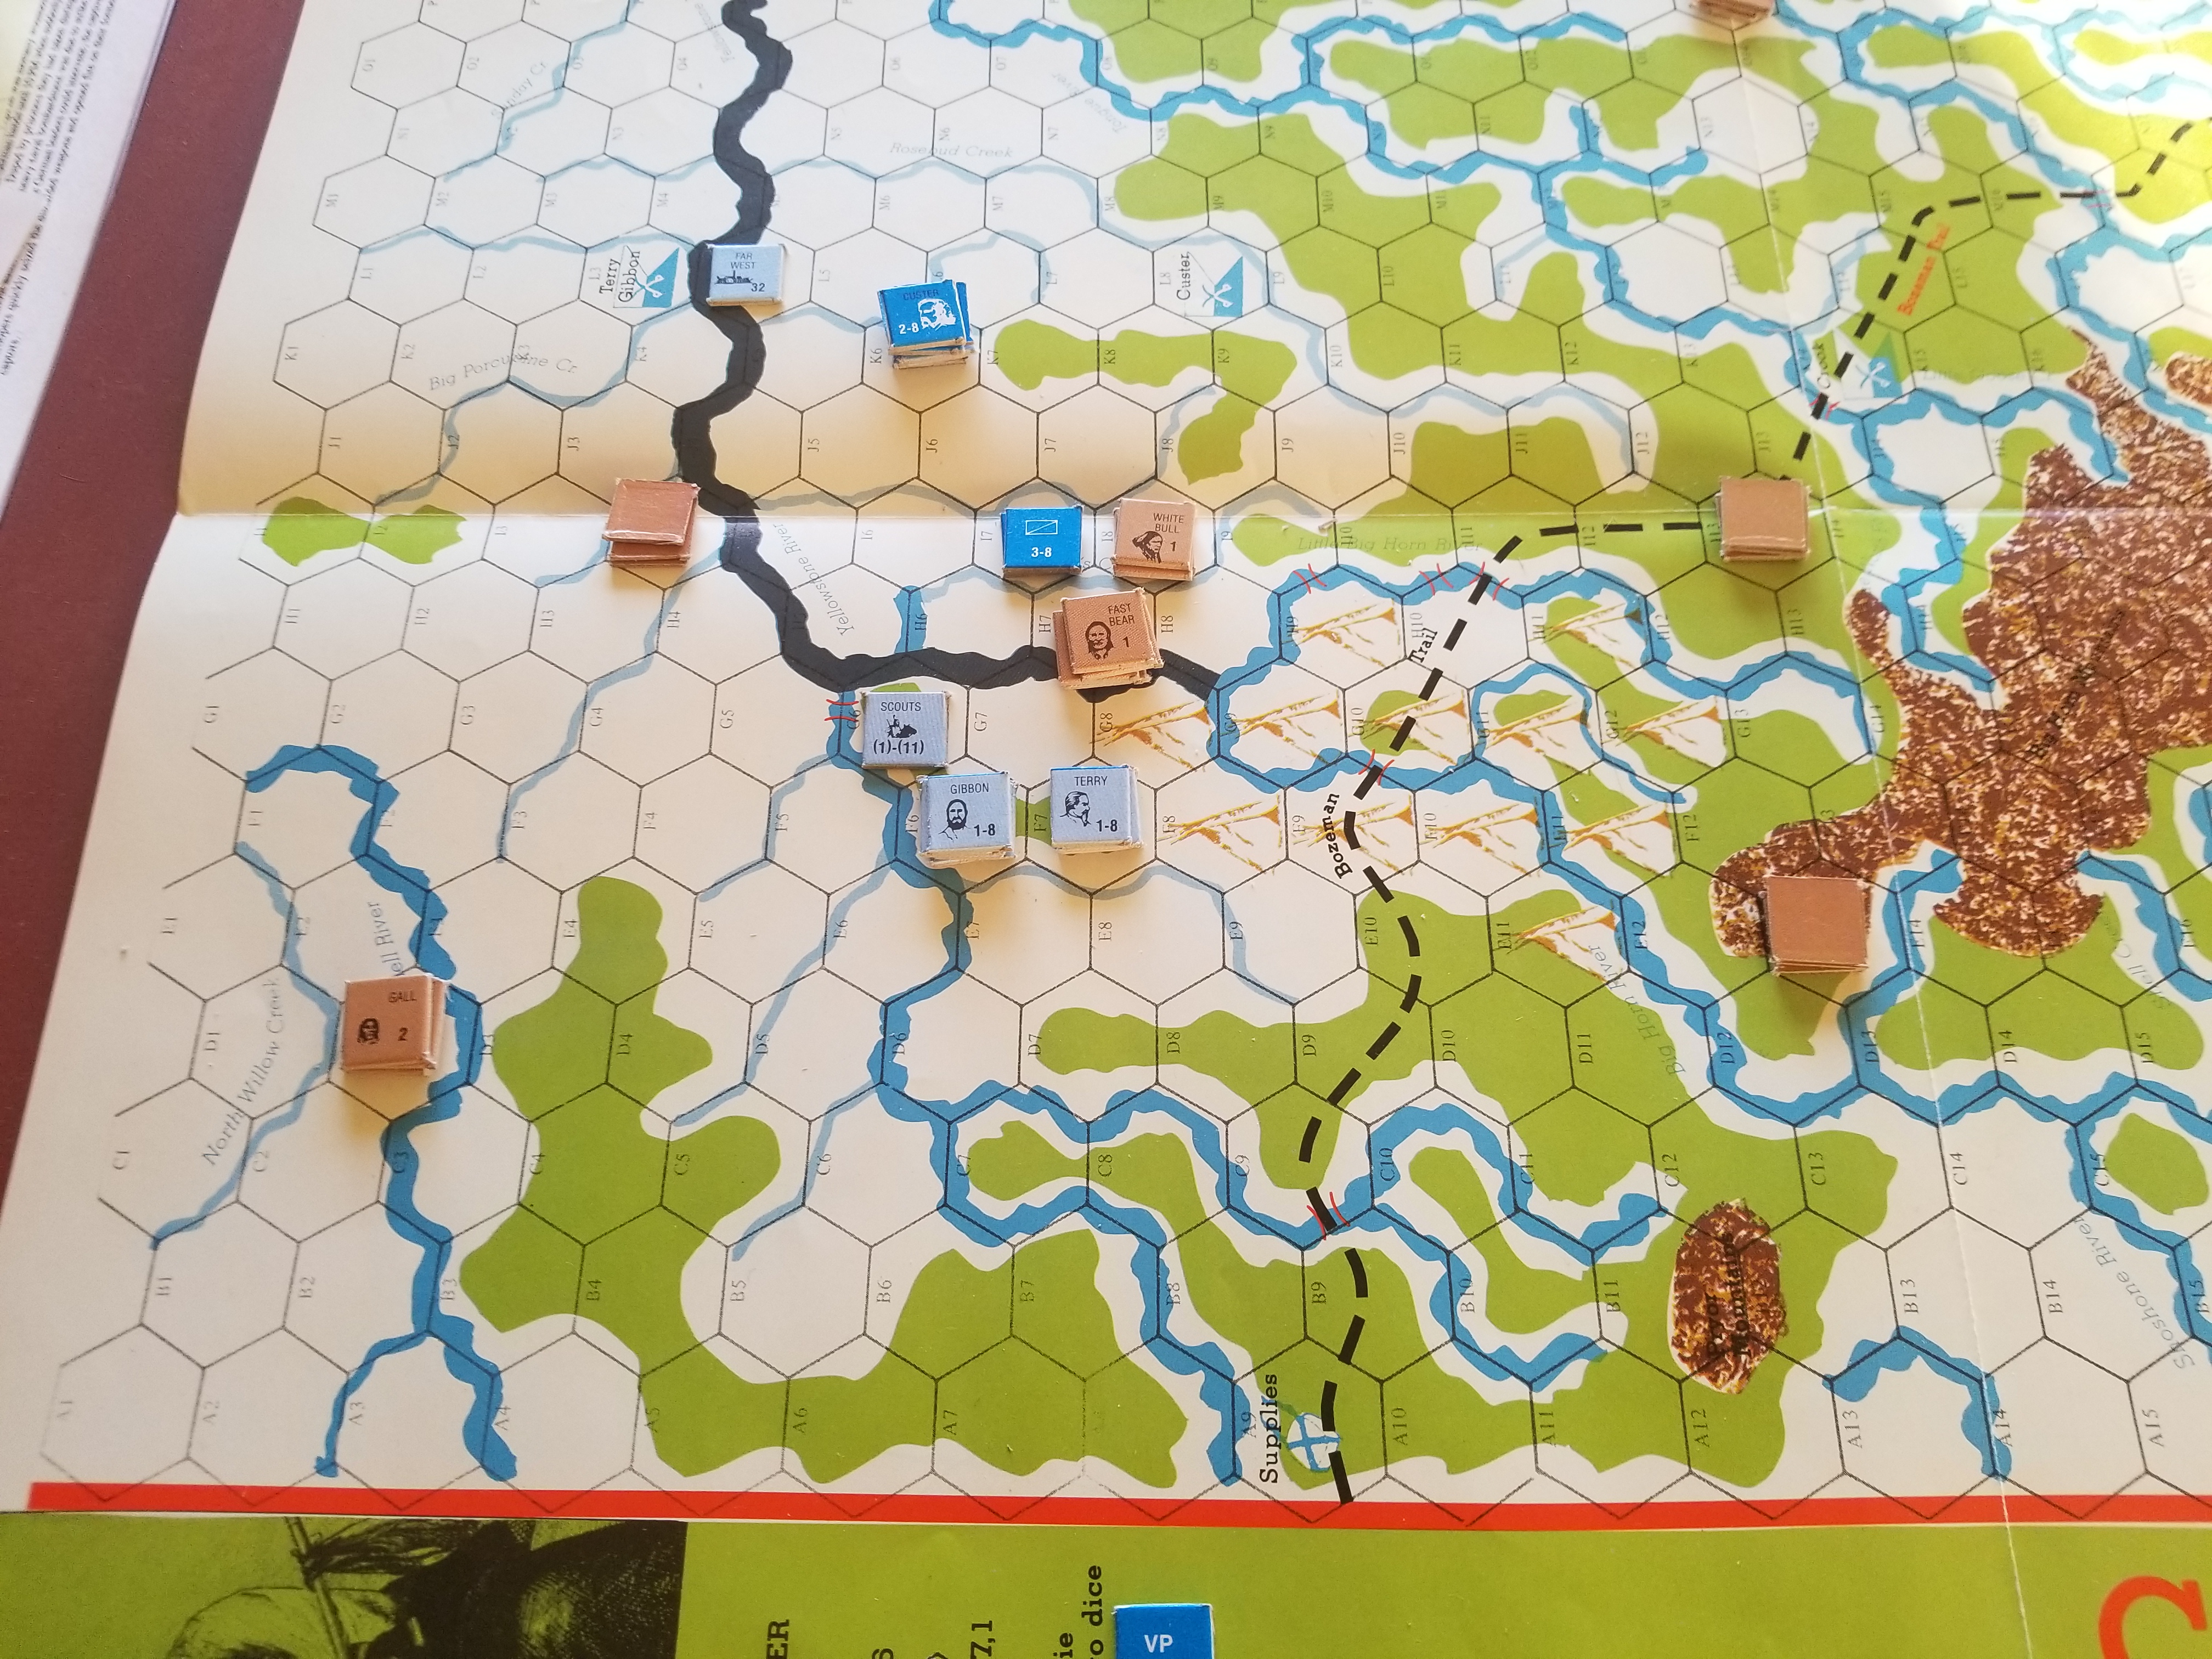
Custer attacks both Fast Bear and White Bull, causing casualties and forcing White Bull to retreat. Which may not be a bad thing.
Terry/Gibbon command keep grinding down their opponents, also killing Lame Deer.
Each command was able to find, maintain contact, use envelopment (in game terms “prong attack”) to attack, and inflict casualties. Doctrine in action (?).
The system’s randomness has created some interesting situations, with plenty of give-and-take. It really is fun, with the “Hostiles” bouncing all over the map.
In Turn 4, Sitting Bull’s weak contingent attacks Terry/Gibbon’s combined arms force despite overwhelming odds.
During Turn 5, Terry/Gibbon maintains contact with Sitting Bull, while Custer envelops Little Bear’s force. Sitting Bull’s force is destroyed, and Little Bear takes casualties.
Later in the turn, Custer is attacked by Sioux drawn like moths to the flame of randomness. One of Custer’s battalions is destroyed.
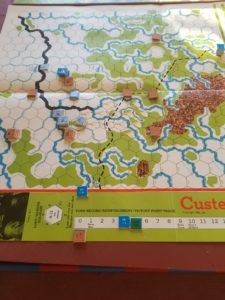
At this point, who knows what the hell will happen. At the end of Turn 5, Army has 9 VPs, Hostiles 3.
Been back at the Pine Cone Lodge for a week. Moved from one work farm to another.
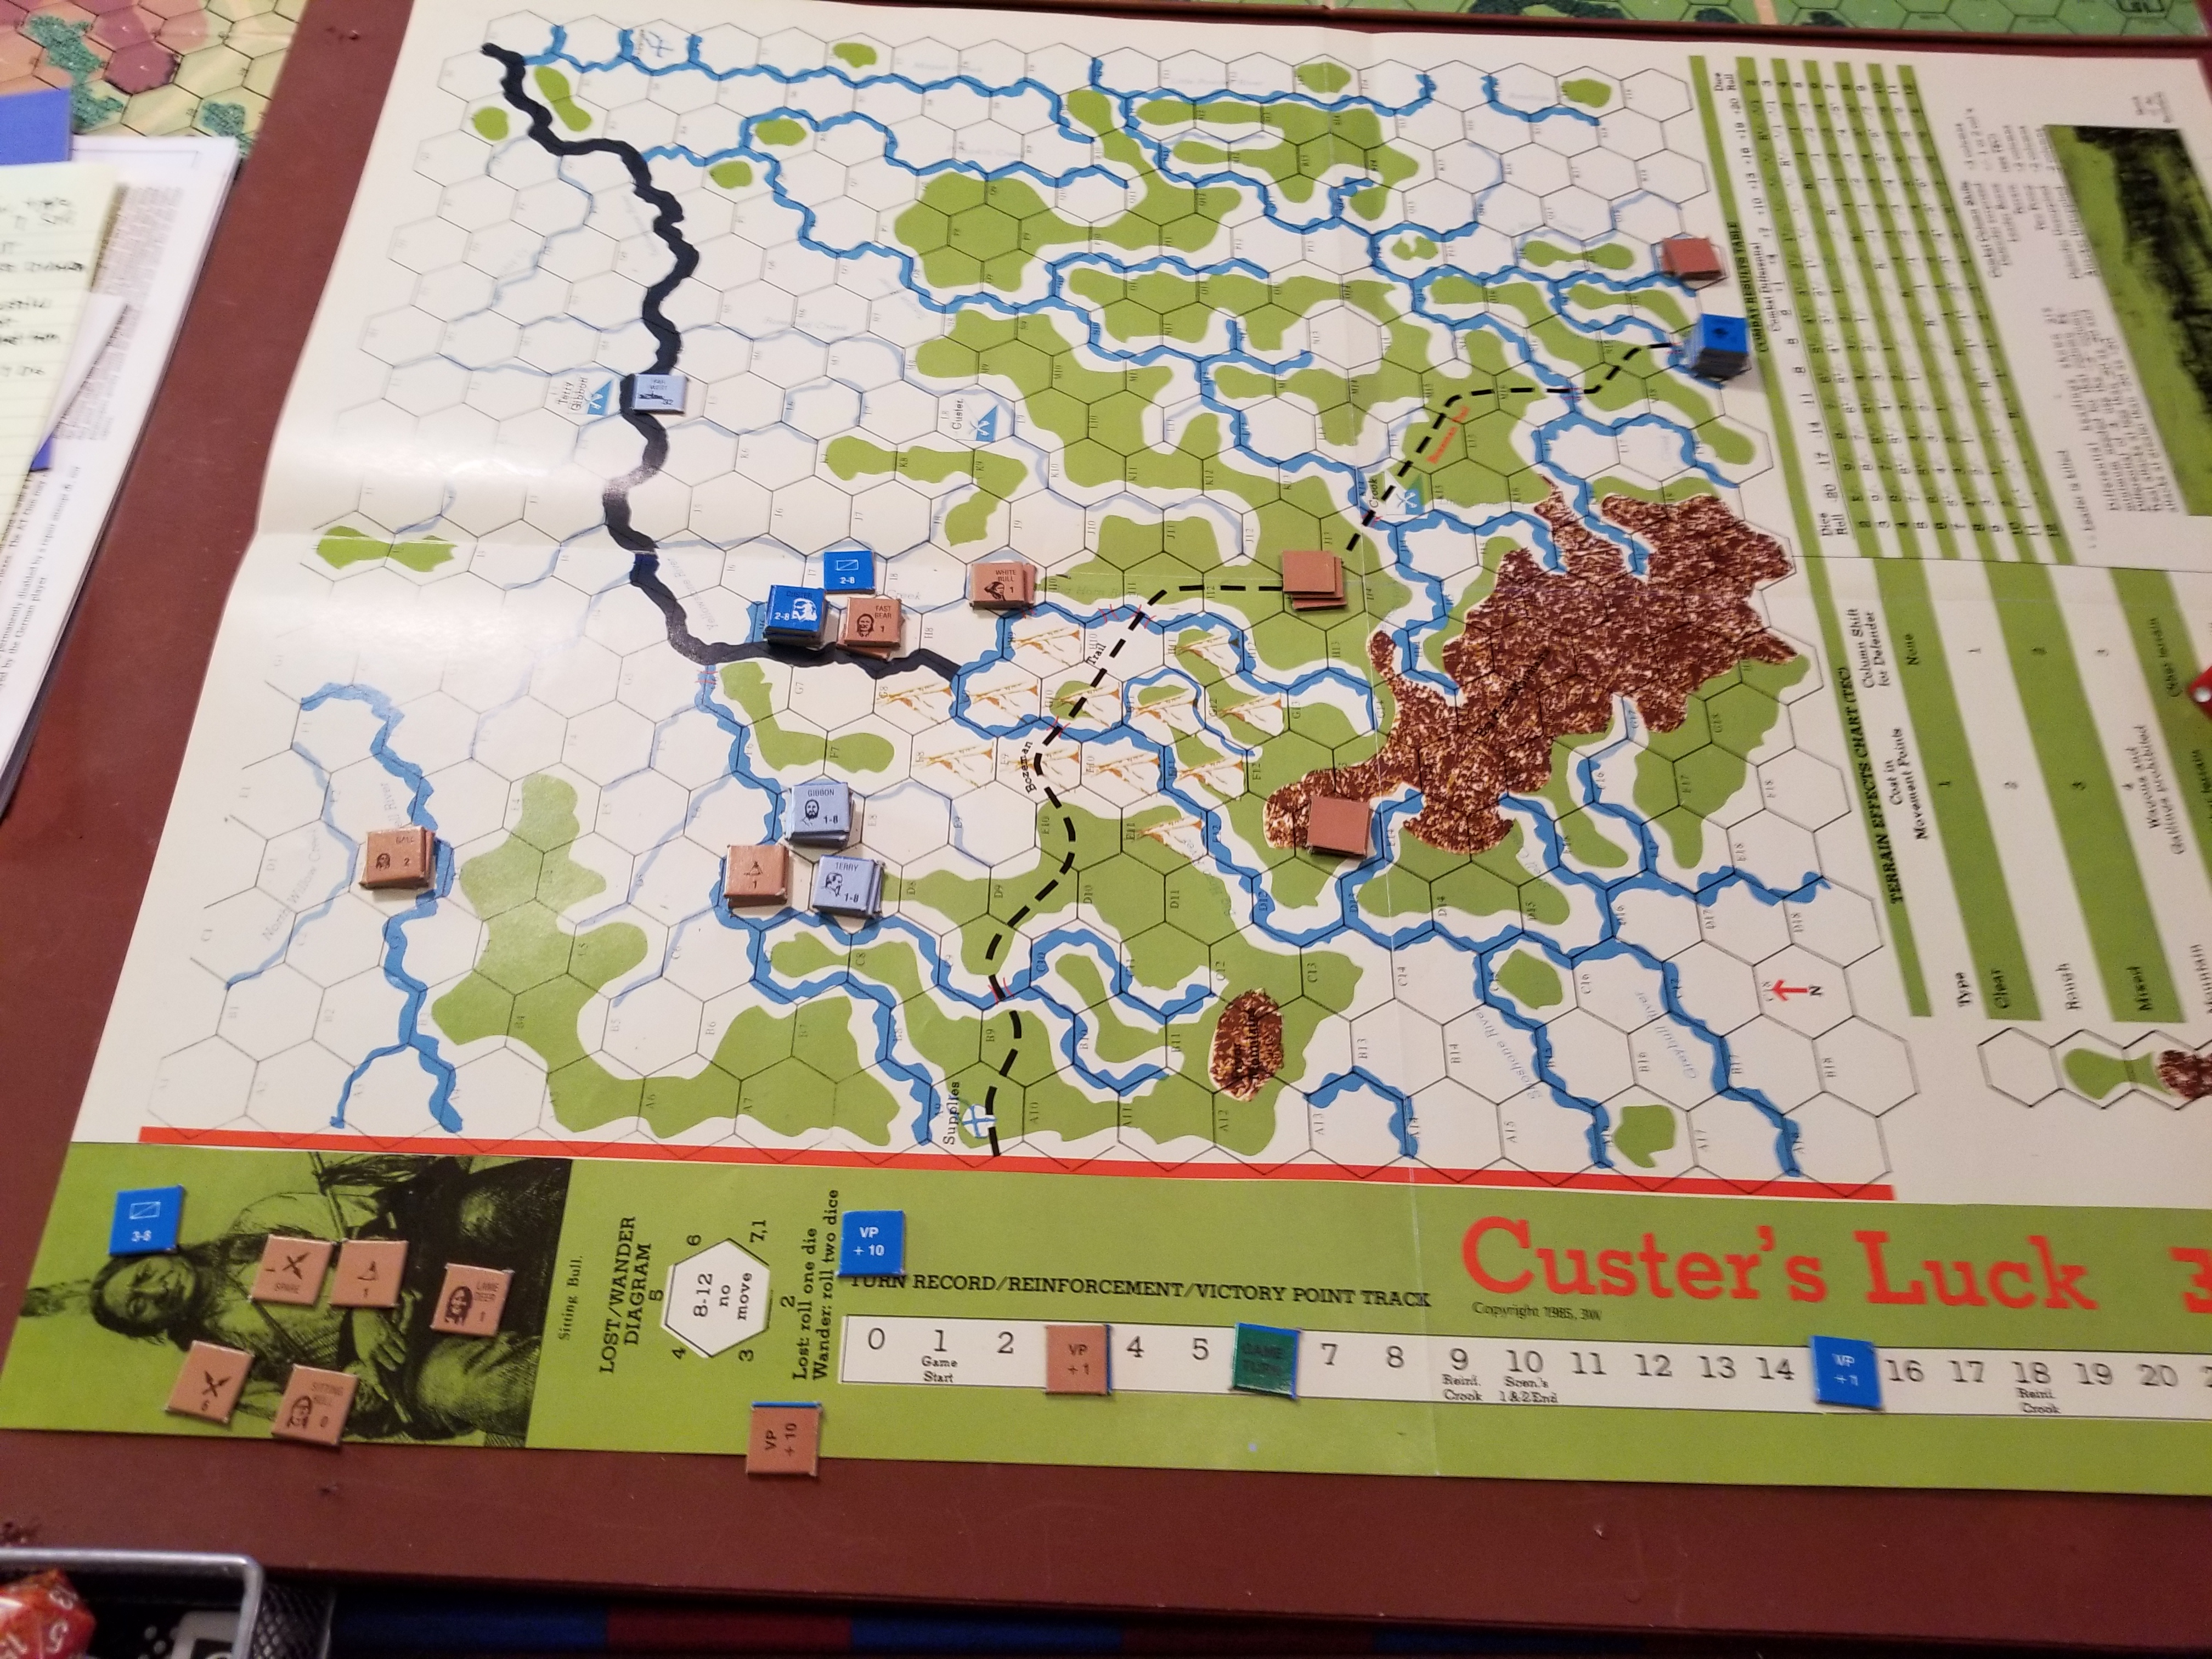
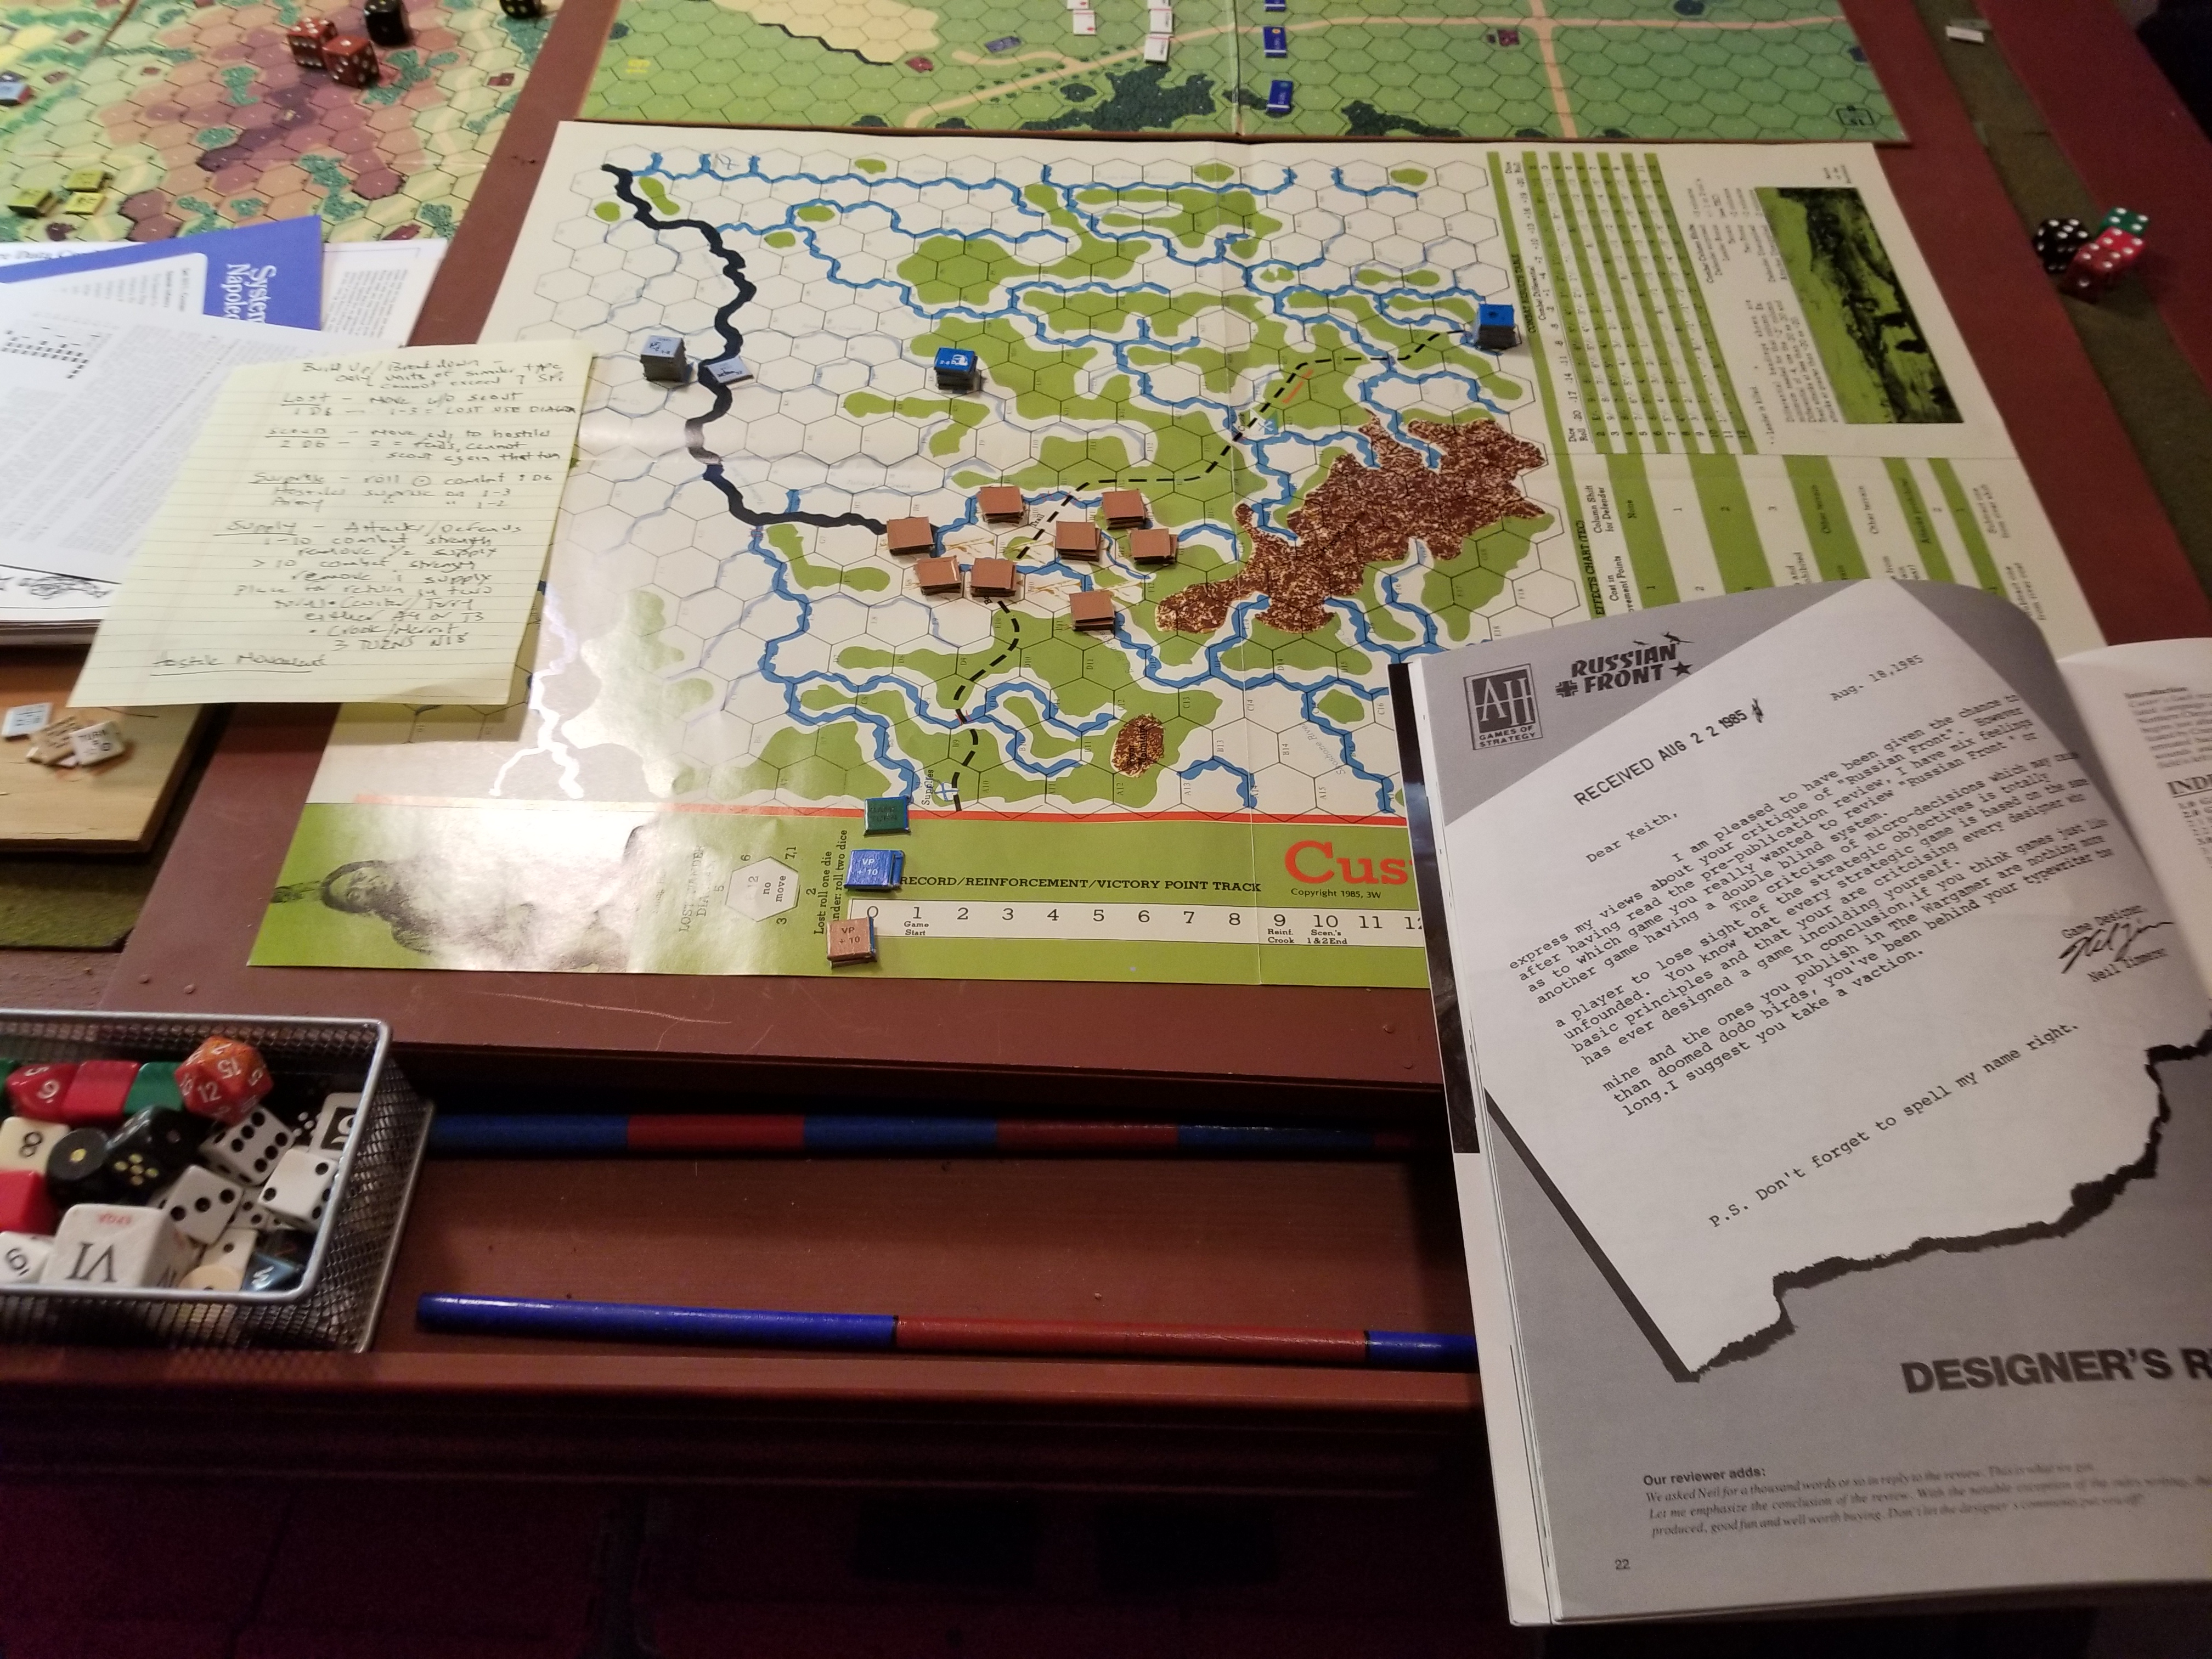
Finally back to wargaming last night with Custer’s Luck. Purchased and wrote about this a few months ago, and was happy to finally get it on the table. Fitting, because I started setting up on the anniversary of the Battle of the Little Bighorn.
This is a solitaire game, with garish map and utilitarian counters. The rules are…..well, let’s just say they provide a framework for playing the game. Lots of minor problems, but they can be pushed through with a little common sense. It’s a magazine game, right? Well, that’s harsh. Always liked The Wargamer, with interesting topics and, at times, interesting take on things.
The game covers the 1876 summer campaign. The Army’s objective is to kill as many Sioux as possible (shocking!). There are three cavalry commands; Terry/Gibbon, Custer, and Crook/Merritt. While it can be played multi-player, the mechanics are oriented for solitaire play. Sequence of play is Custer (move & combat), Terry/Gibbon (m&c), Crook/Merritt (m&c), “Hostiles” (m&c).
The Sioux initially set up face down with each stack having a leader, village and combat unit drawn at random. Rules say 12 stacks, I could only muster up 8. Hostile movement is dictated by a compass chart. They move on a 2D roll of 7 or less, and remain stationary on a roll of 8-12.
Army Scouts can be used to identify a hostile stack. Wagons and Mules are used for supply, with combat reducing supply capabilities. The Far West steamboat stooges around as per the whims/attention span of the US commander.
Combat is straightforward, with leadership, terrain, surprise, envelopment, and supply modifiers effecting column shifts, not unit strengths.
Decided to play the historical scenario. Crook/Merritt command does not move.
Initial Setup. Handwritten Player Aide To Your Left. Rules On Right With Insane Letter To Editor….Zoom In….
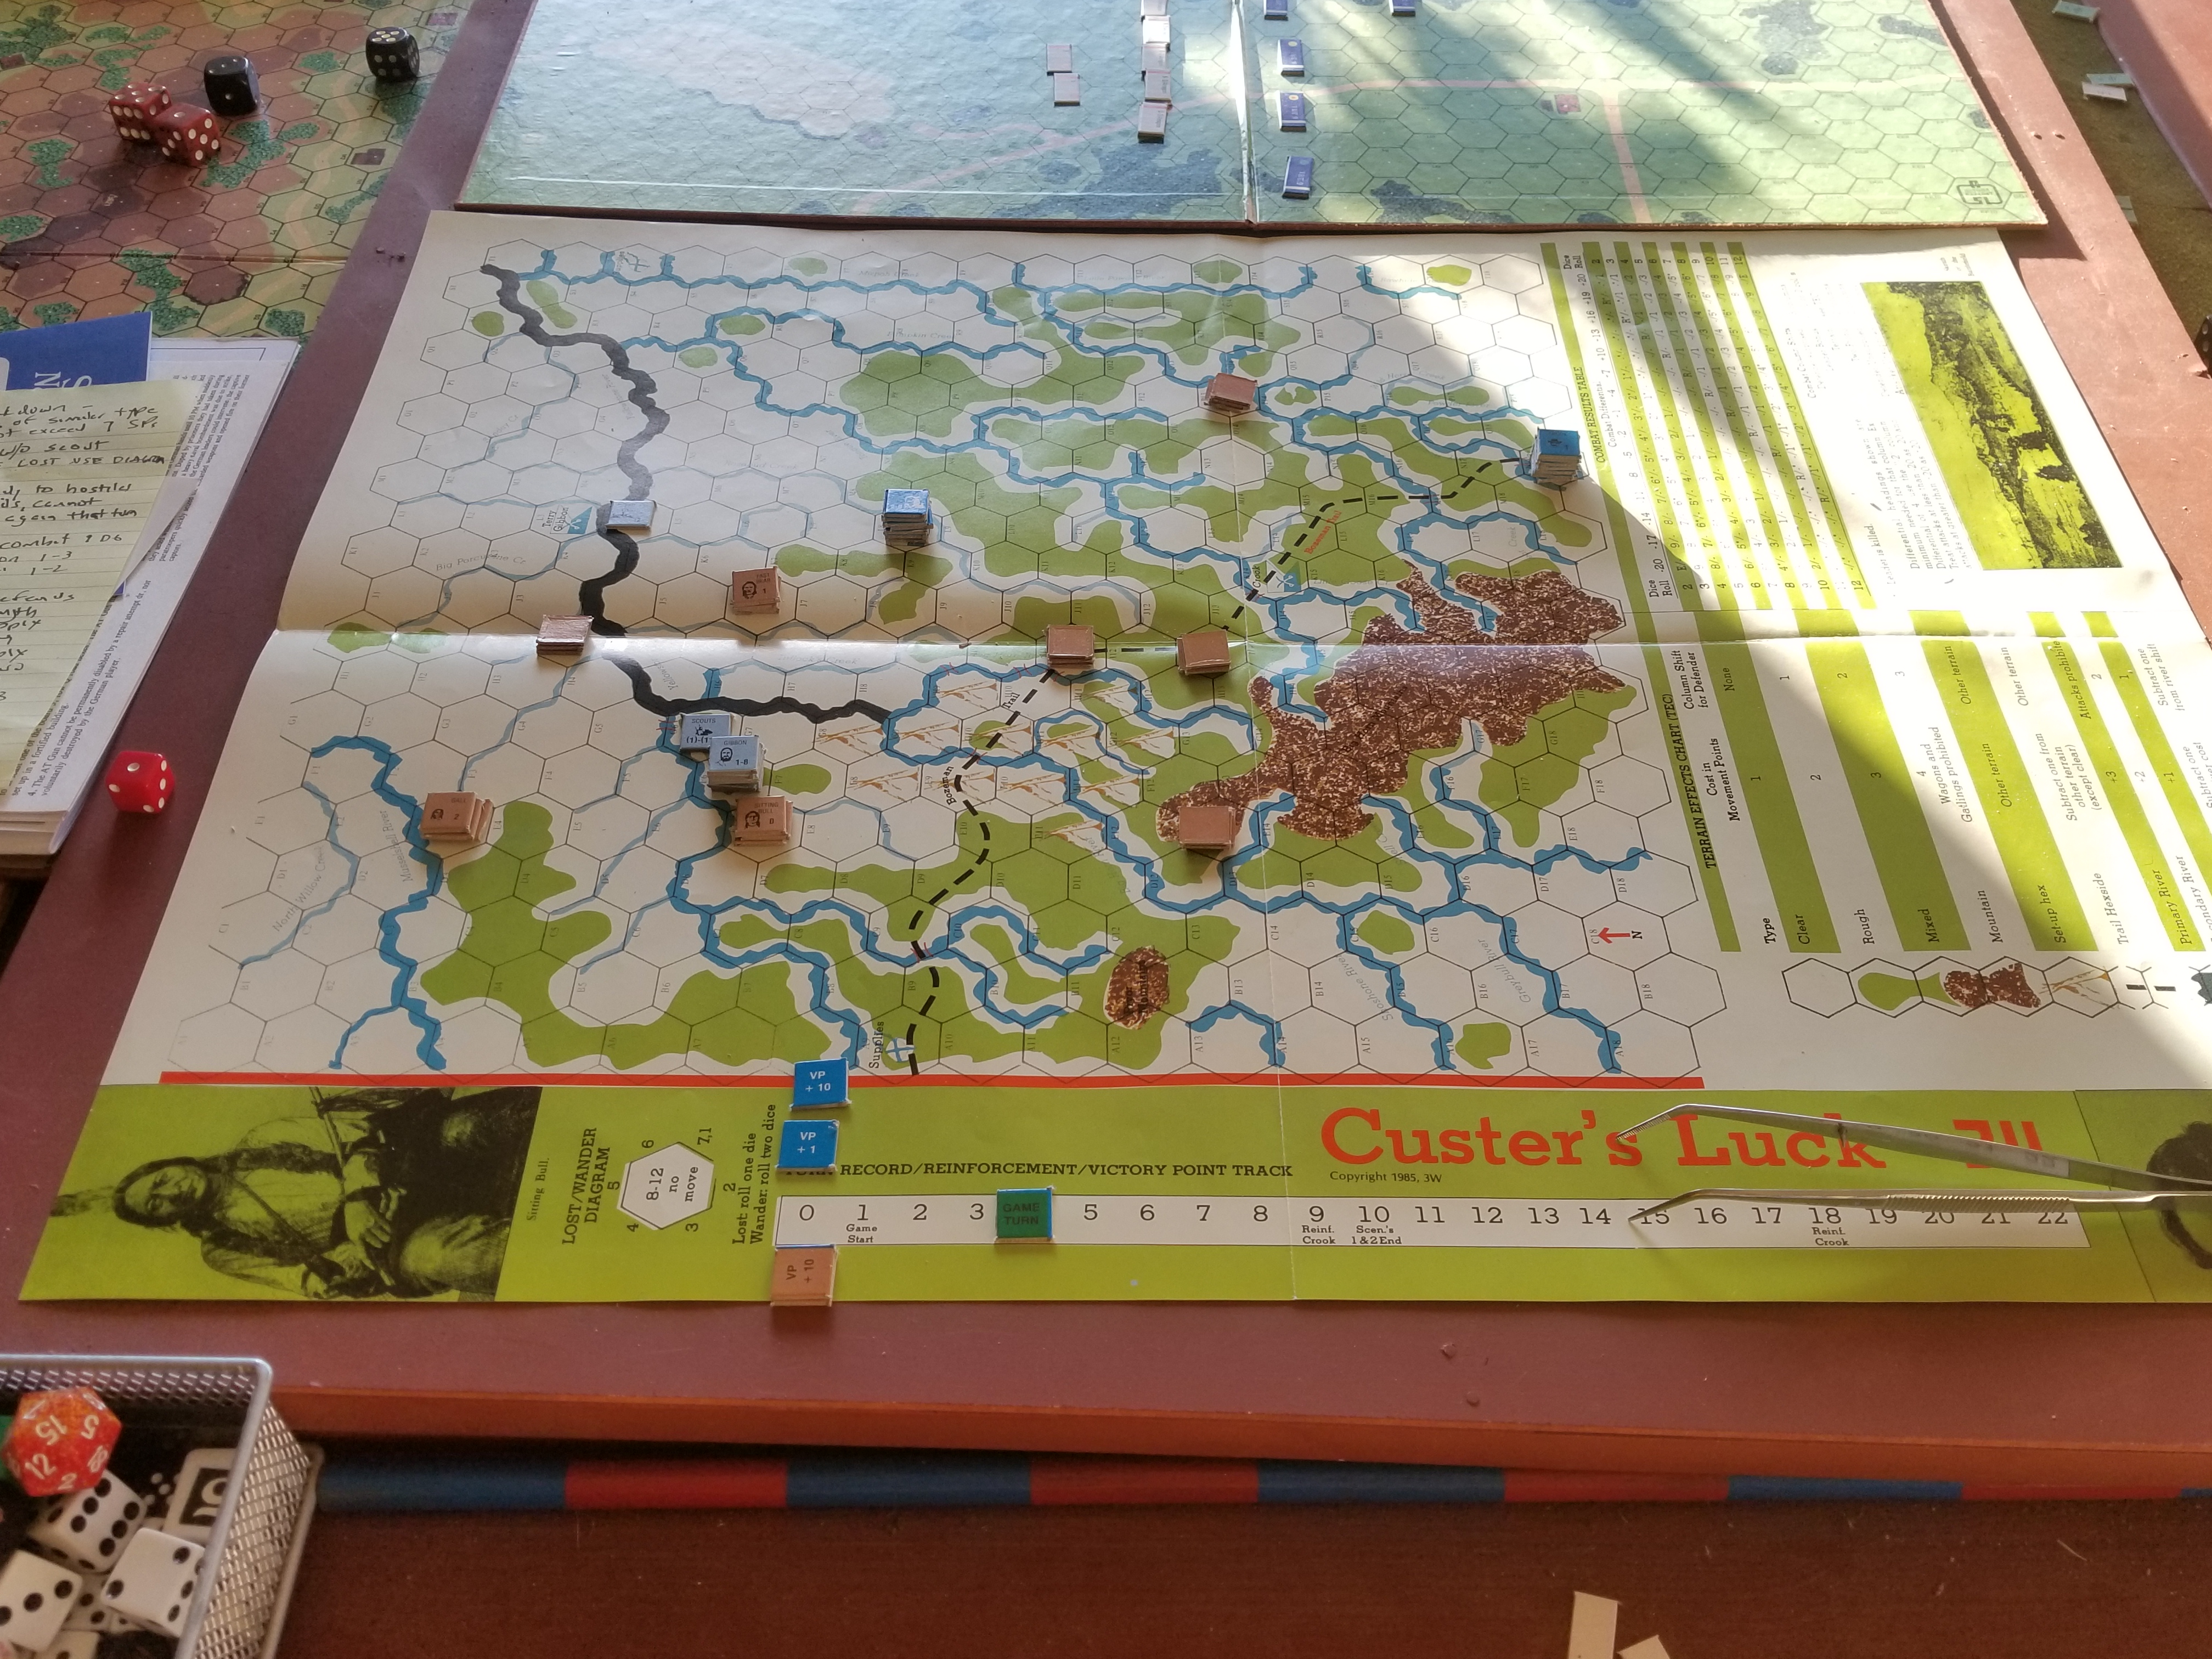
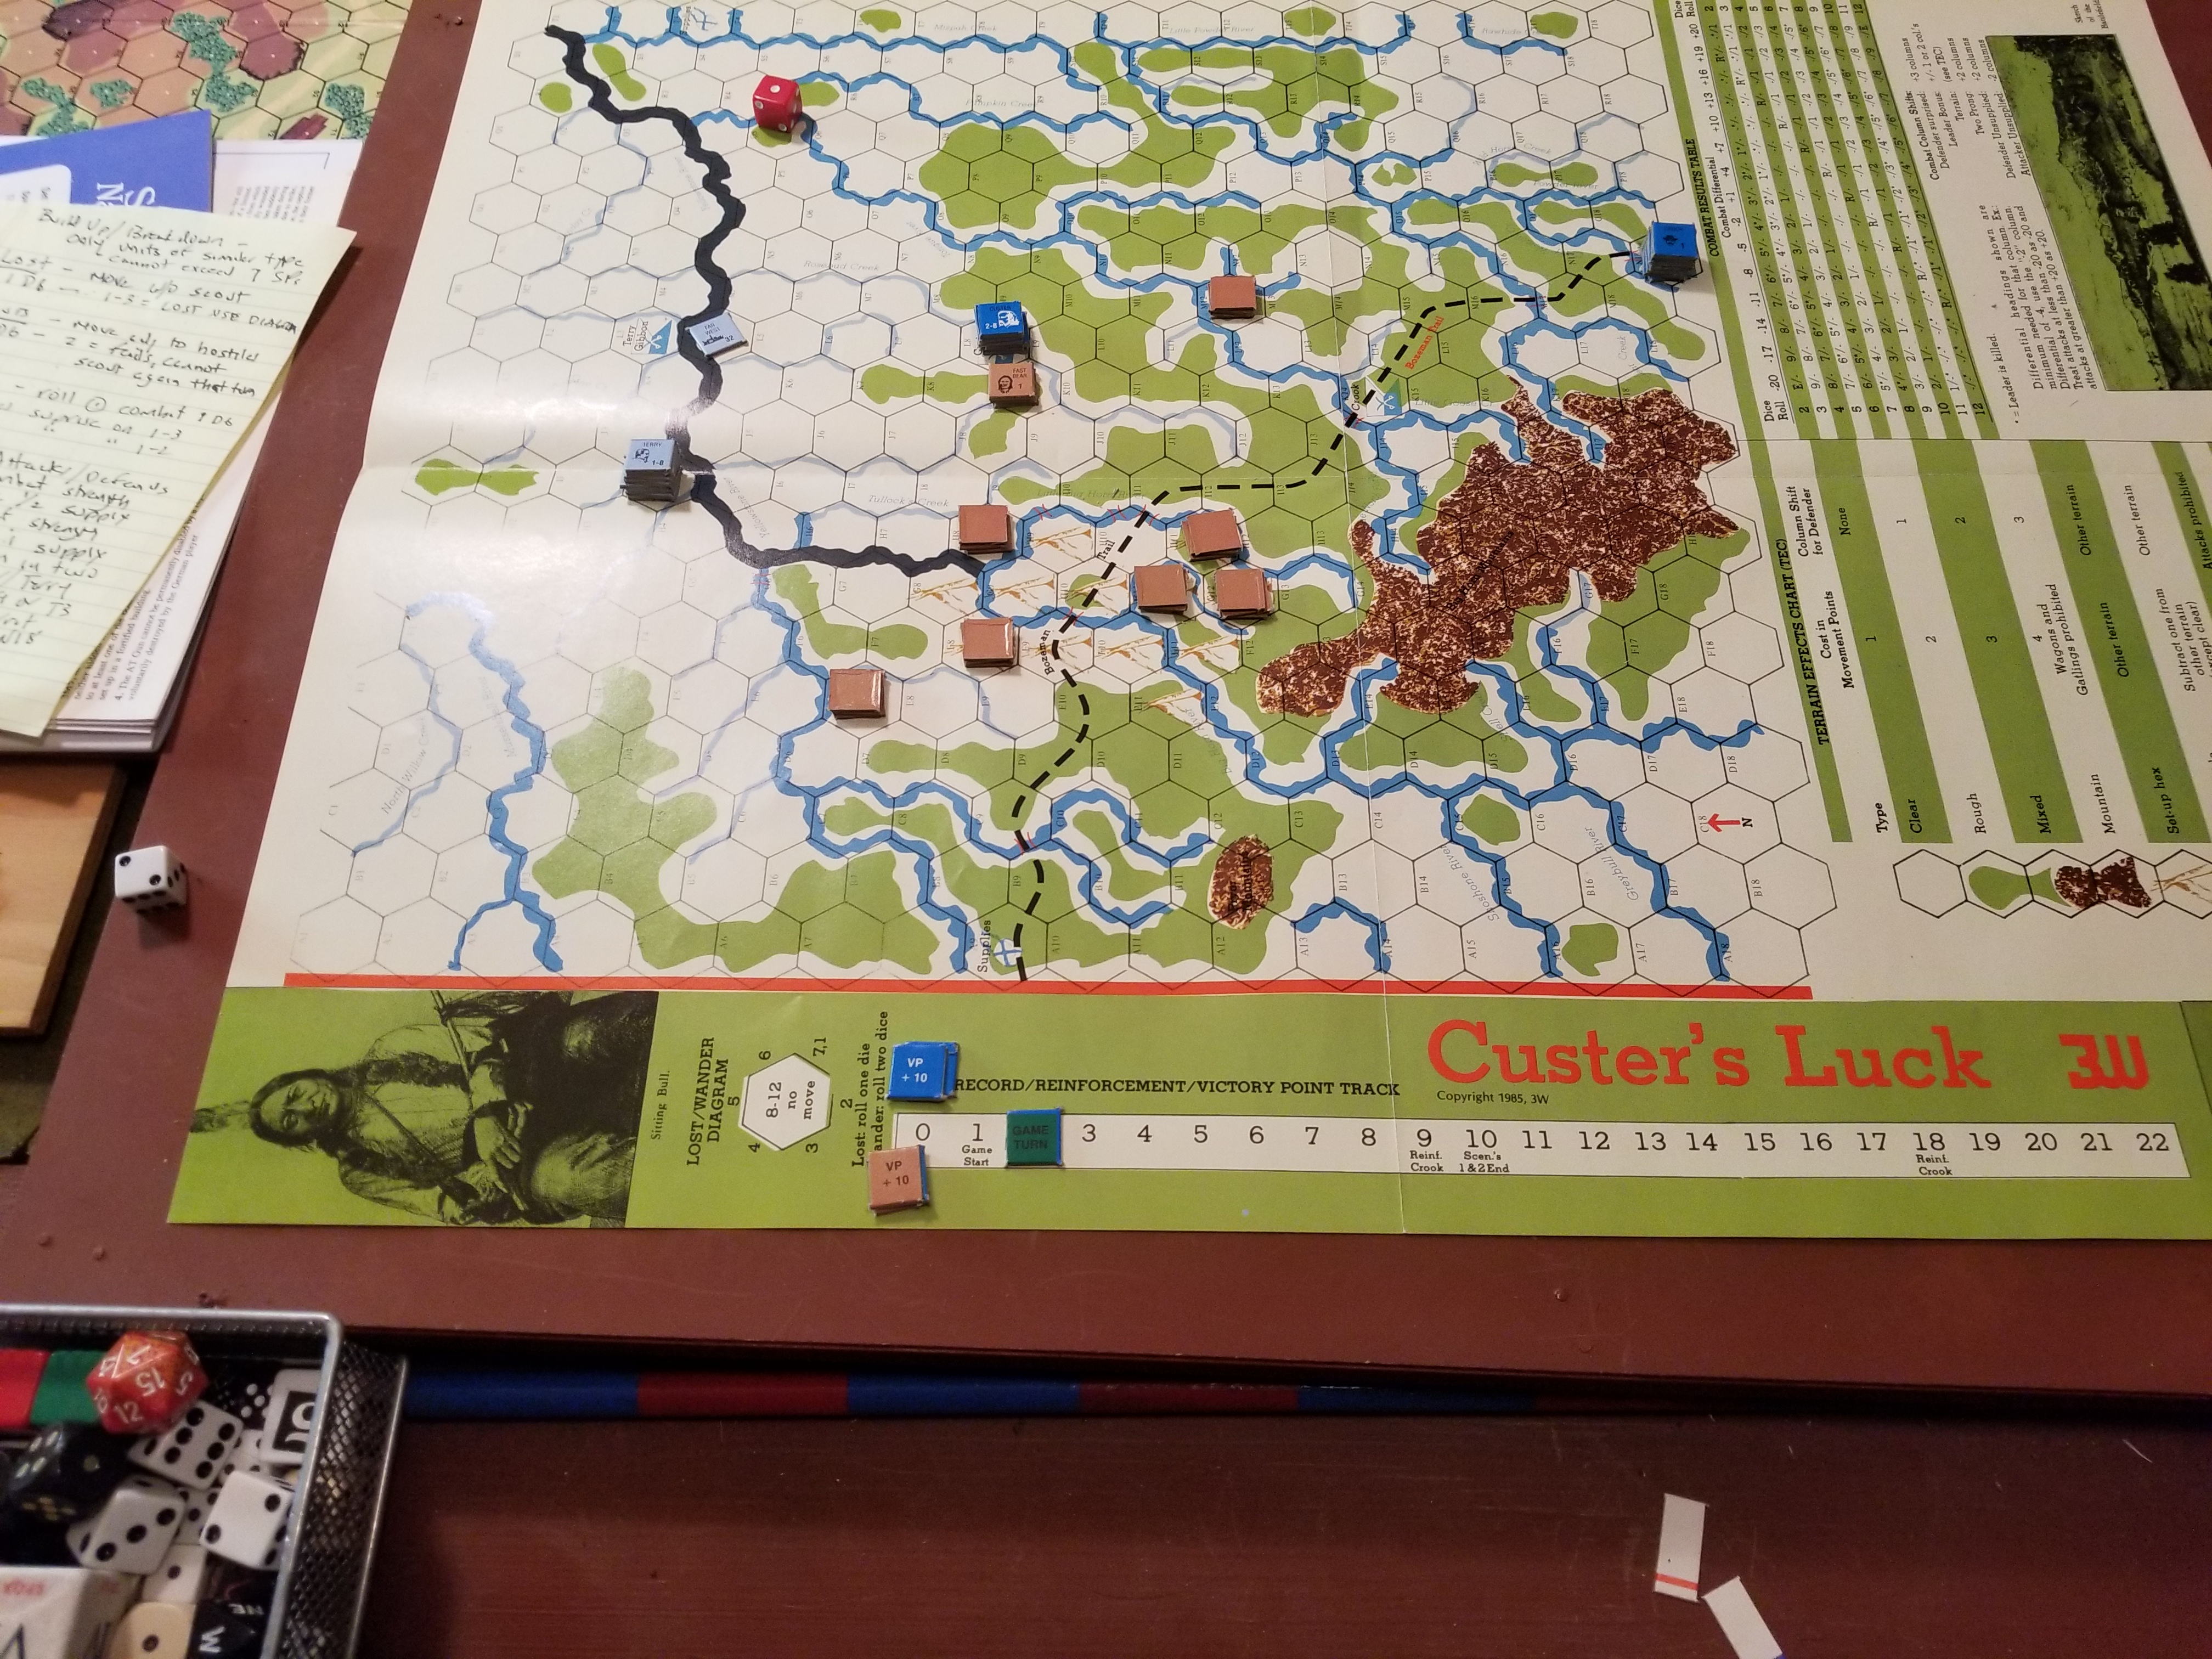
Decided to let Gibbon/Terry move south to pin Hostiles. Custer was ordered to exercise restraint….OK, this is not the (real) historical scenario.
Plodding Forward In The Relentless Summer Glare, Gibbon/Terry Advances (left). Custer Shows Restraint And Is Attacked By Gall.
Hostiles begin random movement. Gall heads straight for Custer. This time, it’s Gall’s Luck. His negative odds attack only results in a retreat. Again, Custer shows ahistorical restrain and does not pursue.
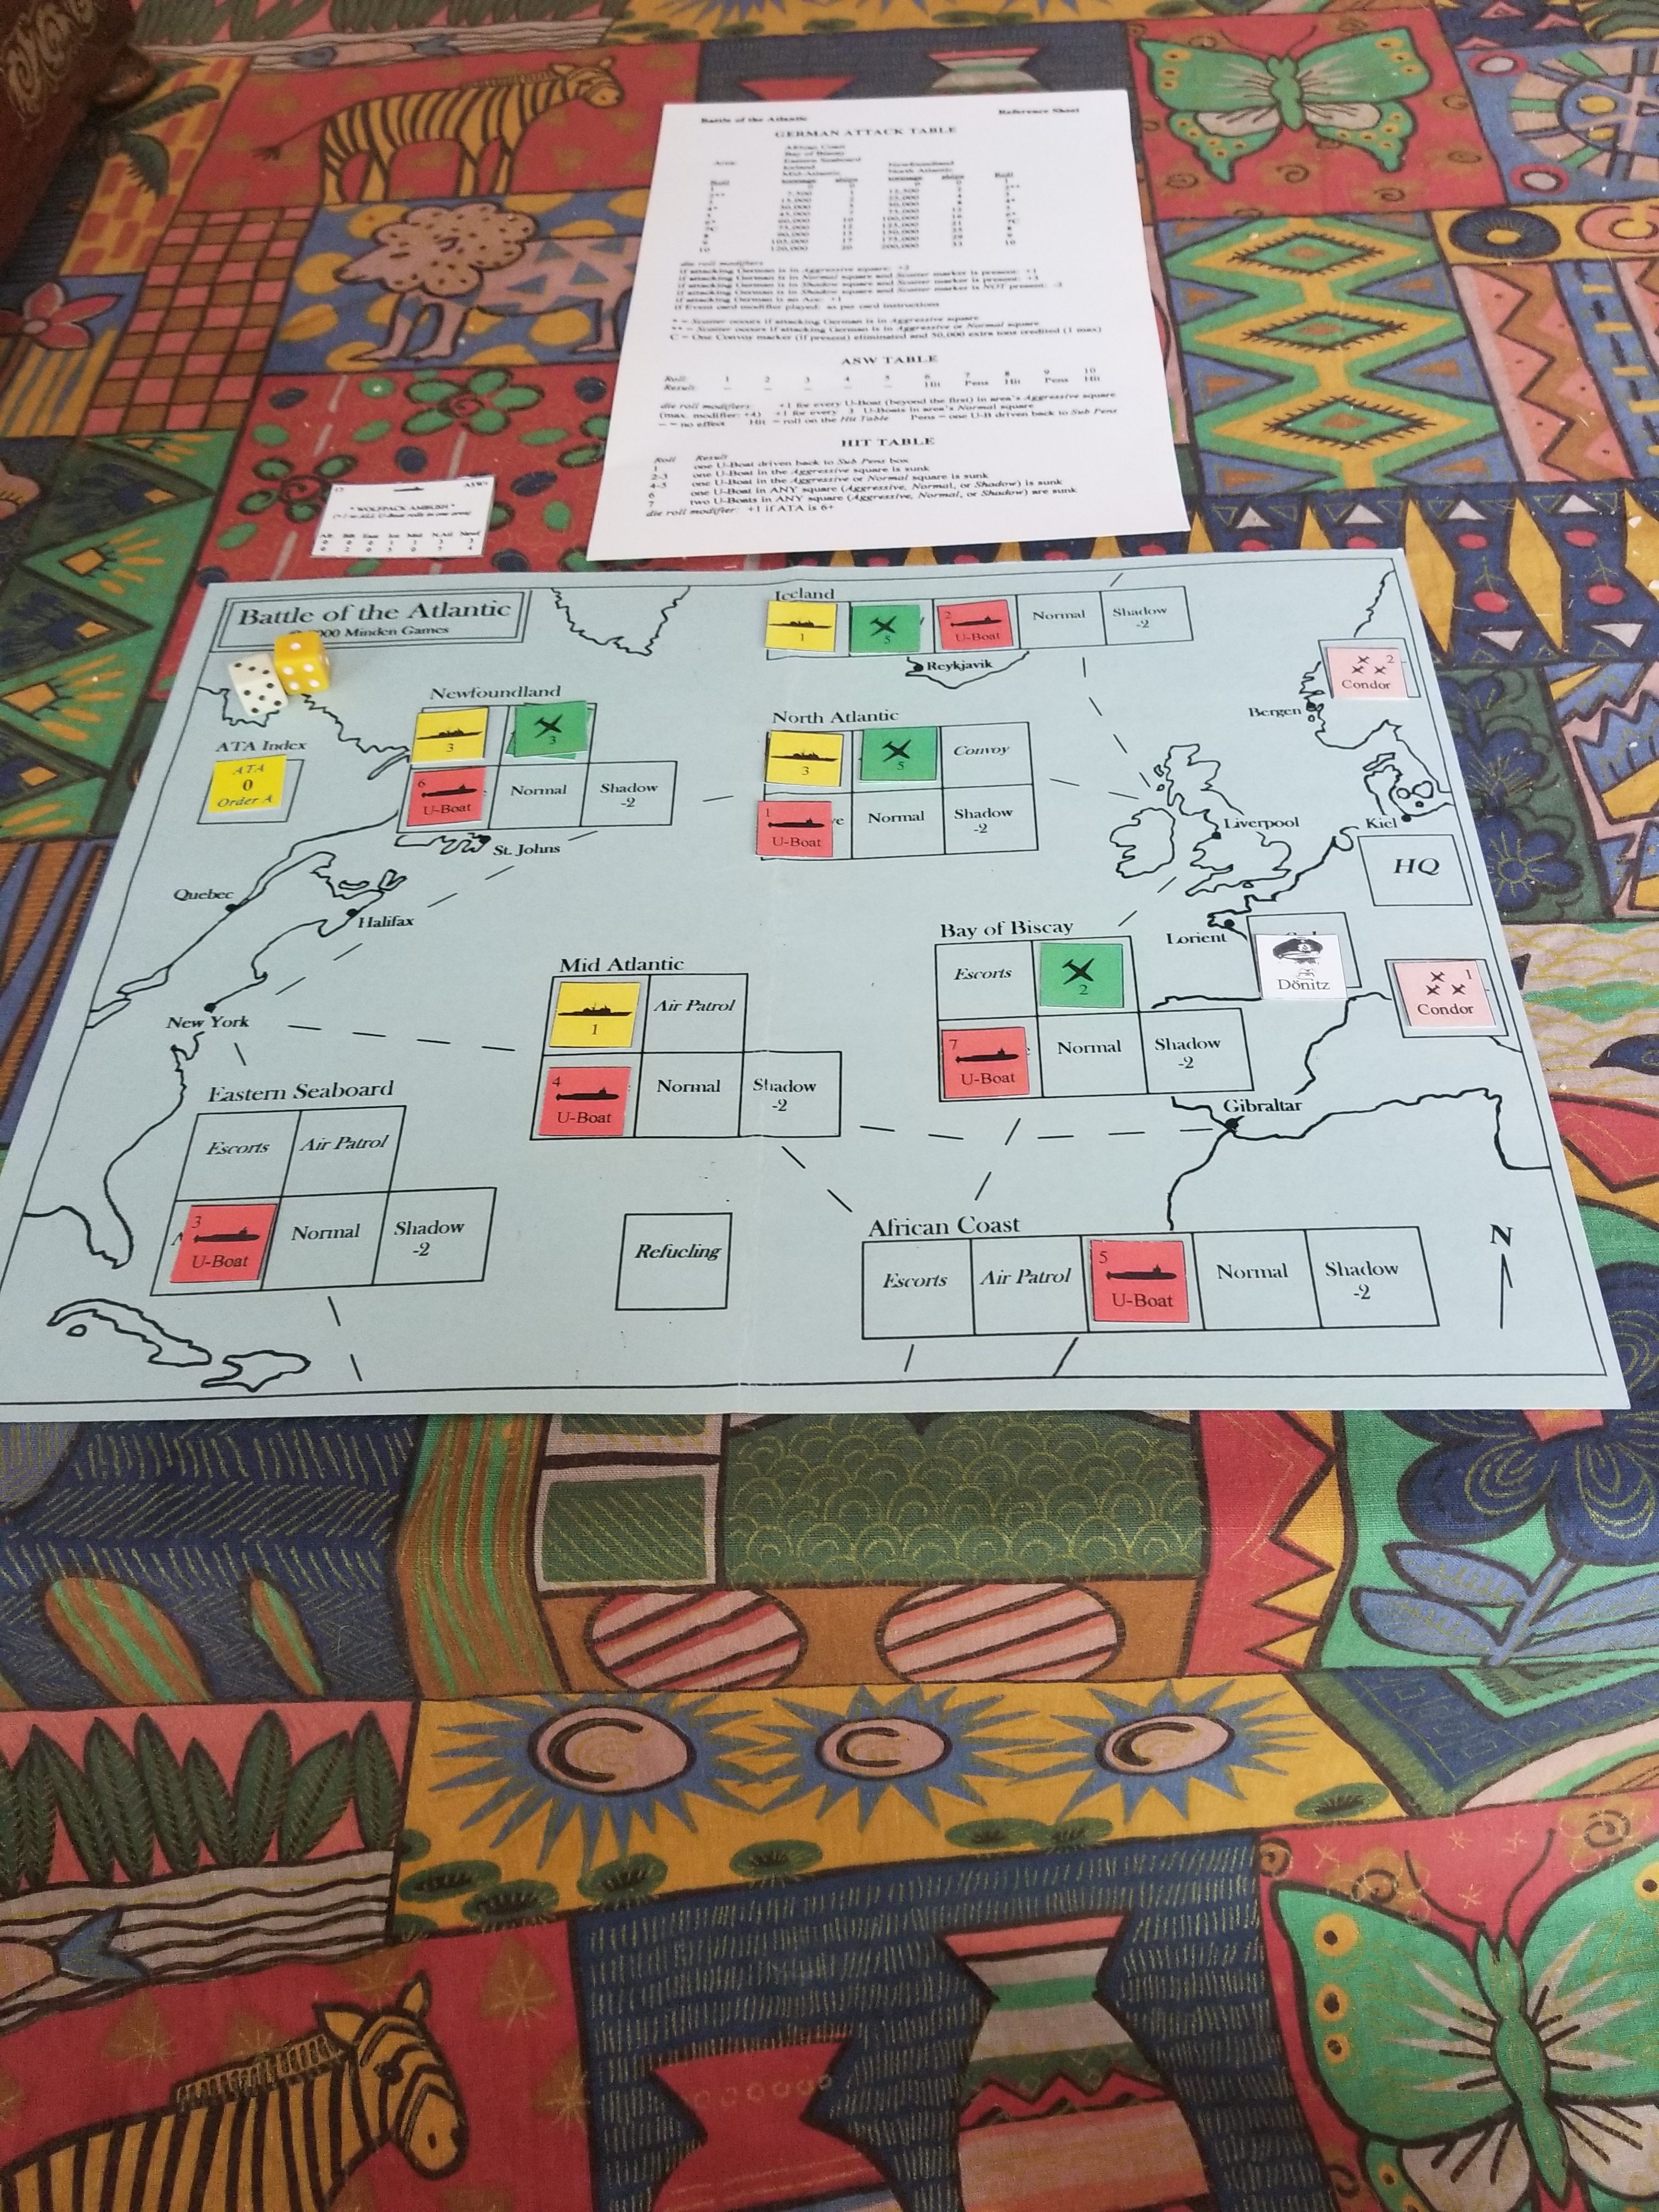
1. Concentrate U-Boats. Downside is that ASW becomes more effective.
2. Concentrate in North Atlantic only if Convoy marker is there (Allied ASW typically concentrated in North Atlantic).
3. Keep Donitz in the Sub Pens (didn’t go into this in my initial review), because his presence reduces chances for ASW capability increases.
Author states that BoAT is a difficult game to win. He offers optional rules to help the Germans (see previous post).
The article includes rules clarifications and references an excellent review from WebGrognards.
Despite using an “aggressive” posture for all submarines, the Germans had a very difficult time attaining the tonnage sunk figures needed to attain victory. And, this is a period when Allied AWS capabilities are relatively low.
Well, maybe that’s just fine. Maybe it would have taken quite a bit of good fortune to win the Battle of the Atlantic (BOAT), just like Barbarossa. Do you want play balance, or something akin to historical conditions? Or, is it playability?
I think Grabner’s BOAT does a nice job of providing solitaire playability with abstract historical conditions. Is it a simulation? No, but it is an interesting way to spend an evening or two.
Started playing Battle of the Atlantic last night. The active player controls German U-Boats, Condor aircraft, surface raiders and resupply submarines.
British air and surface ASW asset dispositions in each sea zone are determined by a card draw. Cards also determine German U-Boat production and British technological advances, as well as designating certain combat modifiers for the turn in which they are drawn.
Initial Setup
Technological advances effect the order in which Allied ASW assets, U-Boats and Condor aircraft are placed, as well as which side resolves their combats first. Technological advances (Ultra, HF/DF, Radar) are cumulative, pushing the initiative towards the Allied player. This is critical, since losses are taken immediately.
German objectives are to a) sink as much tonnage as possible, b) maintain at least half their U-Boat fleet at the end of any one turn, and c) prevent the Allies from forming and deploying convoys.
The German commander must determine which sea zones to deploy attack assets, and what posture (aggressive, normal or shadow) they take. Aggressive subs can sink more tonnage, but are easier to destroy.
Play is quick, with straightforward CRT tables for each combatant and asset type.
After my usual stupid misplay during the first turn (roll one die, not two on the German Attack table), the first two “real” turns found the Germans falling short of their victory objectives, but suffering light losses. I’ll find out more this evening.
Completed another Ranger reconnaissance mission (Card #3) yesterday afternoon.
Preparation time drastically reduced to about 15 minutes. Kept my same roster and equipment from the last mission. Plotting ingress and egress from the objective was straightforward. I remembered to seal off the objective and PZ with supporting fires, as well as providing some contingency support at the LZ.
Managed to survive without incident. Now I’m ready to move on to a combat mission. Fun little game, small footprint.
Took Ranger off the shelf the other day. Had messed around with it about a year ago, after picking up the latest edition for practically nothing on E-Bay (bad box).
Each game consists of a mission. The mission has two parts, planning and execution. United States Army small unit doctrine for squad or platoon sized missions is used. If you have had any exposure to this, learning the game is simple. If not, there is a very informative booklet included to help you learn the basics.
What’s fascinating is the few number of rules. The platoon leader has to act like a platoon leader during the planning, briefing and rehearsal stages of the mission. Determine your unit’s load, work out the route from your insertion point to the objective and then back to your pick-up point, plan for supporting fires, and manage your rehearsals.
Mission execution is accomplished using the programmed text. While movement to the objective can be a little tedious, you can’t make a mistake, or something bad might happen. Make sure your unit is in an appropriate tactical formation, call halts every 750-1,000 meters, and don’t get in a hurry.
One aspect of the programmed text that confused me at first was how to stop moving once my squad had reached the objective rally point. Well, the answer was simple….call a security halt, and go to that paragraph. The text options provide the prompts to start your actions at the objective.
To be successful, actions at the objective must comply with doctrine. If you start free-lancing, bad things do happen.
This game has a very quick set-up, but preparation before the mission is lengthy, but an integral part of the game. However, after a couple of missions, SOPs can be established, reducing planning time and increasing effectiveness.
Playing time for my first mission was about 1.5 hours, all-in. This squad-size reconnaissance mission is an excellent introduction to the game. I look forward to moving on to Mission Two in the very near future.
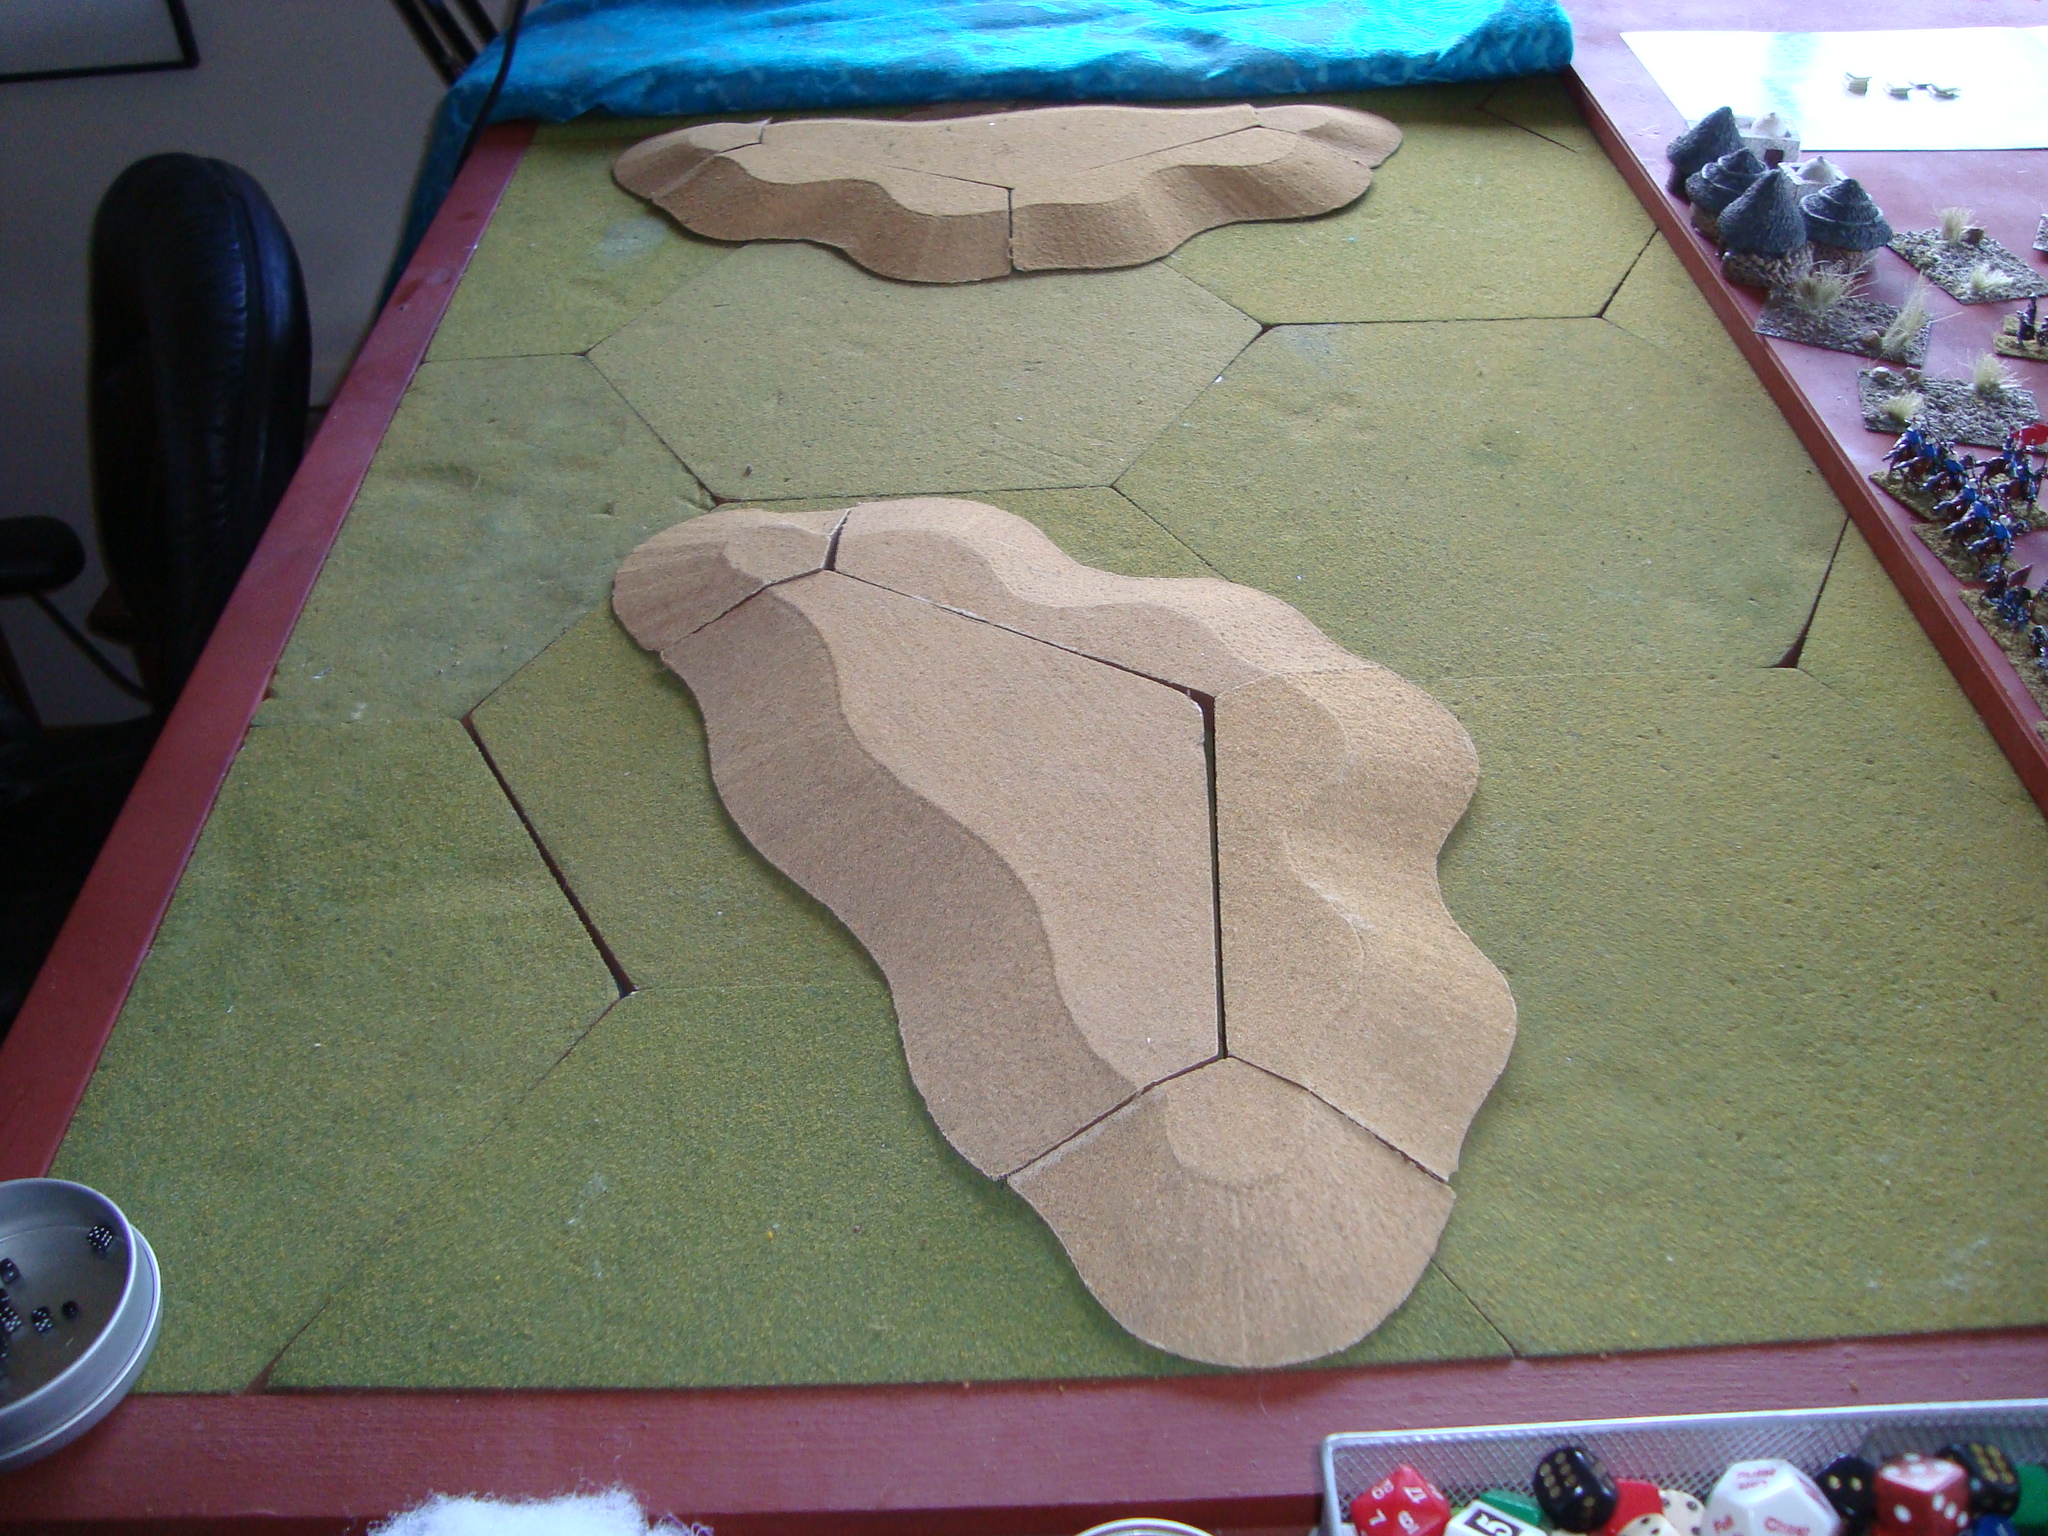
The wadi option for the battlefield was too difficult to put together, so I just elevated things and instead of the river/wadi, set up an east to west gap between impassable sand ridges. “Faragh” is the English translation of the Arabic word for gap (or so I’m told by the internet, and I have no clue as to how to pronounce it).
Not exactly stunning eye candy, but it will serve.
The die roll for the defender’s programmed deployment resulted in the Zanj force being evenly split on each side of the ridges. Once that takes place, I’ll roll for the Portuguese order of march.
With Lord Renaldo moving north, it was time to set up a battle scenario.
The first step was to establish the traits of the garrison commander at Behefe and his army. The commander is Bey Imen Mahir. He is inexperienced (-1 unit for command range) and battle shy (-1 when his unit melees). His army is not pious (so cannot have a pious unit), but is attended by a skilled physician (reduces impact of disease die rolls).
Step two was to determine the composition of Bey Mahir’s army. I arbitrarily selected one unit of Persian Mercenaries (for fun), then rolled a D6 for six Tribe and six Civic Guard companies. The resolve of each Civic Guard and Mercenary company will be determined at time of first enemy contact (shooting or melee) by rolling a D4. The Tribe resolve is per RAW at three.
Up next was determining the effects of Renaldo’s victory on his little army. Rolling a D10, the morale of four units increased one step. These increases were allocated to the shot and crossbow units, which now have a resolve of four. He was unable to recruit new units.
The next step was the scenario itself. I relied on Charles Grant’s “Programmed Wargame Scenarios”. It’s a great book, as you can read here at the interesting Lone Warrior website.
The book has eighteen scenarios. I rolled two D10 (re-roll 00 or 19). The result was Scenario No. 7, “Two Sides of a River”. I modified this to “Two Sides of a Wadi”, and followed the programmed instructions for setting the defense and offense.