Category Archives: Solitaire

In Magnificent Style

Never been much of a video game player. However, a long time ago I developed a serious addiction to Space Invaders. After school I’d head home, fire up the Atari, and hammer away at those lock-stepping aliens. After a month or so, I was slaughtering them at the cyclic rate.

 Now the shoe’s on the other foot….I’ve been playing “In Magnificent Style”, Victory Games’ treatment of Pickett’s Charge. And, the slaughter has been immense.

 This is a well received game, as indicated by the reviews Boardgamegeek.  And, rightly so. But, to play it, one needs to be a glutton for punishment.

Confederate fortunes can change in an instant. A once orderly advance will deteriorate into a tactical shambles if the die rolls go wrong, or there is a series of unfortunate chit pulls. And, those instances will happen. The best considered prudent, or wild and audacious, advance will crumble given the time, distance and firepower challenges facing Longstreet’s Corps.

Still, the game has as strange allure. Part of it is the easy set-up, nice components, quick playing time, uncertainty, and need for only one chart sheet. And, as stated earlier, it is an elegant design.

 I think it would make a great tournament game. Get about six players, and have them play three games each. Have plenty of beer available, and watch the players implode and explode when things start “going south”. It would be theatre.
Renaissance Skirmish Rules – Resolution?

Out on the road for the past week. Long drives. Had some time to think about the skirmish rules.

Will stick with RAW’s basic framework but will rely on the dice to determine the probability of actions not covered, but intuitively needed.

The “Yes, No” dice will take care of questions such as “Can he fire this turn or must he reload?”, or “Is there a modification for this moving target?”, or “Can he add pistol to melee strength”.

Don’t want to bogged down in charts and modifiers. Will add gallop (walk, then trot, then gallop), but other than that.  Just play the game and rely on common sense.  Will see how it works.

ADD or Schizo?

Don’t answer that…….

Had to take both games down Monday morning.  Reasons aren’t worth going into.

Put Thunderbolt/Apache Leader back up and made it through one turn.  Limited myself to cannons & rockeyes in order to simply things concerning line of sight rules.  Just grinding without any regard for results, just grasping the rules.

Speaking of rules, plowing through Dambuster’s flight rules.  Will get that up on the table again.

Enemy Coast Ahead: The Dambuster Raid

Finally put down the rules and started to play last night.  Heavy lifting.  The download mentioned in the previous post was absolutely necessary.  Do not start playing this game without it.  Why?

When I went through my teacher training early in the millenium the rage was about learning styles.  There were seven of them.  Each learning style was to be used (if possible) in the lesson plan because each student has different ways of accessing the material presented in the lesson.

Well, my learning style(s) certainly did not mesh with the RAW for Enemy Coast Ahead.  I’ve been cutting back on the booze, so I think I have my wits about me, but  discerning game flow was damn near impossible.

It took a few days to figure out that the BACK of the scenario contained important set up information, especially as to where on the map to place critical counters.

The game-aid cards (with one each for the planning, flight and attack portions of the game), have all kinds of information not accessible (at least to me) in the rules.

As a result, the first play through involved juggling the rules, scenario, attack player aid card, and the download on my IPad.  Again, get the damn download!!!

I think I have it now, and it is fun once you struggle through it.

What a difference from the Thunderbolt/Apache rules.  With these rules, you can start reading and play right up to the primary attack phase.  There things get a little stickier, but the introduction is easy and painless.

Hoping my next session is easier.


On Deck – Revisited

Earlier this month I set up Thunderbolt/Apache Leader.  Made it through part of one turn before it came down for the Wavell’s War East African Campaign.

Set it back up the other day and started going through the rules.  Short term memory is shot.

However, competition arrived in the form of Enemy Coast Ahead: The Dambuster Raid.  This is a solitaire, GMT game, with great looking components and programmed rules.  I am working on Scenario 5, which is the “newbie’s” scenario.

The Errata and Scenario 5 Replay download is extremely helpful.

Will work on both over the next few days.  Should be fun with two well considered solo games on the table.

On Deck

Will start playing Thunderbolt/Apache Leader tonight.  Decided to stay with solo aviation games.  I’ve messed around with this one before, but never quite got comfortable with it.  Time for another try.  BTW, this is the original, not the updated version that came out a couple of years ago.  This will be a time-filler until Tim shows up Friday night for our long-awaited Wavell’s War East Africa Campaign game.

RAF – Latest Scenario Played

Sanity prevailed and I played The Thin Blue Line scenario, rather than the entire campaign. At my rate of play, which is one day per session, it would have been too lengthy a proposition.

The Thin Blue Line begins on August 27 and ends on September 11th. This represents the longest period of sustained German raids.

I was able to attrit the Luftwaffe, but not enough to gain a victory. However, the RAF was in good shape at game’s end with a fairly deep pool of experienced replacement pilots and plenty of replacement aircraft. At the rate things were going, an operational victory was probably two days (of game turns) away.

The hour and day card draws tended to favor the British player. What the British player cannot stand is successive German raids over the period of one game hour, or during the course of a day. The quicker the clock and calendar moves, the better for the RAF.

One thing I started doing a little too late was making sure there were enough British fighters scrambled to attack the bombers, and not just the Me-109 hunter groups. This involved massing planes and taking some risks about subsequent coverage if there were followup raids, or another series of attacks. My warning levels were consistently high which helped, and, once again, the card draw kept the clock moving.  It was so similar to historical “Big Wing” theory.

Once bombers are disrupted, aborted or placed in the damage box by a fighter attack, the effectiveness of a raid is greatly diminished. Again, fate did not favor the Germans, with many raids reduced to a low factor attacks, and resulting low levels of damage and victory points.

A great game, and worthy of all the praise it has gathered over the past twenty years. My only complaint is that a couple of charts are buried in the rules, especially the Airfield Operations summary. I will copy this onto a separate sheet the next time I play.

New Dice

As part of the ongoing grappling with solo gaming, I purchased several types of dice over the past few weeks.

DSC01394

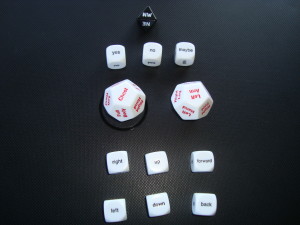
The top die is for points of the compass.  Could be used for entries for opposing forces, reinforcements, etc.

The row below is to be used for decision making.  Which course of action to take?

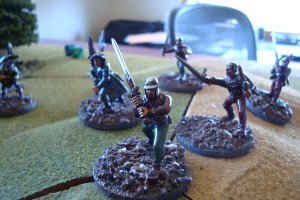
The big die have various body parts labeled.  Great for solo gaming, especially with these guys…..my Warhammer Renaissance Skirmishers.   This should eliminate the drudgery of chart reading for “hits”.

DSC01121

The bottom two rows are directional.  Useful for creating some type of AI for your opposition force/forces.

All the dice are manufactured by Koplow Games.

Looking forward to coming up with creative ways of using them.


RAF – End Of Scenario Thoughts

Finished up “The Hardest Days” scenario. Lots of fun.

Like many solitaire games, RAF is process oriented. The turn sequence mechanics are the crux of the game, with player decisions taking far less time than in a typical multi-player game.

The obvious reasons are the low counter density, and the player’s active involvement with counter movement is limited to the RAF. Another reason is that many of the mechanics are card driven, without the usual wristage.

The lessons learned during this play through were to take full advantage of the ability of adjacent sectors to patrol in those sectors most threatened, that at least once a day you just have to take a beating, and use everything you can on the last raid of the day.

Squadrons in adjacent sectors can augment patrols. This is a far better use of these assets than waiting for a favorable warning situation which allows the employment of adjacent squadrons in the target sector,.

With followup raids and limited time advances, the RAF will have at least one turn when most of its assets are either landing or rearming. Sending up a single squadron to contest a raid is suicide, so it is best to just sit back, get bombed, and wait until your grounded aircraft become operational.

By the 1800 turn (last of the day), the Luftwaffe has few assets remaining. This can be especially true for fighters. That last raid may comprise only a couple of escorts. If the RAF commander places all of his available assets on patrol, the chances are that he can achieve air superiority for that interception and really do some damage to the bombers. This tactic is so effective that there is actually a rule limiting the number of patrolling squadrons for the 1800 turn.

My game ended in a draw. I might just try the campaign scenario which adds several layers of chrome. Why not?

Renaissance Wargame – The Action Pt 3

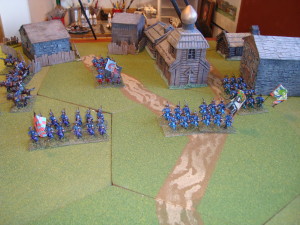
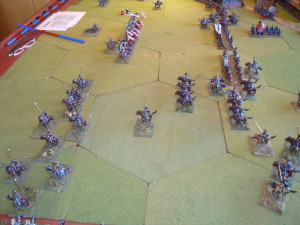
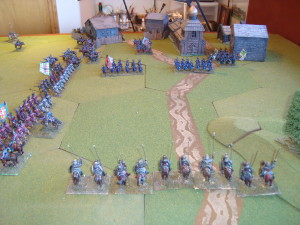
What a dog fight!  The Poles right wing is shattered, with Tartars enveloping that flank.  However, the Dvor Sipahis’ attempts to repulse the Polish Haiduks threatening the Russia  rear failed.

The Polish cavalry are now a beaten command, with only the Hussars having a reasonable chance of being steadied.  The left flank Pancerni have been attrited and the light cavalry is incapable of any real resistance.

With all that, I still might play a couple more turns to see how the doughty Haiduks fare.

Haiduks Deploy
Haiduks Deploy
Polish Left is Shattered. Russian Cavalry Begins Envelopment
Polish Right is Shattered. Russian Cavalry Begins Envelopment
Russian Dvor Sipahis Regroup After Being Repulsed By Haiduk Musketry