Category Archives: Boardgames

Islamic State – Libya War

This  game is published by One Small Step Games (OSS) in  Counterfact Magazine.  I downloaded it from Wargame Vault.  It is solitaire, the contemporary topic is of some interest, and the format seemed to lend itself to download and DTP construction. The forum section of the game’s  Boardgamegeek page is essential reading as are the revised rules found at OSS’s game page.

The map printed out fine and looks good.  The counters were difficult to cut because the colors of the various factions’ units are similar shades of drab and lack visible guide lines.  The result was a grotesque lack of uniformity.  I decided to use Risk blocks in lieu of some of the counters/chits.  This improved appearances.

The game’s topic is the war against Daesh in Libya.  Allied forces are tasked with controlling key cities and oil fields as portrayed on the point-to-point map.   Each of the game’s eight turns is broken down into five (or six based on a turn-end roll), IGO-UGO action rounds.  Victory is determined by how many areas Daesh controls, number of active leaders, negative press coverage (due to collateral damage) received by the Allies, and hostages and downed pilots executed.

Allied forces can perform any one of several actions during their phase.  These are conventional unit movement into a Daesh controlled hex which triggers combat, “snatch and grab” operations using special forces to seize Daesh leaders for interrogation  or hostages, landing (amphibious) operations, heli-borne assault, reconnaissance, and strike missions with aircraft.

Daesh actions are generated using a table listing ten possible actions including kidnapping, terrorist attacks, and sabotage.

Combat is performed on a display arraying  Allied units against a Daesh counterpart randomly drawn from the Daesh force pool.   Each Allied unit can be supported by aviation, drone or artillery assets.  Allied forces never eliminate their opponents.  A positive combat result will have the Daesh unit ineligible to be activated again during the current turn, or unable to return to the Daesh unit pool until after the next game turn.  Intelligence concerning the whereabouts of hostages or Daesh leaders can also  result from combat.  Any Daesh force that survives an attack  “fires back” at their opponent and, in certain situations there is a combat modifier due to special weaponry. These units are returned to the force pool.

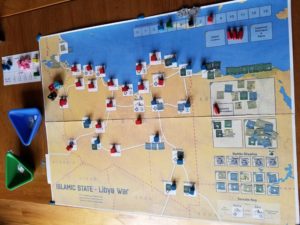
Here’s an imaginatively framed shot of the game in-progress.

I used traditional blue and red blocks to identify friendly and Daesh controlled areas instead of counters.  At bottom right is the combat display.  Both types of Allied units (combat on top and support at bottom) can fire at Daesh units.  The Allied force pools are located above the combat display.  The red lozenges are for Daesh leaders.  I substituted pink blocks for the hostage counters, blue lozenges for pilots and a yellow block for media.  These were placed on a hand scribbled holding area card, which also had the turn phase track.  Daesh victory points were tracked by a red block, allied casualties by a blue block and collateral damage by a black block.  Turns were marked with another green block, along with stacks of destroyed Daesh counters by a result calling for their re-entry to the force pool sometime later in the game.   The containers were used to hold conventional Allied units not on the map, and the Daesh force pool.  Support units can be used only once per game turn.  In the absence of specific guidance I treated parachute and special forces units as support units since it would take some time to re-brief, re-organize these types of specialized units.

The rules were criticized in a now-deleted post over at Boardgamegeek.  I would say that the layout could be better, perhaps more along the lines of the solitaire Destruction of Force Z, which presented the rules and, most importantly, charts in  game turn sequence.  After flipping back and forth between Islamic State’s eight pages, I did a cut-and-paste to reduce the rules to a manageable, more sequential  and flippable four pages.  Unlike the redacted reviewer, I cannot see playing the game in 60 minutes or less.  Not a bad thing, but there are  too many moving parts. Still, the pace is brisk with plenty of decisions and actions in every turn.

In my game the  Allies lost by Turn 5, probably due to my misreading of the collateral damage rules.  The Combat rules section indicates that collateral damage should be checked after combat – but is that individual combat or turn phase combat?  The Collateral Damage table indicates after all turn phase combats have been completed.  The latter significantly reduces the potential point gain for Daesh.

I enjoyed the game, and don’t regret the cost of purchase, time taken to construct the components, and understand the rules.  It is an intriguing system.  For me, on a cost-benefit basis, the returns on investment seem marginal.  I don’t imagine replaying it right now, or in the near future.  For someone else, this might be a go-to game, but not for me.
Romania: The Transylvania Gambit

This treatment is included with Serbia The Defiant and covers Romania’s August 16 entry into World War 1.

Rather than cooperate with Entente forces in Salonika and attack Bulgaria, the Romanians opted to limit operations against Bulgaria and focus on regaining Transylvania.

This threat was quickly matched by  Austro-Hungarian (A-H), German, Bulgarian and even Ottoman forces.

A-H troops offered stiff resistance  in Transylvania, while a composite force of the latter three nations,  under the command of the redoubtable General Von Mackensen, attacked Romania from the south.  Romanian reverses on both fronts forced the already hard-pressed Russians to send reinforcements to bolster their new ally.

Romanian resistance collapsed, with an Armistice signed in April 1917.

The game is set up and ready to go.  I’ll start pushing cardboard this evening.


Destruction of Force Z – Wrap Up

My immediate interest in the game was triggered while reading The Royal Navy in Eastern Waters:  Linchpin of Victory, 1935-1942 by Andrew Boyd.  This is a very interesting and well researched examination of the events leading up to the Force Z debacle.  The author dispels many of the convenient myths surrounding the event.  Well worth the time and effort, especially if you can pick it up when on Kindle sale for $1.99 or so.

The game reminds me of In Magnificent Style, where you have to push your luck to the limit in order to achieve the intent of Force Z’s sortie.  I did this, especially when I reversed course and sailed towards the Japanese battleships, rather than “game” the system and eek out a minimal victory of just a few points.

To compound the British player’s problems, the chances of sinking the Japanese battleships is fairly low, and seemingly not worth the risk, despite the lucrative victory points.  Also, the odds of fighter cover actually materializing is relatively low, and anti-aircraft fire is fairly ineffective.  In this regard the game reflects the operational and tactical  factors leading to Force Z’s destruction.

The optional rules allow the British player some relief; limiting Japanese bomber availability on a per day basis, increasing the Repulse’s capability to avoid torpedoes, and including the carrier Indomitable to provide available and increased air cover.  I would consider a house rule making British surface attacks more effective and, perhaps, increasing the victory points awarded for bombarding the Japanese landing sites, since this was the mission of Force Z.

The rules are comprehensive and structured to guide the player.  This is good as there are simply too many charts and die rolls to remember.  This also enhances replayability because the player can just break out the game, dial up the rules, and start grinding through each turn’s eleven phases.  On the other hand, this grinding slows game play.  But, a typical game will probably not last too long if Japanese searches are effective.  In my instance, the British enjoyed ideal conditions (overcast weather, radio silence, and poor search rolls) and still had little success.

I like the random events and movement charts, and plan to use  variations  in other gaming situations.  The tactical display was fun because it reminded me of playing Midway back in (as it was called then) Junior High.

I’m now thinking about breaking out Avalanche Press’ Strike South and work through the scenario with more detail to reflect the different operational options historically explored by the British before 1942.  A comparison of the two systems will be interesting.

In summary, this is an engaging game providing excellent value and replayability.


Destruction of Force Z – Session Report

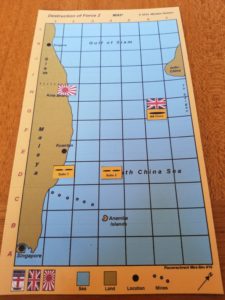
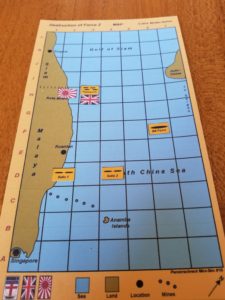
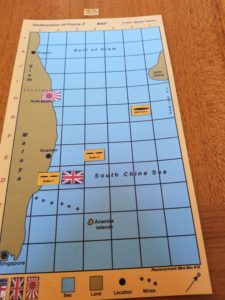
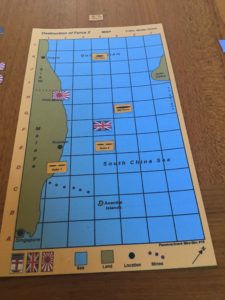
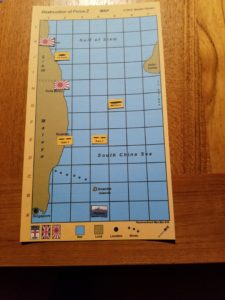
The game set up, along with the initial dispositions of both forces, is shown in the following photo.  The Japanese flag represents the amphibious landing at Kota Bharu.  Placement of the Japanese convoy, battleship and cruiser squadrons is determined during the Random Events Phase.  Force Z is represented by the British flag in Singapore.   The index card and colored blocks are used to keep track of weather and ship damage.

For the first three turns, Force Z moved east of the Anamba Islands,  then turning north towards the landing.  The Japanese were unable to locate Force Z, which was maintaining radio silence in the overcast weather, until it attacked the Japanese battleships (7 VPs) at night (Turn 4).  I couldn’t find anything specific in the rules, so I decided  Japanese surface units appearing during a turn couldn’t move, also.  Despite hitting the Japanese ships, no damage was inflicted.

After this inconclusive encounter, the British sailed at flank speed towards Kota Bharu to bombard the the landings.  The Japanese were still unable to locate Force Z, and could not prevent the destruction of  their offshore convoy which had appeared off Kota Bharu during the Random Events Phase (Turn 5).

After this success, the British steamed south towards Singapore, breaking radio silence to request RAF air cover (Turn 6).

At this point, the Force Z commander decided take advantage of darkness (Turn 7),  steaming north to again engage the  VP-rich Japanese battleships.  The Japanese cruisers entered the northern part of the map during the Random Events Phase.

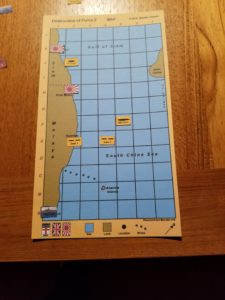
Force Z moved into the Japanese square, forcing a surface engagement.  It was here that British luck ran out, as the Japanese search was a success, and no RAF fighter cover appeared to help fight off a massive level bomber and torpedo bomber attack.

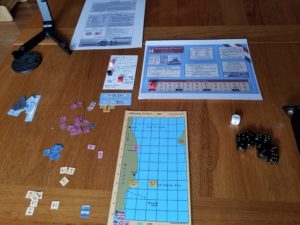
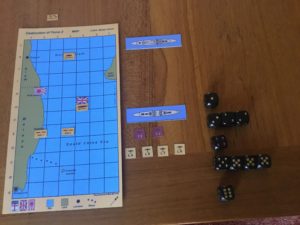
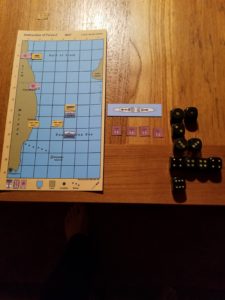
The following photo shows how I handled the “tactical” aspect of the game.

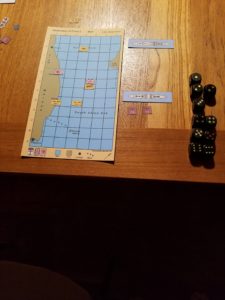
Both British ships were in the square, so each can be attacked by bombers.   D6 rolls determine the number of attackers and what ship(s) they attack.  The rolls indicated a mixed force of 12 torpedo and 25 level bombers, all of which  concentrated on the Prince of Wales.  The first attack was by the level bombers.  Each ship has a maximum of 10 d6 anti-aircraft rolls.  These rolls either eliminate attackers, or are indicate to hit modifiers.  Bombers need a modified roll of 10 to score a hit.  A further damage die roll is made for each hit.  The rolls are shown below.  I use the dice, rather than the tally sheet included with the game to record rolls, and then use the result to determine hits.  A die that “hits” is then placed above the “tactical display”, as a reminder of the rolls needed for determine damage.

The torpedo bombers were handled in a separate series of rolls.

The Prince of Wales somehow survived, taking five hits, two less than the number to sink. Five hits reduced its movement rate to one square per turn.  After this mayhem, a surface action occurred.  The Japanese battleships and Prince of Wales were unaffected, but the Repulse took one damage hit.

The Repulse was ordered back to Singapore, while the stricken Prince of Wales could only hope for a failed Japanese search, or the intervention of the RAF.  The ship was located and the RAF again failed to provide air cover.  The level bombers did not find the Prince of Wales, but the torpedo bombers did.   An attack by 27 aircraft sank the ship.

The Repulse continued south during the night (Turn 10), while the Japanese made another landing at Singora.

Repulse was able to return to Singapore before the Japanese Turn 11 Search Phase.  This ended the game.

The Japanese victory point total breakdown was:

  • +8 Points for sinking Prince of Wales
  • +1 Point for one hit on the Repulse
  • +1 Point for each Japanese landing
  •  -2 Points for the sunk convoy

The net is  9 Japanese victory points.  The historical total was 18 points.

Wrap-up in the next post.

Destruction of Force Z – Overview

Downloaded this  awhile ago over at Wargame Vault, based on reviews at Boardgame Geek.  It’s a Minden Games solitaire offering  originally published in Panzerschreck Magazine #16.

As is the case with most solitaire games, there are  lots of charts and wristage.  I skimmed the rules and decided to just start playing.  The rules are laid out in turn phase sequence, so I just set up the IPad beside the game and went at it.

Each turn consists of up to eleven phases.  These are:

  1. Weather – Roll 1d6 for either clear or overcast conditions.  Overcast is a +1 modifier for Japanese Search.
  2. Radio – British player can break radio silence.  In doing so loses a -2 drm during Japanese Search.  But, gains possibility of Air Cover to help attrit attackers.
  3. British Ship Movement – Can move up to 4 squares (cannot move diagonally) three times a game, or one-three squares.  Damage reduces movement.  During movement British ships can be attacked by minefields and/or submarines if in same hex.
  4. Random Events – Dictates appearance of Japanese transports, cruiser or battleship units.  Can also effect movement of Japanese submarines, shore landings or allow “shadowing” which is a -1 drm for Japanese Search.
  5. Japanese Ship Movements – Ships on map roll 2d6 for random one to two square movement.
  6. Japanese Search – Rolls 1d6 (3 or less) to sight British ship(s).
  7. British Air Cover – If Radio silence is broken, presence of air cover over British ships determined by die roll.  If present, roll 3d6 for number of fighters.
  8. Japanese Bomber – Includes both level bombers and torpedo bombers.  Roll 1d6 for contact.  If contact make separate 1d6 roll for number of level and torpedo bombers.
  9. Combat Phase – Roll 1d6 for individual attacks by Air Cover, then 1d6 Anti-Aircraft fire to eliminate/abort/or effect aim of bombers.  Then roll 1d6 for success by individual level bombers and torpedo bombers.
  10. Surface Battle – Takes place when opposing force ships in same square.  Roll 2d6 for hits and then 2d6 for effect(s).
  11. Bombardment – British in same hex can shell Japanese landing sites, automatically gaining victory points.

There are 18 different situations where wristage and charts are involved,  in addition to  Air Cover attacks, Anti-Aircraft, and Bombing attacks handled on an individual aircraft basis.

Having Second Front air phase flashbacks and may need this to get through a session.

W1815 – First Impression*

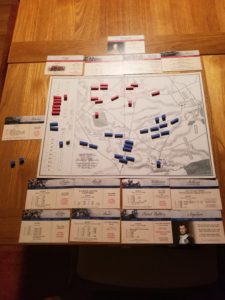
Woke up very early this morning.  After a round of depressing internet reading, I decided to get W1815 (The W is for Waterloo) up and running.   I was having problems comprehending the rules, so it seemed to be one of those cases where the only way to learn the game was to fumble and stumble through a session.

And fumble and stumble I did…….but I had some help.

W1815 has a real following over at Boardgamegeek.  The comments and reviews are positive and I  liked the Kriegsspiel/Table Battles blocks, quick-play and period topographic map.  So, I pre-ordered the 2nd Printing.  Forgot all about it, until I received an email in January that it was shipping.

The “help” was significant card errata.  Cards drive the game, so these errors changed the game. Still, I had fun playing, unaware at first that there might be problems.  But, the game played wasn’t the game as designed.

I hope to receive the replacement cards in the mail sometime soon.   Until then, I’ll make do with these.

* Is it “impression” or “impressions”?  Re-reading this I think it should be “impression”, because I really limit any opinion about the game to a product of deep thinking of the deepest type “fun”.

Serbia The Defiant – Pt. 2

Finished up with the August turns; all seven of them.  That makes for a long month! Scenario extends into December, but I want to move onto something else, and stalemate is imminent.

The A-H forces have made progress in the south (unlike their historical counterparts), and are threatening to envelope the Serbians.  Nothing subtle about the A-H advance.  Just kept pounding away, but there are supply problems looming.  Unsupplied units attack at half strength, and both sides have problems mustering overpowering attacks.

The northern A-H advance has stalled at the Kolubara River.  Serbian defenses will exact a -2 DRM because all A-H units must attack across the river.

Neither side will have much in the way of reinforcements, so the prospects of a breakthrough are fairly low.

Enjoyed this one  It’s a good learning scenario with a variety of terrain and low counter density.

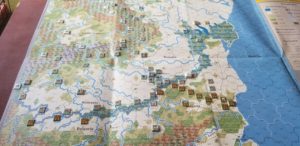
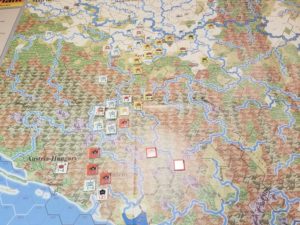
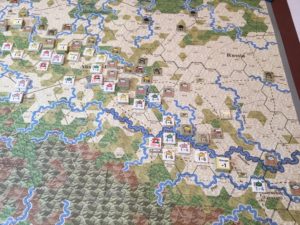
Here’s a photo of the situation at the end of September.

I’ve convinced Tim to play this during our next get-together.  The “Transylvania Gambit” scenario looks fun.  It has Greeks, Germans, Romanians, Bulgarians, A-H and Serbians!

Time To Go To Work

Finished up all the scenarios in Advanced Squad Leader Starter Kit (ASLSK) #2 – Guns.   On to ASLSK #3 – Tanks.

Not even Jay Richardson’s fantastic tutorial could soften the impact of my first reading of the AFV rules and charts.  Brain just shut down.

Well, it will be a long process, and I’ll no doubt avoid armor scenarios, or at least those with several vehicles.  But, it has to be done.  Must learn.  Need to find a way so that it doesn’t seem like work.

Serbia The Defiant

Started a new SPW module and scenario this week.  It’s the August-December 1914 scenario covering the initial fighting between Austro-Hungarian (A-H) forces and Serbia.  One BGG commentary summed it up; “weak units, bad terrain”.

Still, with a low counter density and few special scenario rules (except for the A-H  2nd Army which must re-deploy to attack the Russians), it is a quick and enjoyable play.

Once again, the rules mandate aggressive A-H moves during the first two turns.  The results so far have been relatively bloodless.  The terrain is very rough, with the only clear terrain found near Belgrade to the north of the map sheet.  However, the (universally criticized) historical deployment has the main A-H effort attacking through the mountains in the west, and river networks in the northwest.    This terrain provides excellent defensive opportunities for the outnumbered Serbs.

In this game, A-H forces are concentrating on the northwest sector of the Serbian defenses, and simply tying down Serbian and Montenegran units in the western mountains.

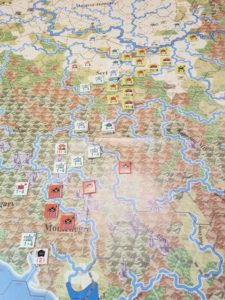
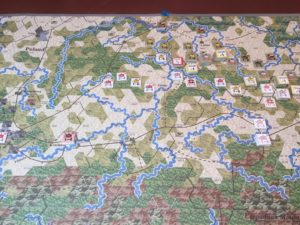
Here’s the situation after two turns, at the beginning of the August 5th turn.  Most of the units lying north and west of the Danube are with the 2nd Army, shortly to be recalled to the west to fight the Russians.  Montenagran units have a cranberry (?) color.

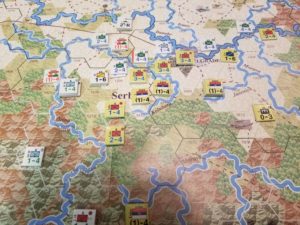
And, here’s a closeup of the northwest area, where A-H forces have been able to cross the Drina River.


Galacia – The Forgotten Cauldron – Scenario Finish

Finished up the other night.  It was a marginal Austro-Hungarian victory, based on casualties only.  No objectives were taken, but  the issue remained in doubt.  While losing on “points”, the Russians certainly had the upper hand when it came to capturing objectives.

In the East, the A-H  2nd Army is in danger of being rolled up along its right flank by the Russian 8th Army advancing towards its objective of Stanislav. The very strong Russian corps is obscured by the -1 strength marker for the top of the four, 4-4 units.

To the west, the A-H 3rd and 4th Armies are locked in combat with the Russian 3rd and 5th Armies.   Here, the Russian units are adjacent to their objective of Lemberg.

To the West, the A-H 4th Army is standing fast to the North of Fortress Przemyl, but its neighboring 1st Army is under extreme pressure, with little in the way of a Russian 3rd Army sweep towards its objective of Krakow.

A good game.  I already have “Serbia The Defiant” on the table and will start play this weekend.