Felt rather bloody minded yesterday, so I set up Cold Harbor II. This is the folio update of a game originally published in Panzerschrek magazine.
Just like the real battle, the Union attack has little chance of success. The game mechanics are simple, but simulate the entrenched Confederates’ devastating cannon and rifle fire. Each turn, the attackers are subjected to separate cannon and rifle attacks before they even have a chance to move. There are no step losses. Units are straight eliminated. Yikes! Movement rates are slow, and can be slowed even more by random events.
To win, the Union troops have to capture just one of the designated entrenchment hexes. The problem is getting there, and if they get lucky, holding it during an (almost) inevitable counterattack.
The big variable in the game is the Confederate artillery. There are a number of “dummy” cannon counters. The real and dummy counters are pooled face down, and then randomly selected and one each is placed in an entrenchment hex. If, for some reason, one section of the line has a few dummy counters, then the Union has a chance. If not……..My try didn’t even make it to the entrenchment.
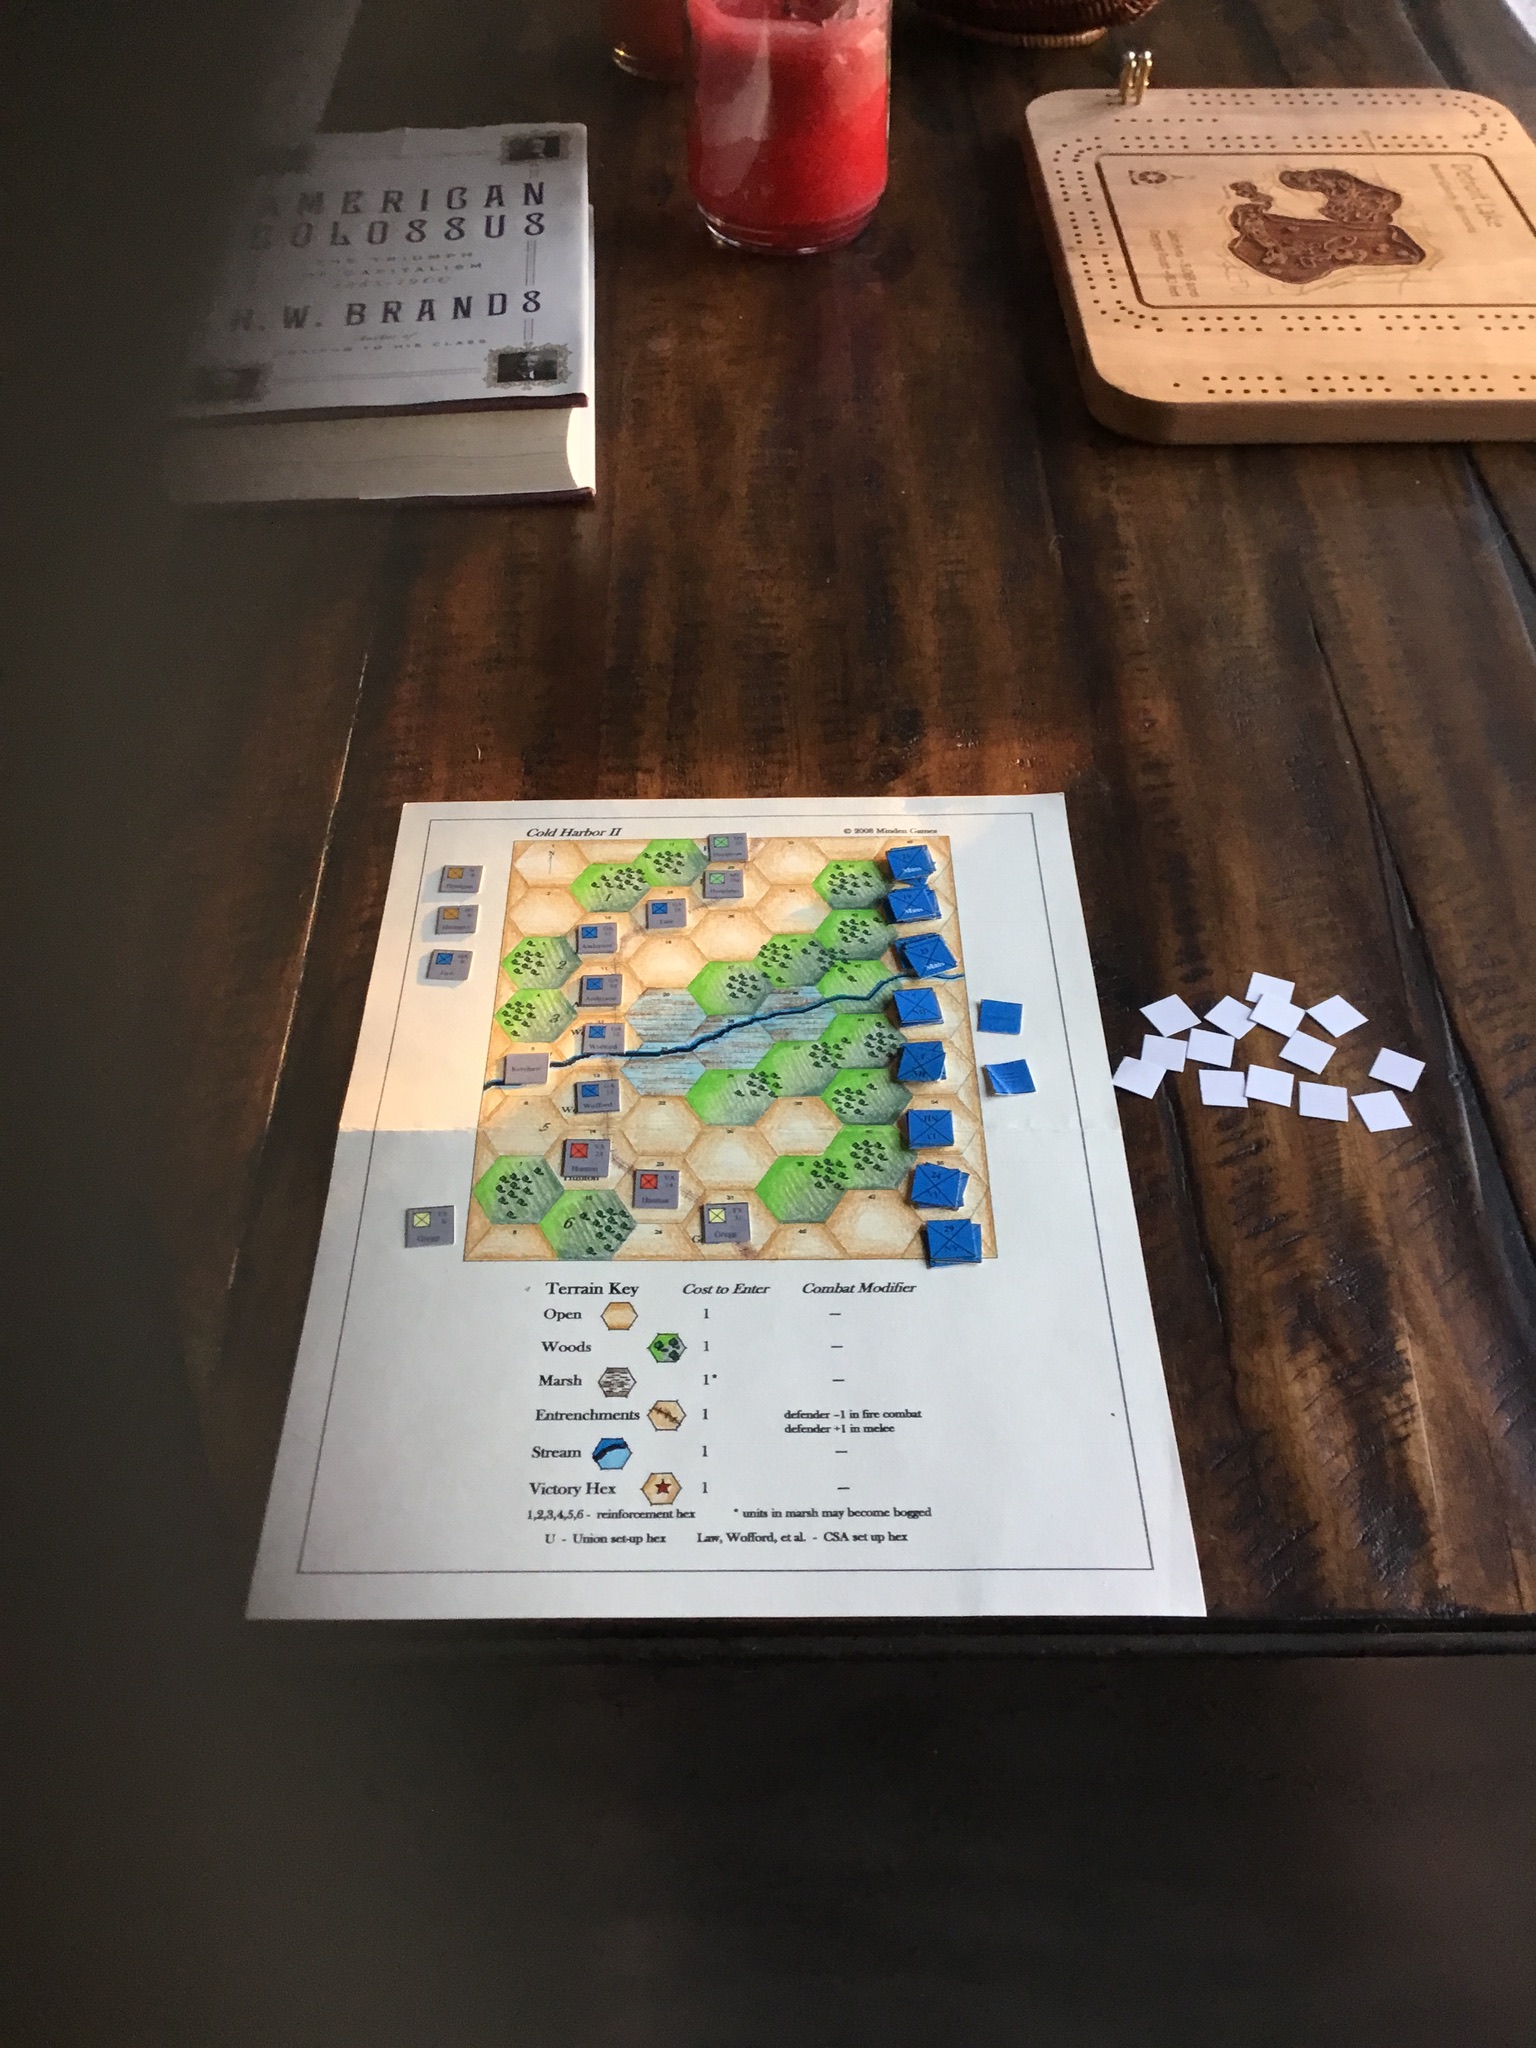
Here’s a photo of the map and initial setup. Rhonda did a great job of coloring the black and white map that came with the game.
Ready To Pick And Place Artillery Counters
Will I play this again in the near future? No. Sometime? Probably when I get in that bloody minded mood again.
Back in Sunfish Capital of The World. The 1942 game is on hold for the next week or so.
Set up and played Swordfish at Taranto. This is another of Gary Grabner’s solitaire designs published by Minden Games.
The game mechanics are straightforward and, as with most/all solitaire games, involves significant wristage. The player commands the 21 Swordfish torpedo bombers that took part in the mission. Playing time is 30-45 minutes, with much of it allocated to the preliminary Mission Planning and Harbor Readiness steps.
In the Planning step, the player uses a pre-printed log to assign which of the two attack waves each plane is in, its payload (bomb/flare or torpedo), its approach towards the ships anchored at Taranto, and target (anchorage, shore facilities) to be attacked. This log has each pilot and plane’s identification number already filled in.
Next, the player rolls to determine the harbor’s alert, anti-torpedo net and barrage balloon status. These can create DRMs during the Approach step.
Each of the two attack waves follows a series of steps, with each aircraft rolling a six sided die for outcomes.
The Take Off and Outward Flight step determines if any of the aircraft suffers mechanical or navigation issues, which may abort their mission or cause problems later.
Flares are deployed in the next step. The failure to deploy flares effects attack results.
The next phase is the Approach step, followed by Target Acquisition and, finally, Attack step. A series of tables determines any damage to each aircraft, which ship it attacks, and results of the attack.
The Homeward Flight and Landing step determines which of the surviving aircraft land safely. Damage incurred during take off, approach or attack can effect this outcome.
Victory points are awarded for minor damage, major damage or sinking a capital ship, as well as damage to smaller craft and land installations.
Despite the laundry list of actions required for each aircraft, the game plays quickly. The charts are embedded in the rules (as is the Log), but are not spread out and organized sequentially by phase. You can literally work through the rules/charts while playing.
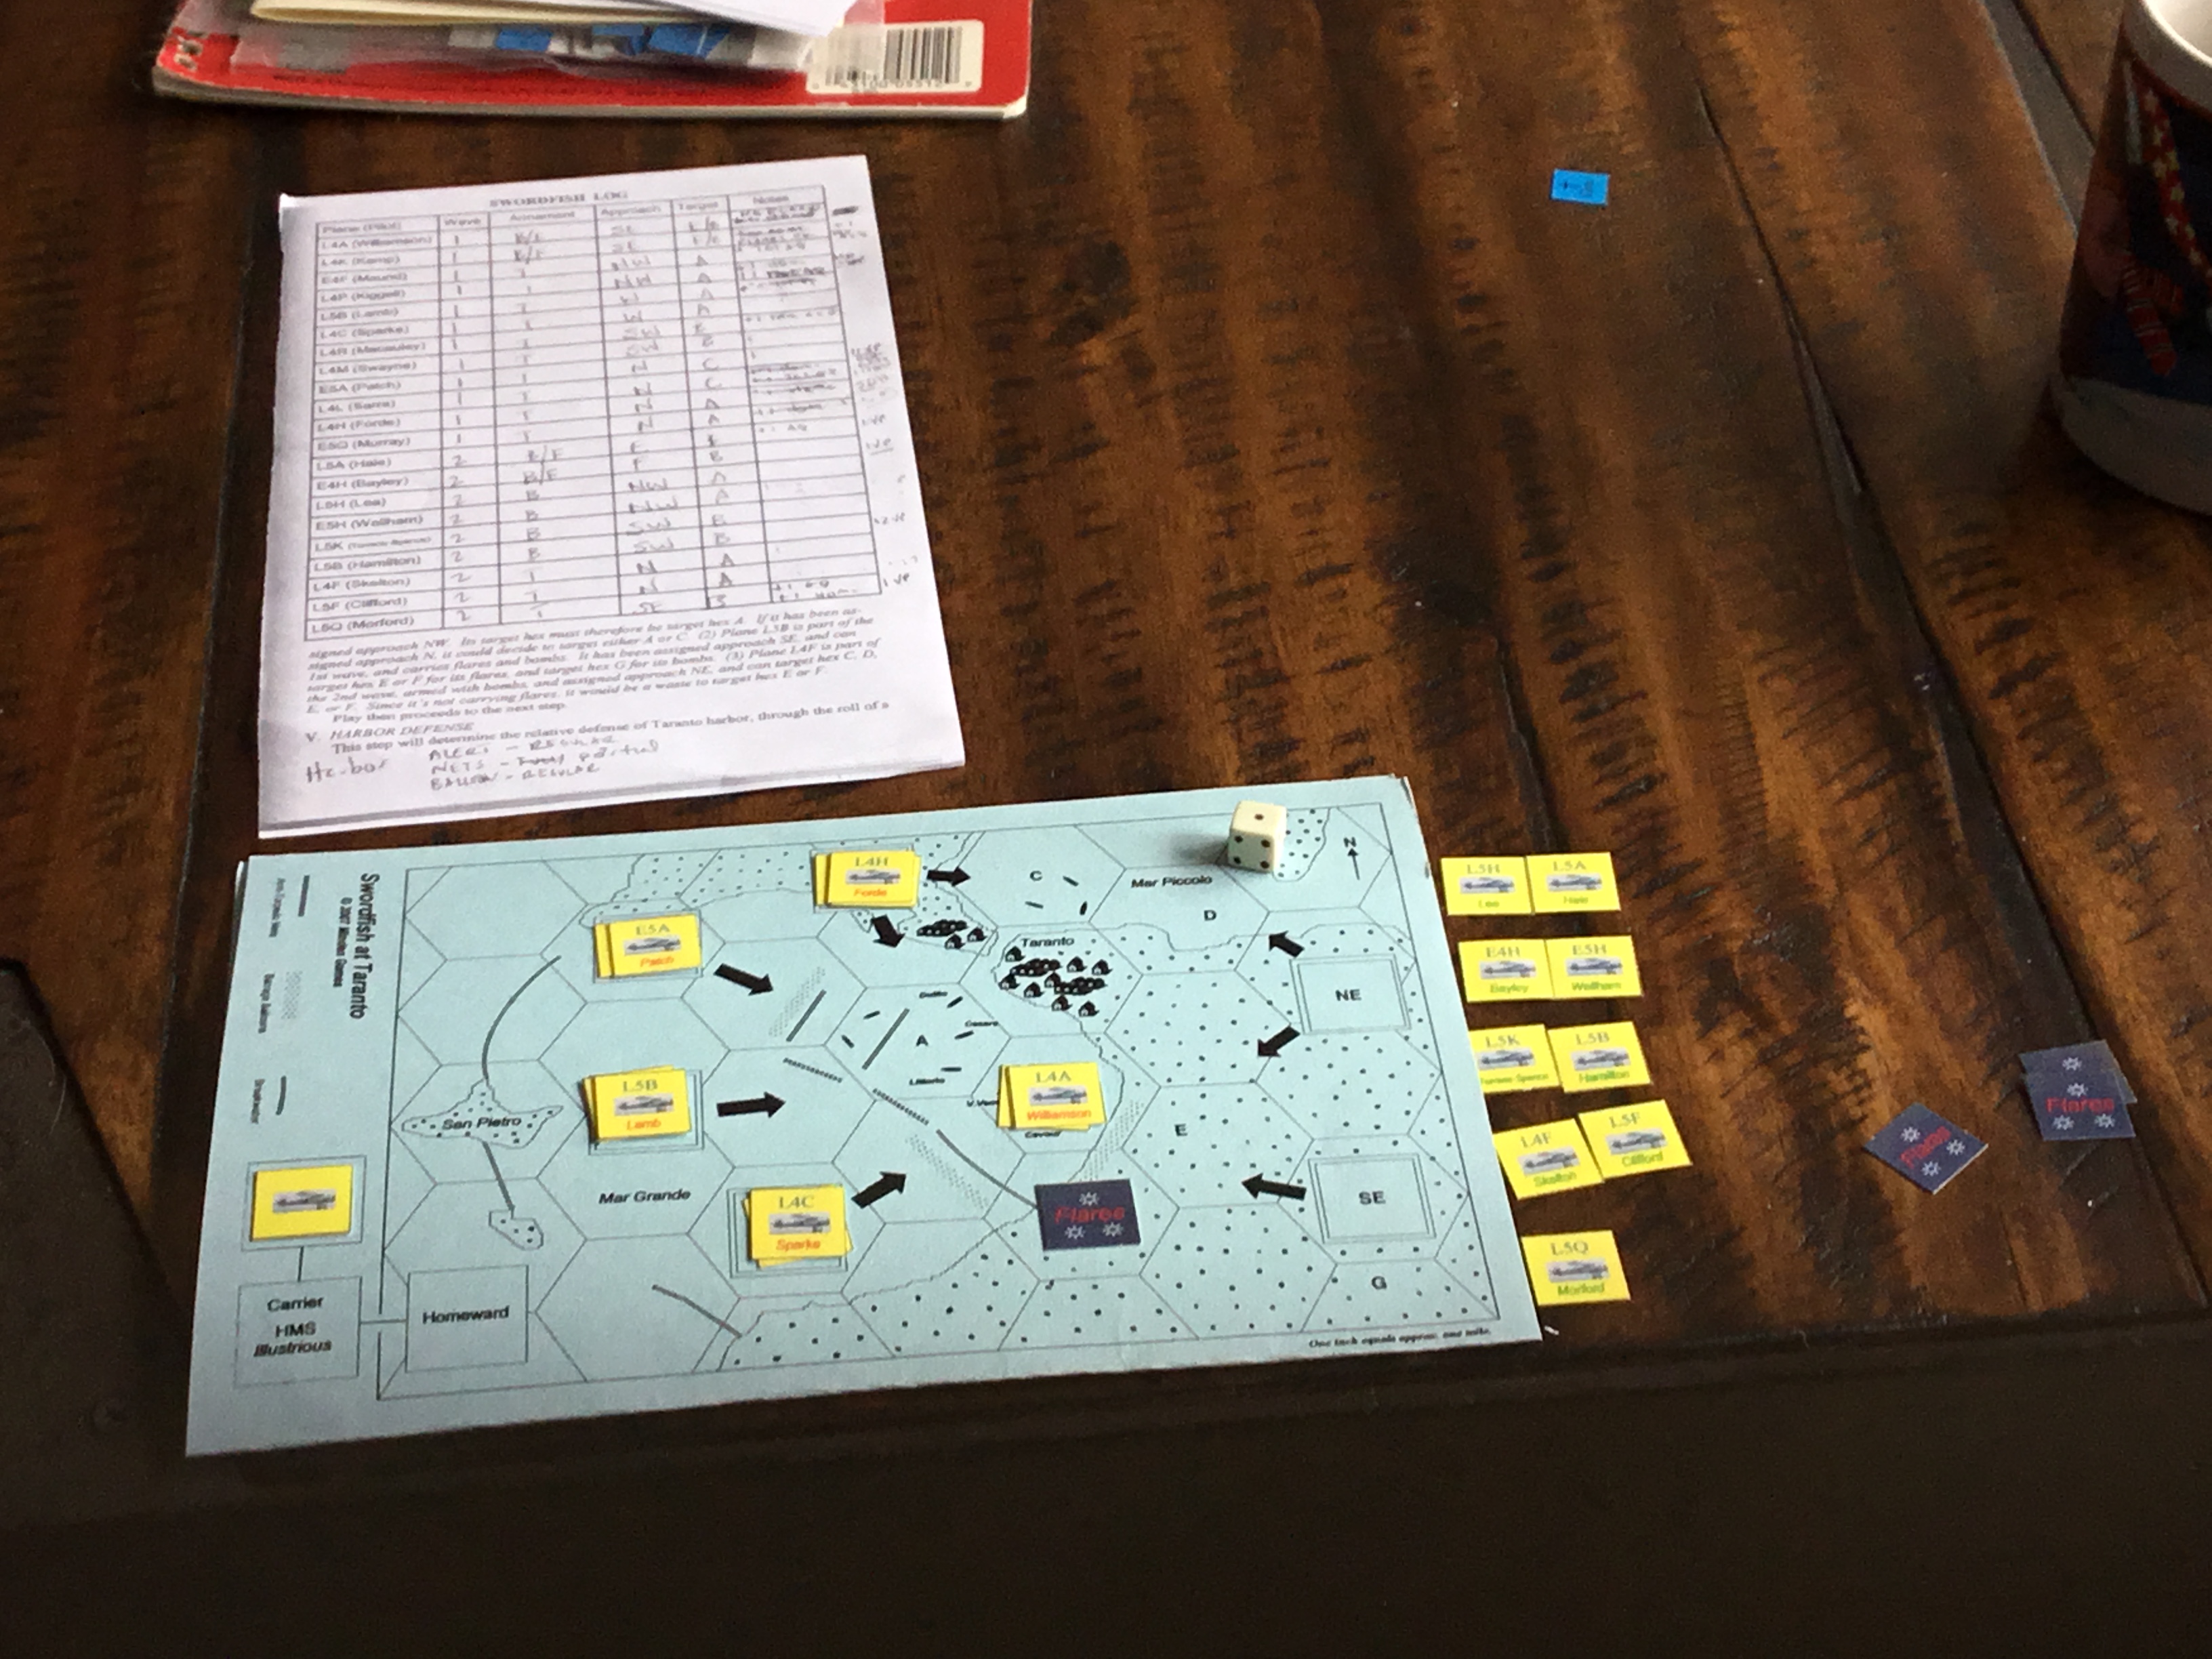
The map is small, with rudimentary graphics. I would recommend using a copier to increase its size to allow more room to place individual aircraft counters.
First Wave Approaches. Aircraft/Mission Roster in Background.
I lost two planes during the attack, and one on landing. The two waves sank three battleships and inflicted other damage. This resulted in a win exceeding the historical result. I was lucky, just like the actual attack force. I decided to quit winners.
Swordfish is a fun little game, worth a play or two when time and space is tight.
Been back at the Pine Cone Lodge for a week. Moved from one work farm to another.
Finally back to wargaming last night with Custer’s Luck. Purchased and wrote about this a few months ago, and was happy to finally get it on the table. Fitting, because I started setting up on the anniversary of the Battle of the Little Bighorn.
This is a solitaire game, with garish map and utilitarian counters. The rules are…..well, let’s just say they provide a framework for playing the game. Lots of minor problems, but they can be pushed through with a little common sense. It’s a magazine game, right? Well, that’s harsh. Always liked The Wargamer, with interesting topics and, at times, interesting take on things.
The game covers the 1876 summer campaign. The Army’s objective is to kill as many Sioux as possible (shocking!). There are three cavalry commands; Terry/Gibbon, Custer, and Crook/Merritt. While it can be played multi-player, the mechanics are oriented for solitaire play. Sequence of play is Custer (move & combat), Terry/Gibbon (m&c), Crook/Merritt (m&c), “Hostiles” (m&c).
The Sioux initially set up face down with each stack having a leader, village and combat unit drawn at random. Rules say 12 stacks, I could only muster up 8. Hostile movement is dictated by a compass chart. They move on a 2D roll of 7 or less, and remain stationary on a roll of 8-12.
Army Scouts can be used to identify a hostile stack. Wagons and Mules are used for supply, with combat reducing supply capabilities. The Far West steamboat stooges around as per the whims/attention span of the US commander.
Combat is straightforward, with leadership, terrain, surprise, envelopment, and supply modifiers effecting column shifts, not unit strengths.
Decided to play the historical scenario. Crook/Merritt command does not move.
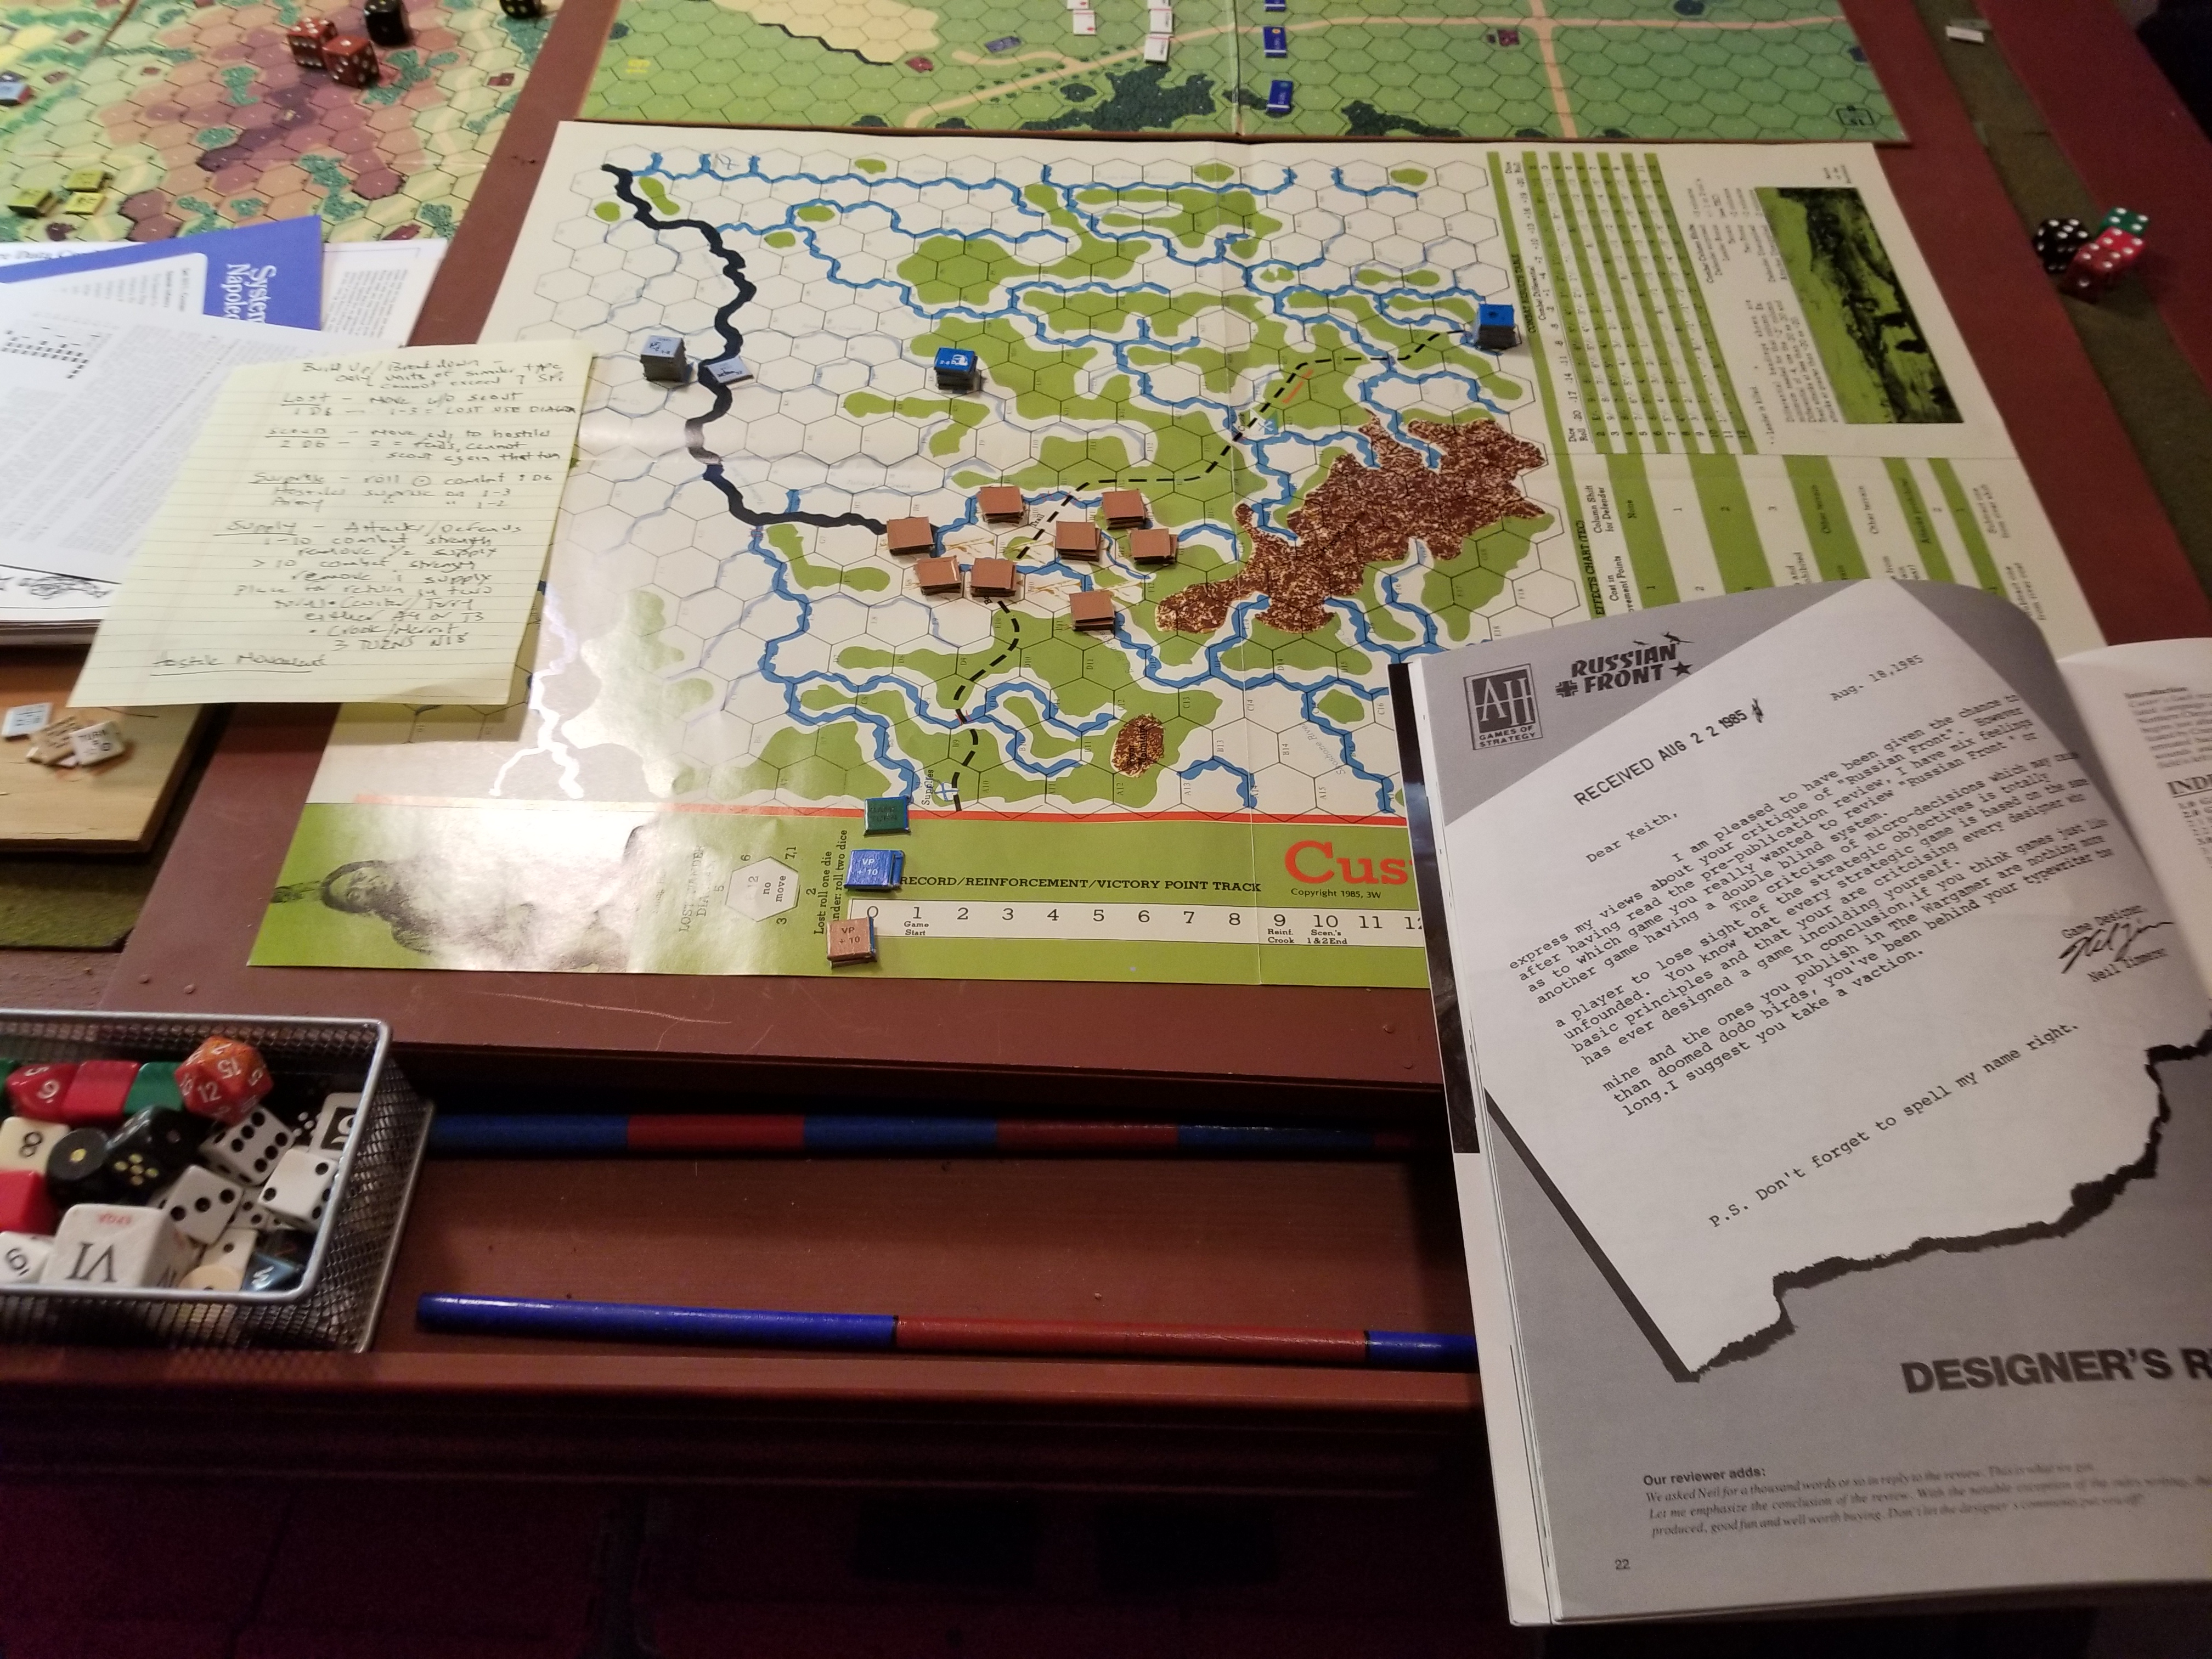
Initial Setup. Handwritten Player Aide To Your Left. Rules On Right With Insane Letter To Editor….Zoom In….
Decided to let Gibbon/Terry move south to pin Hostiles. Custer was ordered to exercise restraint….OK, this is not the (real) historical scenario.
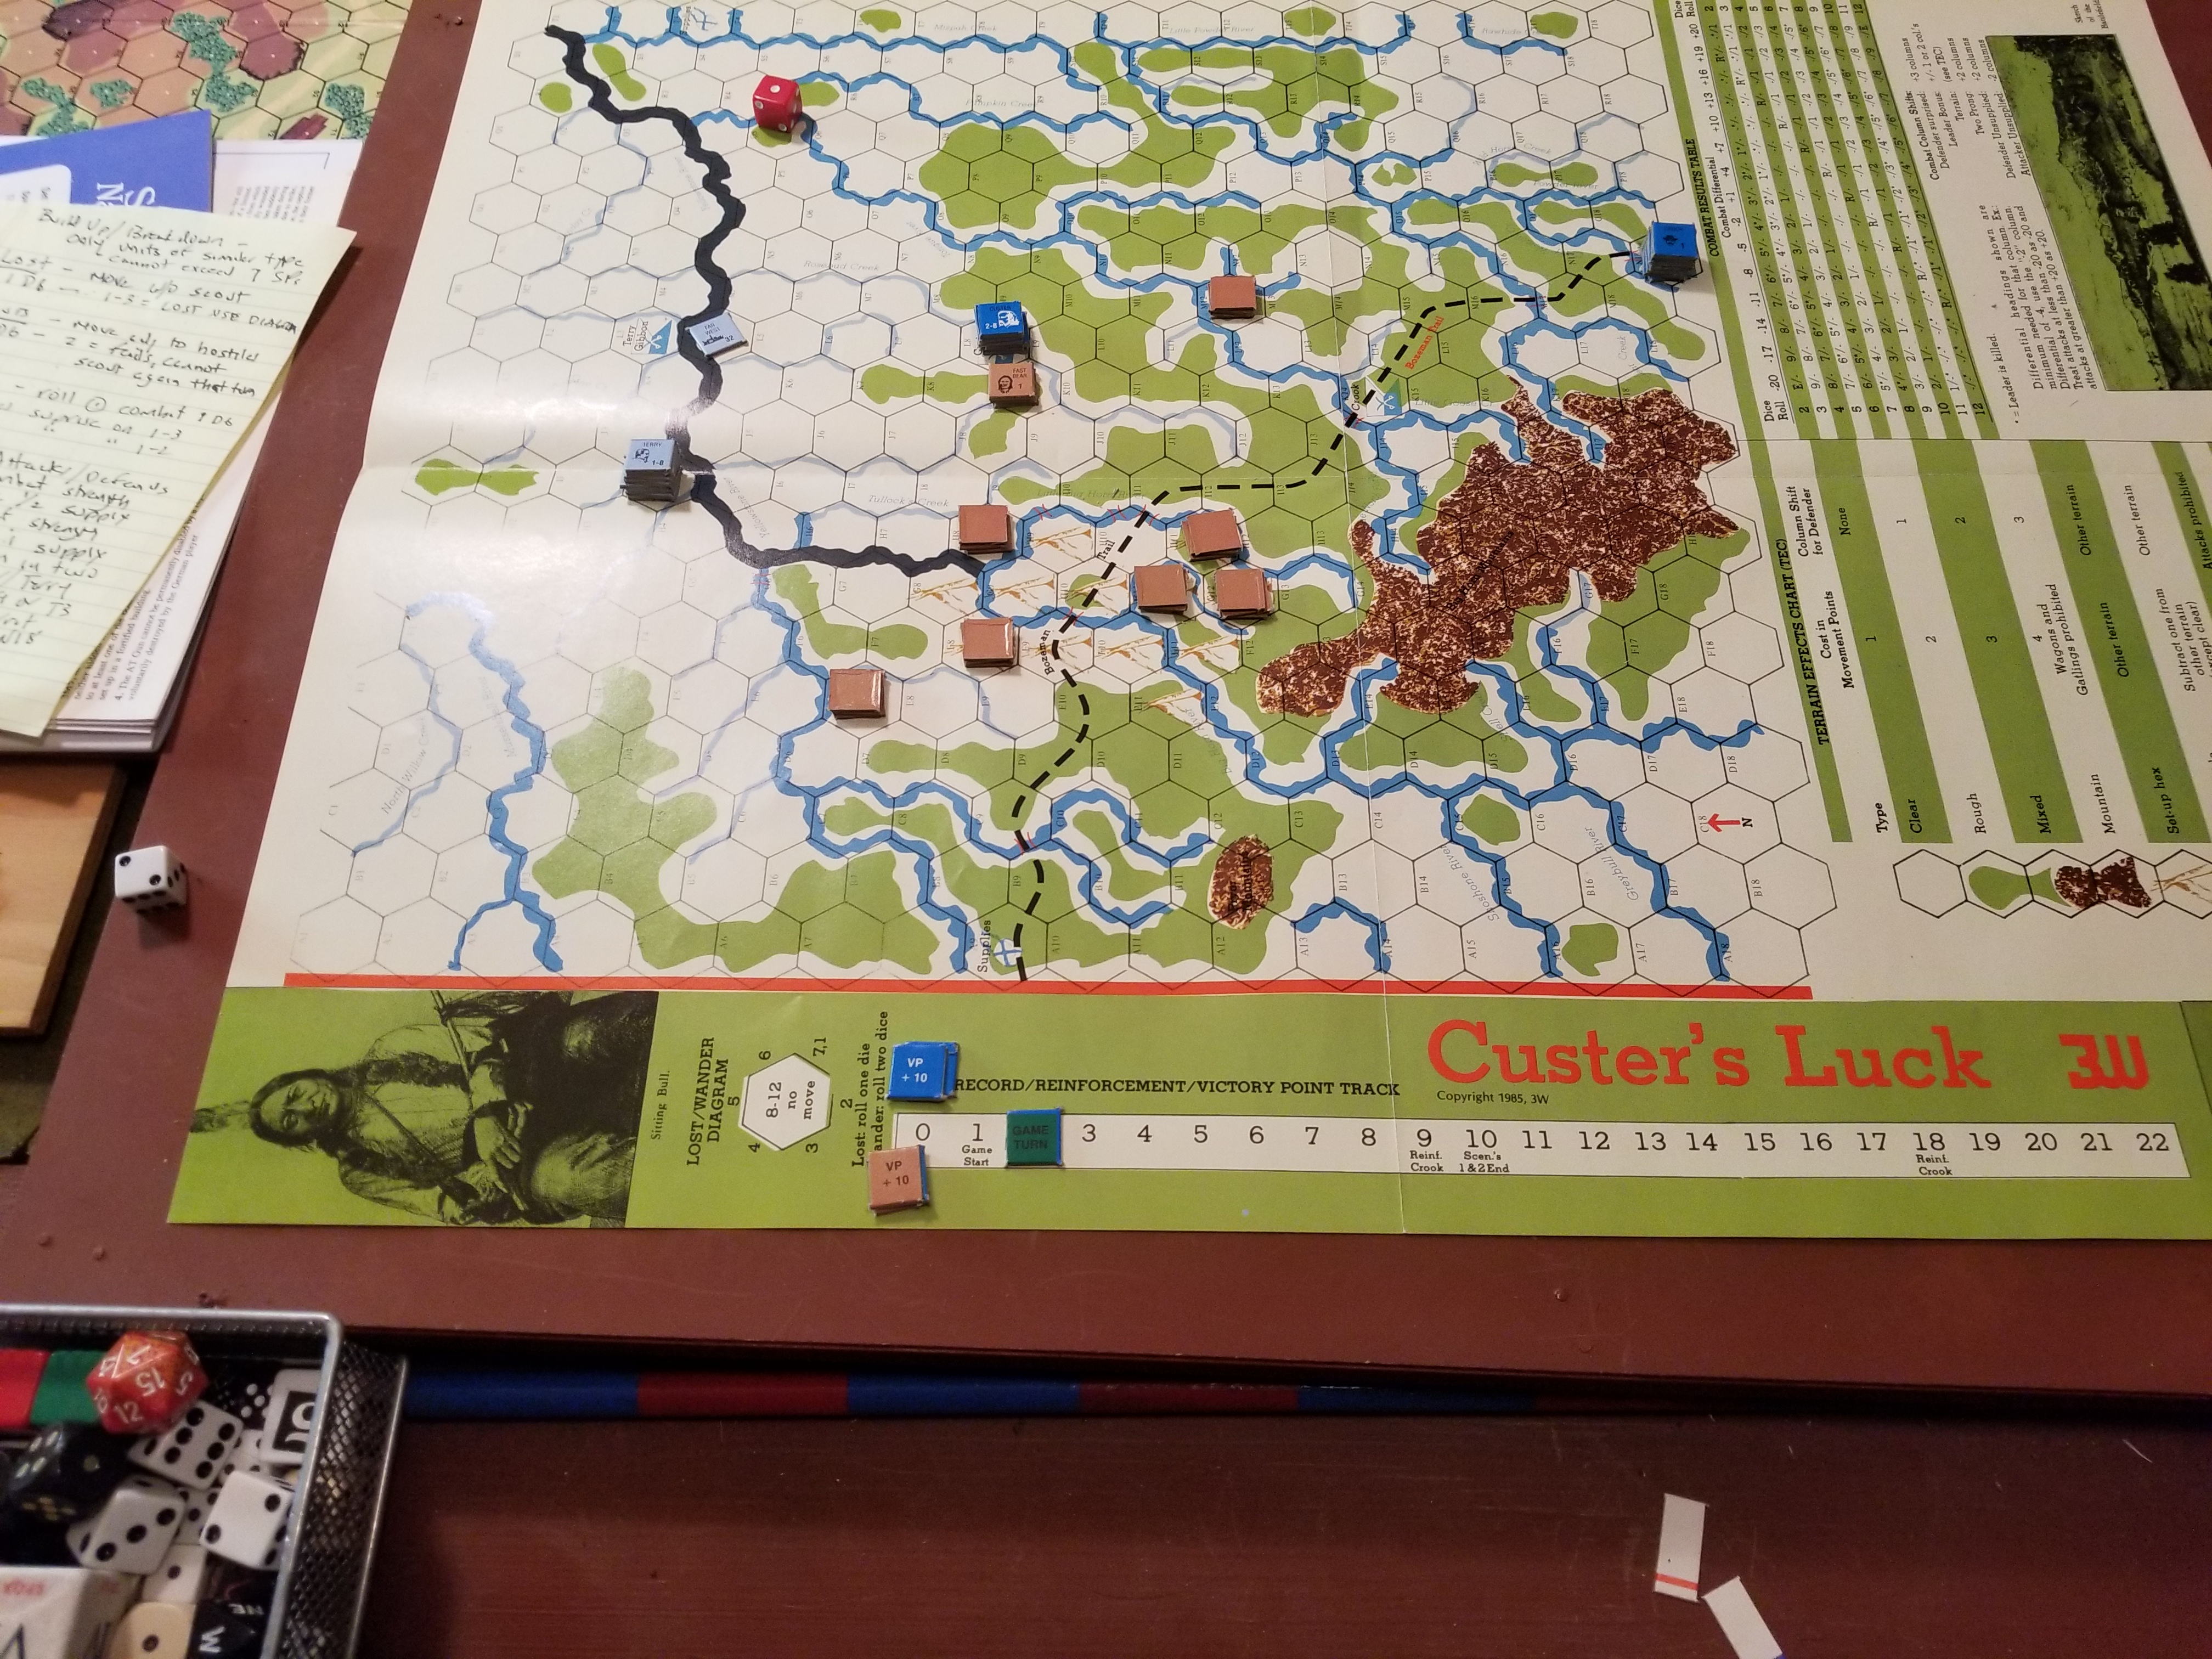
Plodding Forward In The Relentless Summer Glare, Gibbon/Terry Advances (left). Custer Shows Restraint And Is Attacked By Gall.
Hostiles begin random movement. Gall heads straight for Custer. This time, it’s Gall’s Luck. His negative odds attack only results in a retreat. Again, Custer shows ahistorical restrain and does not pursue.
Despite using an “aggressive” posture for all submarines, the Germans had a very difficult time attaining the tonnage sunk figures needed to attain victory. And, this is a period when Allied AWS capabilities are relatively low.
Well, maybe that’s just fine. Maybe it would have taken quite a bit of good fortune to win the Battle of the Atlantic (BOAT), just like Barbarossa. Do you want play balance, or something akin to historical conditions? Or, is it playability?
I think Grabner’s BOAT does a nice job of providing solitaire playability with abstract historical conditions. Is it a simulation? No, but it is an interesting way to spend an evening or two.
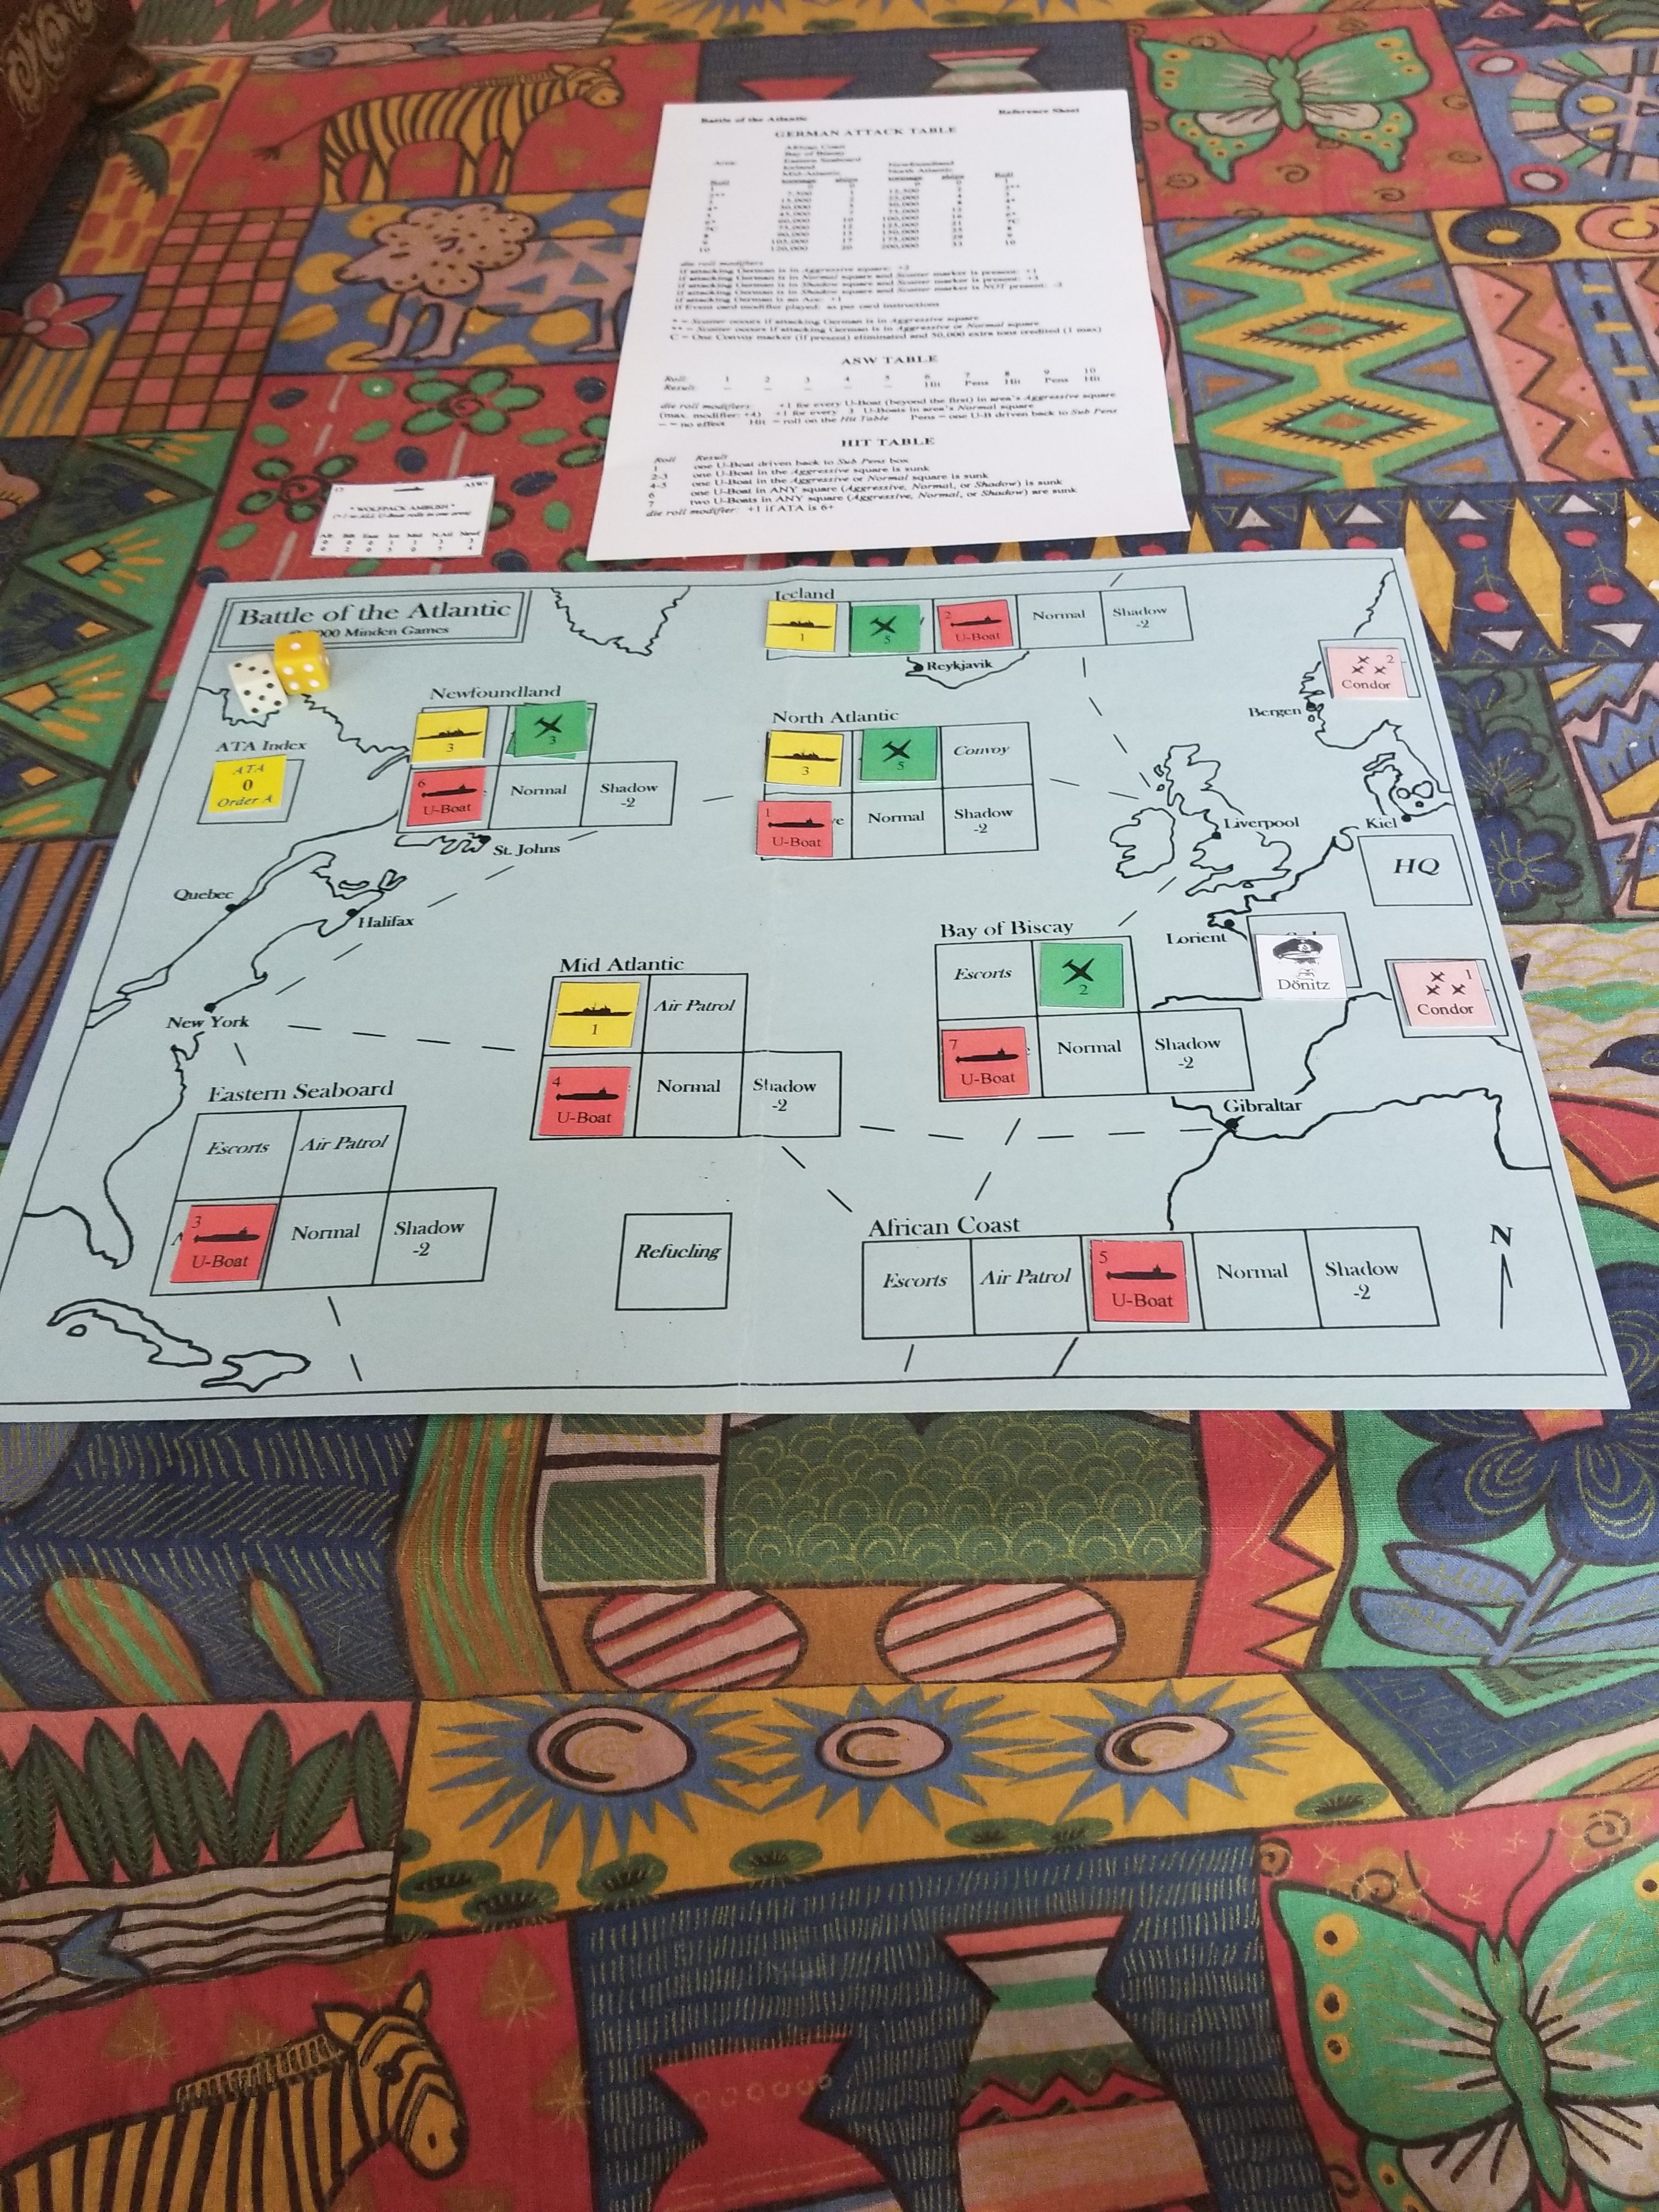
Started playing Battle of the Atlantic last night. The active player controls German U-Boats, Condor aircraft, surface raiders and resupply submarines.
British air and surface ASW asset dispositions in each sea zone are determined by a card draw. Cards also determine German U-Boat production and British technological advances, as well as designating certain combat modifiers for the turn in which they are drawn.
Initial Setup
Technological advances effect the order in which Allied ASW assets, U-Boats and Condor aircraft are placed, as well as which side resolves their combats first. Technological advances (Ultra, HF/DF, Radar) are cumulative, pushing the initiative towards the Allied player. This is critical, since losses are taken immediately.
German objectives are to a) sink as much tonnage as possible, b) maintain at least half their U-Boat fleet at the end of any one turn, and c) prevent the Allies from forming and deploying convoys.
The German commander must determine which sea zones to deploy attack assets, and what posture (aggressive, normal or shadow) they take. Aggressive subs can sink more tonnage, but are easier to destroy.
Play is quick, with straightforward CRT tables for each combatant and asset type.
After my usual stupid misplay during the first turn (roll one die, not two on the German Attack table), the first two “real” turns found the Germans falling short of their victory objectives, but suffering light losses. I’ll find out more this evening.
Had a couple of sessions this GMT game with Tim over the weekend.
It’s been awhile since we played it, so there was some fumbling and stumbling at first, as though that has never happened before. We had agreed to play a few turns, then reset for a second go-through.
Both sessions were different.
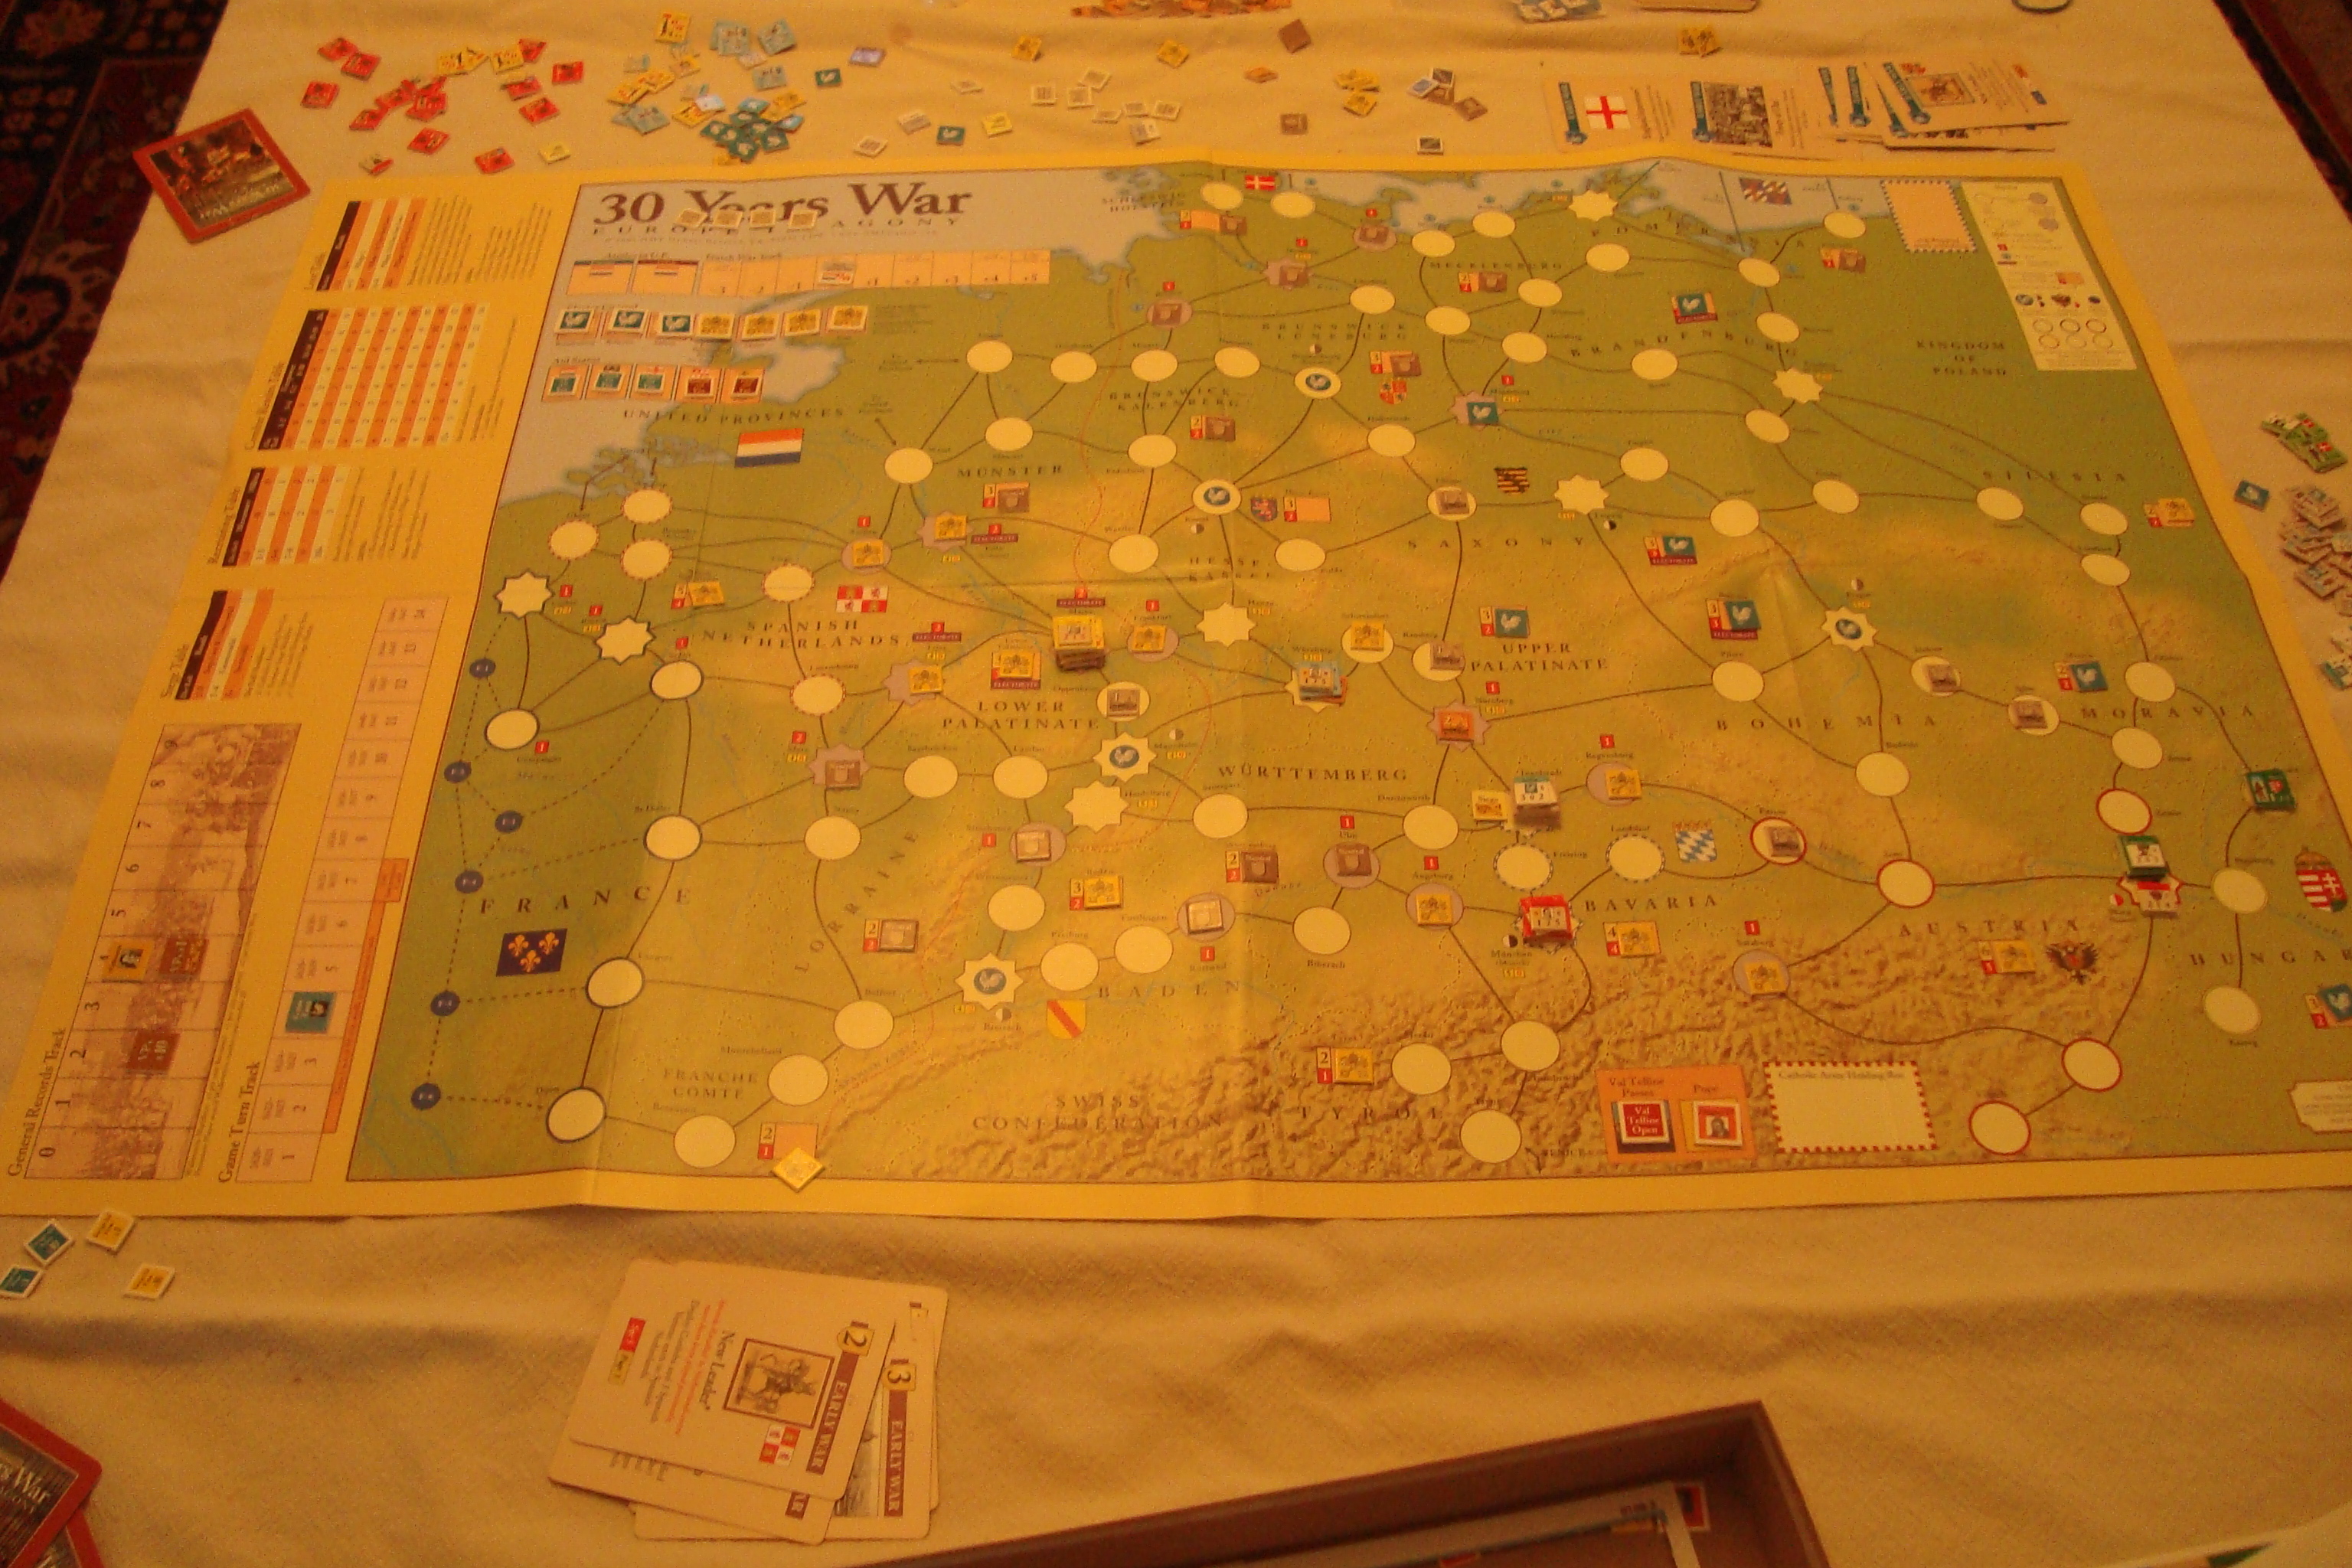
This is a card-driven game, with point-to-point movement, and like its GMT siblings, cards can be used for a number of purposes including triggering events, activating leaders so units can move and fight and receiving funds to pay units.
The turn sequence involves alternating play (rounds) of six of the seven cards in your hand (and subsequent movement/combat), paying units and then determining what attrition occurs to those units you cannot pay. Units are either veterans, mercenaries and militia, each of which have slightly different capabilities and costs to pay. When larger armies move, they reduce the ability of a selected point to support subsequent moves. The effects of this pillaging can be reduced in a subsequent “recovery” phase, which is actually the first phase of a game turn.
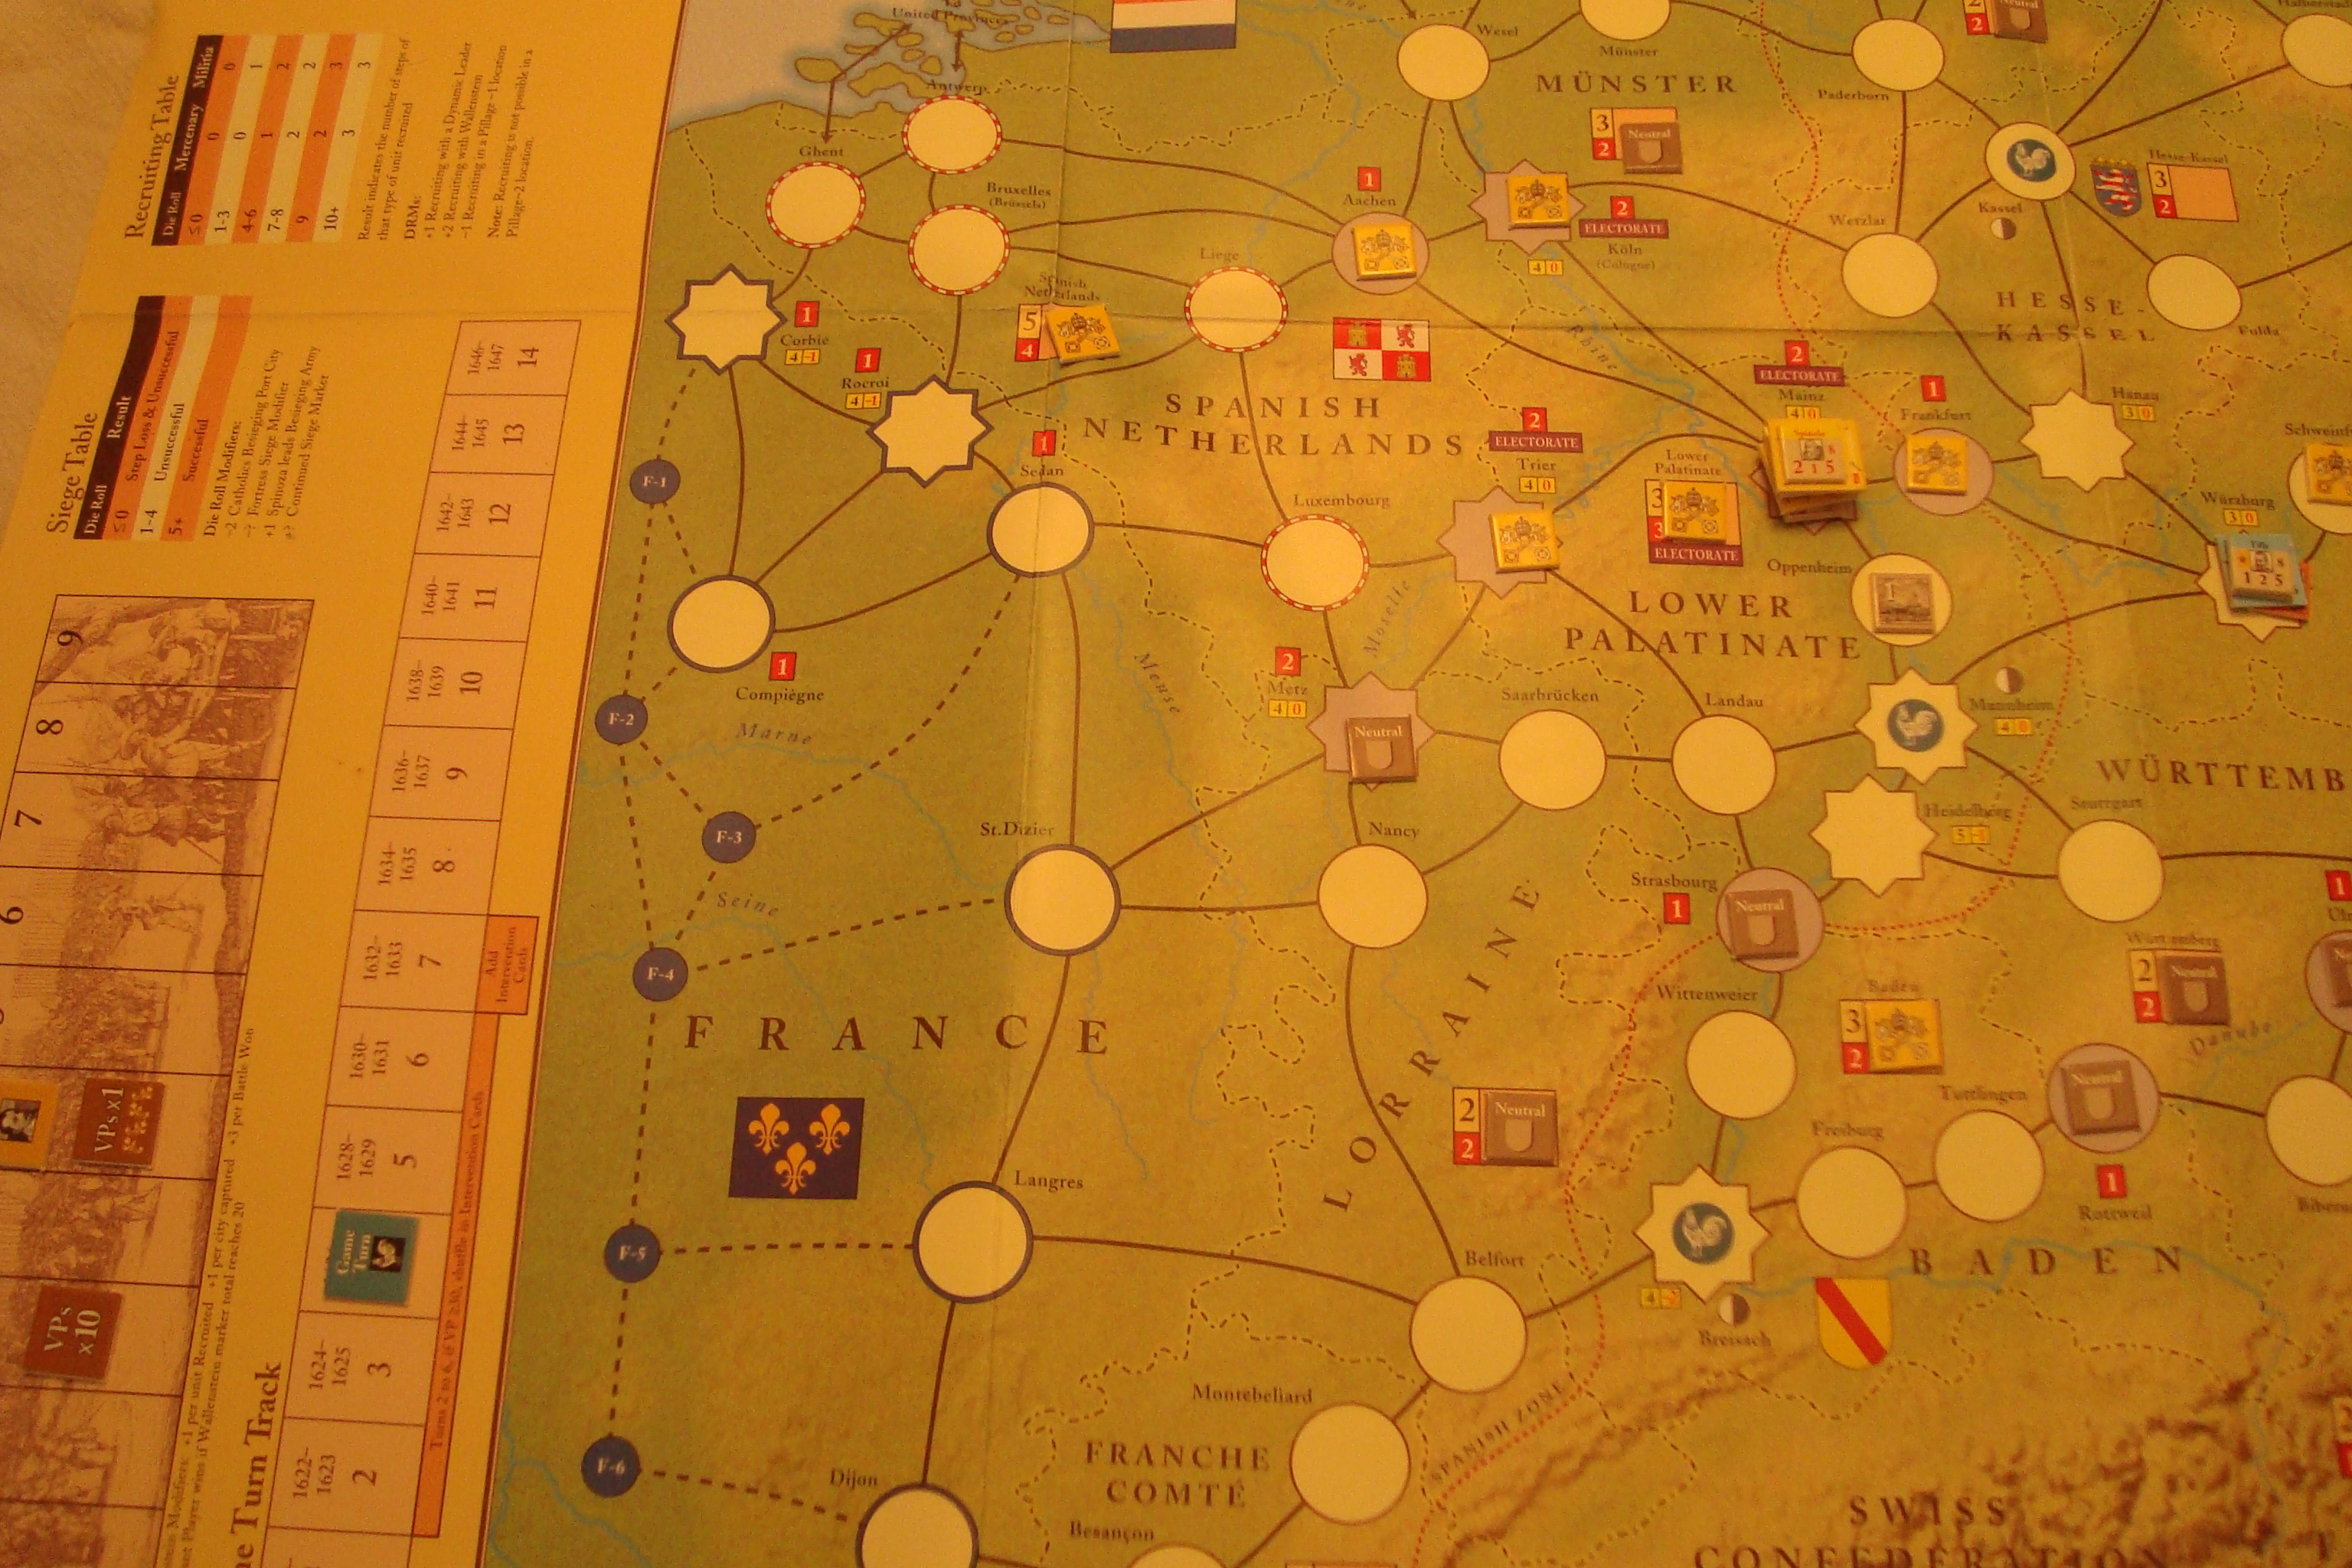
There are only a few charts, all of which are printed on one side of the map. I was able to really improve my ability to read charts upside down during both sessions. This is a skill I would have preferred not to have developed.
In the first session, cards were played for their event, not as much to activate leaders, get foreign aid to pay troops, or recruit. In the second session, both of us focused on the operational aspects of the cards.
This can be attributed to card flow. In some cases you must play one event in order to trigger other events. And, it is in your best interest to play them successively, not wait a turn or two before playing the second or third card in a sequence.
On the other hand this can be attributed to not really knowing what the hell you’re doing. Between sessions I asked Tim, “What’s the strategy for this game?”
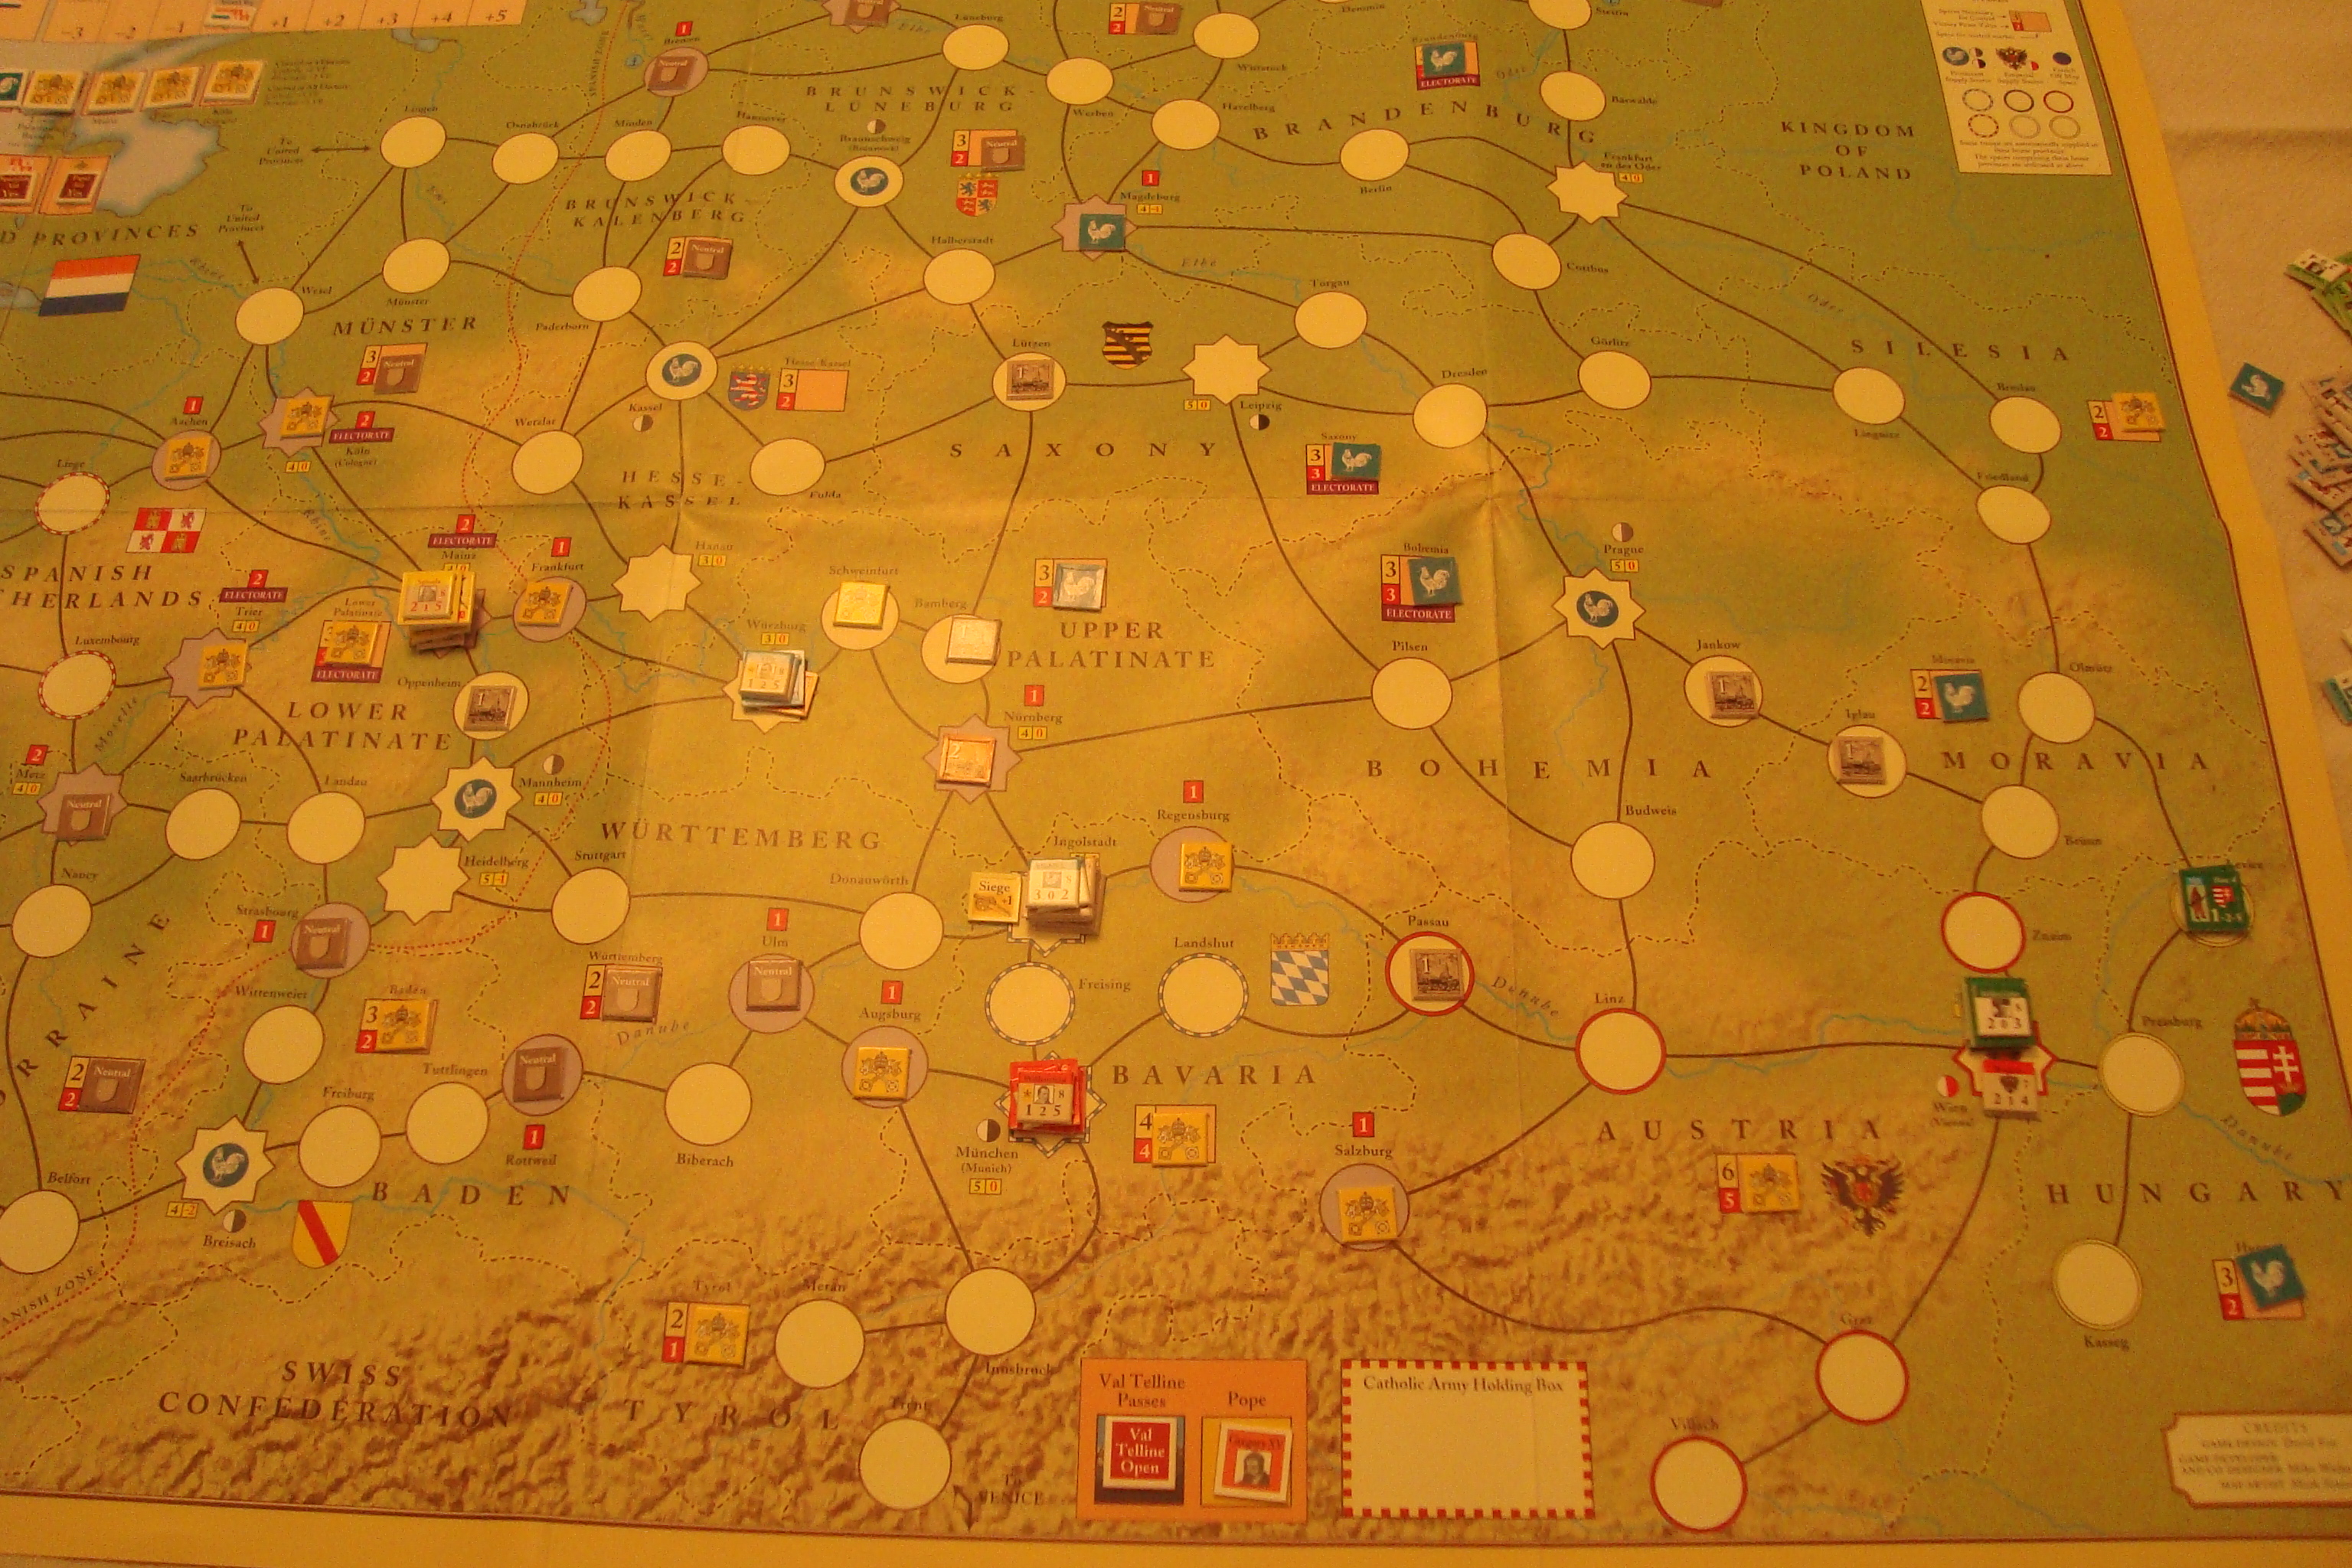
Since troops weren’t being recruited in the first session, the opposing forces were rather small and the effects of looting (when not paid) were minimized. These effects not only ravage the countryside, reducing the chance of living off the land without pay, but also ravage your units. In the second game, my victorious Bavarian contingent was decimated because they were without pay, and in an area that had been previously looted and couldn’t support them.
We agreed that the Catholic forces had better leaders (fewer points to activate), but that the funding for the Protestants allowed them to avoid having to roll as many times for attrition of units.
The second game featured far more action. The Upper and Lower Palatinate was the scene of most of the fighting, but with the Protestants coming very close to taking Vienna. We shut it down to have dinner and, after celebrating Tim’s birthday at Gustav’s (fitting given the game), we returned in no condition to continue.
In conclusion, a very good game with – once you get it – accessible mechanics, excellent game flow, and plenty of strange twists due to the effects of attrition.
The Map Illuminated in the Soothing Glow of Tim’s Dining RoomSpanish Veterans Cower In Their Area of OperationsAction In Palatinate & Hungarians Threaten ViennaThe Other Dog of War
Finished up playing yesterday with mixed feelings. This scenario is one of four published under the overall title of “War In The Outposts”.
It’s a great scenario if you want to “play” a physically manageable & comprehensive overview of this system. The scenario has a low counter density, a small map so it can stay set up for a long time, and a relatively short time frame beginning in May and ending in October (bi-monthly turns). It involves just about every aspect of the Glory (and by extension, Europa) system. The naval system, which many consider problematic, is featured, with an emphasis on amphibious landings, use of ports for general supply, submarines (and midget submarines) and coastal defense.
On the other hand, it’s not much of a game. Let’s call it “an operational study”. Here’s a link to a brief overview of the campaign. I’ve included it because it contains a good bibliography, as well as a link to a brief overview of South Africa’s part in WW2. I can vouch for “England’s Last War Against France”.
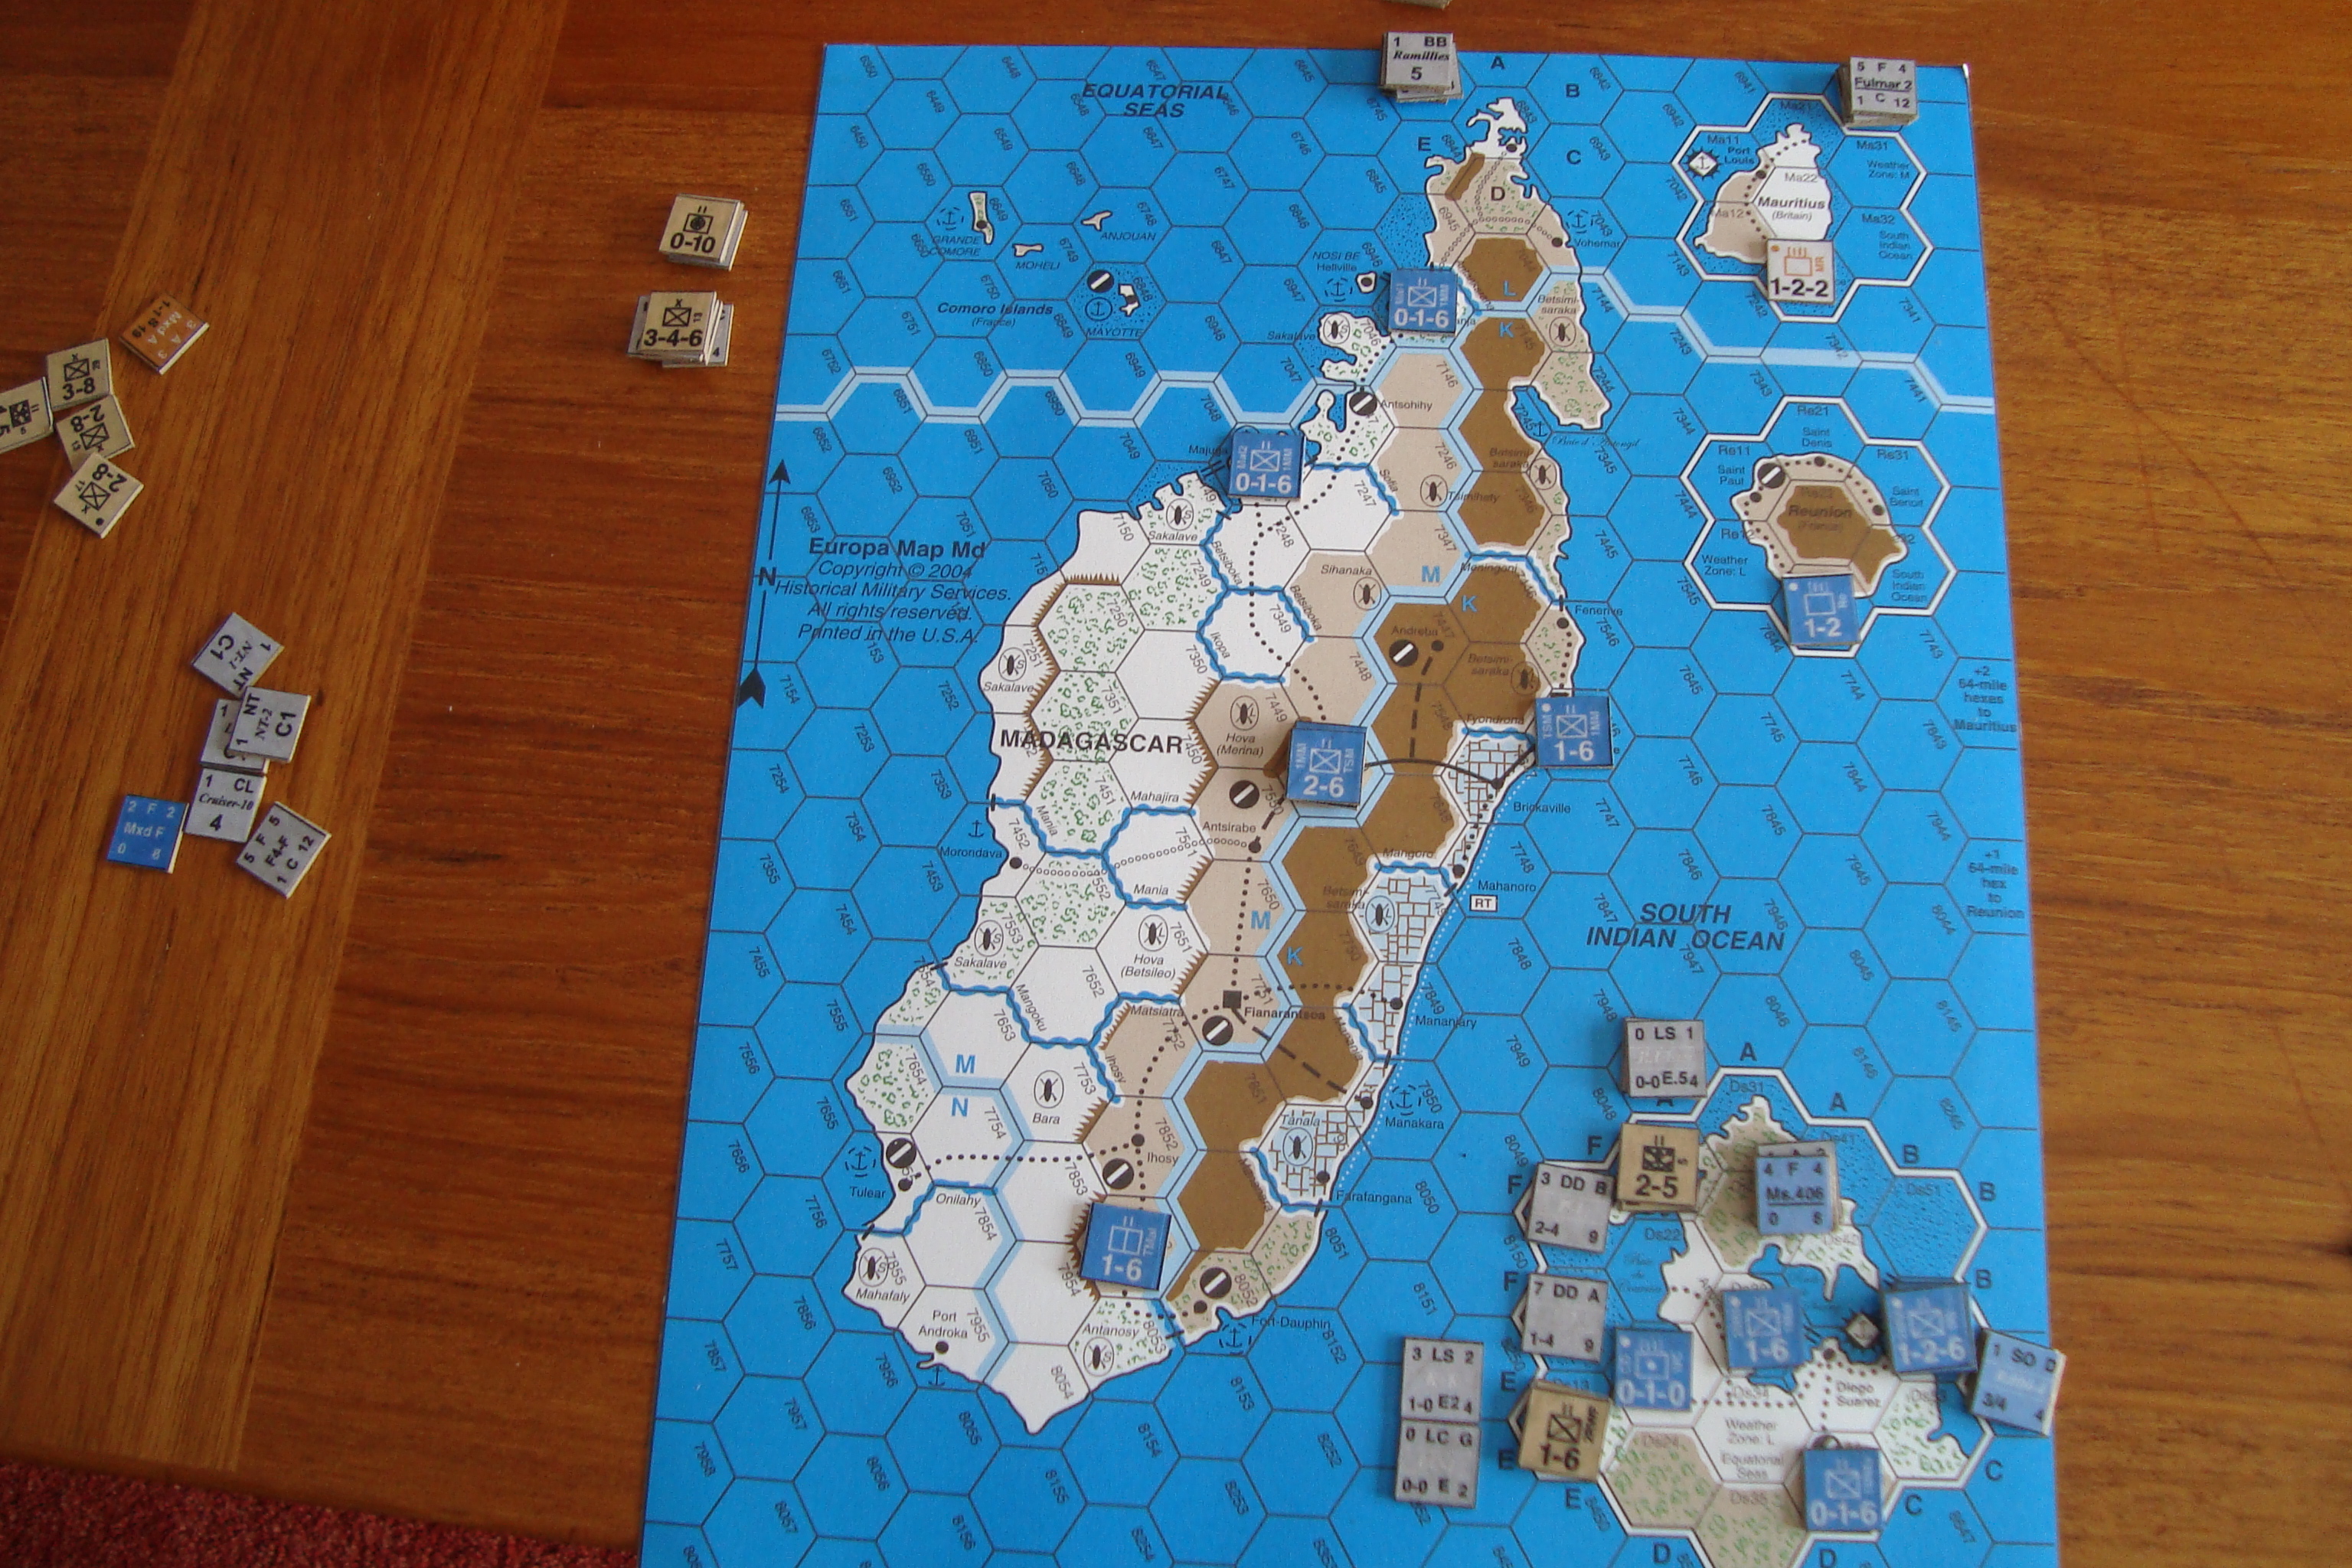
The decisive victory conditions are stringent: Take Diego Suarez in two turns, control Madagascar by October, do not lose a unit, and not expend more than one resource point. Attaining the latter is especially difficult because it limits British player is limited to one attack with one regimental equivalent (RE) at full strength for the entire game. Everything else is at half-strength, which makes losing a unit very possible and, perhaps, probable. While the Allies have overwhelming naval and air strength for the first two turns in May, most of these assets are immediately diverted to other theaters. From June through September, the British have to operate with minimal naval and air assets, with a carrier/battleship force arriving for the final month.
The opening two turns are devoted to taking Diego Suarez. This area of operations is represented by a map insert at an expanded scale. The British must negotiate restricted waters, deal with disorganization after their landings, and having only a few areas where they can bring overwhelming naval gunfire to bear. A French defense in depth, sacrificing units for time, makes it difficult to control the area by the end of June. British attacks typically take place at 3-1, with maybe a 4-1. The combat results table (CRT) can be brutal, with an exchange result eliminating a British unit, or an attacker stopped result throwing the time track off.
Map Showing Insets, Vichy Set Up and Invasion of Diego Suarez
After Diego Suarez is secured, the British slowly move through the island, attacking French units at low odds, after amphibious landings. Overland travel is very slow. The best approach is to isolate the main French units, reducing their strength so, once again, a 3-1 or 4-1 attack can take place. This takes time, and outside of the process of figuring out how to work with zones of control for a mix of units and capabilities, not much fun……if you even think ZOCs can be fun – kinda.
All this kvetching aside, the scenario does simulate the historic campaign, and is a challenge to the player. In that regard, you can’t complain. Would I play it again, no. Was it worth the time, yes. A good rules overview, and a chance to use the color counters I downloaded from the Europa website (DO NOT go out and try to download now. A nasty pop-up will appear) several years ago.
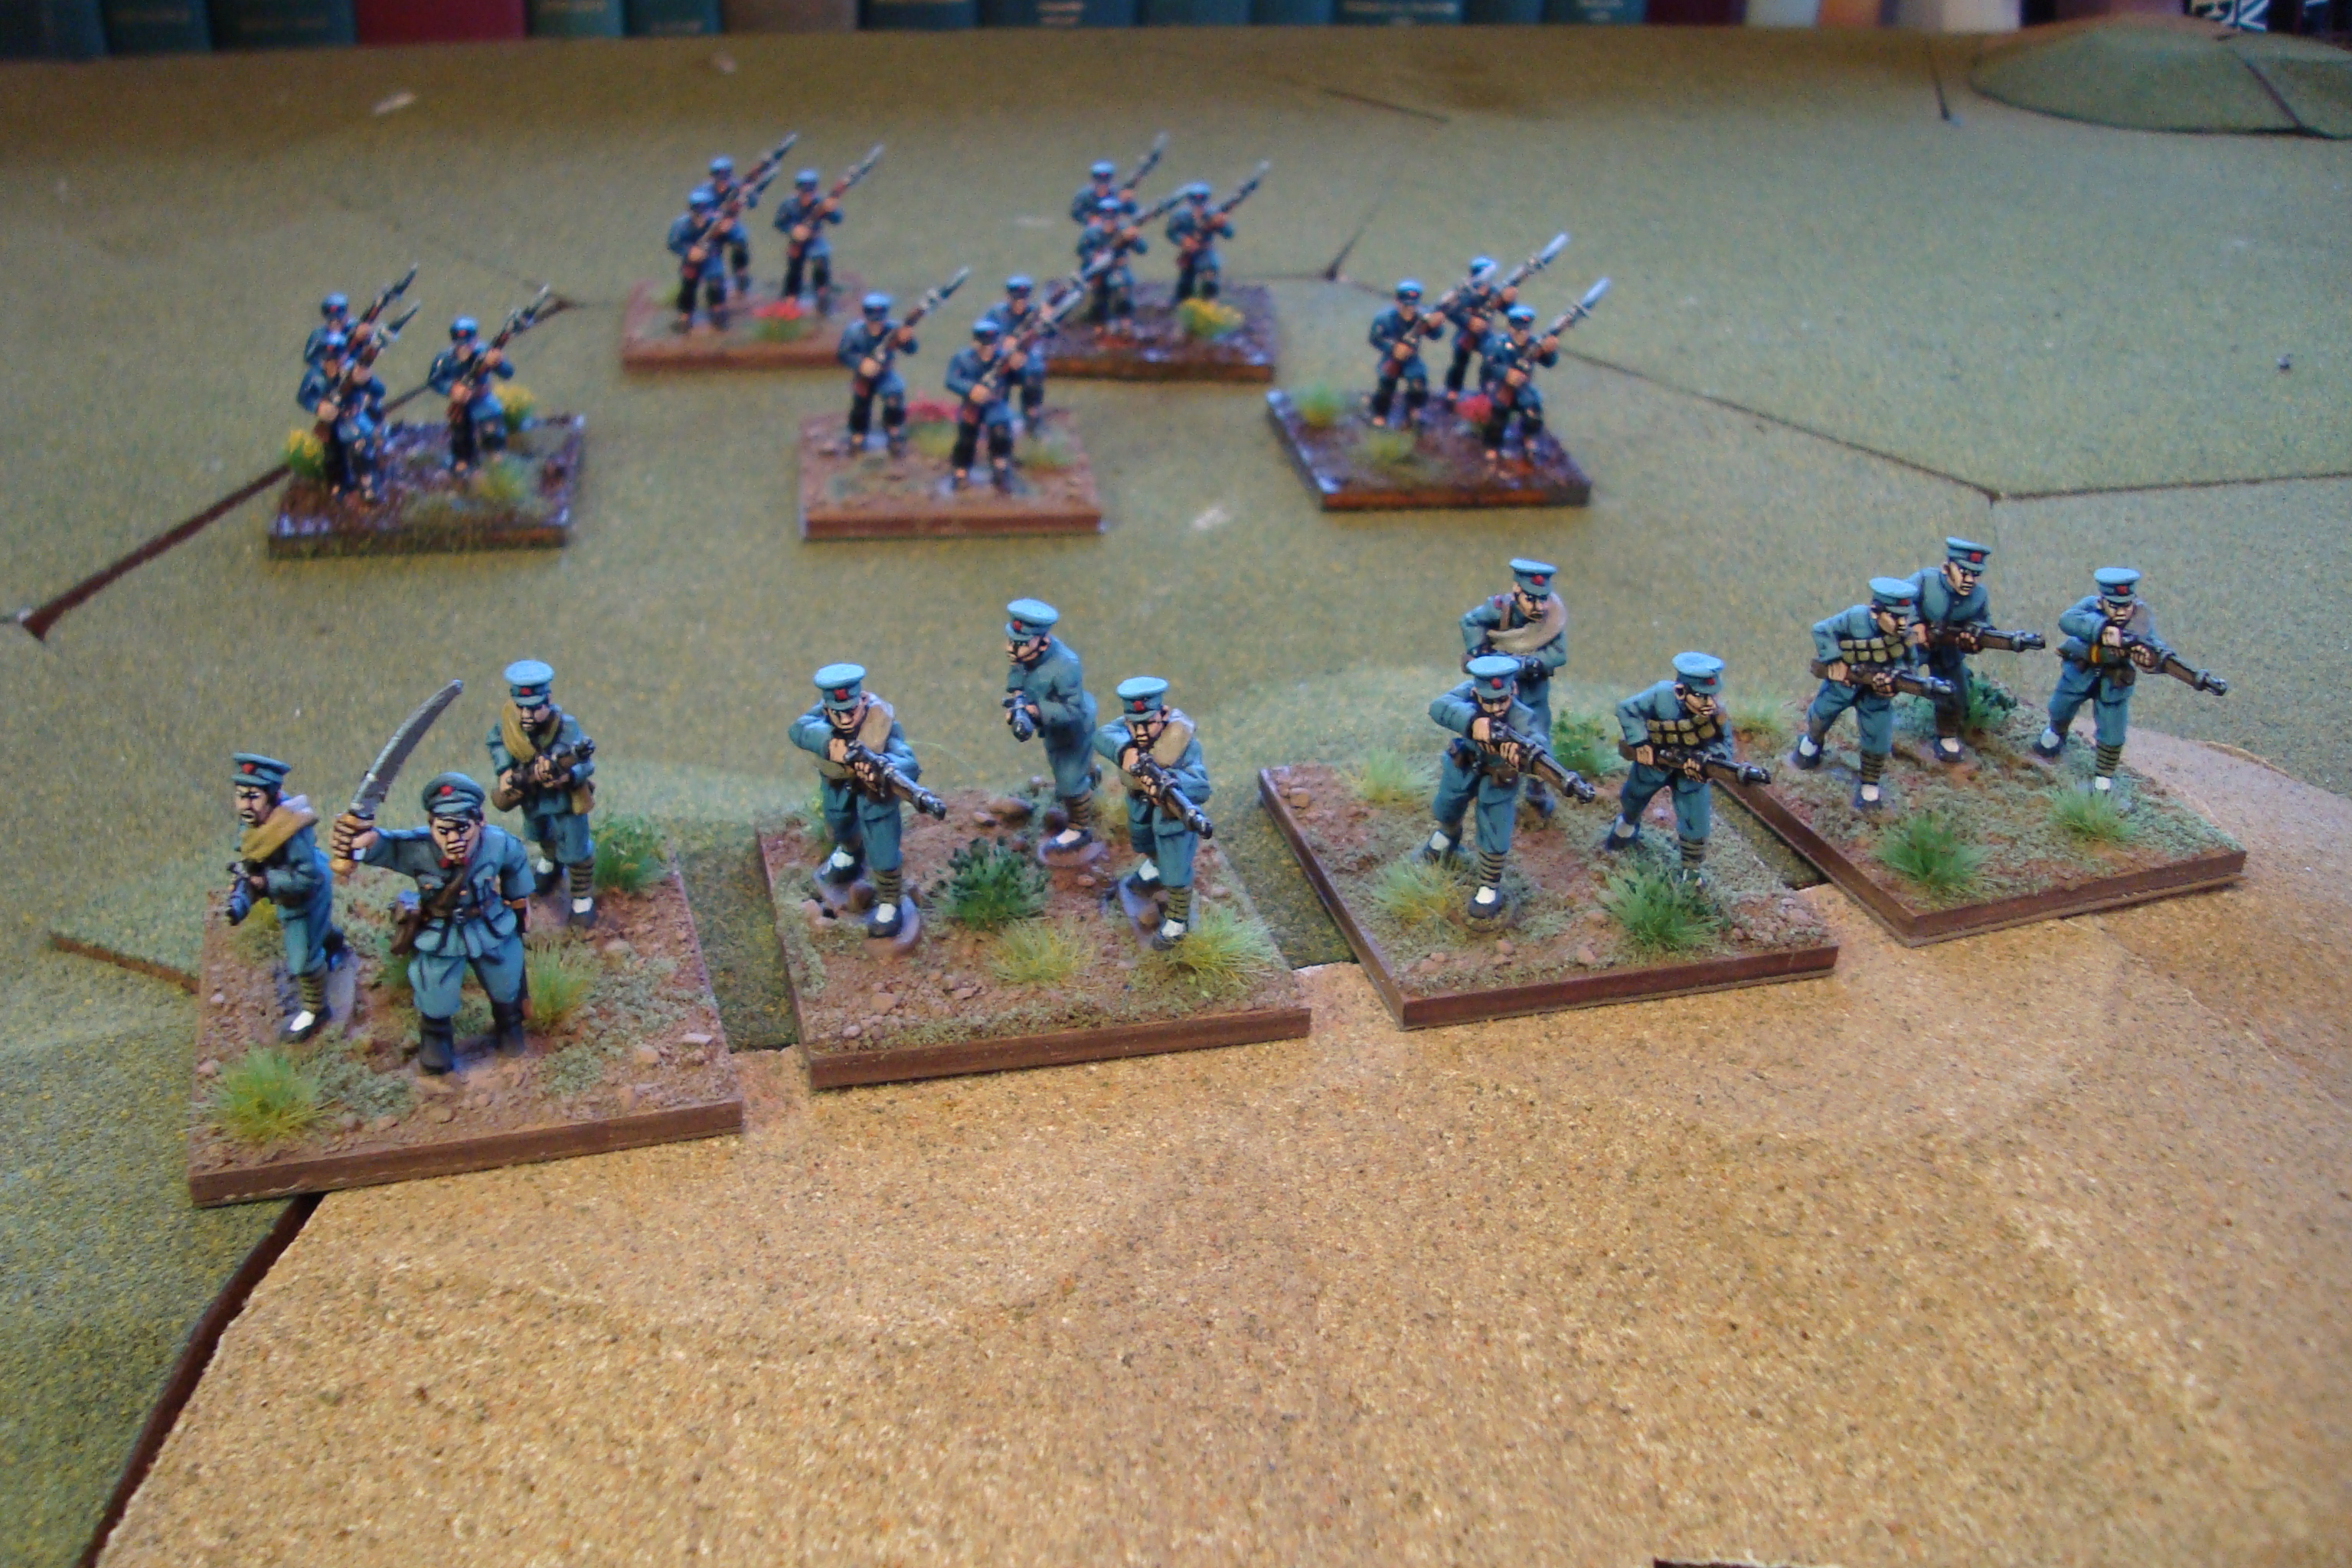
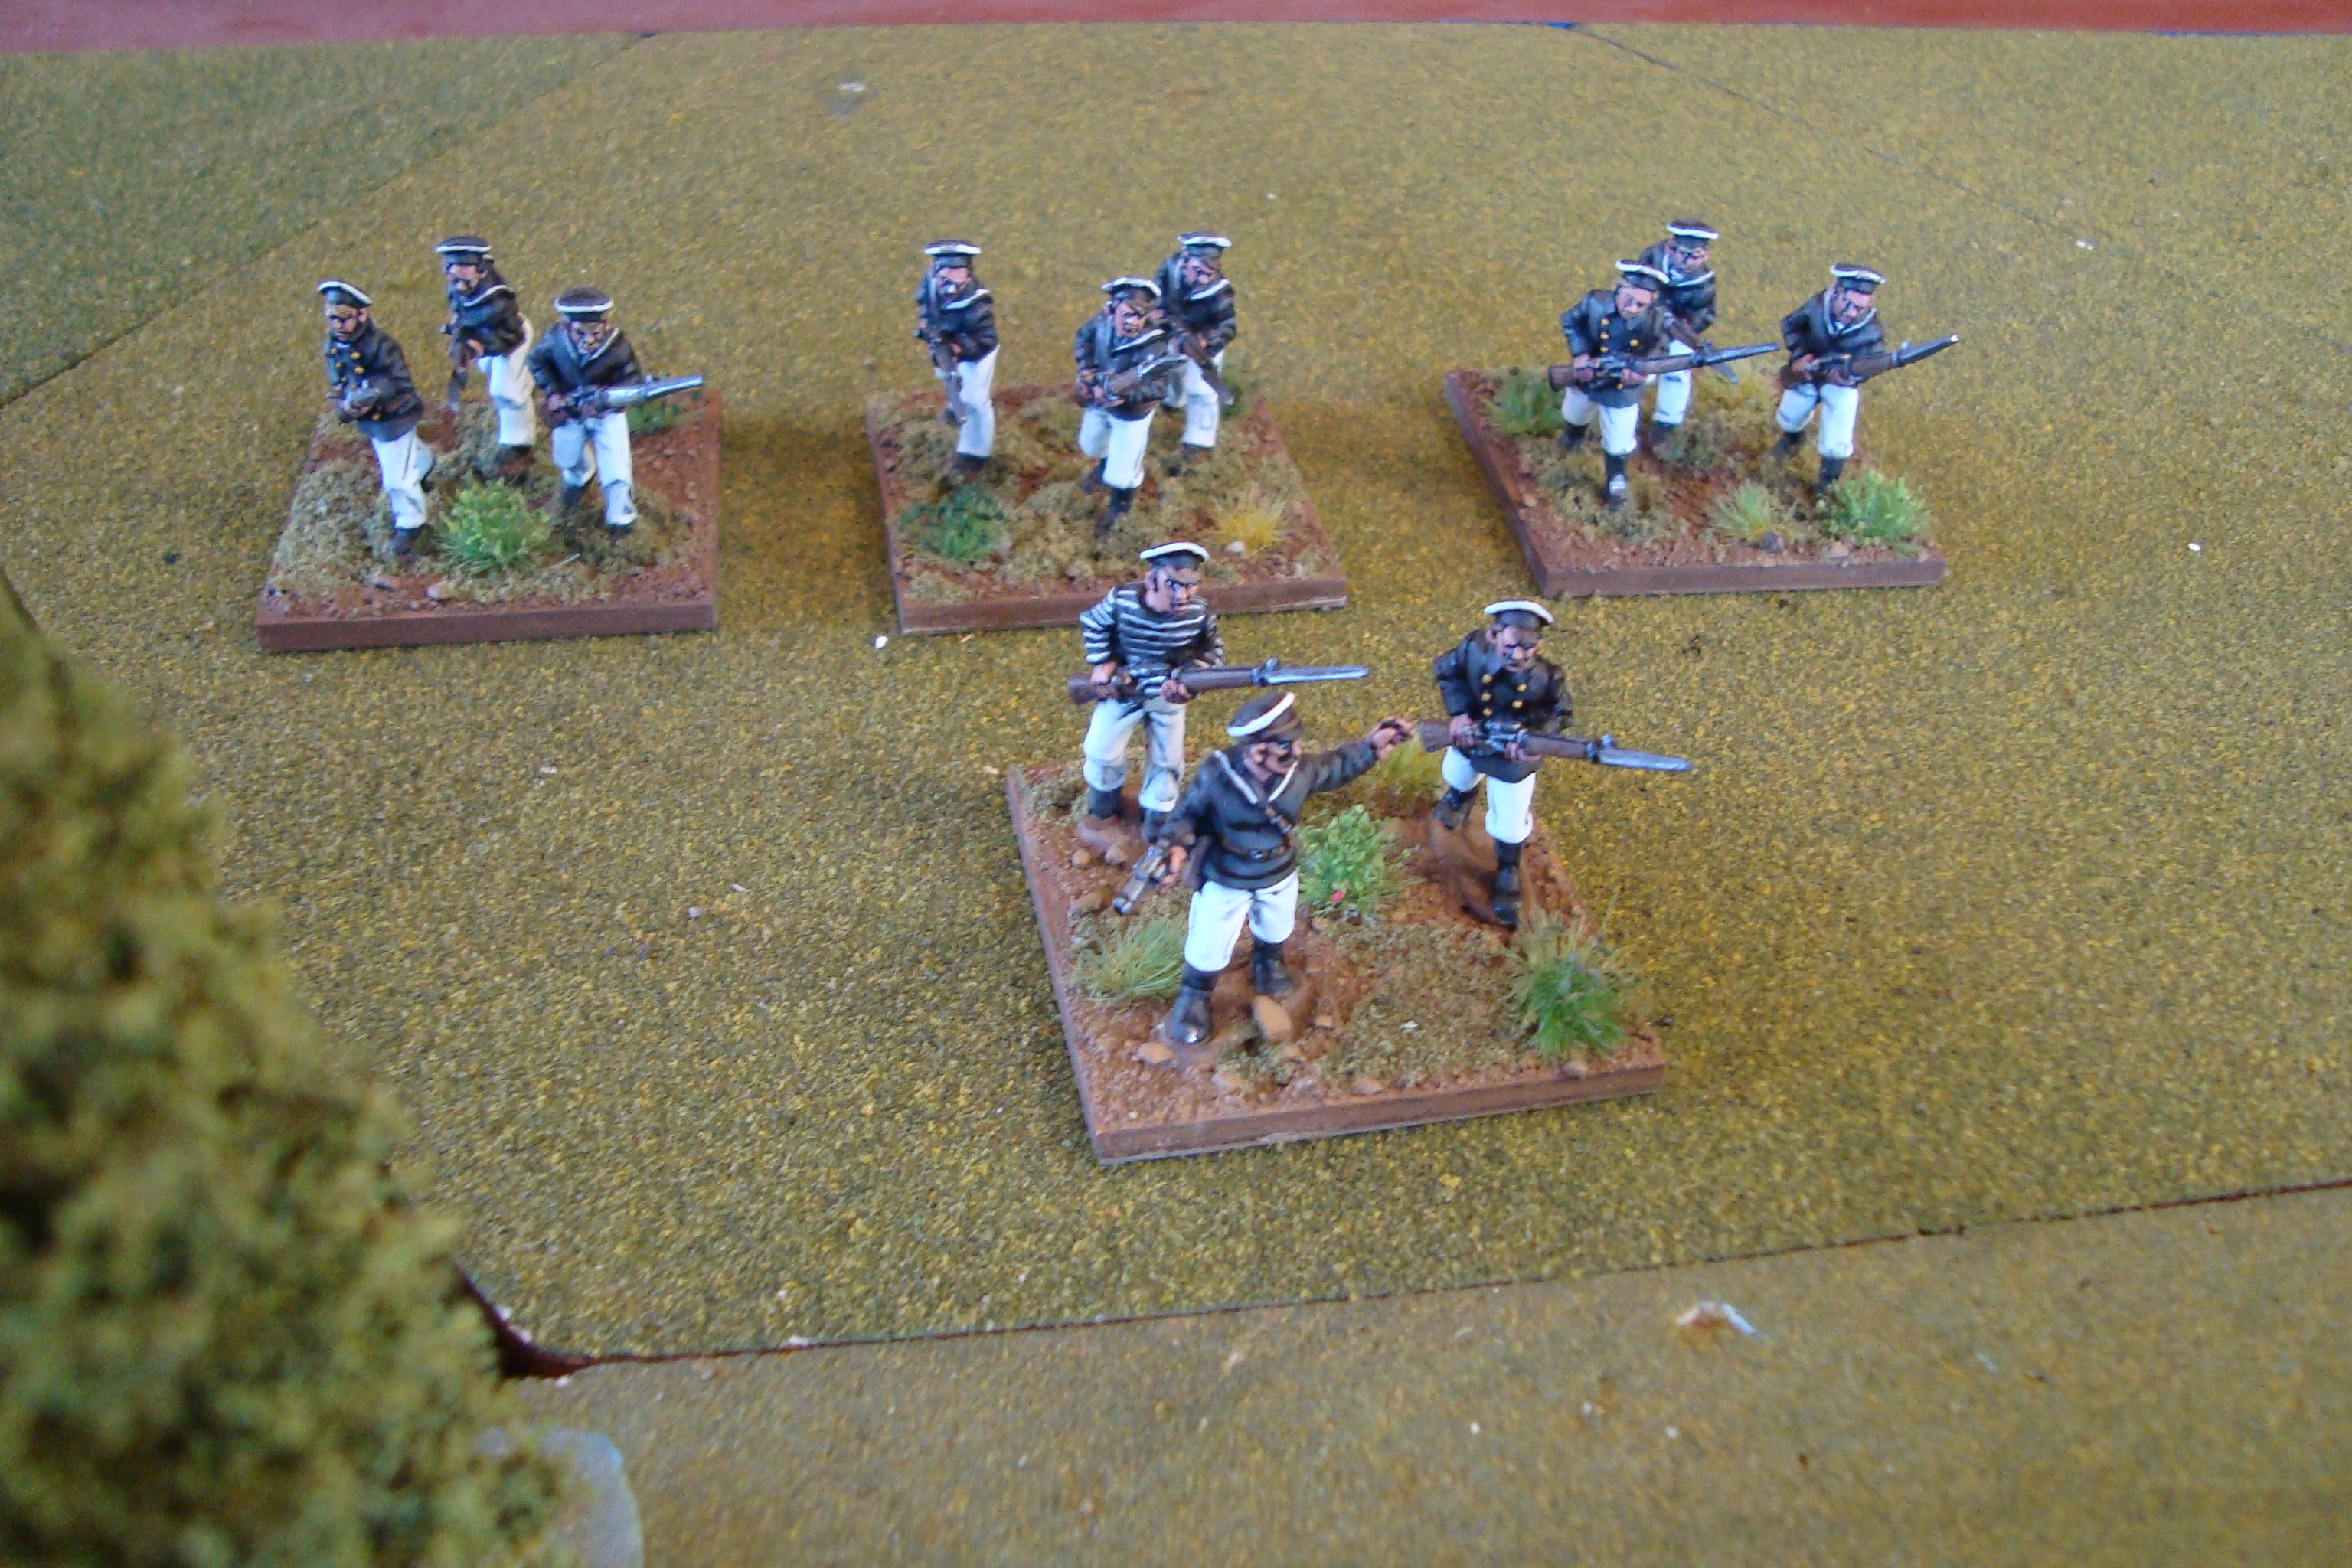
Started playing Red Actions! earlier this week. Since this was my first play-through, the scenario was simple, with just a few units, no machine guns, artillery or AFVs. I wanted to find out how the fire and manuever rules work and what their effects are.
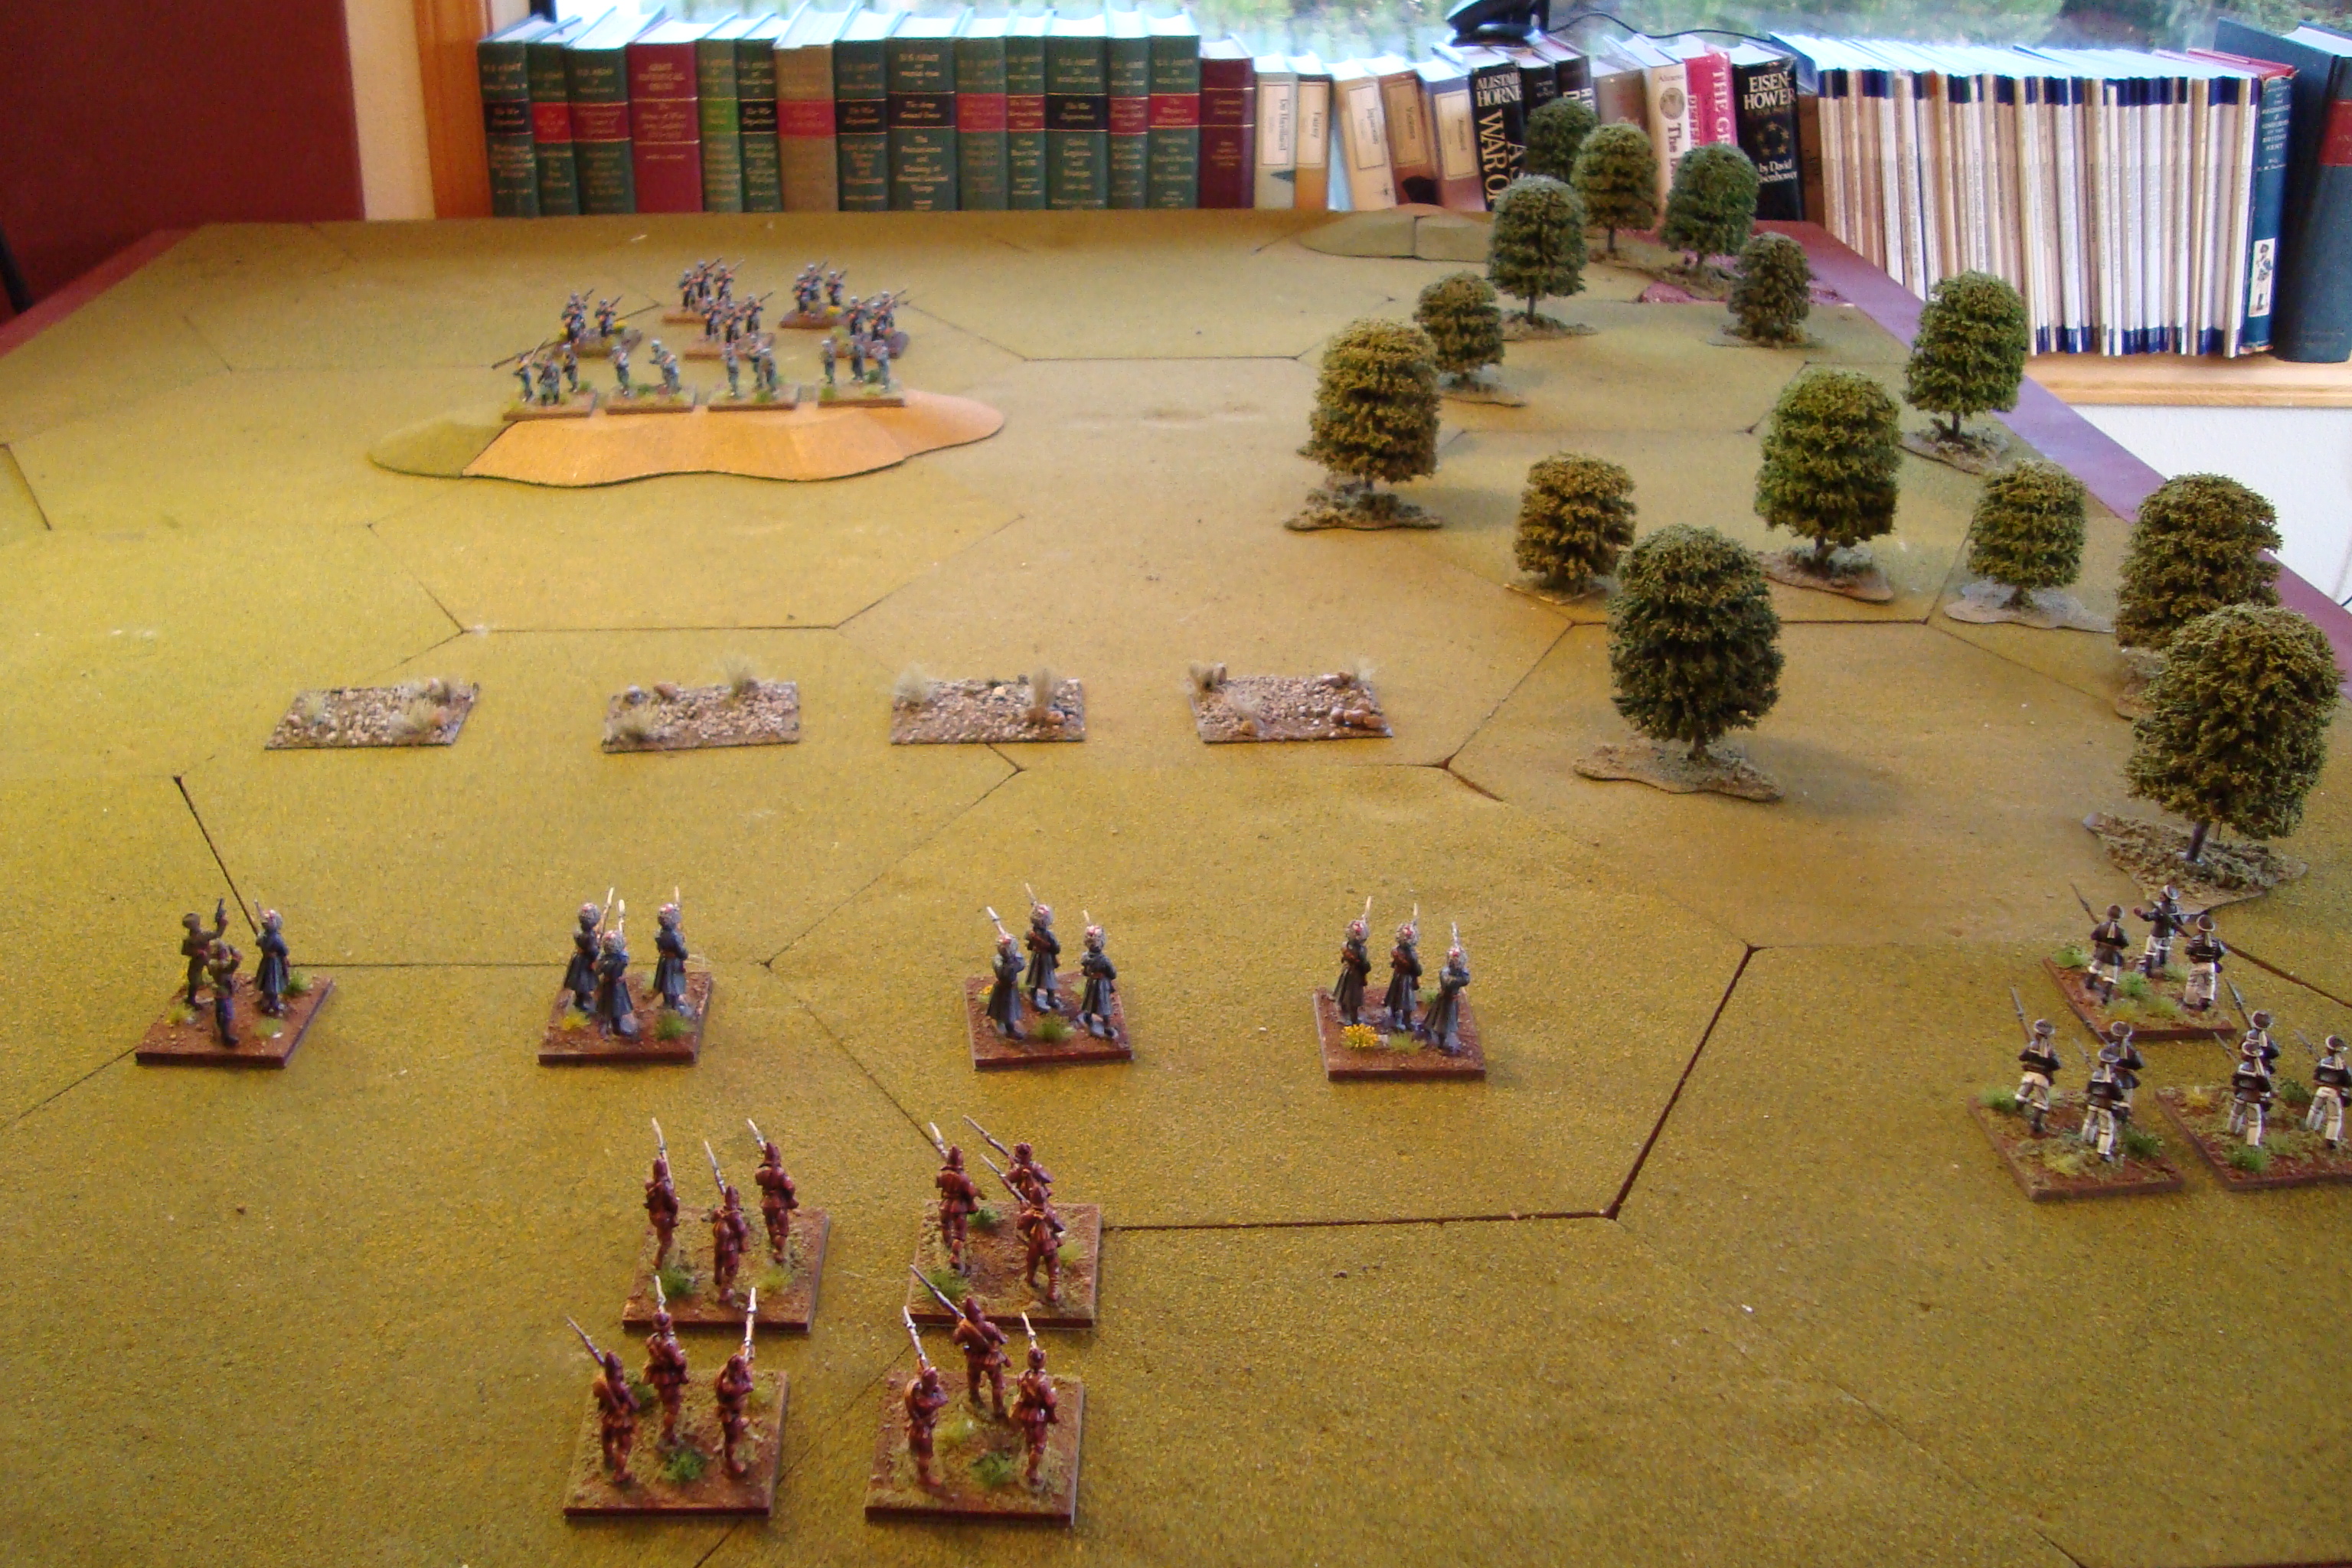
Three Soviet Companies are tasked with taking a entrenched position on a ridge line. The Soviet force is comprised of regular, Cheka, and naval infantry companies. The opposing Chinese force consists of a regular company and conscript company.
The terrain is relatively open, with a wooded area to the east and rough terrain to the south of the ridge. I designated both the entrenched position on the ridge and rough terrain as hard cover, allowing a -1 column shift for the defenders. The intent for the rough terrain is to provide the Soviet force with some cover and concealment. The distance between the ridge and rough terrain allowed for long-range fire at one-half the fire factor.
The tactics are straightforward. The regular Soviet company is to advance and take cover in the rough terrain, and to then provide suppresive fire on the ridge. The naval company is to advance through the wooded area (providing cover and concealment) and attack the ridge from the flank. The Cheka company is in reserve.
The Chinese have their regular company entrenched on the ridge, with the conscripts in reserve behind the ridge. This deployment involved a trade-off. The regular company has a higher fire rating, but the conscripts are rated as a “Mob” and can only charge or fire without taking a special morale check. On a D6 role of 1-2 they will remain in place.
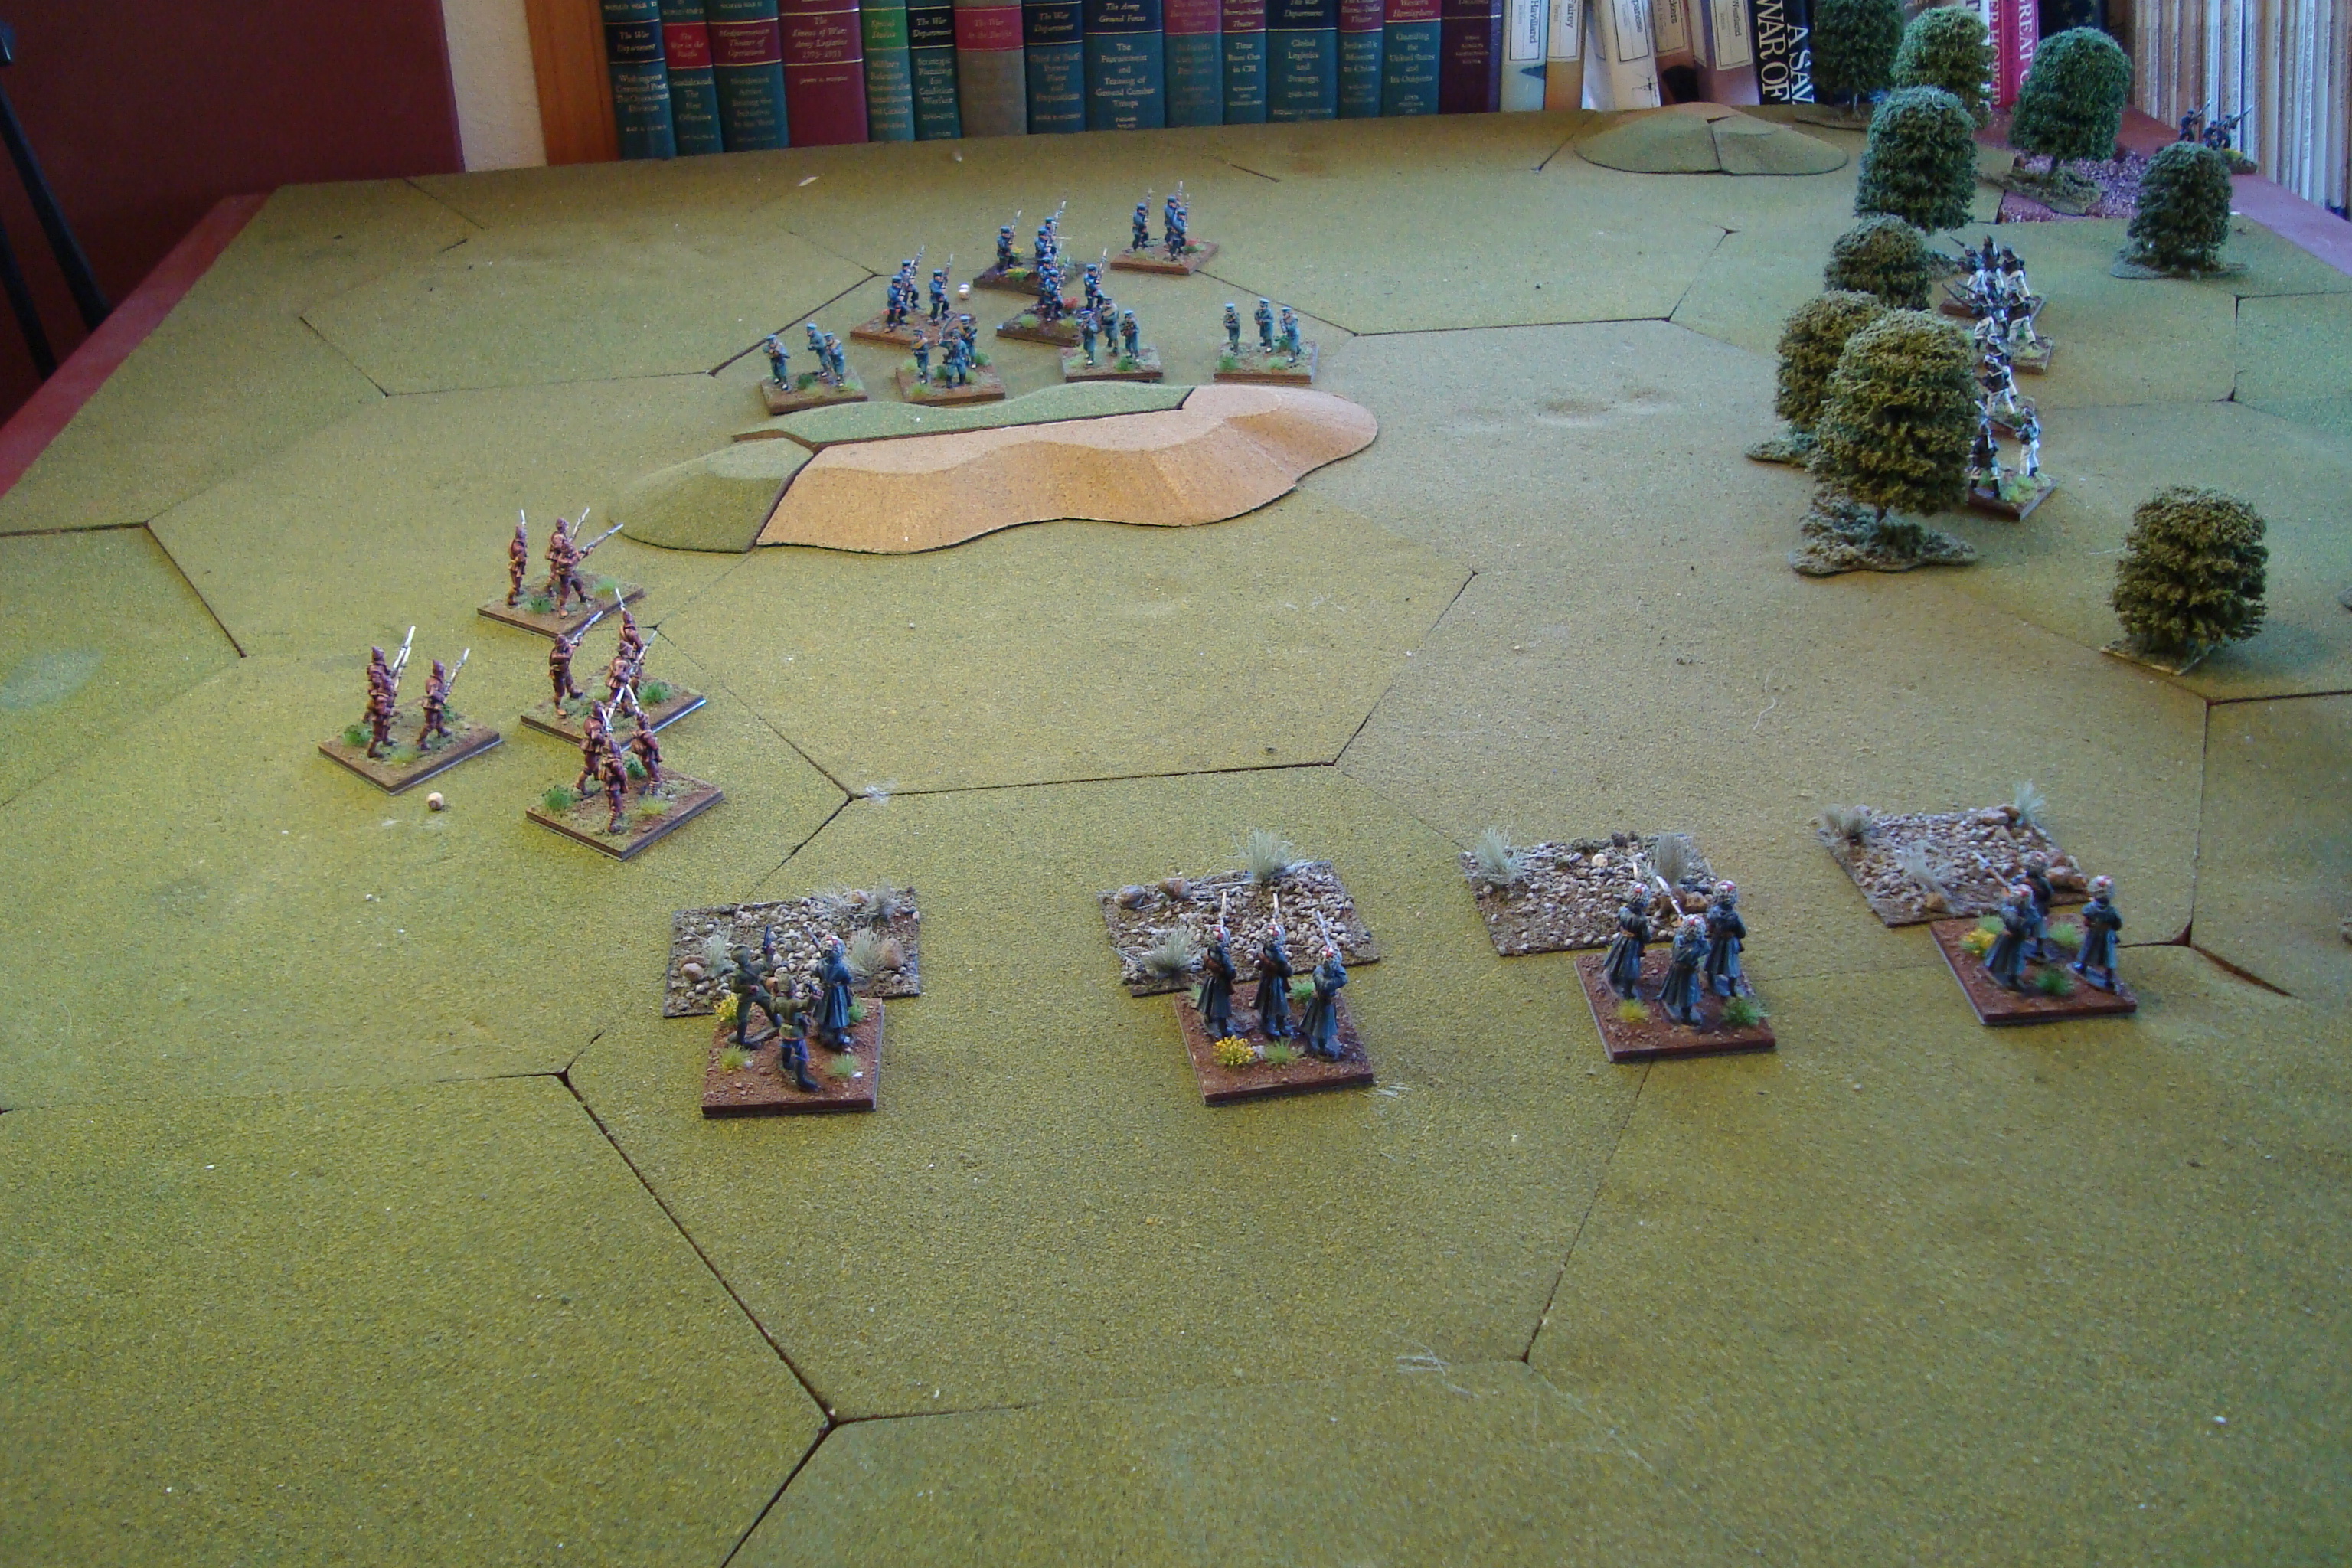
Terrain and Initial Deployments Looking NorthChinese Troops On Objective and In ReserveSoviet Sailors Begin Moving Into The Woods
The first few turns saw sustained firing between the ridge and regular troops in the rough terrain. Both companies were pushed off due to retire results, but quickly returned to their positions. The naval troops worked their way through the woods, and began taking the reserve conscript company under fire. Due to the short range between the units, this developed into a firefight, with both units firing at each other at full strength during each turn, rather than the turn-by-turn long-range fire.
Growing impatient with this back-and-forth, and like an overenthusiastic Lieutenant at The Basic School, I ordered the Checka company to advance along the (Chinese) right flank or west side of the board. Double envelopment Little Schlieffen?
As this advance developed, the Chinese conscripts sustained losses and were in bad shape morale wise, while the regular troops had retreated (again) from their trenches. The question for the Chinese was whether to fight it out, or retreat. Since I had not set this contingency up (delay/defend with turn limit), and had a good initial feel for rules and effects, I stopped the game.
Chinese Have Been Pushed Off Ridge With Cheka Preparing To Assualt
I like this rule set. I think the morale rules using terror markers, as well as other outcomes are very playable. Infantry fire at long range is not particularly bloody, but short range fire – and its accompanying firefights- can decimate a unit quickly. Although using 28mm figuures, I kept the 15mm movement scale because of the small size of my “big board”. This scale seemed to work just fine, and made working with the rules easier. While some folks have mentioned having trouble with the conversational dialogue of the rules, I think they are just fine.
For those of you interested in reading more about Red Actions!, here’s some links that might be of help. I know this is an older system (more on that in another post), but it is good one that can be played without miniatures. The link to the website and rules is here. A couple of viable reviews are here and here. The always entertaining Edinburgh Wargamers have a portions of their site devoted to this period. While they use another rule set, it’s a great source of fun and ideas.
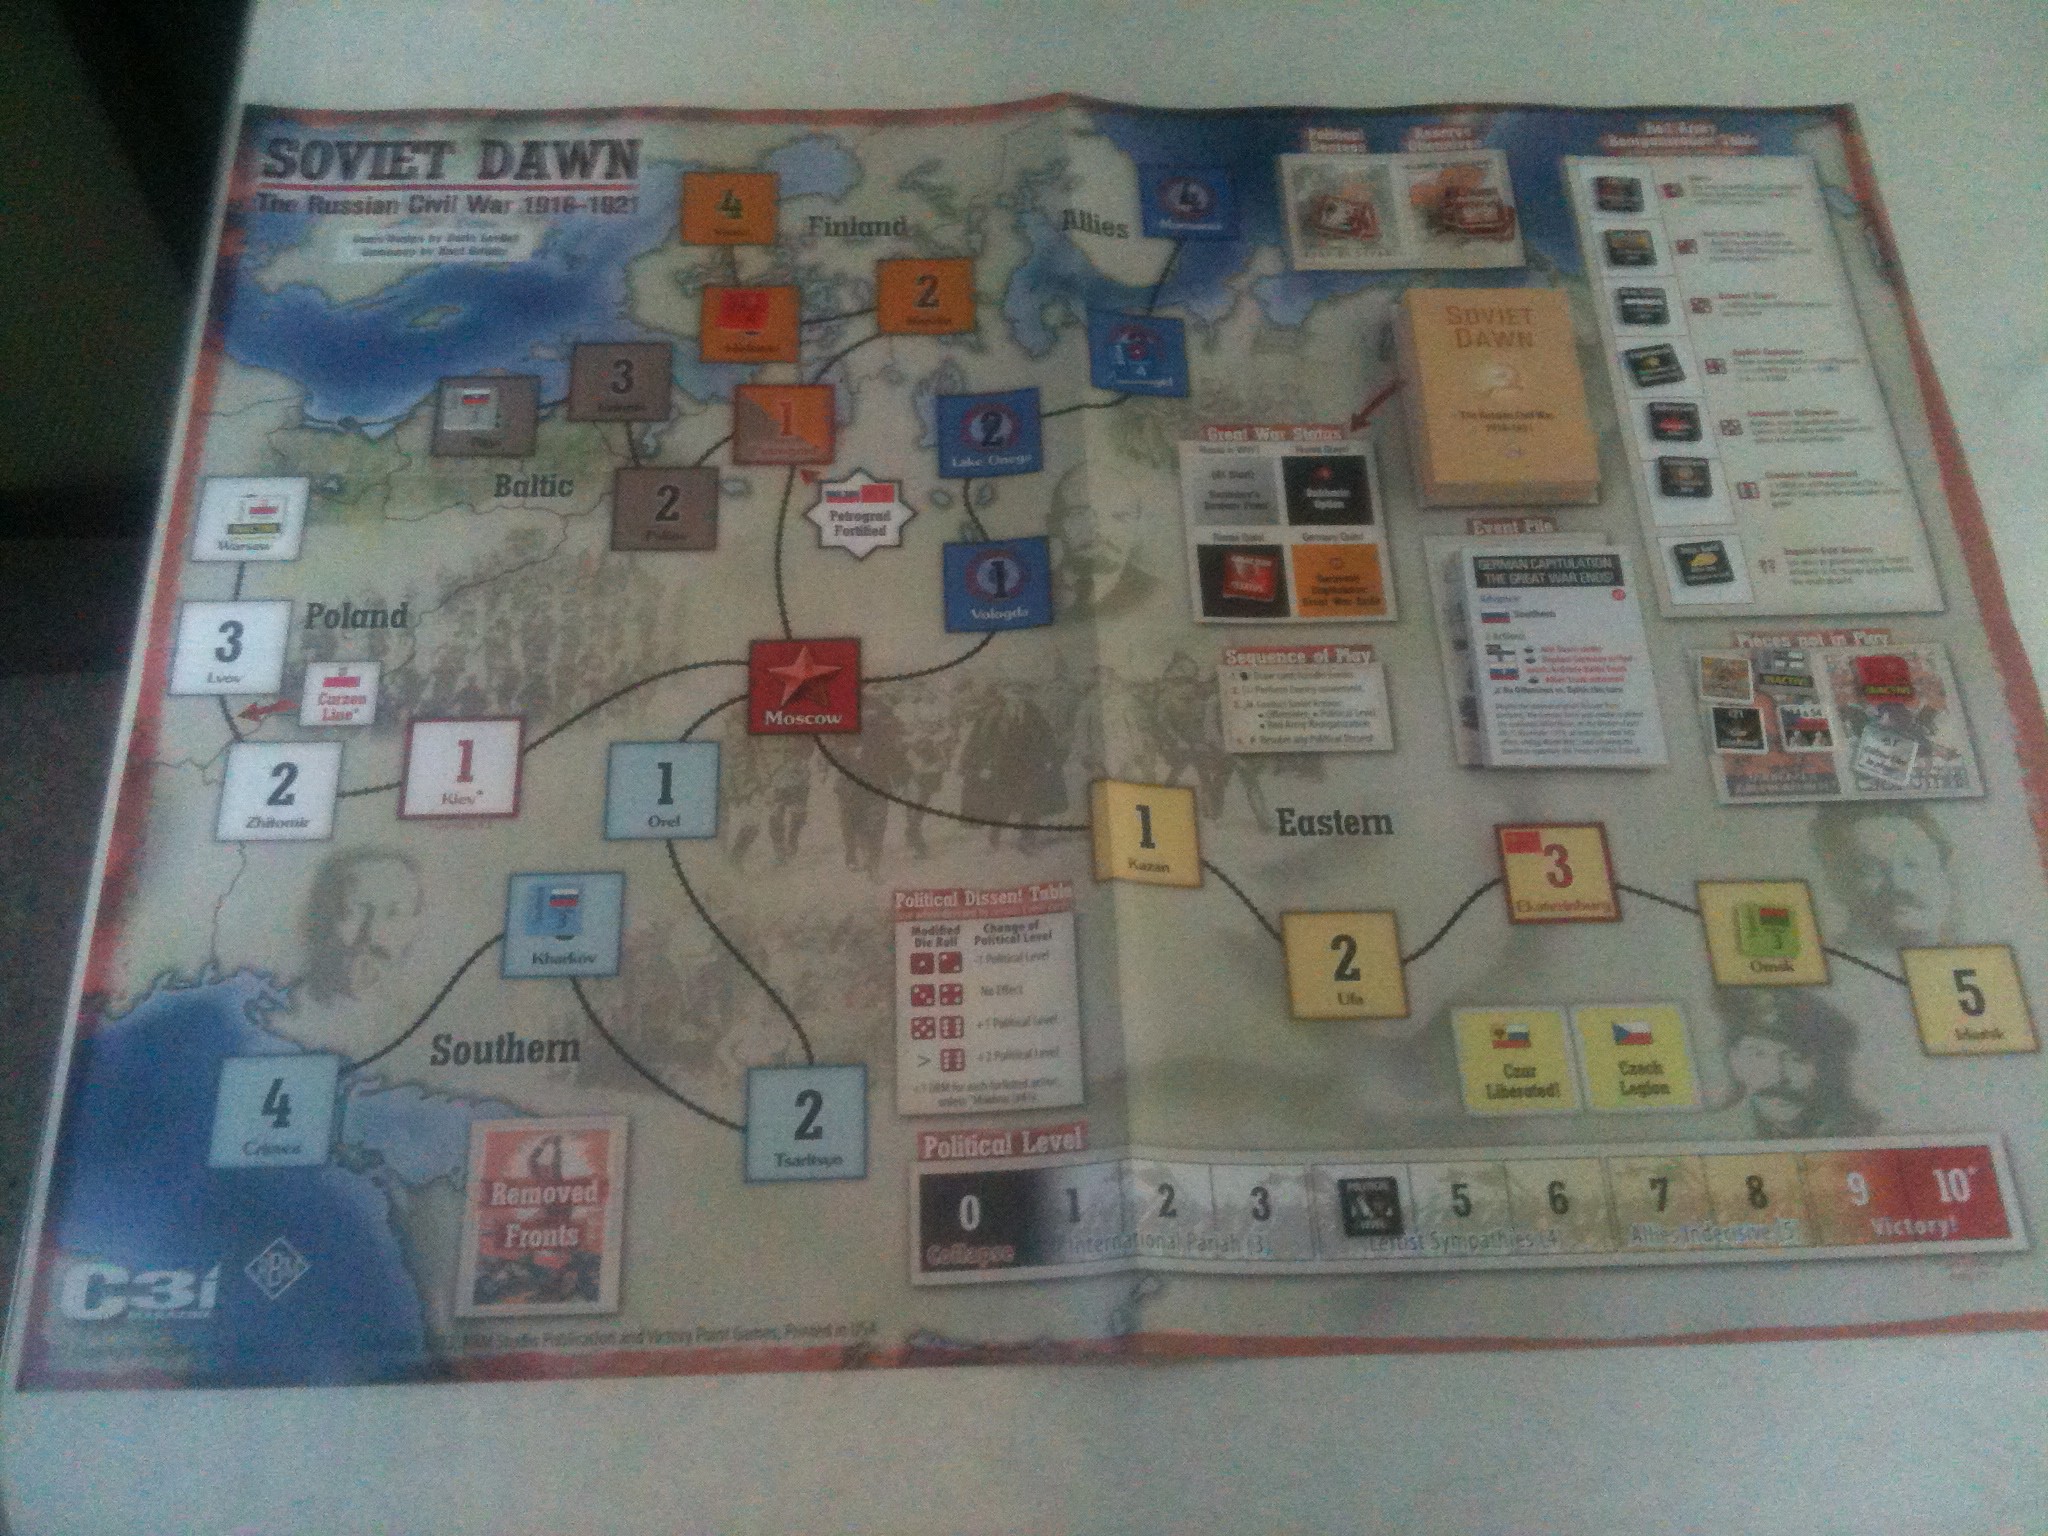
With an increasing focus on Red Actions! this month, it made sense to try out Soviet Dawn. This is a solitaire game I picked up on EBay for a very reasonable price. Originally published by Victory Games, this version was included in GMT’s C3i magazine Issue No. 27.
Was able to play four (!) games this Saturday afternoon. The back story as to why I was able to/did this would bore even the most avid reader.
This is a nice card-driven solitaire game. Easy to set up, with simple rules and plenty of replay value. A good review of the game can be found over at Web Grognards.
Game play is a real juggling act, holding off Germans, Finns, White Russians, Poles and Western Allies while trying to build international political credibility. During the first game, I lost track of the Eastern Front, and allowed Moscow to be captured in just 12 turns (cards).
The next two games featured the blitzkrieg generated by the “Denikin Unstoppable? Objective Moscow!” card. This punisher allows the White Southern Army to advance towards Moscow until defeated. A couple of bad rolls, and you are out of business, especially if you allow the Czar to be rescued when the “Czar’s Fate Decided in Ekaterinburg!” card is played. This gives the Soviets a -1 DRM on all offensive roles. Not good!
The fourth time was the charm. I was able to shut down the Poles, Southern Whites and Finns, while getting some nice rolls on the Soviet Army Reorganization Table, and Political Level Track. Was I lucky?….Sure, but it was nice to beat a very enjoyable and accessible game system.
Game play time is about 20-30 minutes, so with the easy set up, a fun game can be played very quickly in a small space. I also liked the map. Here’s an indifferent IPhone photo.
Tim and I decided our next FTF game will be a scenario from War of Resistance (WOR), one of two games in HMS/GRD’s Glory series.
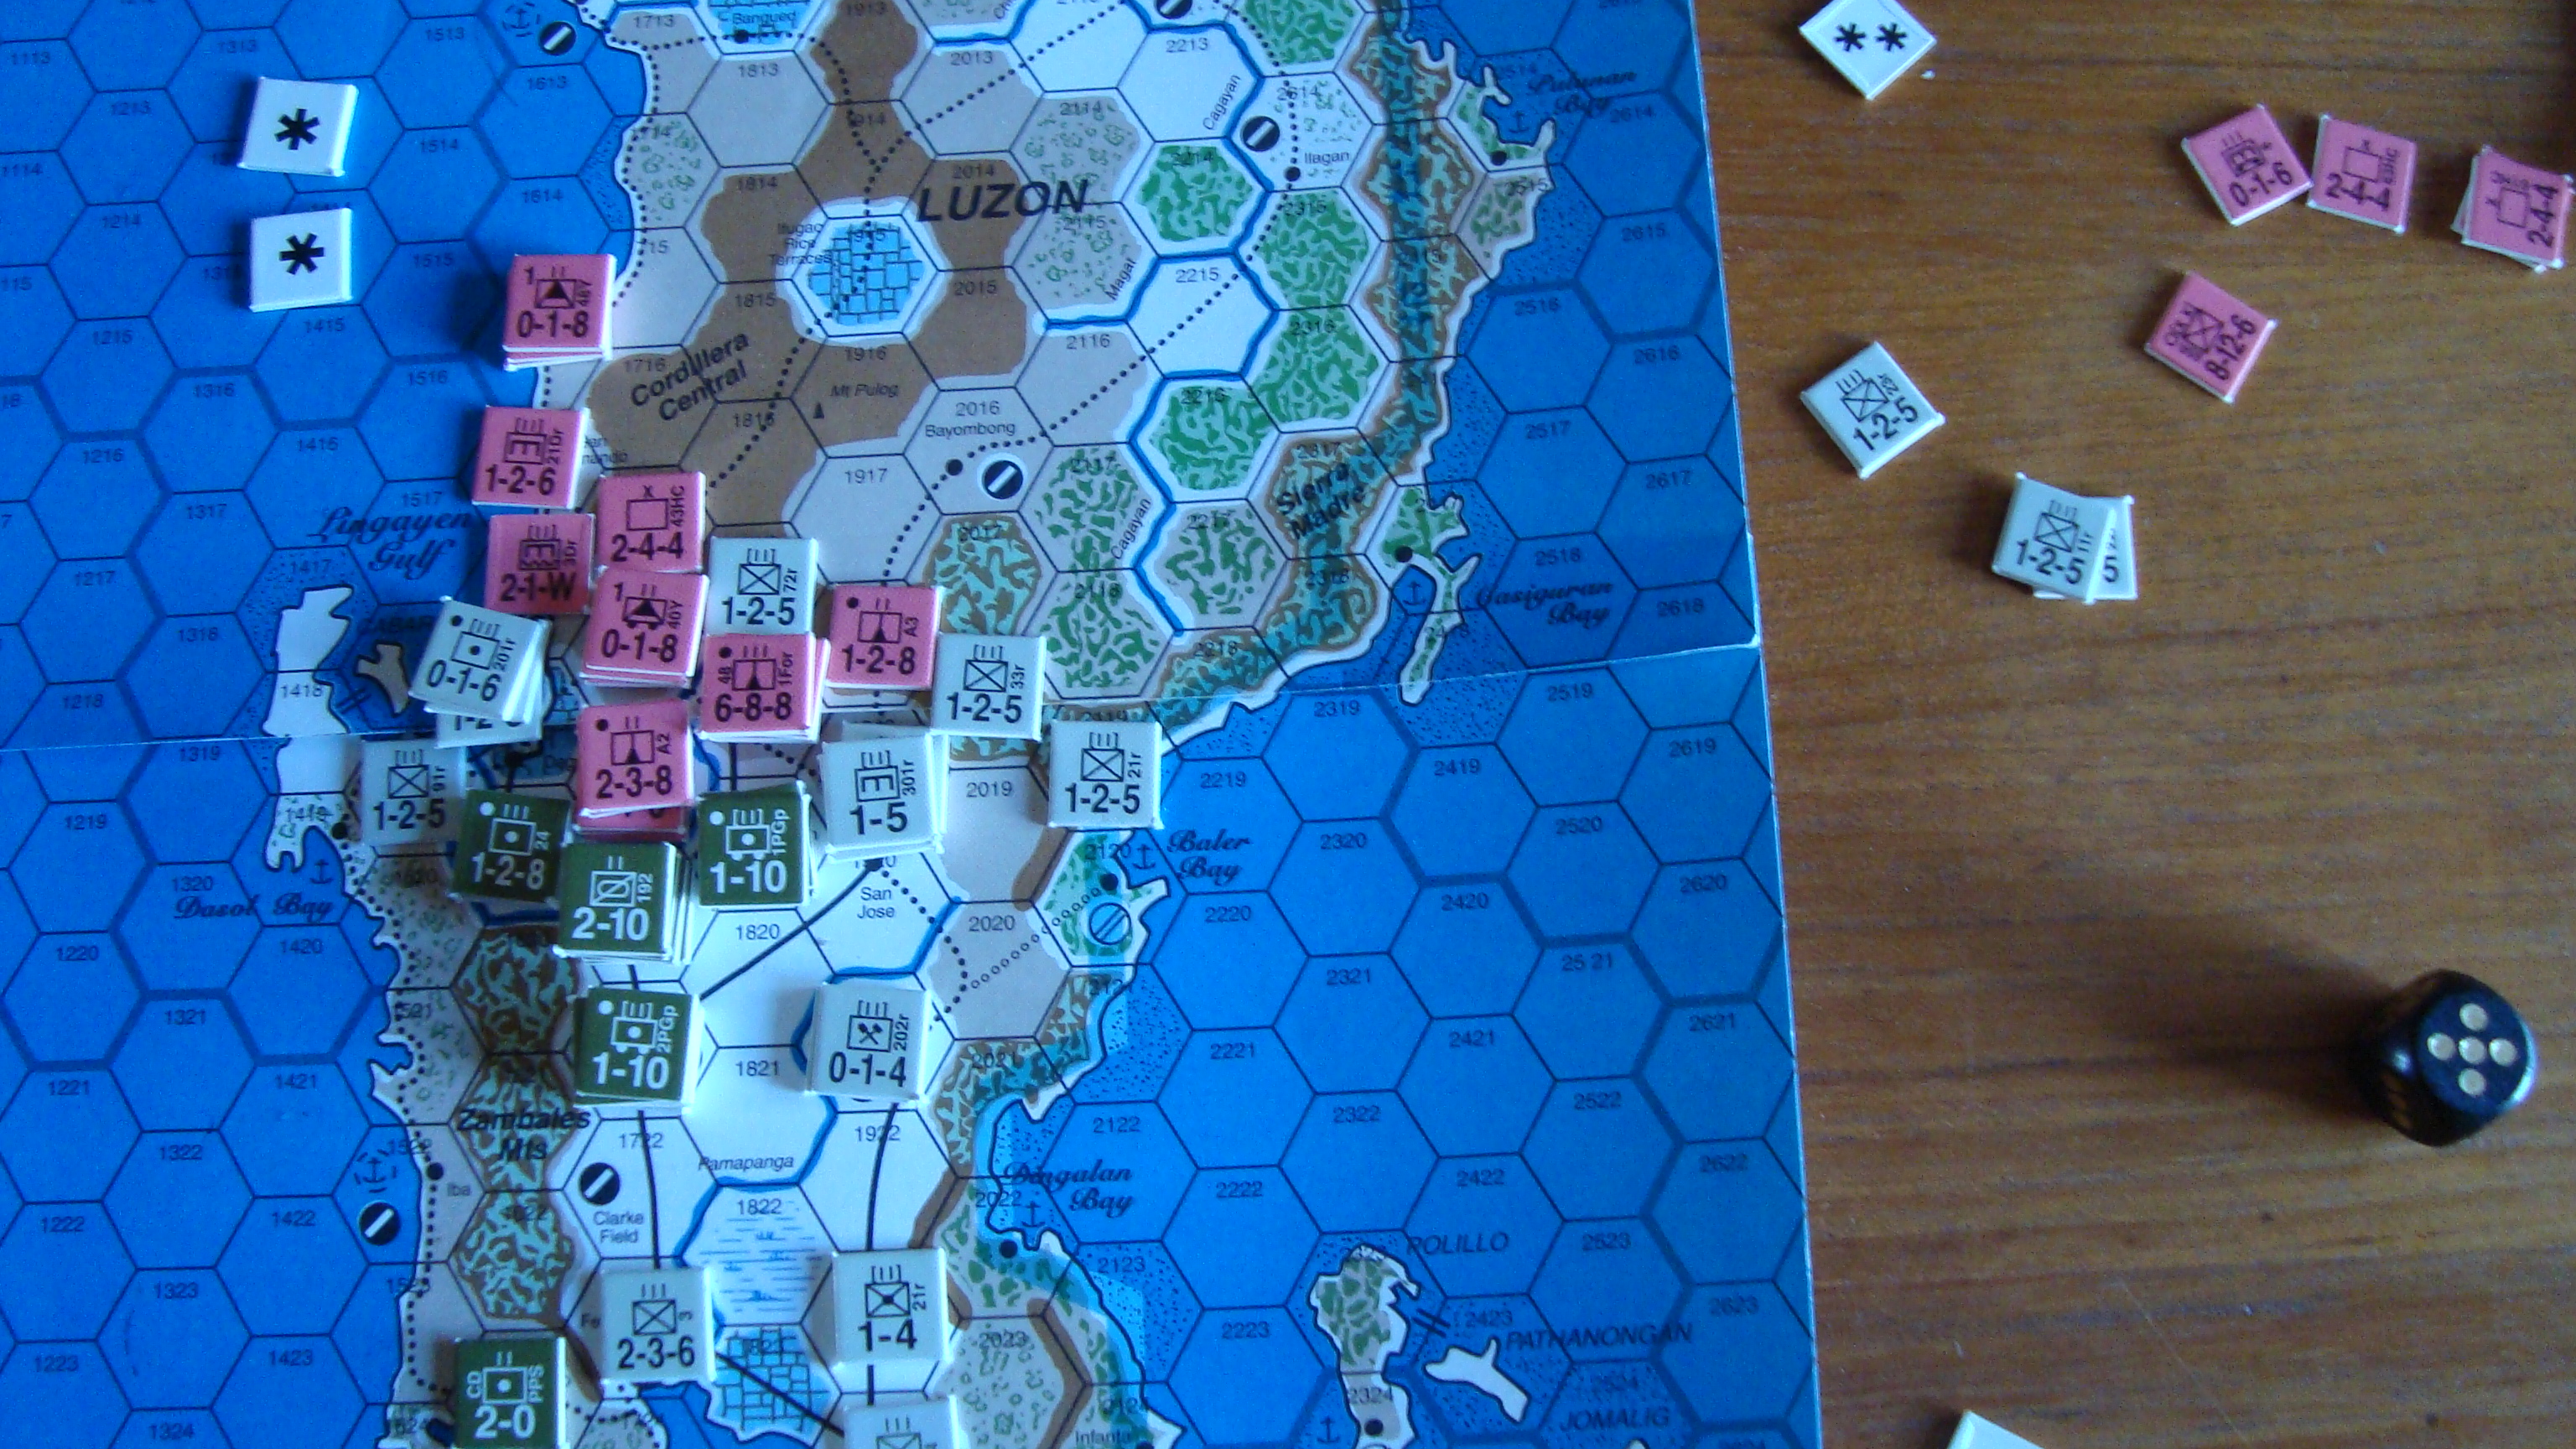
I have both games, so he took the rules for WOR, and I set up the Luzon scenario from The Damned Die Hard (TDDH). Interesting scenario, with the US player having to decide where to defend against a relatively strong but disorganized Japanese invasion force that is already ashore, and then a fighting withdrawal further south through terrain that is no easily defended. To make things tougher, the Japanese have air supremacy.
As the British say, “All battles occur at the junction of two maps”, and this game is not an exception. The break between the two map sheets is right across the best initial line of defense. I’m going to get copies made and scotch tape the damn things together.
The unit sizes are small – battalions, reduced battalions, and regiments. ZOCs are reduced for many units, and the smaller artillery units can only support one Regimental Equivalent (RE). Special rules for jungle, and jungle rough terrain that provide the Japanese with some real advantages, as well as exploitation movement for light infantry and certain infantry units based on their intrinsic movement factors. So, while it looks like Europa, it isn’t Europa. Closest Europa comparison I can come up with is Winter War. The similarities that come to mind are small unit size , ZOC limitations, and special terrain features having a real effect on play.
Here’s the link for the WOR designer notes. These notes are detailed, and give a good feel for the rules.
Company’s coming over so I had to take the game down. Here’s a picture of the Dec IV turn after the Japanese pushed through the initial US MLR.
Seems like a fun game, and I am looking forward to setting it up again late this week.