Monthly Archives: December 2015

Drive on Washington – GBACW

Christmas is over and company’s gone.  First opportunity to get back to Drive on Washington for about a week.

This is a simulation of the Battle of Monocacy, where, depending on who you read, a Confederate attack on Washington DC was stopped by General Lew Wallace of (later) Ben Hur fame.

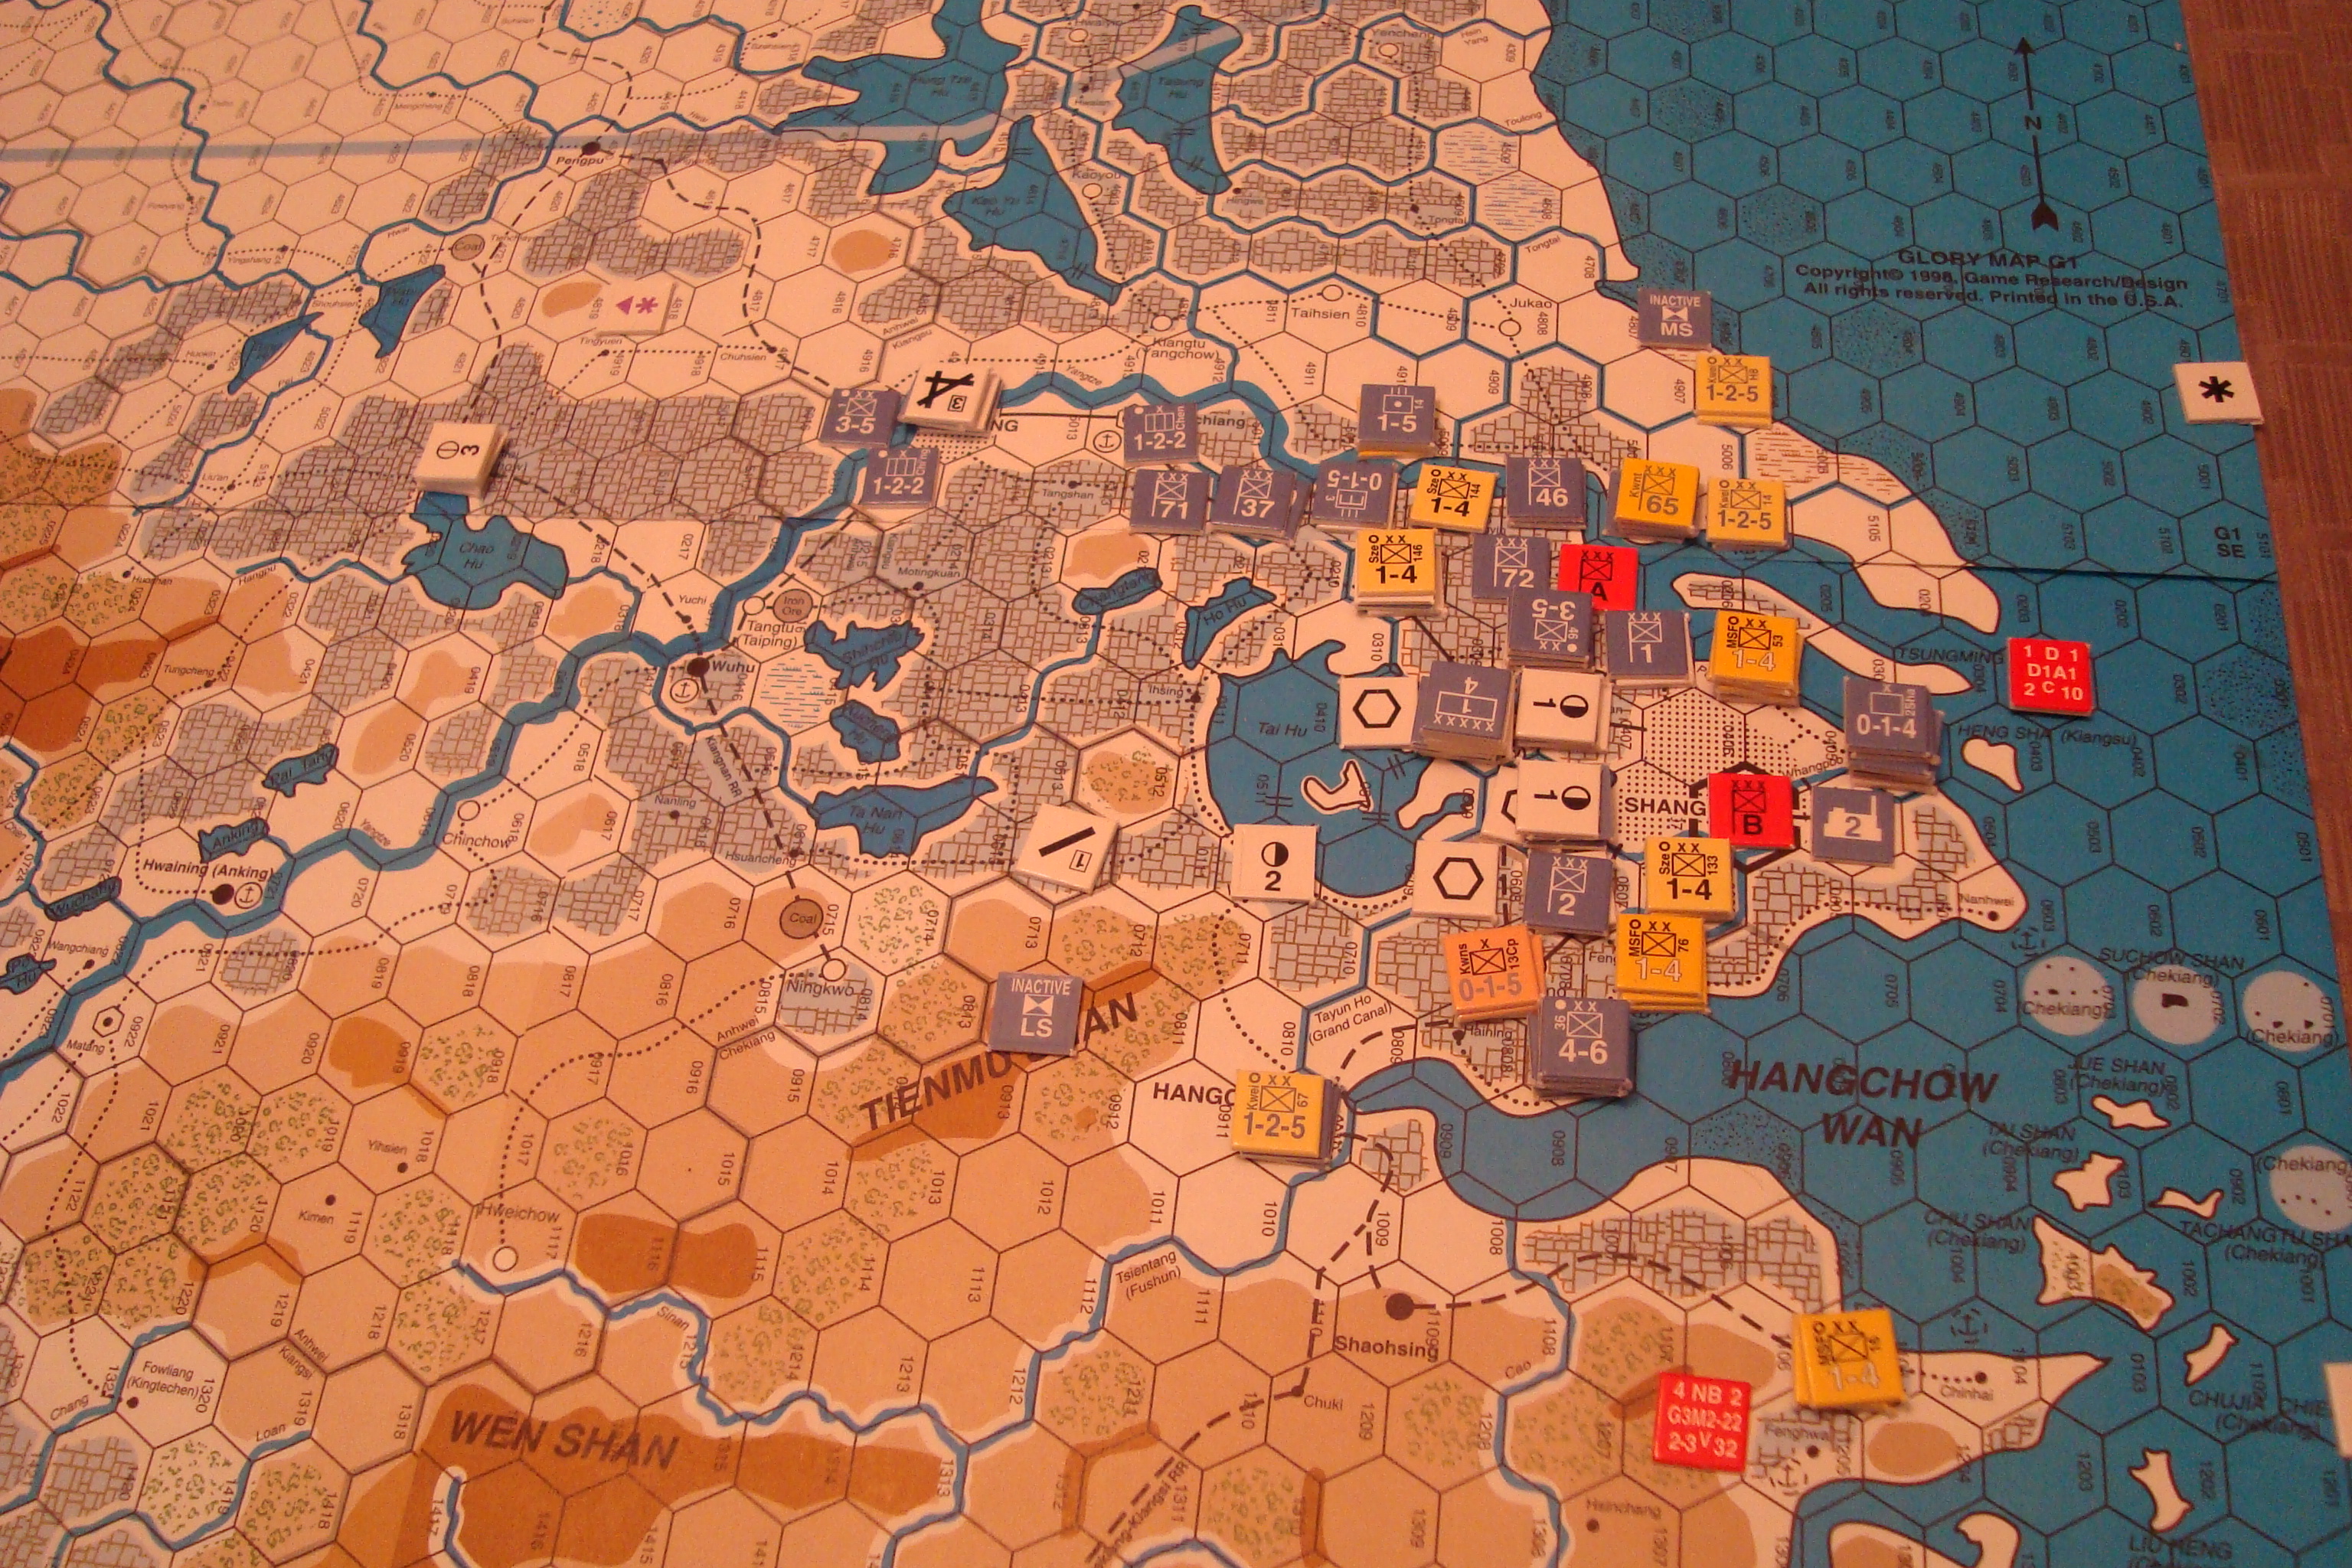
This SPI game is supposedly hard to find judging by the price out on EBay.  I picked up a copy on the cheap a couple of years ago, and like most things, it was a little too good of a price to be true.  The box was badly battered, and the rules looked like they had been last used to house train a dog.  Still, the map was in great shape and all the counters appeared to be present.  Wrong again.  Missing three counters; one Confederate leader and two Union units.  Still, I can play the game.

Union forces are deployed at fords or bridges along the Monocacy River in an attempt to guard approaches to Washington DC.  Four separate Confederate divisions are placed in general areas, poised to attack, but must first by activated by their overall commander, General Jubal Early.  Early’s arrival is rolled for each turn, with a roll equal to or less than the game turn placing him on the map.  Division activation occurs when Early passes within ten hexes of a division commander.  The division may move the turn after it is activated.  The Confederates may also search for a ford on the Union left.  The discovery of the ford is handled  by a random chit pull.  The Union may destroy the “Wooden Bridge” denying the Confederates one crossing point by rolling a one or two, but cannot destroy the Railroad Bridge.  The bridge to the right of the Union line is weakly defended, but some distance from the Washington turnpike.

It took four turns to find the ford, six turns for the entire Confederate force to be activated and moving, and three turns to  burn the Wooden Bridge.

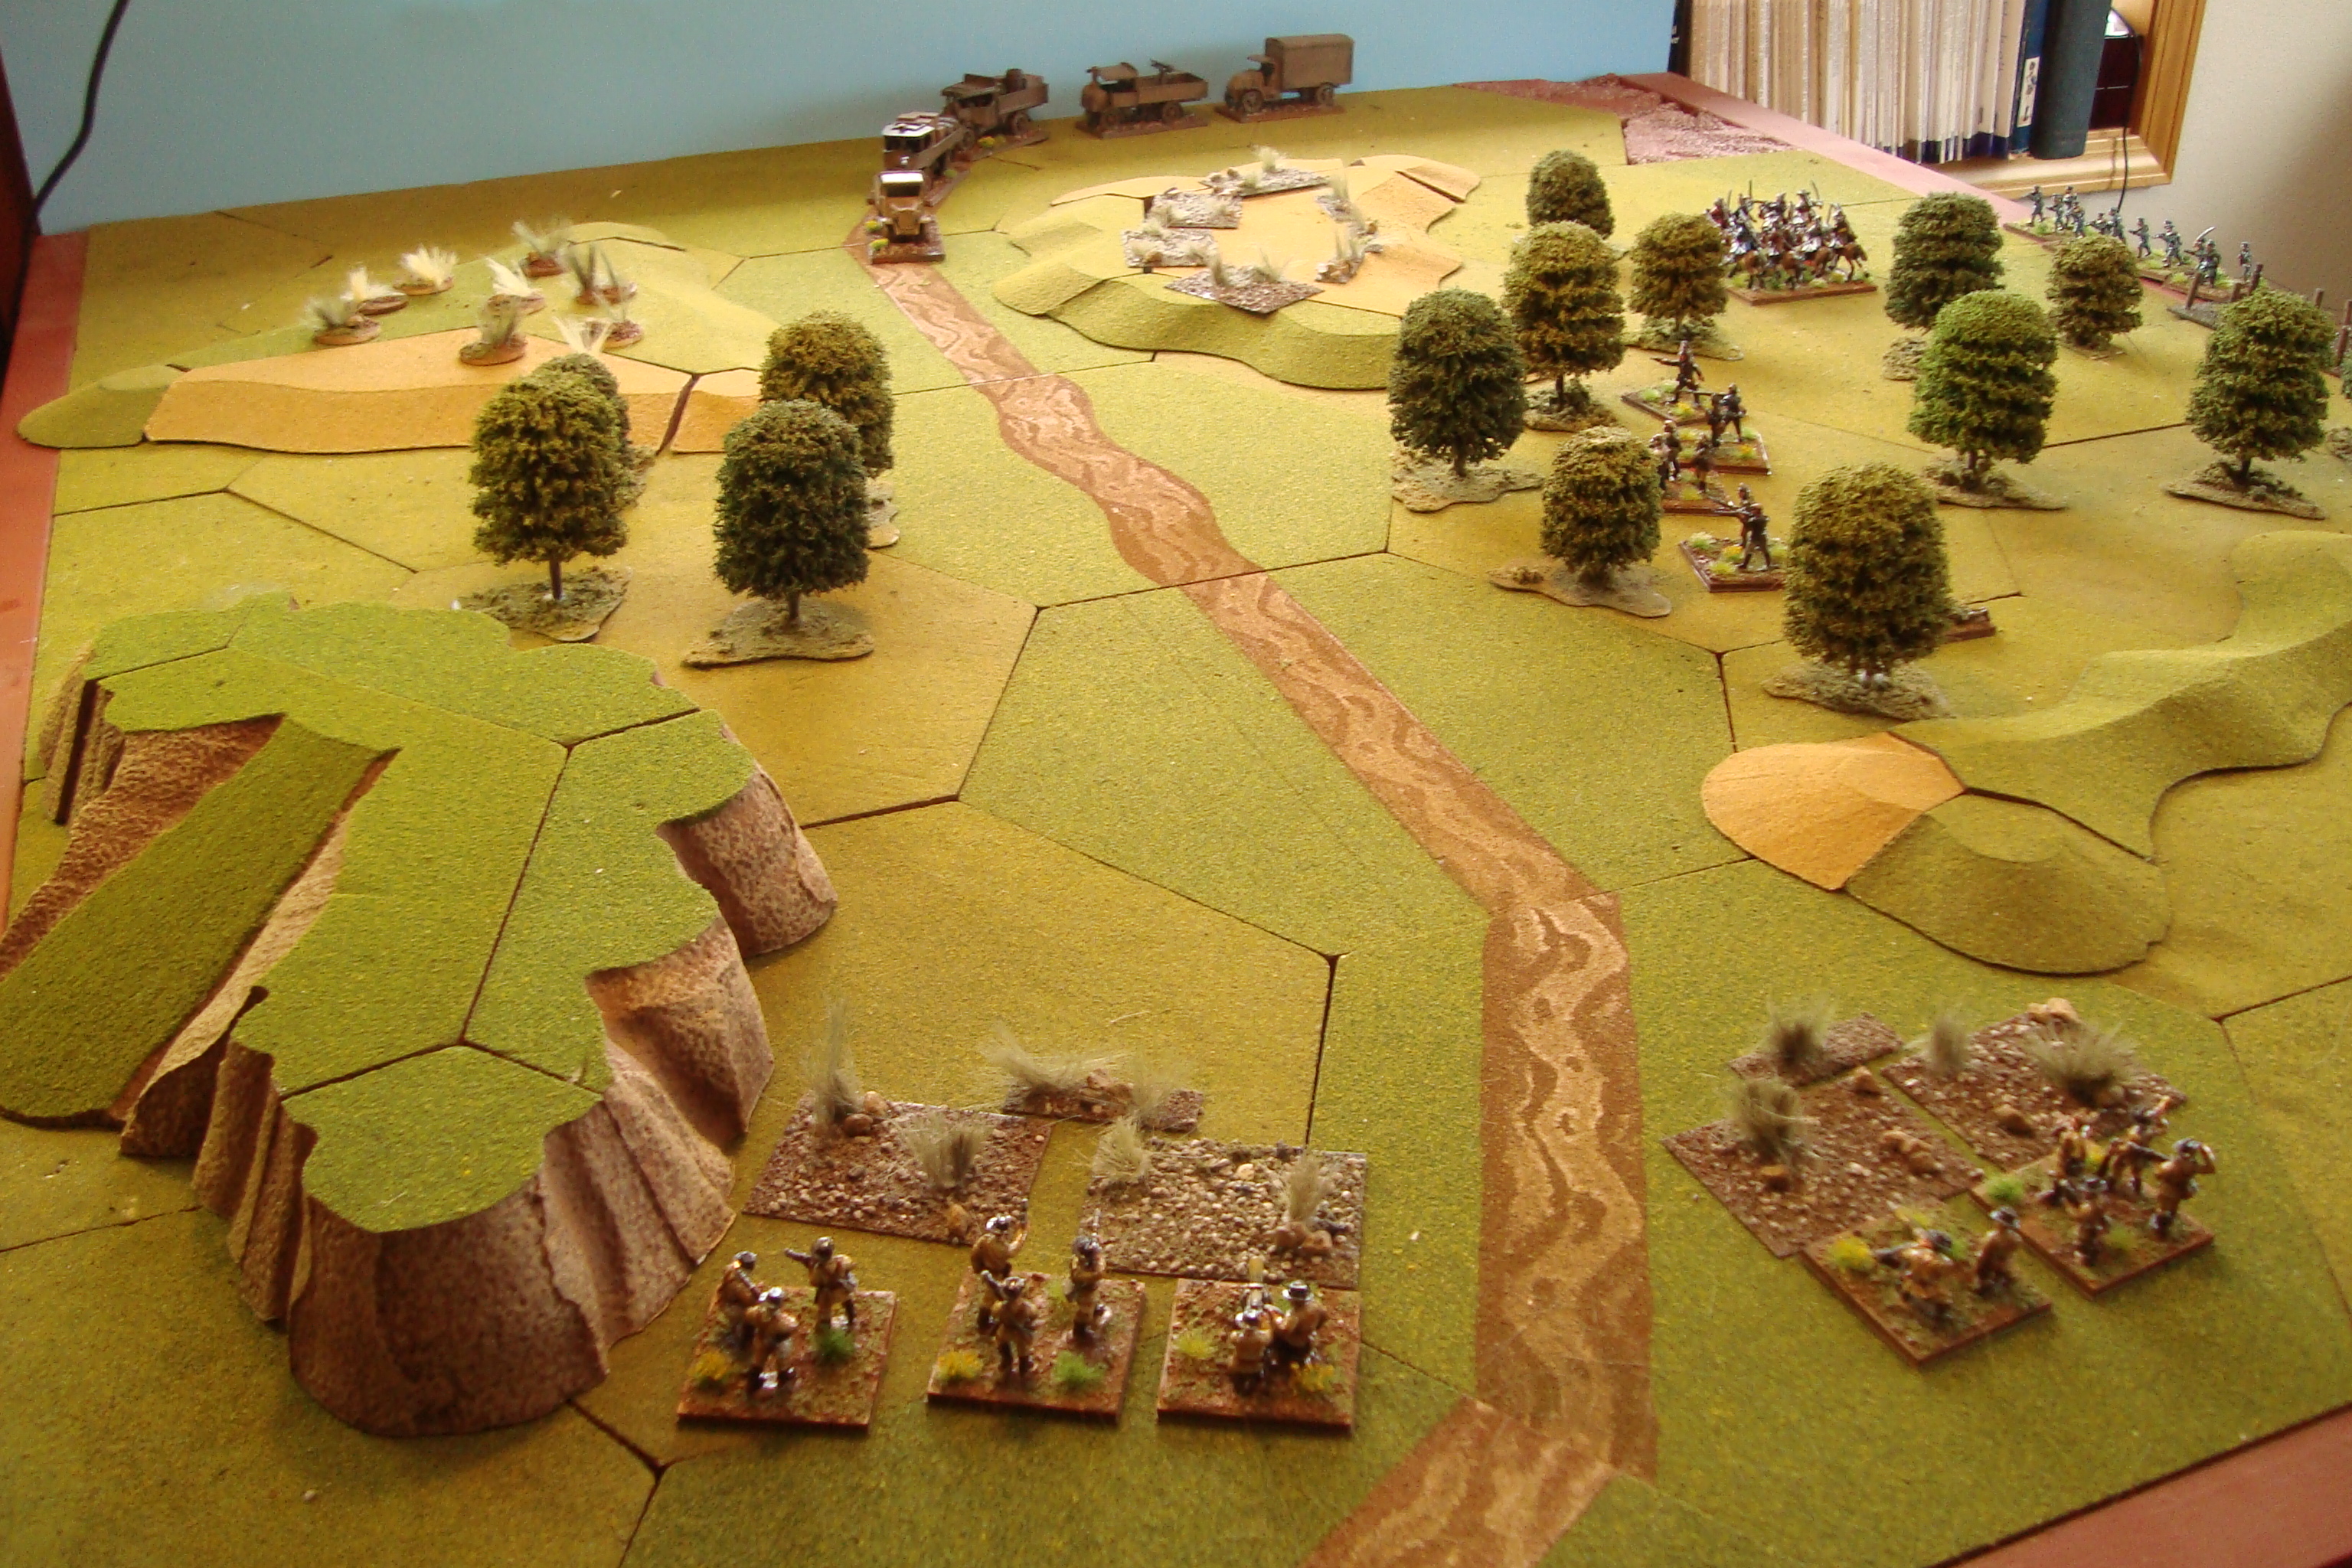
The stage is set for a series of sharp and vicious fights to force the bridges and known ford, or to quickly locate the ford on the Union right, and envelop the forces deployed along the Monocacy River.

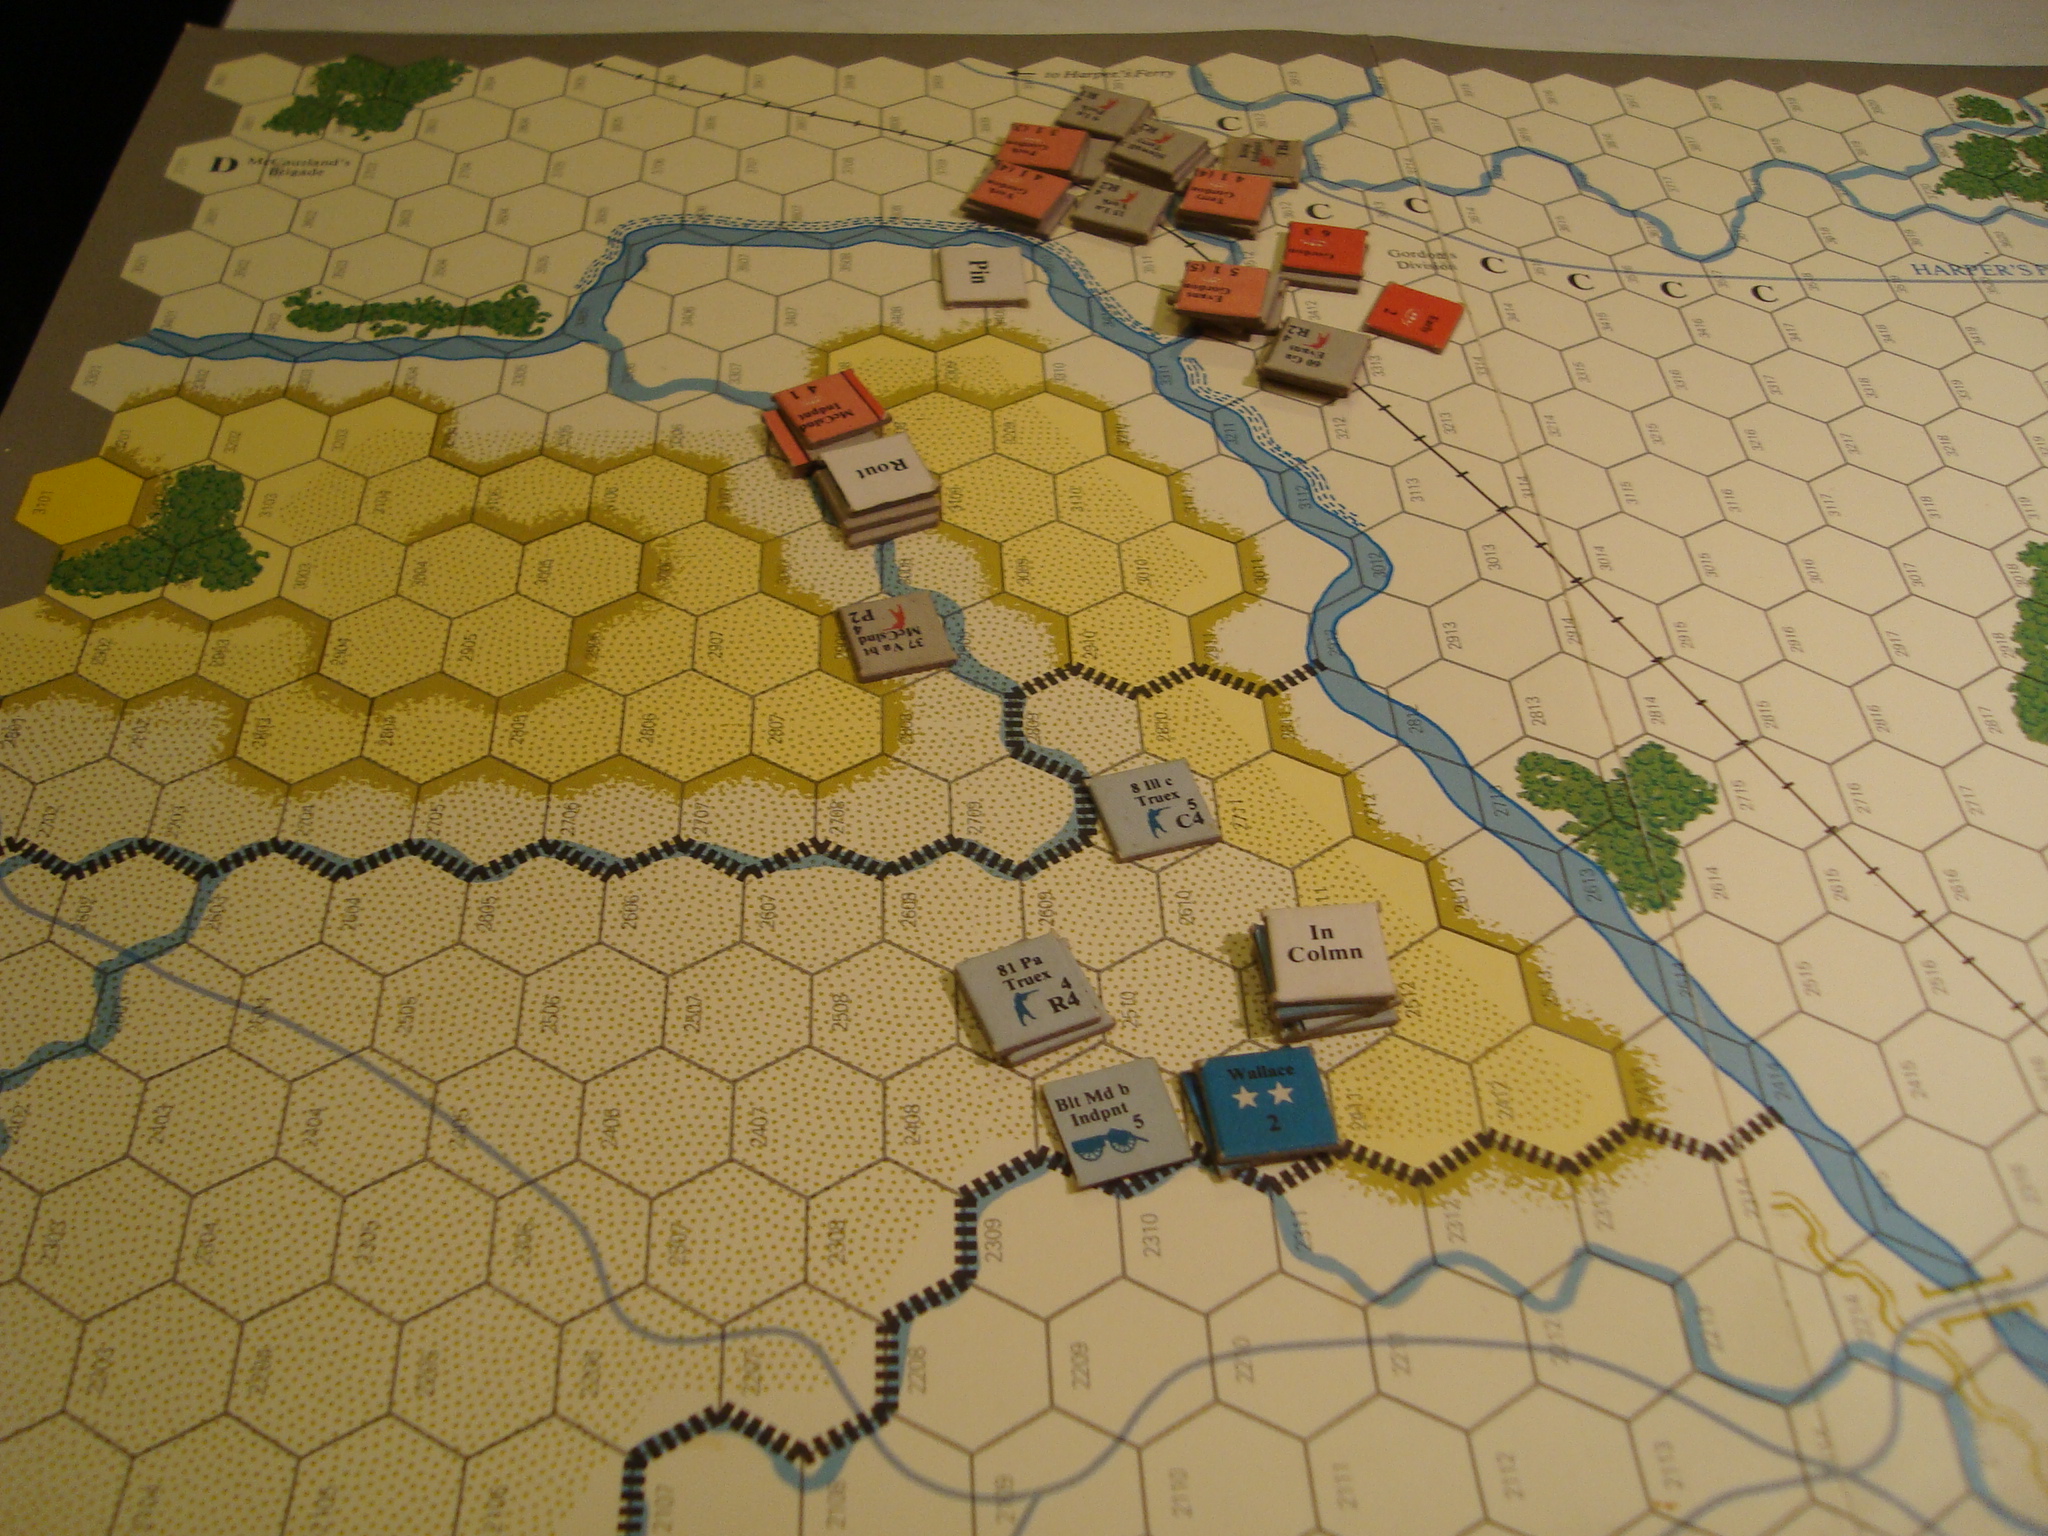
As with my other games playing the Great Battles of the American Civil War (GBACW) system, fire combat is not always  bloody, but in most cases will stop an attack through either a rout or pin result.  By 1864, Union cavalry units had carbines.  Their 5x adjacent hex firepower stopped Rebel cavalry from seizing key terrain on the Union left, allowing Truex more time to react to Gordon’s division moving across the now discovered ford.

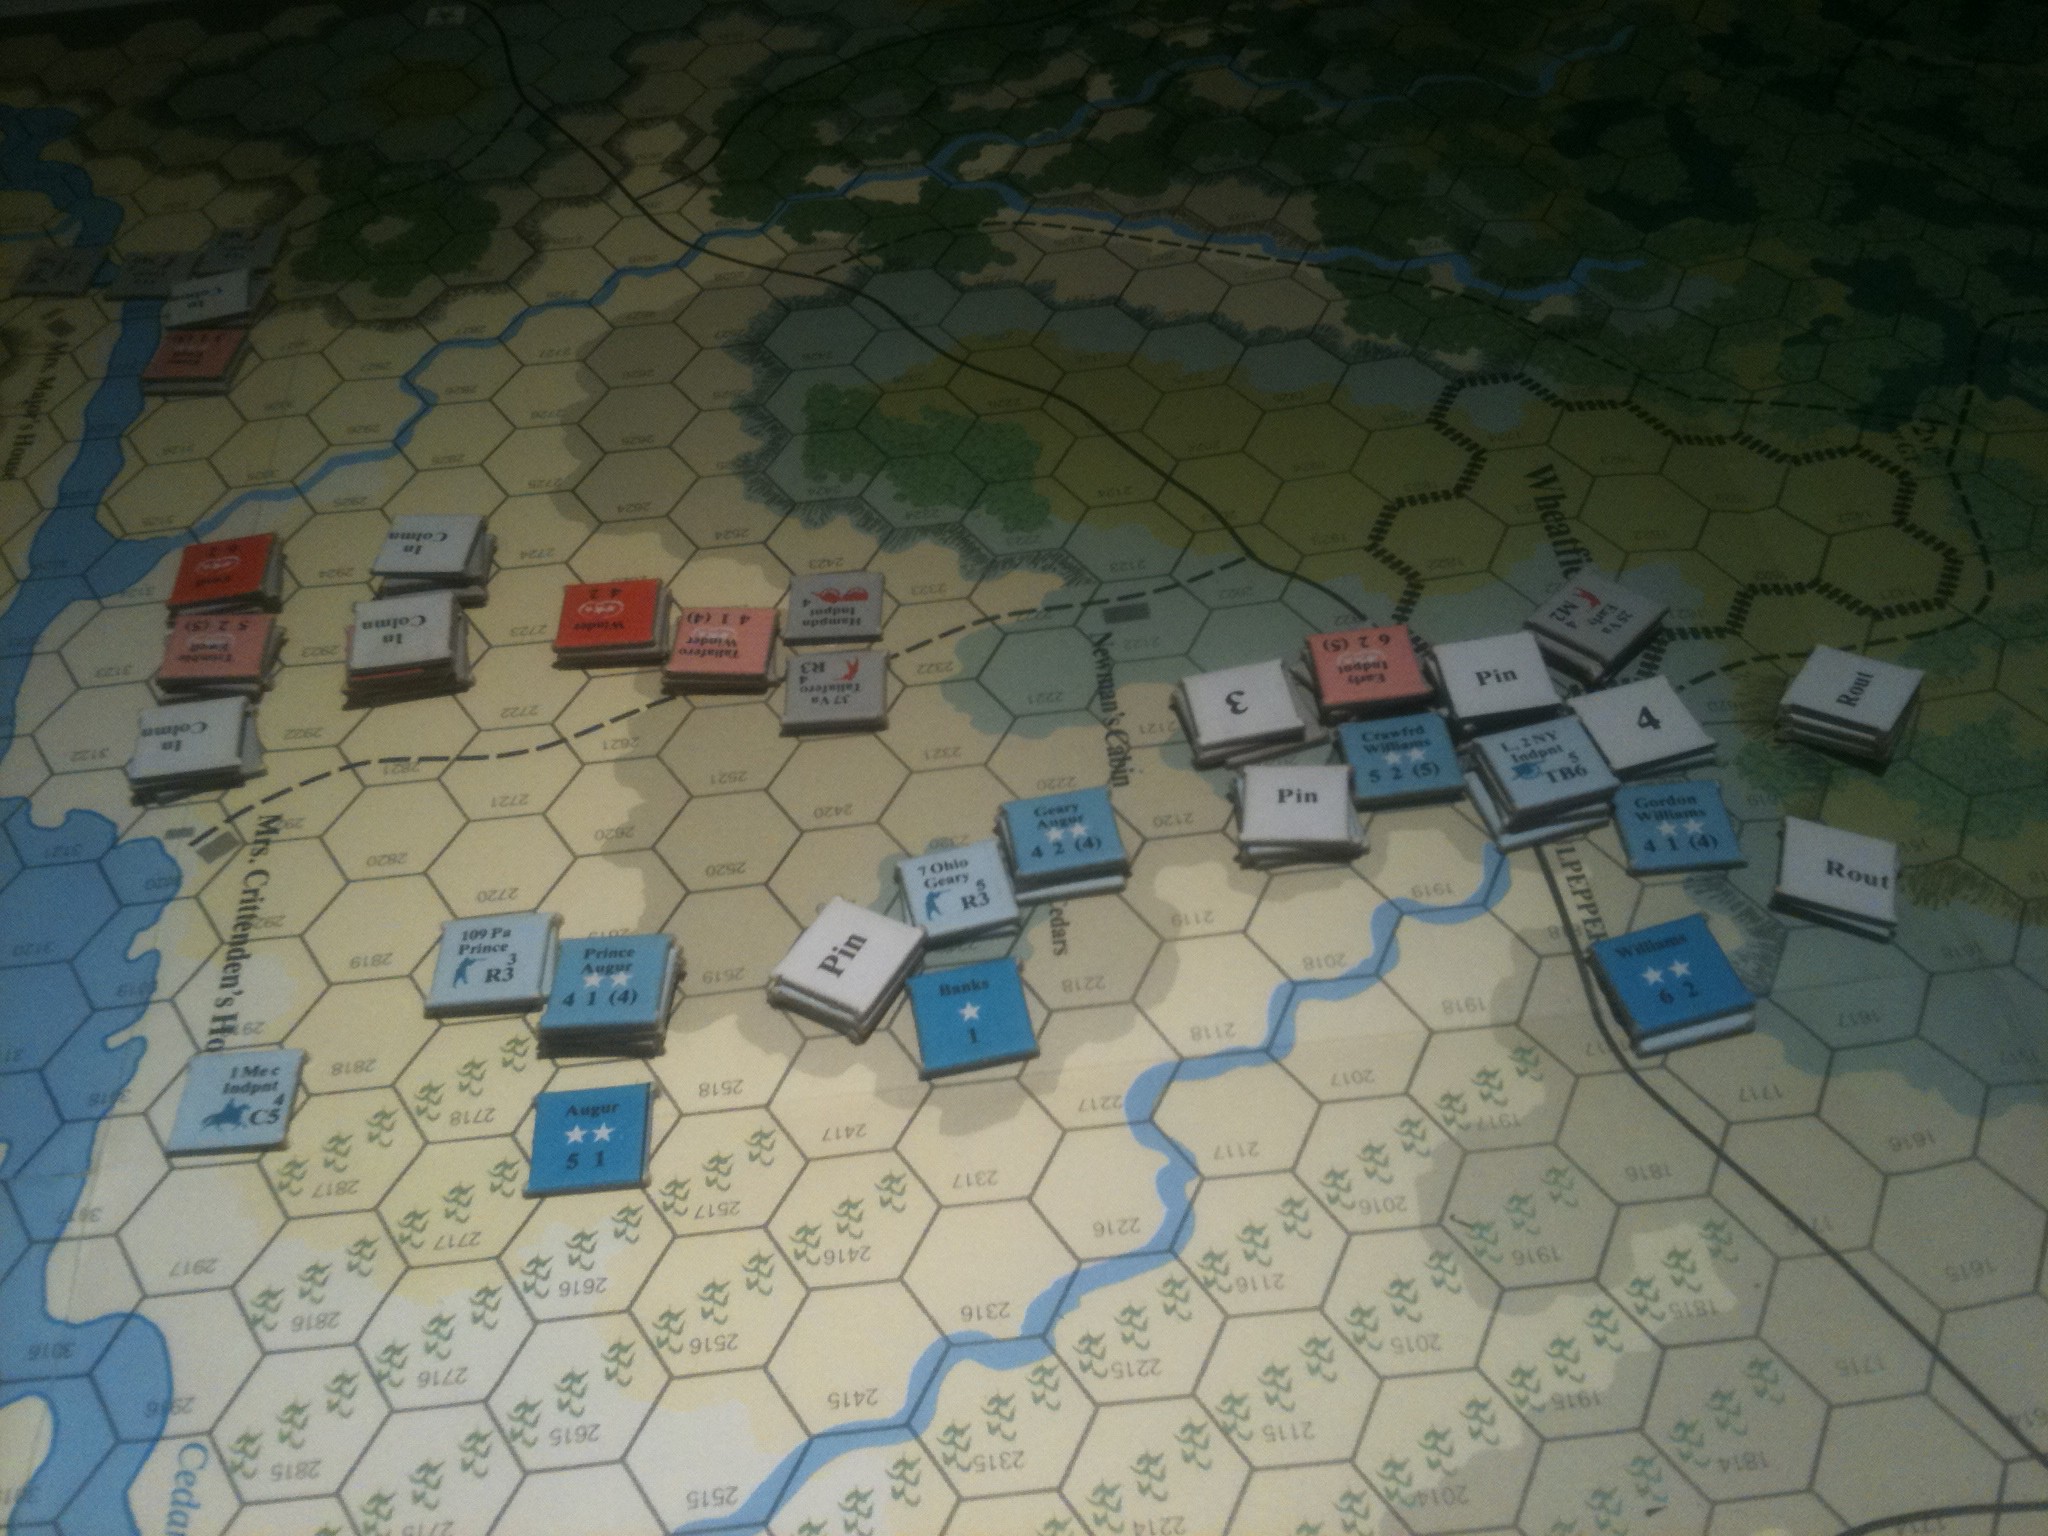
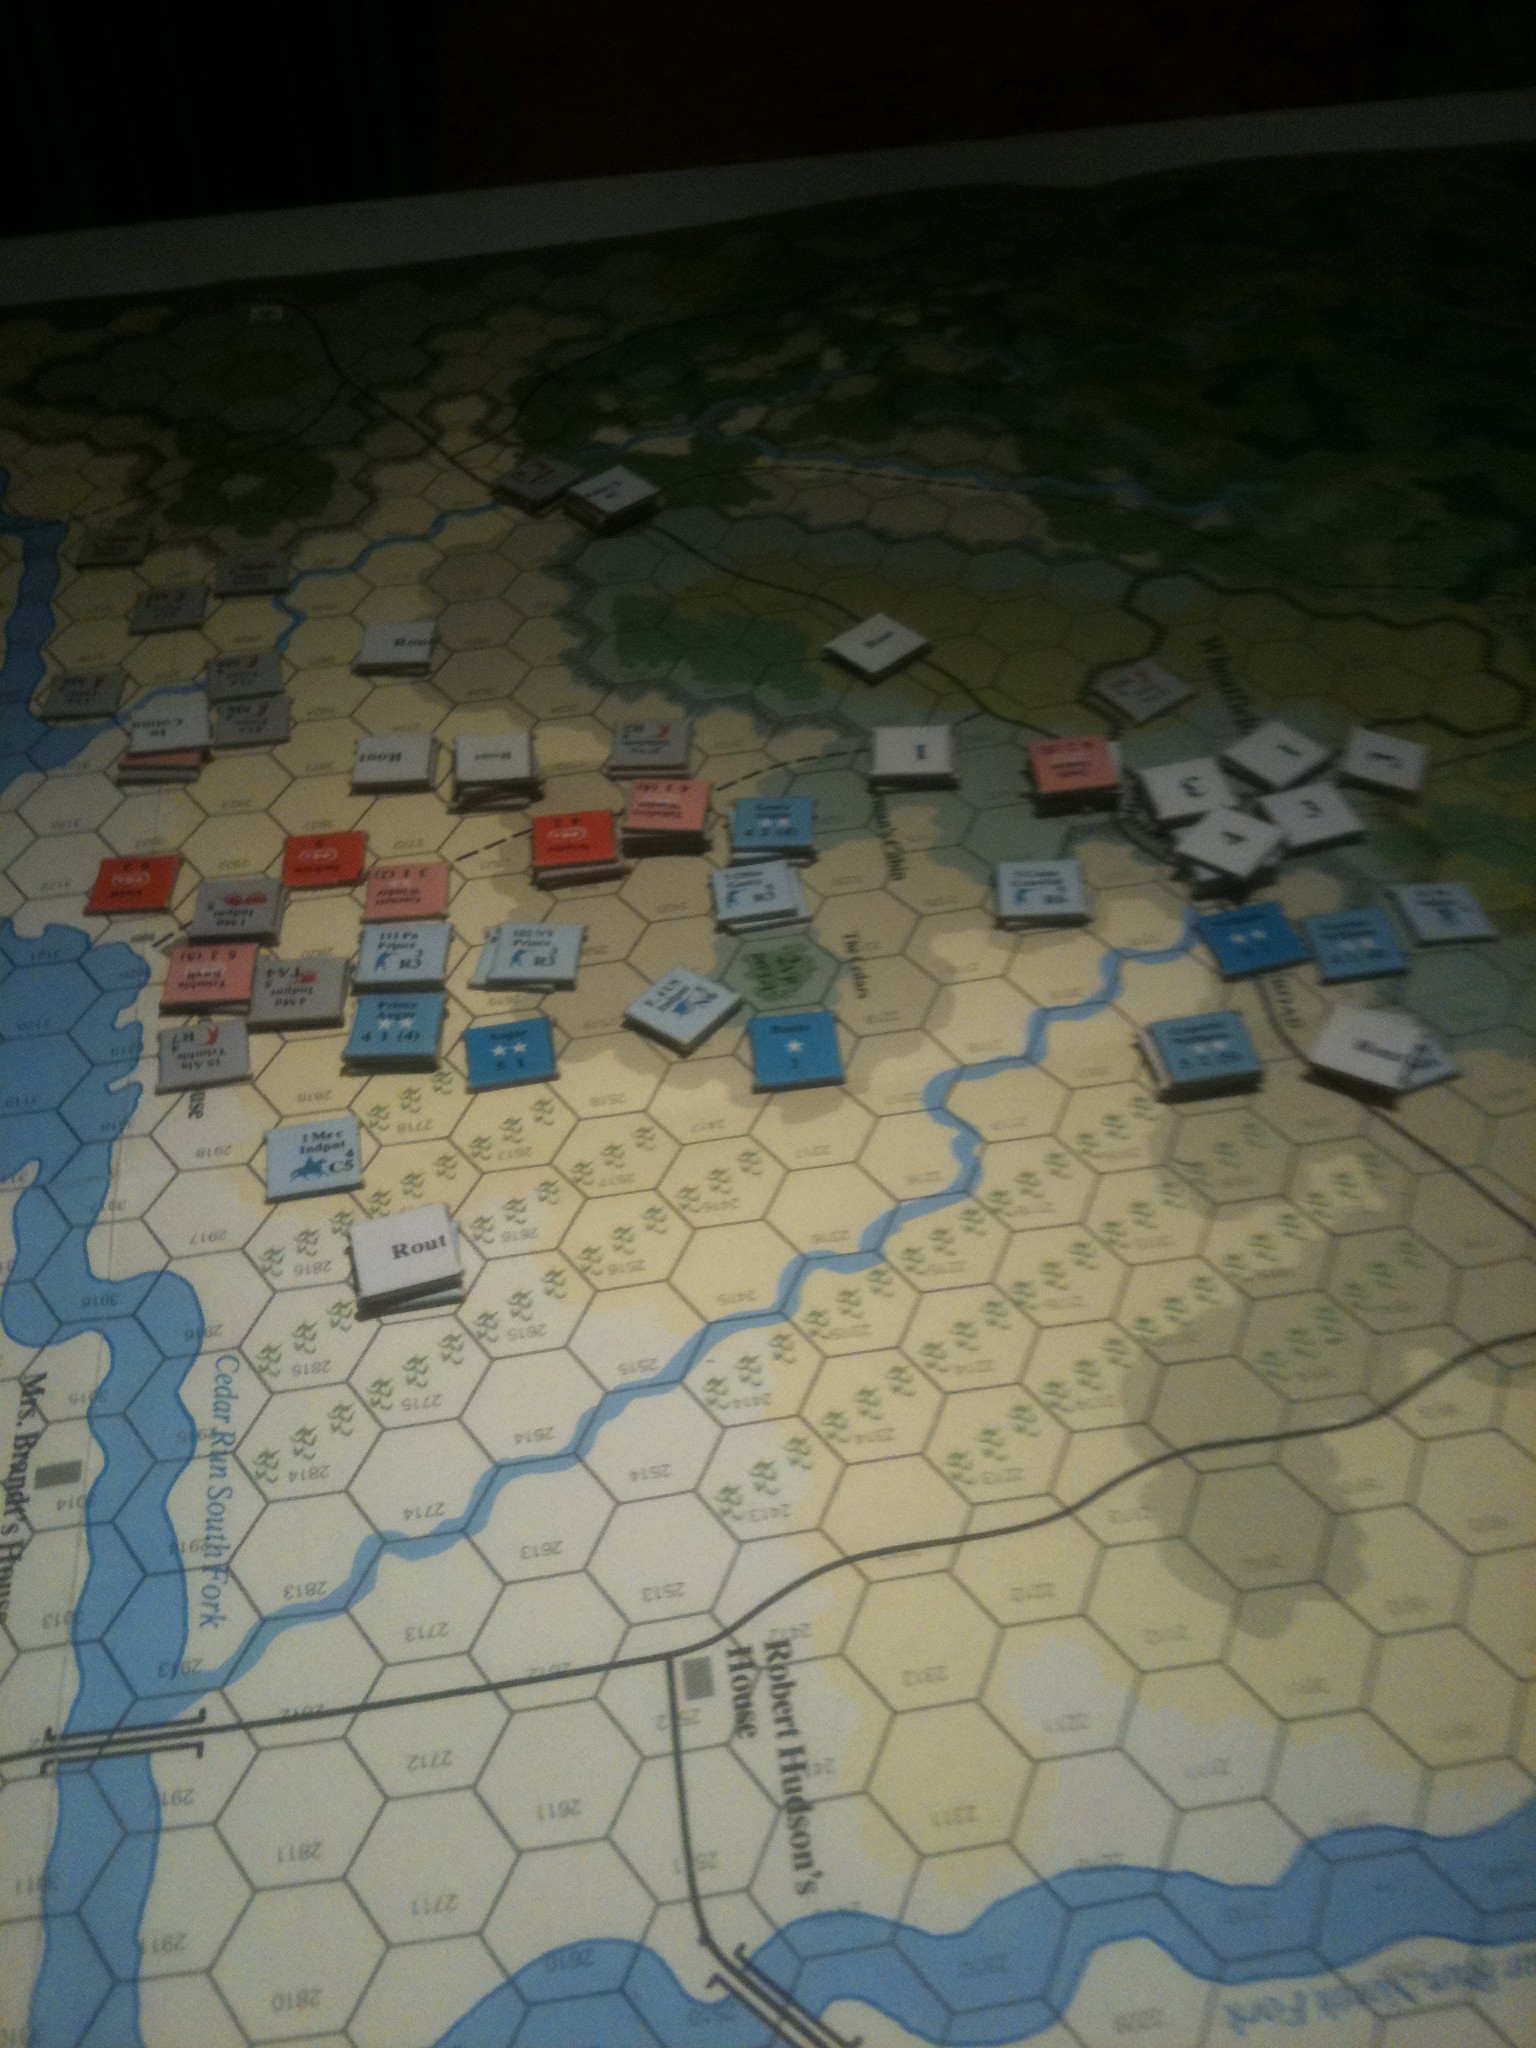
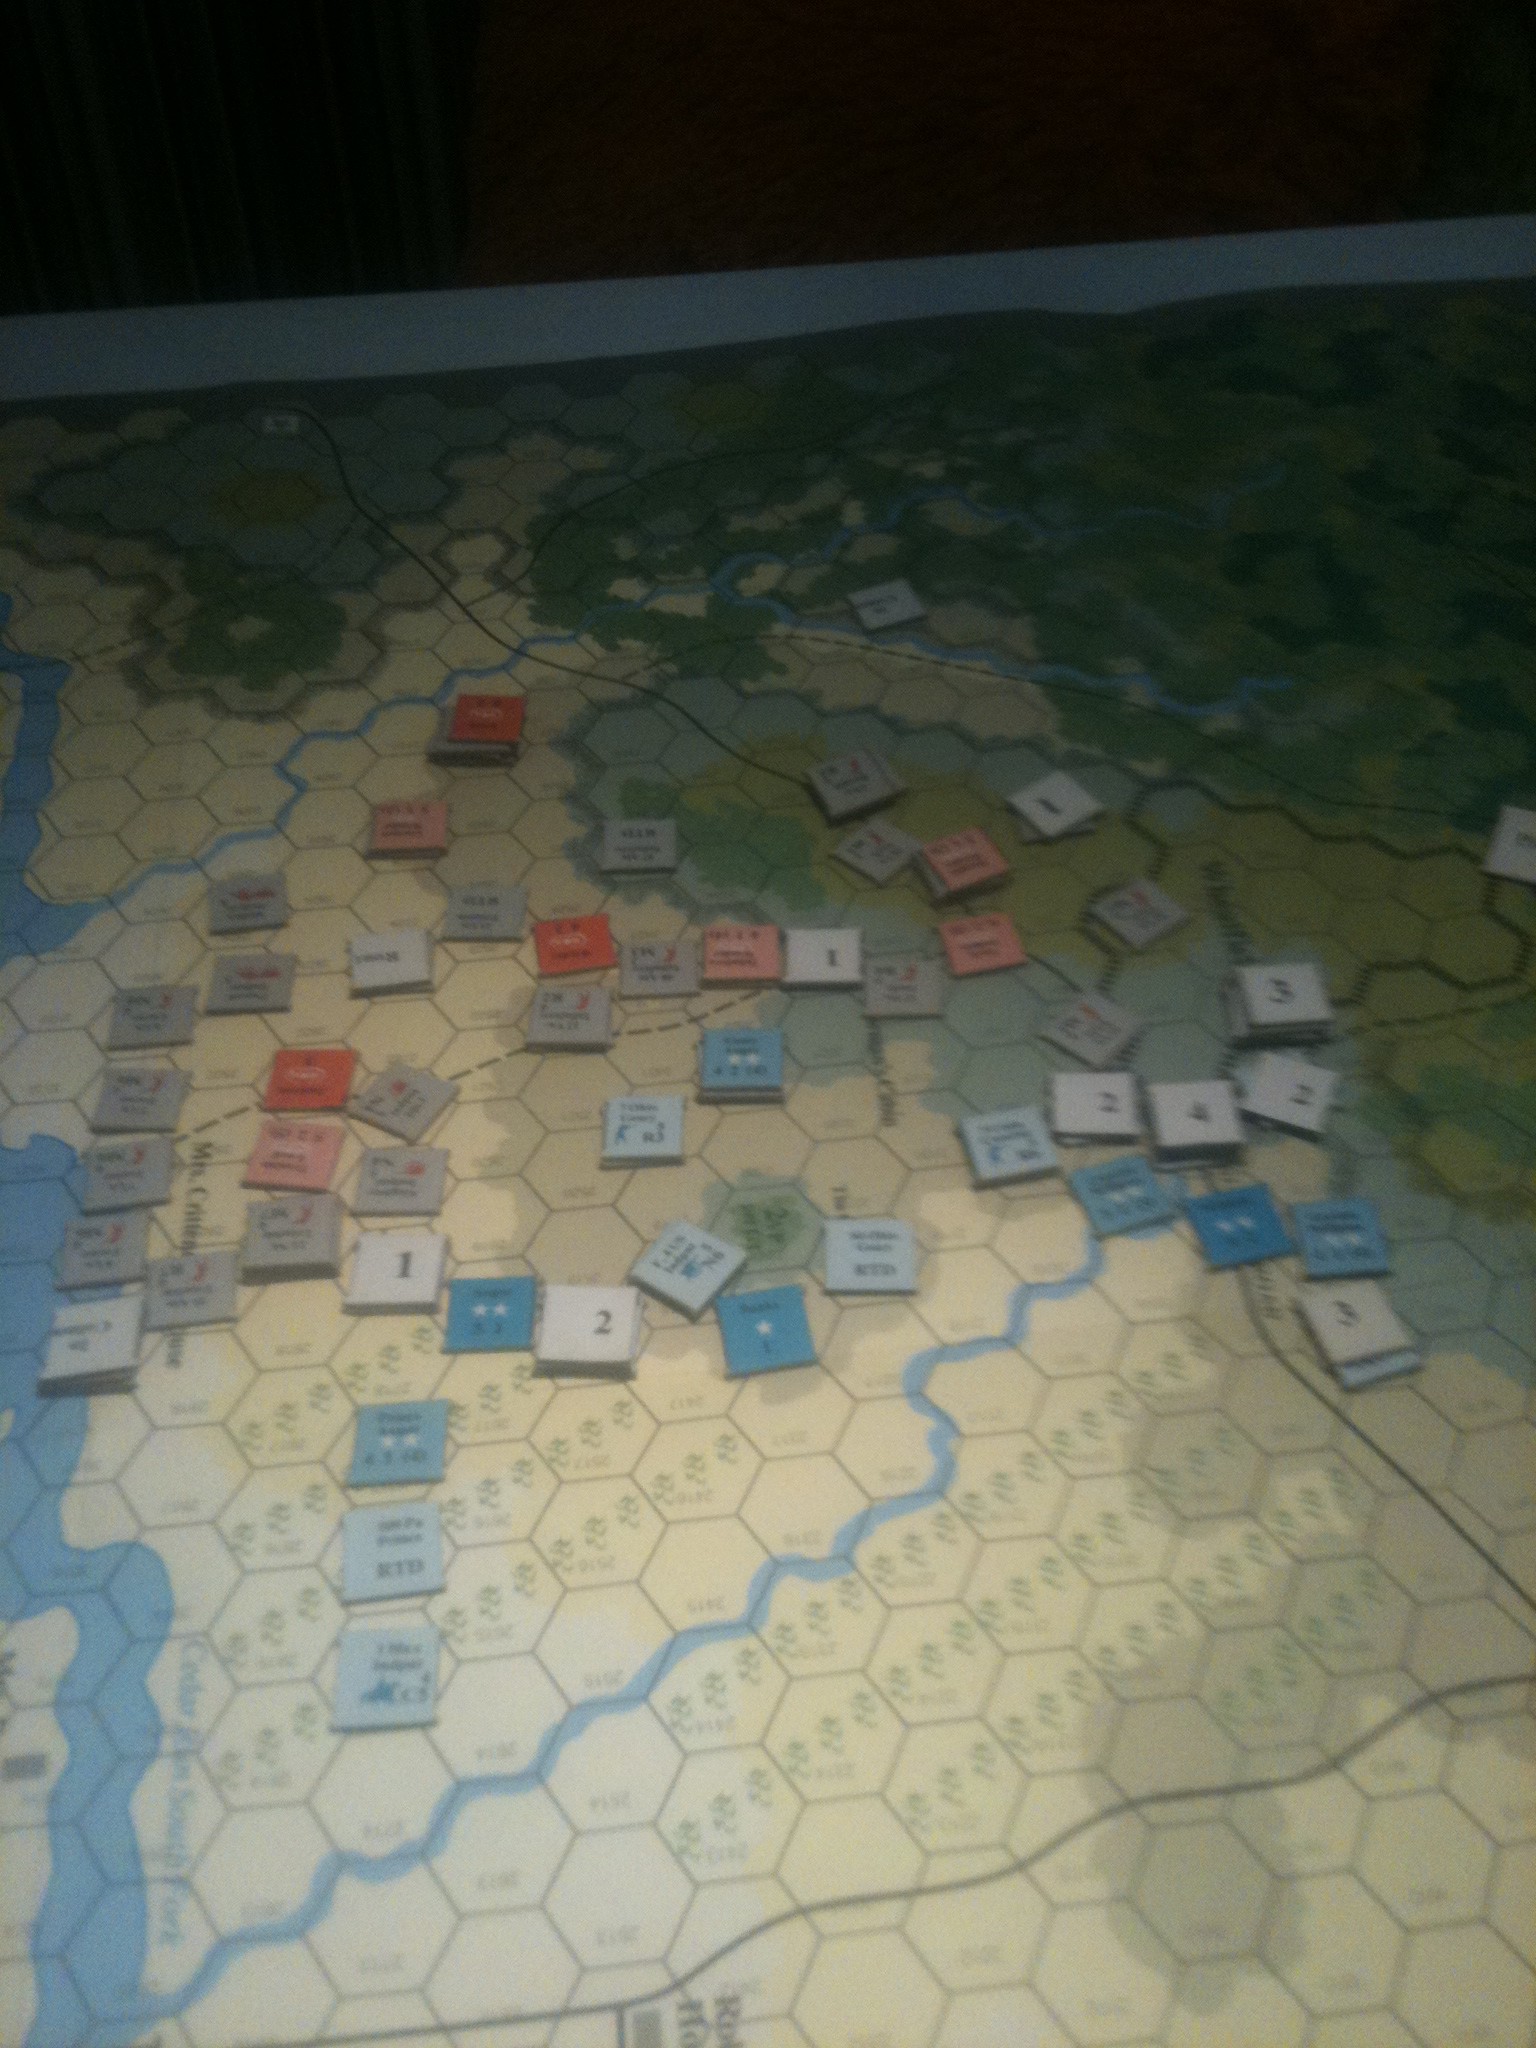
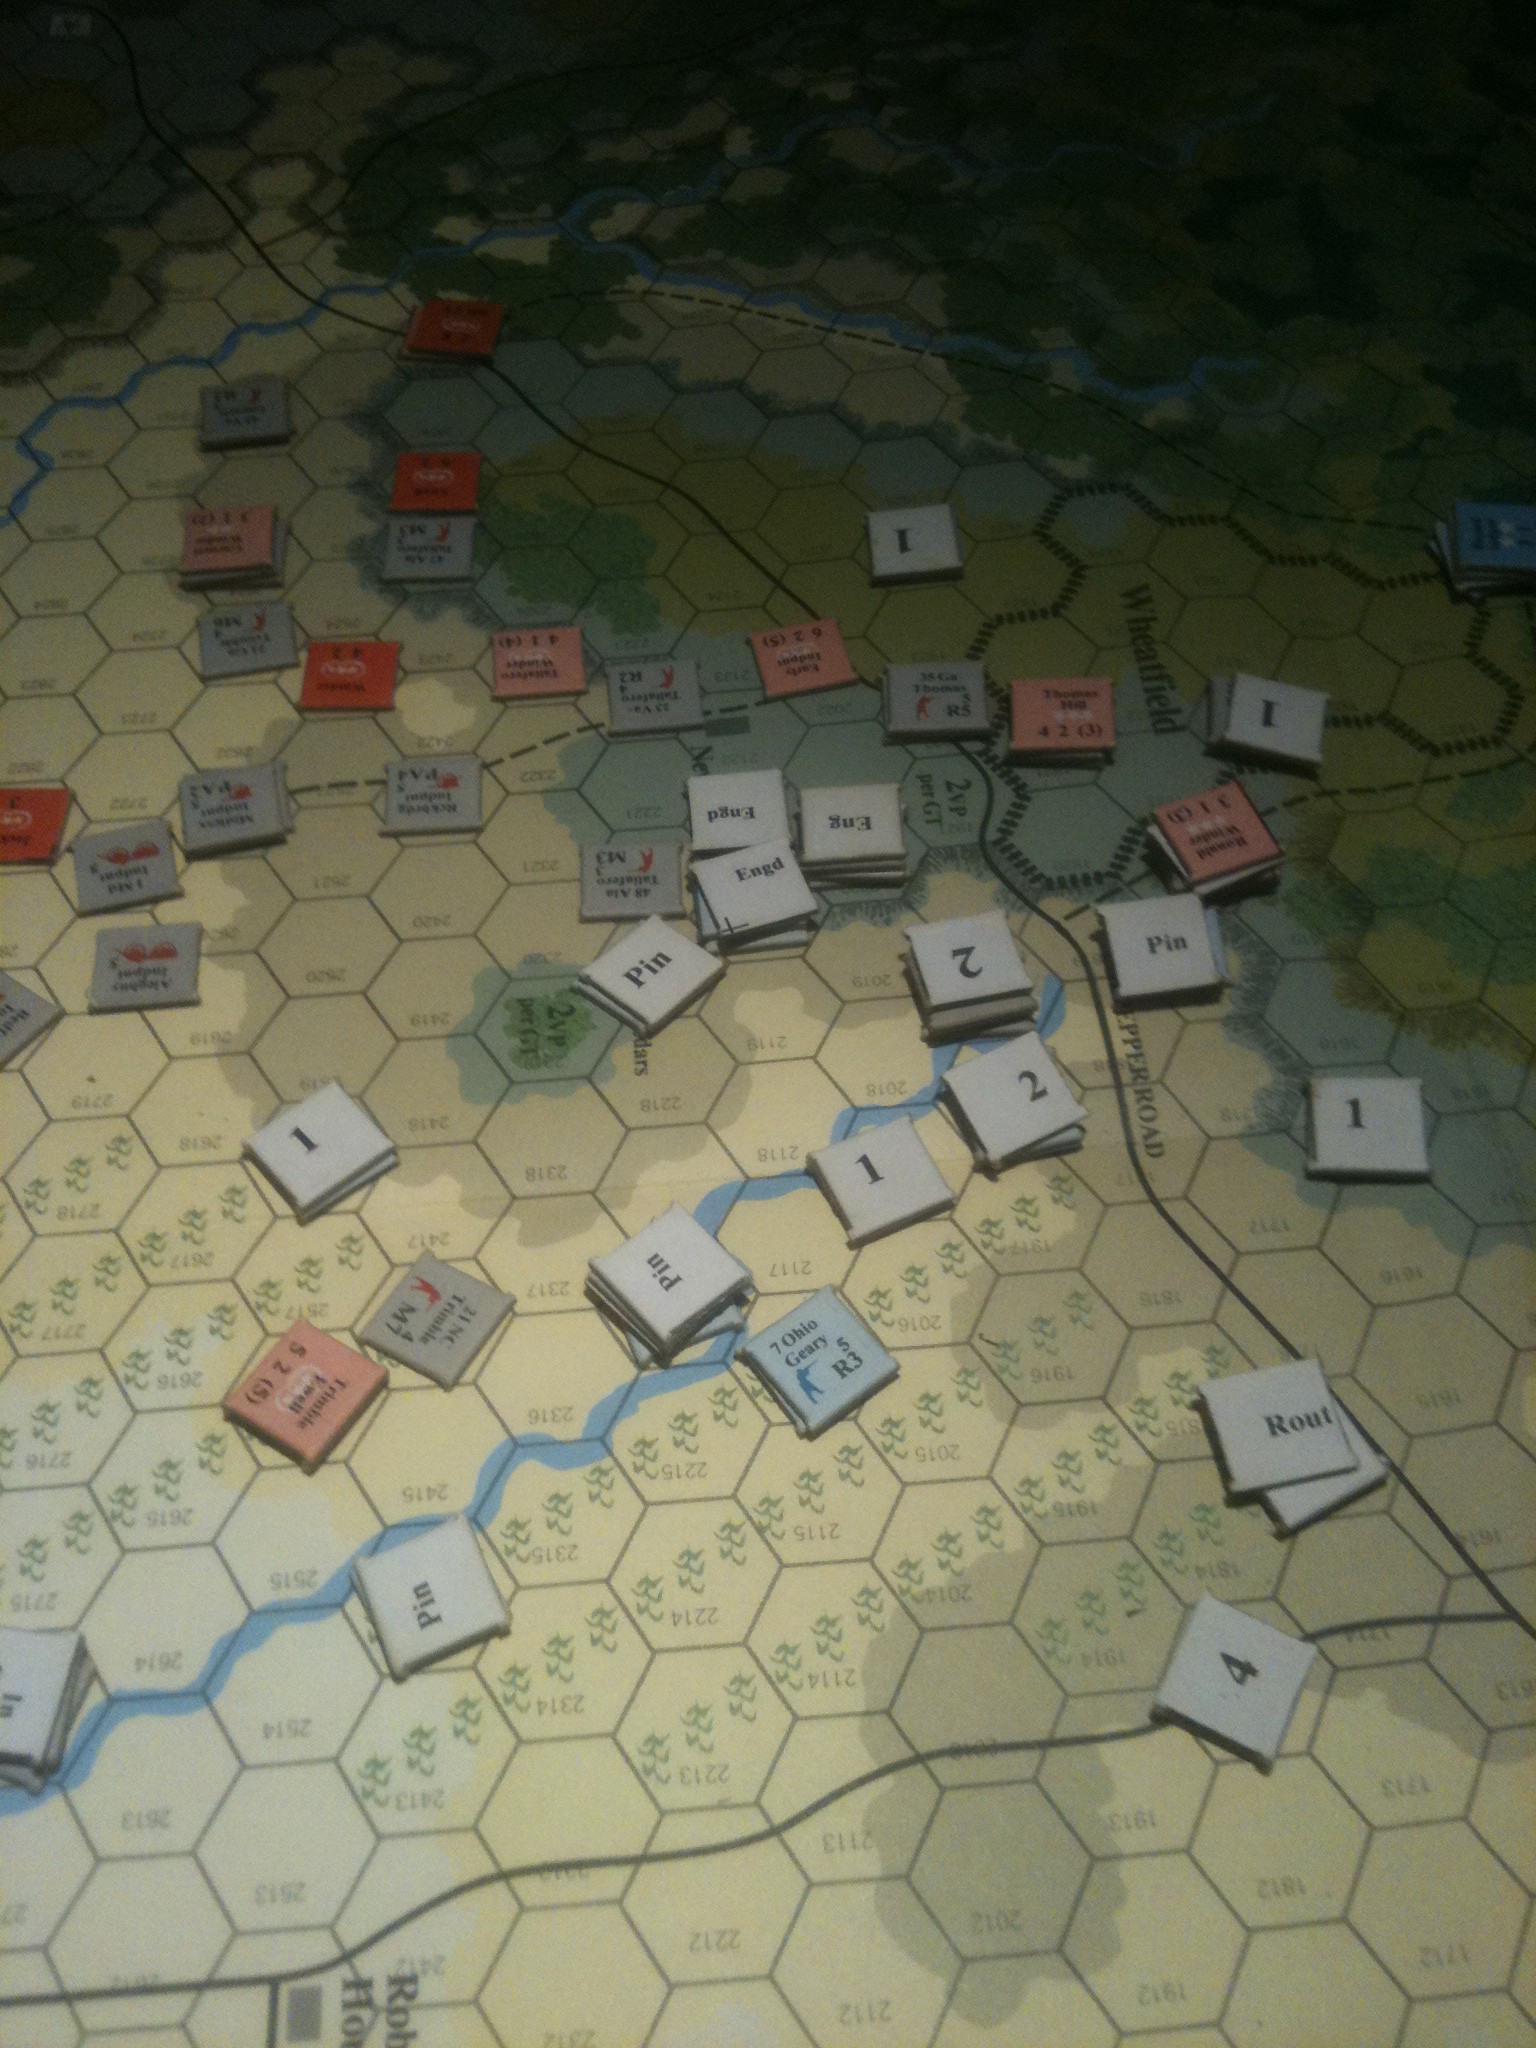
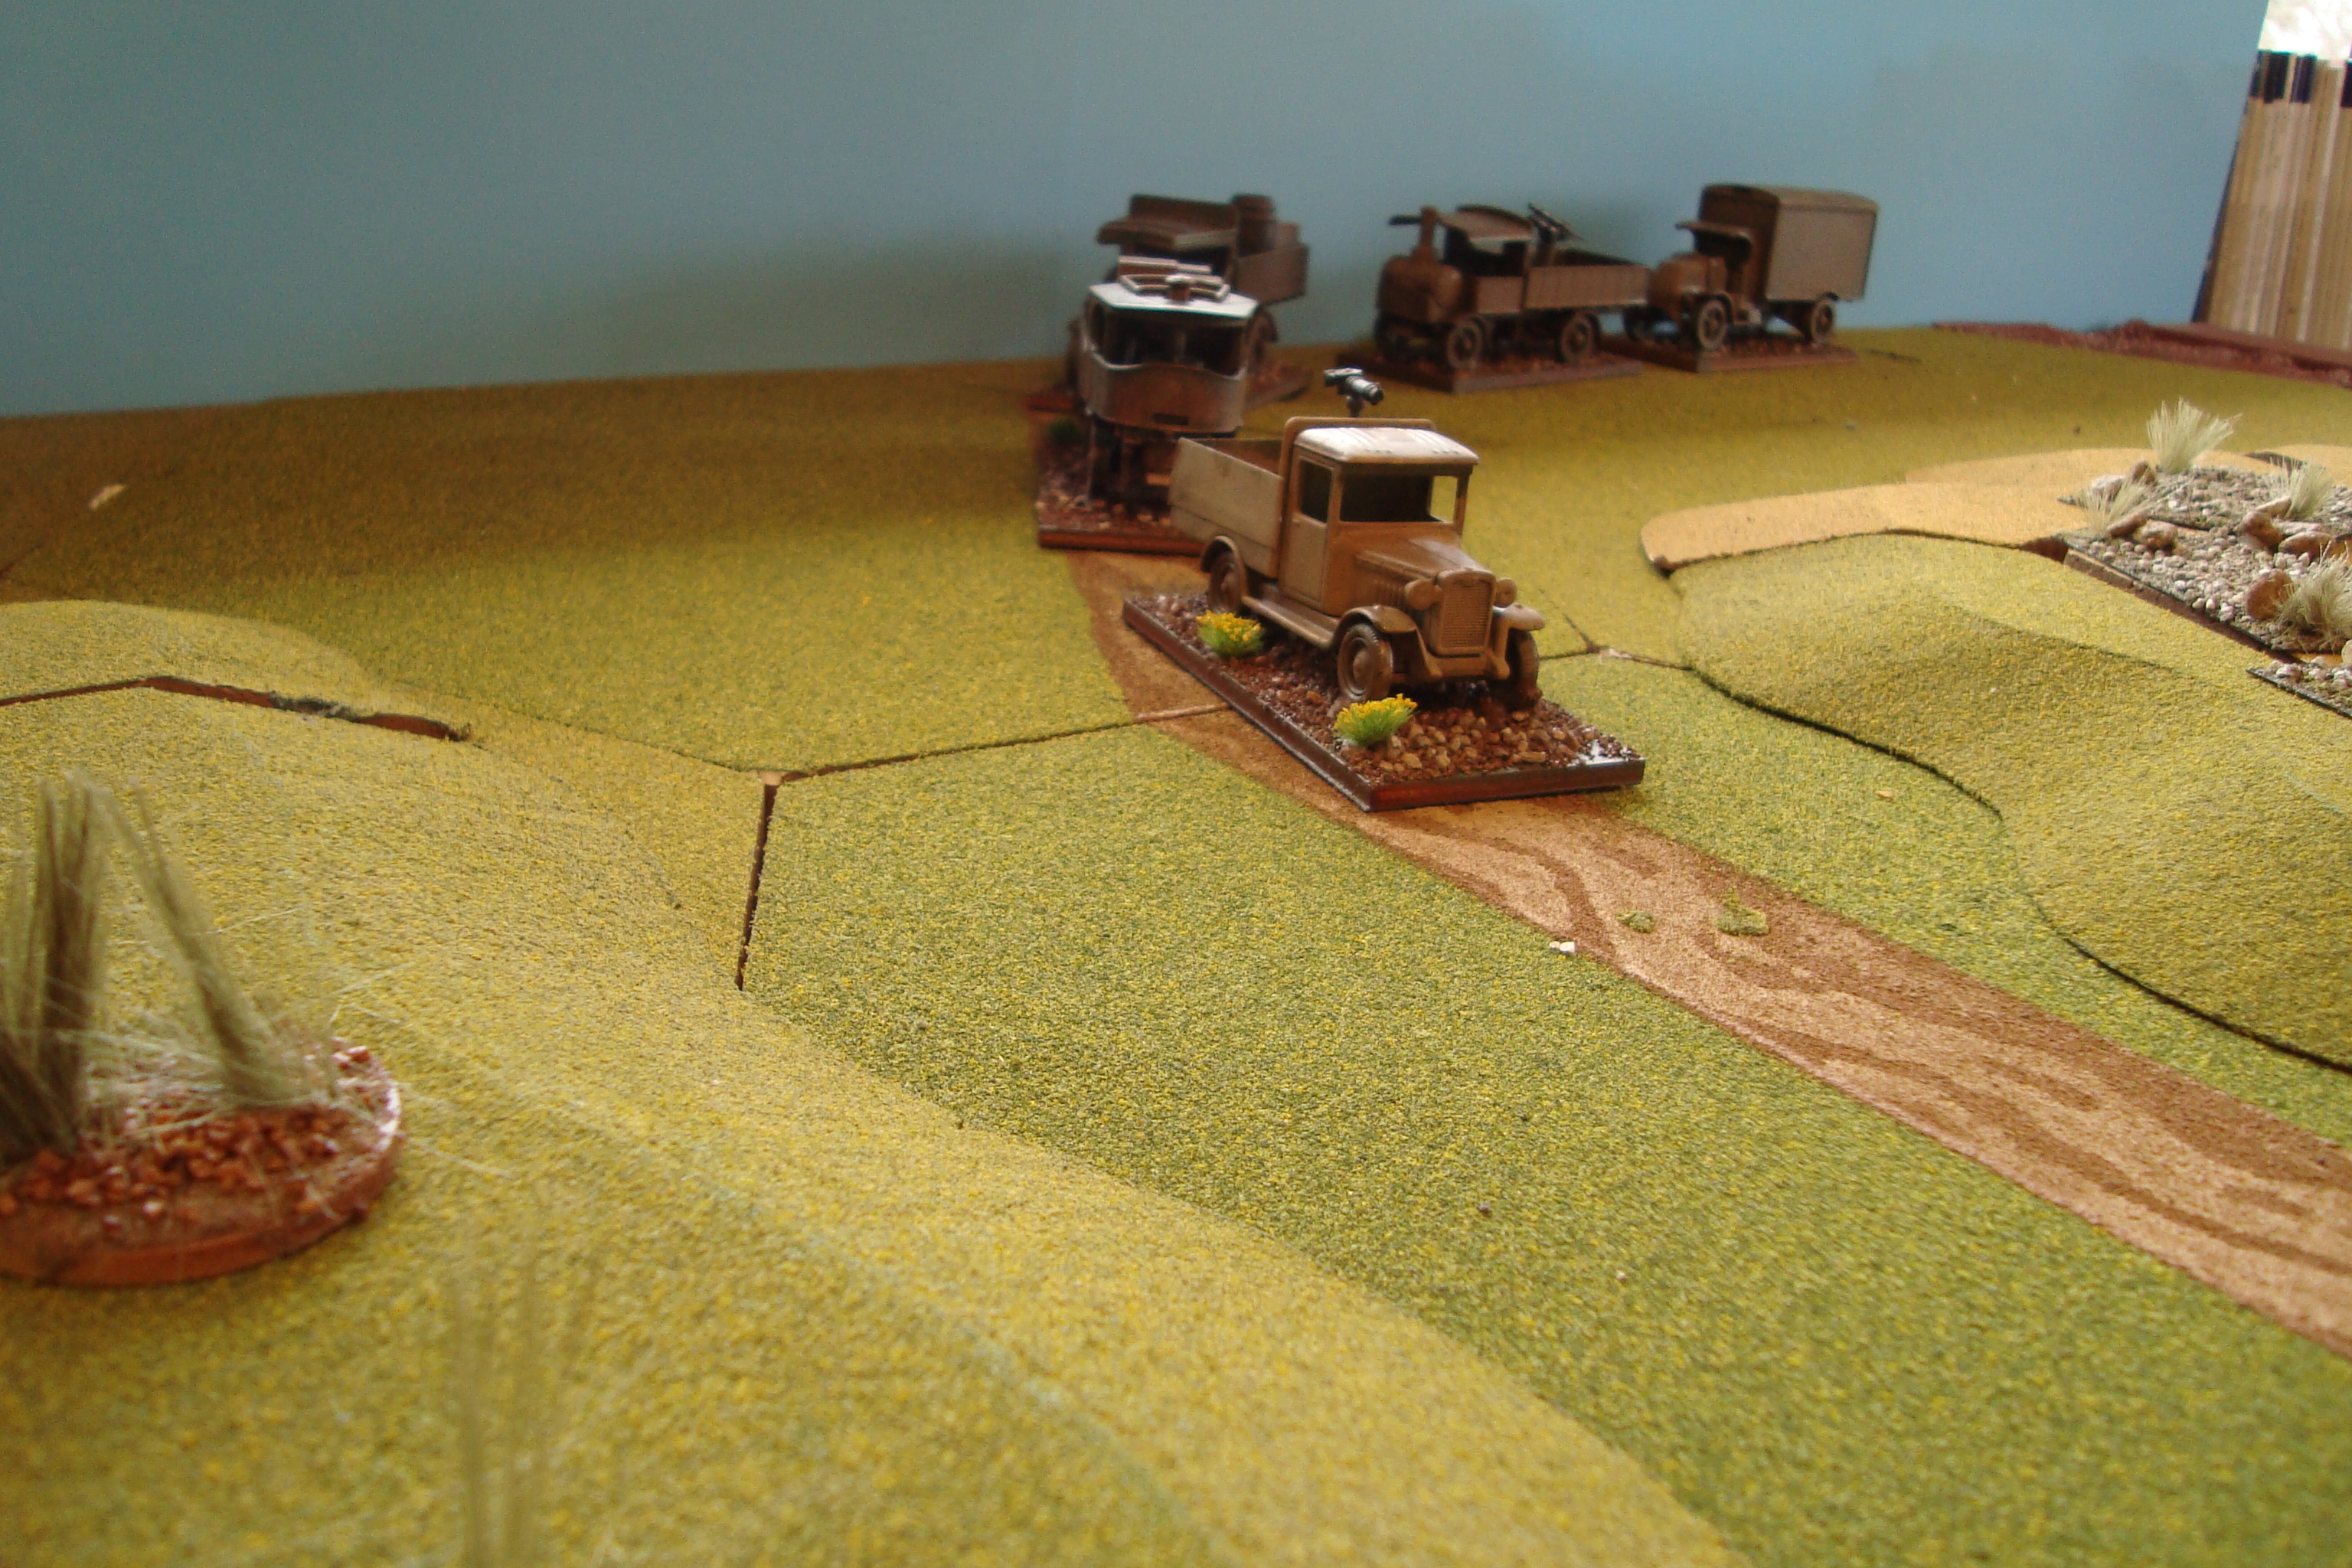
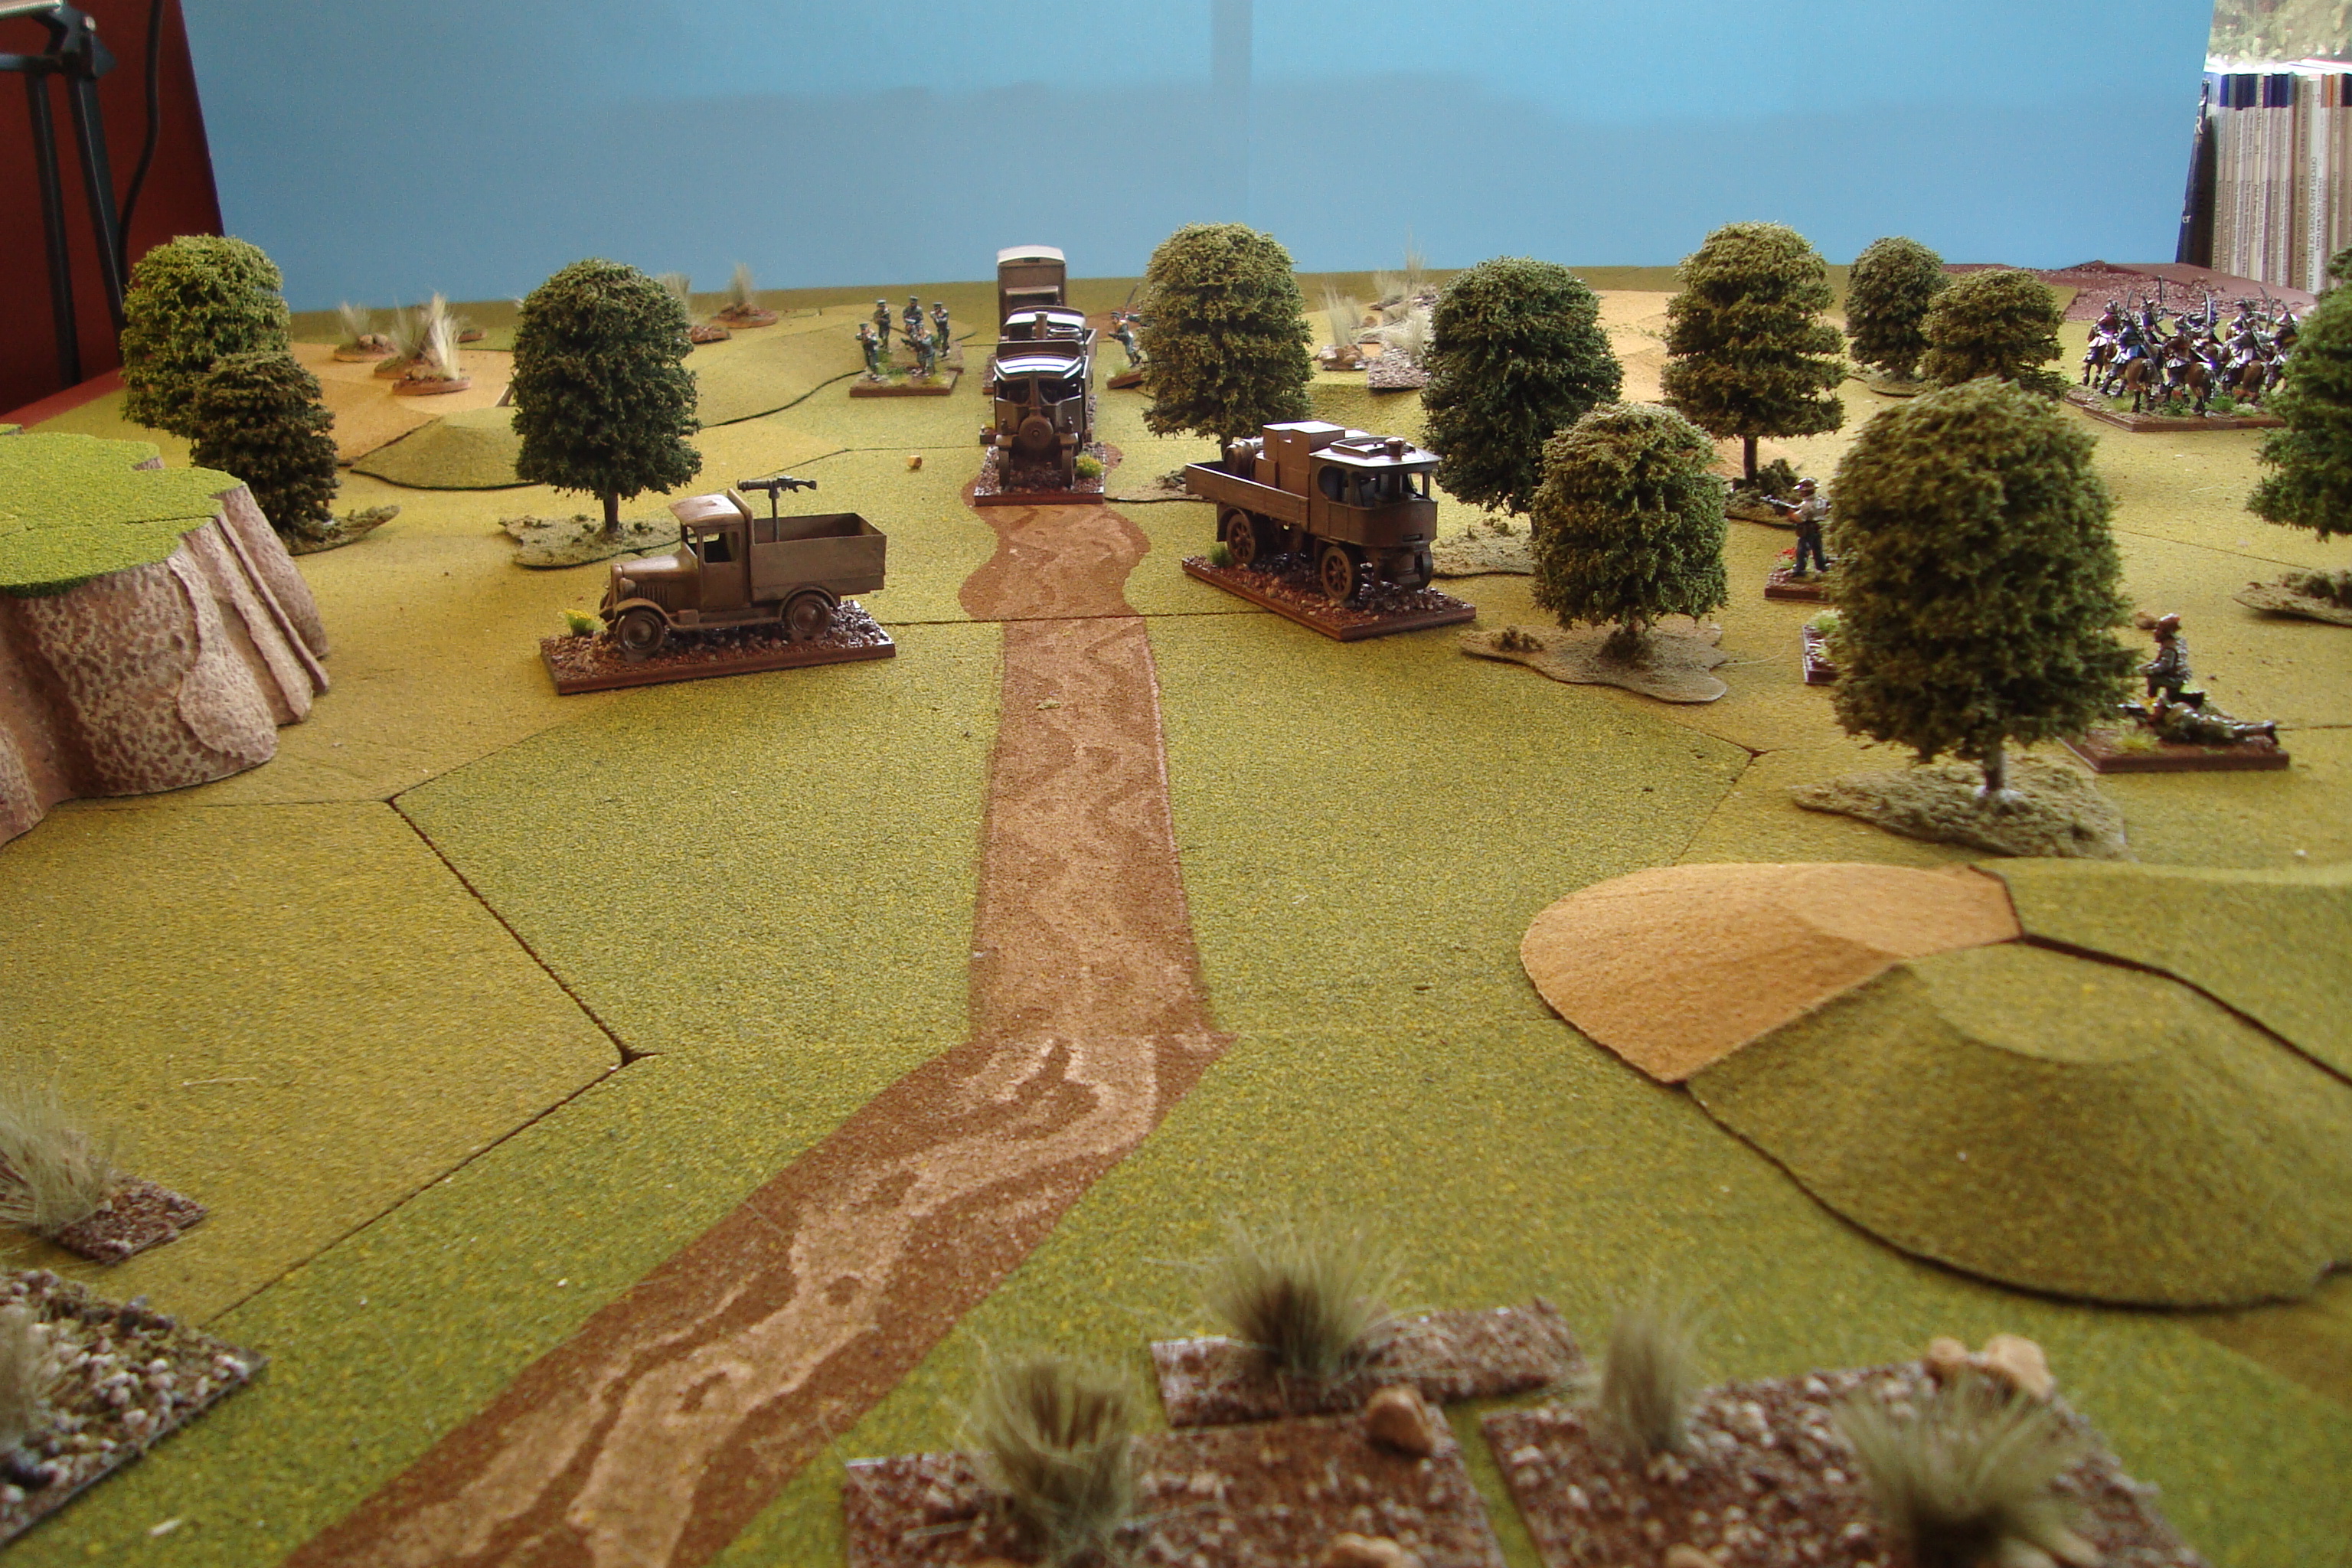
By Turn Six, the game was really moving.  Here’s a few photos showing the situation before and after the turn.

Confederate Forces Approach The Ford Near the Union Center
Union Center. Wooden Bridge burned, with Truex moving to stop Gordon's Confederates. McClean dug in to defend the Railroad Bridge
Union Center. Wooden Bridge burned, with Truex moving to stop Gordon’s Confederates. McClean dug in to defend the Railroad Bridge
Confederate Attacks Stall. Bridge on Union Right at Right of Photo
Confederate cavalry repulsed. Gordon poised to cross the now discovered ford as Truex begins to deploy.

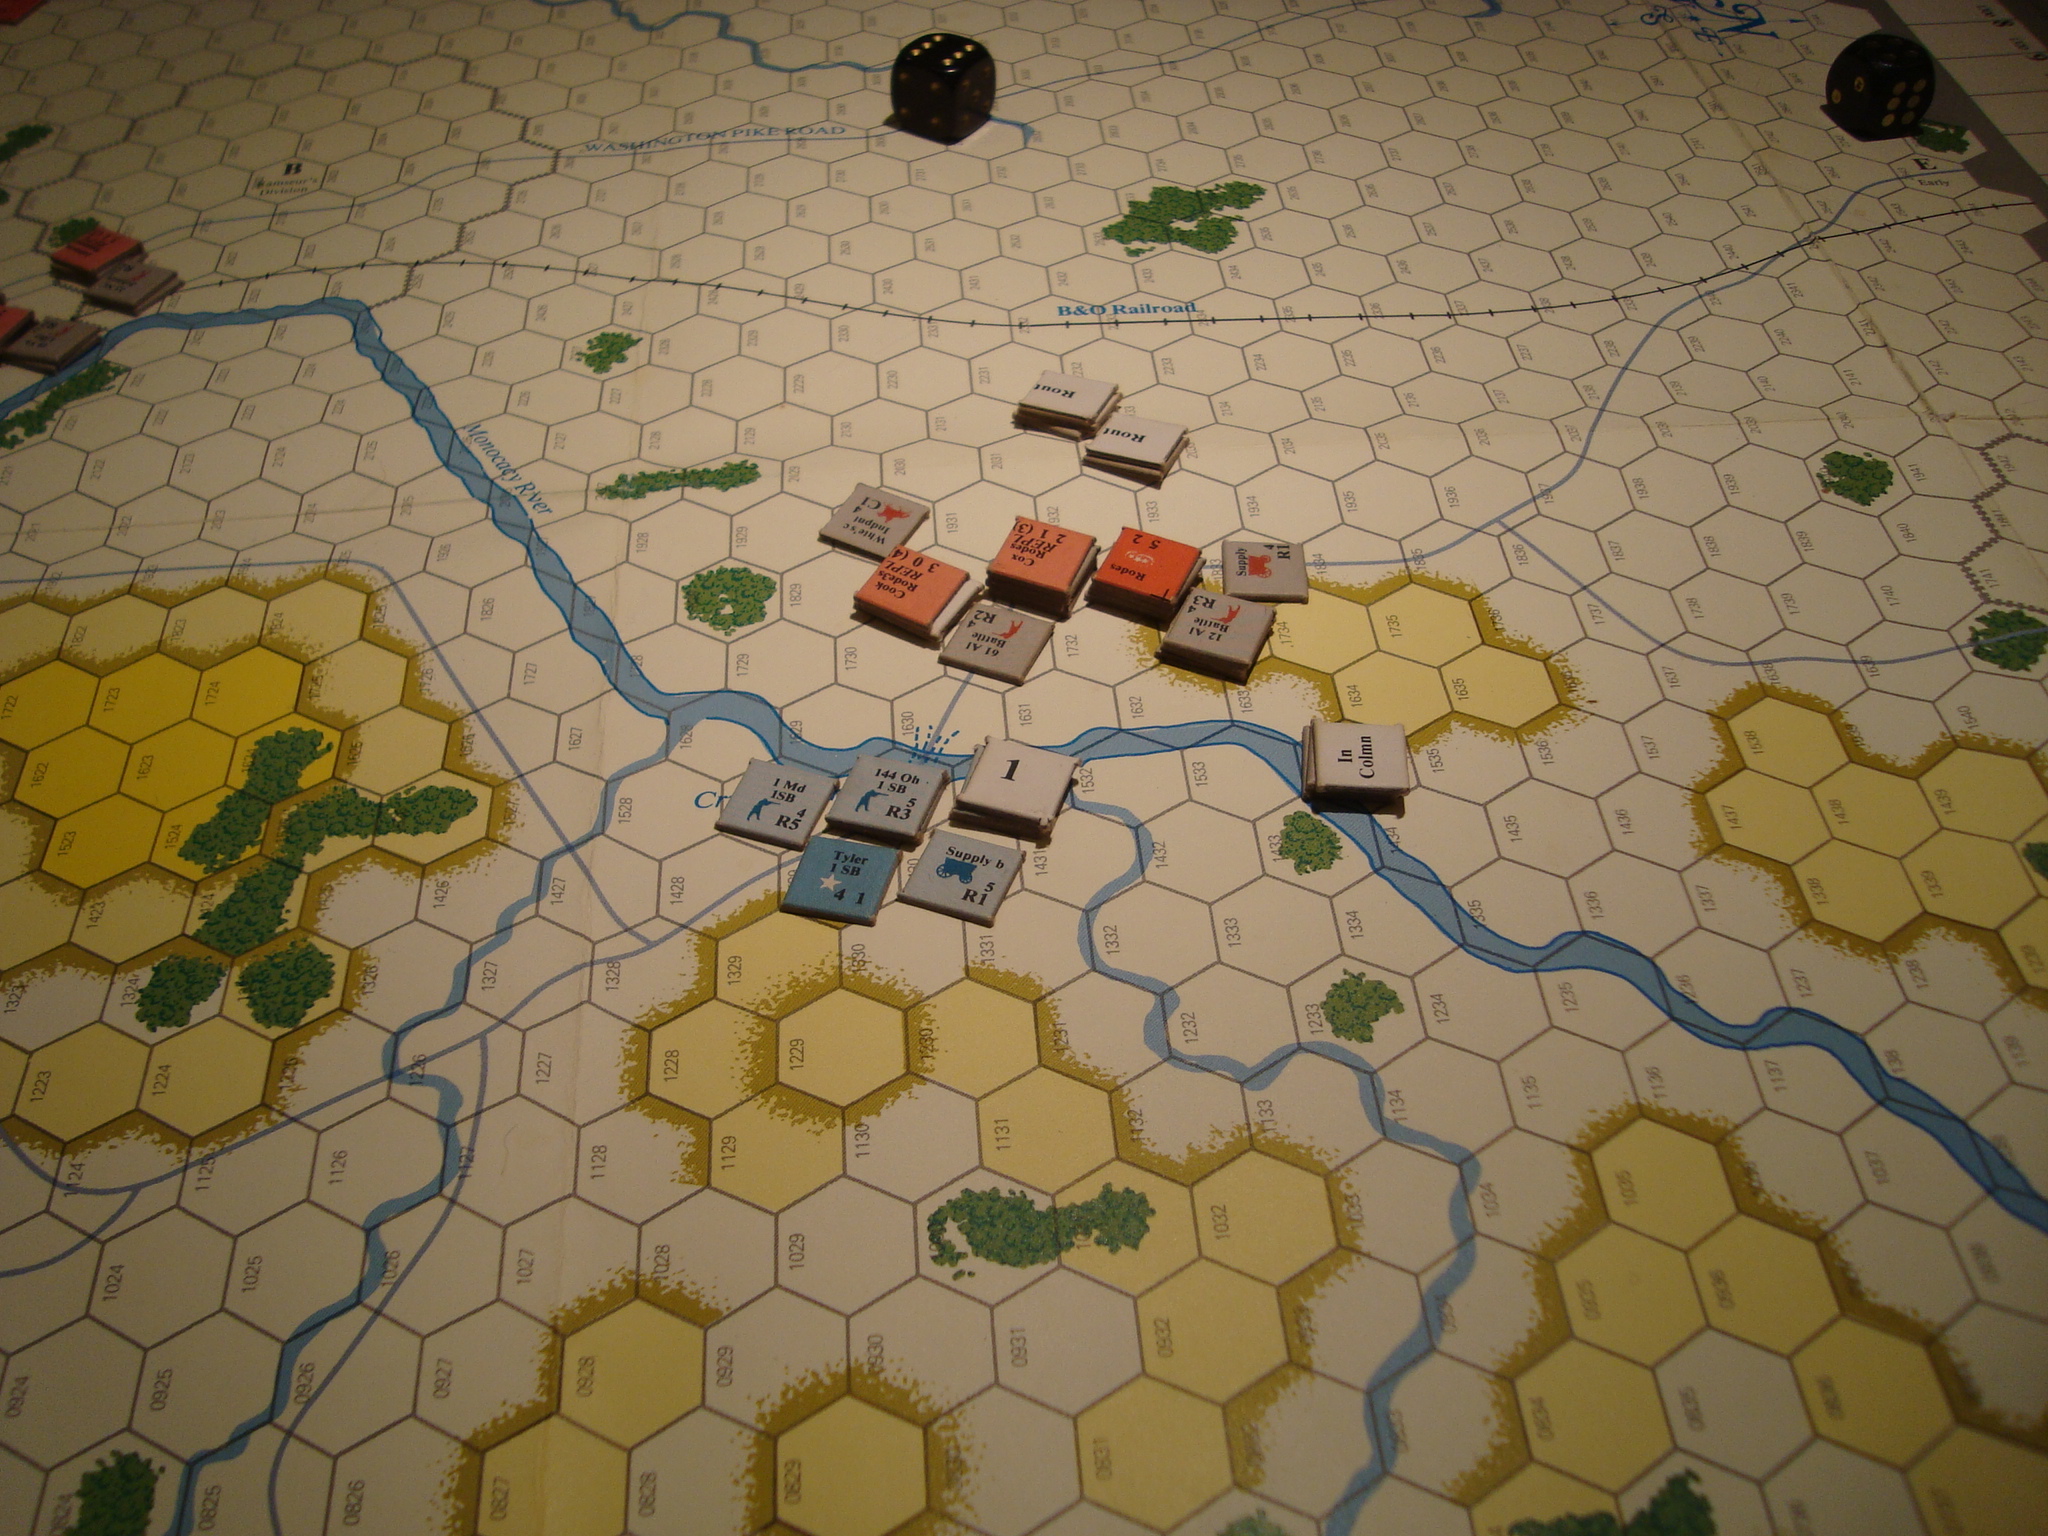
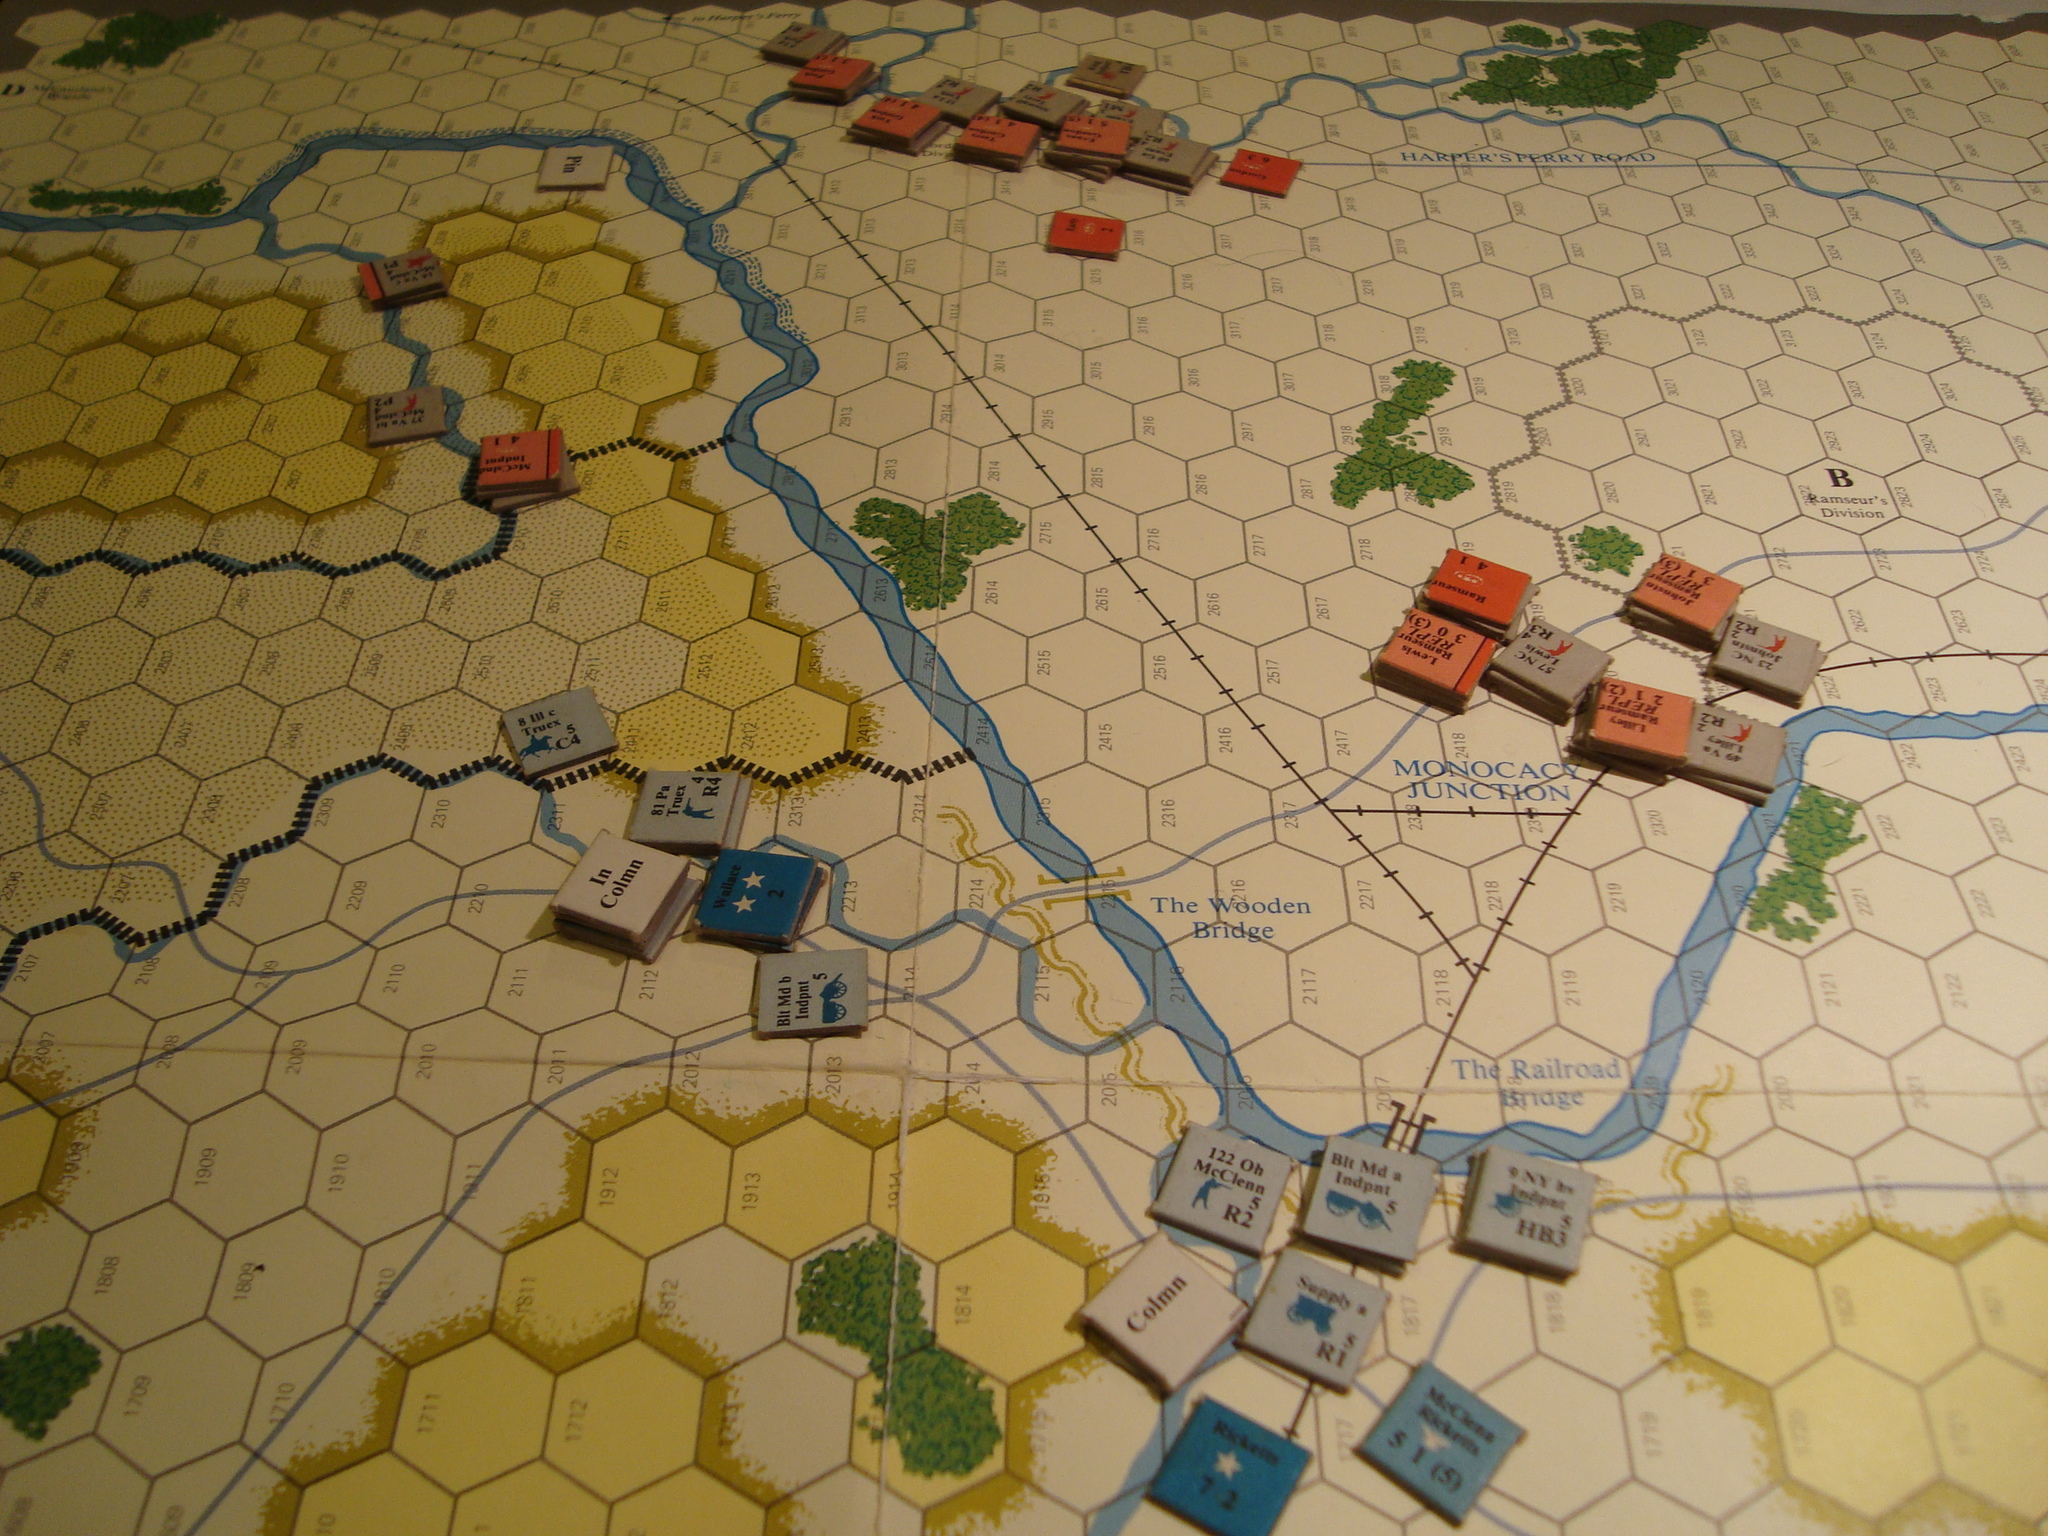
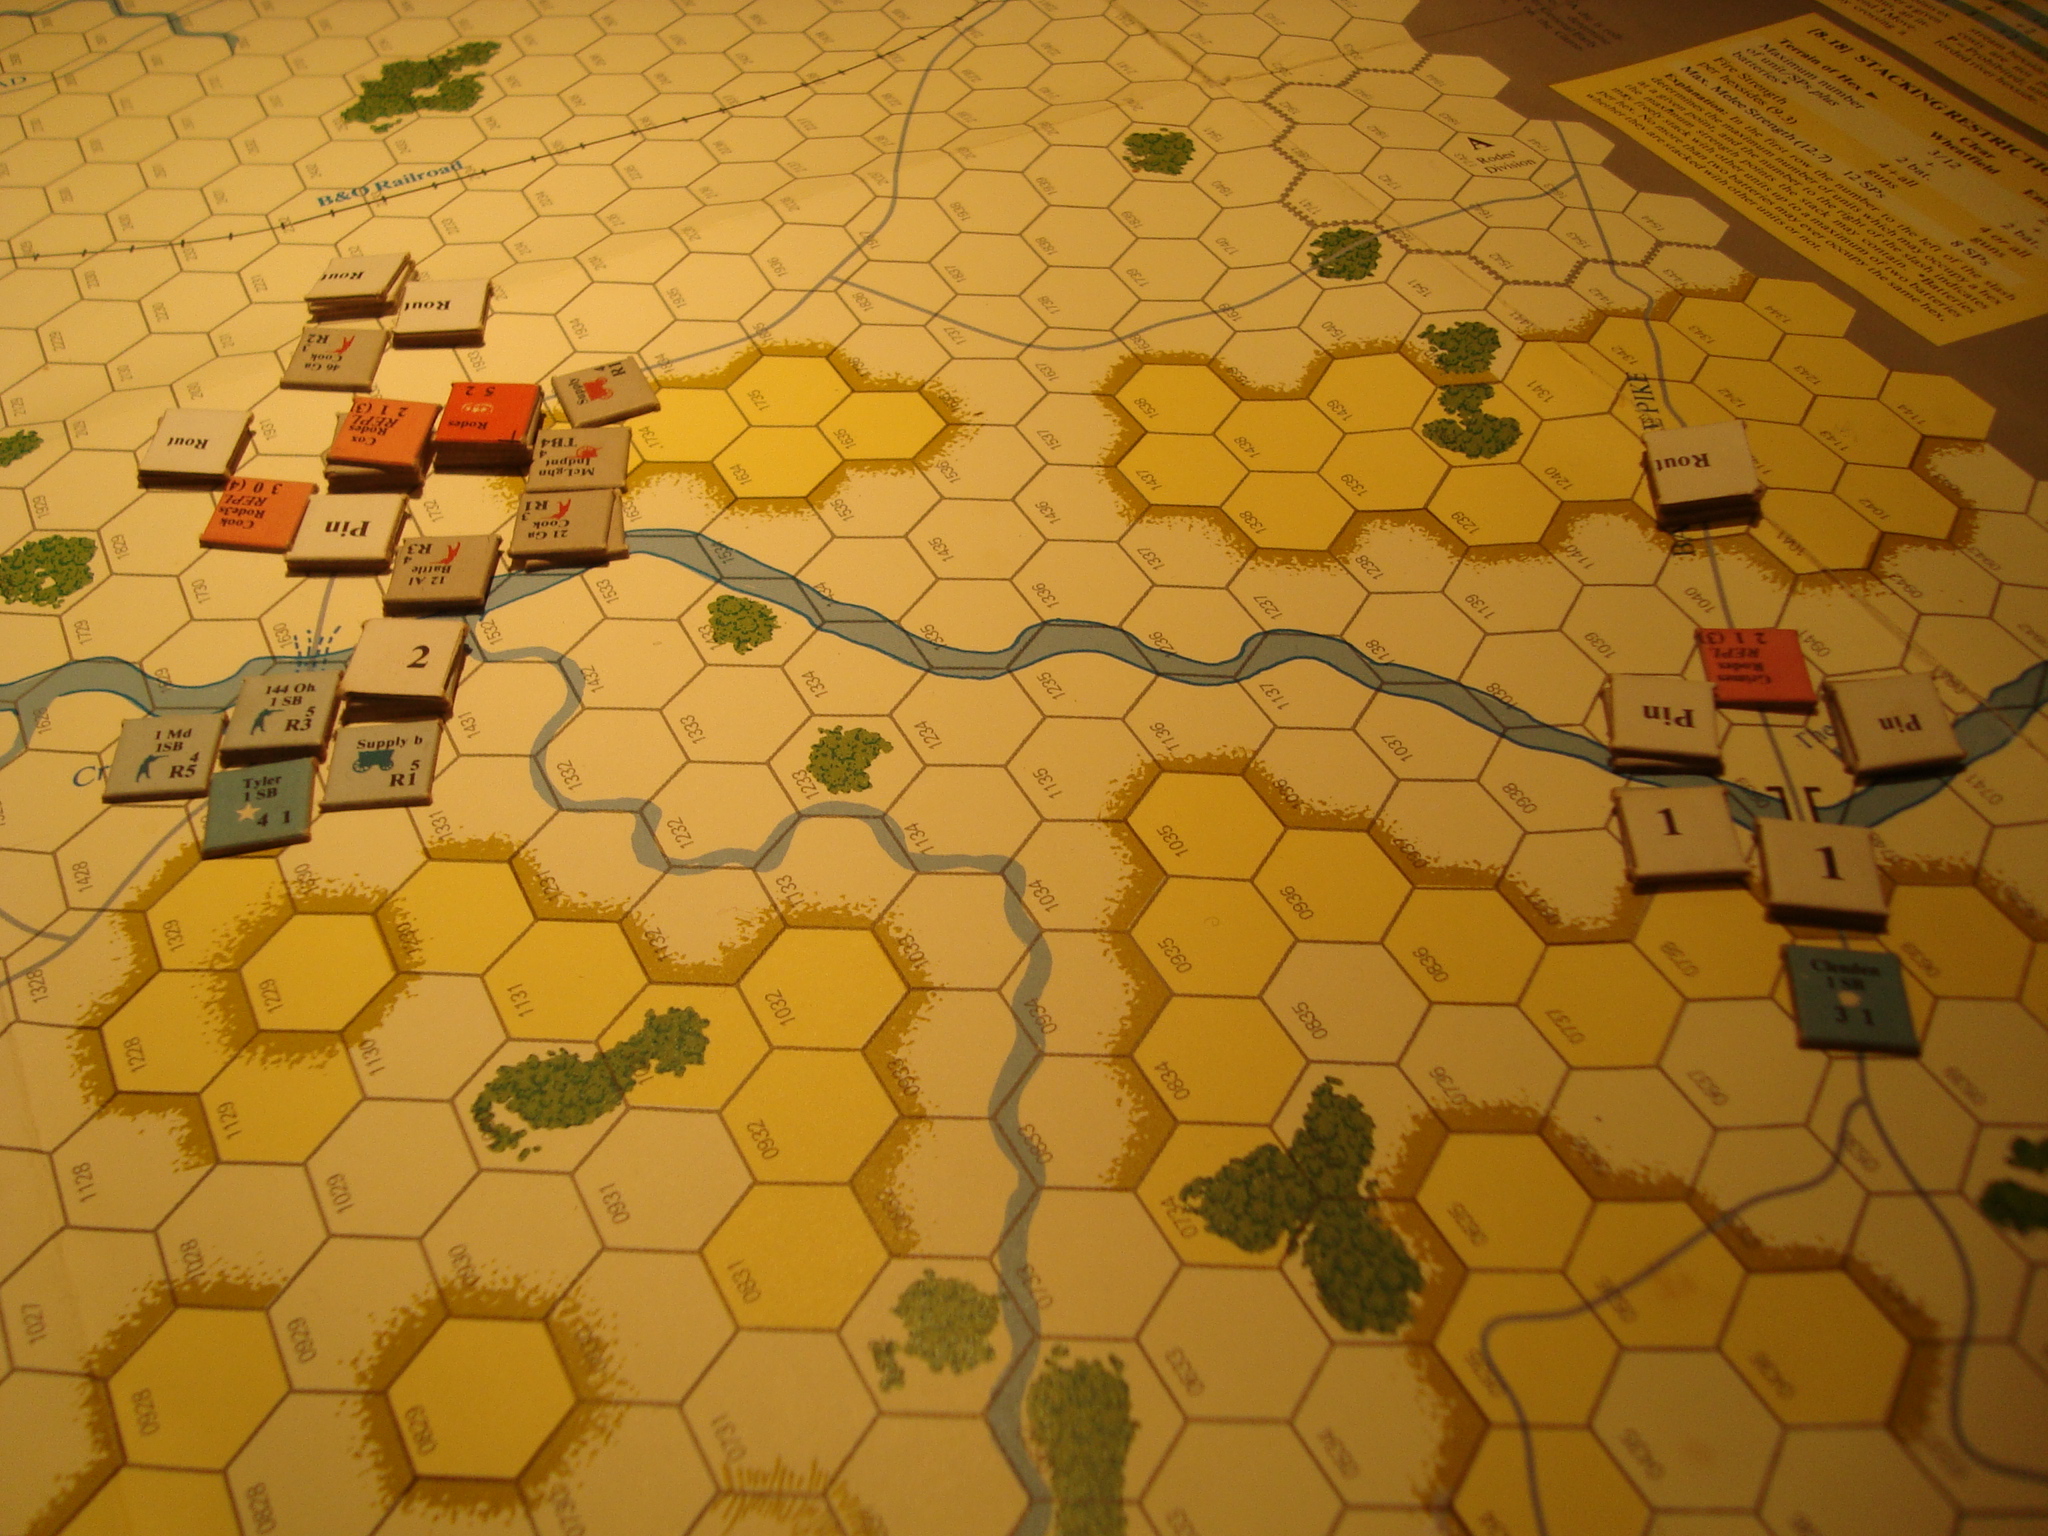
I’ll pick up the narrative after Turn 7.


Fall Grun – Europa

Most, if not all, Grognards are familiar with the strange and terrible saga of the Europa gaming system. For those of you who are not, here’s a summary of events up to 2013, as well as a trenchant series of exchanges about more recent developments.  Their signature East Front game, Total War, has been in a strange legal-sloth-hand-of-fate purgatory for years. The website is virtually dormant, indicating no news is bad news.

Fortunately, there is some hope. A group of Europa Diehards have continued to play and discuss the game, with one intrepid soul actually publishing a new game.

Timothy Davis’ effort covers the hypothetical German invasion of Czechoslovakia in 1938 using rules published by John Astell. Astell was a major figure in the early days of the Europa system, and, apparently retained publishing rights. This rule set is “Blitzkrieg Unending.” Tim’s company is New Europa Games and Variants.

I contacted Tim through the company’s website last month. He was working his way through some printing/publishing problems with the Europa variant counters. However, he still found the time to ship me a copy of Fall Grun.

I like it!

It does have the feel of a Beta. The rules have some gaps, the charts are nothing extraordinary and the map is printed on less expensive vinyl. But it’s a quality job and very similar to Europa. So why in the hell couldn’t the HMS/GRD folks do this? Tim’s published a quality product – especially for experienced Europa players who can fill in the gaps – and offers it for a relatively low price. OK, the question is rhetorical since it’s well known that there are all kinds of legal/creditor/investor issues hobbling HMS/GRD…..but just get the bloody game out.

Back to Fall Grun. The counter symbols are slightly smaller than Europa, but the maps have the same feel with different colors for terrain and symbols for terrain features such as woods. Europa players would find most of the charts easy to work with. If one doesn’t like the vinyl map, use maps from the other games or contact Timothy about the availability of the more expensive paper maps. Yes, paper is more expensive than vinyl….Go Figure.

Timothy deserves kudos for his efforts!  His variant counters also look pretty damn good.

I hope my wargaming accomplice Tim and I get this on the table soon. Dunno, since there is talk about playing the East Africa scenario from Wavells War next.

Here are pictures of the game’s components. These were not taken with my IPhone!

DSC01294

German Counters
German Counters
Czech and German Air Force Along With Soviet, Hungarian, Pole and Polish Air Units
Vinyl Map
Vinyl Map


The Case For Repetition

Random thoughts the past few days about my wargaming being stuck in a rut. The past few months have been focused on GBACW, Red Actions!, Glory (War of Resistance) and Irregular Wars. I guess it’s time to move on to something different.

On the other hand, the consistent focus on these game systems allows me to enjoy them in some depth. There’s a tendency in our hobby to be a gadfly, moving from one period to another, accumulating lead or games that sit on the shelf or closet. I’m as guilty as anyone about that. I have cleaned up “Lead Mountain” to just a handful of figures, but the game shelf and closet is still full of unplayed games.

The temptation is to read the rules, give it a setup, play part way through and if the game doesn’t work, pack it up and put it back on the shelf. I’m trying to resist that.  Also, this repetition is a motive to get more in-depth about a period, battle, or war.  That’s why I bought Paddy Griffith’s  books.

I do own a number of games that are part of a series. That’s by design, even though I accumulated many of these games without having played one of them. Just went with recommendations I found on-line. Hopefully, I will find these games and gaming systems as enjoyable as others.

For now, I’ll stick with repetition, only with a new series of games. That’s appropriate for the New Year.

Battle of Cedar Mountain – GBACW

Finished up Cedar Mountain yesterday.   Took awhile, and that was a problem.  Tended to lose focus during sporadic 1+ turn sessions. Finally got serious and cranked out a number of successive turns to maintain momentum.

Still, a good game and enjoyable.  A classic encounter battle, with each side fighting to seize and hold four hexes representing key terrain.  Victory points are awarded for each turn a side controls a hex, as well the standard GBACW points for inflicting casualties on brigades and leaders.

Here’s a detailed account of the historical battle with an map from the excellent Obscure Battles website, recently featured in Web Grognards.

The rules are generally the same as Wilson’s Creek and Stonewall.  However, there is no ammunition depletion, and extra rules are added for artillery overshoot and target density in each hex.  Neither of these new rules had any material impact on gameplay.  Both sides were happy that rolling a one no longer involved the possibility of running out of ammunition.

Union forces deploy some distance from the victory hexes, with Confederate units entering the map throughout the game beginning with Turn One.

The Union units had the most favorable terrain for a quick advance, and established possession of the victory hexes.  Confederate entry speed was hampered by the lower stacking and movement rates in woods.  All of the fighting took place in the center of the map, in the area bounded by Cedar Run and the turnpike.

After the failure of an initial Confederate assault, arriving troops were sent on a flanking march around the Union left.  Although the initial assault by the flanking units was repulsed, the weakened Union units fell back under pressure, both in the center and left, establishing a horseshoe shaped perimeter in an attempt to conduct an orderly retreat.

Newly arrived Confederates, supported by the tattered remnants of units that had been fighting throughout the day, were able to cutoff any Union retreat.  The result was a decisive defeat for the Union, mitigated in Victory Points for the number of turns the Union had controlled the victory hexes.

This was a bloody game, with the aggressive Federal army suffering significant casualties.  Confederate units were also badly battered.

Why?

This spate of GBACW games piqued my interest in the Civil War.  One of my favorite military historians is the late Paddy Griffith.  Although he died (way too soon) several years ago, you can still access his website.  He once did me a very kind favor years ago.  But that’s the subject of a separate post.

Back on topic.  This spate of games (like to use spate) motivated me to buy two of Paddy’s books.  One I had owned years ago, but made the mistake of lending it to a Civil War enthusiastic colleague of mine, and as usually happens in that situation the book was swallowed up into the great void of “I can’t remember that”. This book, “Battle in the Civil War“, is an illustrated and very accessible version of his text heavy, and far more detailed,  “Battle Tactics of the Civil War“.  I decided to employ one of Paddy’s theses in this game.  BTW, both books are well worth the cost.

This thesis is that shock tactics were rarely used in the Civil War, but not because of the popular idea of the deadliness of rifled musket fire, but that the armies lacked the ability to coordinate this type of attack, and that by the time they did have the experience, both sides shied away from assaults during open battle (and this does not include the catastrophes of Cold Harbor, The Crater, et al) and were content to engage in lengthy fire-fights.

Confident that I am better than Franz Sigel or Dan Sickles, I launched a series of maniacal John Hood like melee combats.  For the most part, Richard Berg’s rules led to a bloody shambles.  Because…….Berg’s rules (and he is a wonderful game designer), allow low value musket and rifle fire, doubled, to either pin or rout units in the adjacent hex.  This especially benefits the defender, who can conduct defensive fire before the attackers can fire and move into the hex for melee.  An attack in depth is a possible solution.  Stack three attacking units in the hex, put your lowest valued unit on top because it will take the fire hit,  and hope that two of the three survive a morale check.  If the attackers are not pinned or routed, they may cause the defender to break and rout before contact is made.  This is somewhat consistent with Griffith’s observations that units would  break if faced with the threat of a melee.  My conclusion:  Paddy would have had a different design take on GBACW.

Anyway……….

Another enjoyable game, and I am putting “Drive on Washington” on the table for another (and probably my last) round of GBACW.

Here’s a series of photos to give some vague concept of what happened in the game.  I take a solemn vow that I will never, never, ever, use an IPhone for photos, and if for some reason I break this vow, I will always, always, always, turn on more lighting.  Not impaired, just pathetic.

Advancing Union Forces Occupy Victory Hexes
Confederates Flank the Union Left
Confederates Increase Pressure on Union Left
Union Left Collapses


Red Actions! – Ambush Scenario

Since I’m suffering from a bad case of painter’s block, decided to work on a simple Red Actions! scenario.

This will involve a mixed force of Germans, Partisans and Cavalry attacking a Chinese armed convoy, including a reaction force.

To add some randomness and re-playability, I put together three scenarios for the convoy.  The convoy is either clueless, cautious, or know something will happen.  These readiness states dictate vehicle dispersion, speed and use of the reaction force.

For the attackers, I’ve assigned numbers to each terrain feature for some variability in setup.  Some combinations could be tactically ill-advised.  We’ll see.

Here’s some photos of the set-up and first time messing around with the action.

Convoy Approaches. Germans in foreground, Partisans in woods, and cavalry behind ridge.
Convoy Approaches. Germans in foreground, Partisans in woods, and Cavalry behind ridge.
Convoy Closeup. Need to get a crew for the MG Pickup.
Lead Vehicles blasted off road by German machine guns.
Lead vehicles blasted off road by German machine guns.  Reaction Force in background.


War of Resistance – Tim’s Observations

Here are Tim’s comments….We plan to play this scenario one more time, hopefully between Xmas and New Year.

Weather was an issue. The rain, with the accompanying -1 die roll modifier and increased movement costs was a real problem for me. I was having to use units to cart supply to the front when I needed every body at the front.

I should have attacked your river transports much, much sooner. I was pleasantly surprised at how effective the one raid was.

I understand better why it is hard to use the factional units as cannon fodder. Even with their stacking limits, I still wonder if it would be possible to use them in good defensive terrain (rice paddies, or behind a river) hoping for an exchange or to buy time. I know its not really an issue in the context of the scenario but the Central Army 4-6 divisions can’t be replaced and the 3-5 divisions can be only replaced very slowly.

I hope you handed out lots of medals to your aviators. They gave their all and suffered accordingly! I wonder if the Chinese would be well advised to adopt a ‘fleet in being’ strategy for their air force. Having said that, I was sweating when your one naval patrol attack got through…

NGS is really important to the Japanese. I actually could have used it more than I did– I forgot that TFs can sail up the Yangtse as far as Nanjing.

Infantry having an exploit phase is nice. I often would launch an attack and then use the exploit phase to regroup my troops for your turn. I would create a big stack and then split them back up during the exploit phase.


War of Resistance – Fate of Nanking

Had another War of Resistance (WOR) session with Tim over the weekend. Once again, it was the Fate of Nanking scenario, with Tim as the Japanese commander, and the Chinese committed to a forward defense of Shangai. This scenario starts with an abbreviated August I (1937) turn, and ends with the Jan II (1938) turn. By eschewing strong drink, and limiting our football viewing, we were able to play through the Dec II turn.

I had studied the logistics rules since our last session, and was much more comfortable allocating resource points and moving them from off map to where they could be used. Chinese engineers were kept busy building forts and repairing rail line hits. The limited rail net moved attack points to the theater headquarters, and strategic river movement was employed to augment the supply effort. As a result, I was able spend less time muddling through  logistics, and more time on operational challenges.

Tim provided plenty of challenges. He quickly exploited a gap in my river defenses, and established an amphibious beachhead threatening my left flank. As a result, I had to pull back forces dug-in in Shangai, abandon my factories (which can create resource points) and establish a main line of resistance (MLR) in the suburbs. This was an important early move, since the Chinese player’s mission is to delay and defend, and Tim’s landing probably cost me at least one turn.

Tim’s operational problems are to utilize naval transport to move troops from Japan to China, while juggling the problems of limited port capacity and possible damage to his landing craft used for ship to shore movement. Taking advantage of the clear weather, smooth seas, and experience gained in our last session, he rapidly built up his combat power and began a series of attacks supported by strong naval gunfire and aviation assets.

The Chinese Airforce attempted to thwart this naval movement and also shoot down Japanese ground support aircraft. Their efforts were futile, and almost every Chinese air unit was eliminated or aborted.

As the methodical Japanese moved west, they encountered successive defensive lines built by engineers augmented with civillian labor. This increased manpower allows the construction of a fort in one turn. With narrow avenues of advance, and four construction capable units, the Chinese forces enjoyed consistent -1 modifiers when attacked. The Chinese defenders were also aided by flooded rice fields, which halved Japanese attack strength. However, by October, the rice growing season had ended, and the impact of intensely cultivated terrain was much reduced.

Tim was able to consistently create high odds attacks, taking advantage of the inability of the Chinese to mass combat power in any single hex. This is a function of the low strength Chinese divisions, and lack of regimental or brigade troops to augment the combat power of the divisions within stacking rules. In addition, the Chinese player has only four (4) artillery units, which I used to support stacks of unsupported divisions, which otherwise would defend at half strength, rather than augment the stronger, supported, divisions.

This attritional combat took a heavy toll on the Chinese, who are unable to rebuild lost supported divisions during this scenario. I didn’t help matters by failing to feed the lower strength elminiated units back into the fighting.

By November, Tim had split my defense, and established a beachhead on the north side of the Yangtze.  He also destroyed my riverine supply capabilities along with their cargo in a devastating aerial attack.  As a result, many of the Chinese units were un-supplied for a turn which, fortunately, did not effect their defensive capabilities.   However, this slowed the Chinese withdrawal north of the Yangtze.  At this point, China’s greatest ally was time.  A patchwork defense in depth  continued to slow the Japanese advance.

The game came down to a final roll of the dice by Tim to activate his two headquarters during the reaction phase of the Dec II turn. Had he made these rolls (1 or 2, d6), he would have had a chance to break through my last ditch defense of Nanking. Fortunately for the Chinese, this didn’t happen.

We’ll never know what the outcome would have been if the game had been played for one more month to the scenario’s conclusion.  Our consensus is that it would have been a toss-up.

Here’s a series of photos to augment my narrative.  I’ll hold off on any analysis until Tim forwards his thoughts on the game.

Initial Japanese Landing by A Corps on Yangtze.
Japanese Arrive and Move Into Contact
Japanese Reinforcements Arrive In Shangai and Move Into Contact
Japanese Breakthrough Center, Split Chinese Forces
Japanese Penetration Sealed Off
Effect of Naval Patrol Attack on Chinese Supply
Situation At Game's End
Situation At Game’s End

Madagascar – A Glory Scenario

Finished up playing yesterday with mixed feelings.  This scenario is one of four published under the overall title of “War In The Outposts”.

It’s a great scenario if you want to “play” a physically manageable & comprehensive overview of this system.  The scenario has a low counter density, a small map so it can stay set up for a  long time, and a relatively short time frame beginning in May and ending in October (bi-monthly turns).  It involves just about every aspect of the Glory (and by extension, Europa) system.  The naval system, which many consider problematic, is featured, with an emphasis on amphibious landings, use of ports for general supply,  submarines (and midget submarines) and coastal defense.

On the other hand, it’s not much of a game.  Let’s call it “an operational study”.  Here’s a link to a brief overview of the campaign.  I’ve included it because it contains a good bibliography, as well as a link to a brief overview of South Africa’s part in WW2.  I can vouch for “England’s Last War Against France”.

The decisive victory conditions are stringent:  Take Diego Suarez in two turns, control Madagascar by October, do not lose a unit, and not expend more than one resource point.  Attaining the latter is especially difficult because it limits British player is limited to one attack with one regimental equivalent (RE) at full strength for the entire game.  Everything else is at half-strength, which makes losing a unit very possible and, perhaps, probable.  While the Allies have overwhelming naval and air strength for the first two turns in May, most of these assets are immediately diverted to other theaters.  From June through September, the British have to operate with minimal naval and air assets, with a carrier/battleship force arriving for the final month.

The opening two turns are devoted to taking Diego Suarez.  This area of operations is represented by a map insert at an expanded scale.  The British must negotiate restricted waters, deal with disorganization after their landings, and having only a few areas where they can bring overwhelming naval gunfire to bear.  A French defense in depth, sacrificing units for time, makes it difficult to control the area by the end of June.  British attacks typically take place at 3-1, with maybe a 4-1.  The combat results table (CRT) can be brutal, with an exchange result eliminating a British unit, or an attacker stopped result throwing the time track off.

Map Showing Insets, Vichy Set Up and Invasion of Diego Suarez

Map Showing Insets, Vichy Set Up and Invasion of Diego Suarez

After Diego Suarez is secured, the British slowly move through the island, attacking French units at low odds, after amphibious landings.  Overland travel is very slow.   The best approach is to isolate the main French units, reducing their strength so, once again, a 3-1 or 4-1 attack can take place.  This takes time, and outside of the process of figuring out how to work with zones of control for a mix of units and capabilities, not much fun……if you even think ZOCs can be fun – kinda.

All this kvetching aside, the scenario does simulate the historic campaign, and is a challenge to the player.  In that regard, you can’t complain.  Would I play it again, no.  Was it worth the time, yes.  A good rules overview, and a chance to use the color counters I downloaded from the Europa website (DO NOT go out and try to download now.  A nasty pop-up will appear) several years ago.