Not quite, but damn near. Eclipses, Family, Friends…..and about 4,000 auto miles.
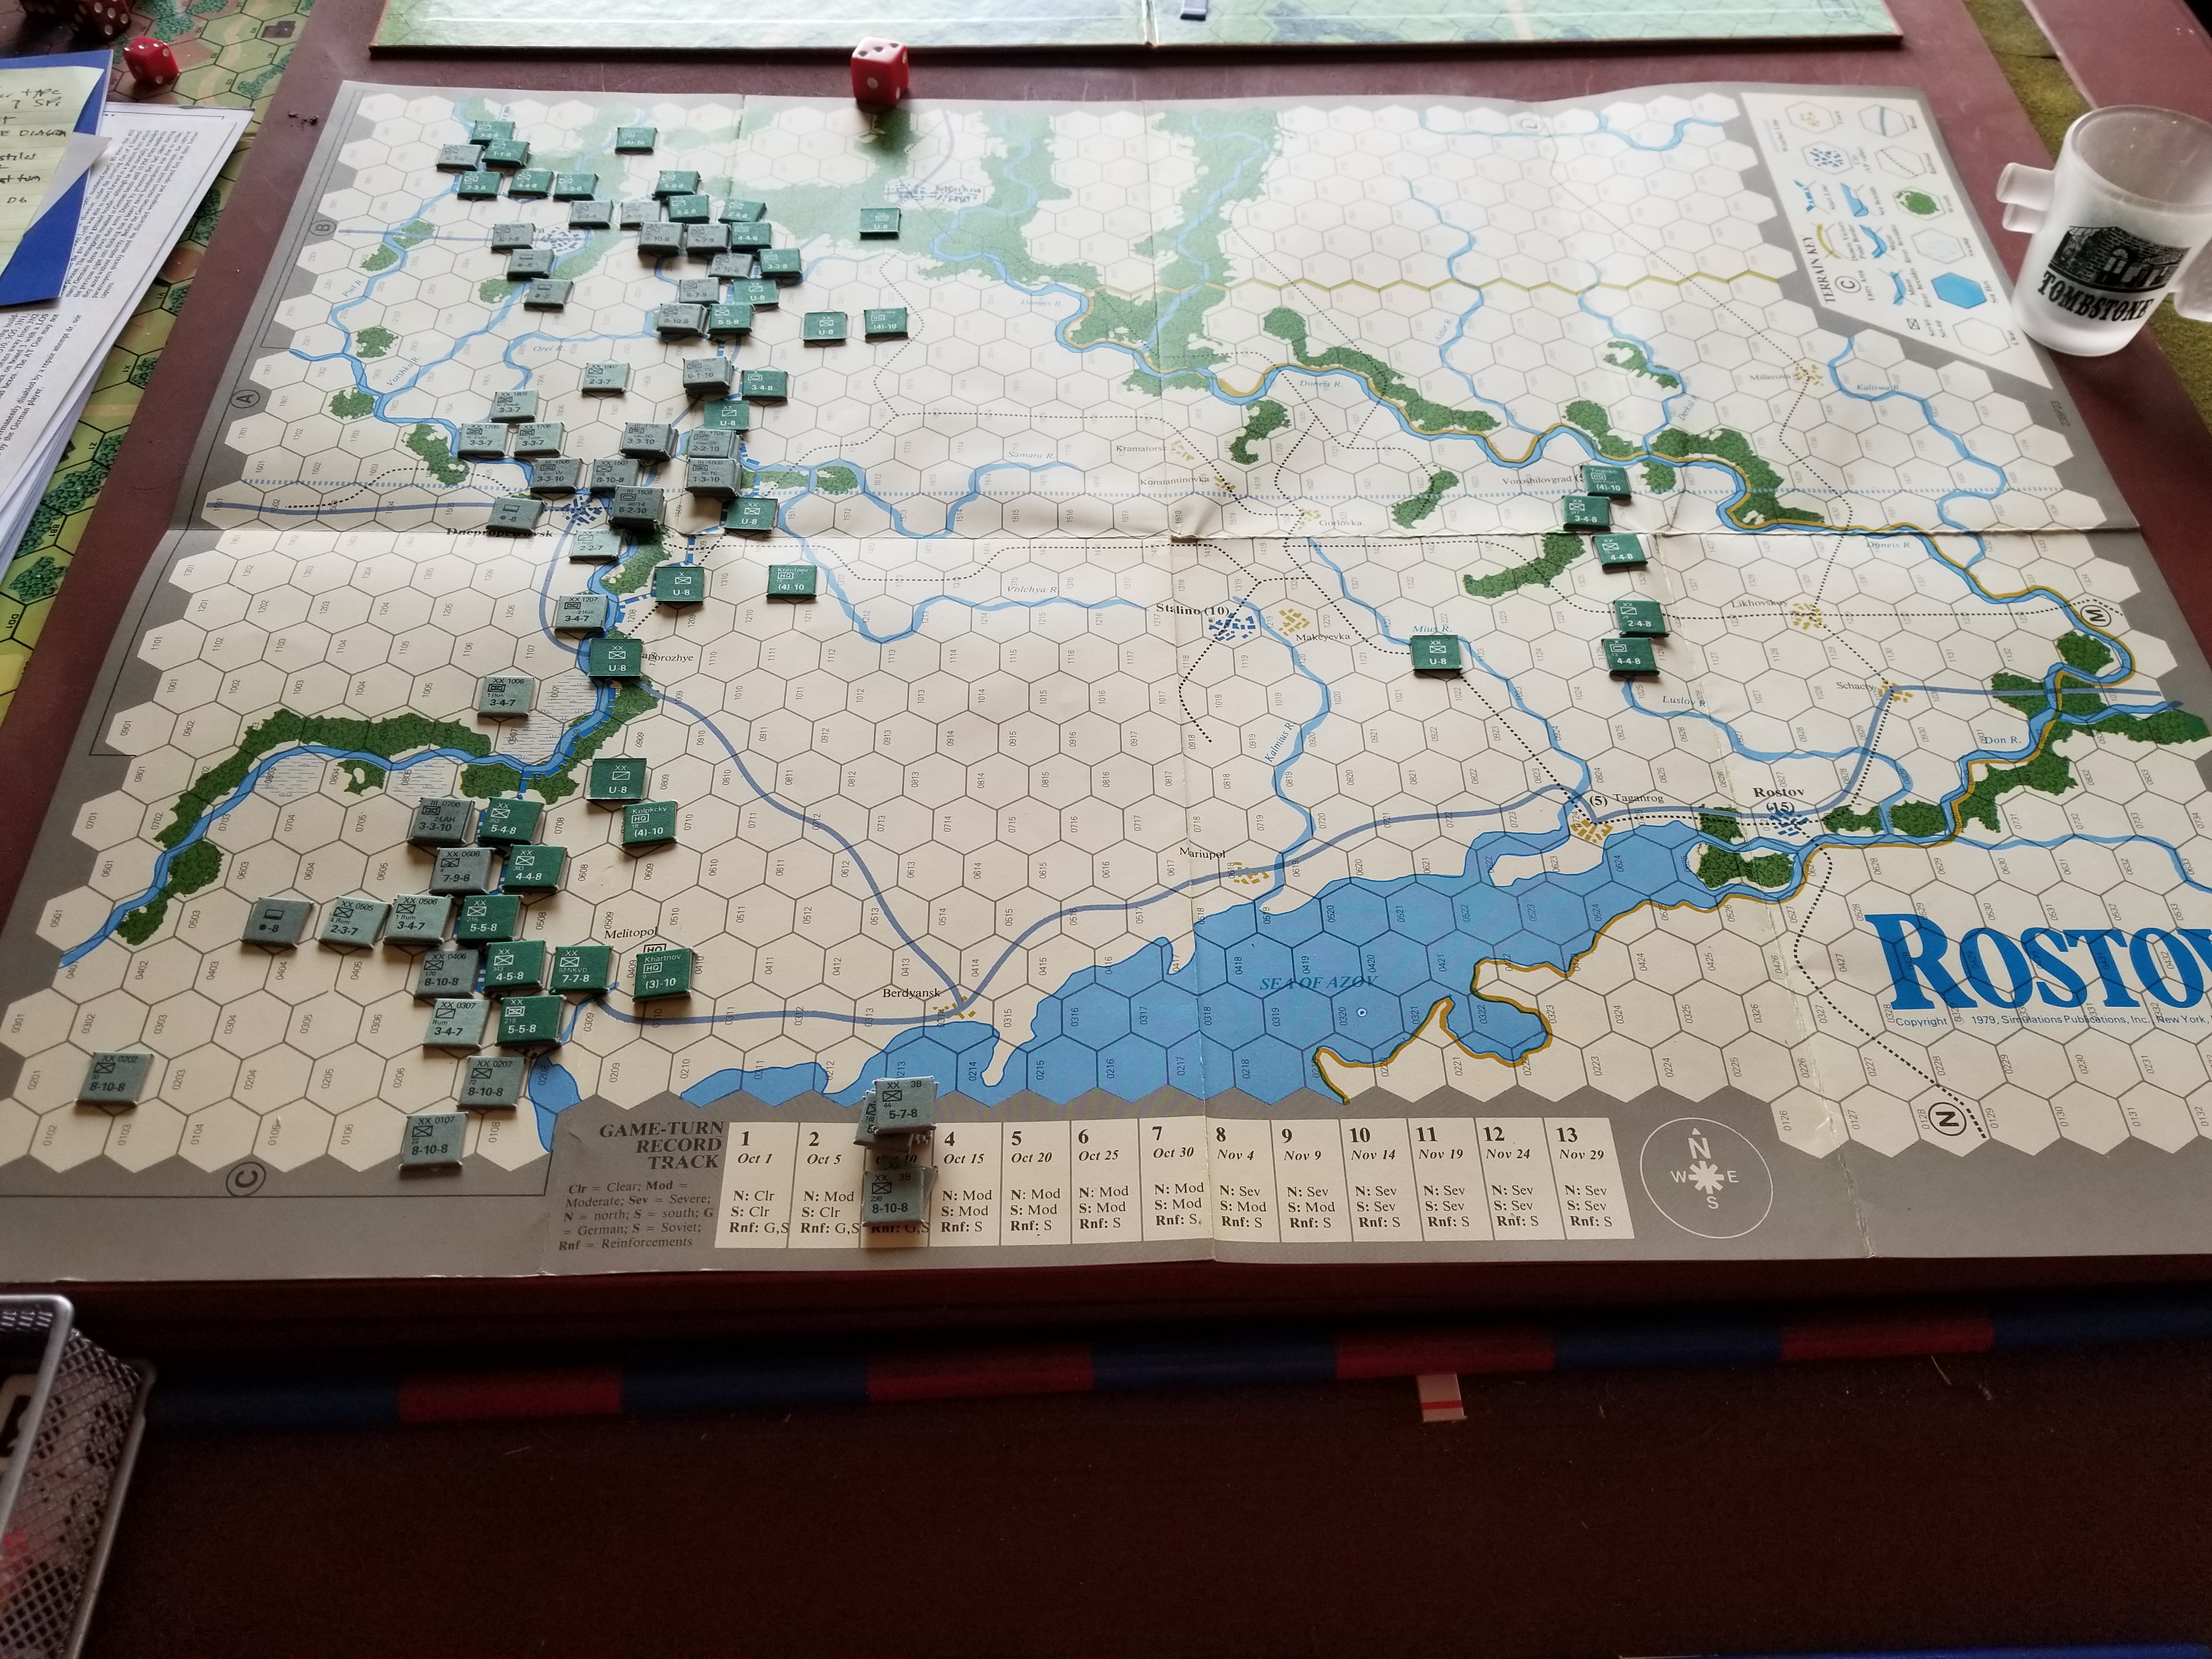
New game on the table before I launch off again. A relative of Panzergruppe Guderian – Rostov. Part of the Army Group South quad game, also released as a single game, and then released much later in S&T,
Same untried Soviet units, but both sides can move armored/mech/cavalry units a second time during a turn. Lots of exclusive rules.
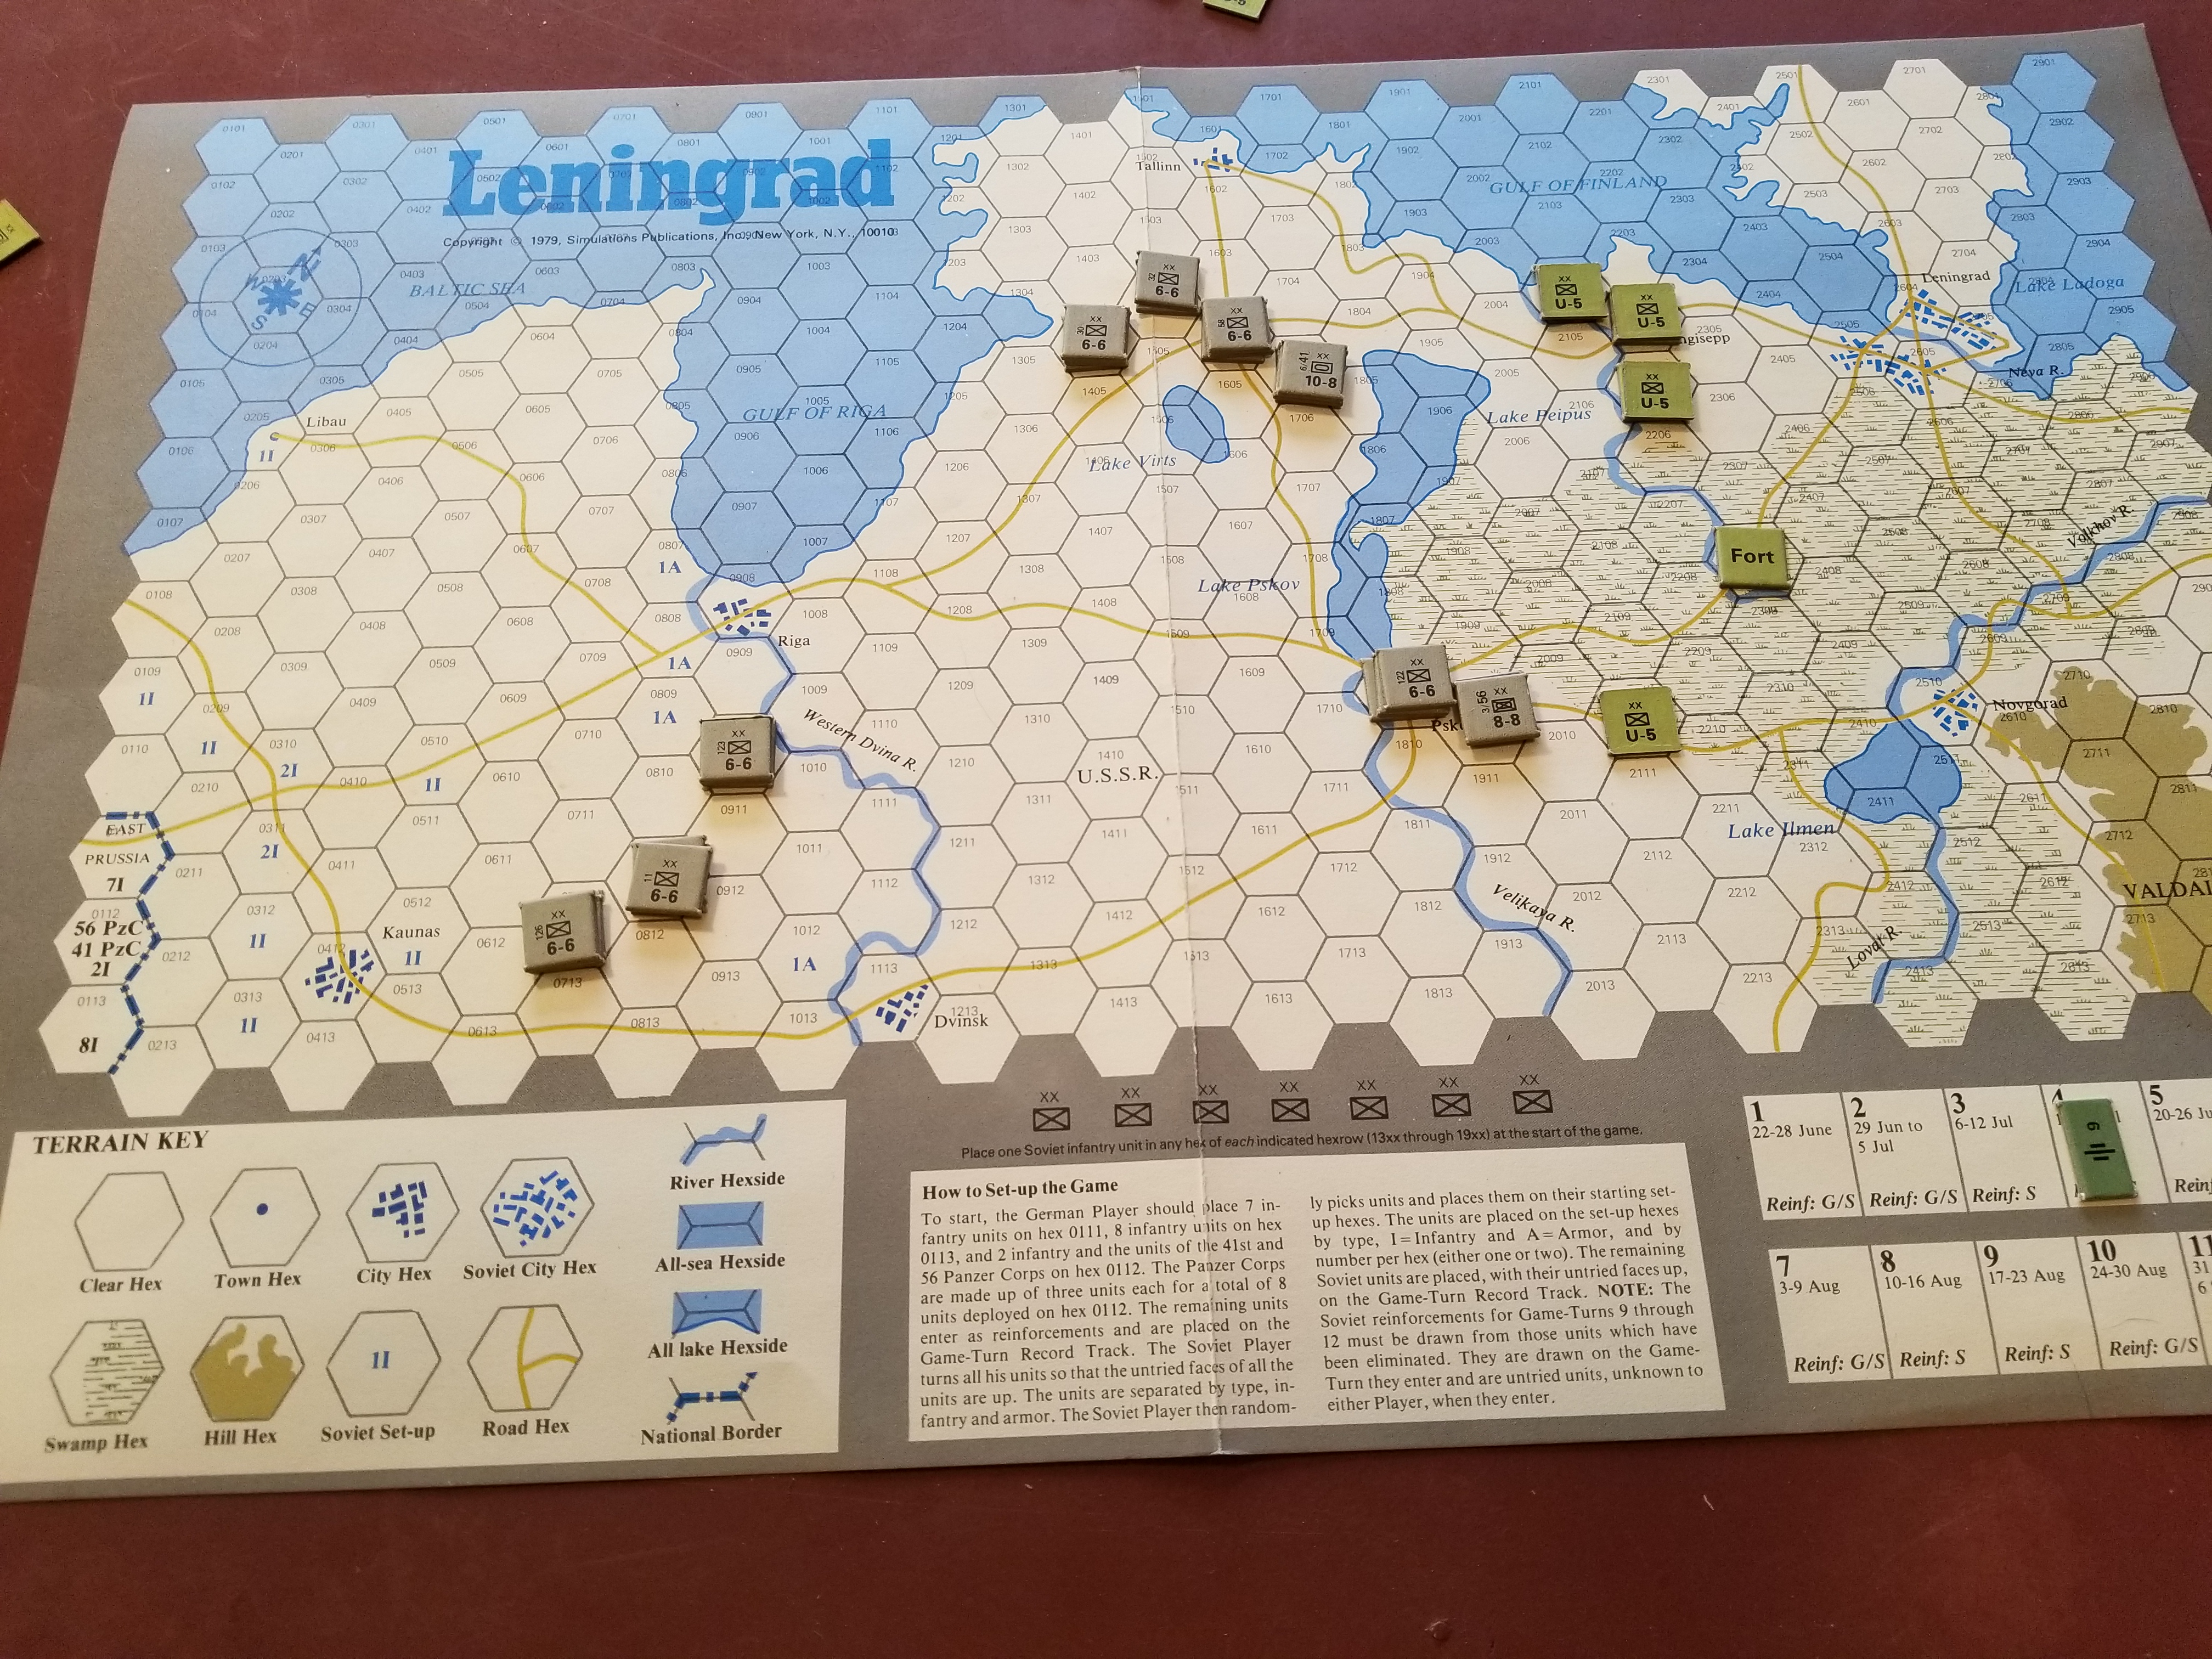
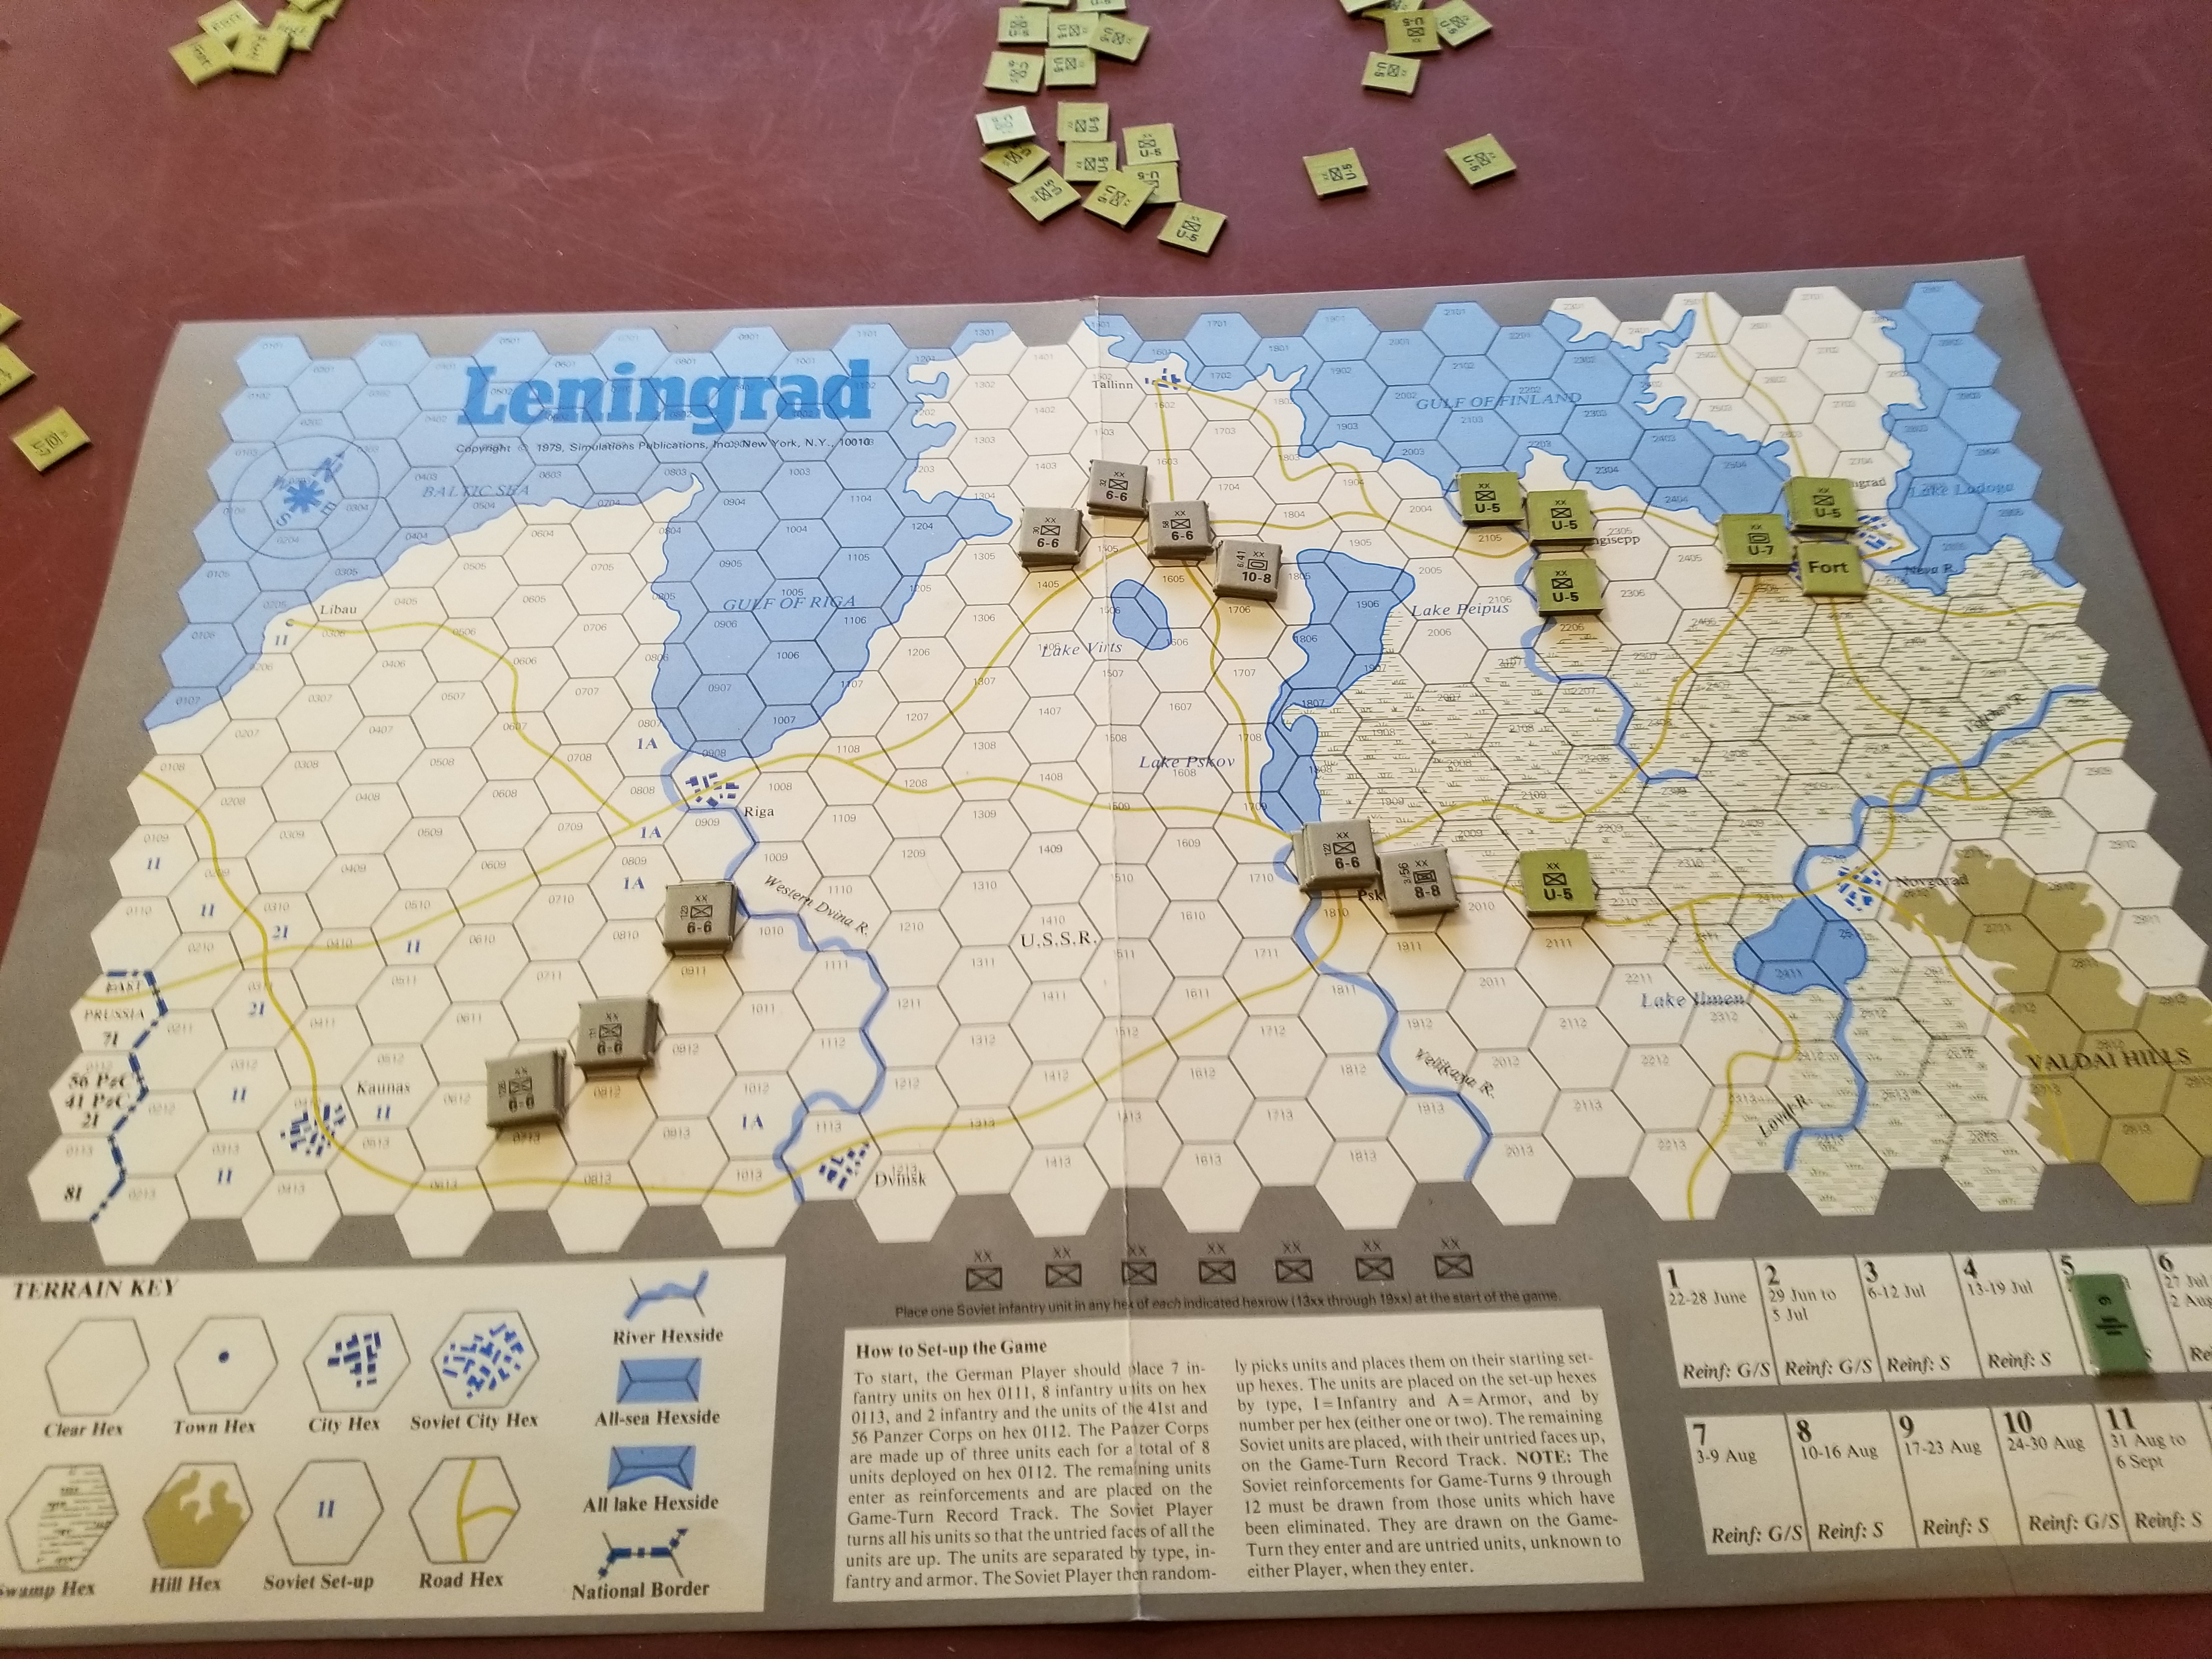
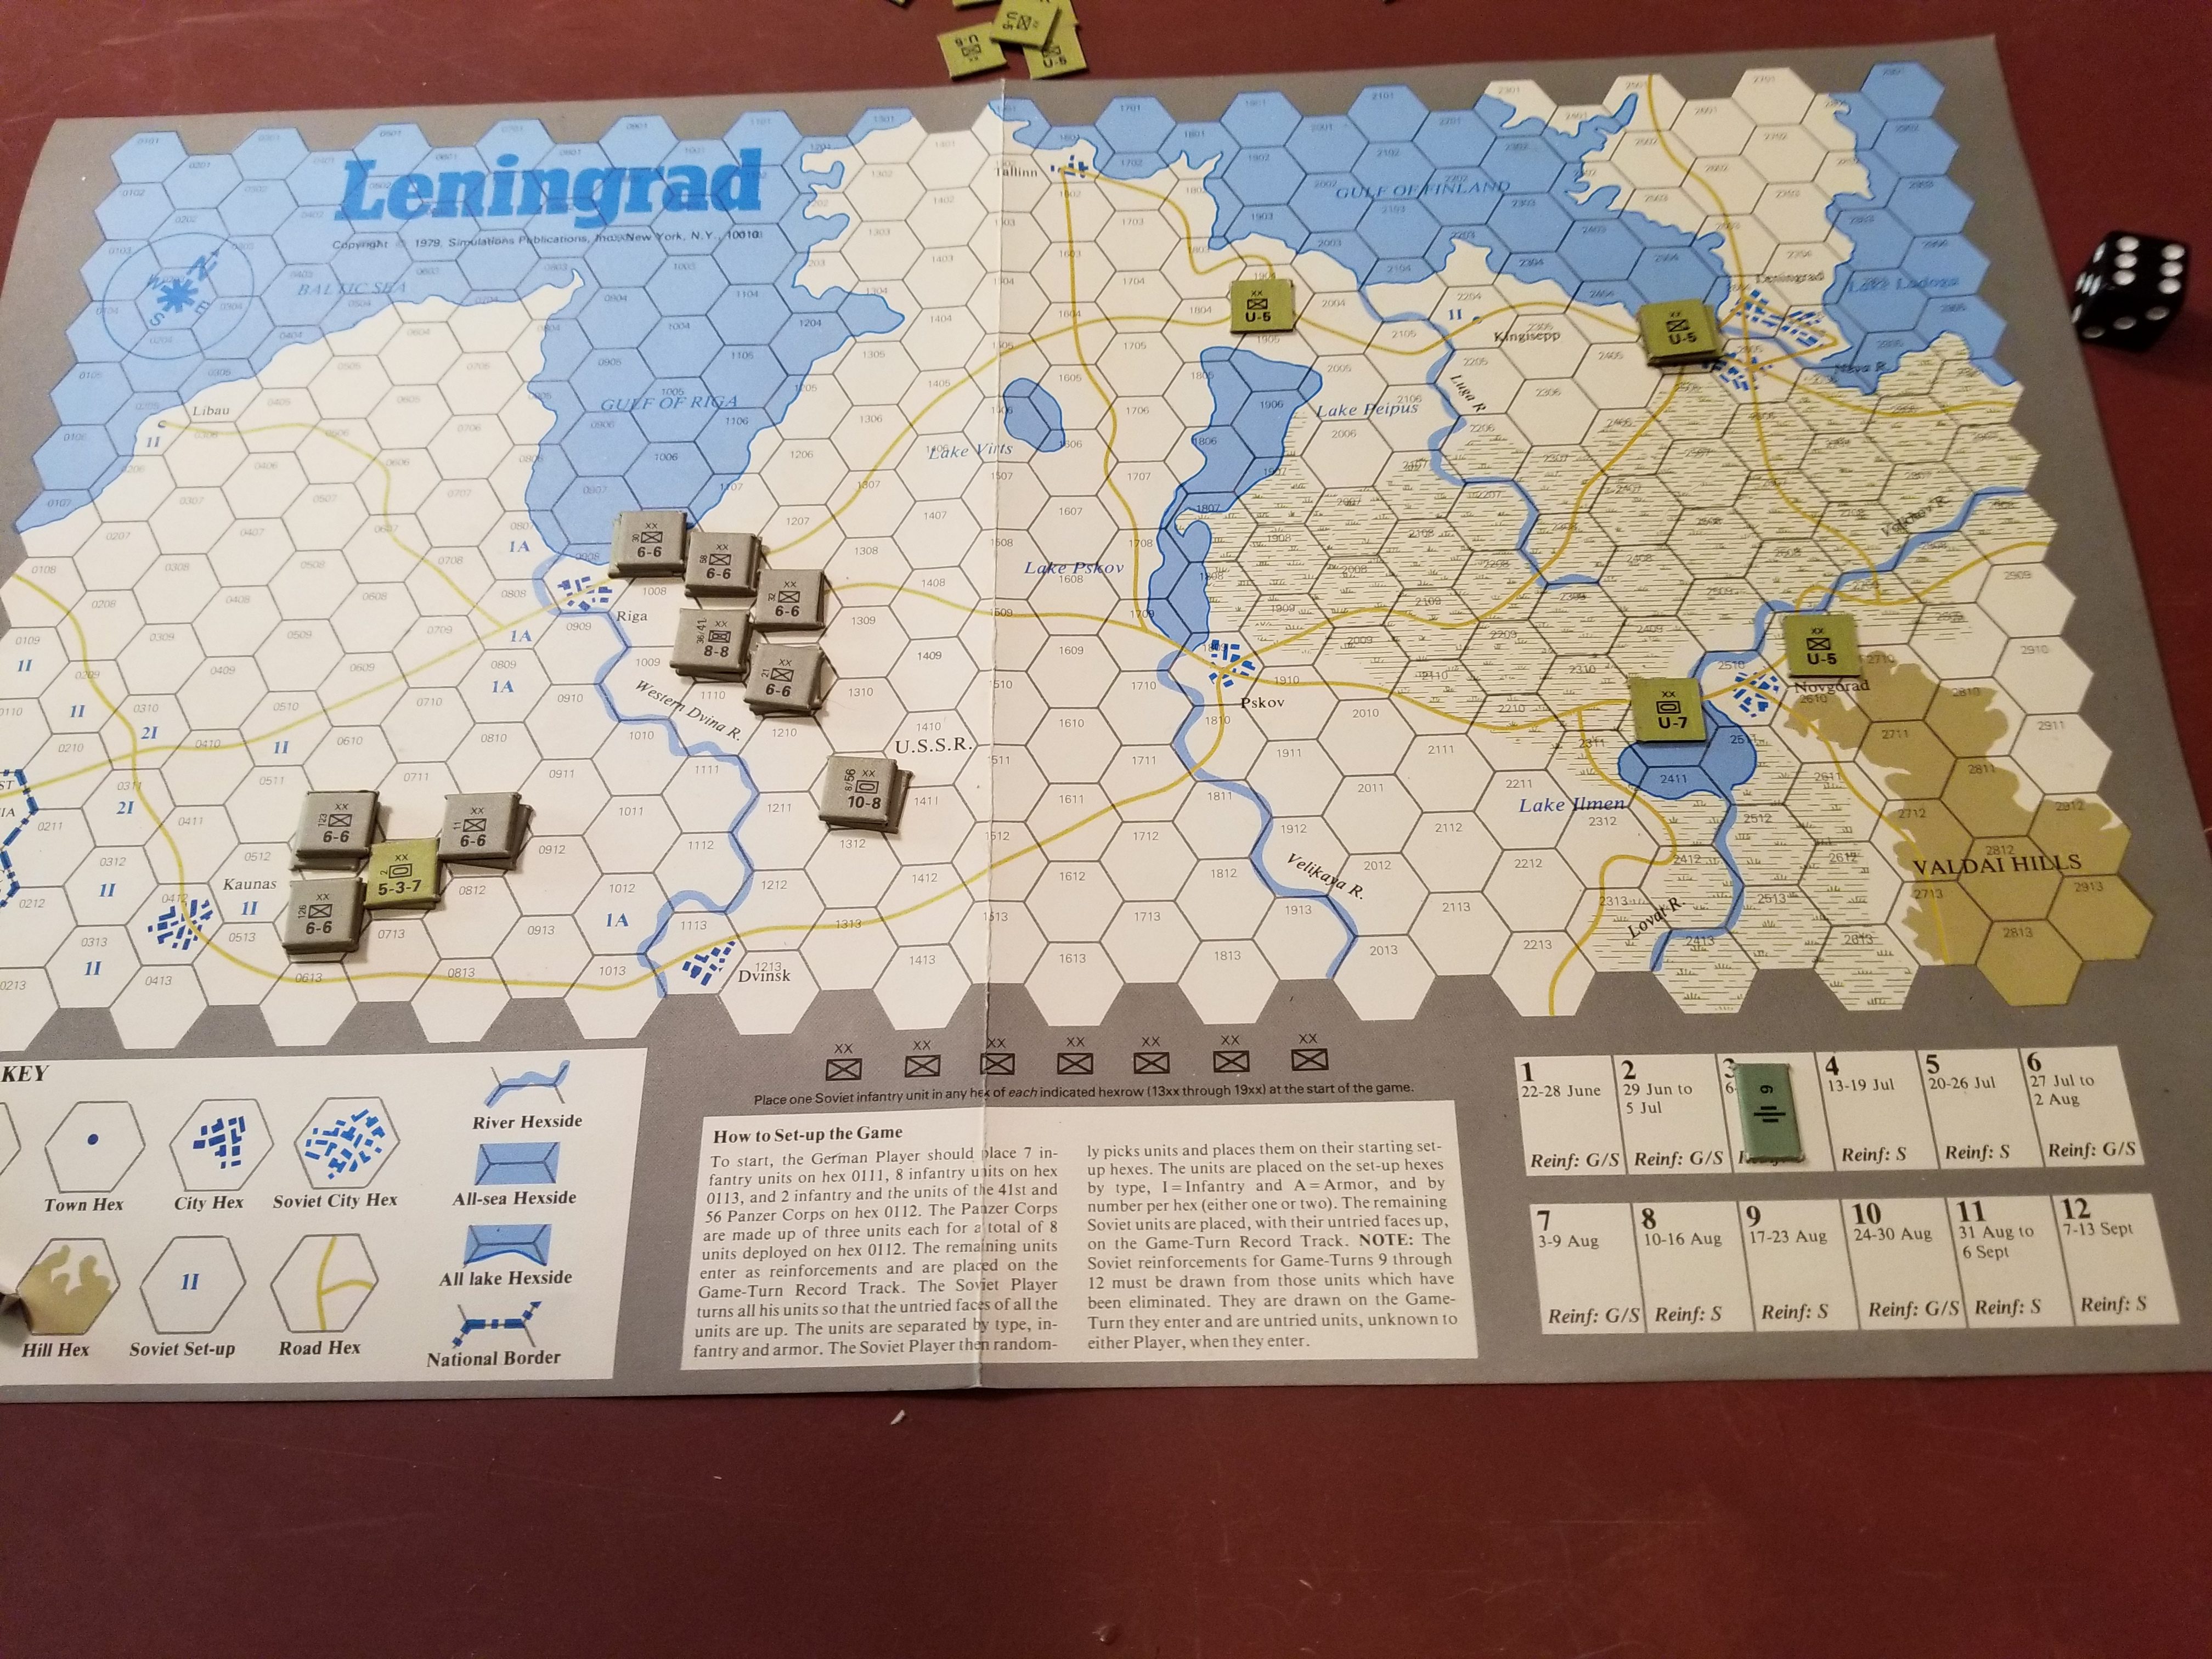
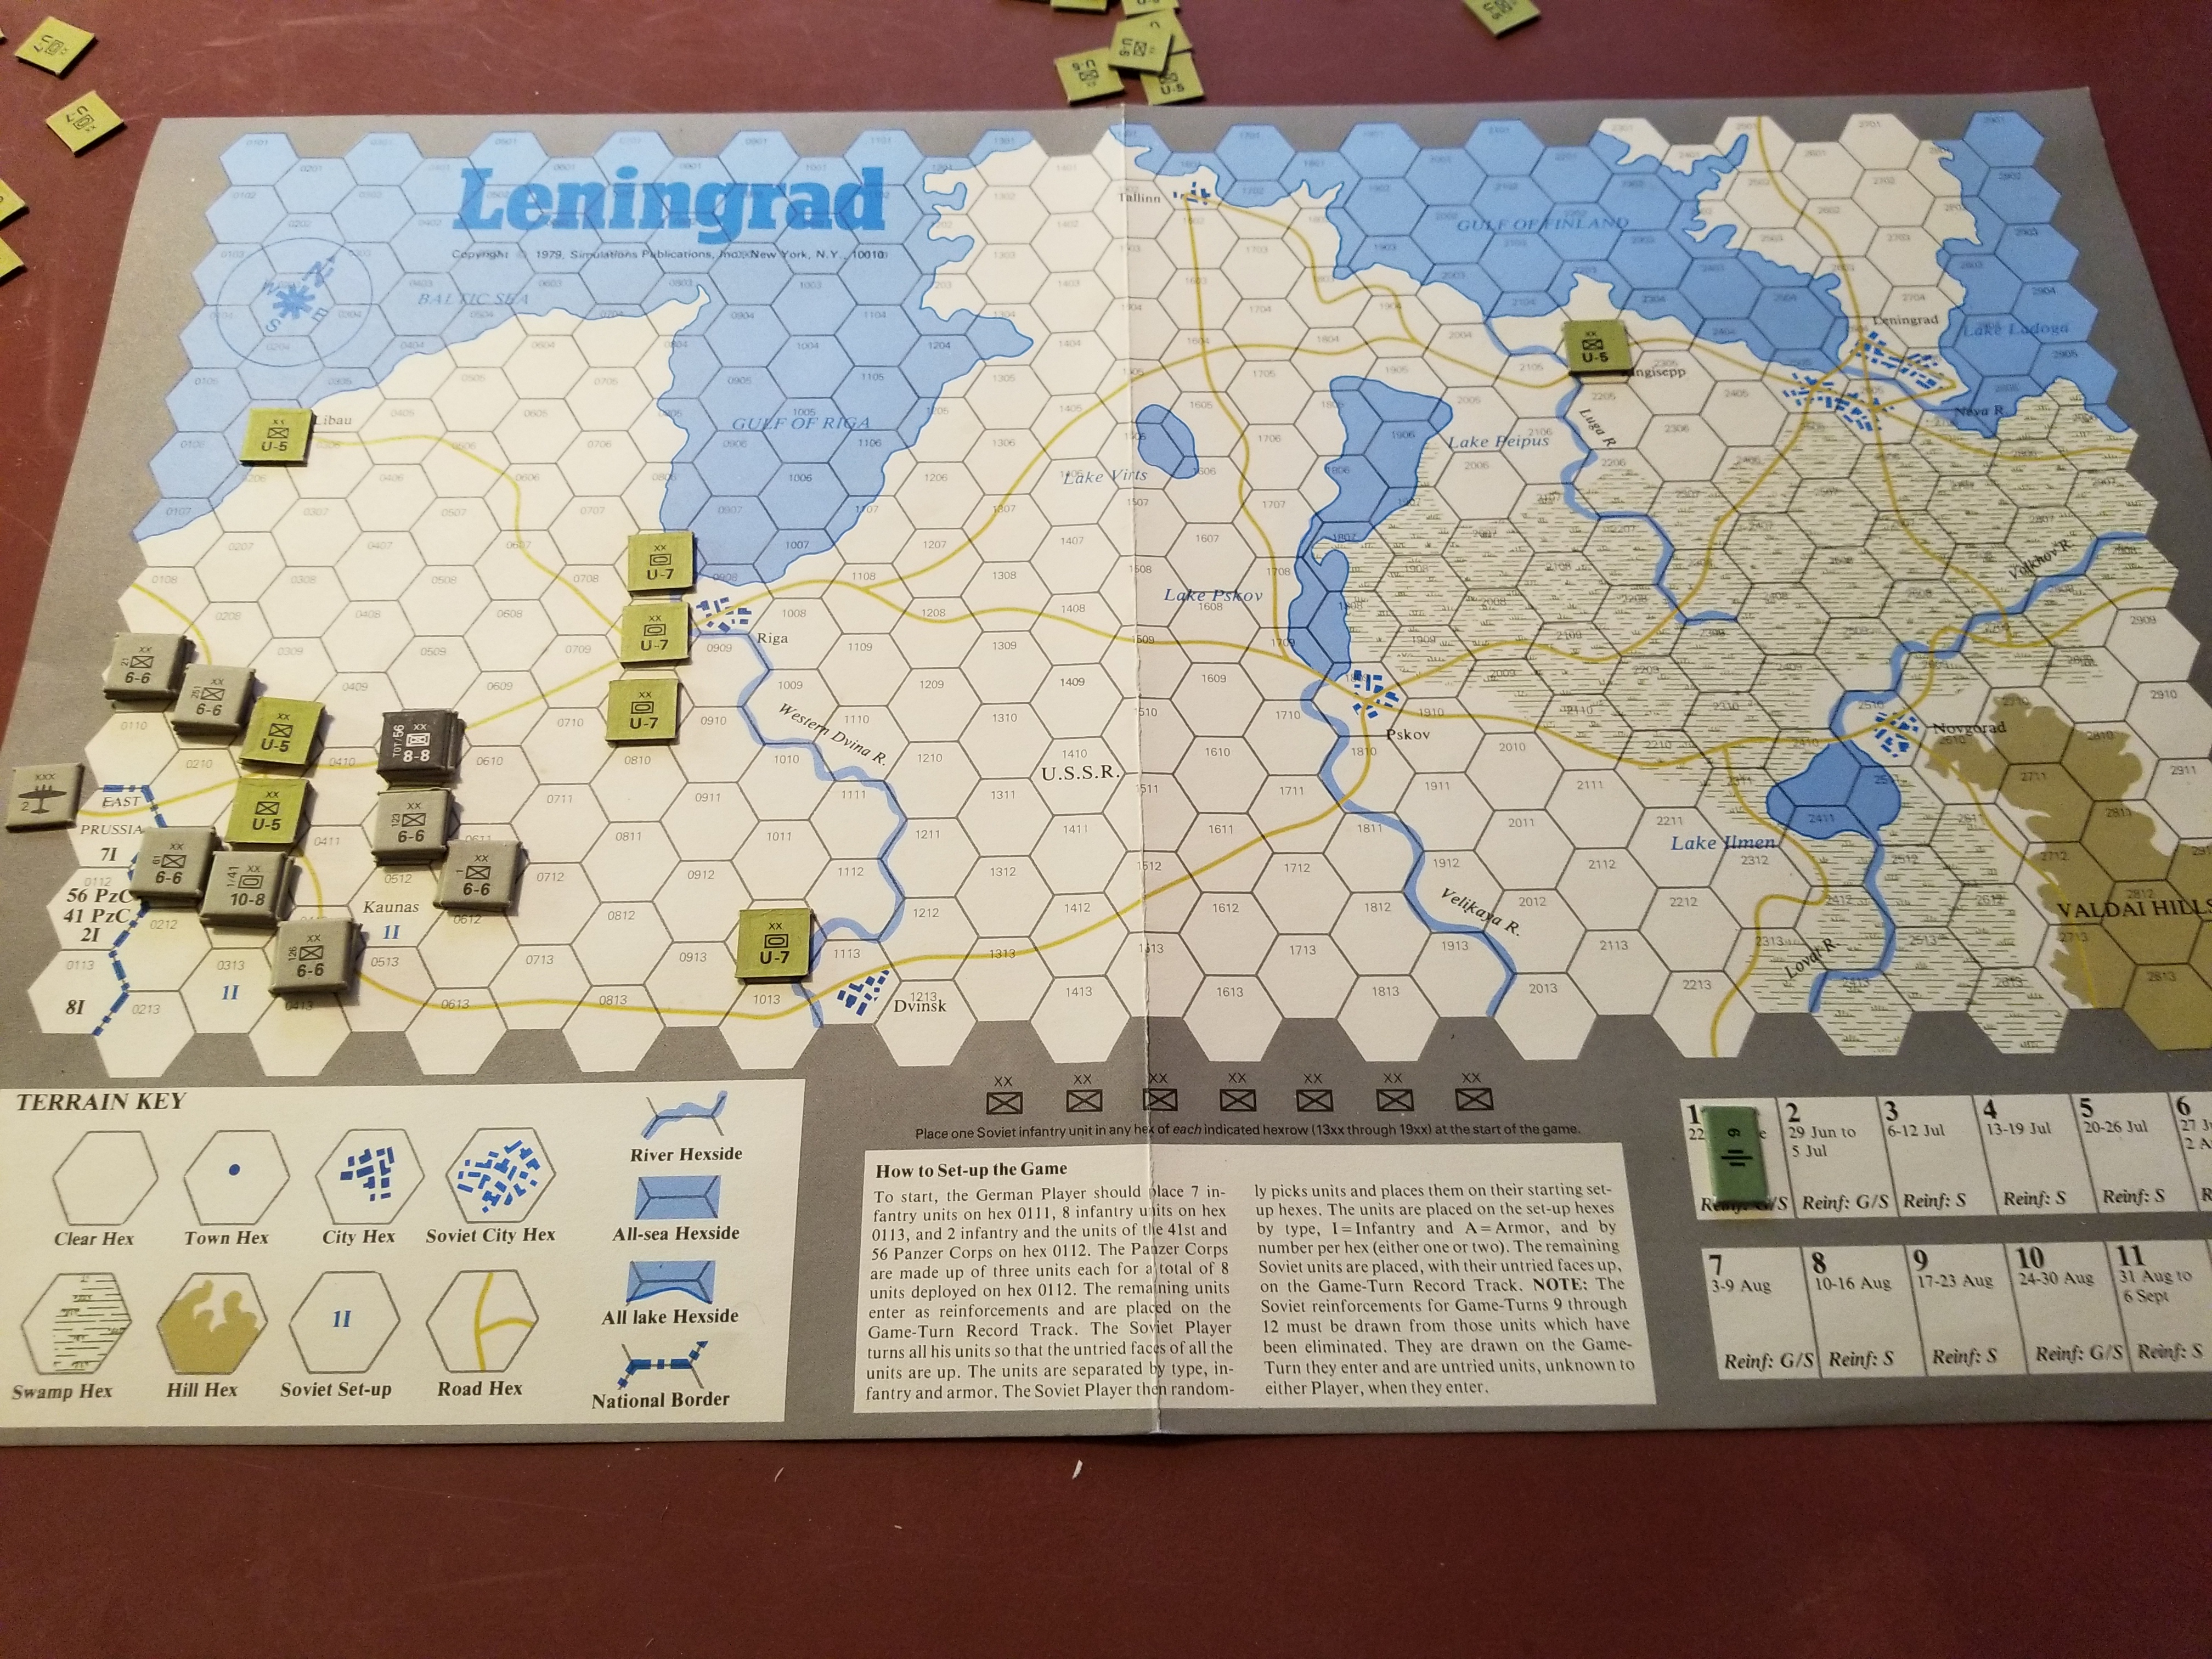
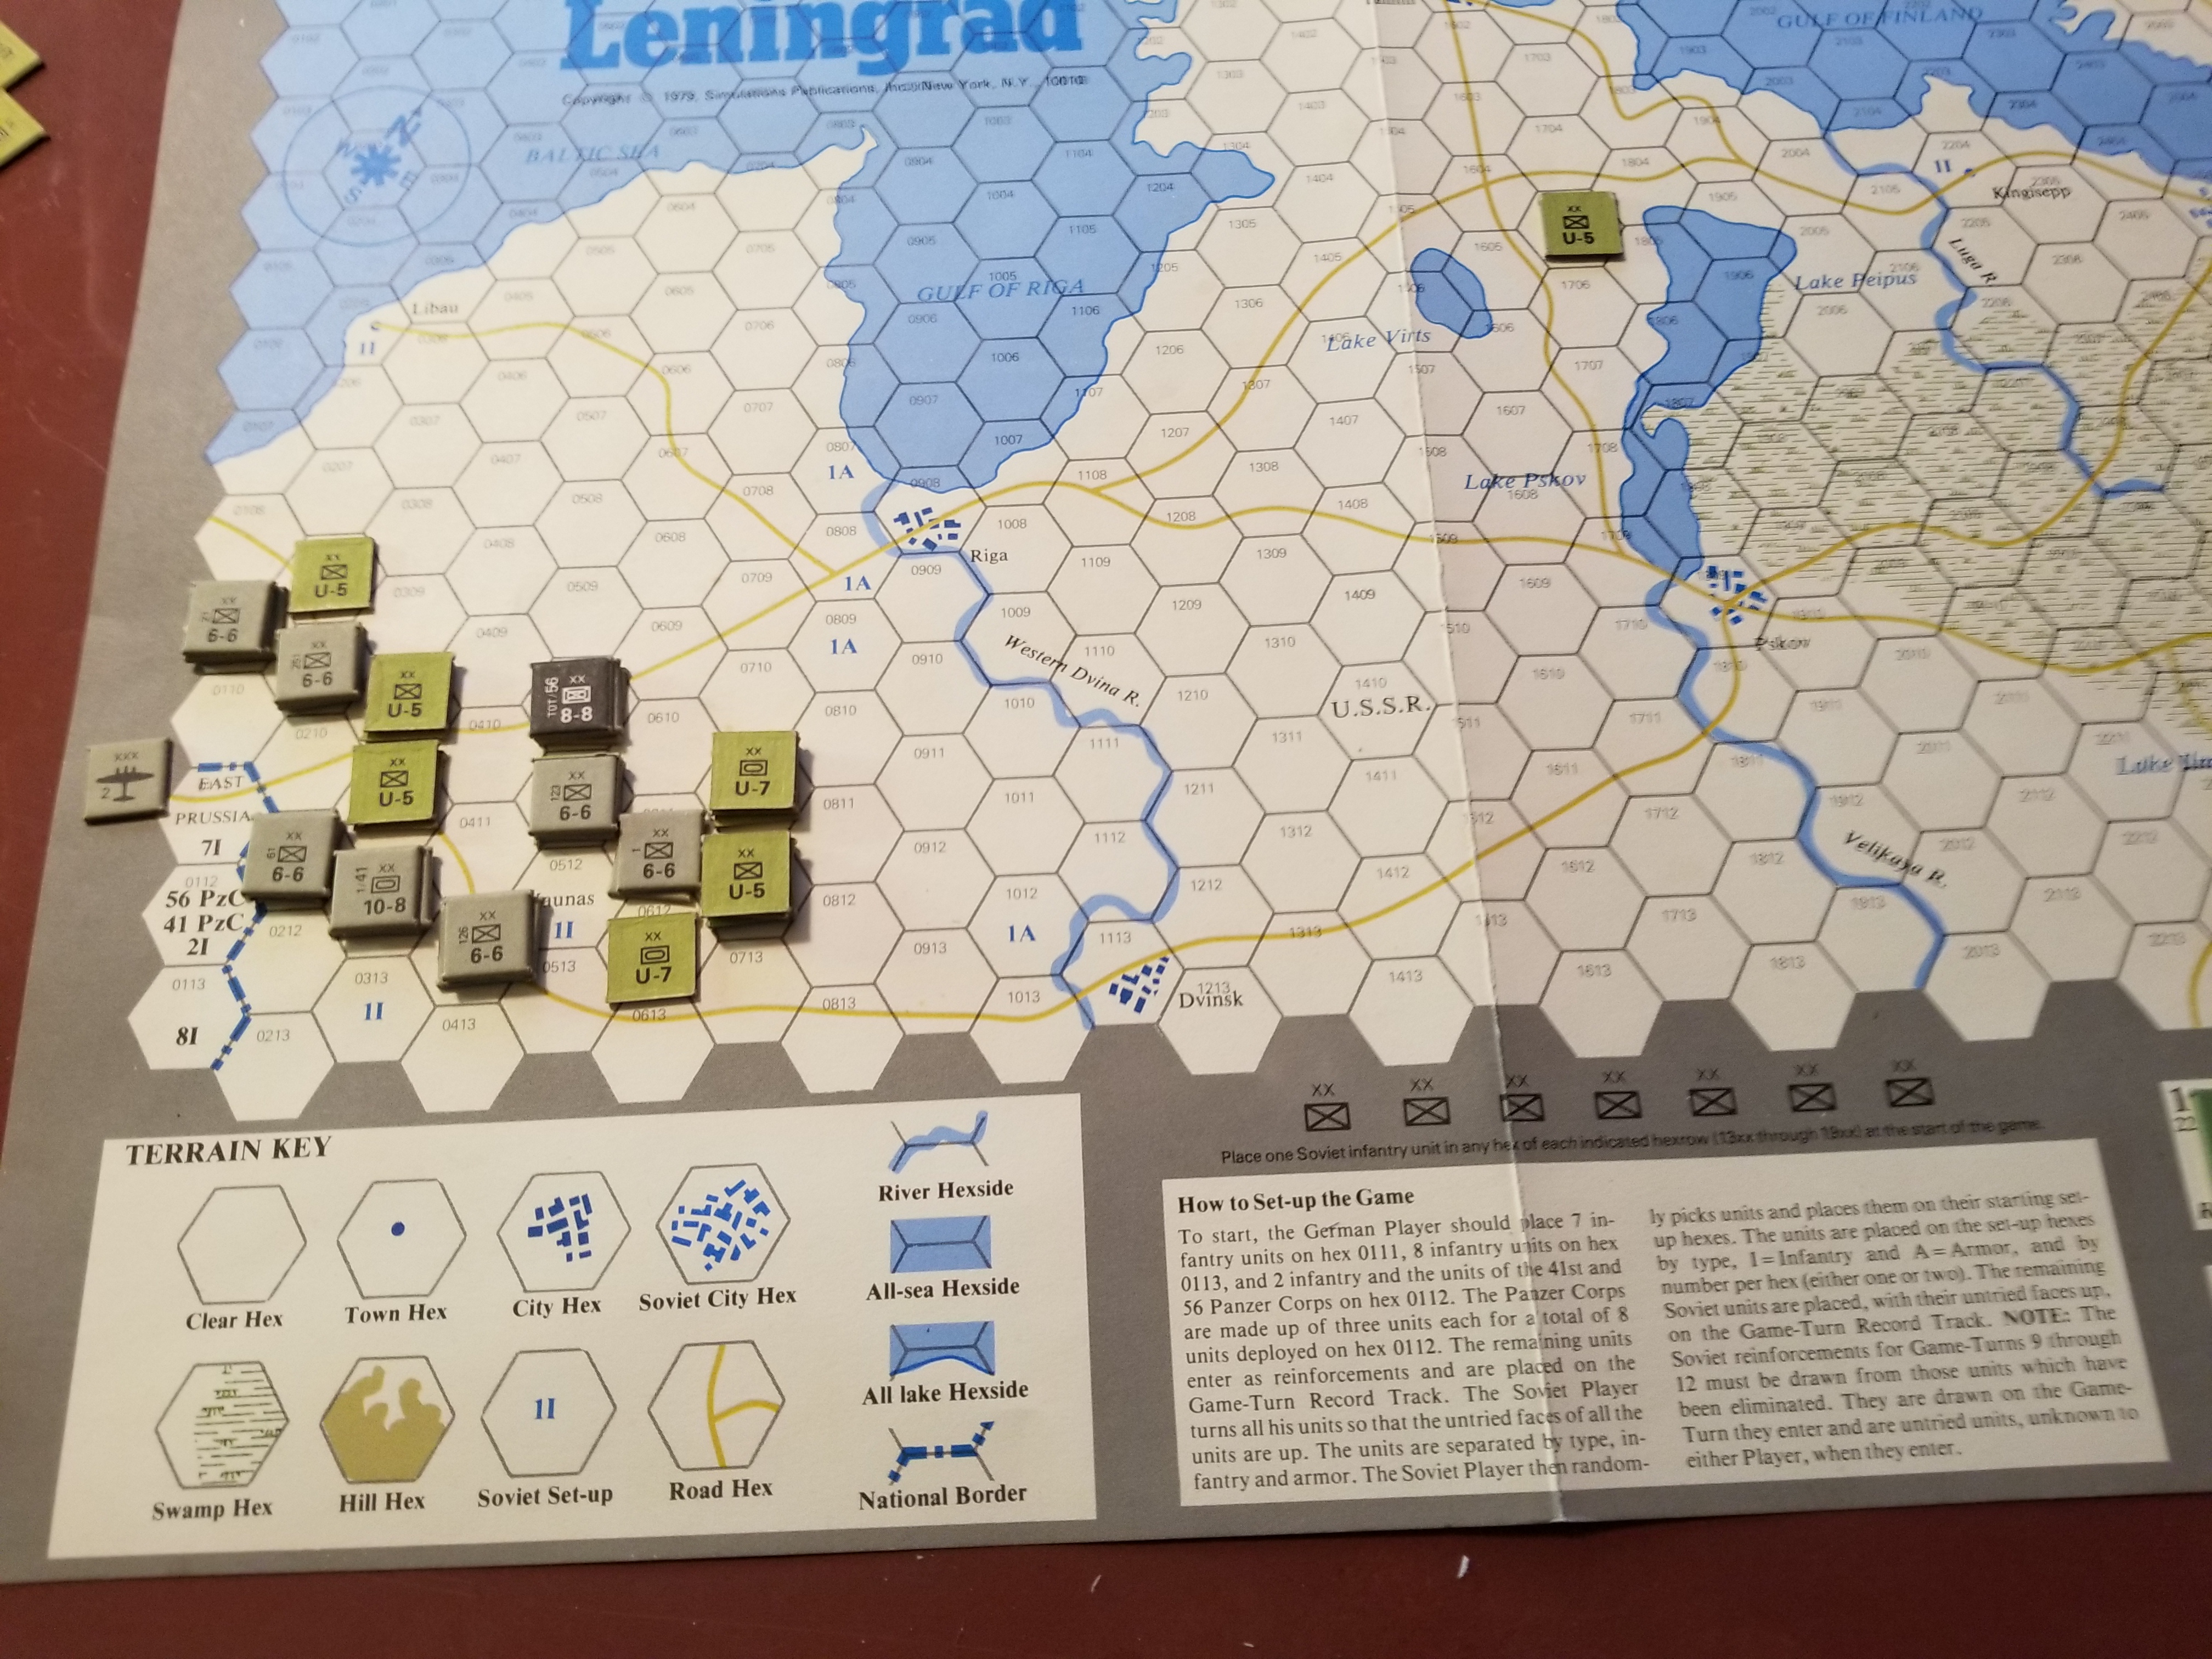
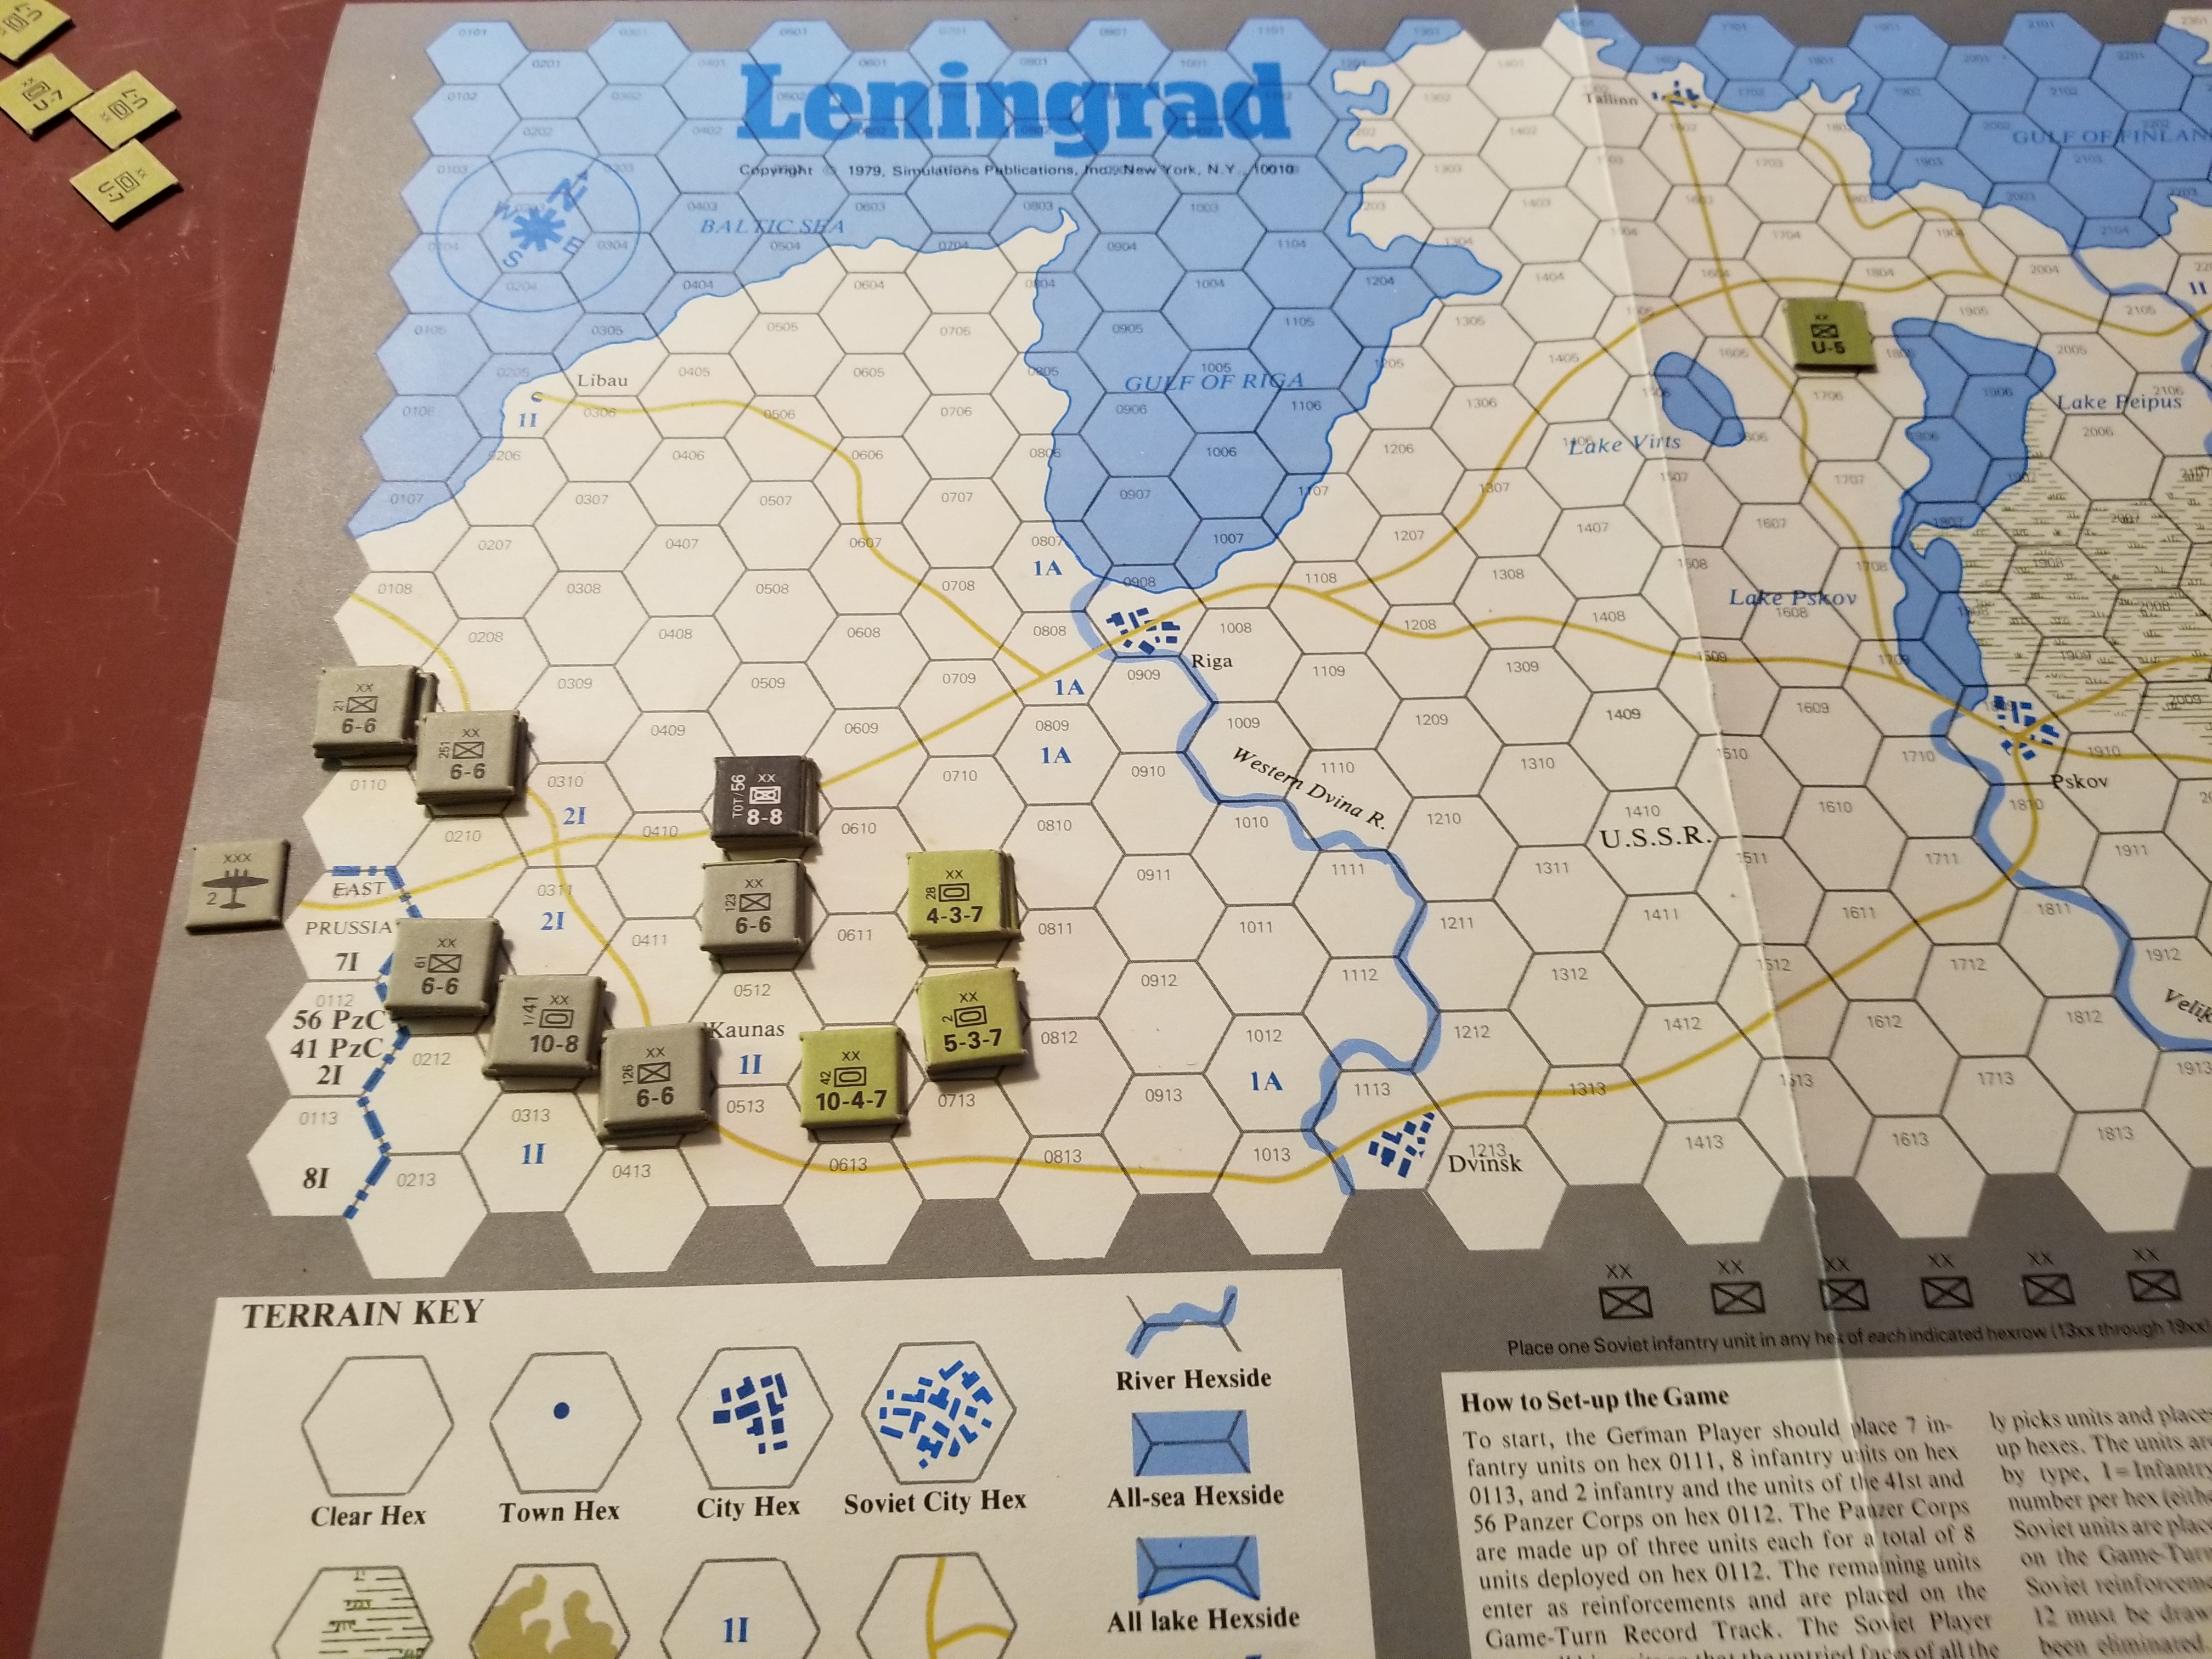
Have it set up and will start this evening. Here’s the initial deployment as prescribed by the rules.
I know…….the green Soviet counters just look wrong. Tombstone shot glass has the Soviet reinforcements.
Quick play, small footprint. Unknown strength Soviet units help make it solitaire friendly and increase replayability.
The Germans have to be good and lucky to win. I didn’t make low odds attacks or try aggressive overruns, and wound up losing. Sums up the whole historical proposition.
Now, the Soviets have to play their part, too. Can’t just lay back on Leningrad. Some level of forward defense is needed and, necessary.
It’s nice for a game to live up to one’s memories.
Rainy cool weather, so I decided to finish this one off.
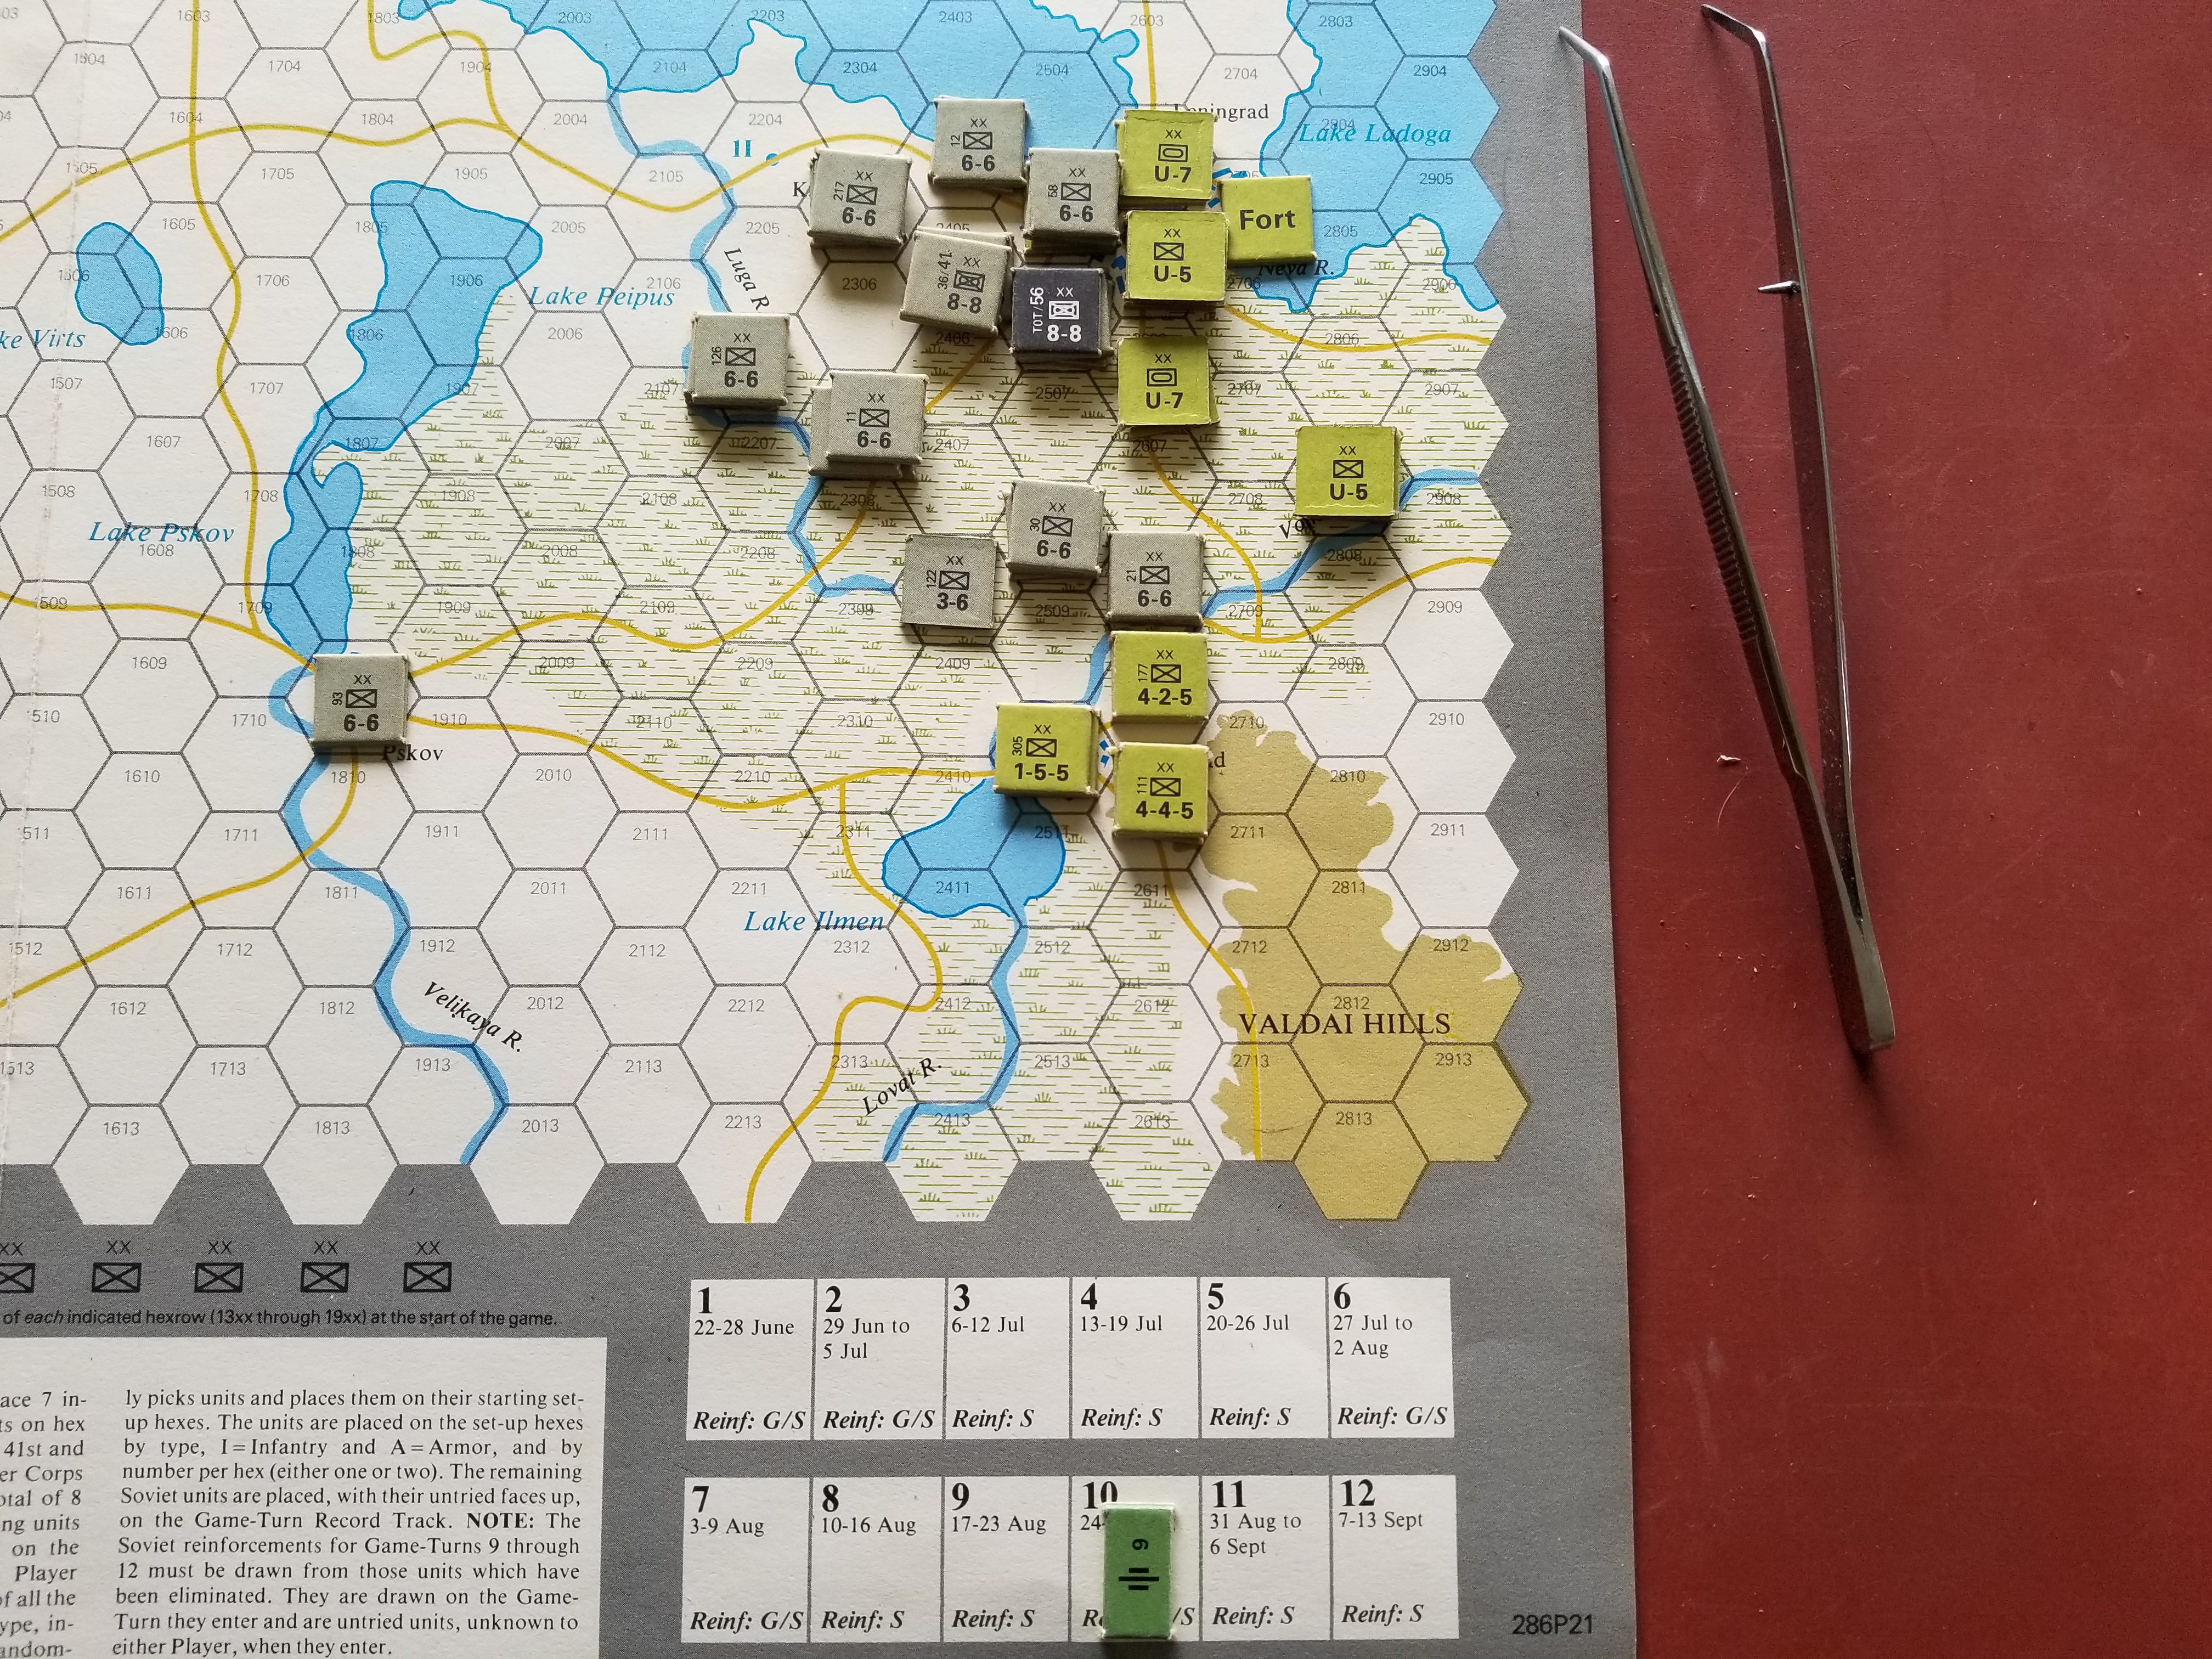
The Germans were able to push their way into the western suburbs of the city during Turn 9. However, they had to withdraw from Norvogrod.
Situation End Of Turn 9
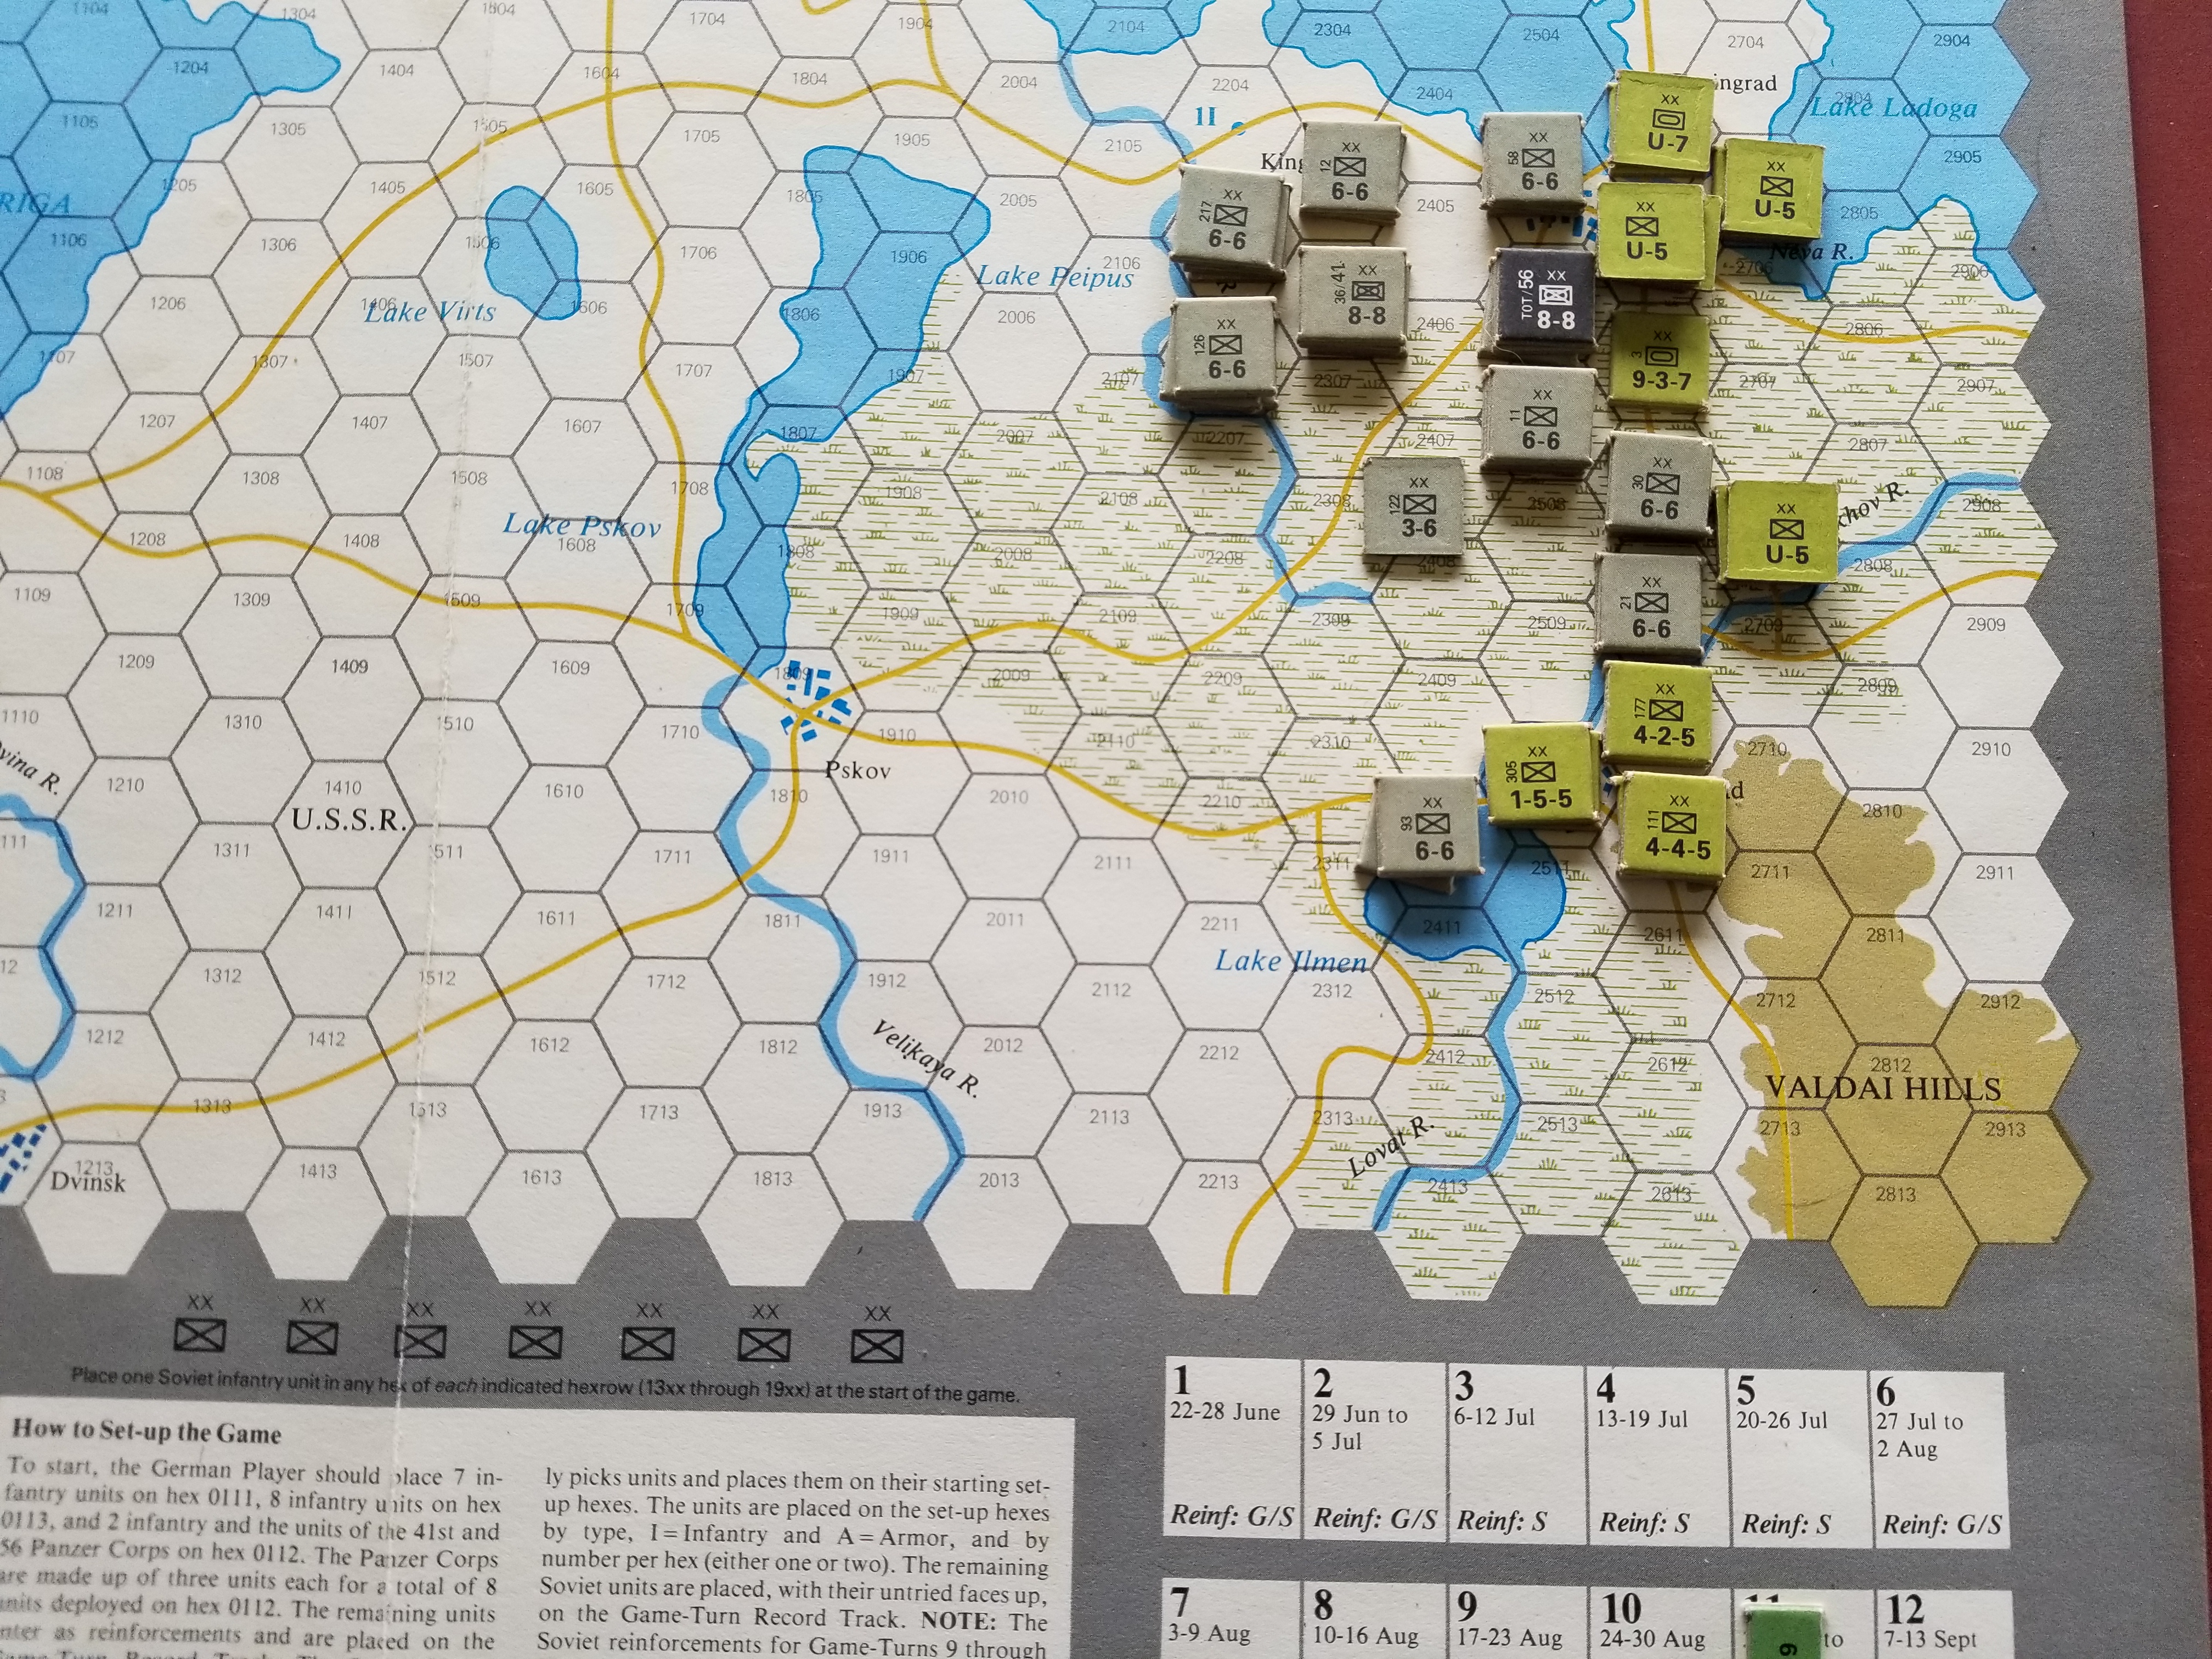
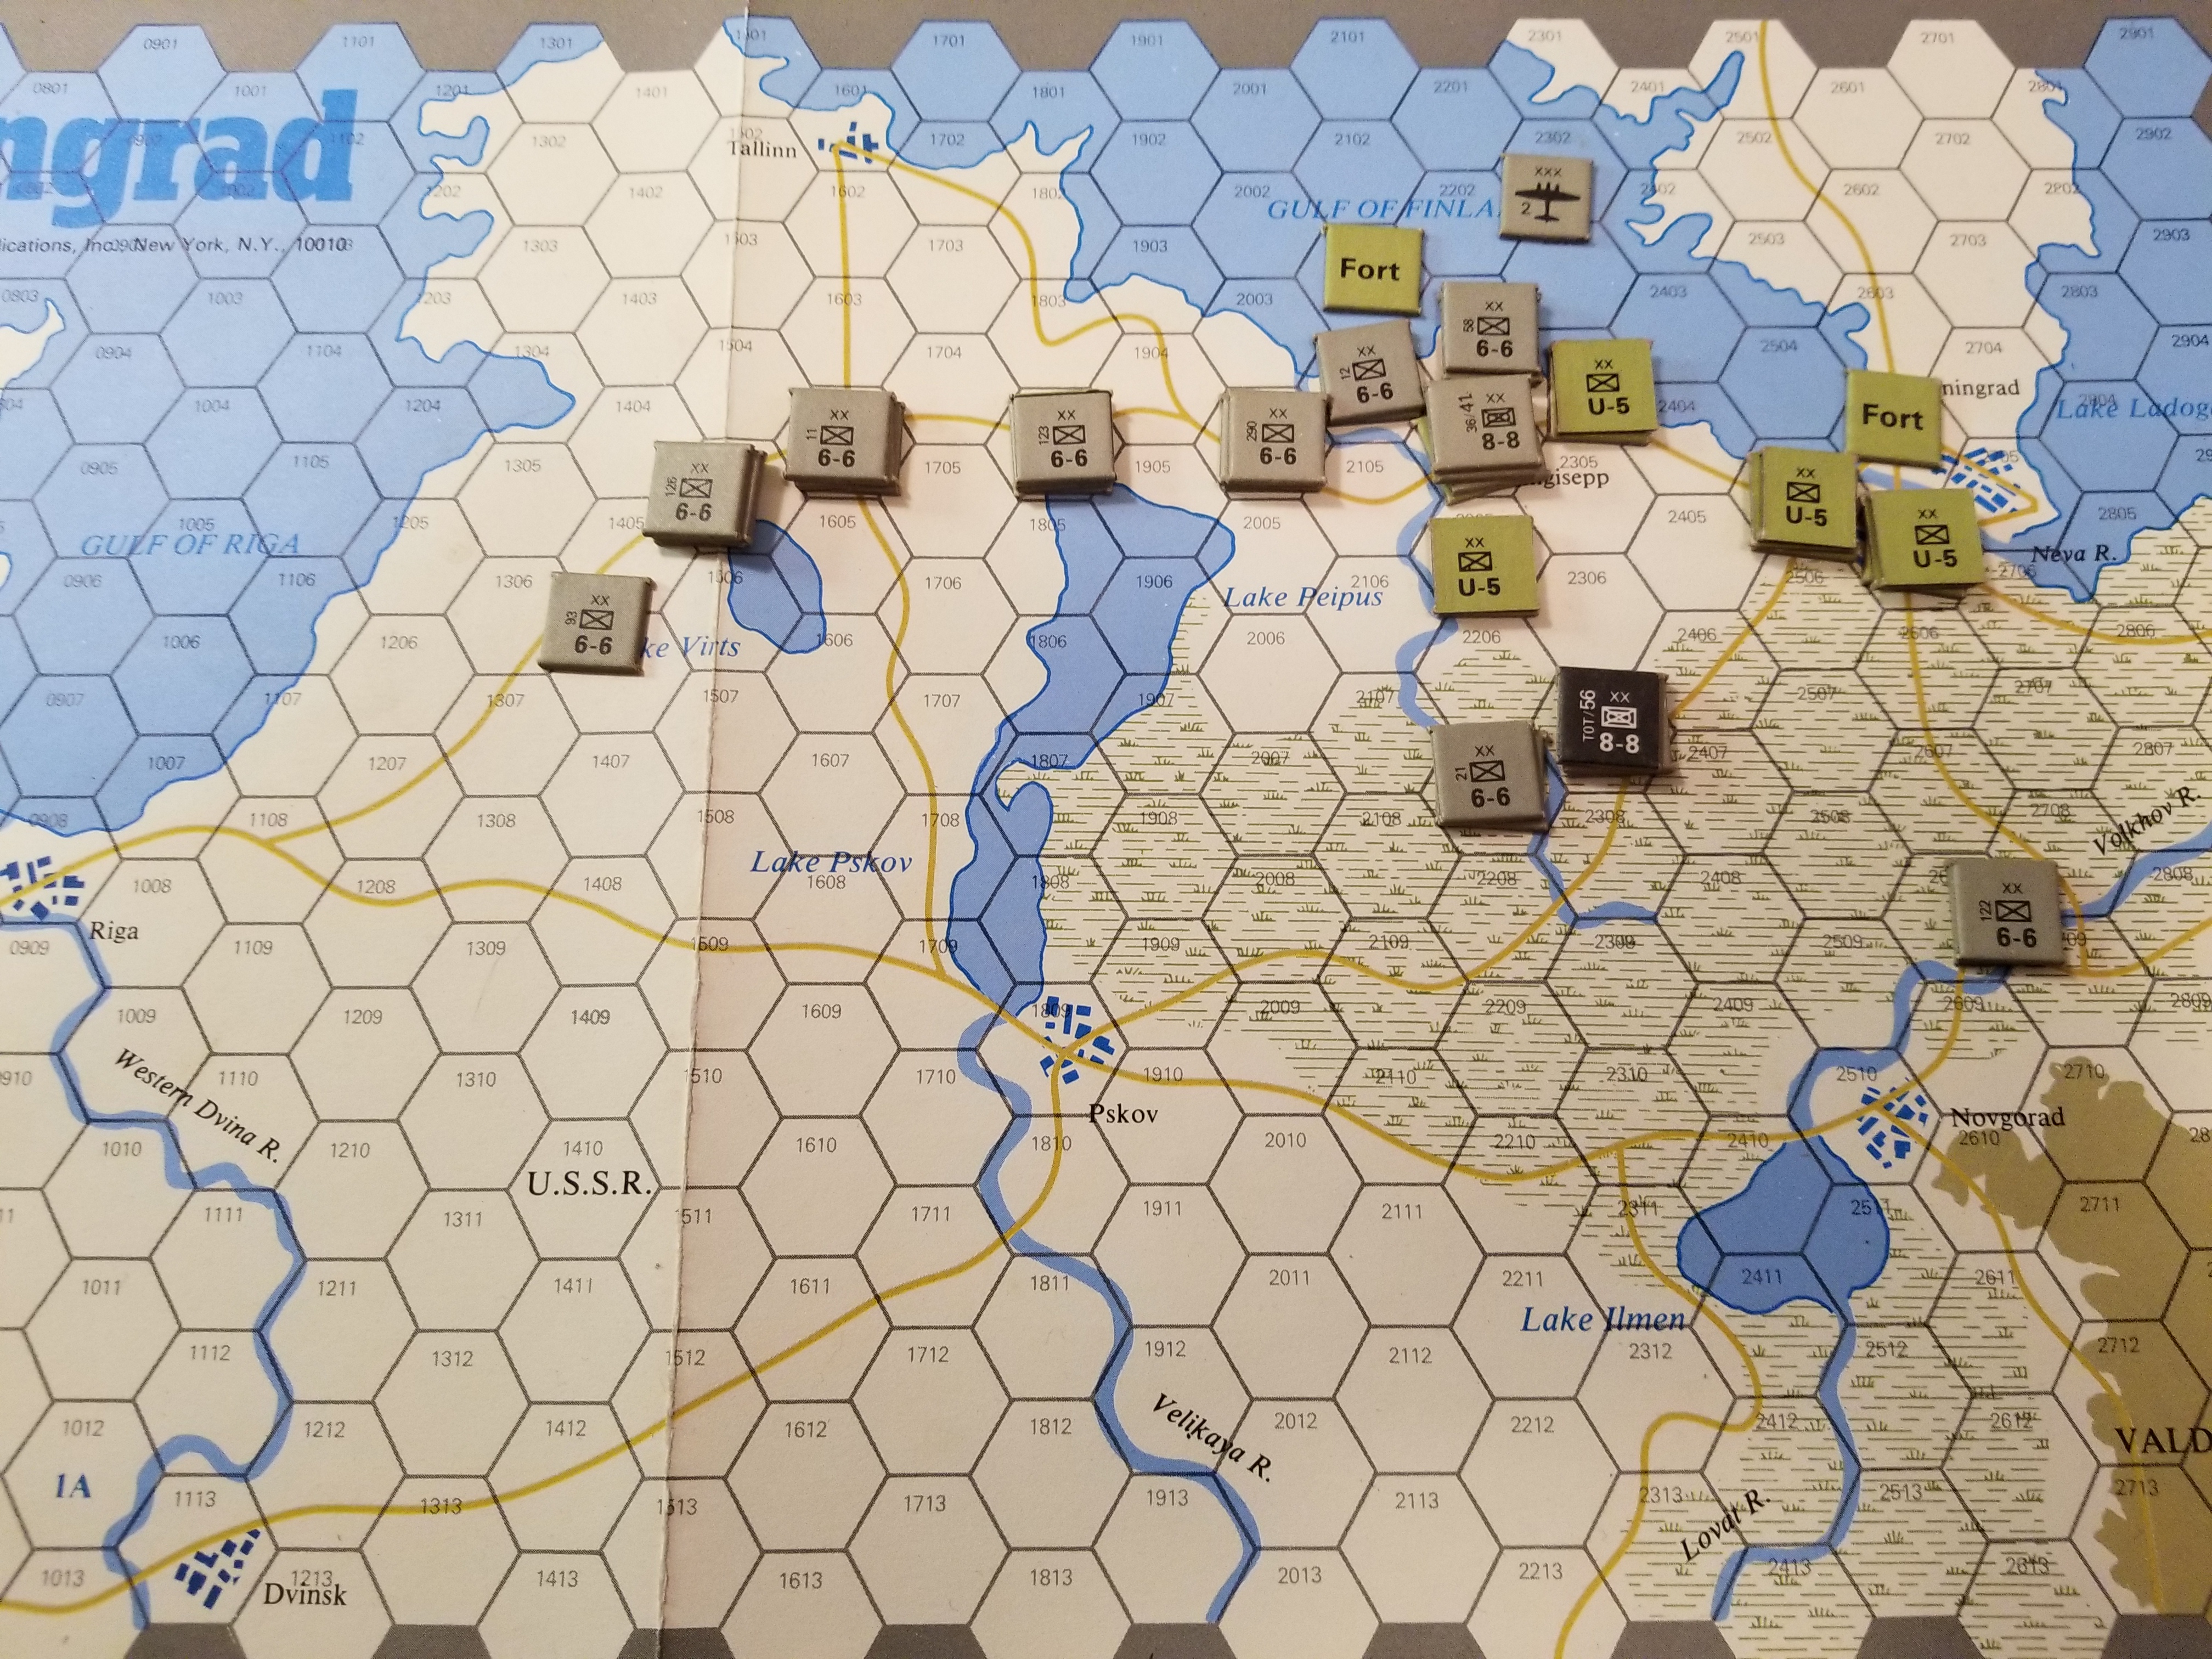
During Turn 10, the Germans attempted to clear out Soviet units just south of Leningrad in order to open up the remaining fortified suburb south of the Neva River for an attack from three different hexes. This attack was only partially successful, with one Soviet armored unit (9-3-7) still blocking the southern approaches.
Situation End Of Turn 10
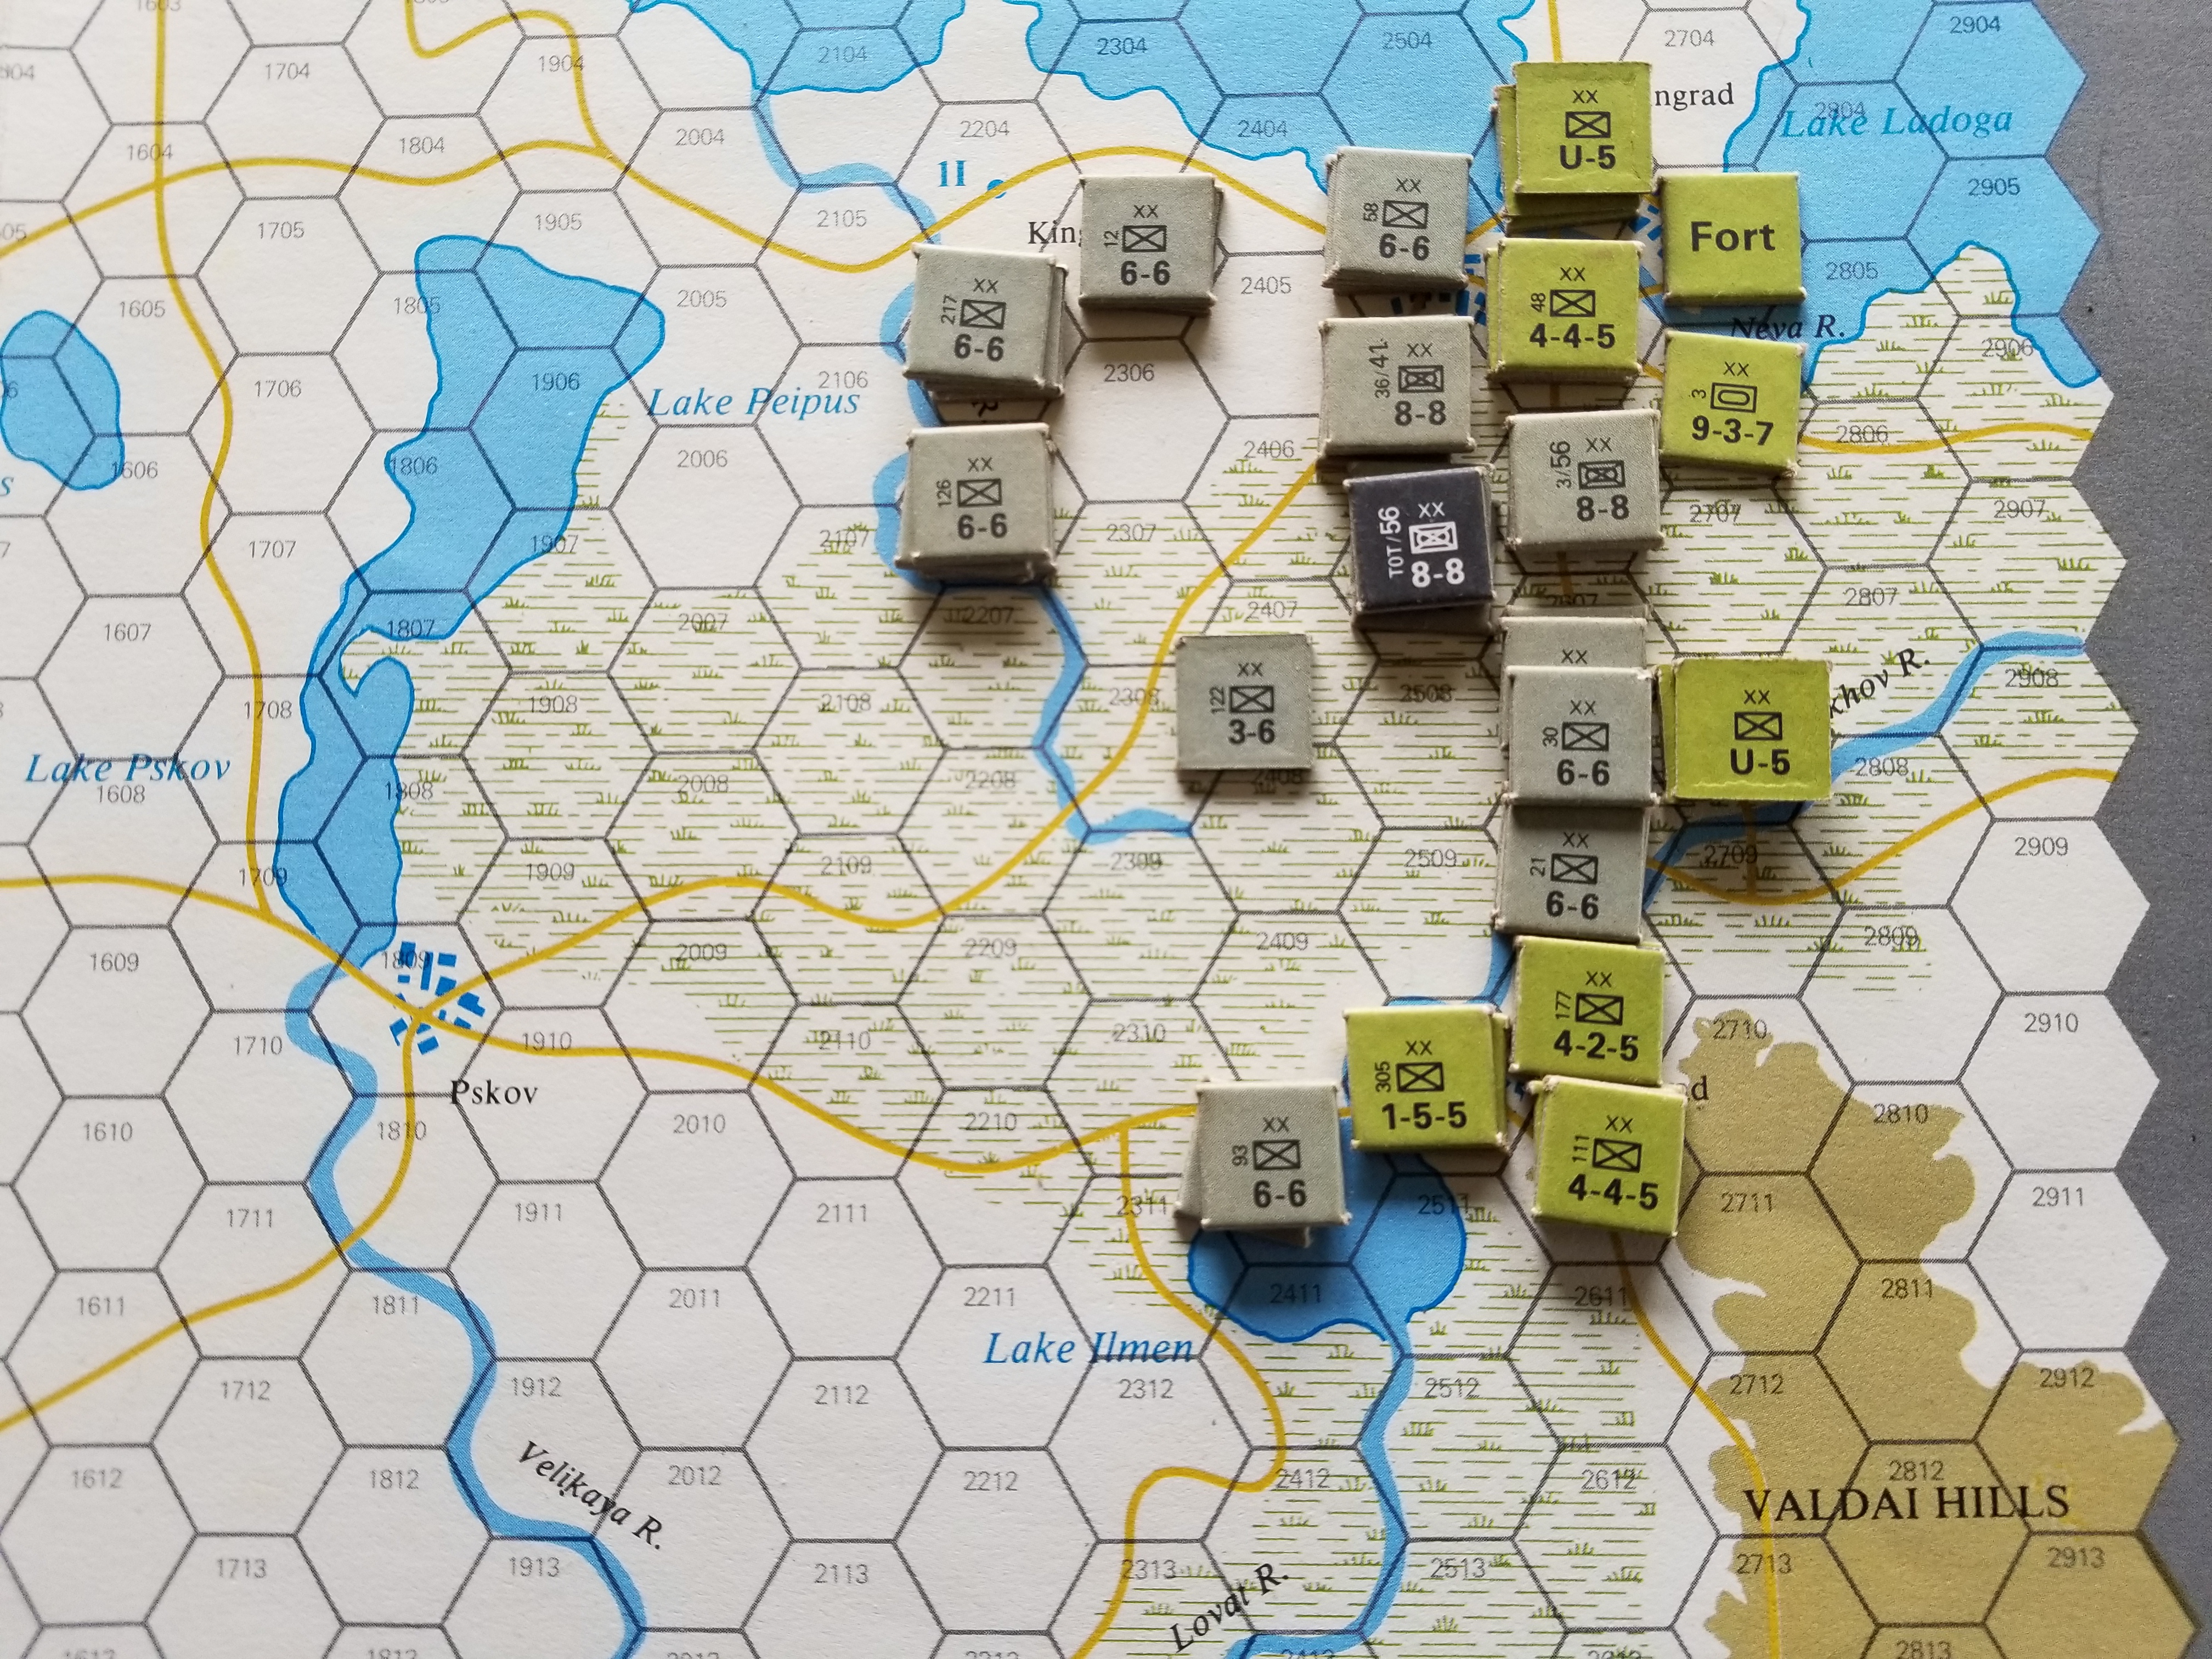
Desperate, German armor attempted a low odds overrun (also a 2-column shift), and was able to force the 9-3-7 to retreat. The following attack on the Southeast suburb only reduced, but did not destroy Soviet units.
Situation End Of Turn 11
In the 12th and final turn, the Germans mounted a forlorn hope attack across the Neva in an attempt to take one of the two victory hexes. The attack was unsuccessful. There was no change from the situation at the end of Turn 11.
Neither side had any victory points. The Soviets did not reduce or destroy any German armored/mechanized formations, and the Germans did not take the two northern suburbs of Leningrad. The result was a Soviet tactical victory.
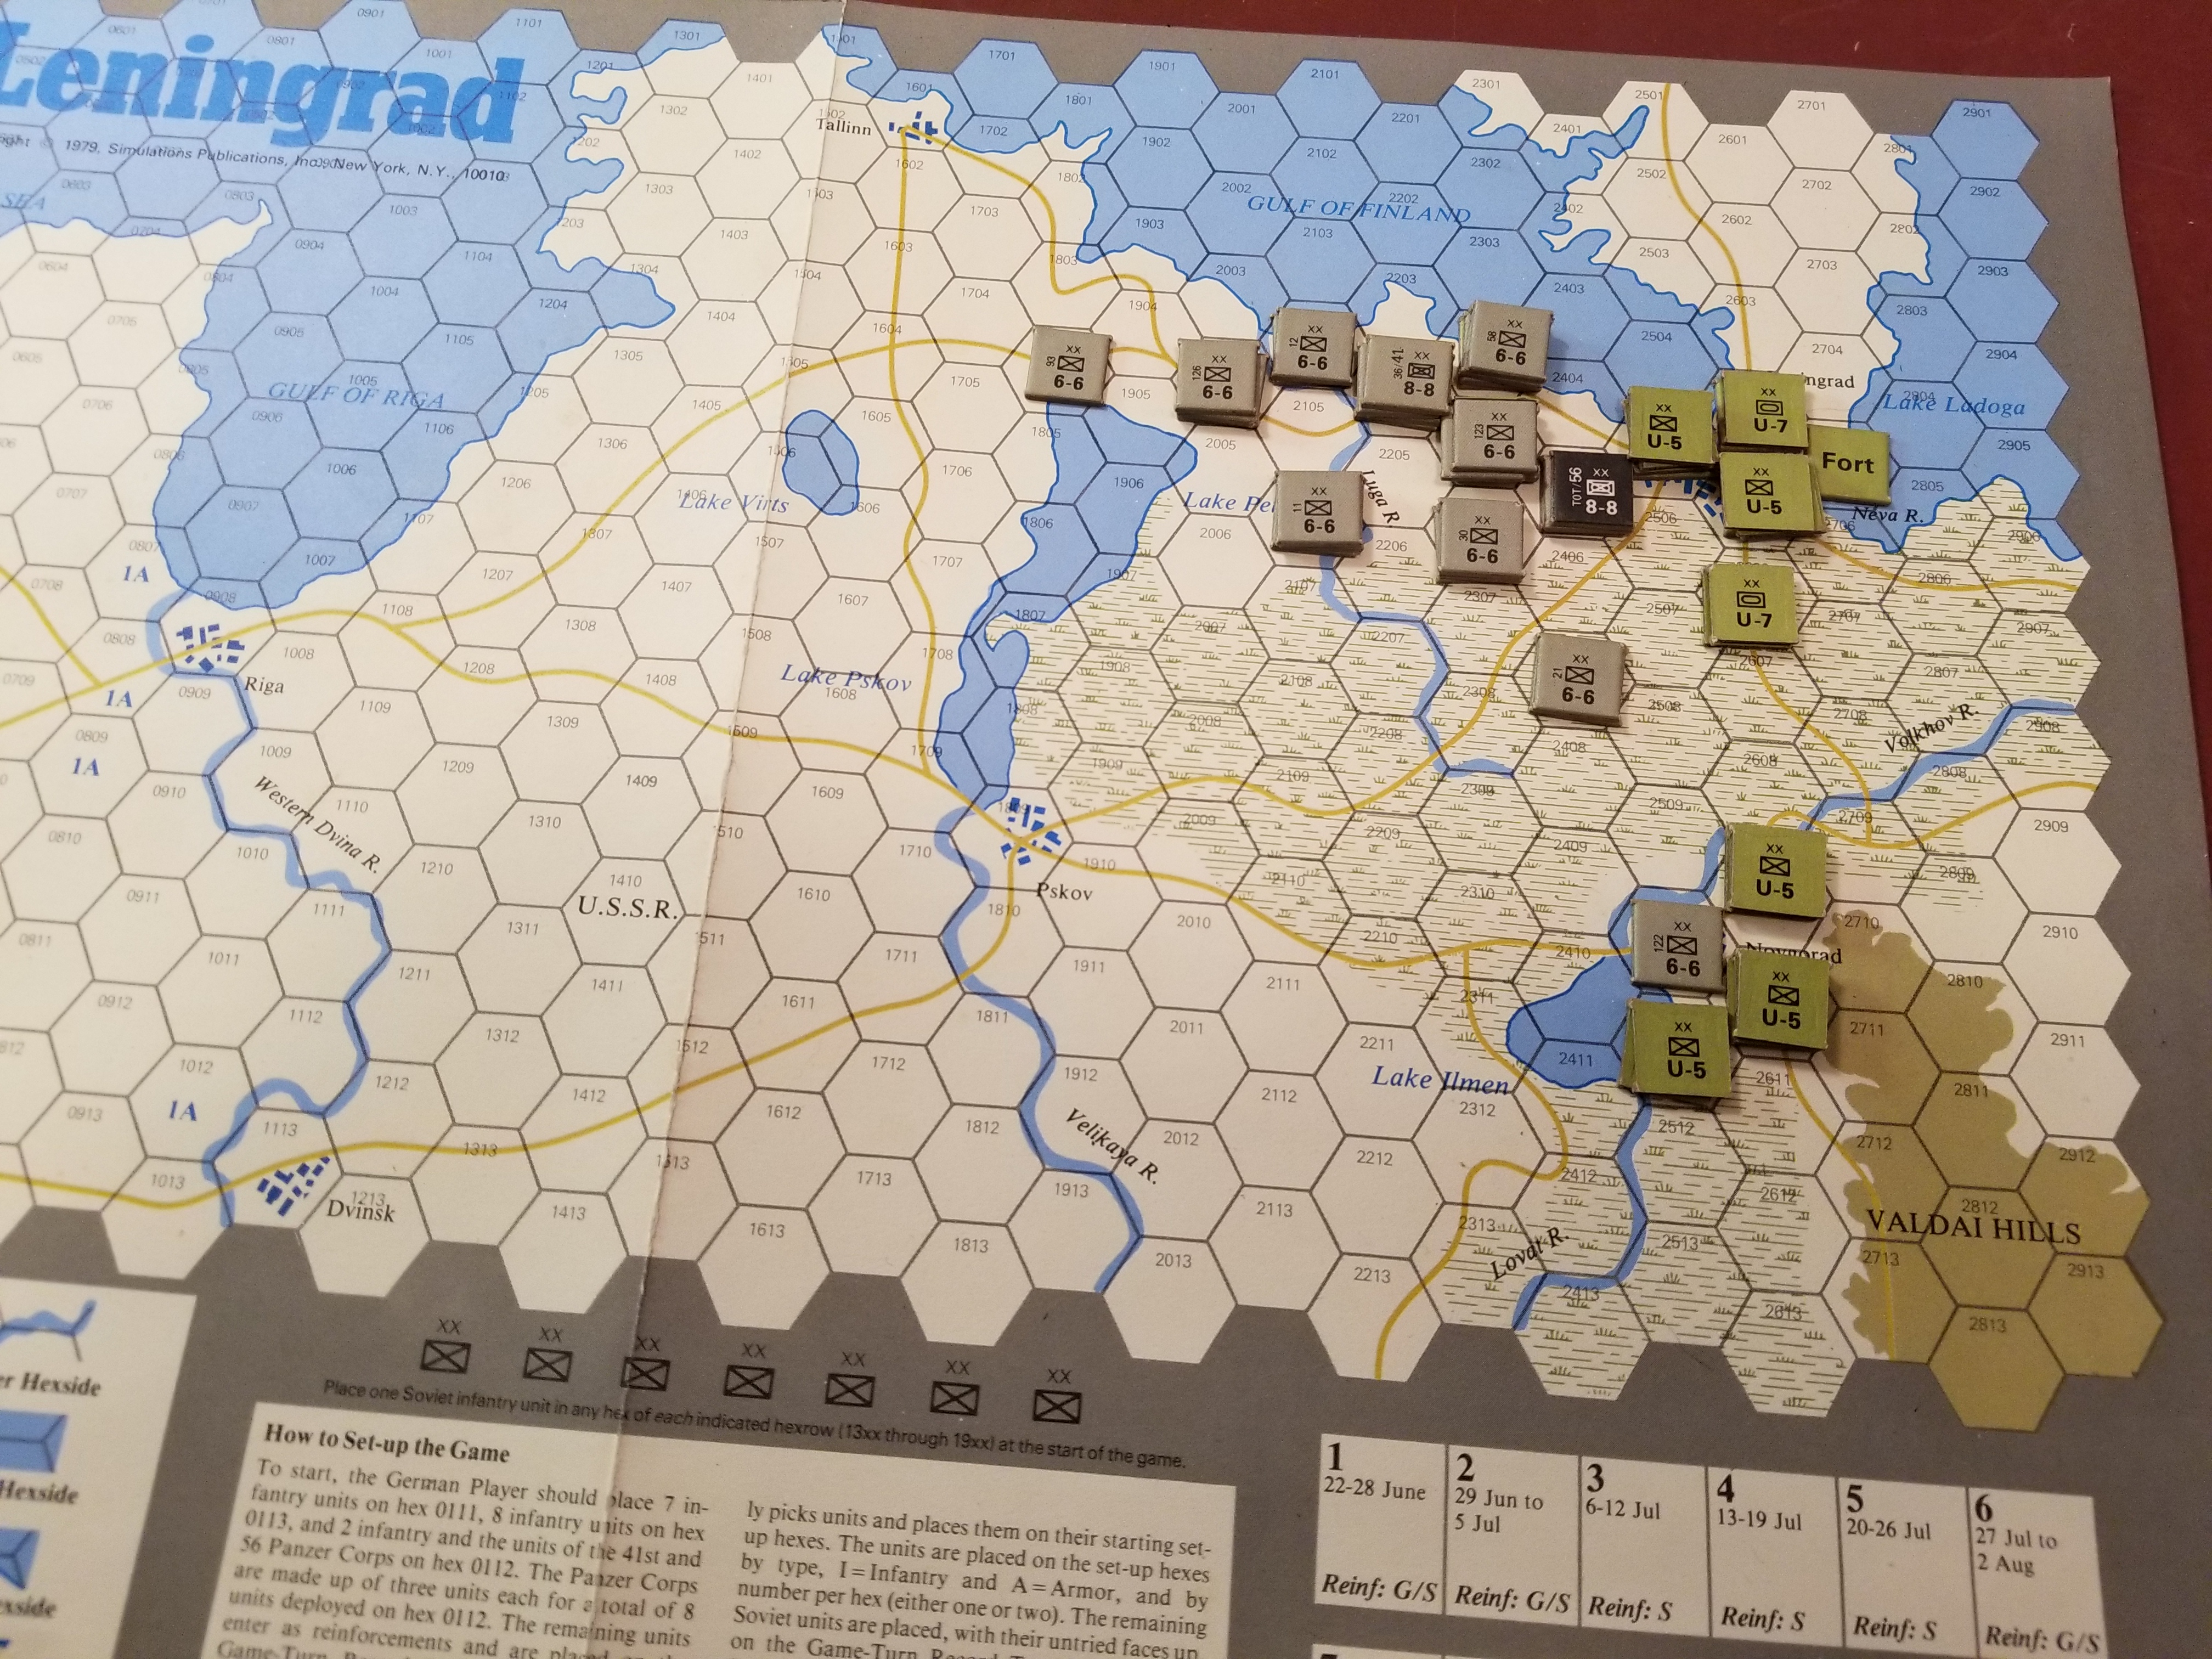
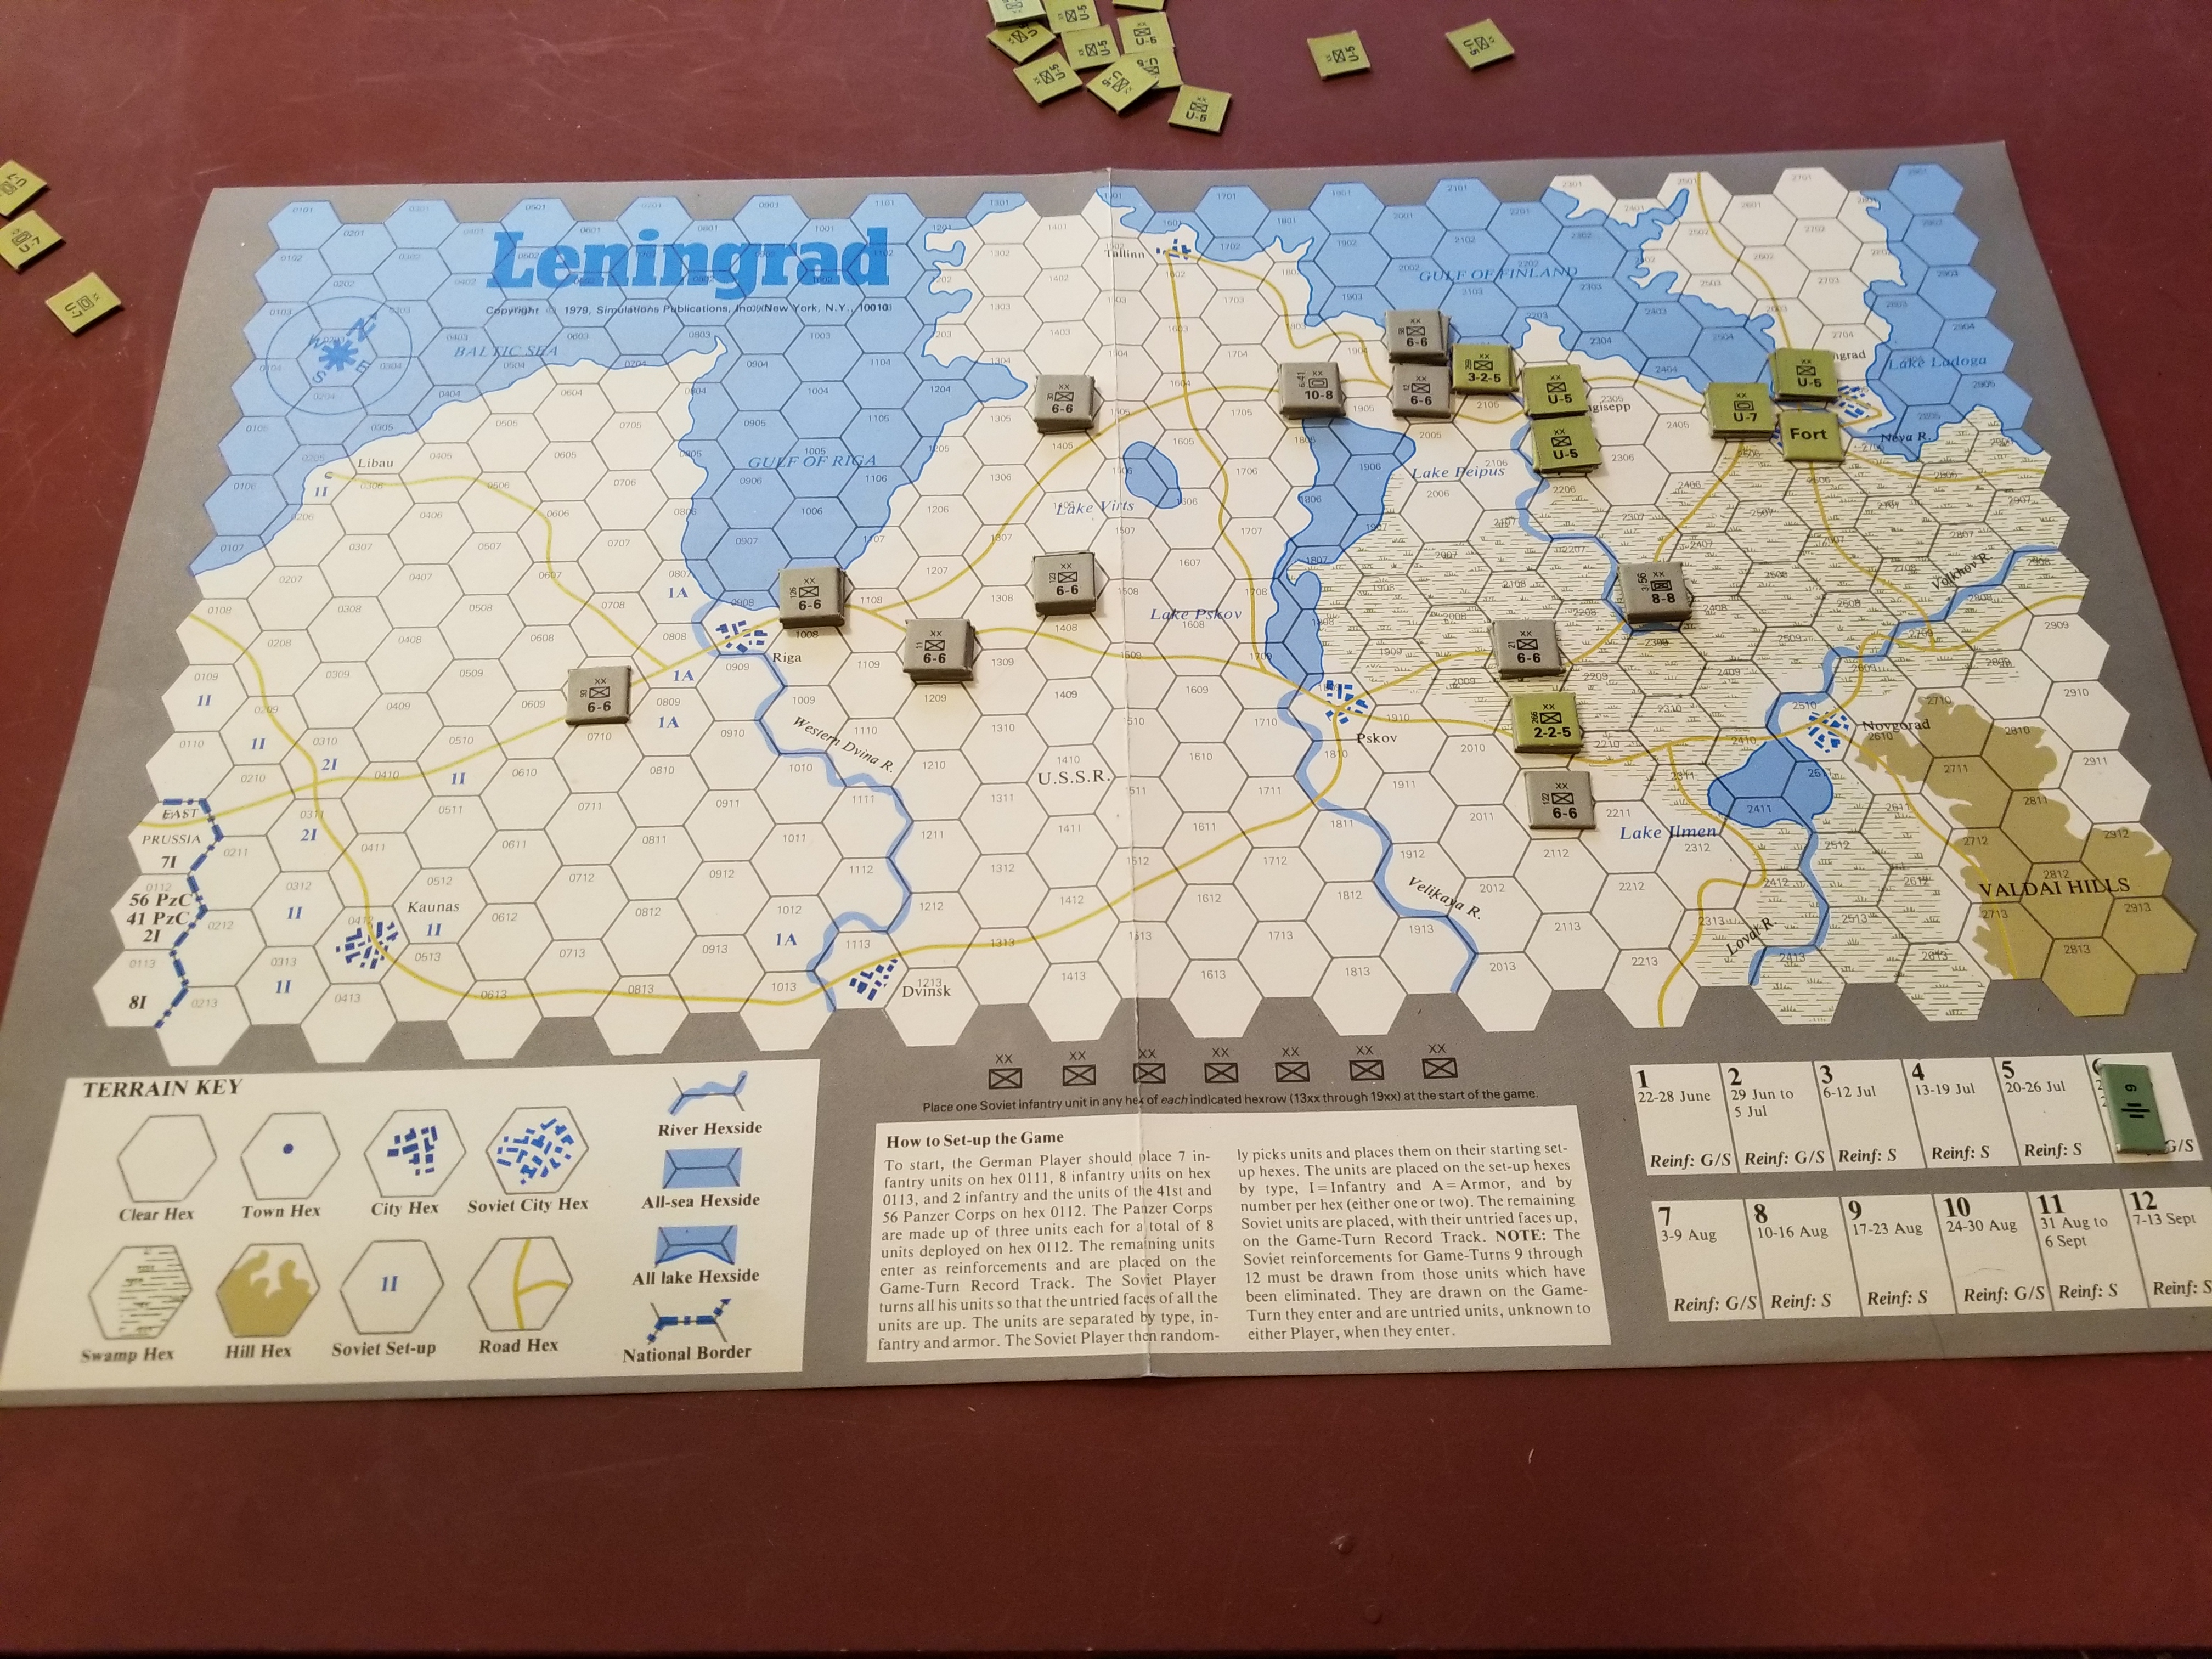
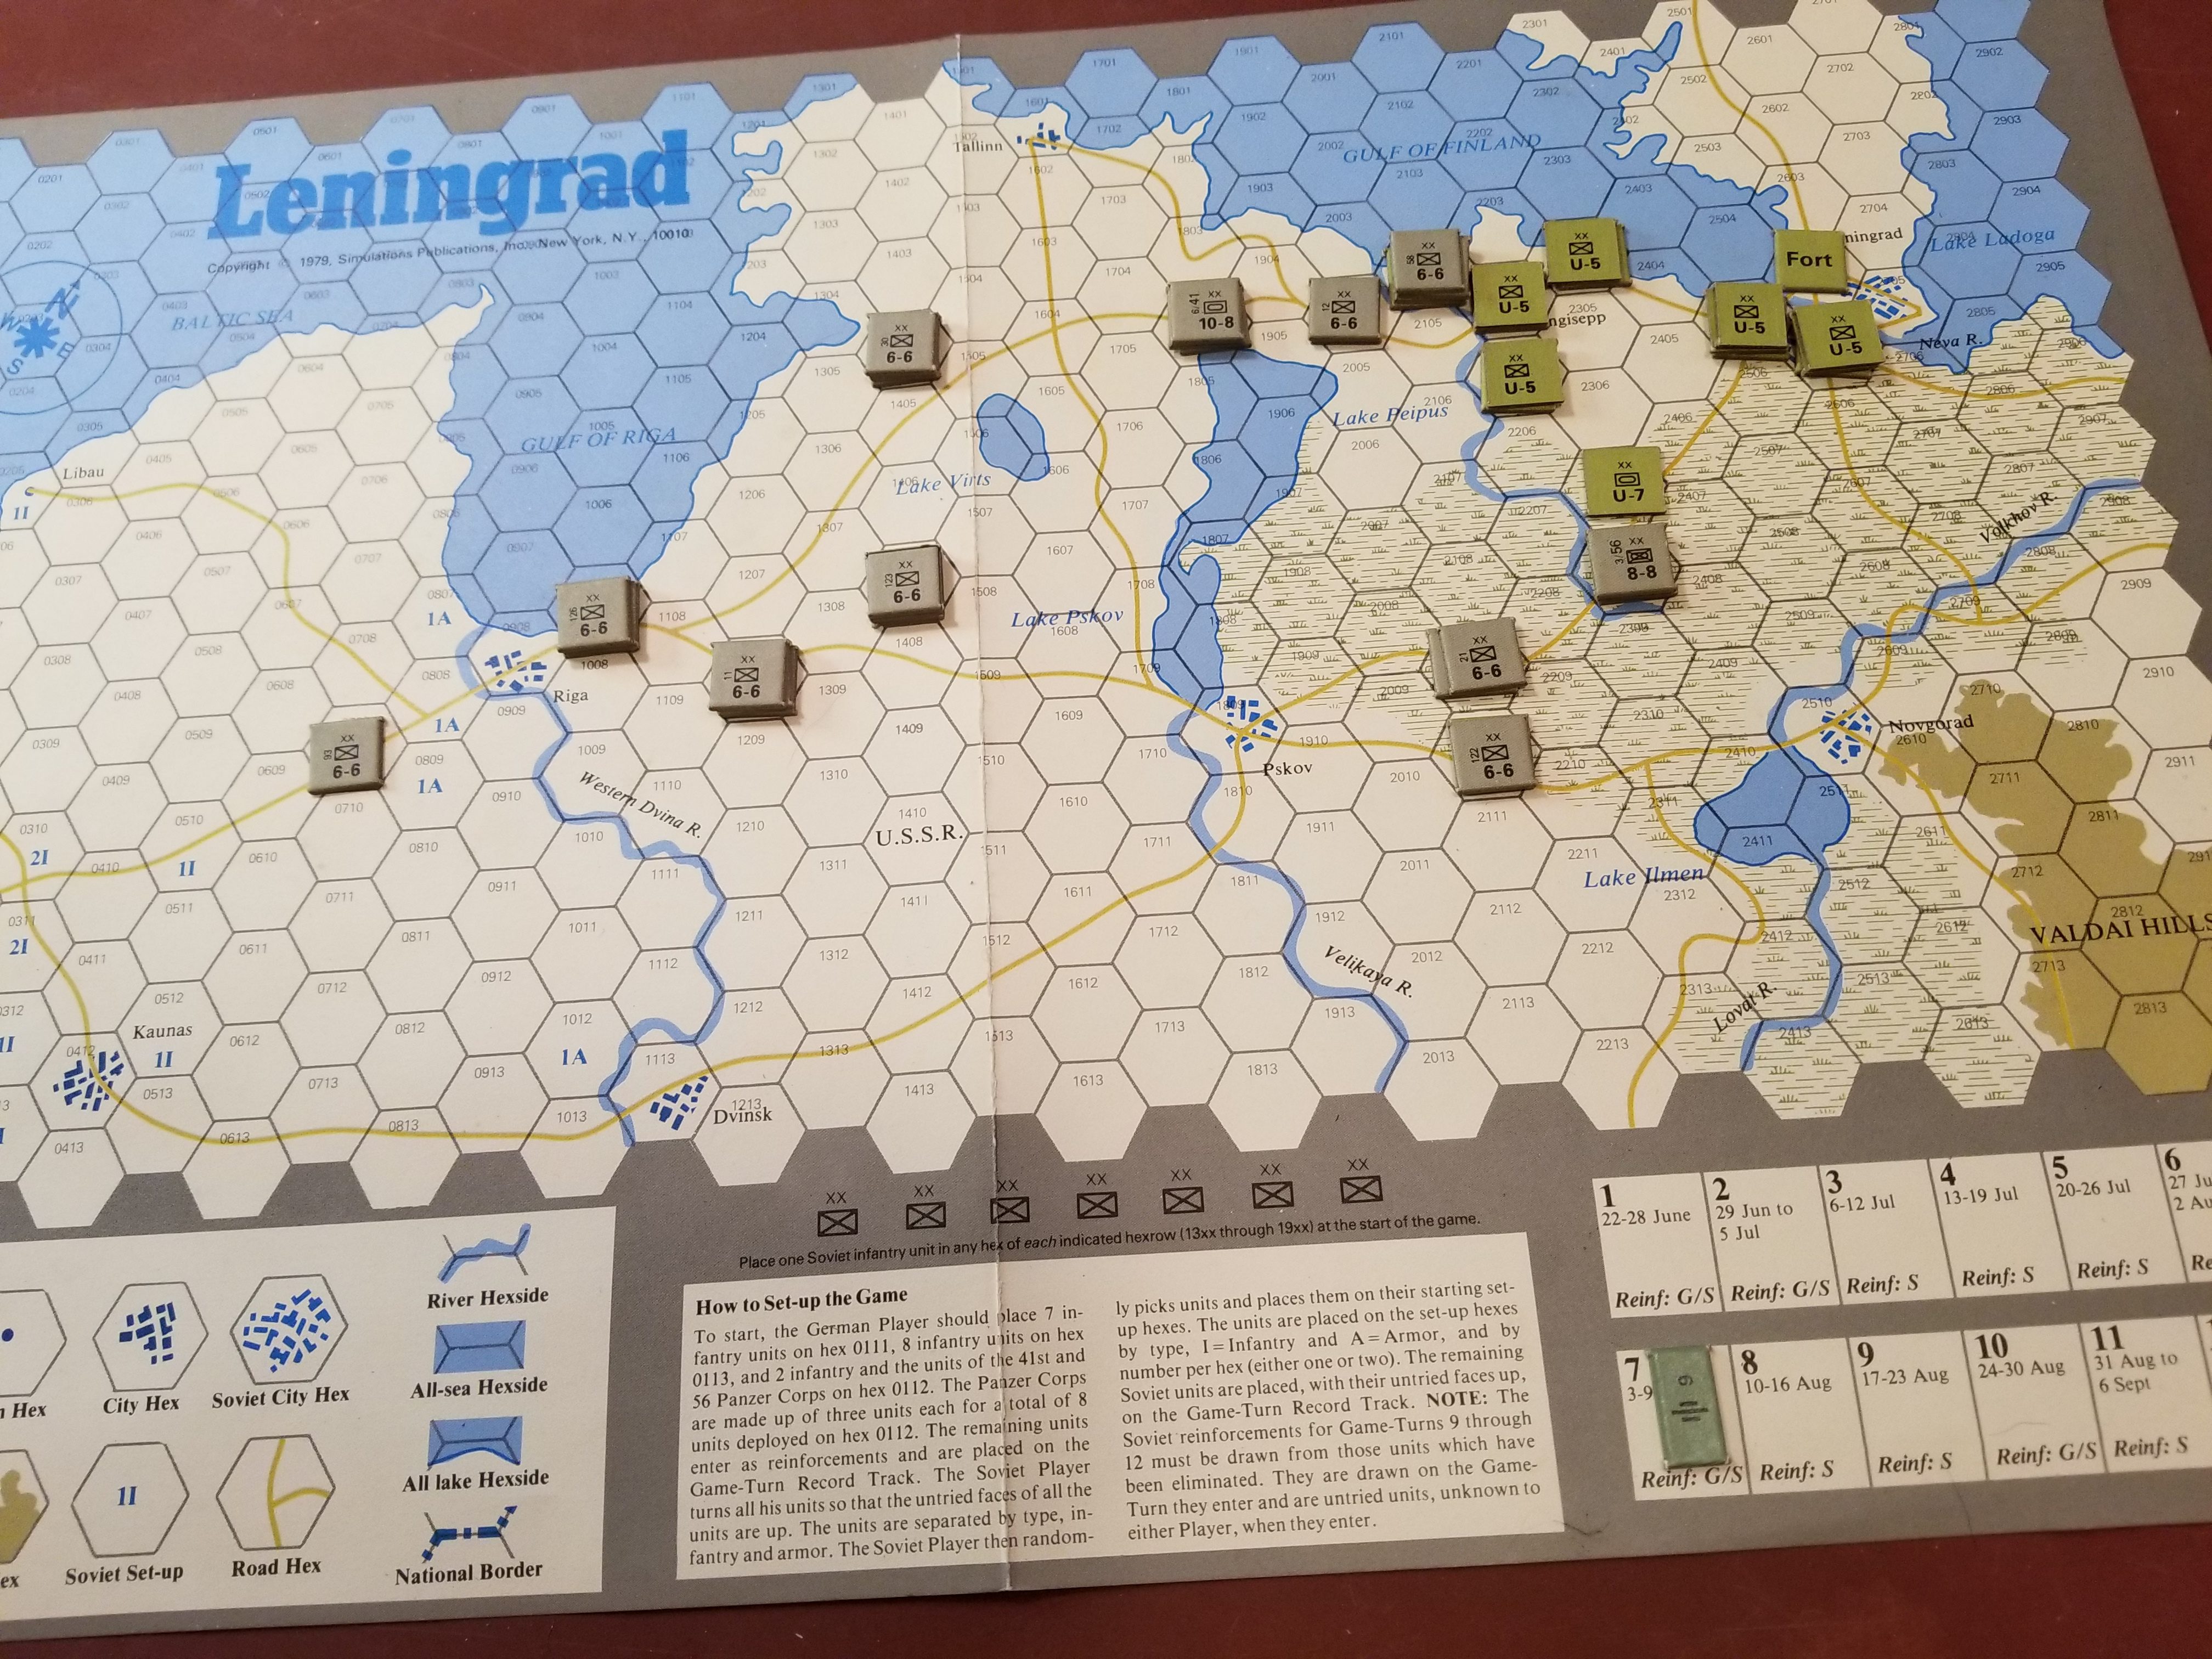
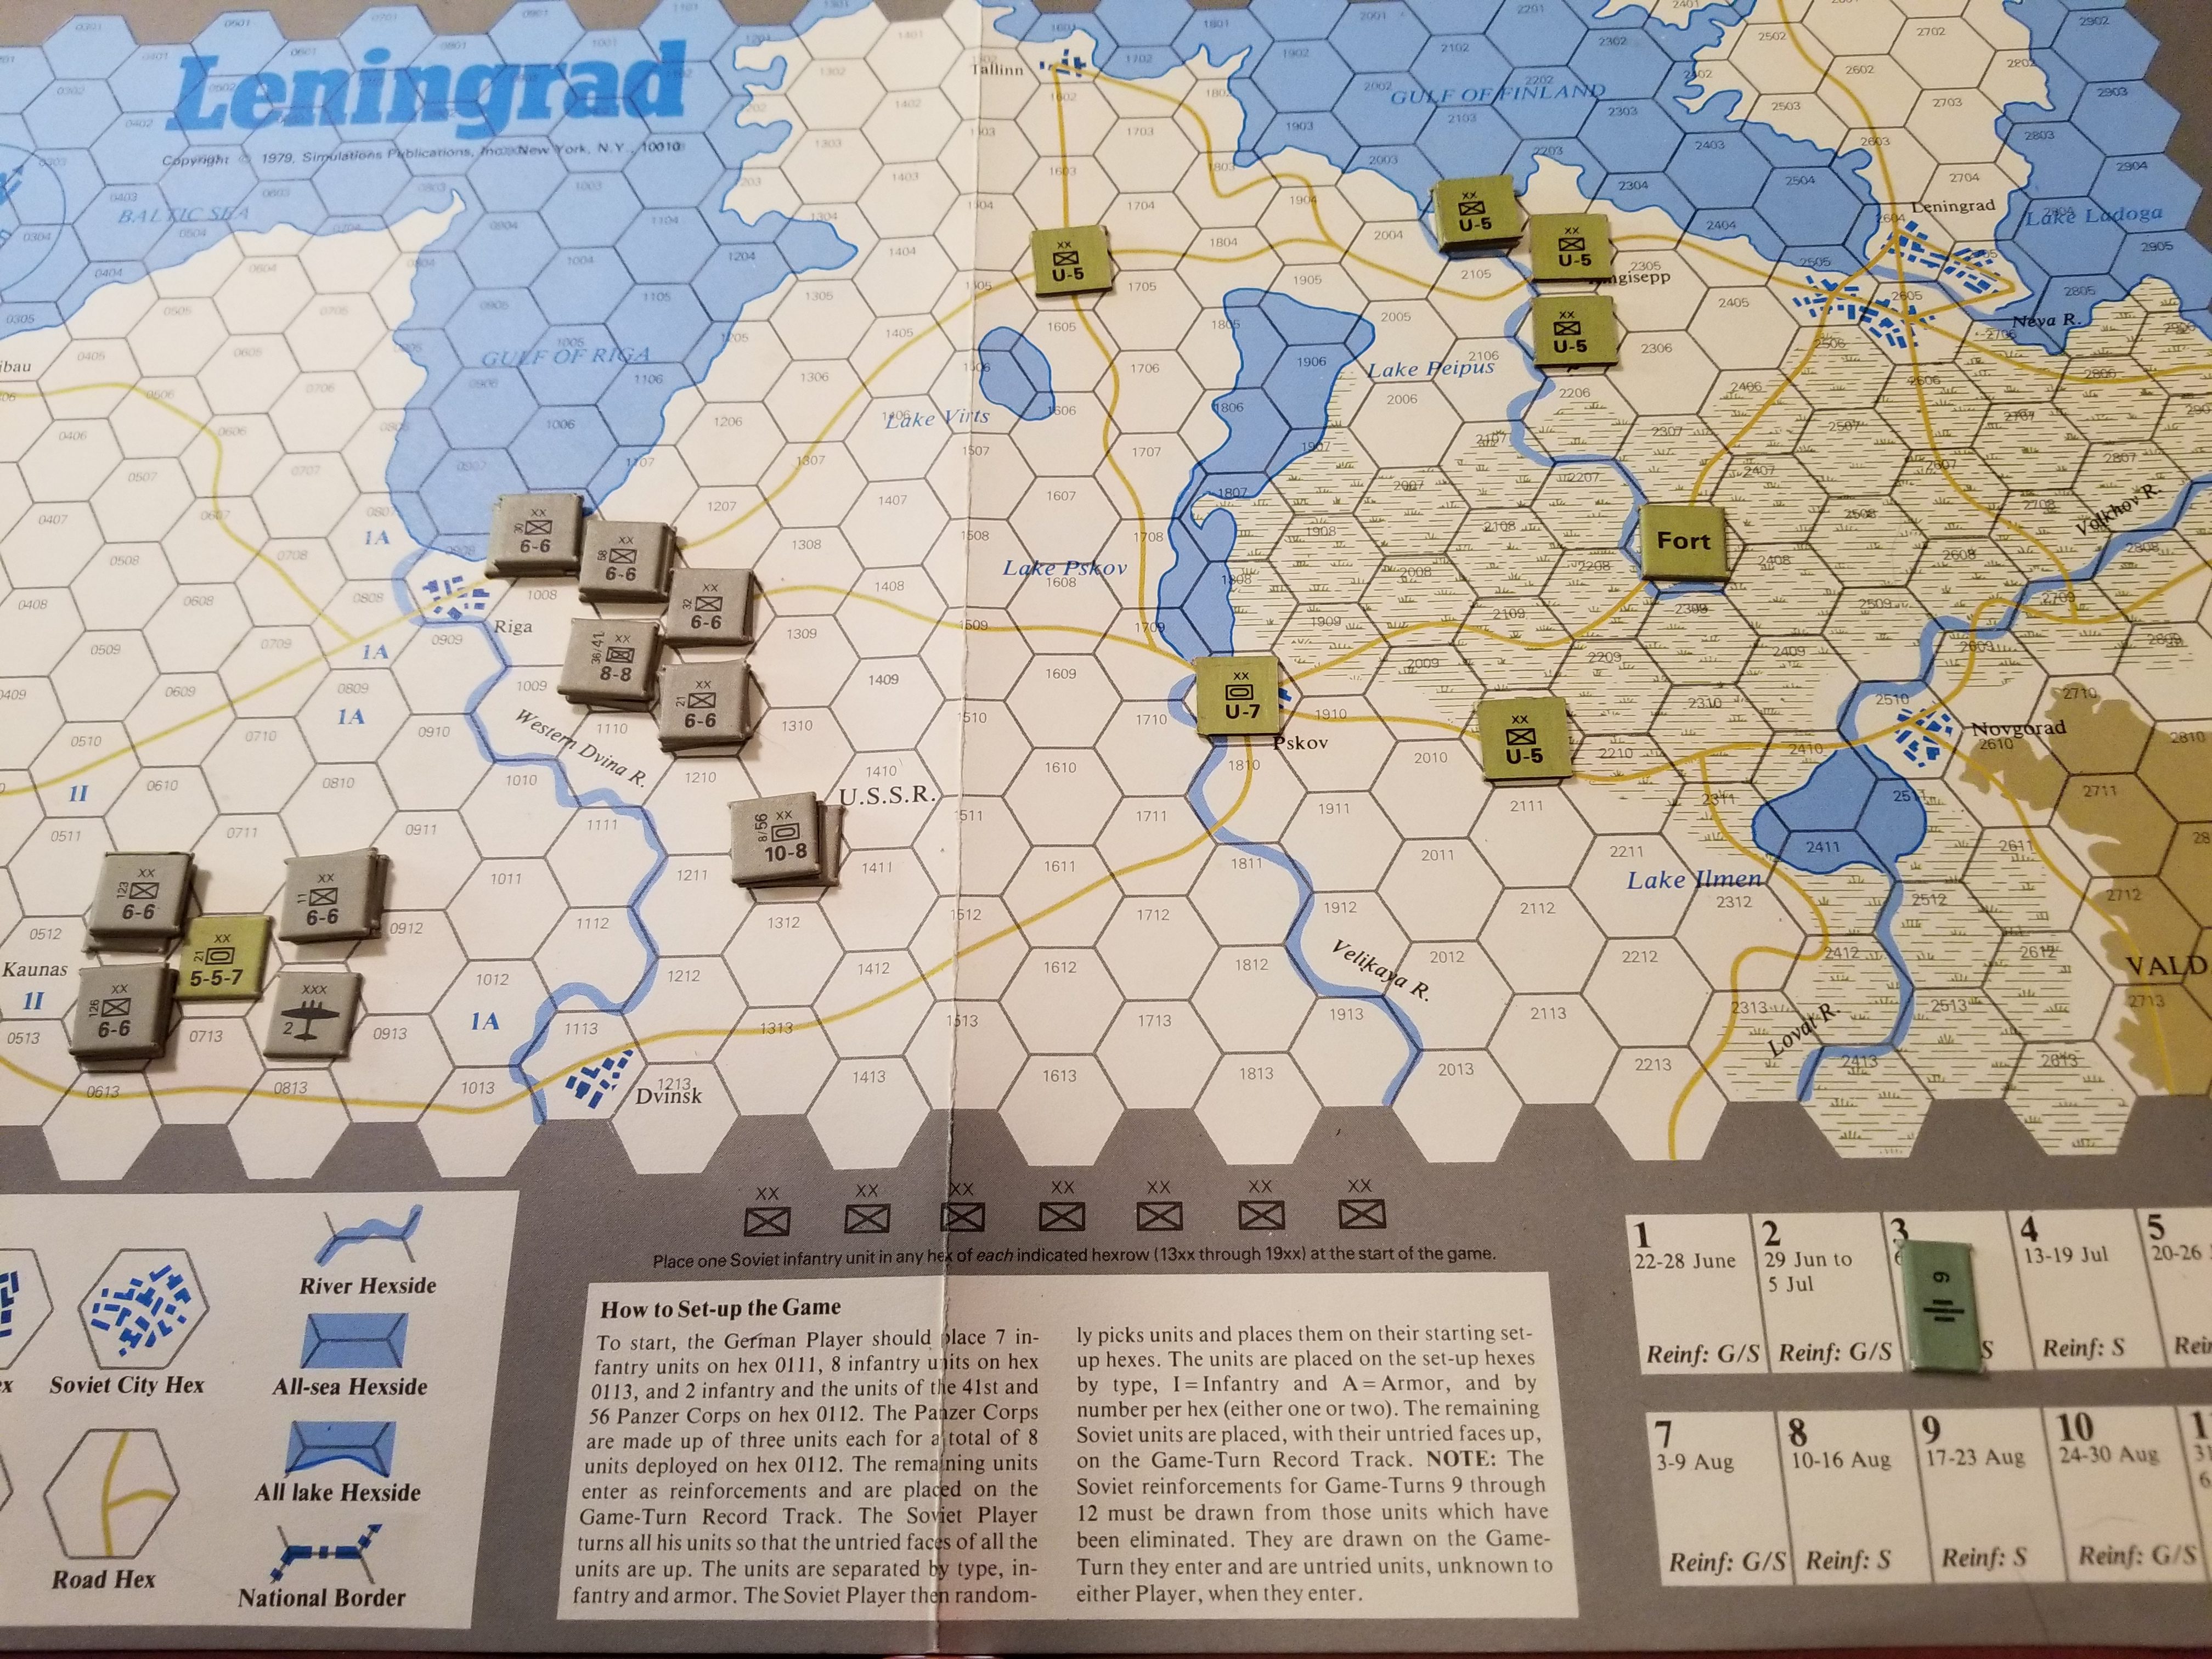
The German advance continued during Turns 7 & 8, with successful attacks eliminating Soviet forces along the Luga River.
However, beginning Turn 7 Soviet reinforcements began applying pressure from the south. A German infantry corps was diverted to Novgorad. The Soviets used Turn 8 to bring up even more units for an attacks that reduced the Germans to an under strength division.
Looks like it will be a slugging match to take the city, and the Germans will have to divert forces to contain the Soviet pressure.
Germans Advance Turn 7. Attack On Luga Line Begins. South Flank Exposed.
Turn 8 Germans Clear Luga River Line, But Soviets Reinforcements Mass And Attack In The South
Hacking away and having fun with this little game.
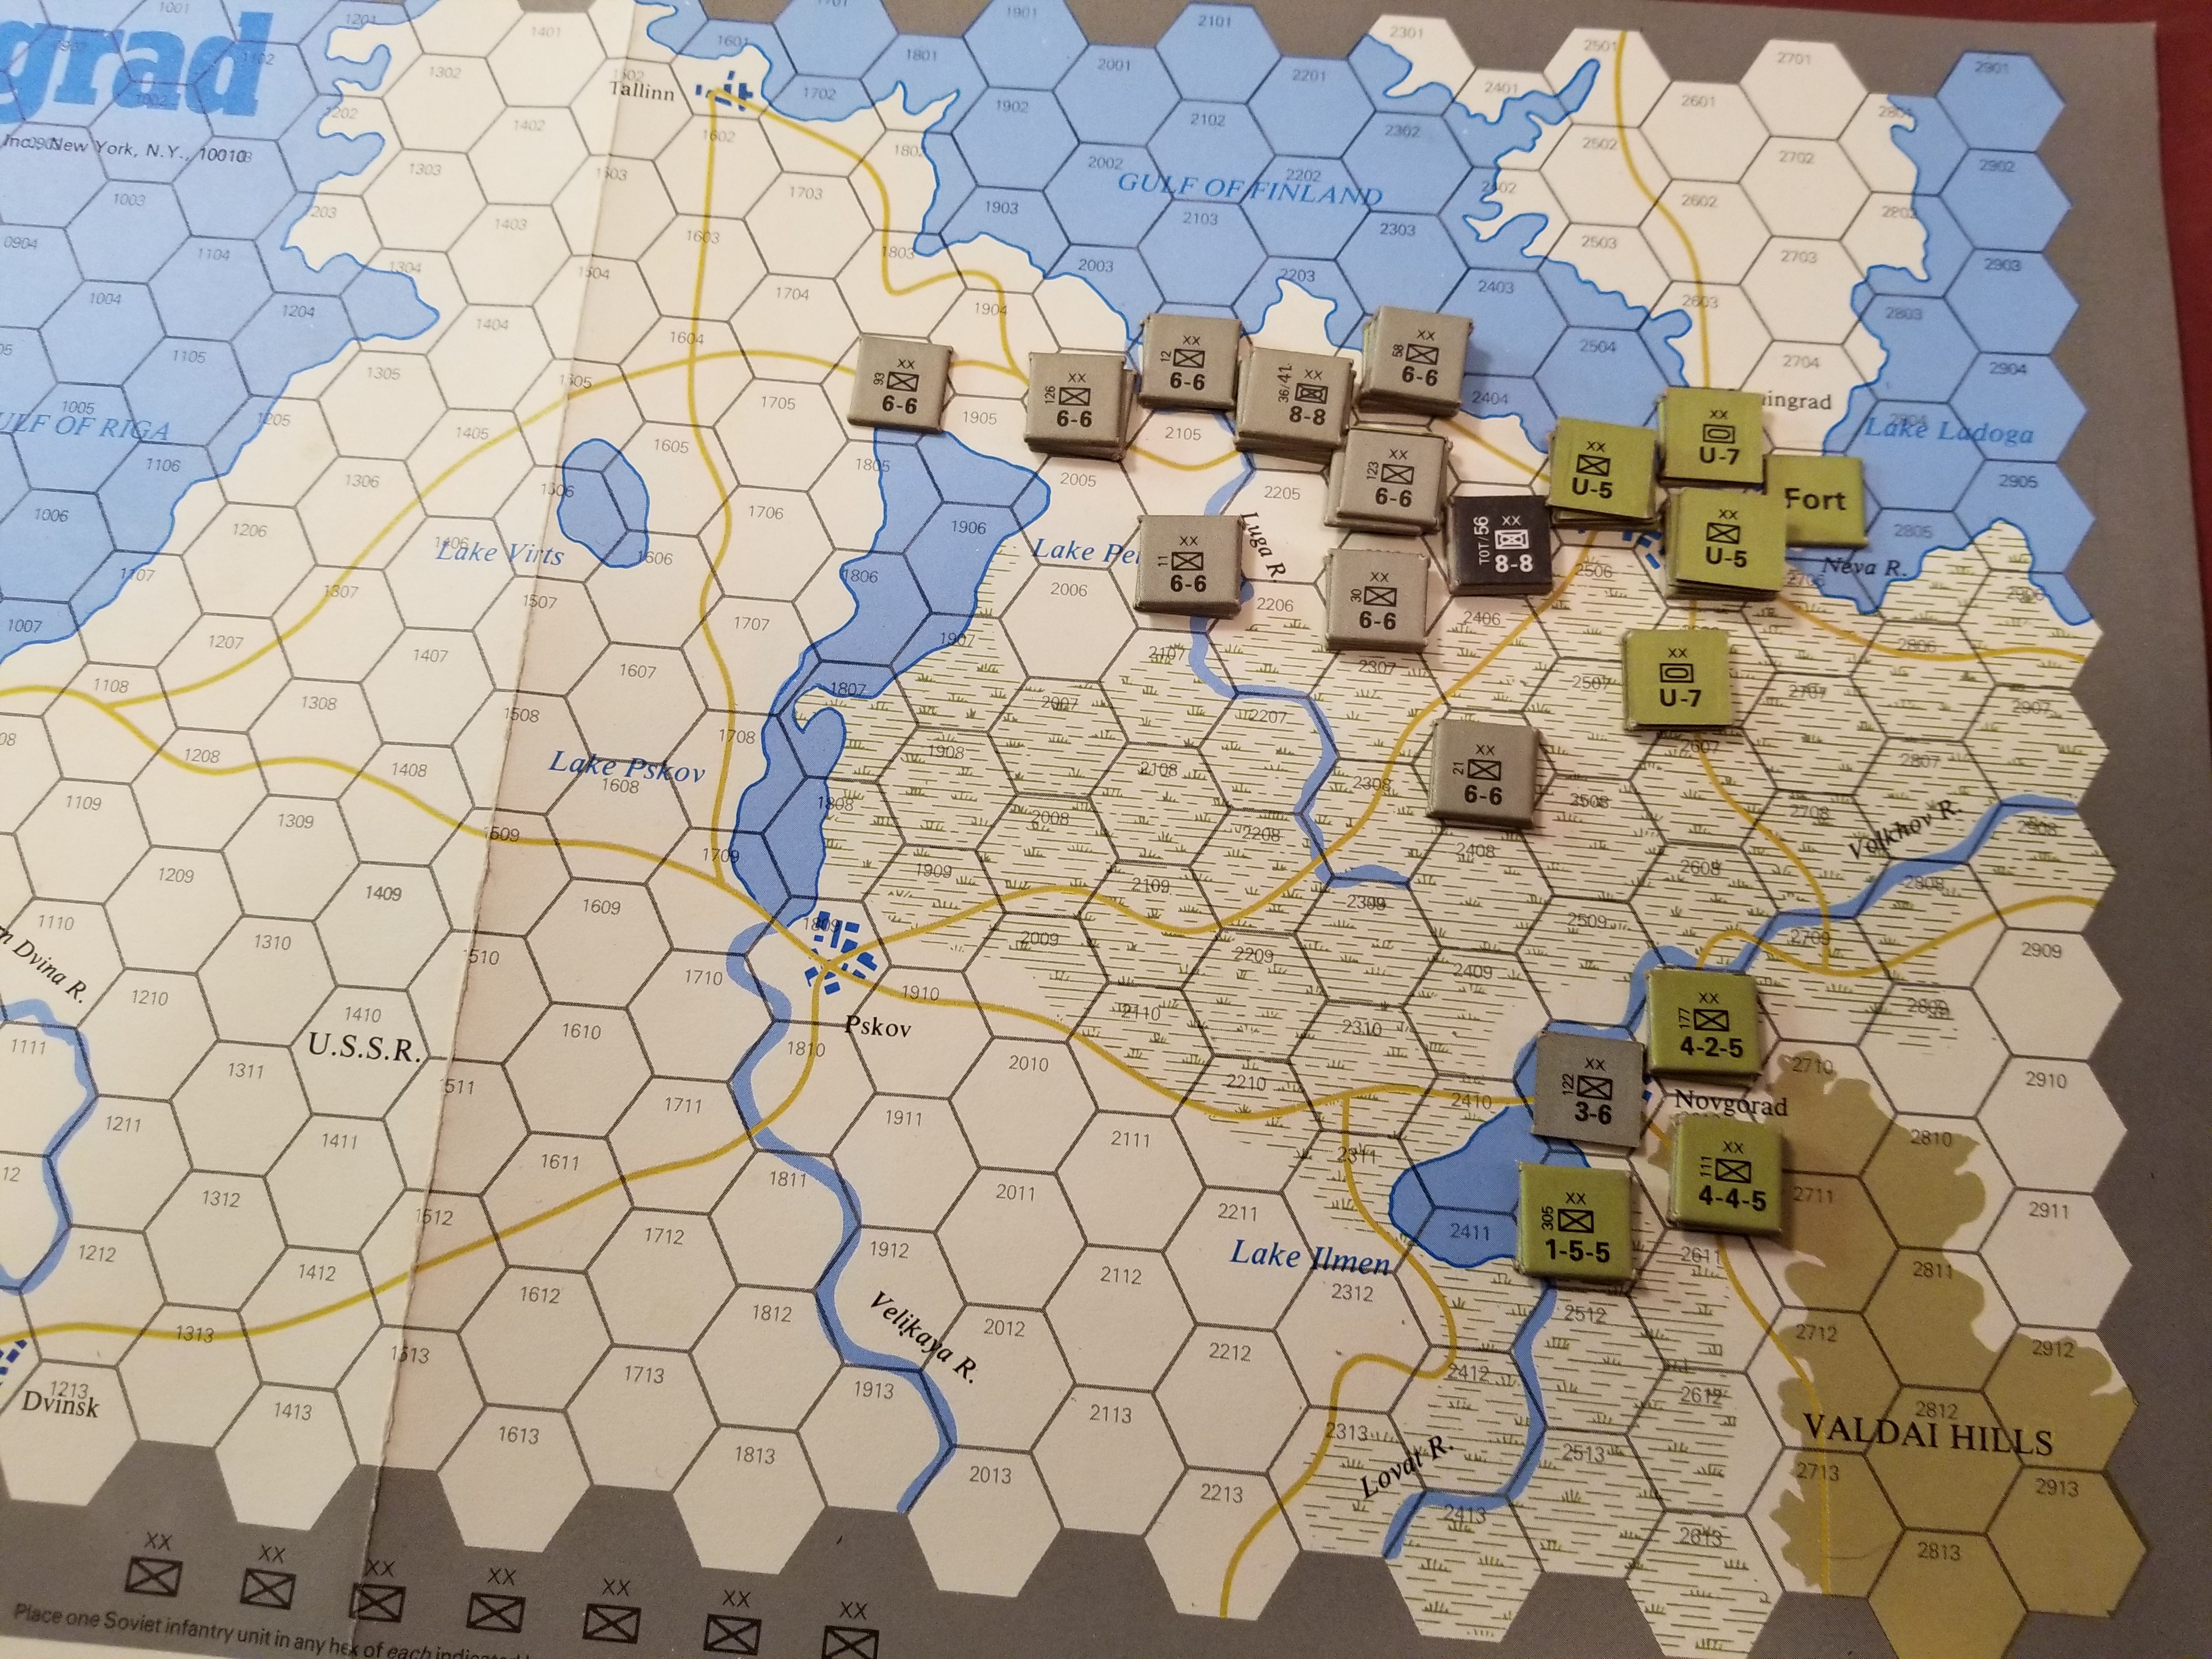
Germans now approaching the city from the Northeast, but with some pressure in the South. Soviets feverishly building fortresses and feeding reinforcements in to delay the assault. Question is, are there enough and can they be massed for a concerted defense?
Situation End Turn 4Situation End Turn 5German Phase Turn 6Skewed View of Situation End Turn 6
Been lazy about posting up and following up on play.
Germans continued their advance during Turns 2 and 3, but Soviet opposition in and about Leningrad is beginning to take shape. Big question for Germans is to whether to continue their advance on a northeast axis, or divert resources to cut roads in the Peipus marshes.
A bad role during Turn 3’s combat phase left a stubborn Soviet unit deep in the German rear. This is similar to what happened during the actual campaign.
Here’s a photo recap.
German Situation Start Of Turn 3Situation End Of German Phase Turn 3Situation End Of Turn 3 With Soviet Reinforcements
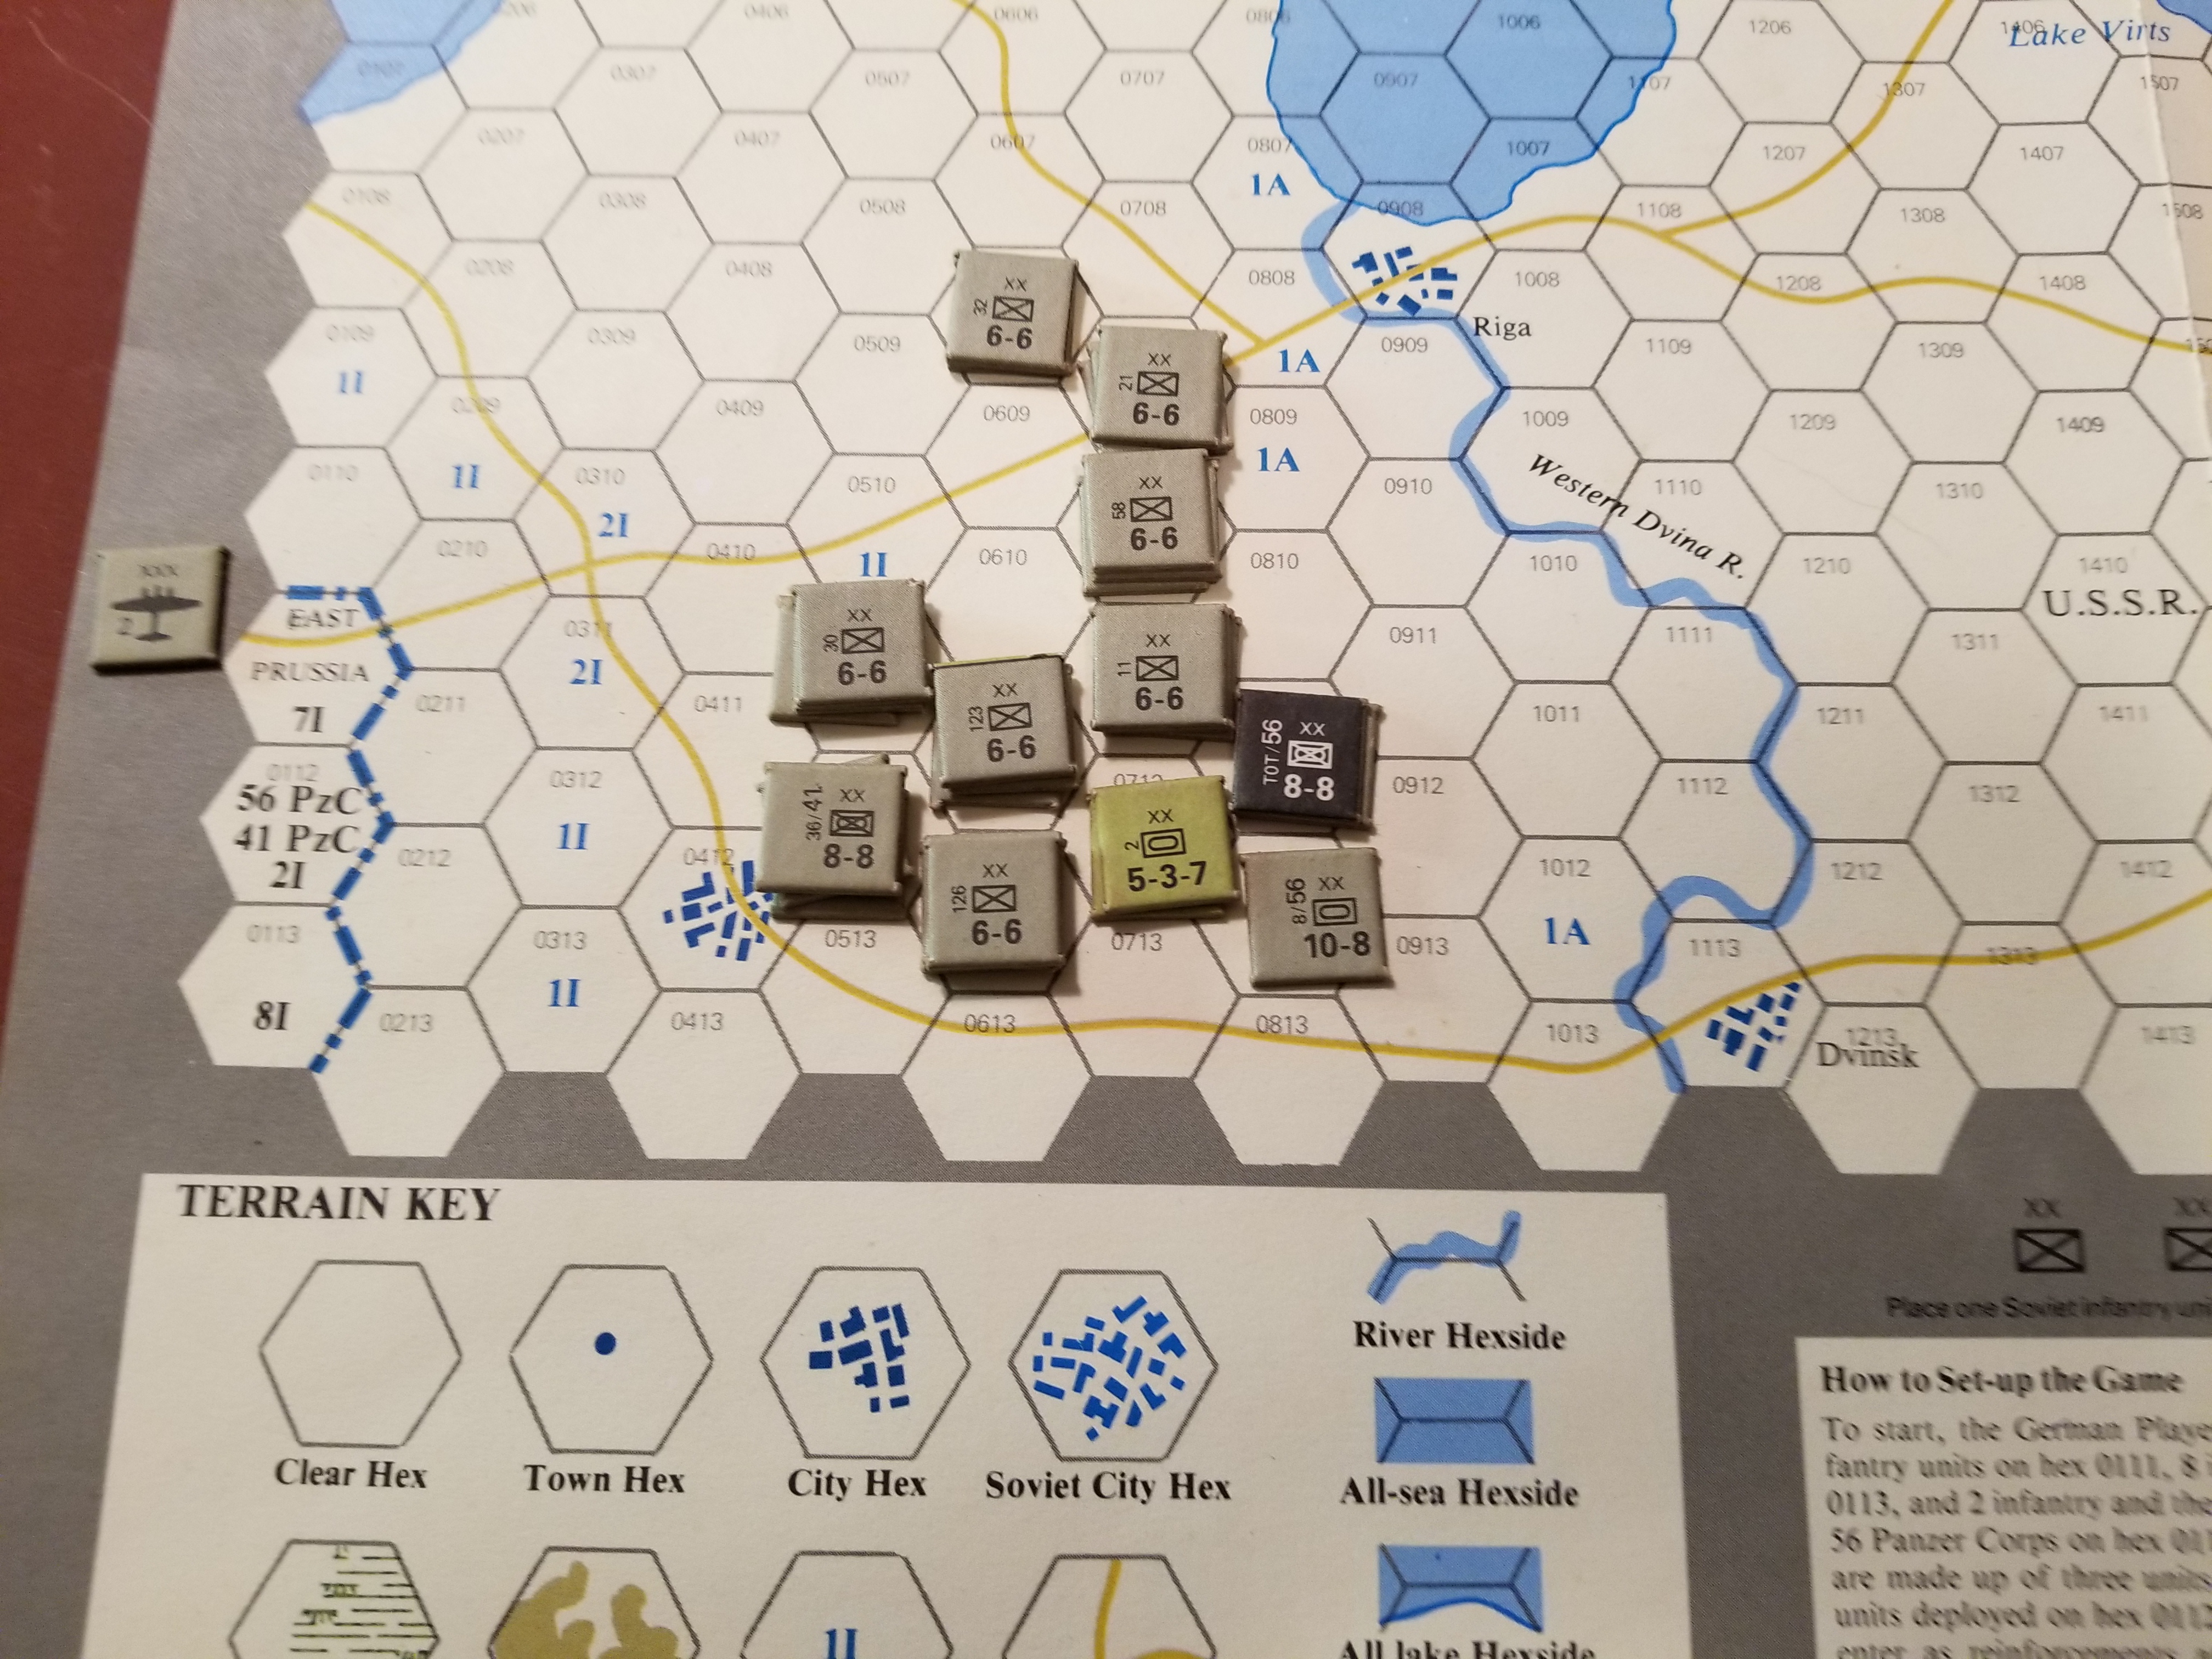
After enveloping infantry units near the border, German units encountered unanticipated strong (note 10 strength unit) Soviet armor in the south. This is the beauty of the random/unknown unit picks at set-up.
Two over-extended German infantry units were eliminated by a Soviet counterattack. The other rules-mandated counterattacks in the north were defeated.
Don’t know if the Germans can create another Kesselschlacht in Turn 2 to eliminate the armored threat.
Here’s a impaired-photo summary of Turn 1.
German Opening MoveSoviet Mandated CounterattackSoviet Armored Counterattack Eliminates Overextended German Infantry
Decided to go with another small and quick game. Can remember several enjoyable solo sessions many years ago.
The full title of the game is Leningrad: The Advance of Army Group North Summer 1941. An excellent review of the newest edition can be found here. I’m playing the original 1979 game.
As the author points out, it’s a beginner’s version of the very successful Panzergroup Guderian series of games. These were a mainstay of late 70’s and early 80’s board gaming.
Powered through the game last night. Once you get going, it is as advertised…..a game that takes about 2 hours. And, it’s a lot of fun.
Should have done a better job of documenting turn-by-turn highlights, but I did take pictures. Here’s the narrative highlights.
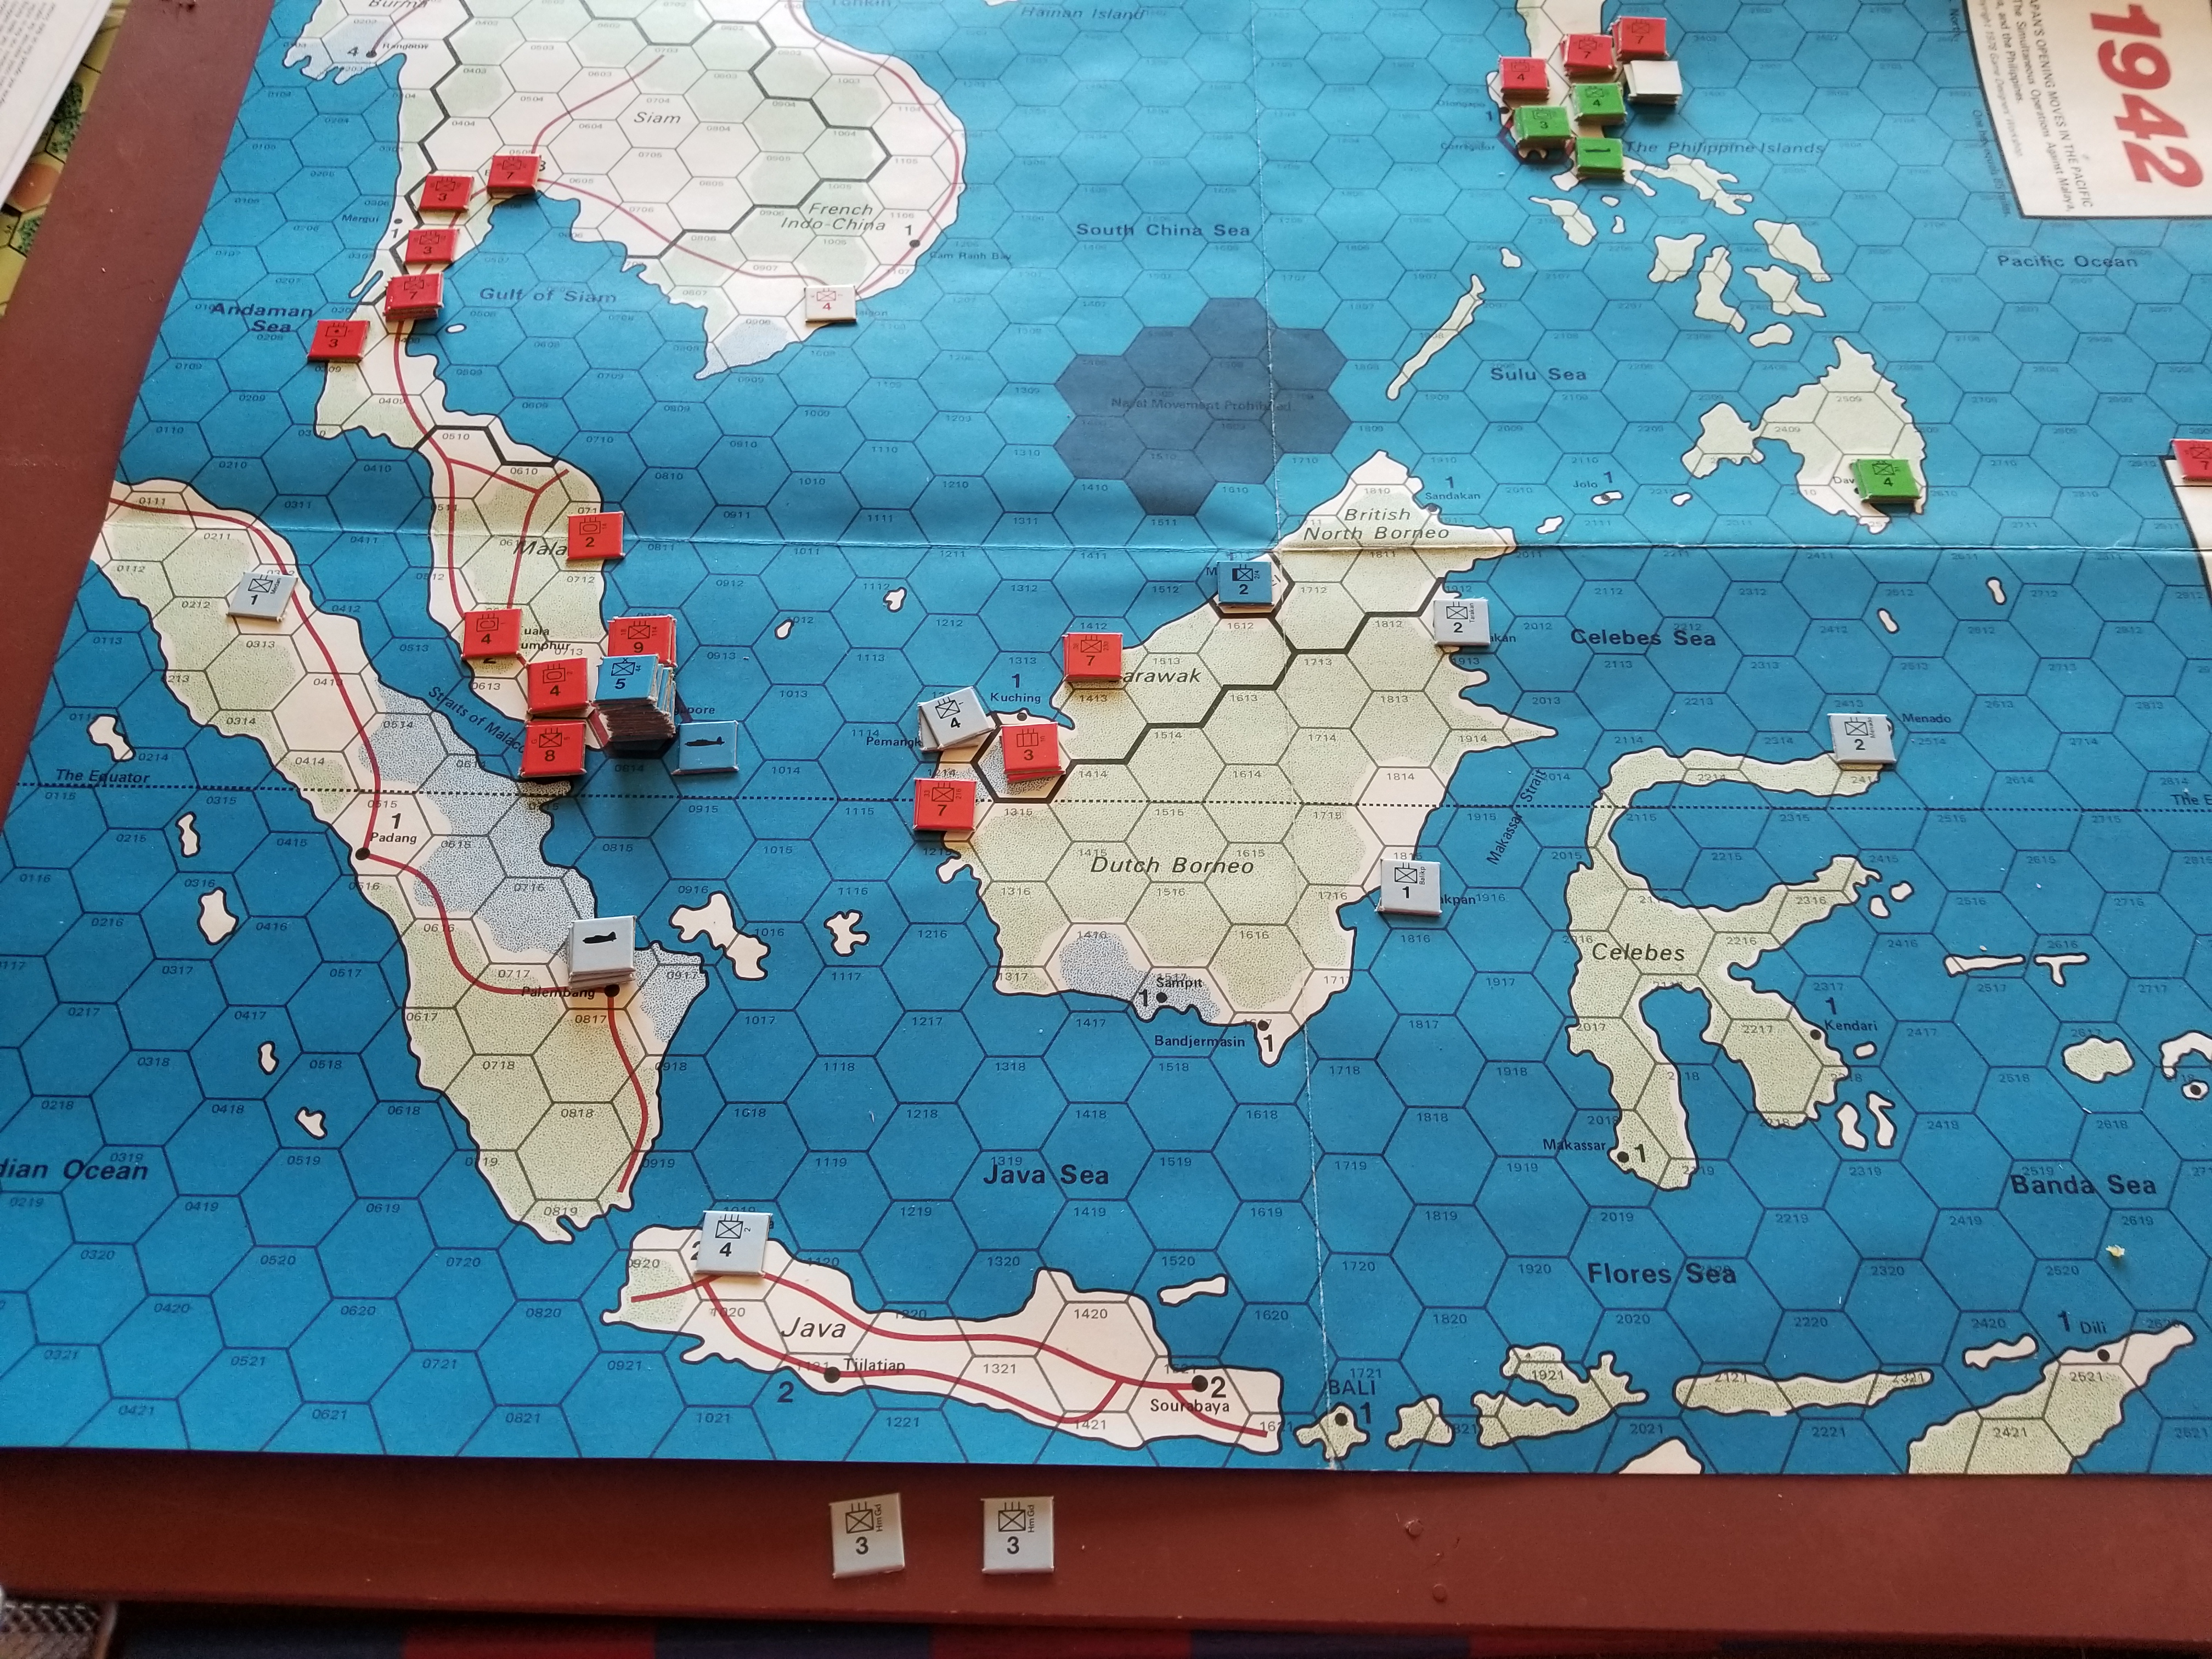
Beginning with Turn 3, the Japanese continued to pressure both American and Commonwealth forces, undertaking flanking attacks where they could get 3-1 or 4:1 odds, typically augmented by at least a +1 D6 roll modification due to air support. The Japanese were fortunate in that their attacks resulted in surrender results, which maximize victory points.
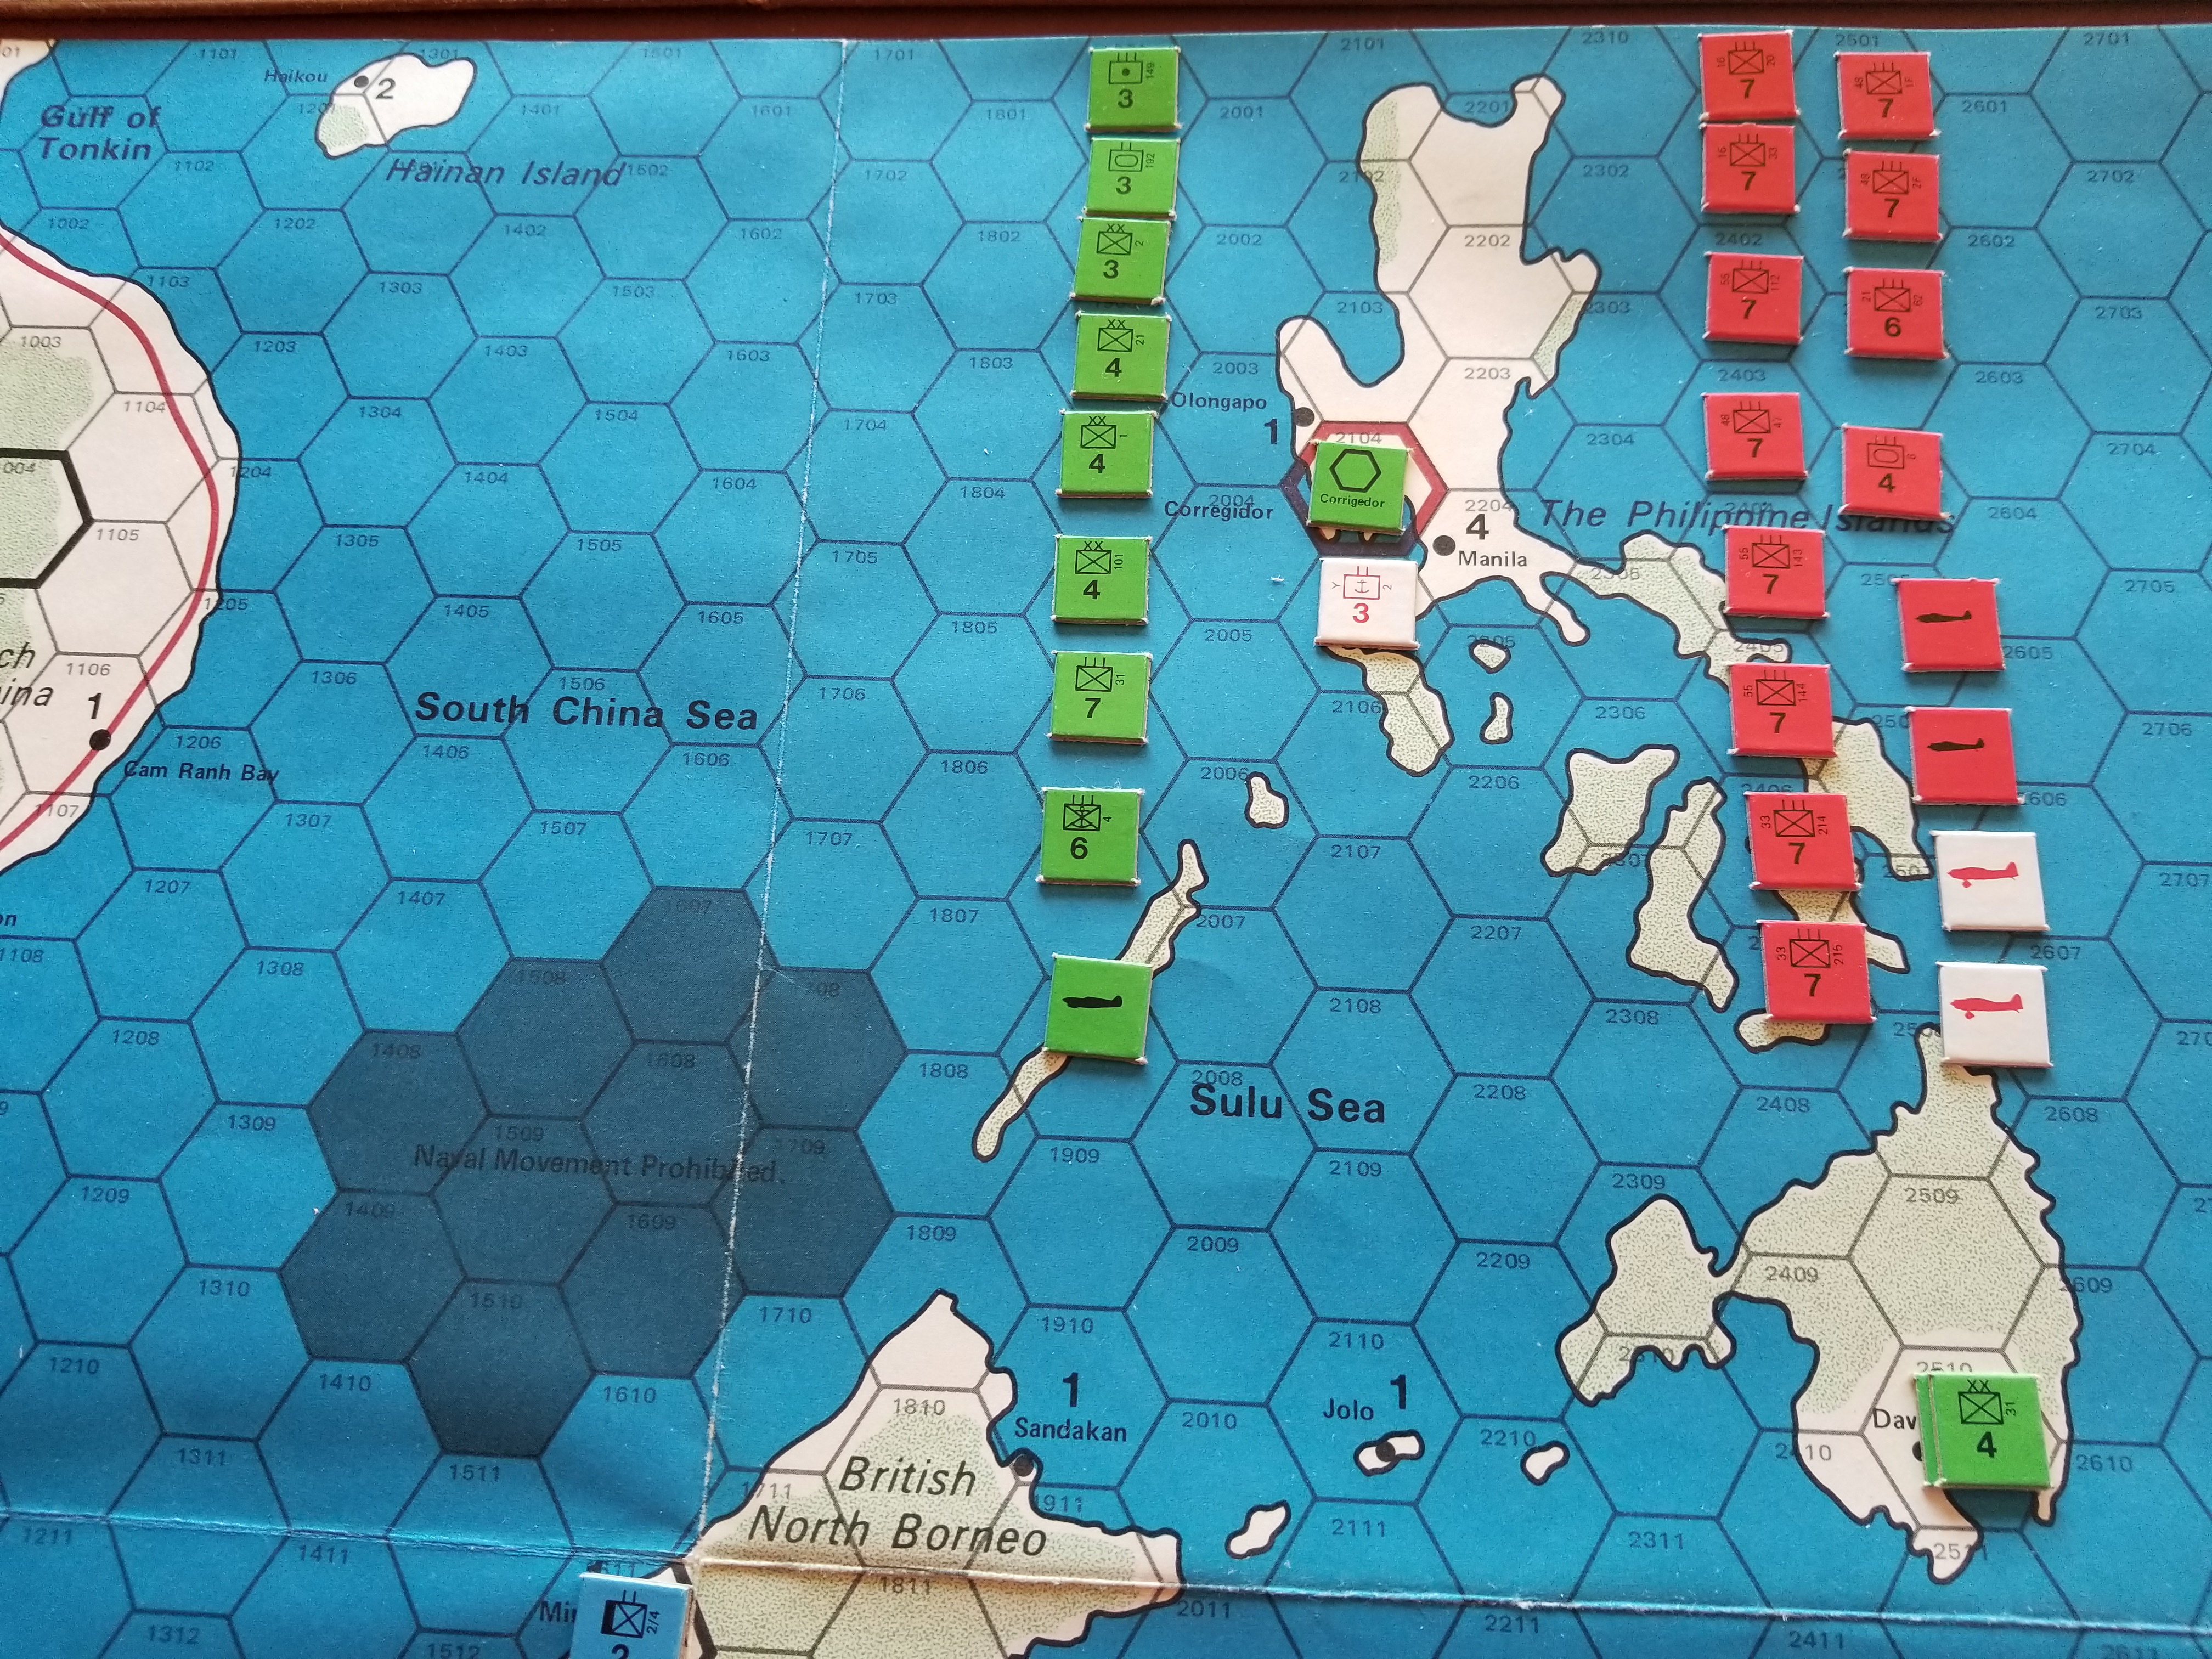
First Commonwealth, and then American forces withdrew to their fortresses of Singapore and Corregidor, respectively. There are no stacking limits in fortresses, so the Japanese were again forced to make low odds attacks.
The Turn 6 attack on Corregidor was at 3:1, with a +1 D6 roll. The Americans surrendered. The Japanese used Turn 7 to transfer air units. On the last turn of the game (Turn 8), the Japanese attacked Singapore, using all of their air power, including aircraft carriers. This support was countered by the lone Commonwealth unit, but augmented by Dutch air. That one air unit made all the difference. The 2:1 attack had a D6 roll of “2”, which modified by the +2 for air, with a result of “no effect”. If it had been a +3 for air, Singapore would have fallen.
The result was a marginal Japanese victory, as there were too many surviving Allied units (which reduce Japanese VIPs).
While not a simulation by any stretch of the imagination, this game forces the Japanese commander to shift resources and make attacks at lower odds than one would want; just like the real campaign. Likewise, the Allied commander has to eventually withdraw to fortresses, and hope for a positive outcome.
It’s tense, quick and fun.
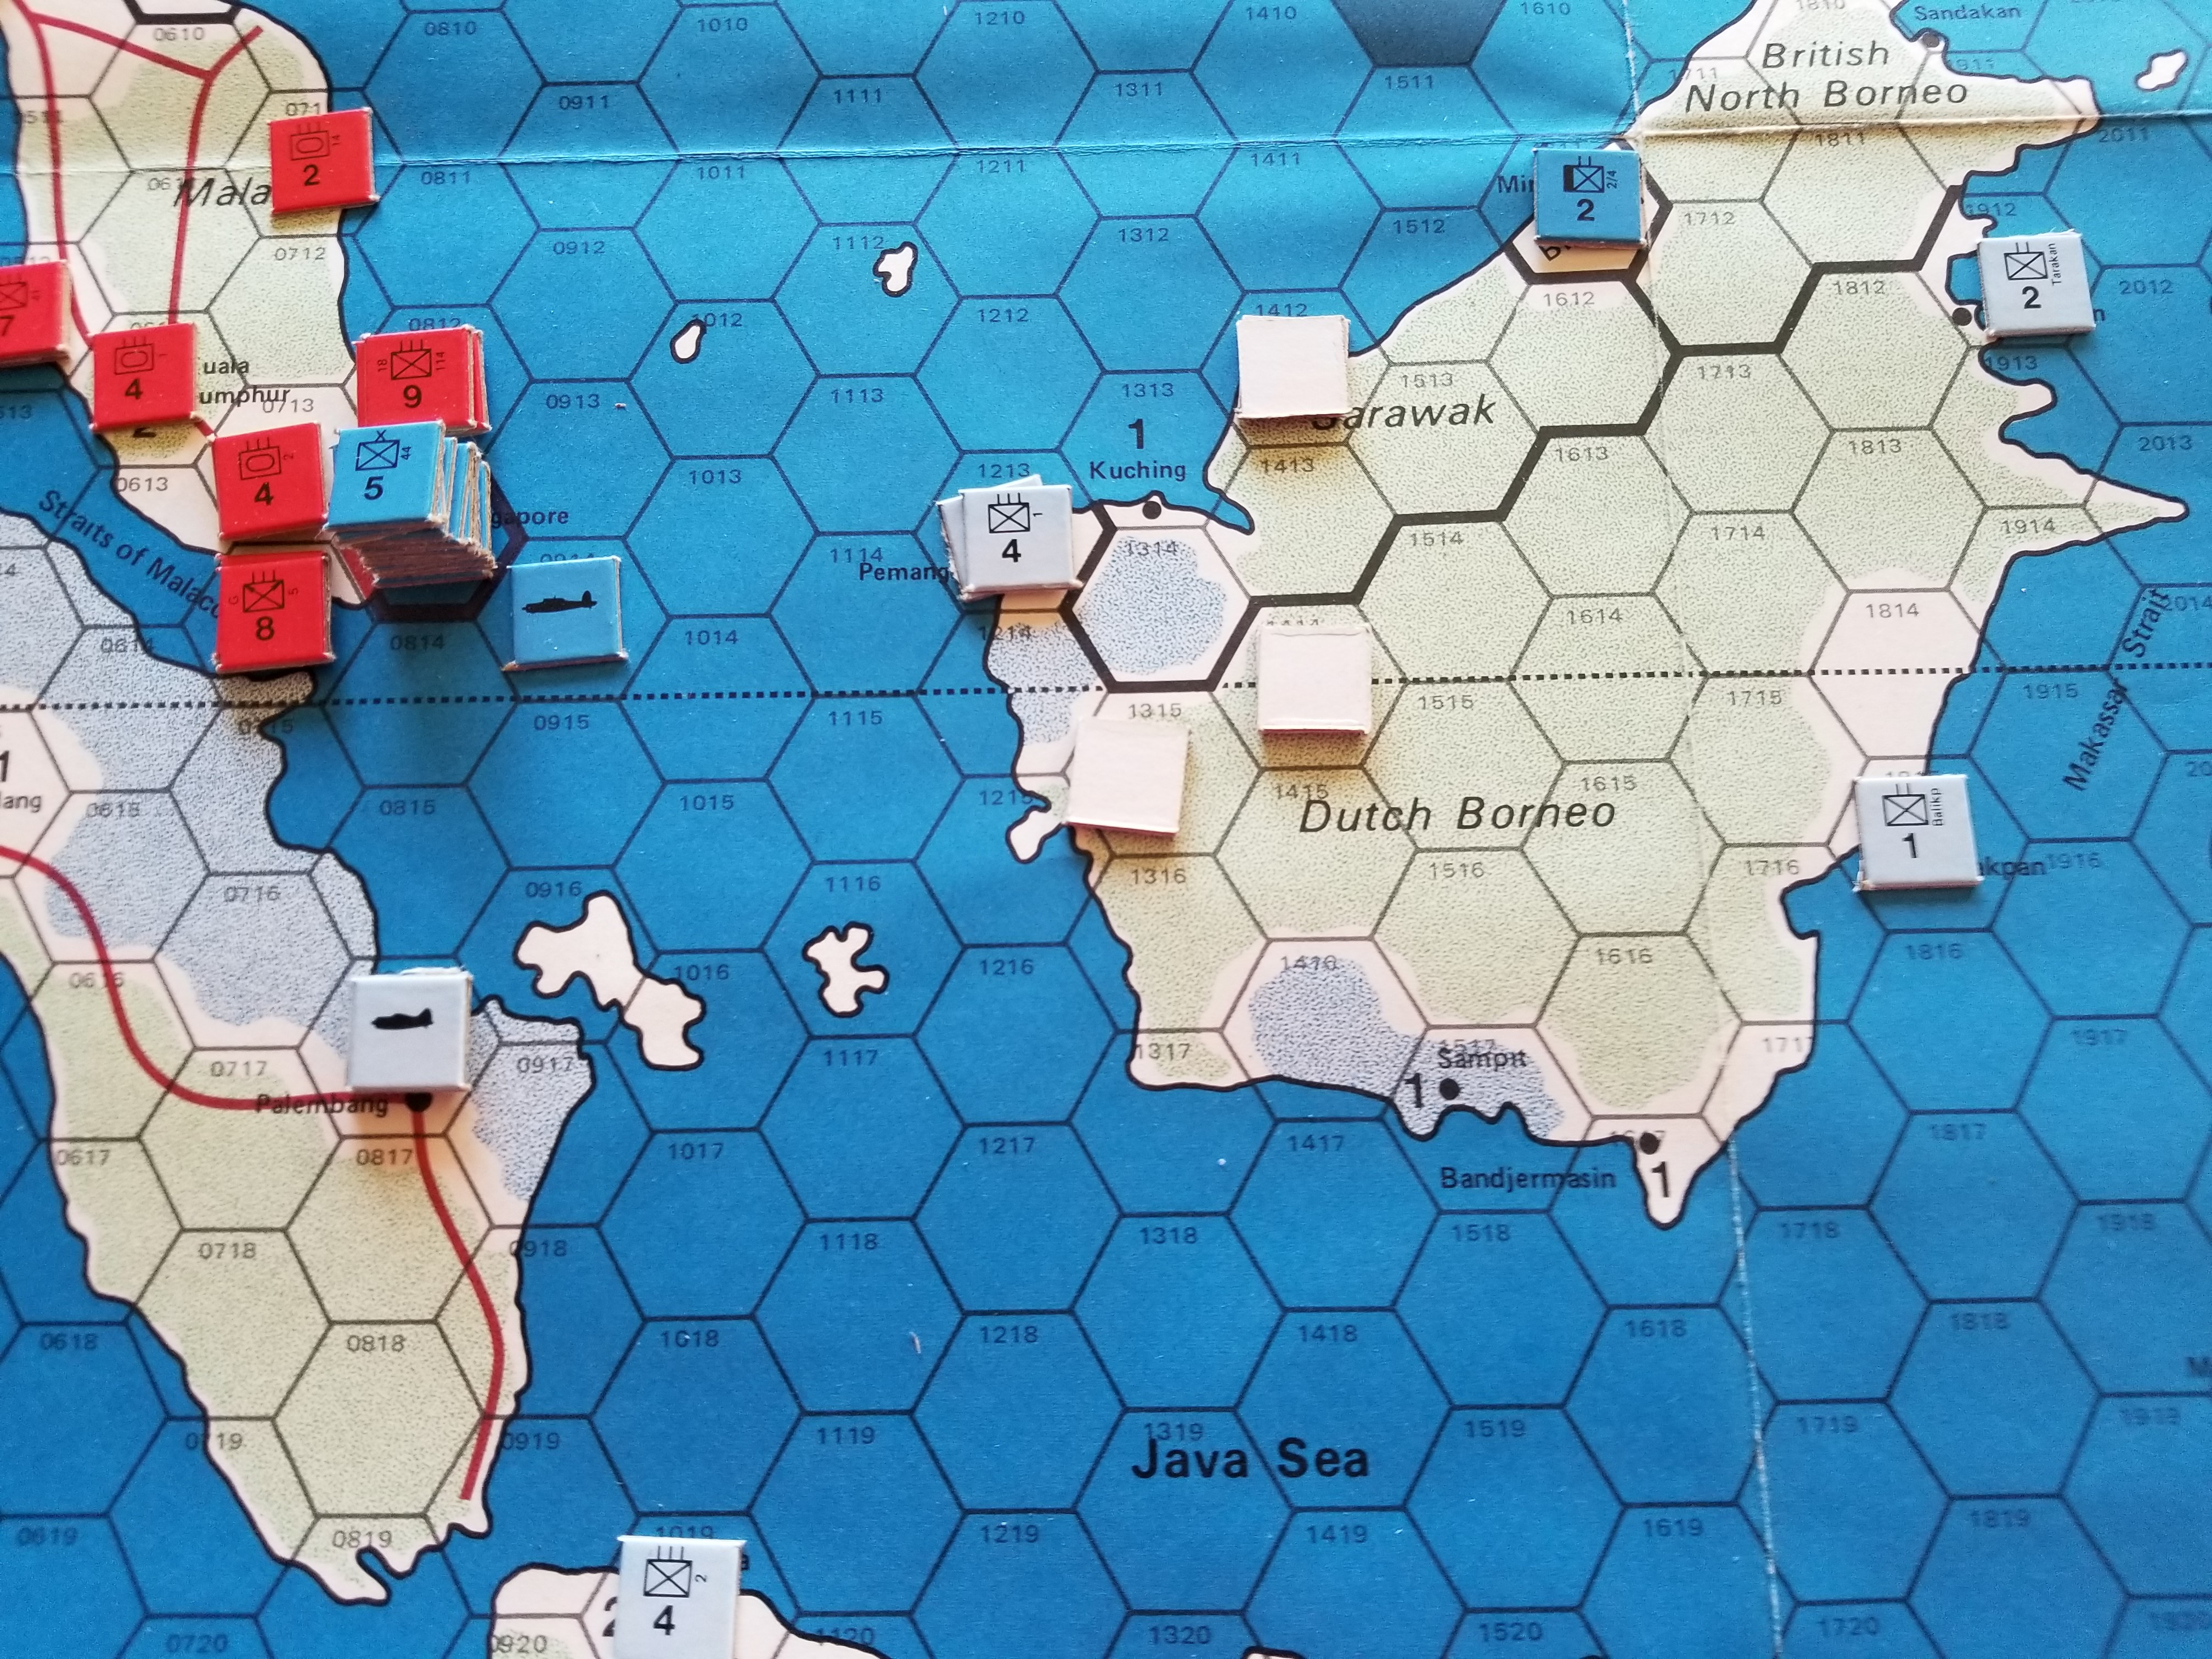
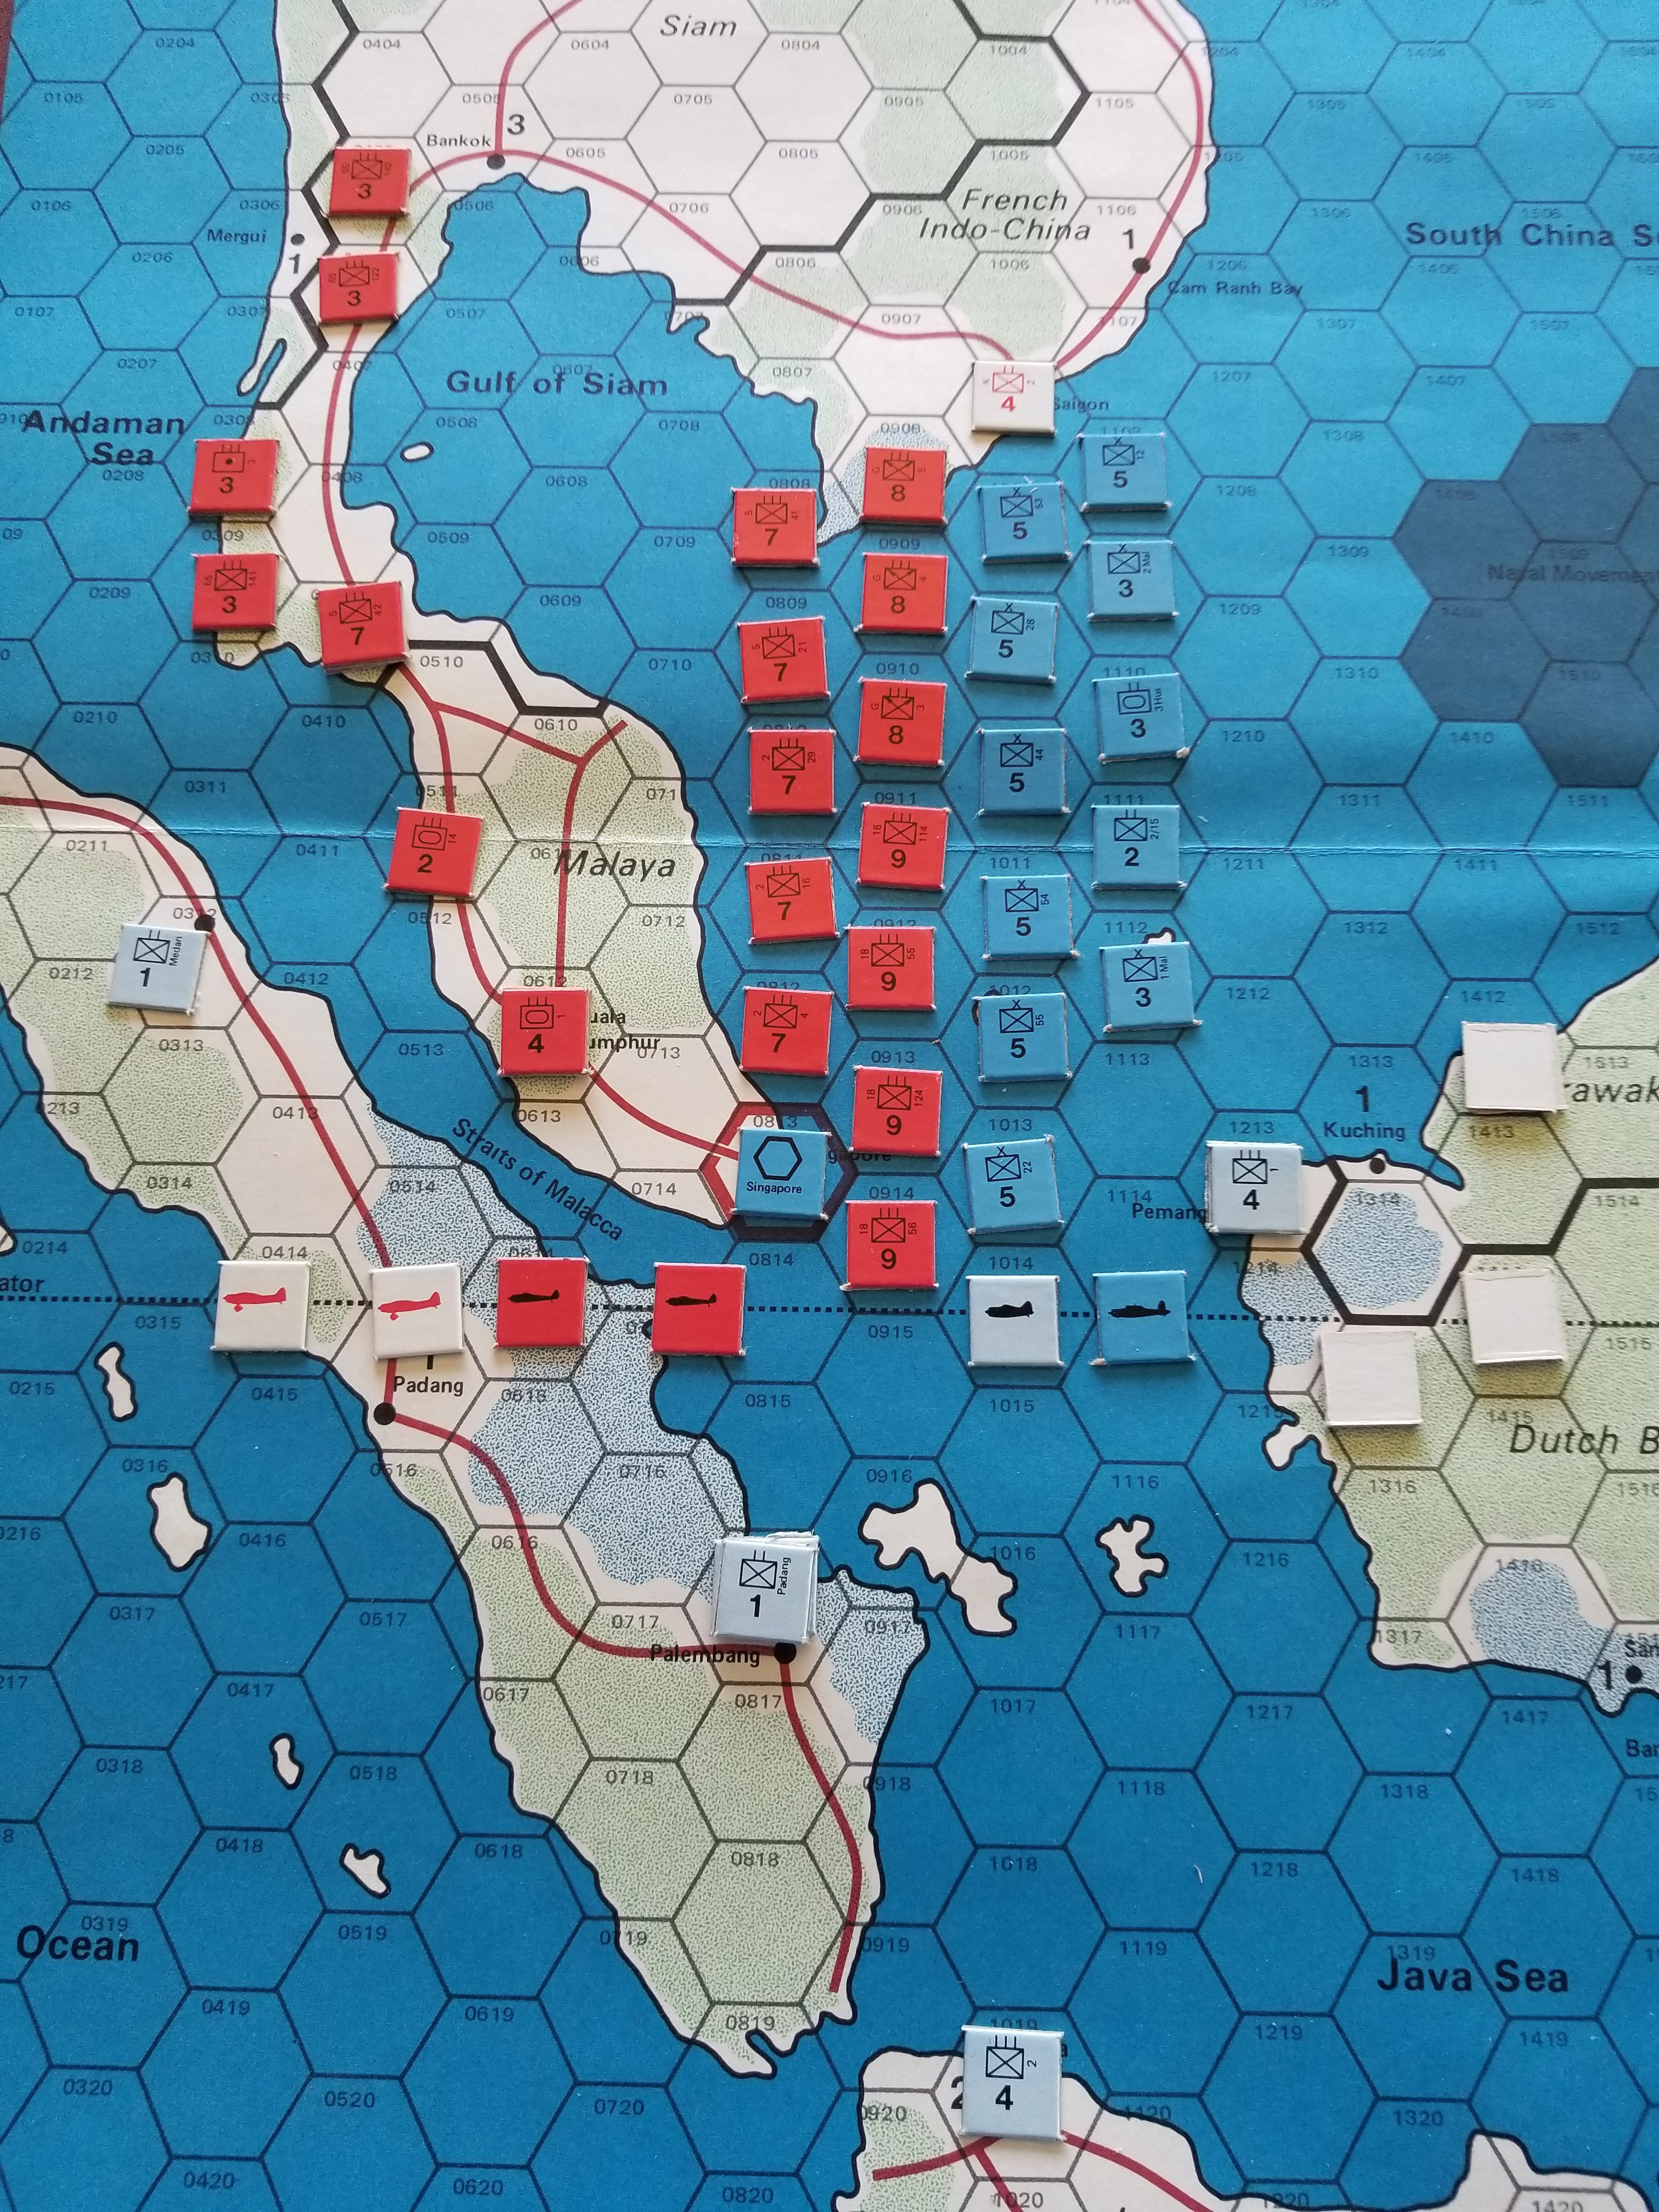
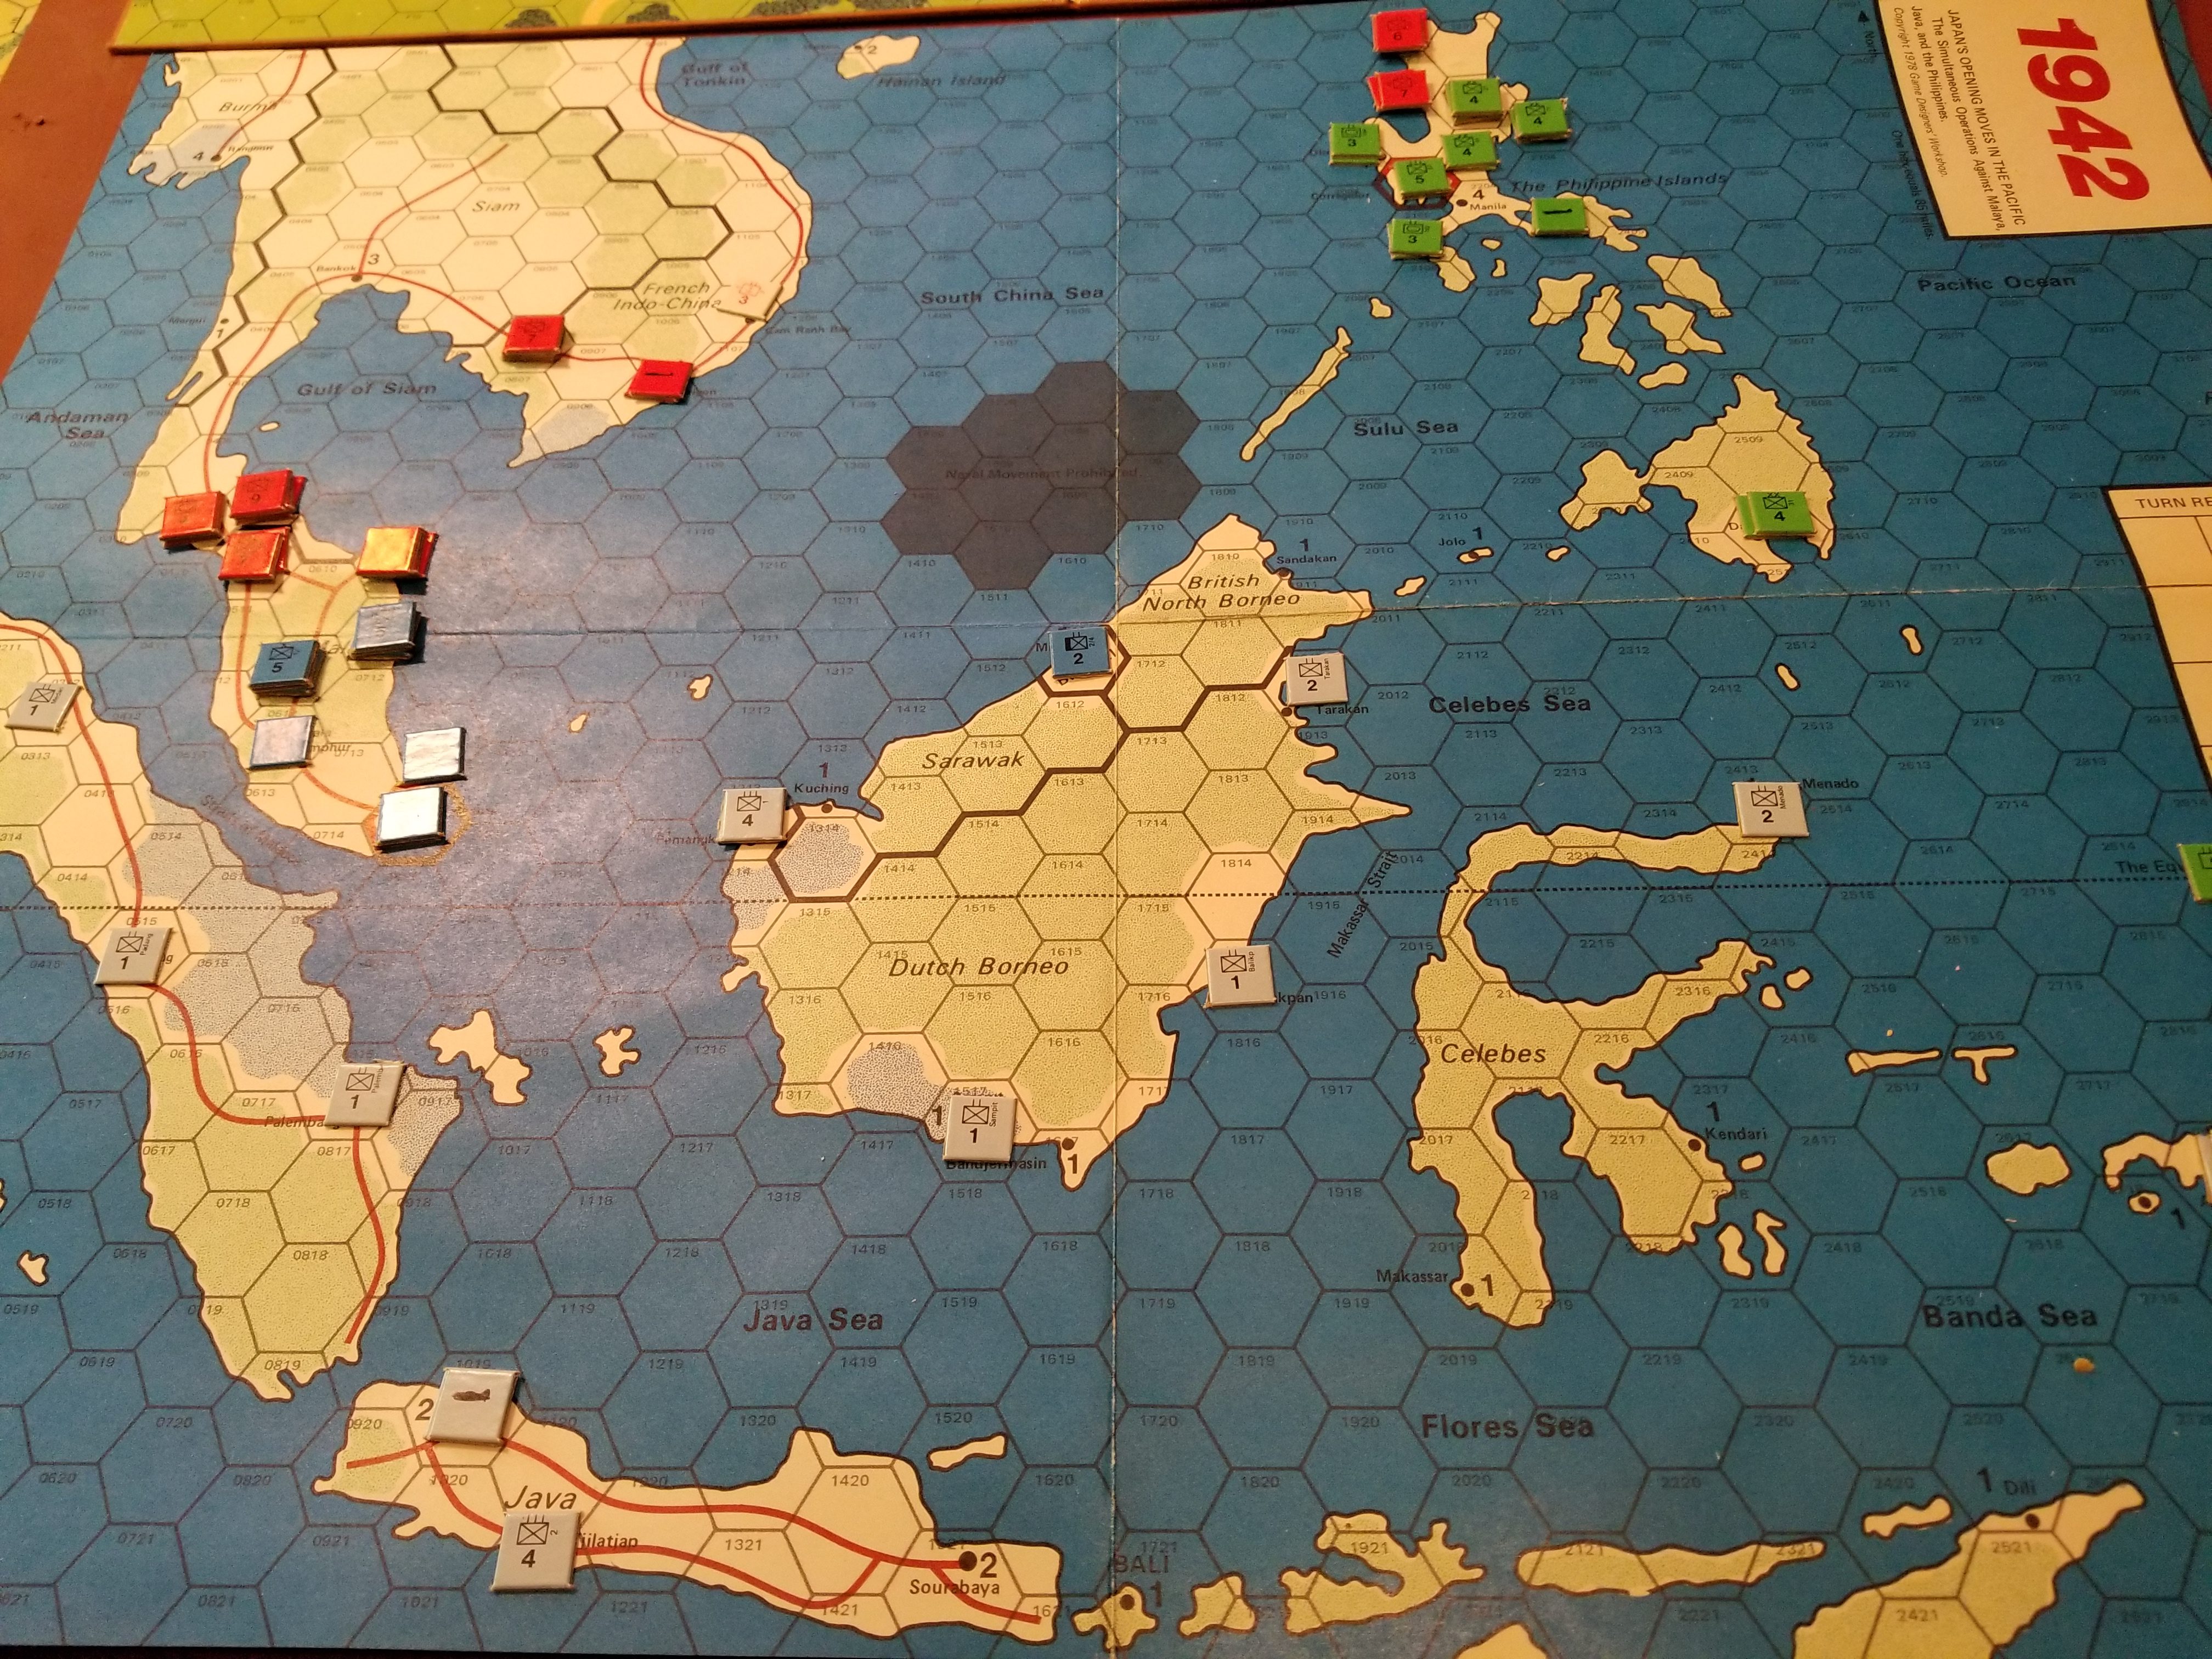
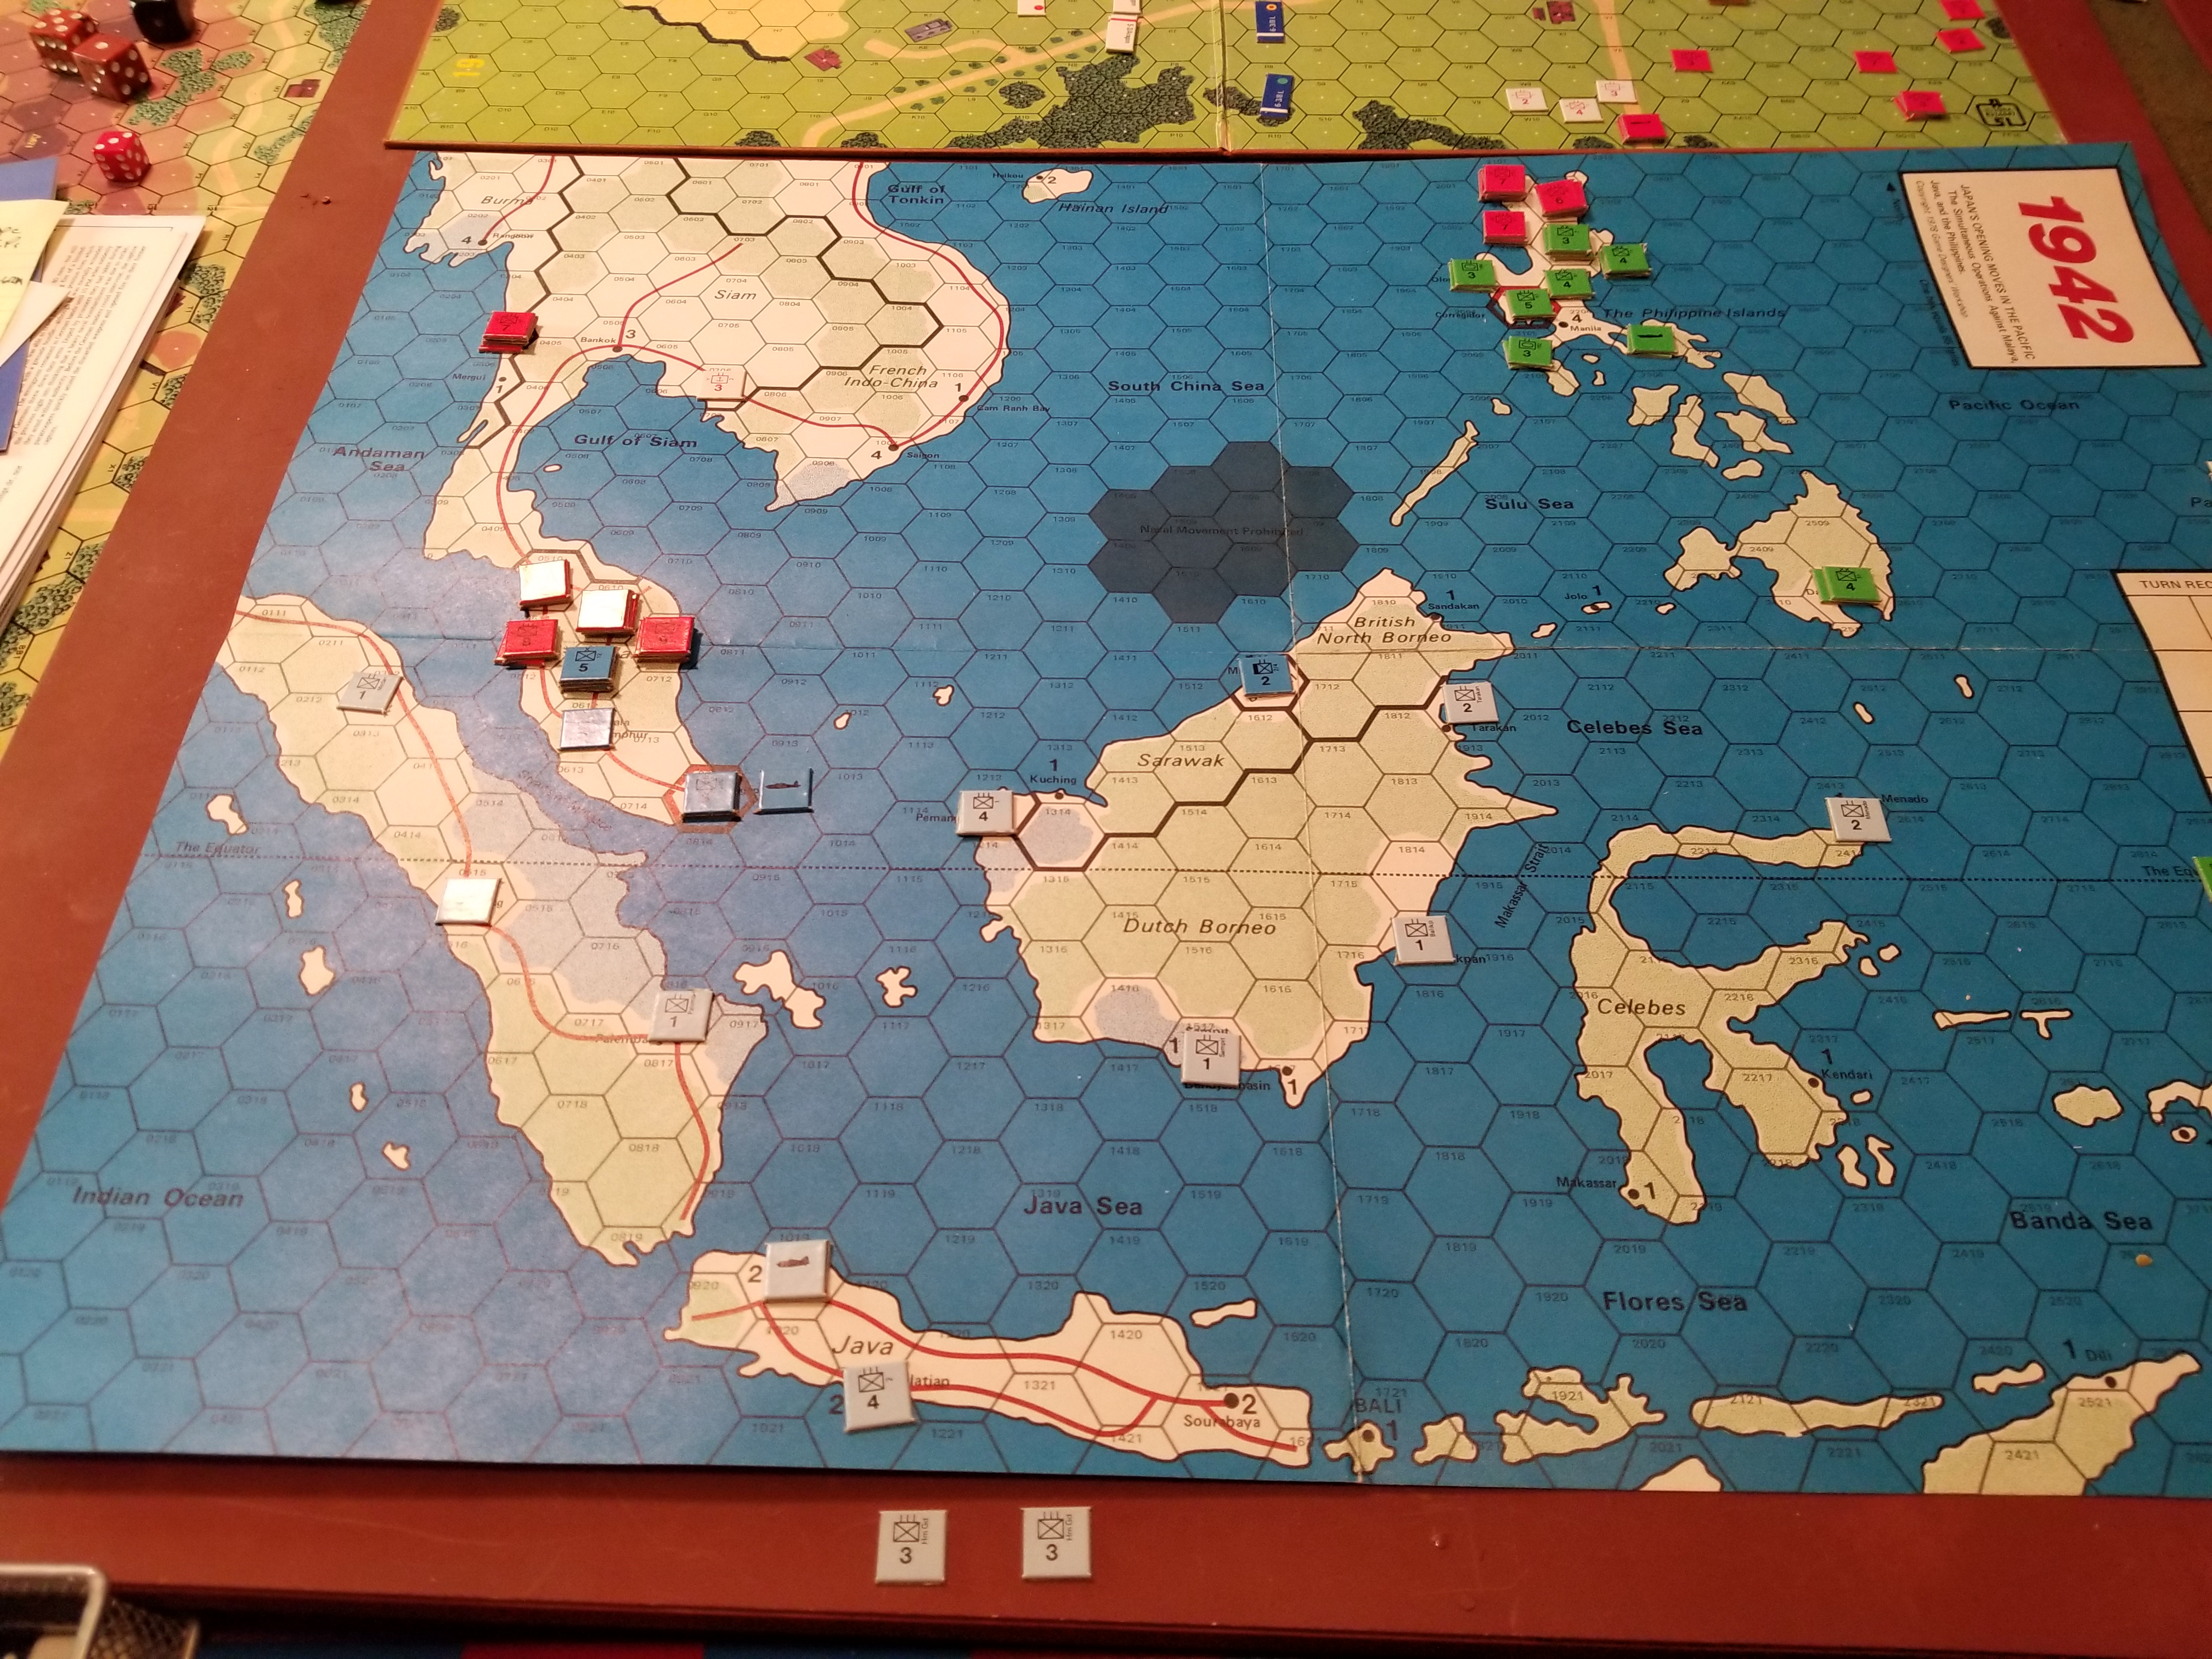
American Right Flank Is Disrupted. Japanese Close In On Dutch Garrison In Pemangkat. Dutch Air Umbrella Now Extends Over Singapore.Commonwealth Withdraws Into Singapore. Americans Preparing To Withdraw From Luzon To CorregidorBoth Commonwealth And American Troops Retire To Their Fortresses. Dutch In Pemangkat Are Surrounded.Japanese Attack And Capture Corregidor. American Units SurrenderJapanese Repulsed By DutchFinal Assault On Singapore
During the Allied (first) Phase of Turn 2, the Japanese suffered a slight reversal when the Americans destroyed the disrupted unit in Northern Luzon, and their main attack in the Malayan Peninsula was pushed back by Commonwealth forces.
Despite this, the Japan build-up in both areas continued unabated, at the cost of the additional naval movement points to sustain the landing areas.
Situation At End Of Allied Phase Turn 2. Disrupted Japanese Unit In Northern Luzon Has Been Eliminated.
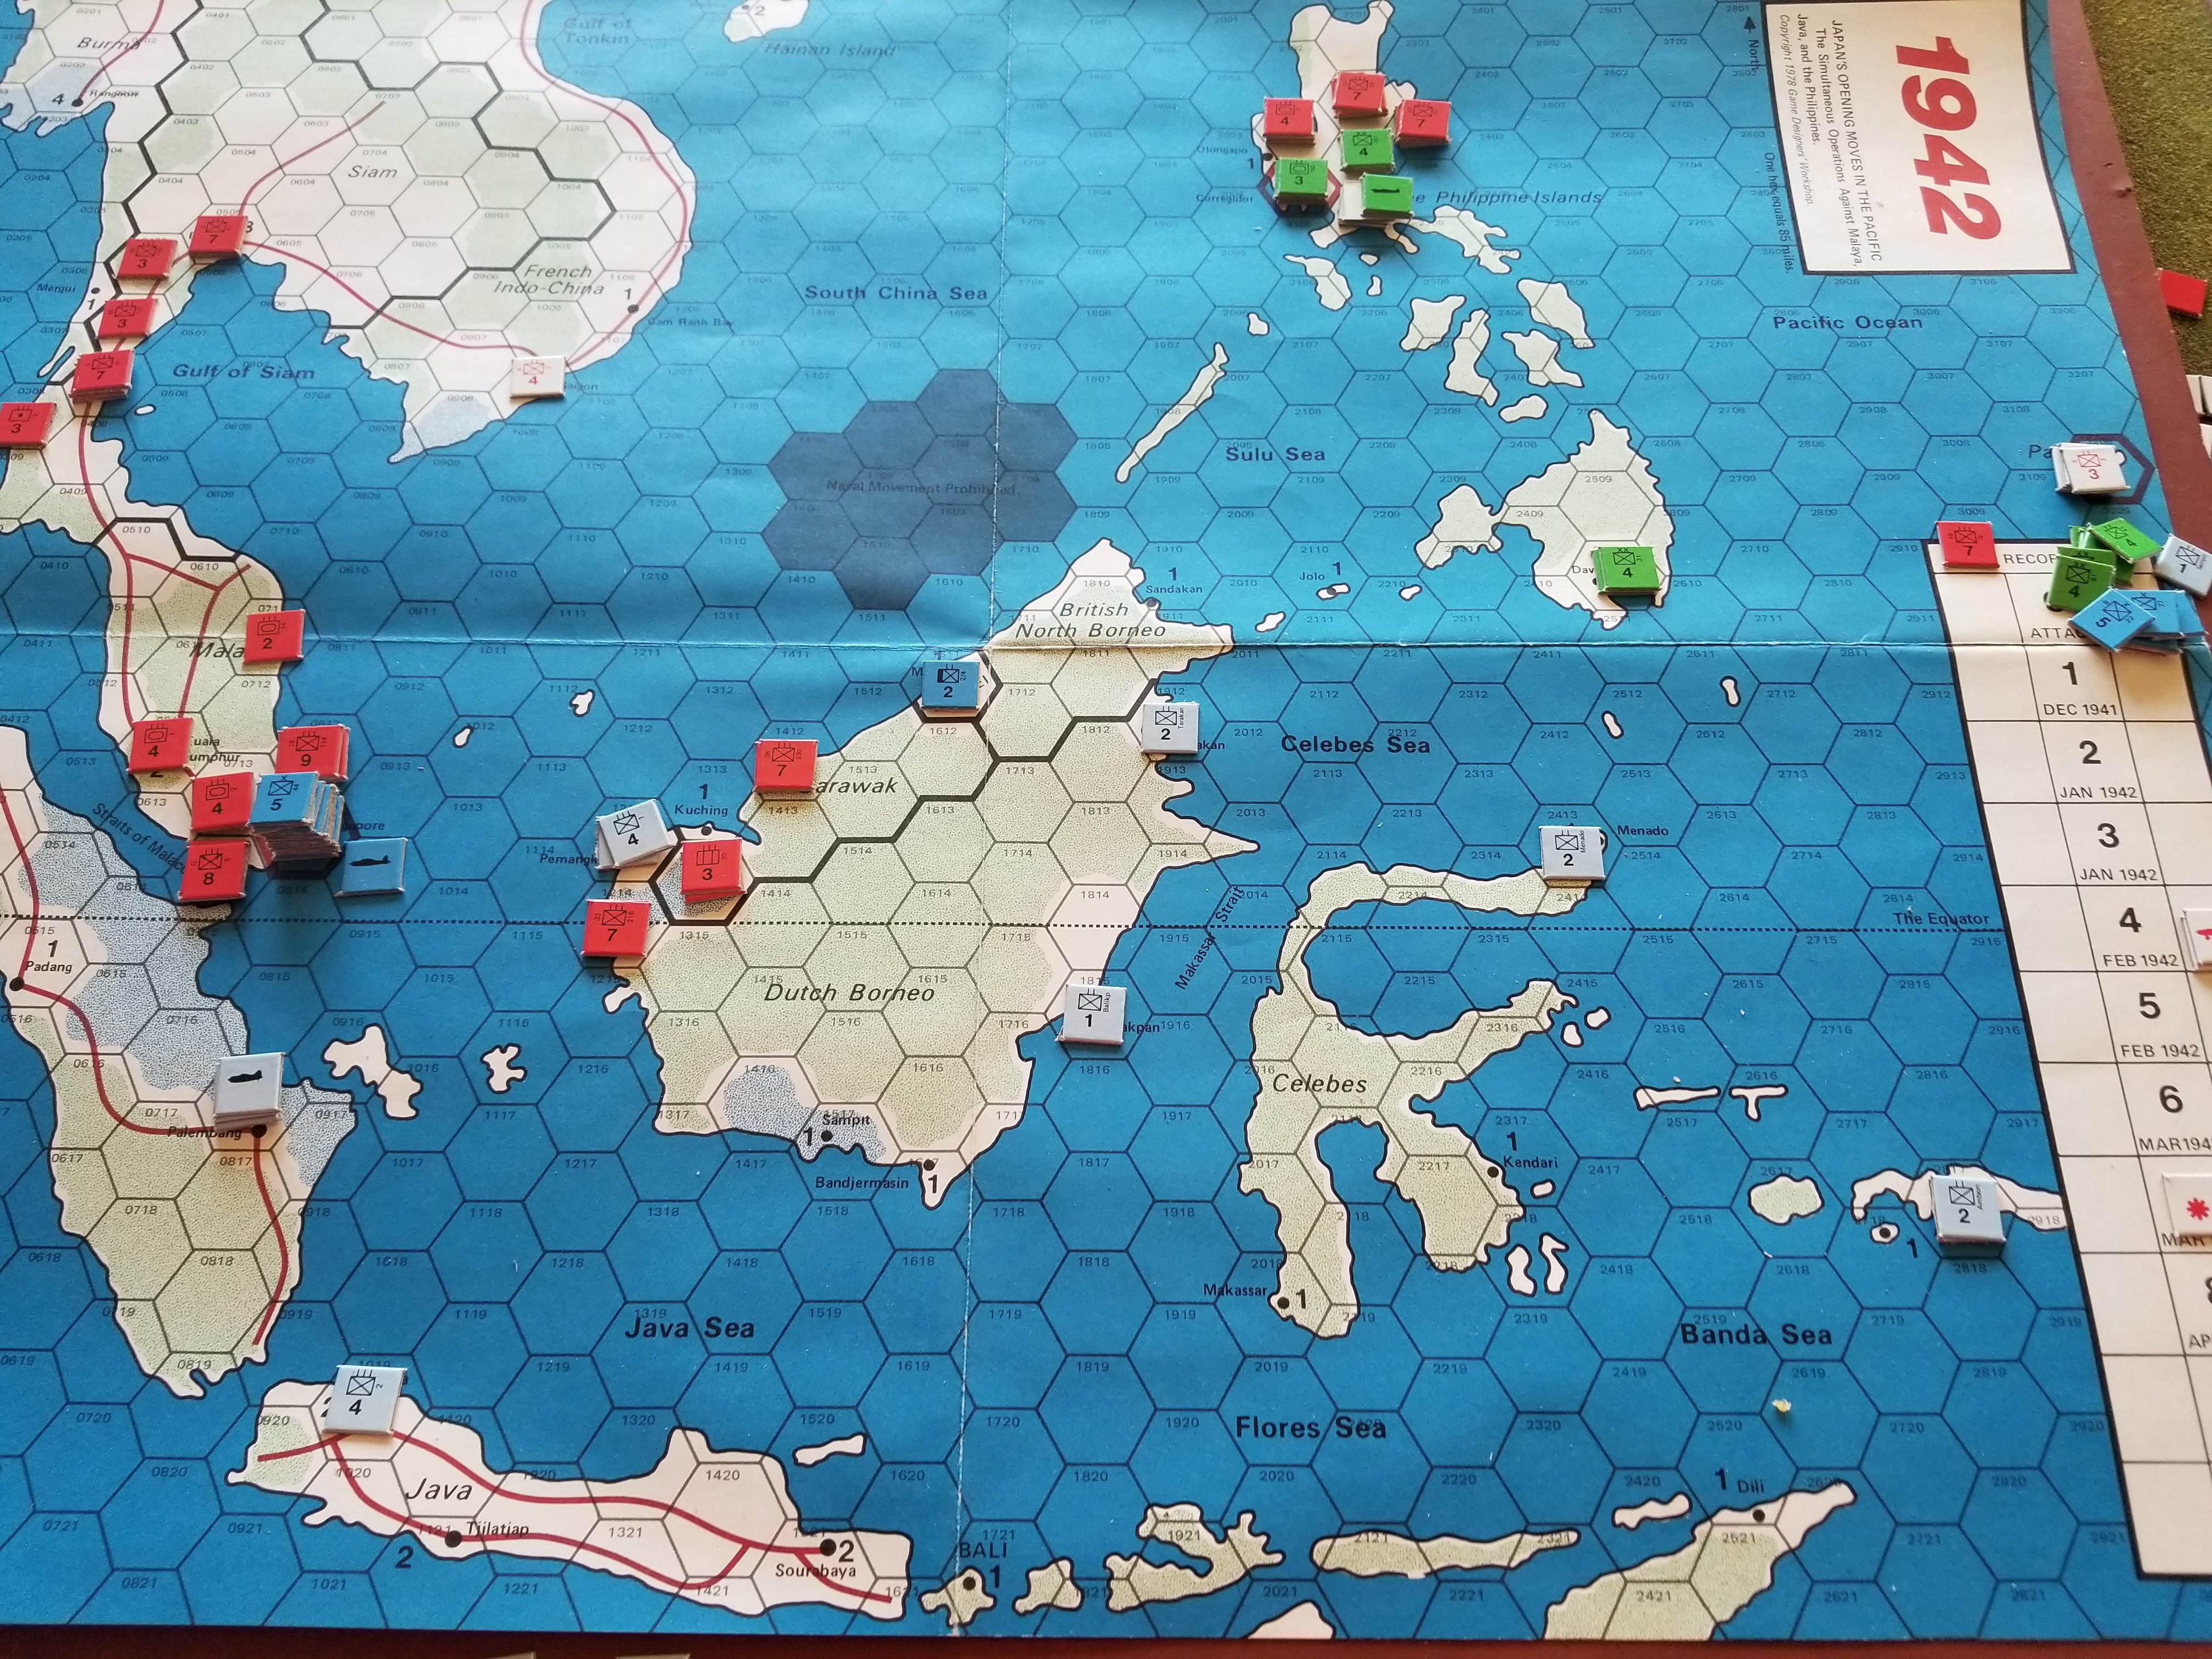
While the Americans were able to stall strong Japanese attacks supported by Formosa based air units, the Commonwealth suffered a severe defeat in Northern Malaya. A bold (2:1 with +1 modifier due to naval air) attack resulted in four (!) Commonwealth units surrendering.
During Turn 3, the British commander, faced with the possibility of overwhelming flanking attacks, ordered a general retreat into the Fortress of Singapore. The Dutch responded by shifting their lone air unit to support Singapore. Japanese units then moved to surround the fortress. The Americans chose to consolidate their Northern Luzon defensive line and await the inevitable Japanese buildup and assault.