Yes, wrapped up…….with an unanticipated and very abrupt ending.
As usual, it was as function of (another) rules/scenario comprehension (or lack of) gaffe.
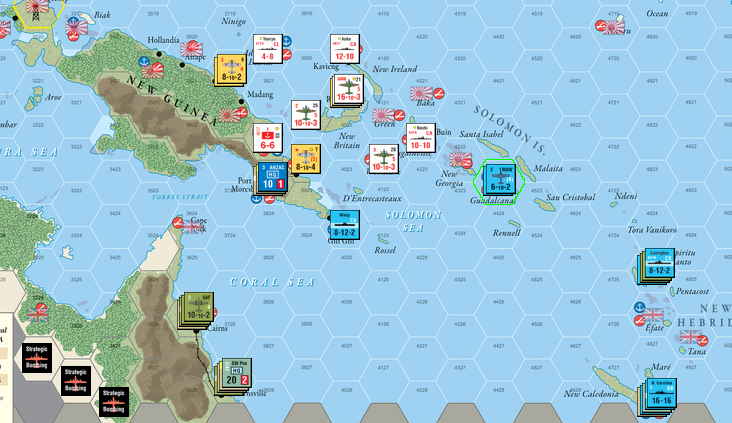
I forgot that in this scenario, neither side is affected by “Interservice Rivalry”. This status has a significant impact on gameplay as these rivalries preclude activating both Army and Naval units in the same turn/offensive. In SOPAC, the bulk of the respective naval forces are located in the New Hebrides and Solomons, while army units are in New Guinea/Australia.
Given card draws, the relatively weak strength of US naval forces during the first few turns, and this apparent operational limitation, the Allies had focused on New Guinea, with positive results.
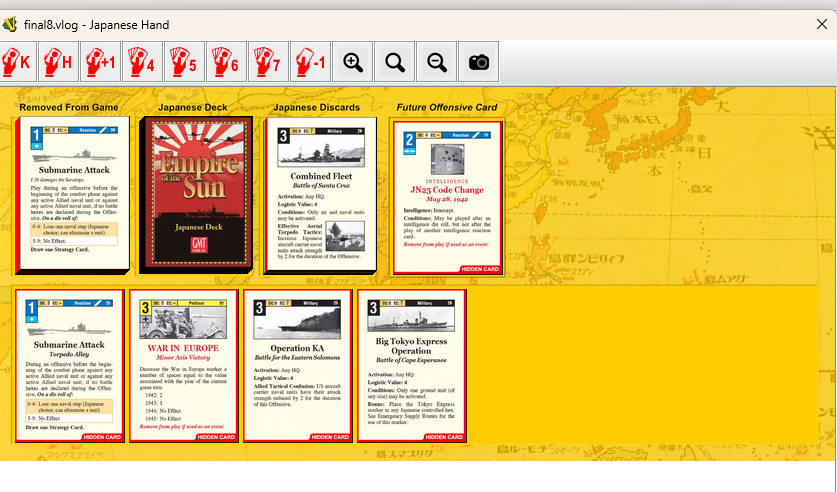
Here are the card draws for Turn 5. Note that starting with Turn 5, the Allies have the first card play. The Japanese can override that by playing a Future Offensives Card – which they do have (that might have been a good play…dunno).

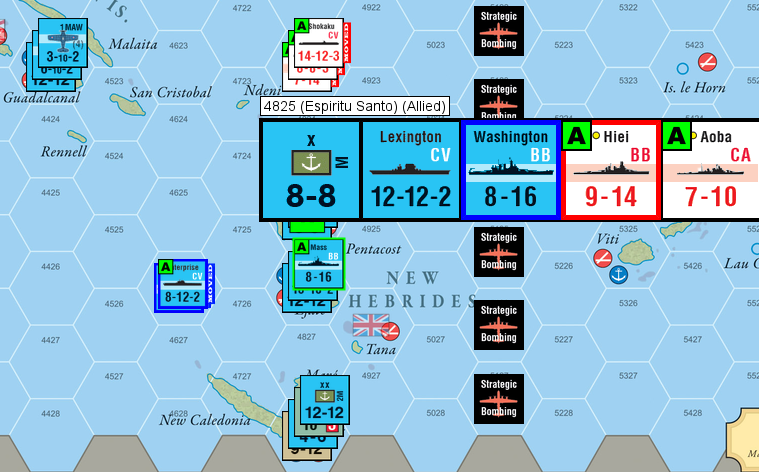
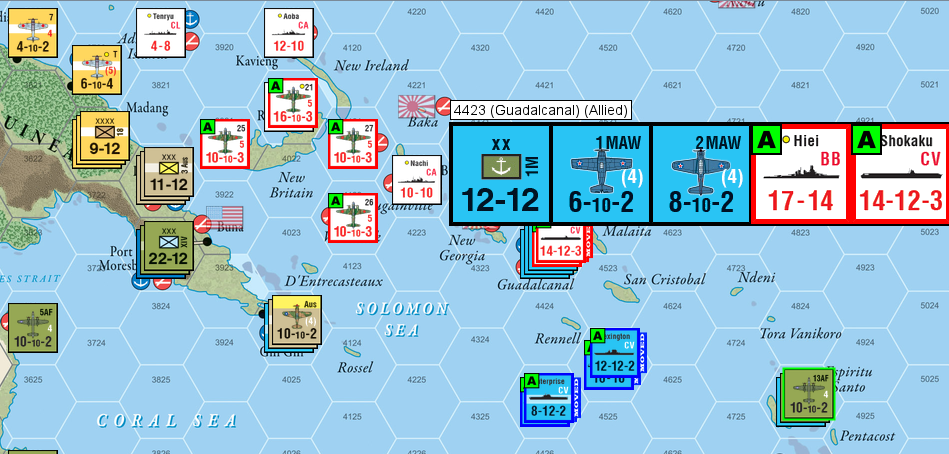
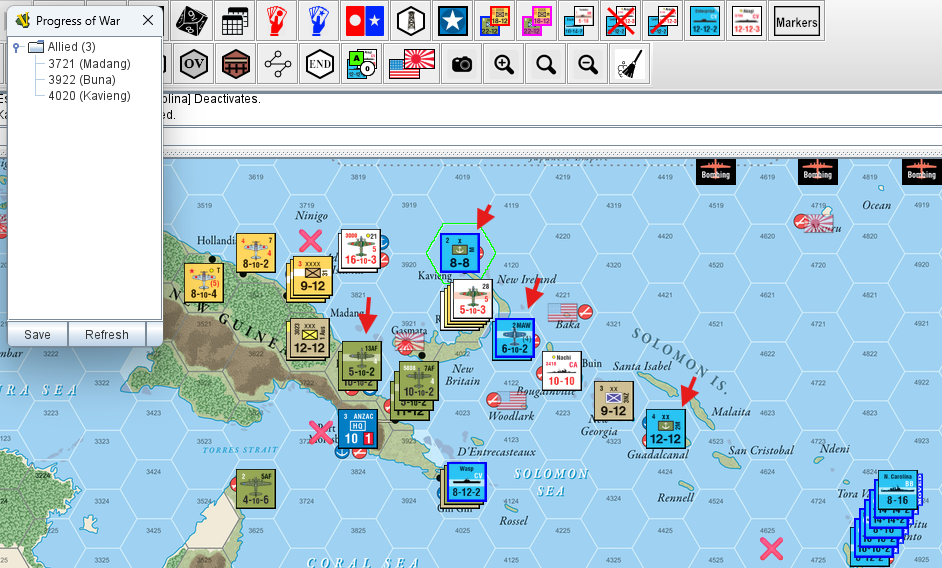
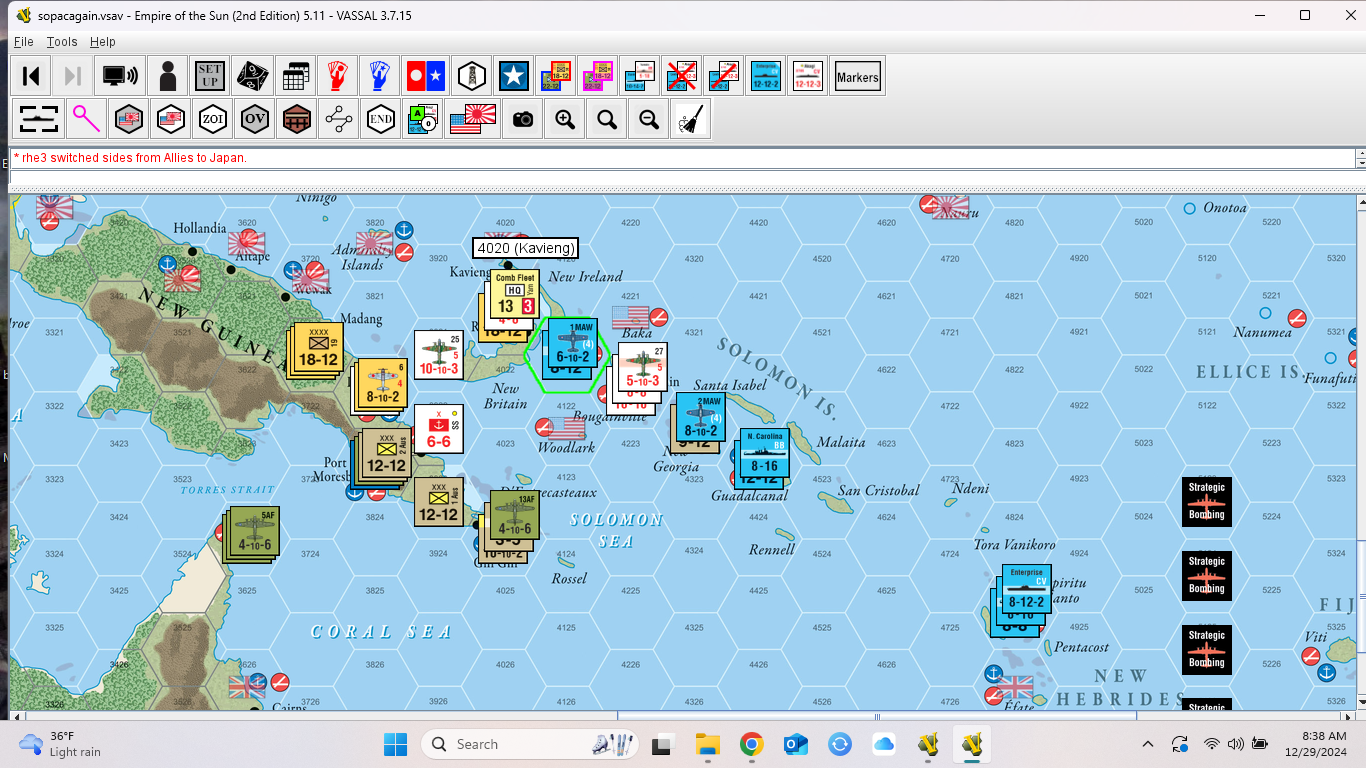
The Japanese Navy started the action off by activating their Solomon air assets for another pounding of Henderson Field. The Allies refused to react with their carriers, so the only opposition was two Marine air units (in EOTS any units in the Battle Hex have to participate in combat, but do not have to be activated to do so – which is a bonus because more “outside” units can be activated to participate).
The preceding paragraph only tells part of the story. The initial Allied response was to react. Not a good idea. The Japanese had roughly 60 attack factors, with the Allies only able to muster 40. The would have probably been a big BLAMMO, with crippling comparative losses for the Allies. I love the “Undo” icon.
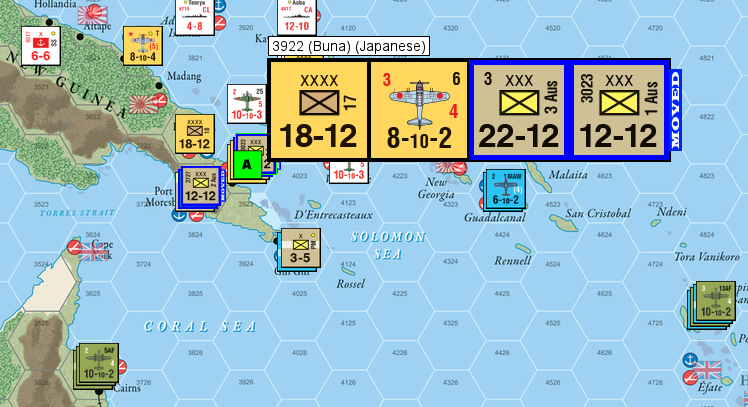
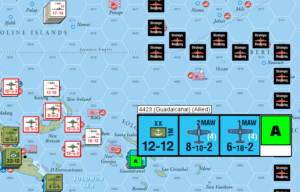
Meanwhile, the Allies continued their aggressive attacks in New Guinea, destroying the understrength corps that had arrived in New Guinea during the Replacement Phase of Turn 5. Note the participating Japanese naval unit. Another rules gaffe. While I now recognized interservice rivalries were not in effect, I forgot naval gunfire support applied only to the offensives player, not the reaction (defensive) side (if the offensive player has the only naval unit in the Battle Hex during ground combat, he/she enjoys a +2 combat die roll modifier).
The ensuing combat destroyed the 9-12 Japanese Army unit, ending any effective ground resistance (there still is a weak Japanese Naval Infantry unit just off the photo to the west (left)).
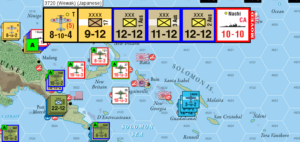
The Japanese response was to launch an all-out attack on the Allied naval units in the New Hebrides. The Allies had no choice but to react.
The VASSAL die-bot rolled high for the Allies and low for the Japanese. The Japanese sailed back to Truk without the Yamato and with damaged surface units.
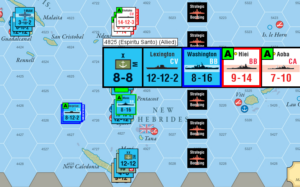
Again, the preceding paragraph is just part of the story. I initially used the Allied Central Pacific Headquarters to activate naval units. This HQ can add three units to the activation force, but……..and this is important……it can only activate units in the New Hebrides. This meant the The Wasp, now situated in New Guinea as part of the dispersion of naval assets to prevent catastrophic loss early in the game, could not join the reaction force. Neither could the Army’s long-range bomber units.
However, Genius Boy had forgotten that the Halsey Card had been put in play earlier in the game. Halsey’s South Pacific HQ can also add three units to the reaction force, and is not limited to the New Hebrides. Add the Wasp and Army air, and the Allies strength was increased by 16. Significant.
I shut the game down for the night, and returned to it the next day. Mulling the options there seemed to be no way the Japanese could win. The Allies now controlled three additional ports, and any Japanese counteroffensive would have to wait until they received replacements (a 9-12 reduced corp) for Turn 6. While theoretically feasible, this attack would face strong ground units and a significantly reinforced US fleet.
Now it’s on to the Burma Scenario.