Category Archives: Solitaire

Warfighter – France Expansion: Weapons & Missions

Another day, another post.  Cold mornings with temps in 20s keep from engaging with the Work Farm, and I have the looming tax returns at arm’s length.  So, might as well post up.

The French come with a number of weapons/weapon systems not found in the basic game.  Different personal weapons with similar capabilities of those used by US forces, but crew served machine guns.  The French do have a number of explosive firing options.  The Eryx launcher is intriguing.

The missions are intriguing also, with low load-out limits and a nice mix of small and large resource points to spend.  I’ve included the African Warlords Expansion #32 locations in the following photo


Warfighter – France Expansion: Equipment & Skills

Some time ago, I purchased the African Warlords Expansion #32.  Never opened the box.  But, after my more recent plays of Warfighter 2nd Edition, I decided to go all-in and purchase Warlords Expansion #33, as well as France #51.  These sets open any number of new play possibilities.

The France expansion contains a number of new (at least to me) skills and equipment options.  The set also includes an entirely new complement of weapons.  I’ll hold off on discussing the weapons until I’ve used some of the expansion’s unique systems.

The Local Translator card looks to be of some value.  Notice that only one card is for French soldiers, only.  Two of the cards involve hydration and acclimitization.

The African Location Cards add environmental considerations to the game.  Many locations require a D10 roll to determine if the individual soldier or squad is affected by the heat.  If the player must roll equal to or higher than the environmental number to avoid being suppressed or wounded (player’s choice).  The only way to avoid this is to play a “Hardy” token.  This token is contained in later basic game expansions, and covered in the DV Games on-line rules compendium.

The new equipment cards provide a number of options to obtain/expend Hardy tokens and avoid heat effects.  It looks like individual loadouts will involve a maximum use of canteens and hydration packs.  I’ll have to think through cooler placement.

Looking forward to setting this one up.

Good Decision(?)

It worked out…..barely.  The Hostile Turn was interesting.

Since  no soldiers were in the location occupied by the hostiles, no reinforcements were drawn.  The still active Leader’s “Inspired” trait allowed each hostile to discard one suppressed marker, so the RPG Team took a shot at Minyard.  The result was two wounds to both him and Sietz.  Fortunately, Minyard’s hand contained a “Take Cover” card  cancelling the attack.  Whew!   The Martyr moved to the location occupied by the other hostiles, leaving the Objective card unoccupied.  Again, no reinforcements were drawn for the Objective because it was unoccupied.  The screen shielding the target had left.

The Team now had one 40mm round  left, so one chance to kill the VIP.  Since this would take a single action by Seitz, both soldiers refreshed/augmented their hand, hoping to draw a card or cards to enhance the attack.  No luck, so only a single Combined Fire card could be used, adding two to the attack role.

In Warfighter, any weapon attack involves both a six-sided and ten-sided die (D6 & D10).  The D6 determines whether the attack “defeats” the target’s cover, while the D10 determines if the target is killed or suppressed.

The Objective has a cover rating of four, with the M203 having a kill number of eight.  higher (the “0” on the D10 counts as a “10”).  A roll of four or more is required to defeat the cover, and eight or more to kill.  If only one number is rolled, then the target is suppressed.  If neither rolled, the target is unaffected.

I rolled a 3D6, and 8D10.  No kill!  Ugh and Oh Well, My My……But, walking away I remembered the M203 has a penetration rating of one.  This is added to the defeat cover roll.  Success!

Next…..On to Africa!

Tough Decision

Had left my Warfighter scenario set up on the dining room table, so I  picked up where I left off….with a tough decision to make.

The decision was whether or not to play the “Stronghold” card as my fourth location, and the last card before activating and engaging the scenario’s objective.

Here’s a photograph with lots of information….along with a semi-coherent account of what happened.

The team’s mission is to  eliminate a VIP from Range 2.  But, in order to do this, the objective has to be activated, and this requires a soldier entering the adjacent location (card).

The team consists of Minyard (action cards to left of play aid, weapons and equipment above his personality card to the right of the play aid) with a M4 carbine, and Seitz (action, personality, weapons and equipment to the right of Minyard)  with an M203 carbine (M4 plus grenade launcher).  The plan is to use Seitz’s grenade launcher to eliminate the VIP.  In Warfighter, each soldier gets two actions per Soldier Turn.  Some cards allow the soldier to perform without using an action.

There is plenty of time left, and good cards to play.  No reason to discard in order to discard and draw for an alternate location card…..or was there?  I decided to go for it, even though activating the Stronghold location triggers the placement of at least seven points of hostiles.

Minyard held the card and used one action to place it.

Well, I drew what you see at the top of the photo.  Two Gunmen, a Radioman, a Leader and an RPG team. The Gunmen have to be killed first as they screen the other bad guys.  Yikes!!  I considered calling it quits, but decided to give the cards a chance.

So…..I used a Move Out  card (no action) for Seitz to enter the Stronghold  location.  This activated the Objective, which calls for a hostile fighter card draw.  My reward was a Martyr Bomber!  That dark cloud did have a silver lining.  A Martyr must move towards the nearest soldier during the Hostile Turn.  So, he would leave the objective ocation, and not serve as a screen for the VIP.  Well, that’s my interpretation.  And, in desperate times, researching Rules As Written (RAW) is not necessarily a priority.

Seitz then engaged one set of gunmen with a hand grenade, using a Snap Shot (again no action) card, killed them both, and moved back – using another Move Out  card – to his previous location.  Seitz engaged the Gunmen  with his M203, and after they were eliminated, suppressed the RPG team with another M40 grenade.  Minyard then suppressed the Radioman, but couldn’t harm the Leader.

Suppressed Hostiles will not be able to attack or move during the upcoming Hostile Turn.  However, the Leader can take action.

Will finish the turn tonight, and hopefully write up the outcome tomorrow.

Kids!

Now  playing this great solitaire game.  I had forgotten just how good it is.

Went over to its Boardgamegeek page and downloaded this mini-mat.  Saves so much space!  Now I can comfortably play it at my desk, with the Soldier Player cards and loadout on a small side table.

The usual re-entry fits-and-starts with the rules.  This narrative discussion really helped.  So, with this, the 2nd Edition rulebook, downloaded key terms and universal rules, I had all the resources required to play.

Here’s a quick snap of the first mission of my campaign game.

Notice the Refugee Card?  That ruined everything.  Damn Kids!!!  No auto bursts or explosives.  My M-203 – which I’m counting on to kill the mission’s VIP target and to kill multiple bad guys, is useless.  So, I became bogged down in a gunfight characterized by my die rolls that suppressed, but did not kill.  After one Player-Soldier was wounded twice and  my Mission Timer clicking down, I went into abort mode.

Granted, it is a tough mission with low (41) resource points. But, I’m sure an experienced player would have figured things out.  I’ll use this as a negative score, and do my usual reset.

Lots of fun, though.

TSATF – Last Move

Rolled for Boxer resistance on the last two ridges.  None on one ridge, and one, passive, unit -with only four riflemen, on the other.

Don’t need to play this out.  Marines will simply engage at a distance, and force them off.

This game turned out well.  I’m fairly satisfied with my solo adjustments for Boxer placement, strength and aggressiveness.

I did roll for Marine casualties.  Four of the eleven lightly wounded are now considered seriously wounded.  Add those to the four KIA and other three seriously wounded, and the Marines took roughly 1/3 casualties.  High price.

Well, time to put them back in their cabinet and start playing Husaria.

TSATF Skirmish Continues

Well, maybe not that interesting at first, but later the situation became too interesting for the Marines.

The Boxers failed the morale check needed to charge the Marines occupying the west ridge line;  ran off the ridge and went prone/pinned.  Elsewhere the firefight continued, with both sides sustaining casualties.  Surprisingly, the retreating Boxer unit rallied on a die roll of “1”.

Here’s photo of the situation.

The riflemen of the rallied Boxers turned to engage the Marines moving through the saddle, while the remainder charged and closed with the Marines to their front.  The Marines moving through the saddle, in turn, charged the detached riflemen.

Both Marine units were pushed back!  In TSATF, hand-to-hand combat is simply a comparison of die rolls, and the Boxers were rolling well.  Despite losses, the Boxers  held the west hill.

However, the Boxers unit losses were now greater than fifty percent.  The detachment on the hill failed the required morale check and fled (final turn phase after shooting). The riflemen, however,  passed their check and remained in place.

In the following turn, the two Marine squads rallied and moved back towards the west ridge, staying in defilade. The Boxer riflemen focused on the remaining Marine unit, but their fire was ineffective.  Here’s a photo of the situation at the end of this turn.

Quick Note:  I’m keeping the casualty cubes in-place for an end-of-game count.  Red indicates a serious wound, pink a light wound, and black for death

The Marines regained the crest of the west ridge and engaged the Boxers to their front.  The Boxers literally fought to the last man.  The Boxers holding the east ridge drew an event card reducing their effective firing range to only 12 inches, or not far enough to engage the Marines to their front.  They wisely withdrew to the reverse slope.

The Marines advanced through the open ground to take the east ridge.  Here, the  Boxers emerged from defilade, but retreated after taking casualties and failing  their morale check.

While this action was taking place, Marines occupied the west ridge.  Here’s a photo of the current situation.

Lots of wristage before next turn’s action.  Have to determine who and what will be on the final two ridges.  I will also inventory all losses, clean up the casualty cubes, and maybe die to see which of the lightly wounded Marines can no longer continue.

Skirmish Mission

Rhonda’s enjoying Palm Springs weather, so I’ve set up The Sword And The Flame (TSATF) on the dining room table.

The scenario calls for the Marines to clear a series of ridges.

I’m considering all ground to be rough ground for shooting, so there is a -1 DRM for all firing.  However, the ground will be considered clear for movement, so without penalty.

Visibility is twelve (12) inches from ground to crest, unlimited from crest to crest, and crest to base of next hill.

The challenge is coming up with some solo-friendly randomness.  Here’s a quick and sketchy overview.

My initial stab at this problem is to use the Action, Event and Terrain cards published by The Virtual Armchair General.

An Event will be triggered by a die roll of six (6), and confirmed by a Yes/Maybe die roll.

Whether or not a terrain feature is occupied will be determined by a 10 sided  die.  A roll of four (4) or less means the feature is unoccupied.  A roll of five (5) to eight (8) means a Boxer force is occupying the crest.  A roll higher means the Boxers are on the reverse slope.

Another percentage die roll determines force composition.  A roll of four (4) or less means Regulars.  Another outcome results in a Boxer force.  For the Boxers, another roll gives the number of figures with firearms.  All Regulars carry rifles.

Terrain cards will be drawn when Marines enter a “new” terrain feature – either a slope or the “new” ground beyond a ridge line.  These cards will indicate if movement is slowed.

Any casualties are considered to be out of this game.  Wounded figures will be diced for at the end of the game, anticipating a follow up contest.

Islamic State – Libya War

This  game is published by One Small Step Games (OSS) in  Counterfact Magazine.  I downloaded it from Wargame Vault.  It is solitaire, the contemporary topic is of some interest, and the format seemed to lend itself to download and DTP construction. The forum section of the game’s  Boardgamegeek page is essential reading as are the revised rules found at OSS’s game page.

The map printed out fine and looks good.  The counters were difficult to cut because the colors of the various factions’ units are similar shades of drab and lack visible guide lines.  The result was a grotesque lack of uniformity.  I decided to use Risk blocks in lieu of some of the counters/chits.  This improved appearances.

The game’s topic is the war against Daesh in Libya.  Allied forces are tasked with controlling key cities and oil fields as portrayed on the point-to-point map.   Each of the game’s eight turns is broken down into five (or six based on a turn-end roll), IGO-UGO action rounds.  Victory is determined by how many areas Daesh controls, number of active leaders, negative press coverage (due to collateral damage) received by the Allies, and hostages and downed pilots executed.

Allied forces can perform any one of several actions during their phase.  These are conventional unit movement into a Daesh controlled hex which triggers combat, “snatch and grab” operations using special forces to seize Daesh leaders for interrogation  or hostages, landing (amphibious) operations, heli-borne assault, reconnaissance, and strike missions with aircraft.

Daesh actions are generated using a table listing ten possible actions including kidnapping, terrorist attacks, and sabotage.

Combat is performed on a display arraying  Allied units against a Daesh counterpart randomly drawn from the Daesh force pool.   Each Allied unit can be supported by aviation, drone or artillery assets.  Allied forces never eliminate their opponents.  A positive combat result will have the Daesh unit ineligible to be activated again during the current turn, or unable to return to the Daesh unit pool until after the next game turn.  Intelligence concerning the whereabouts of hostages or Daesh leaders can also  result from combat.  Any Daesh force that survives an attack  “fires back” at their opponent and, in certain situations there is a combat modifier due to special weaponry. These units are returned to the force pool.

Here’s an imaginatively framed shot of the game in-progress.

I used traditional blue and red blocks to identify friendly and Daesh controlled areas instead of counters.  At bottom right is the combat display.  Both types of Allied units (combat on top and support at bottom) can fire at Daesh units.  The Allied force pools are located above the combat display.  The red lozenges are for Daesh leaders.  I substituted pink blocks for the hostage counters, blue lozenges for pilots and a yellow block for media.  These were placed on a hand scribbled holding area card, which also had the turn phase track.  Daesh victory points were tracked by a red block, allied casualties by a blue block and collateral damage by a black block.  Turns were marked with another green block, along with stacks of destroyed Daesh counters by a result calling for their re-entry to the force pool sometime later in the game.   The containers were used to hold conventional Allied units not on the map, and the Daesh force pool.  Support units can be used only once per game turn.  In the absence of specific guidance I treated parachute and special forces units as support units since it would take some time to re-brief, re-organize these types of specialized units.

The rules were criticized in a now-deleted post over at Boardgamegeek.  I would say that the layout could be better, perhaps more along the lines of the solitaire Destruction of Force Z, which presented the rules and, most importantly, charts in  game turn sequence.  After flipping back and forth between Islamic State’s eight pages, I did a cut-and-paste to reduce the rules to a manageable, more sequential  and flippable four pages.  Unlike the redacted reviewer, I cannot see playing the game in 60 minutes or less.  Not a bad thing, but there are  too many moving parts. Still, the pace is brisk with plenty of decisions and actions in every turn.

In my game the  Allies lost by Turn 5, probably due to my misreading of the collateral damage rules.  The Combat rules section indicates that collateral damage should be checked after combat – but is that individual combat or turn phase combat?  The Collateral Damage table indicates after all turn phase combats have been completed.  The latter significantly reduces the potential point gain for Daesh.

I enjoyed the game, and don’t regret the cost of purchase, time taken to construct the components, and understand the rules.  It is an intriguing system.  For me, on a cost-benefit basis, the returns on investment seem marginal.  I don’t imagine replaying it right now, or in the near future.  For someone else, this might be a go-to game, but not for me.

Destruction of Force Z – Session Report

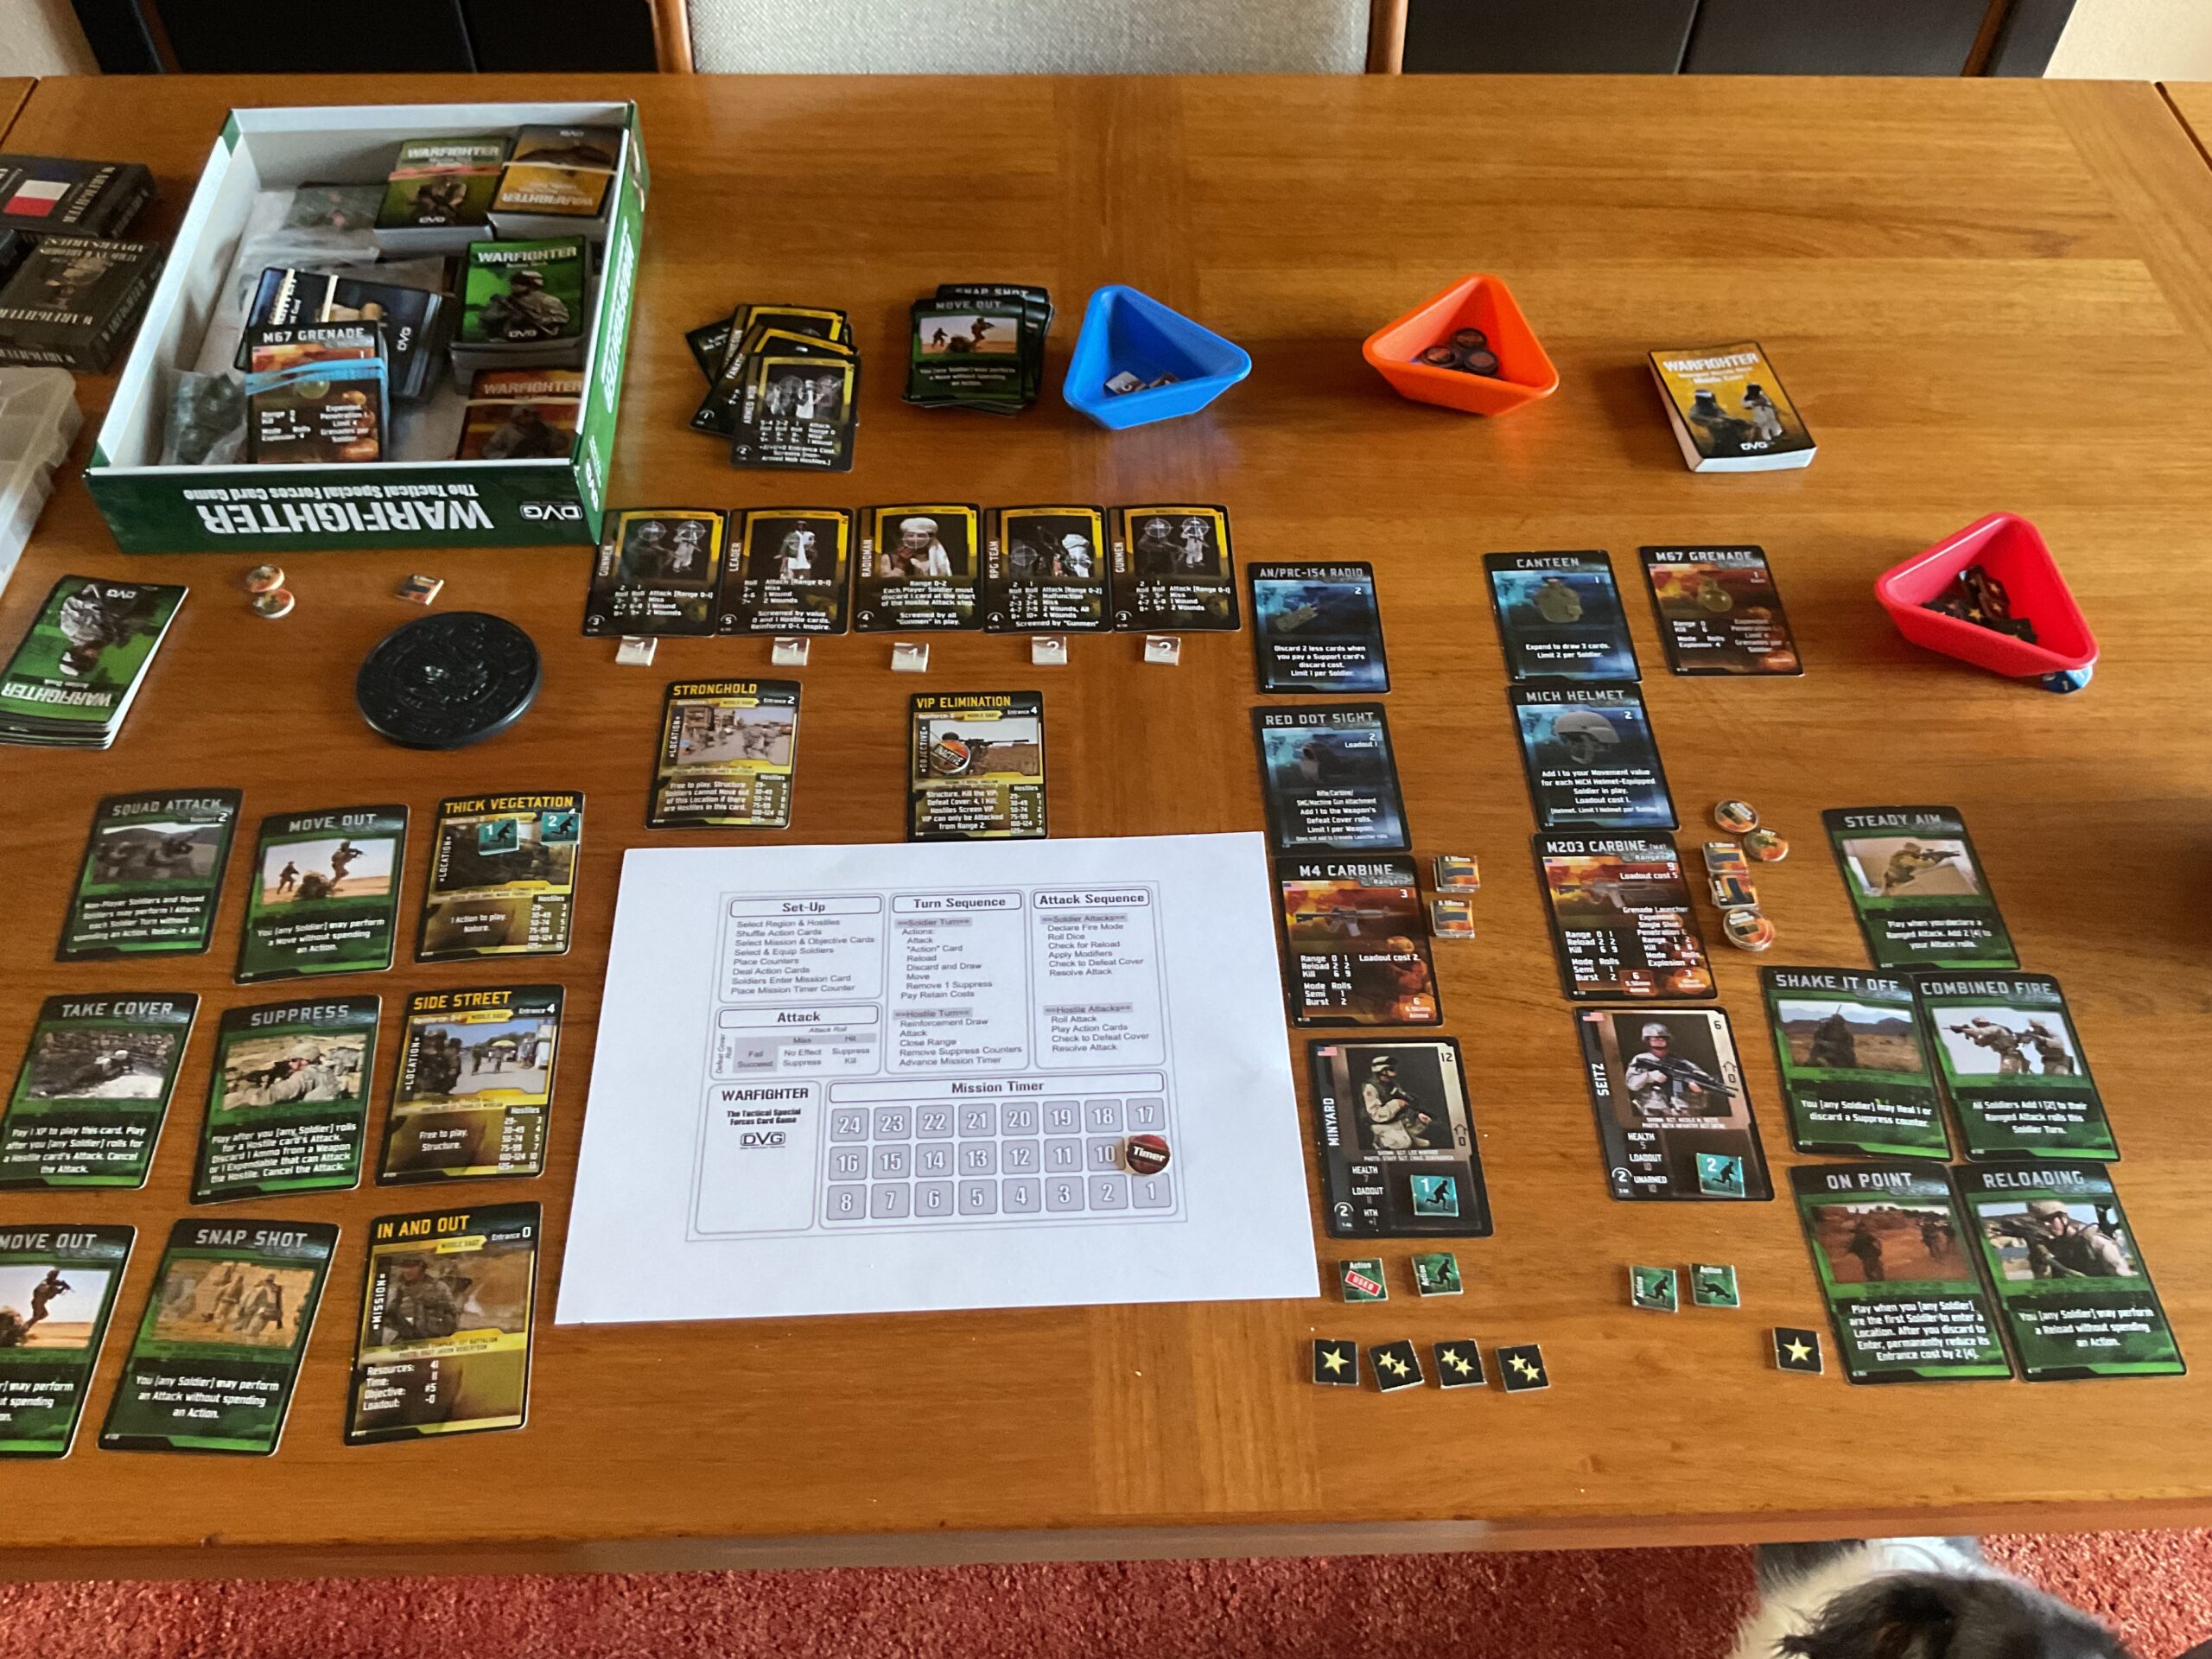
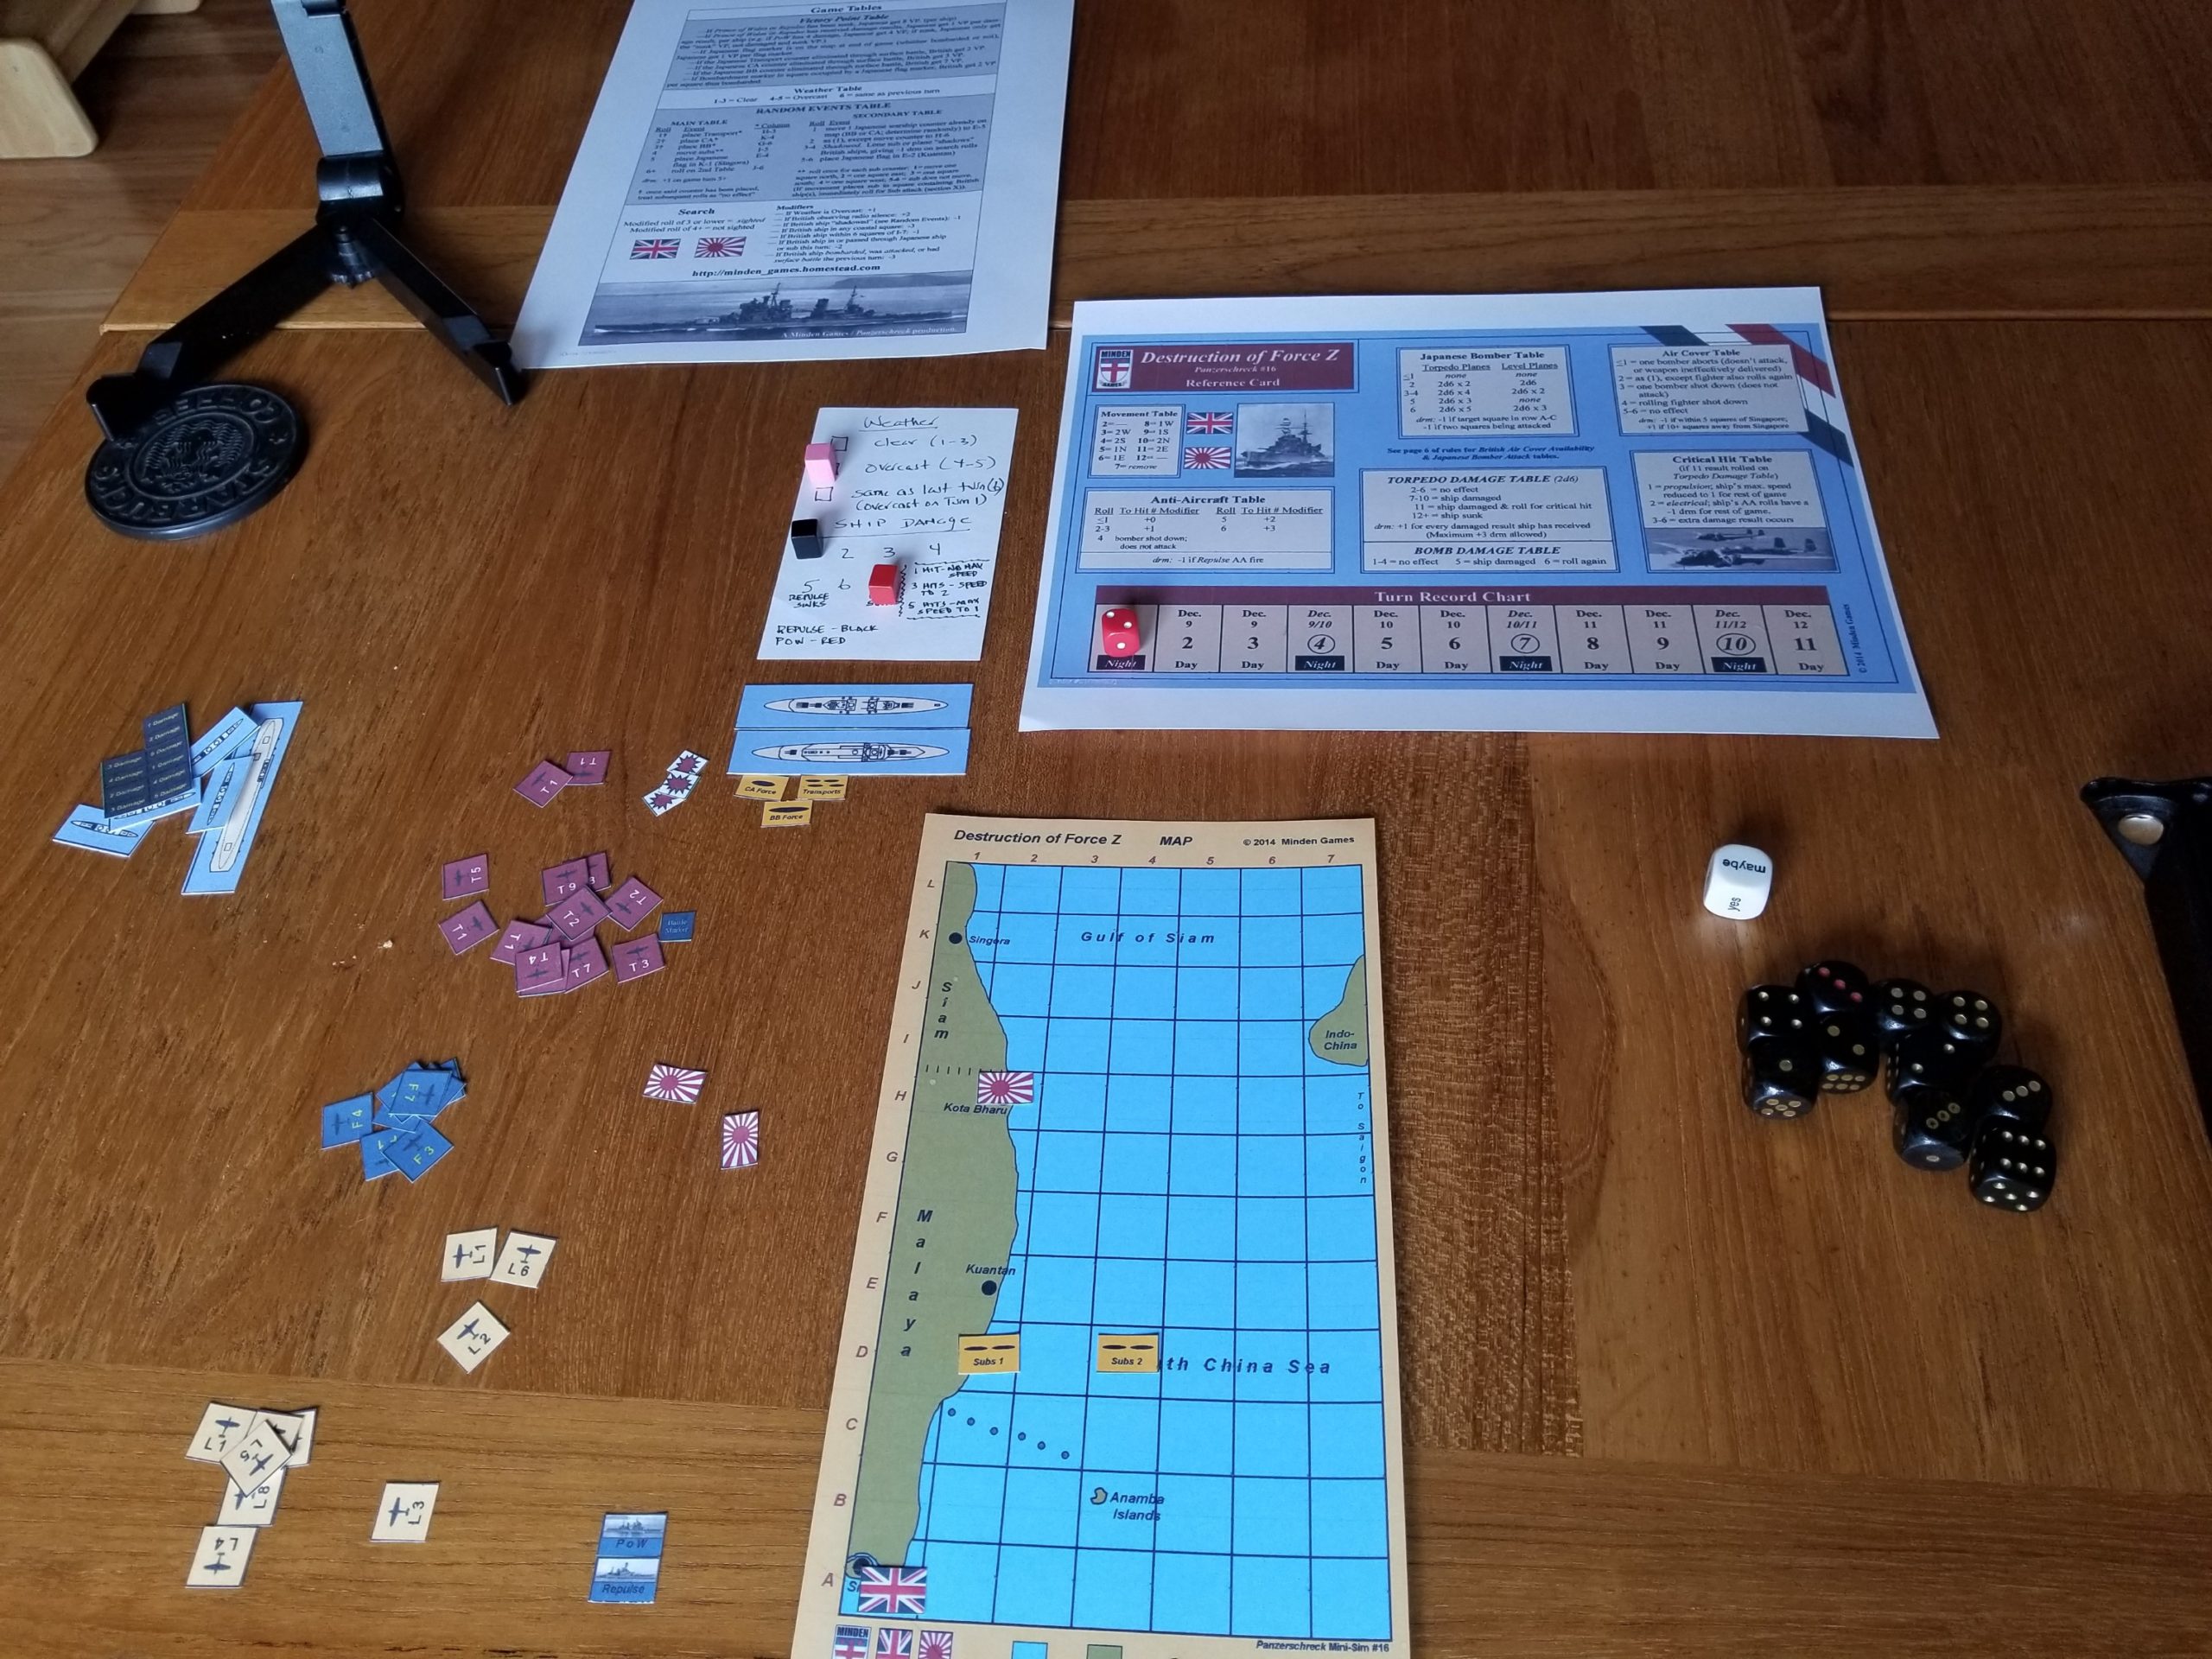
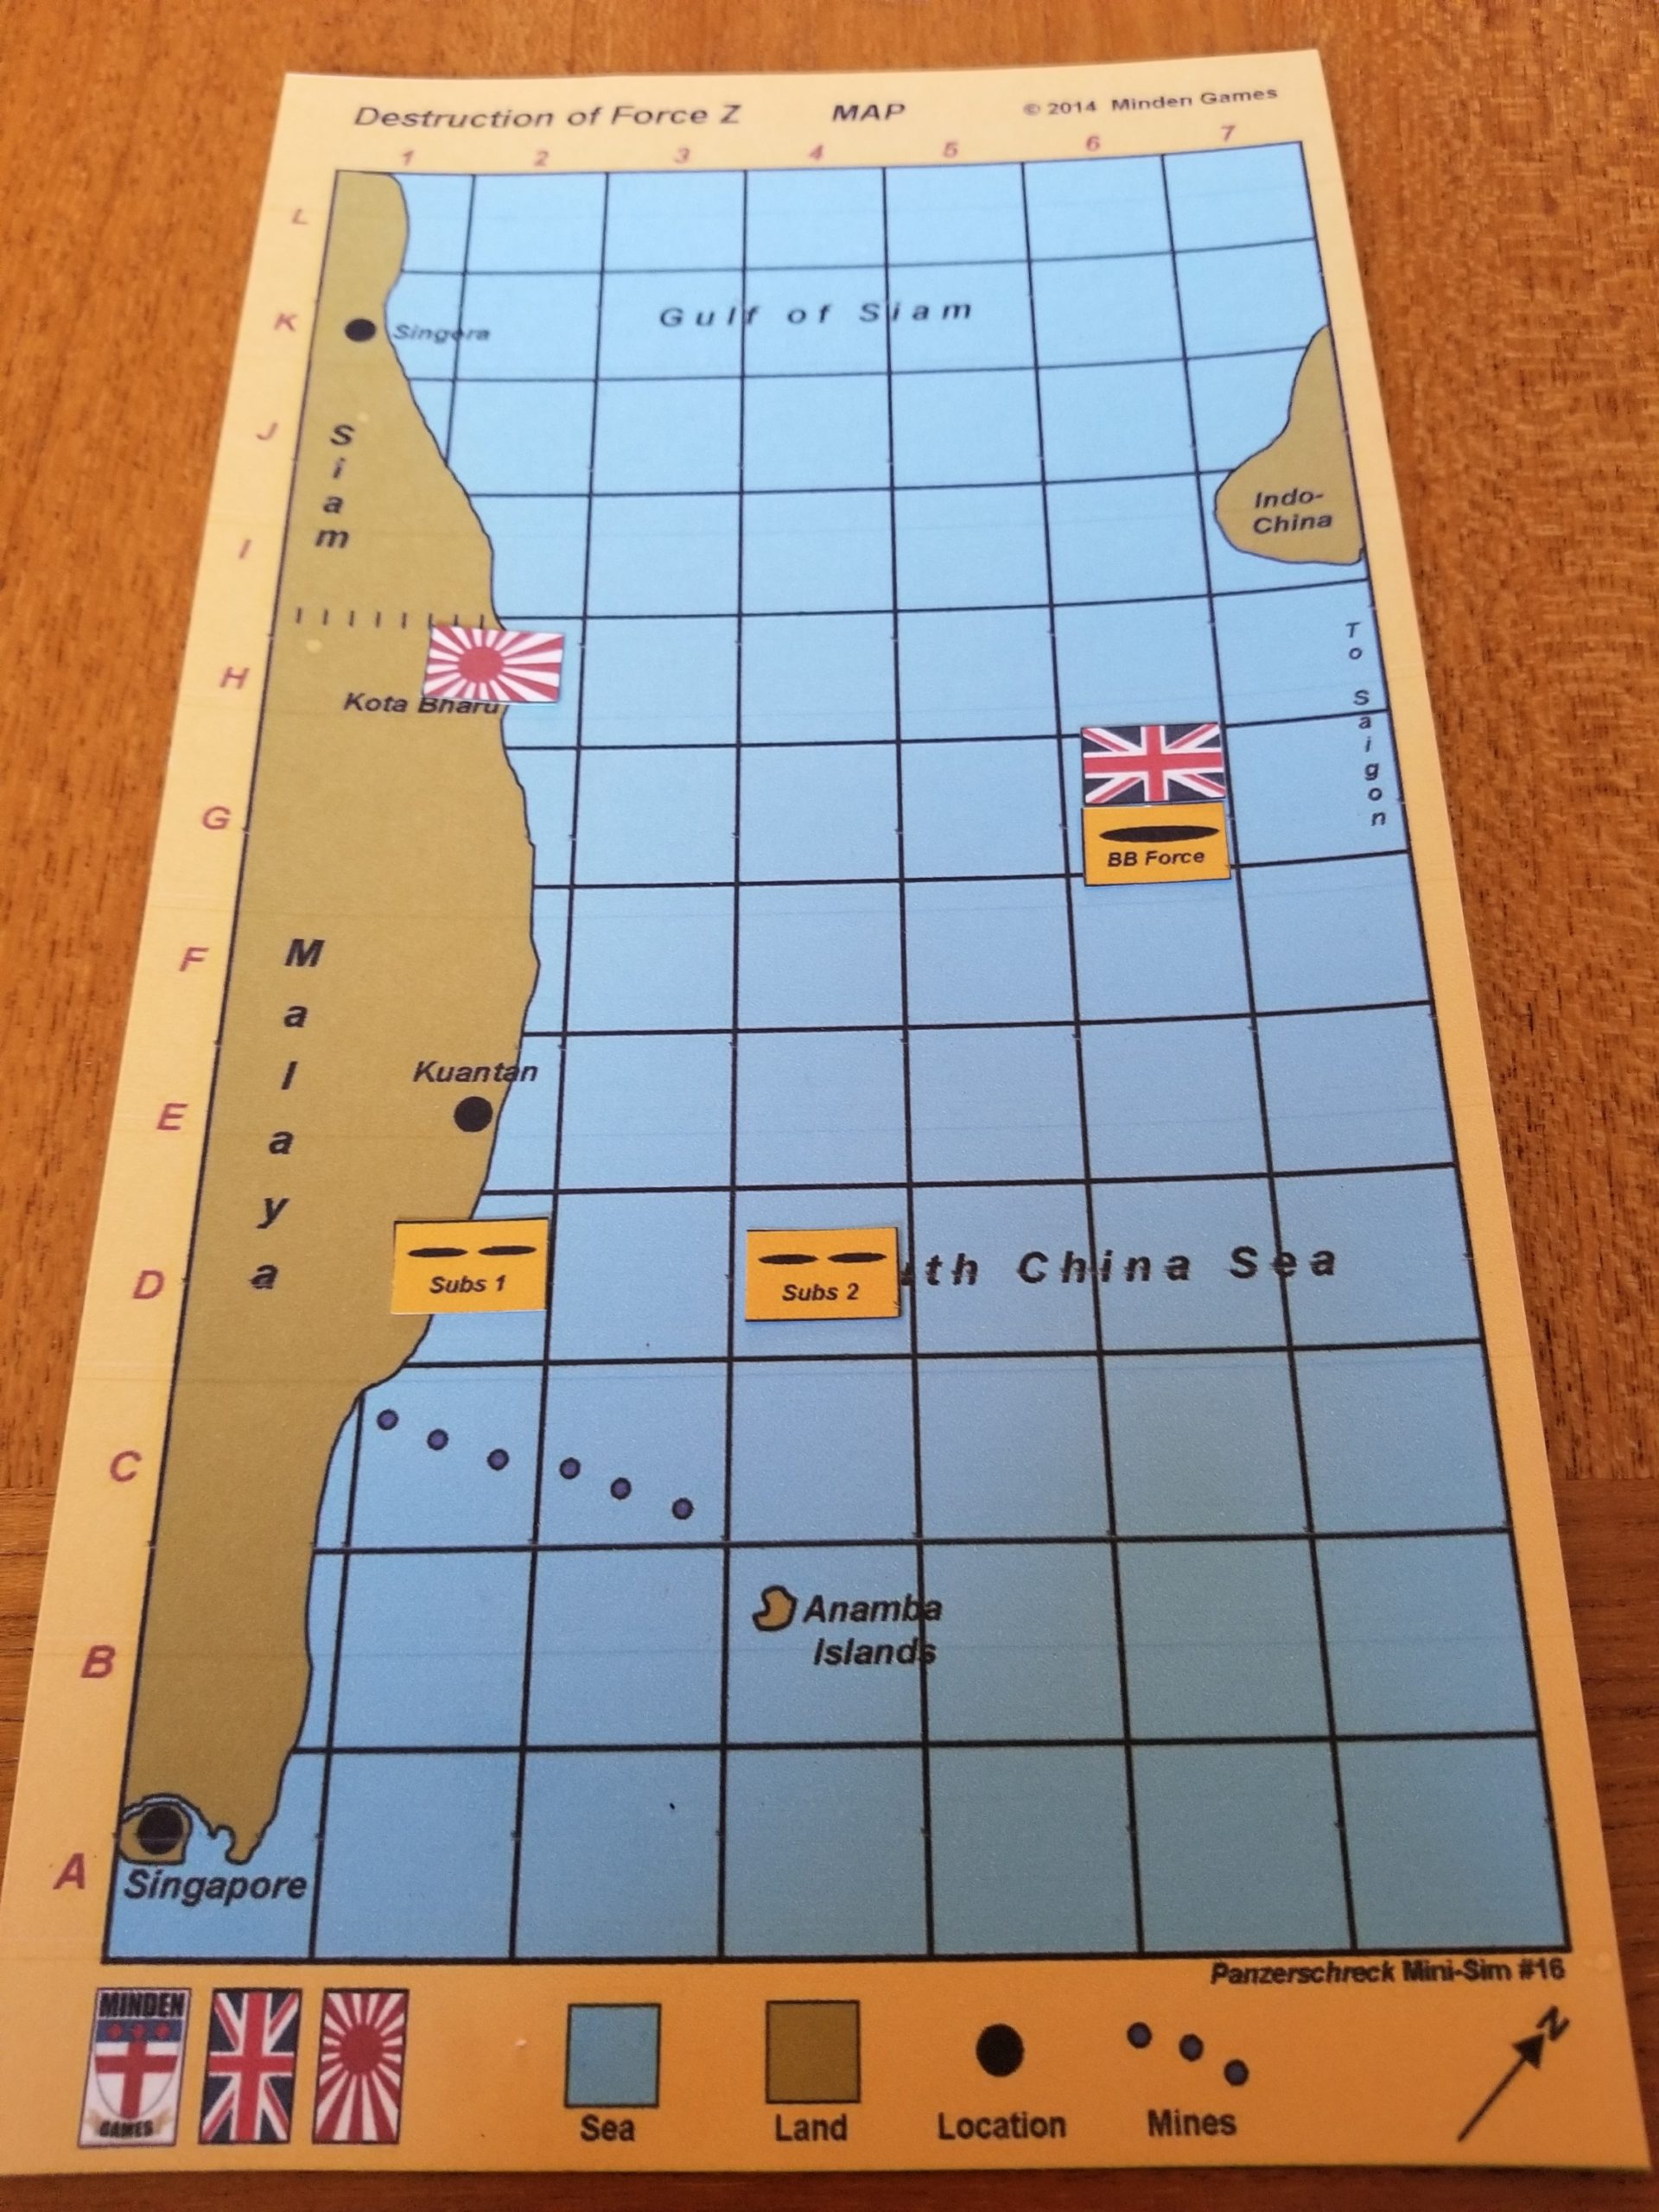
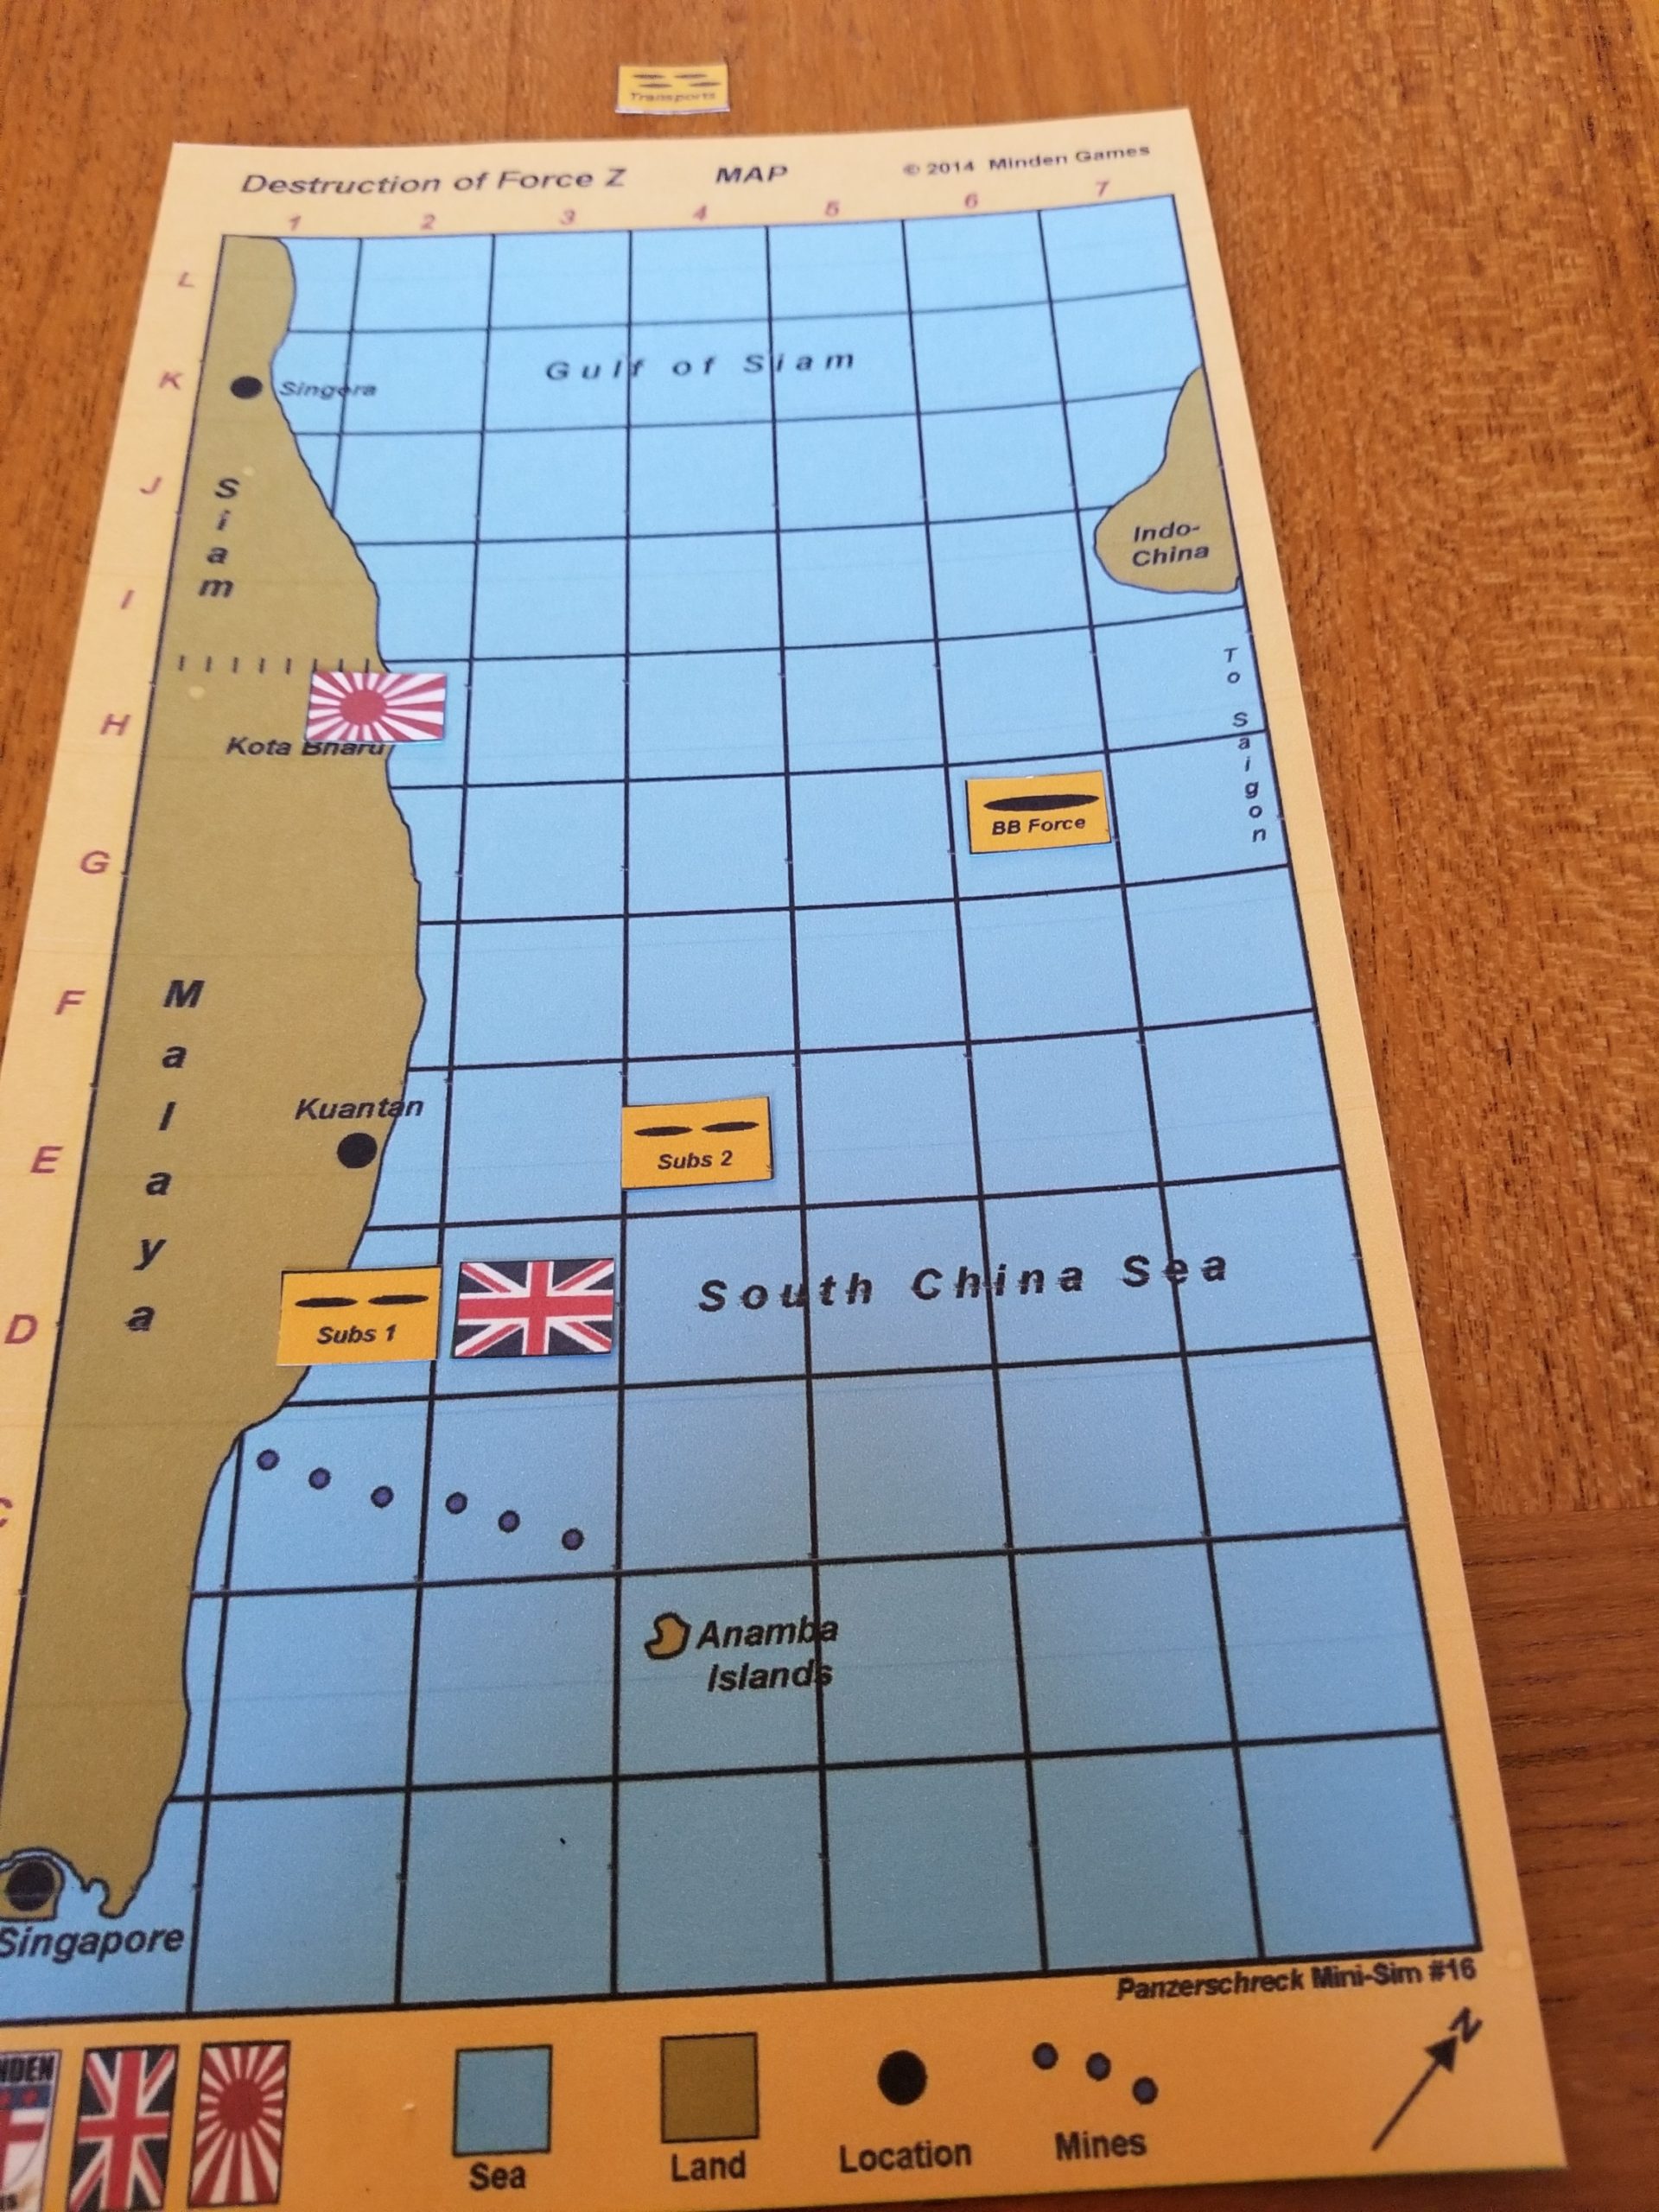
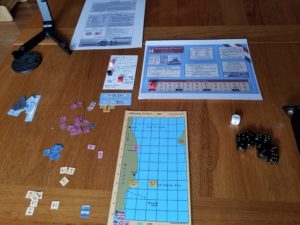
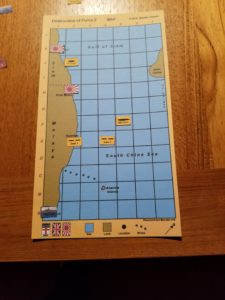
The game set up, along with the initial dispositions of both forces, is shown in the following photo.  The Japanese flag represents the amphibious landing at Kota Bharu.  Placement of the Japanese convoy, battleship and cruiser squadrons is determined during the Random Events Phase.  Force Z is represented by the British flag in Singapore.   The index card and colored blocks are used to keep track of weather and ship damage.

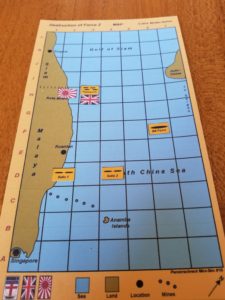
For the first three turns, Force Z moved east of the Anamba Islands,  then turning north towards the landing.  The Japanese were unable to locate Force Z, which was maintaining radio silence in the overcast weather, until it attacked the Japanese battleships (7 VPs) at night (Turn 4).  I couldn’t find anything specific in the rules, so I decided  Japanese surface units appearing during a turn couldn’t move, also.  Despite hitting the Japanese ships, no damage was inflicted.

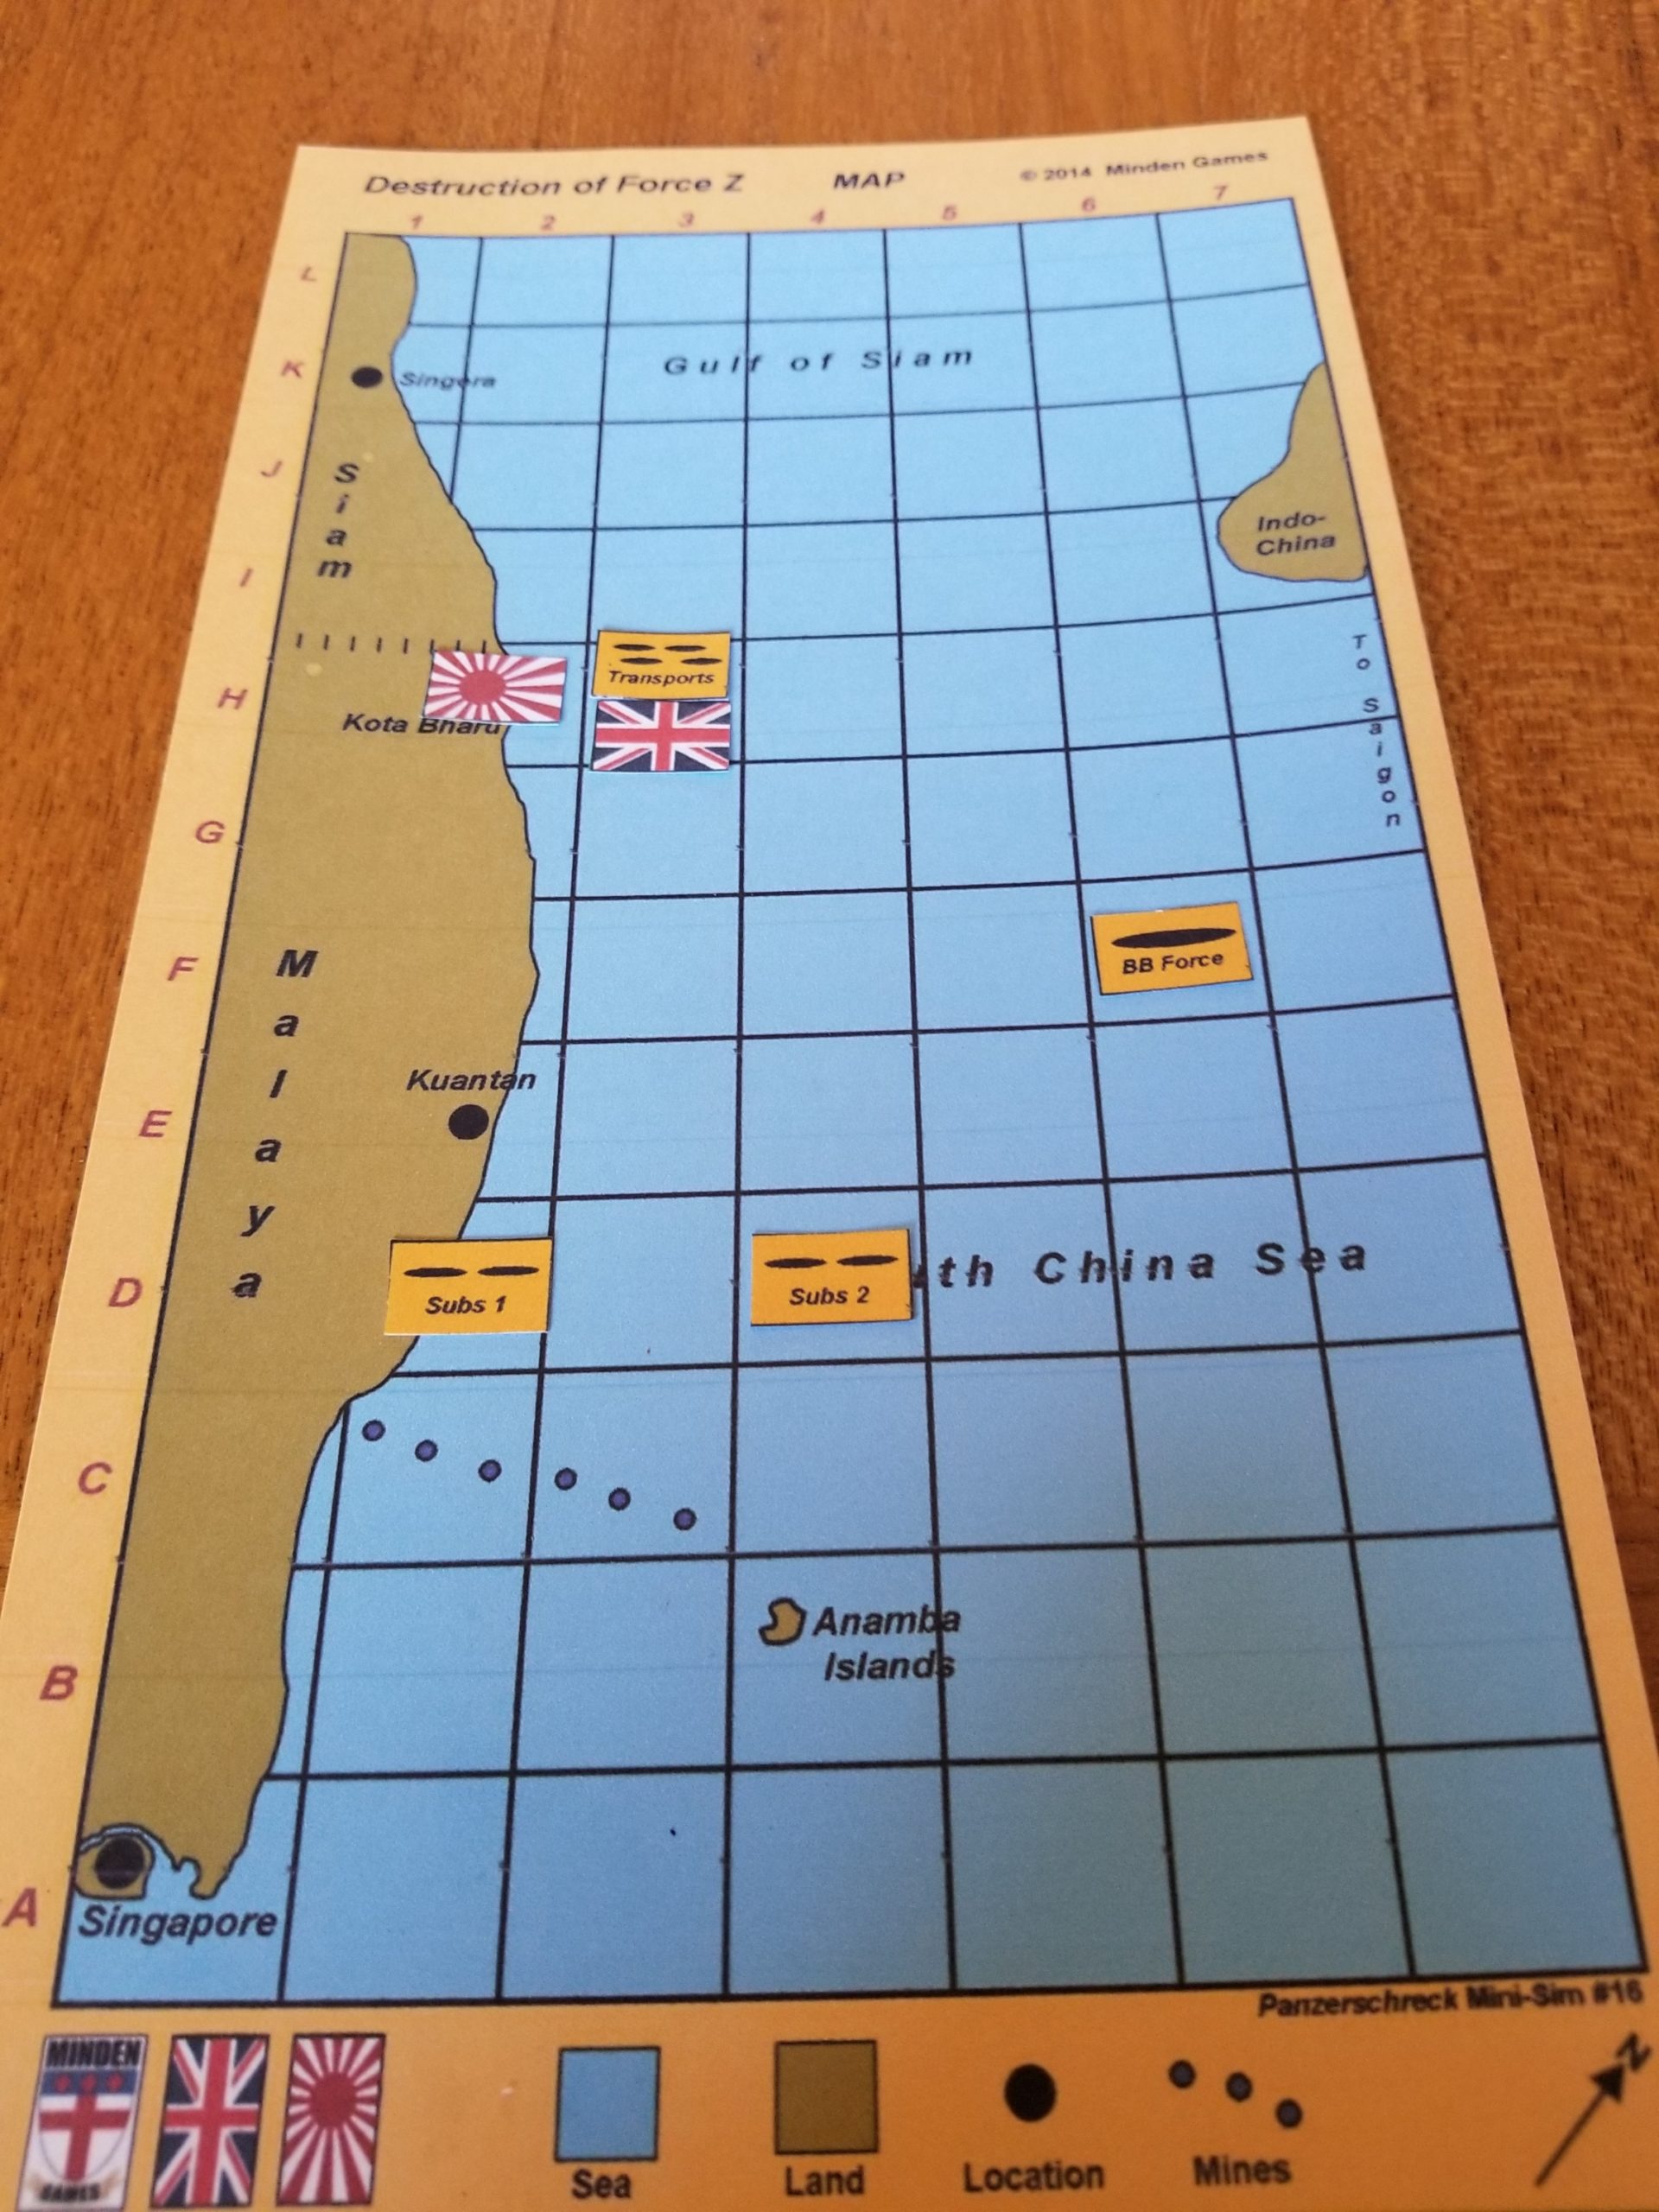
After this inconclusive encounter, the British sailed at flank speed towards Kota Bharu to bombard the the landings.  The Japanese were still unable to locate Force Z, and could not prevent the destruction of  their offshore convoy which had appeared off Kota Bharu during the Random Events Phase (Turn 5).

After this success, the British steamed south towards Singapore, breaking radio silence to request RAF air cover (Turn 6).

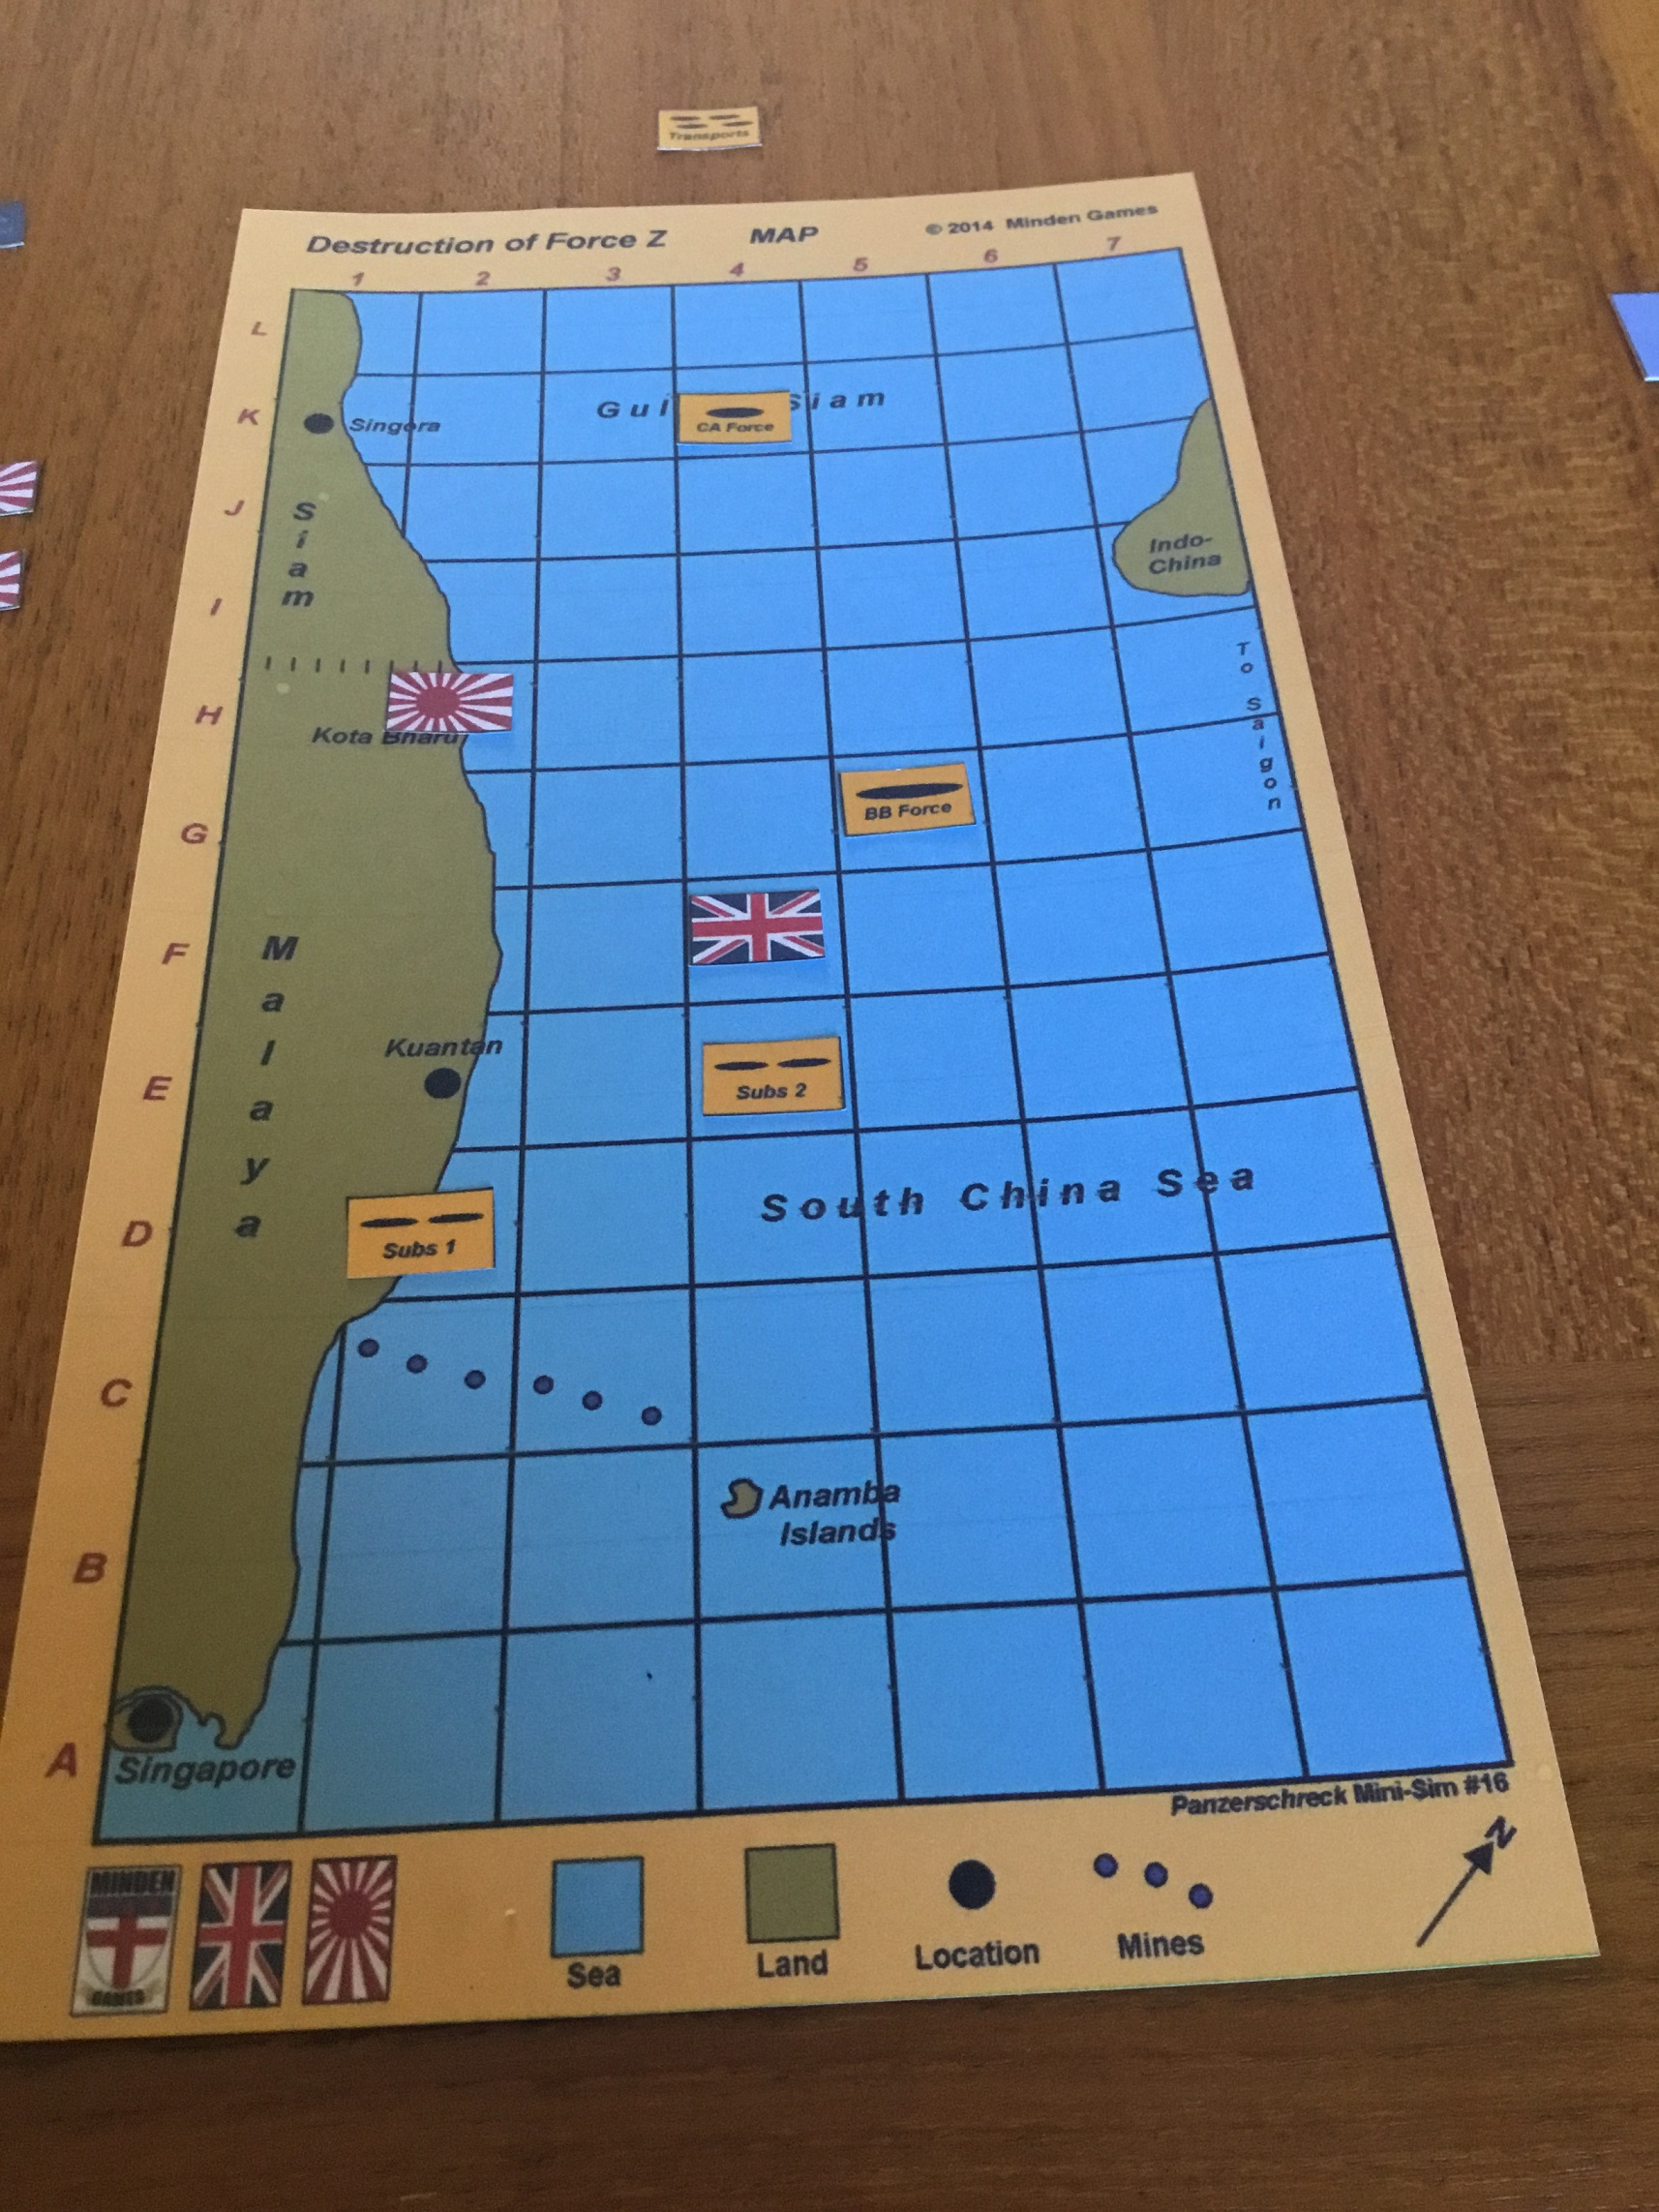
At this point, the Force Z commander decided take advantage of darkness (Turn 7),  steaming north to again engage the  VP-rich Japanese battleships.  The Japanese cruisers entered the northern part of the map during the Random Events Phase.

Force Z moved into the Japanese square, forcing a surface engagement.  It was here that British luck ran out, as the Japanese search was a success, and no RAF fighter cover appeared to help fight off a massive level bomber and torpedo bomber attack.

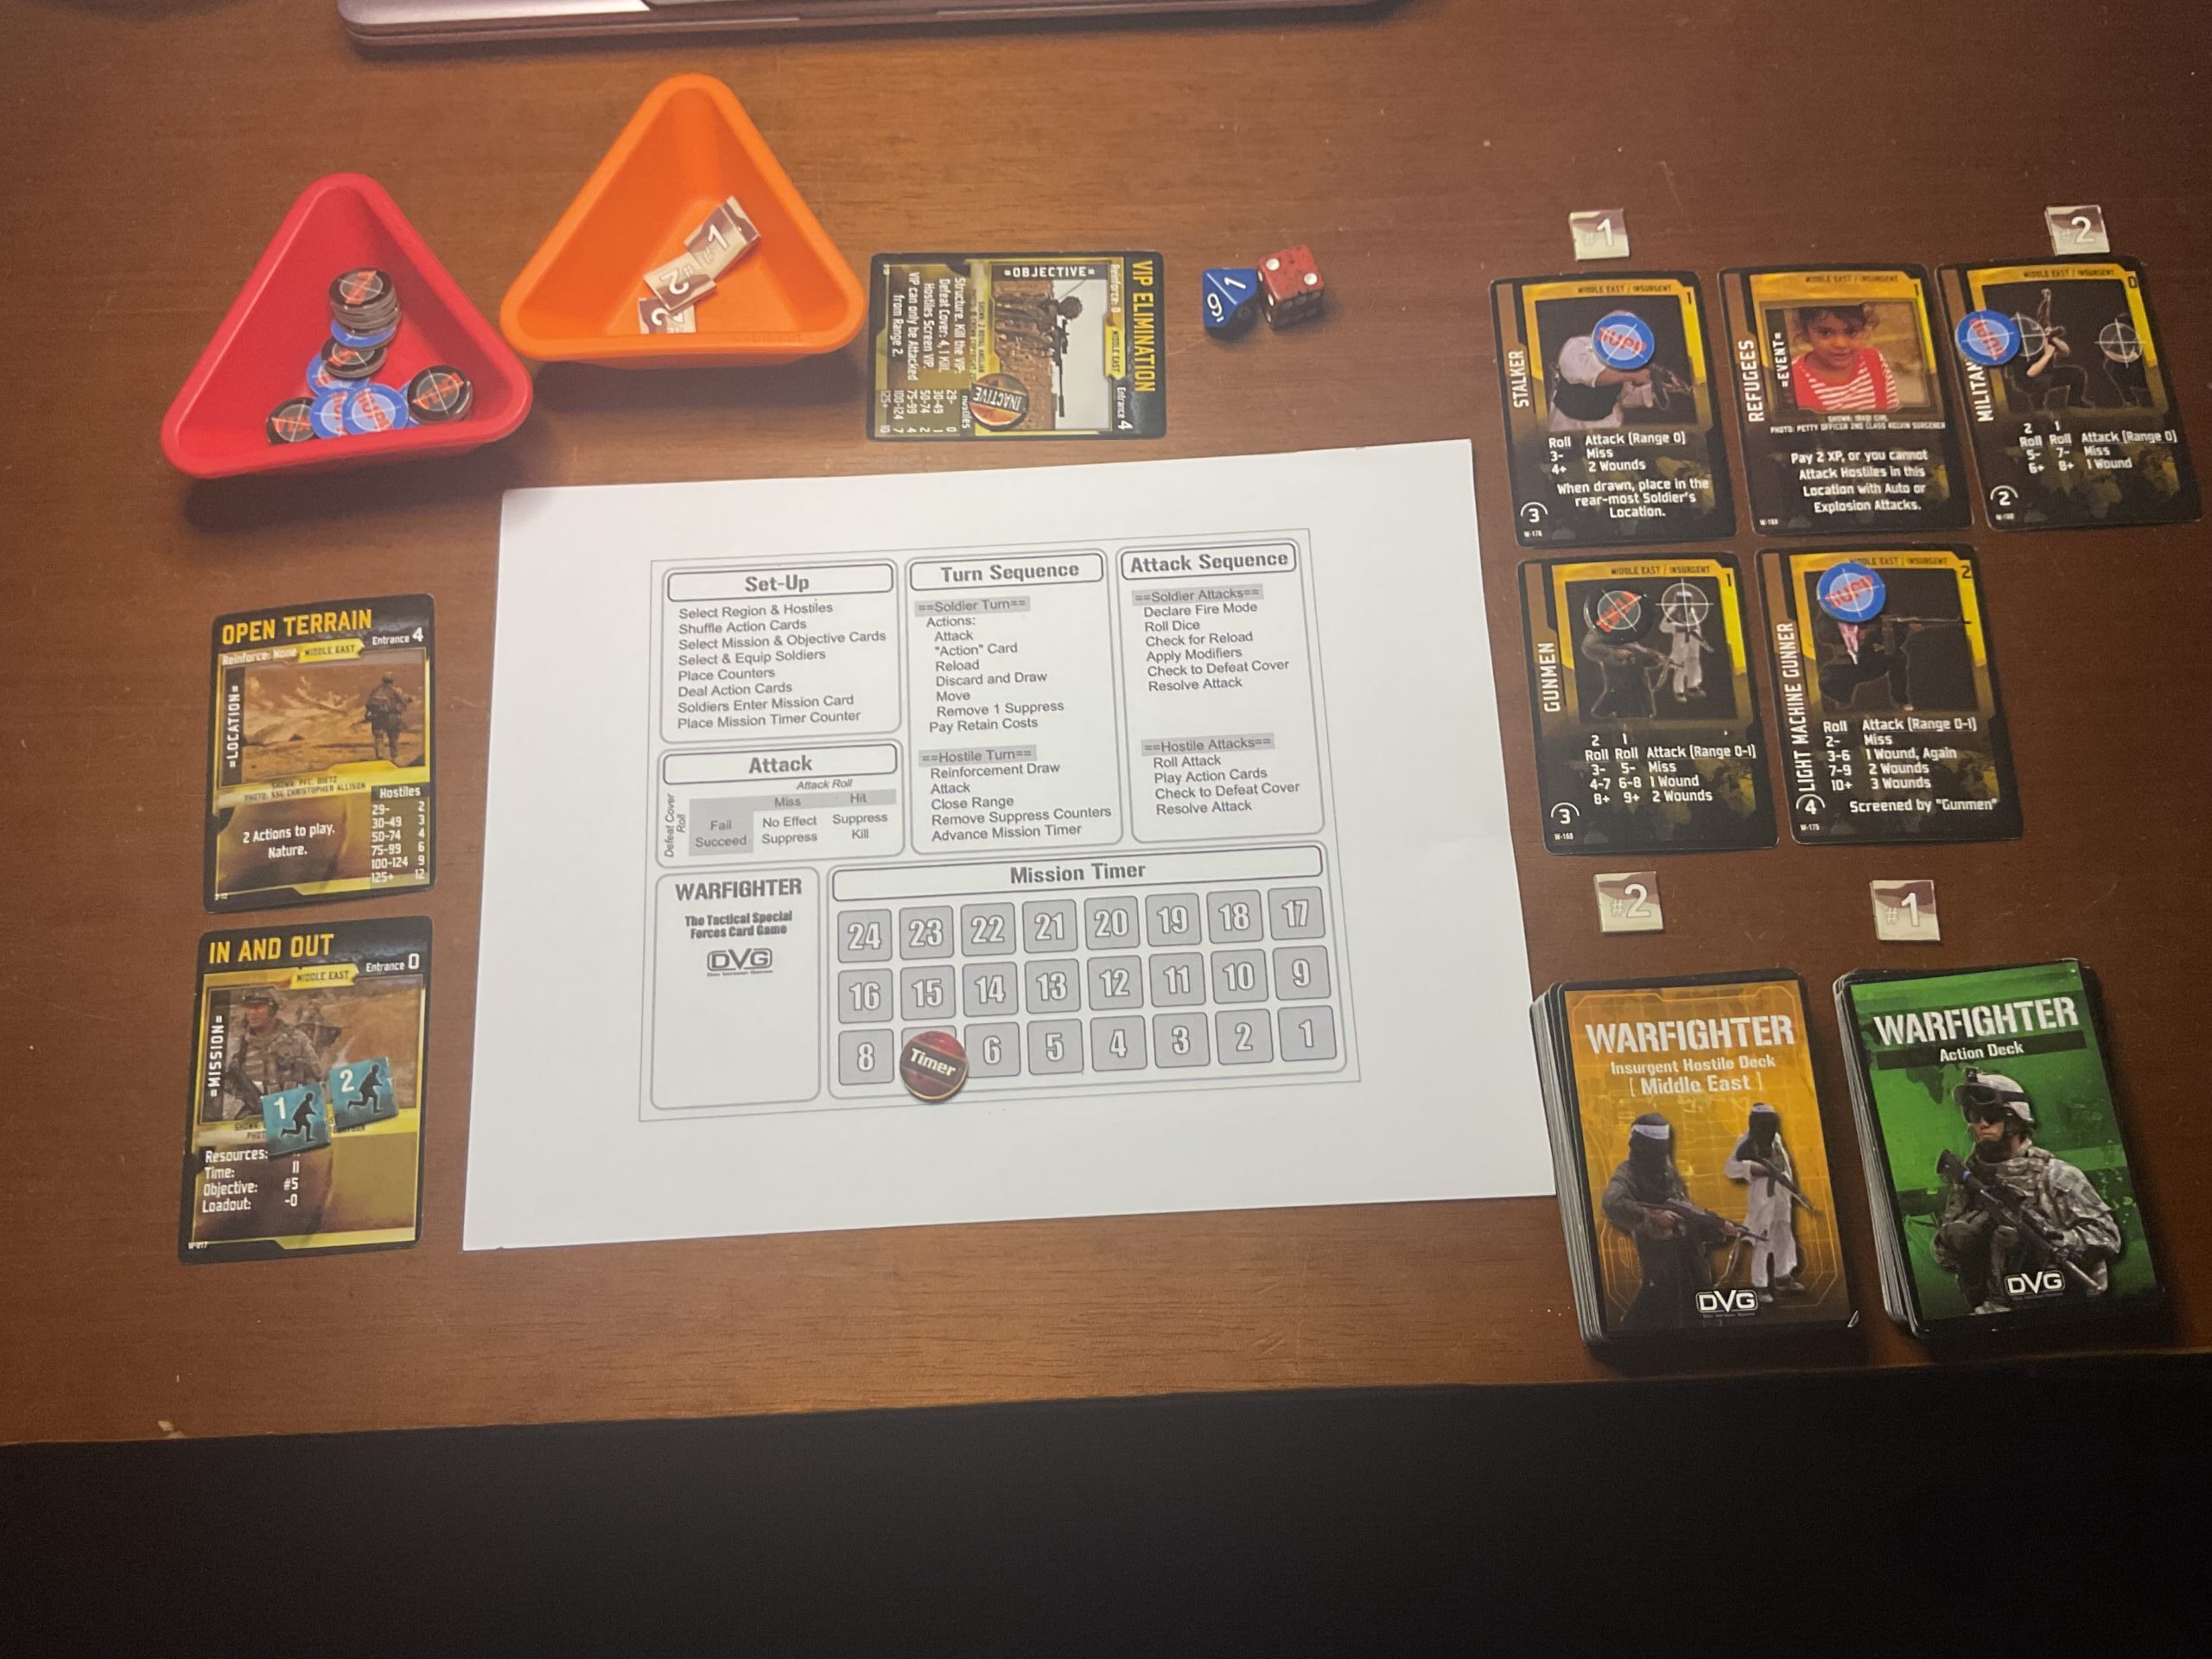
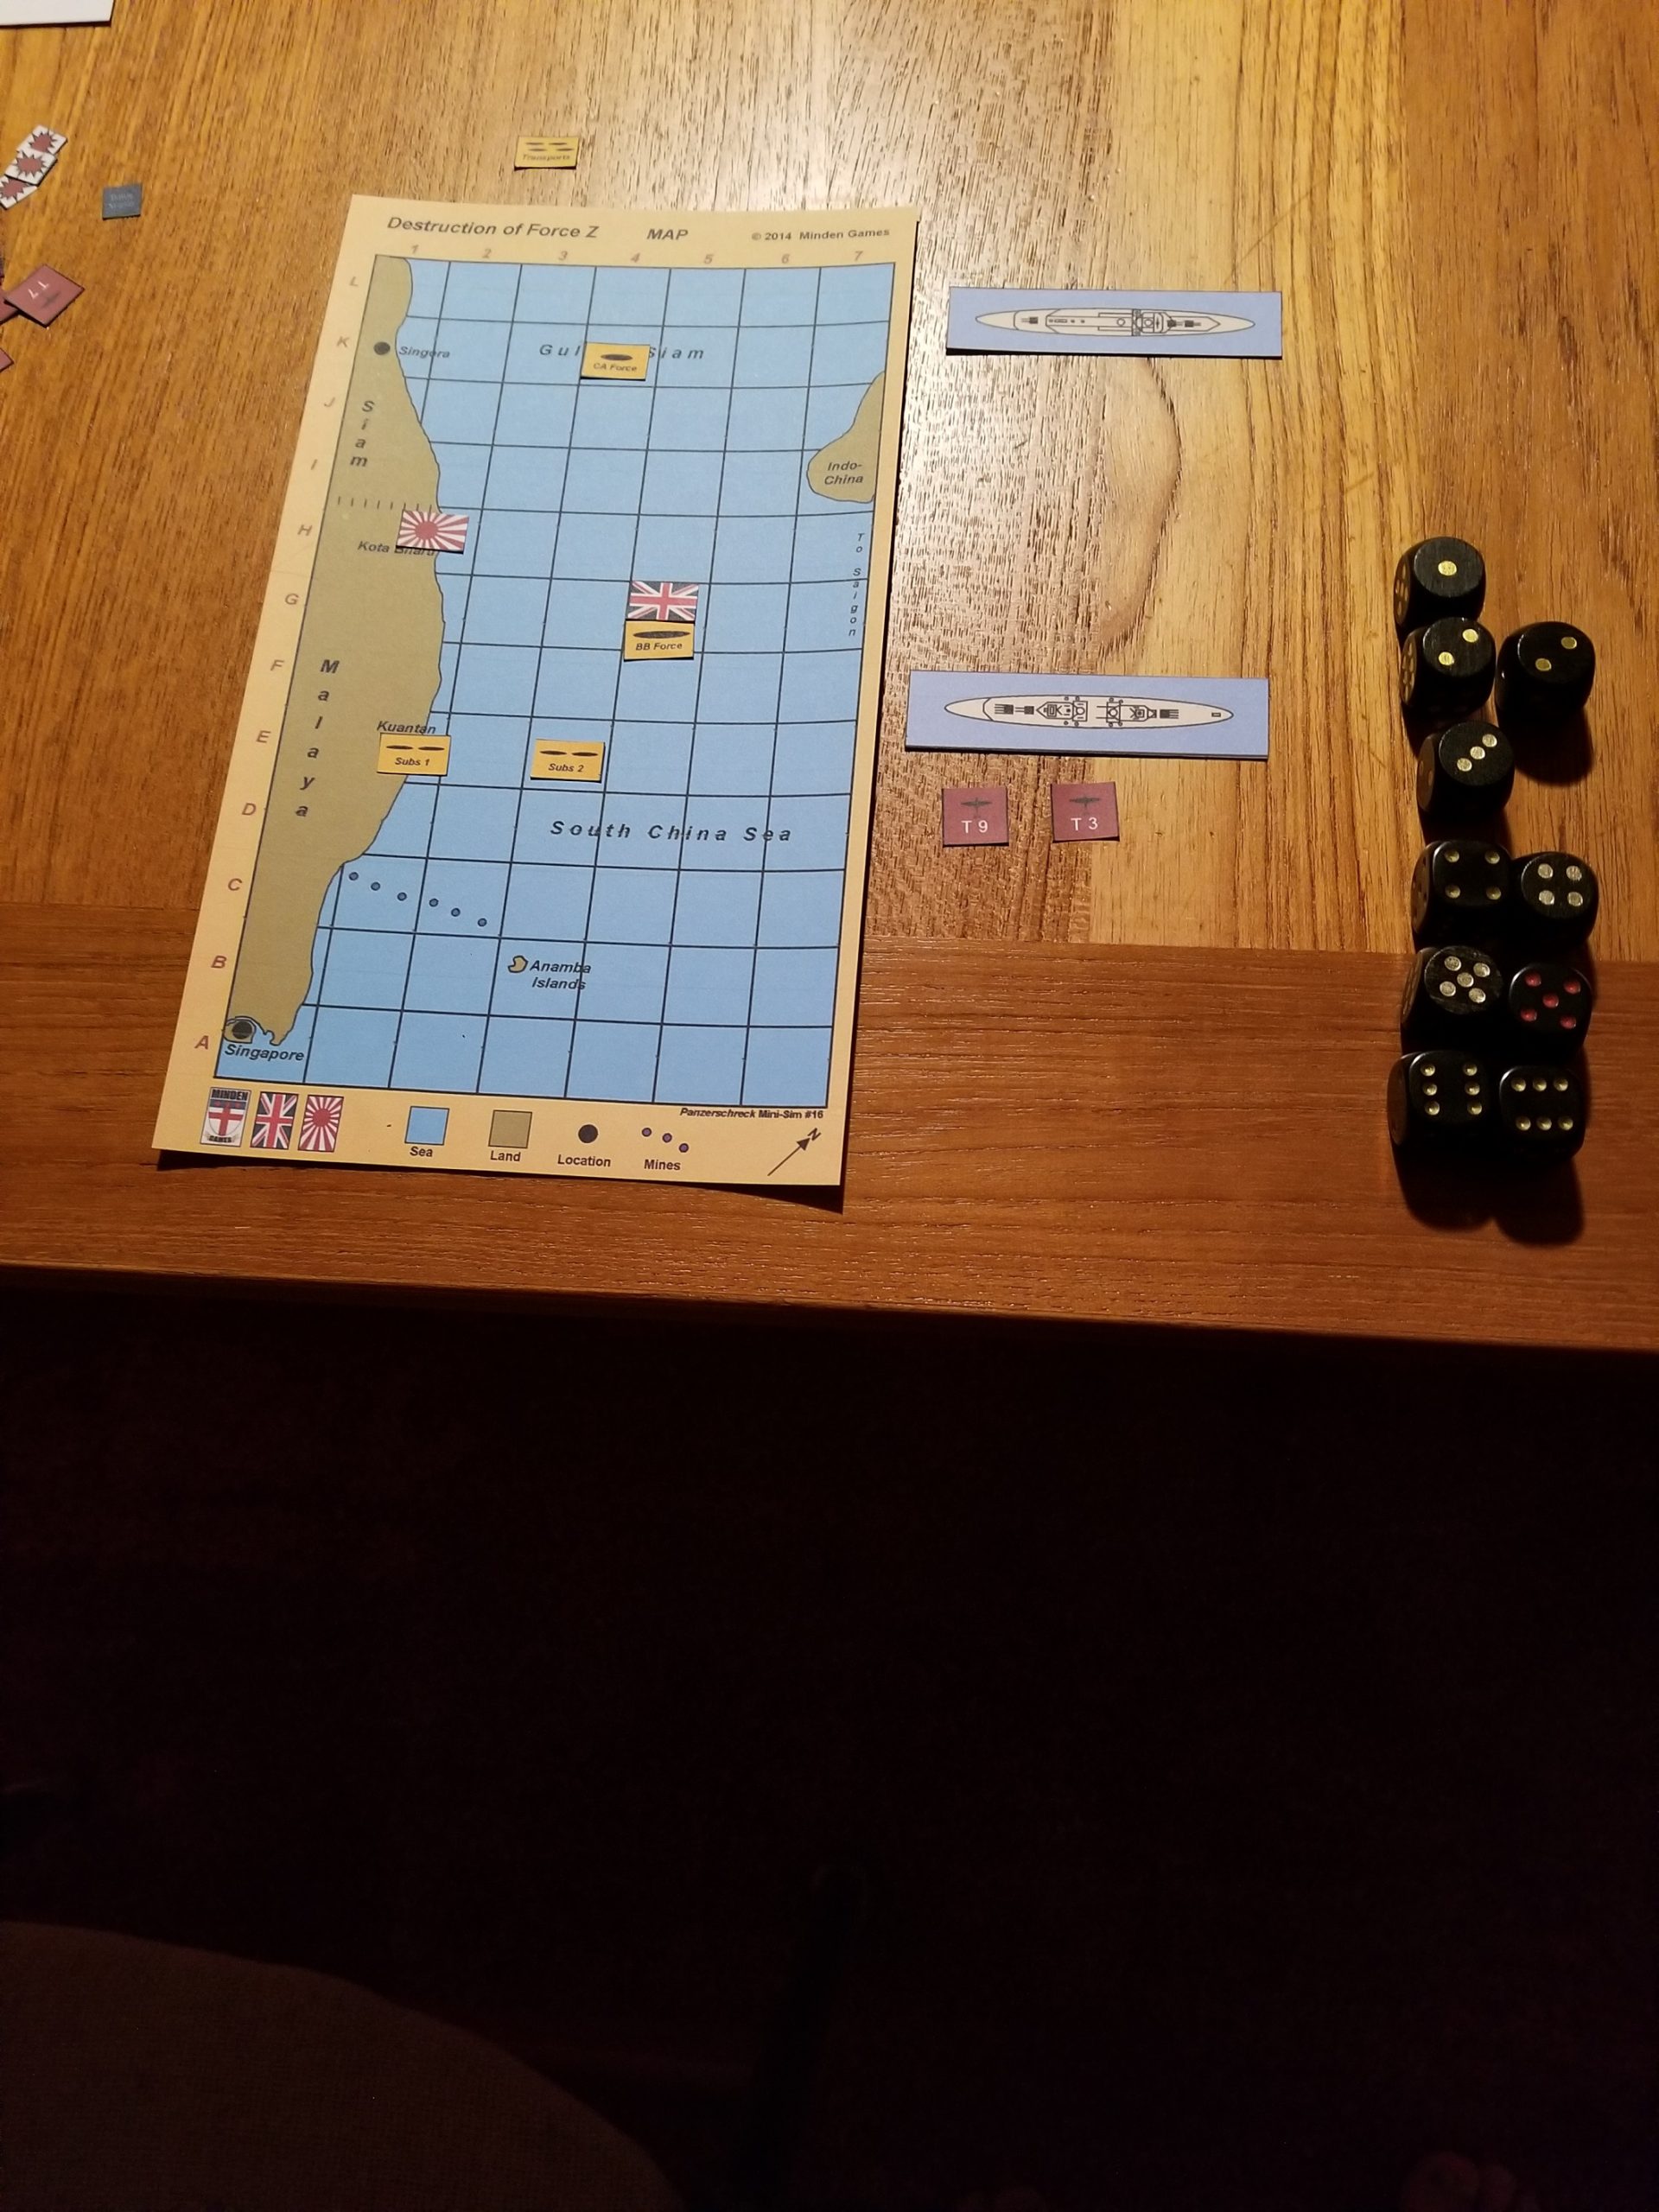
The following photo shows how I handled the “tactical” aspect of the game.

Both British ships were in the square, so each can be attacked by bombers.   D6 rolls determine the number of attackers and what ship(s) they attack.  The rolls indicated a mixed force of 12 torpedo and 25 level bombers, all of which  concentrated on the Prince of Wales.  The first attack was by the level bombers.  Each ship has a maximum of 10 d6 anti-aircraft rolls.  These rolls either eliminate attackers, or are indicate to hit modifiers.  Bombers need a modified roll of 10 to score a hit.  A further damage die roll is made for each hit.  The rolls are shown below.  I use the dice, rather than the tally sheet included with the game to record rolls, and then use the result to determine hits.  A die that “hits” is then placed above the “tactical display”, as a reminder of the rolls needed for determine damage.

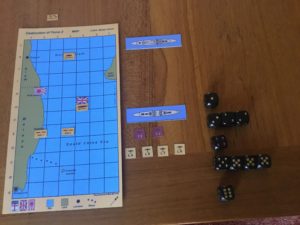
The torpedo bombers were handled in a separate series of rolls.

The Prince of Wales somehow survived, taking five hits, two less than the number to sink. Five hits reduced its movement rate to one square per turn.  After this mayhem, a surface action occurred.  The Japanese battleships and Prince of Wales were unaffected, but the Repulse took one damage hit.

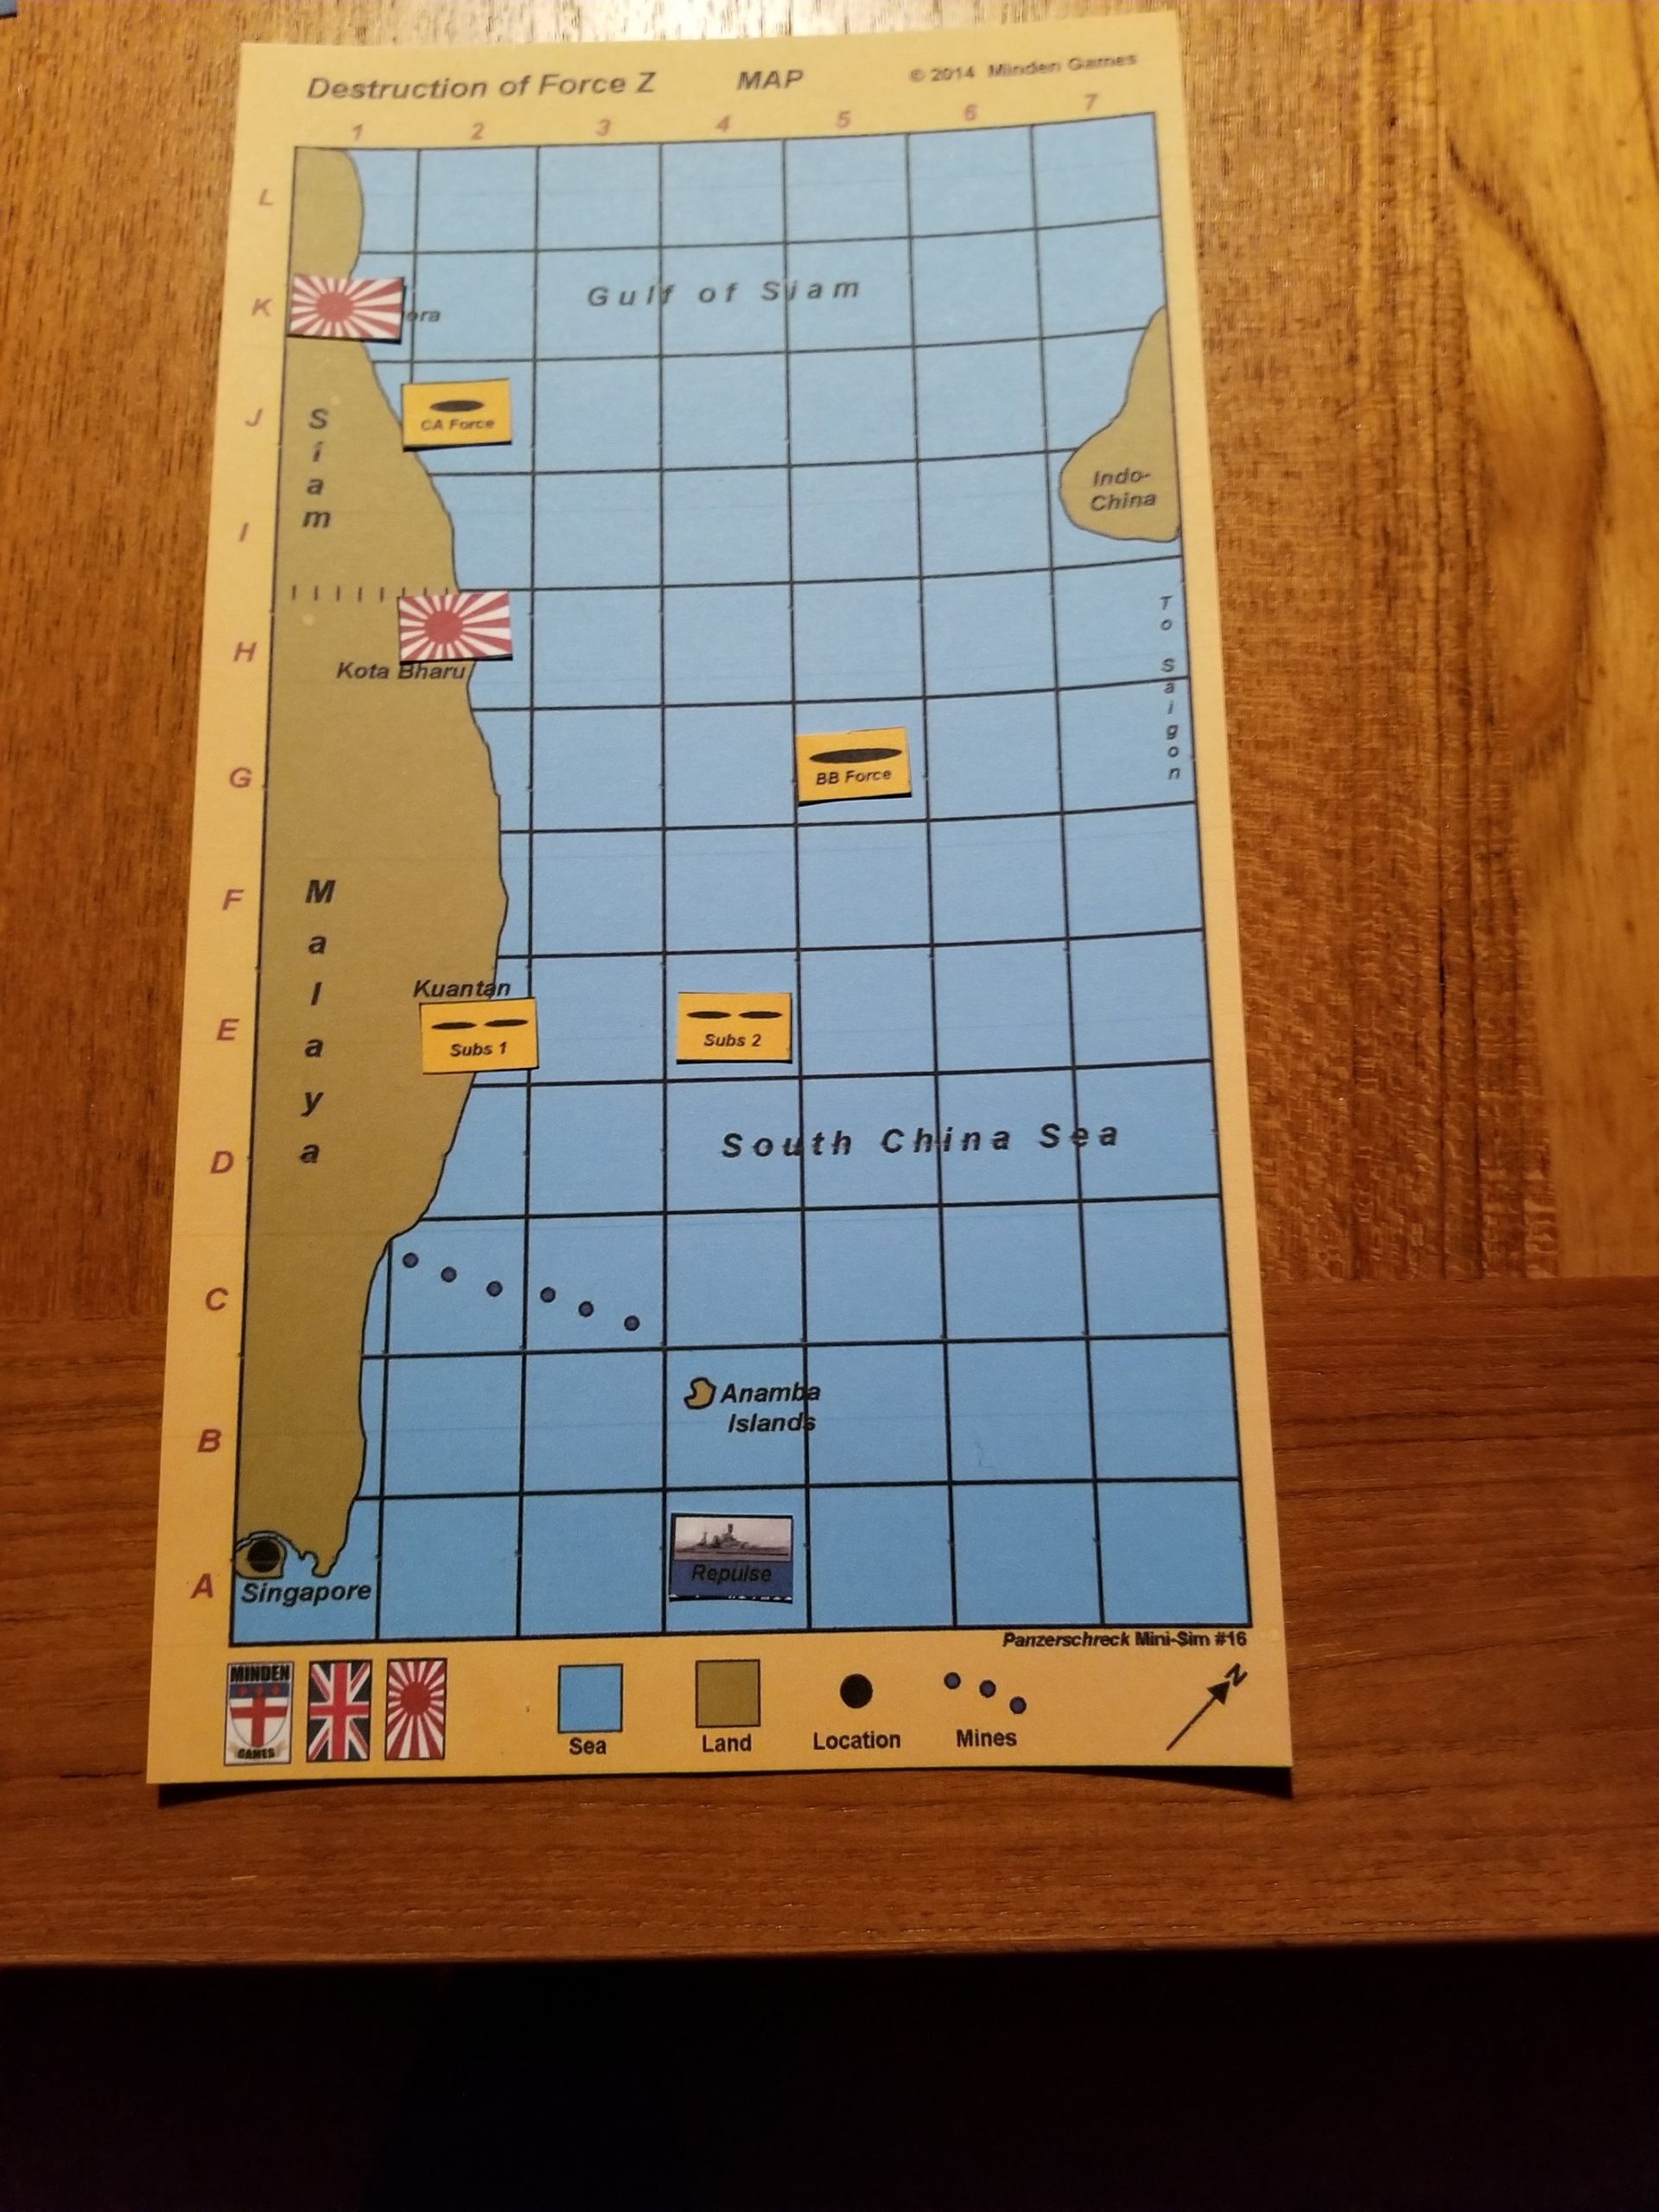
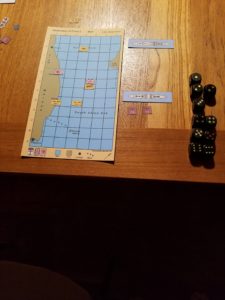
The Repulse was ordered back to Singapore, while the stricken Prince of Wales could only hope for a failed Japanese search, or the intervention of the RAF.  The ship was located and the RAF again failed to provide air cover.  The level bombers did not find the Prince of Wales, but the torpedo bombers did.   An attack by 27 aircraft sank the ship.

The Repulse continued south during the night (Turn 10), while the Japanese made another landing at Singora.

Repulse was able to return to Singapore before the Japanese Turn 11 Search Phase.  This ended the game.

The Japanese victory point total breakdown was:

  • +8 Points for sinking Prince of Wales
  • +1 Point for one hit on the Repulse
  • +1 Point for each Japanese landing
  •  -2 Points for the sunk convoy

The net is  9 Japanese victory points.  The historical total was 18 points.

Wrap-up in the next post.