Monthly Archives: February 2024

And It All Seemed So Simple

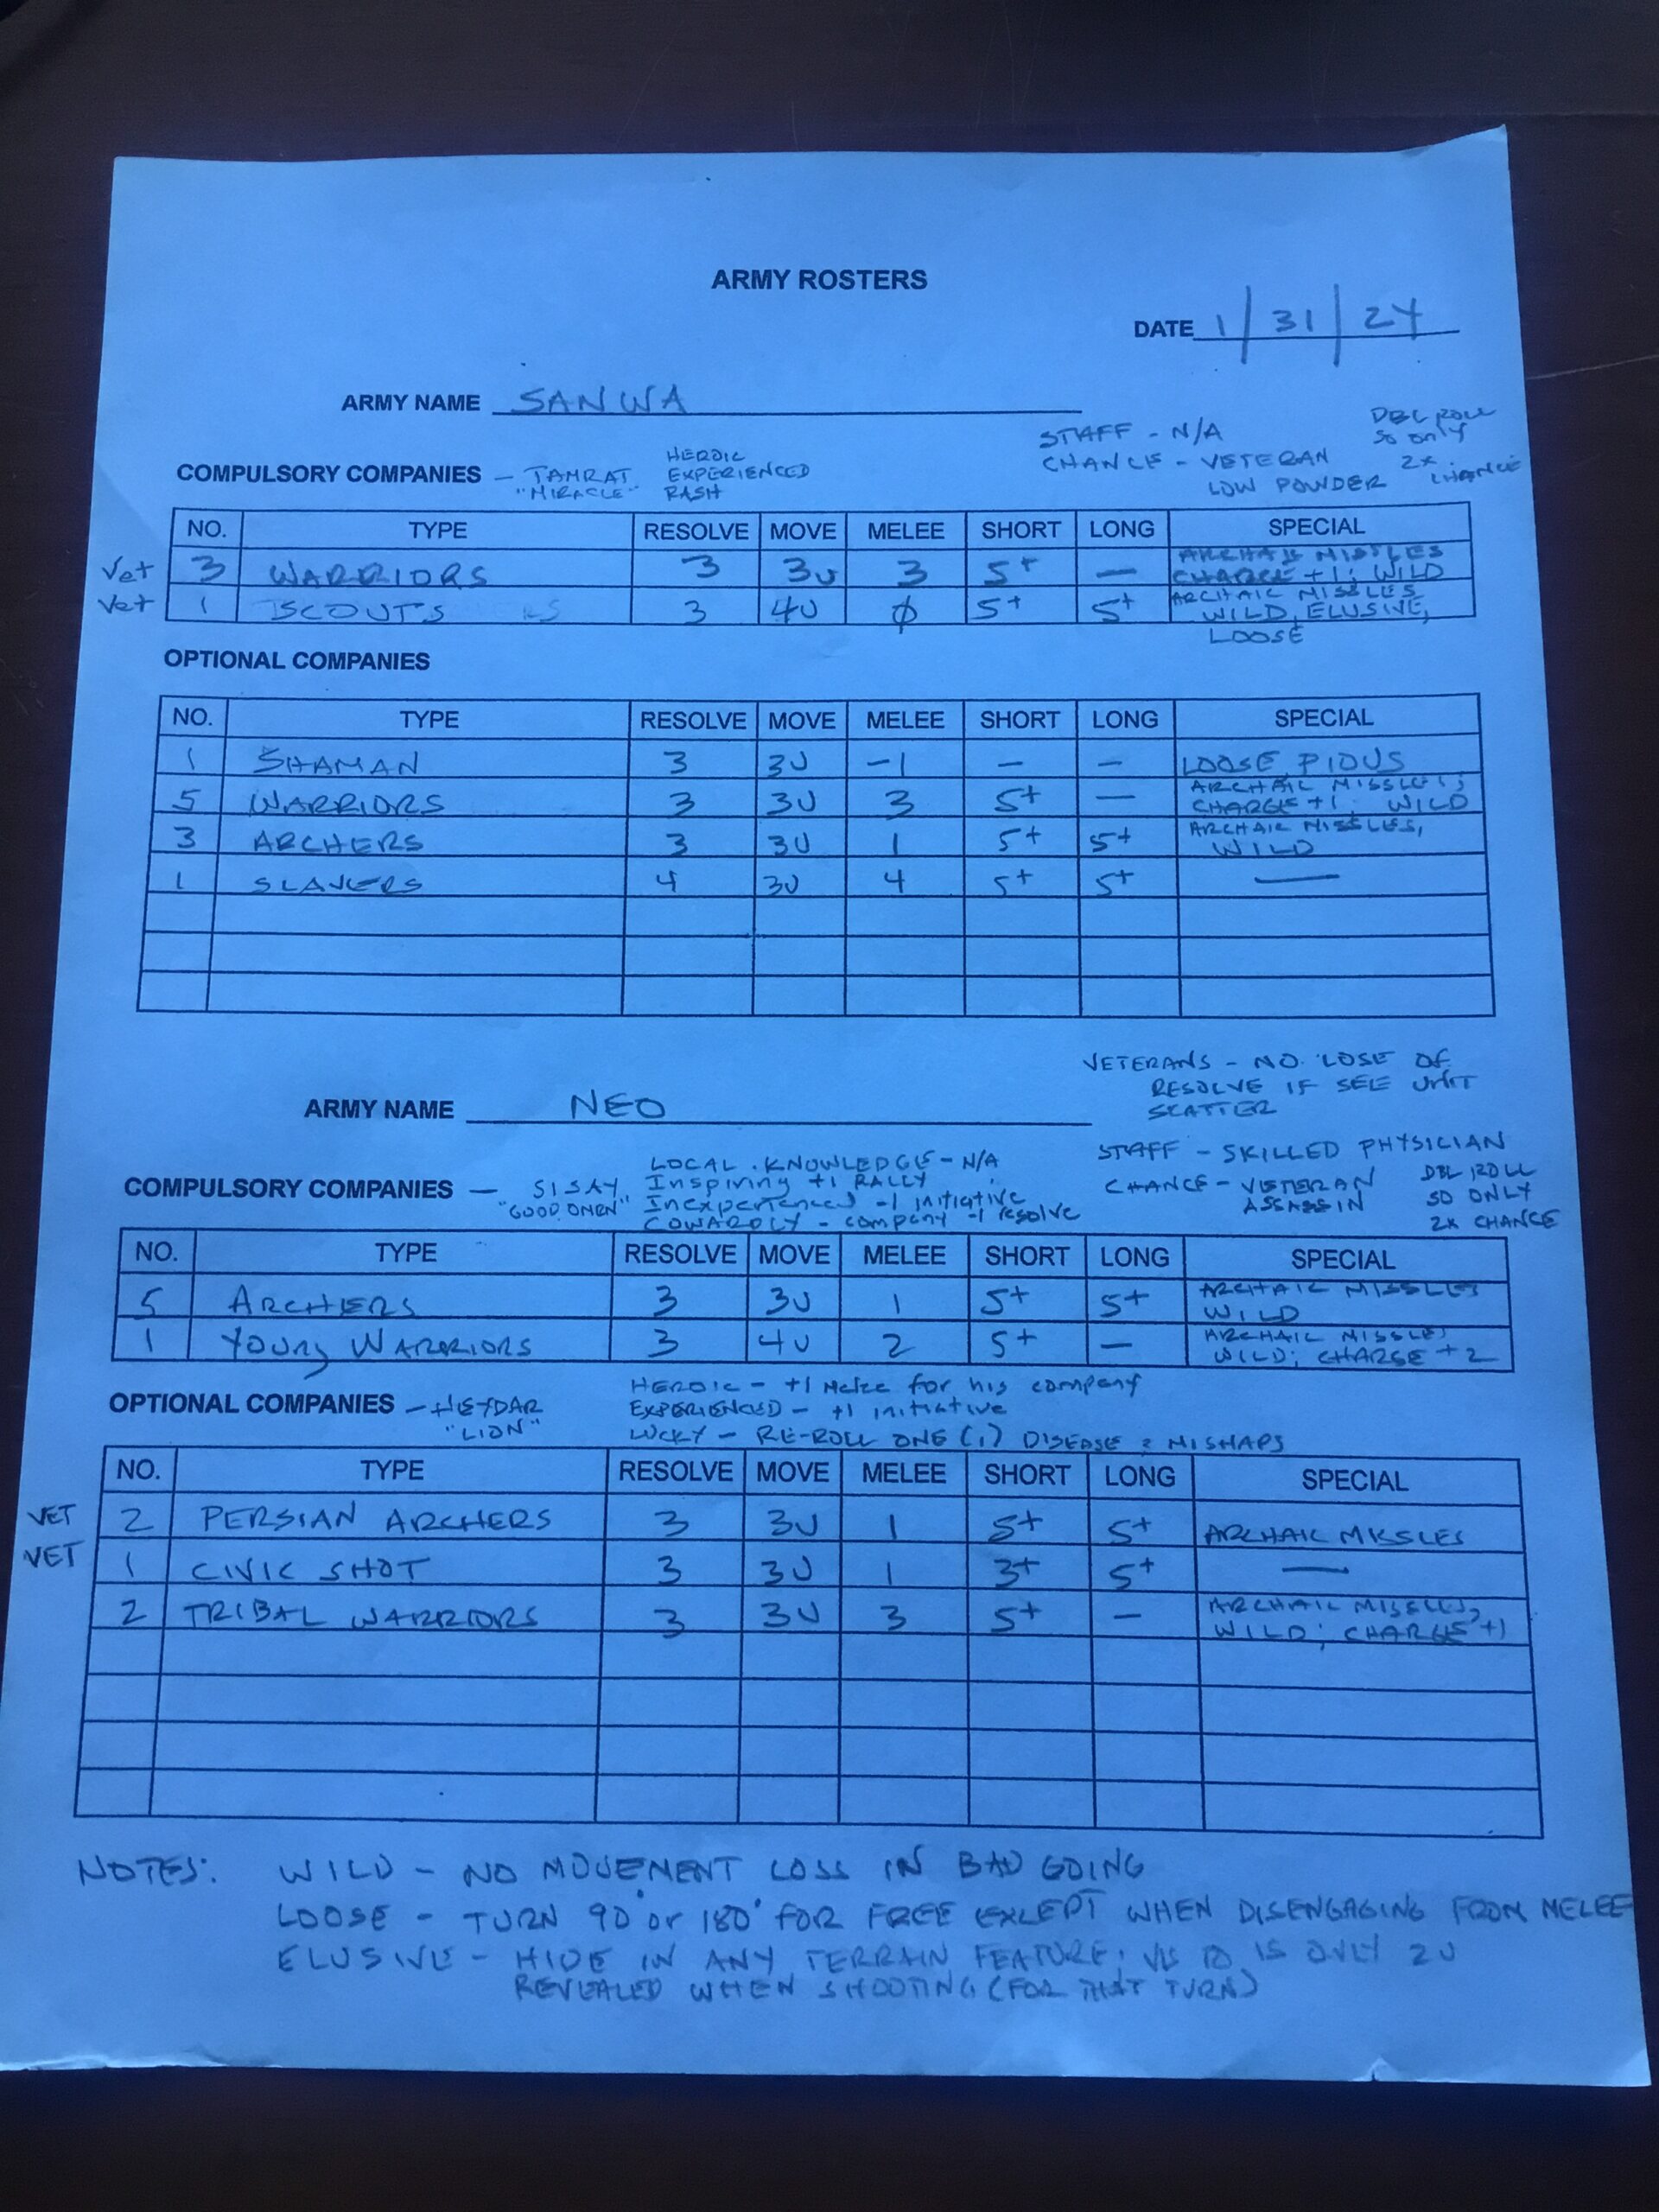
Before I get into the mayhem, here’s a summary of the Game Modifiers.

Coastal Arabs:  Well Laid Plans – Allowing all companies to be in Command for one phase; and Ill Chosen Bedfellows – A -1 DRM for Disease and Mishap Rolls.

Ottomans:  Enterprising Captain – one Company always in command; the aforementioned Ill Chosen Bedfellows, which combined with their incompetent physician will cause real Resolve problems; and Miraculous Cure – good to add one to a unit having lost one Resolve due to disease.

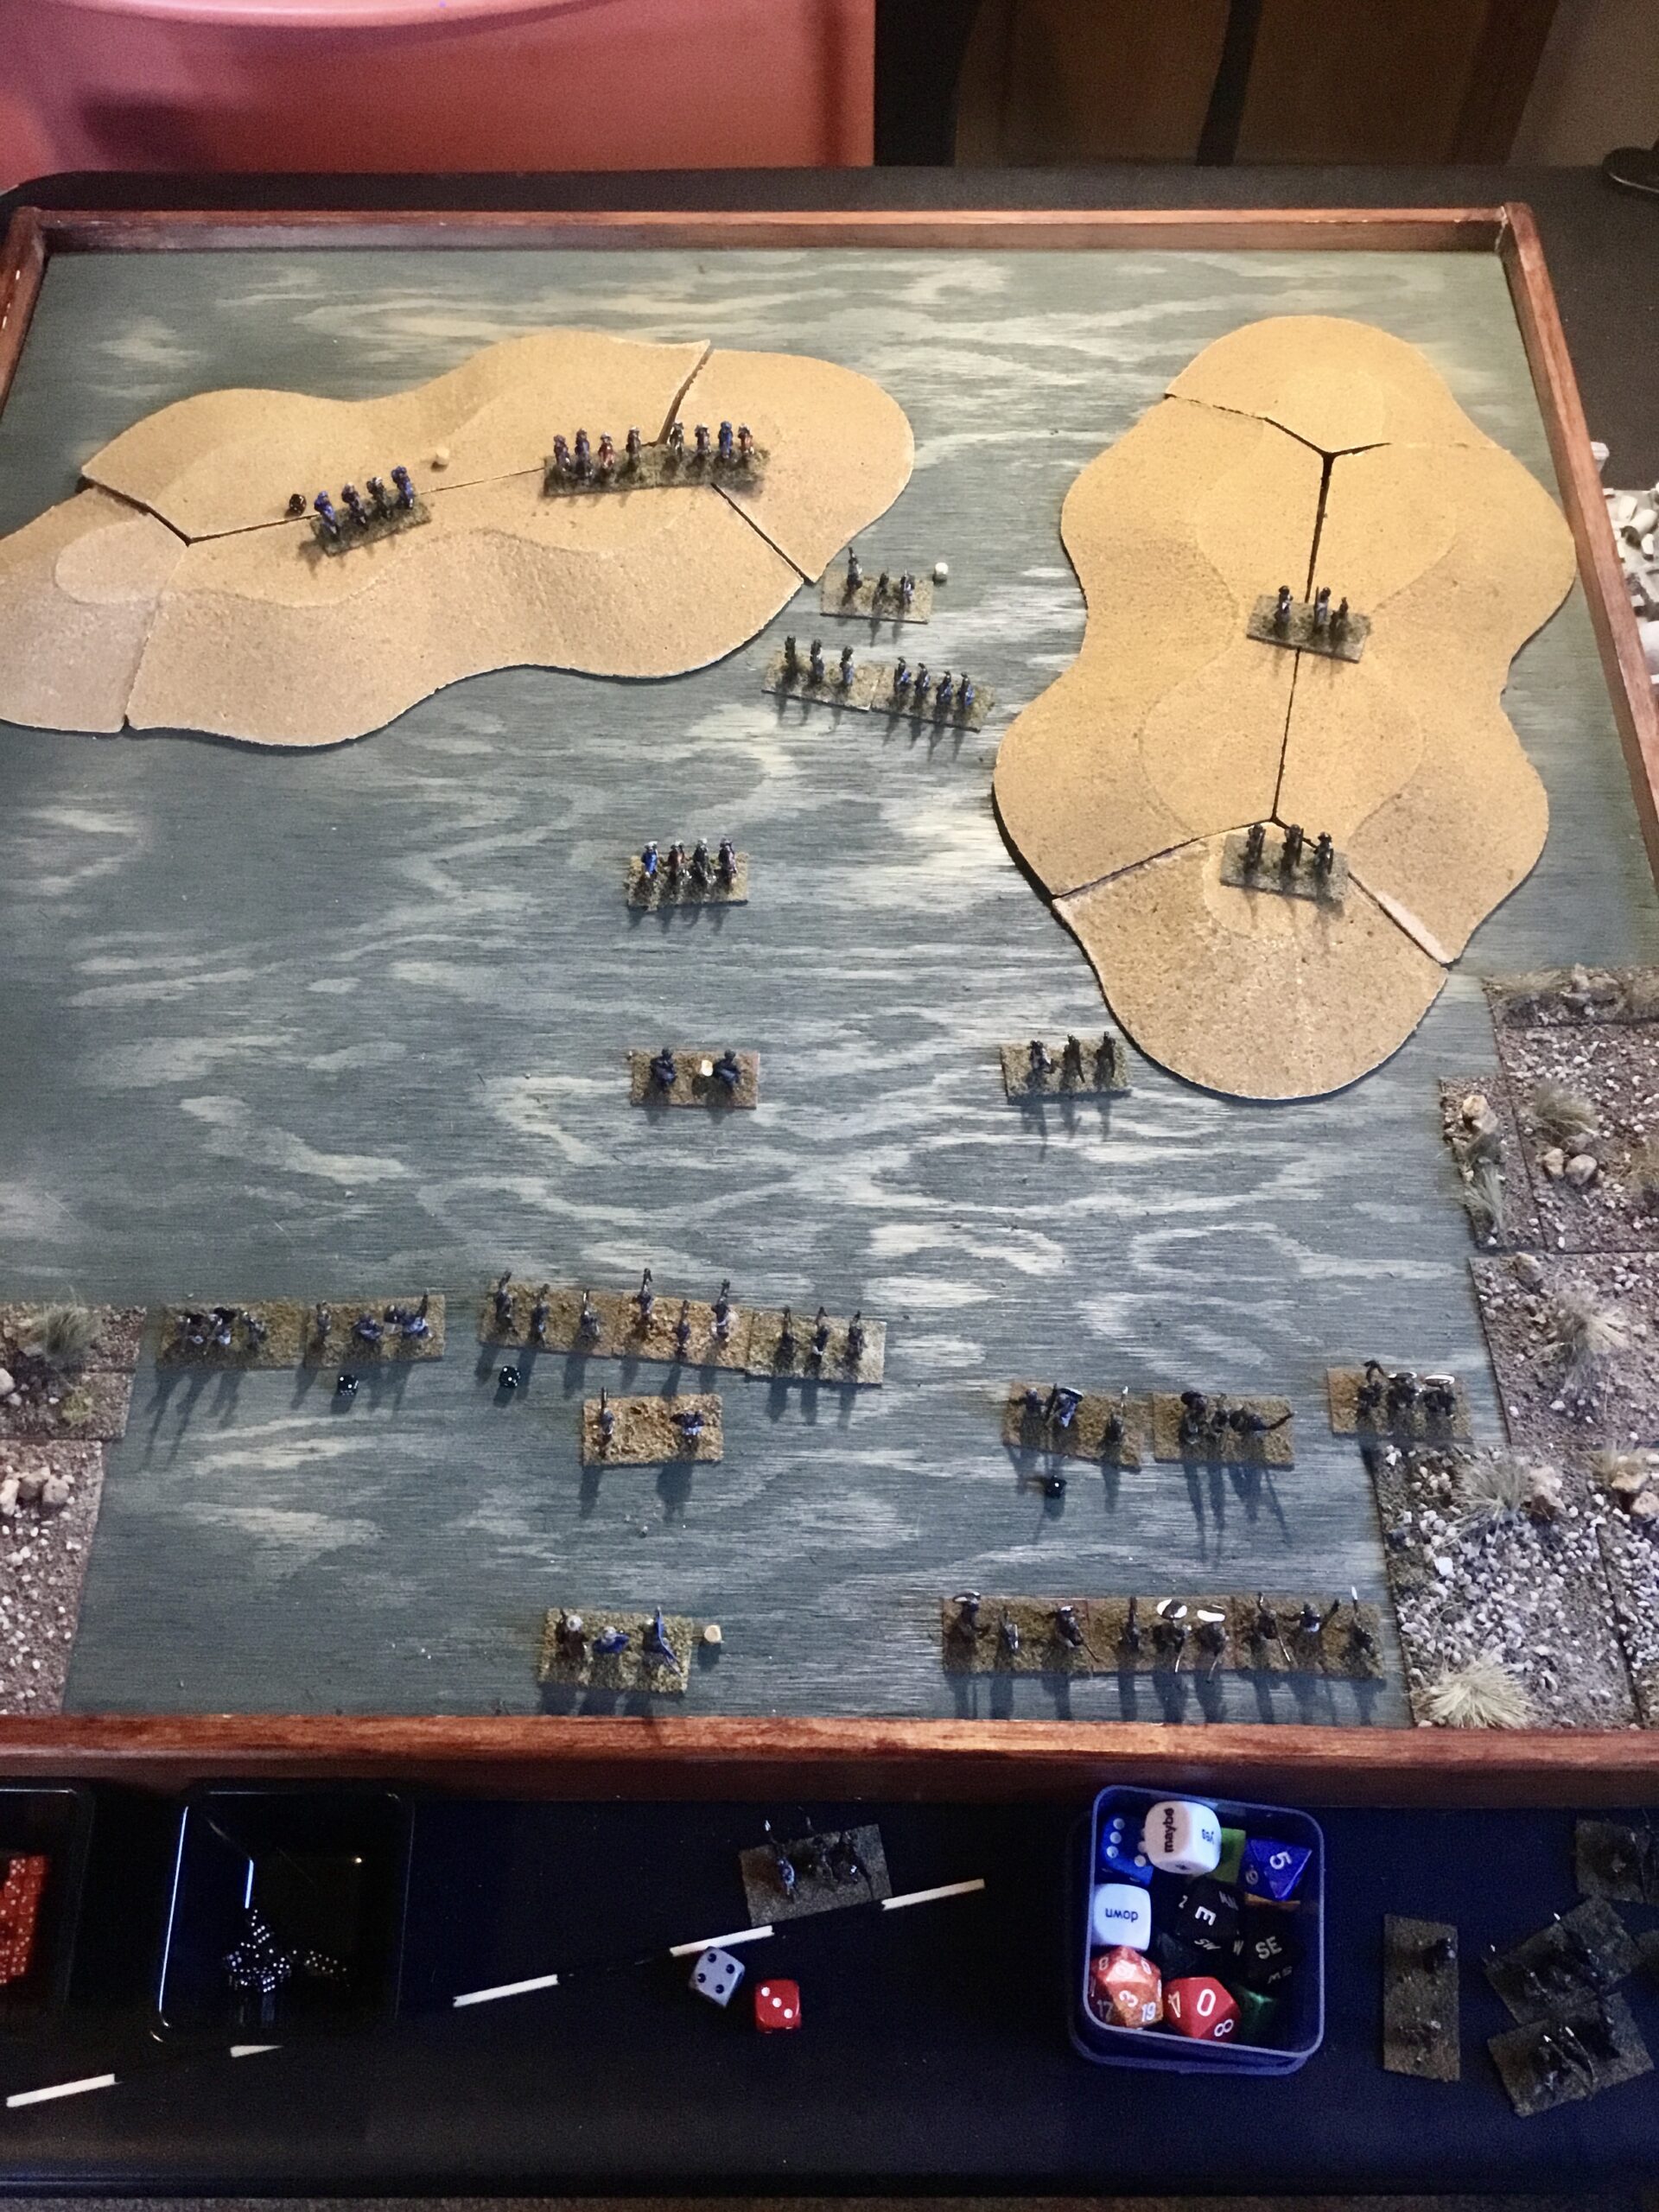
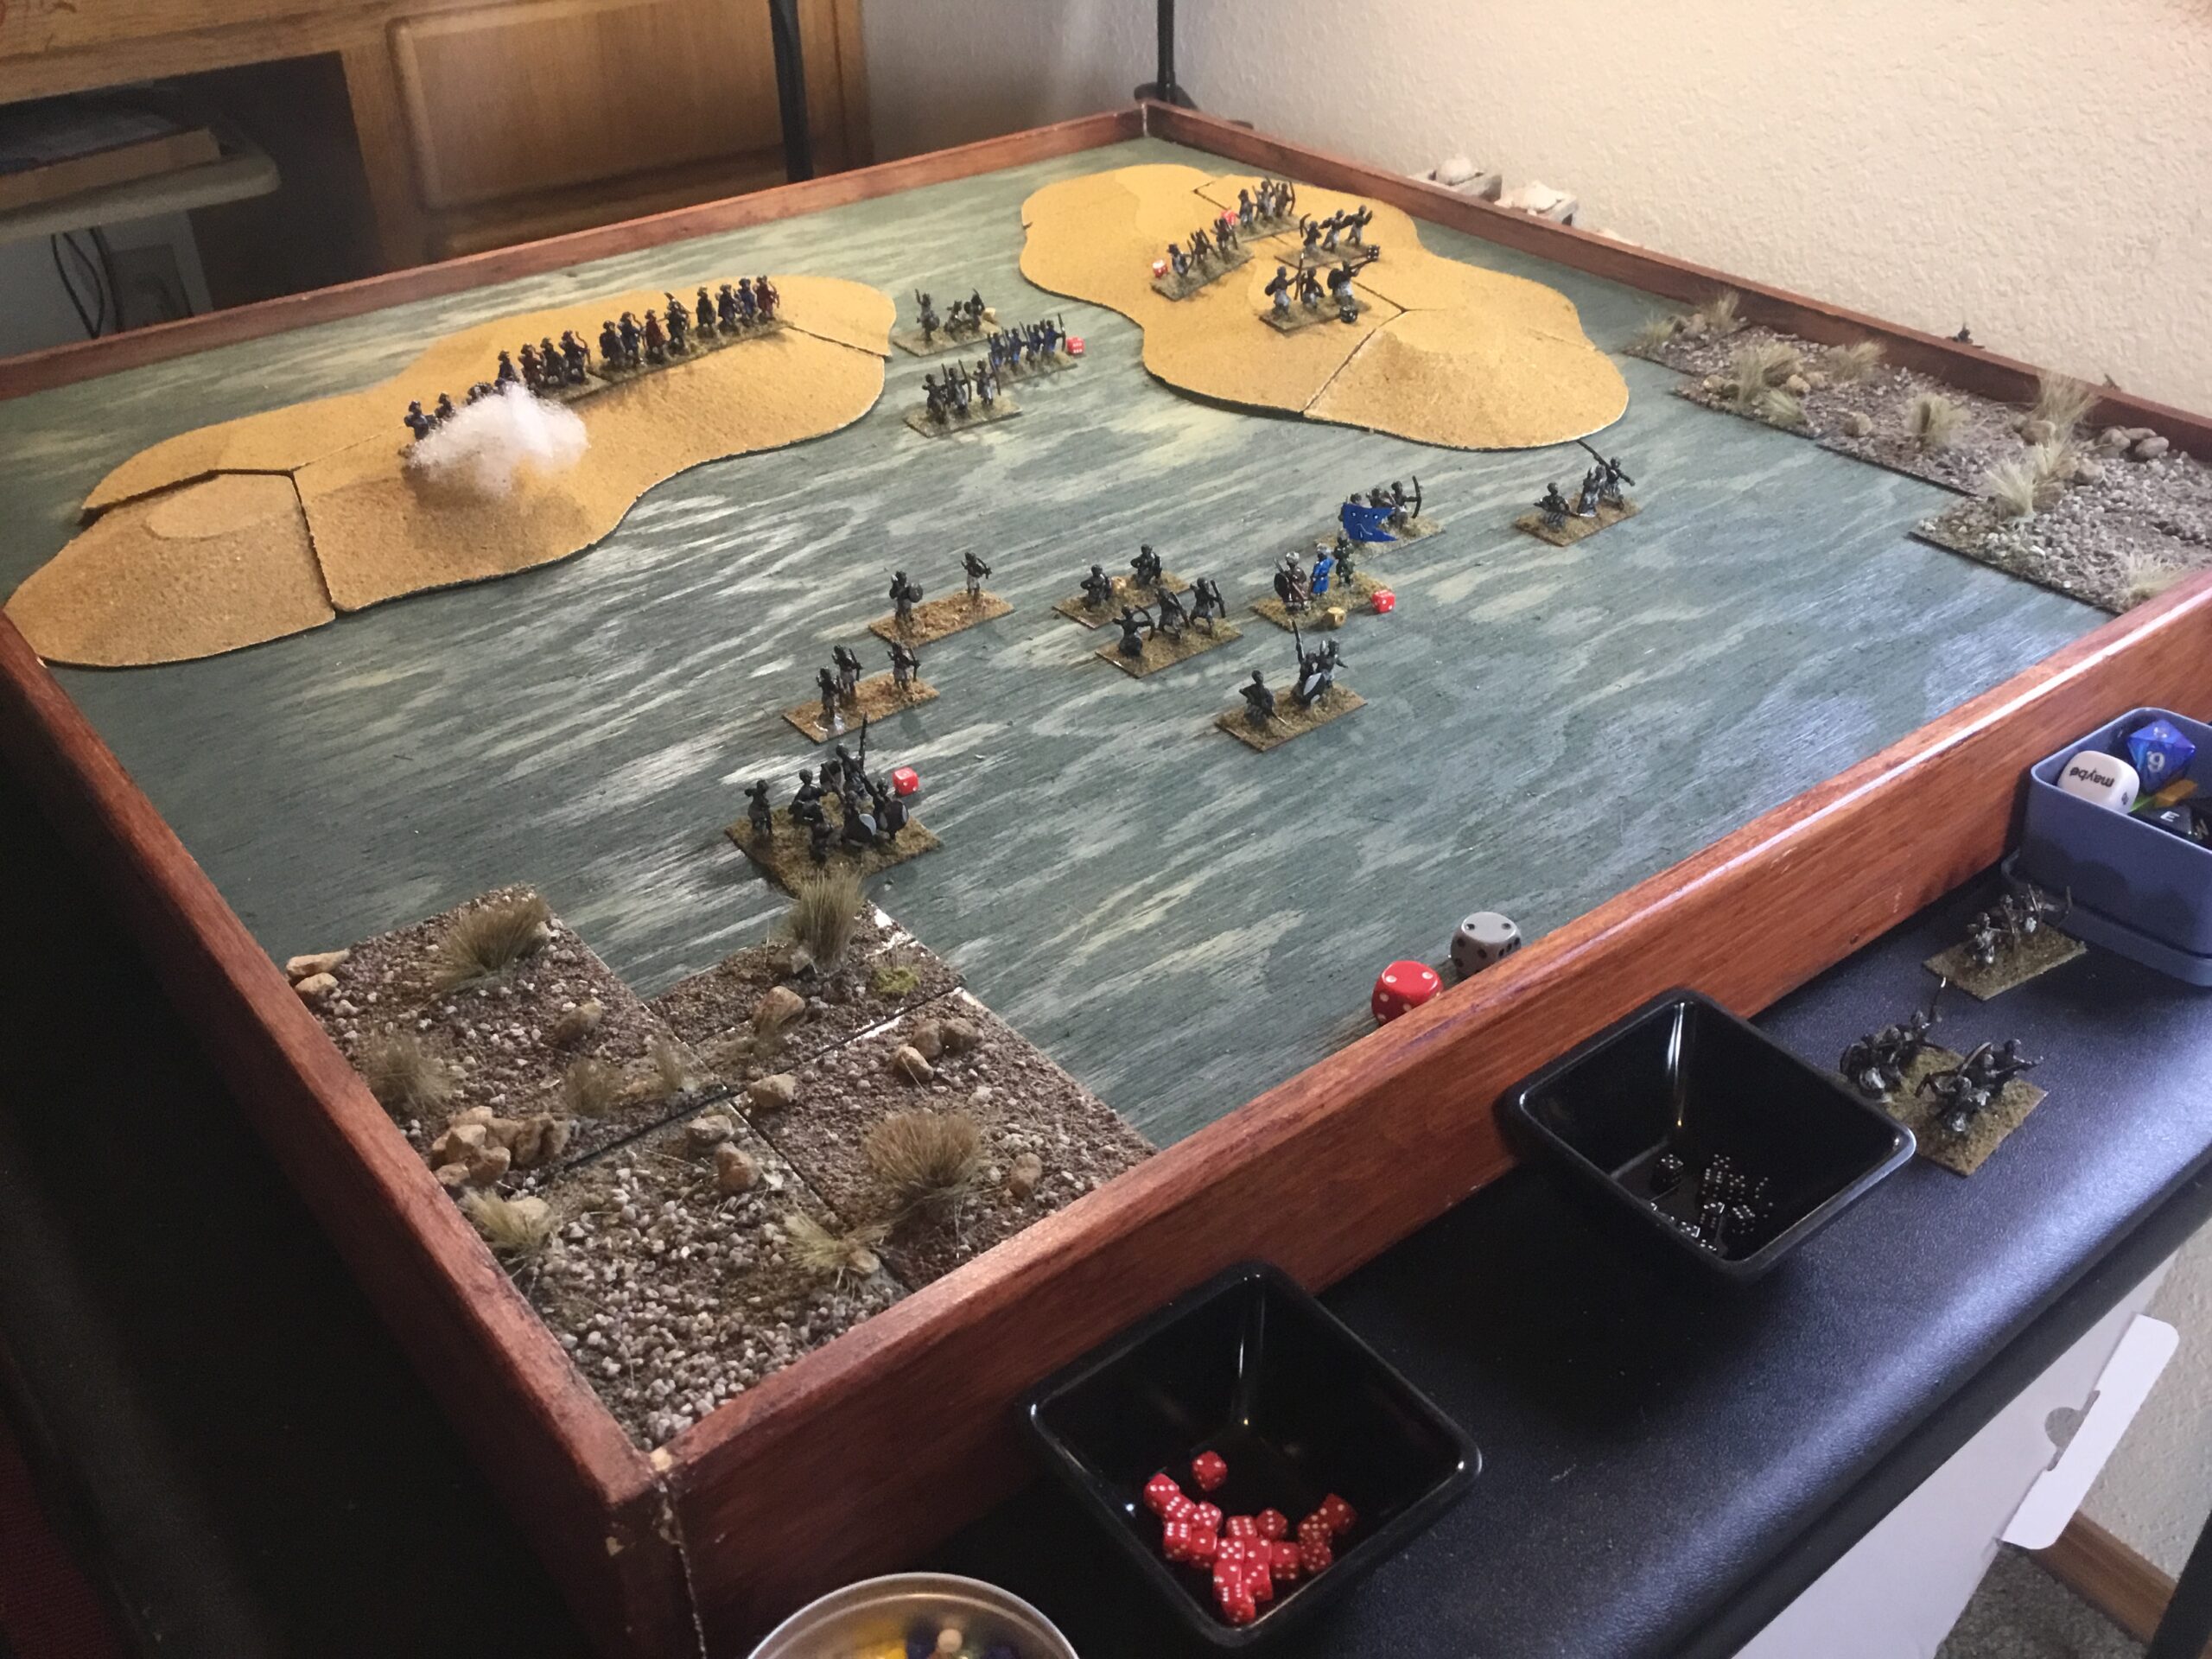
The Disease and Mishap rolls were really something.  Each side lost a company through bribery (Bought Off), the Ottoman right became too Enthusiastic and moved well forward of their initial dispositions, while Coastal companies arrived late.  Both sides were affected by disease, with the Ottomans ravaged.  Two companies lose two Resolve!

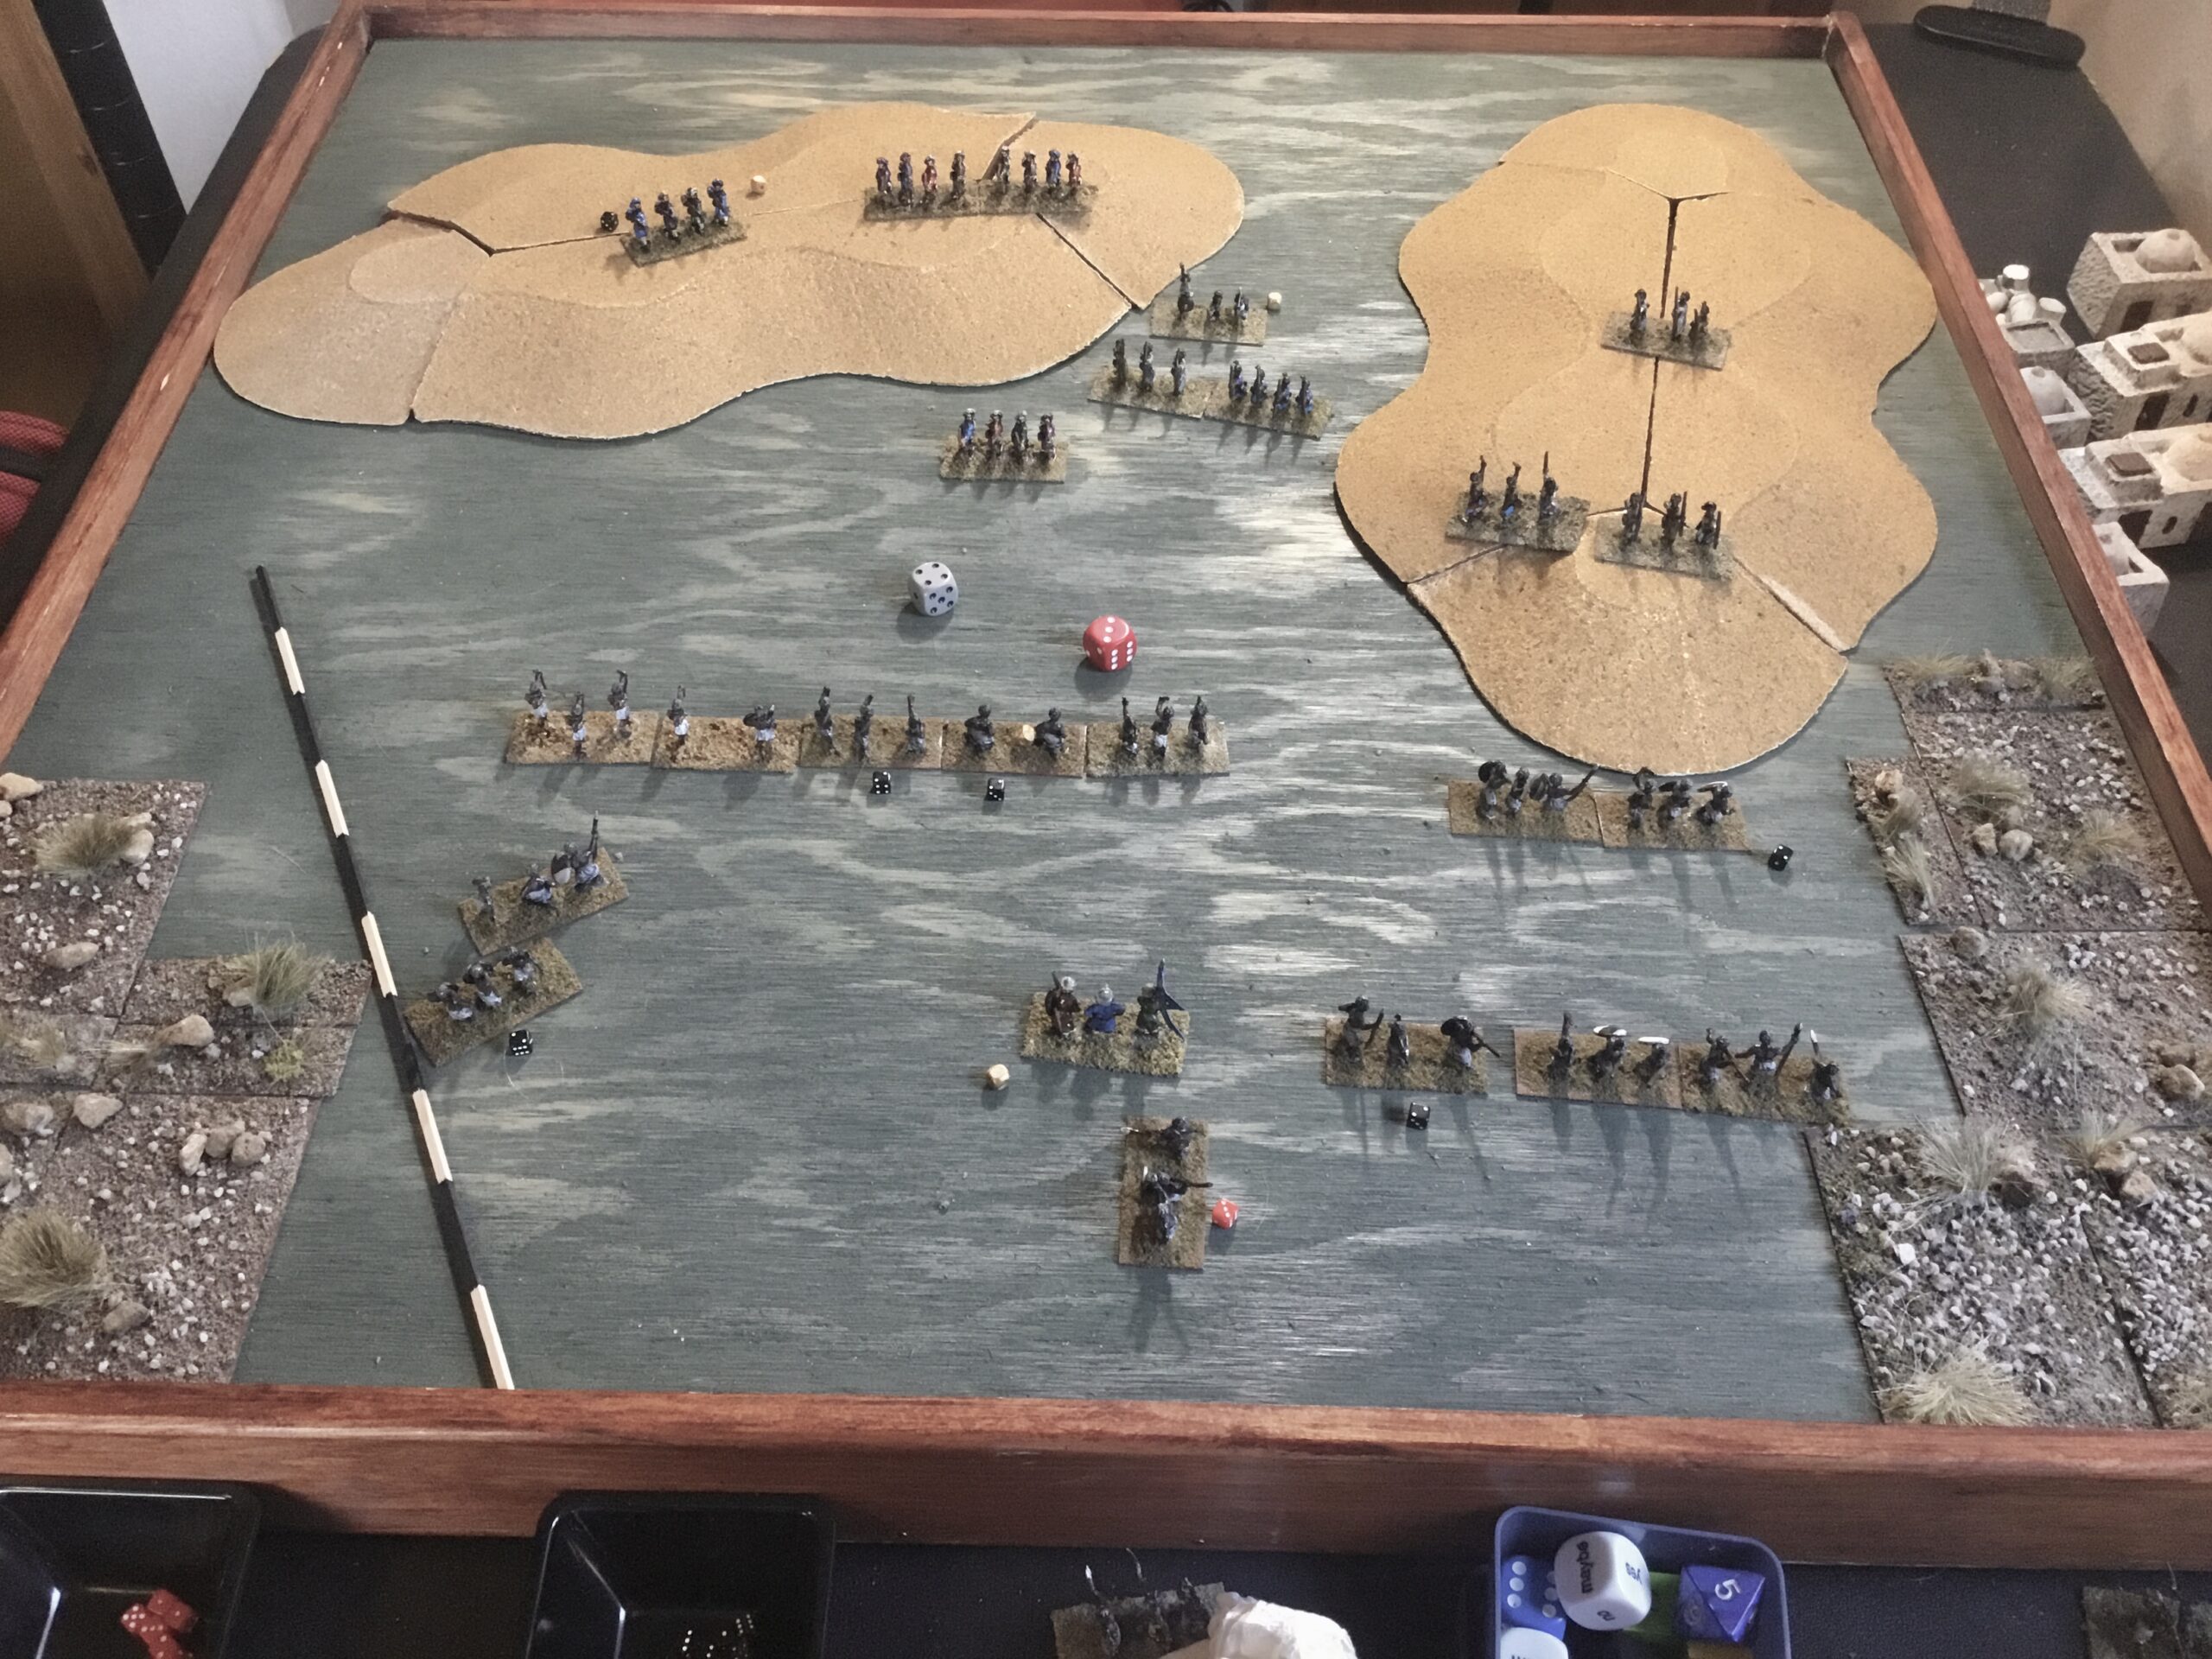
Here’s a picture of a not quite so tidy battlefield.  The black die indicate units that have already lost Resolve.  This is not a game system for The Orderly & Systematic General!

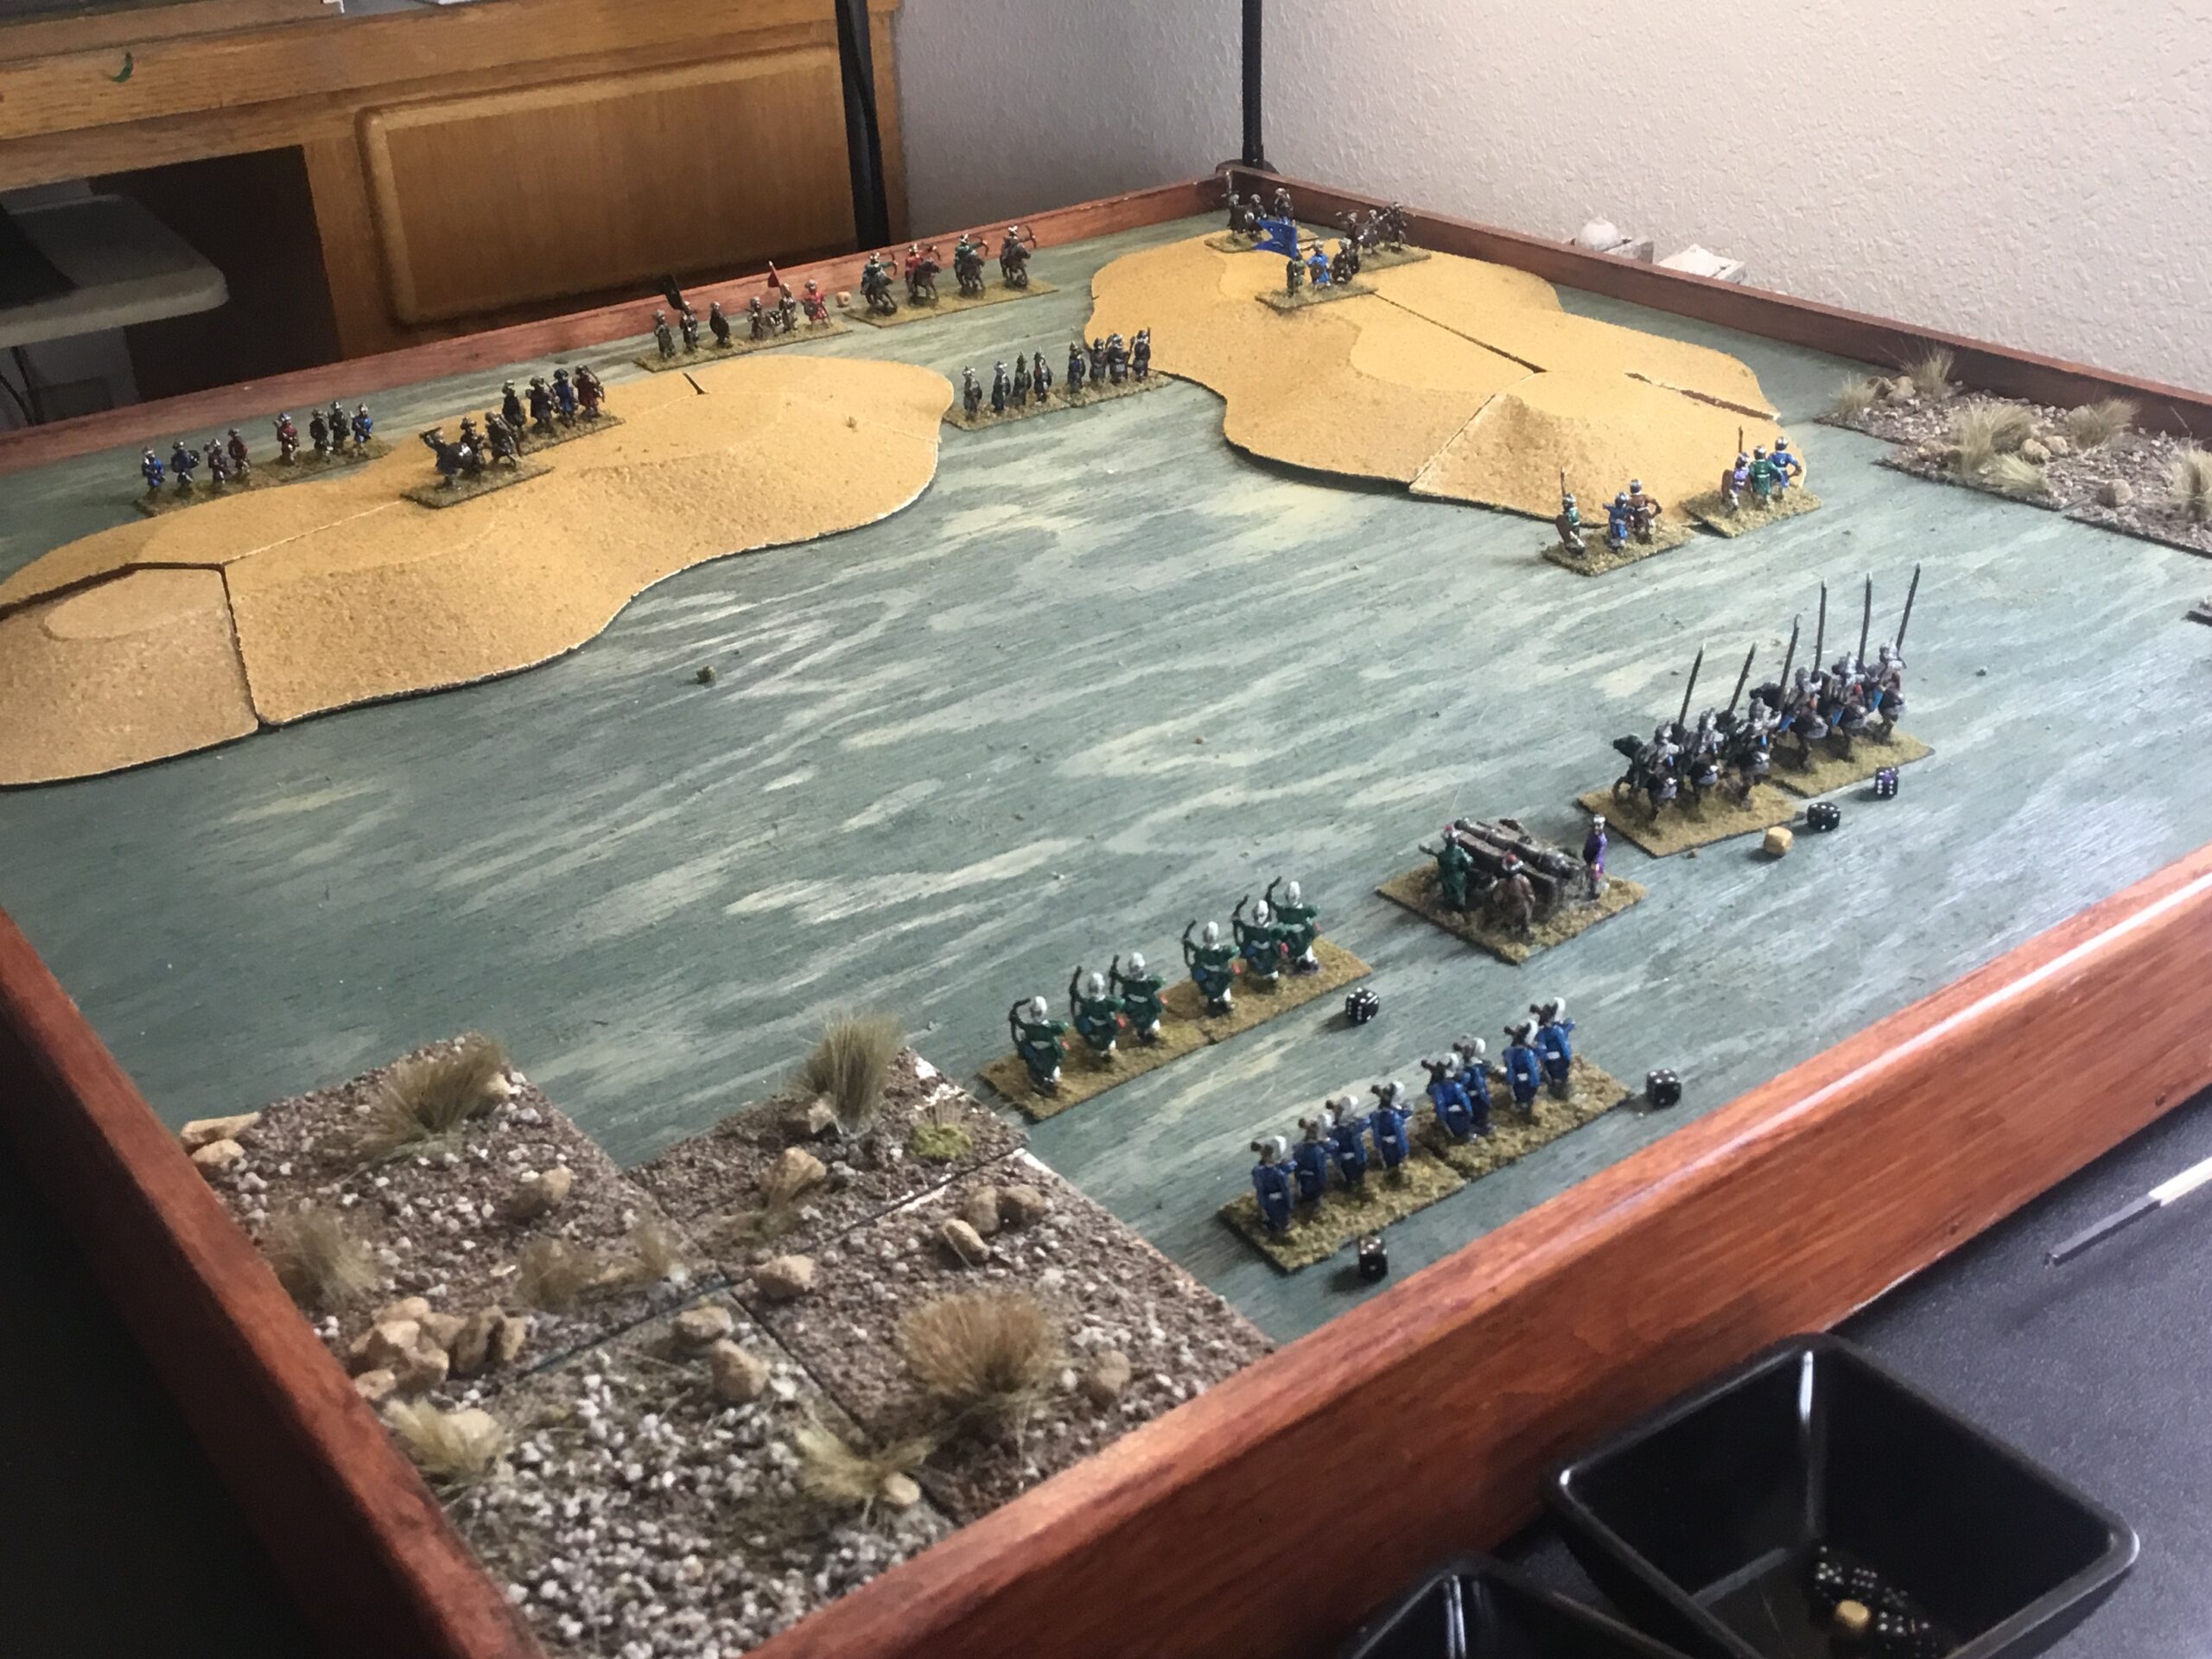
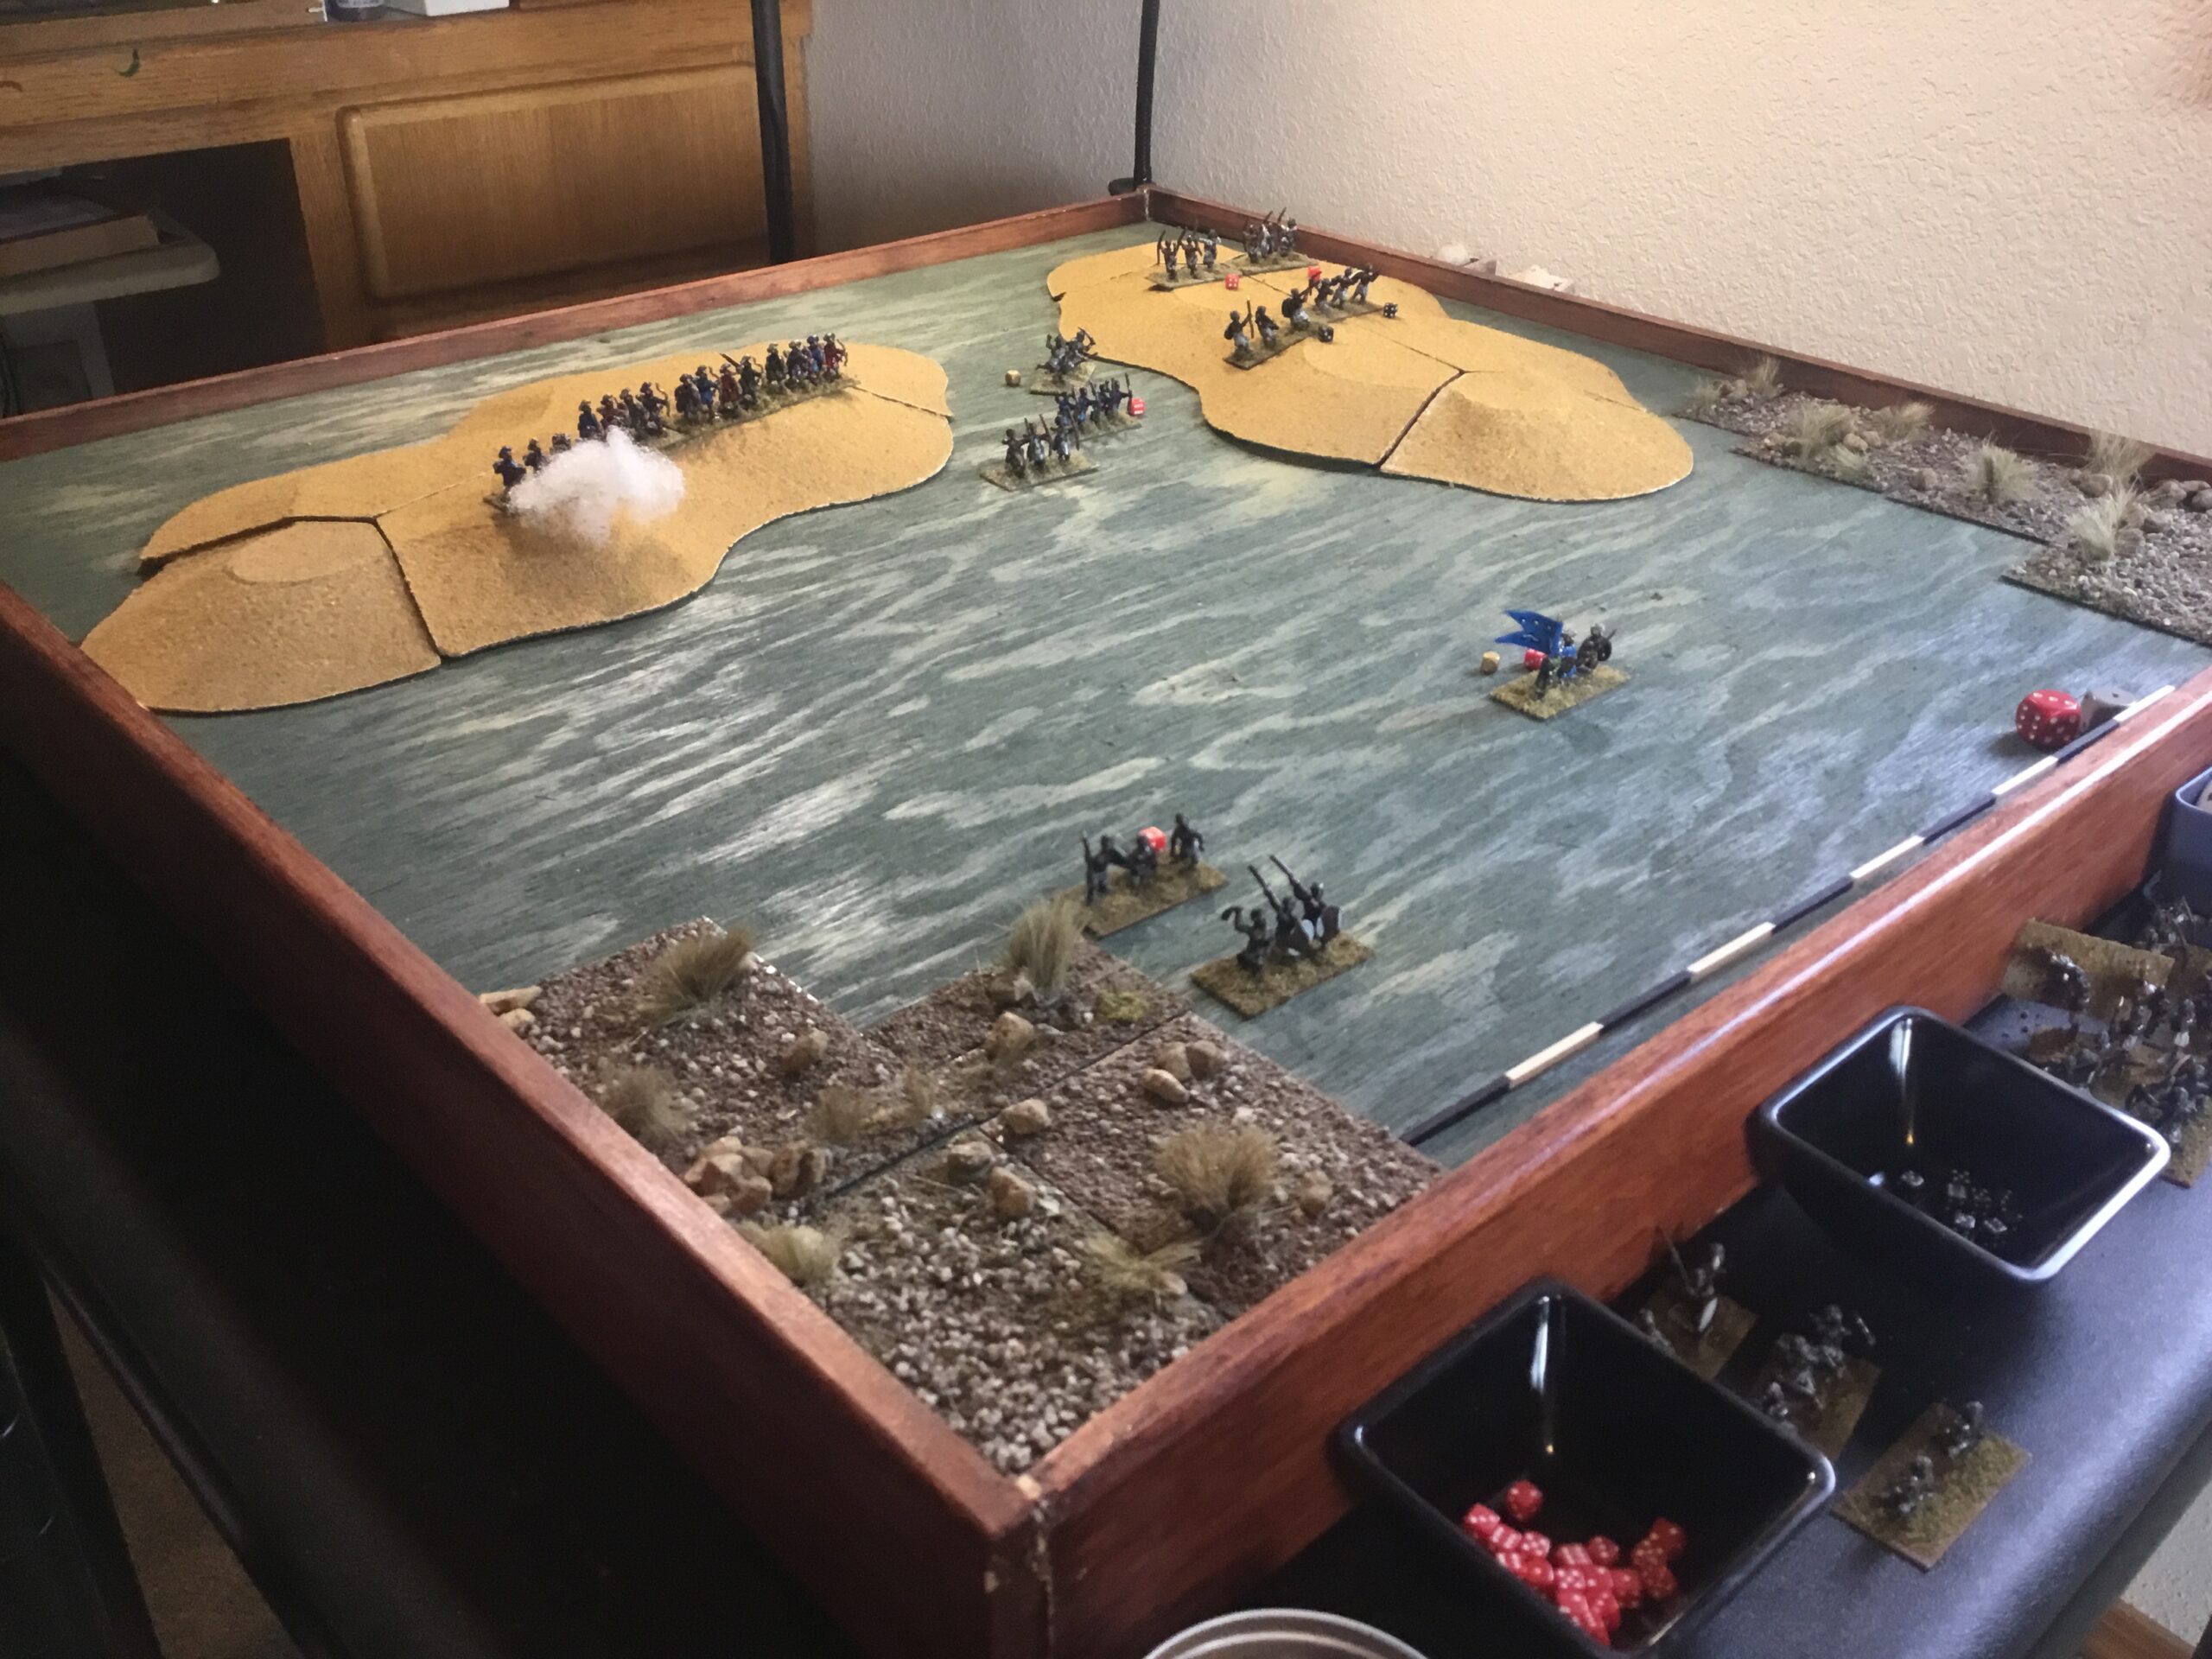
Both sides need to spend a few turns regrouping……

Tanks! Redux

Watched Dunkirk the other night.  Not the new one, the good one.

Duly inspired, I dug out my 1/100 armor with accompanying terrain, and set up a mini-campaign for Tanks!.

Basic premise was a pack of misfit British armor, caught up in the backwash of the Arras counterattack, tries to get to the coast.  Set up random parameters for German opposition, and British crew capabilities.

Since the campaign was “based on a true story”, the rag-tags had an interesting set of crew skills and helpful equipment.  These add-ons provide the abilities to shrug off misfortunes of all kinds. The Germans were faceless, robotic drones.

The tricky part was what each force could see, and if they saw something, how/could that information be communicated.  Did some basic research on tank radios and found there is not that much out there.  So, just had some fun with it, using yes/no, directional, and other random dice.

The British had an armored car for scouting; an A12 Cruiser,  a Mk 1 Matilda and a Mk 2 Matilda.  The German mix could include Pz II, III or IVs.

The unintended consequence of all of this was another trip into the world of computer graphic design.  I’d designed some Tanks! cards with GIMP in the past, but had lost all of my chops.  Downloaded a template over a Boardgamegeek, and  floundered.  Wound up using my old mock-up cards.  Hopefully, I’ll continue to slog away at the new cards.

Again, it’s a real challenge to resist ginning up too many house rules.  Sure, I had to make spot judgments on backing up, Matilda frontal armor and others, but resisted the need to codify them.  Here’s photos of the first two scenarios.  Lots of Hide N’ Seek trying to work through woods along roads/side roads.

Had to pick up this AM.  I’m thinking coastal operations later in the week, or Heroes of Normandie.

Underrated Fun

Quick and semi-gratuitous post.  Set Fistful of Lead up on the dining table.  Couple of shootouts.

Can’t recommend this rule set enough.  Easy to read through, and the Play Aid Sheet covers about 95 percent of what you can run into.

Just turn the little guys loose, and see what kind of mischief ensues.  Only level of control I impose is whether or not they can see/are aware of what’s going on around them.  For that, I use the trusty “Yes/No” die.

This Spring – if that ever gets here – one project is to assemble some paper buildings.

Unintended Consequences

Put together the Army Rosters and rolled for Commander and Staff  characteristics.

Wanted to play a quality (Ottomans) versus quantity (Local) scenario, with both  forces built using an equal number of points,  and using the same terrain as last time.  Why same terrain?  I want to see if that defensive position can be forced.   The attacking Ottomans do have an advantage as the Locals don’t have as many shot or archaic missile (bow) units as the previous game’s defenders.

However…………

The Ottomans have a real leadership problem.  The dice dictated an Inexperienced Lord that is also Cowardly.  His staff has an Incompetent Physician.  These are a lot of negative DRM modifiers.    On the other hand, he is considered Dashing.  All that means is that he can get into trouble quicker.  This all begs the question, “How did someone like this get command”?  Well, it does happen, and we will see what Bey Osker Boz can do.

On the other hand, or side of the hill, the Local Commander, Taaj el-Burki, has no strengths or weaknesses, but does have a Bad Gunner on his staff.  But, since his force has no artillery, it’s of no consequence.

Here’s a photo of the Army Rosters Sheet.  Before I get started, I’ll have to come up with a name for the “Local” place.  I’ll go over the “Game Modifiers” in my next post.

Movement Or Motion?

Decided to get the new Ottomans on the table, so focus for the Irregular Wars campaign will shift to the North.

Working premise is fighting for control of a port in/about Aden between Ottomans and Local Bey.  This involves creating some new characters.

I stumbled on an old post while revisiting my fragmented methodology.  What I had scribbled down or previously posted didn’t reflect my currenting thinking, so I set about reinventing the wheel.

The basis of all this is the game’s Chance Cards, but modified to provide solo campaign variability for The Lord (Commander), his Staff, and a specific battle.

Here’s a link to the revised chart.  I’ll be working with it later today.

At Last

After finishing up the Italian Wars and Husaria figures in early January, I decided to get on with it and take care of the last of my  15mm Ottomans.  I was on a painting roll, and they were the last of my projects.

Yes, the last.  I may augment what I have, but that’s it for any large scale endeavours.  I know;  Never Say Never….

Here they are.  Now, they won’t stay in a cardboard flat.  Gave that up some years ago.  Hundreds of dollars in figures and countless hours of work left in flimsy cardboard.  No, they’ll go into a tool box.  A nice home….They’ll make excellent opponents for my late Medieval/Early Renaissance (@1450 CE) Europeans.

Going to give painting/constructing  a rest for awhile.  Work on my East Africa Renaissance Campaign, as well as get out some skirmish figures and terrain that need to see the light of day.

Action At Neo – The Battle

It ended so quickly.  What some might find to be the weakness of the Irregular Wars’ rule set was on full display during this action.

Over at Boardgamegeek, there’s a on-going (and increasingly pedantic) thread discussing fog of war and randomness.  While Irregular Wars doesn’t have much in the way of fog, it certainly can provide plenty of randomness.

First off, the tidy initial dispositions featured in the previous post were immediately disrupted by the designed randomness of the Disease and Mishaps die rolls.

Some companies pushed forward, led by over-enthusiastic Captains.  Others formed up ravaged by disease, with reduced Resolve (companies with black die).

It took a couple of turns for the attacking Kattegoans to sort themselves out and advance towards the Neons.  Their attack plan called for Archers to neutralize the Neon center, while Warriors assaulted the small ridgeline on their right.  The flanked Neons would then be subjected to a general assault.

However,  Neon archery took its toll.  After several exchanges, many Sanwanian units were wavering (red dice).  And, it only took one misplaced Company’s (left within archery range) scattering to unhinge the Sanwanian center and left.  Again, a Scattering Company reduces the Resolve of any friendly unit within 80mm (2U)by one.  Wavering companies are down to their last Resolve.  They lose that, they Scatter.  And, that’s what happened – en masse.

The companies facing to the rear are those that scattered in just one turn.  Here’s what the battlefield looked like after they were removed.

While the Sanwanian Warriors on the right made a last valiant effort to close with the Neon Archers, the latter companies were able to disengage.  The Warriors withdrew.

A notable victory for  Neo, with all due credit to the help provided by Bey Mahir of Behefe.

Action At Neo – Initial Dispositions

The stage has been set for battle between the Sanwanians and Neons.

Quick note:  I have capitalized game-specific terms/usages.

The Neons made the most of the short time they had to prepare.   Much of the credit for the ability of the peaceful Neons to resist goes to the Lord of the Behefian forces sent to their aid.

Bey Heydar (or The Lion) is an Experienced  and Heroic Persian mercenary (receiving a positive die roll for Initiative and also when his Company is in Melee).  He has brought with him three companies of Persian Archers and one of Shot,  along with two companies of  mercenary Warriors.  His staff includes one of Behefe’s most experienced Physicians (this is a positive modifier when rolling for Disease and Mishaps after initial deployment(s)).

Recognizing the Neons lack of combat experience, Heydar’s preparations  focused on a Neon strength; hunting.   The majority of the Neon contingent received intensive  Archers training, with  one Company of young men to be used as Warriors.

The nominal Lord of the Neons is Sisay (or Good Omen).  He has excellent Local Knowledge and is an Inspiring Lord (receiving a positive modifier when rallying companies).  However, he is Inexperienced and Cowardly (these two traits will result in negative modifiers when he rolls for Initiative and if/when in Melee with his Company).

The Sanwanians are led by Tamrat (or Miracle).  His  distinguished conduct in the recent  victory over Kattego made him  the logical choice to lead this large force,  with includes a  solid Veteran contingent.  He is Heroic and  Experienced.  His only shortcoming is Rash behavior in the field (increasing his chances of being killed in melee).

The Sanwanians are once again accompanied by their  adopted Wandering Mystic (Shaman in game terms), Kibwe Nkruma.  He is counted on to bolster the Resolve of any Wavering companies.

Photos of the summary sheet for the battle, and initial dispositions before rolling for Disease and Mishaps are shown below.  The dispositions are oriented North/South (Top/Bottom), with Neons in the North.


New Leader….New Enemy

What a difference a victory makes.  The otherwise peaceful Sanwanians, reveling in their marital prowess and emboldened by the exhortations of Kibwe Nkruma, are now coveting the rich grazing lands surrounding the village of Neo.

The visionary (some say psychotic)  Nkruma convinced Sanwa’s Council of Elders  the unexpected victory  was proof the village’s destiny is that of greatness and accompanying wealth.  To ignore their providential good fortune would invite disaster at the hands of  Shango, God of Fire and Lightning.

The Council agreed that with Kattego weakened there would be plenty of time  to attack North and subjugate Neo.  Once accomplished, Kattego would be attacked and brought under Sawanian control.

These two villages would provide new-found riches in crops, herds and slaves.  They  would also serve as buffers against aggression from coastal towns.

Council members opposing this plan were given the choice of compliance, death or exile.  One chose exile, but fearing for his and his family’s lives regardless of promises of safe passage, fled  to Neo.

The Neons were shocked and dismayed by his news and abrupt turn of events.  They had lived in peace for as long as anyone could remember and had no experience in warfare.

Desperate, they turned to the leader of Behefe, Bey Iman Mahir,  for protection.

He agreed to send soldiers to help defend Neo.  He wanted to stop the spread of this agitation before it affected his domain.  However, he also saw the possibilities of increased wealth.  So, there were terms.

The terrified Neons agreed to reduce the prices of goods sold to Behefian merchants, and to now pay annual tribute to  Bey Mahir.

Mahir’s small expeditionary force marched to Neo and began training the Neons for combat.