Strange preoccupations die hard, but my System 7 fixation is over.
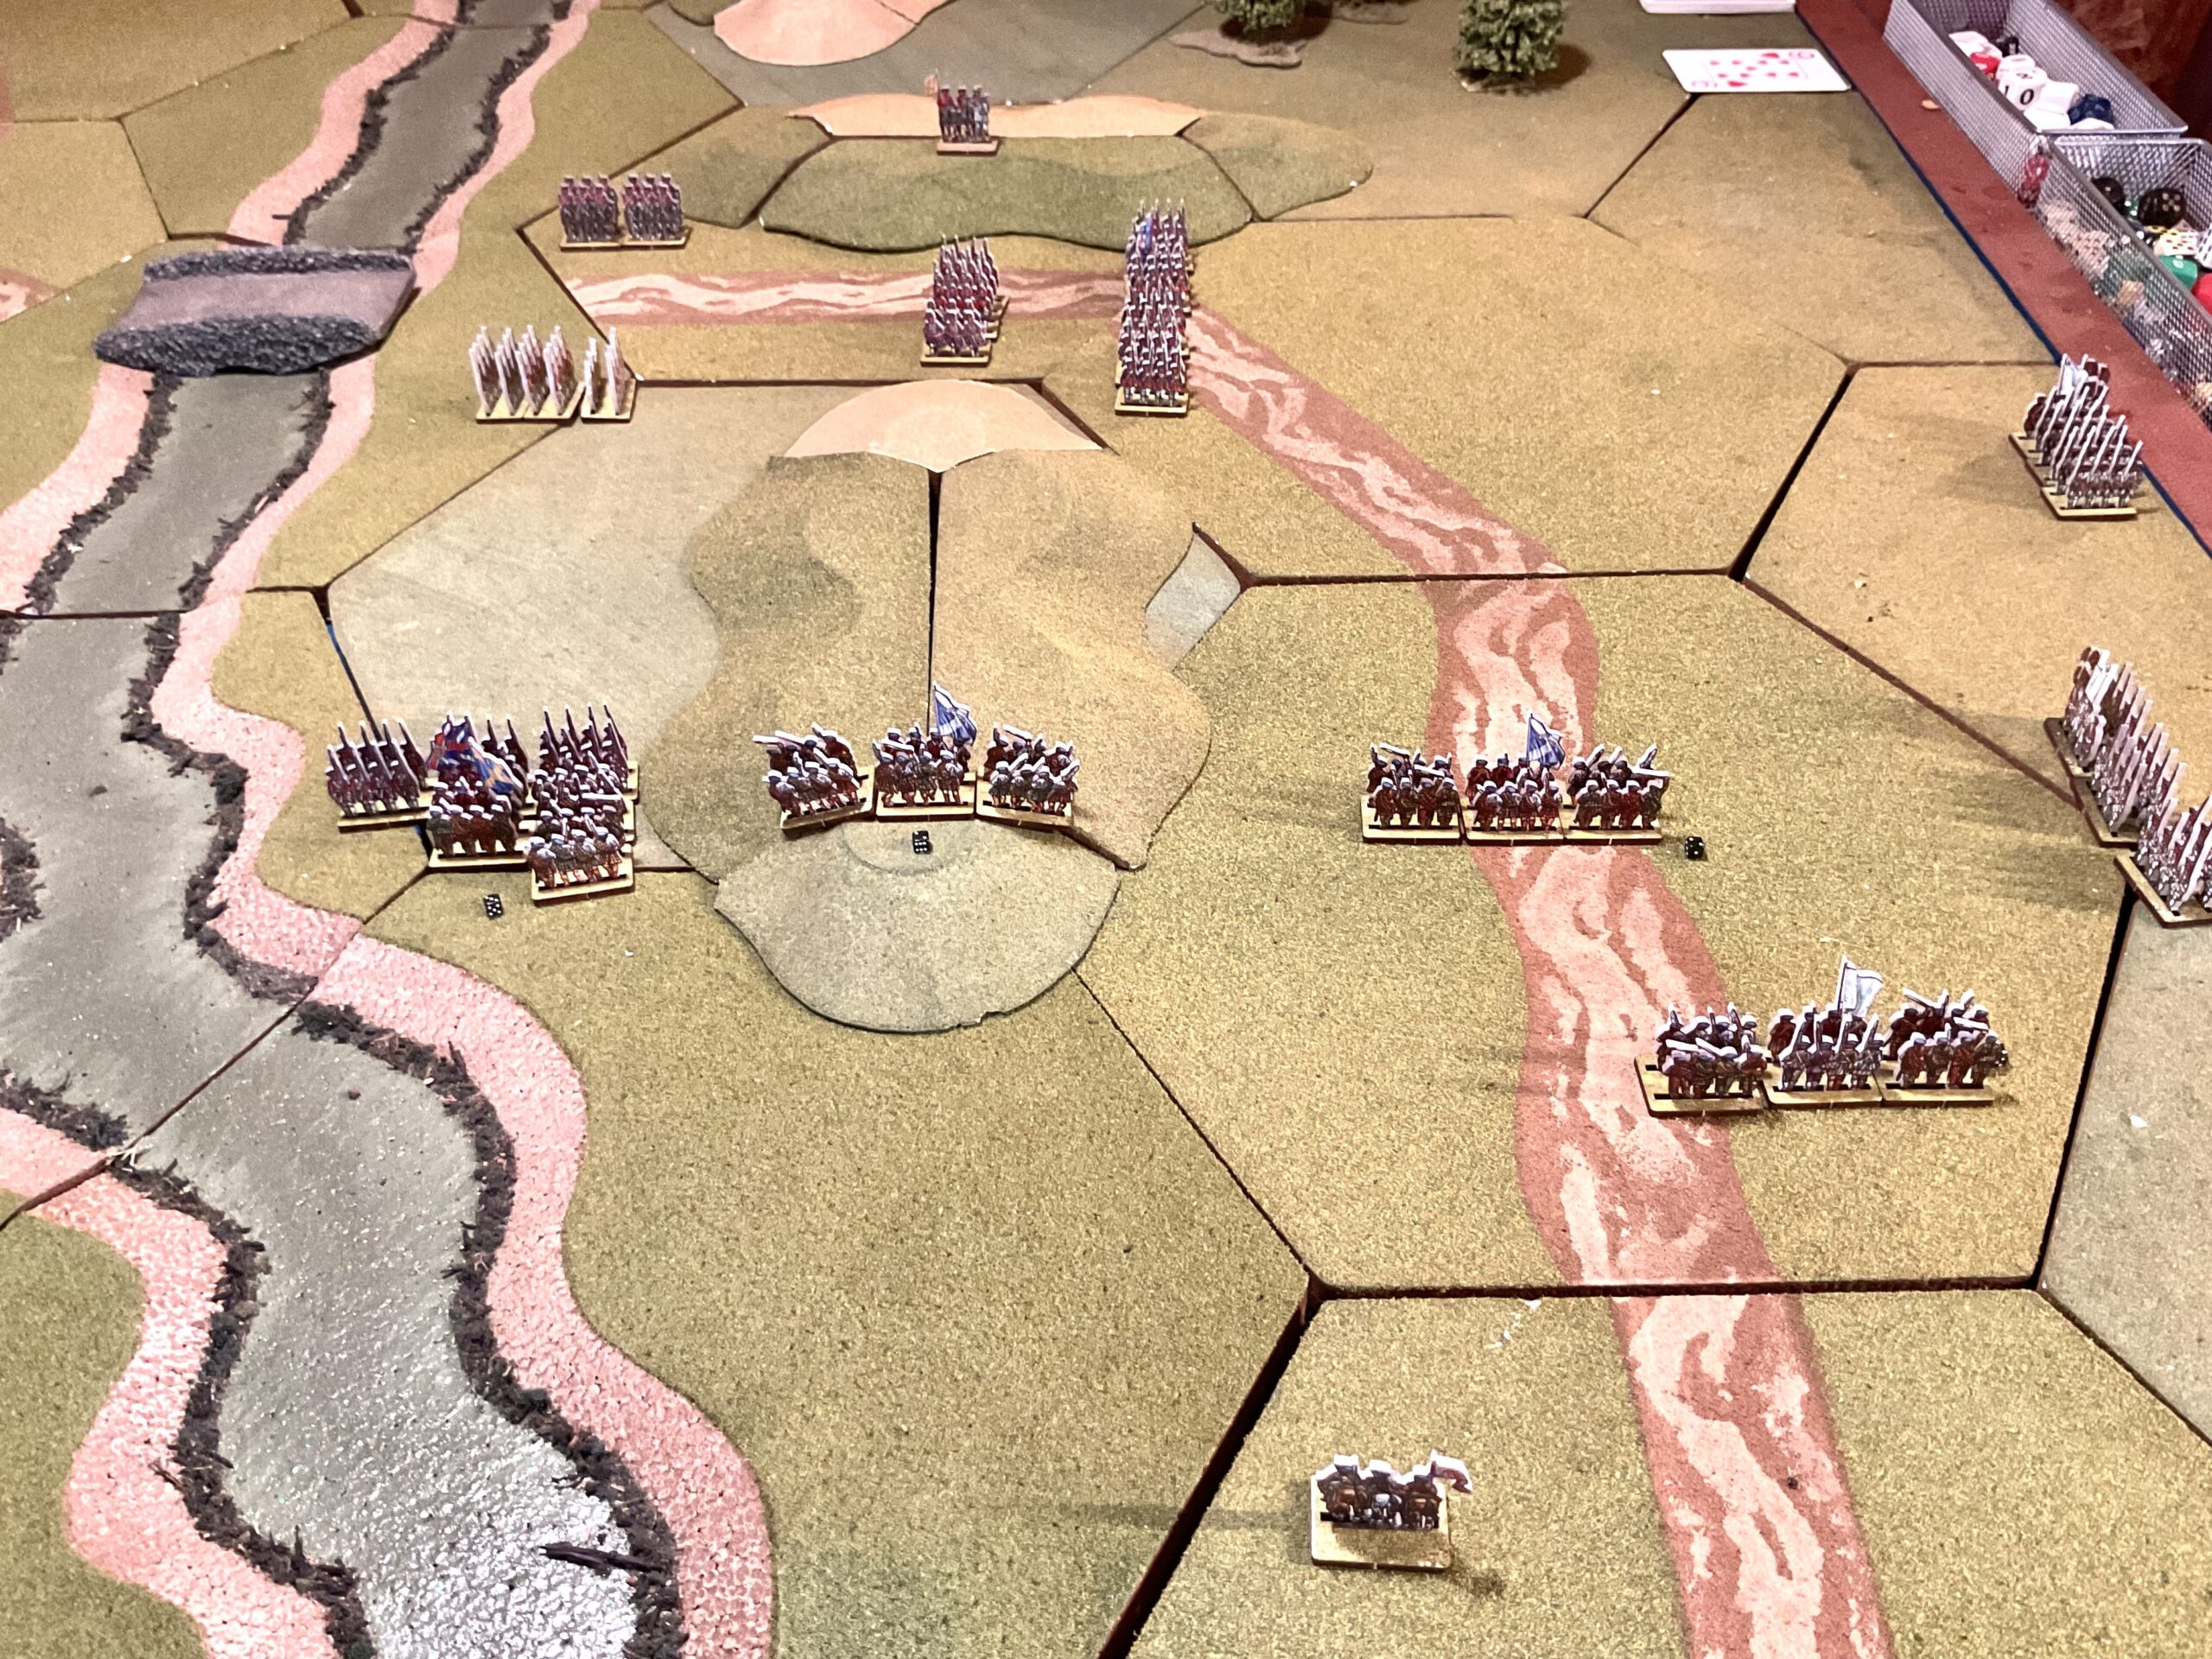
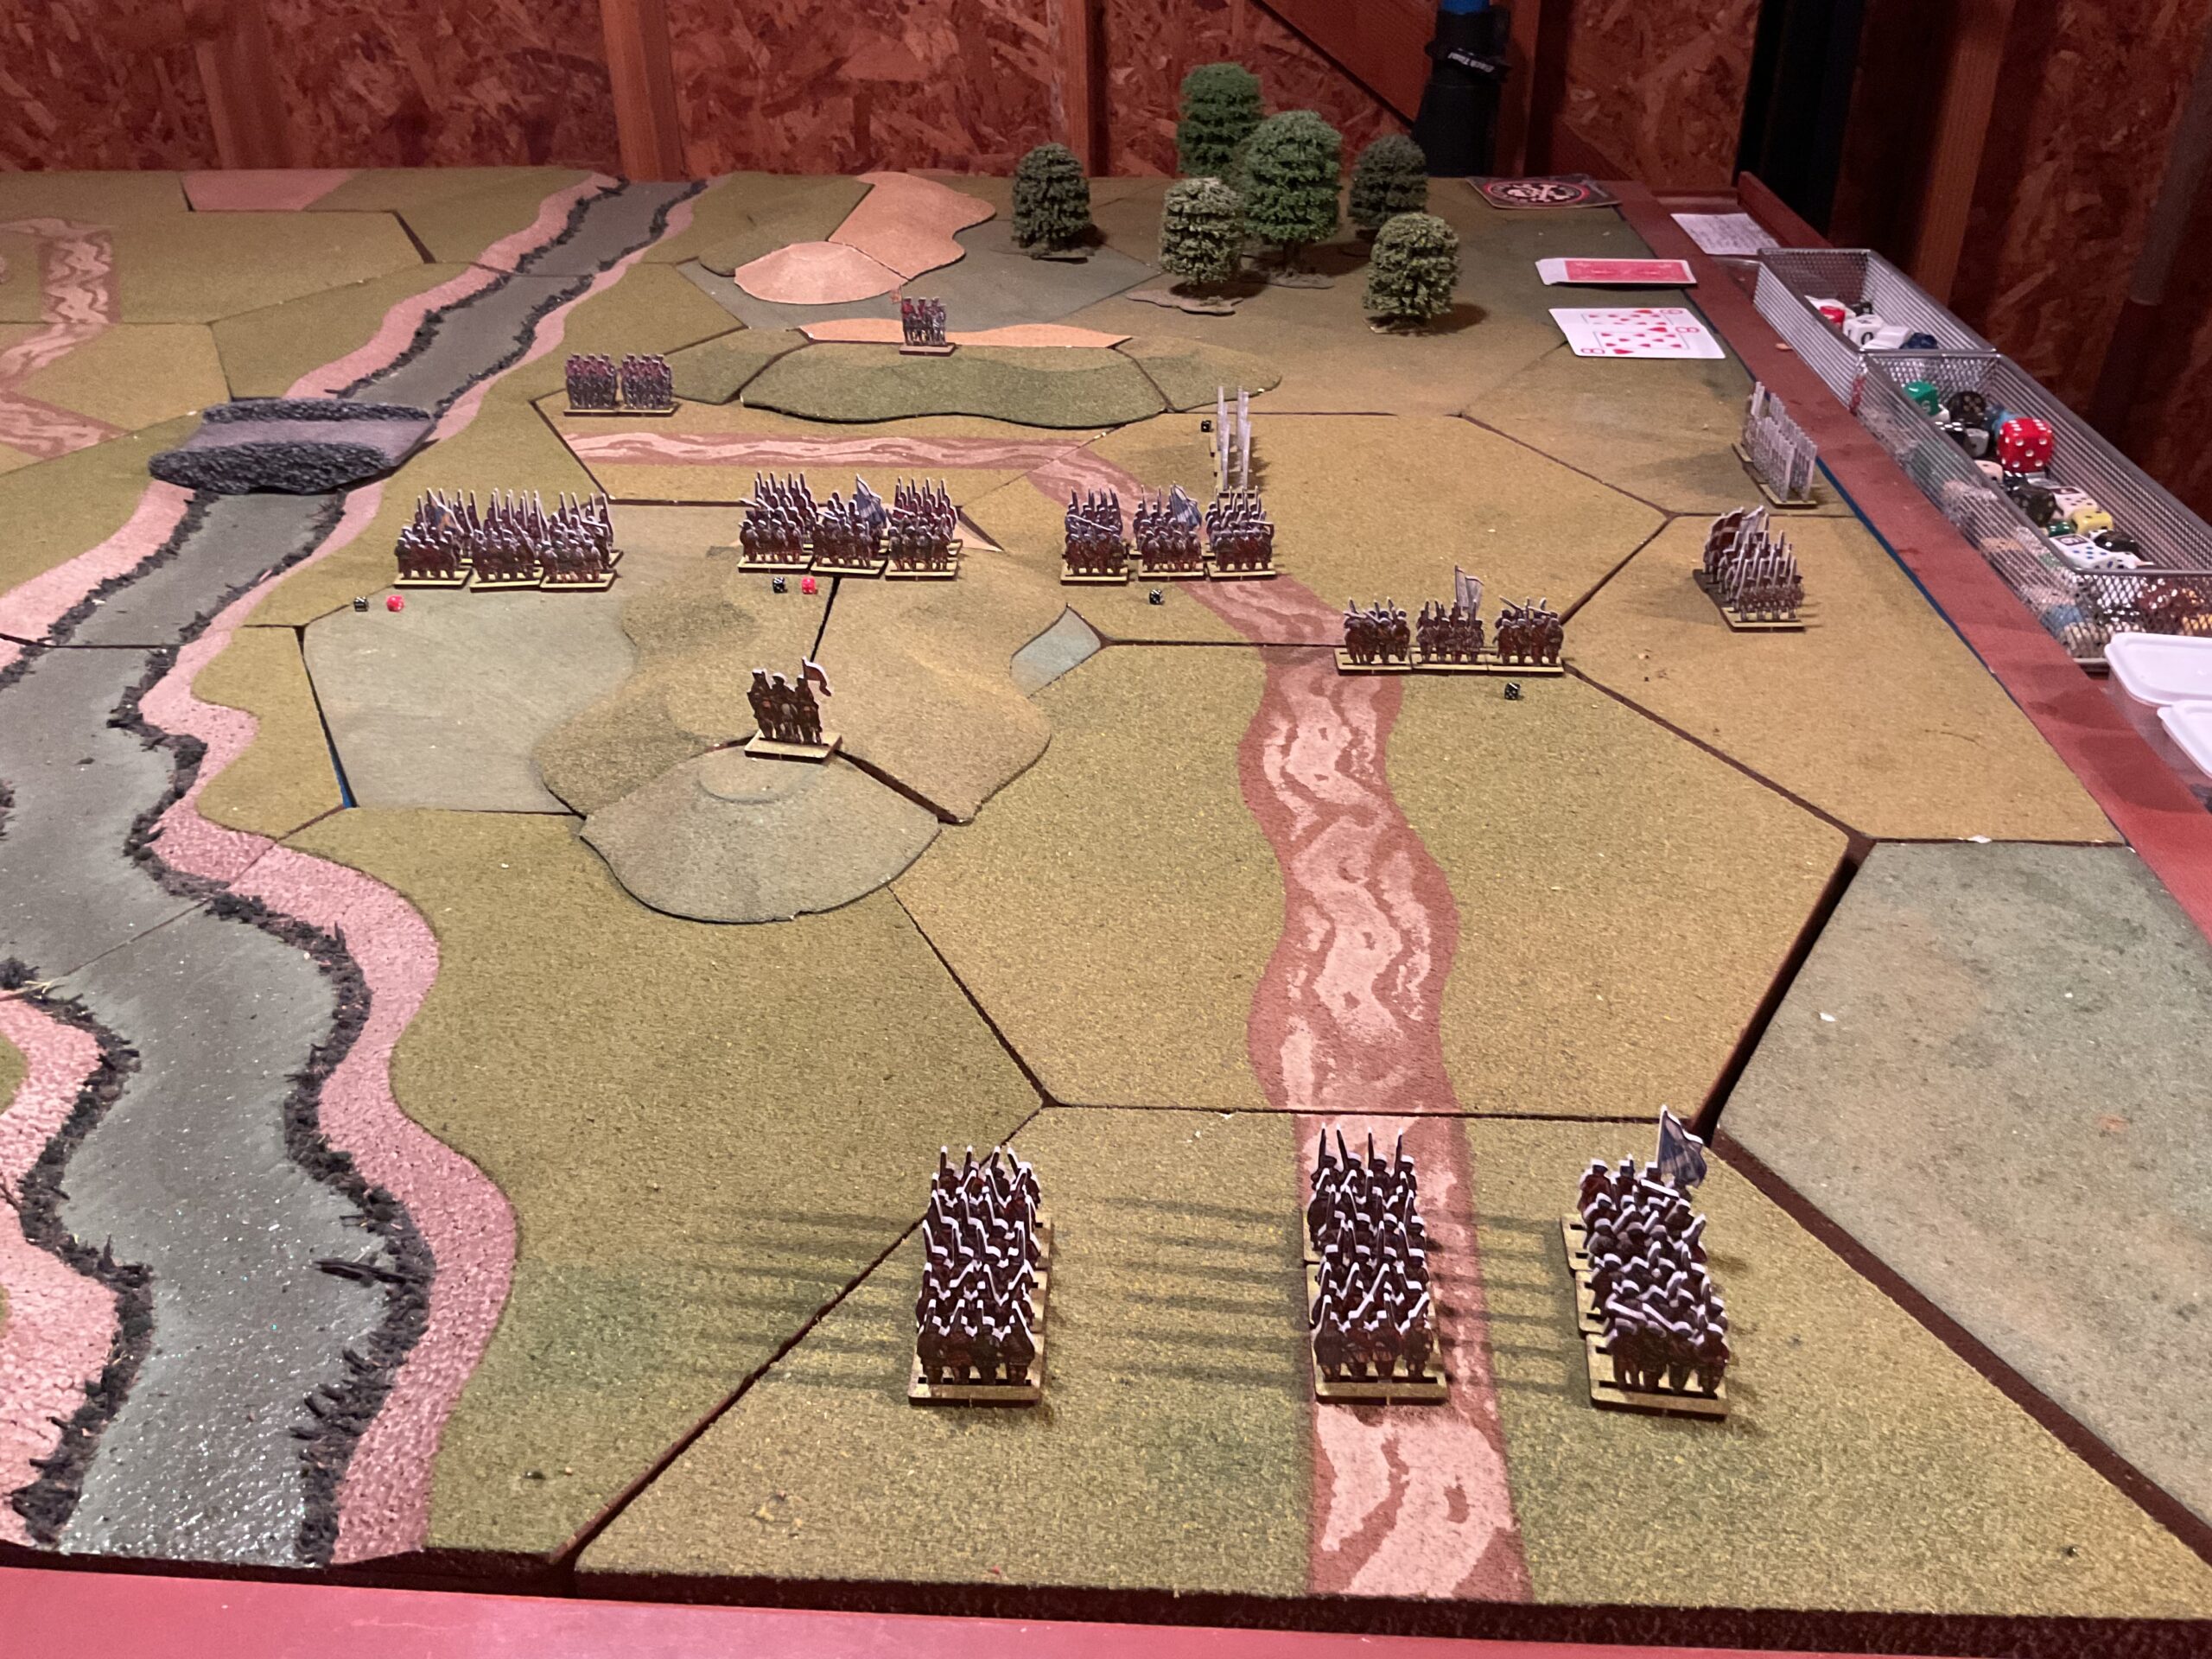
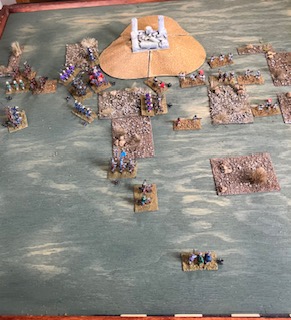
All that research and calculating…..started playing but no enthusiasm. Here’s photo of a portion of the battlefield, with the French menacing the Spanish in mixed order. I really dislike overhead lights.
I can understand why the game never caught on. Movement of the cardboard bits is annoying. You can at least grab miniature bases. So many charts. Petty, but I’d rather play Kriegspiel.
I’ve always wondered how much of this hobby is the preparation, and how much is the actual playing? In this case, about 99.9 percent of the former.
Time wasted? No. I revisited what I did (kinda) know about Napoleonic tactics, and learned some more. And, was exposed to new information. I enjoyed that.
All of it is put away. When tax season ends, and if I summon up the wherewithal, the whole lot will go on the market. It fits in a compact box, easy to ship.
Couldn’t resist the rogue synapse that compels me to pull out my System 7 Napoleonics components.
I had a partial jolt back in 2023, with my last full synaptic jolt several years ago.
It was as though time had stood still. Still thrashing on scale and unit rosters.
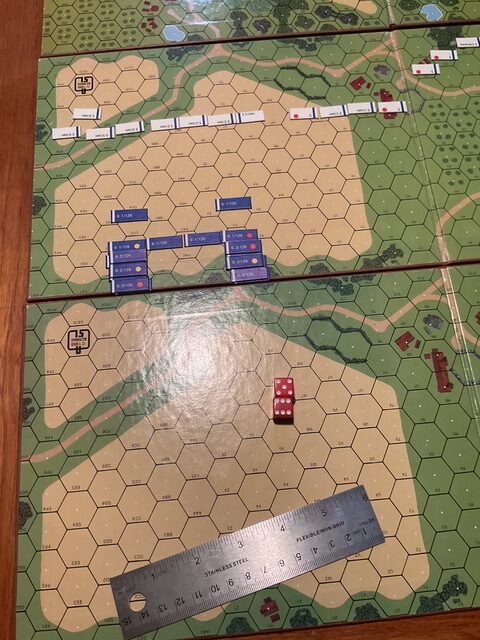
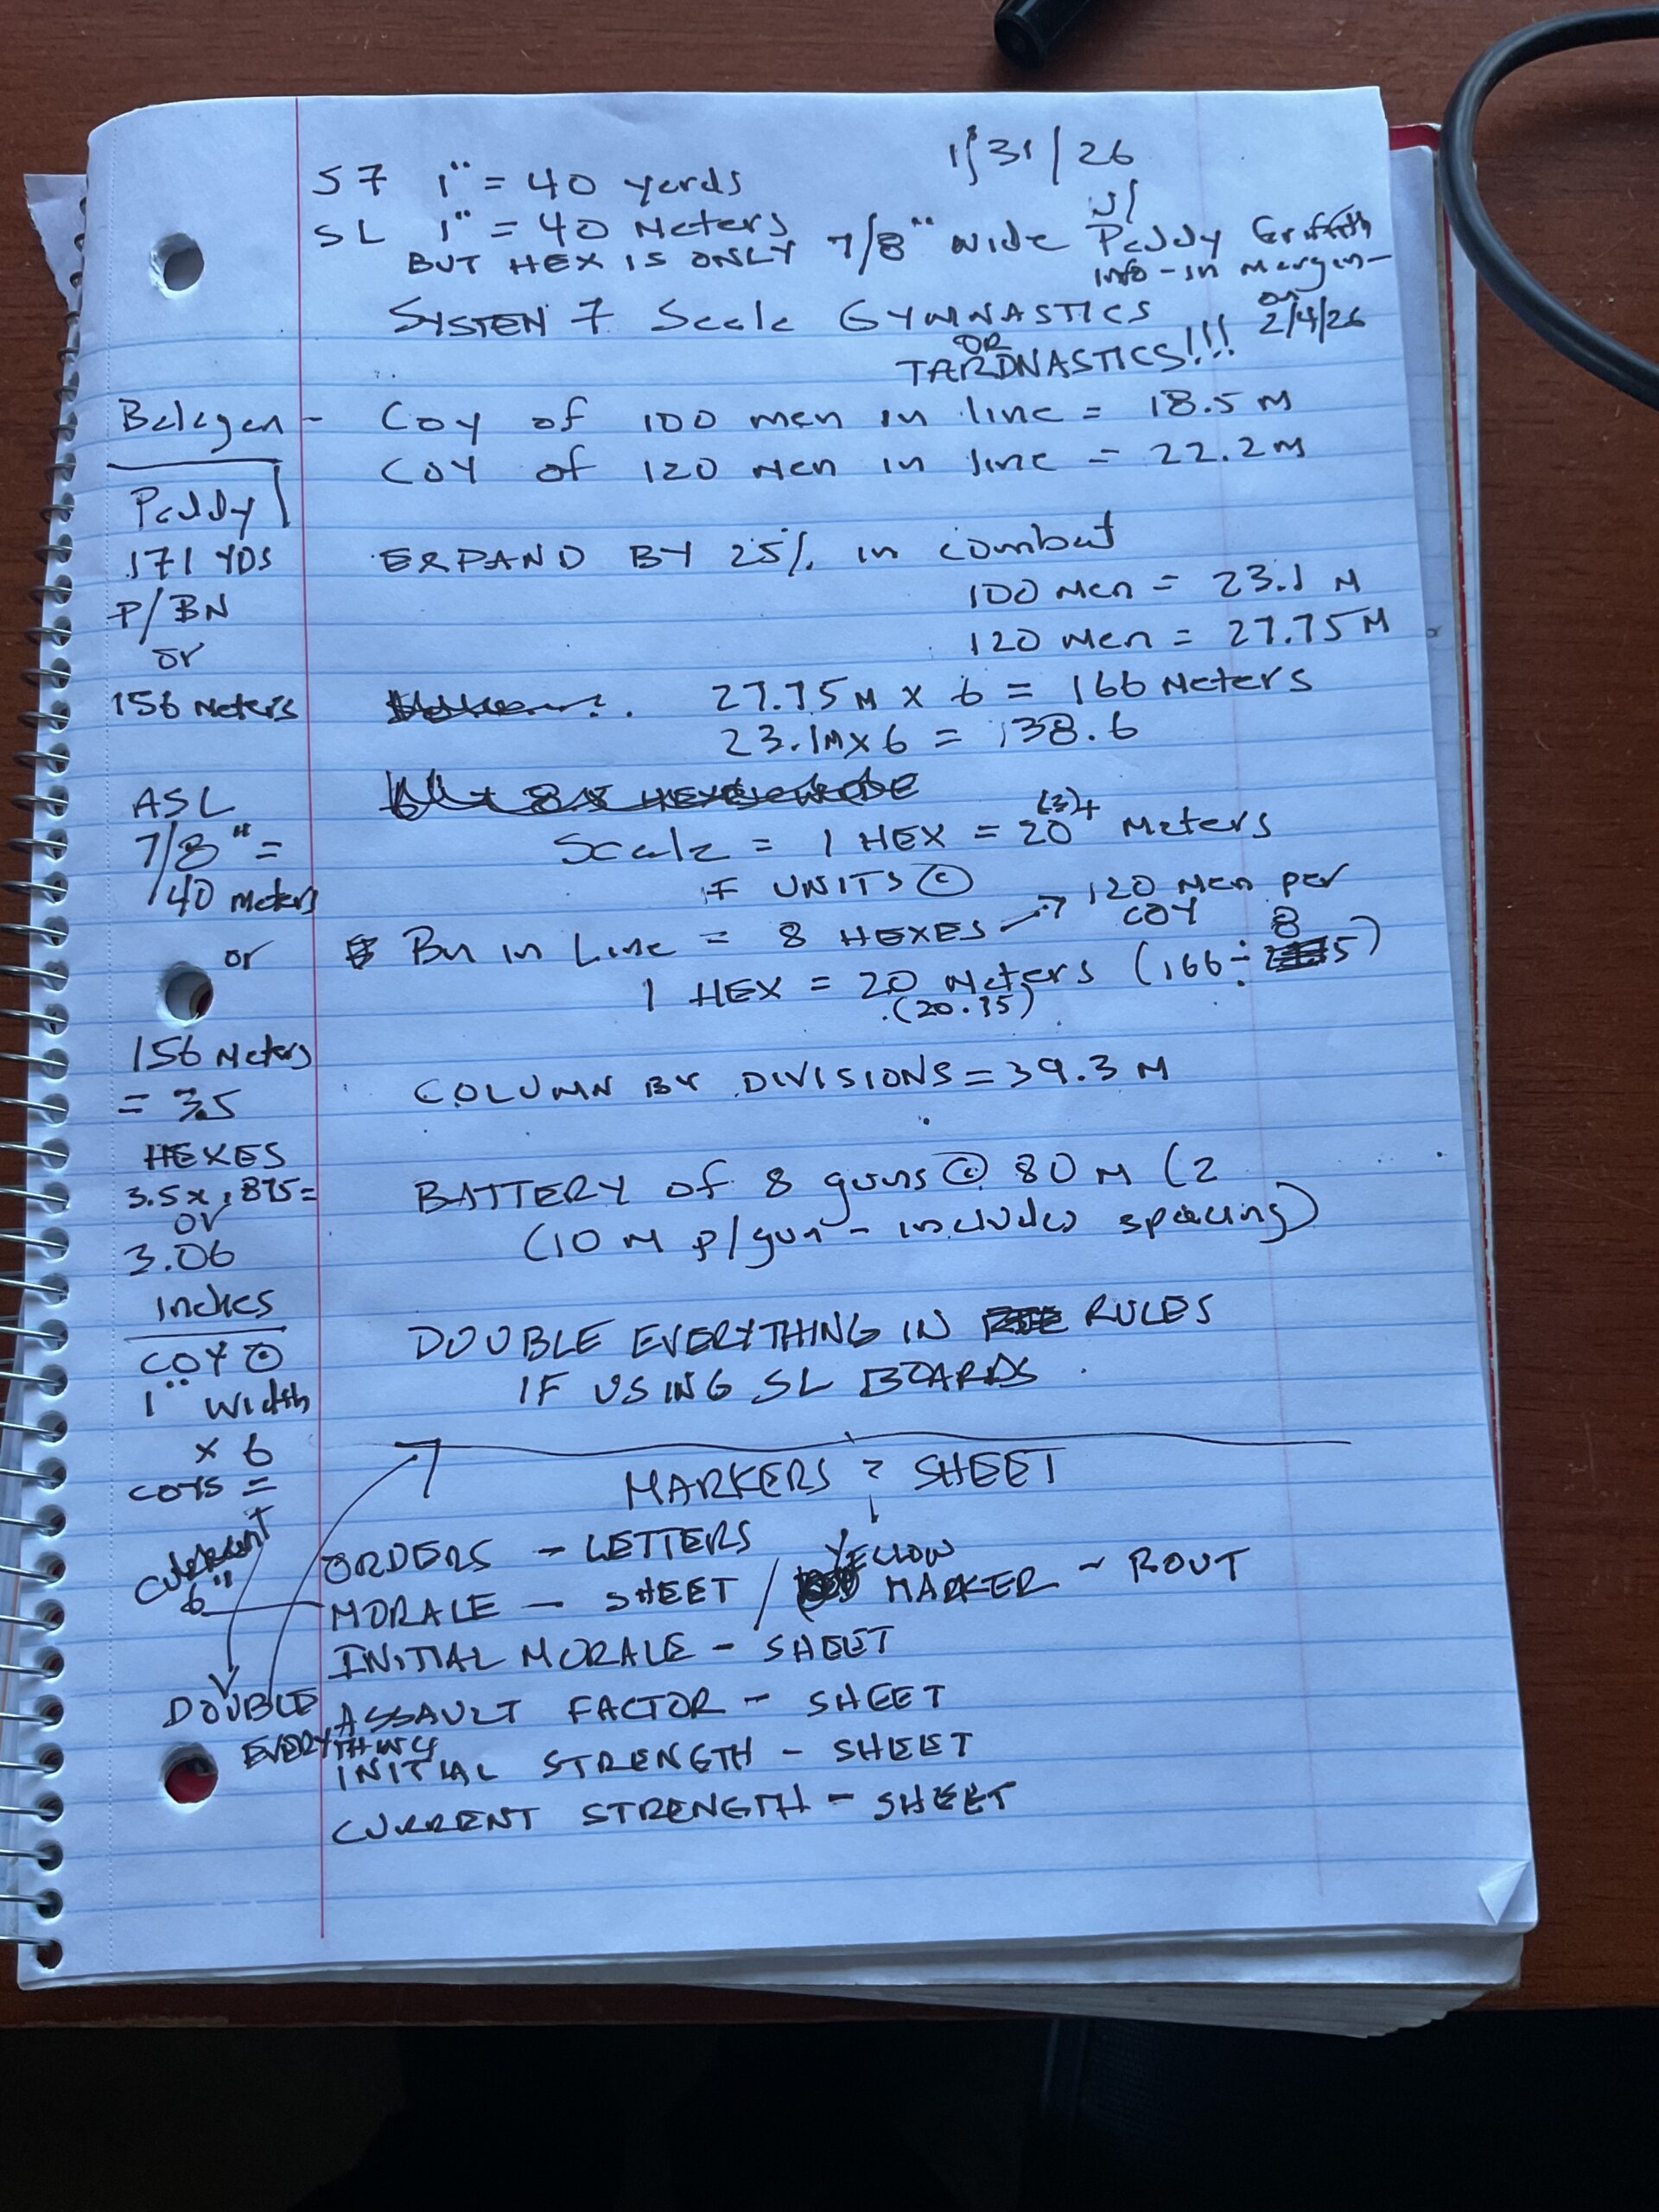
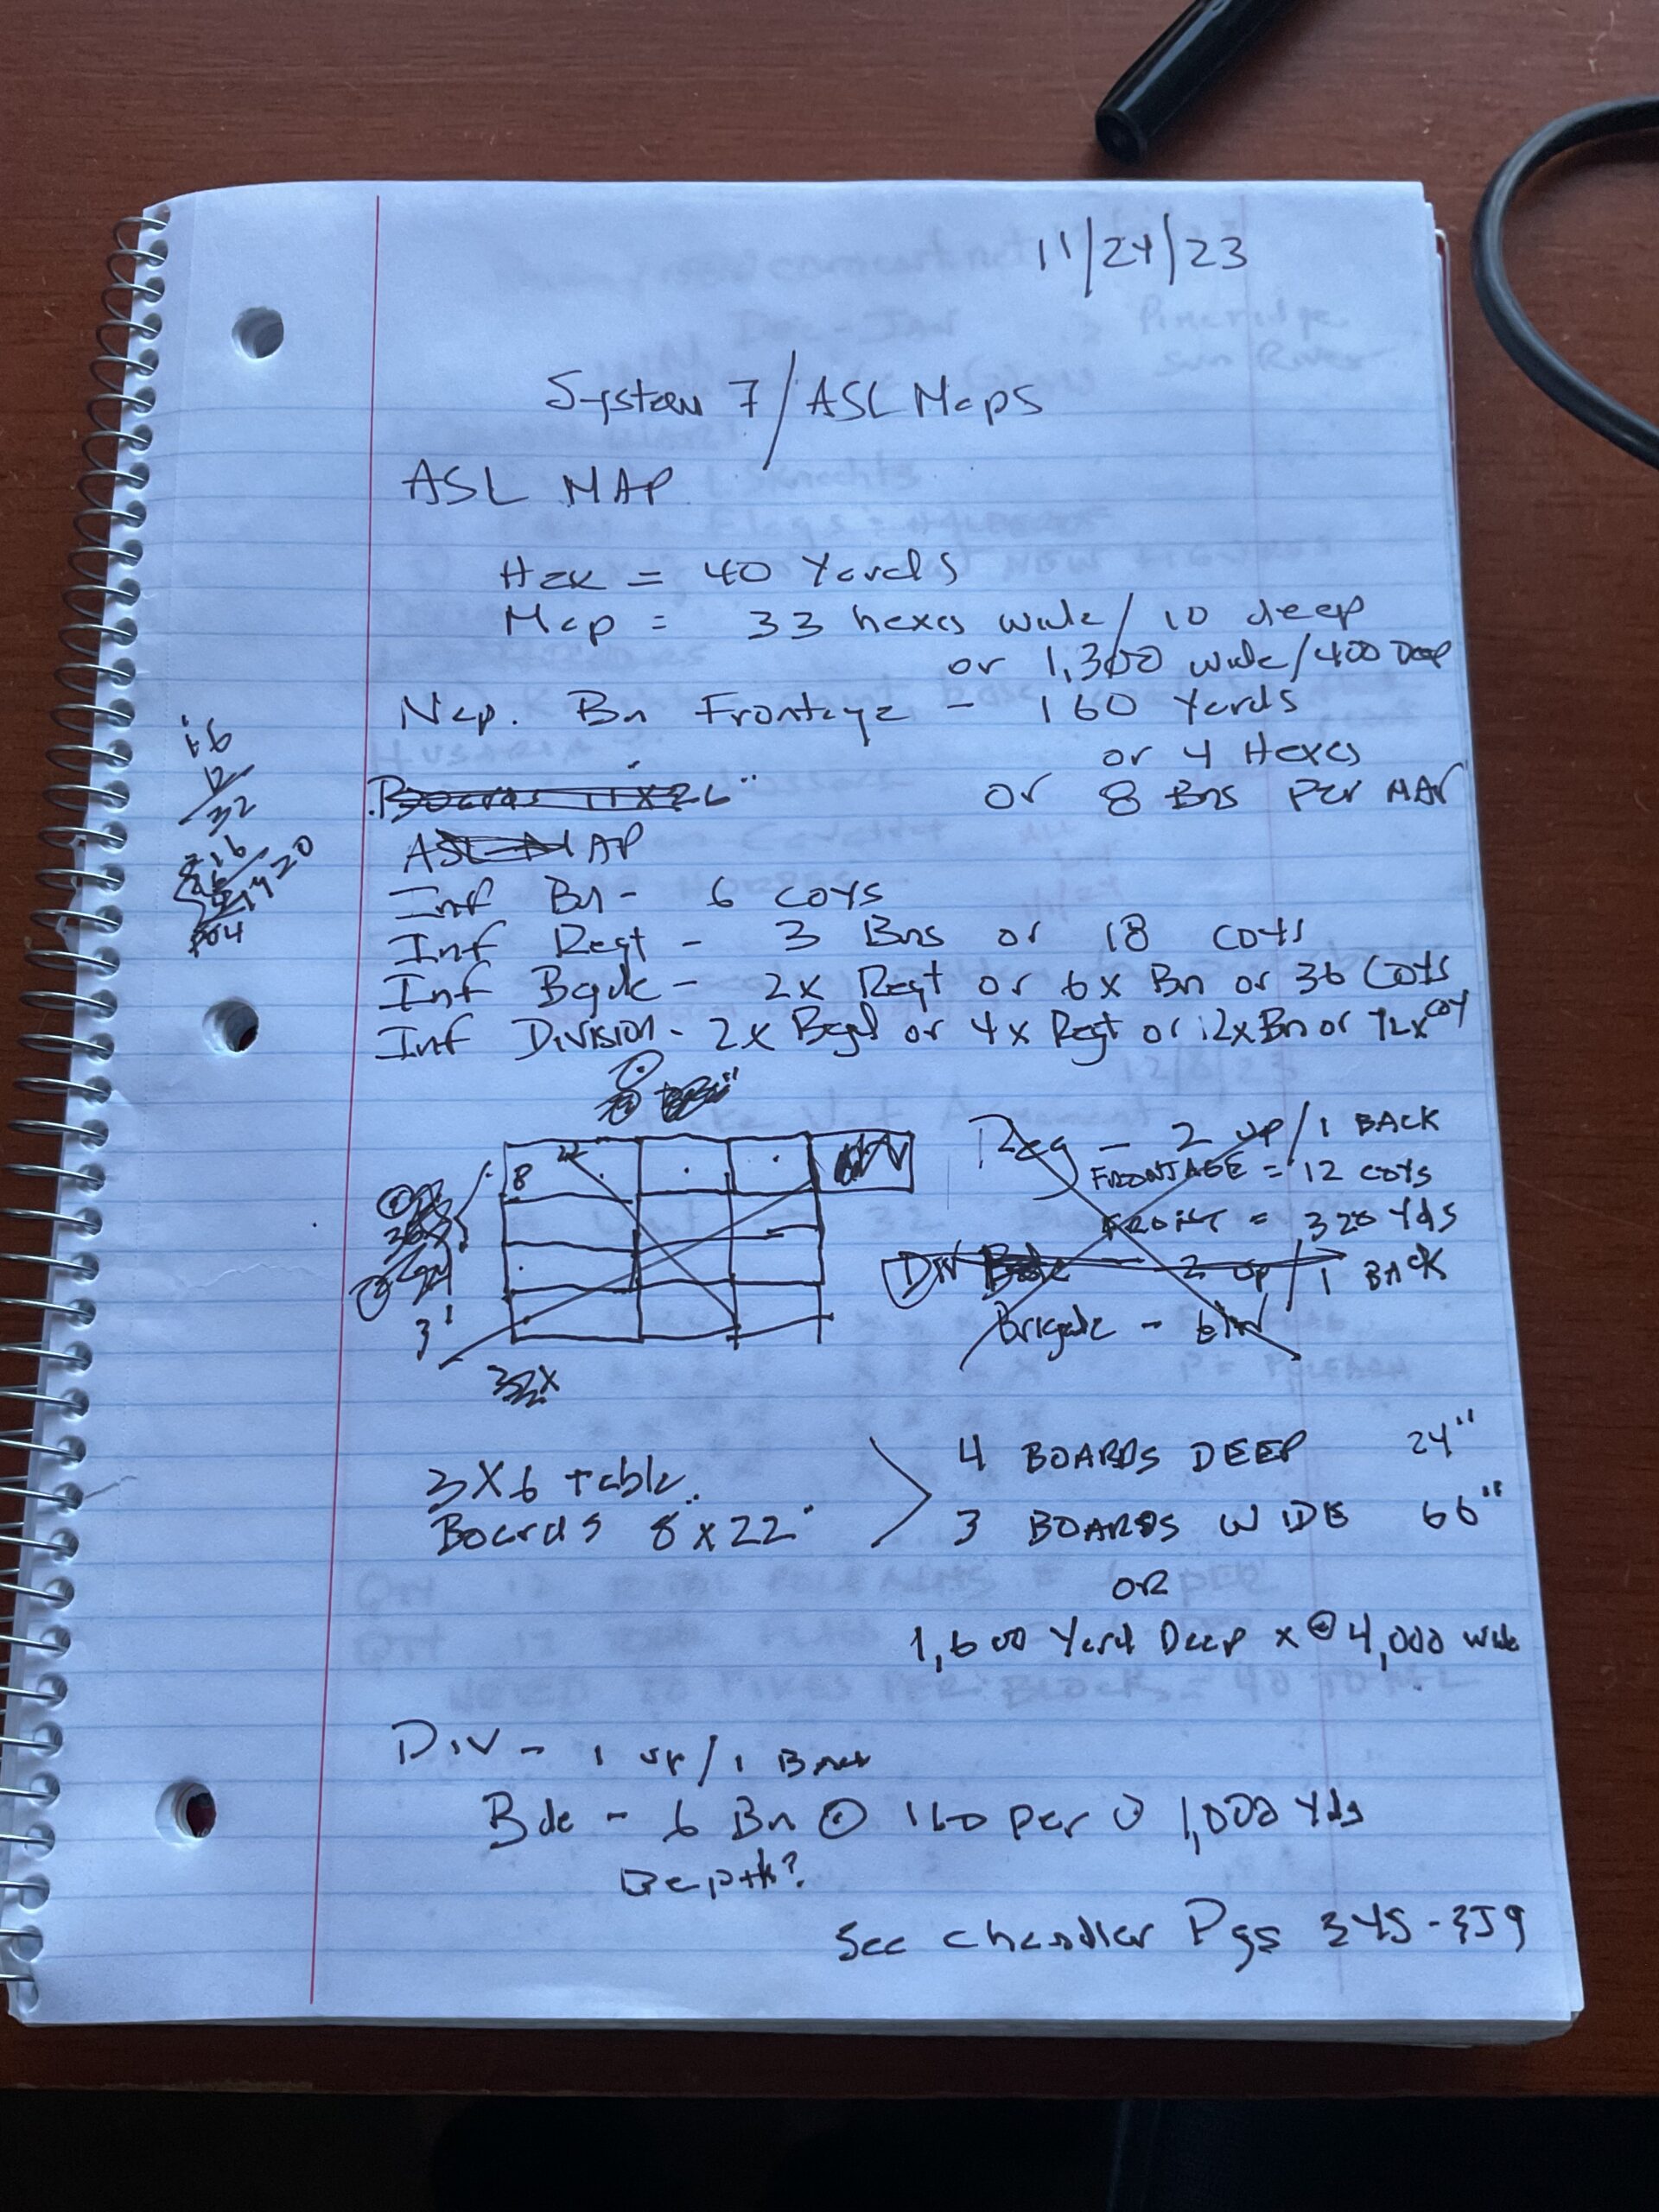
Here’s how I operate. Not pretty.
Finally figured it out, with the help of Balagan and Griffith. Scale using Squad Leader maps is approximately 2:1, so movement and firing ranges are doubled from rules as written.
I worked out a cut and paste template for each/most unit sizes and morale ratings.
Now I can assemble a roster based on force composition. Haven’t tried it, but it might work.
As usual, the real problems are a) getting it all to the table and b) playing.
Finished up my first attempt at Valour & Fortitude (V&F). Enjoyable.
Of course, after all of the pre-game preparation, I was inconsistent (at best) in using the commander characteristics and army orders I had created, and forgot to draw Fate Cards at the beginning of each and every turn, or playing those I had drawn. Typical omissions once I get playing.
But why let all that get in the way of some fun?
The Fire and Action phases are straightforward, with a minimum of moving parts. Likewise for the Melee phase. In the Action Phase, a unit can move either in column, in line or double time (always allowed one facing change (Reform)); Rally by rolling to remove Tenacity “hits” (more on this later), or Assault.
For me, the tricky part of play was when to implement the Valour and Fortitude morale tests. However, a quick and handwritten “if this, then that” cheat sheet solved the problem.
What really intrigued me was the lack of chrome involved in failed tests. Units simply are taken off the table, with neighbors affected only when their brigade fails a Fortitude check. I’m used to a whole series of movement and impact gyrations for neighboring units when a rout occurs. This is a welcome and effective change.
Also, the (almost) universal use of a six-sided die roll of “4” as the minimum roll to score a hit on an opponent during fire and melee, as well as pass morale checks, greatly reduced chart checking.
Speaking of charts, I did put together a Terrain Effects Summary which I glued to the back of the cheat sheet included in the rules.
Along with my failure to consistently employ characteristics and cards, I also did a spotty job of documenting the entire affair. And the depictions of what I did capture are, as usual, less than stellar.
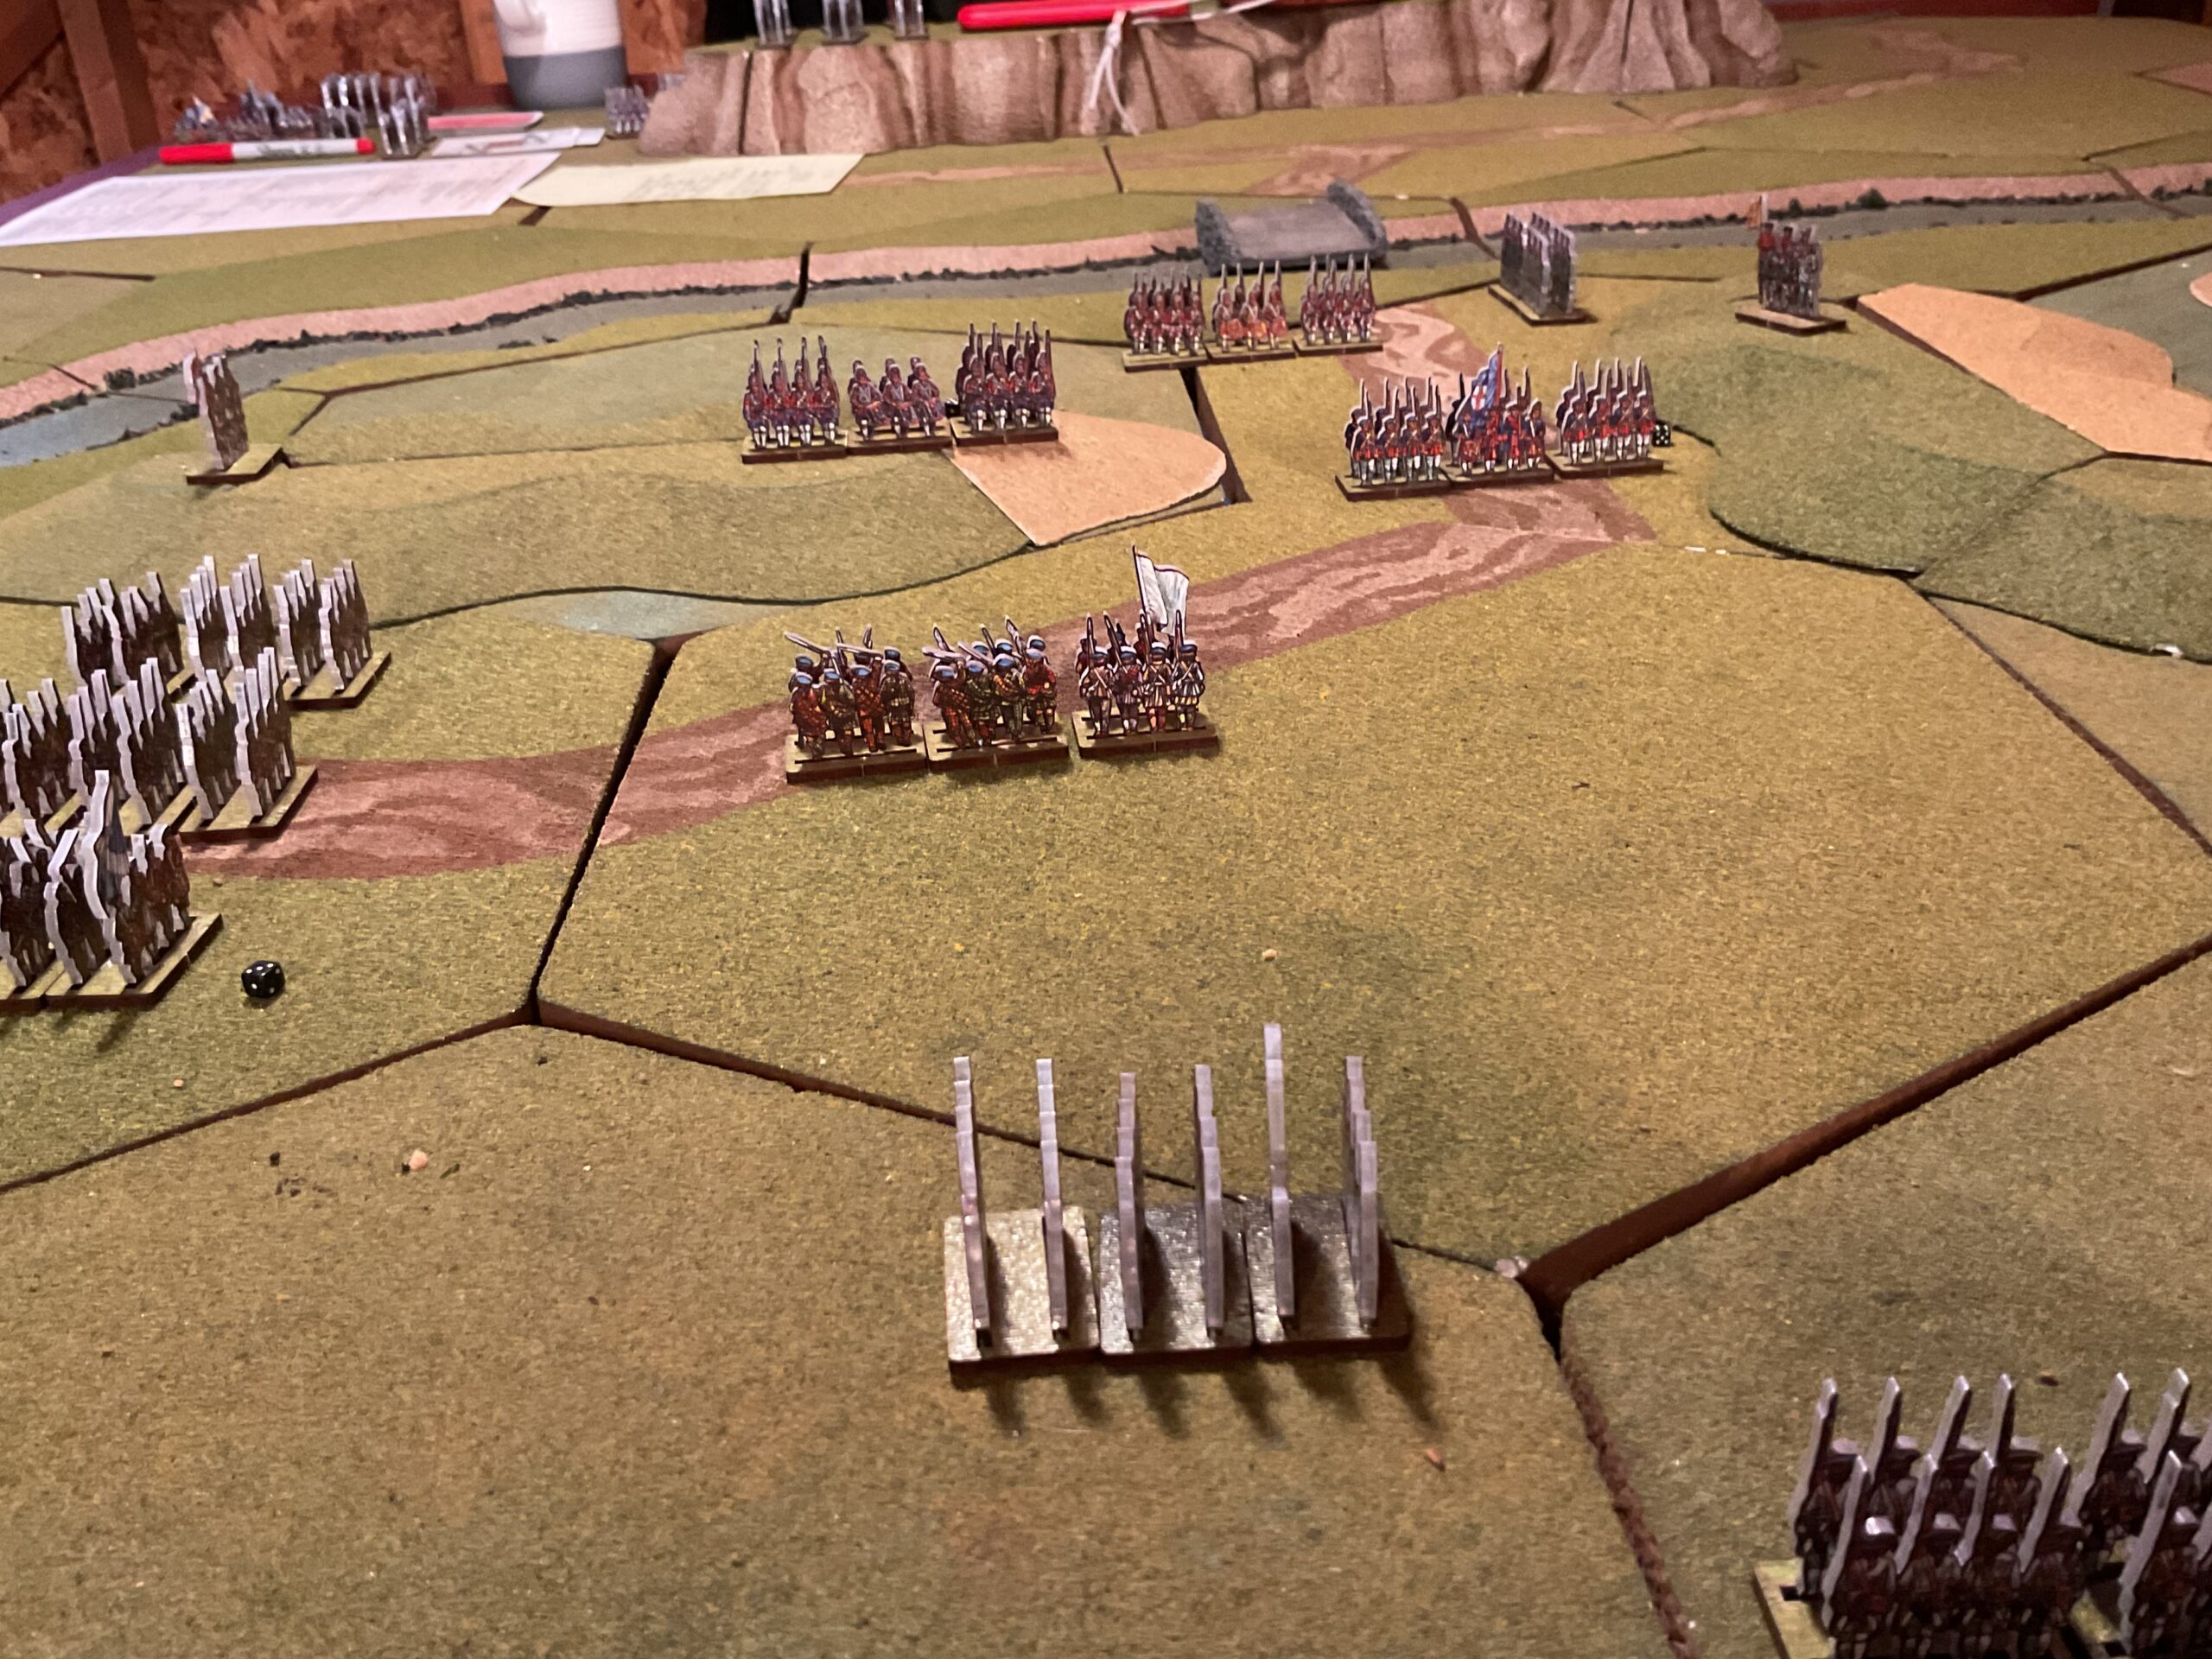
The British mission was to defend the river bridge. Their programmed plan was to position units on both intervening hills, with a reserve of grenadiers and cavalry across the river, but ready to support either the first hill’s brigade of Regulars, or second hill’s Militia defenders.
The Jacobite Highlanders assaulted the first British hill position, with a small brigade of French troops bypassing the hill, and moving to flank the second British hill position. Roughly 40 percent of the Jacobites were held in reserve (as dictated by the programmed scenario).
The Highlanders “went right at ’em”, using their high melee ratings to clear the British position. However, they suffered significant losses and were close to Shaken status.
Jacobites Capture First Hill
A quick (well , maybe not so quick) rules note…..each unit has a Fire, Melee and Tenacity ratings. Tenacity reflects their ability to take casualties. When a unit’s casualties equals their Tenacity rating, they become Shaken. Any casualty taken by a Shaken unit exceeding their Tenacity rating prompts a Valour Test (one for each casualty above their rating), with an immediate D6 roll of 4+ required to pass each required test. If failed, the unit routs and simply goes away.
A unit rout triggers a brigade Fortitude Test at the end of the current turn phase. Again, a D6 roll of 4+ is required to pass. If failed, any Shaken units in the brigade rout, and any Brigade unit within 6 inches of an enemy takes one loss. The brigade also suffers a defeat (defeats are used to determine winners/losers, with terrain objectives designated at the beginning of the game also considered defeats if lost).
One additional melee note. A unit that wins a melee (suffers fewer losses than the opponent) does not have to take a Valour Test. On hills, the up-hill side wins ties.
And…yet another note. Reducing Tenacity hits is an iffy business. A D6 roll of “6” is required to remove one. Hard to do – at least in this battle.
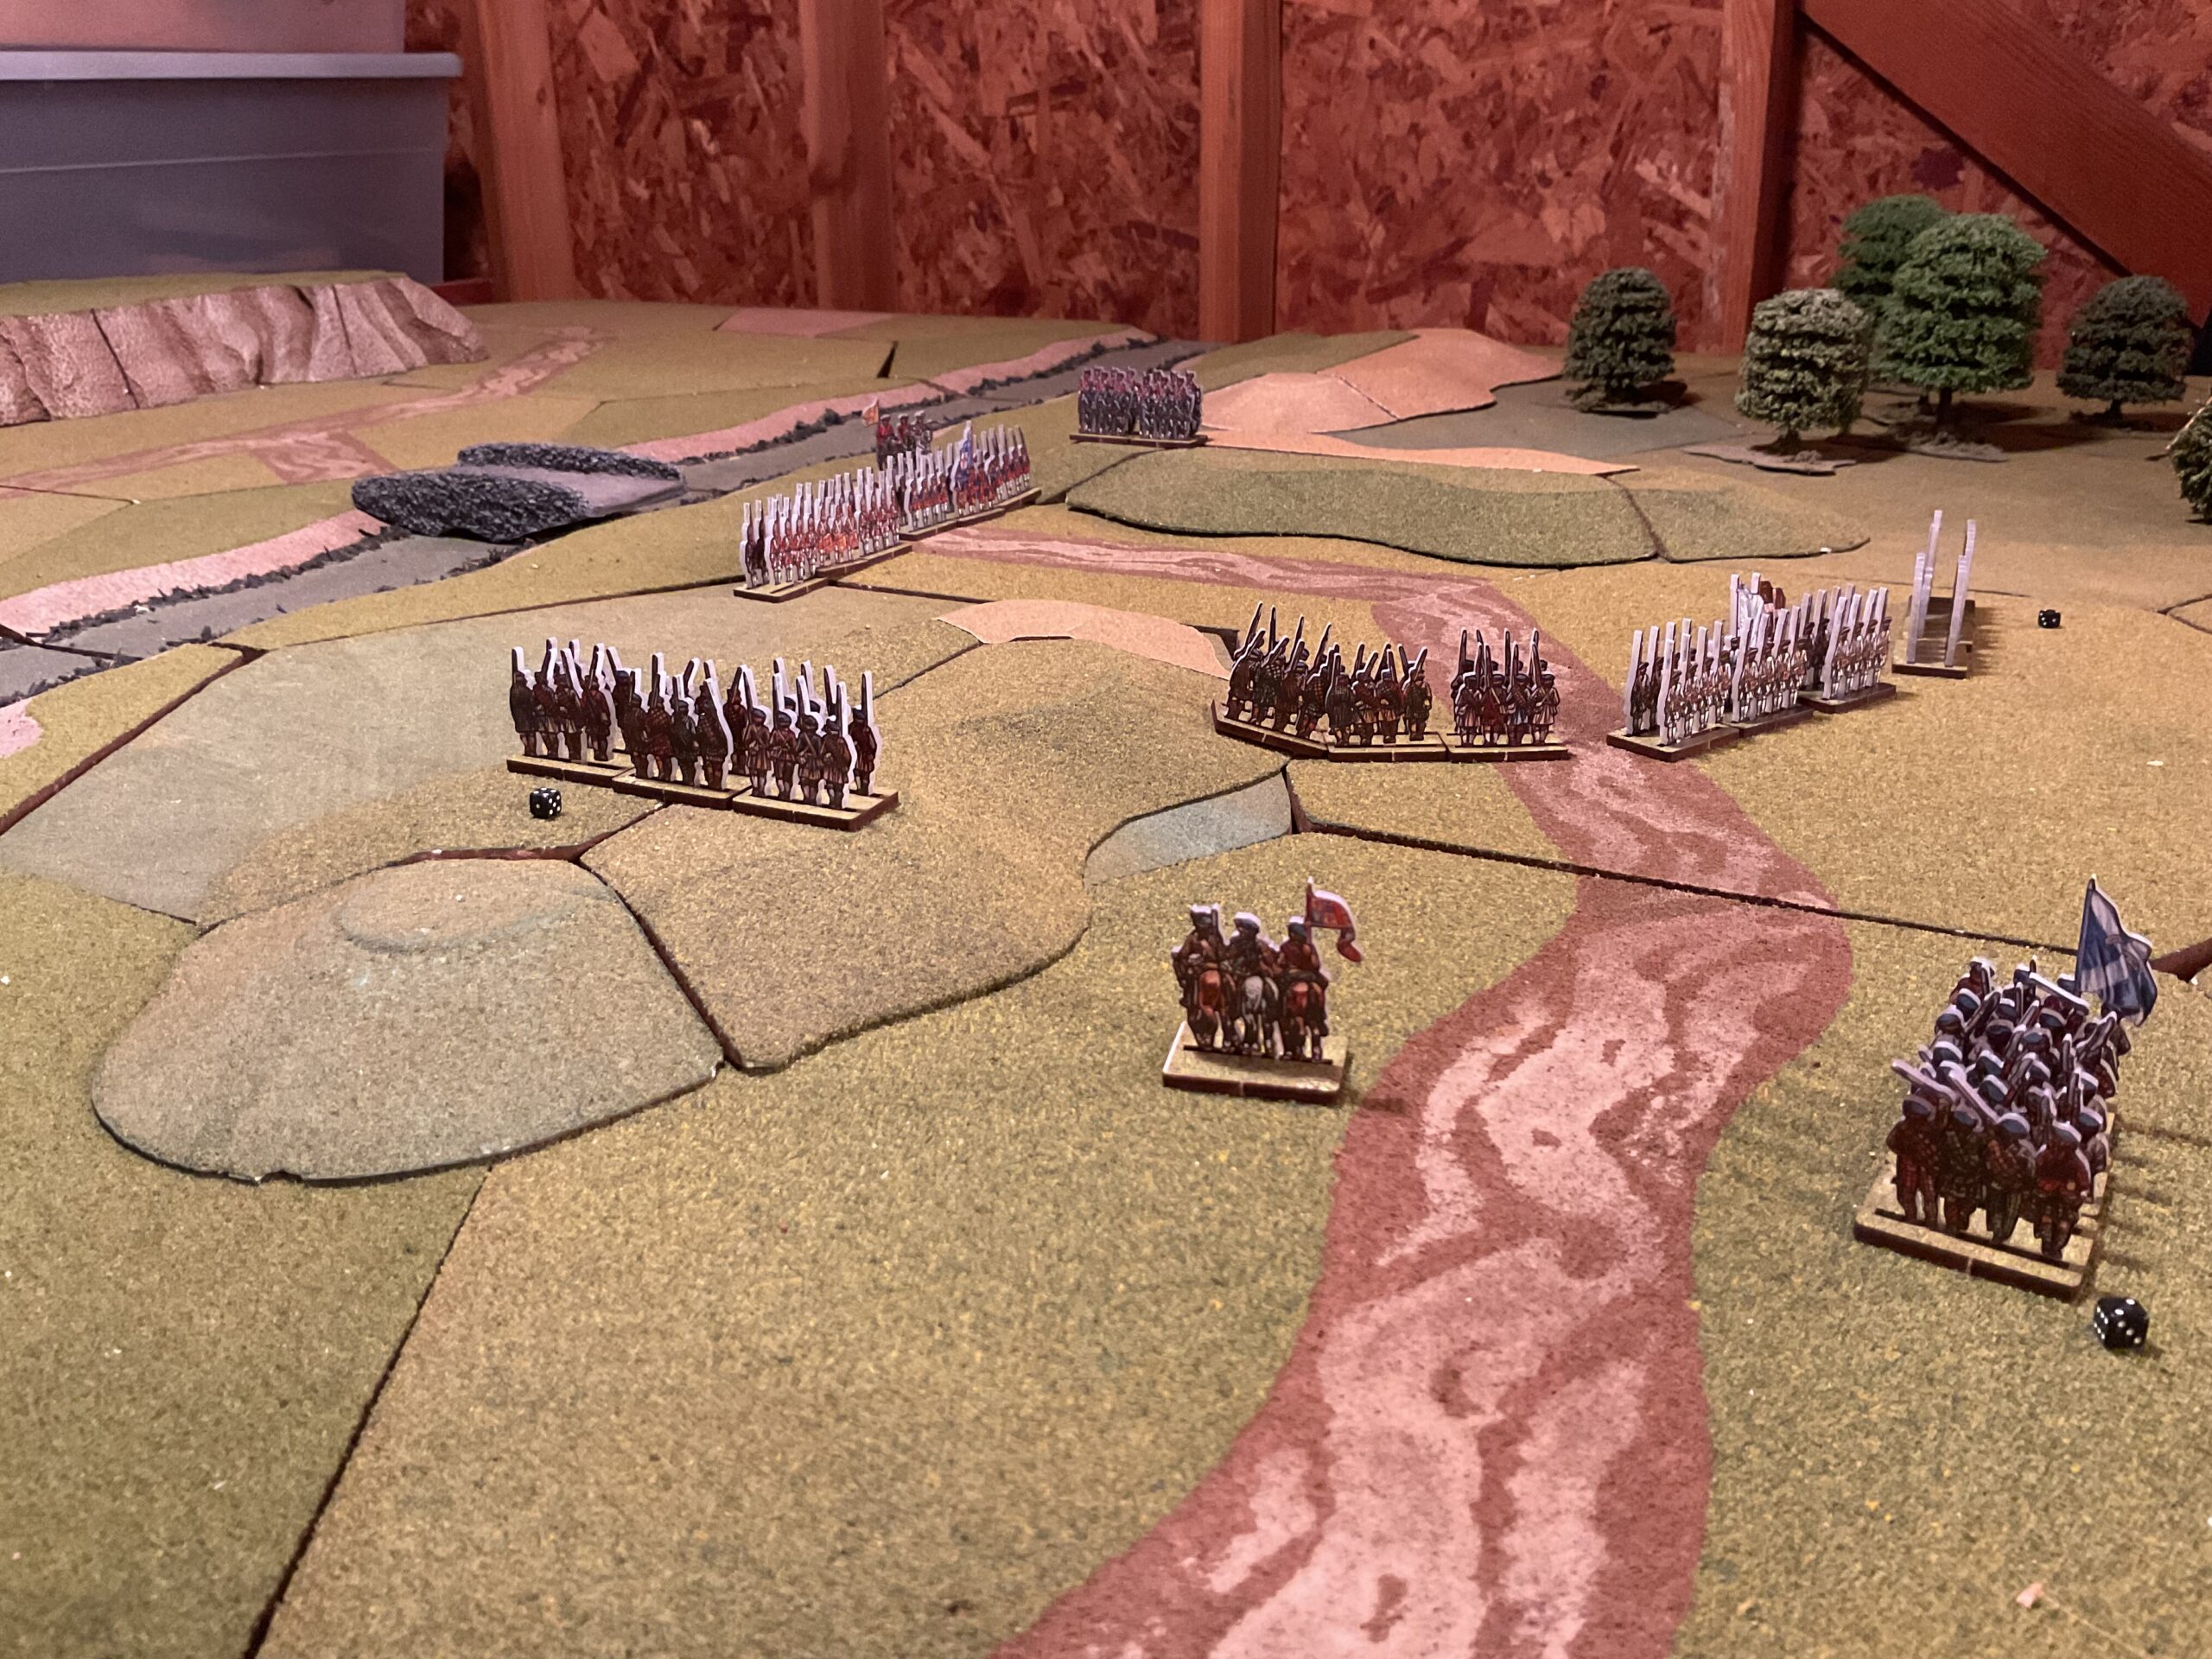
The British response was to deploy the Grenadier brigade to stop the Highlanders and to order the Militia off their hill position to stop the flanking French.
Highlanders Assault British Grenadiers As Jacobite Reserves March Forward
The Grenadiers did stop the Highlanders, but were overwhelmed by the Jacobite reserves. The Militia succumbed to French musketry.
Surviving Grenadiers And Militia Face Jacobite Reserves (L) and French (R)
At this point, the loss of the bridge position was inevitable. I would consider it a marginal Jacobite victory, as their losses were significant and it took a long time to take the bridge.
I’m going to play this one again, but put together definite Defeat parameters, which will include not only geographical positions, but turns necessary to take the bridge.
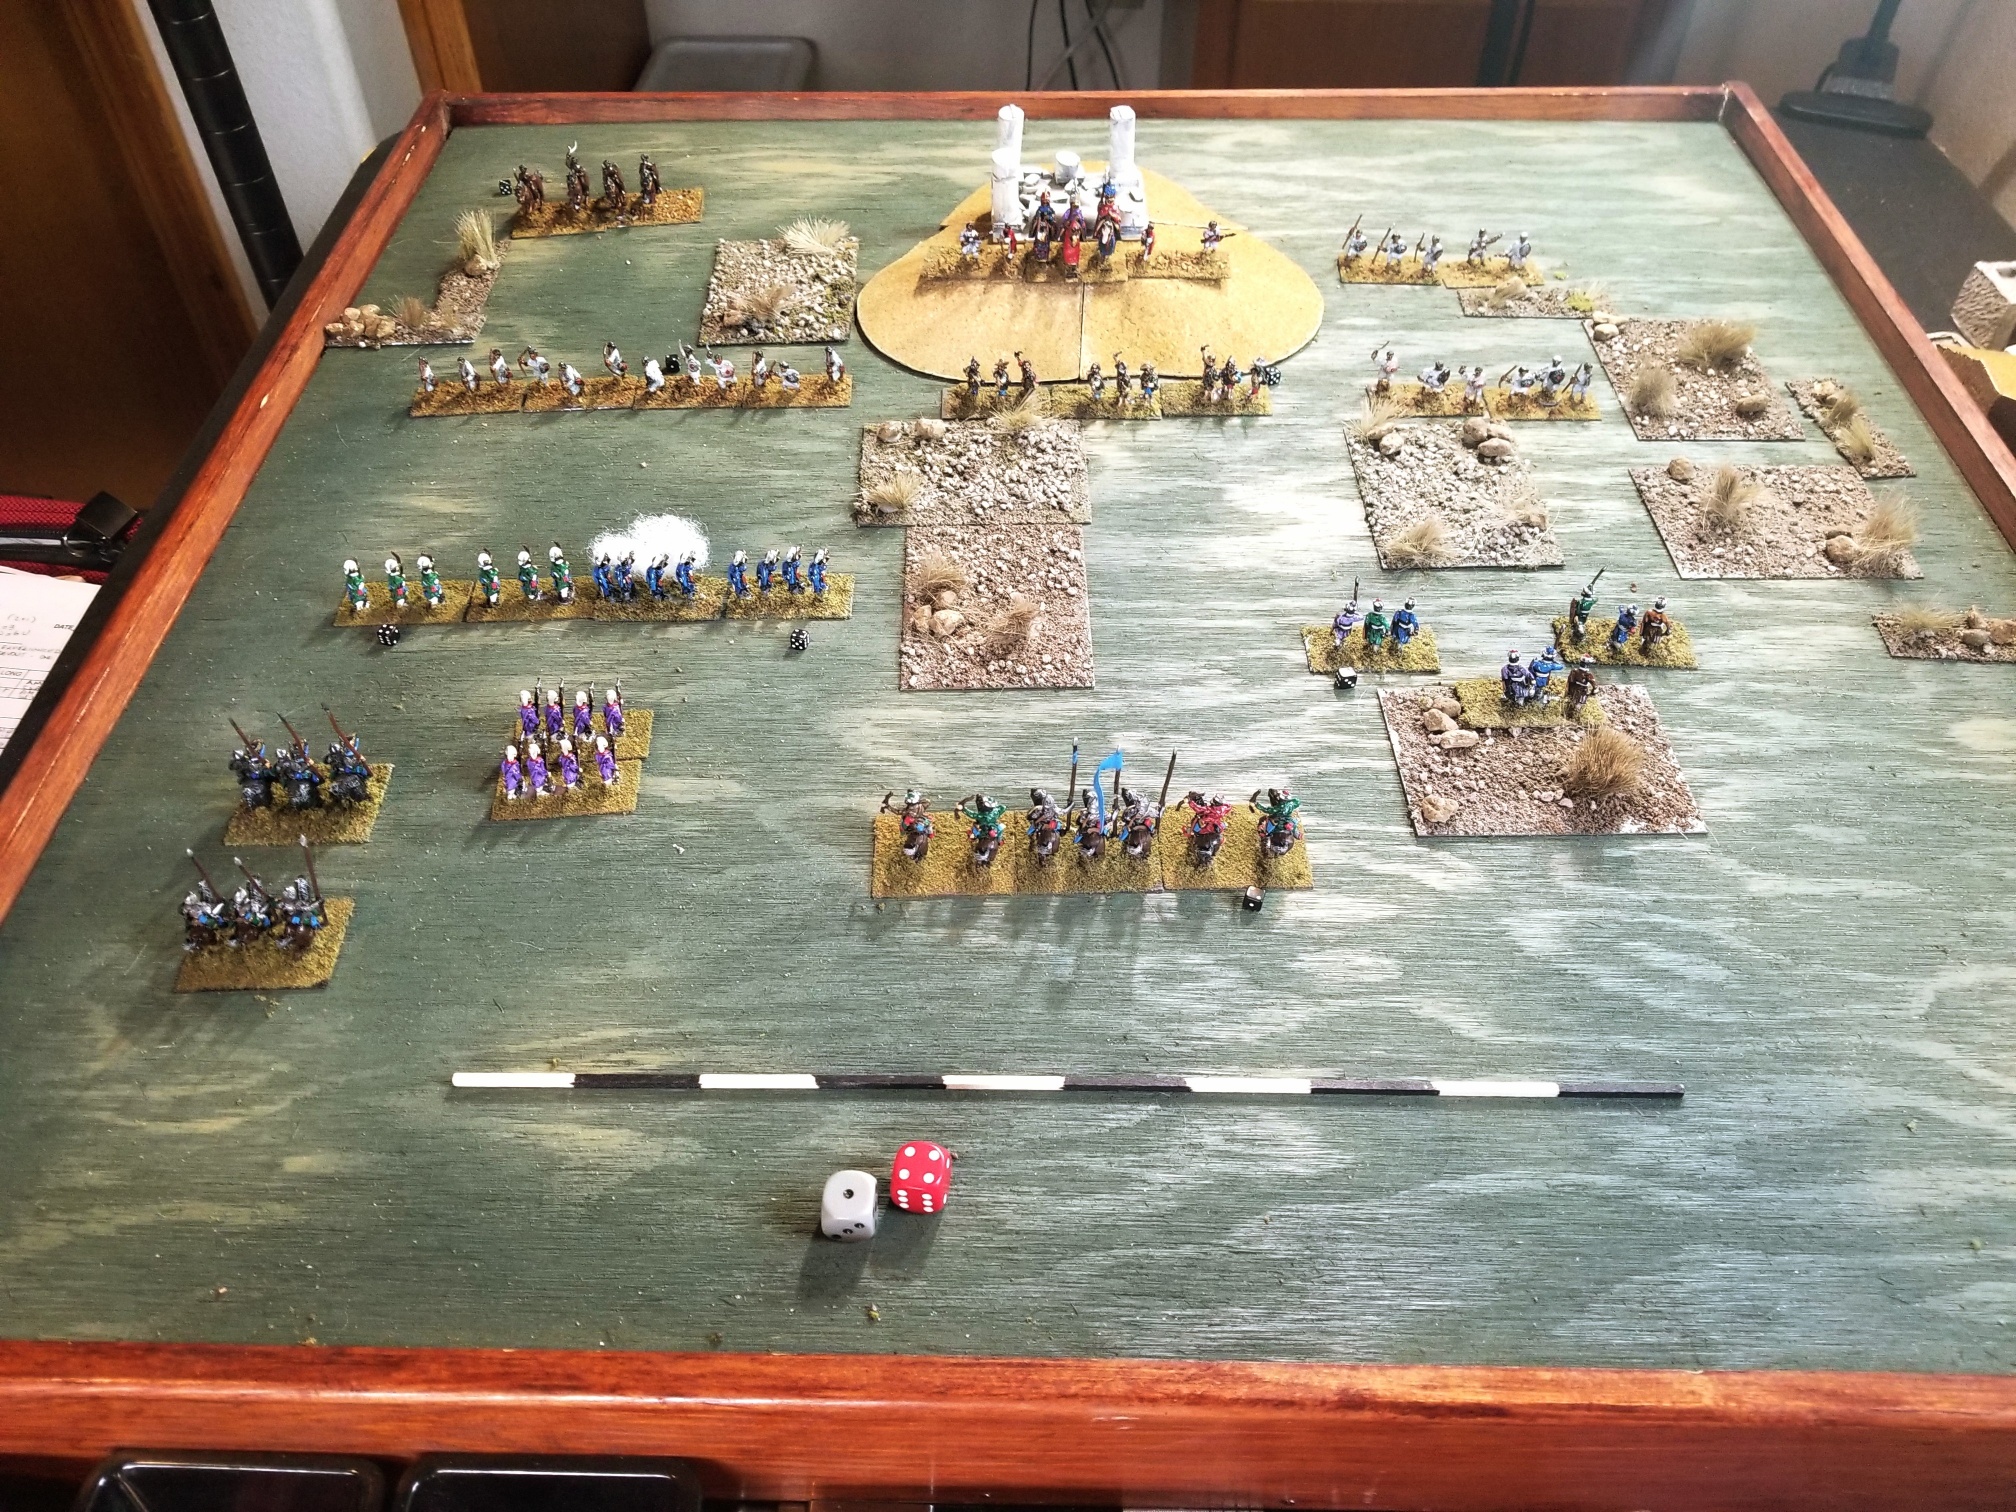
Got to it with Valour & Fortitude yesterday afternoon. First game in The Shed in a long time.
As usual, thought I was prepared, but wasn’t. Needed to put together unit ratings cheat sheet – with fire, melee and tenacity ratings, get a deck of cards for the Fate Deck, as well as retrieving my Commander Characteristics and Army Orders.
Despite these administrative chores, and following the Oregon vs USC football game on radio, I managed a couple of preliminary moves.
The unanswered question about the updated venue is how well it will heat up as temperatures continue to drop. We’ll see. I have the space heaters.
Here’s a quick shot of the table. It’s roughly 4×5 feet. Note all the boxes of terrain and gaming materials stored underneath. Decades of accumulation, with little if any purging.
Setting up a Valour & Fortitude(V&F) 1745 Jacobite Rebellion game using WorldofFun (WOF) 18mm plastic flats. Finally have the shed table (re)squared away and ready for action (photos in follow-up post).
You can read all about these rules over at the Perry Miniatures website.
I bought the figures several years ago without any specific game system in mind. V&F is all the rage, the rules are free, and they had army lists available for the rebellion. I use the past tense, as I have copies of the lists in Goodreader, but can’t find them on the net.
Why a new search? Well, I downloaded the Jacobite army sheet twice, but not the characteristics – or fate cards – sheet. Typical. I’ll cobble something together from other lists. Fortunately, only the first four characteristics on the sheet are unique. The remainder appear to be the same for each army.
While the game system involves drawing a fate card as the first action of a player’s turn, and using points to upgrade a commander’s capabilities, I wanted to add other, more personal, characteristics for each side’s leaders. Rather than use the Irregular Wars system for that, I dug out the old standby, Programmed Wargames Scenarios by Charles Stewart Grant. Published in 1981, it has been an influential and relevant resource.
Grant’s system uses dice to determine his array of characteristics for commanders, and “programmed” orders for either Red (Attacker), Blue (Defender), or both armies. It’s a good and fun solo system. He also includes an excellent and amusing set of “fate cards”. However, I’ll use those contained in V&F for my first couple of games.
The results were interesting to say the least. Here’s a summary.
TRAIT/ORDERS
BRITISH (Blue – Defense)
JACOBITES (Red – Offense)
C in C Personality
Bold
Bold
Tactical Capabilities
Attack
Good – +2 to unit attack
Weak – -1 to unit attack
Defense
Above Average – +1 to unit
Weak – -1 to unit defense
Local Population Attitude
Indifferent
Indifferent
Allocation of Forces
50% defend South Hill
40% attack South Hill
30% defend North Hill
20% bypass to East, attack N. Hill
20% reserve (West of bridge)
40% reserve (off table)
Execution of Orders
Give no ground. Defend well forward. Can move off contour to exploit favorable situation.
See Pg. 19 for responses to events.
See Pg. 21 for reserve response to events.
The local population option is an interesting touch. Locals can actively aide one side or the other. This includes sabotage, giving bad directions, or whatever one’s imagination conjures up.
I haven’t figured out how to apply the tactical modifiers. Apply to the entire army or to a single unit designated by the CinC?
In addition to the CinC, V&F calls for Brigade Commanders. A brigade can have anywhere from two to eight units. I’ll have two Brigadiers per side. However, I’m not assigning characteristics/traits to them since it’s my first game with this system, and I’ll have plenty of other opportunities to butcher the rules.
Not the best time to wargame. Too much fun to be had outdoors. But, you can’t spend all of your time outside. So, a couple of lightweight endeavours for the next couple of months.
The Irregular Wars campaign is on hold, and the “Small Table” is now set up for Advanced Squad Leader Starter Kit (ASLSK) scenarios. My philosophy with ASLSK is that one has to keep playing it or lose all rules chops. There is enough rulebook referencing when conversant, so a prolonged absence can make things painfull. I’m going to take it easy and cherry-pick one-mappers, and maybe maintain momentum into the Fall.
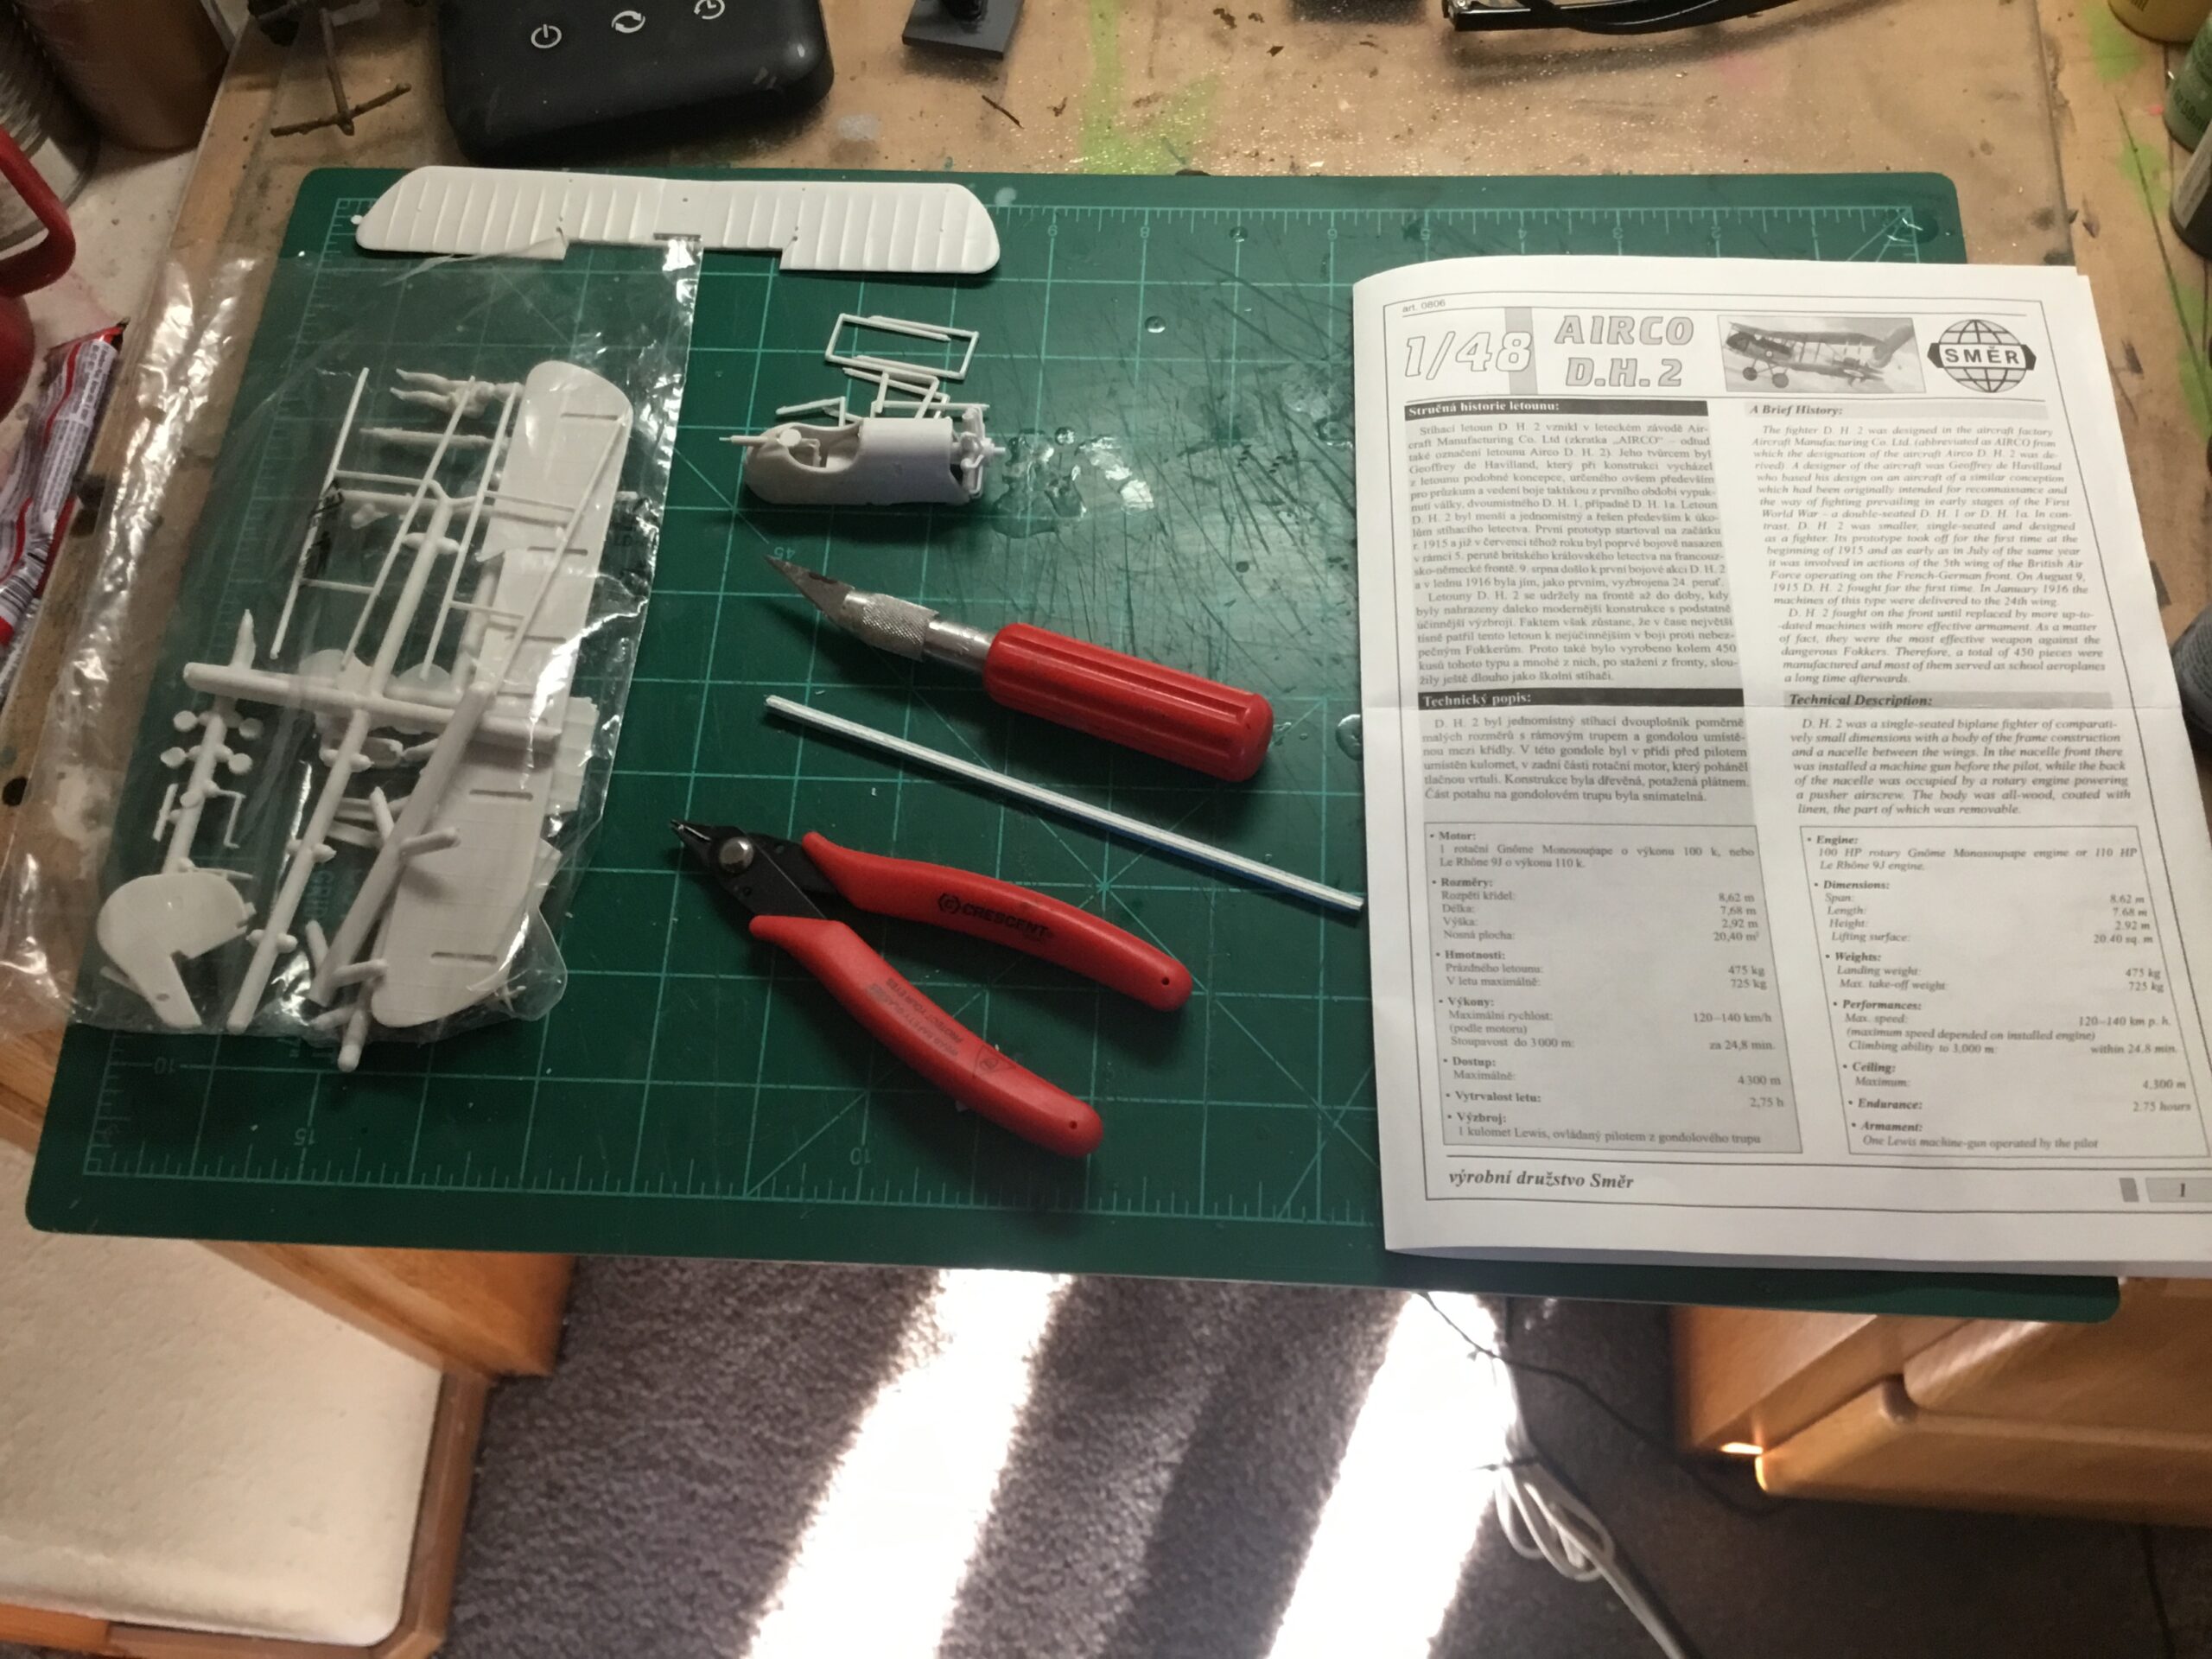
While figure purchases are on indefinite hold, but I have the itch to build something, I dug up an aircraft model to use in my Red Actions game. To do it right I need to learn how to “rig up” a biplane. Things could get frustrating, but what the hell…….
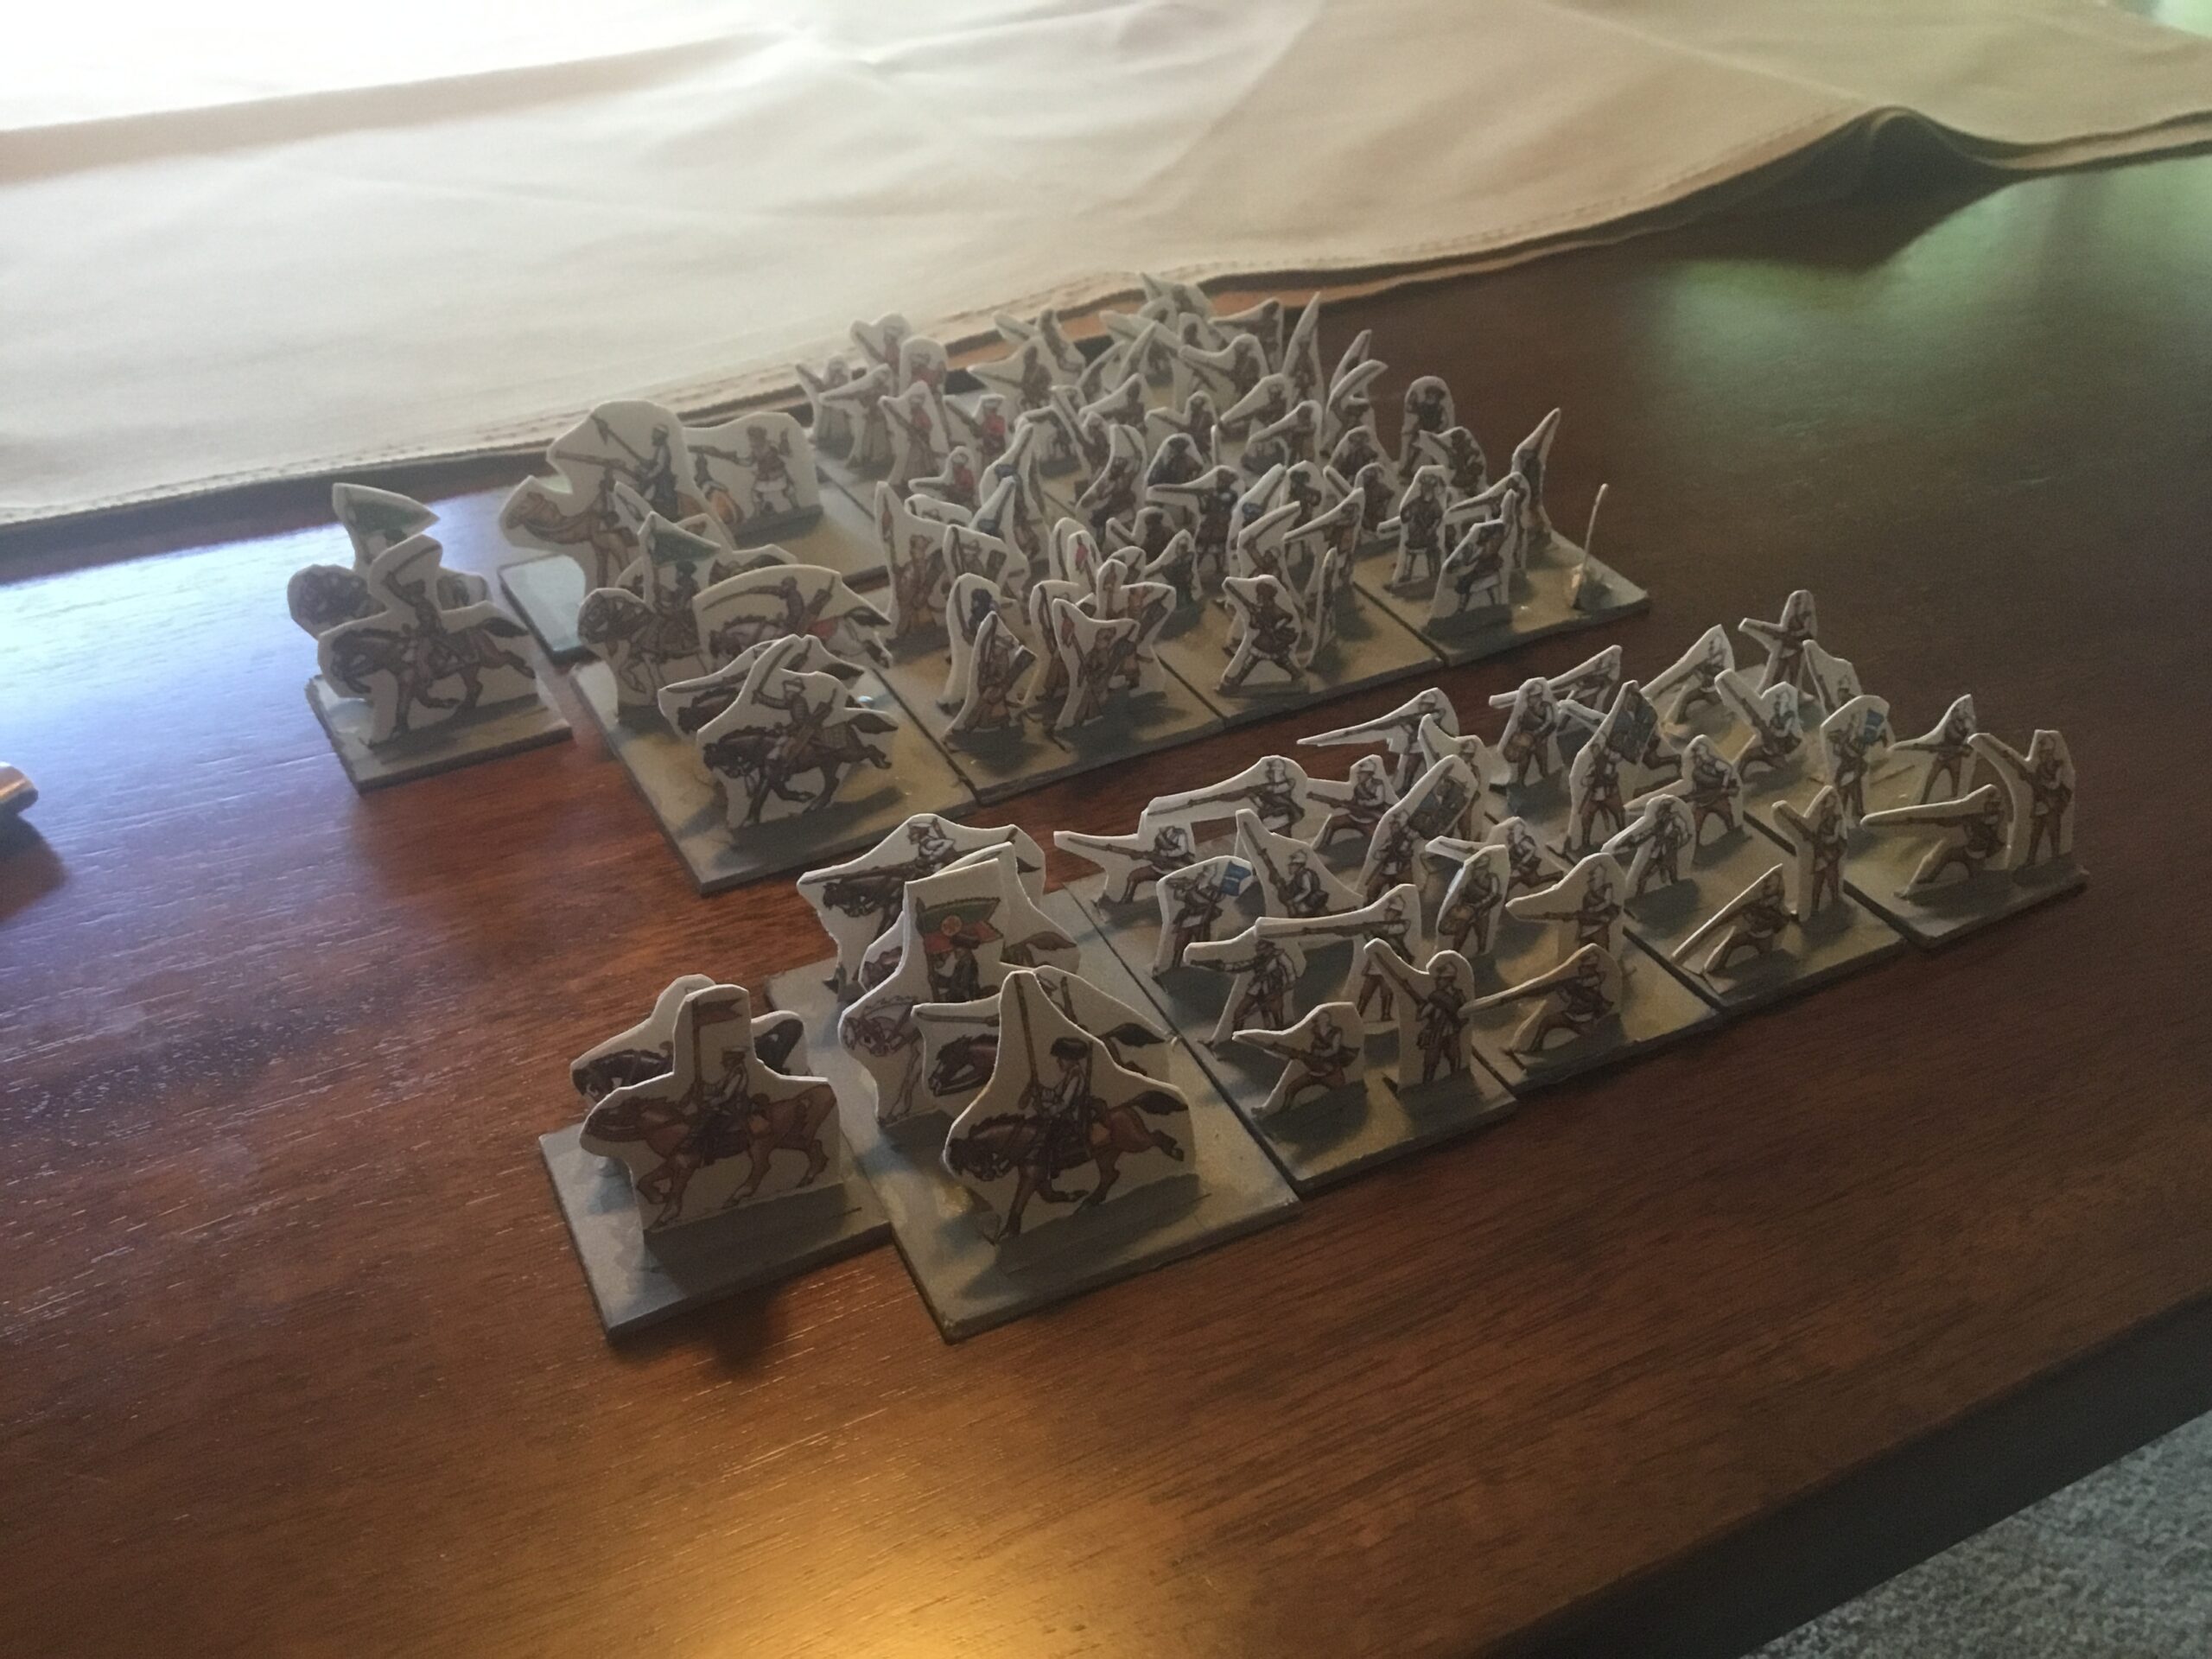
While pawing through a closet I found a WalMart plastic bag. “What The Hell Is This?”. Well, this is this…….
Forgot I had put together small Central Asian and Russian forces for “The Men Who Would Be Kings” last summer/fall. Purchased them over at wargamevault.com
I did bring a game mat (if you can call a bolt of sand colored cloth purchased at Jo Ann’s Fabrics a game mat) with me. The intent was to break out my World Of Fun Napoleonics and mess around with the Valour and Fortitude rules on the dining room table at some point during my stay. That might still happen.
But, why not a couple of quick and fun games with these?
A prolonged struggle due in no small part to my Annual Spring Cleanup. It’s a once-a-year ritual here at the Pinecone Lodge. Yes…..pine cones, pine needles along with pine tree limbs large and small, all on-the-curb by May 1.
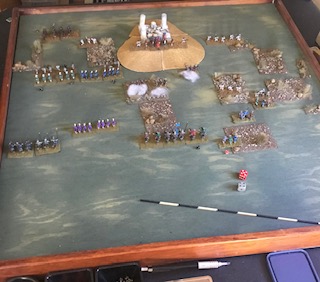
It was another (in what is becoming a) typical Irregular Wars battle. The opening stages are orderly, with matters deteriorating into a series of isolated fights brought on by units wavering, scattering and moving beyond their command radius.
The photos illustrate the progression. In fairness, the terrain on the Ottoman right (Viewer Right) does not lend itself to neat and tidy contact.
Here we have opening contact on the Ottoman left, with impending contact on the right.
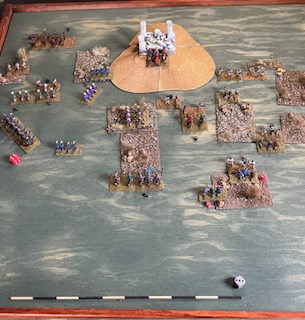
The Ottomans are positioning their reserves for support to their left. Because of the risk of losing resolve due to contact from wavering or scattering units in melee, this positioning has to leave lanes open and 2-inch distances from any units in melee. Their Lord, in the Sipahi unit with blue flag, tries to stay in the center-rear to maintain command. His Abyssinian counterpart is positioned on the crest of Temple Hill.
The Ottomans prevail on the left, withstanding a counter-attack by the Abyssinian light horse and lancers (with Lord). The Abyssinians on the right have driven off the Ottoman Azabs, but do not advance, anticipating providing some support to their beleaguered right, which is unhinged due to units wavering, then scattering due to the Ottoman shot. Again, this scattering causes a loss of resolve to any unit within 2-Units of movement. This eliminates any nearby wavering unit and the chain reaction I’ve emphasized in past posts.
The Ottoman Akinjis (light cavalry) and Janissaries have now cleared the threat on their right, and the Abyssinian counter-attack has stalled.
Game Over.
Another fun contest, featuring a set of rules that certainly keeps things interesting.
The Ottoman attack has finally developed. It took some time to rally unit resolve, and re-align the ranks after the poor Disease and Mishaps die rolls.
Beginning to think that I’m a tactical rut. Once again (it seems) the main effort is on the left with a demonstration on the right. Or, is it a terrain placement rut? I’m not going back in the archives, because I just don’t want to know. I guess it’s enough to be aware (?).
Trying very hard to honor the command radius distances for each side. That does make a difference.
I bumped the Janissary missile troops rally value to a “2”, vice “1” based on my past readings of their tactics. We’ll see how that works when they contact their Abyssinian counterparts. I did remember one lesson from the previous Ottoman fight; the missile units are backed up by two units of Janissaries with cutting weapons.
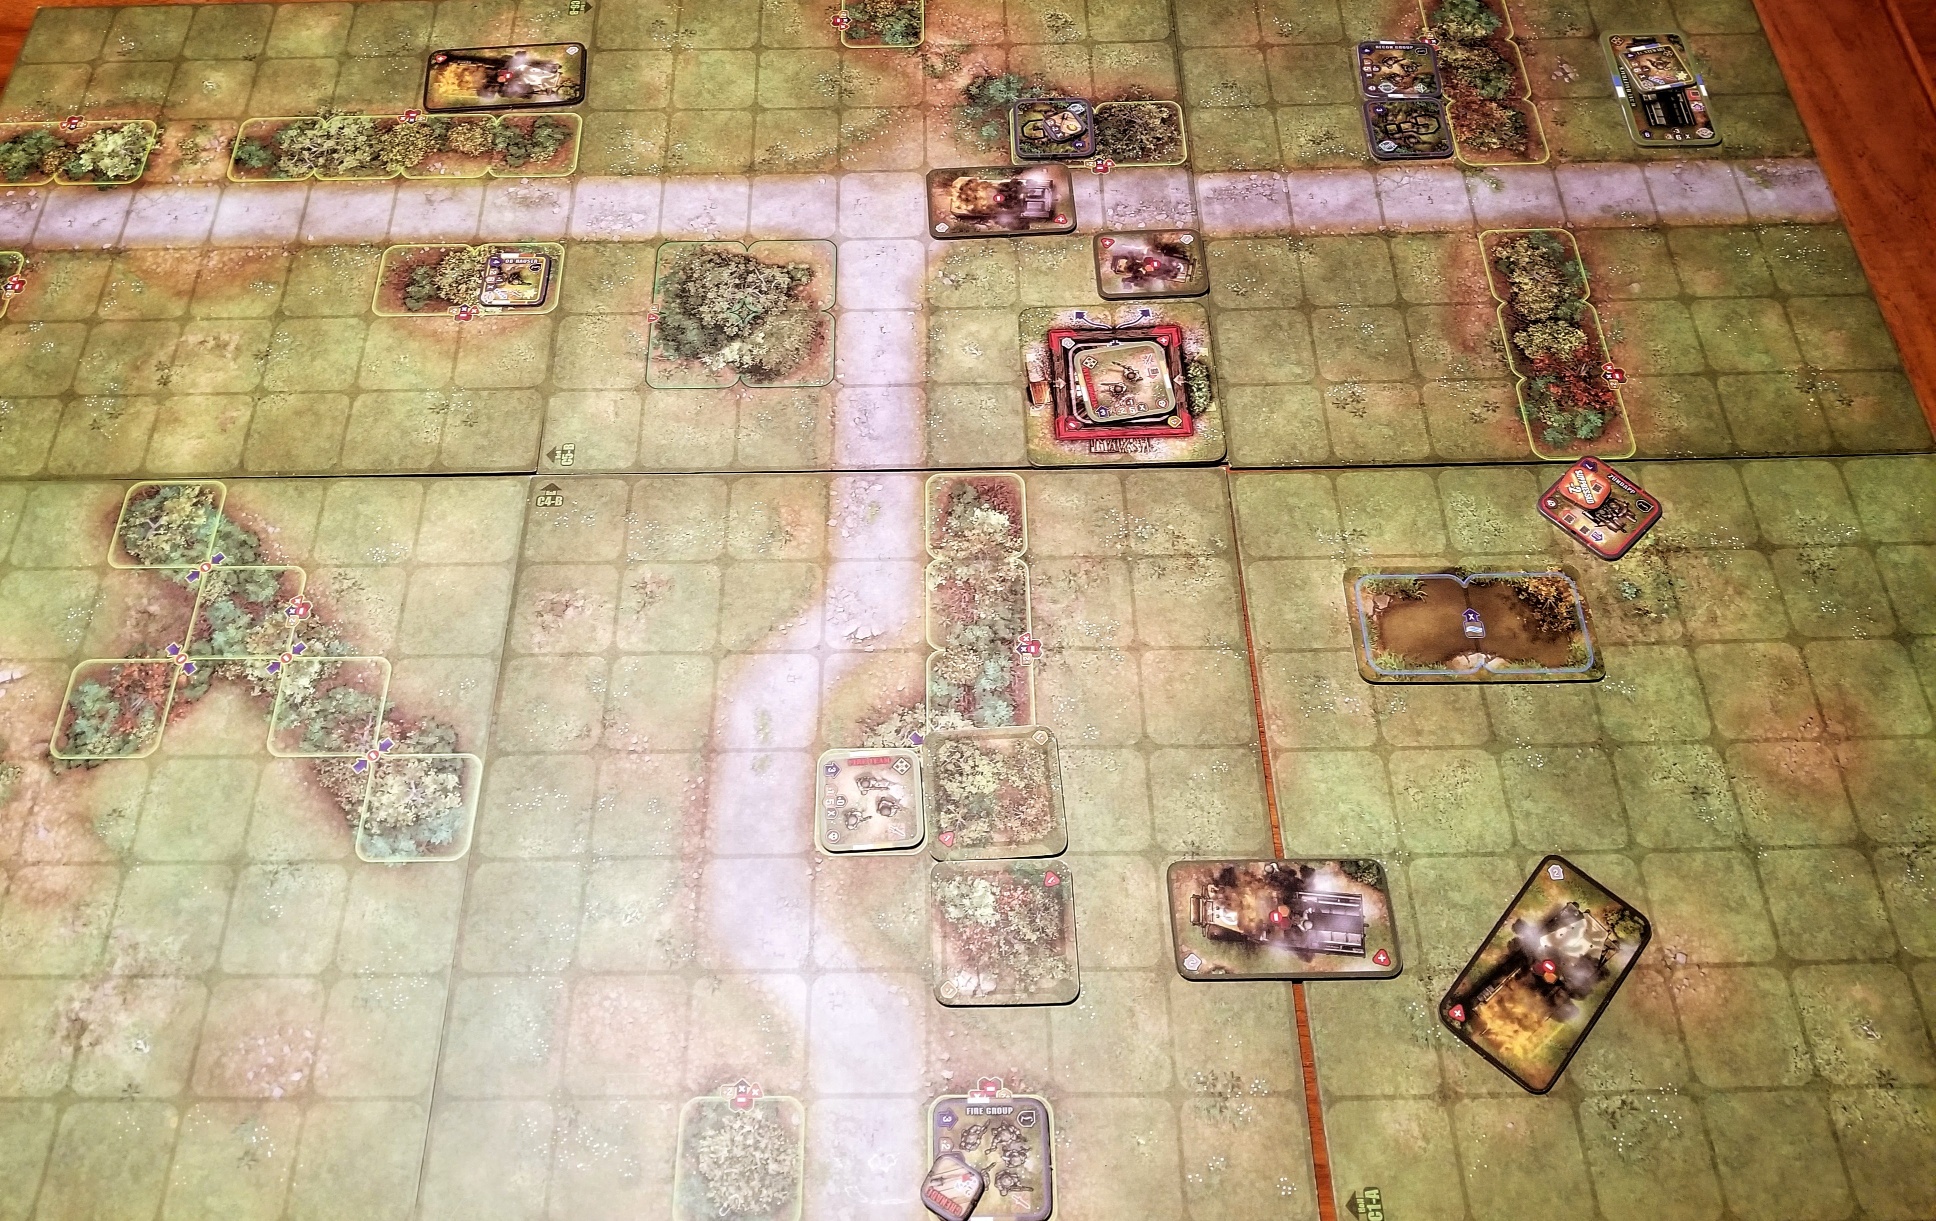
Set up another DIY scenario for Heroes of Normandie (HoN).
A meeting engagement between two reconnaissance forces attempting to secure a crossroads.
Both sides had a mix of reconnaissance sections, along with infantry support in two halftracks. The Germans had a motorcycle/sidecar/machine gun , and panzerschreck section. The US had a Greyhound armored car and Jeep with .50 caliber machine gun.
The scenario length was 8 turns, with turn initiative alternating between sides. Each side entered on opposite sides (east and west) of the map. I used event cards, but did not remove any inappropriate ones from the draw decks. This was a conscious attempt to incorporate them in gameplay, but reduce their possible impact.
It was quite the slugfest both times I played.
If I had set this scenario up in Advanced Squad Leader, my play would be far more constrained, with concerns about doctrine and realism. Not with HoN. The cartoonishness that is off-putting for some, seems liberating to me. I feel encouraged to take more chances; that is within tactical reason. Maybe it’s the straightforward vehicle rules…….
Here’s a photo of what was left after eight turns. Most of the vehicles are wrecks, with units huddled in the hedgerows, or in the house at the crossroads. North at top of photo.