Monthly Archives: July 2020

It Gets Serious: May II Turn

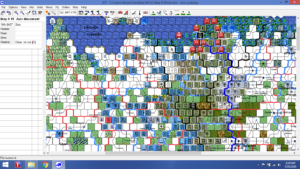
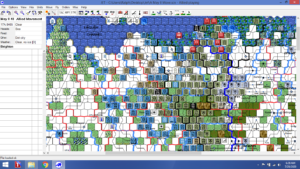
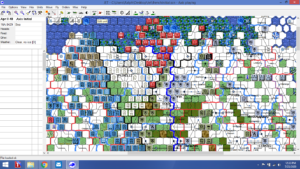
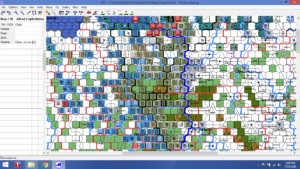
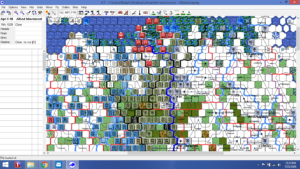
These screenshots summarize the May II Turn.


German armor sweeps past the weak ad-hoc French defenses and advances towards the Marne.  Also, the German commander turns loose “Ants” to disrupt the Allied rear areas.  To the north, German forces grind up the Dutch and Belgians,  advancing to the Dyle Line.

The Allies rush armored/mechanized units to contain the Ardennes penetration, while withdrawing from the Dyle line, using Belgian forces in support.  The Dutch attempt to consolidate their defense in order to tie down German forces for as long as possible.

Painful. But It Must Be Done! Fall of France Through May I Turn

I’ve bitched about my Fall of France (FoF) game with Tim, but I am now compelled to report it.

As usual with this site, the graphics will be less than ideal, a condition due in equal parts to my ambivalence towards pushing the boundaries of computer literacy and reliving a wargaming hell.

I was able to figure out how to get screenshots on my ancient Dell Windows 8 machine.  However, the screen shots of the JET board are just that; a shot of what is on the screen.  The JET mapboard takes up more than the screen, so the graphic evidence of this debacle will be from north of Frankfurt.  That’s  OK, because that it is where most of the carnage occured and is continuing to occur. We are now in the Allies Jun II turn, and things are looking very grim for the Allies.  But….. we must start at the beginning.

The Germans have  extremely powerful air and ground units.  The screenshots show only the top unit in the hex.  But, below that scary surface, lies even more panzer divisions, supported by motorized units, lots of motorized flak and artillery.

One revelation was how tough the German infantry stacks were.  Three 8-8 infantry, paired with artillery represents a lot of combat power.

Allied units are solid, but lack  mobility, flak and supporting units.I shudder when I think about the German’s powerful ground attack air assets used to support these armored and infantry forces.

Then, there are the historically based operational rules.  They create a difficult framework for the Allies to work within.

The Germans start off with an invasion turn, which includes all normal Europa turn phases except the exploitation phase.

The Allies do have a reaction phase. However, this is scripted because most northern French units and those of the BEF must enter Belgium  to occupy the Dyle River Line, setting up the historical “Sickle Cut”.

While Dutch and Belgian units can move during this Allied reaction phase, they cannot enter enemy zones of control.

With the Allies sucked into Belgium, the Germans start the regular  May I  turn.During the Allied player May I turn,  no unit in an enemy ZOC (Zone of Control) can move, and all British or French units have their movement factors halved.

The Allies are further hampered by the inability of their combat / motorized units to attack a full-strength or move using full movement during their exploitation phase until the beginning of the June I turn.   This reflects a lack of mechanized doctrine.

To make things even worse, during the May I turn any French  non-mech/motorized unit has to retreat two hexes rather than one if it has fought  an attacking German force with at least one panzer division.

One other note about the graphics.  As I mentioned, JET is a real marvel.  However, it cannot do several things within the rules as written Europa framework.  The result is that you have to tweak things, and the file you forward may have a heading (found in the upper left hand corner of the screen) that isn’t quite accurate.  An example:  You cannot fly CAP (Combat Air Patrol) during the Initial Phase.  You have to cheat, and “fool” the machine by forwarding to your Movement Phase, where it is allowed.  So, on the files shown, the heading on the screen may show “German Movement Phase”, when in fact the file really reflects the Allied Initial Phase.  Confused….good…..misery needs company…..and  the weight of Tim’s advance has had me in a daze since early May.

Allied Setup
Allied Exploit – Move To The Dyle Line
You can see the German penetration through the Ardennes.  Now, the Allies must avoid being enveloped.  Will post up later with more carnage….after I do a better job of figuring out the screen shot sequence.

Progress

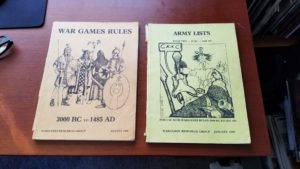
One of this summer’s ongoing projects is finishing up my 15mm ancients to use with Wargames Research Group’s (WRG) 6th Edition rules and Army Lists.  So retro.  The rules were published in 1980, and  used by the old Kansas City Society of Ancients group.

The figures are old Tabletop Miniatures figures, which became Alliance Miniatures, and are now marketed by Alternative Armies.  My collection started back in 1991 when Tabletop figures were cast in Des Moines, IA of all places.   I stumbled upon their small industrial space when I was living in Cedar Rapids, IA (of all places).

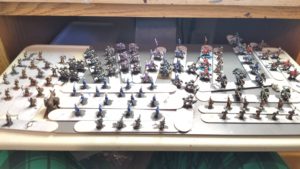
The initial plan was to use them for DBA.  And, they were.  But my interest in DBA has waned and I became interested in reviving the WRG rules.  So, some purchases had to be made at Alternative Armies to fill in the gaps for the Arab Empire (List #100) versus the Nikephorian Byzantines (List #117).  These two armies provide  options that fit what I had already painted, so the new purchases were – thankfully – limited.  Here’s a photo of the latest recruits.

I have nine figures left to paint.  Outside of refurbishing my Medieval 15mm figures, and supplementing my TSATF Boxers, this is the last painting project I have planned.  My limited skills have eroded and I have more than enough painted figures from more than enough periods to keep me more than enough busy.

Next  the necessary drudgery of basing/re-basing.  I hope to start  next week.

Enjoying Kriegsspiel – Again

I purchased the 1824 version of the Kriegsspiel rules from Too Fat Lardies the other day (https://toofatlardies..uk/product-category/kriegsspiel/ probably in response  to some spasmodic Napoleonic reading during the early summer.

Same motivation was probably at work when I ordered a Brandywine map from Command Post games (https://www.commandpostgames.com/product/pub-battles-brandywine/).  I’ve had my eyes on this for quite some time, but not to be used with their Pub Battles.  The map is gorgeous and a significant improvement over the historically accurate, but less striking, Meckel map.  Not cheap, but I think the paper map is worth the money.


The presentation of the 1824 rules is far more detailed than those for 1862.  Many more examples of play by situation – infantry vs. infantry, cavalry versus infantry, infantry versus unsupported artillery etc.

This is all good, but as I noted in an earlier post, part of the fun was just applying common sense, or general tactics to a situation.  Now, I find myself checking the rules, and not enjoying the situation as was the case with the less detailed 1862 version.

Kriegsspiel is granular.  If only because the time scale is two minutes.  Things move slowly, and I am trying to figure out how to speed up play, especially in a scenario calling for movement to contact, as well as an increasing inability to focus.

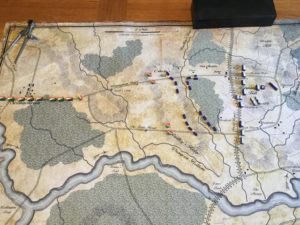
My current scenario has a brigade of two regiments (Red), with attached cavalry, jaegers and artillery, marching to control two crossroads along Street Road., which runs north to south,.  They only know that it is probably defended.  The defense is, in fact, a reinforced regiment (Blue) with artillery.

Blue is deployed to cover both east-west roads leading to Red’s objective,  with the majority of their force occupying Birmingham Hill.

Two groups of Blue skirmishers are deployed forward of the hill.  Their mission is to observe and delay Red’s advance, so Blue can determine which east-west road will be Red’s primary avenue of approach.

The Blue skirmishers have engaged the Red cavalry, causing them to deploy.  Now, things get interesting.  The rules indicate the skirmishers will form square.  If so, what does the cavalry do?  I have not given them orders, nor have I written down their Standard Operating Procedures (SOP).  Or, do the skirmishers simply flee – which they can also do under the rules.  If so, again, what is the cavalry’s reaction?

This is fun stuff and demonstrates the breadth and scope of Kriegsspiel.

Byzantium Reborn Review

This “mini-game” published by Fiery Dragon covers the 1920-21 fighting between Greece and Turkey.  The game was originally published by Micro Game Design Group.  Here’s link to the BGG page:  https://boardgamegeek.com/boardgame/13290/byzantium-reborn

This interesting R. Ben Madison design  lends itself to solitaire play.  Small footprint, not many counters, but real breadth to the rules.  Well, maybe not breadth as much as layers of chrome.  But it is good chrome.  The examples of play are done in a narrative style.  I prefer procedural examples.

It is a different type of system, and although the rules are laid out in game turn squence, there is quite a bit of page flipping early on to get comfortable with terminology, minor pieces of chrome, and general game flow.

The game isn’t as much about combat, but resource and allies management.  Combat is a means to increase your resources through occupying regions (Vilayets), but the real challenge is to gain allies that will intervene in the conflict and/or deny your opponent this support.  Your allies provide Equipment Points (EPs) used for the purchase of combat units/assets.

Each turn consists of a Random Events Phase, Political Phase, Greek Player Phase – which includes Battlegroup Step, Strategic Movement Step, Movement Step, Combat Step and Recovery Step.  There is a Second Random Events Phase, Strategic Phase, and then the Turkish Player Phase, which repeats the Greek Player’s steps.

Random events influence potential Ally behavior and the ability to gain/lose Political Support Points (PSPs) and EPs.  During the Political Phase, players can expend PSPs to “buy” increased support, or reduce their opponents political support.  Again, this support influences the ability to gain EPs which can be used to build or rebuild ground units, or bid for Asset Points (APs), represented by air and artillery units which serve as force multipliers during combat.

This purchase of APs is done on a bidding basis which I initally had trouble with. Likewise, the increased allocation of PSPs can be used to enhance the chances of moving one of the European powers involved in the conflict (Italy, Great Britain, France, Soviet Union and, to a much lesser extent, The United States), from Neutrality to Support and finally to Intervention.  Support and Intervention generate different levels of EPs 

The Battlegroup step is simply organizing one’s forces for combat in each of the Vilayets (regions) controlled.  Strategic movement involves rail or naval movement, and Movement is between Vilayets to either occupy for resources or to set up combats.  Combat is a dice fest, without the use of a Combat Results Table (CRT).  The Recovery step involves rallying unit disrupted in combat.

As pointed out in an earlier review, the game does involve a significant amount of luck, as embodied in the Random Events table.  But, the events are based on historical actions or probabilities/possibilities, and for solitaire play that’s not a bad thing.

As you might sense from my description of the game, it took some time to grasp the differences between PSPs, APs, and EPs as well as the methods for their use.  The bidding for assets and use of dice for combat also involved a learning curve.

However, the effort was worth it.  This is a good game, with an interesting system, that provides an enjoyable gaming experience.  

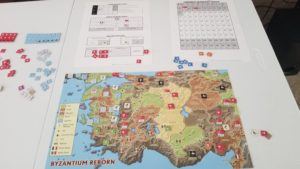
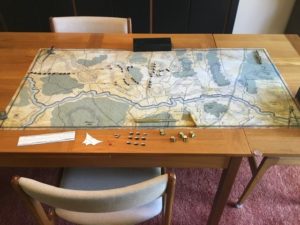
Here’s a picture of it on a card table.  Gives a sense of size.