Monthly Archives: January 2024

It’s All A Blur….Action At Sanwa: Part 2 – The Fight

I have a newfound admiration for gamers publishing quality After Action Reports (AARs).  I lack the discipline and ability to a)  systematically record what occurred and b) take quality photos to document the ebb and flow of the game.

My (weak and convenient) excuse is that I get all wrapped up in gameplay.

So, what follows is a semi-coherent, poorly documented account of The Action(s) at Sanwa.

It’s plural because I played the scenario twice.  As discussed in an earlier post, I was not satisfied by my adherence to the rules, and wanted to try again.

Both games had the same outcome:  A resounding Kattegoan defeat.  By design, the circumstances were similar.  By this, I mean that each side employed the same tactics in both games.  Again, the purpose of the replay was to get better with implementing the rules.

In that regard, the second game was a success.

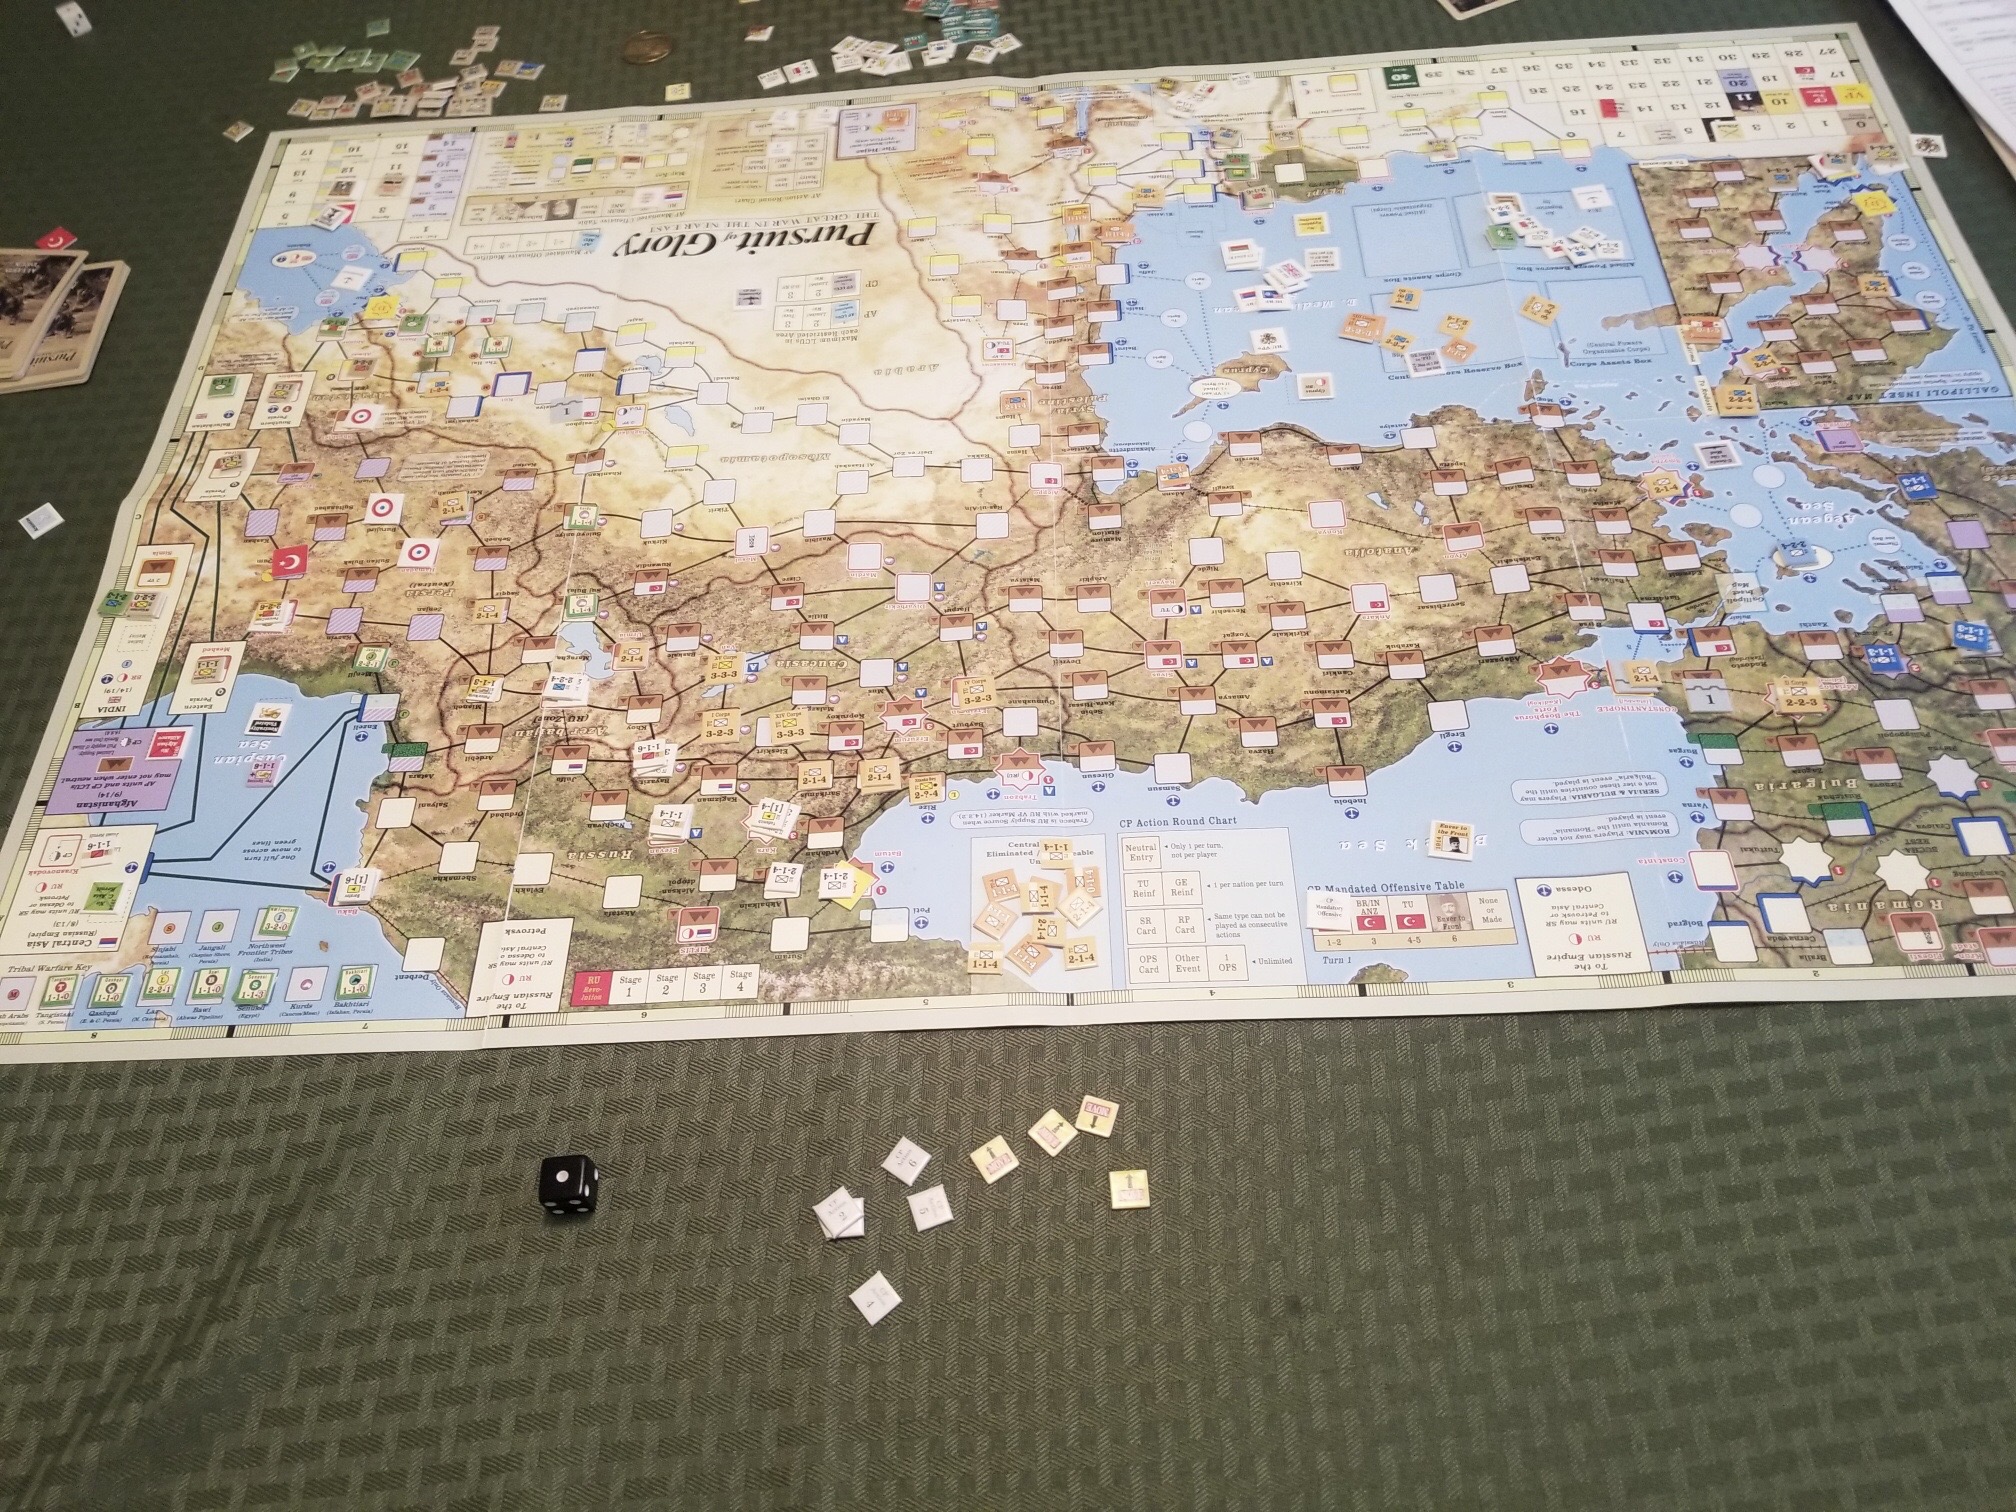
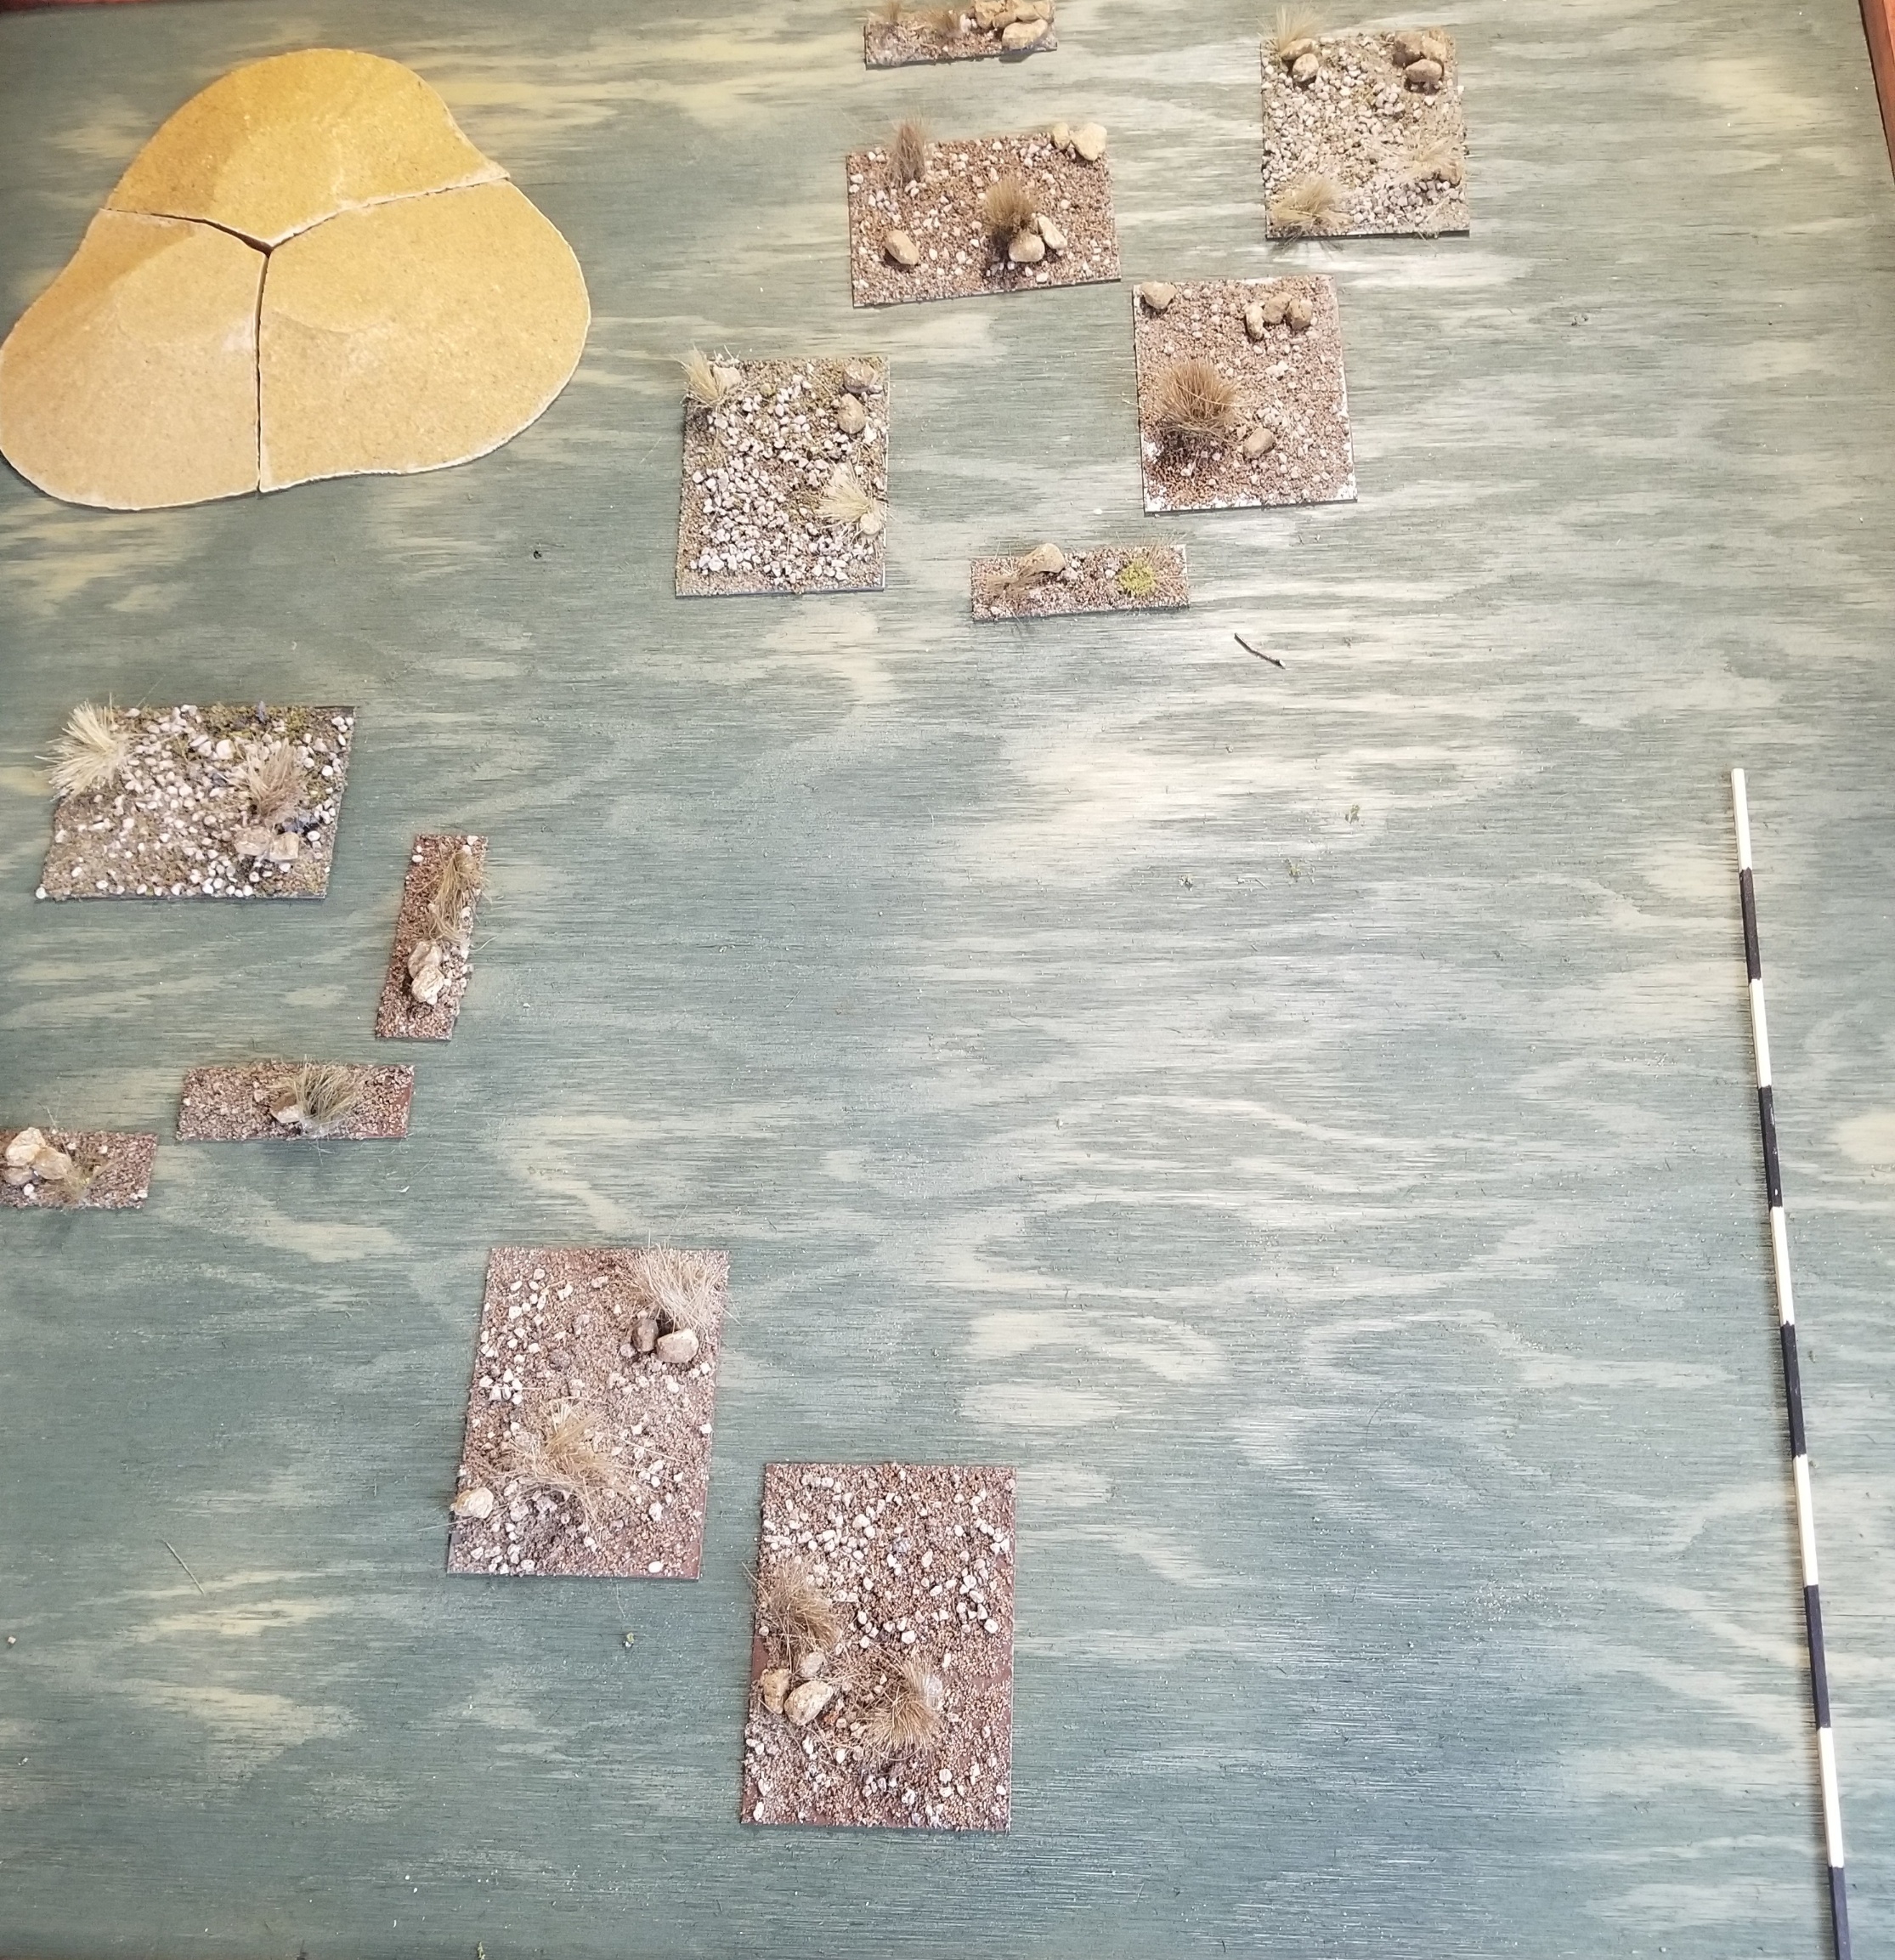
The battlefield featured several areas of rough terrain, and a small hill dominating the west.  North is at the top of the photo.  The measuring stick has 40mm (company frontage) increments (referred to as units in RAW).

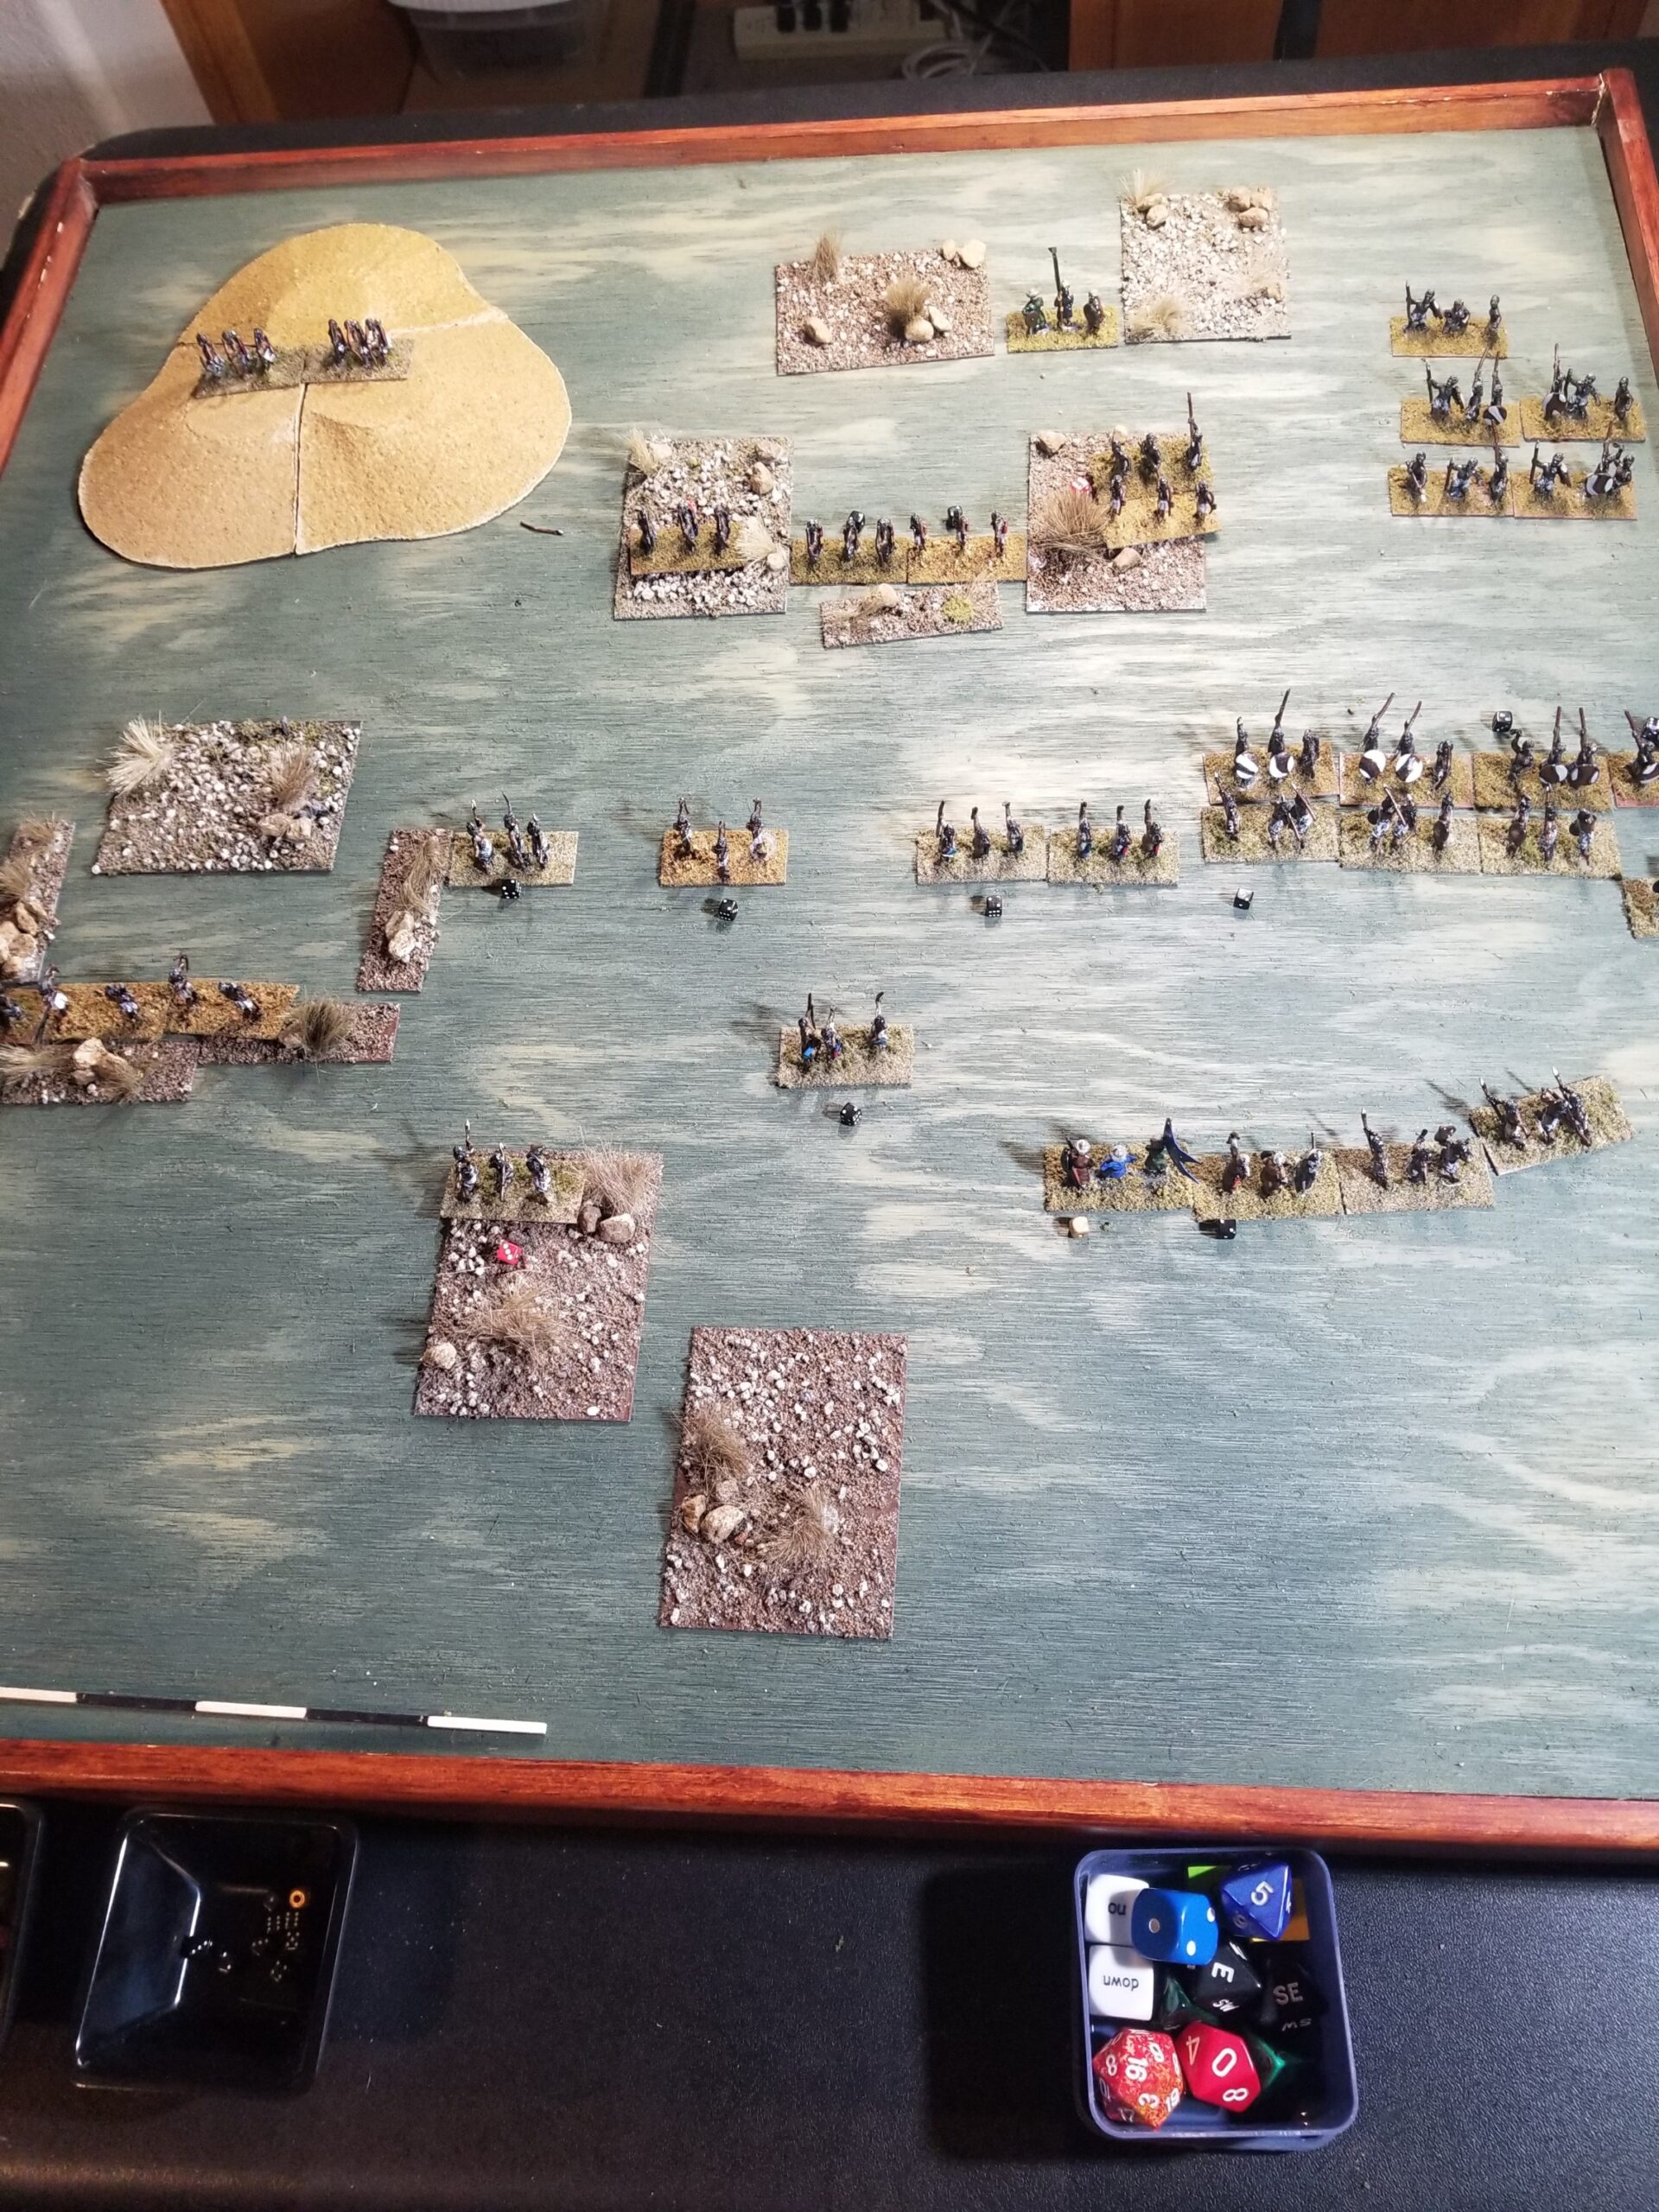
As defenders, the Sanwanians deployed first, with two Companies of Archers on the small hill, four Companies of Archers deployed just north of the rough terrain in the center, and with all  warrior companies to the east, and deployed in depth.  The Lord’s Company was positioned in the center along with one Company of Slavers.

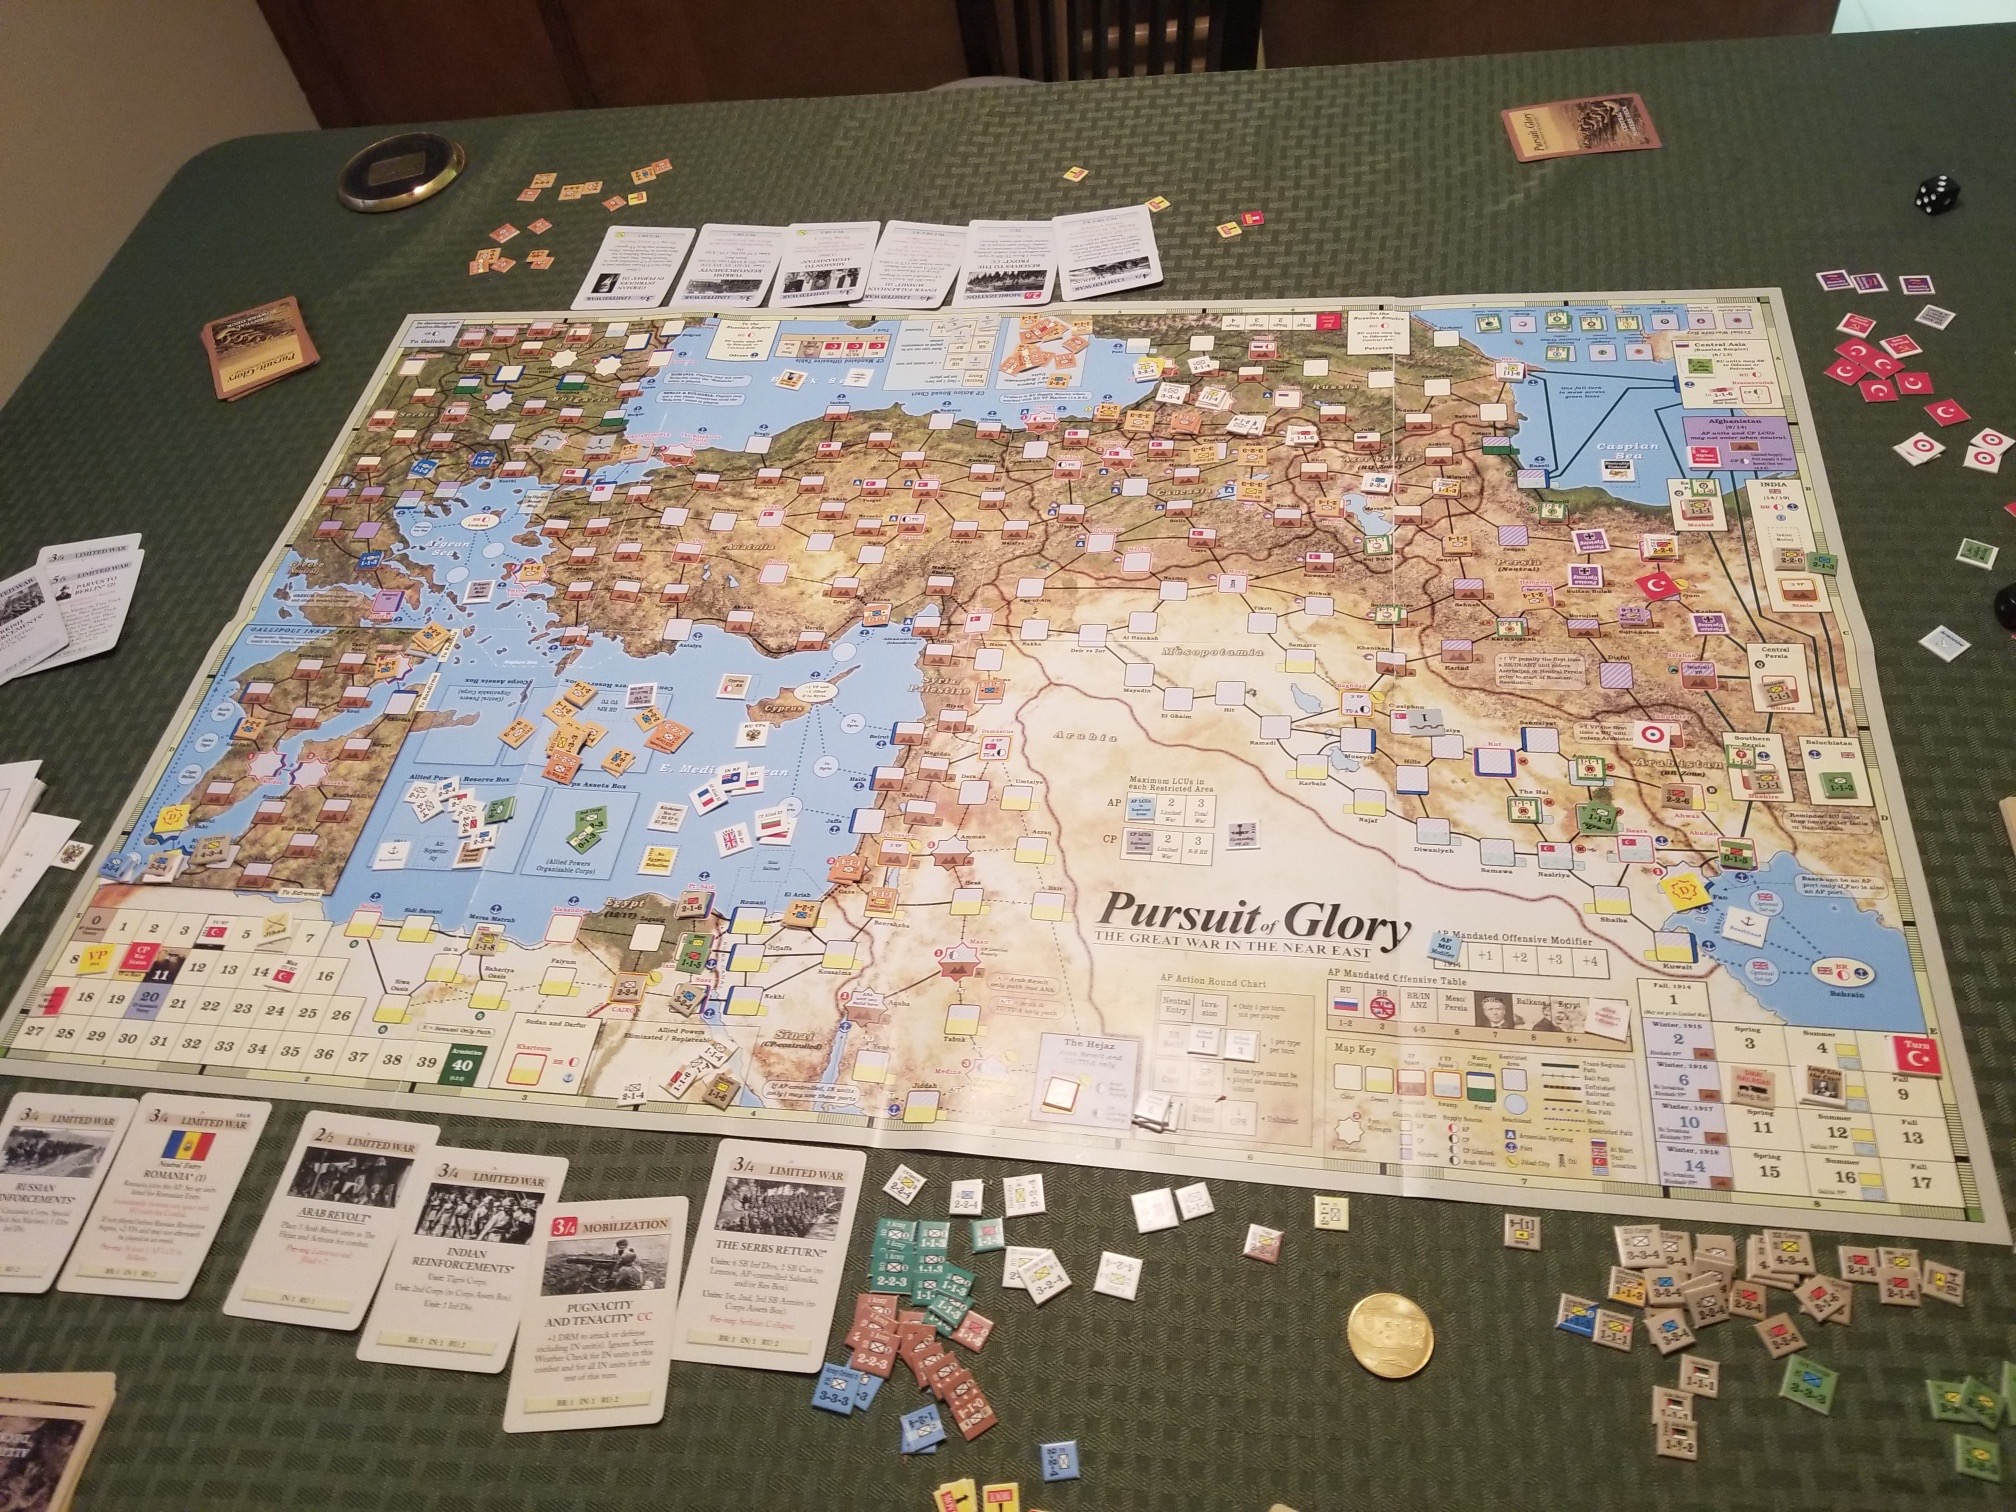
The attacking Kattegoans reacted with a similar deployment.  Two Companies of Scouts holding down the left (west) flank, with three Companies of Archers and two Companies of Warriors in the center, with all others on the right flank.

A quick tactical note:  Deployment in depth is trickey.  Rules As Written (RAW) has a Wavering company (Resolve at one (1)) immediately retiring one (1) D3 movement units (in this game a unit=40mm) to its immediate rear.  Any Company it comes in contact with (there is no interpenetration in these rules) immediately loses one (1) Resolve.  If a unit reaches a Resolve of Zero (0), it Scatters.  Any Company within two (2) movement units immediately loses one (1) Resolve.  Companies stacked up and with low Resolve can literally evaporate in a single turn.  This is absolutely critical when Companies (as is the case with Tribal Warriors) start with a Resolve of only three (3), and maybe at  two (2), if effected by Disease.

Both sides moved out of their deployment areas, crossed their respective  lines of departure, and began exchanging ineffective missile fire.  Yes, some Companies took significant enough losses to retire, but they were quickly rallied and moved back to their original positions.

The Warriors of each side advanced towards each other, but stayed beyond charge distance hoping for a favorable outcome in the lengthy missile exchange.  The Kattegoans lost patience and moved within charge range (Three (3) Units) of their opponents.  They gambled on gaining the initiative for the next turn (“Lord” Oumar being an Experienced Lord with a +1D6 modifier when rolling for initiative).  If so,  they could charge and receive a +1 D6 combat modifier.   It was not to be.  The Sanwanians rolled higher, and attacked.

Both sides were locked in melee for several turns.   Melee in Irregular Wars is decided by comparative 1xD6 rolls.  If the difference in rolls is one (1) or two (2), the units remain engaged.  If the difference is three (3) to six (6), the loser suffers a loss in Resolve.  If greater than six (6), a loss of two (2) Resolves.  Now here is where things get interesting…..a tie results in a “Bloody Draw”, where both sides lose one (1) Resolve.

As mentioned above, when a Company reaches one (1) Resolve, it Wavers, and must withdraw 1xD3 units directly to the rear.  In a “Bloody Draw” with  Companies at a one (1), both Companies have to withdraw.  This creates a battlefield that cannot be characterized as “tidy”, and accounts for the seeming absence of linear frontages for both sides.

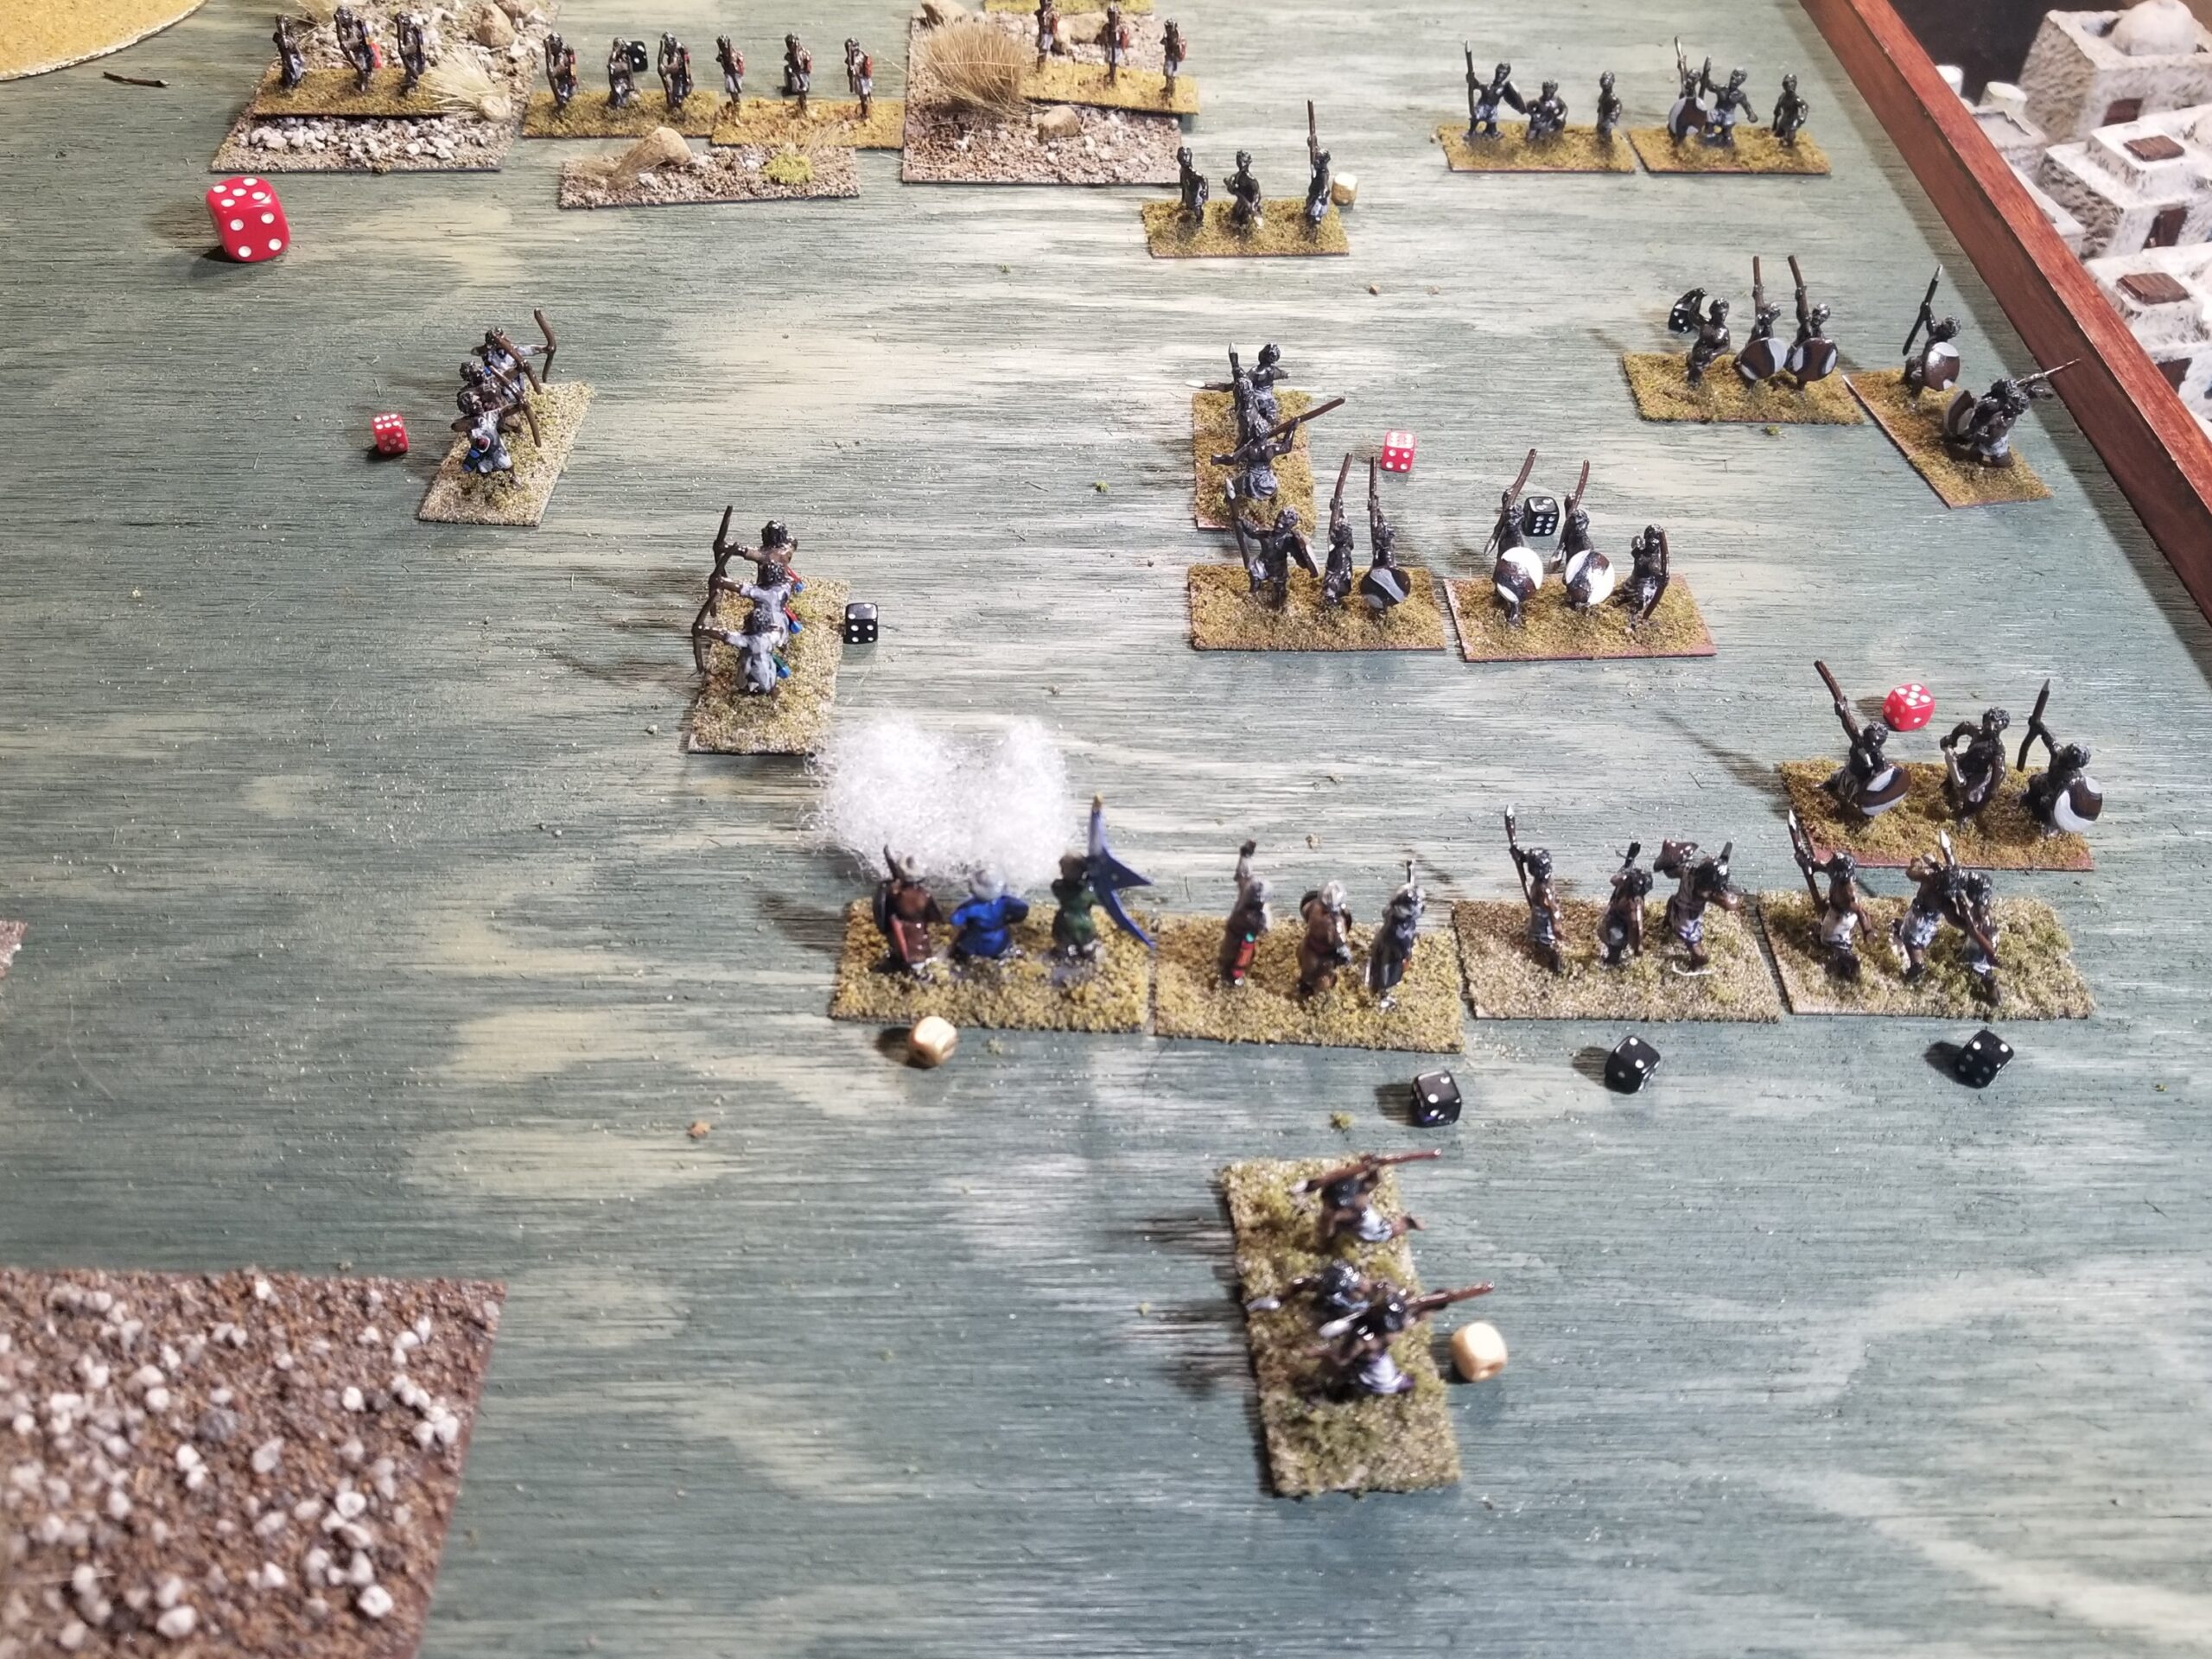
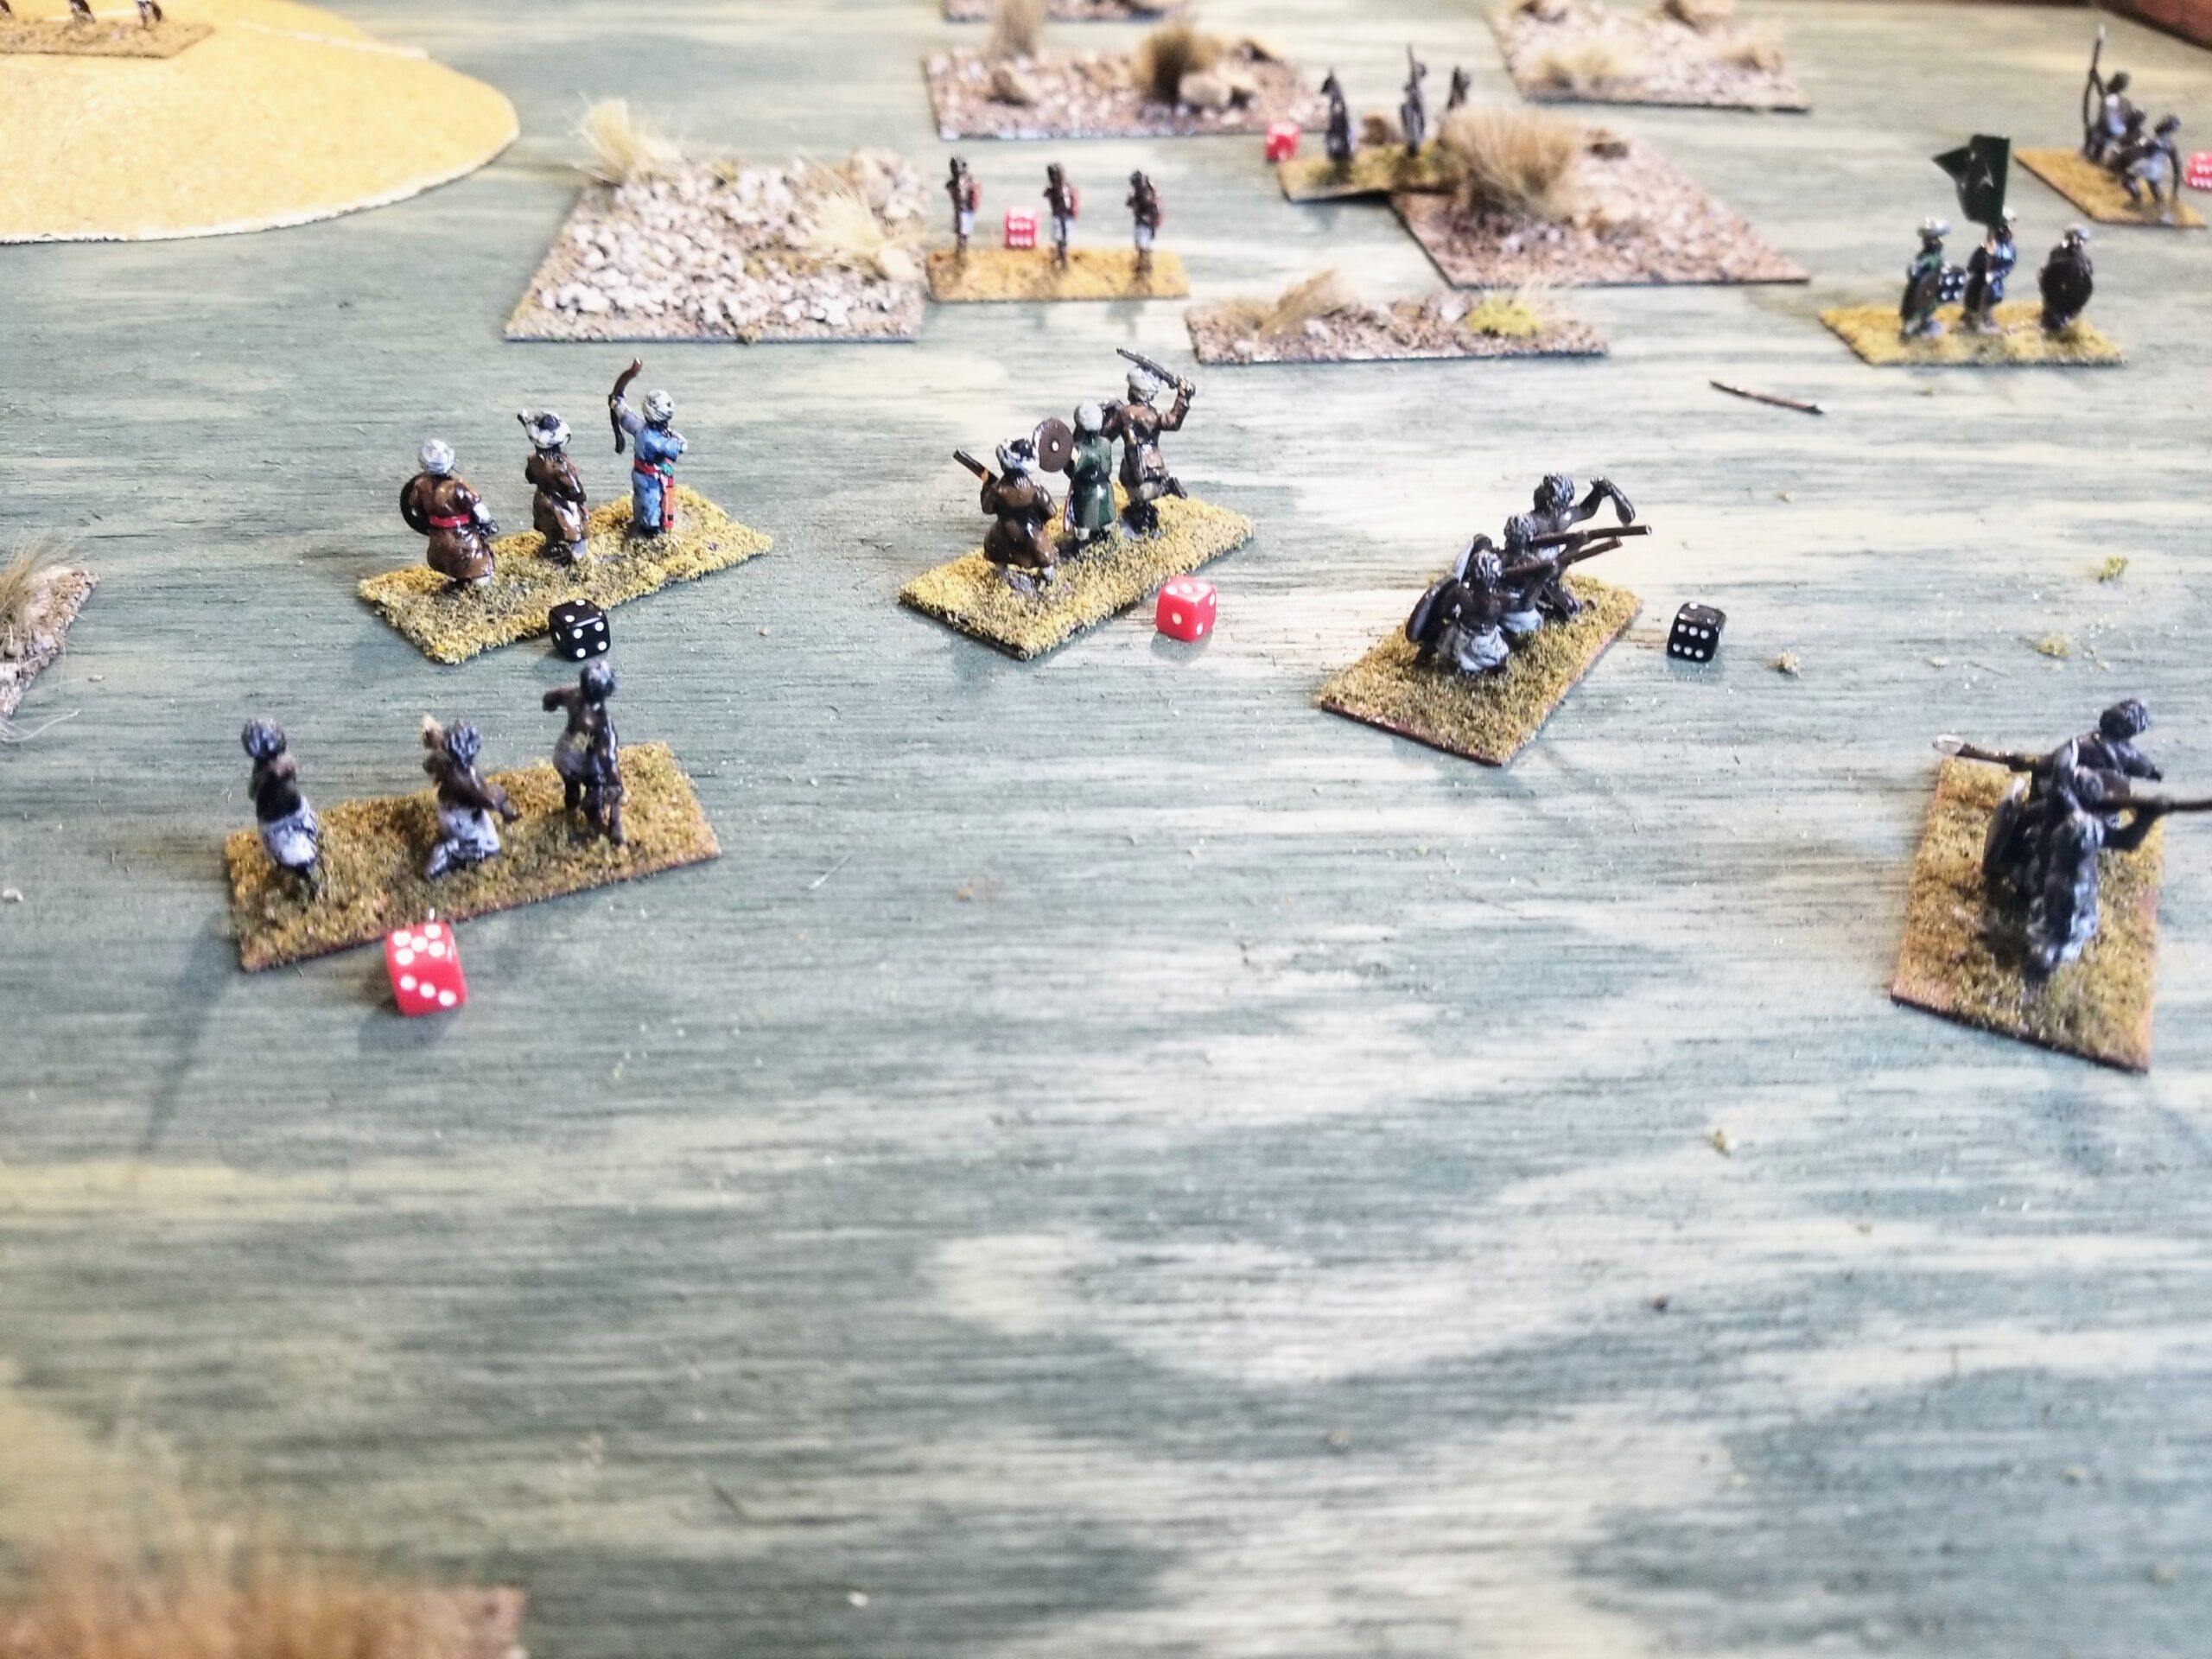
After as series of melees, the Kattegoans buckled (the Sanwanian Warriors have shields – well all except one Company).  Simultaneously, the Sanwanians moved reserves to engage the Kattegoan Archers.

Quick Note:  The cotton “smoke” indicates a firearm equipped Company  has fired and has yet to  reload.  Reloading takes one turn’s Action Phase.  In this photo, the firing Company includes Lord Oumar, who subsequently became very busy using his Company’s Action Phase to rally his Wavering Companies.  His Company took several turns rallying companies before it reloaded.

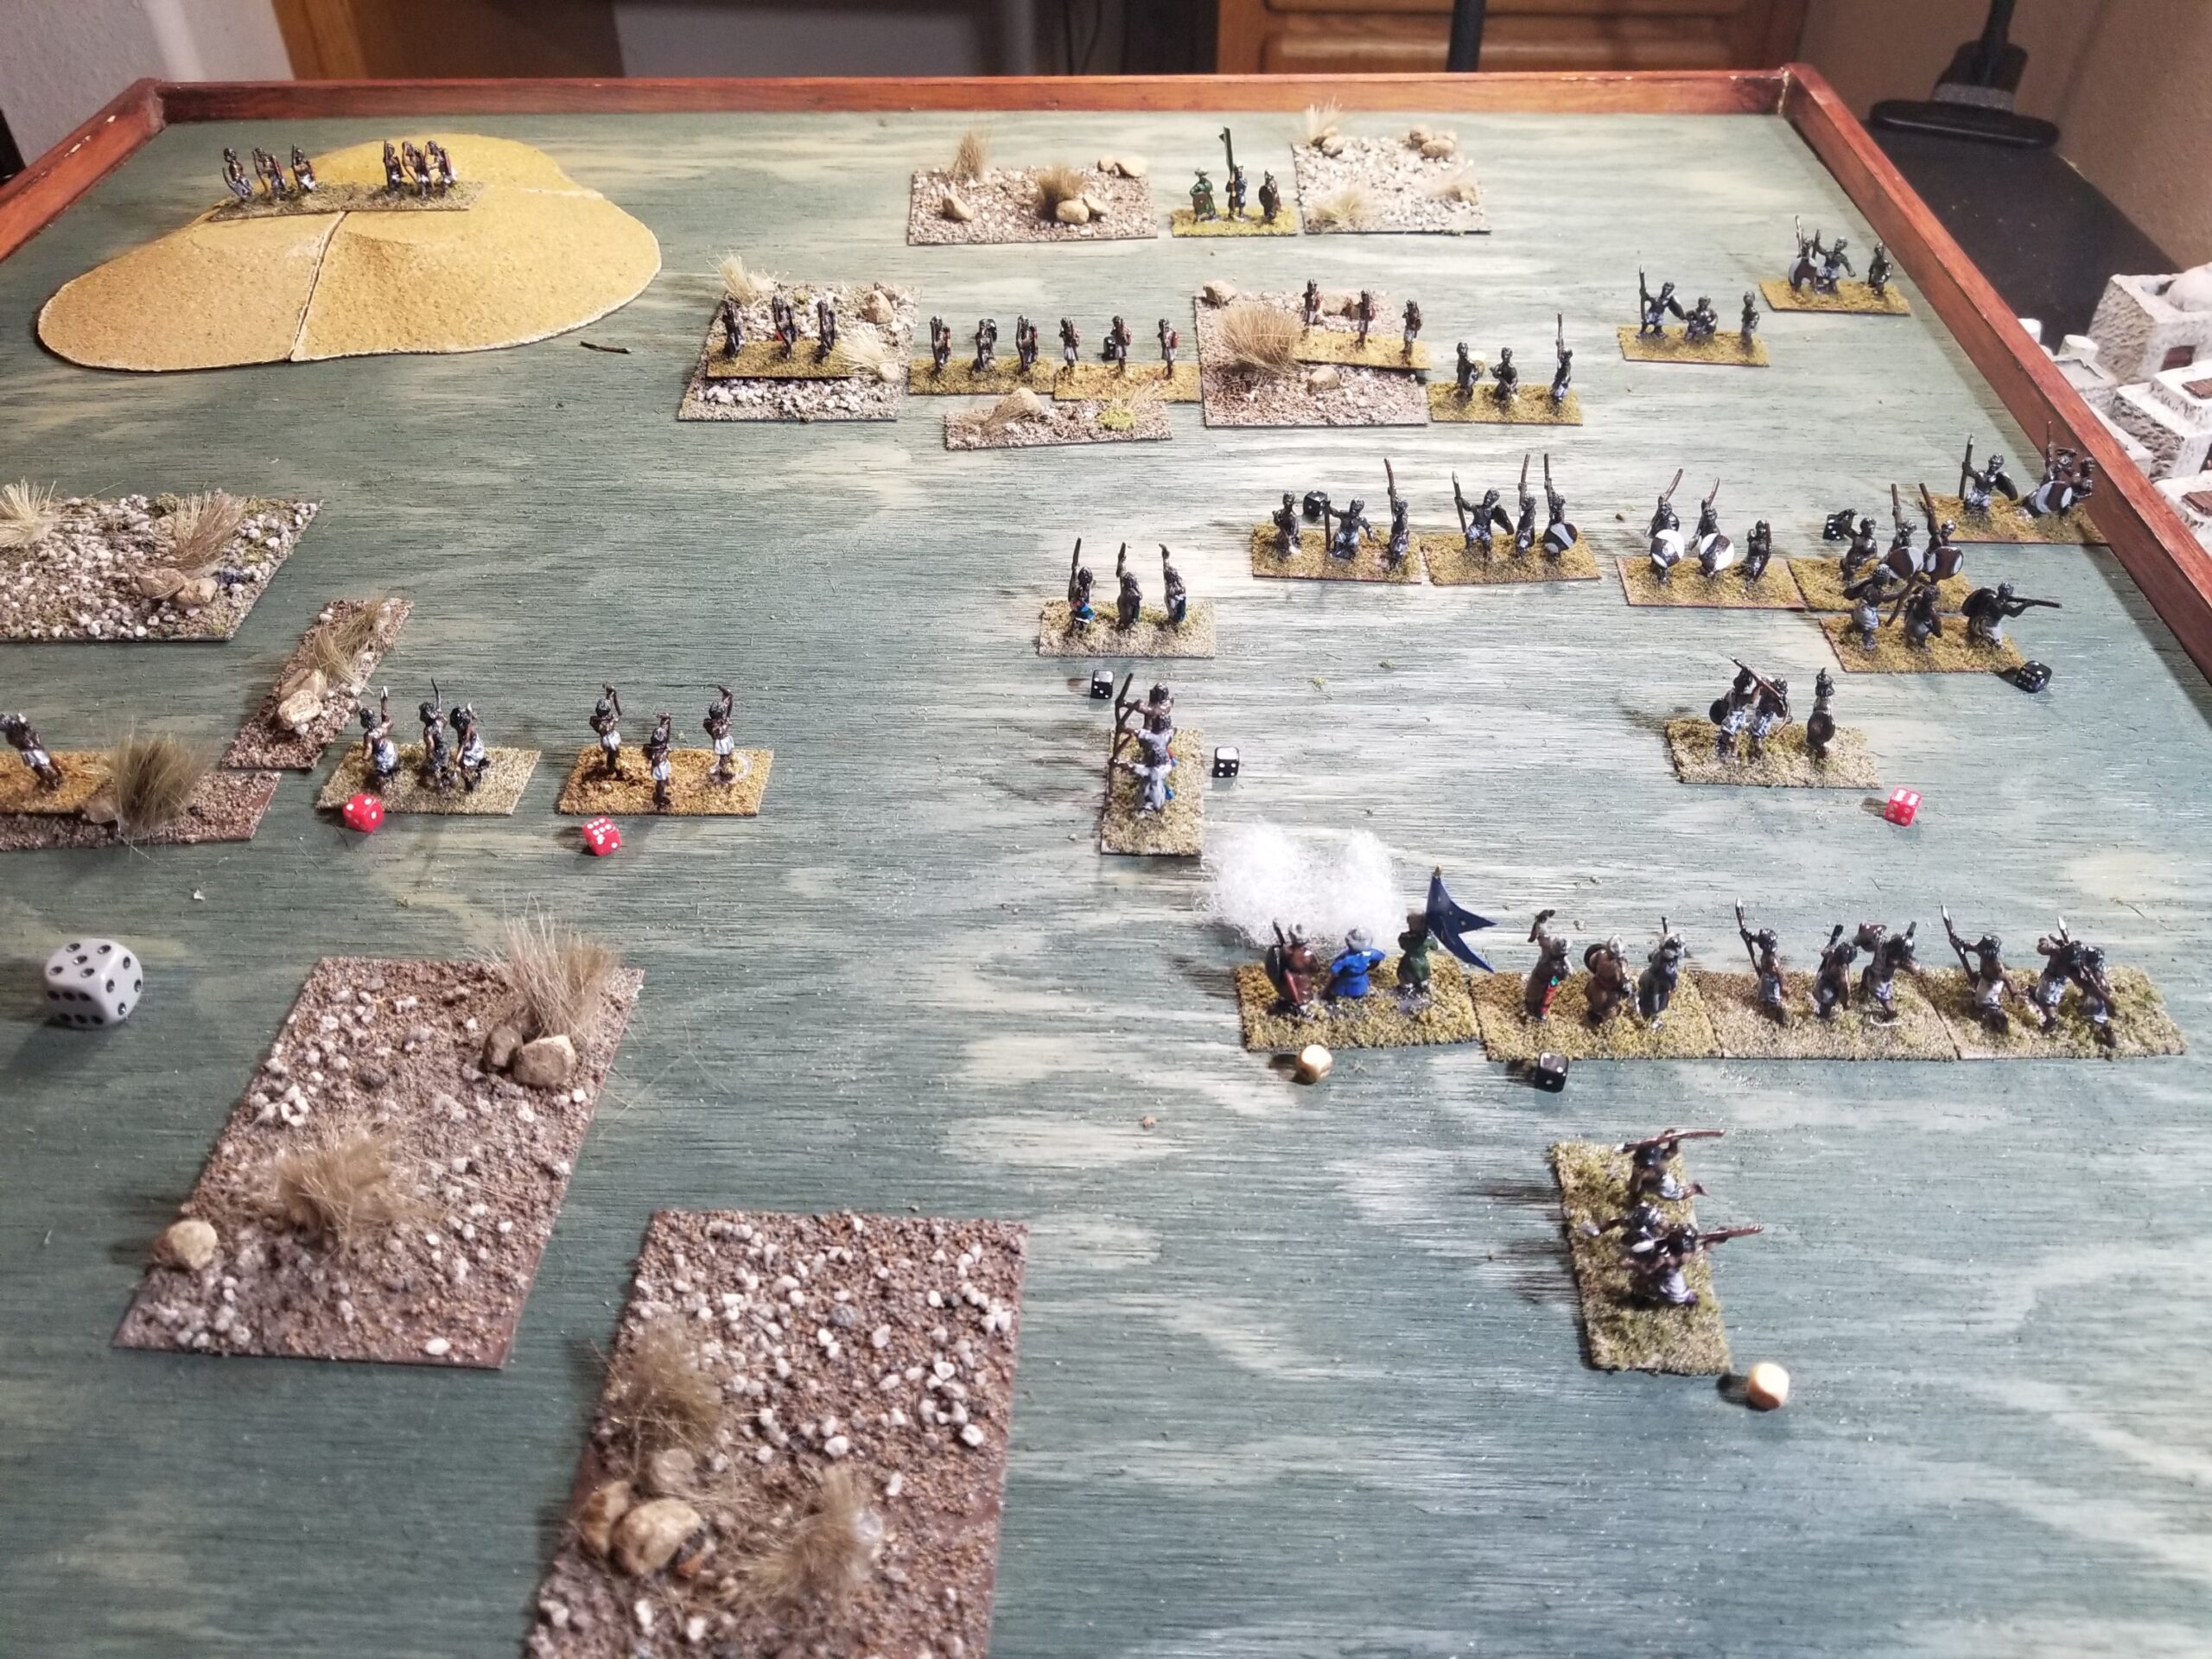
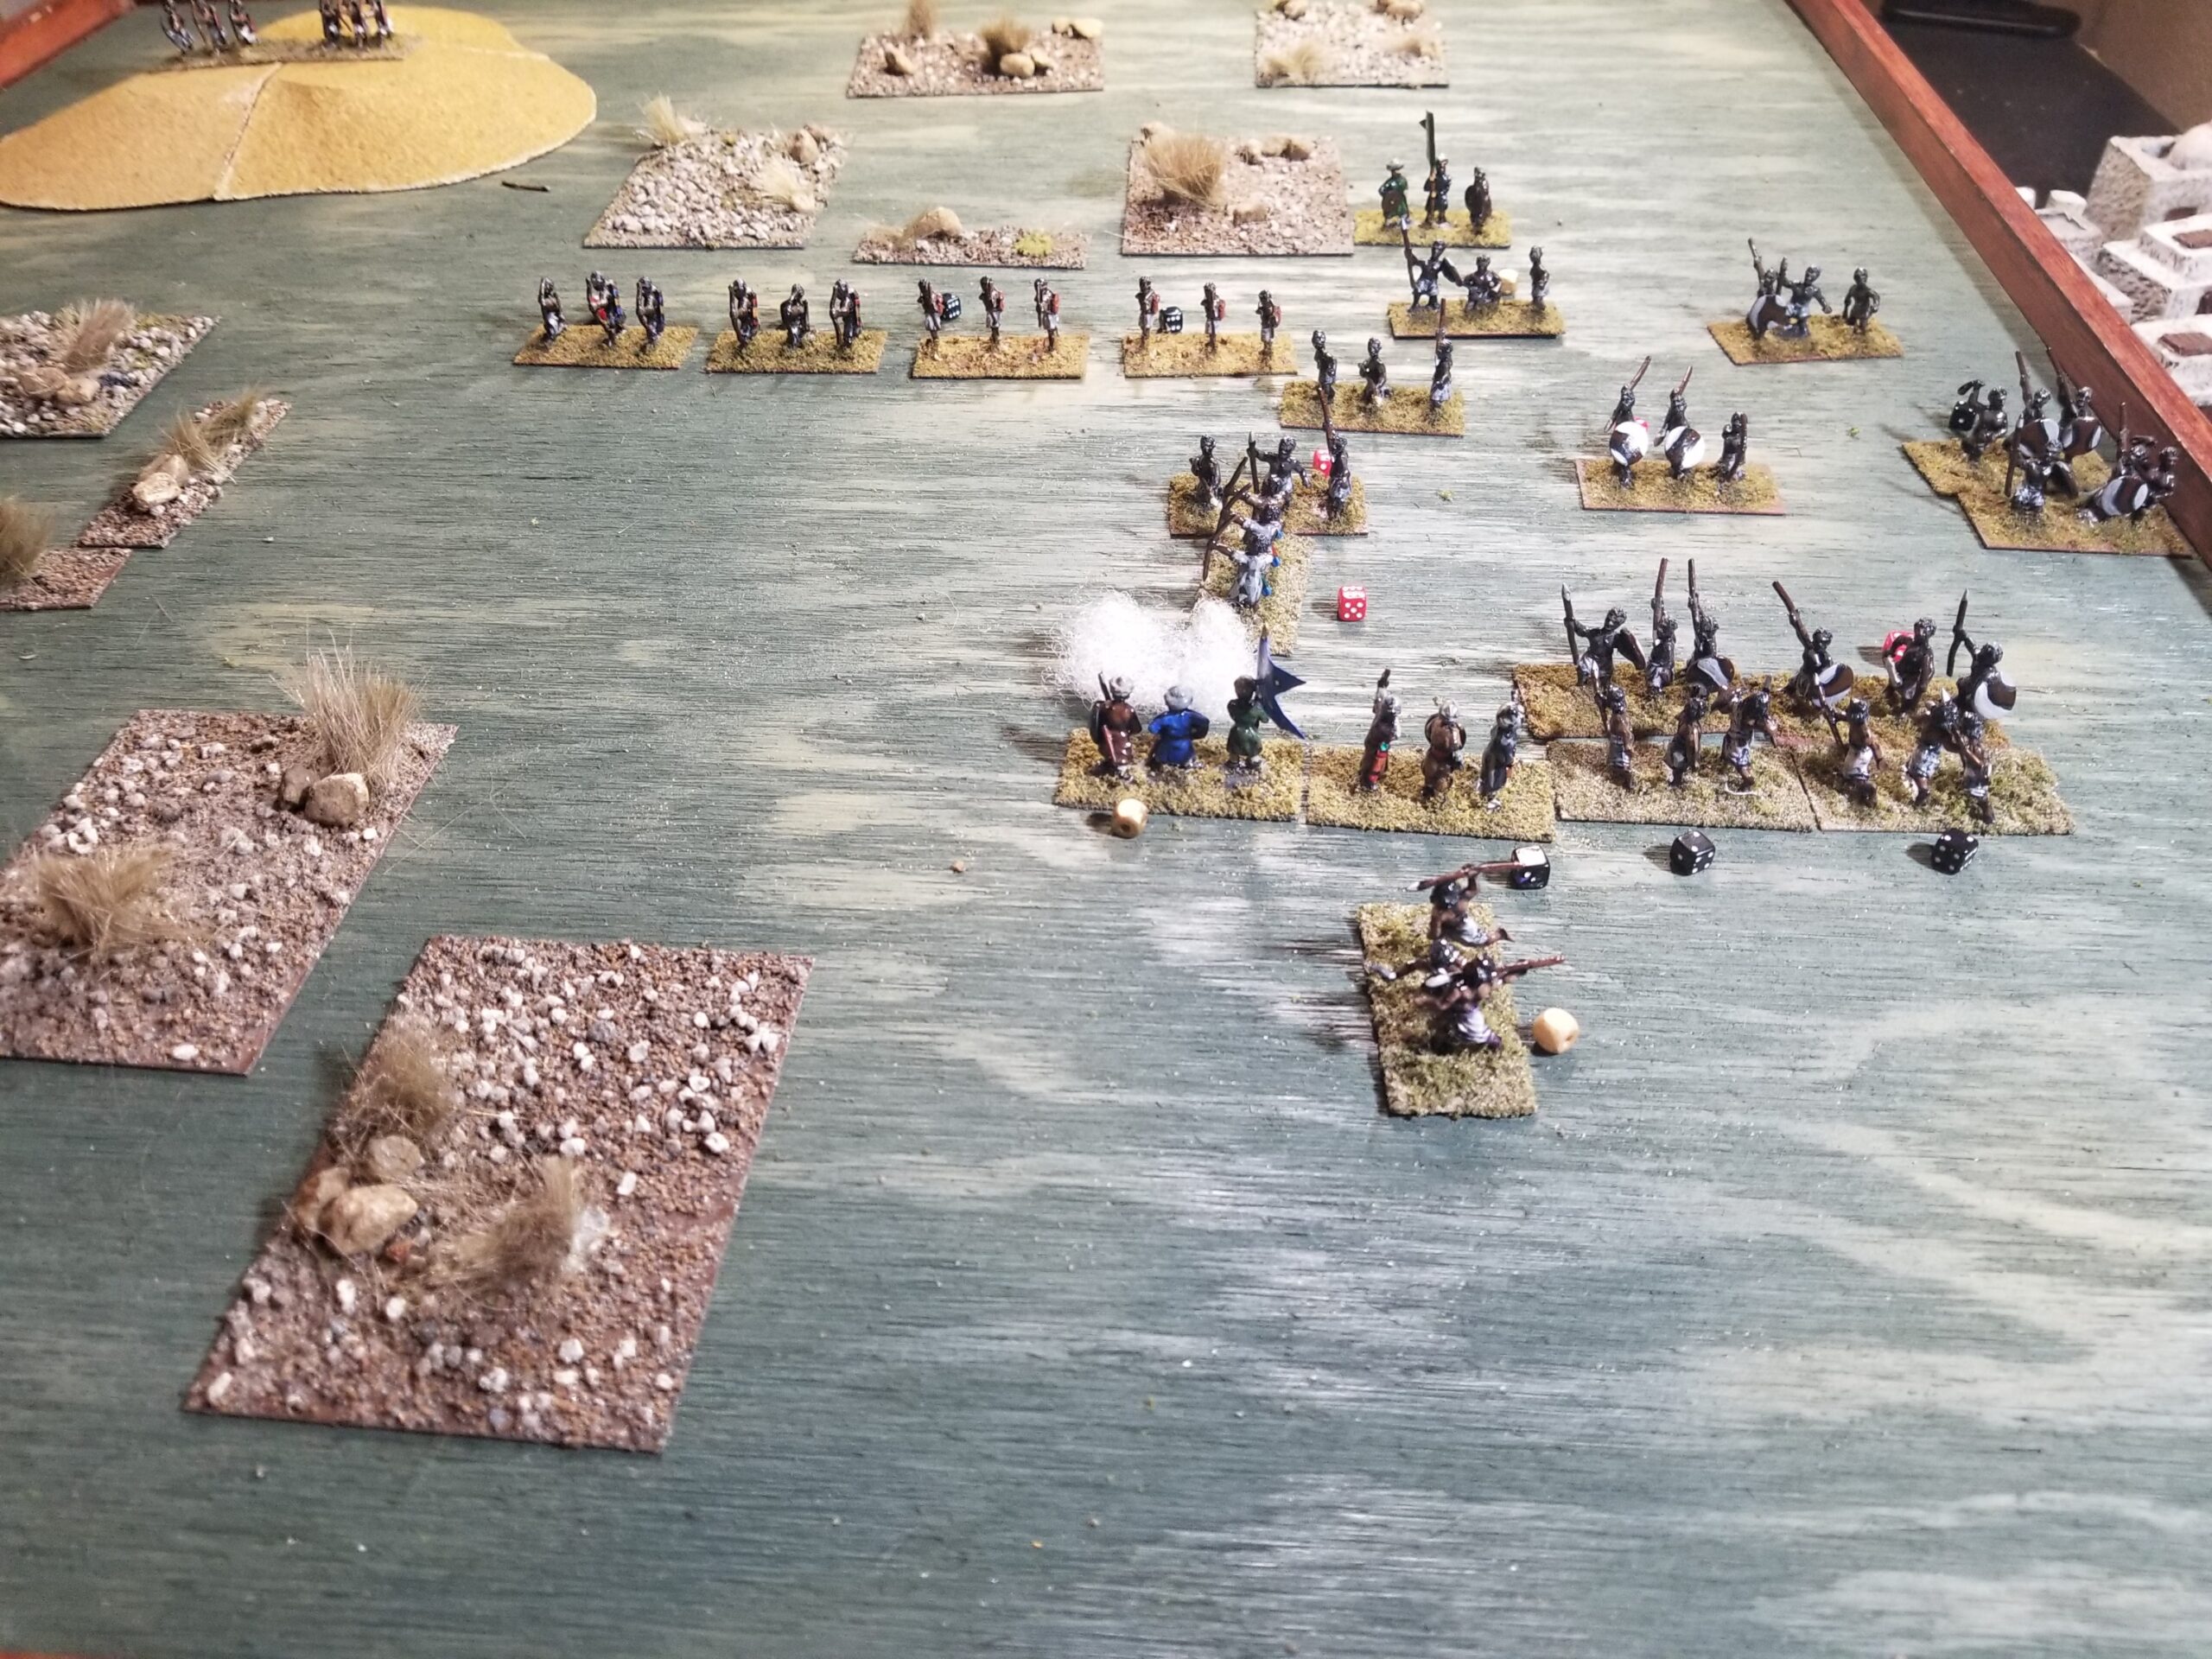
Oumar’s efforts were effective as his threatened flank stabilized.  A Pious Company (with the ability to rally due to their strong religious beliefs – and designated with a gold cube) is shown moving behind the Kattegoans in order to support the left flank.

The Sanwanians maintained their pressure on the Kattegoan right flank, pushing through resistance as the Kattegoan archers continue to be disrupted by missile fire and a flank attack.

As the Sanwanian Archers moved forward  to support the final assault, the Kattegoan flank collapsed.  Only a few companies were able to flee the field without Scattering.

End Game here was very similar to the first battle.  Here’s a few pictures of those final stages of Game Number One.

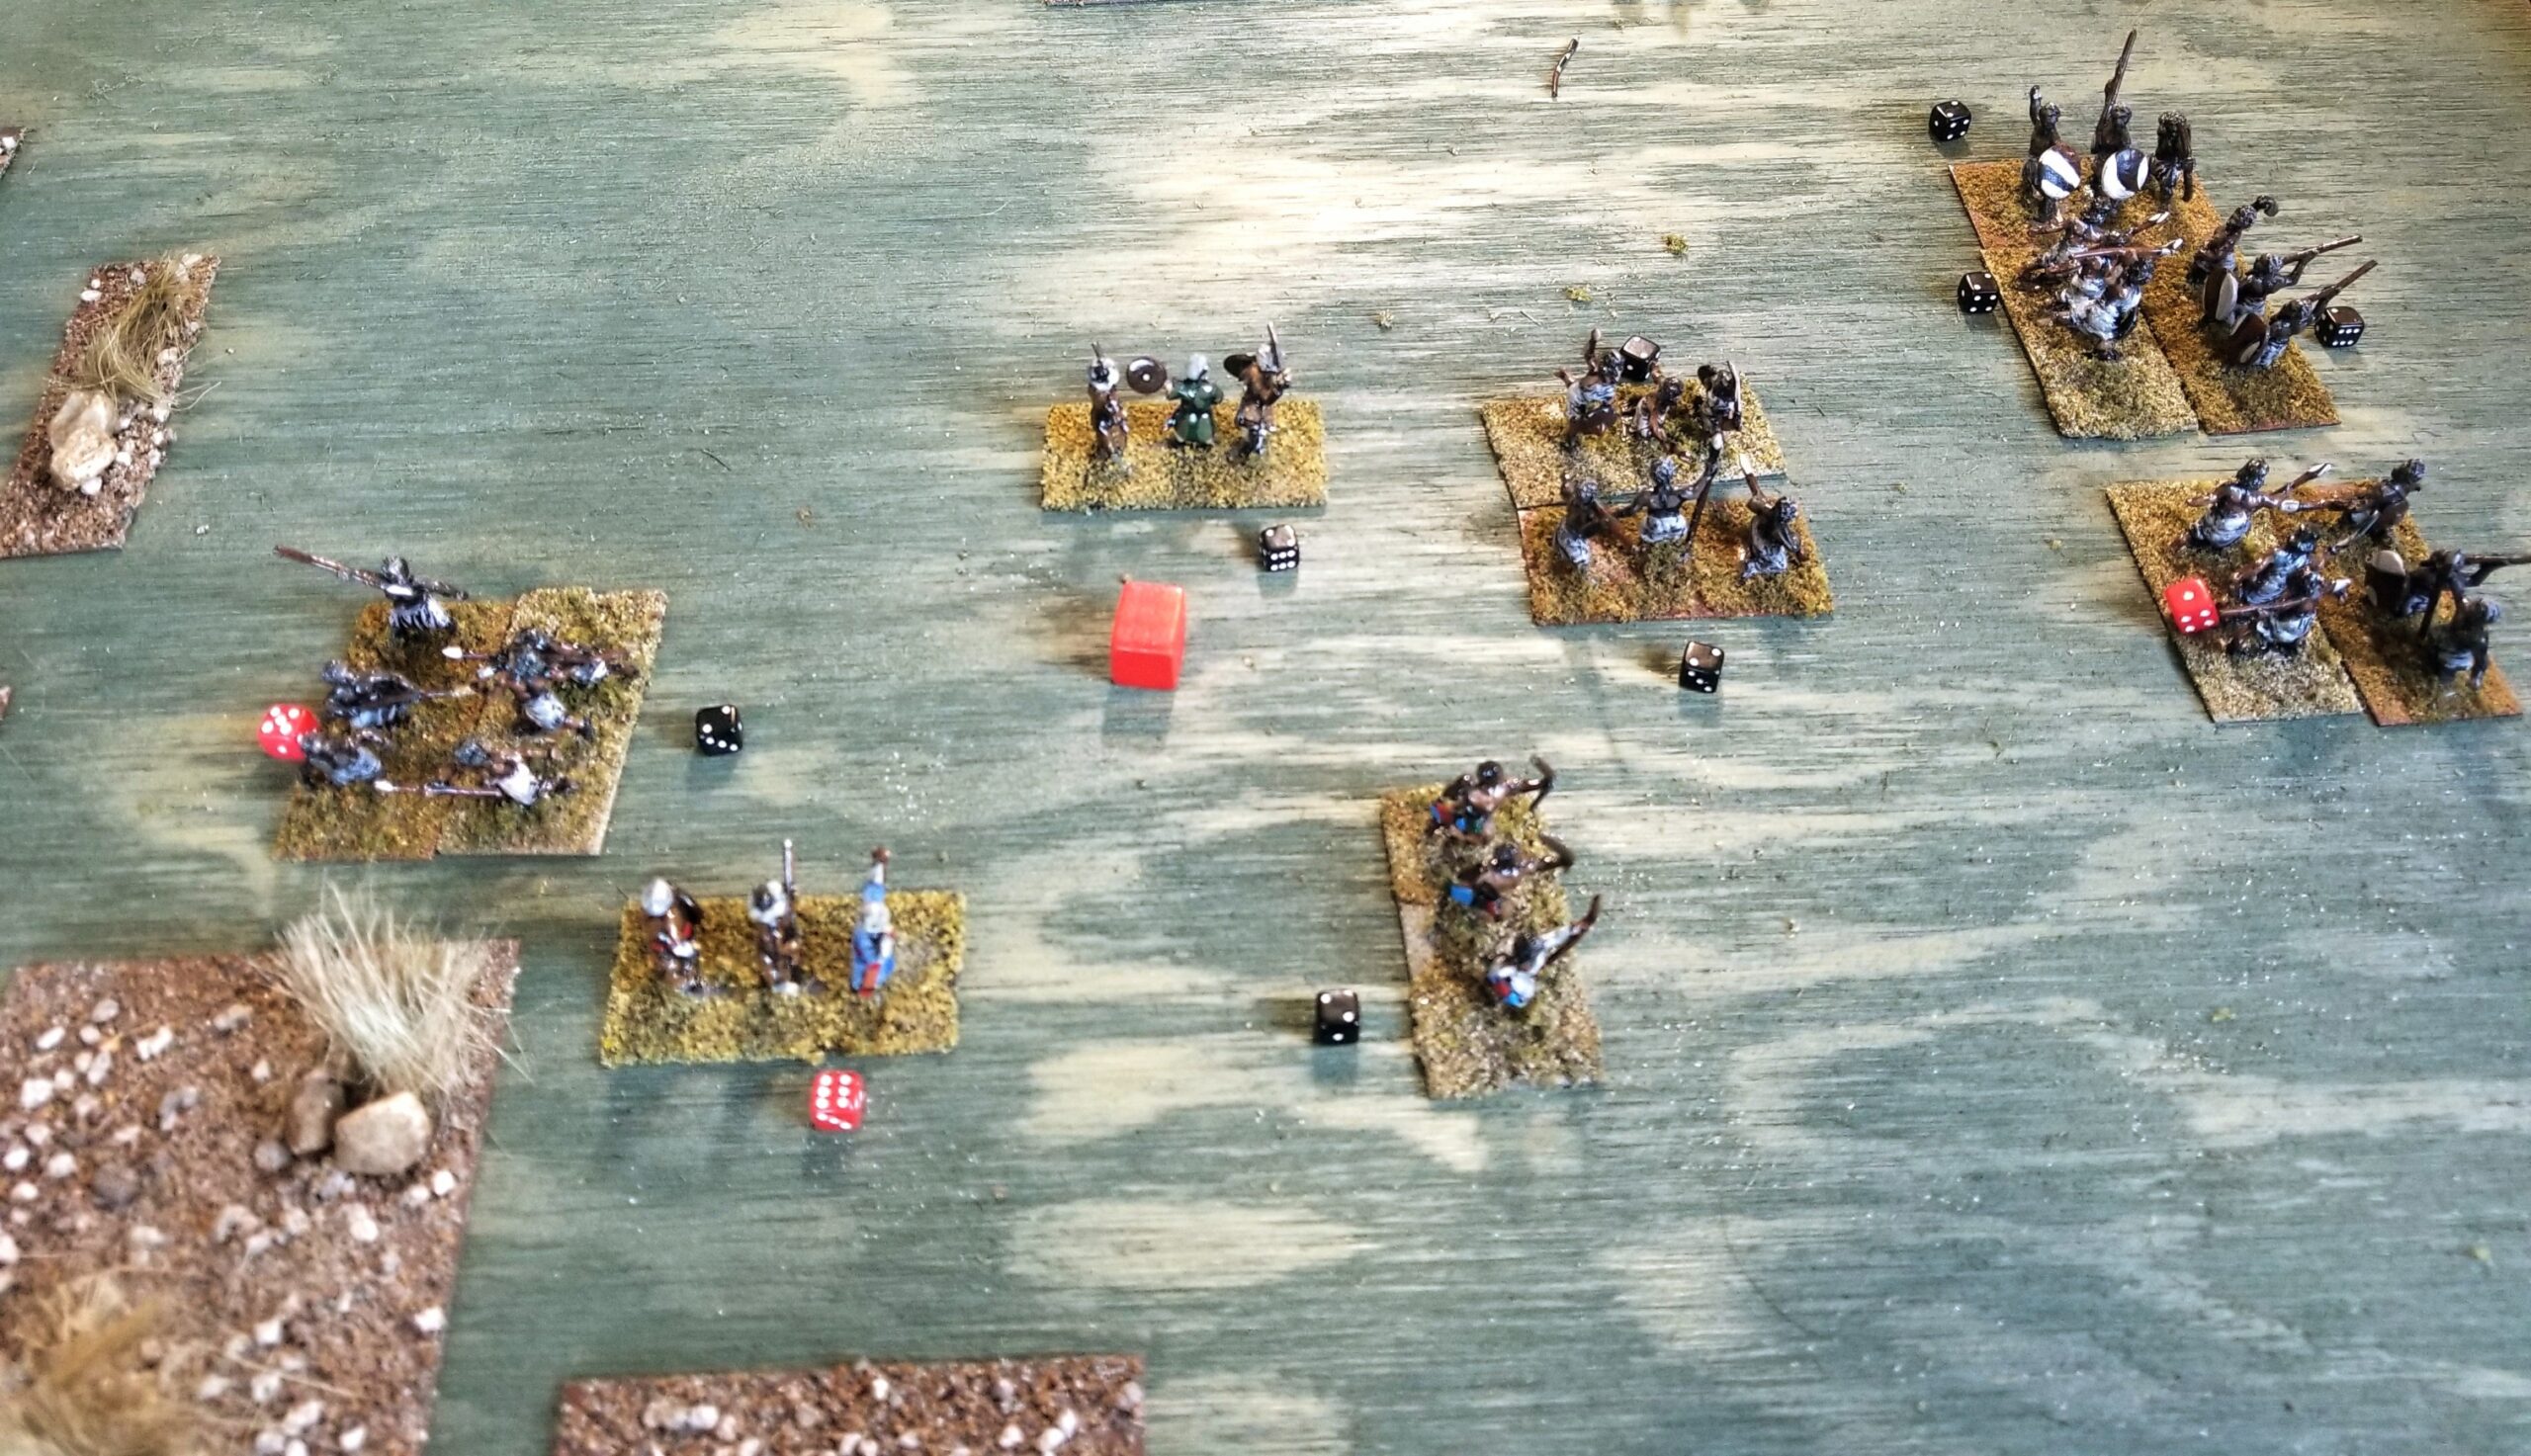
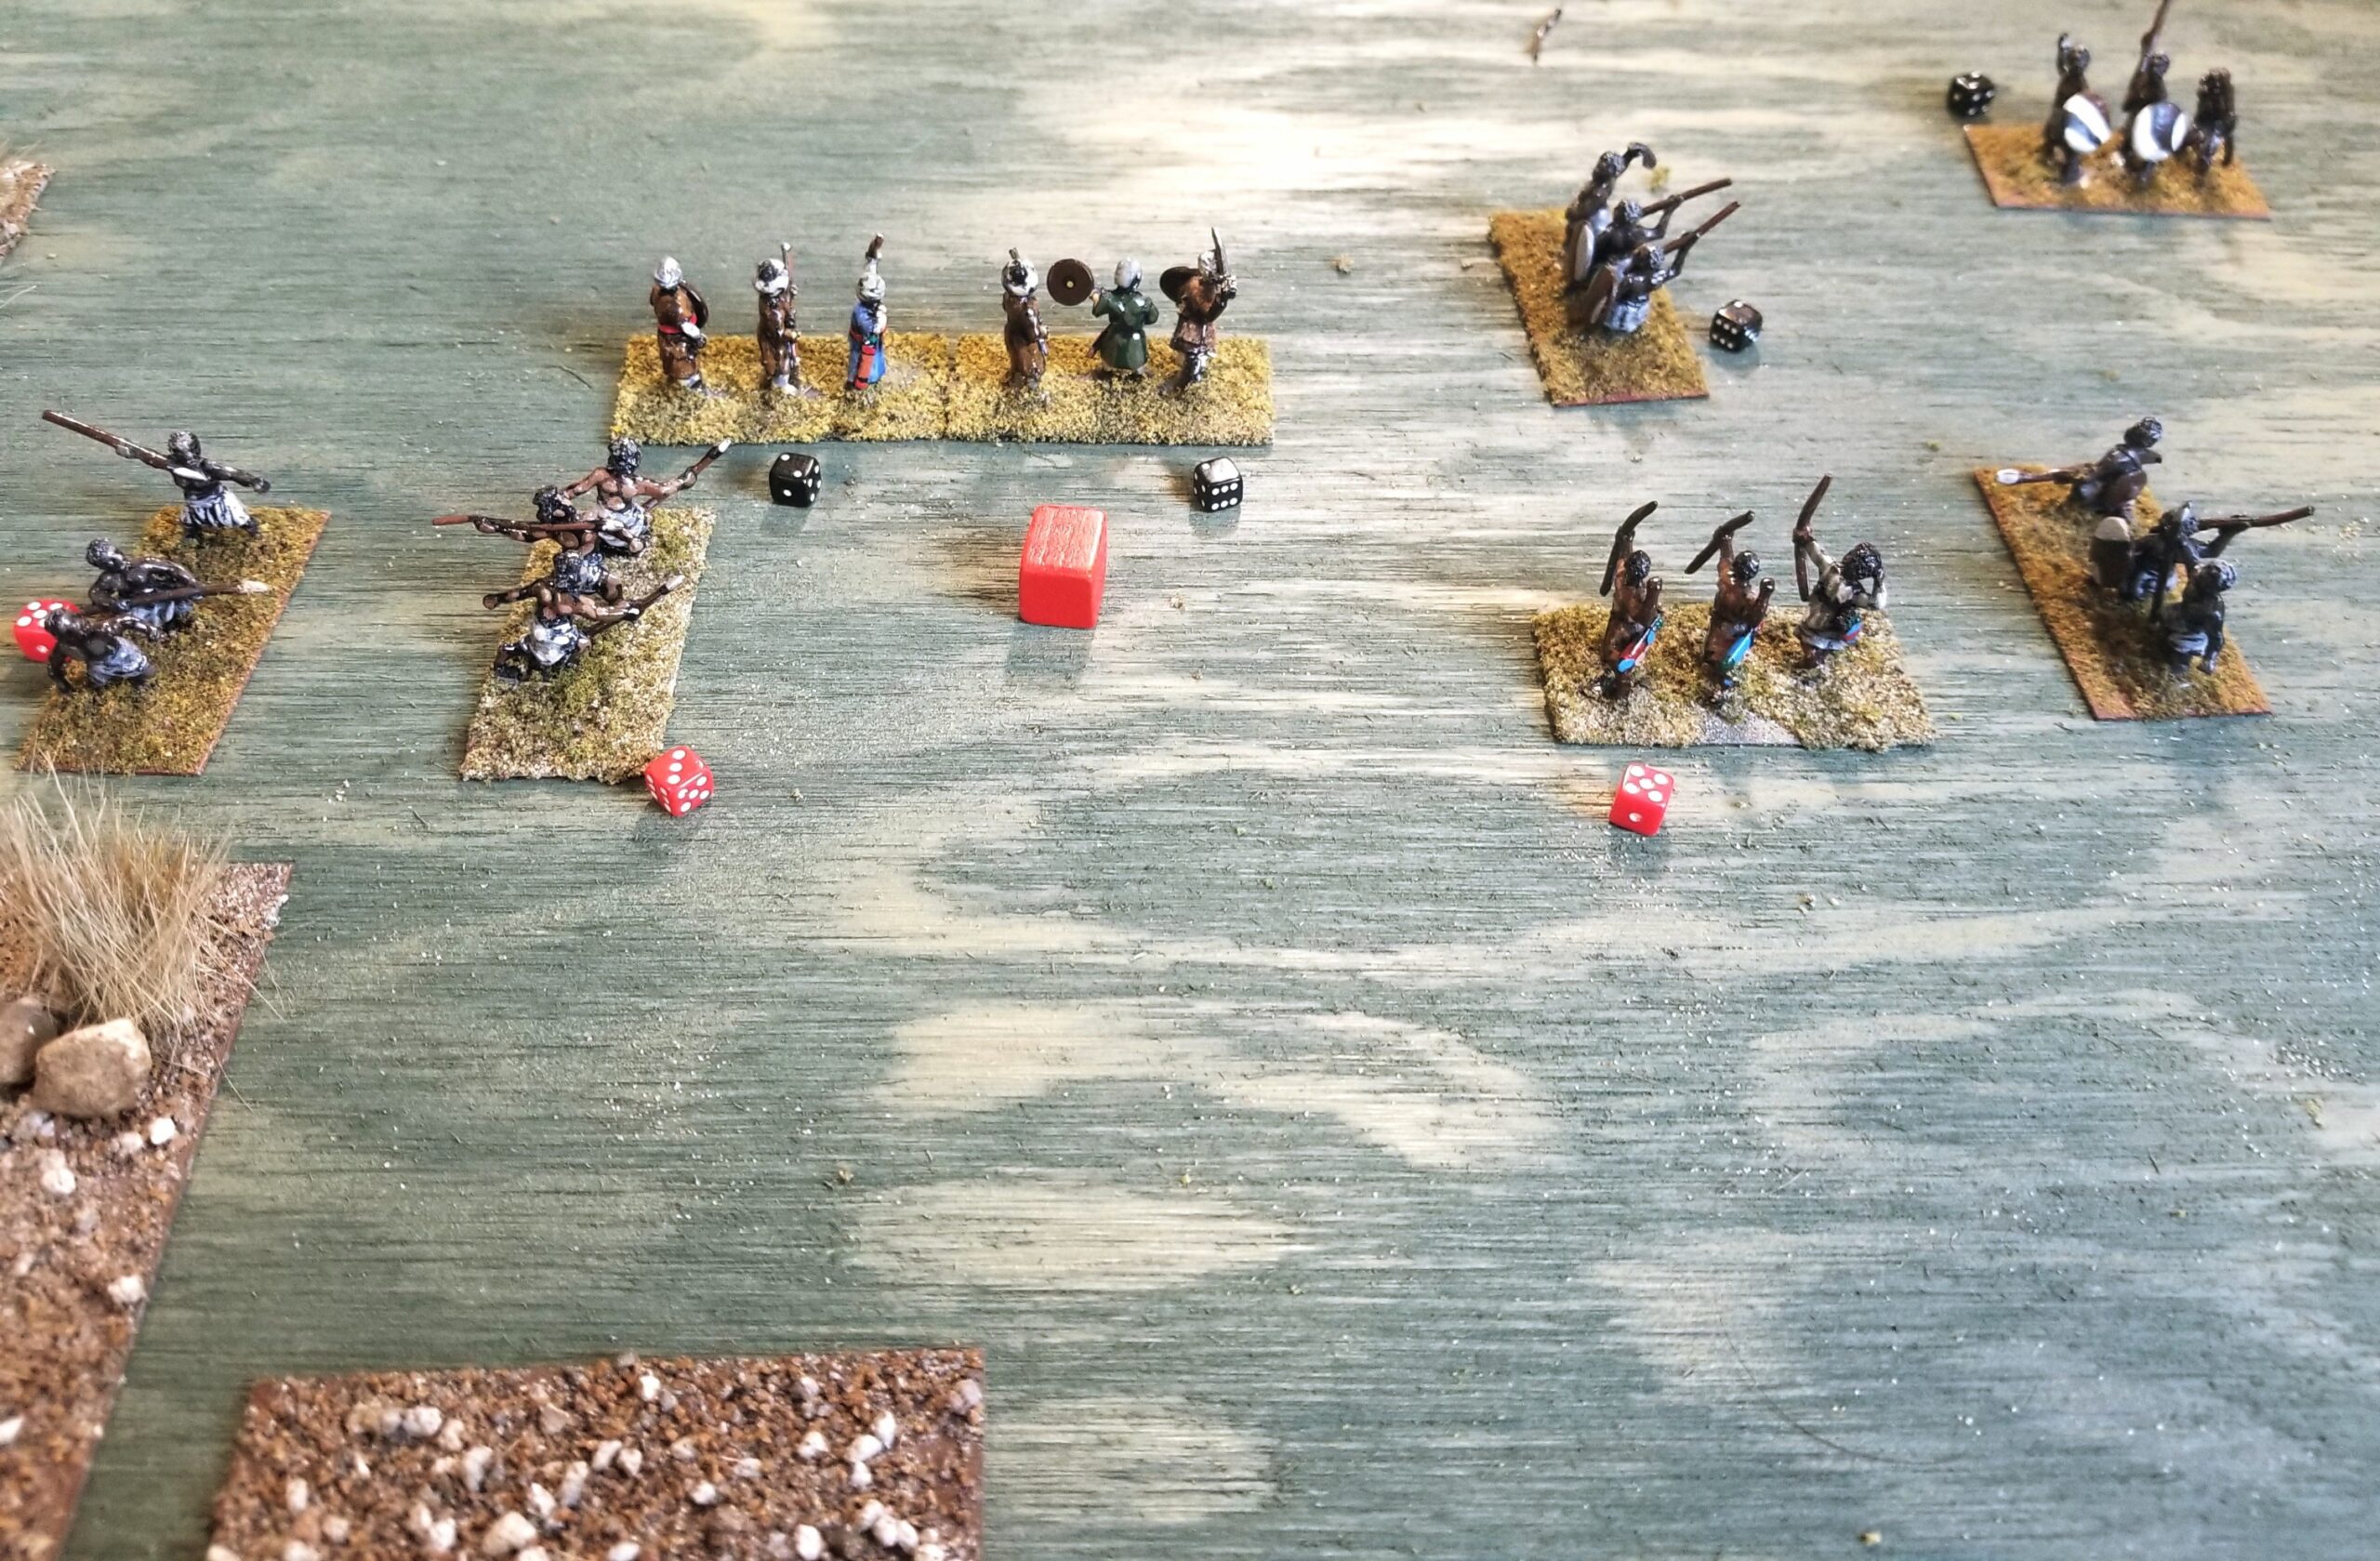
In this sequence, what remained of the Kattegoan right flank/center were hemmed in, and attempted a retreat to the Northwest. It is doubtful their pursuers will take the fleeing Slavers alive.were pursued by the Sanwanians.

Good, fun solitaire game with twists and turns.  Not for the Gamer looking for total control.

Now I have figure out the ramifications of this stunning victory.

Done…..Not Done

Classic miniature wargaming episode involving the ongoing struggle with my K&M trees.

The order arrived last week, so I set to work.  Quick service.

While not a “how to do”, because I am the last person to pose as an authority on the “crafty” part of the hobby, here’s a quick overview of the process used to get  the trees ready for the table.

The first step was to prime the bases, then paint with WalMart Burnt Umber.

Here’s the tools and materials for the rest of the job.  The trees in the background were from my first attempt as described in an earlier post.

A 3/32 bit was perfect for drilling out the bases.  I found the “as is” base hole to be just a bit too narrow for the threaded tree trunks.  The masking tape is approximately 4/10 inch wide.

Some of the trunks need to be shortened (so they wouldn’t protrude through the bottom of the base) and some bent, so a cutter and pliers was needed.

The tape was wound around the upper part of the trunk, so it (roughly) “matches up” with the trunk diameter of the base.

Before inserting the tree, I dabbed the exposed trunk and base with Superglue.  Held it for about 10 seconds in a (relatively) straight position.

Then I painted the taped portion of the trunk with Burnt Umber.

When all 25 of the trees were finished, I flocked the bases.

Done.

No.

I had added a package of 38mm trees to my order, thinking they would match up with my smaller trees.  Despite measuring, it was not the case.  Too small.  But, they were perfectly serviceable for my 15mm figures.  Well, those fellows need properly sized trees on their table, also.

So, another order.  The good news is that the smaller trees do not need tape for their trunks.  Just prime, paint, glue, flock.  We’ll see.

Quitter?

Came to a startling conclusion yesterday…..

Checked out the Multiman site on general principles.  Discovered a couple of new ASL/ASLSK titles were available.  Couldn’t reconcile pulling the trigger, even at pre-order discounts.

To paraphrase, “It’s a fine line between collecting and obsessing.”  I was getting obsessive about picking up ASL/ASLSK titles.  So many interesting scenarios and troop types.

I doubt that a quarter of them will get played.  The main reason is my avoidance of scenarios with vehicles.  Just another layer of too much granular complexity.

Another is that there are just so many other games to play.

Same thing happened a couple of weeks ago over at Strategy & Tactics Magazine.  Two intriguing magazine games on Russian expansion in Central Asia and the Russo-Turkish wars of the late 17th century.

Would love to have them.  But after paying well over $100, they’d just be browsed and then consigned to a box.  I already have the Red Sash games for the latter, as well as  a “Ready Box” of magazine games that have been waiting to be played for years.

I guess every gamer gets to this point.  I’m never going to say “never”, but it will be awhile before I pay for a new game.

OK, OK…..I did ask for, and received, “Malta Besieged” for Christmas.  I can rationalize that.

Irregular Wars – Rules Observations

Here are some rules observations jotted down after my  just completed Action At Sanwa.

I am going to re-play it using my lessons learned (which includes photography), and post up a report on completion.

Impetuous Companies:

This refers to Companies that are out of command range, and must roll for a table-specified action. These actions seem too extreme for a Company that has a designated task – such as hold a terrain feature – outside of command range. My solution is to have the Company roll as impetuous only when an opposing Company is within nine (9) movement units. This distance is based on maximum shooting range (6 units) plus one-half maximum shooting range (3 units). A Commanding Lord can change that Company’s orders by rolling on the rally table as an action when he is in command range.

Commanding Lord:

In RAW, a Commanding Lord is organic to a specified Company. By design, this limits his ability to control the battlefield. His presence confers a +2 resolve to that Company, which reflects not only his presence, but, I guess, that the Company is an elite force. An alternative would be to allow the Lord to “float” around the battlefield, expanding his abilities to control. This is the norm in many other games. I’ll hold off on changing this, but since I don’t have any bases with a leader figure “built-in”, I’ll use a Gold Cube to designate the Lord’s Company.

Kibwe (Wandering Mystic/Shaman):

In RAW, a Faction can have a Pious Company. This Company can rally a friendly Company, or curse an enemy during an Action Phase. I literally forgot about Kibwe during the game. In the re-do, I’ll designate a Company for him and mark that Company in some manner. This will be a compulsory Shaman Company, not an option as shown in the Army Lists.

Wavering Companies:

I had some problems with the mechanics.

A wavering Company has been reduced to a resolve value of one (1). When reaching that value, it must immediately retire 1d3u (units) directly to its rear, while maintaining its current facing. A wavering unit acts normally except it cannot voluntarily move to engage in melee.

Should the mandated retirement be the Company’s action for that or following turn? If a unit wavers as a result of shooting, it can move back to its former position in the Action phase, plugging any gap its retirement had caused. It can return to meet any opposing force entering that gap with a charge bonus of +1 (opposing Faction has initiative, moves to flank unit exposed by the withdrawal) if the Lord rallies that Company earlier in the phase. Doesn’t seem right. In WRG, any mandated withdrawal counts as move for the following turn. I’m going to monitor this.

One question just answered itself; that of a wavering Company that wins a melee. In RAW, a Company that scatters, wavers and retires, or withdraws from melee might be pursued. The possible pursuer must roll 1d6 for an outcome. One is that the Company must pursue their opponent using full movement directly forward. A wavering Company cannot voluntarily move into melee. I missed the operative term “voluntarily”. The victor’s pursuit in this case is mandatory, not voluntary.

Other Observations:

The following may be no more than a result of my die rolling during the game:  Shooting was relatively ineffective, and few melee victors pursued their withdrawing opponents

Are Companies too agile? A tactic that emerged was “spin and melee”. A Company can change facing using one (1) unit of their move (RAW indicates for 90 or 180 degree turn). This leaves two (2) units to move into contact with a nearby opponent, and receive a charge combat bonus. Also, and I think this is a good thing, RAW leaves quite a bit of latitude for relative position (1/2u “free” move sideways or wheel) allowing companies to “square up” for melee contact. Many other rule sets have a minimum distance to receive a charge bonus, and are strict about unit-to-unit alignment. Something to consider.

The scattering of one Company can cause a catastrophic chain reaction. Any Company with two (2) movement units (no terrain adjustment) of a scattering Company, loses one (1) resolve. If you have a number of wavering units, they can all scatter very quickly. This happened to the Kattegoan right flank, leading to a decisive victory for Sanwa.

Command Range must be checked at the beginning of each turn. I did a bad job of this.

The 2 foot by 2 foot was too crowded using RAW’s Army Lists.  I’m going to cap each Army at 14 companies or ( if die rolls mandate) less.

Action At Sanwa – Part 1: Preliminaries

The Wandering Mystic, Kibwe Nkruma and his followers entered Kattego some weeks ago.

He quickly alienated  the conservative Kattegoans.  More importantly his disruptive proselytizing drew the ire of Kattego’s leader, Oumar.  Before his arrest order could be carried out, Kibwe fled north to the village of Sanwa.

He had quite a different reception in that village, where the people treated him and his disciples with respect.  The Sanwanians have a number of belief systems, all of which emphasize the supernatural.   Kibwe’s pronouncements resonated with them, and he became a much sought-after soothsayer.

Angered by Kibwe’s escape, Oumar ordered he be pursued, arrested, and brought back to Kattego.

The Sanwanians refused to allow Oumar’s order to be carried out.  Now angered, the usually even-keeled Oumar threatened the use of force.  Once again, the Sanwanians refused to comply, encouraged by Kibwe’s assurances of a great victory.

Anger turned to rage, and Oumar ordered a punitive expedition mounted to take Kibwe by force.  The people of Sanwa  prepared to meet the threat.

As the Kattego Army approached, the Sanwa leaders chose an area of rough ground, just outside the village and overlooked by a small hill, to make their stand.  The small army marched from the city and  waited for the advancing Kattegoans.

Yes, It Usually Is This Difficult

I fish, so I read about fishing.  Sometime in the last couple of years I came across an article describing a unusual fishing survey.  The survey asked the question, “What Percentage Of The Time Do You Go Fishing And Not Catch Anything”?  The surveyor insisted on brutal honesty.  If I remember right, the aggregate was about 75 percent of the time.

Now, who wants to hear about a fishing trip where you don’t catch a damn thing?

I think it’s the same with wargaming blogs.  People only want to read about success with lots of supporting eye candy.

In the interest of something different, here’s a quick story about the proverbial 75 percent.

A couple years ago, during my period of blog inactivity, I decided to upgrade my terrain.  One priority was  purchasing some additional K&M trees.  I had splurged on several many years ago, but wanted/needed more.

It was hard to find them in the USA.   When I did find a provider, I was overjoyed that bases were available.  For some reason, my first ones came without individual bases, but with a plastic “sheet” (for lack of a better word) that, with  superglue and machined nuts,  served to keep the trees upright.  Awkward, do-able, but unsatisfying.  One of those visual irritants when placed on the table.

So, I included a bunch of bases in my order.  Unfortunately, they were no longer in stock and could not be backordered.  The provider  said I could fabricate bases using plastic screw anchors and florist’s tape.  The tree would fit in the anchor, the wrapped tape would form the trunk, and the whole thing  then glued on a (in my case) circular wood base.

I tried.  It was unsatisfactory.  The trees and wood bases went in a box.  The florist’s tape eventually disappeared.

This December I tried again, this time using at first sections of plastic straws and then plastic tubing – from Home Depot – for trunks.  Paint wouldn’t stick to the primed straw sections, and the curved plastic tubing was an absolute bitch to get straightened out.  This drama played itself out over the entire month.  My final attempt at basing resulted in  escalating levels of chaos.

Looking pretty organized.  Pliers, bases, trees, adhesive.  But then…..

Circular bases weren’t working.  Too shallow for a number of different adhesives/mixes of adhesives, so I started digging around for alternative bases.

I found this half-hemispheric (?) bit of wood.  But only one.  Problem with it was the hole had to be drilled perfectly straight or the tree would lean awkwardly.  I have marginal straight-drilling capabilities.   But, bending the trunk would make it acceptable.  Just barely acceptable.

Faced with awkwardly bent trunks – another set of minor table irritants –  and a trip to Hobby Lobby to find the needed wood bits, I decided on a drastic course of action……

I Googled up “K&M Trees USA”.  YES!  I found a new provider with bases in stock.

The bases have shipped.  What unexpected challenges will they bring?

Why Not! Irregular Wars Returns To The (Renovated) Table

It was a chicken and egg situation.  Which came first, the decision to refurbish the old DBA table, or re-boot the Irregular Wars East African Renaissance Campaign?

Either way, after reading the rules, fixing up the 2×2 foot table with Home Depot plywood/ spray paint, and reviewing  old posts, serious scenario development work is now underway.   The Yes/No/Maybe dice have had quite a workout over the weekend, answering an endless number of questions scribbled on a yellow notepad.

Before two new characters are introduced, a quick review and update on this “inspired by true events” campaign last featured some three-plus years ago, having started way back in 2016.

Oh, and a map might be helpful.  Don’t you just hate having to following a military narrative without (or with bad) maps.

Couldn’t find the original, so this one – annotated with a battle site – will have to do.  Gee, I’m a professional………bad map!

The ineffective Lord Renaldo has been recalled to Portugal to face the King and Bastinado.  His replacement is General Einar Costa.  General Costa was born in Brazil, and has fought in several campaigns.   He is devout, experienced and inspiring.  He is considered a “lucky” general.   His staff includes a skilled physician and highly regarded master gunner.

Portuguese strategy has shifted from attempting to exploit the areas outside of Ekene to simply holding on to the port, using it as a stop-over for  merchant ships traveling to/from the Indian Ocean.  While government support is still relatively low,  additional funds have been provided to provide for the city’s defense and improve the port’s facilities.

To the north lies Mwenye.  This port city is ruled by Sultan Jabir Efe.  He is an experienced ruler and leader, having controlled the city for as long as anyone can remember.  His knowledge of the coastal region is second to none.   A thriving port, the city is renowned for its doctors and hospitals.  His armory is supervised by a formidable master gunner.  The Sultan is pragmatic and keeps on good terms with all neighboring cities and villages.

Sultan Efe is using the small, but active, Chinese merchant community in an attempt to establish contact with the Chinese fleet cruising between Aden and Mogadishu.  The local merchants have assured him that interaction will bring increased commerce and wealth.  So far, his efforts have not been acknowledged.

Bey Iman Mahir continues to rule Behefe.  He stills pays tribute to his mentor, Sultan Efe of  Mweyne.  Now an experienced leader, he has excellent regional knowledge.  Relations between Behefe and the indigenous peoples of neighboring Neo are good.  He has been ably aided in his campaigns defending the city by an outstanding physician.

Bey Mahir has also heard of the Chinese fleet.  Not fully trusting Sultan Efe’s motives, Mahir has sent an envoy north to Somalia.  He is to contact Ottoman leaders and inquire as to their interest in trading with Behefe and, perhaps, acting as allies against any threats.

After his surprising victory over the Portuguese, Oumar has emerged as  leader of Kattego village.  Deeply suspicious of outsiders,  his people consider him an experienced and inspiring leader with a vast knowledge of the lands lying west of the coastal cities.  They also believe he is blessed with good fortune.  His success has not effected his humble manner nor aversion to flattery.

More is now known about the Mystic travelling in the region.  He is Kibwe Nkruma, also called Abdal (The Servant) by Arabized Africans.  He is a Diviner, from the West, and a disciple of Shango,  Nigerian God of Fire and Lightning.  He has a small, but devoted, group of followers.  His current whereabouts is unknown.

Rumor has it the leader of the  Chinese is Admiral Lei Qui.  According to Mweyne’s merchants, his reputation is as an inspiring and experienced leader, with strong Buddhist beliefs.  An excellent judge of character, his staff includes an experienced surgeon as well as a highly competent quartermaster.

The region has been relatively tranquil.

Pursuit of Glory AAR- Part 2

Quick Comment:  This game was played using the First Edition, not the recently published Second Edition which, from what I gather, contains some significant rules modifications.

And now….Wargame Forensics.  Why?  I forgot to include the cards played in my map photo.  So, here’s a stab at what happened during the Summer 1915.

The major development was the Allied invasion at Gallipoli and accompanying Central Powers response.  It was business as usual in Caucasia – with more attrition – and a lack of activity on other fronts.  At this point, the Ottoman replacement pool is dangerously shallow.

During the Fall 1915 turn, the Allies shifted focus to  Mesopotamia, eyeing an undefended Baghdad.   The Marsh Arabs tribe frustrated the Allied advance, buying time for the Central Powers to deploy forces to the threatened city.

The Romania Enters The War card was played in error.  Tim noticed that the pre-conditions had not been met (Allies in Salonika), so the forces involved were taken off the table and Tim used the card for operations.

The Central Powers were in reaction mode, trying to cobble defenses together in Mesopotamia and Caucasia, attempting to build up the replacement pool, as well as maintaining some momentum in their effort to “Set The East Ablaze” using dissident tribes.

Our final turn was Winter 1916.

The Allies played the Russian Winter Offensive card, reducing the negative effects on winter attacks, and so maintaining the momentum of  their  push towards Anatolia.  The Asquith-Lloyd George card allowed an increase in British aid to Russia in the form of replacement points.  These positive developments would help Russia delay the beginning of the revolution.

The Central powers gained Bulgaria as an ally  (forces cannot be set up until the end of the turn), and the Ottomans were able to stabilize both the Mesopotamian and Caucasian fronts.   For how long is anybody’s guess.

As usual, just when things were getting good, or dicey depending on one’s perspective, it was time to pack it up.

One overarching observation is how both of us shied away from any significant effort(s) outside of the Caucasian front.  Yes, Tim did invade both Mesopotamia and Gallipoli, but with limited assets.  Neither of us showed any interest in the Sinai or Egypt.  The historical Allied invasion at Salonika did not occur in this game.

My other impressions from the Central Powers’ perspective are:

  1.  Is it worth pursuing a peripheral strategy focusing on Jihad and tribal actions?
  2. How quickly Ottoman forces are reduced.
  3. Given this attrition, is there a more defensible series of positions in Caucasia that will not provide the Russian player with the ability to further delay the revolution?
  4. Outside of Bulgaria (and perhaps the peripheral strategy) what are the opportunities for the Central Powers to be pro-active?

My head is starting to throb.  Time to play something less taxing.

Pursuit Of Glory AAR – Part 1

The first rule of Blogging an After Action Report (AAR) is to blog right after the game.  The second rule of Blogging an AAR is to……you know the rest

I’ve let two weeks pass since Tim and I sat down for a session with the game that gives both of us headaches.  So many situations, so many theaters,  and so few cards

We managed to get through the Winter 1916 turn, and left it with Bulgaria entering the game.  Tim had a definite advantage at that point, as my Ottomans were badly attrited, and barely hanging on in Caucasia.  But, that situation had stabilized to some degree and his Commonwealth forces had bogged down in Gallipoli.  On the other hand, my situation in Mesopotamia was not the best, with only a corps between him and Baghdad.  Still, I now had the Plucky Bulgarians along with their powerful German friends ready to go.

Here’s a shot of the situation at the end of the (first) Fall 1914 Turn.  Plot Spoiler:  These photos are up to my usual (sub) standard.

I failed to capture the cards played in this photo and, as you will see, it happened again in the Summer 1915 turn.  Lack of attention to detail.

My strategy from the outset was to increase the Jihad level as quickly as possible by playing  event cards and capturing Jihad cities.  Of course, starting the time track towards the Russian Revolution was a priority.  I needed  the “Parvus To Berlin” card on the table as quickly as possible.  From an operational standpoint, I wanted to actively defend my victory point cities in Caucasia.  Any loses would delay the revolution. I kept a relatively strong force in Western  Anatolia to act as a reserve, especially to counter an Allied amphibious invasion of Gallipoli.  One challenge for the Ottomans if reserves are kept there is their rudimentary rail system, limiting their ability to shift troops from one theater to another.

I’ll ask Tim to provide some comments on his strategy and operational intent.  From my perspective, he was aggressive in Caucasia, and did an excellent job of wearing down the Ottomans.  This is important as the Turks have limited and dwindling replacement opportunities as the game wears on.

During the turn I played the “Goeben”, “Persian Push” and “Pan-Turkism” cards.  I was able to destroy the fort at Batum, and the latter two cards started jacking up the Jihad level, and my ability to place dissident tribal units on the map.  These tribes can take isolated victory point cities and delay/defend Allied moves in Persia and Mesopotamia.

Tim enjoyed playing the “Enver Goes East” card, forcing me to undertake mandatory attacks at time I wasn’t quite ready for them.  He also opened up the Mesopotamia theater by playing the “Russo-British Assault” event.  Surprisingly, he played the “Churchill Prevails” (more on this later) event for replacements.

Here’s the situation at the end of the Winter 1915 turn.

The Allies began the turn by playing the “Kitchener” card.  This allows the British player to provide the Russians with replacement points.  The “Project Alexandria” initiated a build-up of forces in the Aegean.   And,  it got worse for the Central Powers.  The “Royal Naval Blockade” event was played.  It “caps” the Ottoman replacement pool at 25 points, with each point taken reducing those available and with a -1 Victory Point (VP) adjustment each winter.

The Central Powers used their cards for operation points to undertake less than successful mandatory offensives and taking advantage of victory point opportunities in Persia.

The situation at the end of the Spring 1915 turn is shown below:


During this turn the Allies played the “Churchill Prevails” card, bombarding  forts guarding the entry to the Bosphorus.  Fortunately, for me, only two forts were destroyed.  The “Murray Takes Command” card was also played.  This card initiates the construction of the Sinai Railway,  required for an Allied corps size unit to participate in any regional offense/defense.

Again, the Central Powers concentrated on operations in Caucasia and Persia, launching a corps eastward into Persia, while playing the “Enver To Constantinople” to reduce the havoc that rascal plays on operational planning.

I’ll leave this fragmented account for now, with a follow-up post later this week.

Missed It…..By That Much

The timing was just right.  Finish up over a year’s worth of planning and work on New Year’s Day.

I was close……but didn’t quite make it.

The genesis of all this was my decision to focus on  specific figure brands for  each period.  The next steps were to inventory all my painted lead and decide what rule sets to use.  This all occurred way back in October 2022.  The rule sets were…..

Pre-Renaissance:  WRG 6th Edition;  Italian Wars:  DBR;  Eastern European Renaissance:  Husaria.

Purchases were made, grotesque shipping charges paid,  and the painting began.

I added an even dozen Hinchliffe Sipahis, along with random German Knights, to the to-paint list.  These stalwarts had been occupying a paper sack since about 1991, but lacked mounts.

Progress was in fits and starts until mid-October, when things got serious.  To keep things moving at speed, I relied on cheat sheets like this:

The bulk of the effort  involved the Old Glory Italian Wars figures.  Painting was the least of my worries.  Figure prep involved a power drill auguring out hands for pikes, spears and halberds.  This was accomplished with White Knuckles and Cold Sweat.

The Hinchcliffe figures came with plenty of flash, requiring way too much X-Acto knife work (with accompanying loss of flesh).

To complicate things, I was running low on metal bases.  Fortunately, after several calculations I determined the quantities on hand were (just) adequate.

The culminating events would be a final base flocking and spraying the figures with gloss coat on New Year’s Eve, with all of my storage boxes (metal hand and shop tool boxes) cleaned and re-organized on New Year’s Day.

It all happened……but late on 12/31 I discovered  two lonely Sipahis and eight Arab Archers  had been missed.  OK, not that big a deal……but still.

These figures will be finished this week.  But, as they say, “Now Is When The Work Begins.”

I have to start playing with the damn things.