Category Archives: Renaissance

More Progress

The daily game playing momentum has slowed. Surprising, because once I get going, the game’s very enjoyable.

Interesting set of rules.  Despite the many charts and modifiers, the play is quick, and far less procedural than Wargames Research Group (WRG)  6th  Edition.  Husaria’s narrative allows some latitude in application.

For example: How far does a unit retreat? Is it full move, move modified for formation changes, does the unit deduct for turning 180 degrees, or what? Not complaining because it allows for applying some common sense.

Another puzzler is what happens when a unit fails its Charge Initiative Test? Does the target unit still have to take a Response Test. The answer is “Yes” in WRG 6th .  Here, I’m not so sure. I’ve tried it both ways and have decided that if the unit fails its Initiative Test, the target does not have to test. An outcome of both units retreating is, while possible, not that plausible.

This game is full of frictions. First off, it is very difficult for “Experienced” units (which make up the bulk of units in this game) to pass the Initiative Test to charge and also difficult for them to roll for positive Response Test outcome. As a result, and I’m sure this was intended, plans do not go as anticipated.

This breakdown has caused both generals to scamper around the battlefield changing orders. The order changes are not formulated until the last phase of the turn, communicated during the next turn’s movement phase, and take effect the following turn. By that time, events may have rendered the new order moot or even counter-productive.

One interesting rule involves following up a unit that “gives ground” after losing Combat (melee). The victorious unit can only follow if it has the distance needed remaining from its charge movement allowance. If not, the victorious unit must charge again the next turn. This happened to the Russian cavalry in the center. They failed the subsequent charge test, remained stationary, and were then forced to retreat as a result of Polish musketry.

If you enjoy some chaos in your gaming, this rule set provides it. For me, especially playing solo, this is not a bad thing. And, I don’t mind working within a relatively loose framework. Again, this is after playing the very scripted WRG 6th Edition Rules.

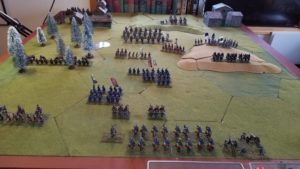
Here’s a summary of the past five (5) turns.

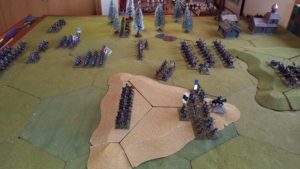
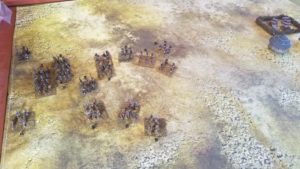
The Polish attempt to hold the east hill using Ratjars failed. However, the Cossack Infantry also withdrew (see comments about mutual failed tests, above). The Cossacks are now working their way back up the hill, but staying on the reverse slope to avoid artillery bombardment. The Polish commander has sent his remaining Ratjars to drive off the Cossacks.

The Haiduks drove off the first wave of Russian cavalry, and holds the center. The Polish Pancerni remain uncommitted, with the Hussars still to their rear and off the table.

The Russian Dragoons holding the forest have been forced to withdraw, with Polish Haiduks advancing through the forest towards the East village.

The Russian Streltsy have retreated to the villages, with orders to defend. The Russian heavy cavalry is beginning to deploy to support another attempt to break the Haiducks holding the center.
Progress Report

Into Turn 10 now.

Artillery fire has driven off the Cossacks. Seemed too easy. But it doesn’t take too long for a unit to have a 10% casualties morale check. And, the morale chart is unforgiving, especially for the Experienced units that constitute each side’s infantry.

Same for the musketry in the center. Strelsky now retreating, with Haiduks following up even after being pushed back for one turn by gunfire.

Recovering from retreat is different. No rallying, just turning around. However, most units will take two turns to do so, with 90 degree turns each turn. I like it. No markers, easy to see a unit’s status on the table.

Command is another adjustment. Not from a rules standpoint, but from a player’s perspective. Orders are given at the end of a turn, carried during the Movement Phase of the following turn, and communicated at the end of that following turn.

A Solo player must demonstrate a more than usual sense of discipline here. Looser rule sets allow more latitude. In this case, as with WRG 6th, you have to force yourself to stick to the rules – well, within the spirit of the rigorous rules, and really anticipate.

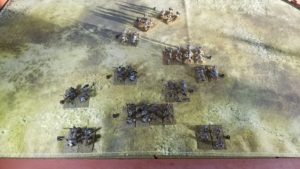
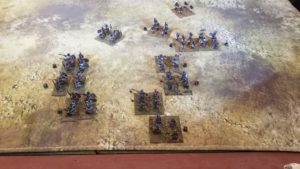
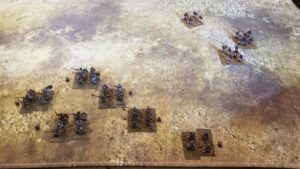
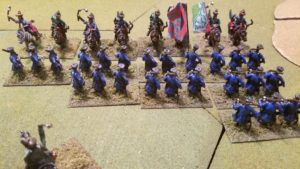
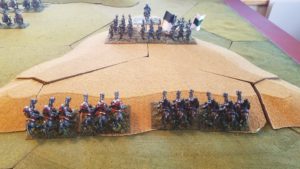
The Muscovite Commander has ordered his cavalry to attack the advancing Polish Haiduks. The Polish Pancerni are now in support. To their flank, the Cossacks have rallied, but are now facing a unit of Ratjars, under orders to hold, and not be drawn into a charge. It will be interesting to see how they respond to musketry.

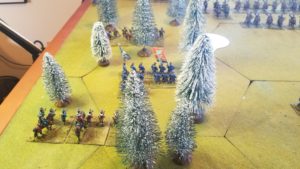
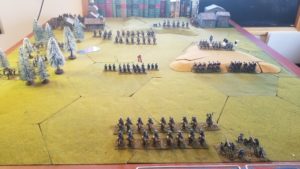
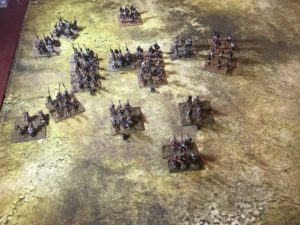
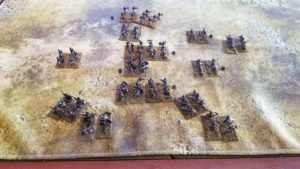
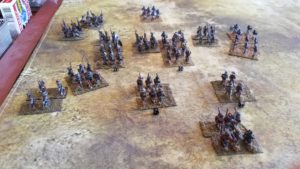
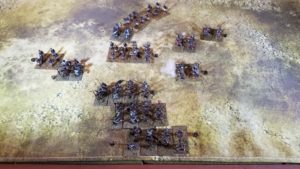
Here are a couple of low-light photos from the Second Story Game Cave.

Starting Husaria….Finally

Finally started the game last night. The usual inertia compounded by senseless Sunday Night Football viewing, and then the last minute completion of Unit Rosters, searching for appropriate dice, etc., etc.

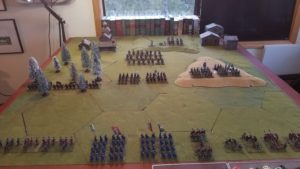
The Polish Army is running low on foodstuffs. To replenish they must attack and seize the two villages to the North of their current position. To accomplish this, they must clear the high ground situated between the two small villages. Intermediate objectives are the woods lying to the West, and high ground lying South and East of the villages.

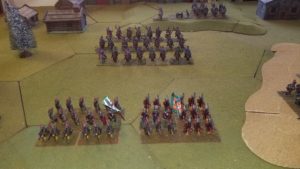
The Muscovites also need these villages to feed their Army. The army’s mission is to defend and hold the two villages.  Their deployment has dragoons in the woods, and two Cossack infantry units on the high ground South and East of the villages.  Two Streltsy units are positioned in the center, between the woods and high ground.  Three cavalry units are to the rear and in support of the Streltsy, with a heavy cavalry unit in general reserve, located on the high ground between the two villages.  The Muscovites also have a light artillery piece co-located with the heavy cavalry unit.

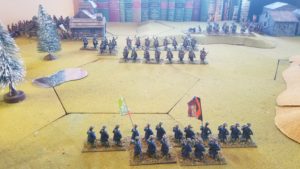
Here’s a low grade photo of the battlefield looking North.

And the Muscovite’s center

The Polish commander’s intent is to pin both Muscovite flanks, attrit the Streltsy infantry positioned in the center by musketry, with the Hussars and Pancerni assaulting and destroying any remaining infantry, while charging to melee with and destroying the enemy cavalry. 

The Polish dragoons have orders to advance and clear the woods to their front (I’ve been waiting to use these cheesy Wal-Mart Christmas trees for a year now. They were originally purchased for use with my 7 Years War flats, but that exercise has not taken place, yet), with the strong Polish artillery (two heavy and two medium guns) ordered to bombard the Cossack infantry positioned on the hill to their front. These guns are supported by a unit of Rajtars (heavy, pistol/saber armed cavalry) in case the Cossacks are goaded into an assault, or move to support the Streltsy.

The Polish cavalry is being held off-table, due to table size. They will work their way forward as the Haiduks’ advance towards the Muscovite center develops.

One turn in, I remembered units have to check Initiative before their first move of the game. Immediate Reset!

Other than that, fairly smooth first few turns, especially since the Muscovites have orders to hold and defend their current positions.

Very curious to see how effective the artillery is.  The hill positions are considered  Soft Cover, providing a -2 die roll modifier (drm) to any Fire Attacks. Artillery has aggressive modifiers for both long and short range (-4 and +2 drm, respectively). My table is roughly 51/2 feet by 5 feet, so setup places the two forces in relatively close proximity. This soft cover adjustment mitigates the artillery short range firing drm, effectively making fire from the artillery’s current position a medium range attack.

I’ve also tried to off-set the Polish advantage in artillery by giving the Muscovites a Cossack General.

Cold and very windy here today. I’ve finished manning the paperwork/bill paying bilge pumps, so there’s a good  chance to really get into it this afternoon.

Husaria – Another Day, Another Summary Sheet

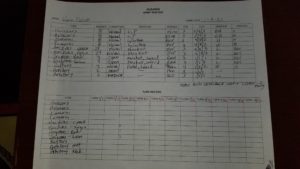
Continuing the (now seemingly unending) set up for the battle between 1650ish Poles and Muscovites.  Decided I needed to utilize the back side of the play sheet included in my last post.

This new effort, or Part 2, continues the rules summaries covering armor classes, combat, firing, formation changes, causes of disorder and reforming from disorder.  Hopefully, this reduces the number of lists to consult, although the remaining number is still somewhat daunting.

Troops have been pulled from the garage.  I still need to set up the terrain and annotate my army rosters.  Something to do this afternoon or tomorrow morning.

Tonight’s New Year’s Eve festivities include a version of truth or dare, with the dare being the consumption of inedible food randomly presented on a Lazy Susan.  Oh My……

Here’s a link to Part 2 of the Summary Sheet.  Again, click to make it full sized.

Leaning Further – Husaria Rules Summary Part 1

Note:  The summary sheet has been updated 

As noted in my previous post, Husaria is very chart and modifier heavy.

I decided to drill down and put together a summary sheet providing an overview of the turn sequence, and serving as a reference for the appropriate charts and modifiers.

The process was reminiscent of my second stint in college.  Yes, I received an undergraduate degree the first time, but I was not a good student.  We’ll just leave it at that.

During that second go-around, I discovered  I did much better on tests when I typed up my notes before studying them.

Here’s a link to the Part 1 PDF.  Once again, click on the little image to get the big image……………

Leaning In – Husaria Initial Impressions

Had enough of WRG 6th for the time being.  Still have to finish the game today, but I’ve started reading a  new set of late Renaissance rules.

Husaria was written by Ian Wilson, and published by The Pike and Shot Society in 2003. Past tense is used because Husaria is no longer in print.  The exact circumstances are now fuzzy, but I snagged a copy some months ago after reading complimentary reviews, and thinking that they could work well for my 25mm Ottomans, Russians, Cossack, Poles and Transylvanians.

The rule set addresses combat in Eastern Europe from 1558 to 1699.  It is specific in that regard because, according to the author’s introduction,  combat in that region differed from Western Europe (and I paraphrase), in that the Military Revolution had stalled;  the predominant cavalry was still lance armed and prepared to charge home, with gunpowder weapons extensively used, but unable to dominate the battlefield.

Troops are categorized as Elite, Veteran, Professional, Experienced and Raw.  Fanatics can be added to the troop mix when deemed appropriate.

The turn sequence is straight-forward:  Roll for who moves first, movement, combat, second side movement, simultaneous firing, response, and new orders (dispatched by messenger).

Initiative and Response Checks are used to reflect morale.  Initiative is checked when a unit must do something “different”, and Response as a result of an action taken against the unit.  There are many, many, many circumstances for which a check of some type is necessary.  One circumstances that promises to be interesting is the Initiative Check required for the first time a unit attempts to move or fire during the game.   Chaos!

Each unit has a Firing Ability Rating (FAR) as well as Close Combat Rating (CCR).  These ratings are applied, along with modifiers and 2xD6 roll, with results determined by a Combat Results Table (CRT).

There are also rules to reflect unit orders,  risk to the general, disorder, and terrain effects.  In short, the usual suspects.

The rules set includes army lists.  Each army has a core group of 6-8 units.  Additional army capabilities and units are added through die rolls.  This promises some variety for each army.  My hope is that this variety does not lead to additional lead purchases.  I’ve started lead mountain again (on that in another post), and I want it to remain a foothill.

There is one glaring omission!  Each unit is assigned a CCR reading something like this:  CCR 4/3/3, with dividing slashes.  There is nothing in the rules that explain these slashes.  I’ve read the bloody rules about ten times (only 24 pages) and cannot find a bloody explanation.  Ugh!  Will probably wind up sending a bloody message to the bloody Pike and Shot Society to see if someone can explain it.  My guess is that each number refers to a round of close combat.

These rules seem to occupy the middle ground between Gush’s Renaissance Wargaming’s super detailed approach and the more abstracted De Bellis Renationis (DBR).  Should be interesting.

Rout At Kattego

The short story is the Kattegoans routed Lord Renaldo’s Portuguese in a hard fought battle.

At the end, few of either side’s companies (units) were capable of movement to contact since their Resolve had dropped to one, as both leaders were either involved in melee or too far away to effectively rally the affected companies.  With low Resolve, a company cannot enter into melee, but can still shoot.

This problem was mitigated by my failure to role for Impetuous Actions for those units outside of command radius.  However, I can partially rationalize this oversight because each company kept to their original plan.  An exception was the Kattegoan leader taking his company on a wide envelopment.  While in the short term this placed him out of touch with his companies, the end result was to flank and scatter (rout) Lord Renaldo’s company, putting an end to the battle.

I can’t rationalize my failure to use a leader’s +2 die roll modification in all but the last round of melee.  This had a significant effect on the Portuguese, as Renaldo’s company was in a melee marked by a series of Inconclusive Draws (no effect on either side) for almost the entire battle.

Only the dogged Pikemen and a lone Crossbow company remained cohesive enough to cover the Portuguese withdrawal to Ekene, where they will remain for some time after this failure and accompanying loss of prestige.  While Lord Renaldo will remain in command for the time being, that may change after word of the debacle reaches Lisbon.

Oumar, the Kattegoan leader, proved to be a somewhat unorthodox commander, leaving his companies to flank the Portuguese force.  While aided by my rules omission, this tactic proved decisive.  He is now considered an Experienced Lord ( proven leader)and will now receive a +1 die roll modification for Initiative.

Here’s a series of poor battle narrative photographs.  I also need to figure out how to change the font/size for the captions.

End Turn 6. Looking West. Note the number of “1” Resolves for the Portuguese. Pikemen on left. Lord Renaldo’s melee in center. Oumar’s company at the upper right behind archers.
End Turn 7. Looking North.
End Turn 8. Looking North. Oumar’s company moving towards contact with Renaldo’s Company. Kattegoans now with low Resolve.
End Turn 9. Looking North. Carnage in center. Both sides’ companies scatter. Renaldo’s company scatters, also.


Ambush At Kattego

Remembered that I needed to role for Disease and Mishaps before starting play.  The dice were not kind to Lord Renaldo.  One of his two Targeteer units thought better of the whole proposition and deserted.

The Portuguese reacted well to the ambush, forming a defensive line.  The Kattegoan warriors were too far away to make contact on their first move.  View for the following photo is to the West.

By the end of Turn 3, the Portuguese right wing units had moved up  to support  units in melee.  The Kattegoan archers focused their efforts on the Portuguese right, but with little effect.  The Portuguese musketeers struggled to attain good lines of fire.  The following photos are looking North and West, respectively.

During Turn 4, the Portuguese line stabilized.   Lord Renaldo’s Targetters anchored their center. The Kattegoan archers flanking fire was still ineffective.  Here’s another view looking North.

By the end of Turn 5, the Portuguese musketeers were firing with some effect.  One melee has ended in a “Bloody Draw”, with both sides recoiling due to Resolve of only “1”.  Neither unit can be rallied because Lord Renaldo is in melee, and the Kattegoan leader has somewhat inexplicably moved off some distance to  the left (North) apparently to support the archers.


Renaldo’s Approach March

I set up the initial dispositions using  the die rolls described in the previous post.

The Portuguese are disorganized,  with Lord Renaldo near the front of his faction.  The bulk of his companies are East and some distance from him.  Only the grenadiers proceed him.  His force is close enough to Kattego to trigger an immediate ambush.

The Kattegoans rolled for two ambush groups with forty percent of the force West of, and three units distance from the Portuguese.  The larger group is to the Southwest and five units distance from the invadiers.

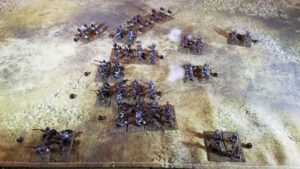
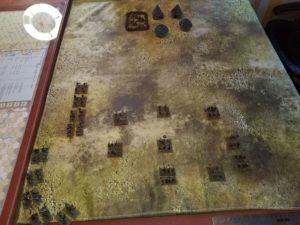
After a series of failed photographs last night, I changed the overhead light and saw the chance for a striking aerial shot of the battlefield.  It is shown below.  That orb is the reflection of a task lamp bouncing off my brand new plexiglass map cover.  If it isn’t one thing…..

No, That Isn’t The Moon


Expedition to Kattego

Working on parameters for Lord Renaldo’s grand foraging expedition to the village of Kattego.  This is an ambush scenario, with special rules.  By the way, the leader of the Kattegoans is Oumar, of whom little is known.

First a quick primer on Irregular Wars rules terminology.

Distances are based on multiples of unit base widths, or “units”, abbreviated as “u”.   In my games the base widths are 40mm.  So 1u equals 40mm.  A unit is referred to as a “Company”.  The force commander is “The Lord”.  A force or army is referred to as a “Faction”.

The Kattegoans  will be concealed .  Their attack will be triggered by a Yes/No die roll beginning each turn the Portuguese are  9u or closer to the village.

A directional die will determine the location of the tribal faction(s), with Kattego being North.

A Yes/No die will determine if there are one or two ambushing groups.   If “Yes”, a percentile die will determine the allocation of companies.  A d6 will determine the ambushing force(s)’ distance  from the Portuguese.

The Portuguese will have already rolled for their formation used approaching the village.  The formation will be tactical on a d6 roll of 1-2; column if 3-4; and disorganized with a 5-6.

Determining the positions of each company in the disorganized formation will be fun.  Each company will be placed using a d6 roll for distance from their Lord.  The Lord’s  position will have already been  determined by a d6 roll, with 1-2 being forward; 3-4 being in the center; and 5-6 in the rear.

When ambushed, each Portuguese company will make a reaction die roll if  beyond 2u from the Lord.  The Impetuous Actions table will be used.  Units with a d61 will not only “Run Away”, but will also lose one resolve.  Note:  I decided not to use the ambush rules that call for an automatic -1 resolve when contact with the enemy is made.

The villagers will be considered a company with a resolve of 4, melee strength of 2, and a short range shooting rating of 5+.

The Army rosters are finished and the table is set.  The game will start after my return from a bikepacking overnighter.  It’s a fun way to maintain social distance.