Category Archives: Sessions

Battle of Temple Hill – Part 1

The Ottoman attack has finally developed.  It took some time to rally unit resolve, and re-align the ranks after the poor Disease and Mishaps die rolls.

Beginning to think that I’m a tactical rut.  Once again (it seems) the main effort is on the left with a demonstration on the right.  Or, is it a terrain placement rut?  I’m not going back in the archives, because I just don’t want to know.  I guess it’s enough to be aware (?).

Trying very hard to honor the command radius distances for each side.  That does make a difference.

I bumped the Janissary missile troops rally value to a “2”, vice “1” based on my past readings of their tactics.  We’ll see how that works when they contact their Abyssinian counterparts.  I did remember one lesson from the previous Ottoman fight; the missile units are backed up by two units of Janissaries with cutting weapons.

Something New

The weather final cooperated, and Tim was able to make his long anticipated – and often delayed – trip to the Pine Cone Lodge.

He is a fan of the Standard Combat Series now published by Multiman.  I had purchased two of the games some time ago.  We decided to play Yom Kippur.  The game covers the initial Egyptian assault across  the Suez in the October War.

We started and reset about three time.  The first was due to a rules knowledge breakdown (shocking!), the second due to Tim’s die rolling breakdown, and the third for “let’s try it again”.

We never made to Turn Four, but had a lot of fun working through several  operational approaches.

I also gained an appreciation of why so many like this system and how it has stood the test of time.

The basic concepts are straight-forward for an experienced gamer.  The only real adjustment is that you always “round up” for die rolls and an eligible unit cannot move in the Exploitation Phase if it is in an enemy zone of control (ZOC).  Each game has its own specific rules, but I found these easy to work with.

Plenty of comments and insights into the system and game at the links posted above.

One thing, though.  The map……….BTW that’s the situation at the end of last play-thru.  Israelis are Blue.  Map is oriented to the East.

Even More Heroes

Set up another DIY scenario for Heroes of Normandie (HoN).

A meeting engagement between two reconnaissance forces attempting to secure a crossroads.

Both sides had a mix of reconnaissance sections, along with infantry support in two halftracks.  The Germans had a motorcycle/sidecar/machine gun , and panzerschreck section.  The US had a Greyhound armored car and Jeep with .50 caliber machine gun.

The scenario length was 8 turns, with turn initiative alternating between sides.  Each side entered on opposite sides (east and west) of the map.  I used event cards, but did not remove any inappropriate ones from the draw decks.  This was a conscious attempt to incorporate them in gameplay, but reduce their possible impact.

It was quite the slugfest both times I played.

If I had set this scenario up in Advanced Squad Leader, my play would be far more constrained, with concerns about doctrine and realism.  Not with HoN.  The cartoonishness that is off-putting for some, seems liberating to me.  I feel encouraged to take more chances; that is within tactical reason.  Maybe it’s the straightforward vehicle rules…….

Here’s a photo of what was left after eight turns.  Most of the vehicles are wrecks, with units huddled in the hedgerows, or in the house at the crossroads.  North at top of photo.

Another Day, Another Ottoman

Lazy.

Too much work to move two armies down to storage, so elected to keep the Ottomans (and a chance for redemption) on the table and re-introduce the Abyssinians, as well as a detachment of Portuguese.

This keeps the focus north of the campaign’s Area of Operations (AO), but still following the general storyline involving the  Ottomans moving south on an overland route towards the Horn of Africa.

The battlefield is dominated by a hill and ruined temple.  So, in a burst of originality, this struggle will be remembered as “The Battle of Temple Hill”.

Patches of rocky scrub limits mobility for all troops, and provides defensive advantages for the Abyssinians.

Here are photos of the original dispositions and the dispositions after rolling for Disease & Mishaps (D&M).  Not as bad as the previous Ottoman debacle, but the Incompetent Quartermaster (adversely affecting D12 rolls) contributed to the disarray and some loss in Resolve.  The Abyssinians enjoyed the benefits of a Skilled Physician, and have suffered few adverse effects.  The black mini-dice indicate reduced Resolve.

Here’s the Army List.  Only Losers Scan.


More Heroes

Still having lots of fun with Heroes of Normandie (HoN).

Set up a quick scenario the other night.  Simple objective for the Americans; Get your armor across two boards.  Six turns, but Germans already in  ambush positions.  Same basic forces for both sides, except each now has a tank.

Played it through a few times.  It all boiled down to the last turn or two.  That’s when the German Pz IV and panzerschreck each get a shot  at the US M4 Sherman.  However, the US advance sequence during the preceding turns is critical in order to get infantry in position to support.  To make things even more difficult, I ran a scenario where the US had to also get an infantry unit off-board.

Did not use cards.  Drew them, though.  What wild outcomes they could have produced!  Need to reconcile my need for order with even more possible fun and confusion.  I’m not in a hurry to resolve this psychological conundrum.  I think a reading of the solitaire rules published on Boardgamegeek may be in order.

Simple, but interesting and fun.  Here’s a bad pic taken before the final game turn, with the Germans having initiative and Americans hoping to get to their turn with the tank still operational.  Cell phone is holding down a non-compliant map corner.

Ottomans Repulsed

Instead of rallying, the Ottomans should have marched back to their ships……..

Although it will take some time for the bad news to make its way East, there will be hell to pay in Constantinople.

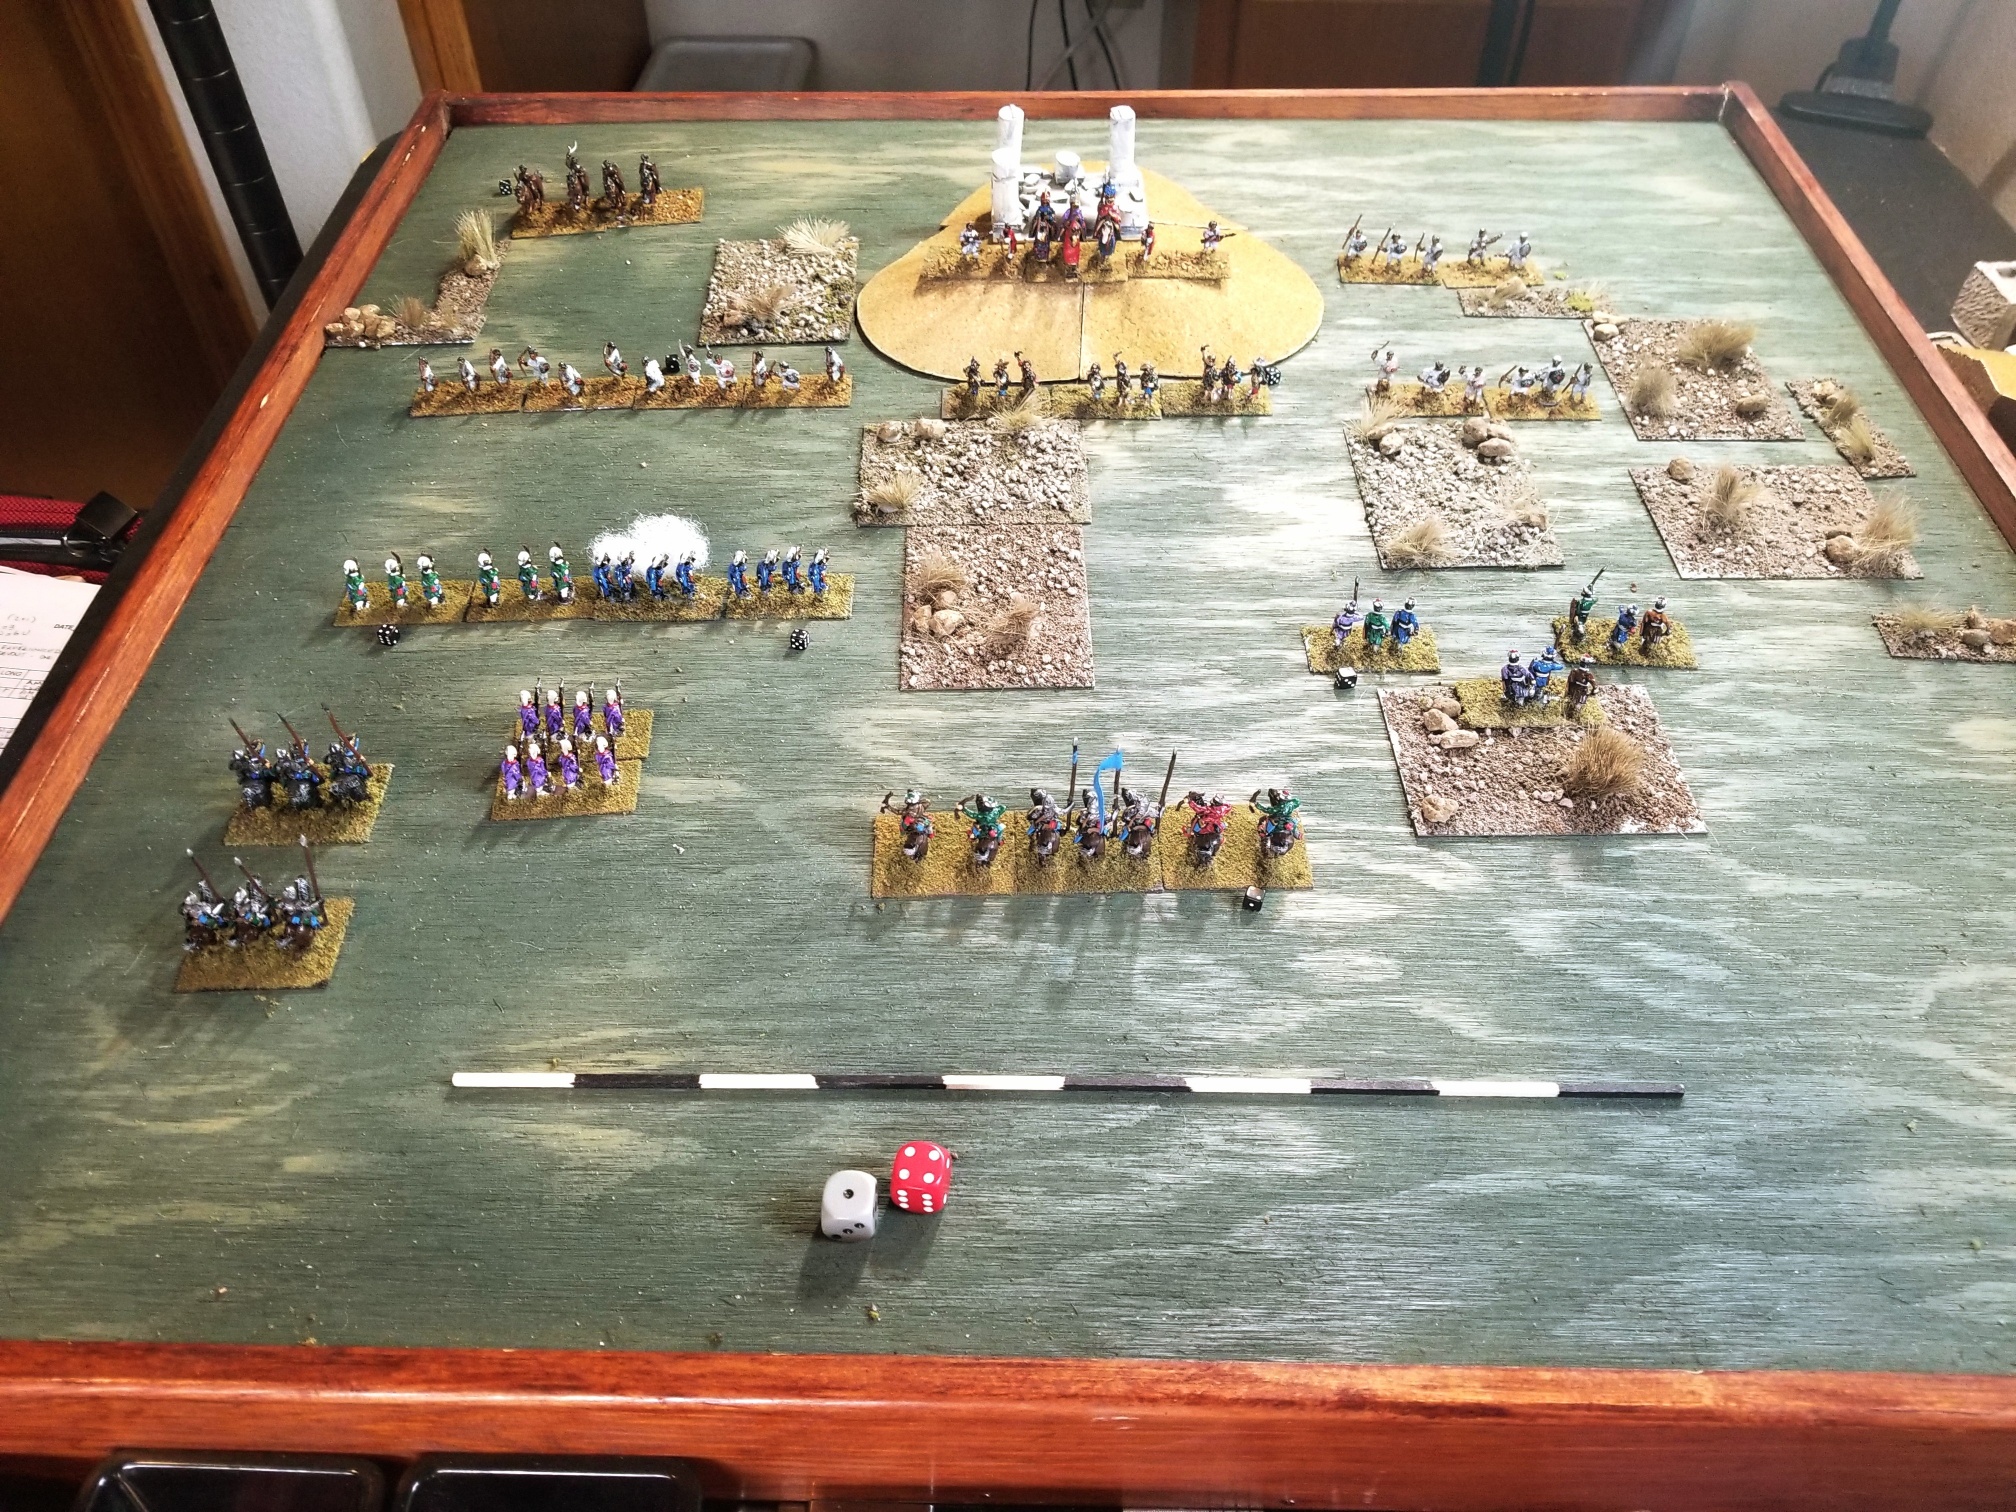
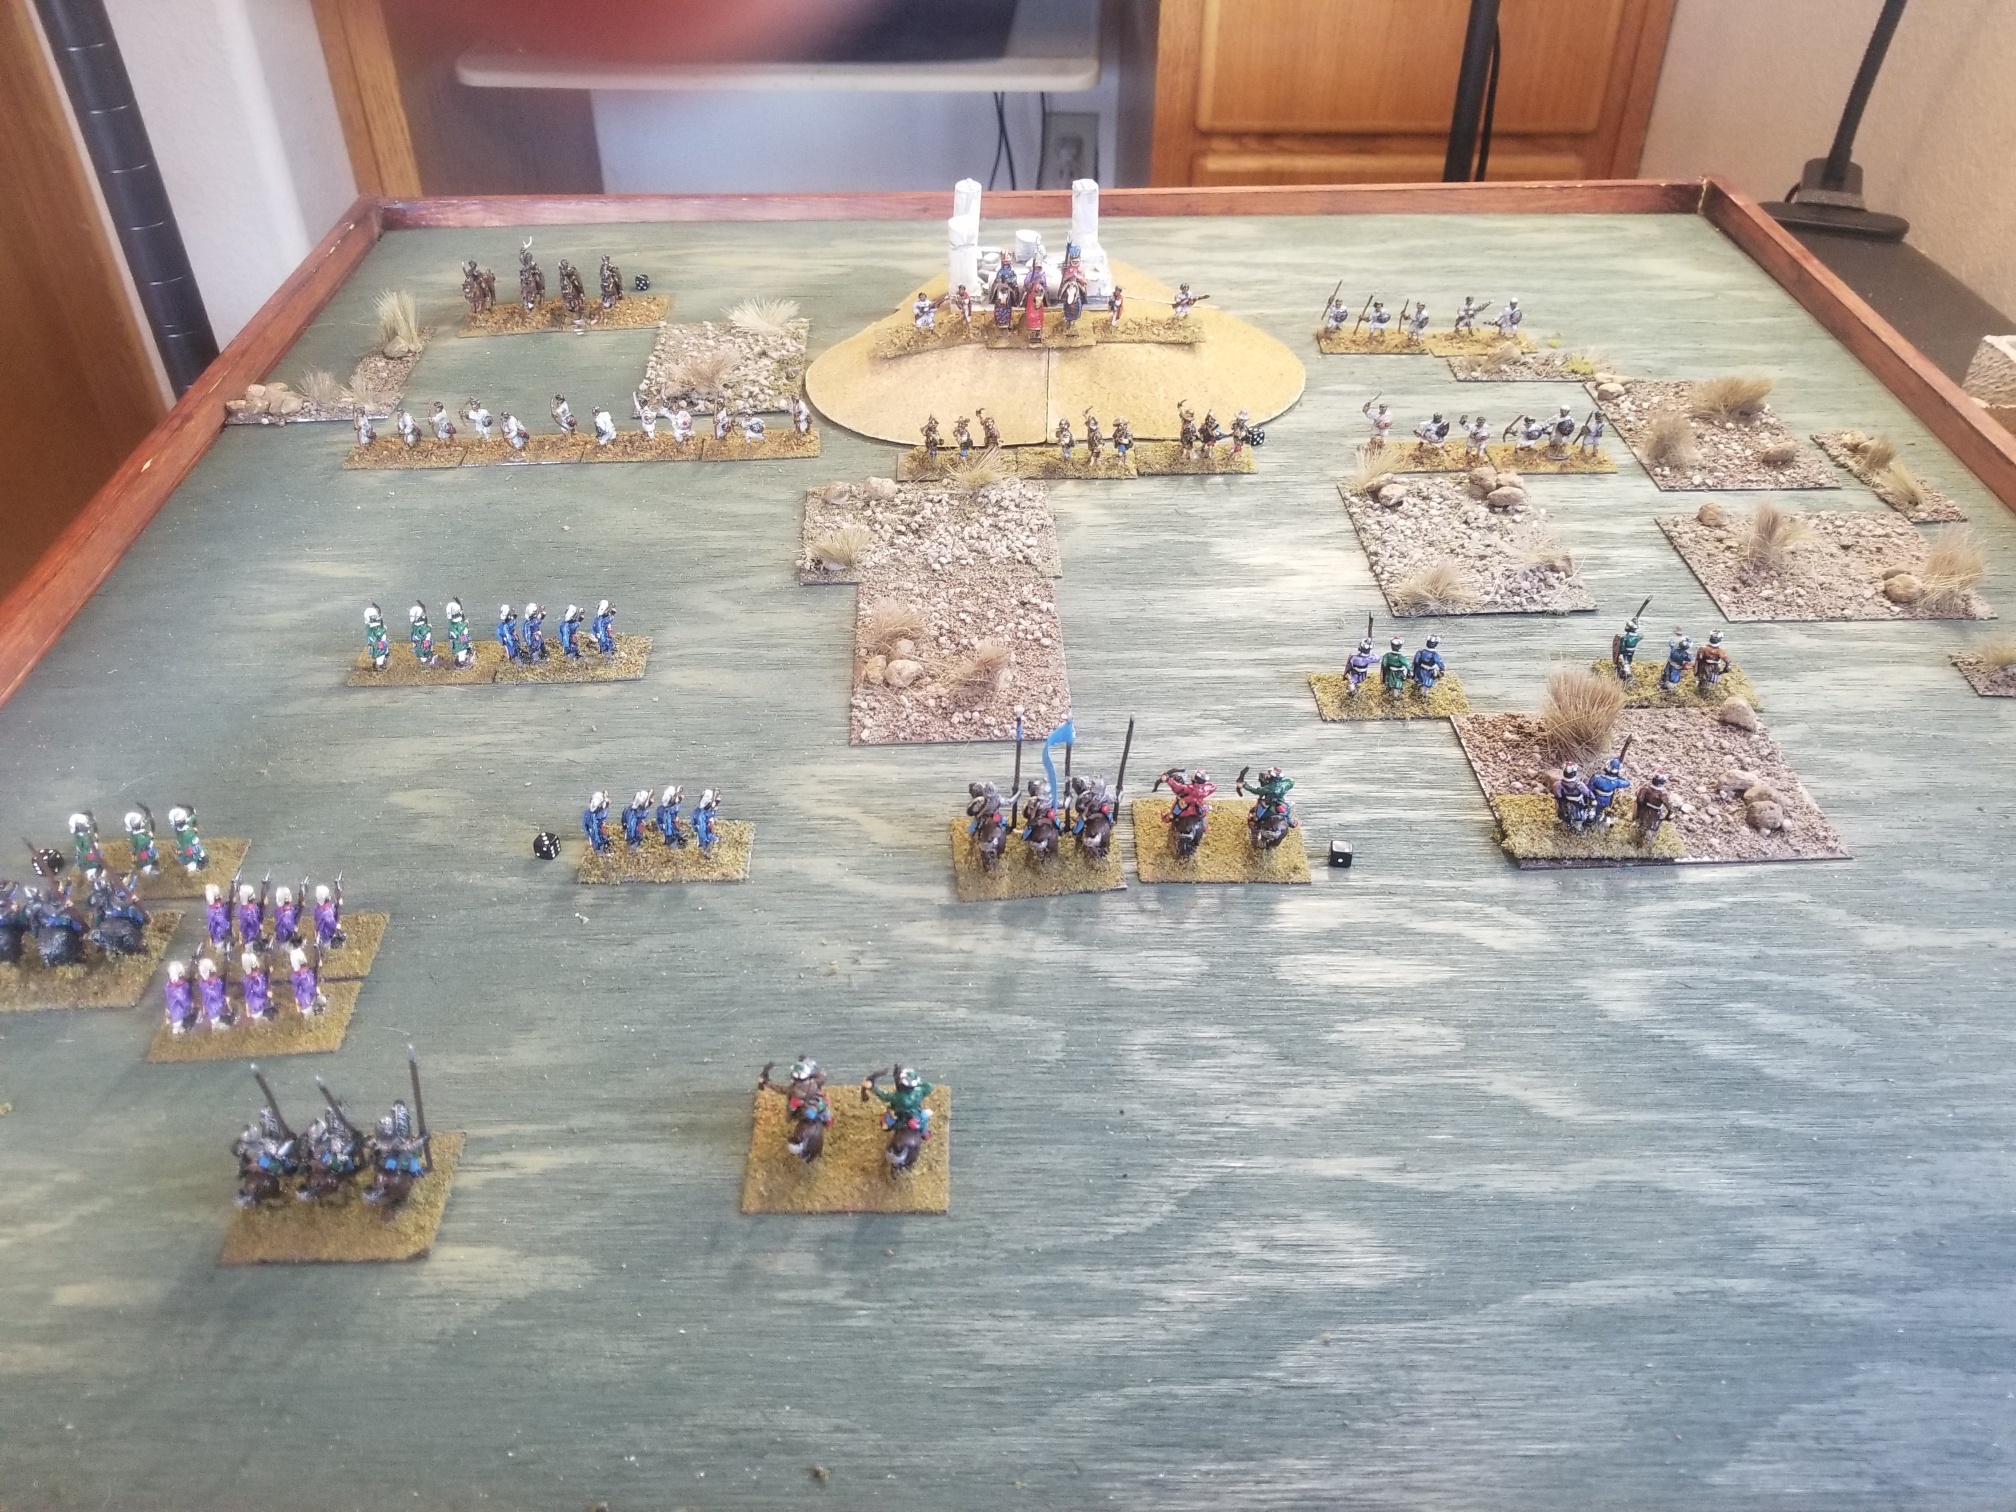
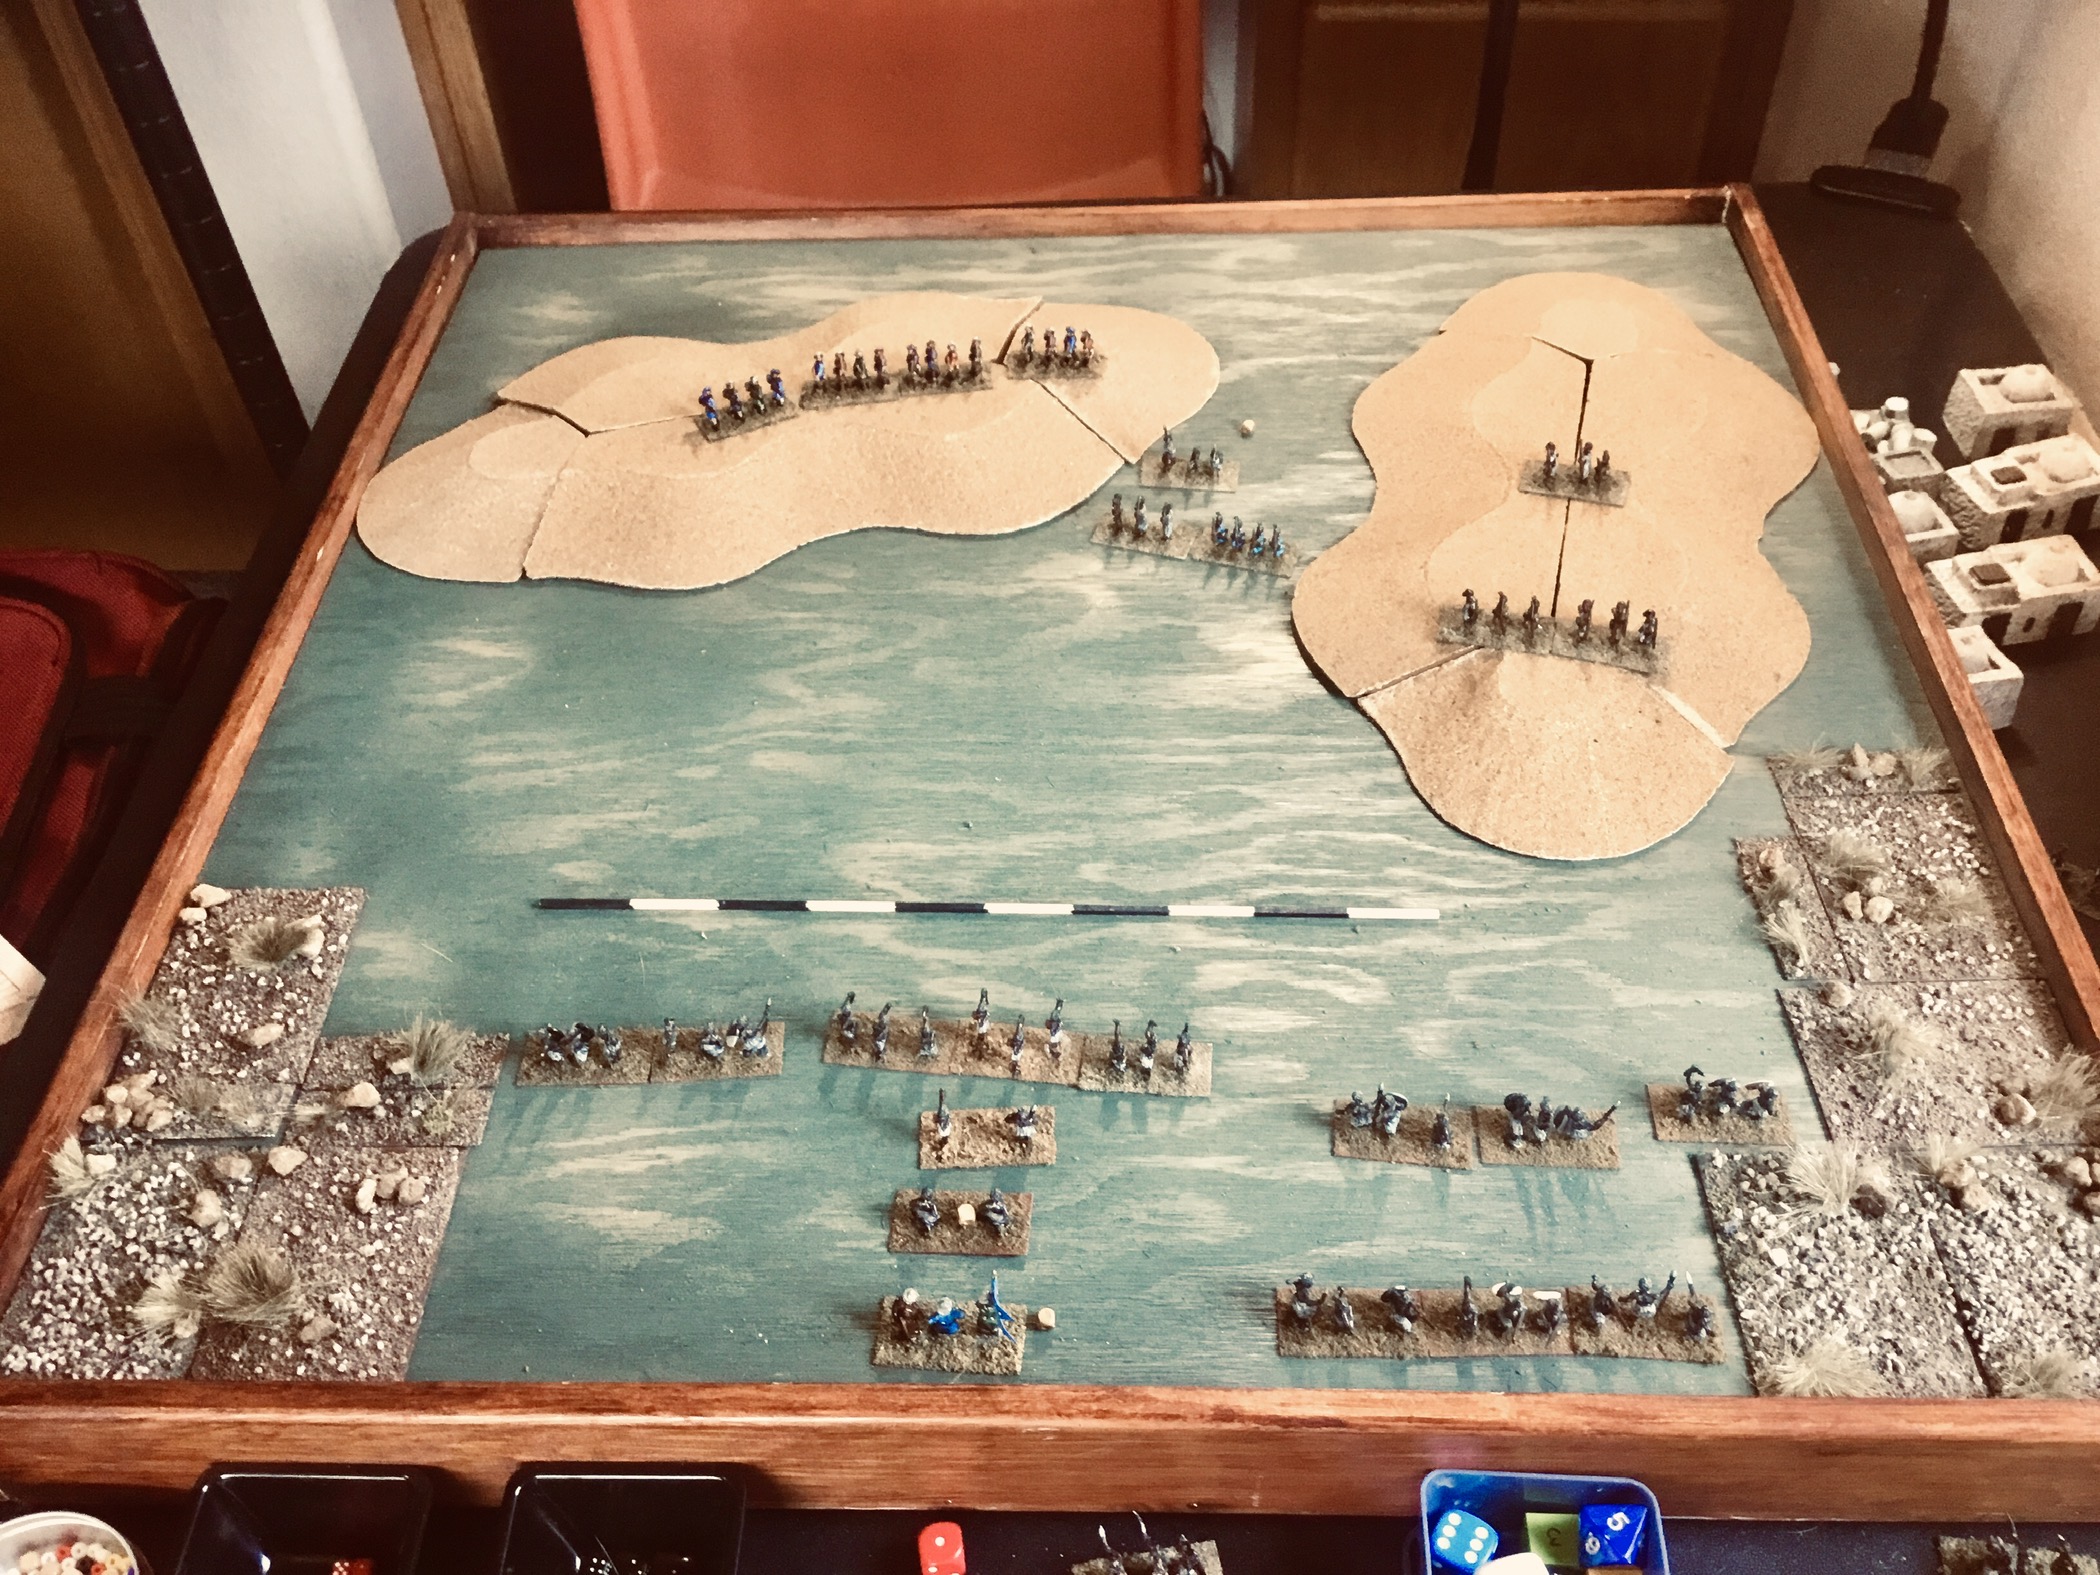
Ottoman ambitions in the Horn of Africa suffered what could most kindly be termed “a setback” at a nameless defile just outside of Aden.

A motley group of civic guardsmen, mercenaries and neighboring tribesmen defeated an Ottoman force comprised of elite Sipahis and Janissaries.

Why? Overconfidence. The Ottoman Commander, Osker Boz, determined a frontal attack would scatter the opposition, assuming his army’s  high resolve ratings  would wear the Yemenites (what someone from Aden is called -today) down. Boz forgot, or ignored,  his Janissaries were missile (bow/shot) troops with low melee capabilities, and that he had just two units of Sipahis.

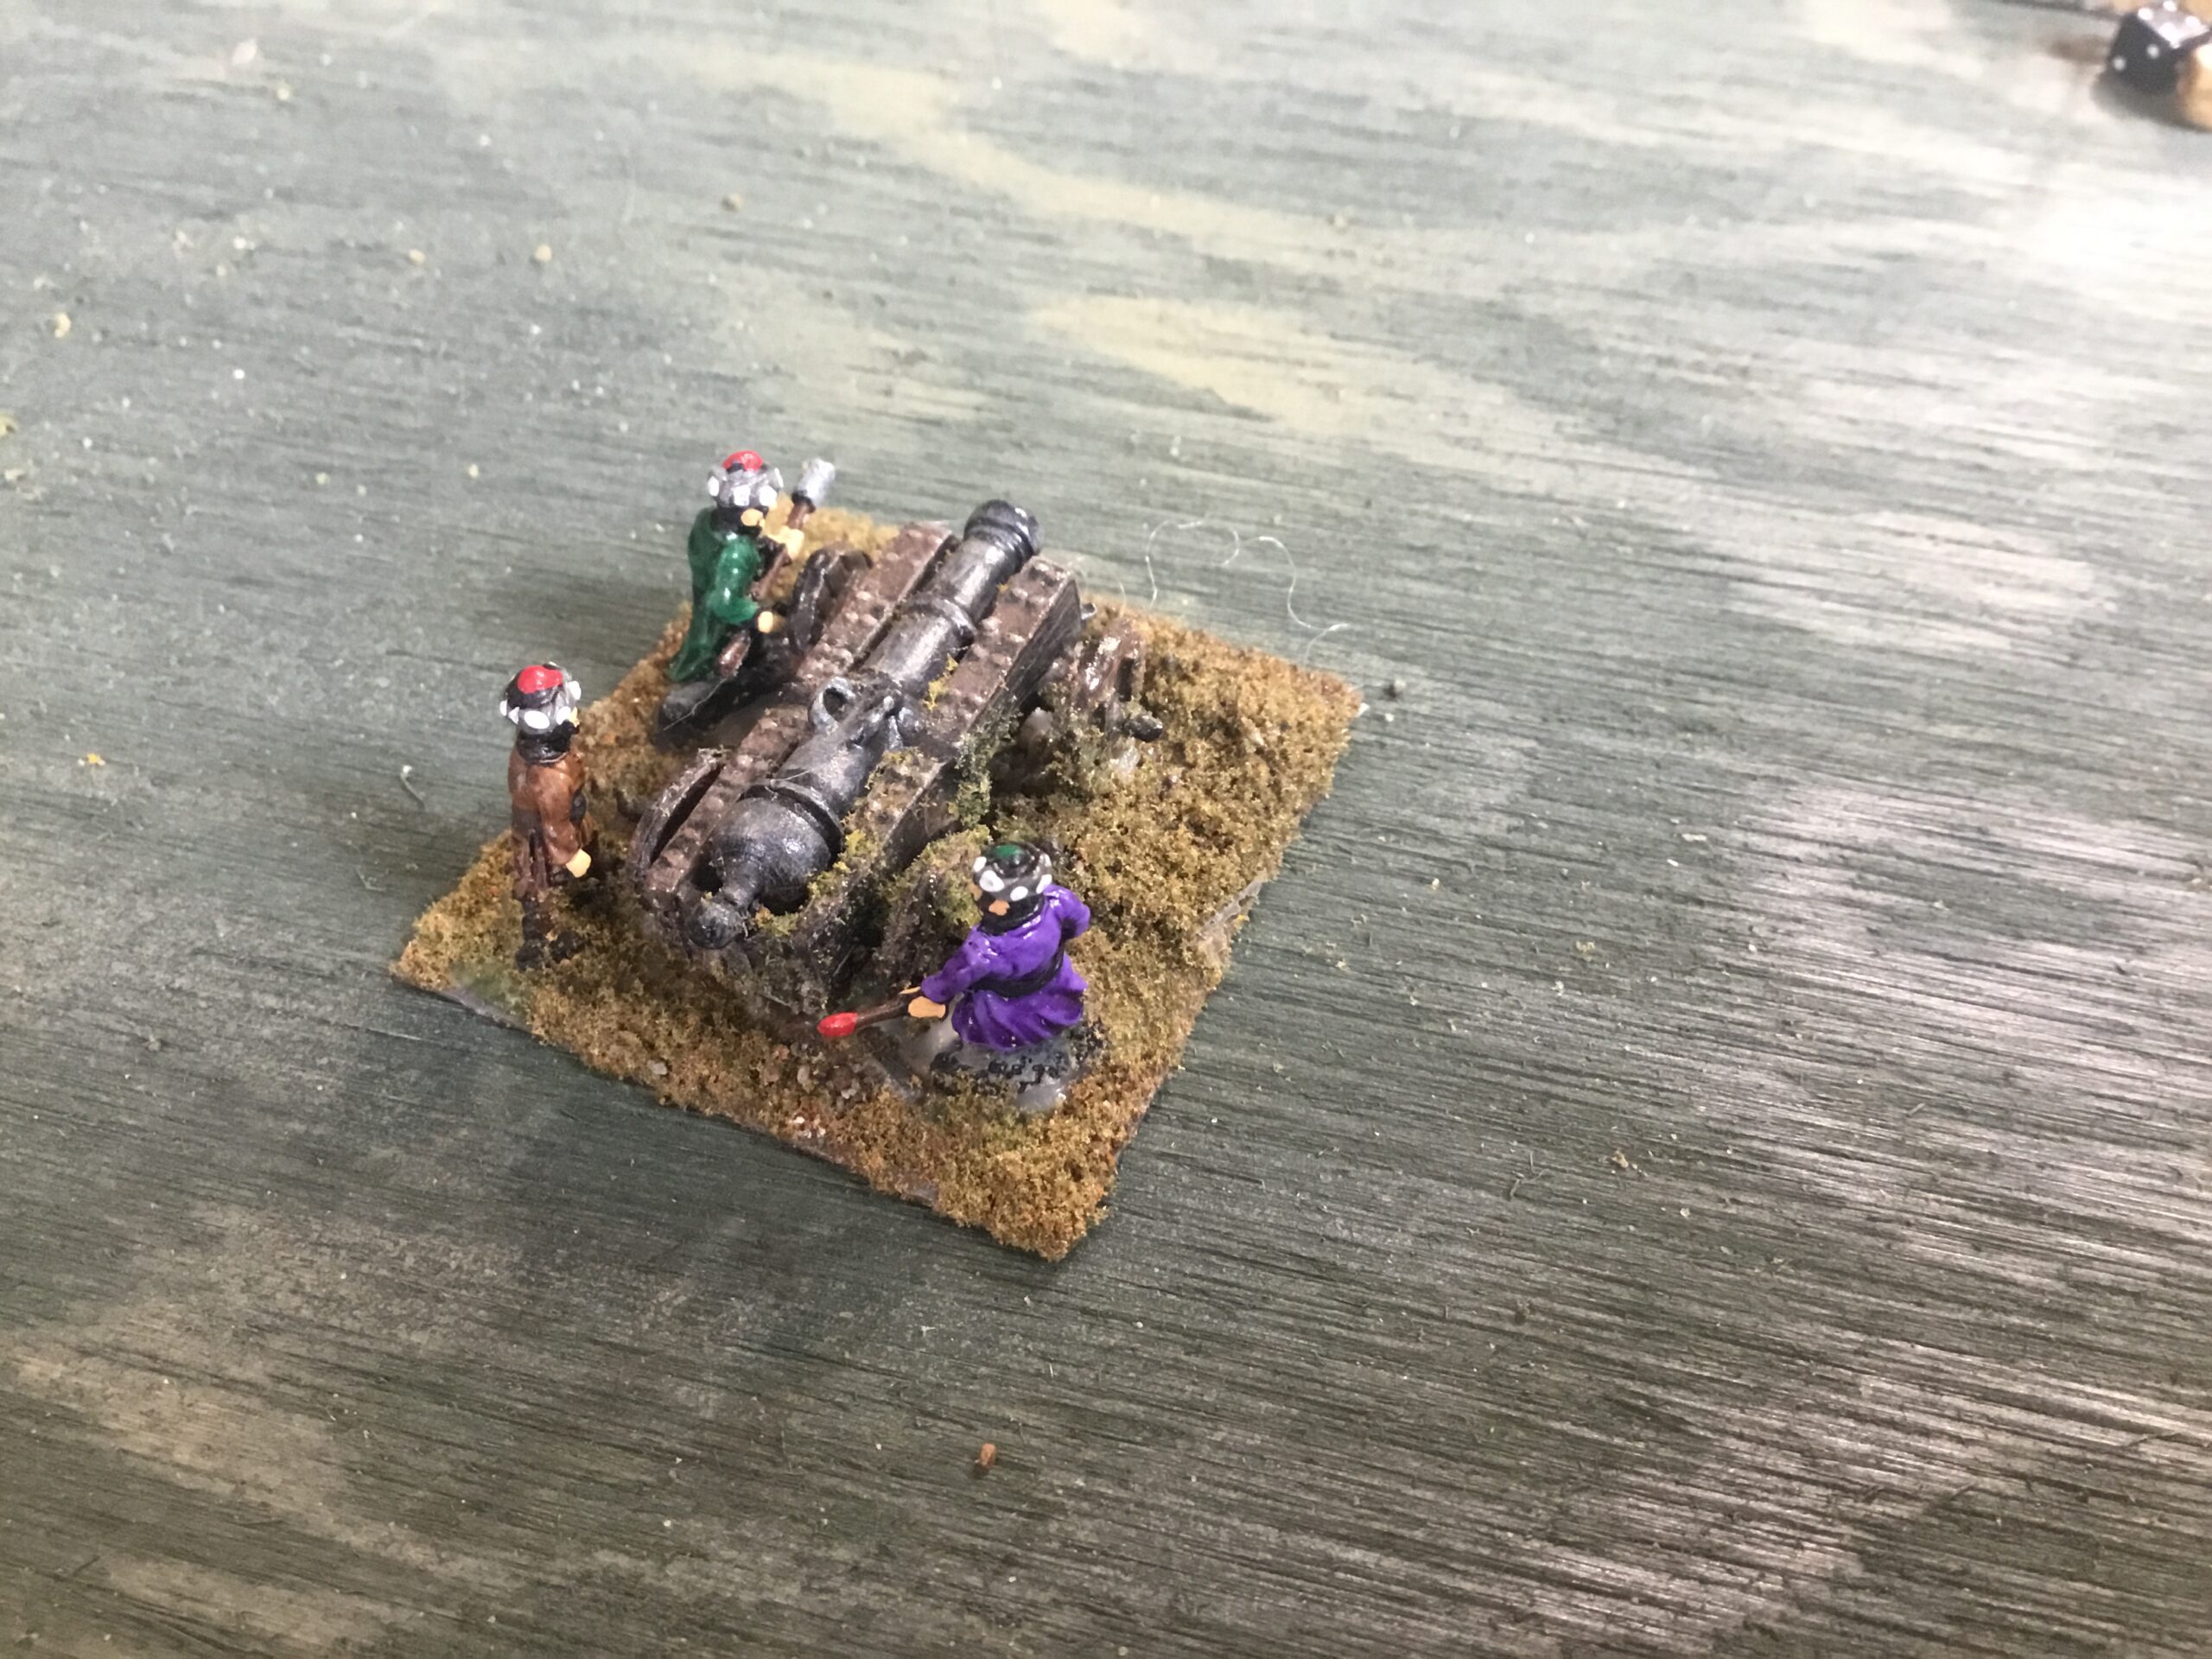
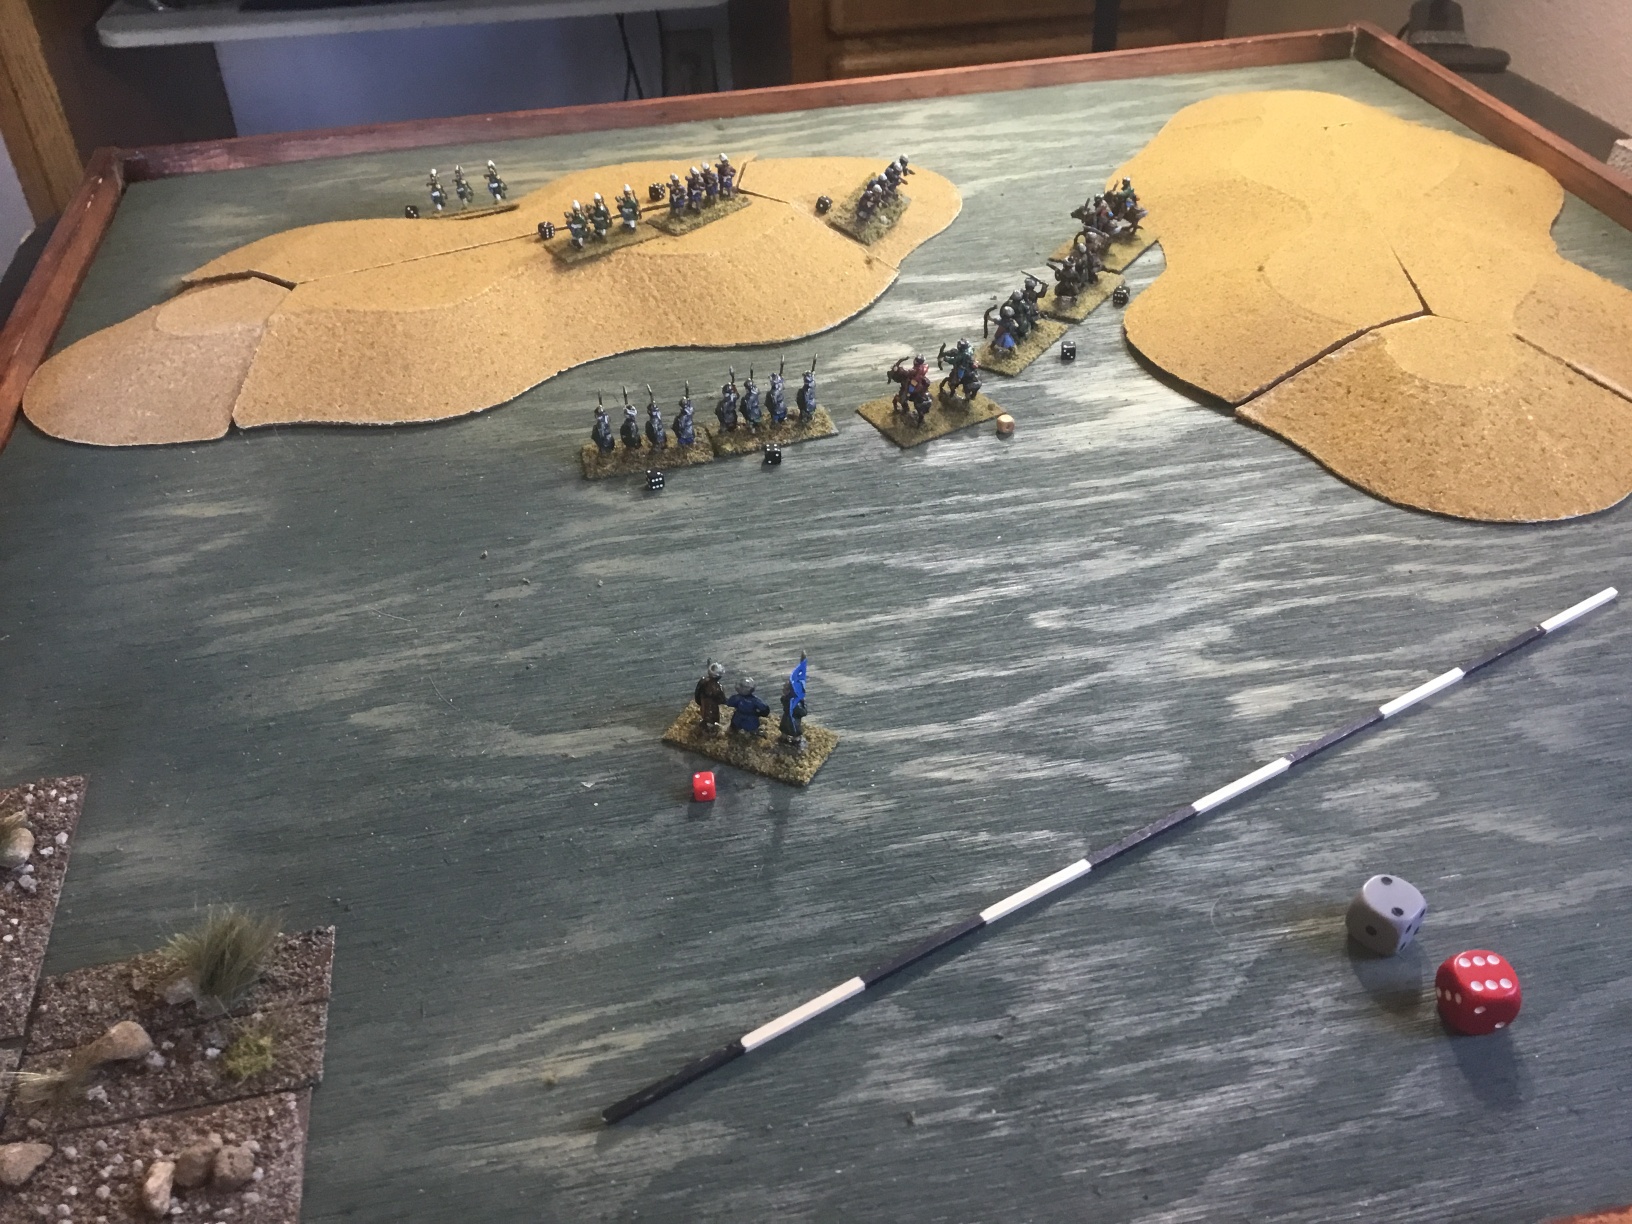
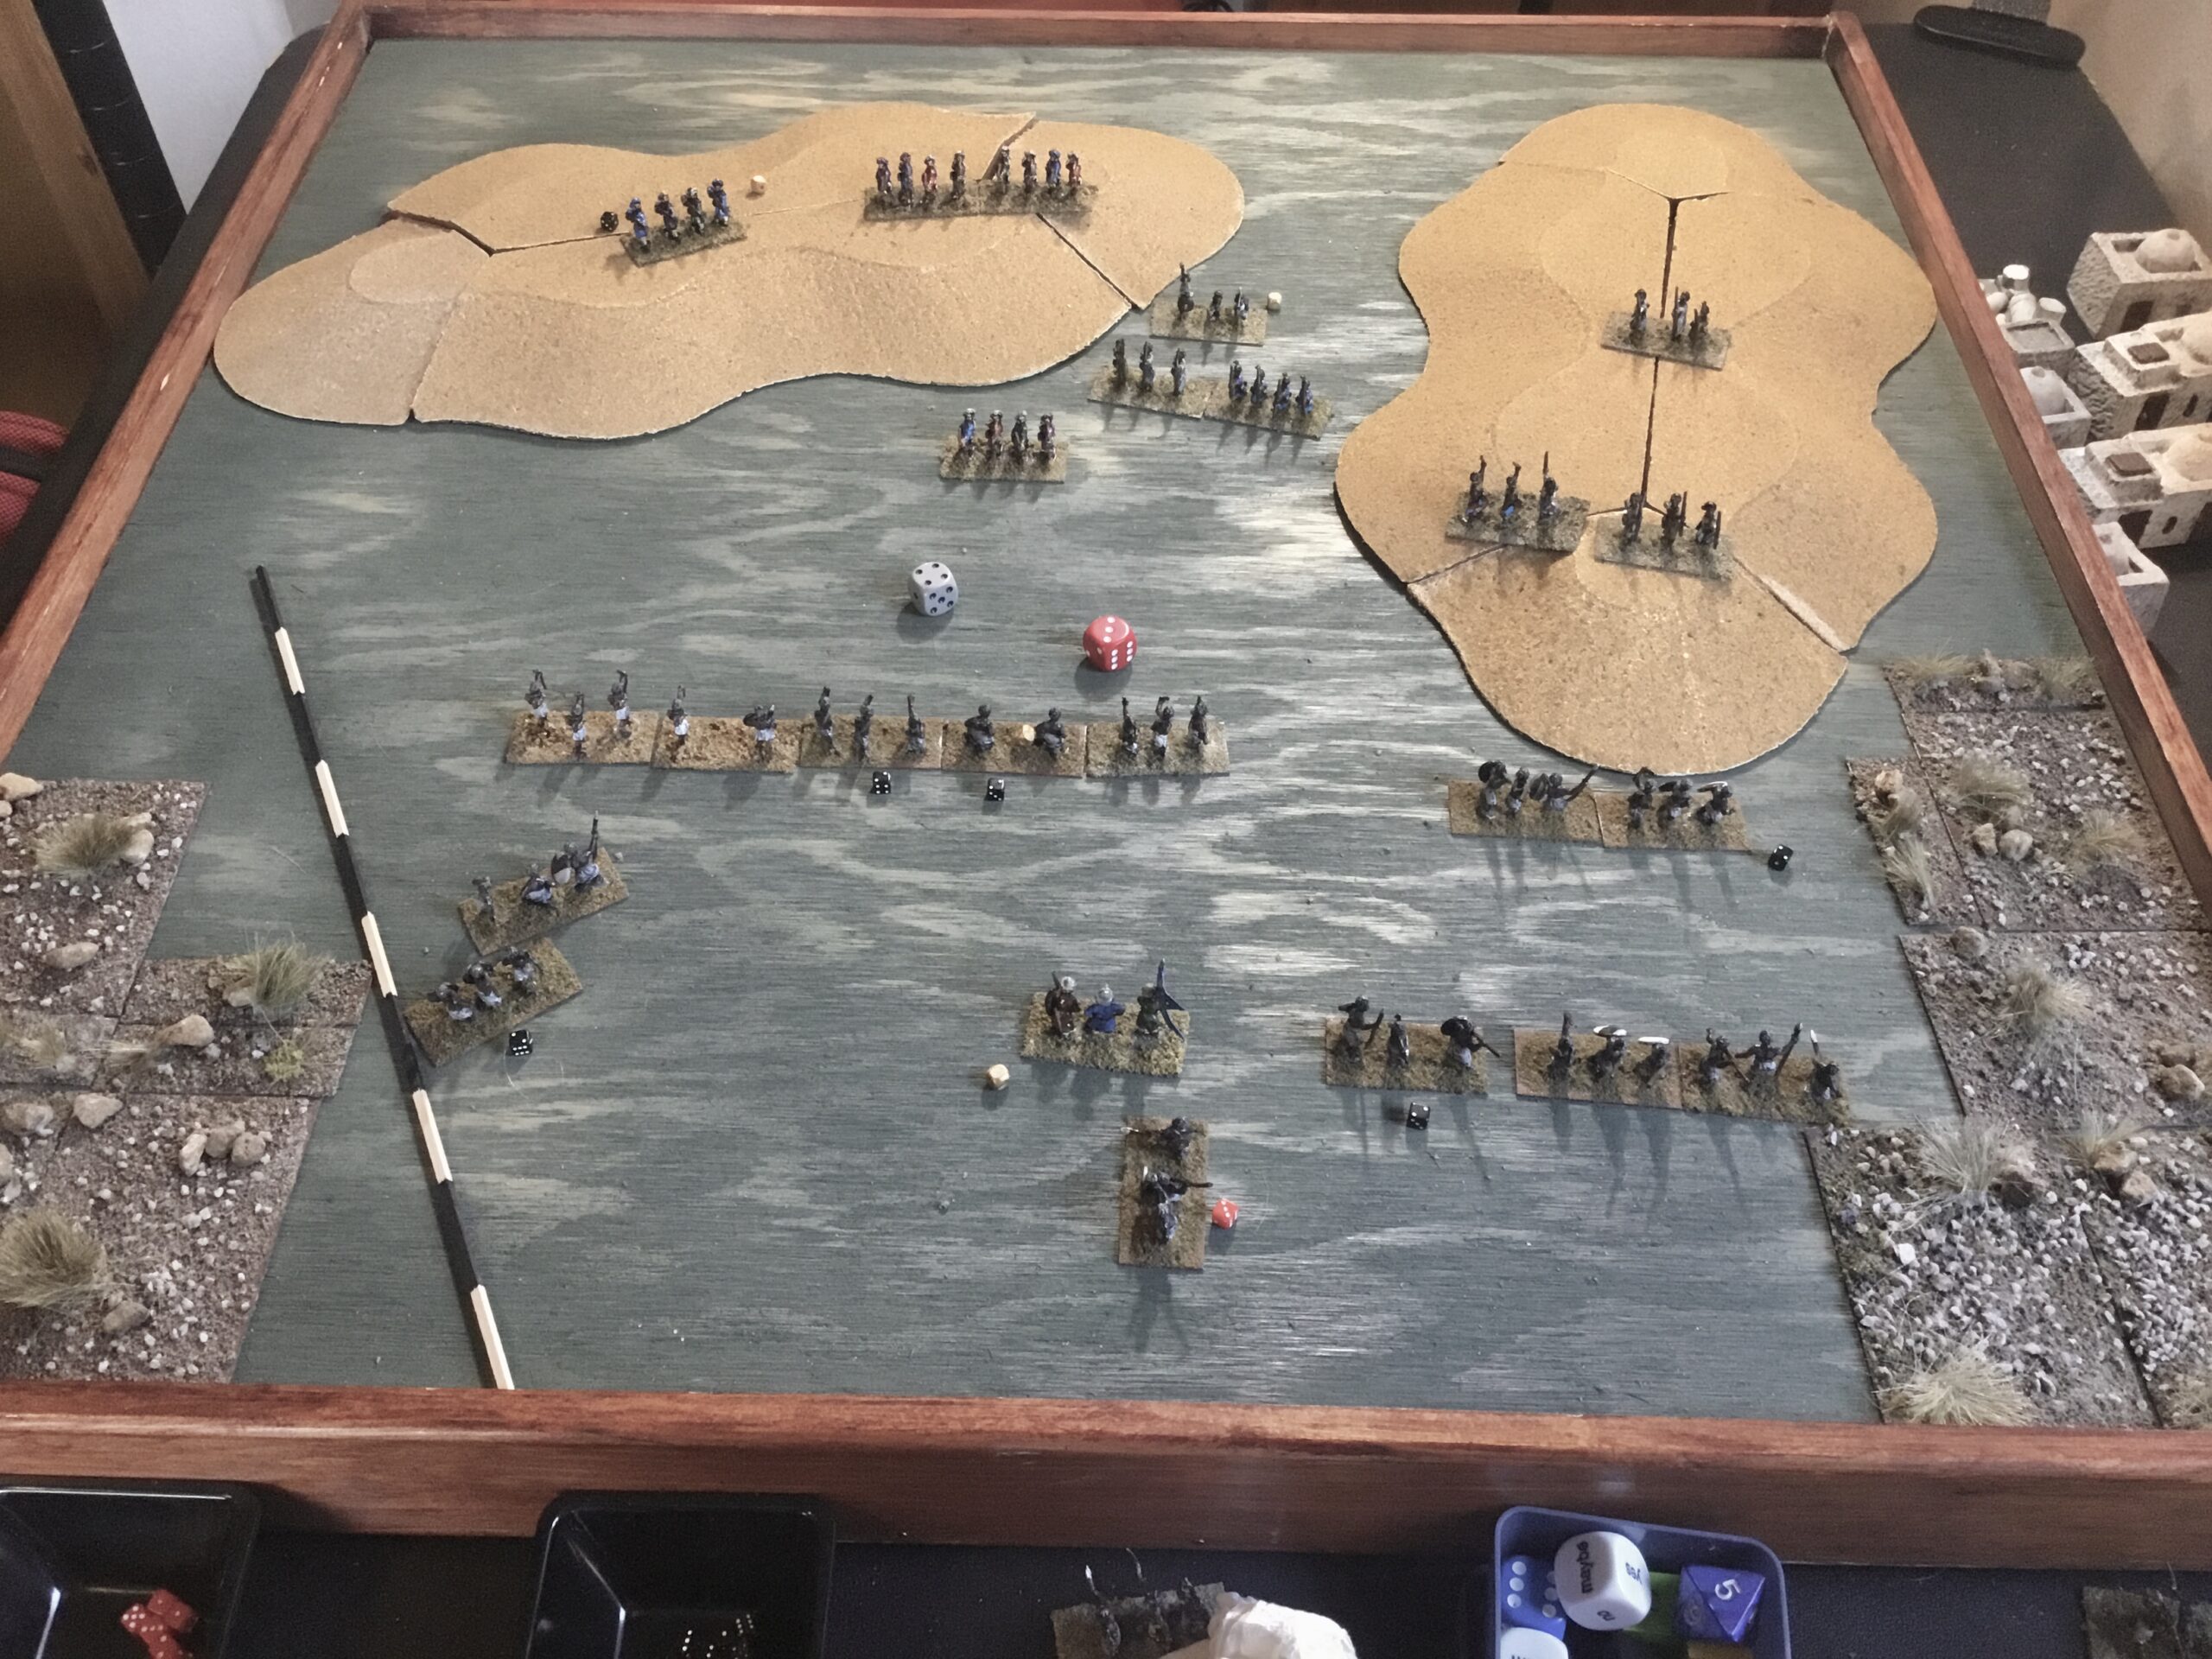
His scheme of maneuver seemed sound. Launch a demonstration with his Azabs against the east ridge (pinning the Yemenite forces), and a measured attack, with the Janissaries shooting as they advanced, against the west ridge. When these attacks had developed, and his artillery had reduced Yemenite resolve, a Sipahi charge against the long spear armed civic guardsmen holding the defile. This was a risky business since long spears have a +2 DRM against cavalry.

The Ottomans advanced after regrouping and restoring resolve.

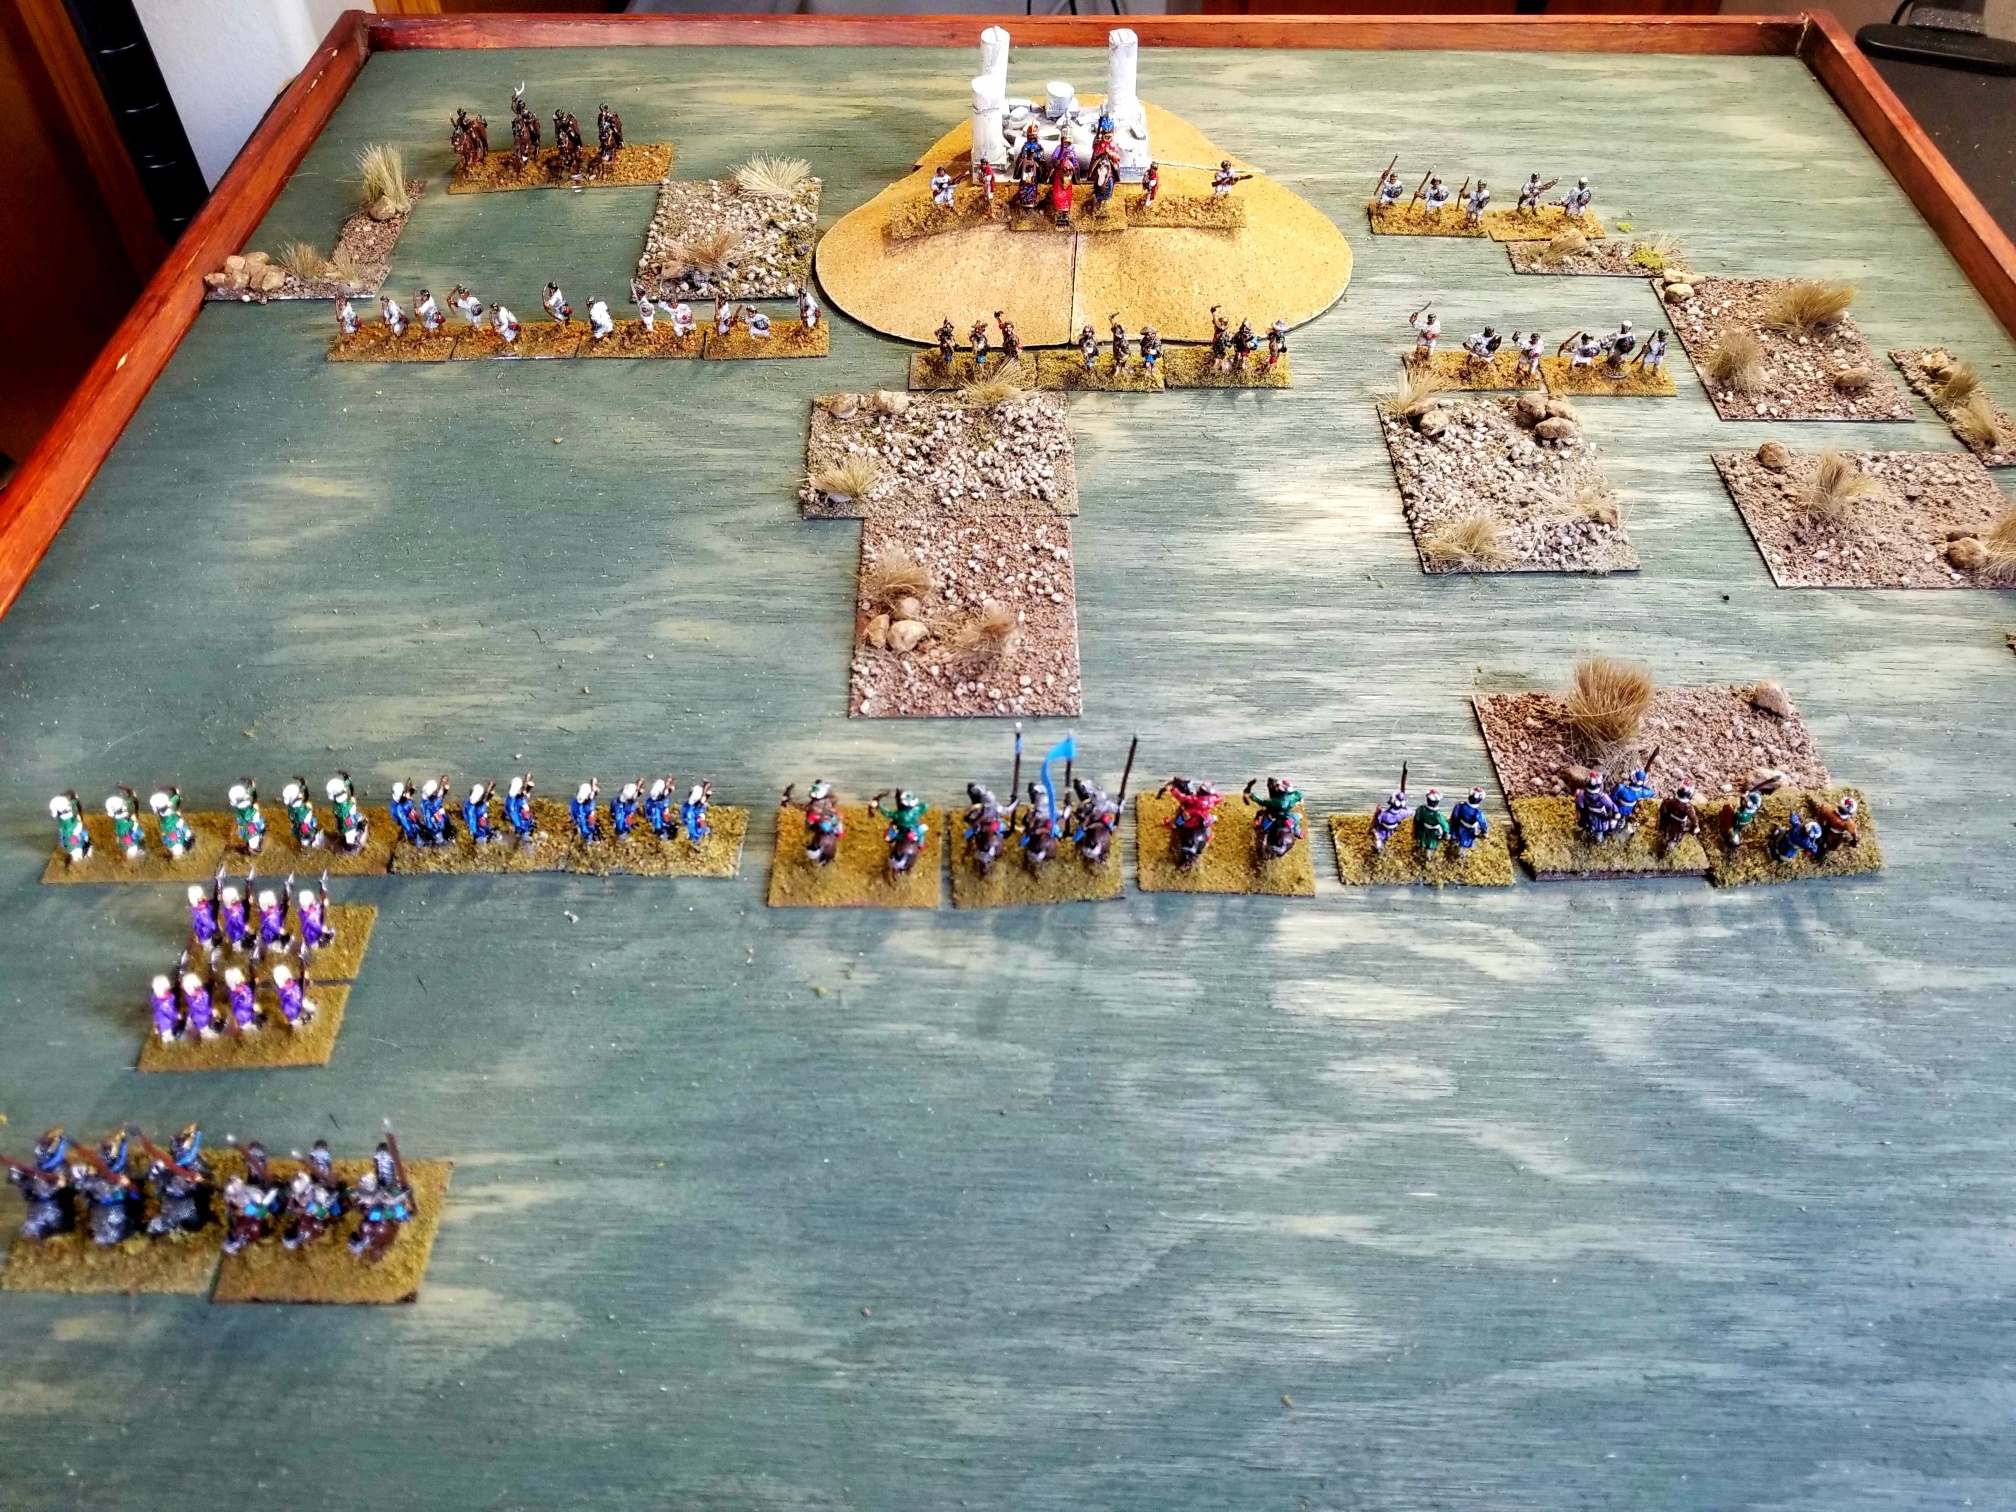
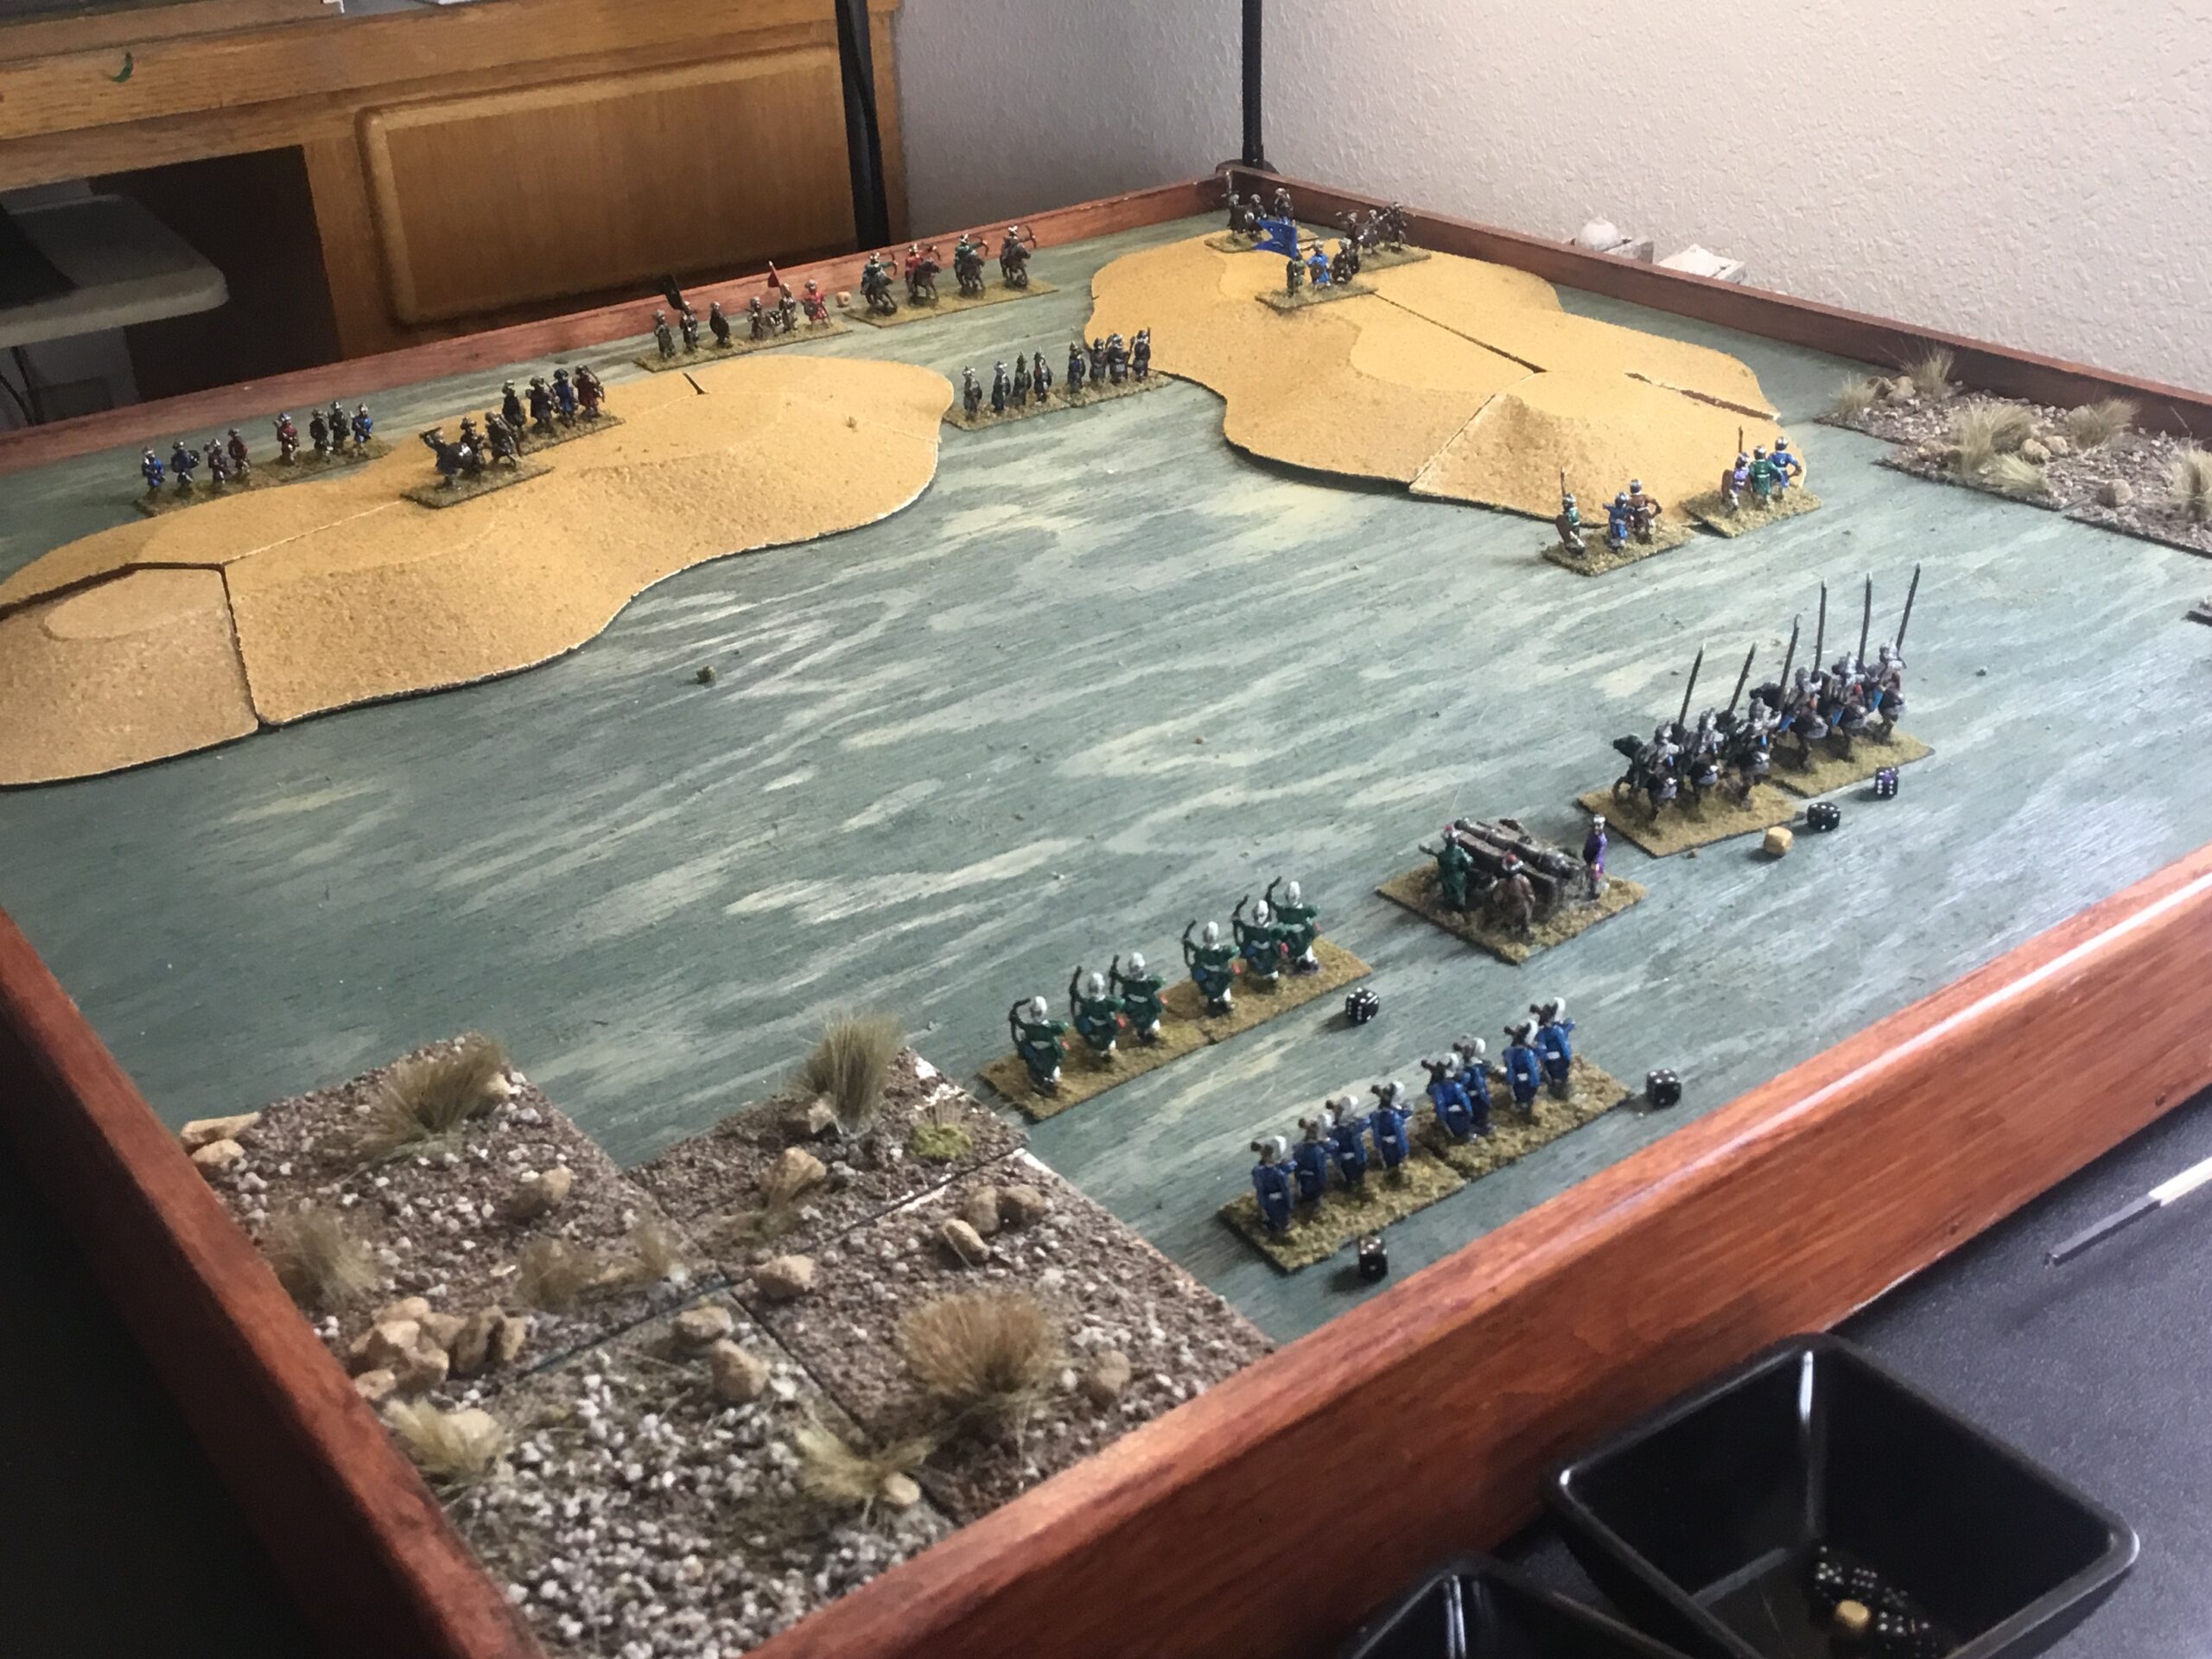
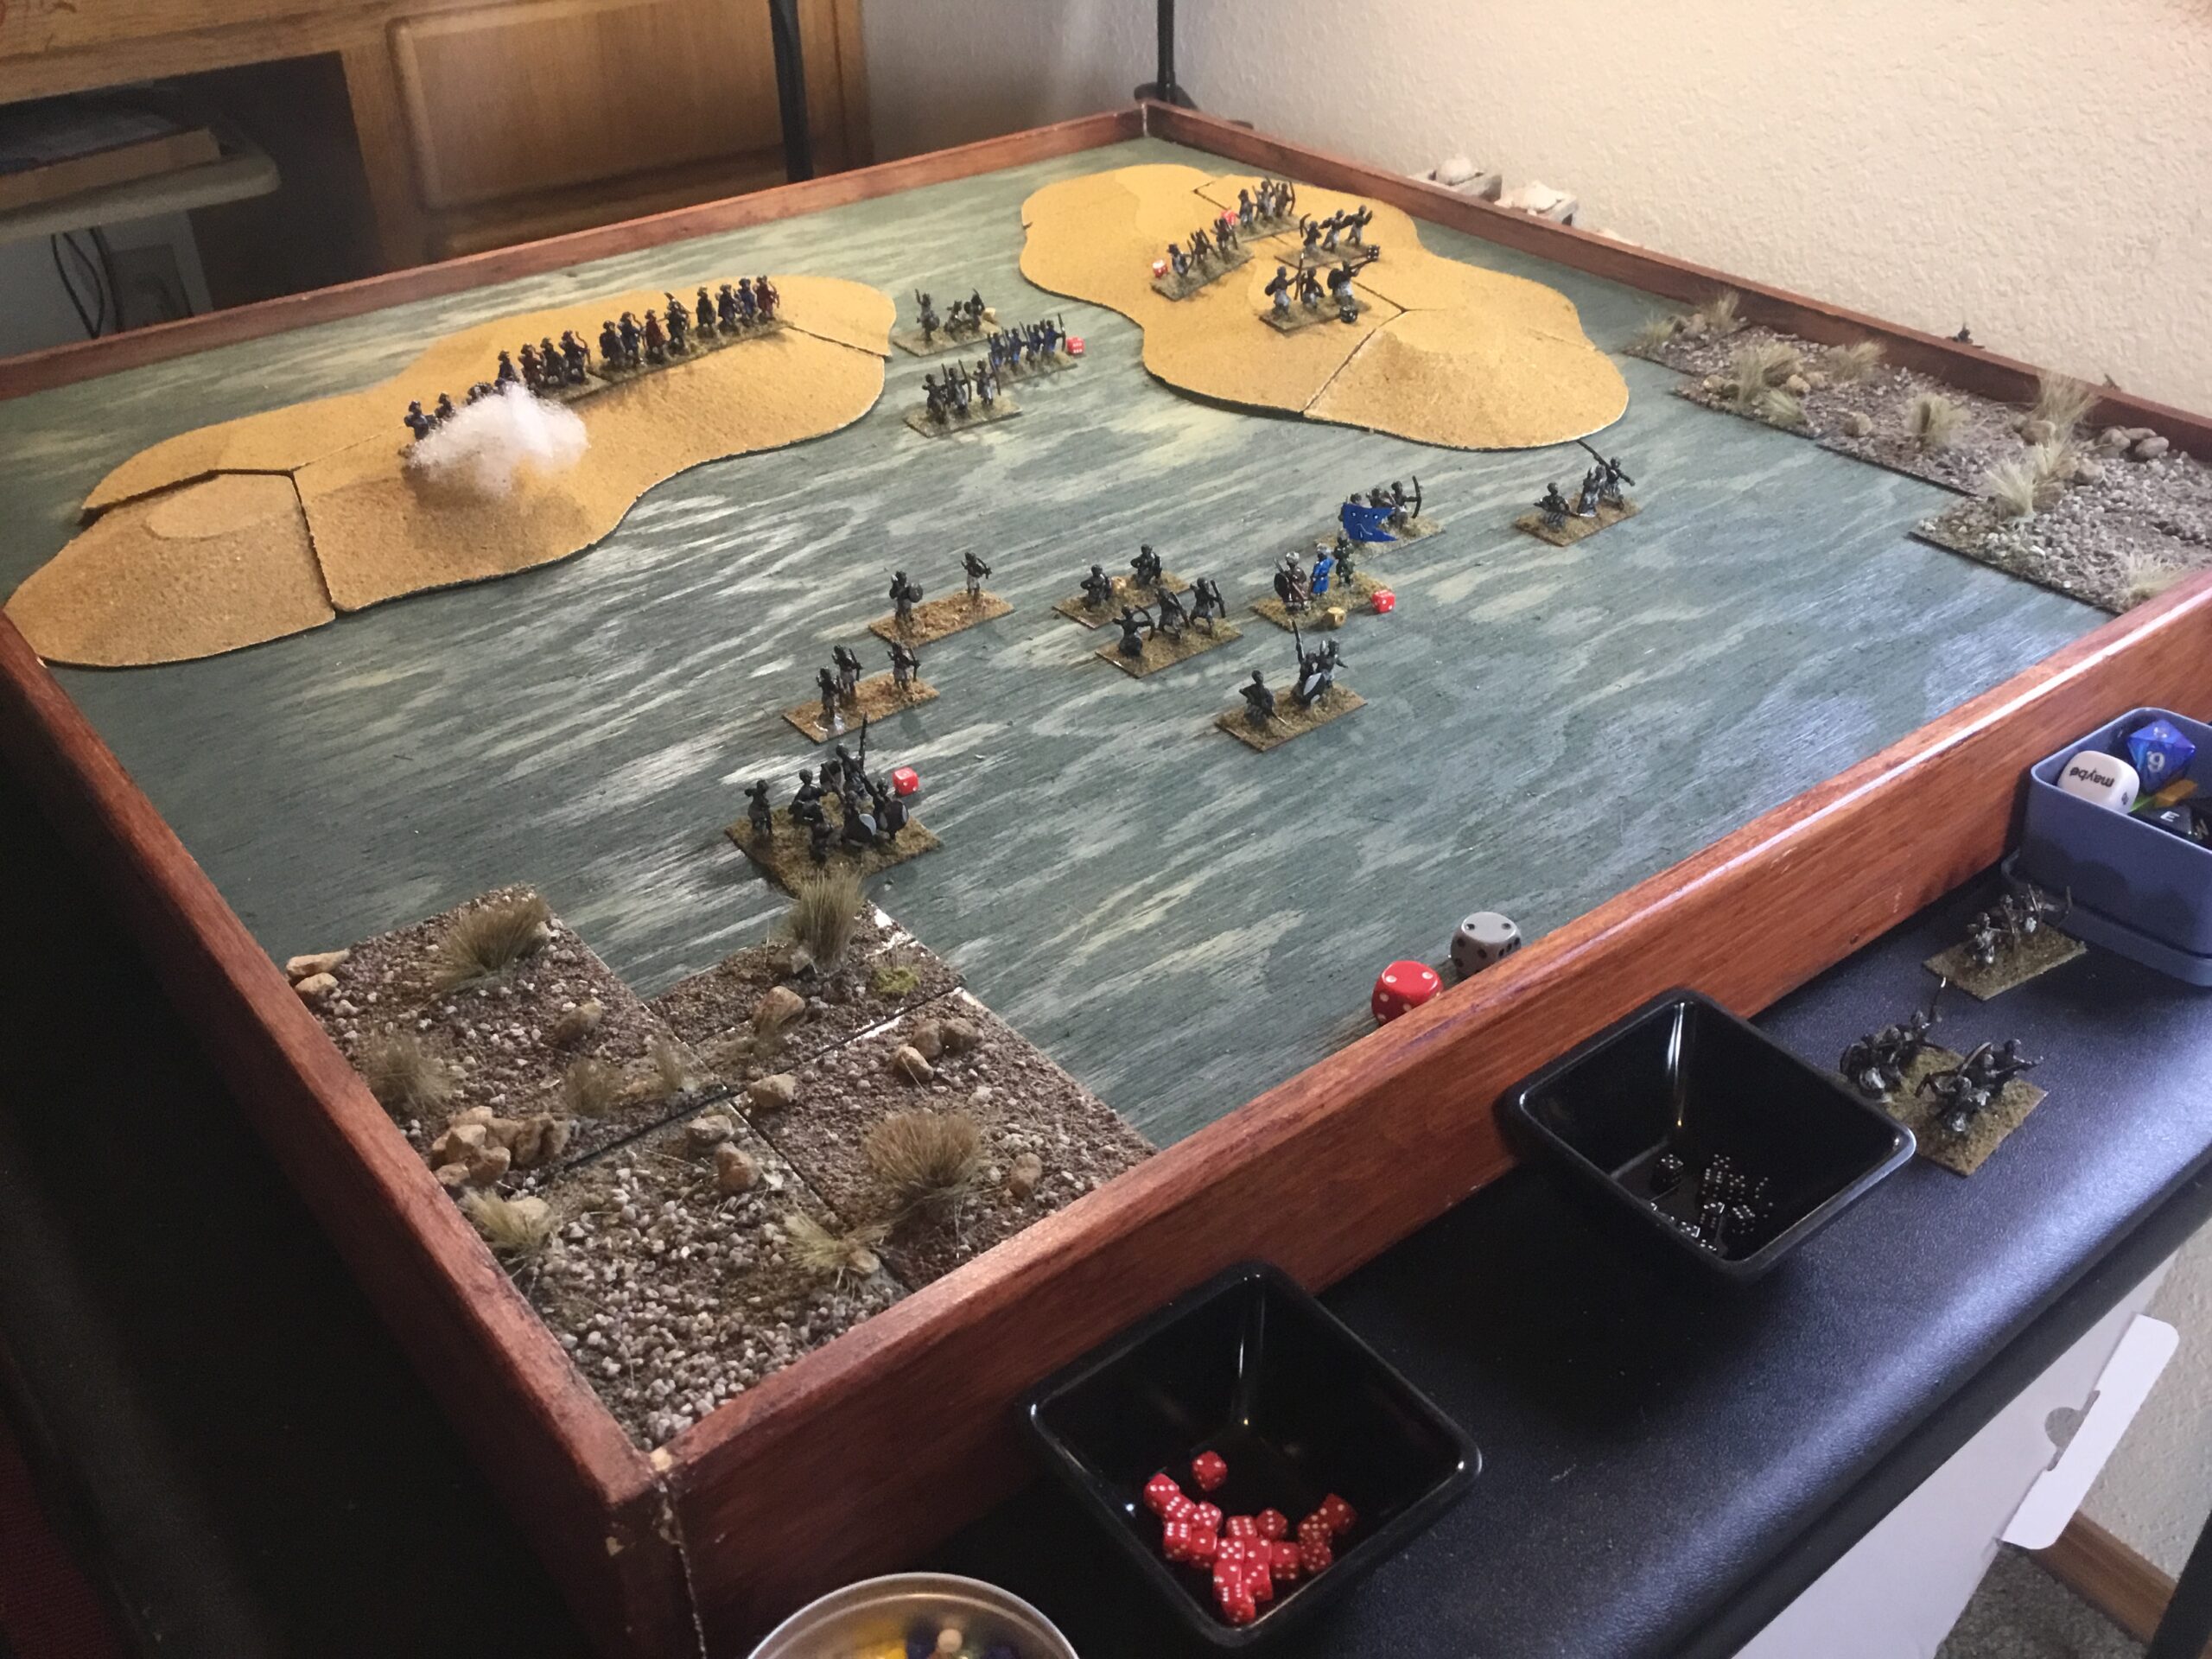
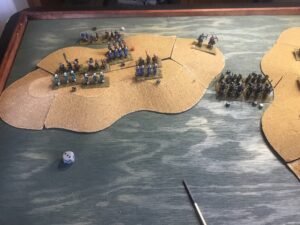
The assault on the east ridge initially pushed back the Yemenites. But they rallied, scattering the Ottoman Azabs. One unit, through both pursuit and being out of command, and rolling for impetuous actions, even charged and scattered the Ottoman artillery unit.

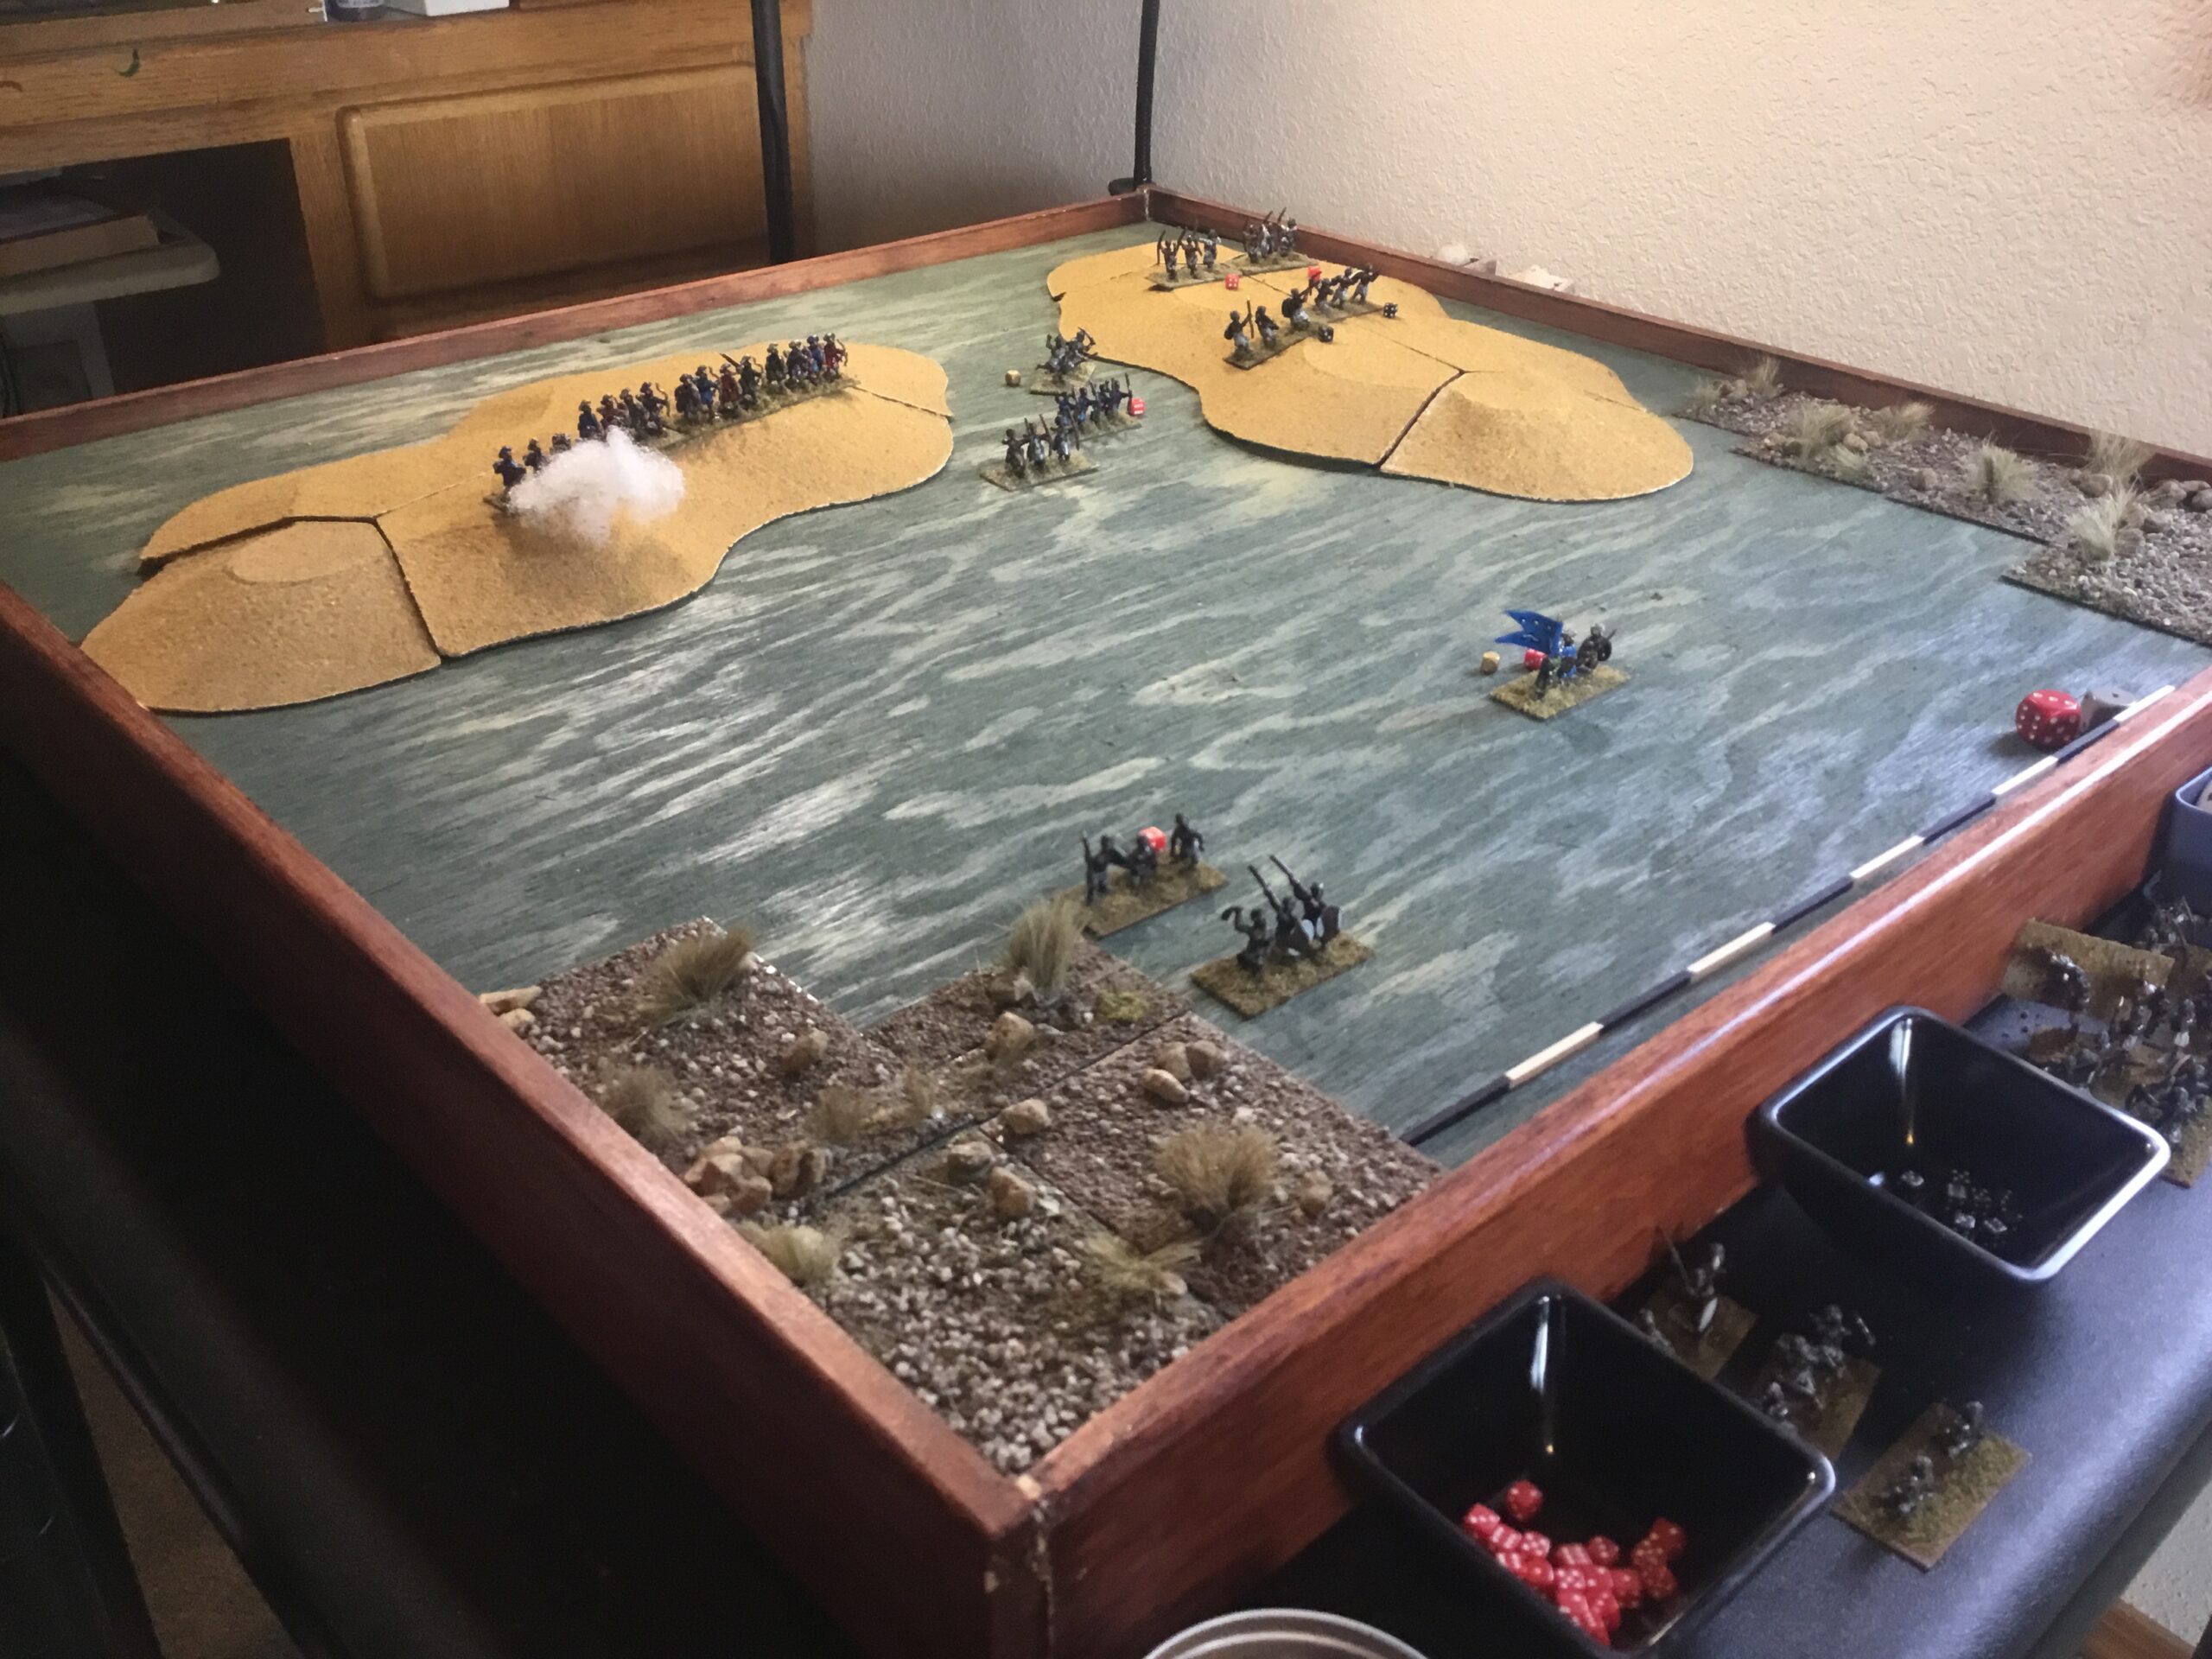
The Janissary missile unit advance/shoot tactics wore down the Yemenites holding the west ridge. In desperation, the Yemenites pulled back to the reverse slope. This was the decisive event of the game. The Janissaries continued their advance while the Yemenites rallied, charging the Ottomans as they crested the ridge. Now locked in melee, it was a matter of time, and decent die rolling, until the Janissaries wavered or scattered.

Meanwhile, the Sipahi initial charge failed to dislodge the long-spear armed guardsmen. Again, locked in melee, the Ottomans were at a disadvantage.

The Sipahis wavered and scattered, leaving the Janissaries to fight a “last stand” against what remained of the Yemenites on the west ridge, eventually breaking under the  pressure.

Quite the fight.

Much of the defeat can be attributed to Osker Boz’s characteristics (inexperience and cowardice) and his employment of an incompetent physician who exacerbated the effects of some poor Disease and Mishap rolls.  As a result, the Ottomans rarely won an initiative die roll, had trouble rallying troops to restore resolve, and had significantly lowered resolve due to illness going into the battle.

Add an attack plan that called for some good fortune, and the outcome cannot be considered a surprise.

Recent rumors from Constantinople indicate that the Sultan has put his plans for naval expansion into East Africa on hold, pending successes by his overland forces working south along the both coasts of the Red Sea. Osker Boz has been ordered to return home. Given this blow to Ottoman prestige, it’s unlikely he will survive the trip.

As usual, a series of marginal photos with incoherent captions.

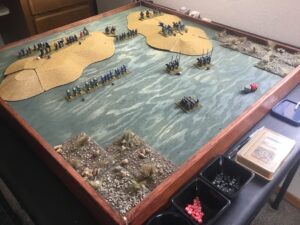
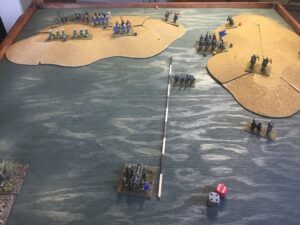
The Ottoman Attack Develops.  Top of picture is NNE.

Melee on East Ridge

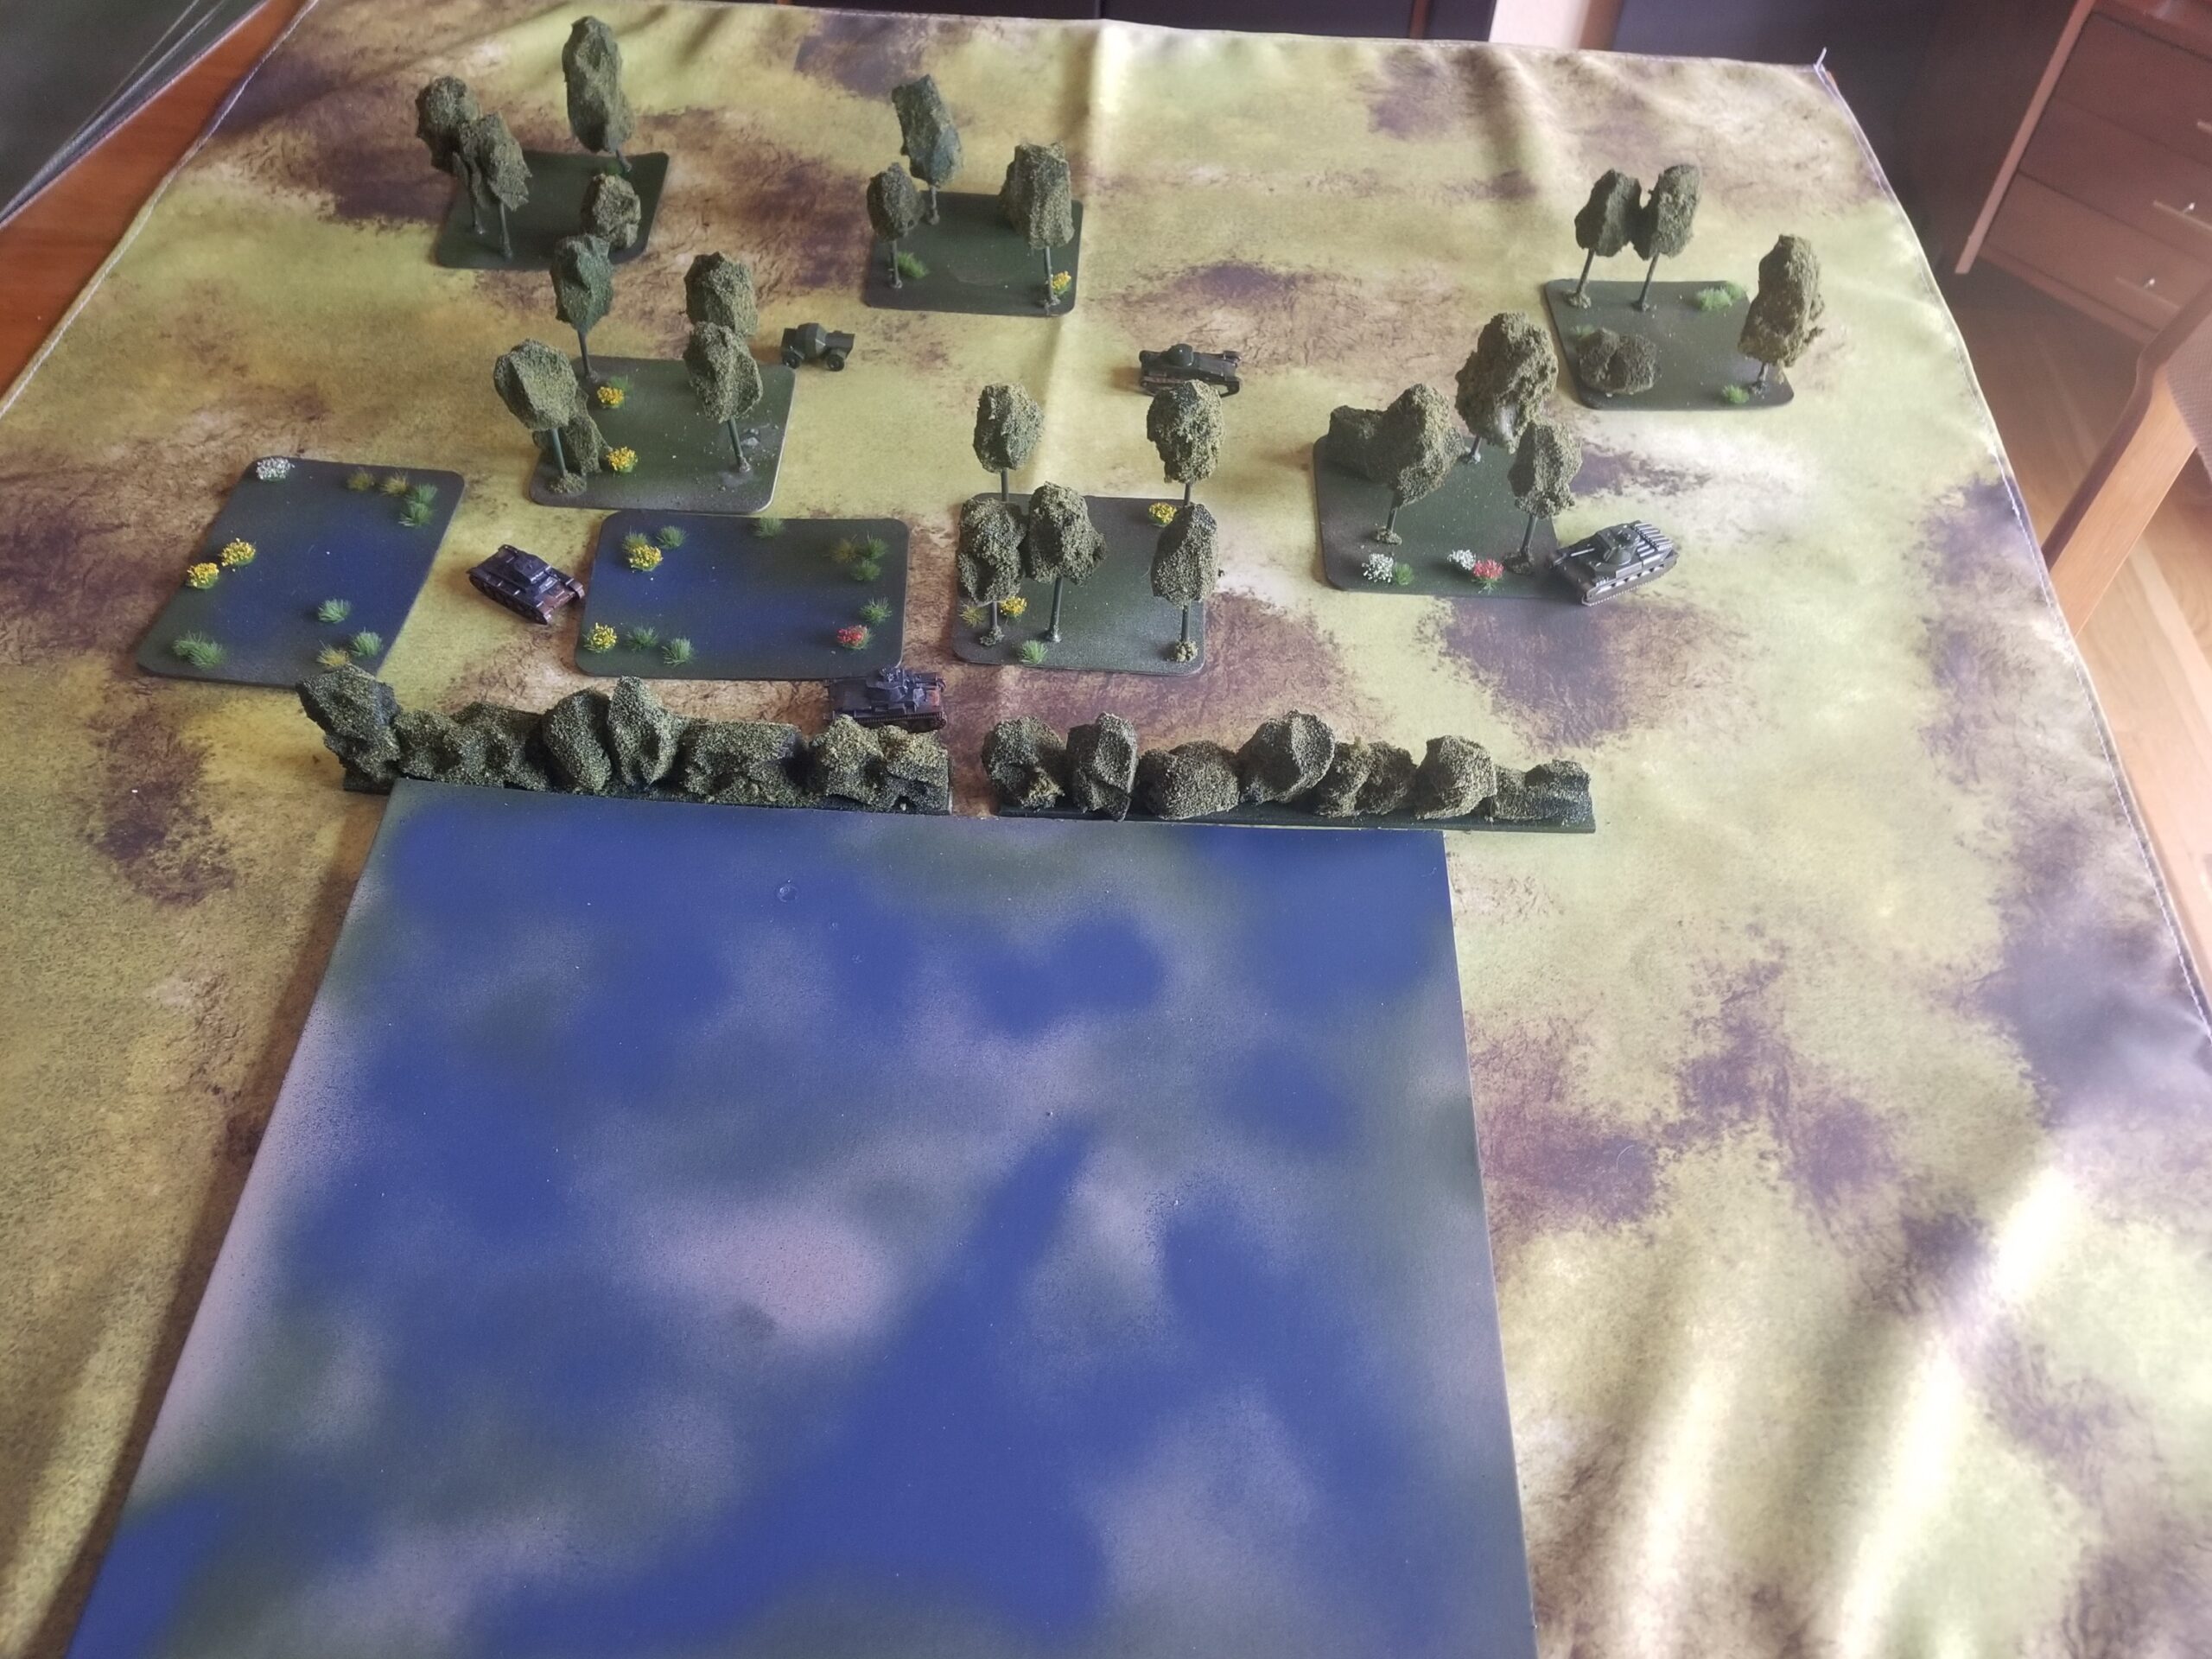
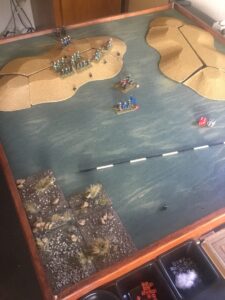
Ottoman Artillery Support Ineffective
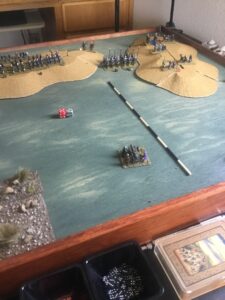
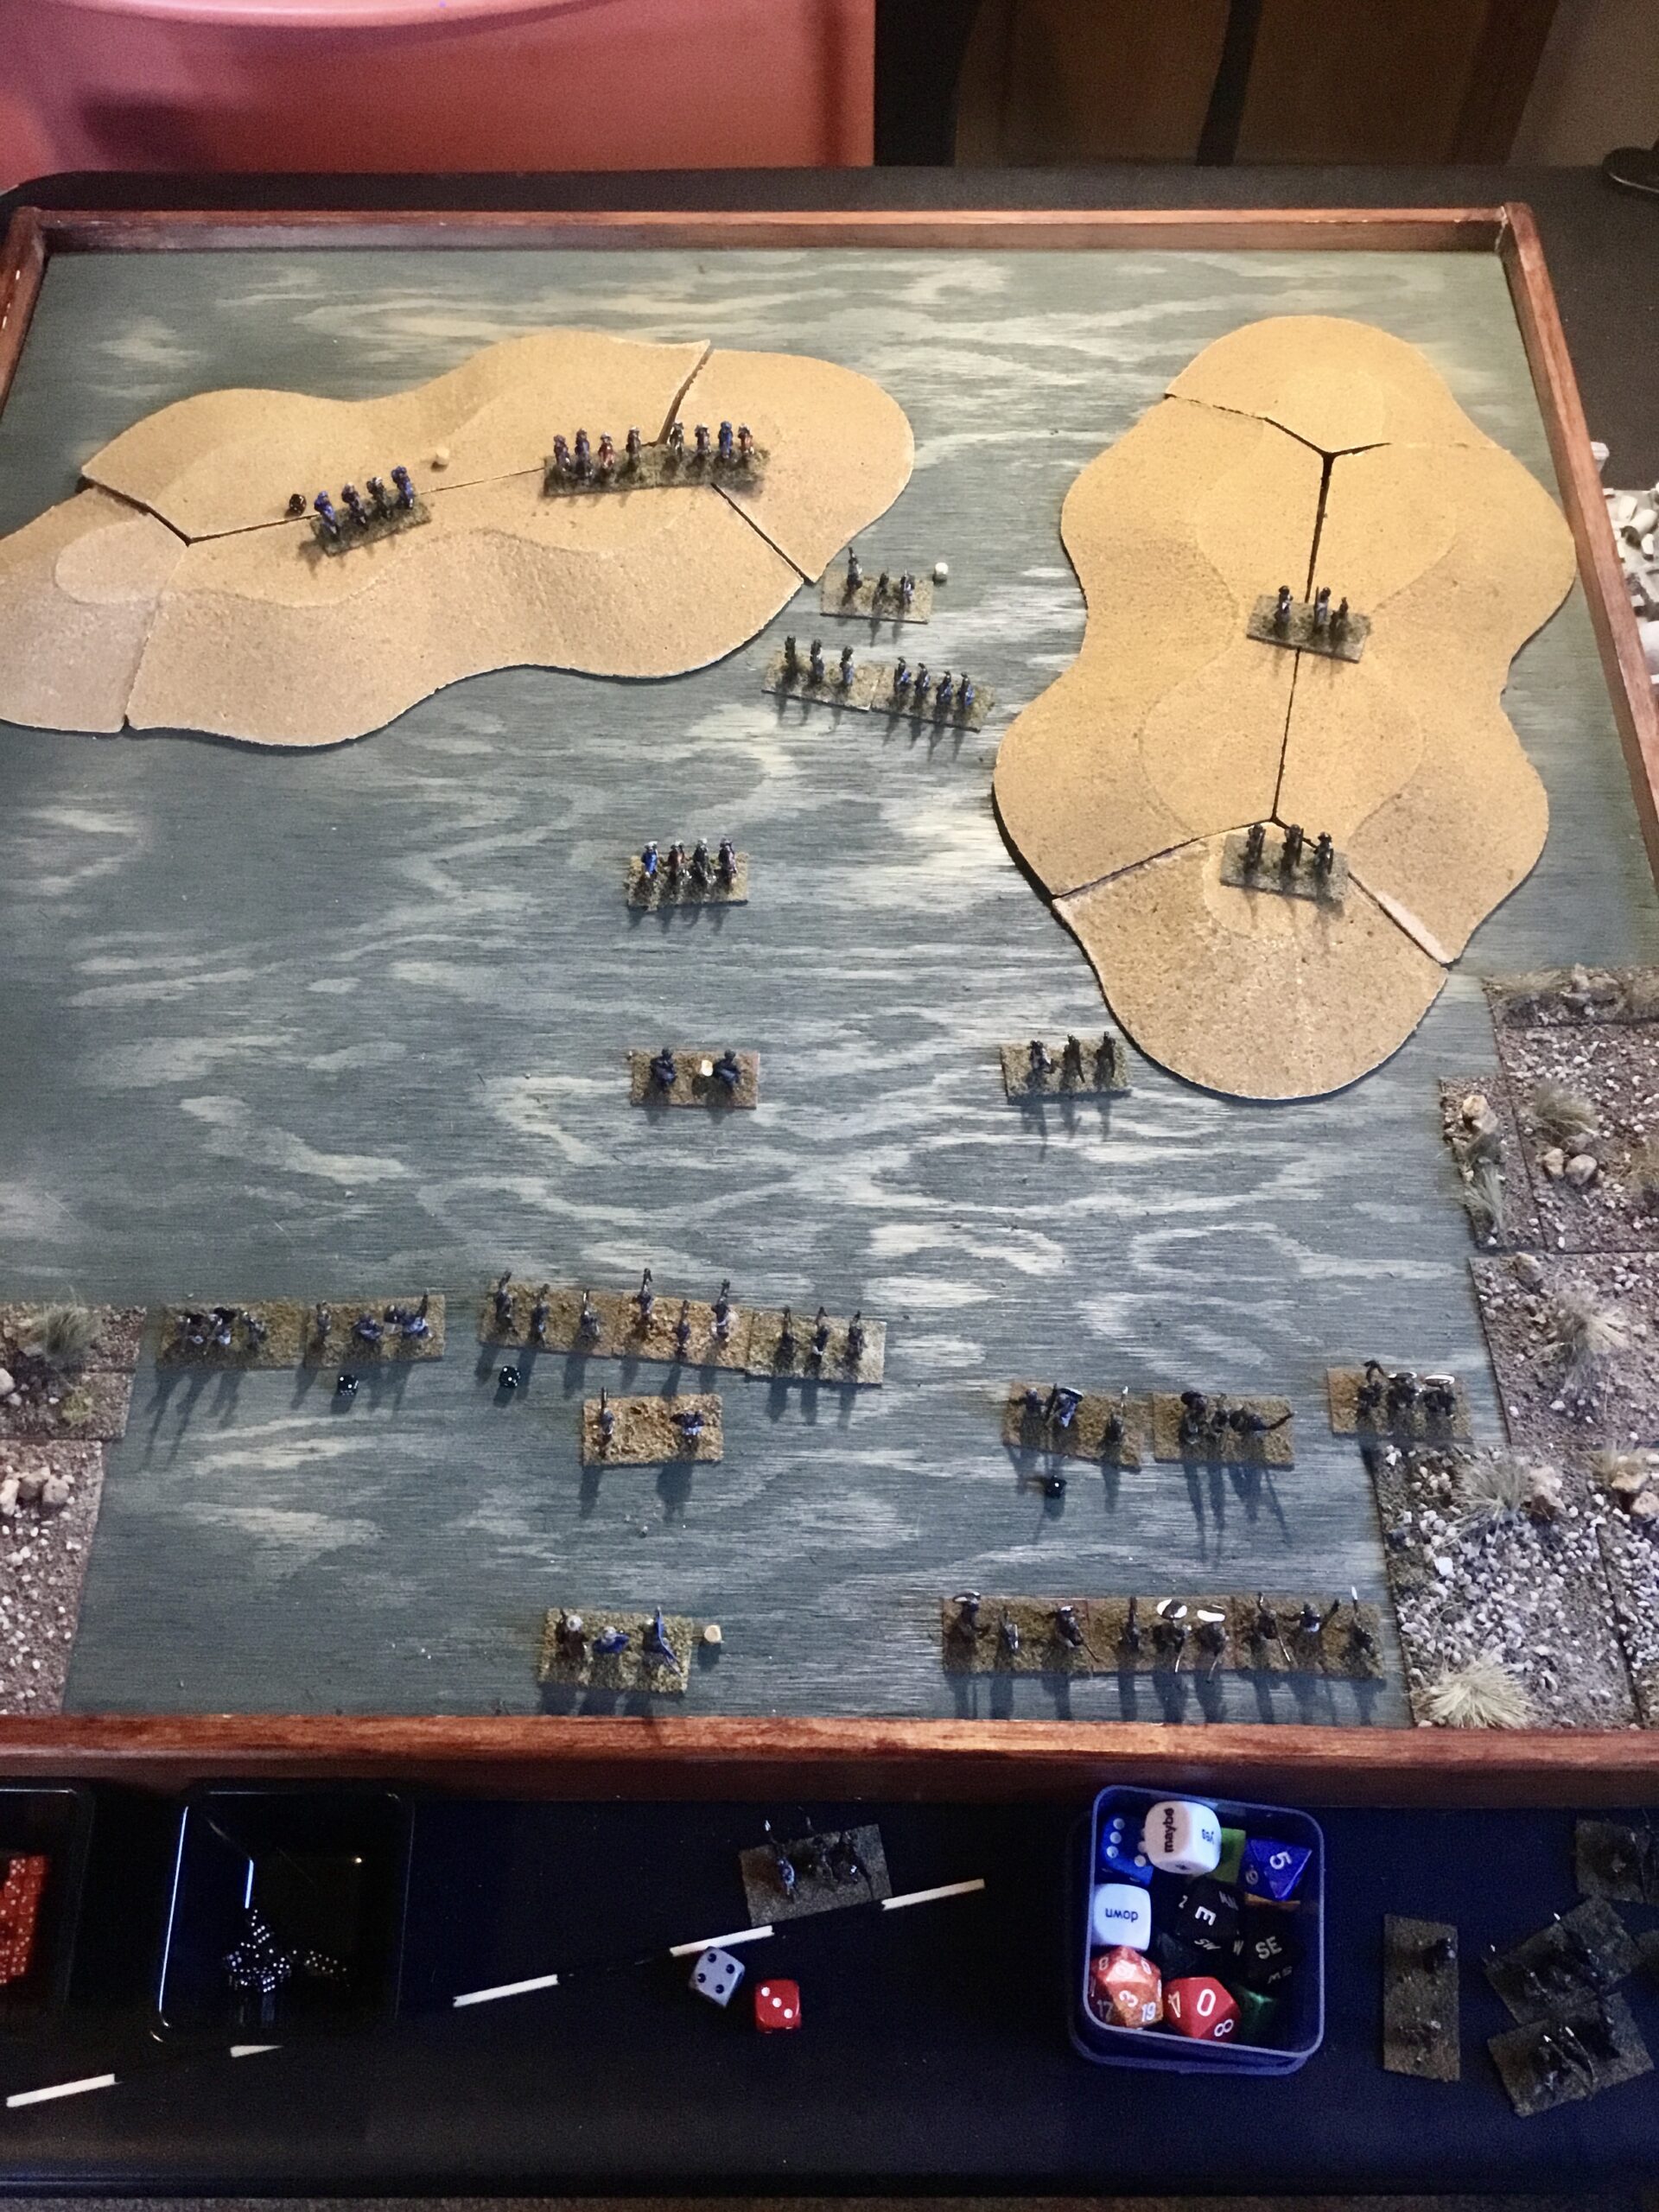
Melee

Melee Continues

Sipahis Scatter With Yemenite Pursuit Threatening Artillery

Preparing For The Final Assault

Final Melee.  Light Cavalry Ready To Flank Janissaries


And It All Seemed So Simple

Before I get into the mayhem, here’s a summary of the Game Modifiers.

Coastal Arabs:  Well Laid Plans – Allowing all companies to be in Command for one phase; and Ill Chosen Bedfellows – A -1 DRM for Disease and Mishap Rolls.

Ottomans:  Enterprising Captain – one Company always in command; the aforementioned Ill Chosen Bedfellows, which combined with their incompetent physician will cause real Resolve problems; and Miraculous Cure – good to add one to a unit having lost one Resolve due to disease.

The Disease and Mishap rolls were really something.  Each side lost a company through bribery (Bought Off), the Ottoman right became too Enthusiastic and moved well forward of their initial dispositions, while Coastal companies arrived late.  Both sides were affected by disease, with the Ottomans ravaged.  Two companies lose two Resolve!

Here’s a picture of a not quite so tidy battlefield.  The black die indicate units that have already lost Resolve.  This is not a game system for The Orderly & Systematic General!

Both sides need to spend a few turns regrouping……

Tanks! Redux

Watched Dunkirk the other night.  Not the new one, the good one.

Duly inspired, I dug out my 1/100 armor with accompanying terrain, and set up a mini-campaign for Tanks!.

Basic premise was a pack of misfit British armor, caught up in the backwash of the Arras counterattack, tries to get to the coast.  Set up random parameters for German opposition, and British crew capabilities.

Since the campaign was “based on a true story”, the rag-tags had an interesting set of crew skills and helpful equipment.  These add-ons provide the abilities to shrug off misfortunes of all kinds. The Germans were faceless, robotic drones.

The tricky part was what each force could see, and if they saw something, how/could that information be communicated.  Did some basic research on tank radios and found there is not that much out there.  So, just had some fun with it, using yes/no, directional, and other random dice.

The British had an armored car for scouting; an A12 Cruiser,  a Mk 1 Matilda and a Mk 2 Matilda.  The German mix could include Pz II, III or IVs.

The unintended consequence of all of this was another trip into the world of computer graphic design.  I’d designed some Tanks! cards with GIMP in the past, but had lost all of my chops.  Downloaded a template over a Boardgamegeek, and  floundered.  Wound up using my old mock-up cards.  Hopefully, I’ll continue to slog away at the new cards.

Again, it’s a real challenge to resist ginning up too many house rules.  Sure, I had to make spot judgments on backing up, Matilda frontal armor and others, but resisted the need to codify them.  Here’s photos of the first two scenarios.  Lots of Hide N’ Seek trying to work through woods along roads/side roads.

Had to pick up this AM.  I’m thinking coastal operations later in the week, or Heroes of Normandie.

Action At Neo – The Battle

It ended so quickly.  What some might find to be the weakness of the Irregular Wars’ rule set was on full display during this action.

Over at Boardgamegeek, there’s a on-going (and increasingly pedantic) thread discussing fog of war and randomness.  While Irregular Wars doesn’t have much in the way of fog, it certainly can provide plenty of randomness.

First off, the tidy initial dispositions featured in the previous post were immediately disrupted by the designed randomness of the Disease and Mishaps die rolls.

Some companies pushed forward, led by over-enthusiastic Captains.  Others formed up ravaged by disease, with reduced Resolve (companies with black die).

It took a couple of turns for the attacking Kattegoans to sort themselves out and advance towards the Neons.  Their attack plan called for Archers to neutralize the Neon center, while Warriors assaulted the small ridgeline on their right.  The flanked Neons would then be subjected to a general assault.

However,  Neon archery took its toll.  After several exchanges, many Sanwanian units were wavering (red dice).  And, it only took one misplaced Company’s (left within archery range) scattering to unhinge the Sanwanian center and left.  Again, a Scattering Company reduces the Resolve of any friendly unit within 80mm (2U)by one.  Wavering companies are down to their last Resolve.  They lose that, they Scatter.  And, that’s what happened – en masse.

The companies facing to the rear are those that scattered in just one turn.  Here’s what the battlefield looked like after they were removed.

While the Sanwanian Warriors on the right made a last valiant effort to close with the Neon Archers, the latter companies were able to disengage.  The Warriors withdrew.

A notable victory for  Neo, with all due credit to the help provided by Bey Mahir of Behefe.

Action At Neo – Initial Dispositions

The stage has been set for battle between the Sanwanians and Neons.

Quick note:  I have capitalized game-specific terms/usages.

The Neons made the most of the short time they had to prepare.   Much of the credit for the ability of the peaceful Neons to resist goes to the Lord of the Behefian forces sent to their aid.

Bey Heydar (or The Lion) is an Experienced  and Heroic Persian mercenary (receiving a positive die roll for Initiative and also when his Company is in Melee).  He has brought with him three companies of Persian Archers and one of Shot,  along with two companies of  mercenary Warriors.  His staff includes one of Behefe’s most experienced Physicians (this is a positive modifier when rolling for Disease and Mishaps after initial deployment(s)).

Recognizing the Neons lack of combat experience, Heydar’s preparations  focused on a Neon strength; hunting.   The majority of the Neon contingent received intensive  Archers training, with  one Company of young men to be used as Warriors.

The nominal Lord of the Neons is Sisay (or Good Omen).  He has excellent Local Knowledge and is an Inspiring Lord (receiving a positive modifier when rallying companies).  However, he is Inexperienced and Cowardly (these two traits will result in negative modifiers when he rolls for Initiative and if/when in Melee with his Company).

The Sanwanians are led by Tamrat (or Miracle).  His  distinguished conduct in the recent  victory over Kattego made him  the logical choice to lead this large force,  with includes a  solid Veteran contingent.  He is Heroic and  Experienced.  His only shortcoming is Rash behavior in the field (increasing his chances of being killed in melee).

The Sanwanians are once again accompanied by their  adopted Wandering Mystic (Shaman in game terms), Kibwe Nkruma.  He is counted on to bolster the Resolve of any Wavering companies.

Photos of the summary sheet for the battle, and initial dispositions before rolling for Disease and Mishaps are shown below.  The dispositions are oriented North/South (Top/Bottom), with Neons in the North.