Monthly Archives: December 2016

Battle At The Oasis of Olufunke – Preliminaries

The Bey’s instincts were correct.  He quickly raised four more Civic Guard units, giving him nine.  His Tribesmen were relatively intact after the battle, and add another five units to his army.  The Civic Guards confidence and resolve soared as a result of their staunch performance, and all units are now rated a “3”.  The Bey’s experience now allows him to have a command radius of six units.

The Portuguese were shaken  by the seeming setback at the Faragh.   The resolve of their Pike units has dropped to “4”, with the Musketeer units resolve now at “3”.   Lord Renaldo’s  negotiated settlement with the Persian mercenaries  is the one bright spot in this deteriorating situation.

A condition of employment was to reveal the ringleaders of their desertion from the Bey’s army.  That being done, Lord Renaldo personally executed them in front of his army.  Now “encouraged”, the Persians have a resolve of “4”.

The Bey’s forces have taken up positions at the Oasis, and the Portuguese approach.  The battle is at hand…….

Battle of Katlego Faragh – Pt 2

Lord Renaldo ordered his troops to by-pass the Zanj tribesmen now blocking the Faragh (gap).  Planning to take advantage of a screen of Musketeers and Crossbowmen, the Pikemen and Targeteers moved north.  But, with the narrow frontage, the Portuguese units blocked each other, offering the Zanj an opportunity to attack.

These piecemeal attacks were stopped, and Bey Iman Mahir ordered a general withdrawal to the east, planning to retire along a route parallel to the Portuguese advance, but separated by the impassable dunes.

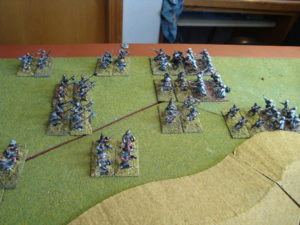
Melee Combat
Zanj Orderly Withdrawal. Tribesmen On The Right Will Also Escape.

While the Bey might be criticized for not pressing home is attacks on the disorganized Portuguese, he was intent on maintaining his army, and most importantly, the high morale of his Civic Guard.  These untested units had acquitted themselves well in the battle.  Bey Mahir believed their success would allow him to recruit more Civic Guard as it was his belief more troops were needed to defeat the veteran Portuguese.  This was especially true since the mercenaries had failed miserably, and could no longer be counted on.  In fact,  there were rumors they might be bribed to change sides.

However, there was real risk in his strategy.  The city of Behefe was not defensible and could not withstand the shortest of sieges.  Its sole water supply was the Oasis of Olufunke, a 15 minute walk south from city walls.    The decisive battle would have to take place there.

What’s In A Number?

Through with Xmas visits/visiting so finally have time/energy/sobriety to post up about another Fire In The Lake game with Tim.

This will be a fuzzy-through-altered-memory overview of the game focusing on my experience, with Tim adding his thoughts in the near future.  As with last time, I had the NVA/VC forces.

First and foremost it was a lot of fun.  We decided to use the historical card option, which allows for a roughly chronological card sequence.  Coup Cards are randomly placed in 12-card groups using each of the three (1964, 1965 and 1968) decks.  There are six total groups to work through, with half of the cards from the larger 1968 deck.

Lesson learned:  When a Coup Card is drawn, get going during the current turn and get set-up to grab some points during the End Turn phase.  While somewhat “gamey” it does (in a way) reflect the chaotic situation that leads to a coup.  The US player cannot use air strikes during the turn prior to the coup (considered monsoon season), so the NVA/VC player can be aggressive without fear of devastating retaliation.

Lesson Learned:  Spend the resources necessary to keep the Ho Chi Minh Trail in good shape.  The source is a “times two the level” source of reinforcements.  This is, literally, a powerful force multiplier.

Lesson Learned:  The  NVA/VC will take casualties.  Inevitable if aggressive operations are launched.  However, casualties can be minimized by using the Ambush option.

Lesson Learned:  Occupying Lines of Communication (LOC) can result in victory points, or at least, tying down US/ARVN resources.

Lesson I Couldn’t Learn:  How to effectively get the VC into cities, where they can disrupt COIN control.  The problem is that they have to reveal their presence, which means they can quickly be “killed”.  Maybe it’s just a matter of using them to soak up US/ARVN options, or flooding a city with VC (Tet).

We managed to get through four Coup Rounds.  At the end of fourth, we discovered (to our surprise – or certainly to my surprise), that the RVN had attained victory by ONE STINKING POINT!  Not a BLAMMO by any stretch of the imagination, but a victory nonetheless.  The good news was that “victory” occurred at about 2200, so we could call it a night.

We’re planning on a another game in the near future.  We’ll switch sides and see what happens!
Poor Misbegotten Thing

Well, it’s over.  The lengthy, frustrating, and unfulfilling process of building the BoB Gunboat has ended.  So many iterations, so many days lingering on the workbench.

Almost all wargame projects start out full of promise, the completed object so thoroughly pictured in the mind’s eye.  Ahh, then the harsh reality of actually building the damn thing.  In many instances the process is so painful that the object is put out of sight and relegated to a box.  Sometimes, it’s just a matter of stepping away, getting a break, and coming back with renewed energy and ability to see what needs to be done for a quality project.  Other times……it just doesn’t happen.

The Gunboat is about as close as I have come to an adult version of my Pinewood Derby car.  My Dad let me build it myself.  The finished project was bad even by 9-year old standards.  Dad tried to salvage things, but it was too little, too late.  The other Cubbies had cool looking cars.  Mine was not.  In a Disney movie, I would win and my ugly piece of child work would be admired.  Didn’t happen.

So it is with the Gunboat, a child-like effort unfortunately completed by an adult.  Oh Well….My, My.

Here’s a picture along with a link to GIF of its Captain.

Battle of Katlego Faragh – Part 1

Jeez….what happened???

For me, writing a wargame after-action report is similar to waking up after a party and figuring out what happened.  It takes a while…….and may lack details.  I admire wargamers who can provide a detailed account of their games (not to mention high quality photos – definitely NOT a characteristic of this site).  However, I just can’t do it.  Why?  I get caught up in the game and am having fun. I don’t take notes at a party, and I just can’t do it consistently during a game.  So, what follows is a series of general impressions and game photos in a rough chronological sequence.

First, game-flow impressions:

  1. The Portuguese were able to gain the initiative for most game turns.
  2. The Civic Guard fought like lions, or the fabled “300”. They held off the Portuguese, lowering the resolve of every unit they came in contact with.  Yes, the narrow gap worked in their favor, and their initial resolve determining die rolls were good (and better than anticipated using a D4), but still, they outperformed expectations, retiring only when their resolve reached a wobbly “1”.
  3. The Portuguese couldn’t get sorted out.  Their hasty attack was probably a bad idea, and it was difficult after that to deploy the right combination of units (fire and shock) to attack through the narrow gap.
  4. They were also cautious.  Lord Eduardo Nicolau Rolando halted his assault to regroup and focus on rallying depleted units rather than continue to attack the weakened and withdrawing Civic Guard.
  5. The inexperienced Bey Iman Mahir did an excellent job of moving his tribal units initially deployed east of the gap, to a supporting role.  He also managed to extricate the Civic Guard units in good order.
  6. However, the Bey’s initial deployment east of the Faragh caused his Civic Guard to be beyond command radius and subject to the wackiness of the Impetuous Actions table.  Luckily for the Bey, he quickly moved west, and most of his companies did not act too impetuously before brought under control, although the Mercenary company “Ran Away” for three consecutive turns, and off the battlefield.  In fact, the initial disruptions in the Guard’s dispositions triggered an ill-advised (in retrospect) hasty attack by the Portuguese.

Now, some rules impressions:

  1.  The Disease and Mishaps roles at the beginning of the game are something.  The Portuguese launched their hasty attack because the Civic Guard units were in disarray, with rolls that either moved units forward, or behind their line of initial deployment.
  2. The Portuguese were literally “saved” by their expert physician.  No less than four units had disease (normally resulting in loss of resolve) rolls that were negated by expert medical care.
  3. My rules interpretation is that a unit contacted by an opposing unit (that opposing unit having the initiative) can, in their subsequent movement phase, attempt to withdraw from melee before the melee phase begins.  This ability to disengage can be a mixed blessing.
  4. It’s a mixed blessing because the attacking unit can roll to pursue.  If successful, the attackers gets a charge bonus.  On the other hand, this is a mixed blessing for the attacker because this impetuousness can disrupt a coordinated assault.  I didn’t grasp this dynamic until this game.  It’s a welcome discovery, as it adds an uncertainty that I fondly (ahhh, and not so fondly remember) from the old Gush WRG rules.  The only Civic Guard unit destroyed was a result of continuing to pursue a unit.
  5. You can’t interpenetrate in this game.  Keep gaps open.  Not only for movement, but because wavering companies (resolve = 1) that contact other units cause the contacted to lose one resolve.

Now, the game photos with narrative captions.

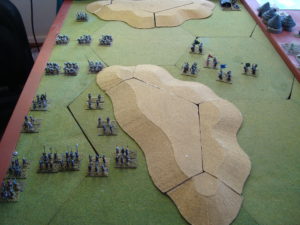
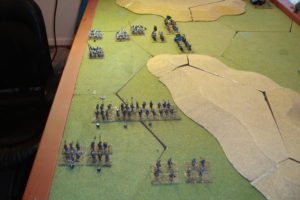
Portuguese Begin Hasty Attack. Tribesmen Begin Move To Support Civic Guard
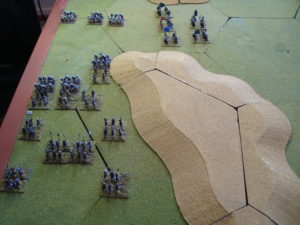
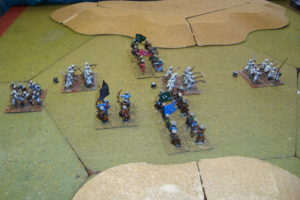
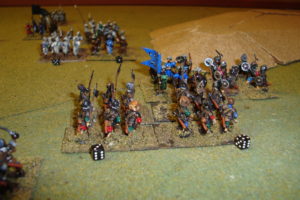
First Contact! Tribesmen Have Closed The Faragh.
First Contact! Tribesmen Have Now Closed The Faragh.
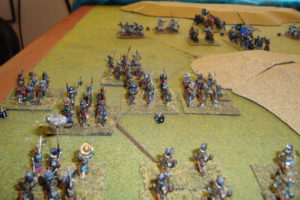
First Contact, Looking West.
Both Sides Regroup.
Both Sides Regroup.
Civic Guard Withdraws Through Tribesmen.
Portuguese Begin Cautious Advance Towards Withdrawing Civic Guard
Portuguese Begin Cautious Advance Towards Withdrawing Civic Guard.


Going Tactical

While the Battle of Katlego Faragh has been raging, I’ve also been playing Ranger and (gulp) ASLSK.

Be careful what you wish for.  My last two games of Ranger have been nothing short of disasters.  Those combat scenarios are a lot tougher than a pure recon mission.   In one game, the squad barely moved past the perimeter before it was hit by a close ambush.  I forgot doctrine, and tried to break contact.  Wrong & BLAMMO.  Need to assault through a close ambush.

The next mission was an anti-armor ambush that went really well……except the getting home.  Again, another close ambush, but far from home and too many casualties to evacuate.  Well, the good thing about wargaming is that it’s just like “Edge of Tomorrow”.  Die, Learn, Try Again.  I really dread rolling 2-3, or 11-12.  As mentioned in my previous Ranger post, bad things happen.

ASLSK has been fun.  Playing the first scenario, rules-in-hand, one half-turn at a time.  With low counter density, no supporting weapons, and a methodical approach, it’s been a pleasant and not frustrating experience.  I’ll try another similar scenario, and then, perhaps, add crew-served weapons.   Unfortunately, the complete rules are in the No. 3 game, and I am loathe to spend $30+  for just a set of rules.  I have a lot of counters and scenarios to mess with already.   Got to figure that out using the ASL rules and the player’s guide.

Battle of Katlego Faragh – Army Dispositions

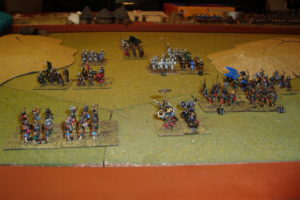
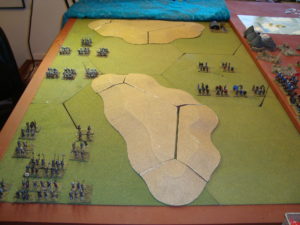
Ready to start the battle.

The Zanj could not accurately determine the location of the advancing Portuguese.  As a result, Bey Imen Mahir played it safe placing  his Civic Guard and Mercenary units to the west of the dune gap, and his Tribesmen to the east.  This involves some risk as the resolve of the western units will not be determined until first contact.

The Portuguese order of march has the Grenadiers and Tribesmen in van, followed by Crossbowmen, Pikes and Shot.  All of their forces are advancing on an axis west of the dunes.

dsc01601
Initial Dispositions
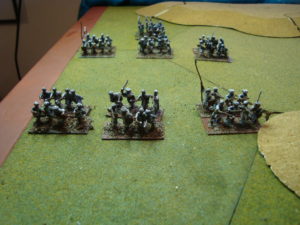
Civic Guard My old MiniFig "Any Period" Arabs
Civic Guard
My old MiniFig “Any Period” Arabs

Now that the enemy has been sighted, both sides must react.  Any reaction by the Portuguese or change in disposition by the Zanj will be decided using the D6 Programmed Wargames Scenario options.

The Zanj options are to redeploy all forces to the threatened side (1,2,3); move some forces to cover the Faragh (4,5); or redeploy the East forces  to cover the gap (6) and support the west flank.  I rolled a 6.

The Portuguese options are to bypass and keep moving north (1,2); destroy any enemy to their front and keep moving north (3,4); detach a force to seize the gap and, with the remaining force, destroy any enemy to their front (5,6).  The die roll was a 3.


Another Mission

Completed another Ranger reconnaissance mission (Card #3) yesterday afternoon.

Preparation time drastically reduced to about 15 minutes.  Kept my same roster and equipment from the last mission.  Plotting ingress and egress from the objective was straightforward.  I remembered to seal off the objective and PZ with supporting fires, as well as providing some contingency support at the LZ.

Managed to survive without incident.  Now I’m ready to move on to a combat mission.  Fun little game, small footprint.

Ranger

Took Ranger off the shelf the other day.  Had messed around with it about a year ago, after picking up the latest edition for practically nothing on E-Bay (bad box).

Each game consists of a mission.  The mission has two parts, planning and execution.  United States Army small unit doctrine for squad or platoon sized missions is used.  If you have had any exposure to this, learning the game is simple.  If  not, there is a very informative booklet included to help you learn the basics.

What’s fascinating is the few number of rules.  The platoon leader has to act like a platoon leader during the planning, briefing and rehearsal stages of the mission.  Determine your unit’s load, work out the route from your insertion point to the objective and then back to your pick-up point, plan for supporting fires, and manage your rehearsals.

Mission execution is accomplished using the programmed text.  While movement to the objective can be a little tedious, you can’t make a mistake, or something bad might happen.  Make sure your unit is in an appropriate tactical formation, call halts every 750-1,000 meters, and don’t get in a hurry.

One aspect of the programmed text that confused me at first was how to stop moving once my squad had reached the objective rally point.  Well, the answer was simple….call a security halt, and go to that paragraph.  The text options provide the prompts to start your actions at the objective.

To be successful, actions at the objective must comply with doctrine.  If you start free-lancing, bad things do happen.

This game has a very quick set-up, but preparation before the mission is lengthy, but an integral part of the game.  However, after a couple of missions, SOPs can be established, reducing planning time and increasing effectiveness.

Playing time for my first mission was about 1.5 hours, all-in.  This squad-size reconnaissance  mission is an excellent introduction to the game.  I look forward to moving on to Mission Two in the very near future.