Tag Archives: GBACW

Pea Ridge

Set this one up a few days ago.

A meeting engagement, regiments arrive piecemeal, with the Confederates having to negotiate constricted roadways in order to attack and reach their victory objectives.

I always tussle with whether or not to read about a battle before I play it.  I tend to not consult a reference so to avoid any pre-conceived notions about my approach for my first play-through.  After that, I’ll take a look, especially since I am fortunate enough to have the original two volume West Point History of American Wars.

Here’s a bad shot of the situation after five turns.  Top of picture is North.  The Confederate victory objectives are, for all intents and purposes, at the south end of the board.  Union victory objective is to hold in-place at their present position (Elk Tavern) to the East.

The game’s characteristics are interesting.

Union forces are outnumbered, but most Confederate units are armed with short ranged (one hex) muskets.  But, using fire and melee tactics is complicated by the need for Confederate units to be stacked with a leader in order to melee.  This rule is intended  to reflect the high historical casualties among Confederate brigadiers.  It also makes a two hex melee attack very difficult.

Many regiments’ morale is unknown.  A die roll the first time a check is necessary determines their rating.  Units keep that rating for the rest of the game.  This differs from TSS, which calls for a new roll for each check.   There is also a night turn, when both sides have an opportunity to regroup.

Managing the movement to contact is difficult.  Command radii are limited, there are lots of artillery units to clog roads, with very little room to deploy from column – necessary for movement at any pace through the heavily wooded areas – to line.  This makes coordinating attacks difficult, especially when time is of the essence for the Confederates.

All-in-all, an interesting challenge.  Here are close ups of the west and east flank’s action.  Notice at east flank (2nd photo), that the Confederates have to move through heavy woods (which effectively limit movement to one hex per turn) in order to envelope the Union blocking force at Elk Tavern.


Drive On Washington – Finale – GBACW

Long overdue wrap up on the game.

Since the fighting at the Railroad Bridge and northern fords had devolved into ineffective firefights, I played the Truex-Gordon fight for the last three turns.

Gordon was able to flank Truex and force a retreat to cover the Washington Road Turnpike.  The Confederates enveloped individual Federal units and, while taking fire casualties to units in one hex, were able to bring overwhelming odds to bear for close-combats.

Truex’s regiments took a terrible beating.  If I had kept track of Brigade Effectiveness, I’m sure they would have been rendered incapable of offering any resistance.  As it was, without the book keeping, they were rendered incapable of offering any resistance.  Note the similar outcome.  Note I did not have to act like a bloody accountant (Sorry Tim).

On the other hand, the Federals had prevented any Rebel units from exiting the map.

I’d call it a draw.  Good game.

Start Turn 13. Gordon enveloping Truex. Railroad Bridge fight a stalemate.
Turn 13. Confederates close, flank and melee with hard-pressed Union regiments.
Turn 13. Truex disengages and falls back to Turnpike Road
Turn 14. Gordon pursues. Sets up for fire combat to be followed by close combat.
Turn 14. Truex's forces attritted.
Turn 14. Truex’s forces attritted.
Turn 15. Positions at Game's End.
Turn 15. Positions at Game’s End.

Even More Drive on Washington – GBACW

Completed Turns 9 and 10 for Drive on Washington.

The Confederates have finally crossed the “Discovered” ford in strength. One of Gordon’s Regiments attempts to pin Truex’s Union division, while the remainder attempt to flank Truex to the south, opening the way to Washington DC. Maruading Rebel cavalry charges a limbered Union artillery battery but, implausibly, fails and is locked in melee. The belagured artillerymen are saved by a timely charge by one of Truex’s brigades and the Southern cavalry retreats. Truex’s division begins a fighting withdrawl to the southeast in an attempt to thwart Gordon’s envelopment.

At the Railroad Bridge, Ramseur’s division begins a prolonged firefight with Rickett’s Union division. Further north, Rodes attack against Tyler’s Federals fails and Clendon’s outnumbered Union cavalry shatters Grimes’ brigade’s charge across the southernmost ford.

The Southern attacks aimed at the two northern fords and the Railroad Bridge have stalled, and their is little prospect for success.

While Gordon’s division has pushed Truex’s division back towards Washington, they running out of time.

In Drive on Washington, victory points are assigned not only for units destroyed or captured, but also for the number of Confederate units that can exit the map on the two roads leading to Washington DC. The number of factors that exit the map are multiplied by a factor based on how early in the game this occurs. The best chance for a decisive Confederate victory is to exit the map prior to the beginning of Turn 12, so the next two turns are critical.

Turn 9: Gordon Pins Truex and Begins Flanking March
Turn 9: Rodes' Attacks At The Northern Fords Stall
Turn 9: Rodes’ Attacks At The Northern Fords Stall
Turn 10: Truex Begins A Fighting Withdrawl Towards The Washington Pike. Firefight at The Railroad Bridge Continues
Turn 10: Rodes Cannot Make Against Tyler or Clendon
Turn 10: Rodes Cannot Make Headway Against Tyler or Clendon


More Drive On Washington – GBACW

Quick post.  Was hoping to get two turns in but sidetracked by Negronis and Twilight Zone Marathon.

Cranked out Turn 7.  Confederates started moving across the discovered ford, but were stopped cold in their assault attempts across the lower Monocacy.  Even little two strength units can (especially during the defensive fire phase), with a not too improbable roll, slap a Pin result on a powerful stack, freezing them up for a turn.  Makes forcing a bridge a tough – resisted the temptation to use dicey – proposition.  Especially difficult when you lack artillery assets.

Here’s the situation at the end of the turn.

Confederates Crossing The Ford, With Federals Formed In Defense - Attack Across The Railroad Bridge Stalls
Confederates Crossing The Ford, With Federals Formed In Defense – Attack Across The Railroad Bridge Stalls
Northern Confederate Attacks Stopped By Outnumbered Union Troops


Drive on Washington – GBACW

Christmas is over and company’s gone.  First opportunity to get back to Drive on Washington for about a week.

This is a simulation of the Battle of Monocacy, where, depending on who you read, a Confederate attack on Washington DC was stopped by General Lew Wallace of (later) Ben Hur fame.

This SPI game is supposedly hard to find judging by the price out on EBay.  I picked up a copy on the cheap a couple of years ago, and like most things, it was a little too good of a price to be true.  The box was badly battered, and the rules looked like they had been last used to house train a dog.  Still, the map was in great shape and all the counters appeared to be present.  Wrong again.  Missing three counters; one Confederate leader and two Union units.  Still, I can play the game.

Union forces are deployed at fords or bridges along the Monocacy River in an attempt to guard approaches to Washington DC.  Four separate Confederate divisions are placed in general areas, poised to attack, but must first by activated by their overall commander, General Jubal Early.  Early’s arrival is rolled for each turn, with a roll equal to or less than the game turn placing him on the map.  Division activation occurs when Early passes within ten hexes of a division commander.  The division may move the turn after it is activated.  The Confederates may also search for a ford on the Union left.  The discovery of the ford is handled  by a random chit pull.  The Union may destroy the “Wooden Bridge” denying the Confederates one crossing point by rolling a one or two, but cannot destroy the Railroad Bridge.  The bridge to the right of the Union line is weakly defended, but some distance from the Washington turnpike.

It took four turns to find the ford, six turns for the entire Confederate force to be activated and moving, and three turns to  burn the Wooden Bridge.

The stage is set for a series of sharp and vicious fights to force the bridges and known ford, or to quickly locate the ford on the Union right, and envelop the forces deployed along the Monocacy River.

As with my other games playing the Great Battles of the American Civil War (GBACW) system, fire combat is not always  bloody, but in most cases will stop an attack through either a rout or pin result.  By 1864, Union cavalry units had carbines.  Their 5x adjacent hex firepower stopped Rebel cavalry from seizing key terrain on the Union left, allowing Truex more time to react to Gordon’s division moving across the now discovered ford.

By Turn Six, the game was really moving.  Here’s a few photos showing the situation before and after the turn.

Confederate Forces Approach The Ford Near the Union Center
Union Center. Wooden Bridge burned, with Truex moving to stop Gordon's Confederates. McClean dug in to defend the Railroad Bridge
Union Center. Wooden Bridge burned, with Truex moving to stop Gordon’s Confederates. McClean dug in to defend the Railroad Bridge
Confederate Attacks Stall. Bridge on Union Right at Right of Photo
Confederate cavalry repulsed. Gordon poised to cross the now discovered ford as Truex begins to deploy.

I’ll pick up the narrative after Turn 7.


Battle of Cedar Mountain – GBACW

Finished up Cedar Mountain yesterday.   Took awhile, and that was a problem.  Tended to lose focus during sporadic 1+ turn sessions. Finally got serious and cranked out a number of successive turns to maintain momentum.

Still, a good game and enjoyable.  A classic encounter battle, with each side fighting to seize and hold four hexes representing key terrain.  Victory points are awarded for each turn a side controls a hex, as well the standard GBACW points for inflicting casualties on brigades and leaders.

Here’s a detailed account of the historical battle with an map from the excellent Obscure Battles website, recently featured in Web Grognards.

The rules are generally the same as Wilson’s Creek and Stonewall.  However, there is no ammunition depletion, and extra rules are added for artillery overshoot and target density in each hex.  Neither of these new rules had any material impact on gameplay.  Both sides were happy that rolling a one no longer involved the possibility of running out of ammunition.

Union forces deploy some distance from the victory hexes, with Confederate units entering the map throughout the game beginning with Turn One.

The Union units had the most favorable terrain for a quick advance, and established possession of the victory hexes.  Confederate entry speed was hampered by the lower stacking and movement rates in woods.  All of the fighting took place in the center of the map, in the area bounded by Cedar Run and the turnpike.

After the failure of an initial Confederate assault, arriving troops were sent on a flanking march around the Union left.  Although the initial assault by the flanking units was repulsed, the weakened Union units fell back under pressure, both in the center and left, establishing a horseshoe shaped perimeter in an attempt to conduct an orderly retreat.

Newly arrived Confederates, supported by the tattered remnants of units that had been fighting throughout the day, were able to cutoff any Union retreat.  The result was a decisive defeat for the Union, mitigated in Victory Points for the number of turns the Union had controlled the victory hexes.

This was a bloody game, with the aggressive Federal army suffering significant casualties.  Confederate units were also badly battered.

Why?

This spate of GBACW games piqued my interest in the Civil War.  One of my favorite military historians is the late Paddy Griffith.  Although he died (way too soon) several years ago, you can still access his website.  He once did me a very kind favor years ago.  But that’s the subject of a separate post.

Back on topic.  This spate of games (like to use spate) motivated me to buy two of Paddy’s books.  One I had owned years ago, but made the mistake of lending it to a Civil War enthusiastic colleague of mine, and as usually happens in that situation the book was swallowed up into the great void of “I can’t remember that”. This book, “Battle in the Civil War“, is an illustrated and very accessible version of his text heavy, and far more detailed,  “Battle Tactics of the Civil War“.  I decided to employ one of Paddy’s theses in this game.  BTW, both books are well worth the cost.

This thesis is that shock tactics were rarely used in the Civil War, but not because of the popular idea of the deadliness of rifled musket fire, but that the armies lacked the ability to coordinate this type of attack, and that by the time they did have the experience, both sides shied away from assaults during open battle (and this does not include the catastrophes of Cold Harbor, The Crater, et al) and were content to engage in lengthy fire-fights.

Confident that I am better than Franz Sigel or Dan Sickles, I launched a series of maniacal John Hood like melee combats.  For the most part, Richard Berg’s rules led to a bloody shambles.  Because…….Berg’s rules (and he is a wonderful game designer), allow low value musket and rifle fire, doubled, to either pin or rout units in the adjacent hex.  This especially benefits the defender, who can conduct defensive fire before the attackers can fire and move into the hex for melee.  An attack in depth is a possible solution.  Stack three attacking units in the hex, put your lowest valued unit on top because it will take the fire hit,  and hope that two of the three survive a morale check.  If the attackers are not pinned or routed, they may cause the defender to break and rout before contact is made.  This is somewhat consistent with Griffith’s observations that units would  break if faced with the threat of a melee.  My conclusion:  Paddy would have had a different design take on GBACW.

Anyway……….

Another enjoyable game, and I am putting “Drive on Washington” on the table for another (and probably my last) round of GBACW.

Here’s a series of photos to give some vague concept of what happened in the game.  I take a solemn vow that I will never, never, ever, use an IPhone for photos, and if for some reason I break this vow, I will always, always, always, turn on more lighting.  Not impaired, just pathetic.

Advancing Union Forces Occupy Victory Hexes
Confederates Flank the Union Left
Confederates Increase Pressure on Union Left
Union Left Collapses


Wilson’s Creek – GBACW

Finished up Wilson’s Creek just before I left for the weekend.

Opted for the rules’ historical Union entry points and task organization.  The bulk of General Lyon’s Union army enters from the north, with General Siegel’s reinforced brigade attacking the encamped Confederates from the east.  Here’s a map of the historical battle.

The opening of the game is something.  As soon as Union units are sighted, each Confederate unit has to pass a morale check.  Since many of the Confederate regiments have a morale factor of two (2), and the roll must be equal to or lower in order to pass, things become rather chaotic.  Confederate leaders scurry about trying to  rally routed troops, and then get them moving towards the two Union threats.  The two senior Confederate leaders, McCulloch and Price, cannot cooperate.  So, I had Ben’s brigade, which had the better soldiers, take on the Union main body, and Price try to handle Siegel’s smaller force.

Meanwhile, the Union troops were moving slowly towards the Rebels.  The entire battlefield is covered in brush, which reduces trail movement to a single hex per movement point, and 1/2 movement point if off trail.  No lightning thrust here.  Surprisingly, a number of Confederate militia units on pickett duty survived their initial morale check, and did yeoman work delaying the Union main body.  On top of it, I failed to read and incorporate the special rule that gave the Union forces two (2) extra movement points per turn.  Slowly, and more slowly than they should have, the opposing sides were able to form battle lines and engage.

Siegel's Union Force Engages Confederates
Siegel’s Union Force Engages Confederates
Union Main Body Begins To Deploy As Rallied Confederates Converge To Form A Defensive Line

The game became a series of firefights, with each side feeding in new troops as they arrived.  Lyon’s main body had moved in column, and took quite some time to fully deploy in the brush.  McCulloch had similar problems, and, given pressure from Lyon’s attempts to envelop, I added some of Price’s regiments to his left flank, even though they could not combine fire against Union targets.  Nonetheless, this was a bloody business, with three (3) brigade commanders killed.

I added to my rules transgressions by consistently misreading the CRT, using the less bloody artillery grapeshot results, rather than the small arms results.  Also, I misinterpreted the P/R result which does not allow the receiving unit to escape either a Pin or Rout through a favorable die roll.  The only mitigating factor was that these mistakes were effecting both sides, and not just one.

By game’s end, Siegel’s force was withdrawing, but not under any pressure from the battered Rebel units.   McCulloch’s brigade was grimly holding the Confederate right, while elements of Price’s forces were slowly giving way on the left.

Federal Main Body In Firefight

To top it all off, my reading of the victory conditions was flawed.  The Confederates gained VIPs by cutting off Union units from their supply source.  As you can (maybe) see in the photo above, I had Confederate cavalry units poised to envelope Lyon’s left.  Had I done this, perhaps it would not have been a Union victory.

All these screwups aside, a good game, with plenty of tension and lots of replayability due to the variety of entrance hexes for the Union forces as well as the randomness of the Confederate response after sightings.

An alternative historical setup can be found over at the spi.net website.

I want to play a couple more games in this series.  So, once the Airstream unfreezes (temps in single digits here), I’ll get going on Cedar Mountain.


Stonewall: Battle of Kernstown – A Quick Review of GBACW – Mk 1

This is a quick review of Kernstown and the (almost) first iteration of the GBACW series.  While there were some minor changes moving forward through the next several games, the basic rules were used for at least five games.

Decisions: Plenty for both commanders.  For the Confederates, it’s where to attack and with what.   For the Union commander, how to react and with what.

History: Both commanders are faced with the same operational problems as their historical counterparts. Both commanders have to “do a lot” with very little.

Luck: The ammunition depletion roll is a real problem.  It severely hampered the Union brigade fighting Garnett just east of town.

Atmosphere: Really good, with lots of moving parts.  The Pin result while undergoing defensive fire can really upset your tactical plan.

Mastery:  Can’t quite answer this now.  Will have to wait until I play the next few games in the series.  I had to read the rules quite a few times before playing.

Tweaks: Right now I can’t think of any reason to tweak it.

Abstraction: Command and control (including rally) might be a little too easy and flexible.

Clarity: Good.

Comprehensive: An excellent introduction to grand tactical battle in the Civil War.

Speed: A little fiddly, especially with all the markers.  Playing one of the monster games would be something.

Scenarios: None for this game, but not really necessary given Confederate entrance and flanking possibilities.

Summary: Fun, and a challenge.  Once I got the hang of the turn sequence, it moved quickly, with lots of action.  One complaint I have is that the marker chits detract from the aesthetics of the game.  Small complaint.

Now Who's Who?
Now Who’s Who?  Final Dispositions.  Pritchard’s Hill In Center.  Garnett Bottom Right.  Jackson Upper Right.

Component quality is SPI early 80’s.  I’ve always liked their maps.  The counters……..mmmmmmm….let’s just say they are functional.

Stonewall: Battle of Kernstown

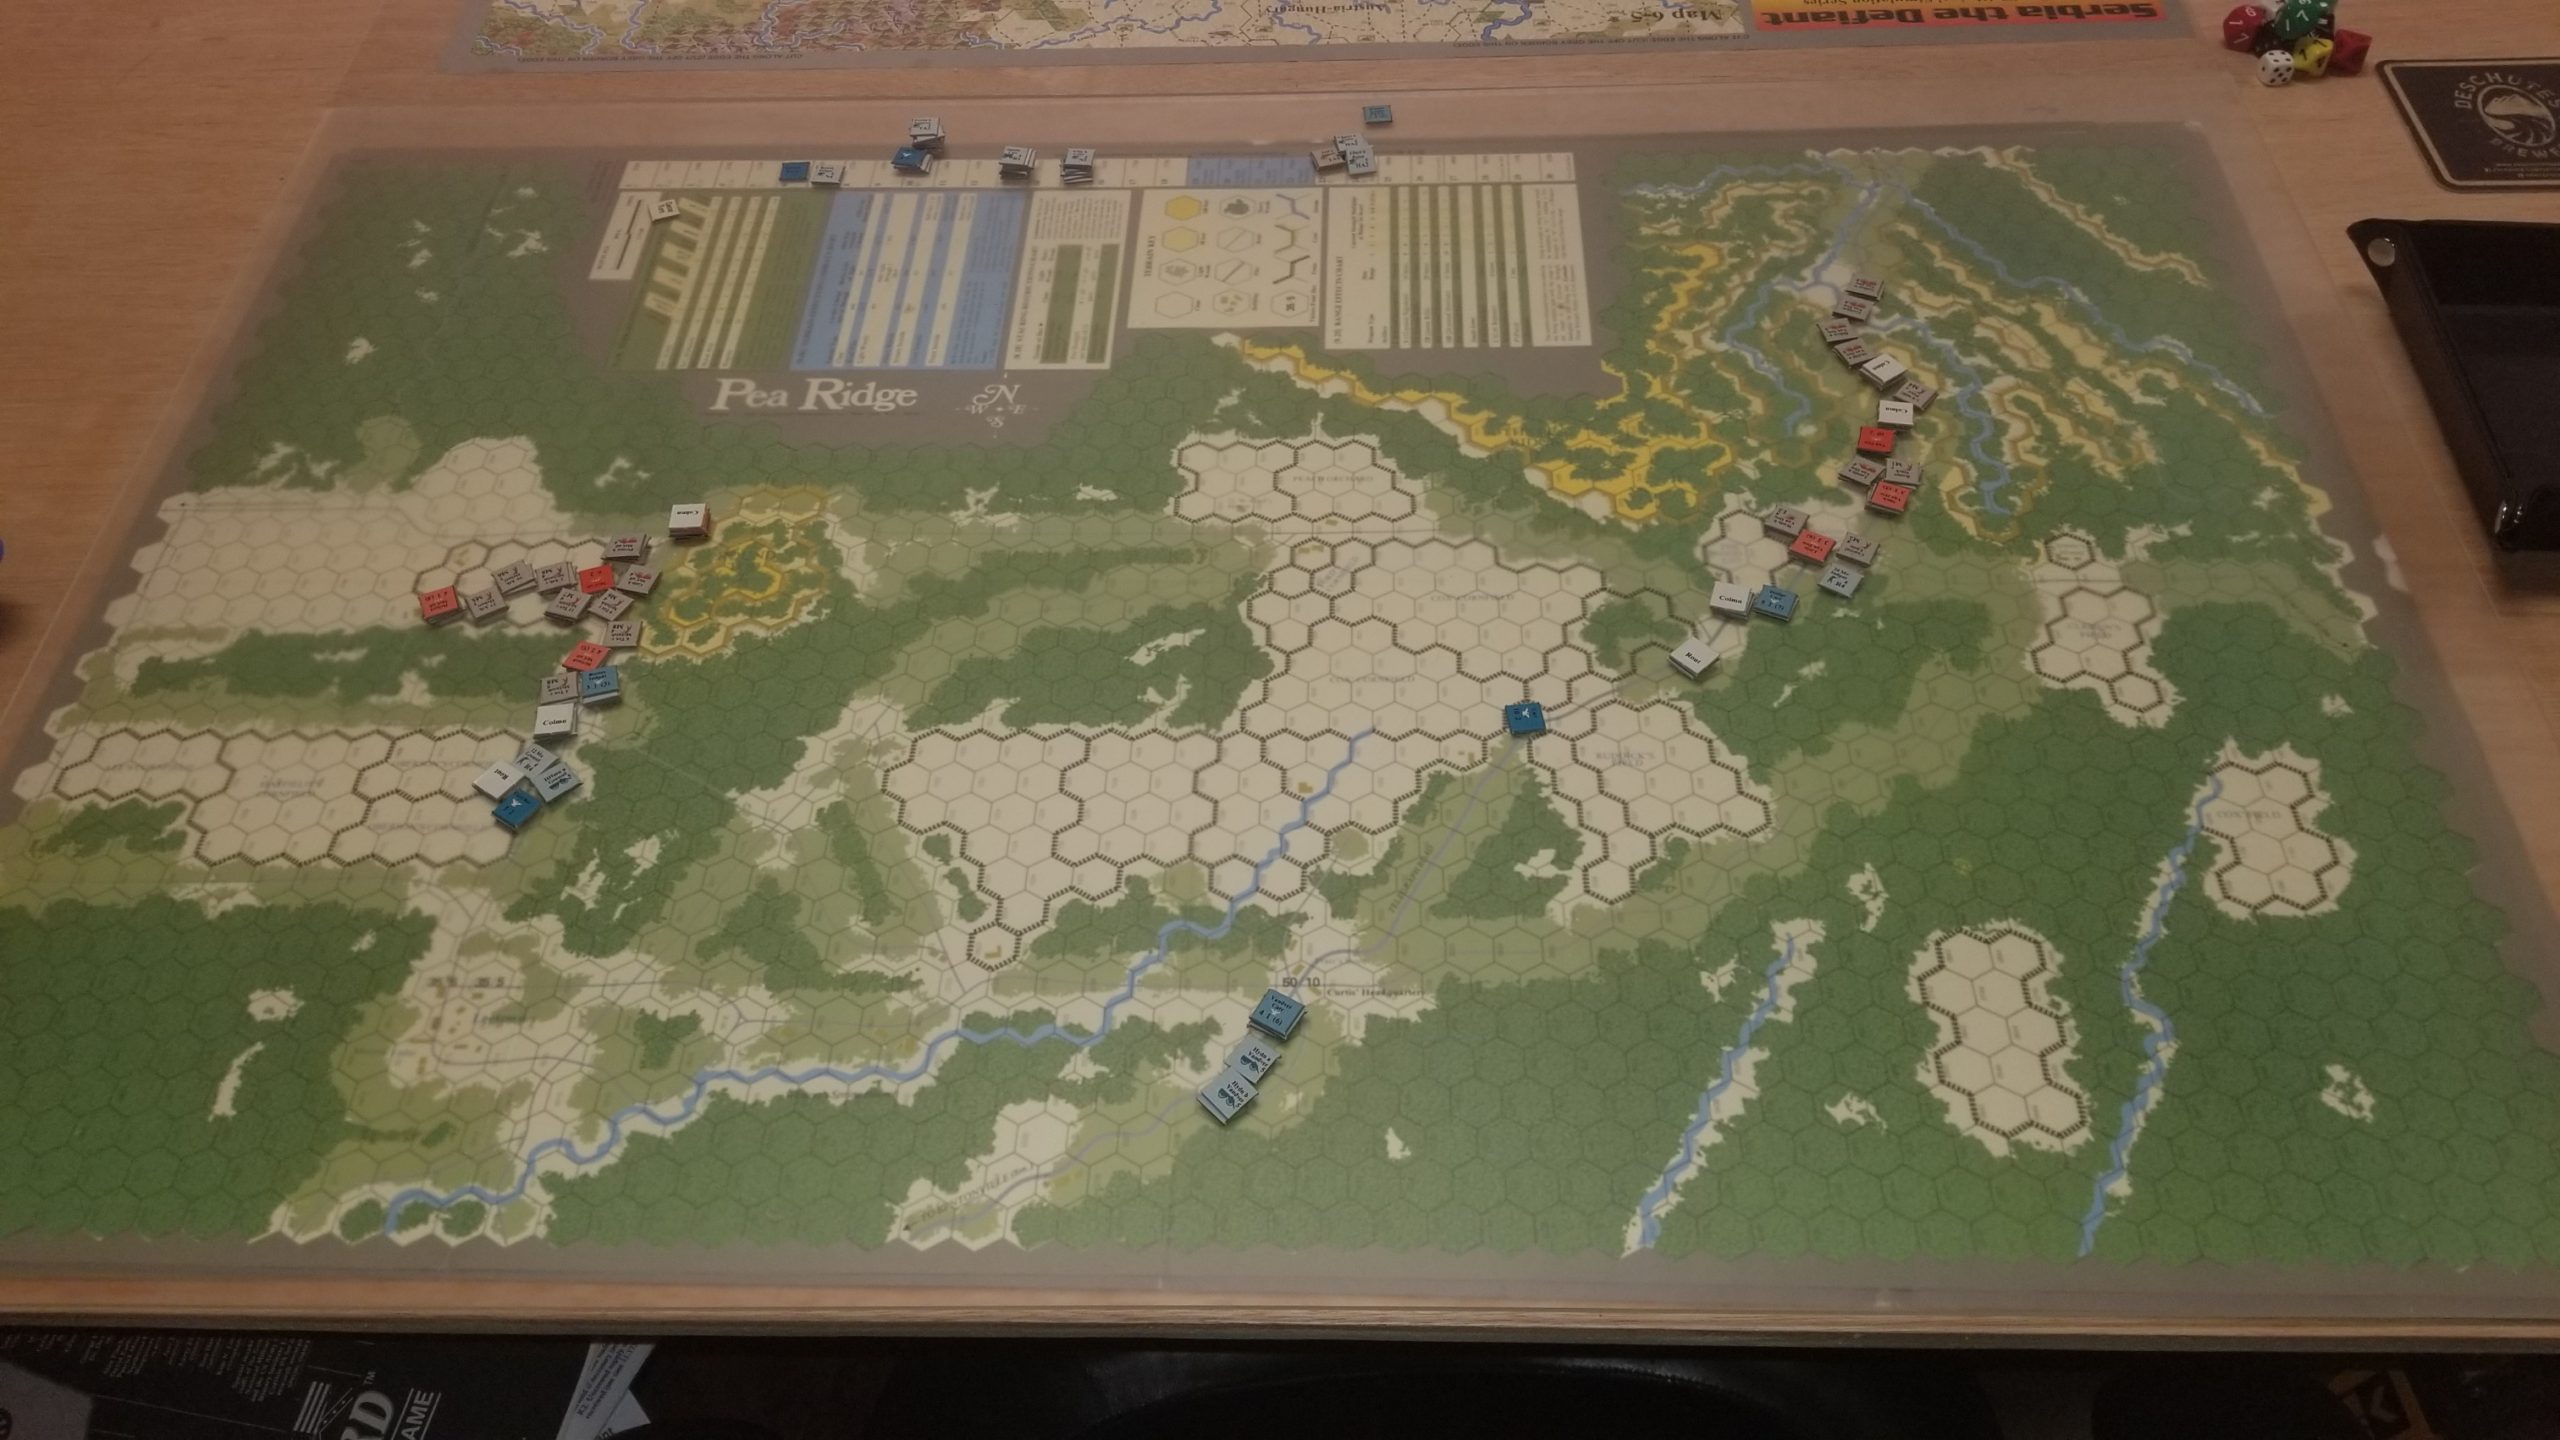
Played through my first game of Stonewall: Battle of Kernstown. As stated in my previous post, this 1978 game was the second game to use the Terrible Swift Sword system developed by Richard Berg. The first game was a monster game of the Battle of Gettysburg entitled, strangely enough, Terrible Swift Sword.

While the system rules have gone through a number of permutations, here is quick and dirty overview of the basic rules for the first several games published by Simulations Publications Inc. Each game comes with its own special rules.

Turn Phase Sequence: Initial Command, Movement, Defensive Fire, Offensive Fire, Retreat Before Melee, Melee, Ammunition Resupply, Rally, Final Command.

Movement: Consistent rates for each unit type. Cavalry has mounted/unmounted; Artillery, limbered/unlimbered, Infantry, line/column.

Facing: Used and critical. Limits firing arc, zone of control (ZOC) and rear three hexes allow opponents to fire in enfilade.

Stacking: Limited to 8 strength points, with maximum of two units. Only top unit can fire, or take incoming small arms fire. Both units take incoming artillery fire. Both units count for melee, and both units are pinned when that combat result occurs. If top unit routs, second unit must roll for rout.

Fire Combat: Units can only be fired on once, firing units combine strengths. Artillery fires separately and at half strength against infantry. Line of sight rules are common sense, but beat to death in the rule book. Combat Results Table (CRT) uses firing strength points. Result are loss of strength, pin, or roll for rout.

Zones of Control (ZOC): Infantry, dismounted cavalry and artillery ZOCs extend to three frontal hexsides. Mounted cavalry all six. Supply wagons, and leaders none. Effect withdrawl fire, retreat fire, block both supply and command radius paths.

Withdrawl Fire: Takes place when unit leaves (typically retires before melee) a ZOC. Retreat fire occurs when a unit retreats into a unit’s ZOC.

Ammunition Supply: When small arms units roll to fire, either one (1) or six (6) die roll (depending on game) results in ammunition depletion. Unit cannot fire for rest of game unless re-supplied by a supply wagon (if available). Artillery units have a limited amount of ammunition. Hits on artillery units by other artillery units can explode cassions, resulting in ammunition depletion. Artillery batteries can redistribute ammunition. Infantry/Cavalry cannot.

Melee: Attacking unit ends movement phase in enemy ZOC. Takes fire, then advances into hex in melee phase. Melee CRT uses differential in strength points between units.

Rout: Based on morale rating. Three hexes, reduced movement and combat capabilities.

Rally: By leaders that are within their command radius. An expenditure of one rally rating point.

Brigade Combat Effectiveness (BCE): Each unit has a designated effectiveness strength. If it falls below that designated strength, it’s combat capabilities are dramatically reduced. BCEs are presented as a playing aide in the individual game rules.

Leadership: Units organized by brigade, with designated brigade commander. Brigade commander has an effectivenss rating, or hexes through which he can control his brigade, and a rally rating, which is used to rally units. One rally point rating automatically rallies one unit that is within its effectiveness rating. Divisional commanders have same ratings, but their effectiveness extends to their subordinates.

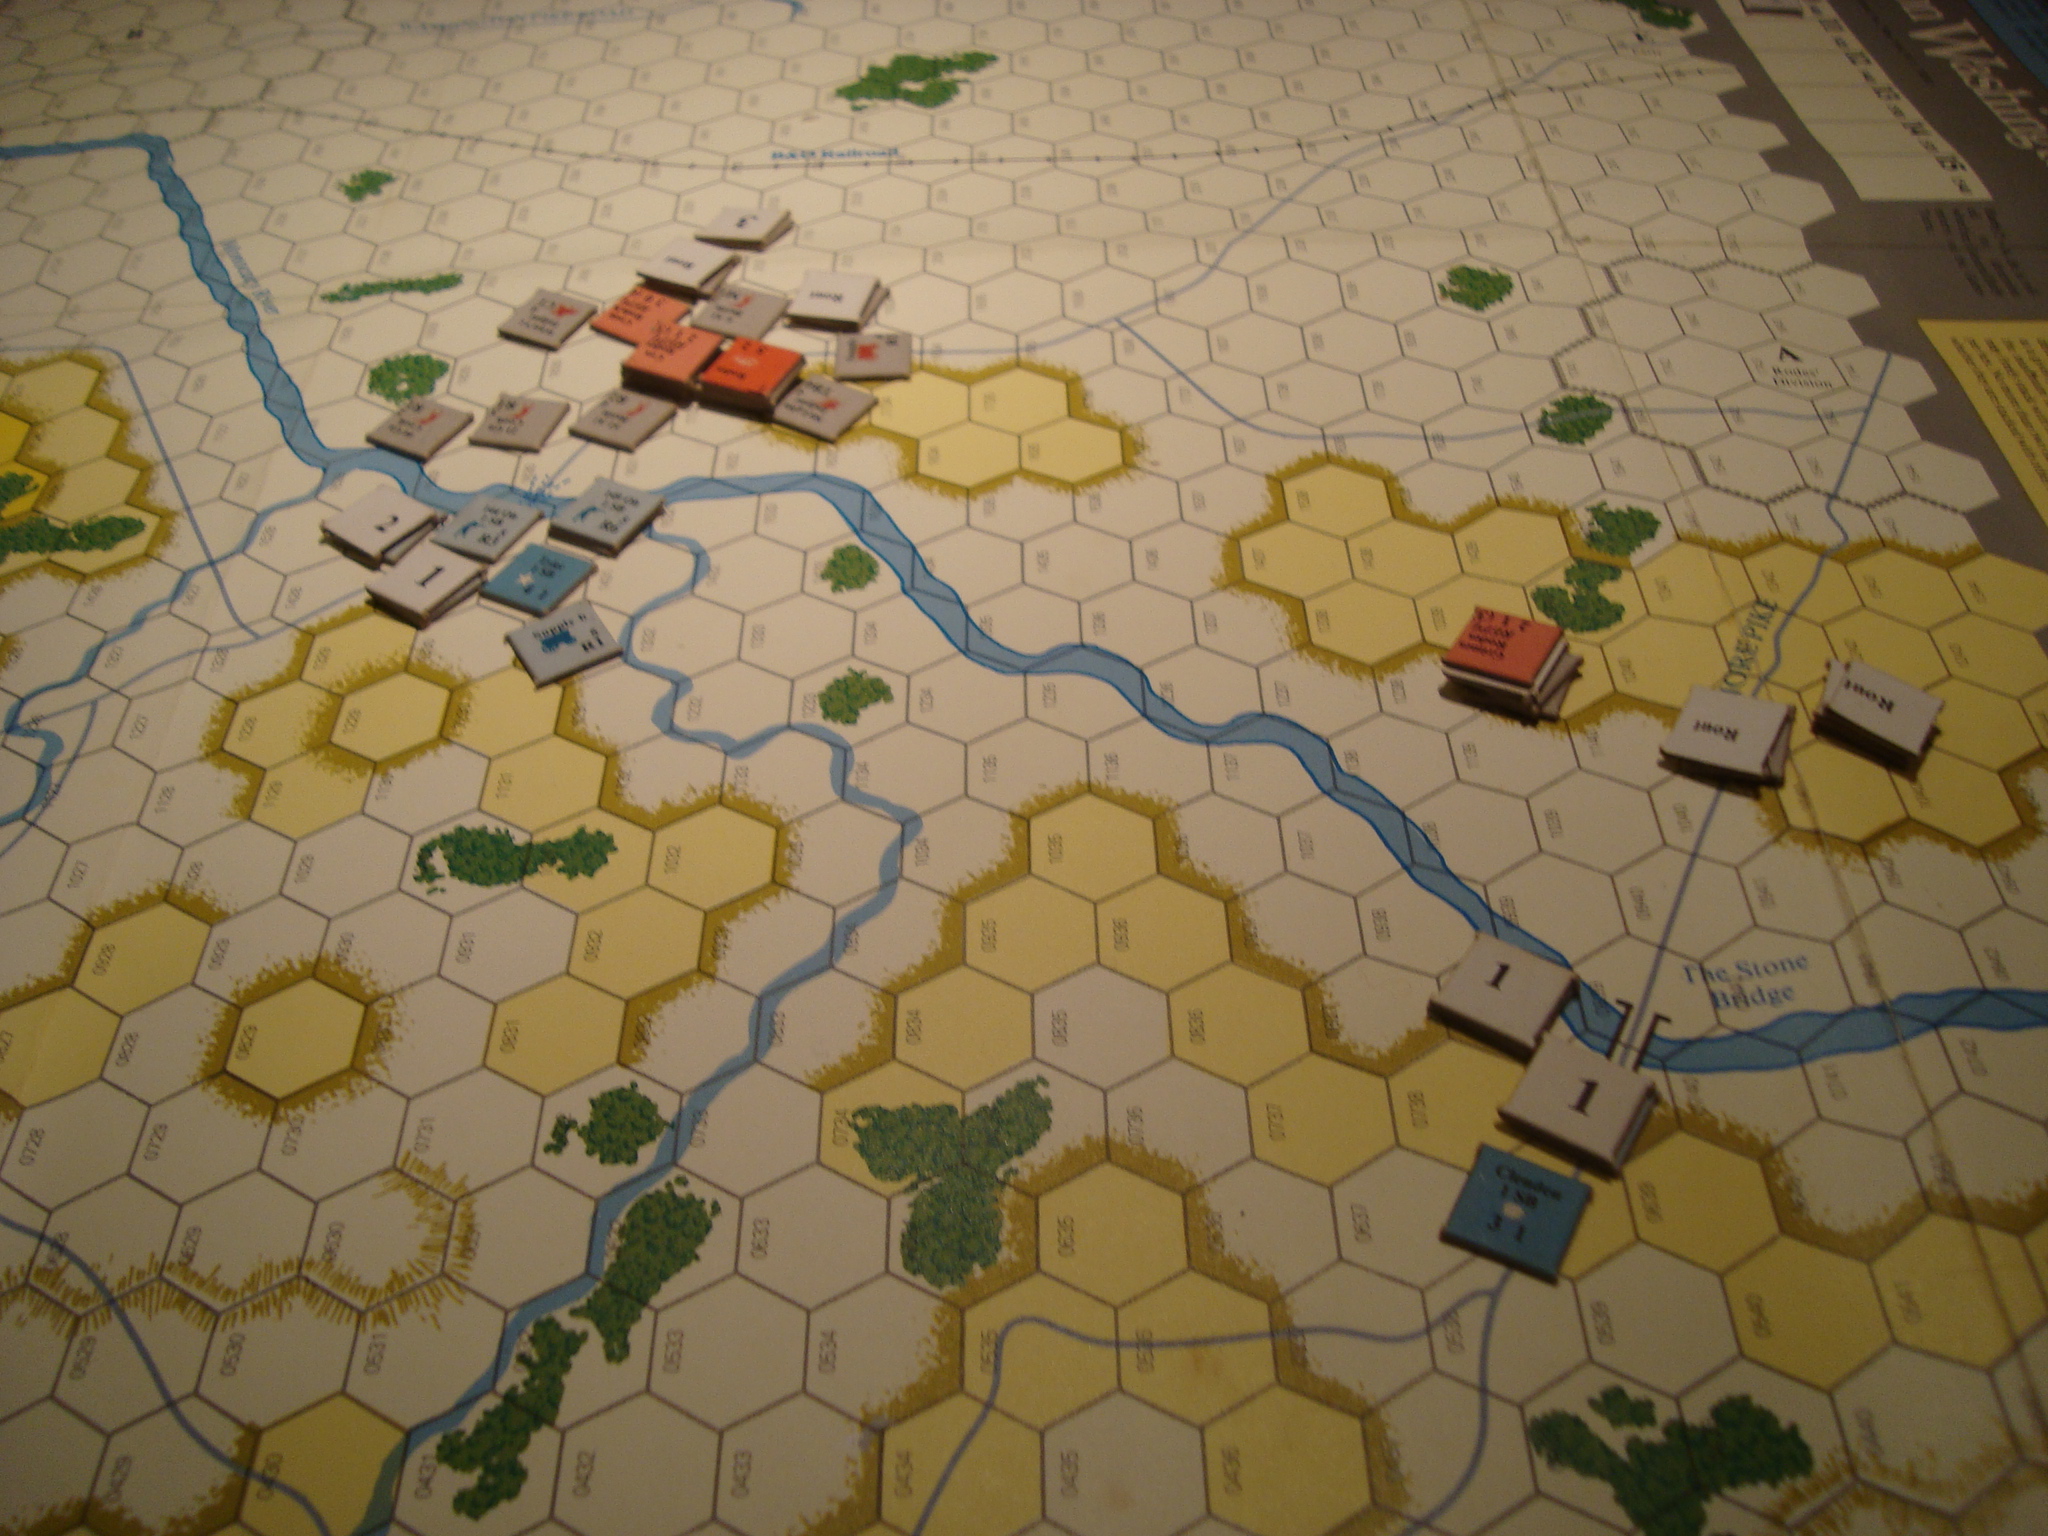
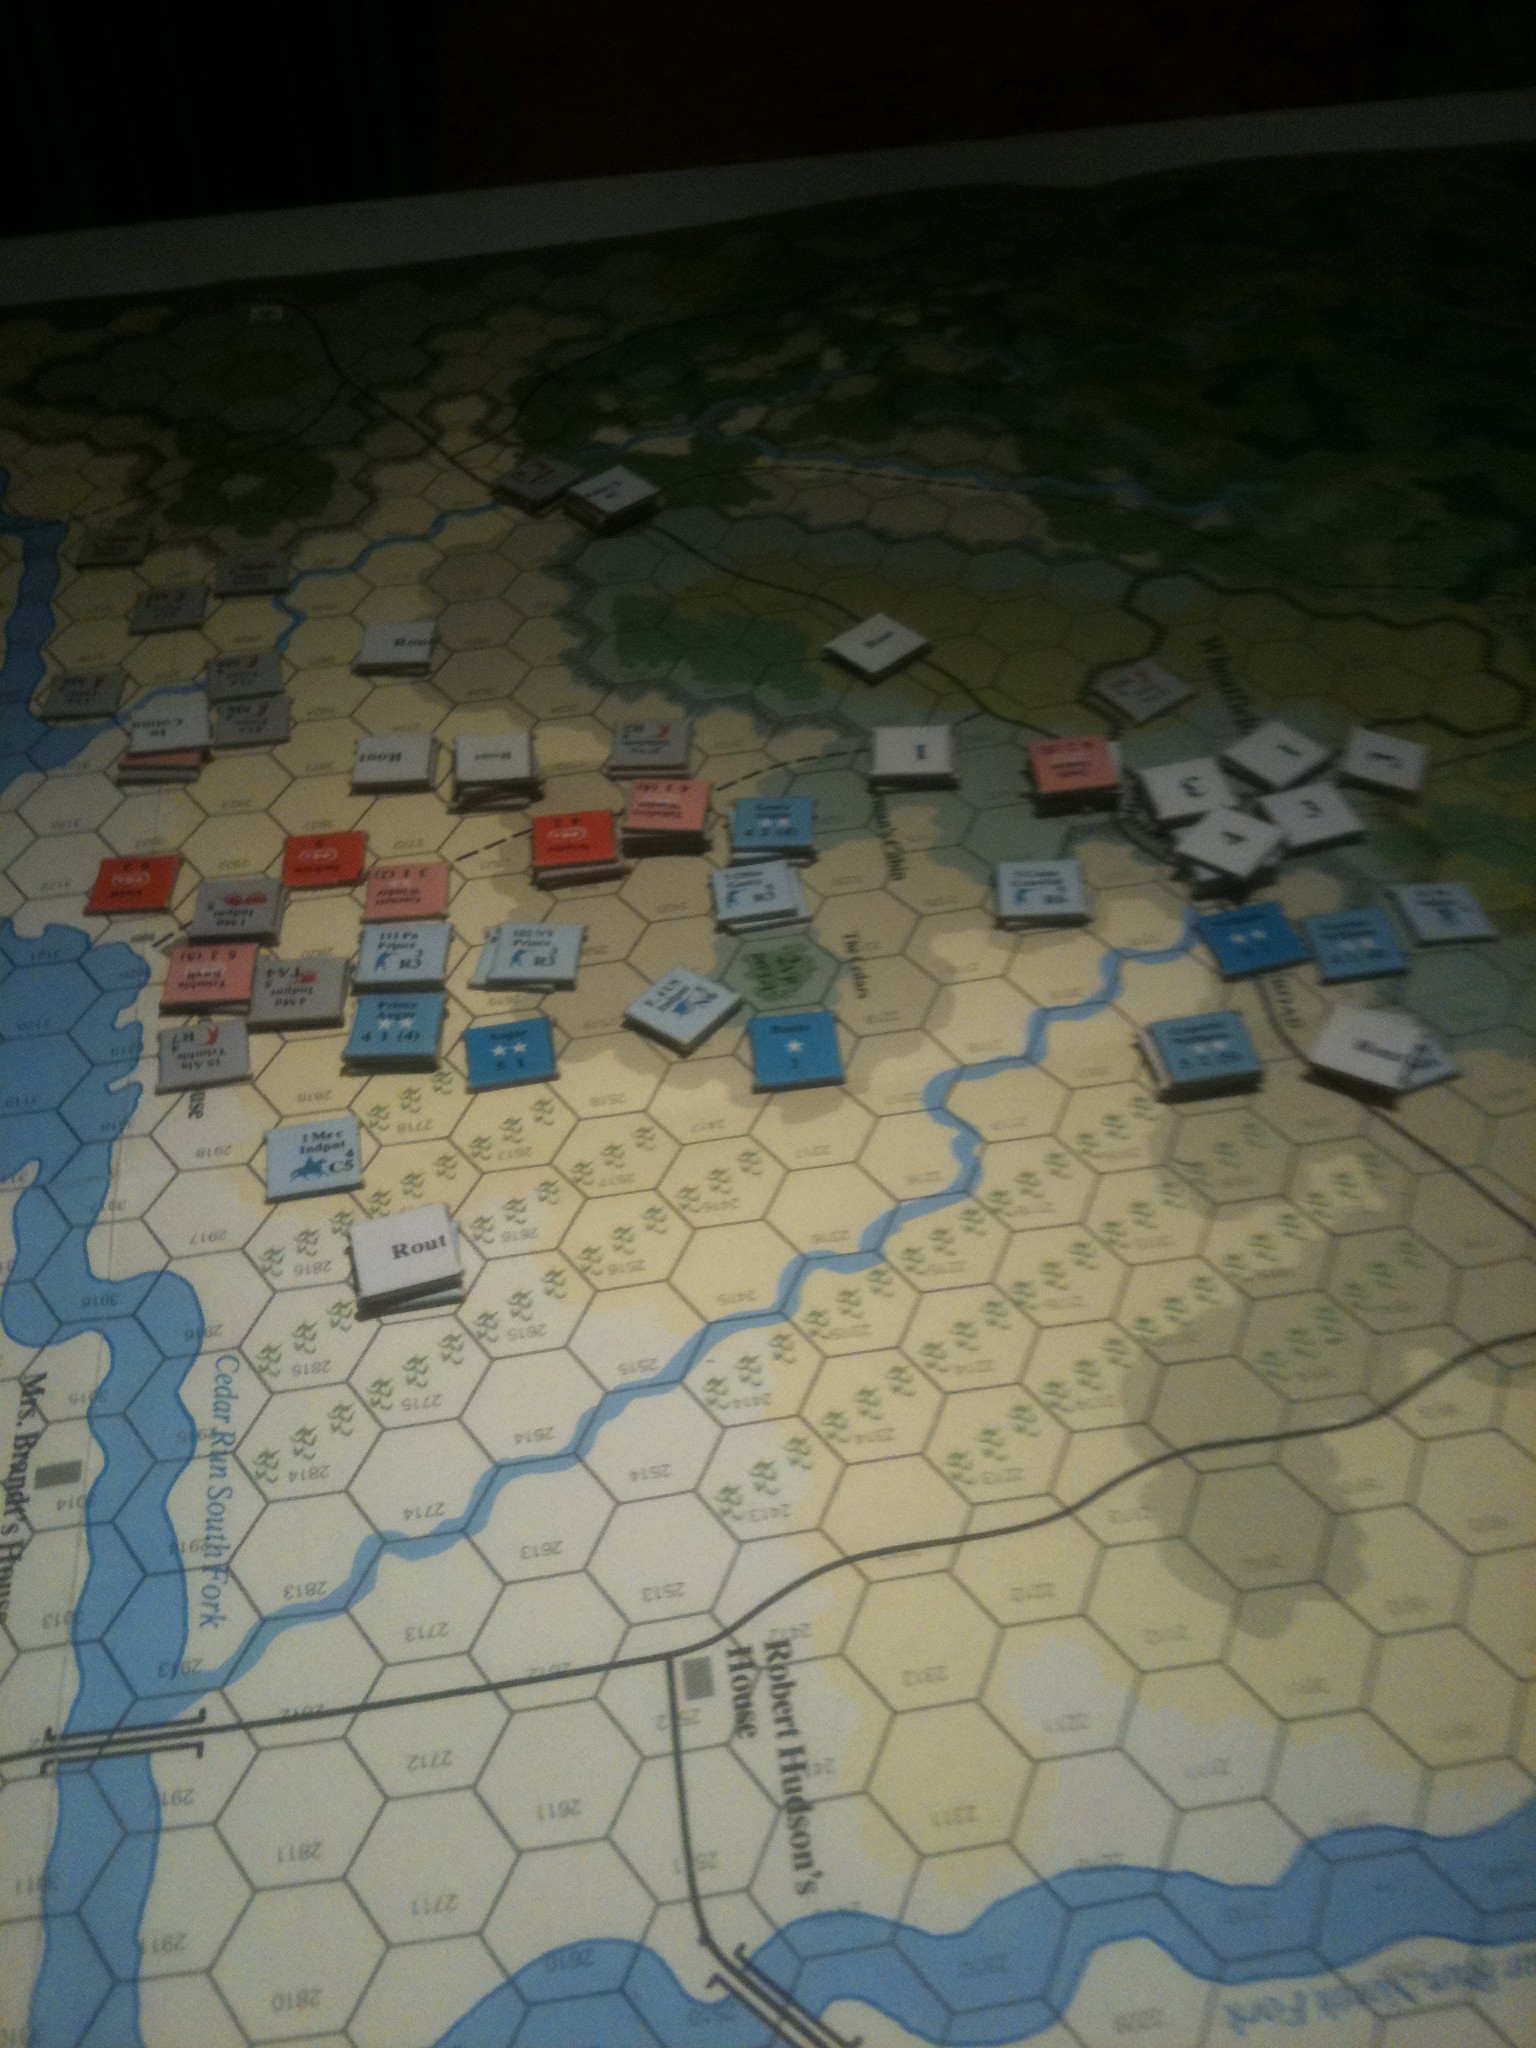
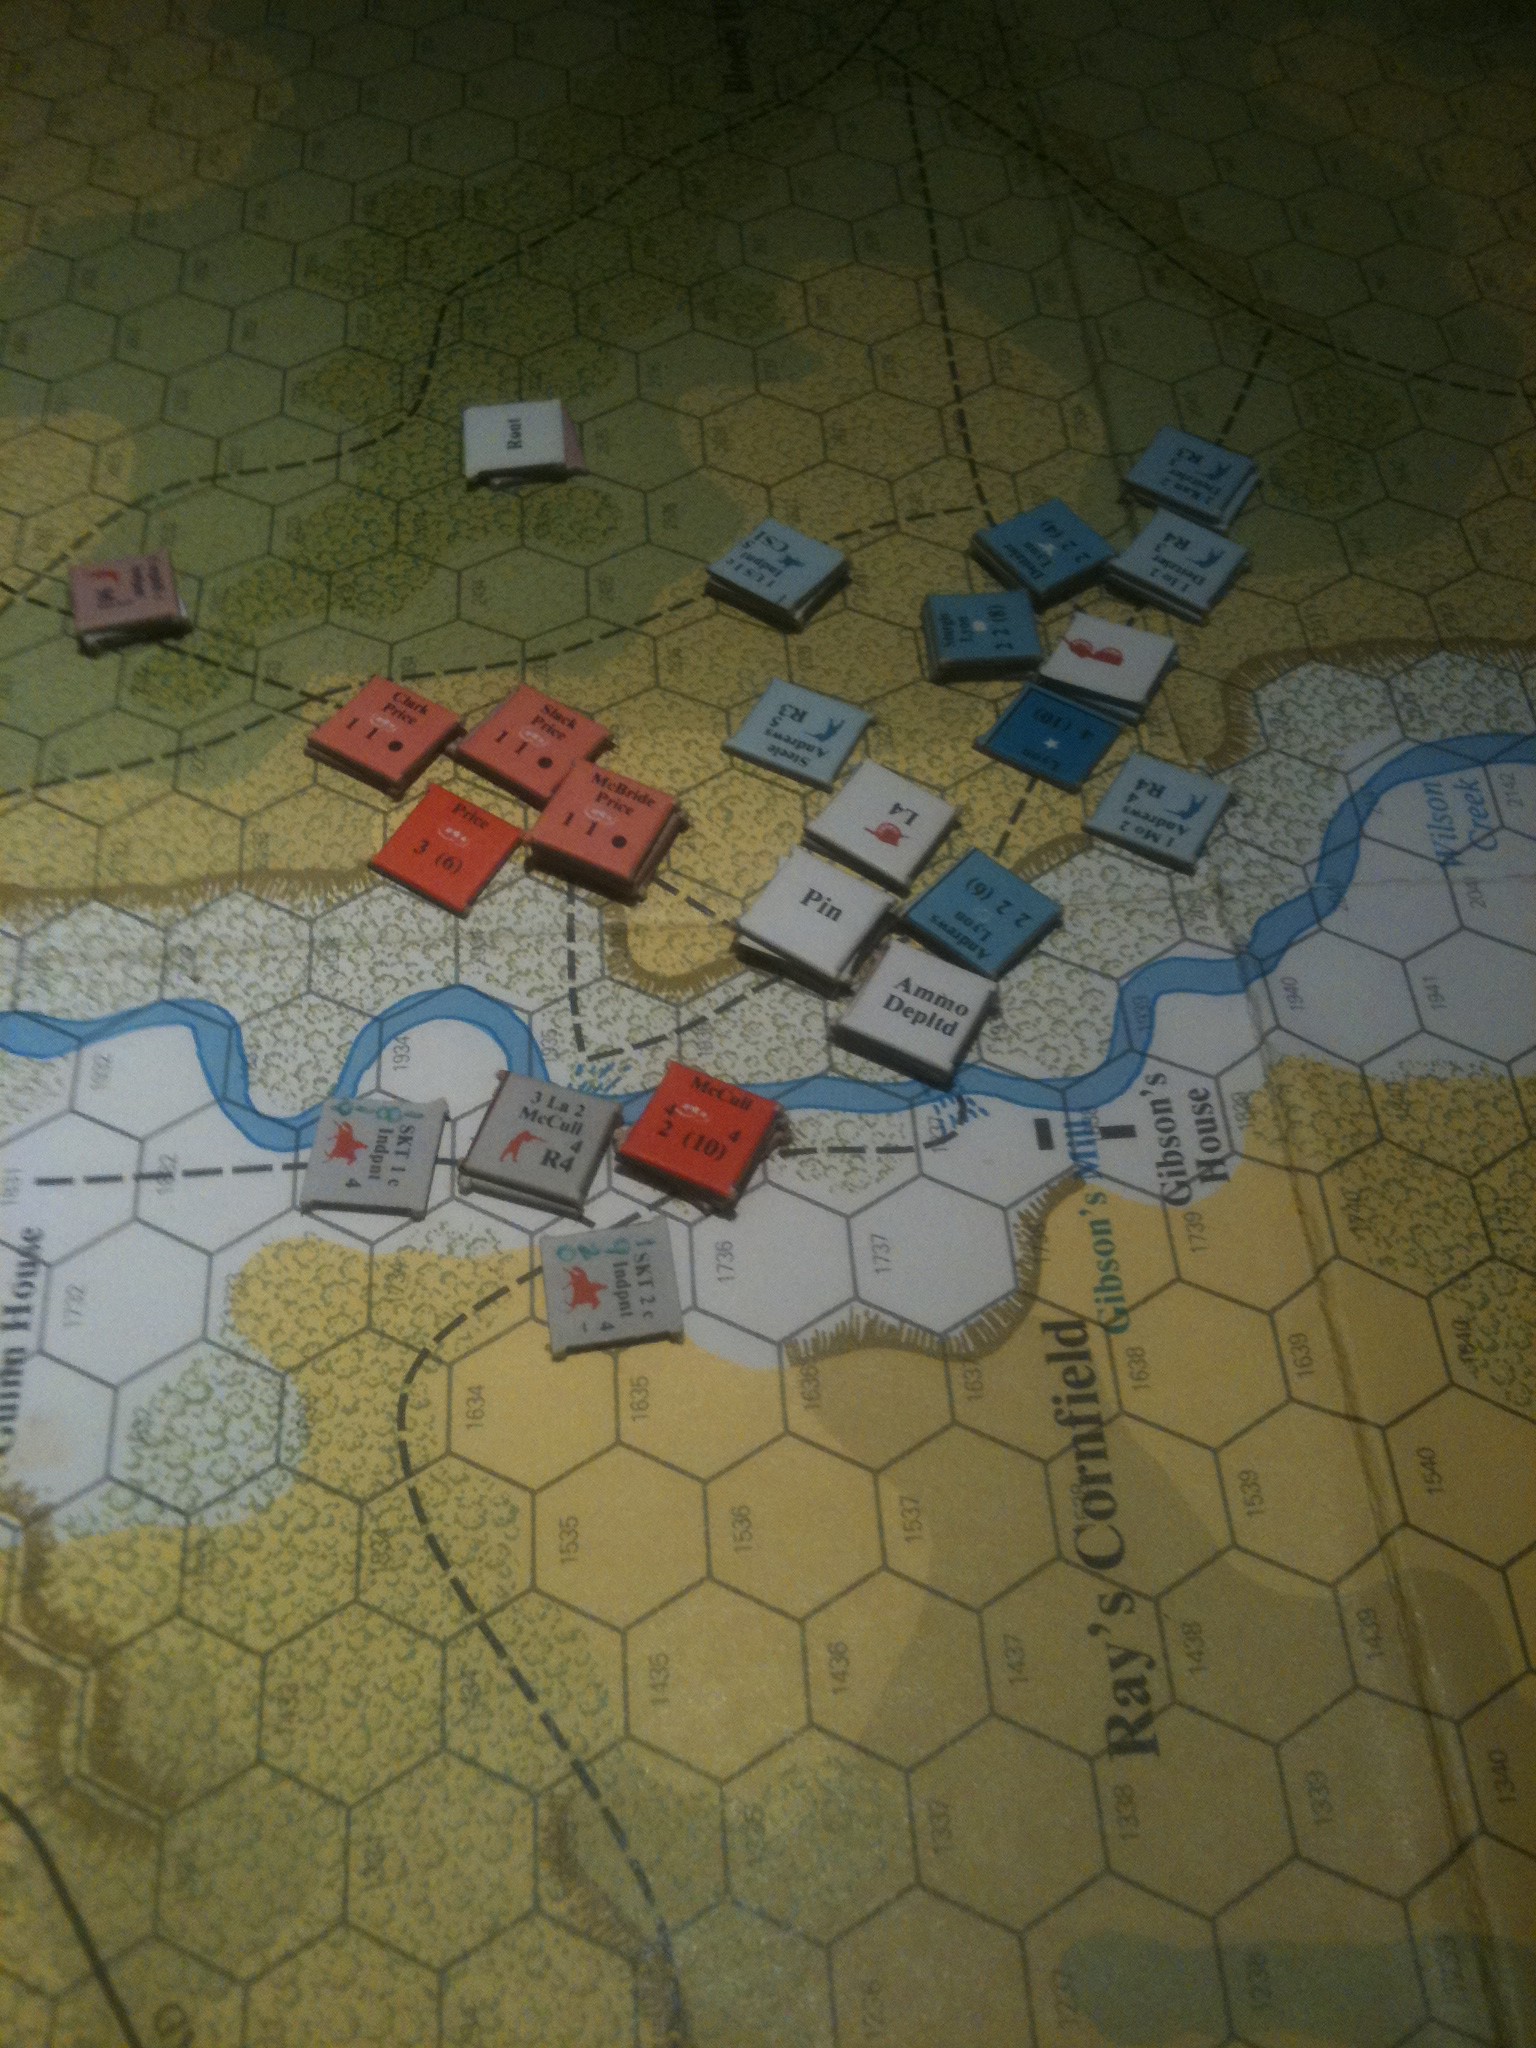
The game’s scenario is an interesting one. Jackson’s force is outnumbered, and has the mission of moving north from the south edge of the map. His three brigades can enter anywhere along the south edge of the map, east of (inclusive) of the turnpike. Objectives (for victory points) are securing a series of hills north of Kernstown, and/or exiting the map with as many units as possible.

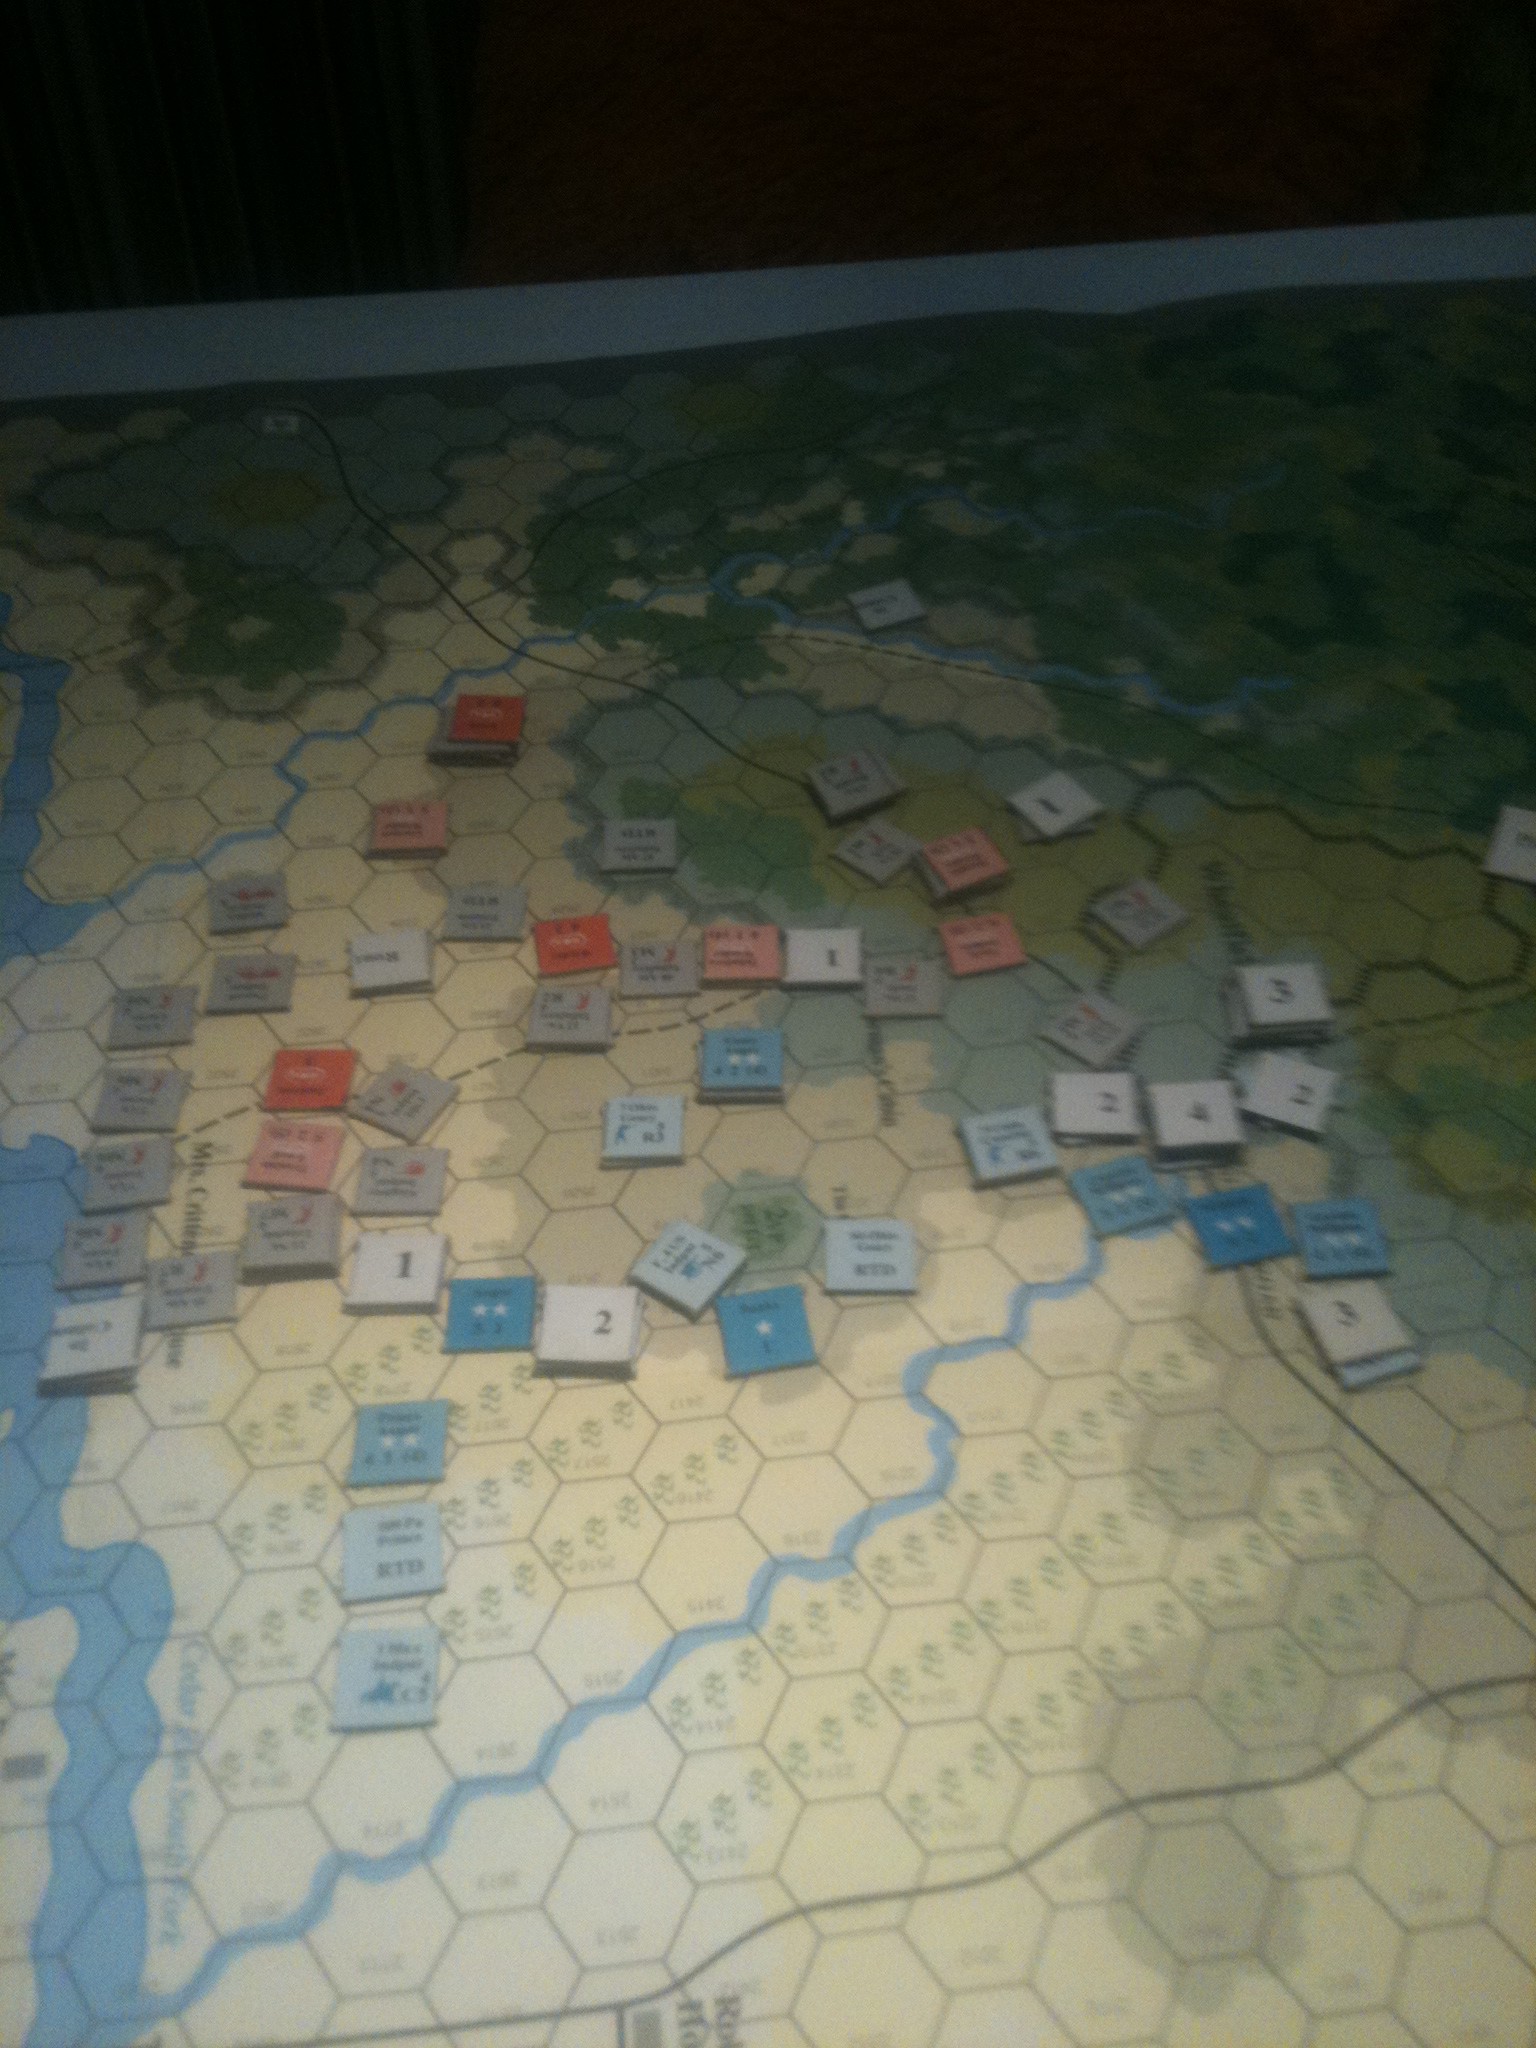
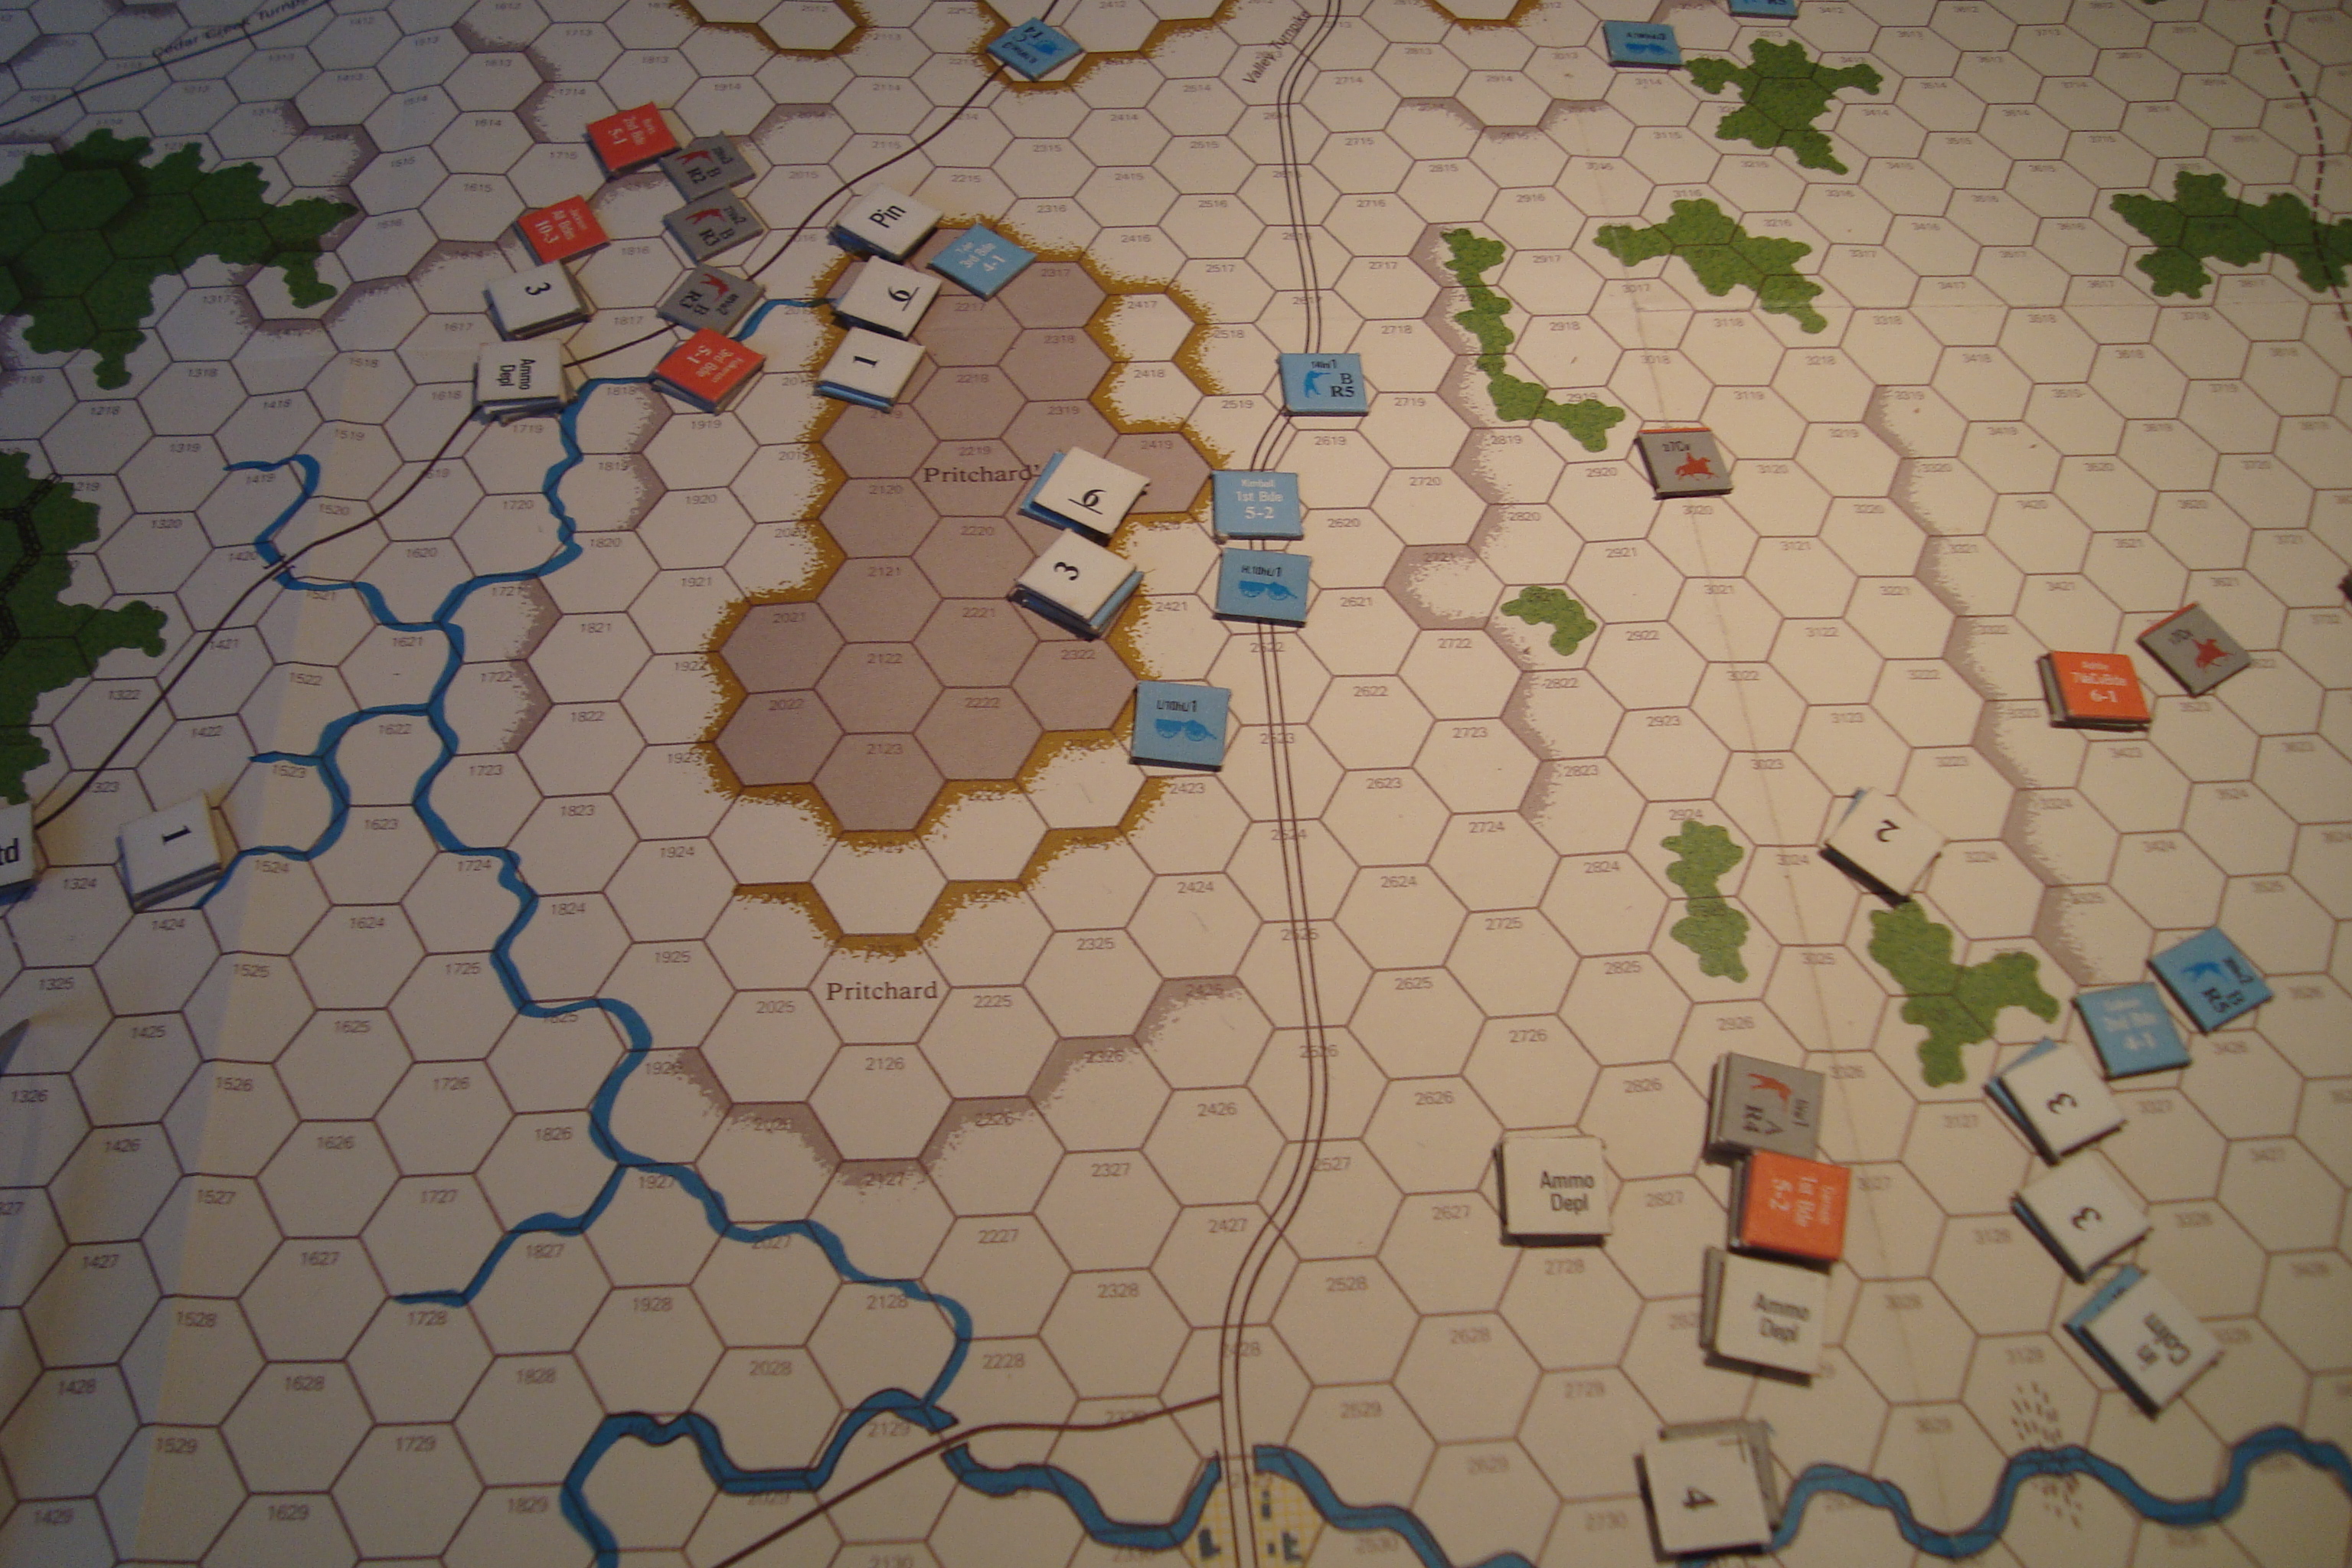
The four Union brigades, while superior in strength, are spread out. An understrength cavalry brigade and an infantry brigade guards the river fords east of Kernstown, one brigade holds Pritchard’s Hill, which commands the town and turnpike providing a direct and rapid route for south-north movement, with another brigade in reserve near the north edge of the map. Here’s a link describing the historical battle.

Of course, I had to try something completely different and, as always, when given the opportunity, attempt to disregard at least one of the Principles of War. In this case, my most aggregious error was ignoring the principle of Mass.

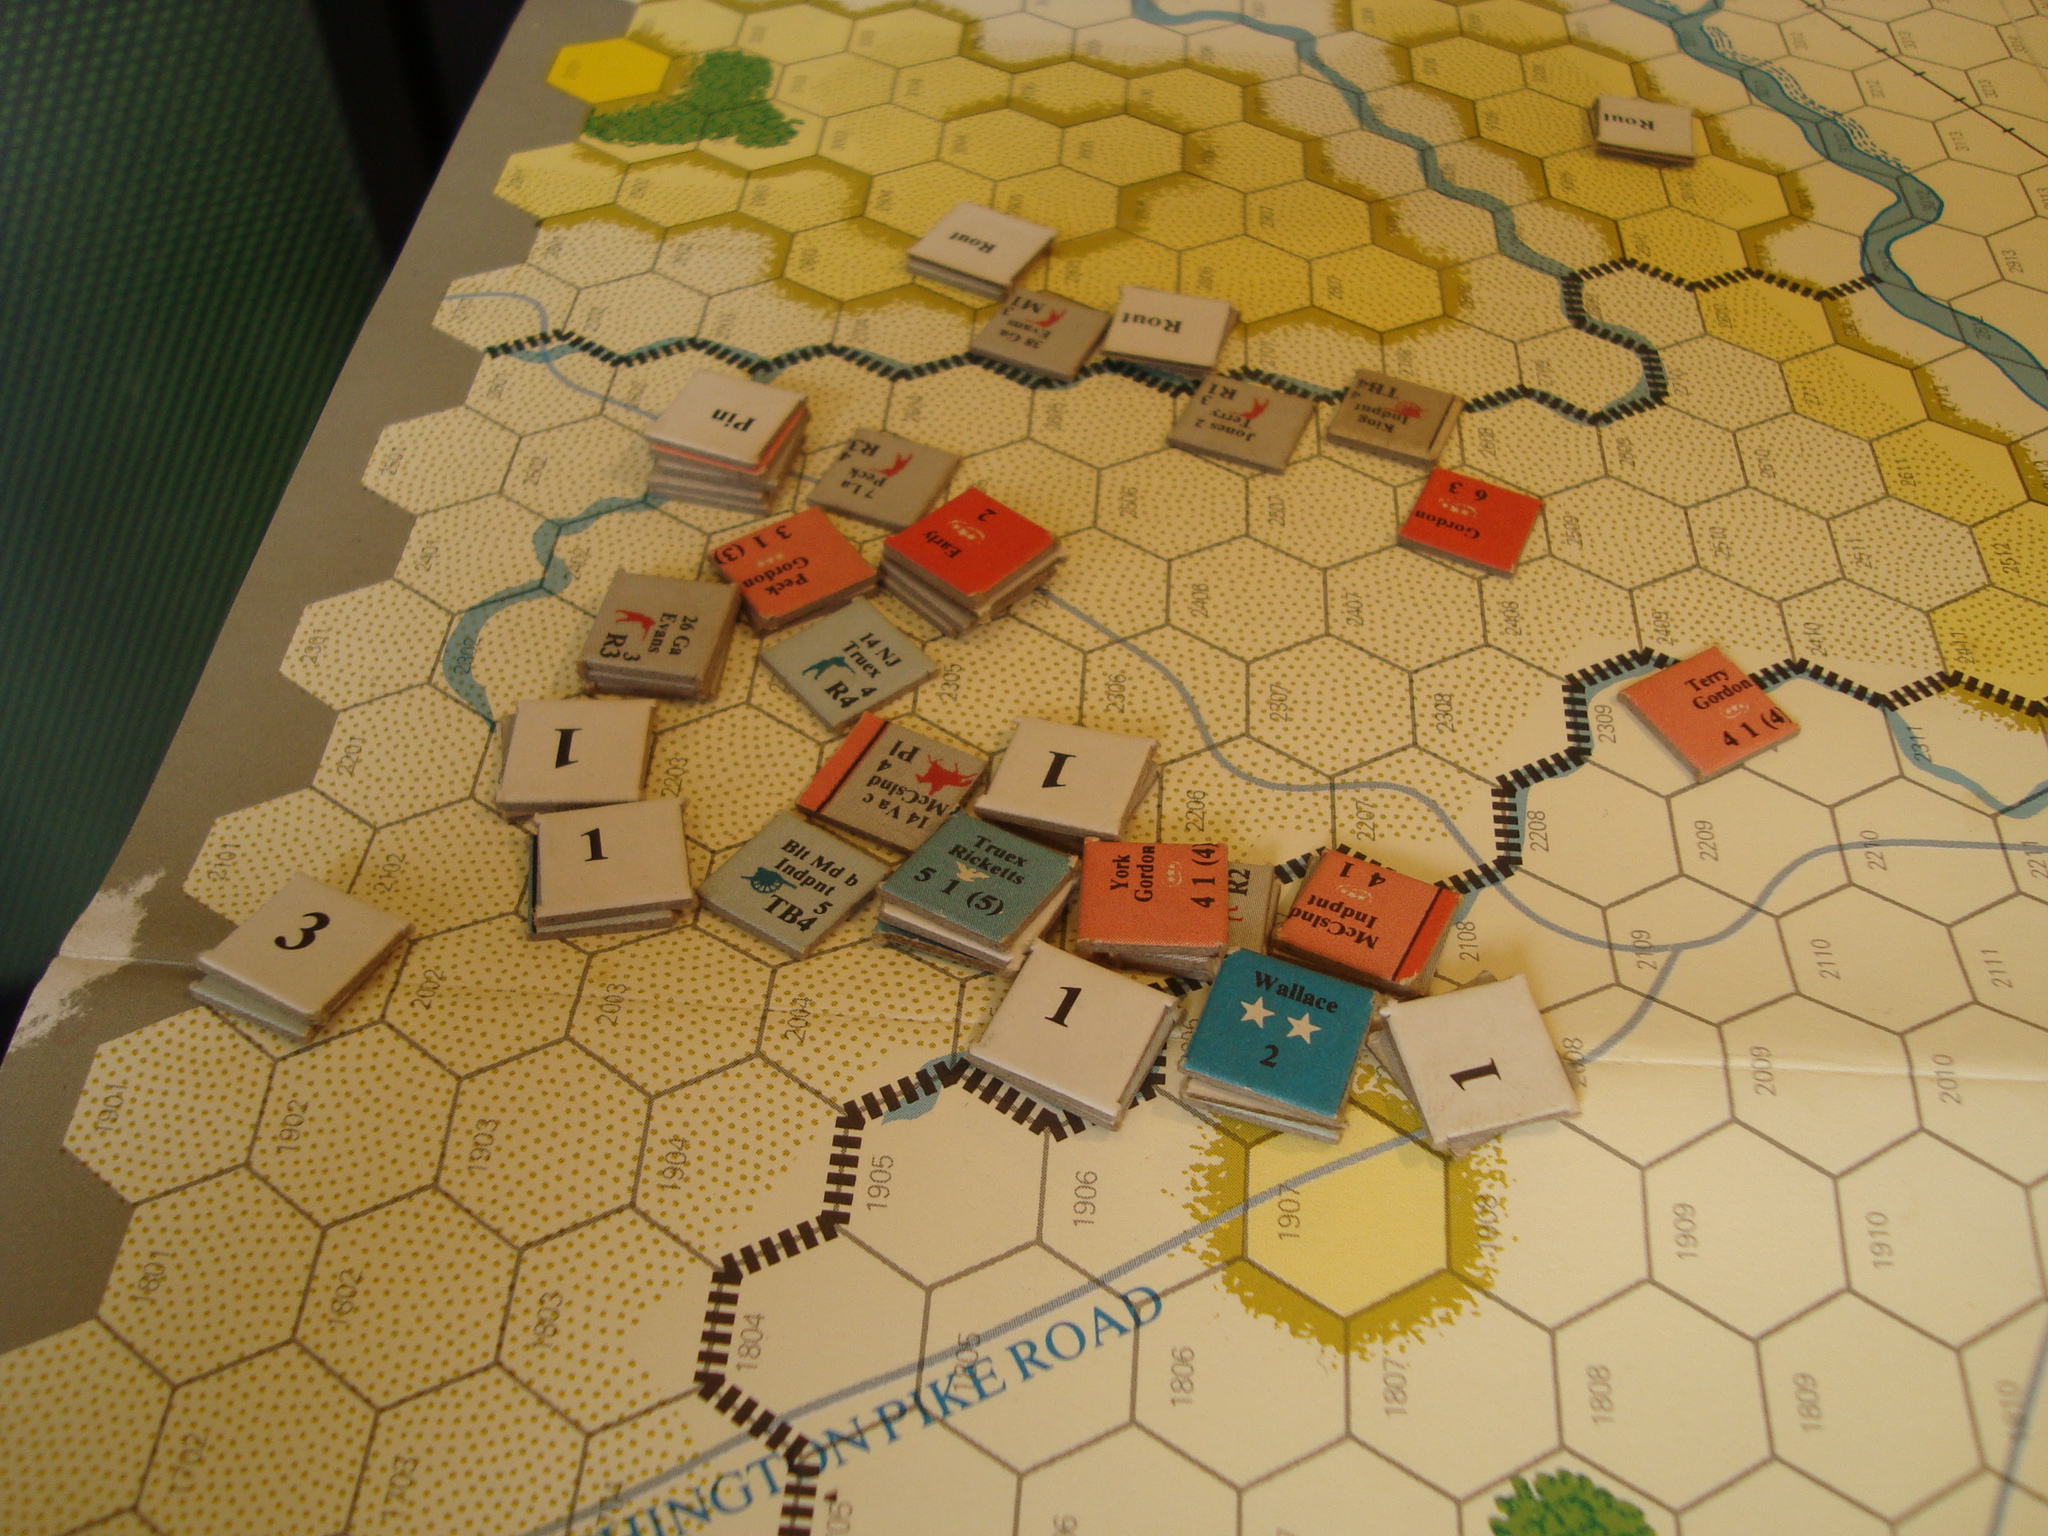
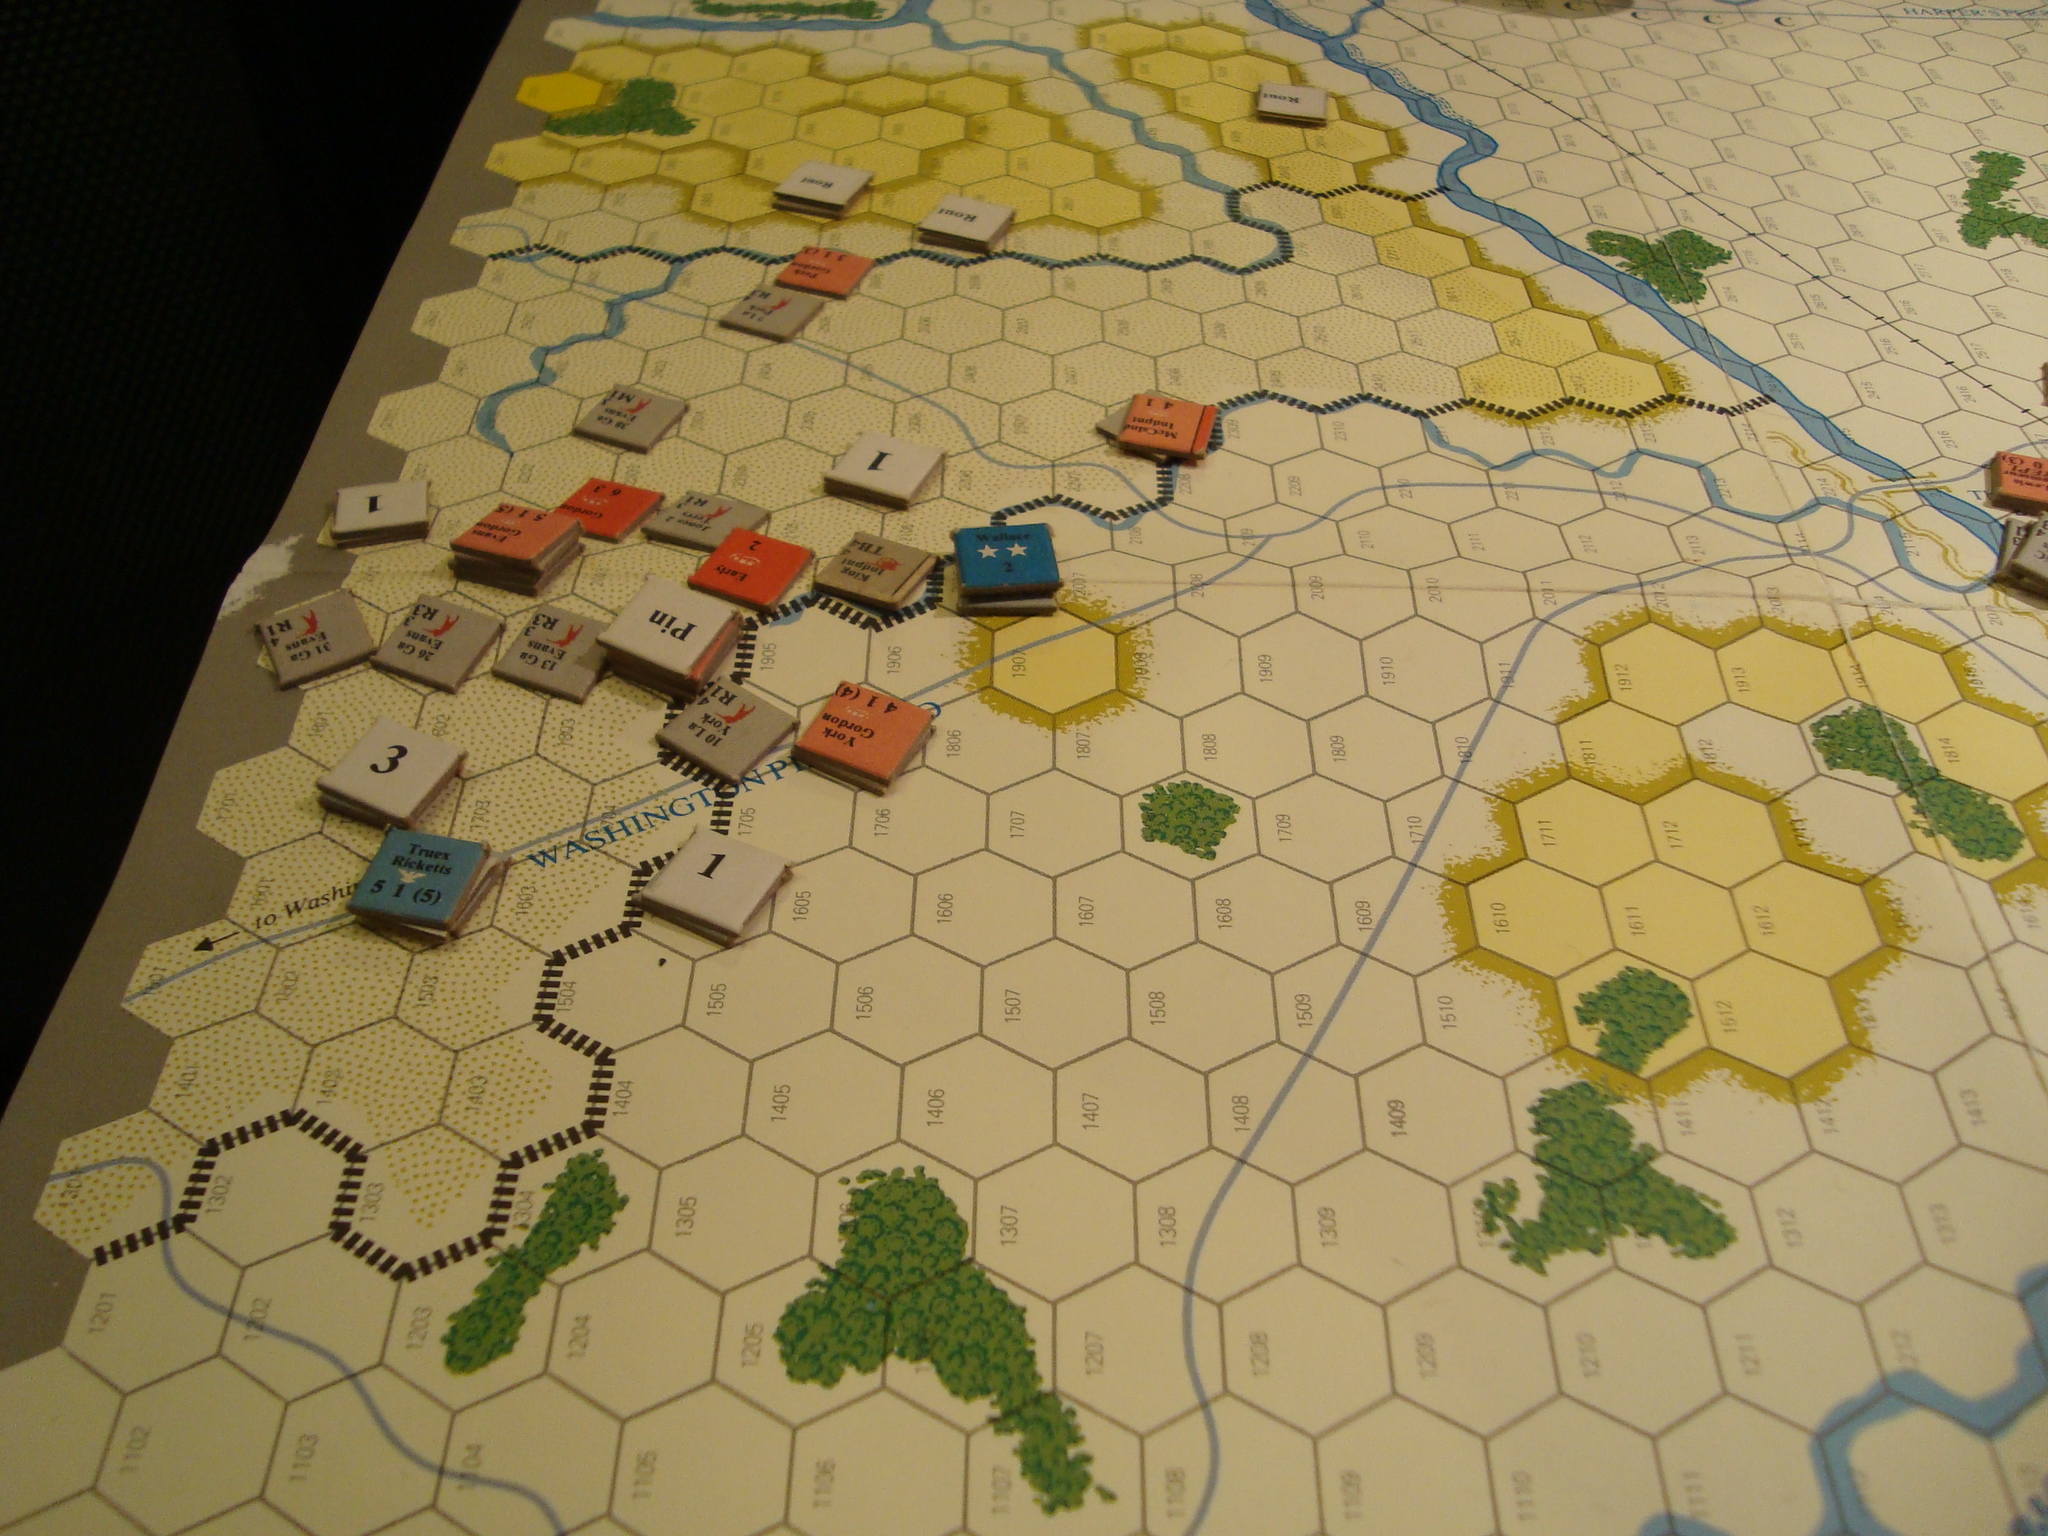
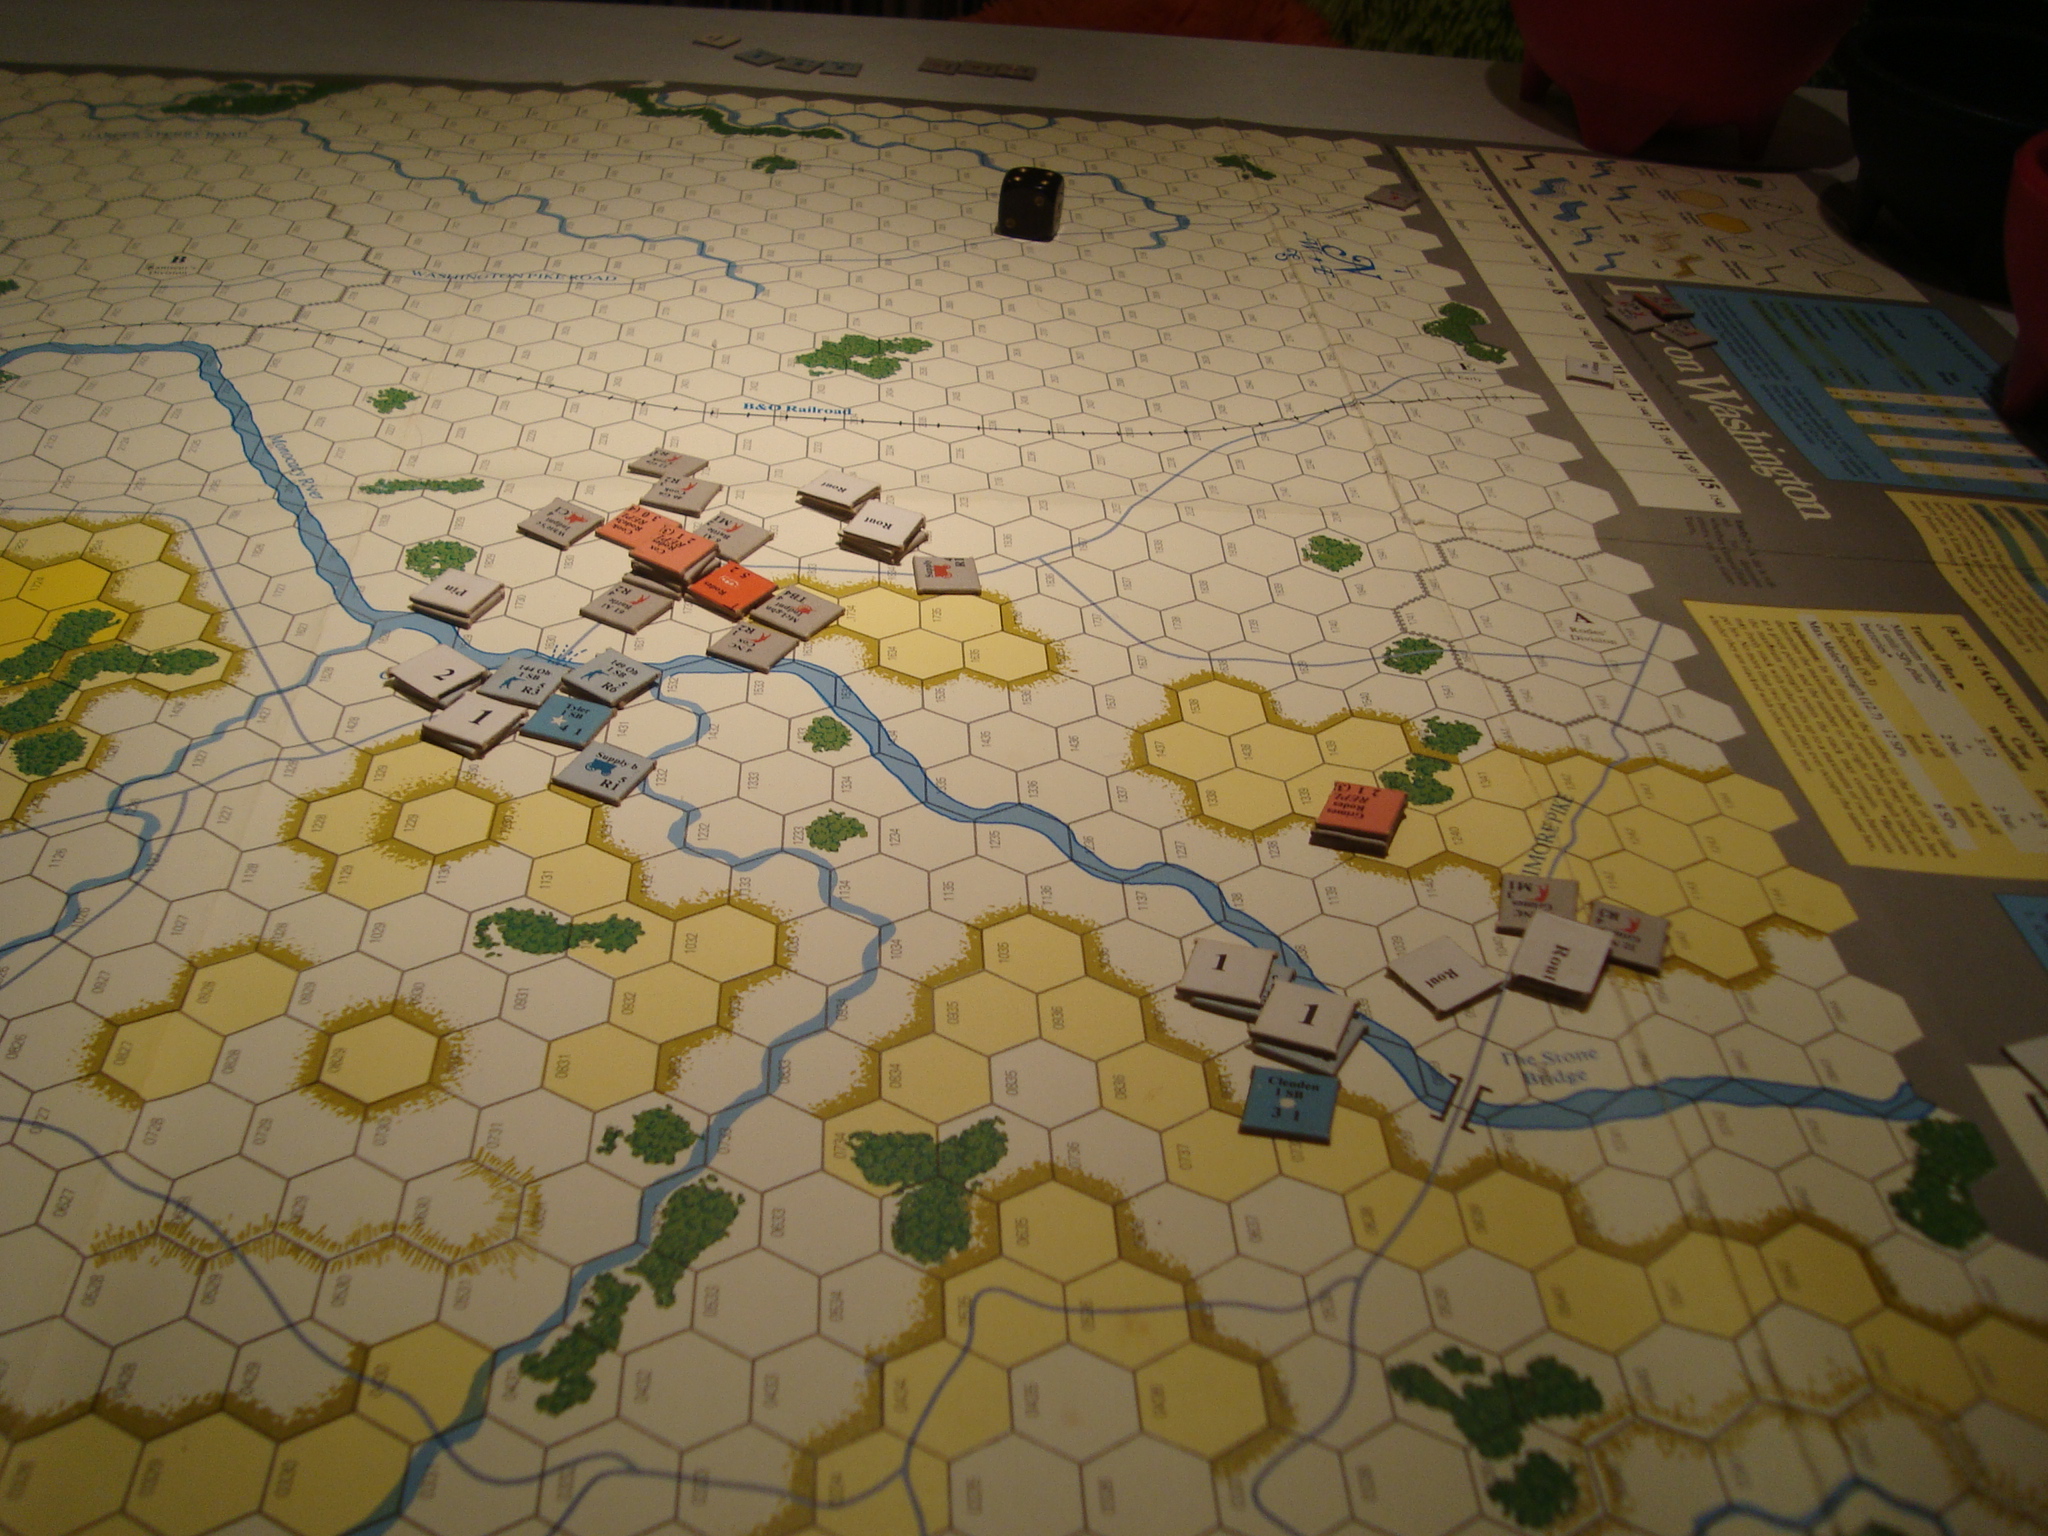
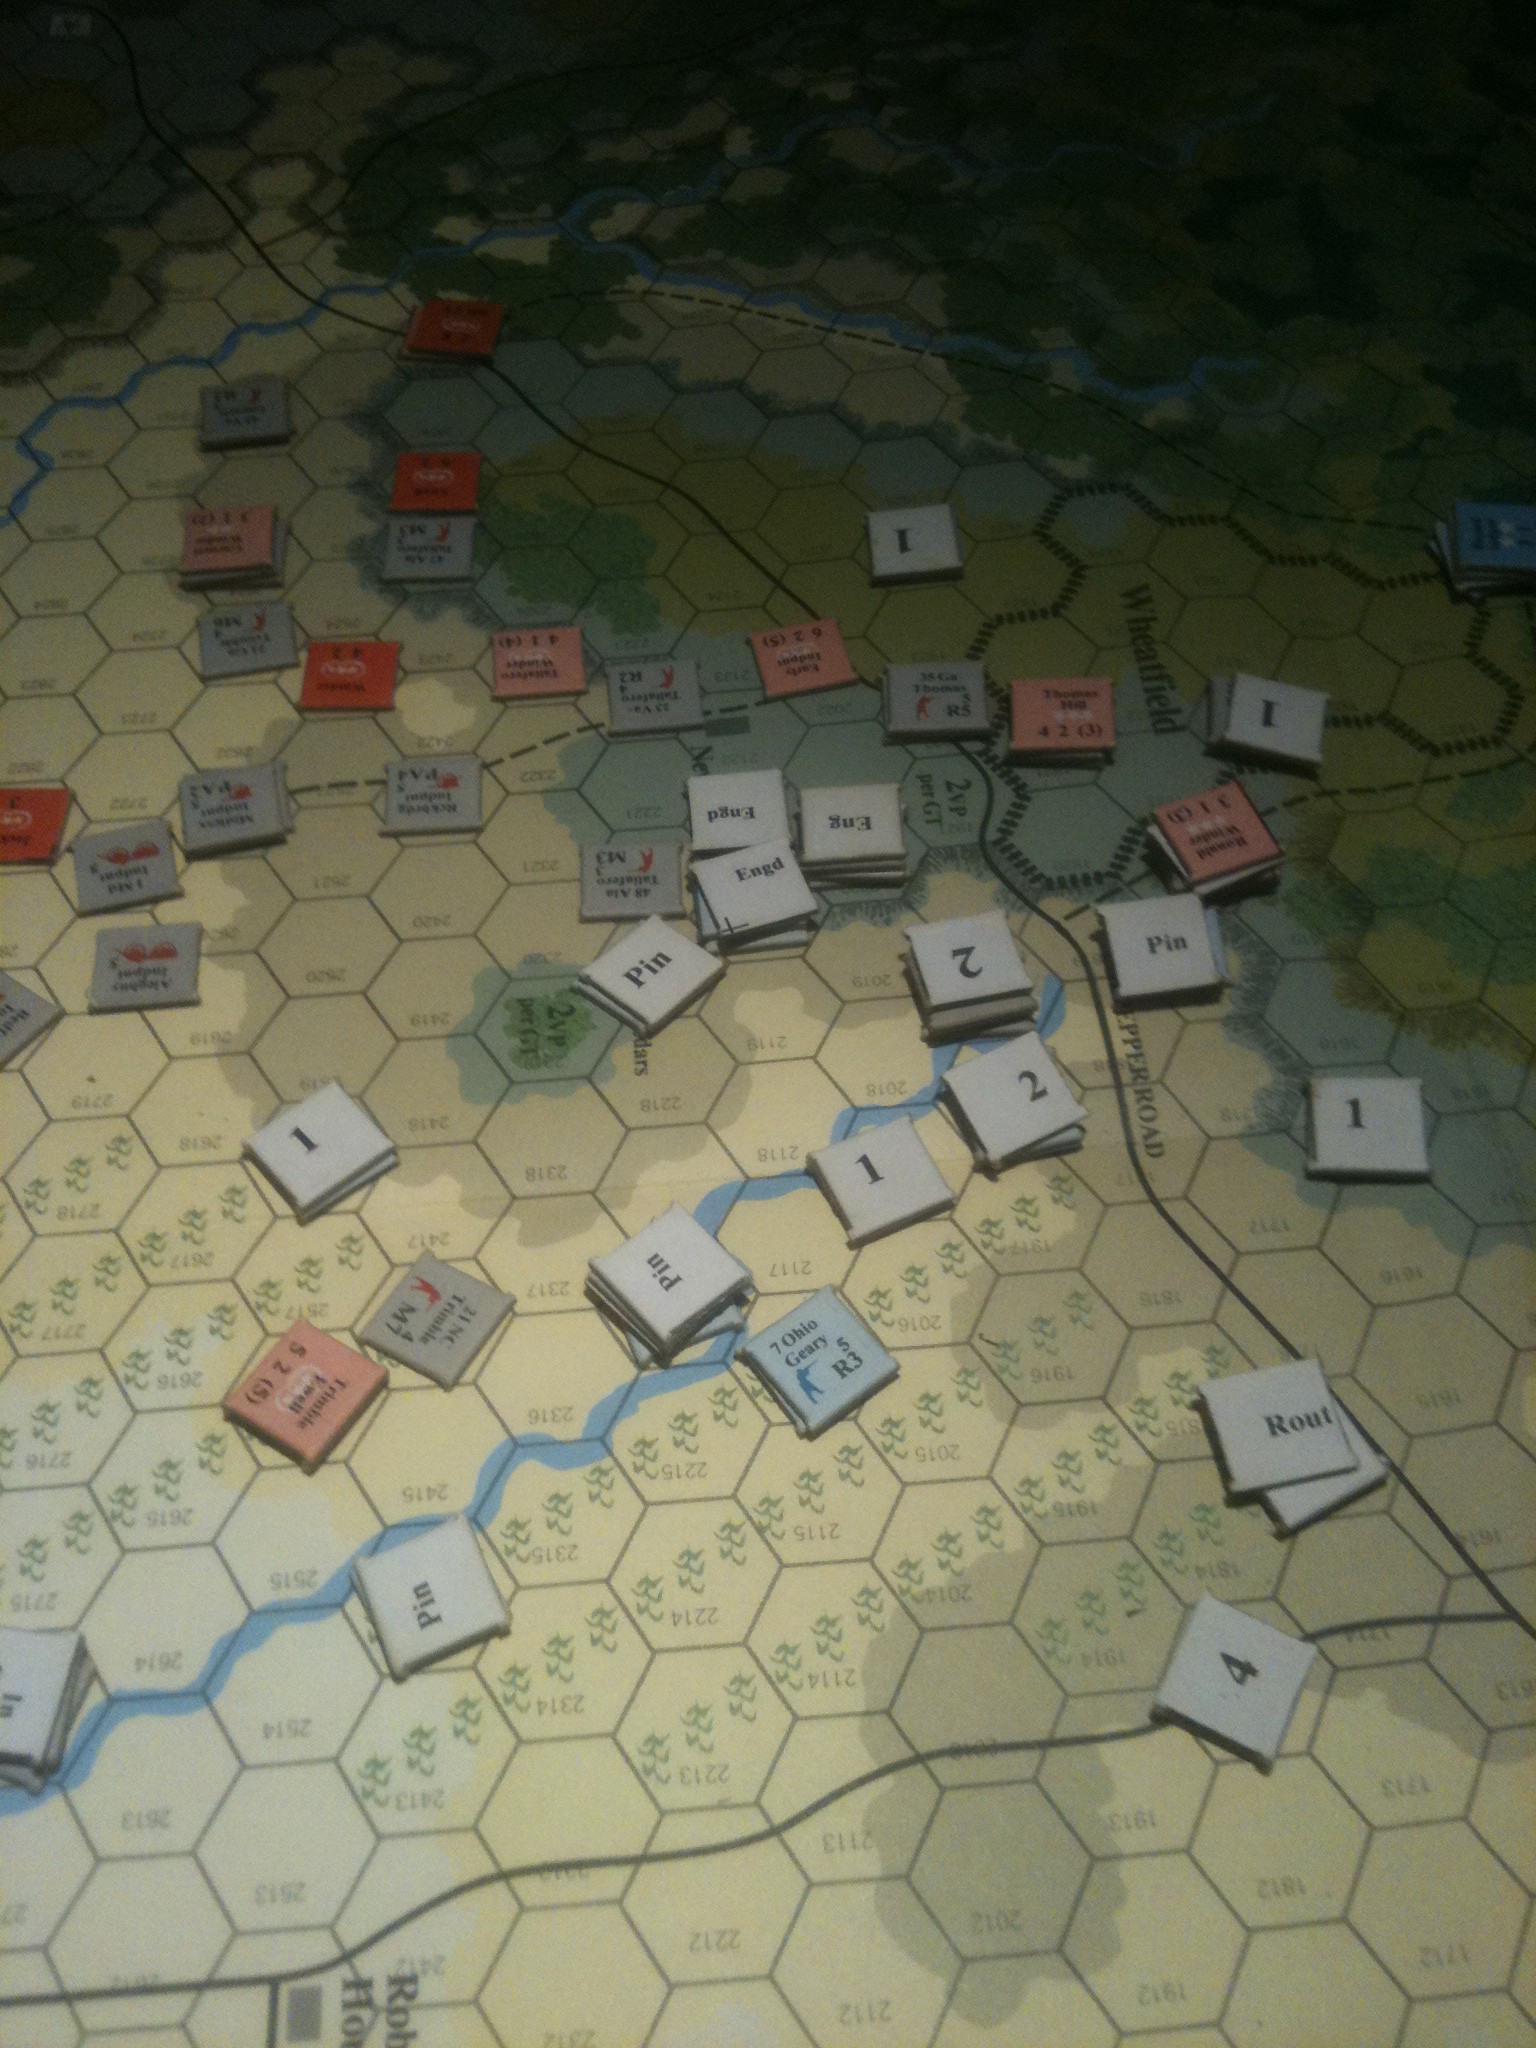
I split the Confederate forces in three. The cavalry brigade was tasked to force the fords to the east, and make a run for the northern map edge. Garnett’s Brigade’s mission was to support the cavalry brigade to its right, force the fords immediately east of town, and advance along the turnpike placing pressure on the Union forces there. The remaining two Rebel brigades, along with Jackson, swung west of Kernstown (not has far west as historically) to outflank the forces on Pritchard’s Hill, to engage and destroy the northernmost Union force. Hopefully, the strong Union force on Pritchard’s Hill could be bypassed, and inflict minimal damage on the bypassing Confederate forces.

It was a Dog Fight.

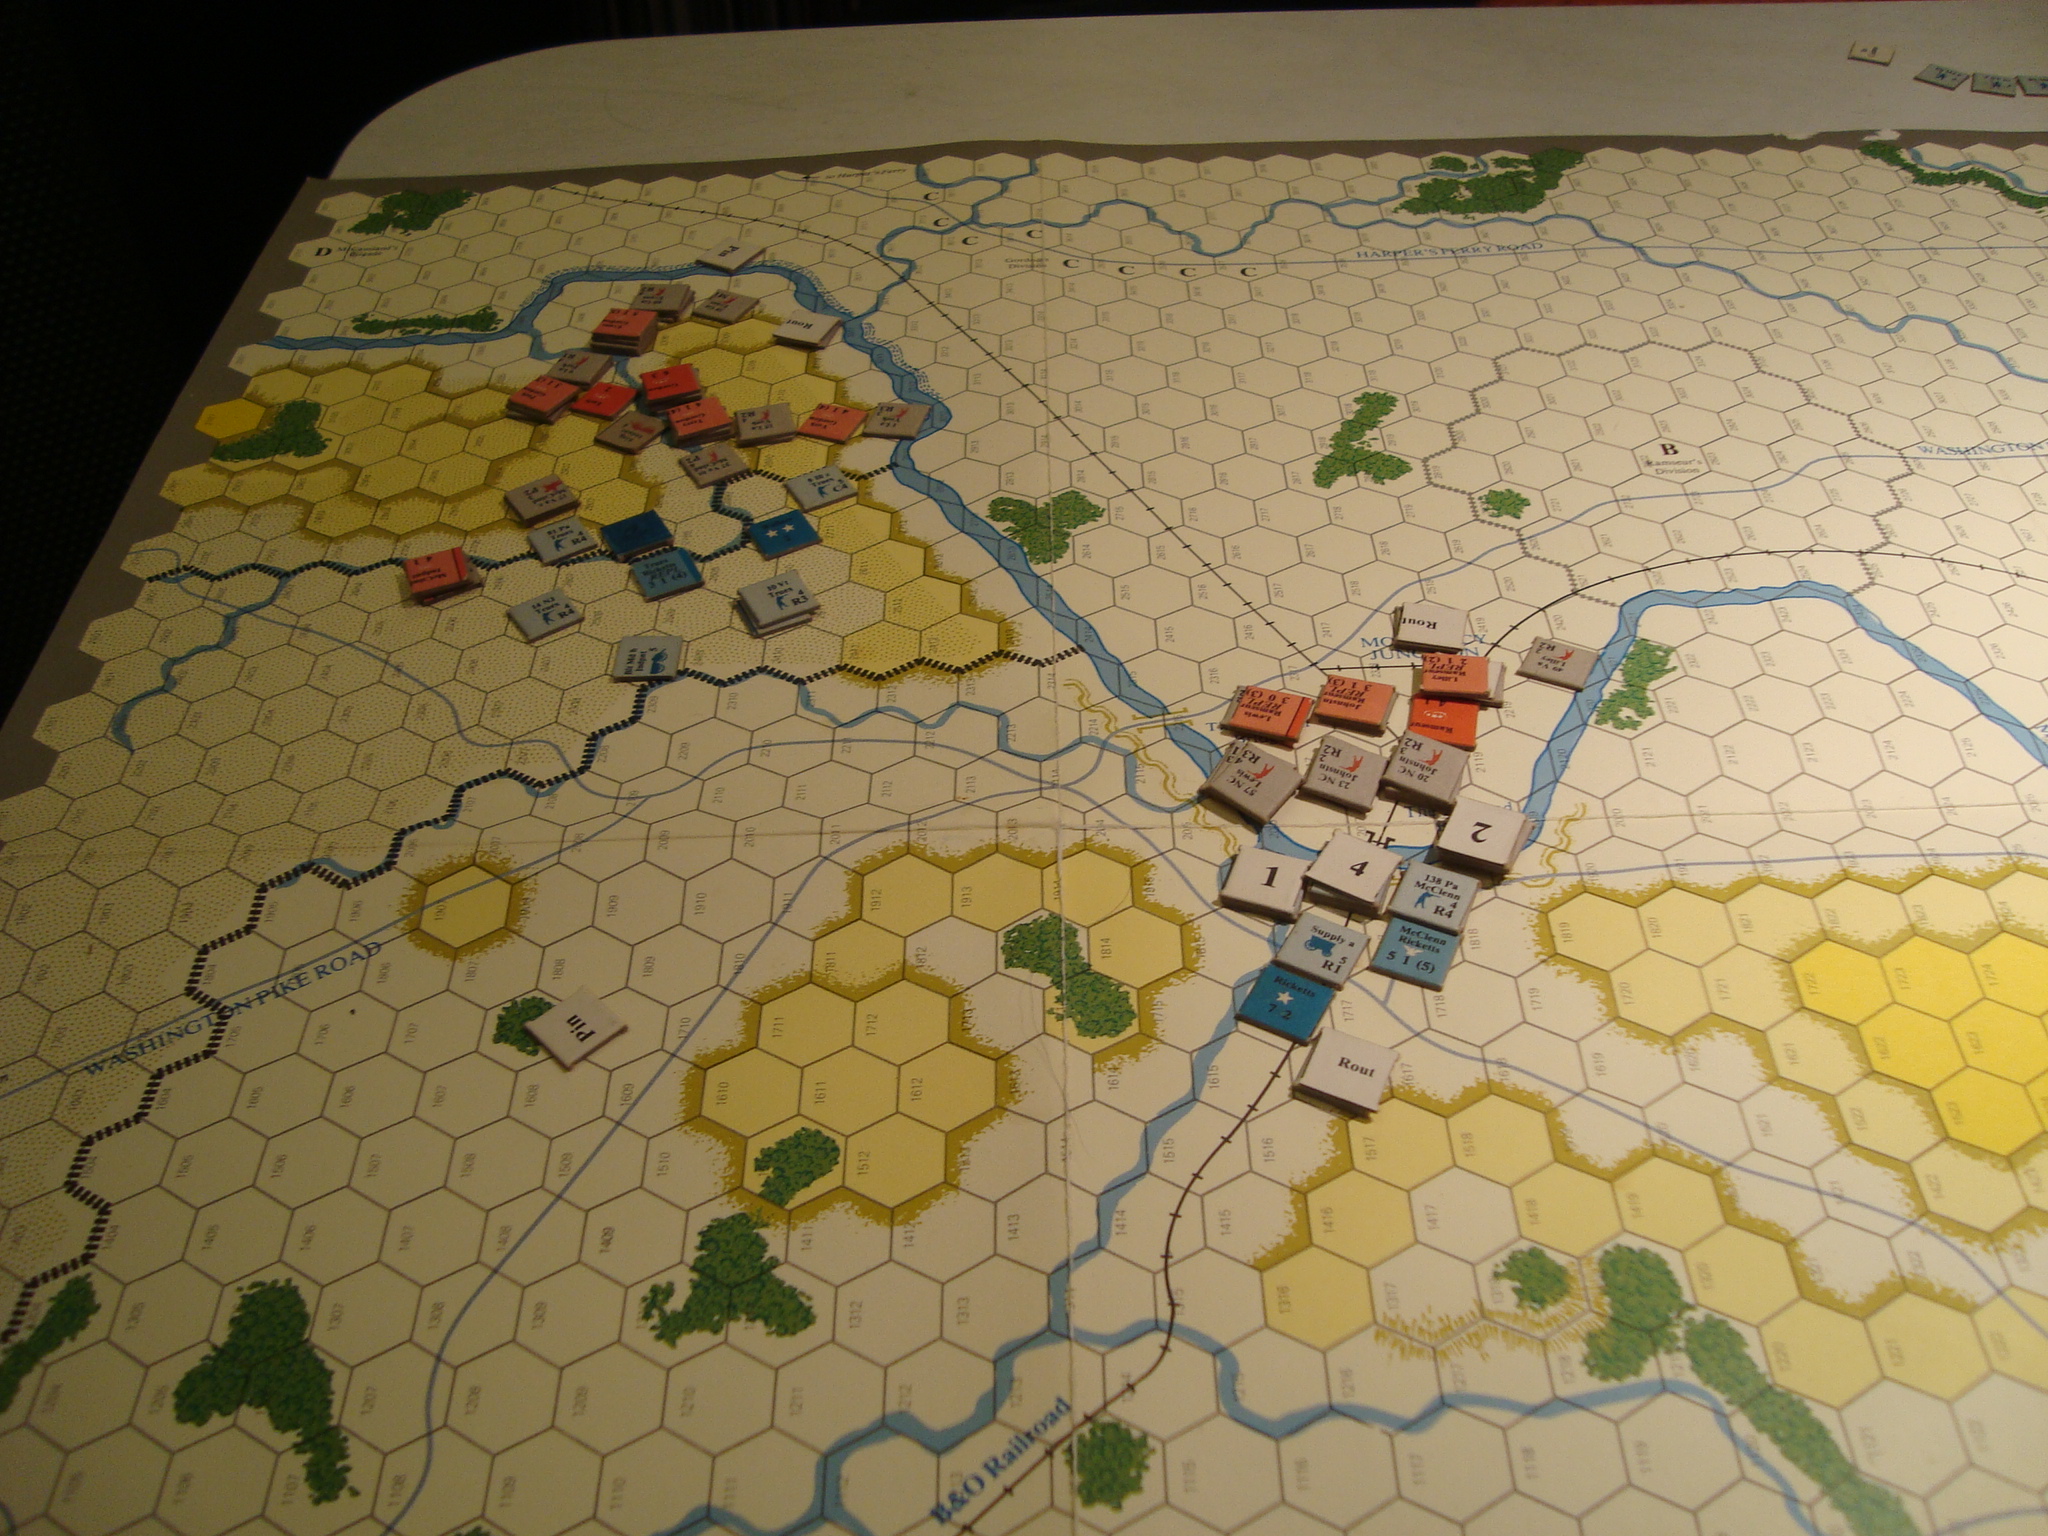
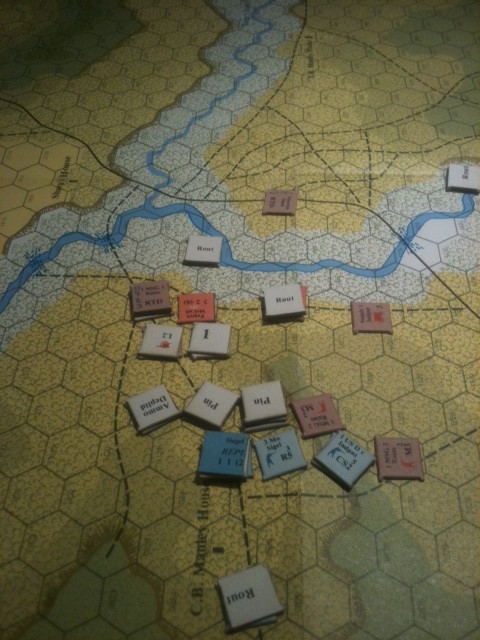
The Confederate cavalry brigade wore down its weaker opponent, forcing the ford and eventually destroying the Union cavalry brigade. As ordered, it moved to the north.

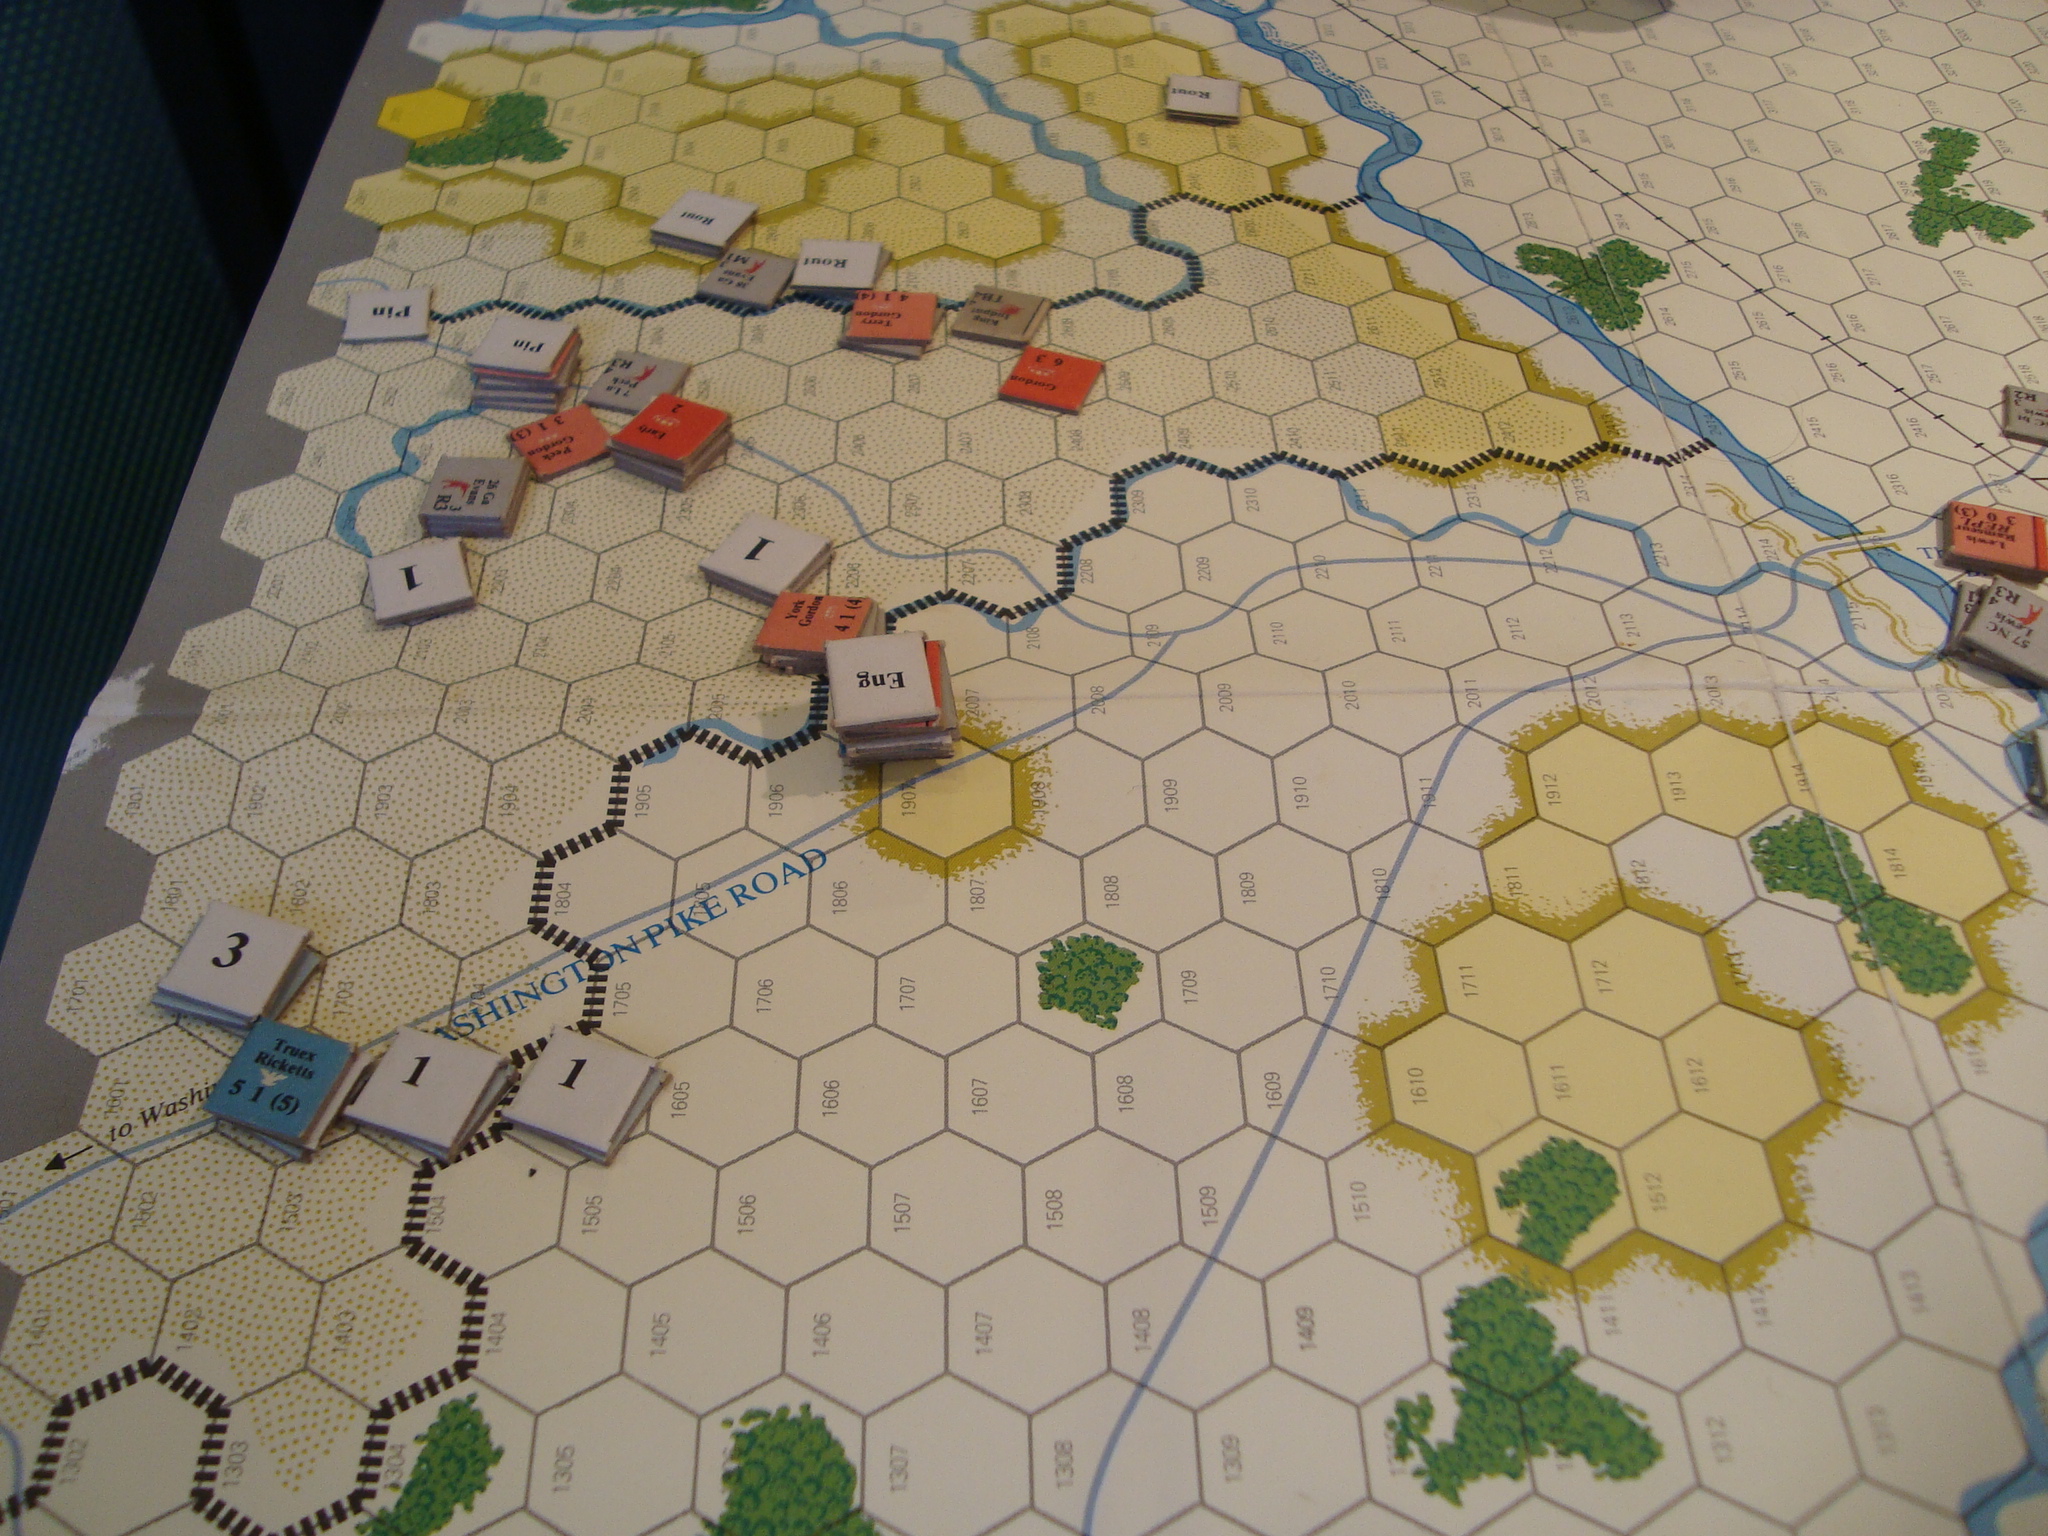
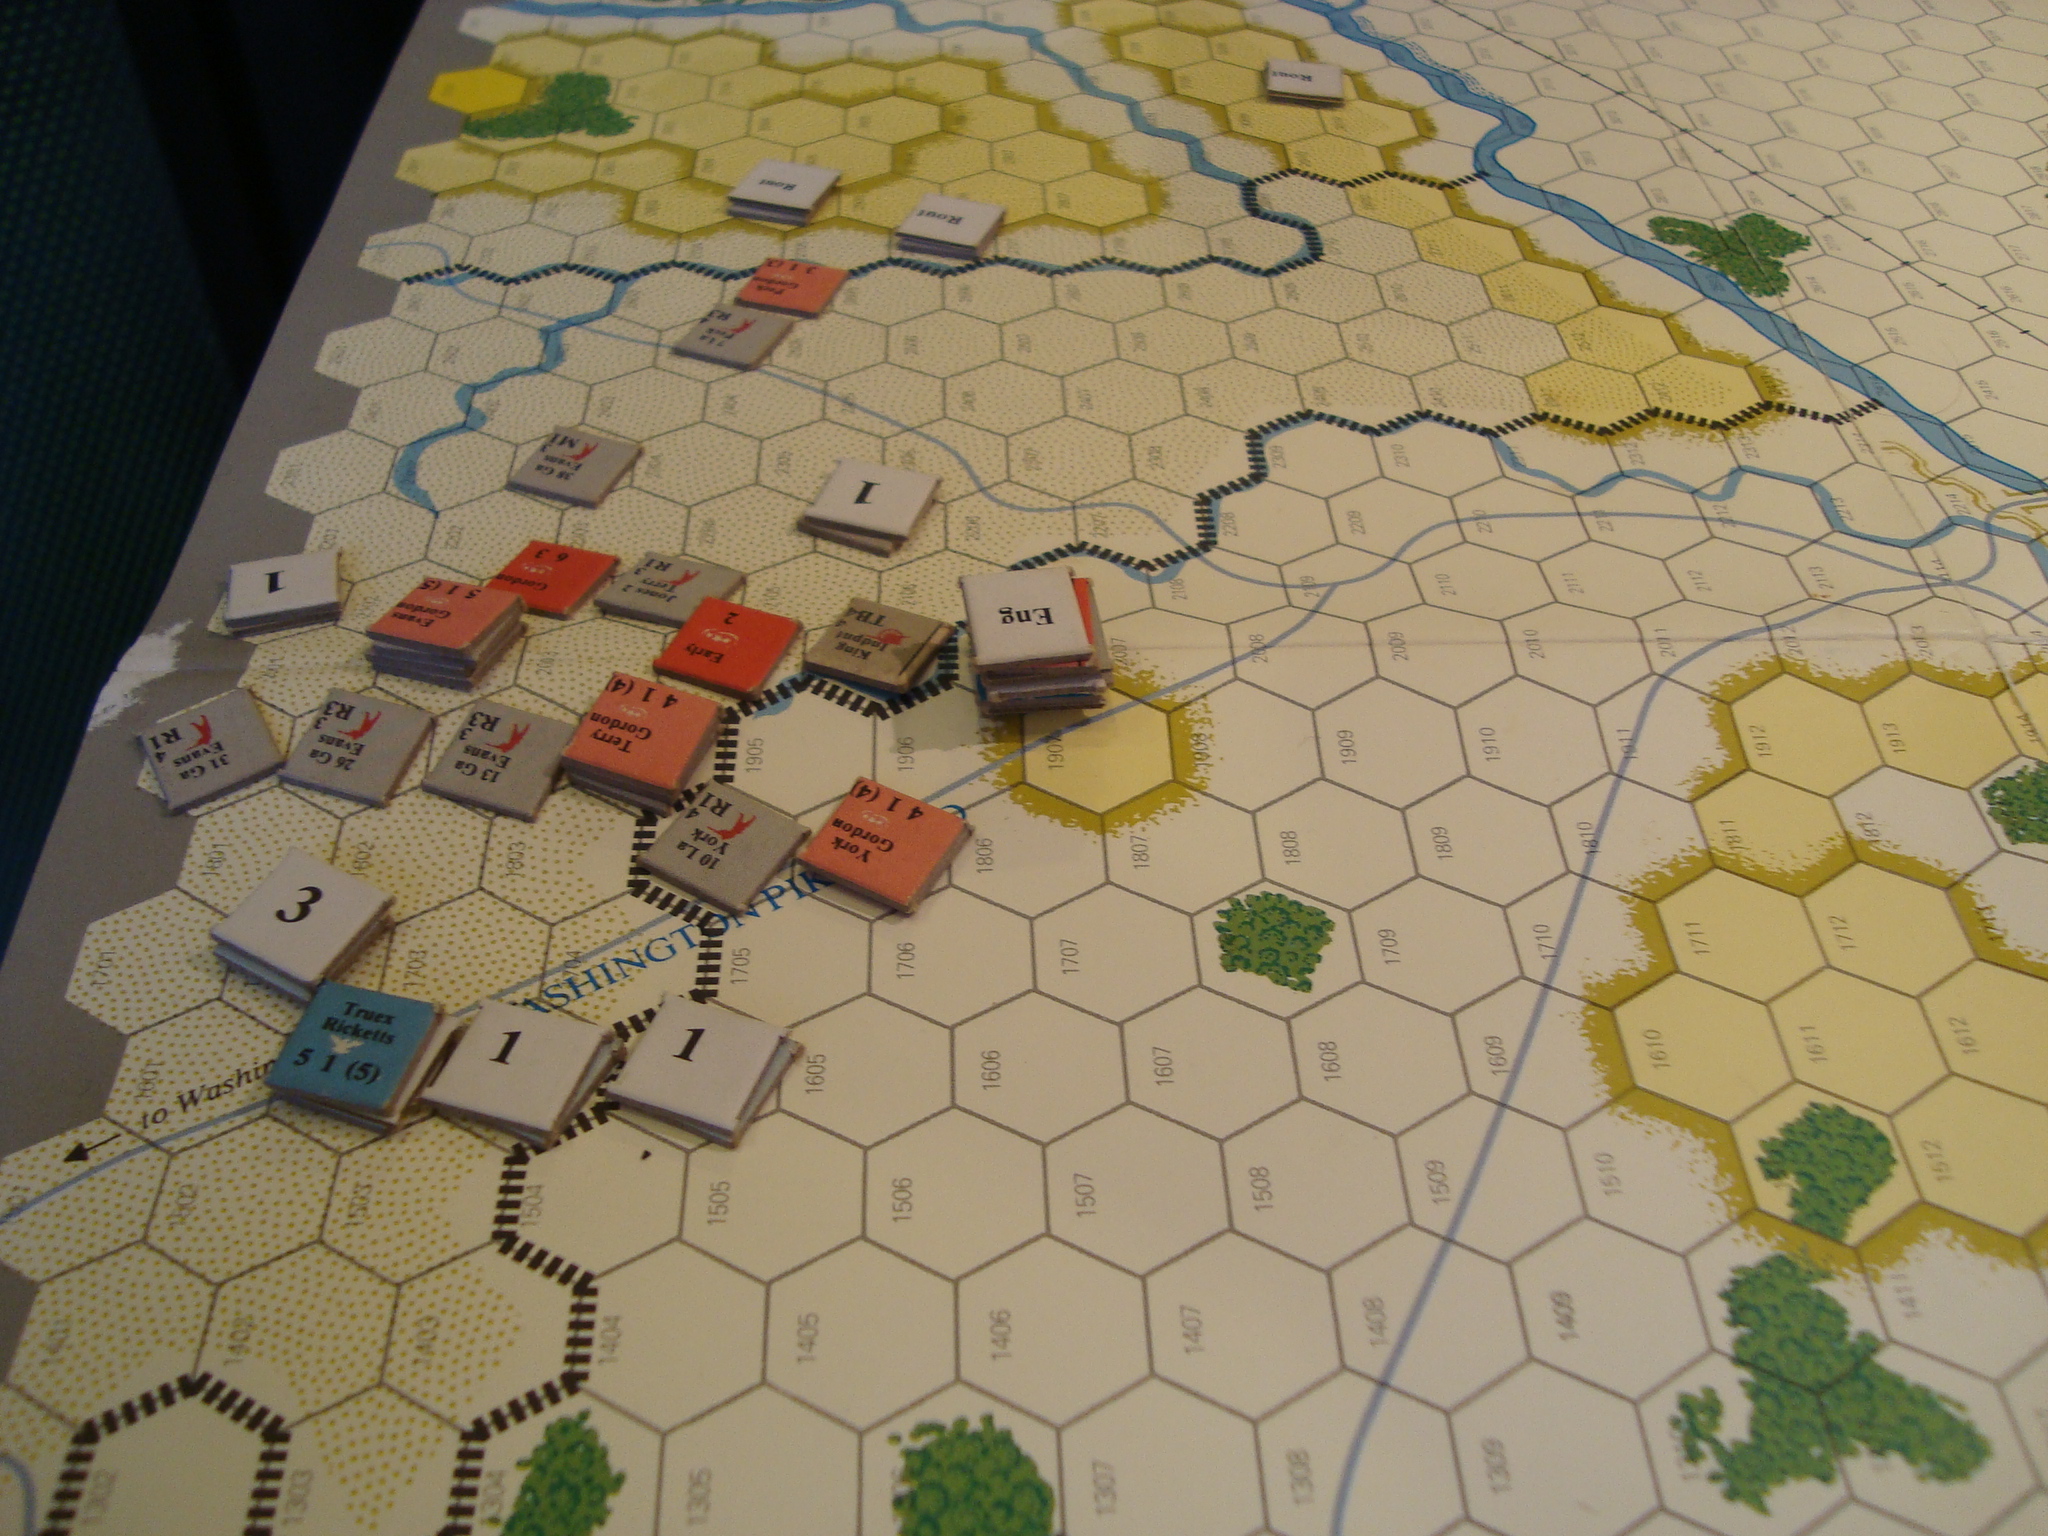
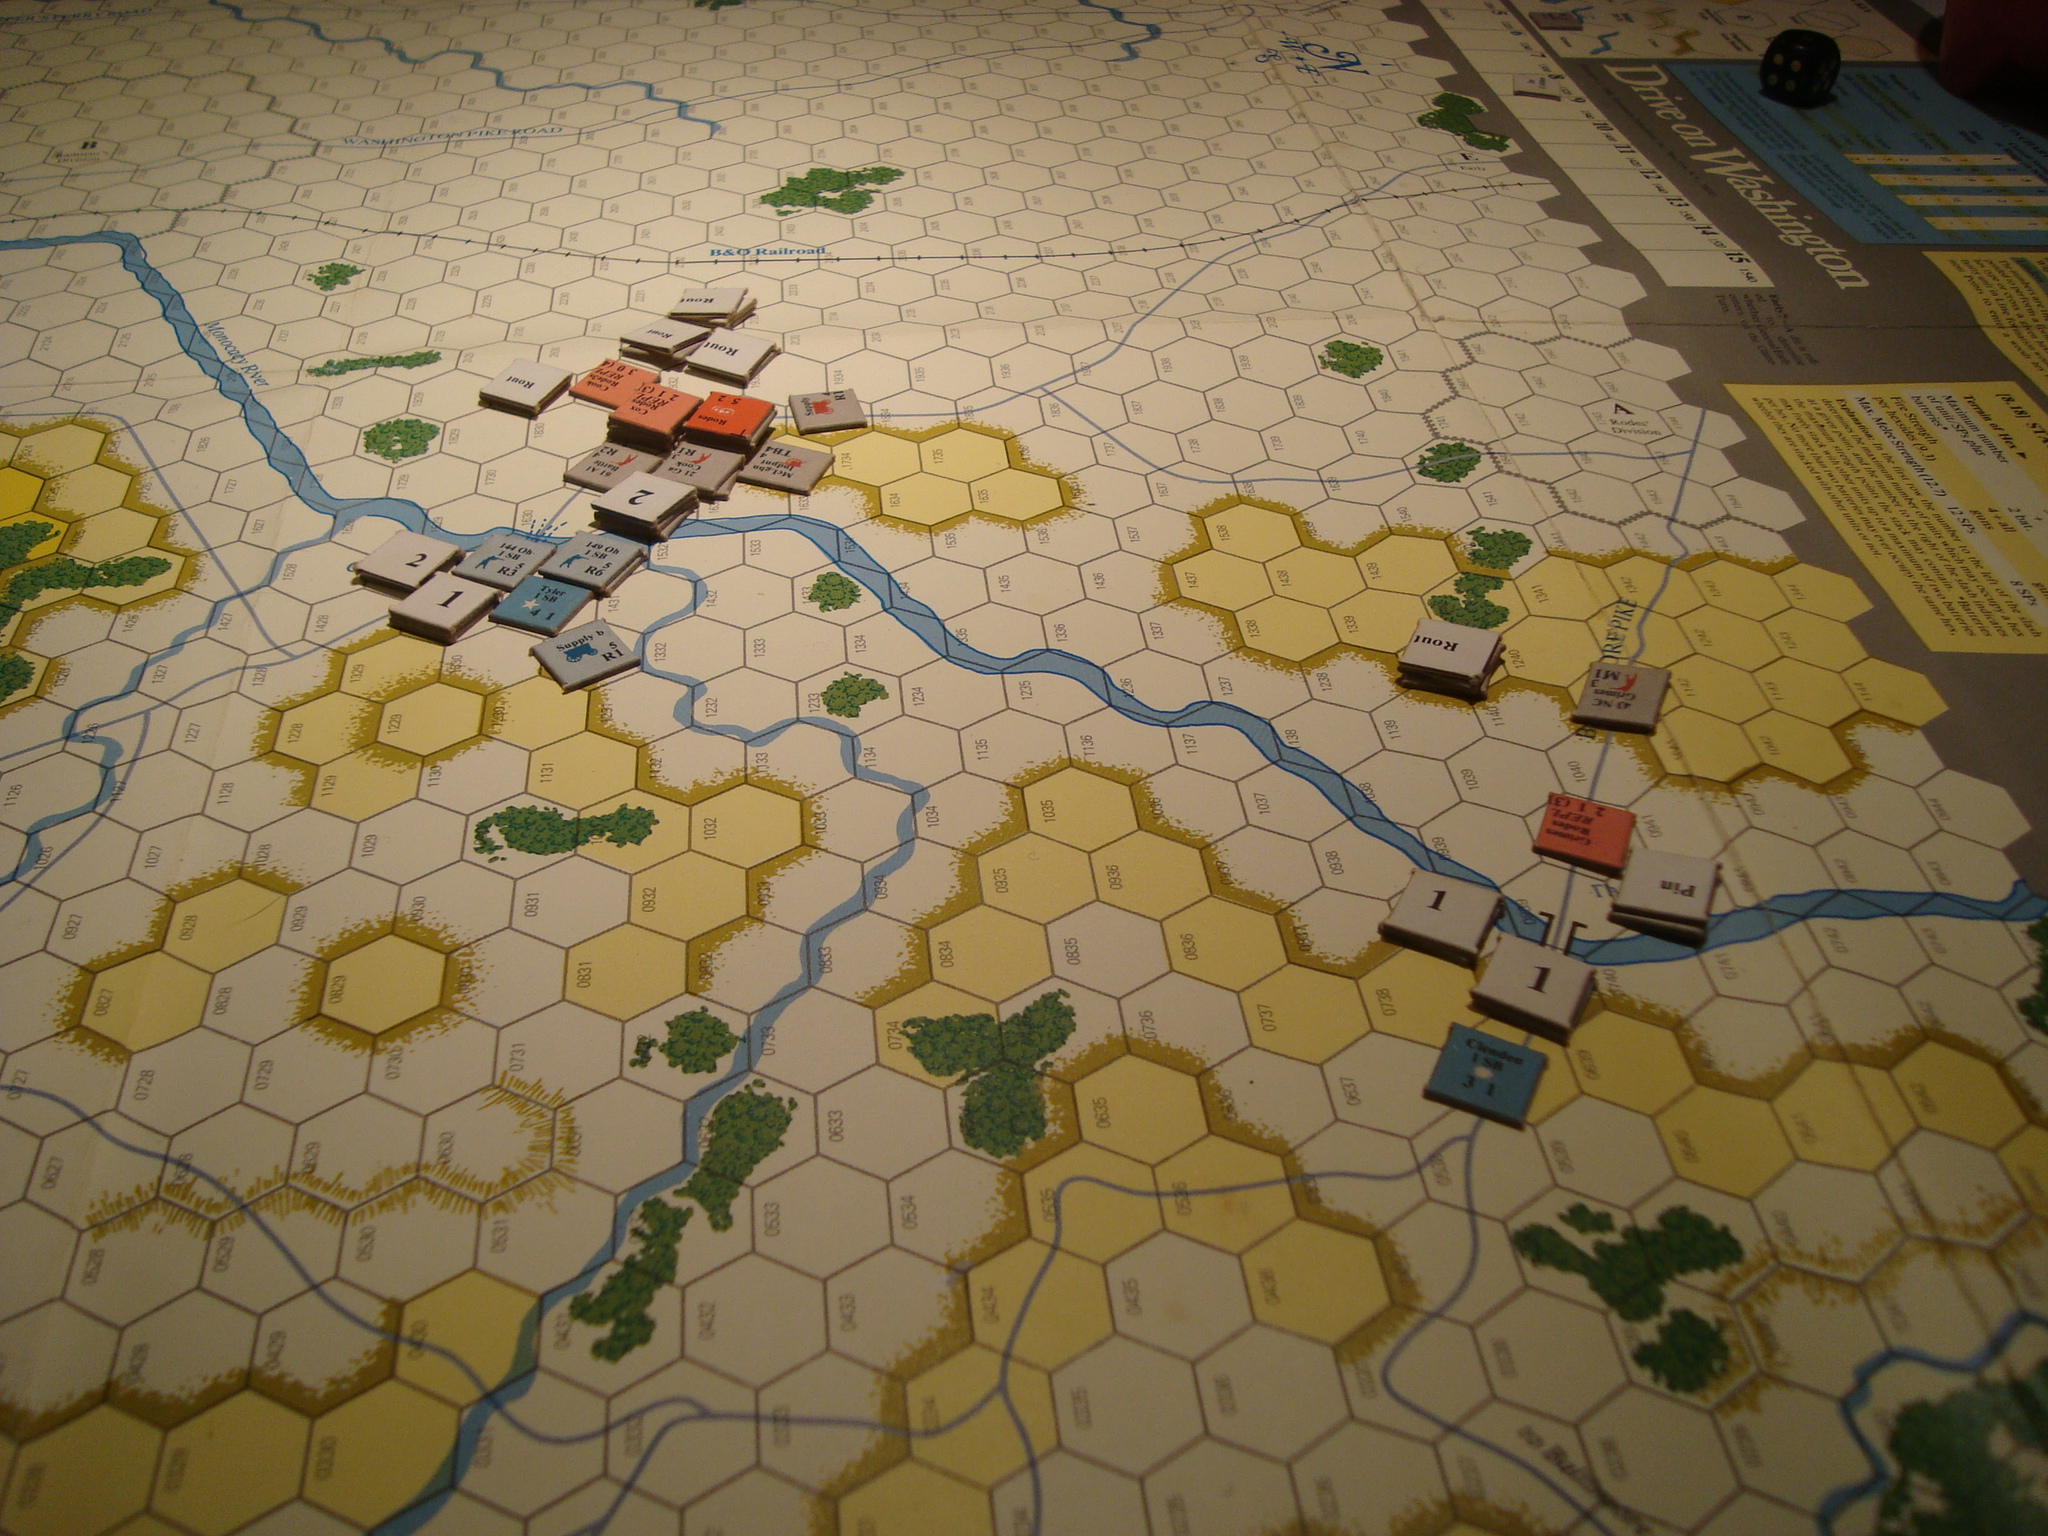
Garnett’s Brigade engaged in a slugfest with its Union opponents east of Kernstown, forcing the ford, pinning them, while taking long range fire casualties from Pritchard’s Hill. Two Union regiments had the misfortune of suffering ammunition depletion on their very first turn! Resupply did occur, but the supply wagon was captured by the marauding Confederate cavalry brigade. Despite these mishaps, the Union forces stopped Garnett’s advance, with both sides suffering heavy casualties.

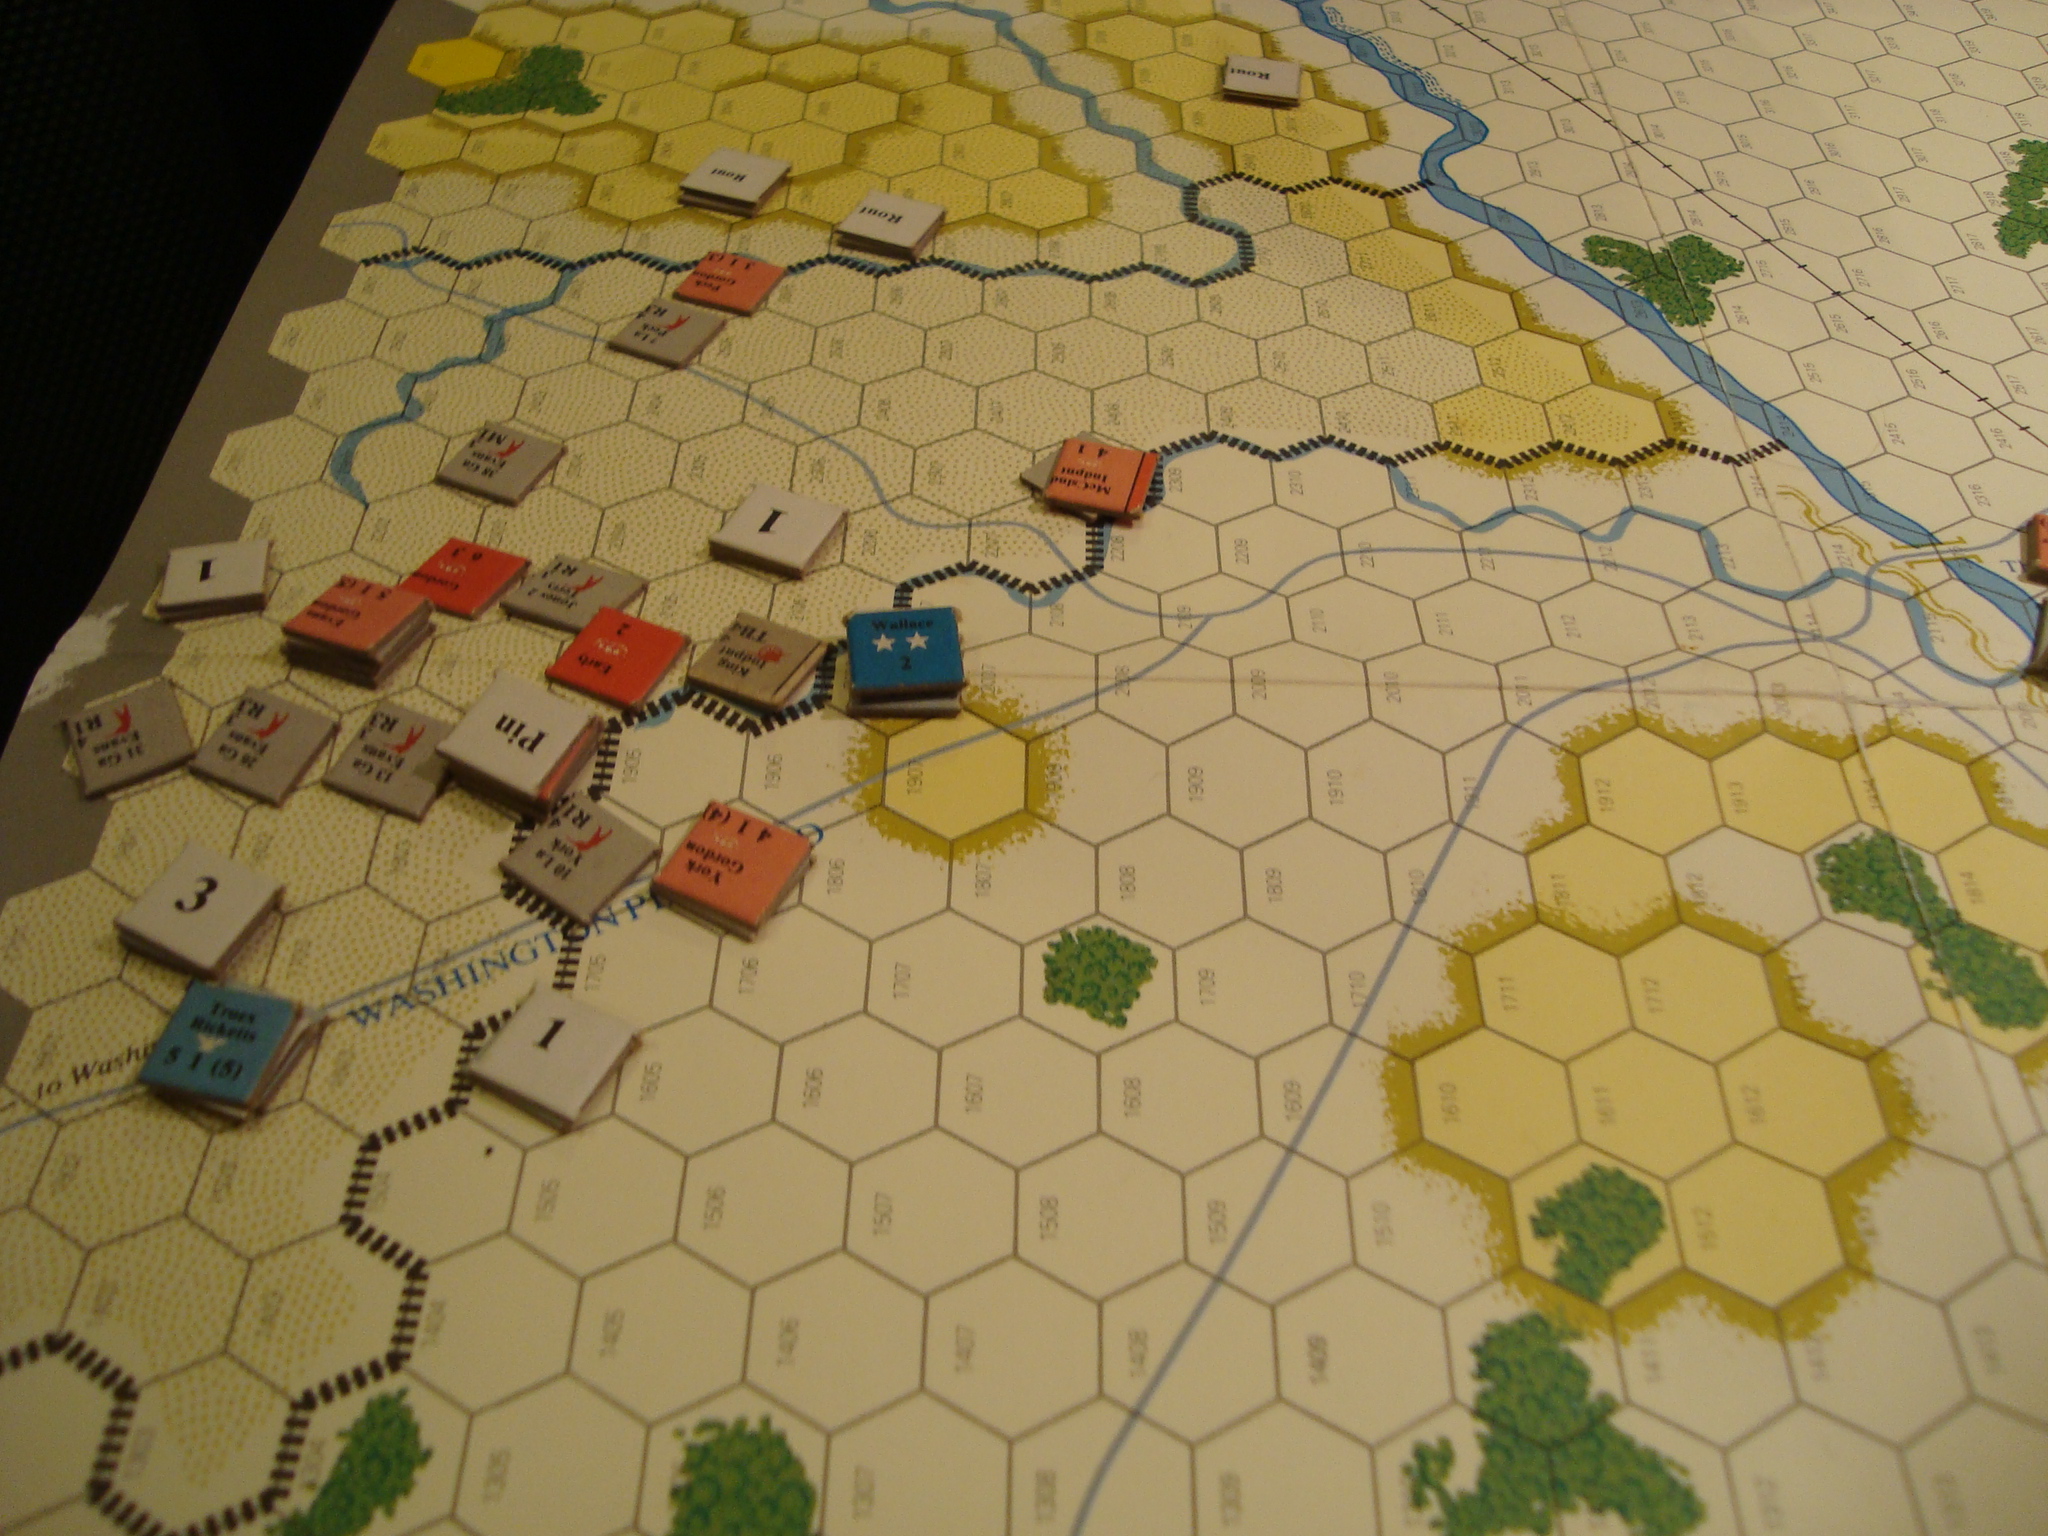
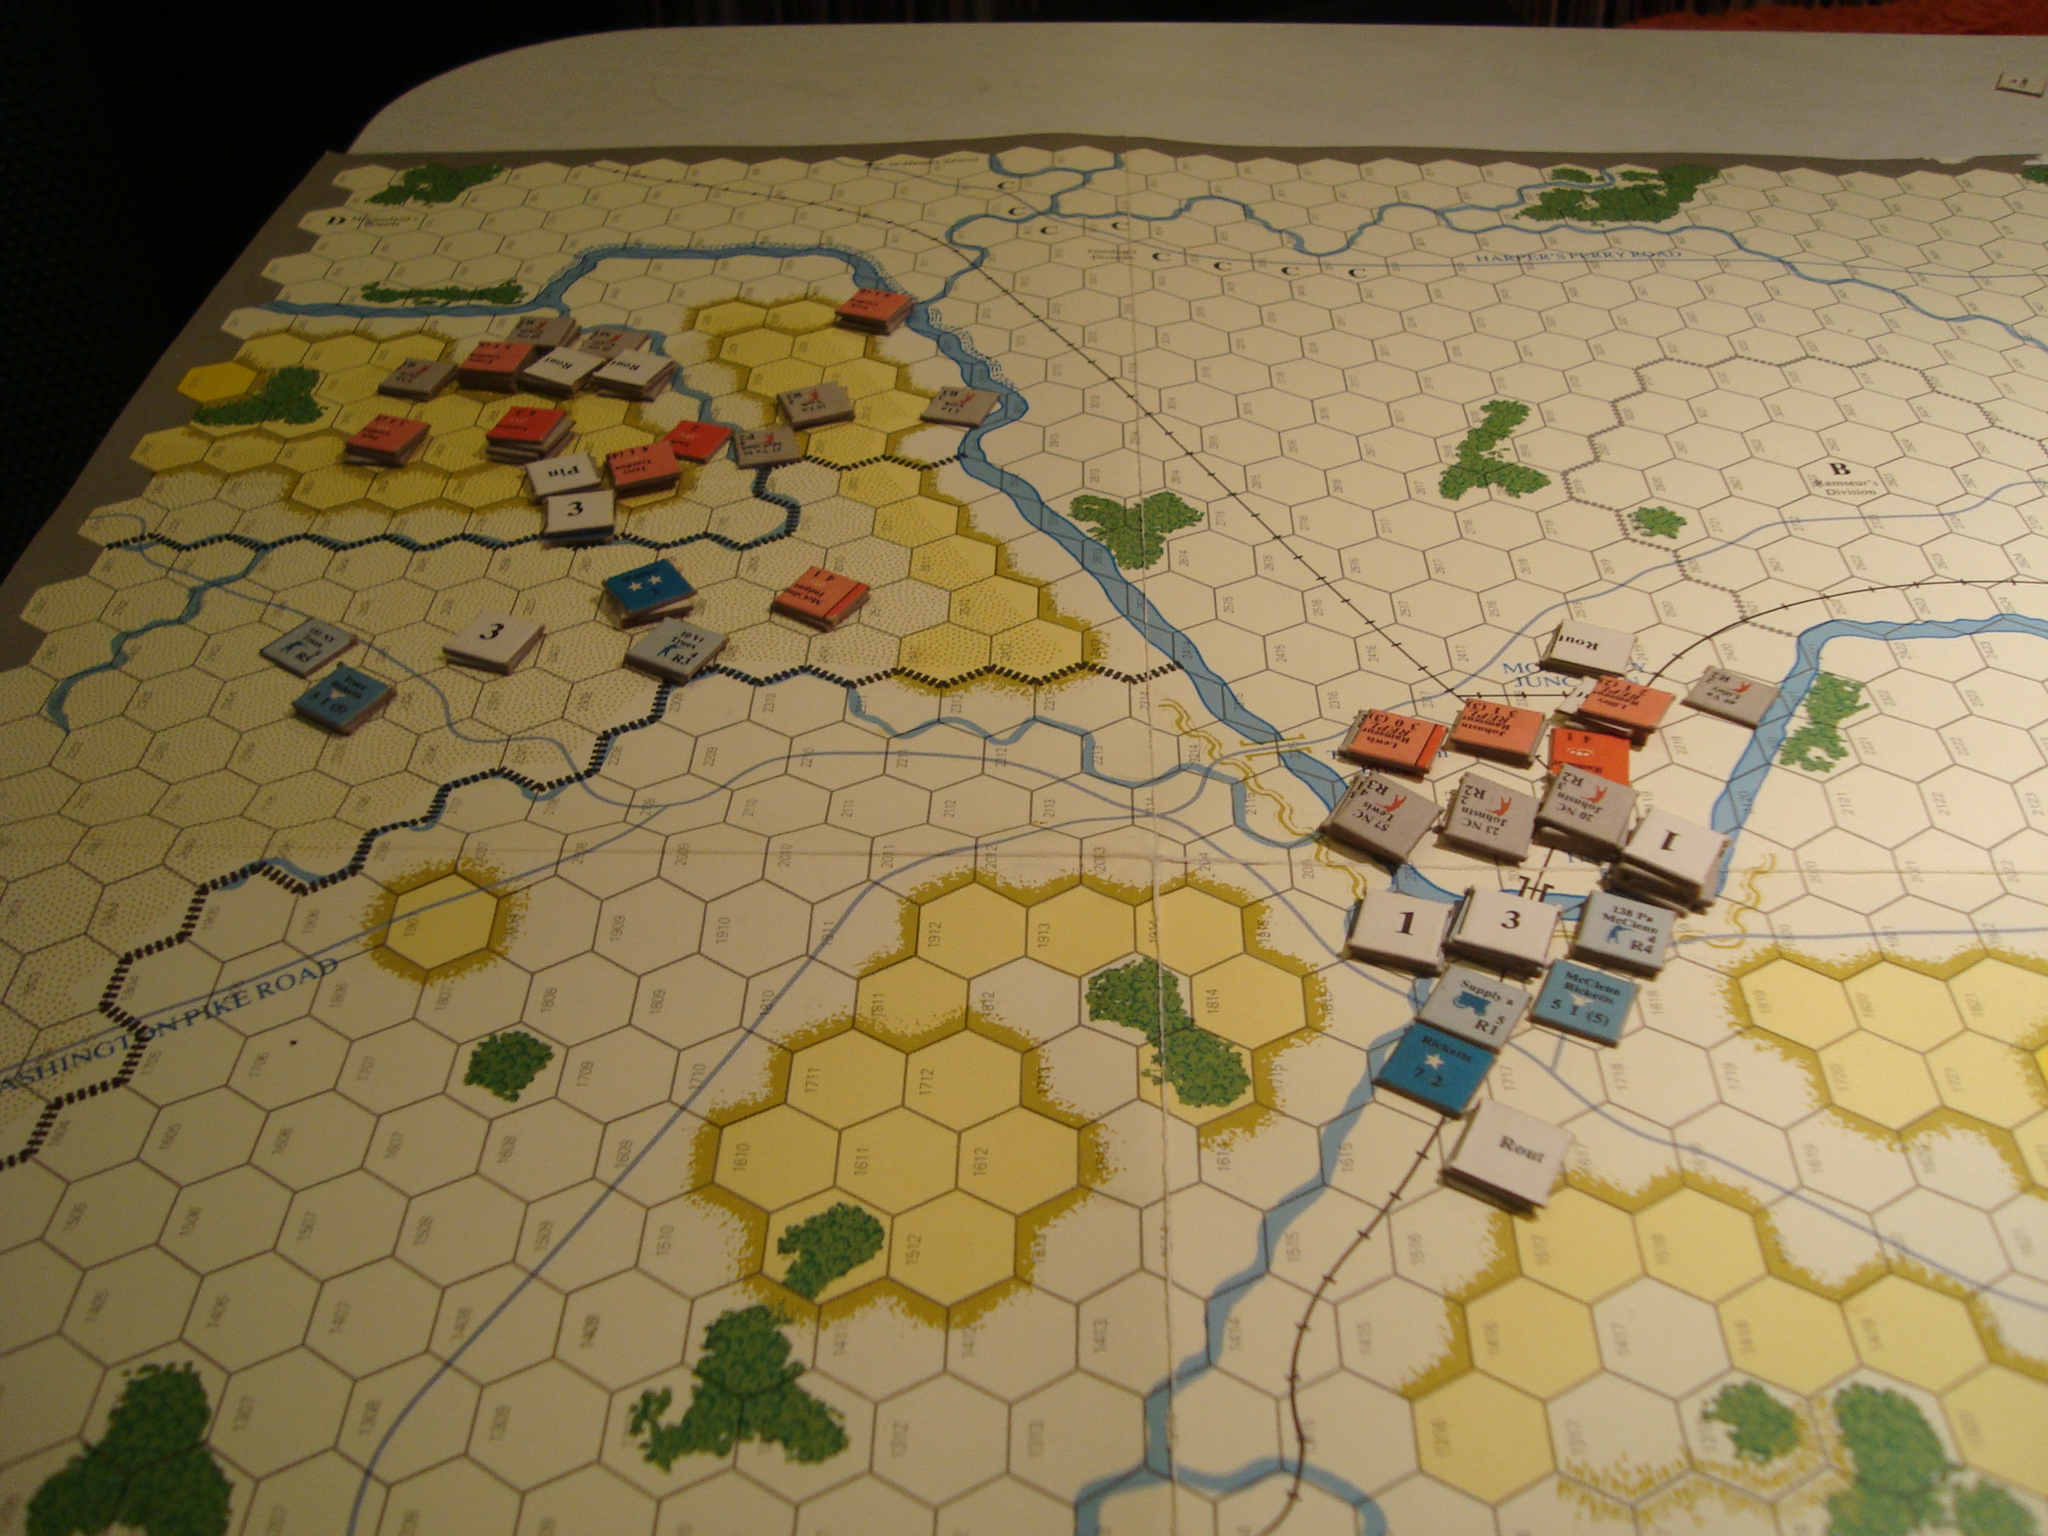
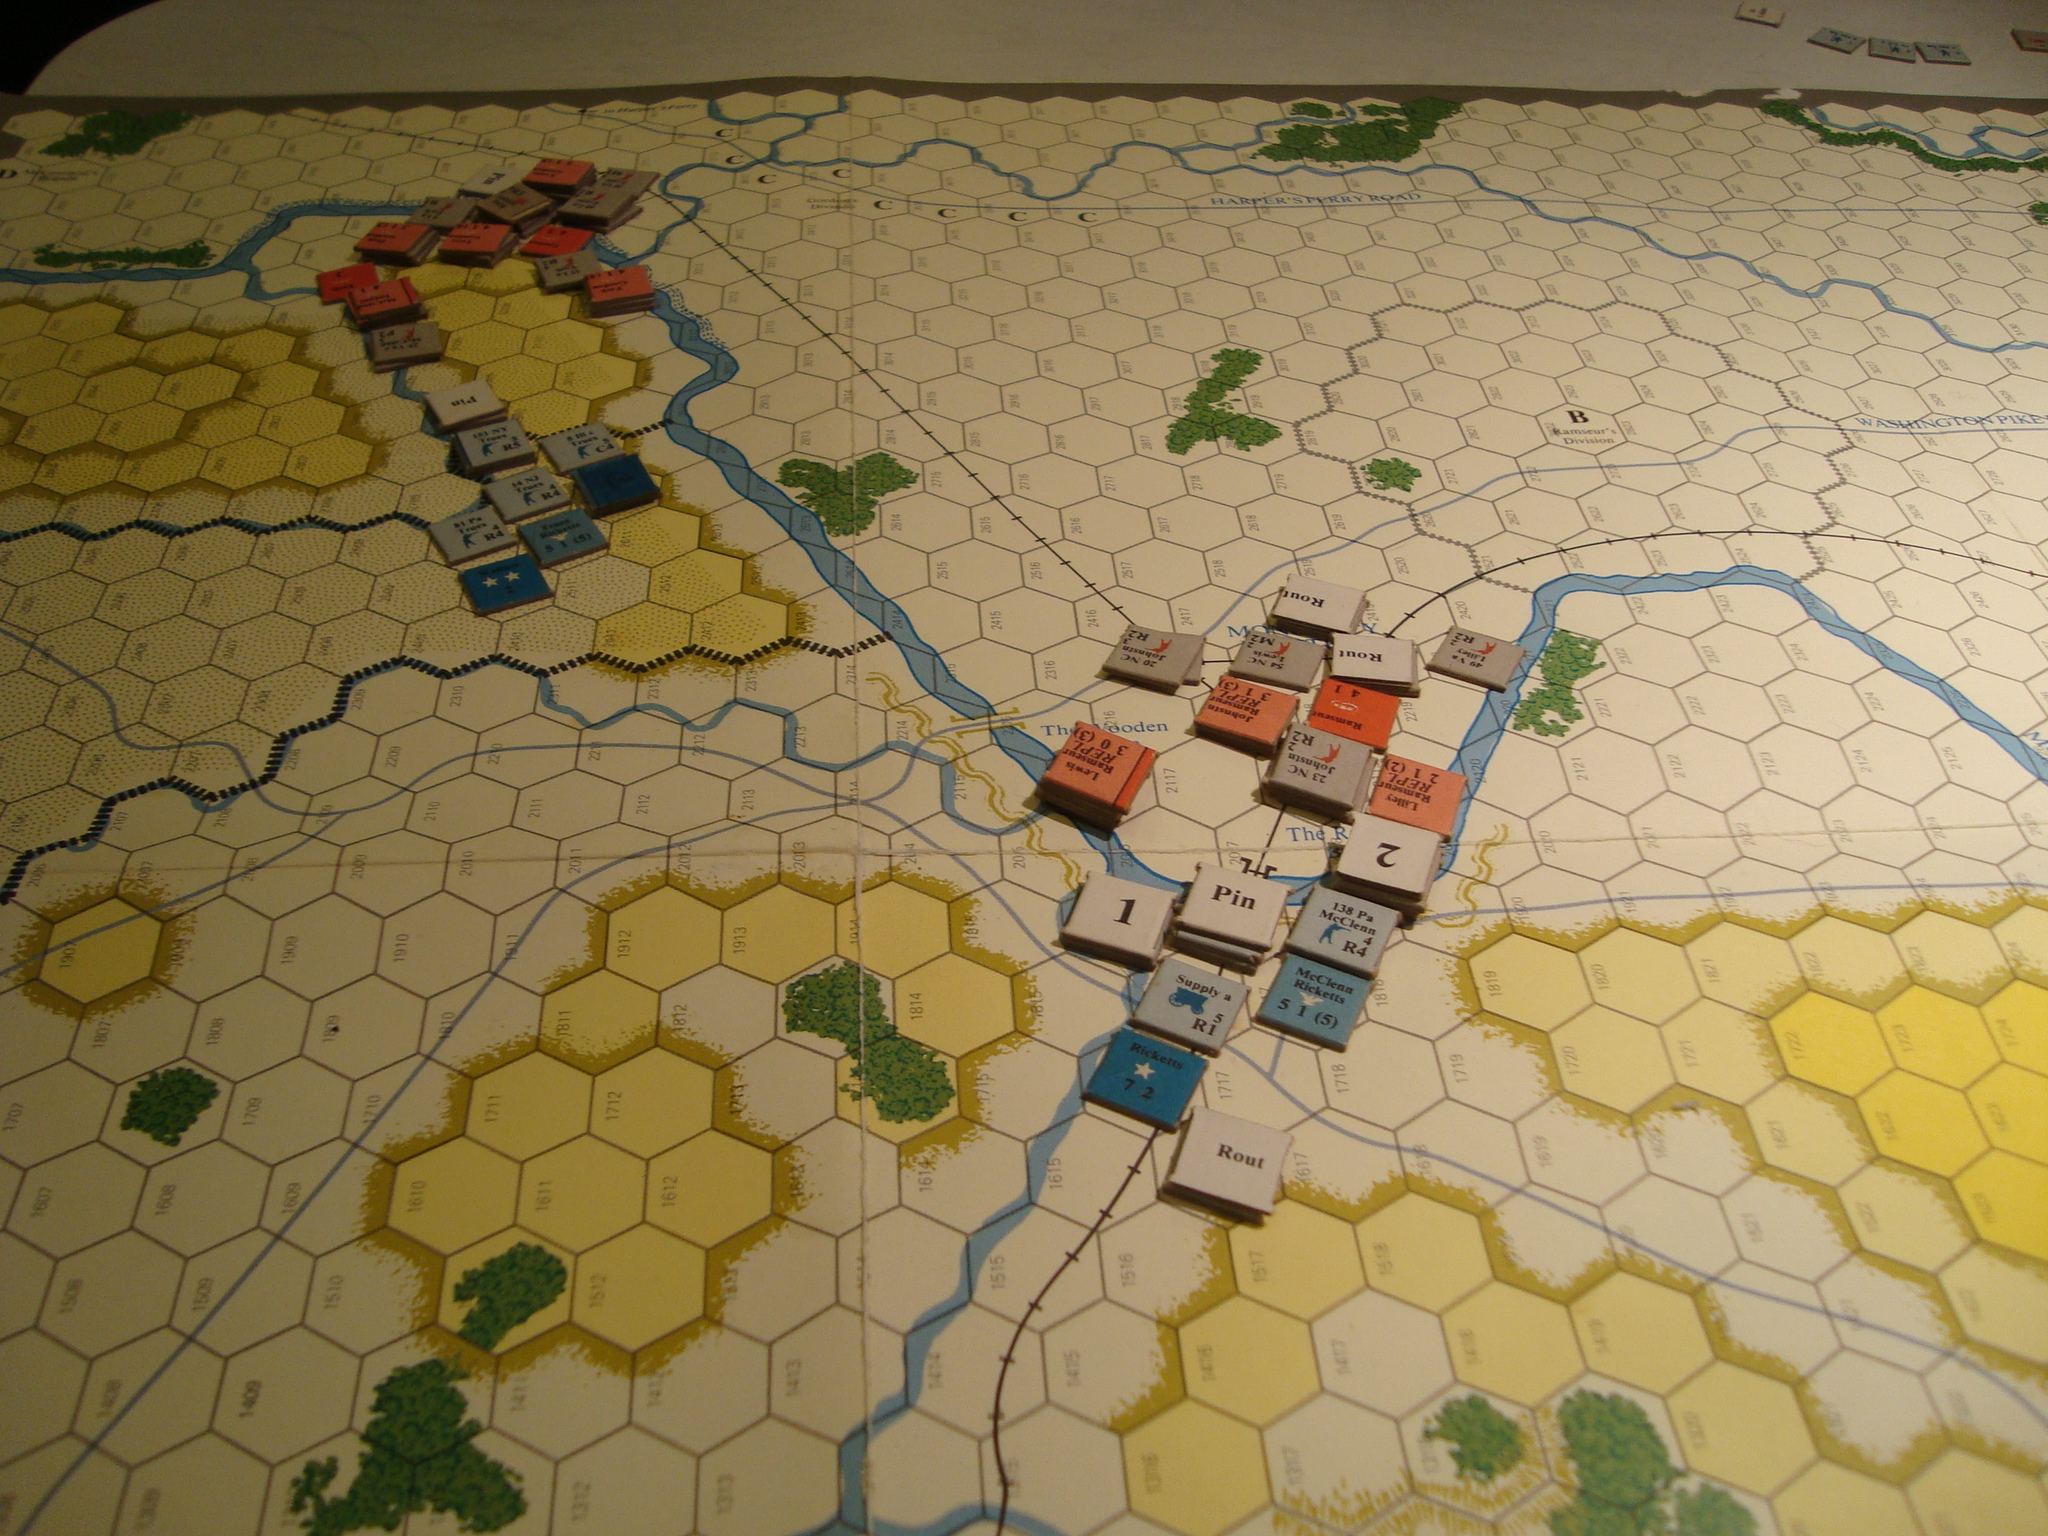
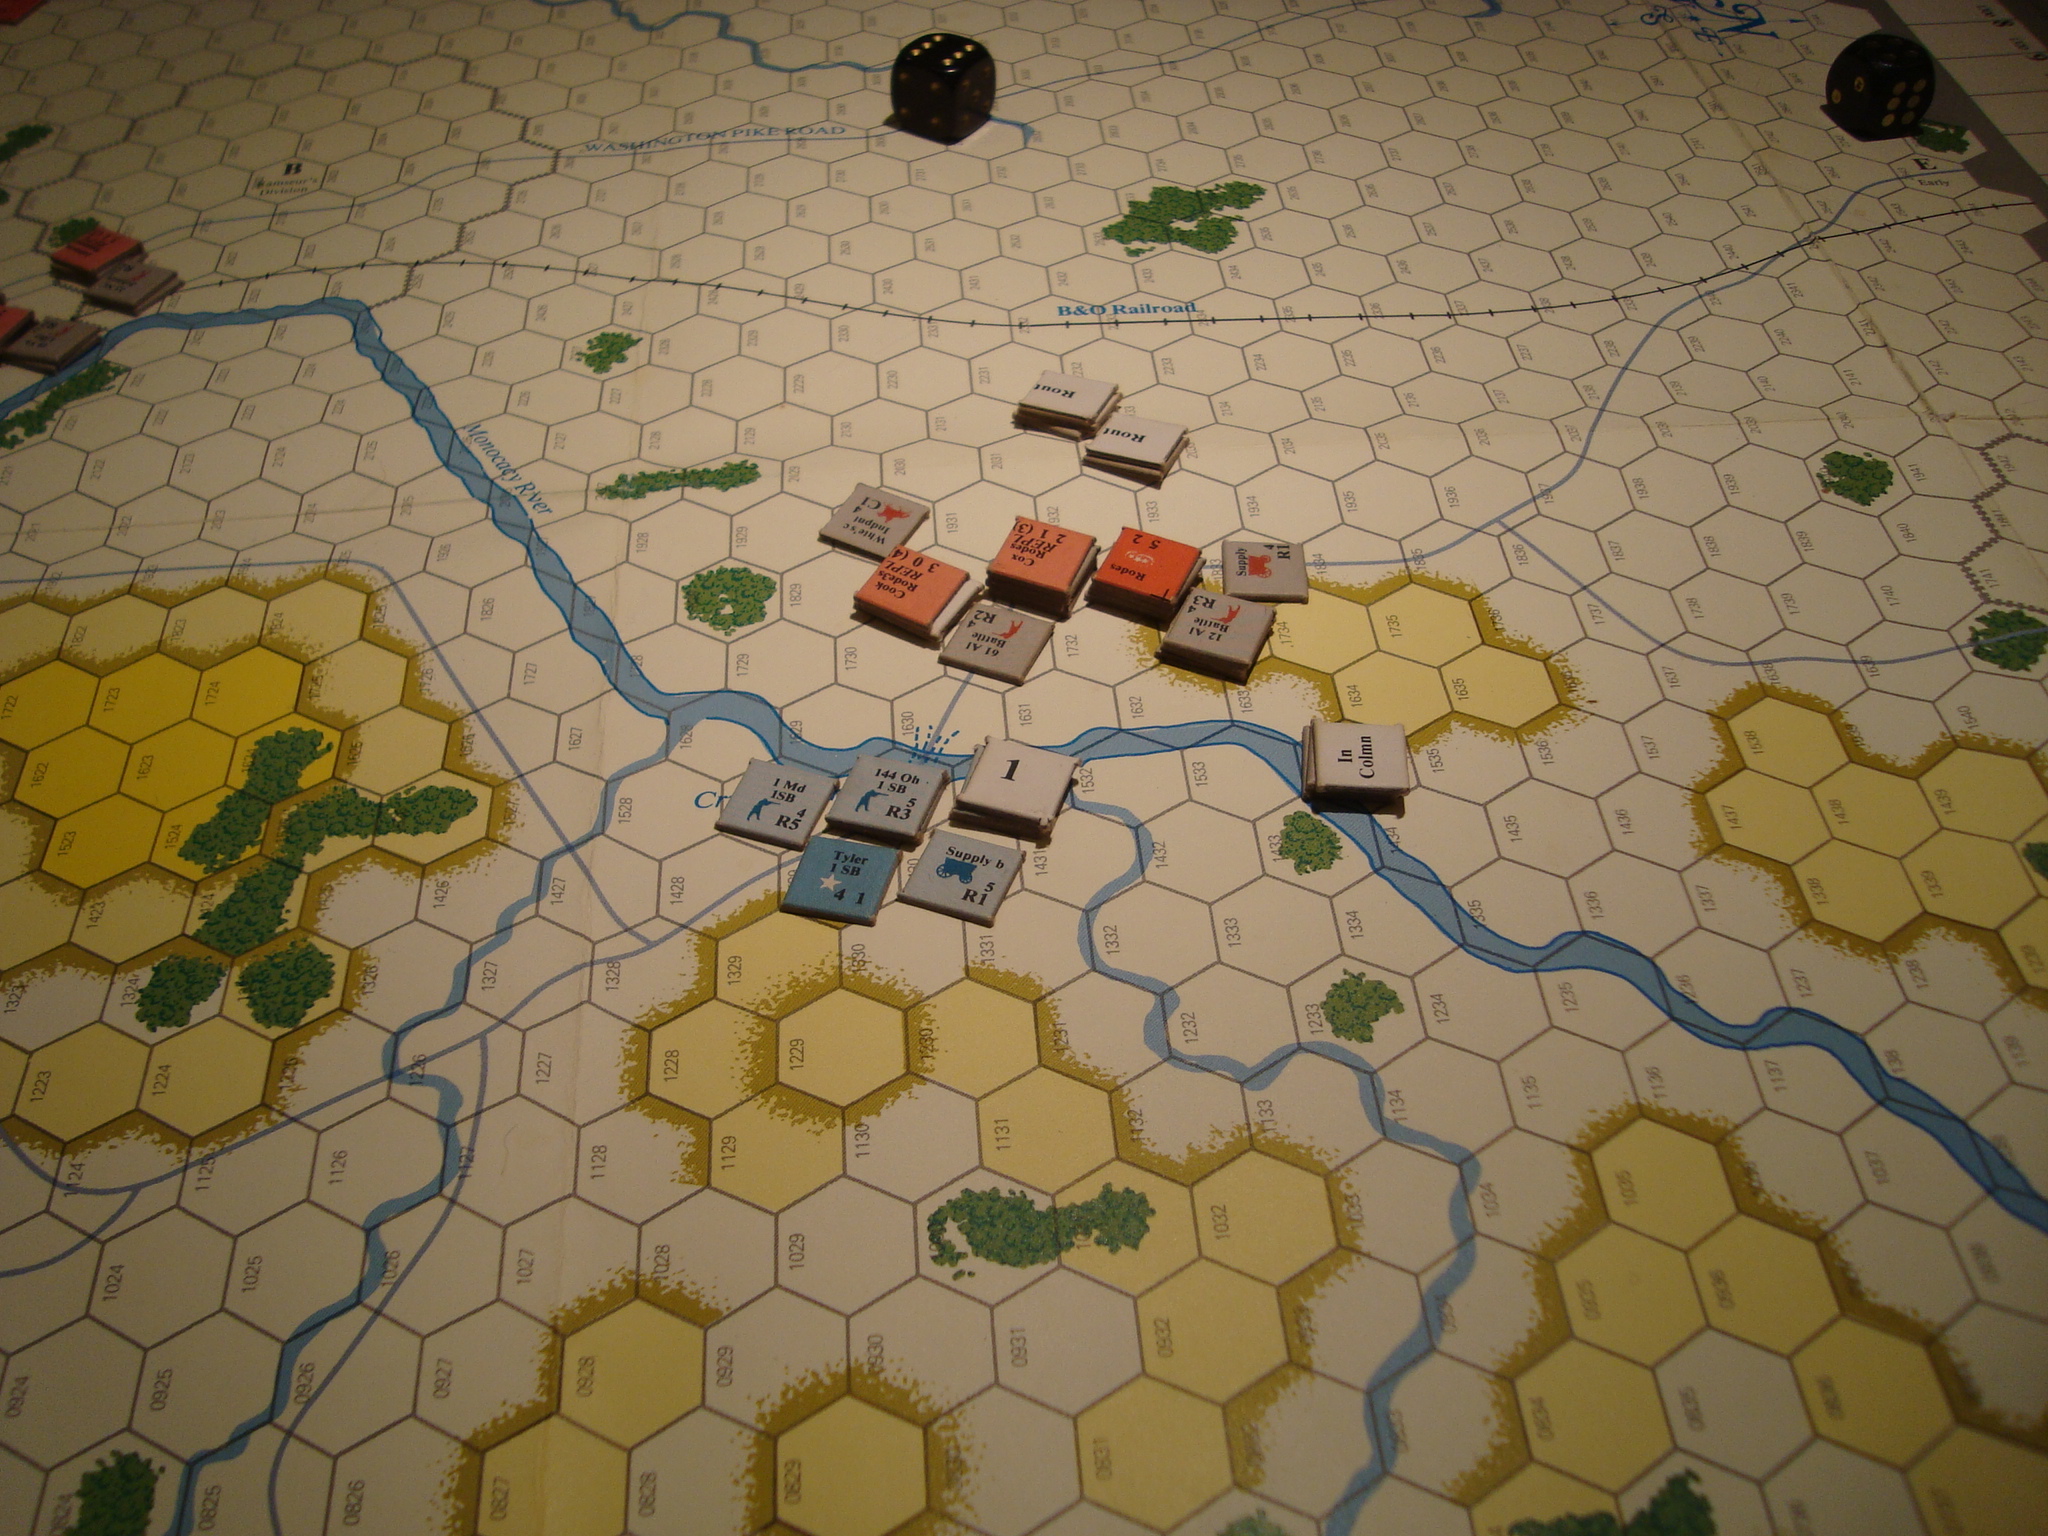
Jackson’s two brigade flanking force engaged elements of the Union’s reserve brigade which had moved south to prevent a flanking attack on Pritchard’s Hill. As this fight developed, the advancing Confederate forces were attacked in the flank by units from Pritchard’s Hill, barely beating off these attackers during the melee phase.

After these attacks, which disordered but failed to stop Jackson, the Union forces continued to hold Pritchard’s Hill, with the now depleted Union reserve units beginning a slow withdrawl to their original position, under some pressure from a beat-up Confederate force.

I didn’t go to the effort of counting up victory points, but I’m pretty sure this was, at least, a Union tactical victory.

More thoughts on the game and system in my next post. Have to set up Wilson’s Creek!

Stonewall: Great Battles of the American Civil War (GBACW)

Set up Stonewall: The Battle of Kernstown. This is a single map, lower counter density game in the Great Battles of The American Civil War Series (GBACW). The game was first published in S&T in 1978, with a boxed version released later.

I’ve been messing around with this system off-and-on (mostly off) for some time, even playing Wilson’s Creek when it came out about 3million years ago, but now want to spend some time with the system. Maybe not all the way to the monster Terrible Swift Sword (Gettysburg) game, but certainly a number of the smaller games, which have been accumulated over the years.

Richard Berg’s original design has evolved quite a bit since introduced in 1976. GMT now owns the franchise, and has published the larger games, many of which are now out of stock.

I’m digesting the rules, and making up a couple of cheat sheets, since the game’s tables are on the map, and not necessarily complete. This will be an incremental approach and hopefully the transition from the earlier to the later rules will be relatively painless. Play will start after I return from Portland and War of Resistance.