Here are Tim’s comments….We plan to play this scenario one more time, hopefully between Xmas and New Year.
Weather was an issue. The rain, with the accompanying -1 die roll modifier and increased movement costs was a real problem for me. I was having to use units to cart supply to the front when I needed every body at the front.
I should have attacked your river transports much, much sooner. I was pleasantly surprised at how effective the one raid was.
I understand better why it is hard to use the factional units as cannon fodder. Even with their stacking limits, I still wonder if it would be possible to use them in good defensive terrain (rice paddies, or behind a river) hoping for an exchange or to buy time. I know its not really an issue in the context of the scenario but the Central Army 4-6 divisions can’t be replaced and the 3-5 divisions can be only replaced very slowly.
I hope you handed out lots of medals to your aviators. They gave their all and suffered accordingly! I wonder if the Chinese would be well advised to adopt a ‘fleet in being’ strategy for their air force. Having said that, I was sweating when your one naval patrol attack got through…
NGS is really important to the Japanese. I actually could have used it more than I did– I forgot that TFs can sail up the Yangtse as far as Nanjing.
Infantry having an exploit phase is nice. I often would launch an attack and then use the exploit phase to regroup my troops for your turn. I would create a big stack and then split them back up during the exploit phase.
Had another War of Resistance (WOR) session with Tim over the weekend. Once again, it was the Fate of Nanking scenario, with Tim as the Japanese commander, and the Chinese committed to a forward defense of Shangai. This scenario starts with an abbreviated August I (1937) turn, and ends with the Jan II (1938) turn. By eschewing strong drink, and limiting our football viewing, we were able to play through the Dec II turn.
I had studied the logistics rules since our last session, and was much more comfortable allocating resource points and moving them from off map to where they could be used. Chinese engineers were kept busy building forts and repairing rail line hits. The limited rail net moved attack points to the theater headquarters, and strategic river movement was employed to augment the supply effort. As a result, I was able spend less time muddling through logistics, and more time on operational challenges.
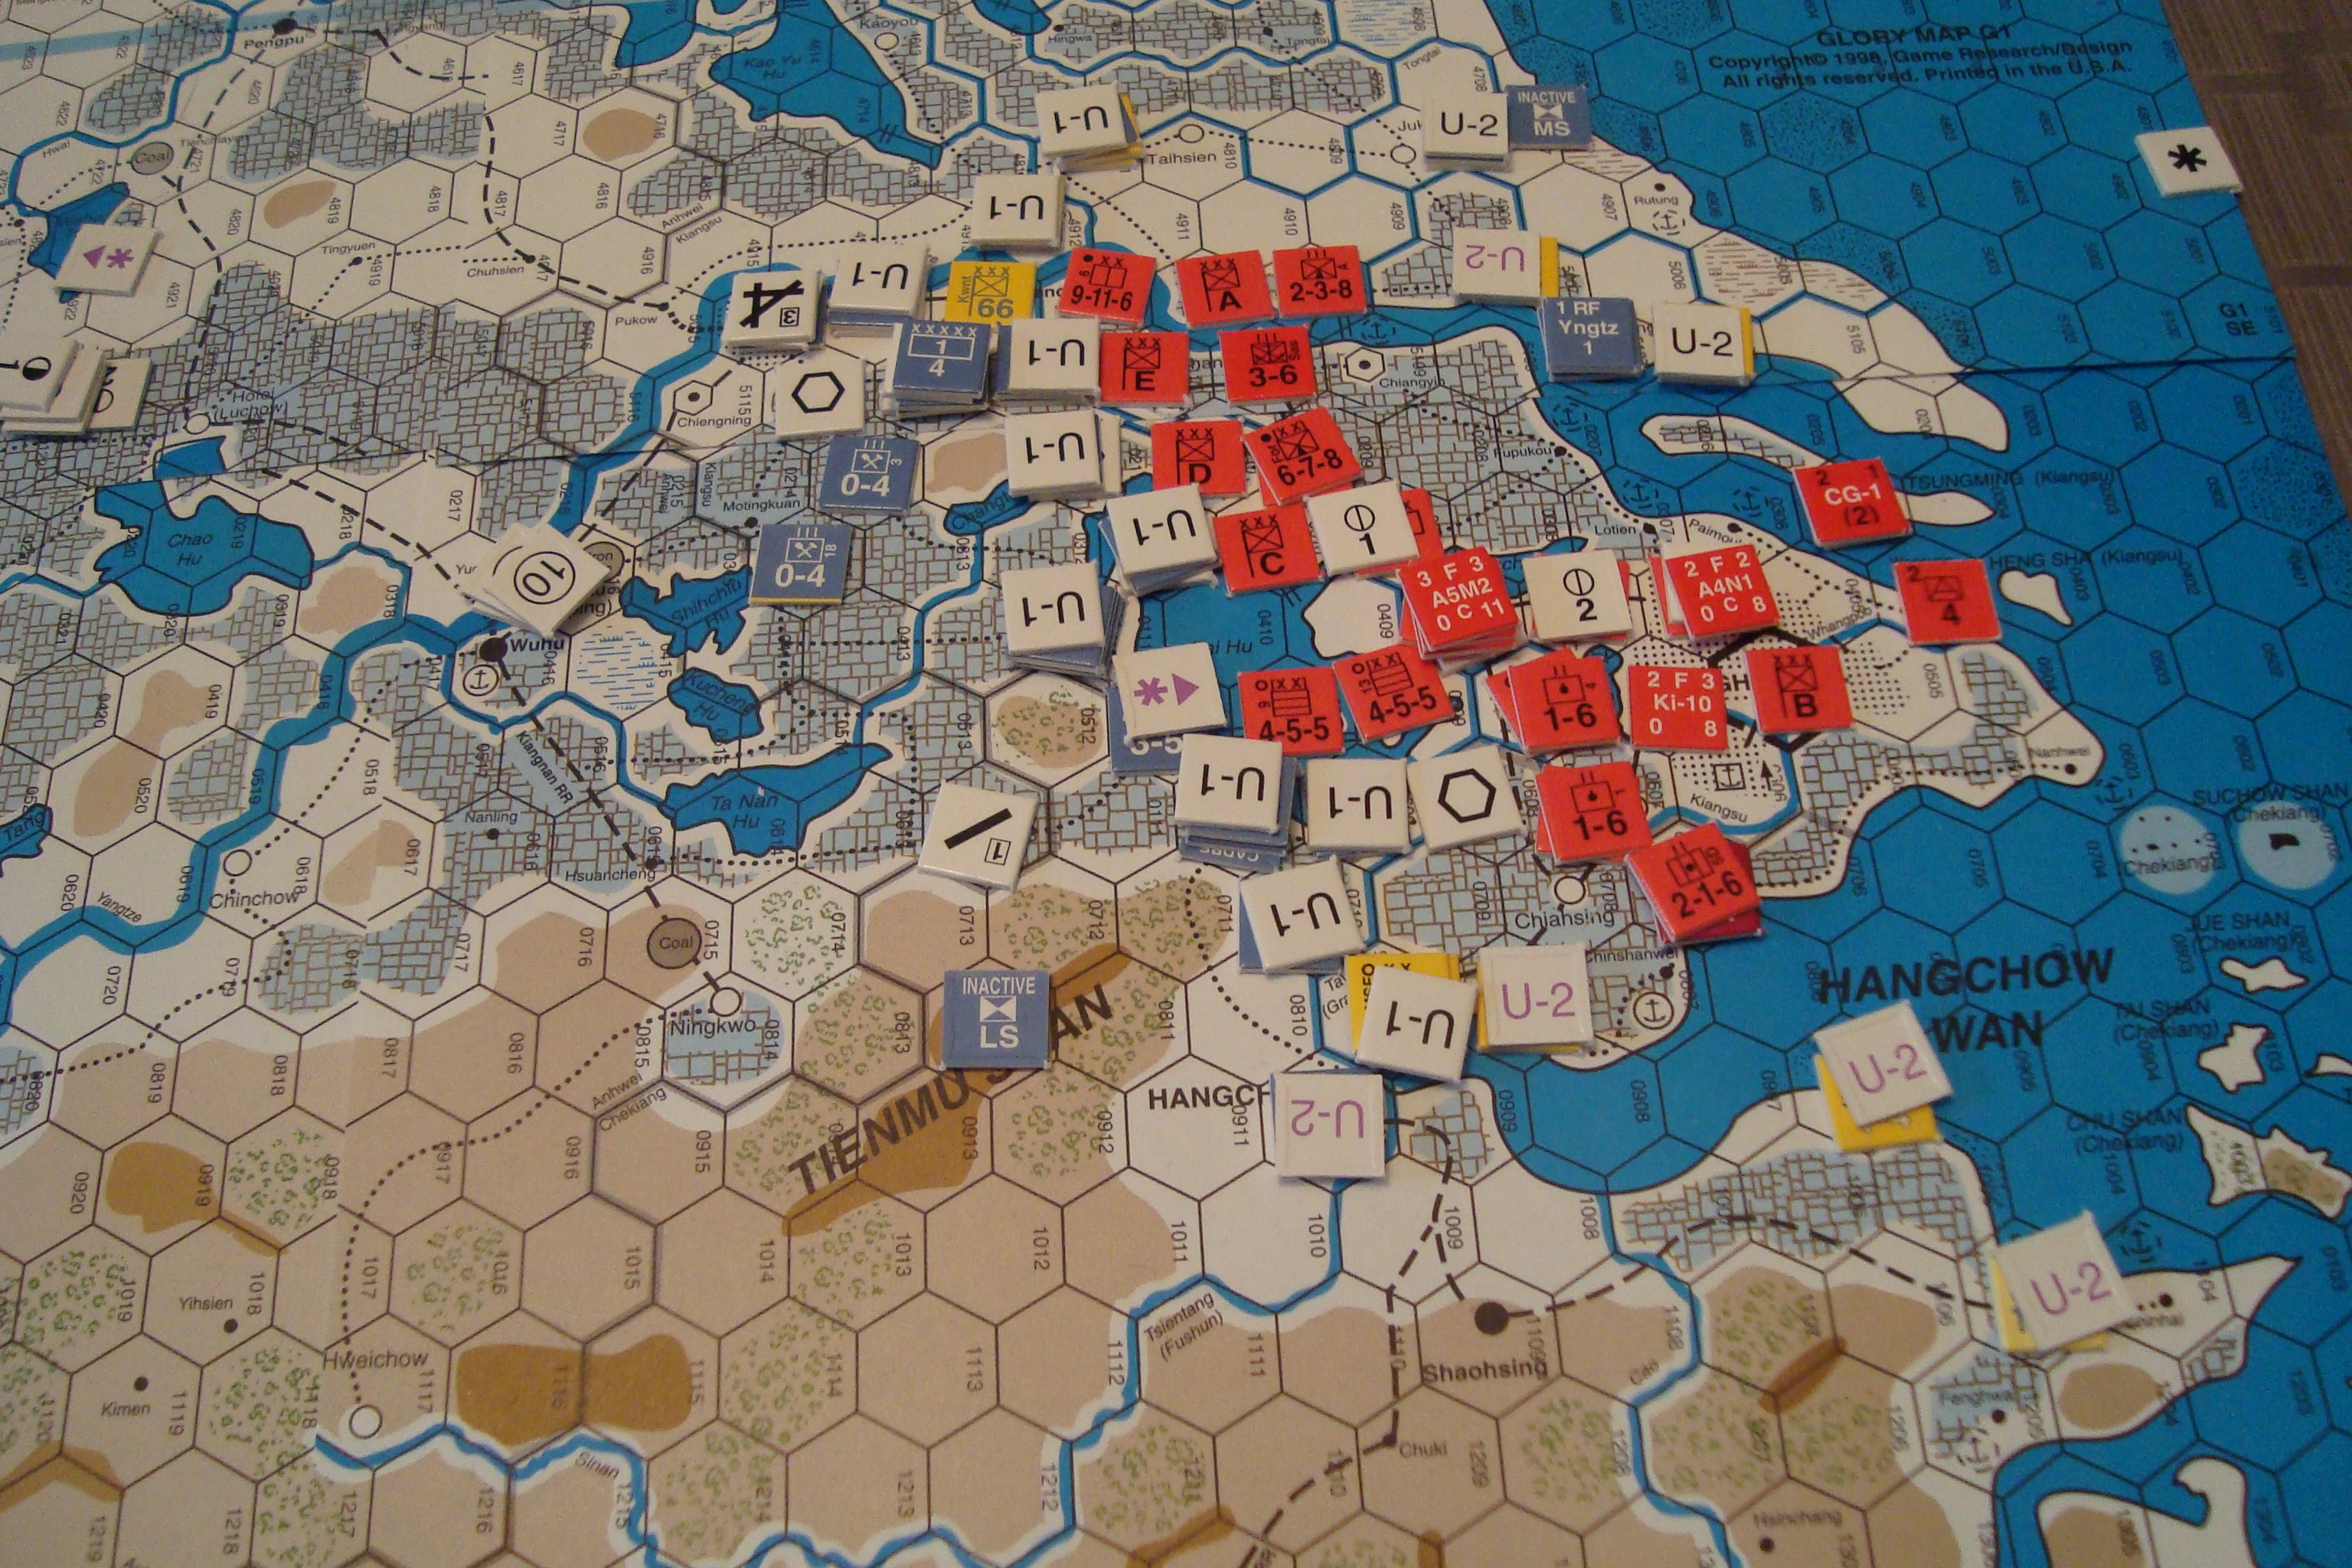
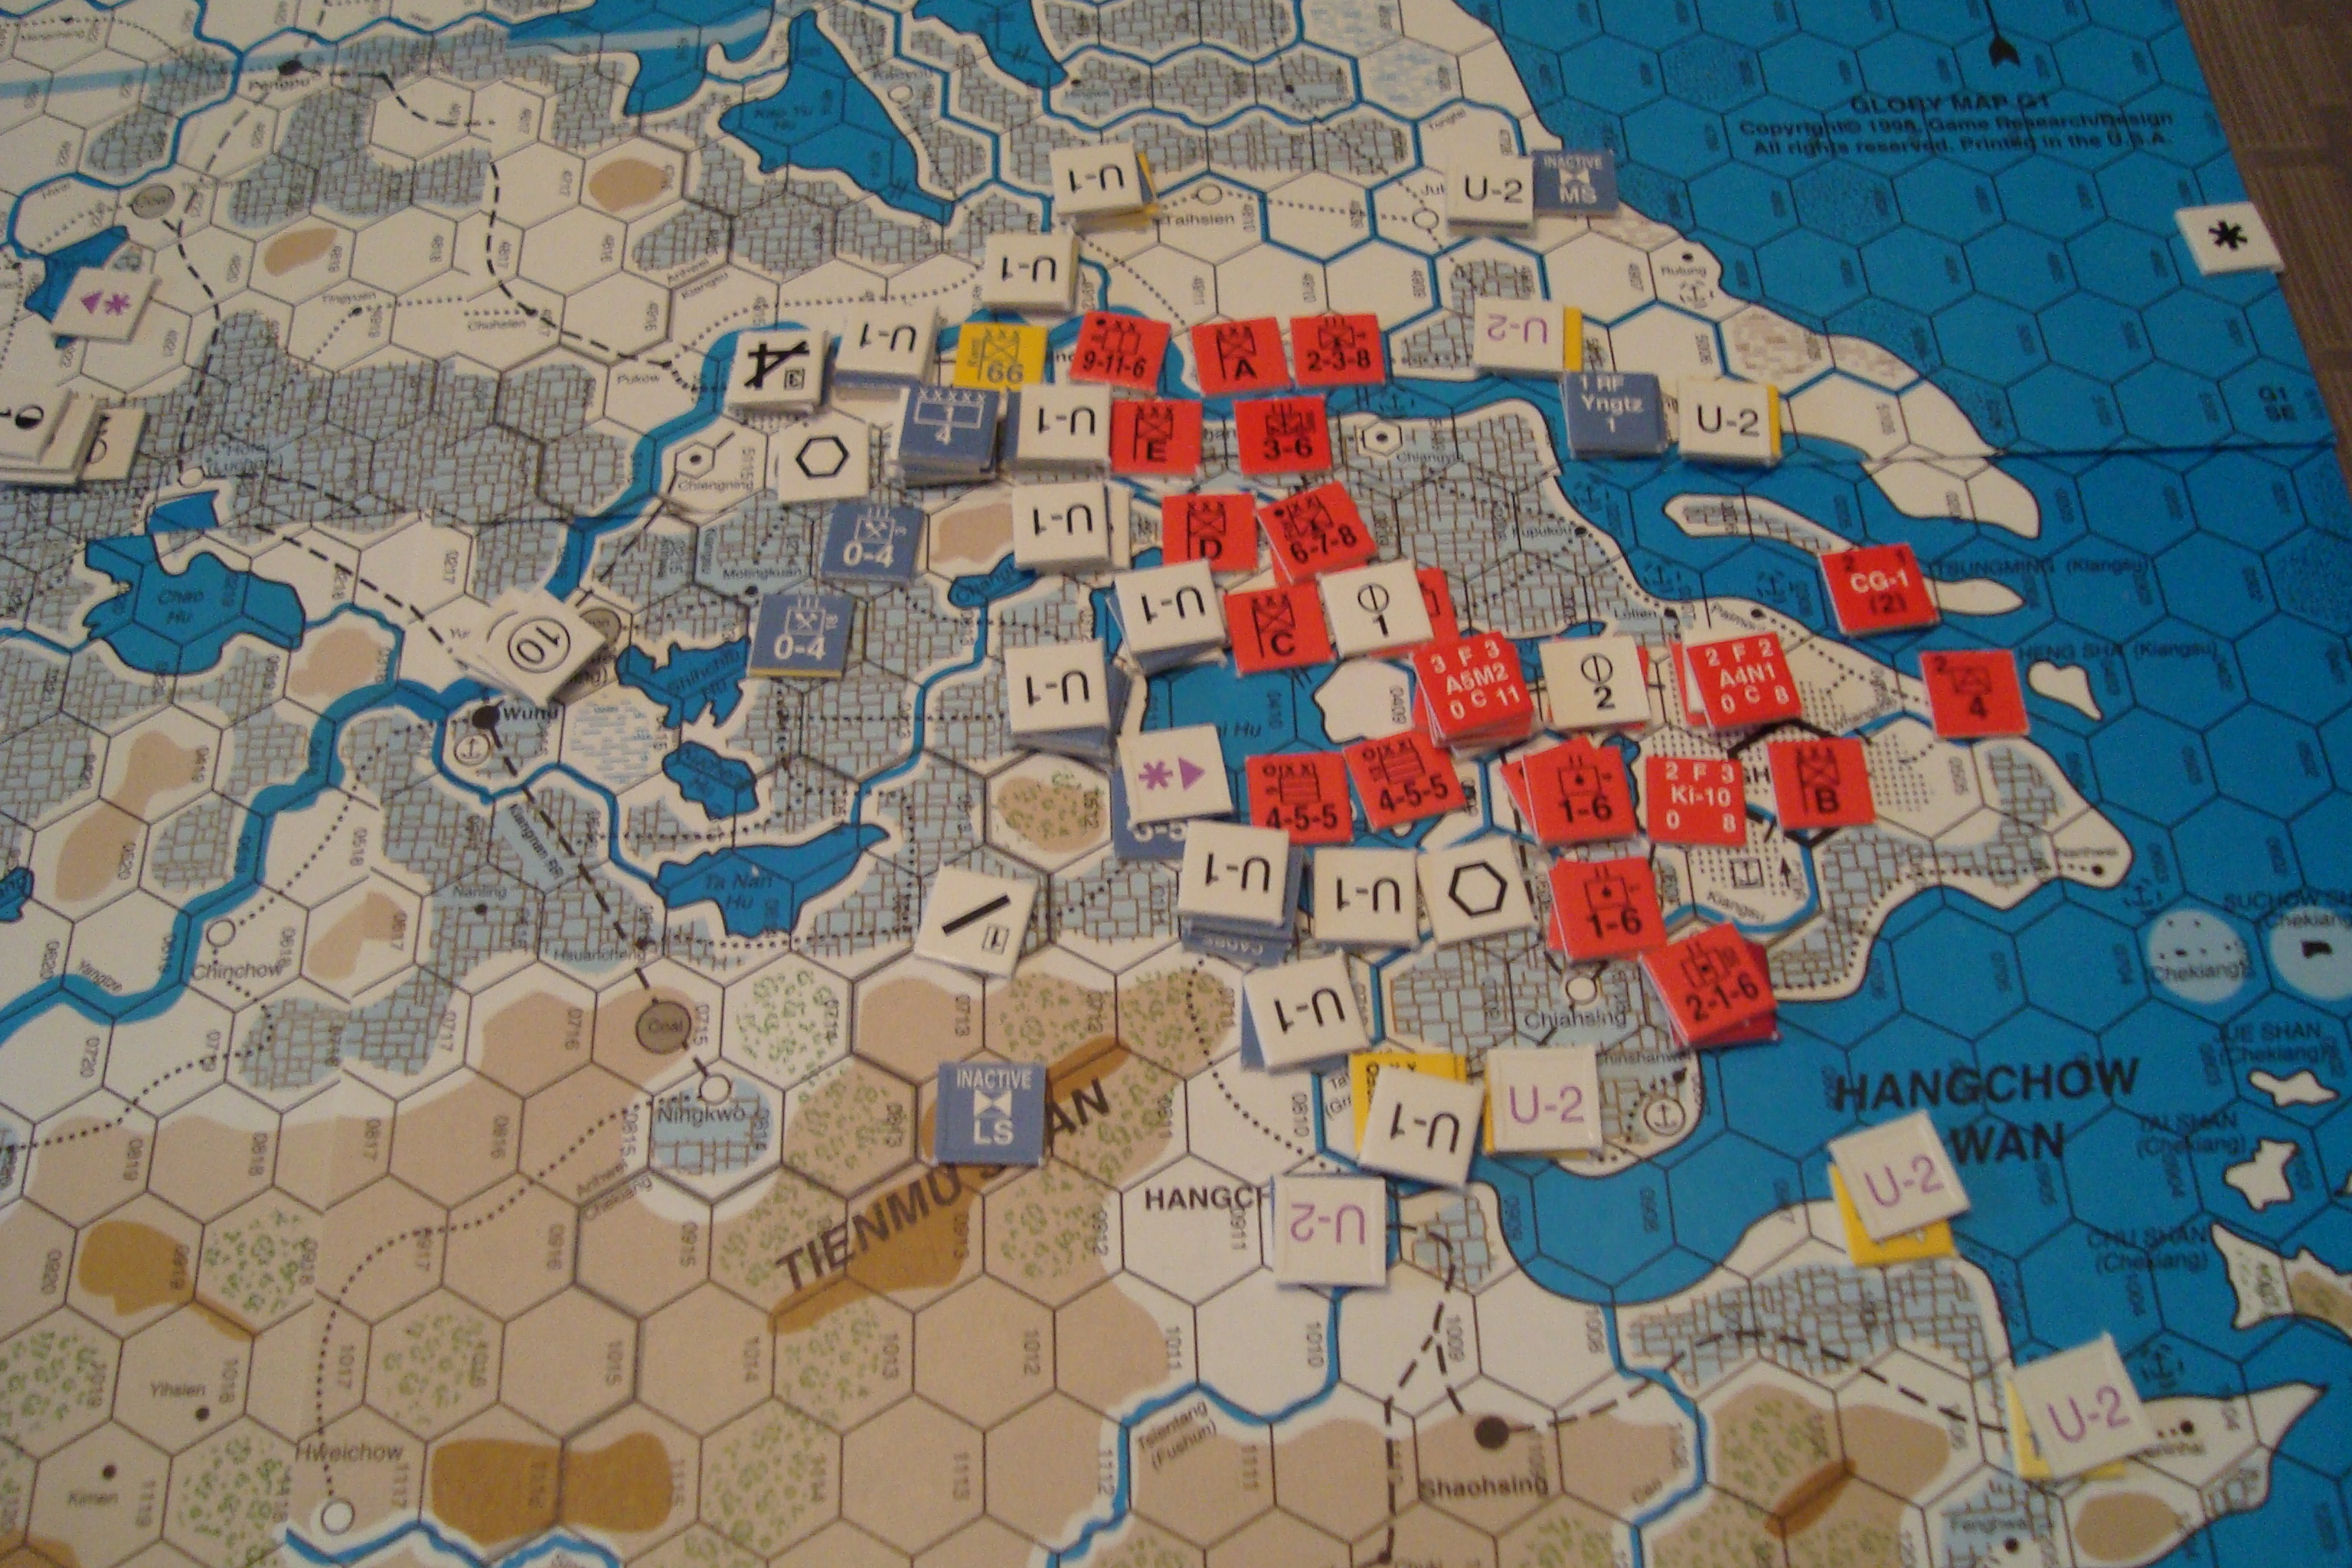
Tim provided plenty of challenges. He quickly exploited a gap in my river defenses, and established an amphibious beachhead threatening my left flank. As a result, I had to pull back forces dug-in in Shangai, abandon my factories (which can create resource points) and establish a main line of resistance (MLR) in the suburbs. This was an important early move, since the Chinese player’s mission is to delay and defend, and Tim’s landing probably cost me at least one turn.
Tim’s operational problems are to utilize naval transport to move troops from Japan to China, while juggling the problems of limited port capacity and possible damage to his landing craft used for ship to shore movement. Taking advantage of the clear weather, smooth seas, and experience gained in our last session, he rapidly built up his combat power and began a series of attacks supported by strong naval gunfire and aviation assets.
The Chinese Airforce attempted to thwart this naval movement and also shoot down Japanese ground support aircraft. Their efforts were futile, and almost every Chinese air unit was eliminated or aborted.
As the methodical Japanese moved west, they encountered successive defensive lines built by engineers augmented with civillian labor. This increased manpower allows the construction of a fort in one turn. With narrow avenues of advance, and four construction capable units, the Chinese forces enjoyed consistent -1 modifiers when attacked. The Chinese defenders were also aided by flooded rice fields, which halved Japanese attack strength. However, by October, the rice growing season had ended, and the impact of intensely cultivated terrain was much reduced.
Tim was able to consistently create high odds attacks, taking advantage of the inability of the Chinese to mass combat power in any single hex. This is a function of the low strength Chinese divisions, and lack of regimental or brigade troops to augment the combat power of the divisions within stacking rules. In addition, the Chinese player has only four (4) artillery units, which I used to support stacks of unsupported divisions, which otherwise would defend at half strength, rather than augment the stronger, supported, divisions.
This attritional combat took a heavy toll on the Chinese, who are unable to rebuild lost supported divisions during this scenario. I didn’t help matters by failing to feed the lower strength elminiated units back into the fighting.
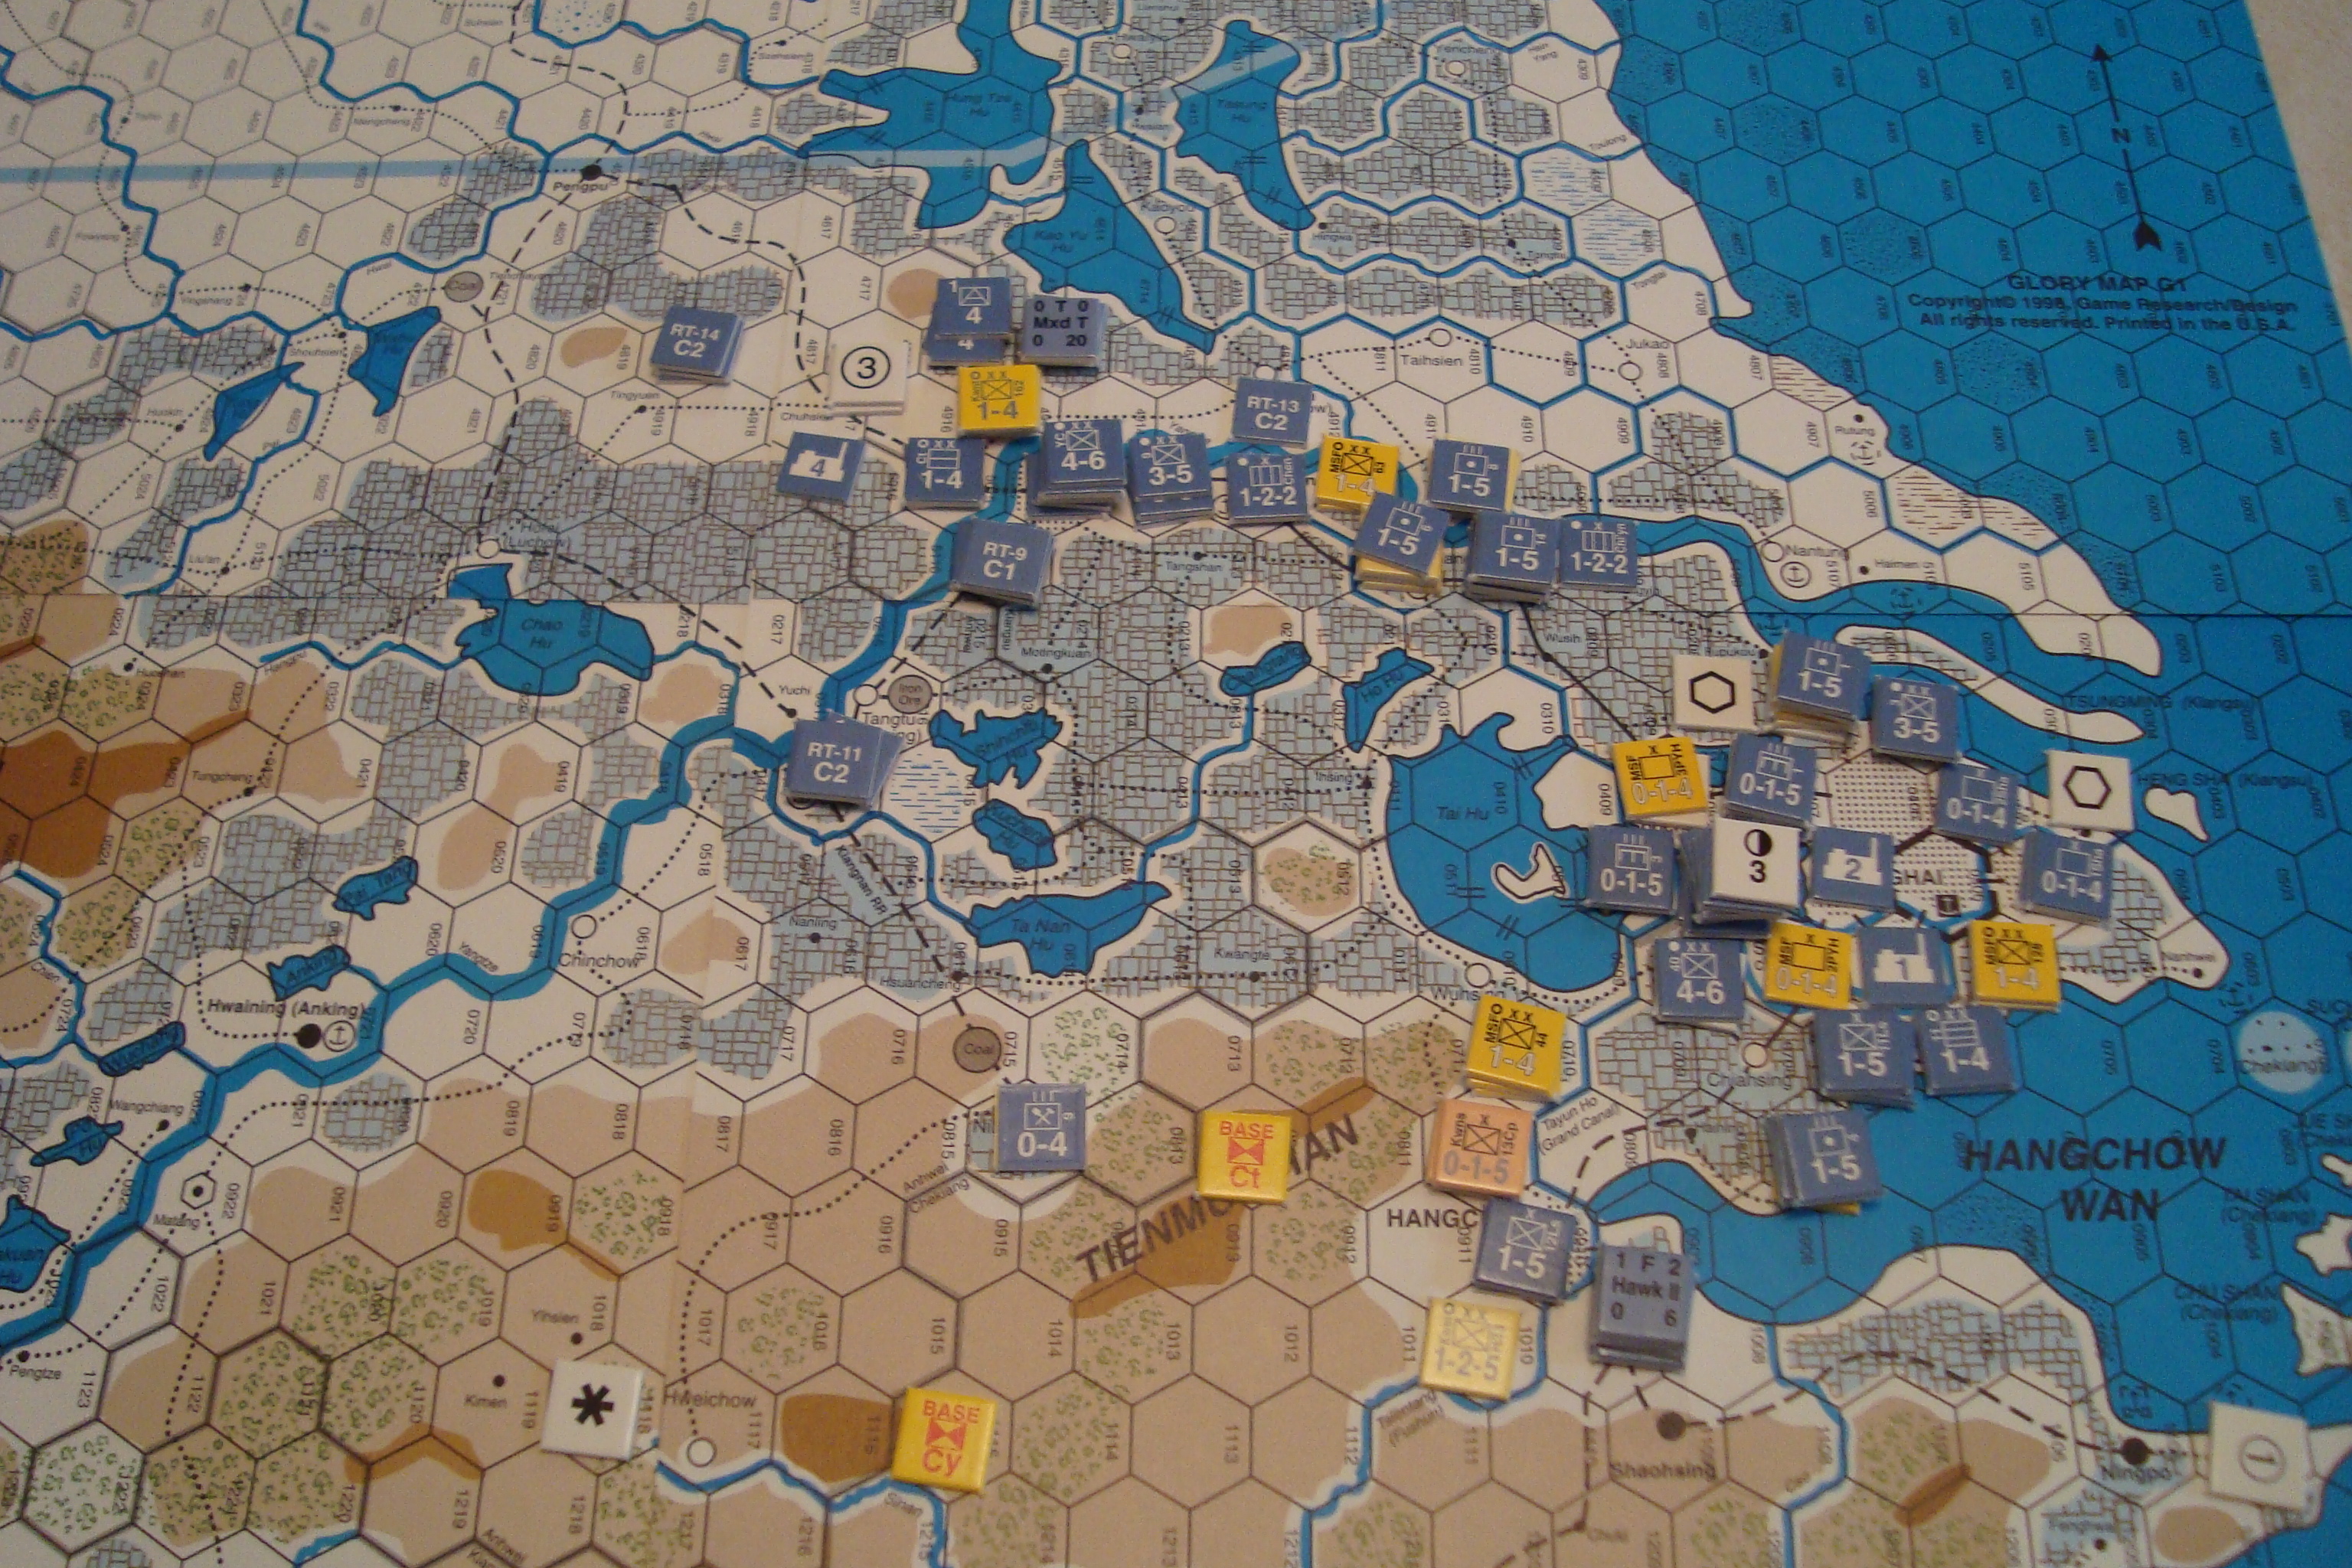
By November, Tim had split my defense, and established a beachhead on the north side of the Yangtze. He also destroyed my riverine supply capabilities along with their cargo in a devastating aerial attack. As a result, many of the Chinese units were un-supplied for a turn which, fortunately, did not effect their defensive capabilities. However, this slowed the Chinese withdrawal north of the Yangtze. At this point, China’s greatest ally was time. A patchwork defense in depth continued to slow the Japanese advance.
The game came down to a final roll of the dice by Tim to activate his two headquarters during the reaction phase of the Dec II turn. Had he made these rolls (1 or 2, d6), he would have had a chance to break through my last ditch defense of Nanking. Fortunately for the Chinese, this didn’t happen.
We’ll never know what the outcome would have been if the game had been played for one more month to the scenario’s conclusion. Our consensus is that it would have been a toss-up.
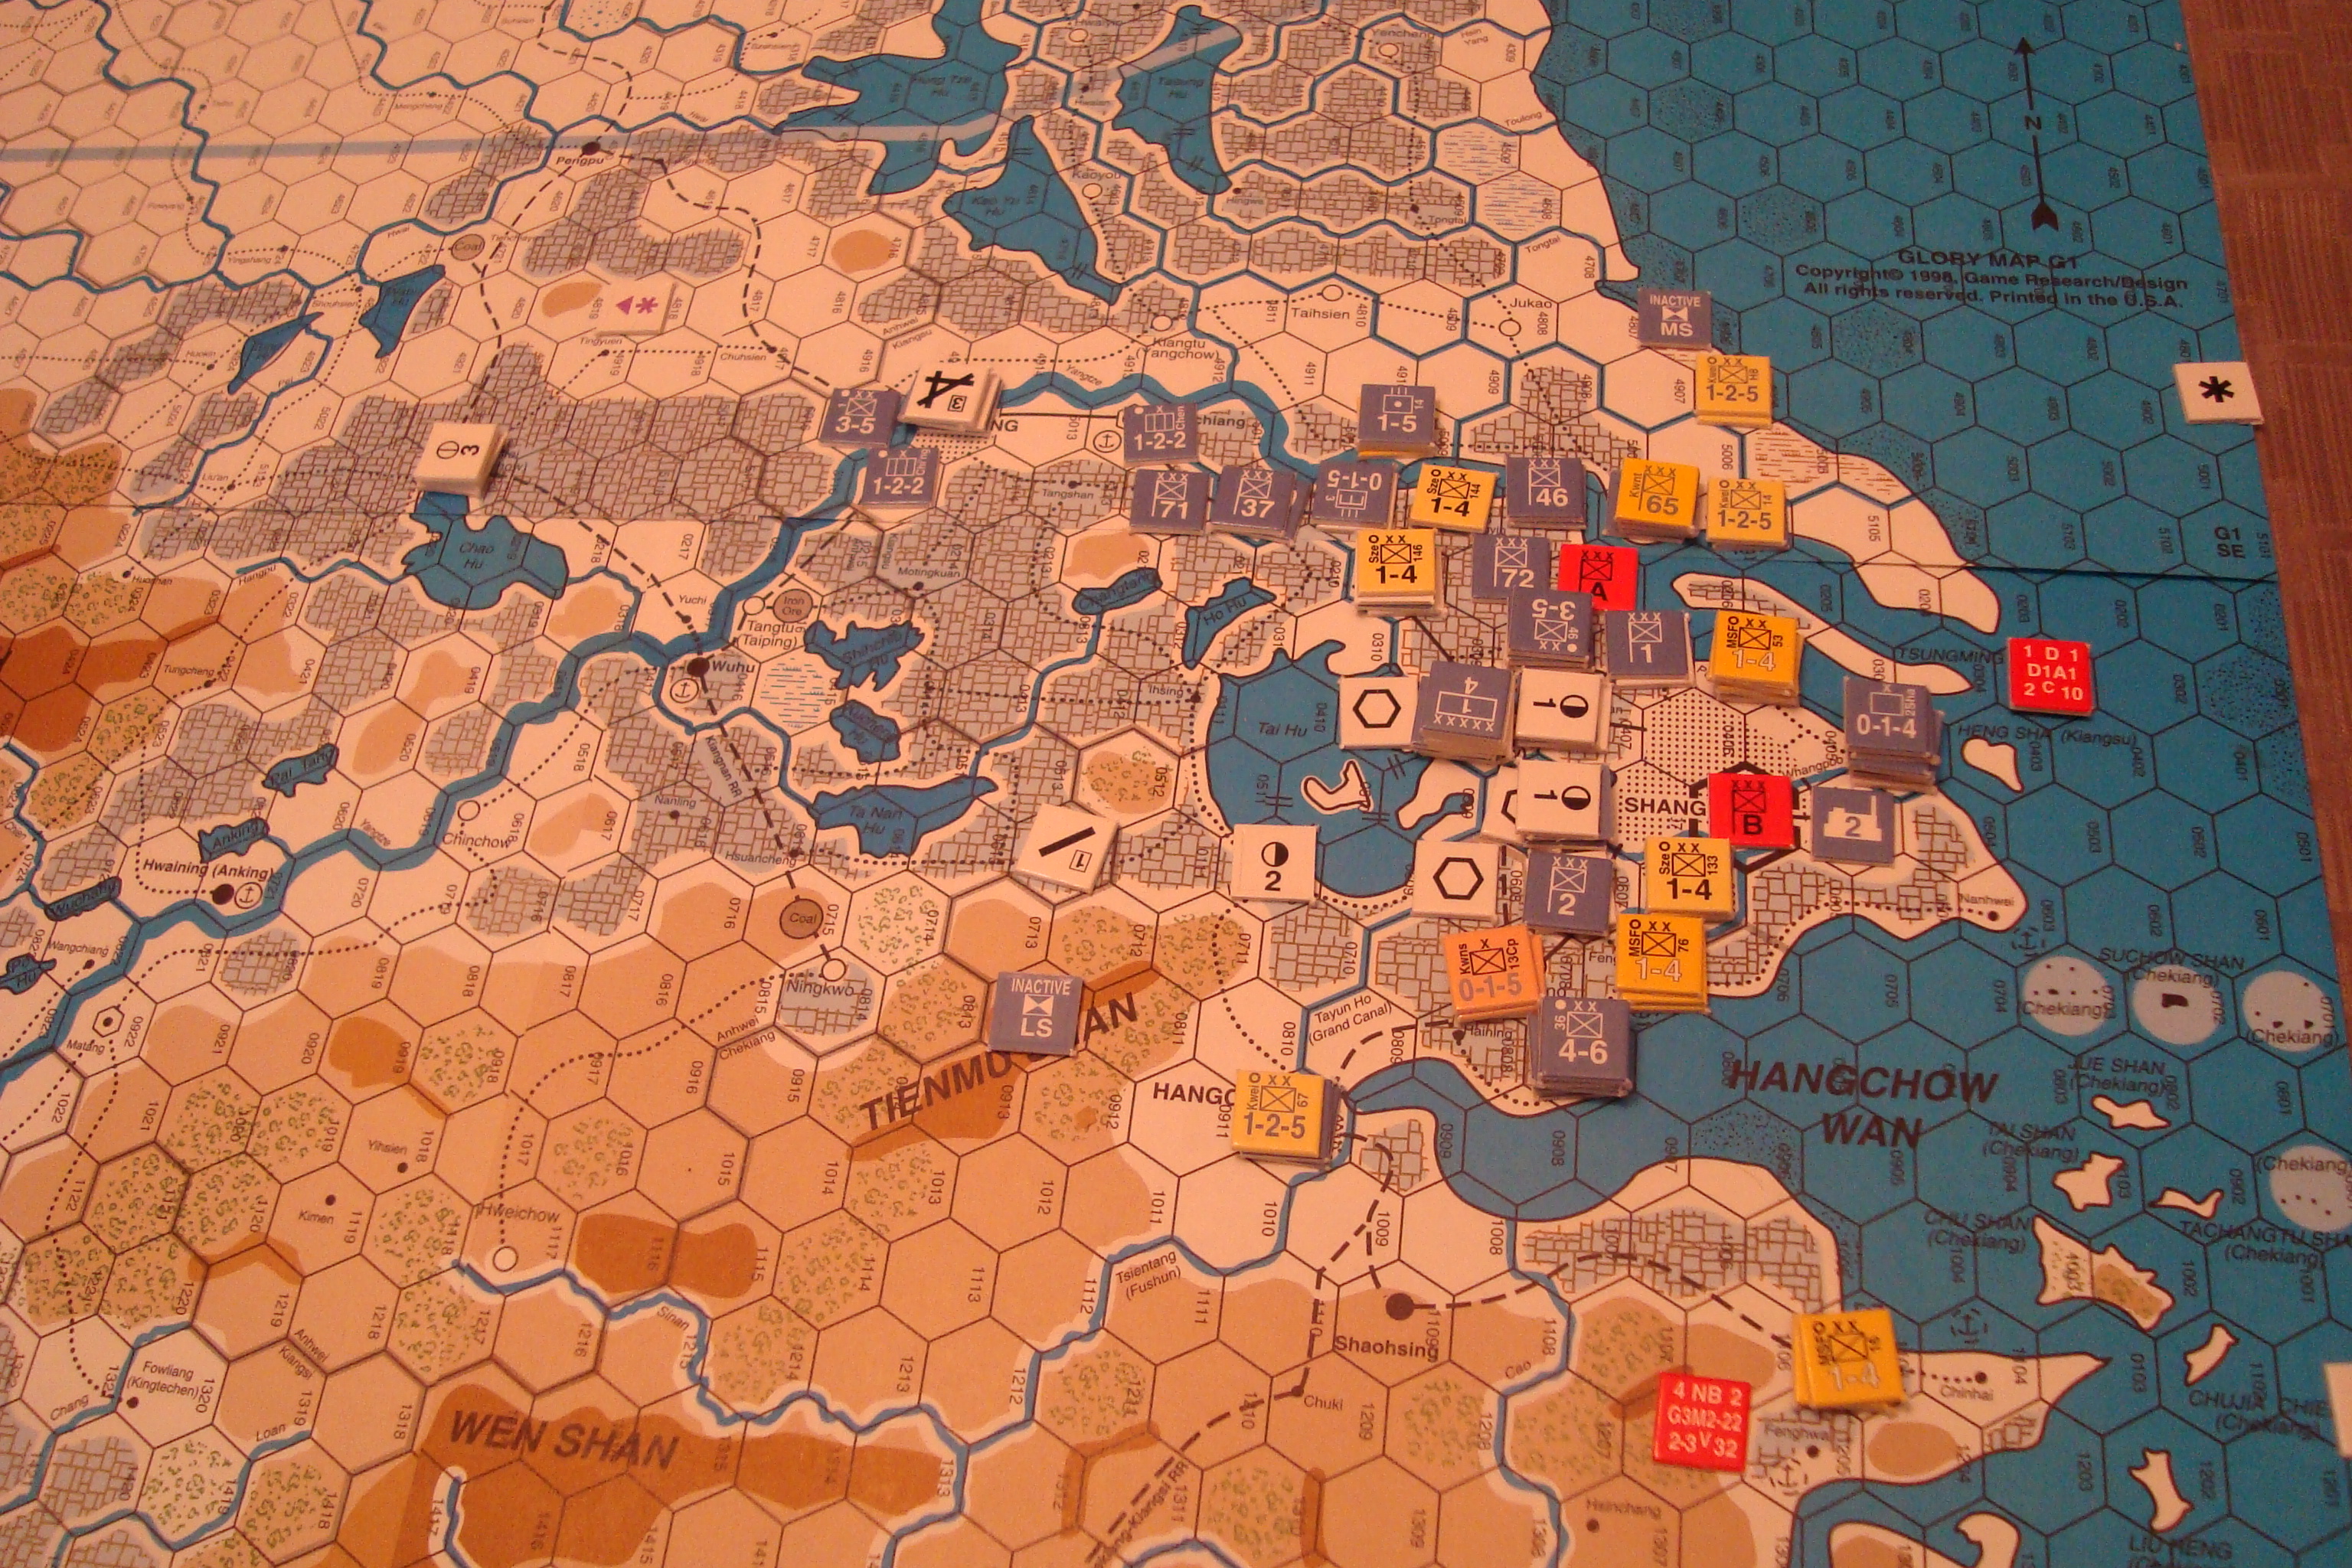
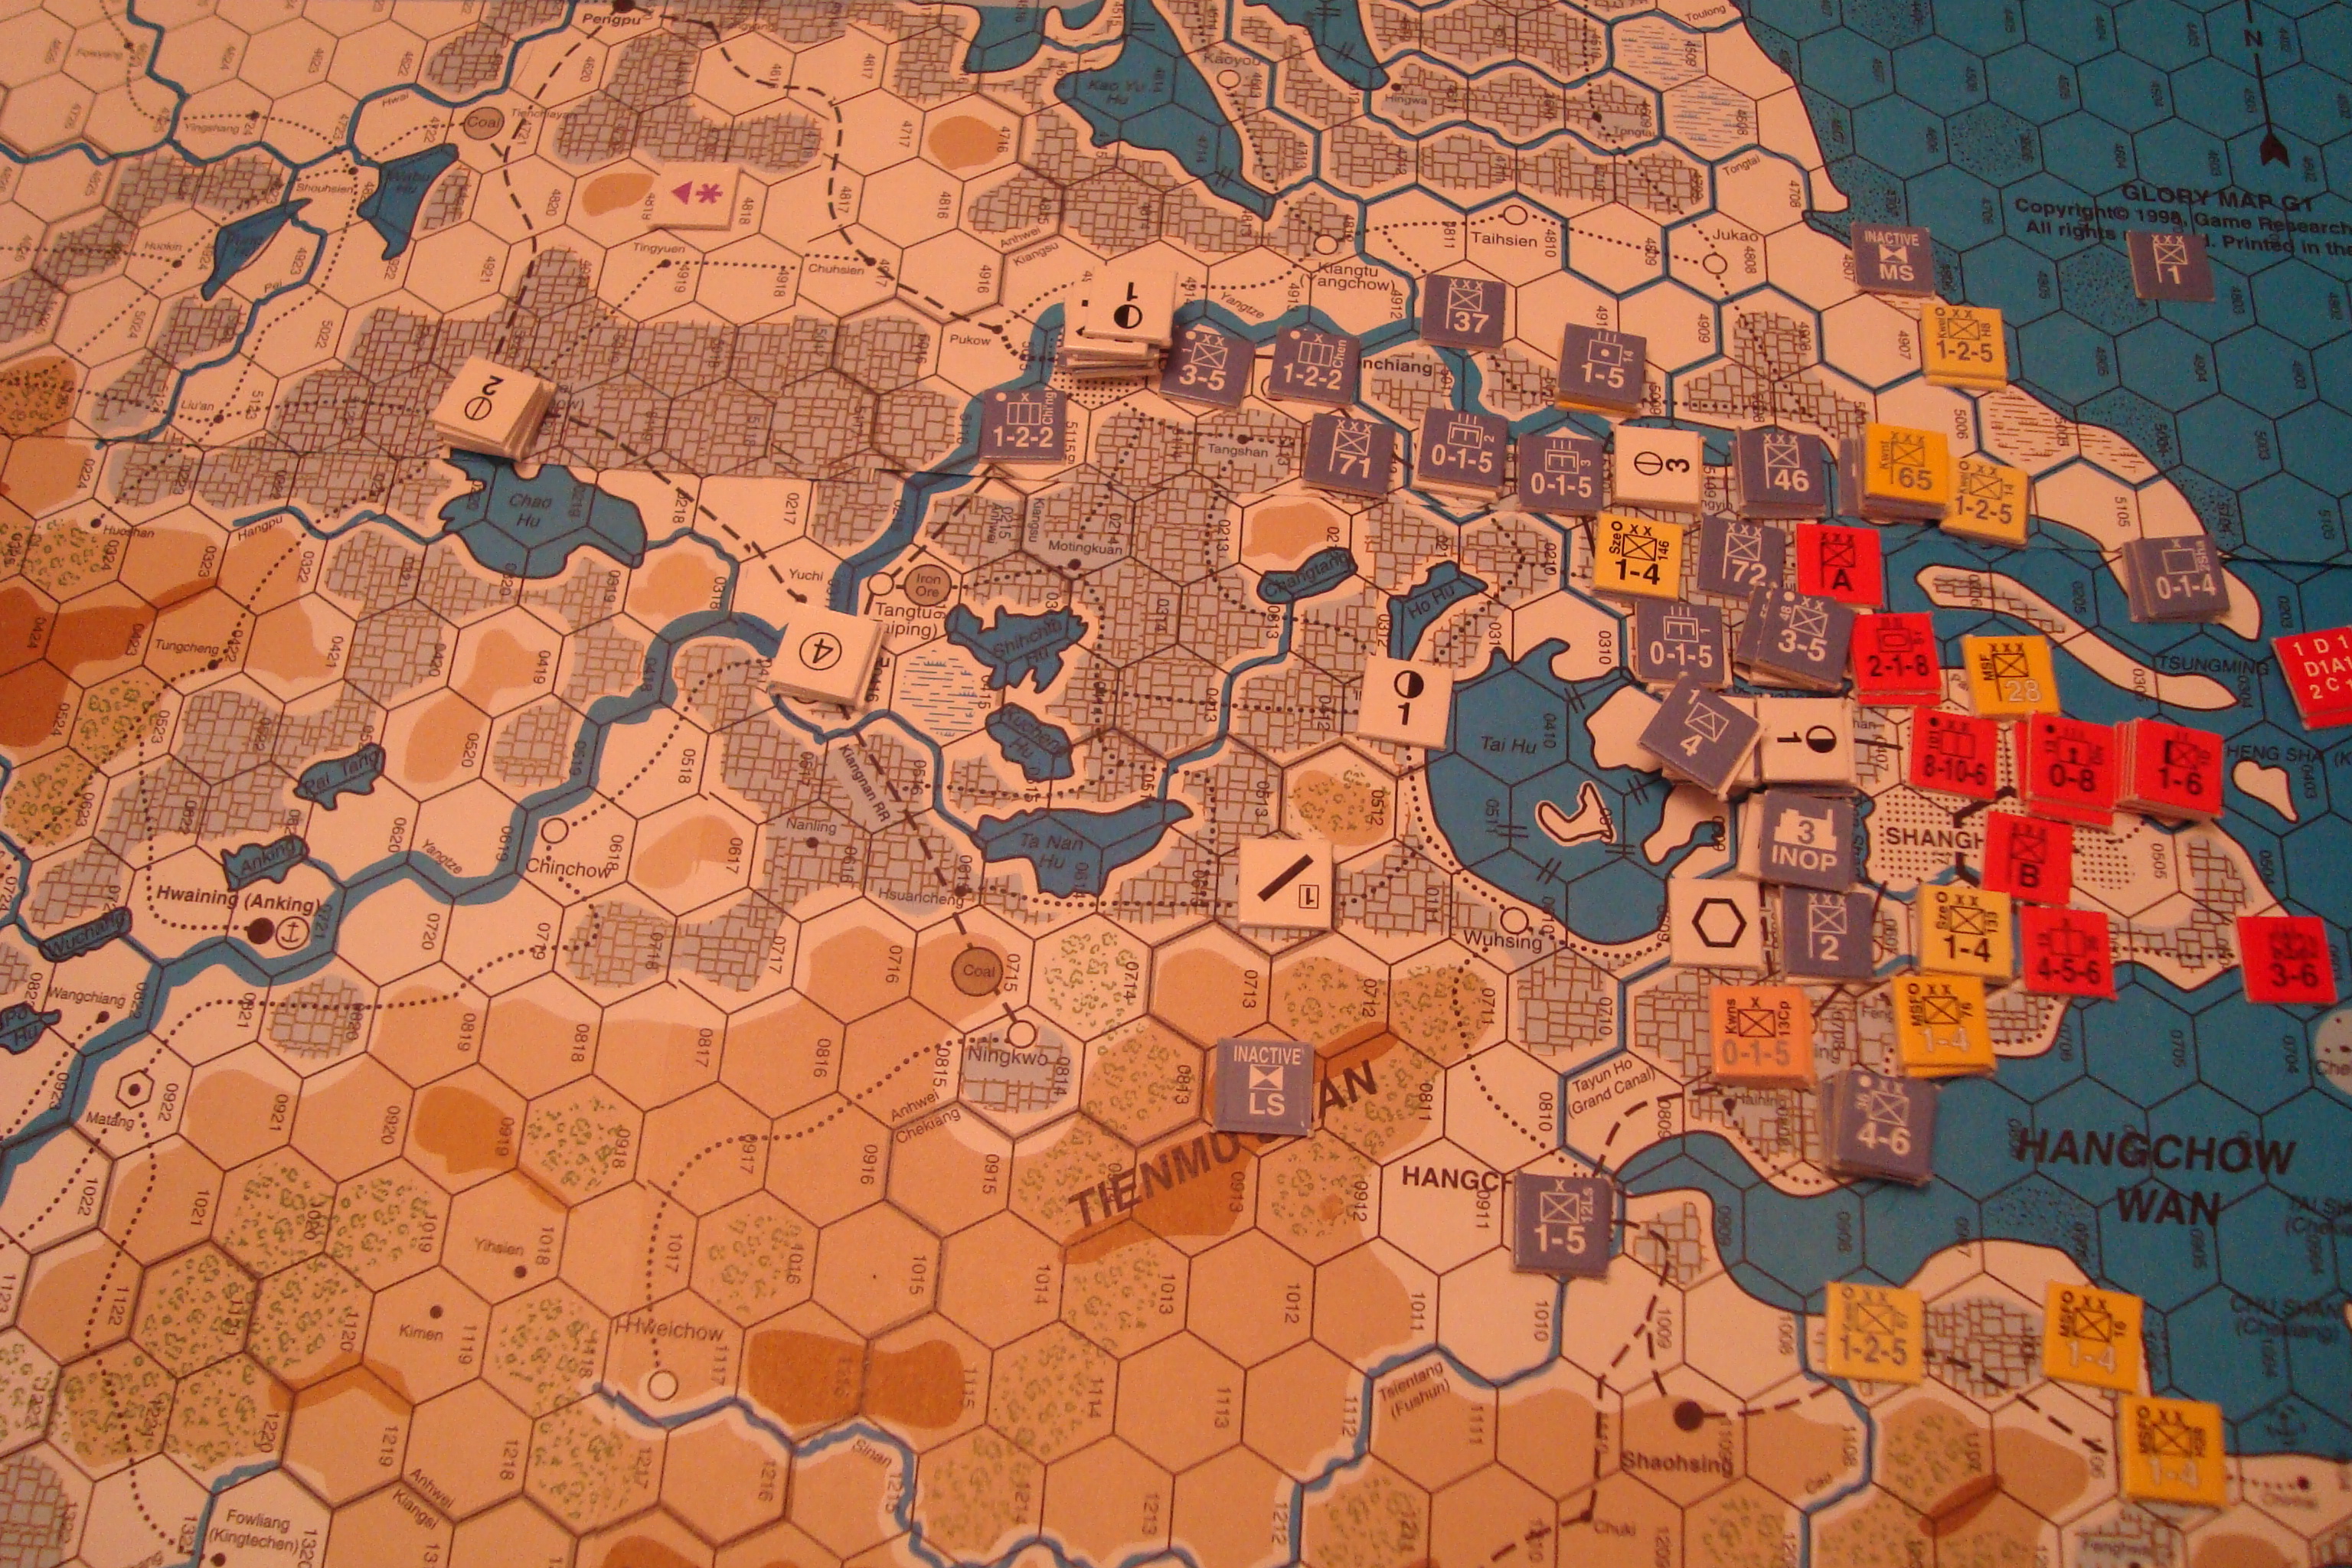
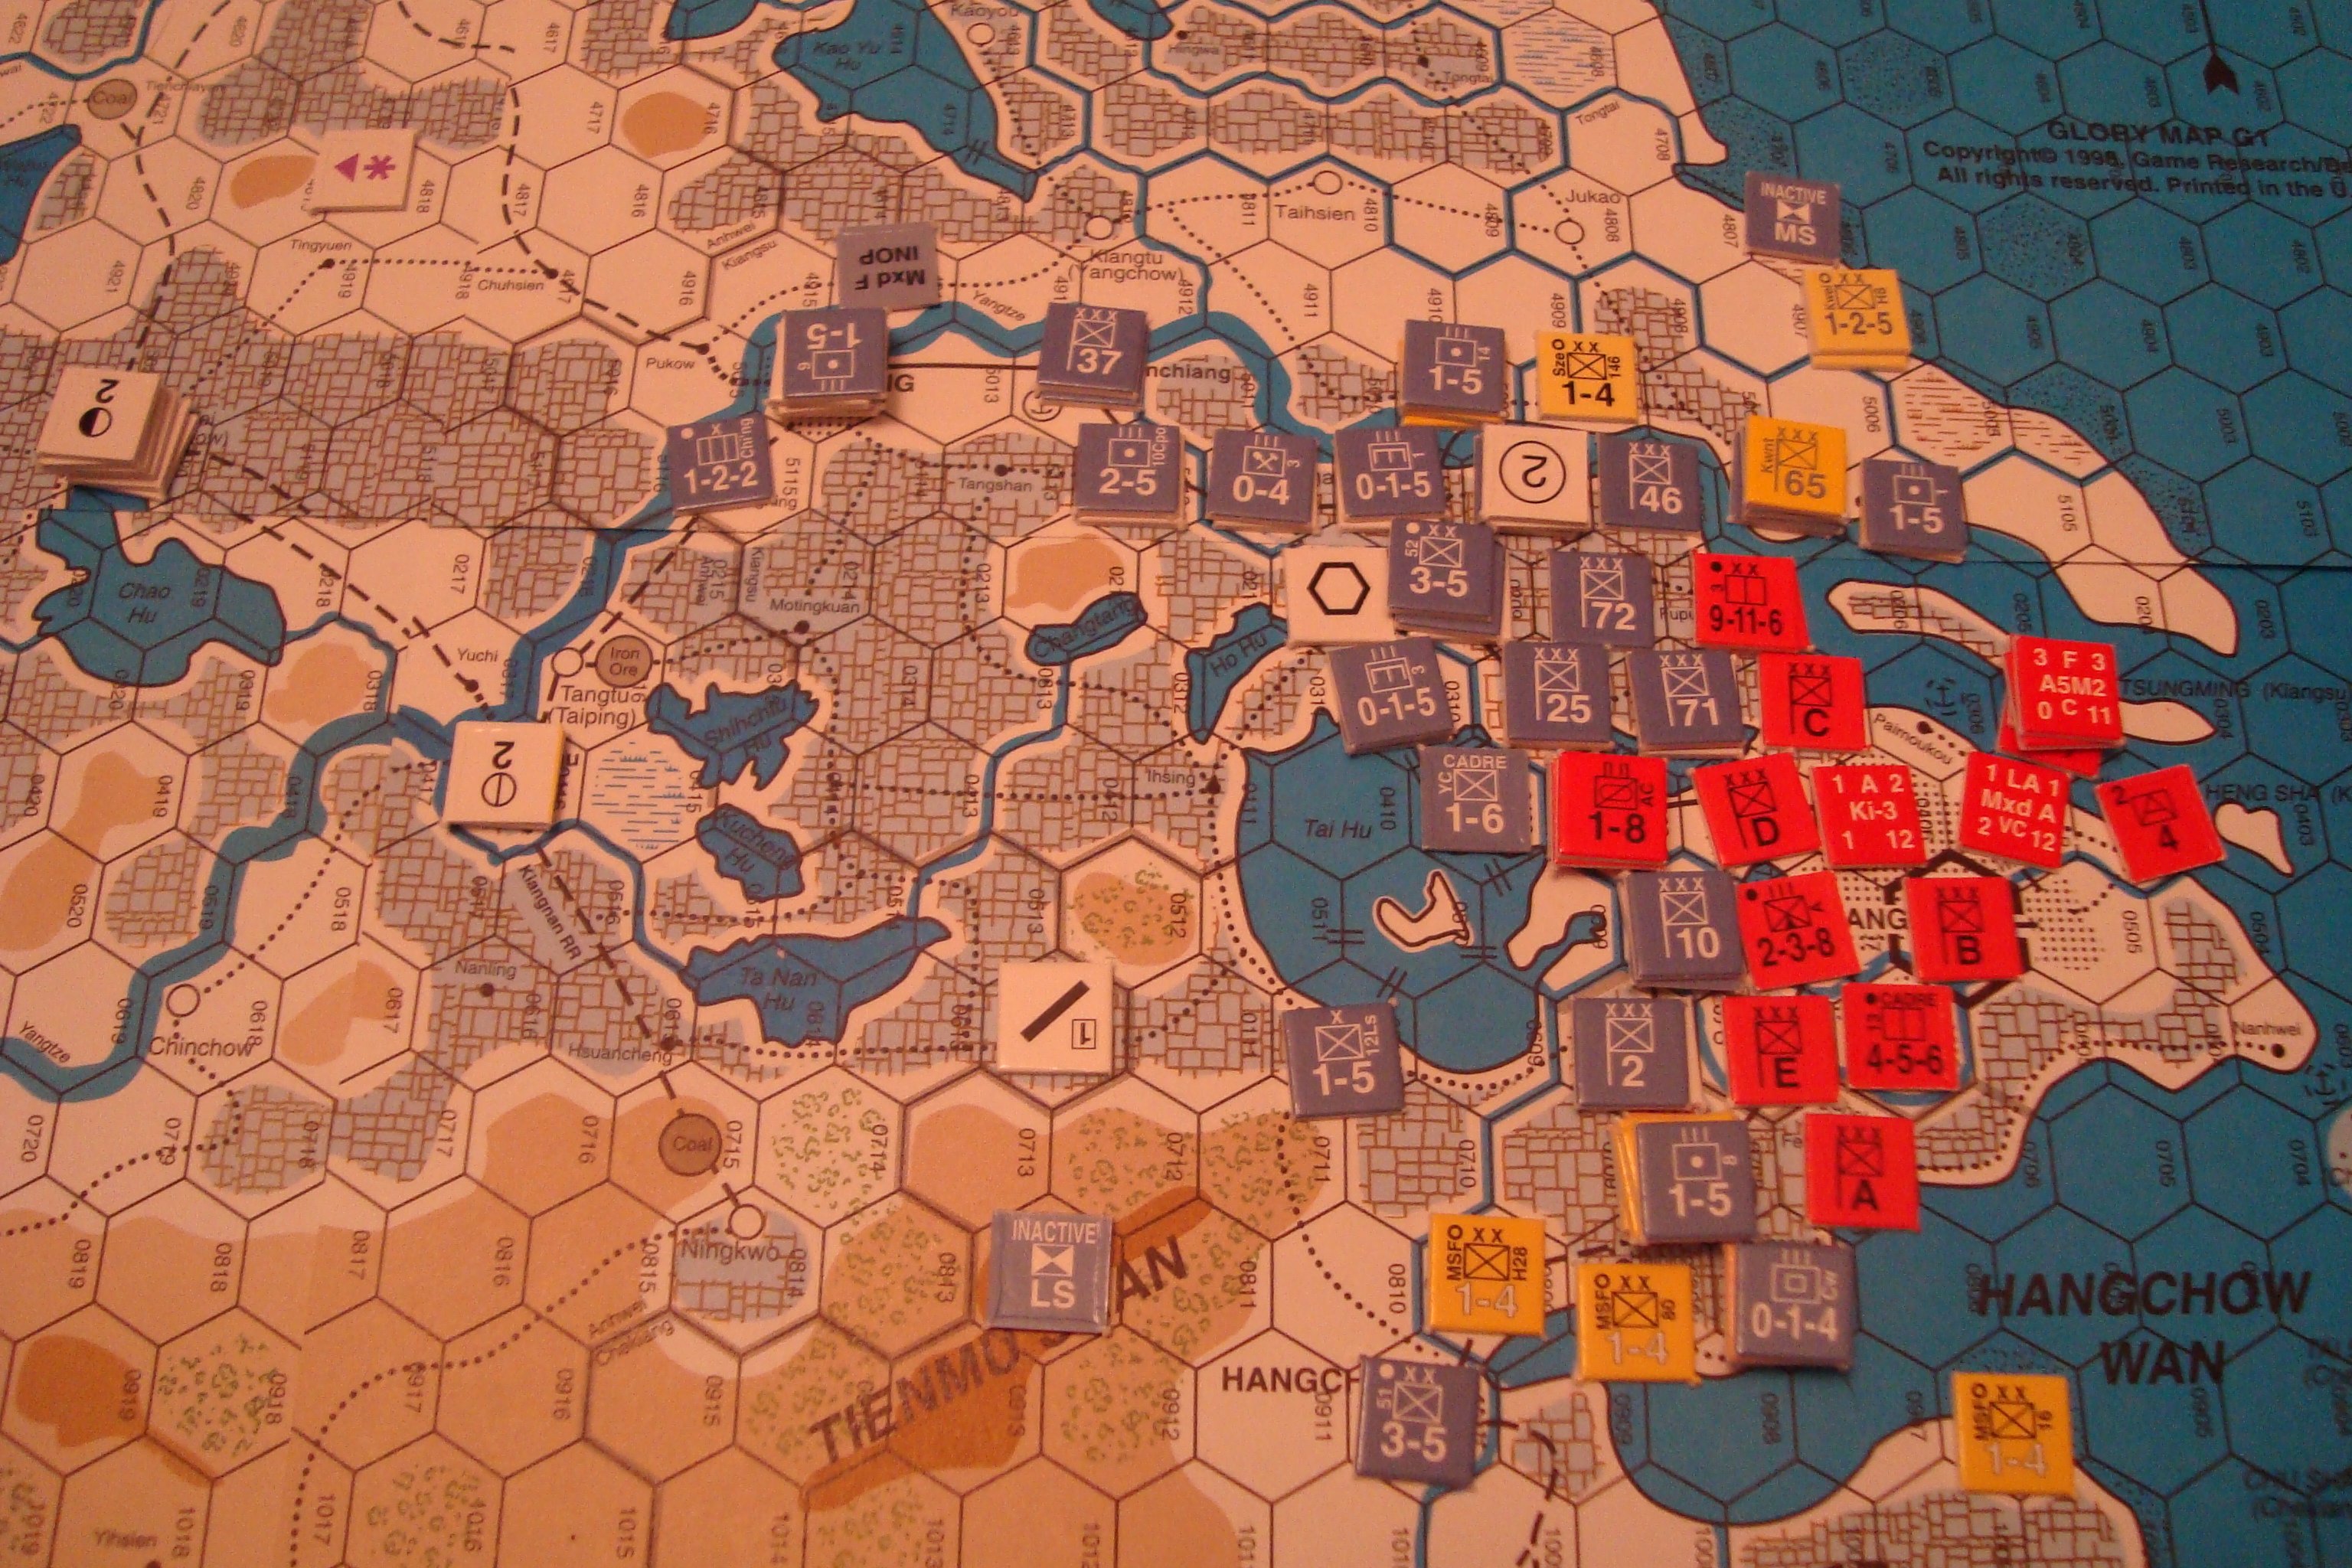
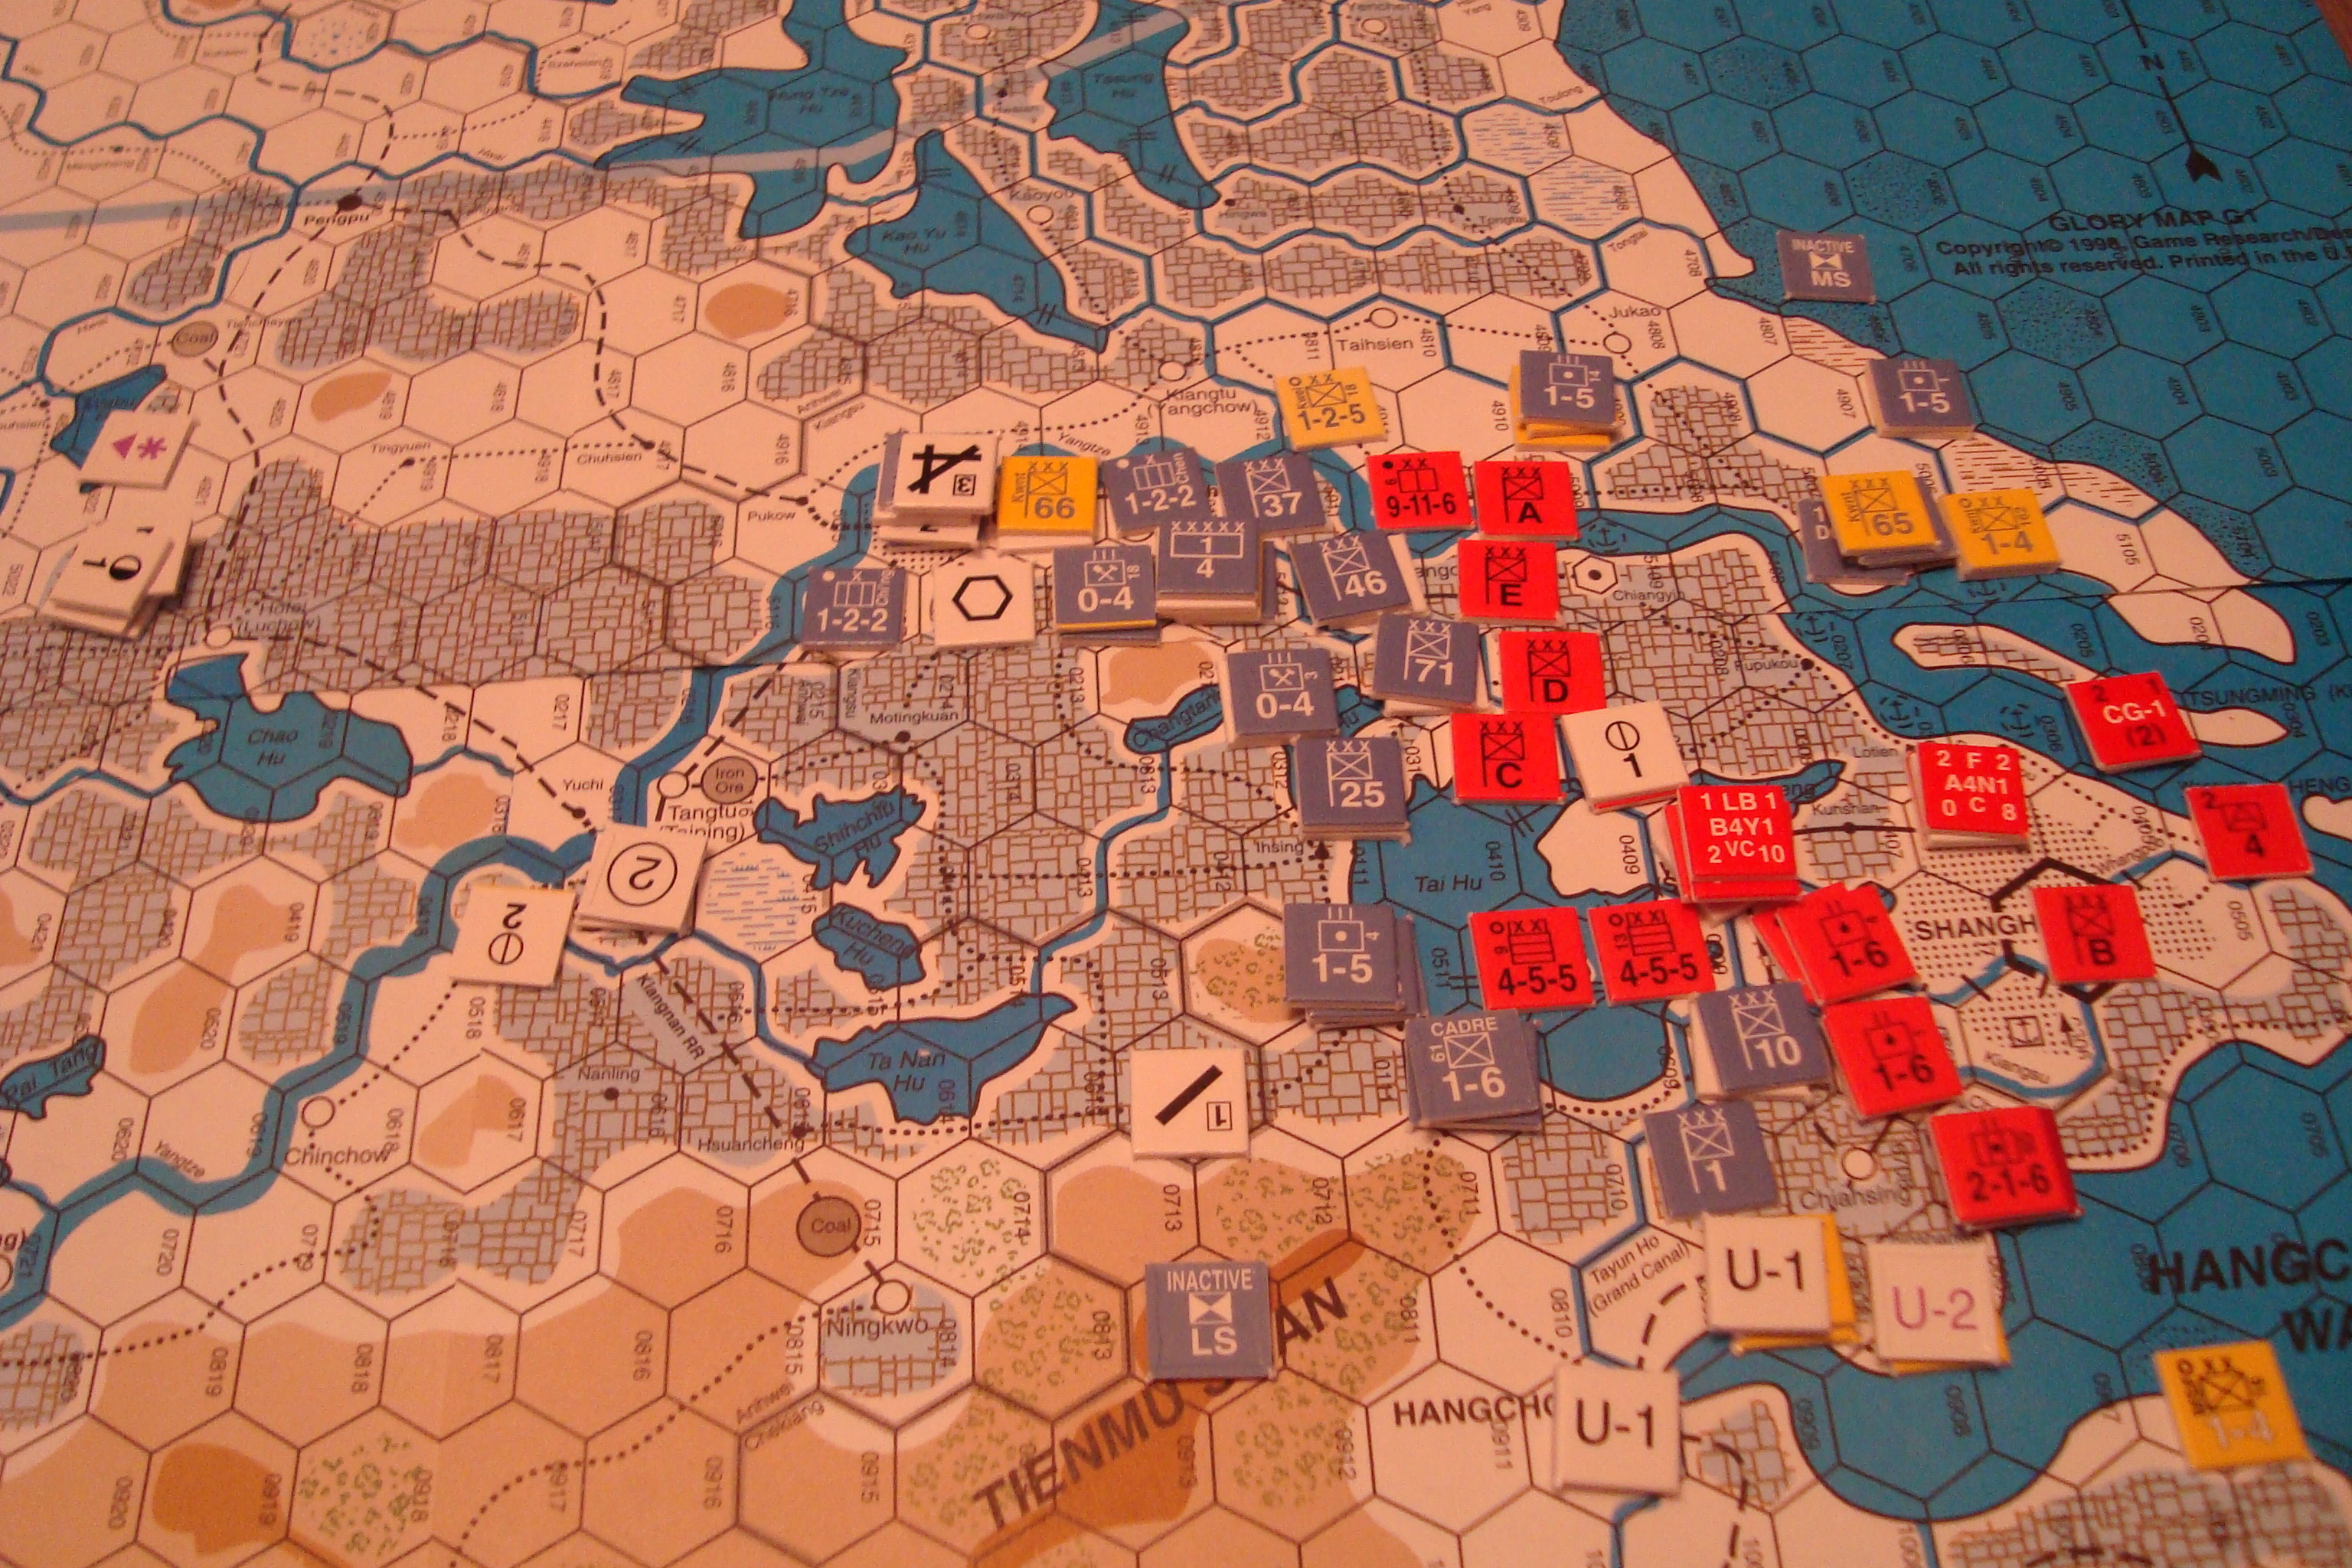
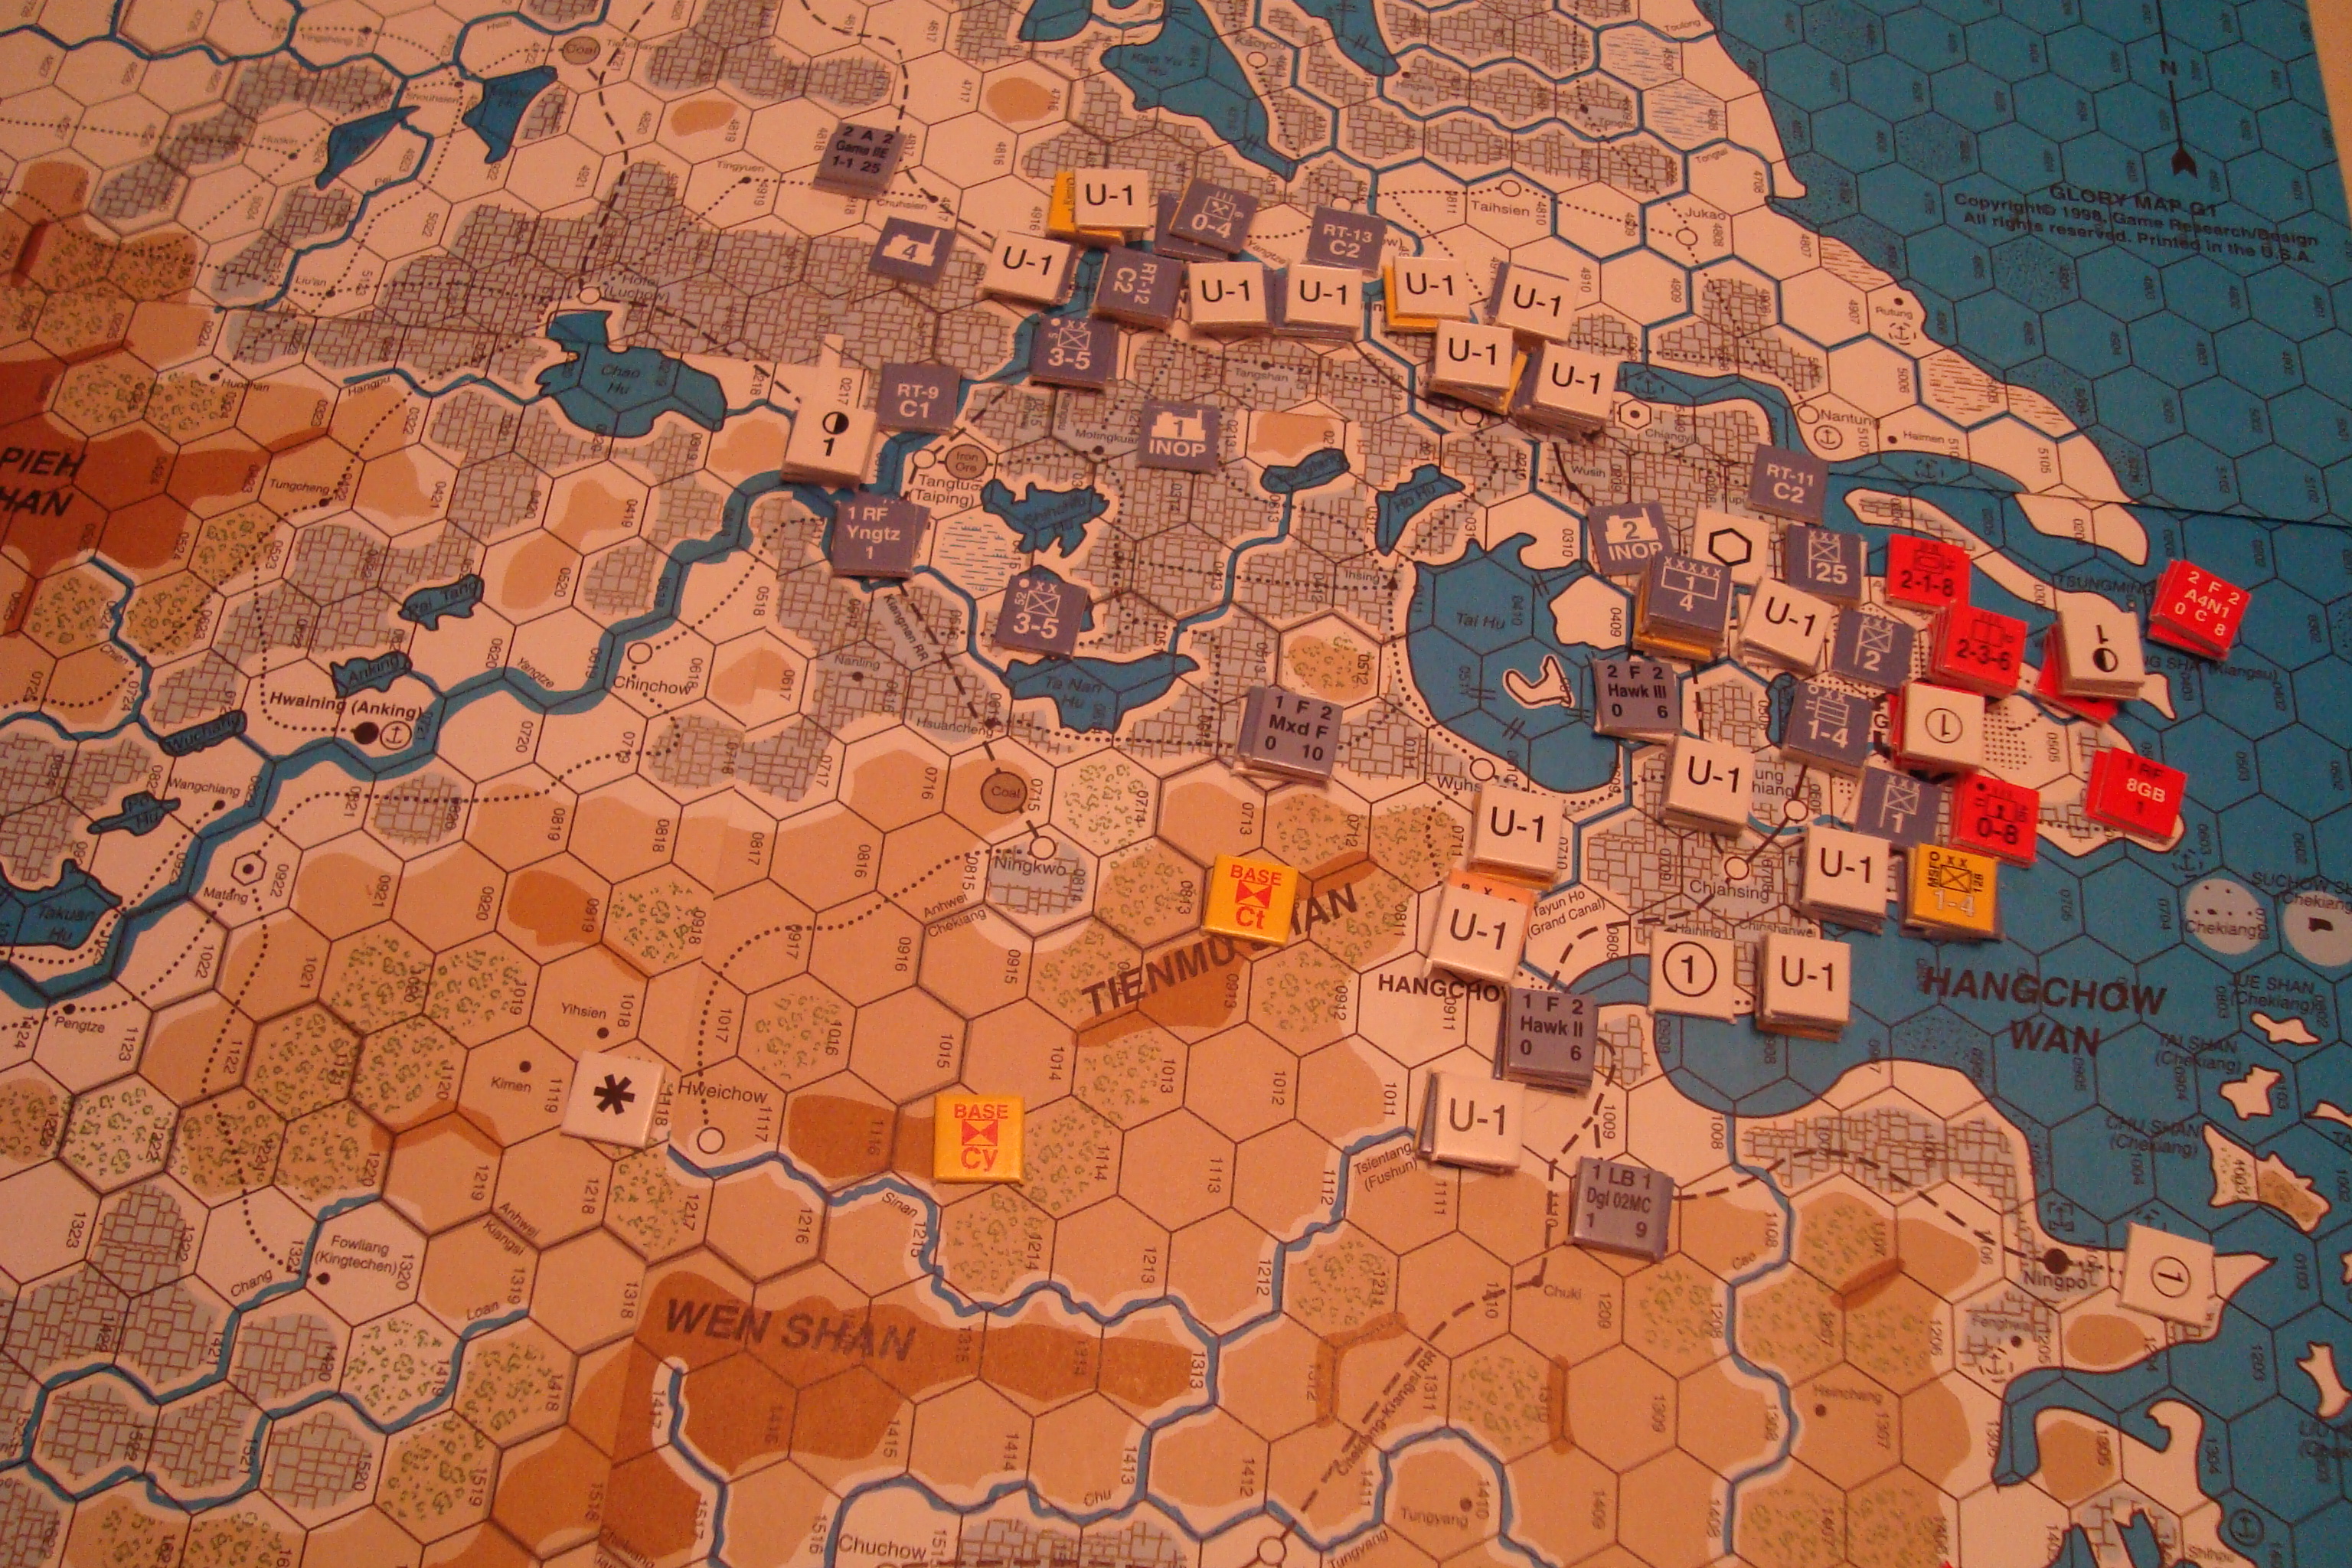
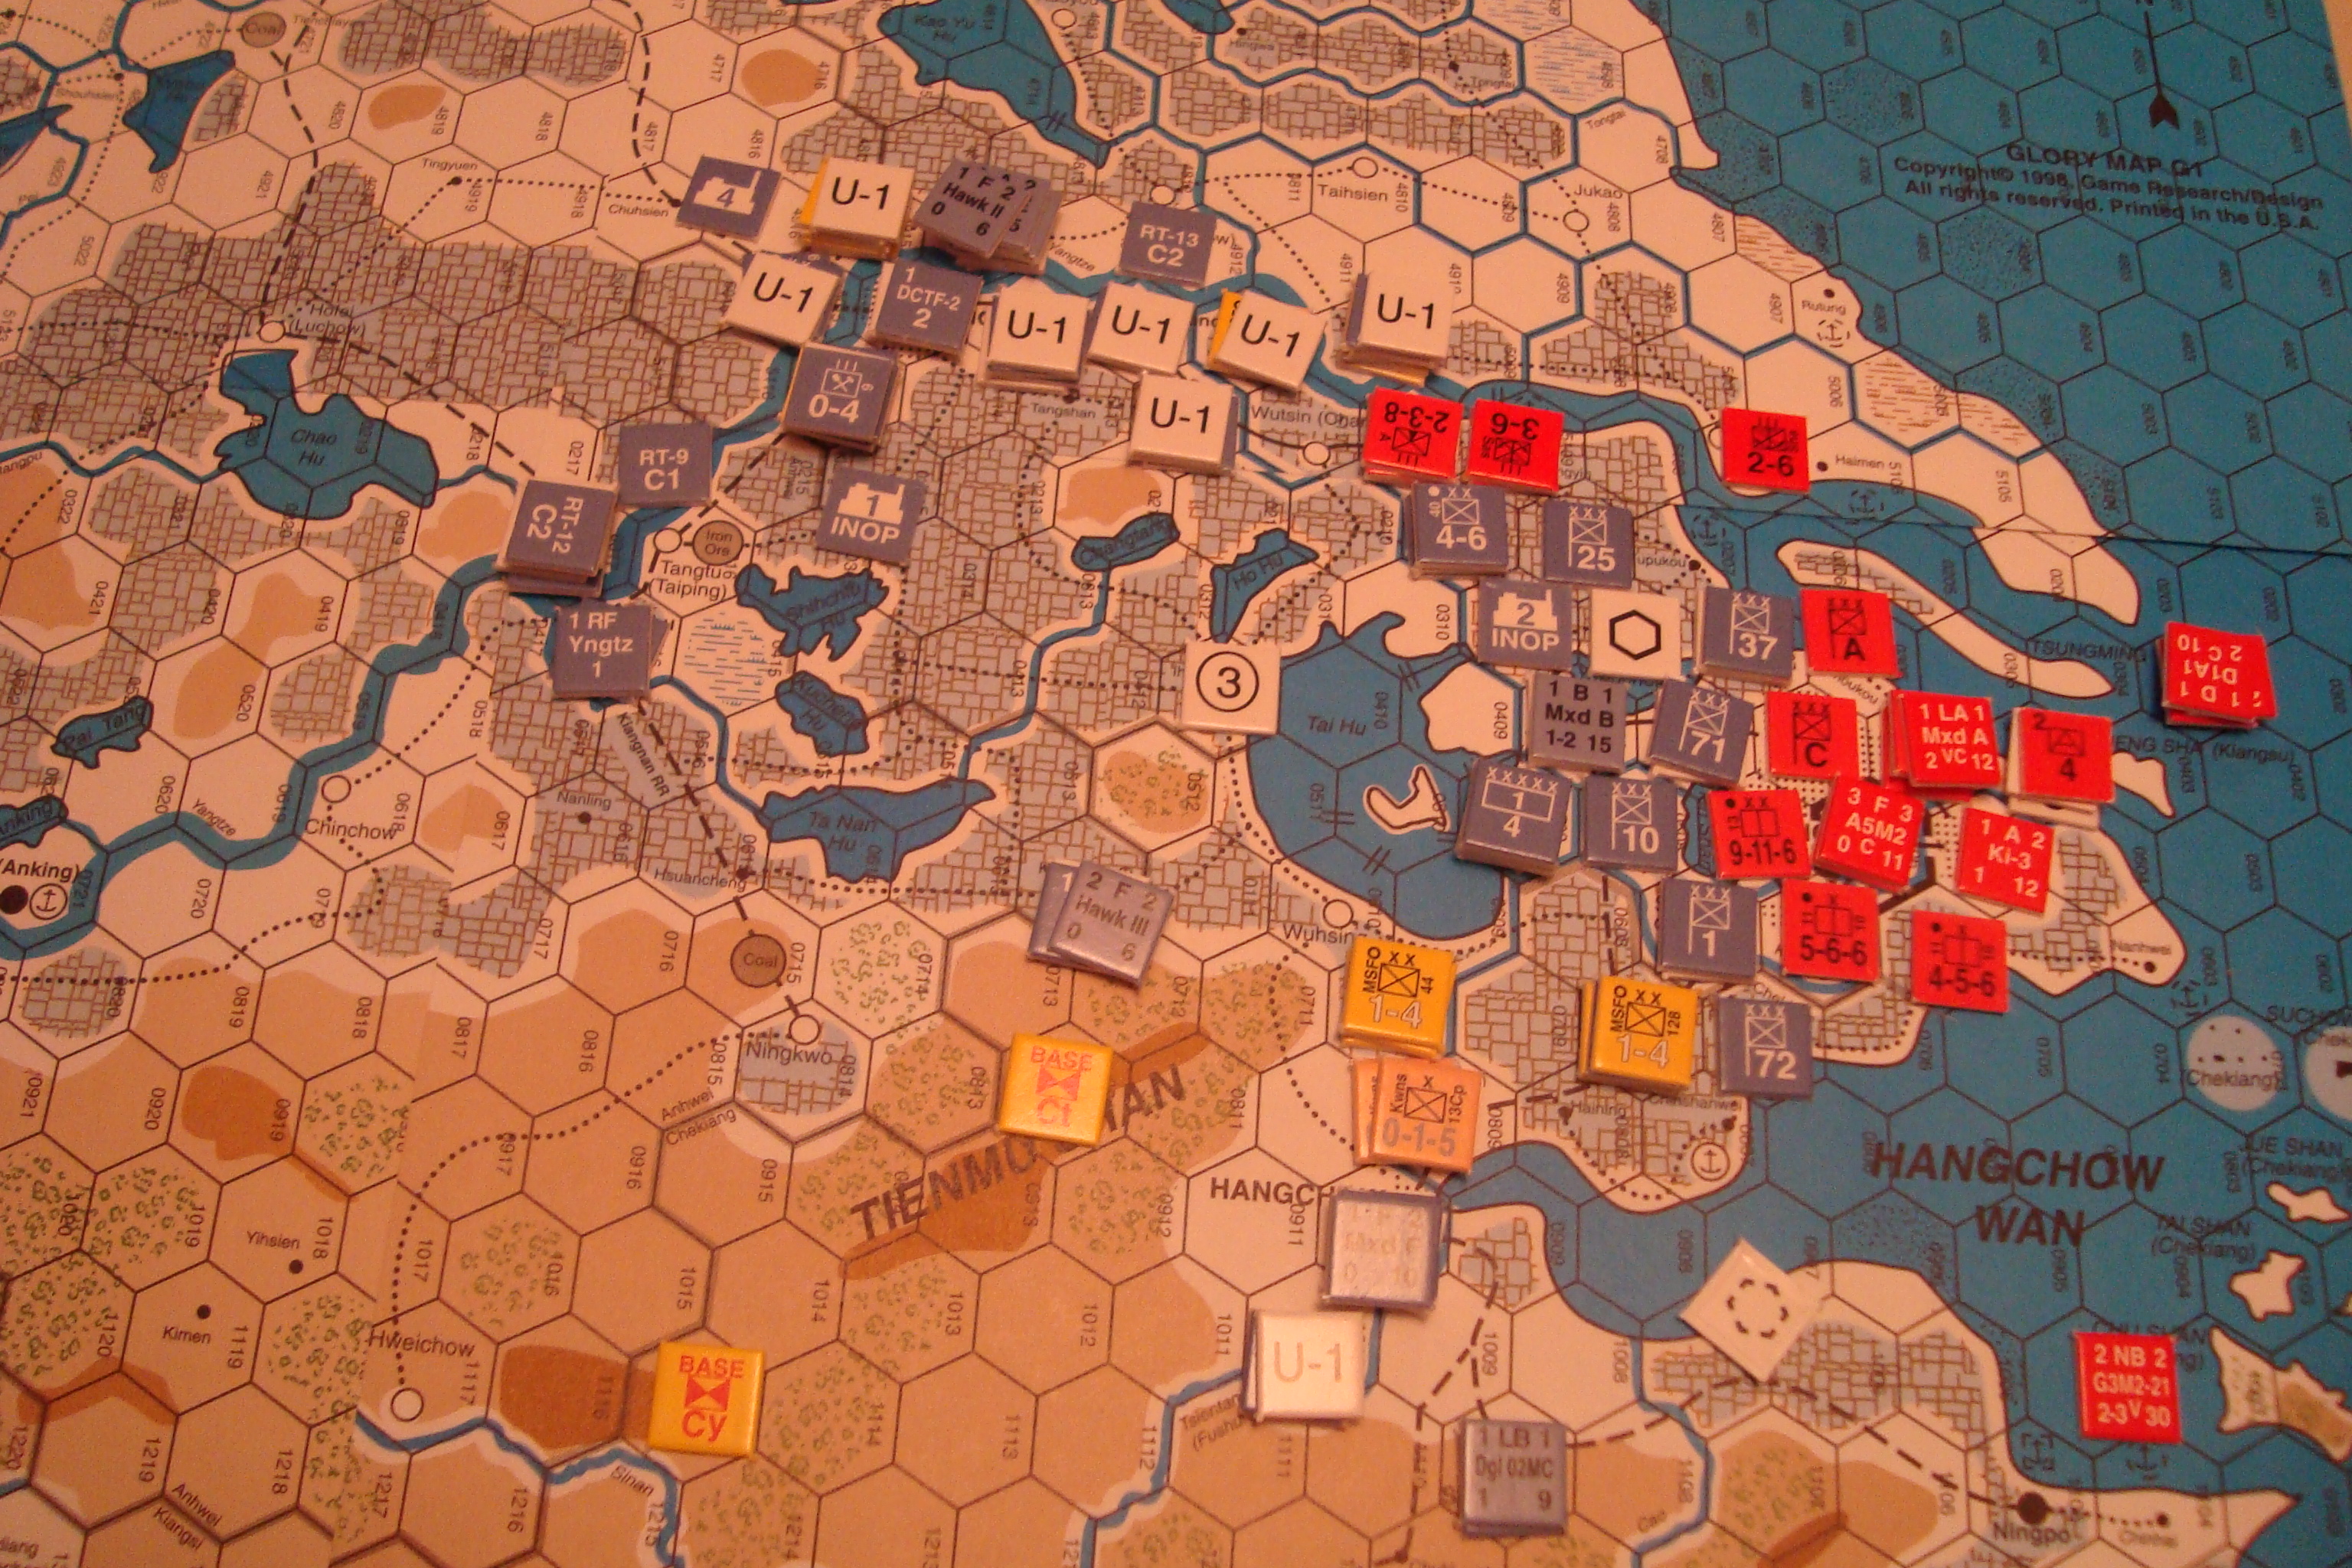
Here’s a series of photos to augment my narrative. I’ll hold off on any analysis until Tim forwards his thoughts on the game.
Initial Japanese Landing by A Corps on Yangtze.Japanese Reinforcements Arrive In Shangai and Move Into ContactJapanese Breakthrough Center, Split Chinese ForcesJapanese Penetration Sealed OffEffect of Naval Patrol Attack on Chinese SupplySituation At Game’s End
Tim posted up about our WOR session. As always, astute and spot-on. Here they are…….
Logistics are a major constraint for both sides. While the Japanese get more resource points than the Chinese, they have to pay RPS to buy extra naval transports and landing craft units. I spent at least one RP per turn for more shipping and still had extra units in Japan at the end of the game. You did a better job of using your HQs for suppy than I did– I kept forgetting that you can use HQs when you are attacking. I should have remembered– the same rule is in March to Victory.
I think we both fell into the old trap of using our air forces for either Ground Support or Defensive Air Support. Looking back, I should have started attacking your railroads sooner, especially the one high volume rail line. I’m not sure what the Chinese should do, but I think it wouldn’t hurt to try some naval patrol missions or port strike attacks. While their bombers aren’t very good making their chances of sinking Japanese naval units pretty small, this isn’t Second Front and the Japanese don’t have very many Naval Repair Points (especially if they are having to repair damanged LCs), so any hits hurt. Attacks on port capacity might be a good idea, too. I know I ran into issues with port capacity.
Weather plays a big role in the game. The rainy weather really hurt you in the Hong Kong scenario and the clear weather helped me. I think in the longer scenarios, the Chinese would be well advised to try to run out the clock until the arrival of the monsoon.
I need to spend some time looking at the interactions of various naval units. The Chinese might be able to use their naval units to impede Japanese movement along rivers.
I think you put too many of your good troops in Shanghai and neglected your flanks. I think it would be worth using your factional or unsupported units in the full or partial city hexes, in the hopes of getting some exchanges and trading easily replaced units for Japanese casualties. Like we talked about, it would be very worthwhile putting some supported units along the rivers to discourage amphibious landings (I also realized after the game that you can’t move along rivers if the enemy controls both sides of the river– I don’t think this would have changed our game).
Having said that, you did do a good job of defending Shanghai. I launched the amphibious invasion because it was going to take a lot of time to dig out your troops. I don’t remember how many factional units you had, but it would have been worthwhile to have left some of them behind in Shangai to act as a rearguard when you pulled out.
Using engineers to negate or reduce negative modifiers for city hexes is really important. As usual, neither side has as many engineers as they would like…
I misunderstood the international concession rules, thinking that the hex was off limits for all combat…It also functions as a port, that would have really helped the Japanese. I don’t know if the Chinese could get enough strength to make an attack on it, but it might be worthwhile to try.
I probably should have landed north of the Yangtse sooner. Opening up a second front helps to stretch the Chinese.
Whampa (the port NE of Shanghai) is a really important hex. I don’t know if you can set up troops in it or if you can use the first turn to move troops to defend it, but making the Japanese fight for it is a good idea. Taking that port really simplified my logistics.
Tim and I were able to get in three sessions of War of Resistance (WOR) on Tuesday afternoon and Wednesday. It’s amazing how some level of moderation in beer consumption, and lack of viable evening movie options, can increase the time spent gaming.
We played two sessions of the Attack on Hong Kong scenario, with full Chinese intervention, and one using the Fate of Nanking scenario. I’ll use the “old” spellings throughout.
Hong Kong is referred to as the game’s introductory scenario. That’s true if you have never played the Europa system before. The Fate of Nanking involves all aspects of the Glory rules system used in WOR. I hoped my playing of The Damned Die Hard (TDDH) would prepare me for WOR. That was not the case, as the supply/logistics, guerilla, reaction and command rules are far more detailed and extensive than those featured in TDDH.
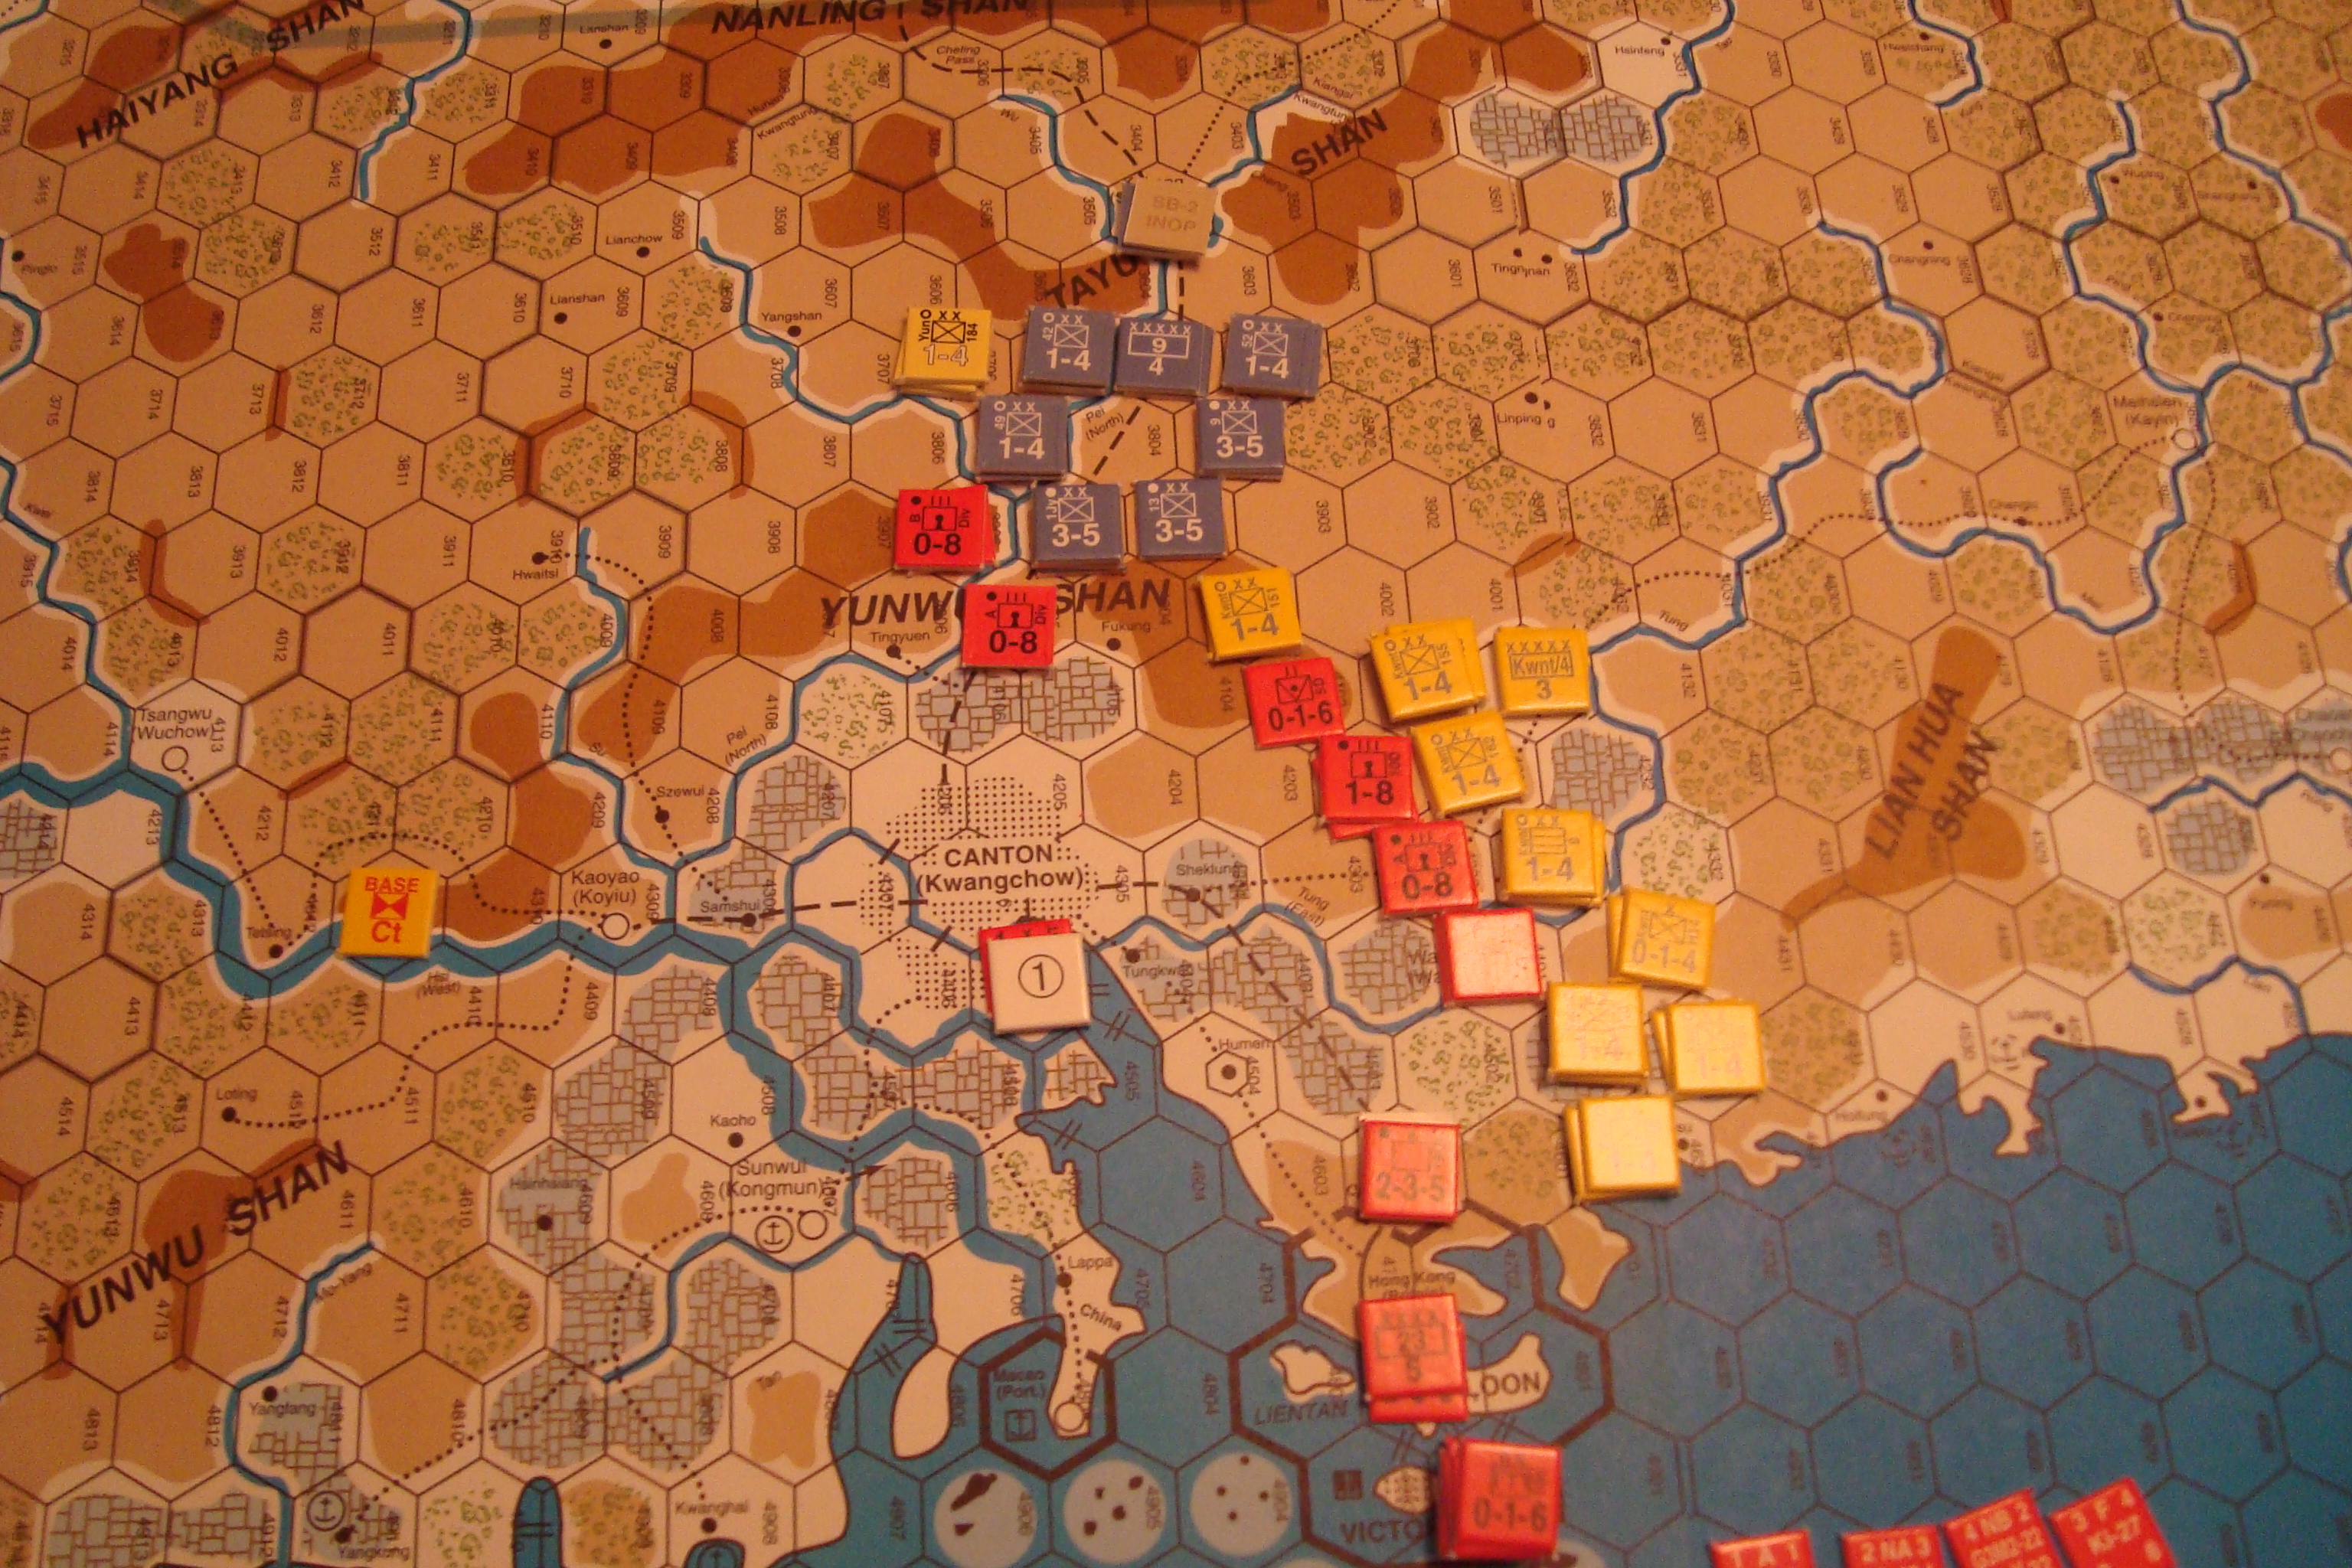
I played the Japanese in the first session, limiting the forces committed to attacking Hong Kong to the OB’s designated assault force. Too many troops were allocated to defend the assault force’s flanks and rear from the two Chinese armies situated to the east and north, as well as the guerrillas located to the west. In addition, I left out one attack supply factor, which limited my full strength assault attempts to two (2). The result was failure to take the city in the time allocated.
We switched sides for the second session. Tim loaded up his assault force and with a successful role for his reaction phase – which allows the non-phasing player to move and attack – during my first turn was able to take Hong Kong in two (2) complete game turns (because of the Reaction Phase and the Japanese player plays first, he had three (3) attack turns). My Chinese attack on his forces to the north had an initial success, but the game was over before they could attack again.
Japanese Take Hong Kong (Why Have I Circled The Wagons in the North?)
The Fate of Nanking was another matter.
The Japanese must land, assualt and secure Shangai, and then move west and take Nanking. The Japanese have significant, but management intensive, naval resources. The Chinese player has strong forces near Shanghai, but weaker forces in the Nanking area.
Supply management is critical for the Chinese player, he must juggle the need for attack and general supply, as well as utillizing resource points for construction and repair. This is a typical challenge in Europa. But in WOR, the very limited number of resource points – which can be converted to attack suppy which, in turn, can be converted to general supply (yes, this is confusing… it confused the hell out of me) – combined with a problematic transportation network, has a direct and significant effect on what the Chinese player can and cannot do. Unless the player is thoroughly comfortable with these rules and their application, a disproportionate amount of time and effort is spent with logistics, with combat operational planning adversely affected.
Guerilla bases and units are another aspect of WOR that is a challenge. While these units were included in both scenarios, we didn’t use them. One reason was that we had our hands full with other aspects of the game. Another was that our games, for the most part, involved urban combat, and guerillas cannot enter cities. As we play longer scenarios, I’m sure we will start using bases to recruit guerillas, for attacking lines of communication.
Reaction can only be used if there is a Army (Japan) or War Zone (Chinese) command unit available. Each Army or War Zone has as command radius, and success die roll. If the die roll is successful, then all units within the command radius can move and fight in the reaction phase. This allows the non-phasing player to maintain momentum generated in his phase of the turn. Tim did an excellent job of applying continual pressure on my units defending Shanghai.
Attack and general supply points can also be stacked with a command unit. This is an effective way of efficiently using supply points, as the ratios needed are far less than the one (1) point per regimental equivalent (RE) typically used. Neither of us consistently took advantage of this capability to improve our logistical support.
With the exception of a small contingent stationed in the international section of Shanghai, all Japanese combat and logistics assets must be transported from Japan to China. The number of naval transports and landing craft vary from turn to turn. In addition, landing craft can be damaged during operations, and removed from further play. Tim said this was a constant concern, and limiting factor, in his operational planning.
I decided to hold Shanghai in strength, which is what happened in 1937. Tim built up combat power in Shanghai and methodically attacked my units at odds of 3:1 or greater.
Initial Chinese Forces
Stalemate In Shanghai
As the fighting in Shanghai developed into a battle of attrition, Tim launched an amphibious assault along the Yangtze River. This prompted a long discussion on the rule limitations on naval transport, river movement, and amphibious assault. We’re still thrashing this out.
Amphibious Landing Along The Yangtze
The game ended with Tim consolidating and building up his beachhead, and with me starting a fighting withdrawl from Shanghai to the west.
Japanese Advance Along The Yangtze Force Chinese Withdrawal From Shanghai
Lots of good game play and challenges. A fun time! We’re planning another go at the Nanking scenario in early December.