Bad die resulted in far fewer reinforcements than needed. Other units were rushed west to create yet another flawed defense line. Always one unit, or one more movement hex is/are needed. Well, this line might hold for a bit. Really needed those six, 3-6 divisions!
Initial odds were 19:8, +3 for AECA. Threw a lot of air at the hex in order to increase the odds to 5:1. The Turks came up to fight, and attempted to bypass the two escorts. The P-40 was shot down on a roll of 2 (!). The Mixed Fighter unit got through, but could not shoot down the targeted Stuka unit. Turkish flak was ineffective. The combat die roll of 2, was modified to 5, for a DE result.
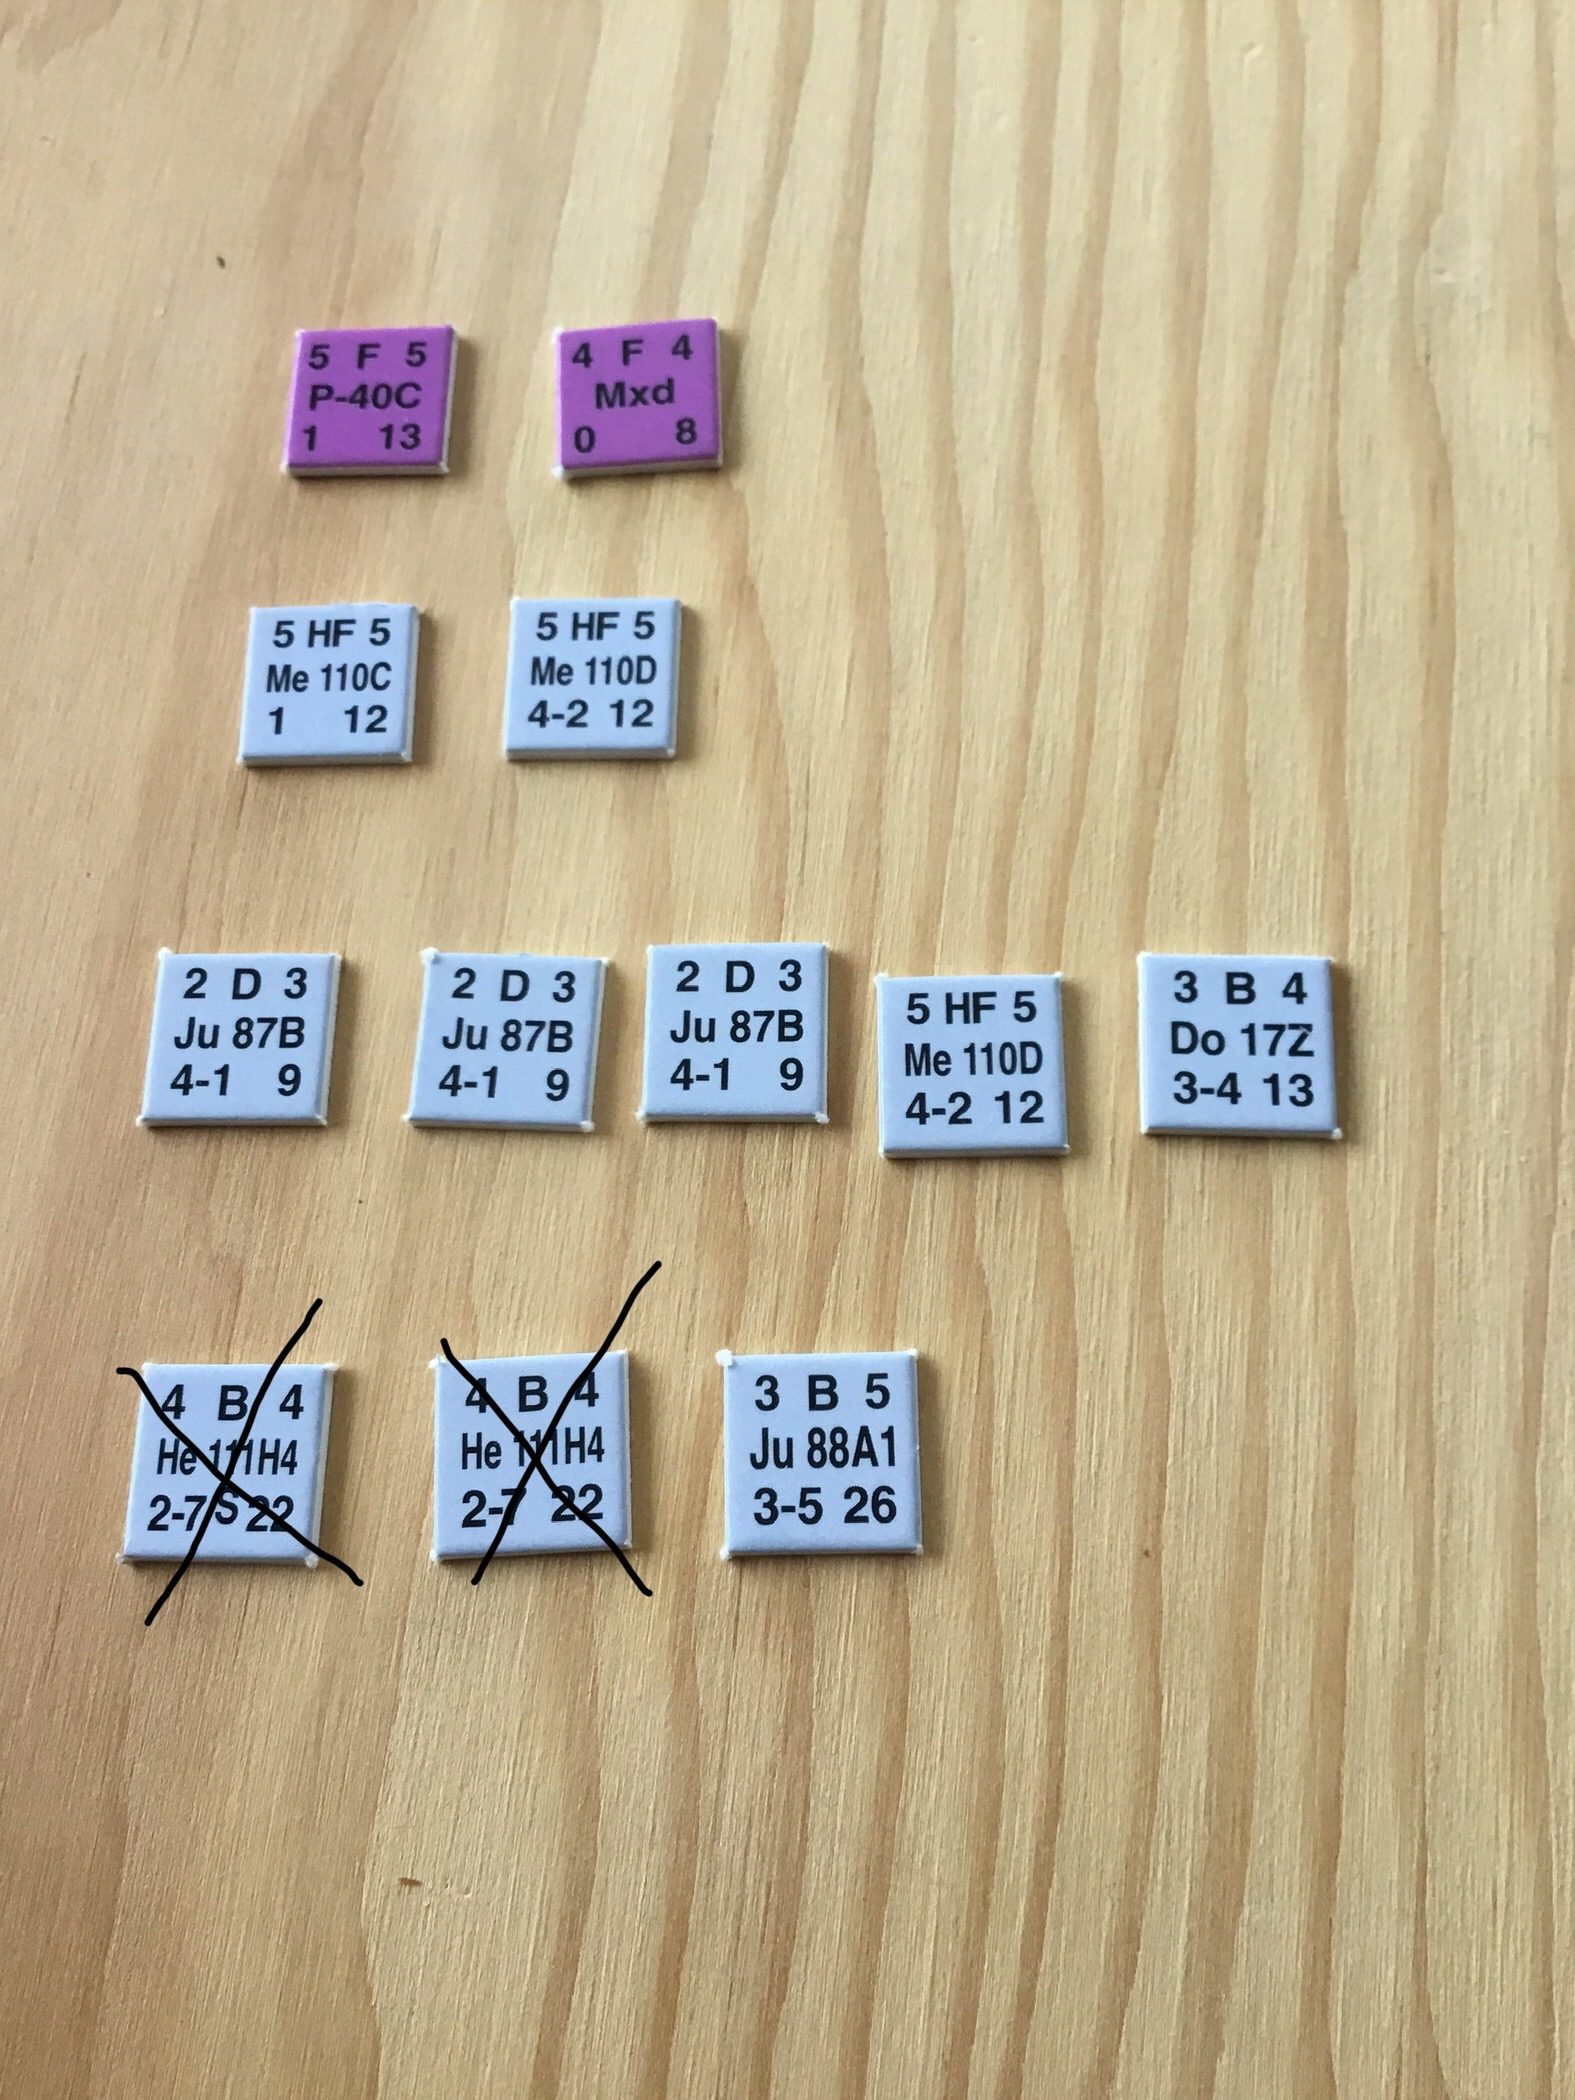
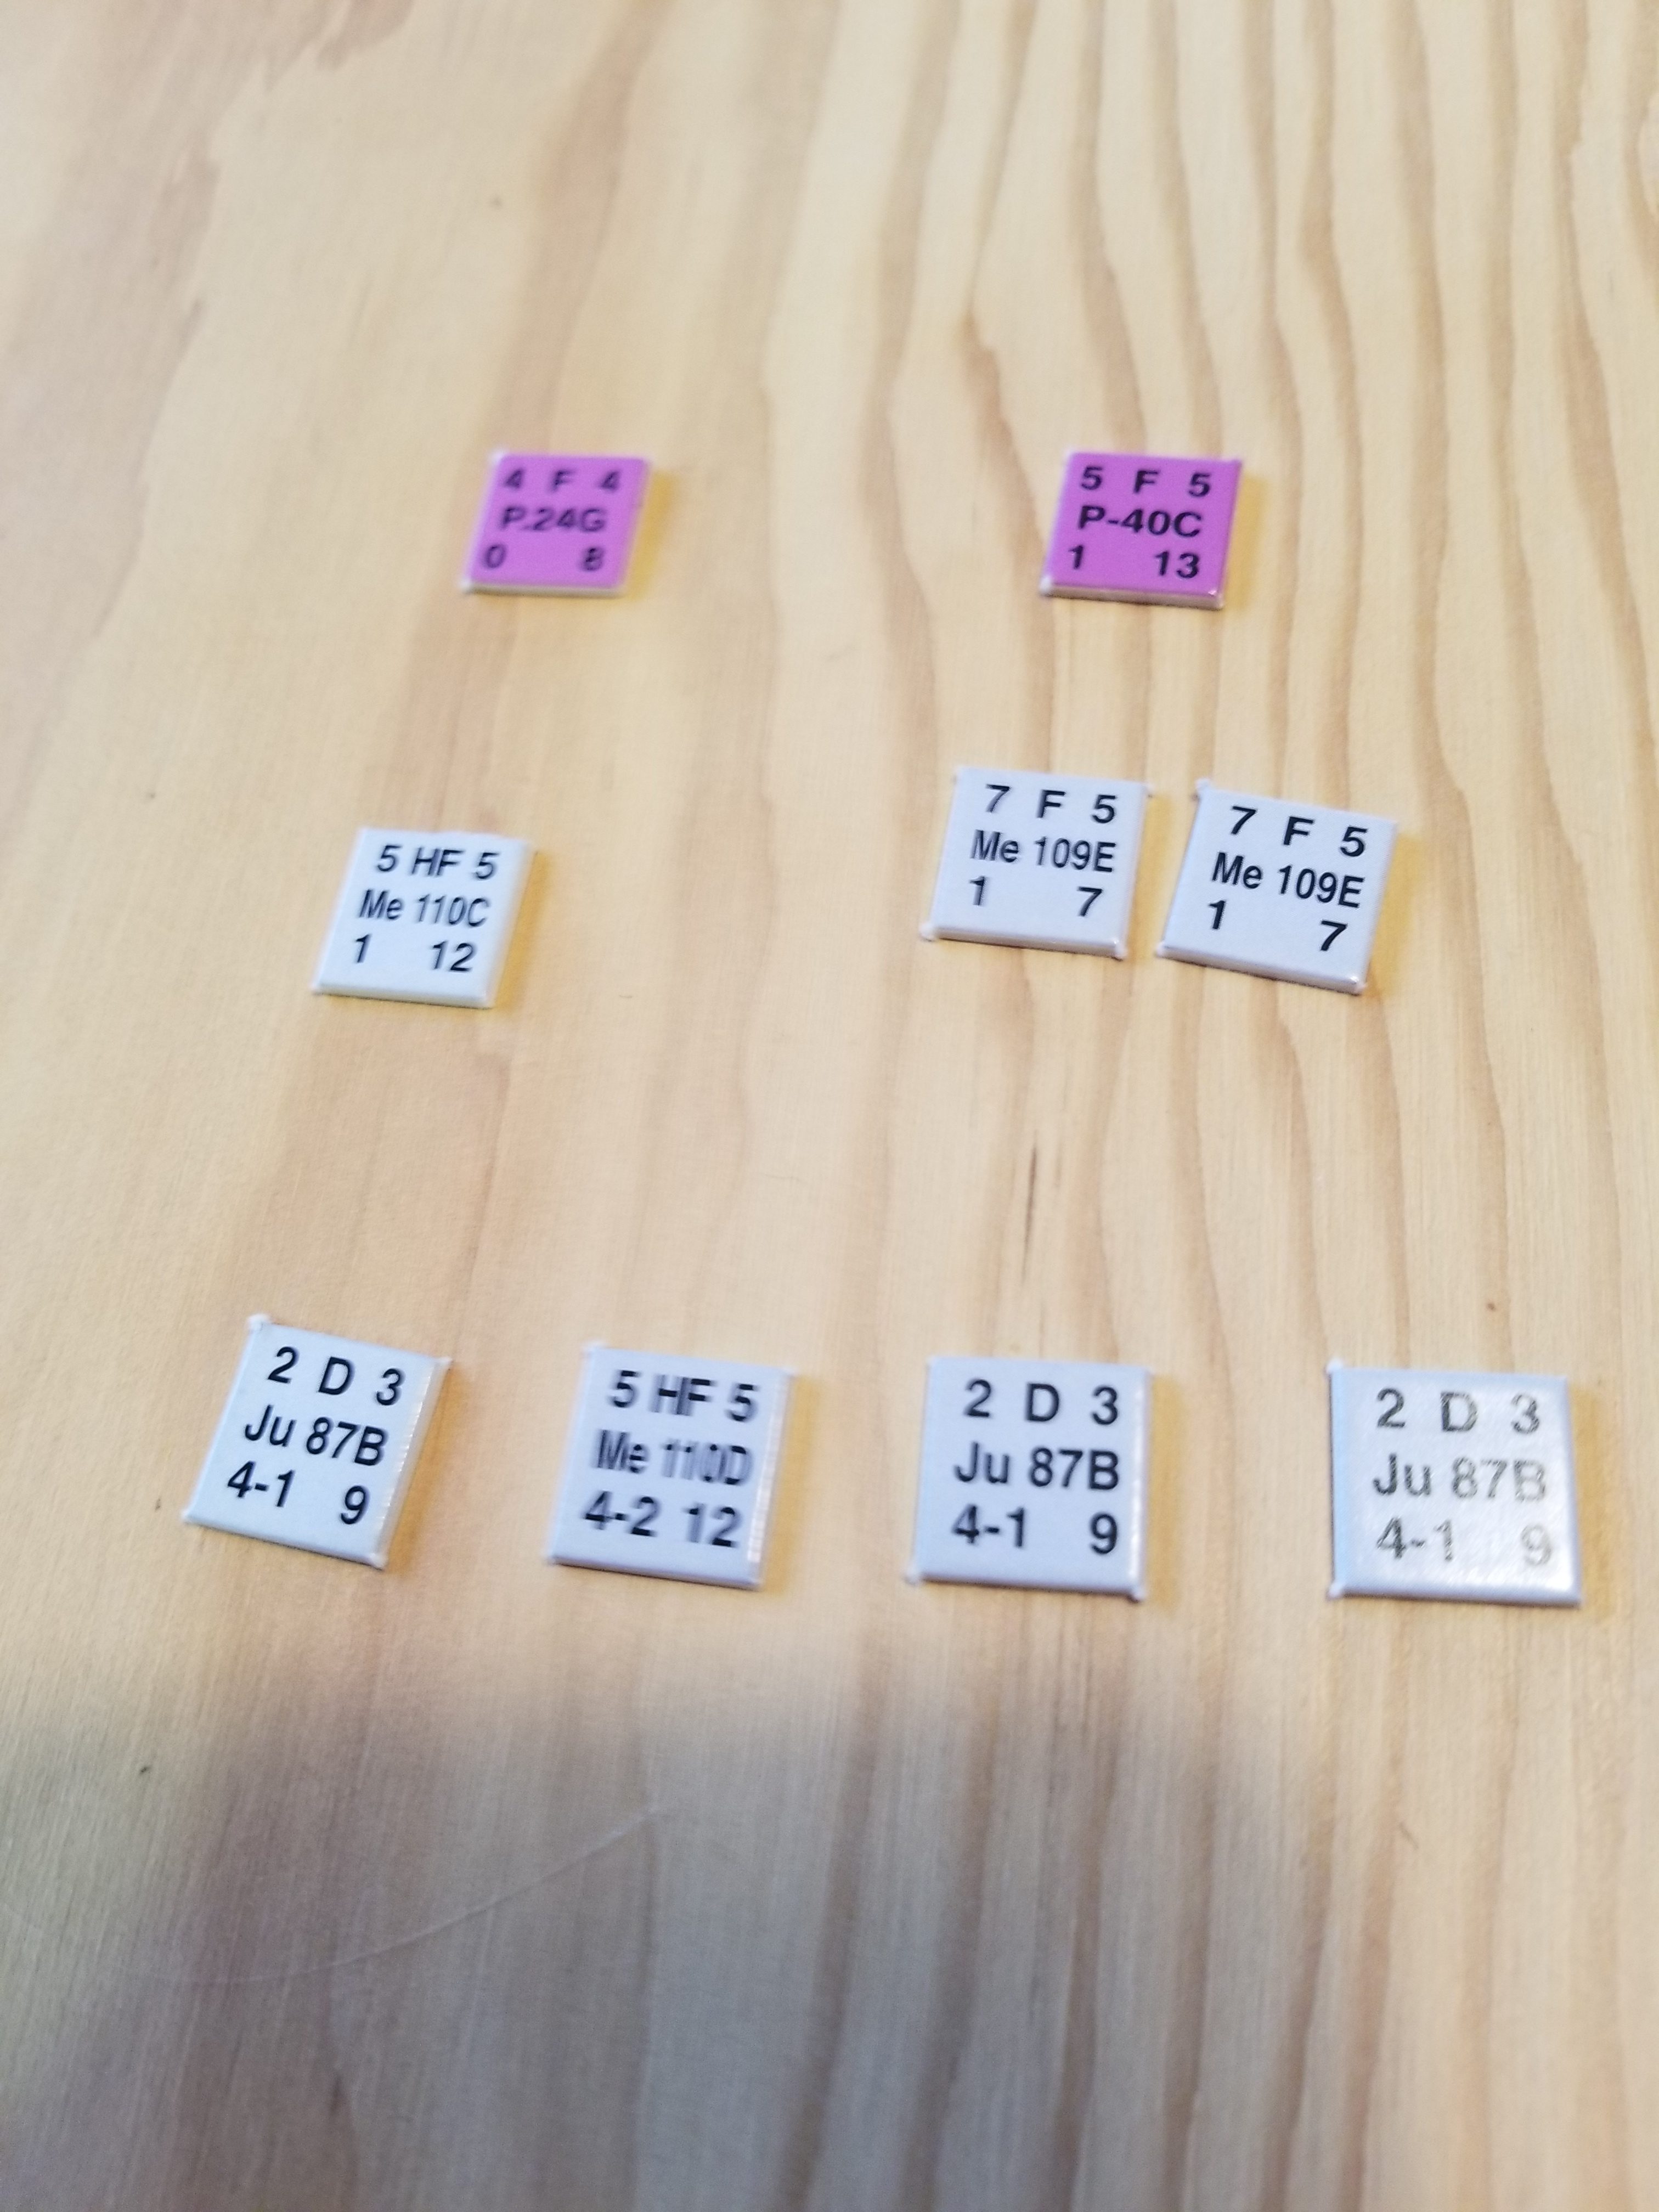
Here’s the air matchup. Note that only six air units were eligible for the mission (one per RE), not the eight shown.
Illustrating My Mistake Using Sophisticated Photo Editing Skills
The second attack was against Hex 4625. The odds were 5:1 (with some help from a single Axis air unit), with a -2 for wooded rough terrain, and -1 for the defending armor cadre’s AECD. The die roll of 6 was modified to 3, for a DR result and a ZOC kill.
The Axis pushed up through the Turk defenses during the Exploitation Phase.
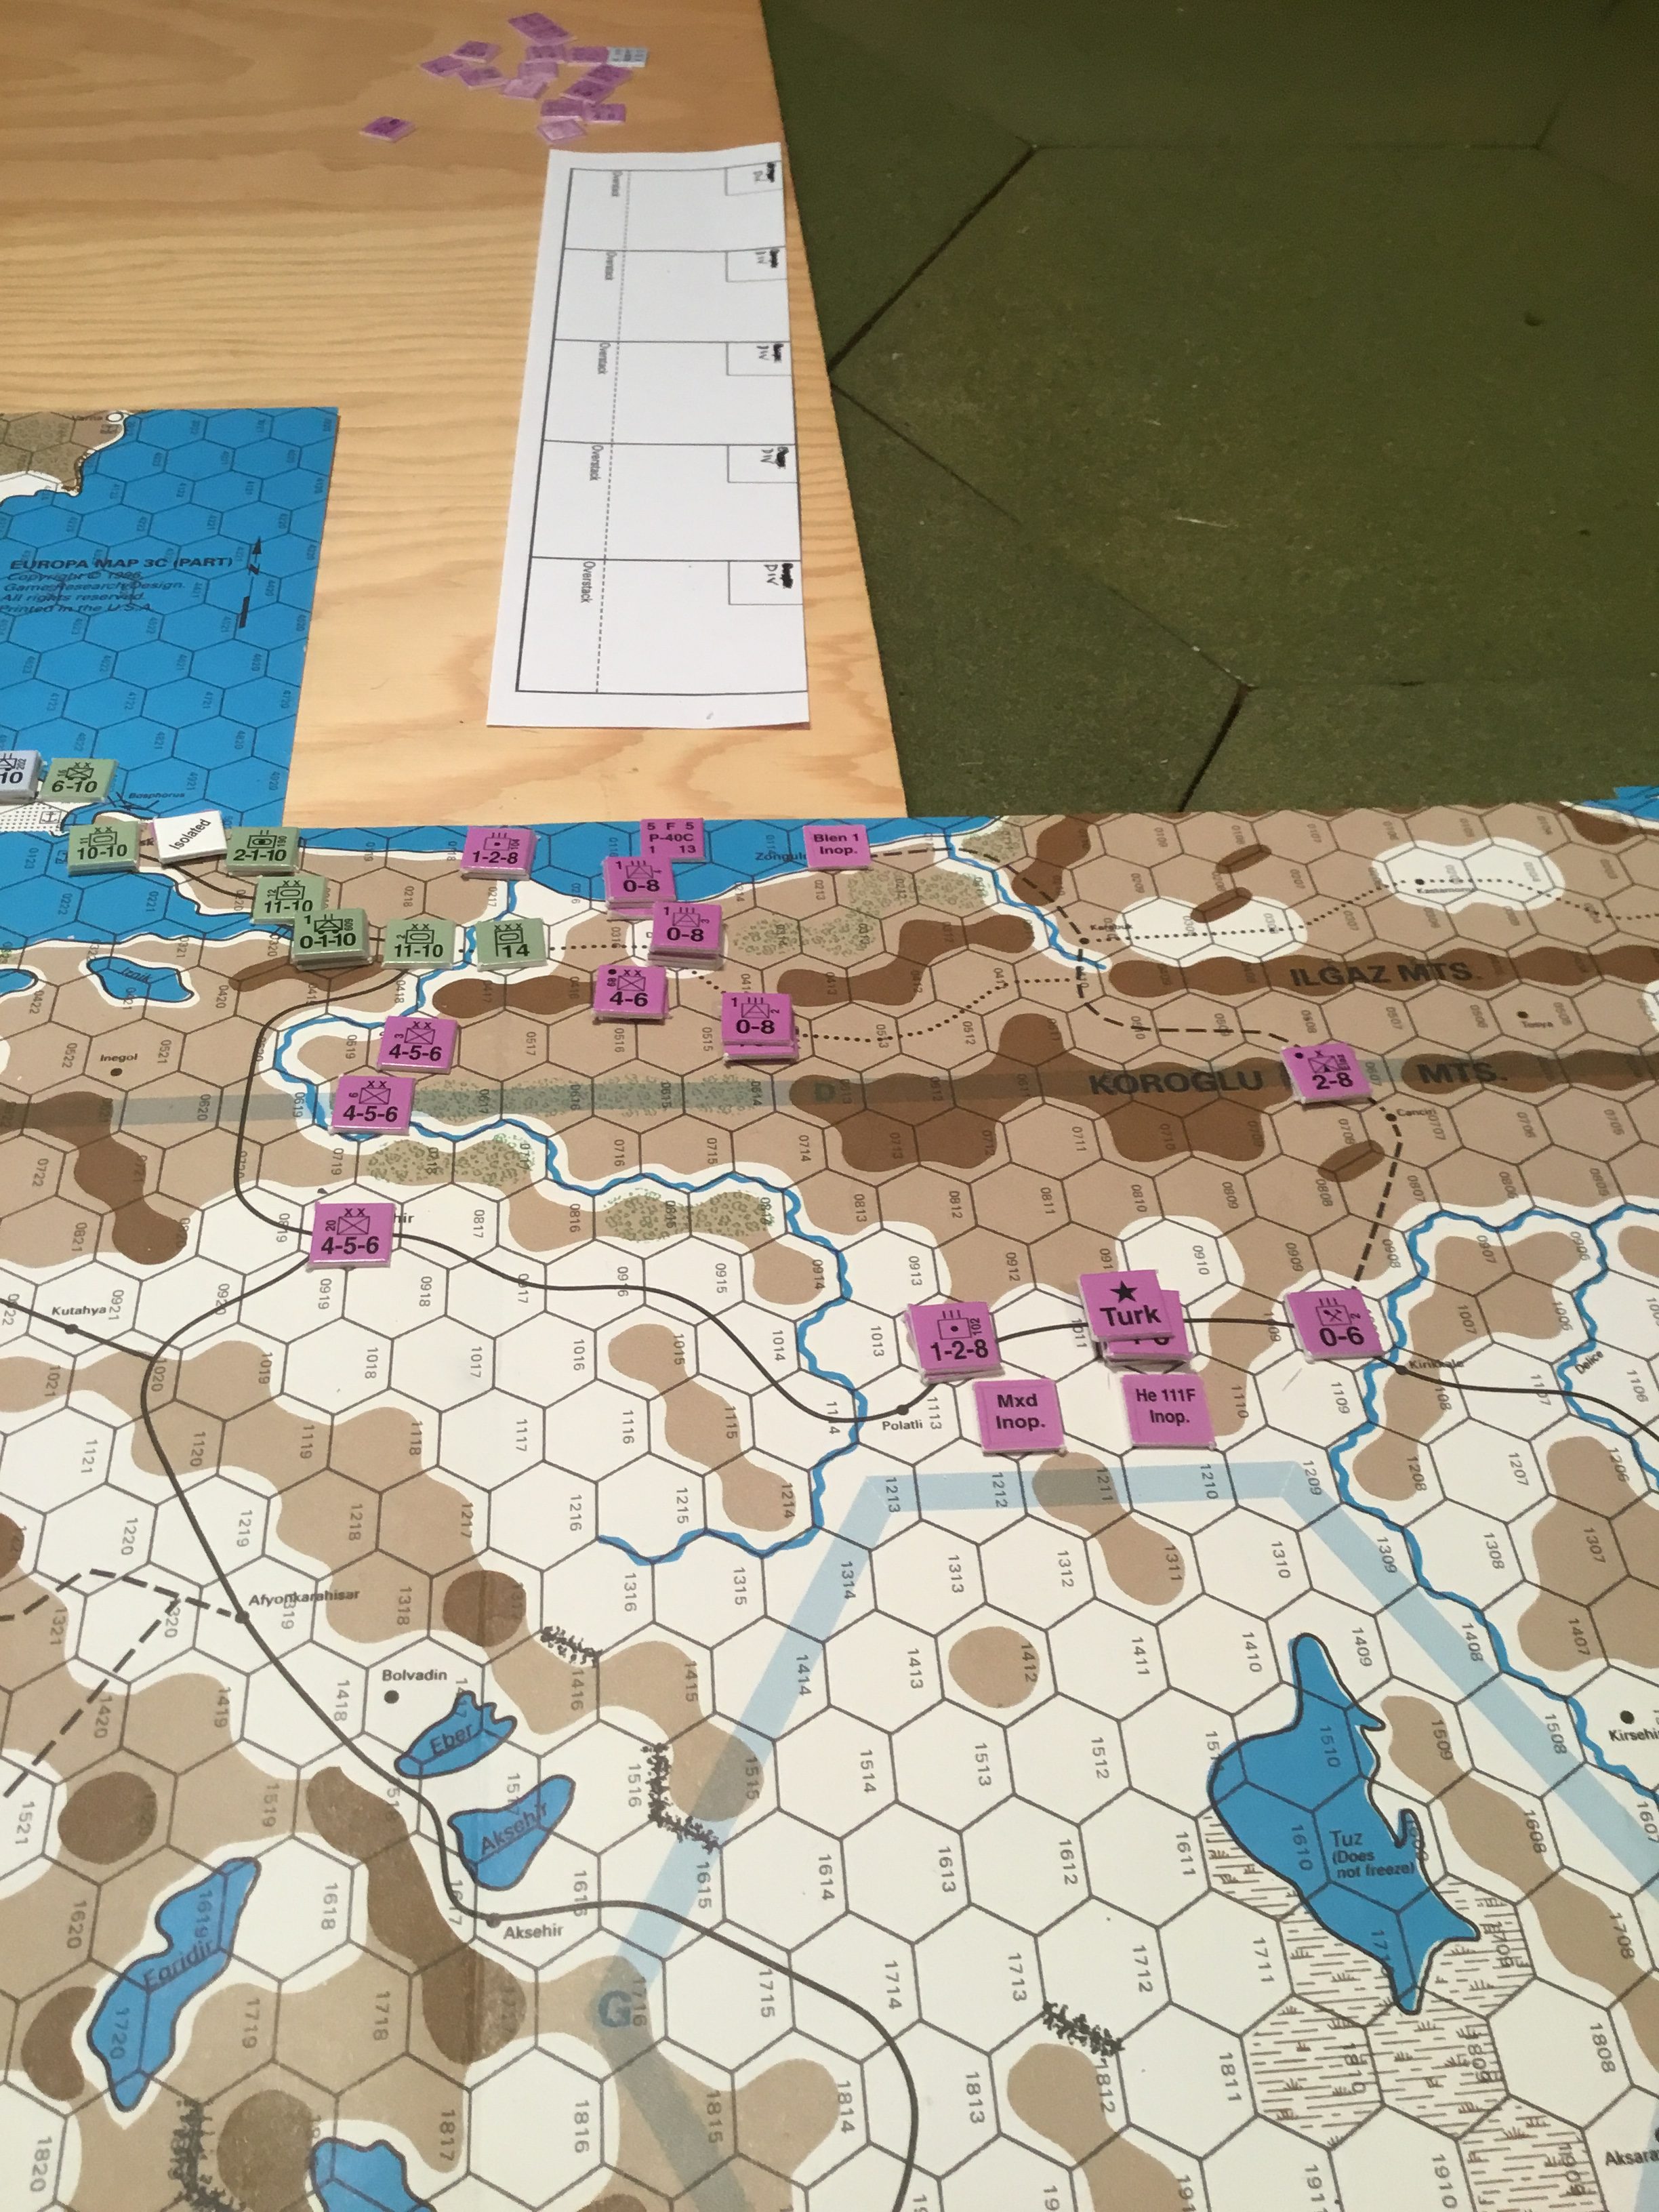
Fortunately, the Turks received all of those postponed Turn 1 mobilization units, which are sorely needed to help build a new defensive line northwest of Istanbul. Especially helpful are four anti-aircraft units.
The new positions try to take advantage of the rougher terrain. However, the low rail capacity limited the number of units moving to the new area of operations.
The 40th Corps attacked Uskudar. Basic odds were 15:6, AECA of +3, but with significant air assets allocated. These aircraft staged up to Istanbul. Two Turk fighter units attempted to bypass the escort.
The ME-110 shot down the P-24, while the P-40 was aborted. The final odds were 31:8 (!!!), but with a roll of “1” and the +3, the Turk units retreated, with one unit destroyed in a ZOC kill, and the other reduced to cadre.
The attack on Hex 0219 involved the 14th Corps at basic odds of 41:7, with AECA of +3. One Dornier unit added ground support. At odds of 6:1, with a +3, on a roll of 5, the Turk units were eliminated.
Axis units to the north and west of Istanbul moved to contain Turkish units but did not attack due to low odds and lack of air support.
German units advanced in preparation for their Exploitation Phase.
In the Exploitation Phase, the 40th Corps pushed hard east, overruning three unfortunate Engineer units (shown off table in the following shot). Other mech/motorized units advanced east, also, with the SS corps remaining behind to support attacks against by-passed Turk infantry units.
Think it all started when I was 9-10 years old. Watched They Were Expendable on television. Little ships destroying really big ships.
The next step was buying MTB a long, long time ago. Really enjoyed it. I don’t have any idea where it went.
At some point, I bought a box of 1/700 torpedo boats. Painted them, but nothing more. A few years ago, I started buying up some other 1/700 ships and, using Pit Road buildings, constructed a whole naval base. Then came the planes. I culled all kinds of rules, and came up with my own . After all that was all finished, all that was put away. Typical.
Now they/it/them are back.
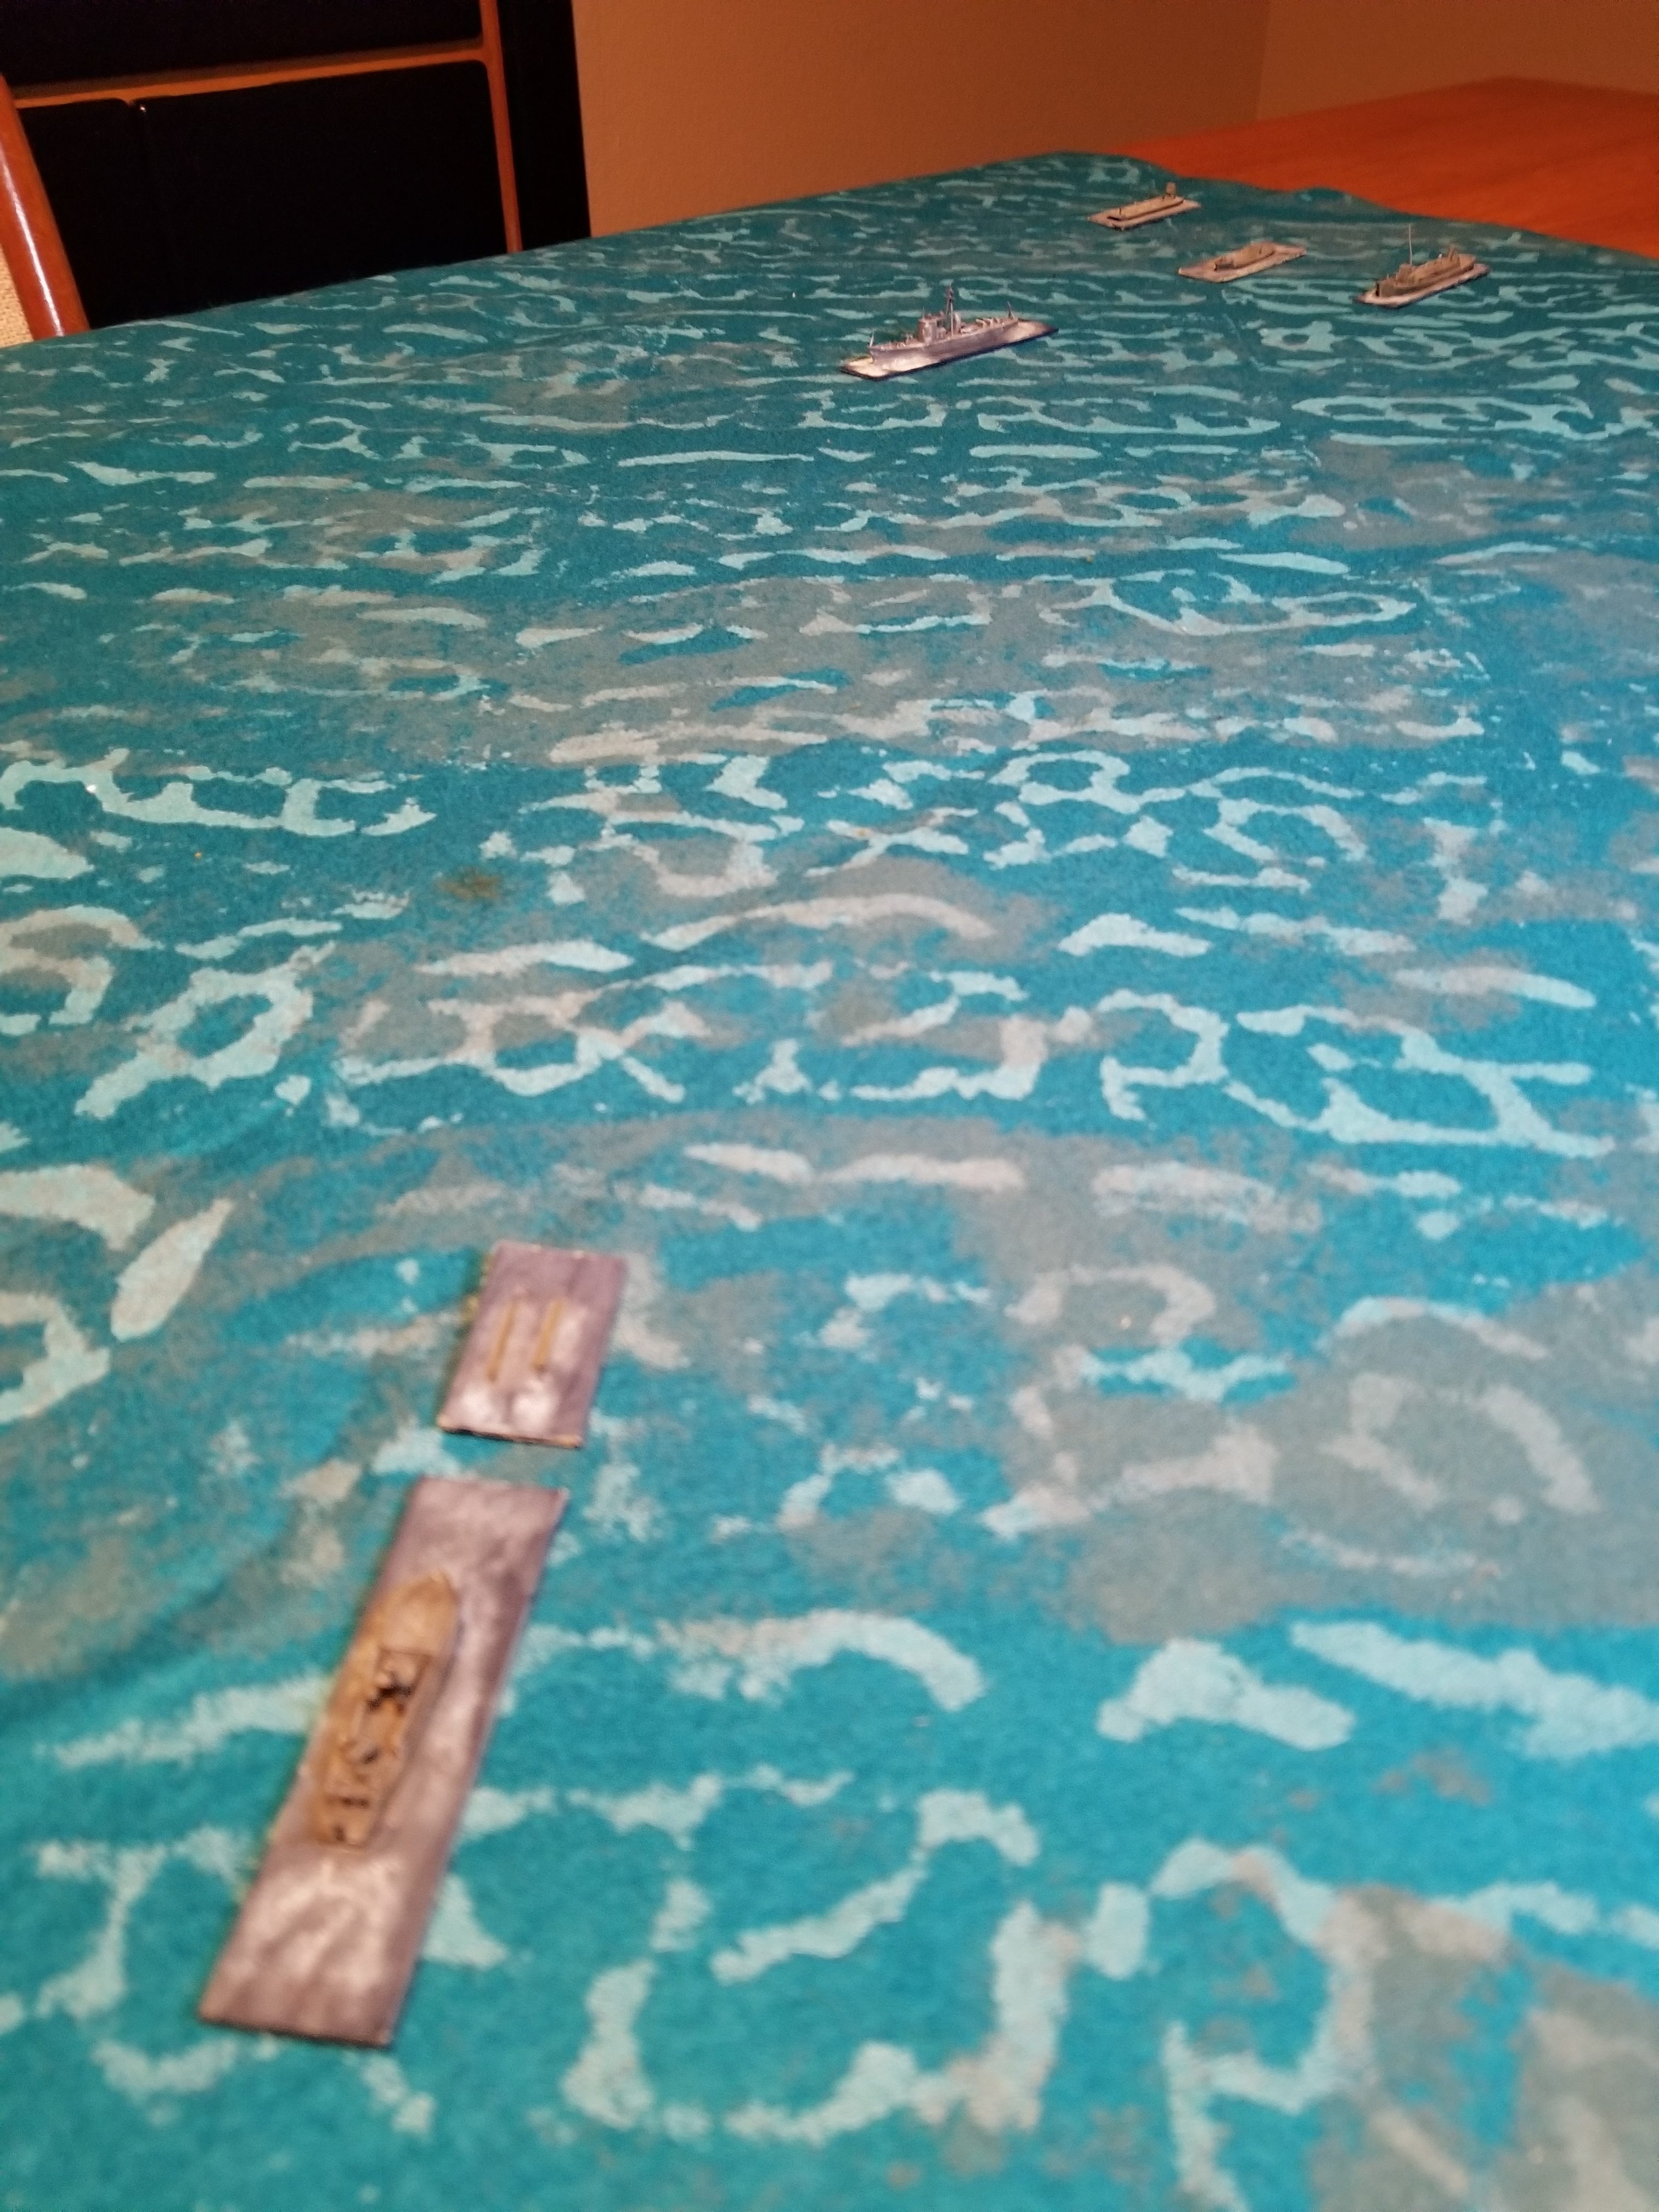
Set up the dining room table with an old, old fleece ocean “mat”. Slapped together unfinished kits, and muddled my way through fabricating torpedo rules.
Half the fun (or more) was getting there. Lots of interesting stuff floating around about PT boats, their crews, doctrine, actions, and torpedos. Granted the torpedo information is about submarines, but it forms a basis for putting together a rules structure. And, I can’t find the link for the life of me. But, isn’t ptboat.org wonderful? Oh….here’s the link.
Ready to playtest a bit.
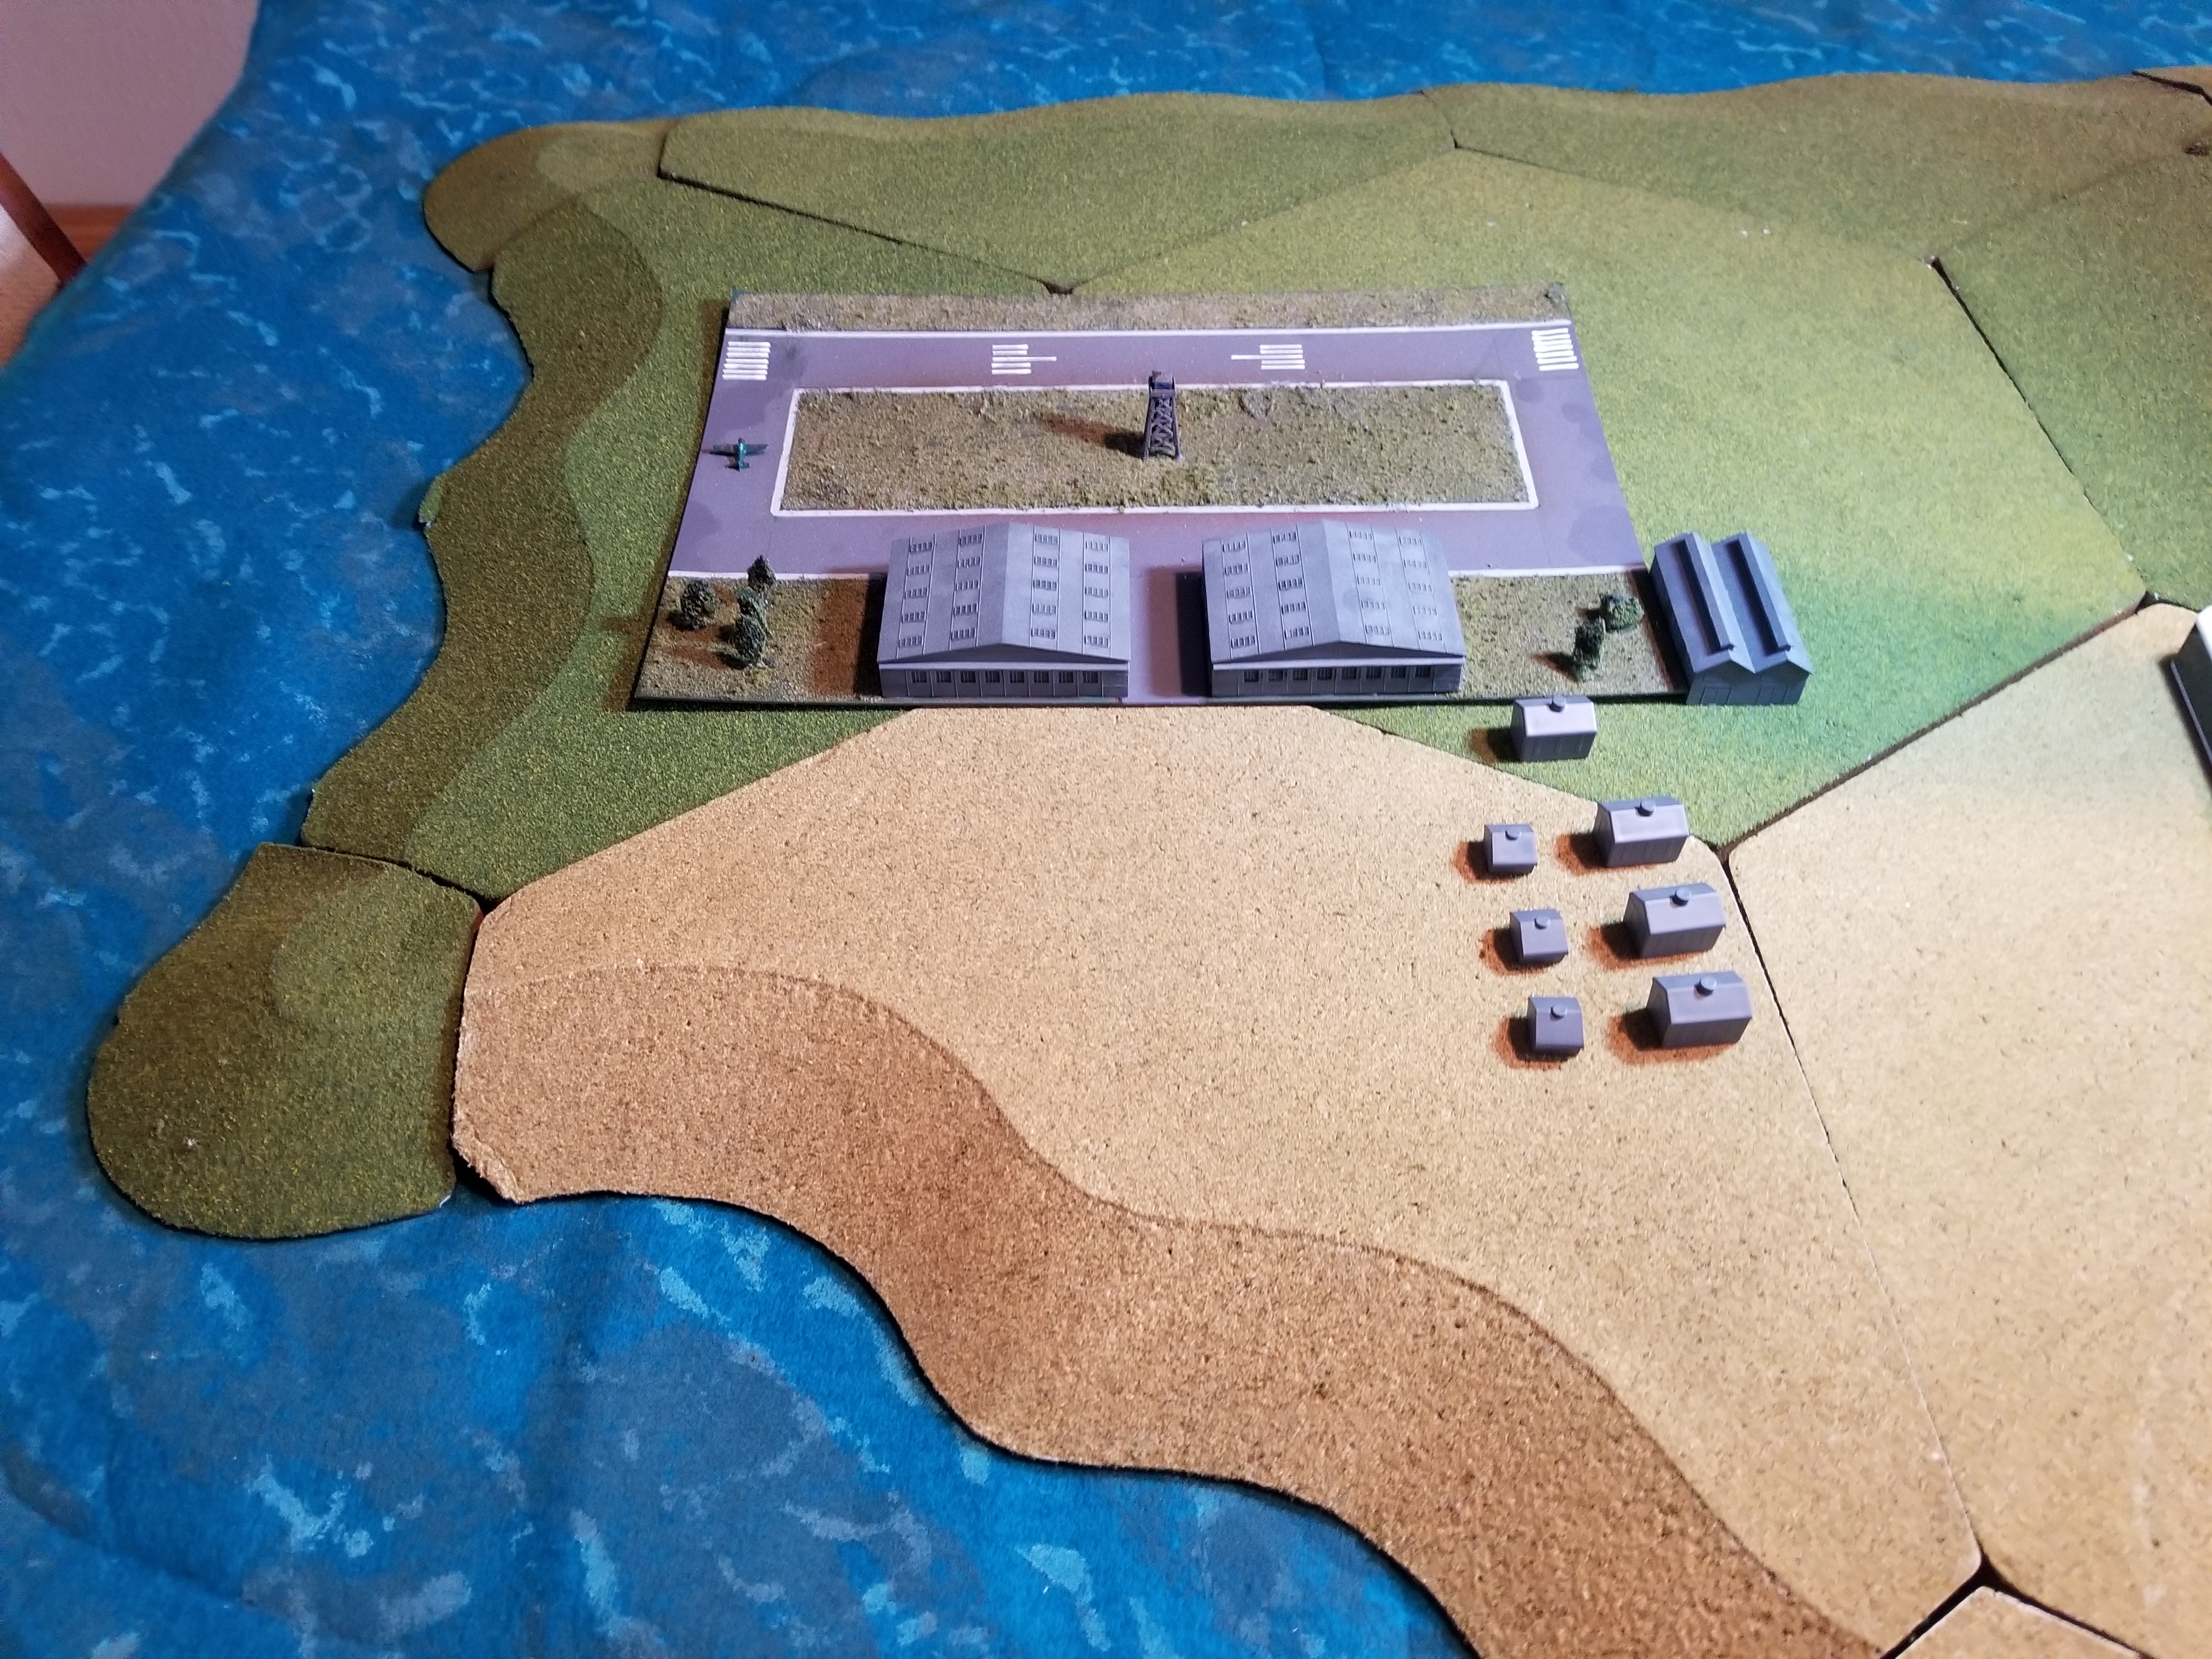
Island AirfieldTorpedo Launch At ConvoyHit….But A Dud?
General mobilization occured during the Initial Phase. The bulk of the 2-8 self supported mountain divisions were upgraded to 4-8 strength divisions. Border troops and the Izmir fortress cadre were also upgraded. However, the Turks rolled poorly on the Success Table, receiving only one out of a possible five new infantry divisions. They fared little better with construction and artillery units. The construction units were consolidated to begin “quick constructing” forts.
Fortunately, the Turks will receive all “missing” units during Turn Two.
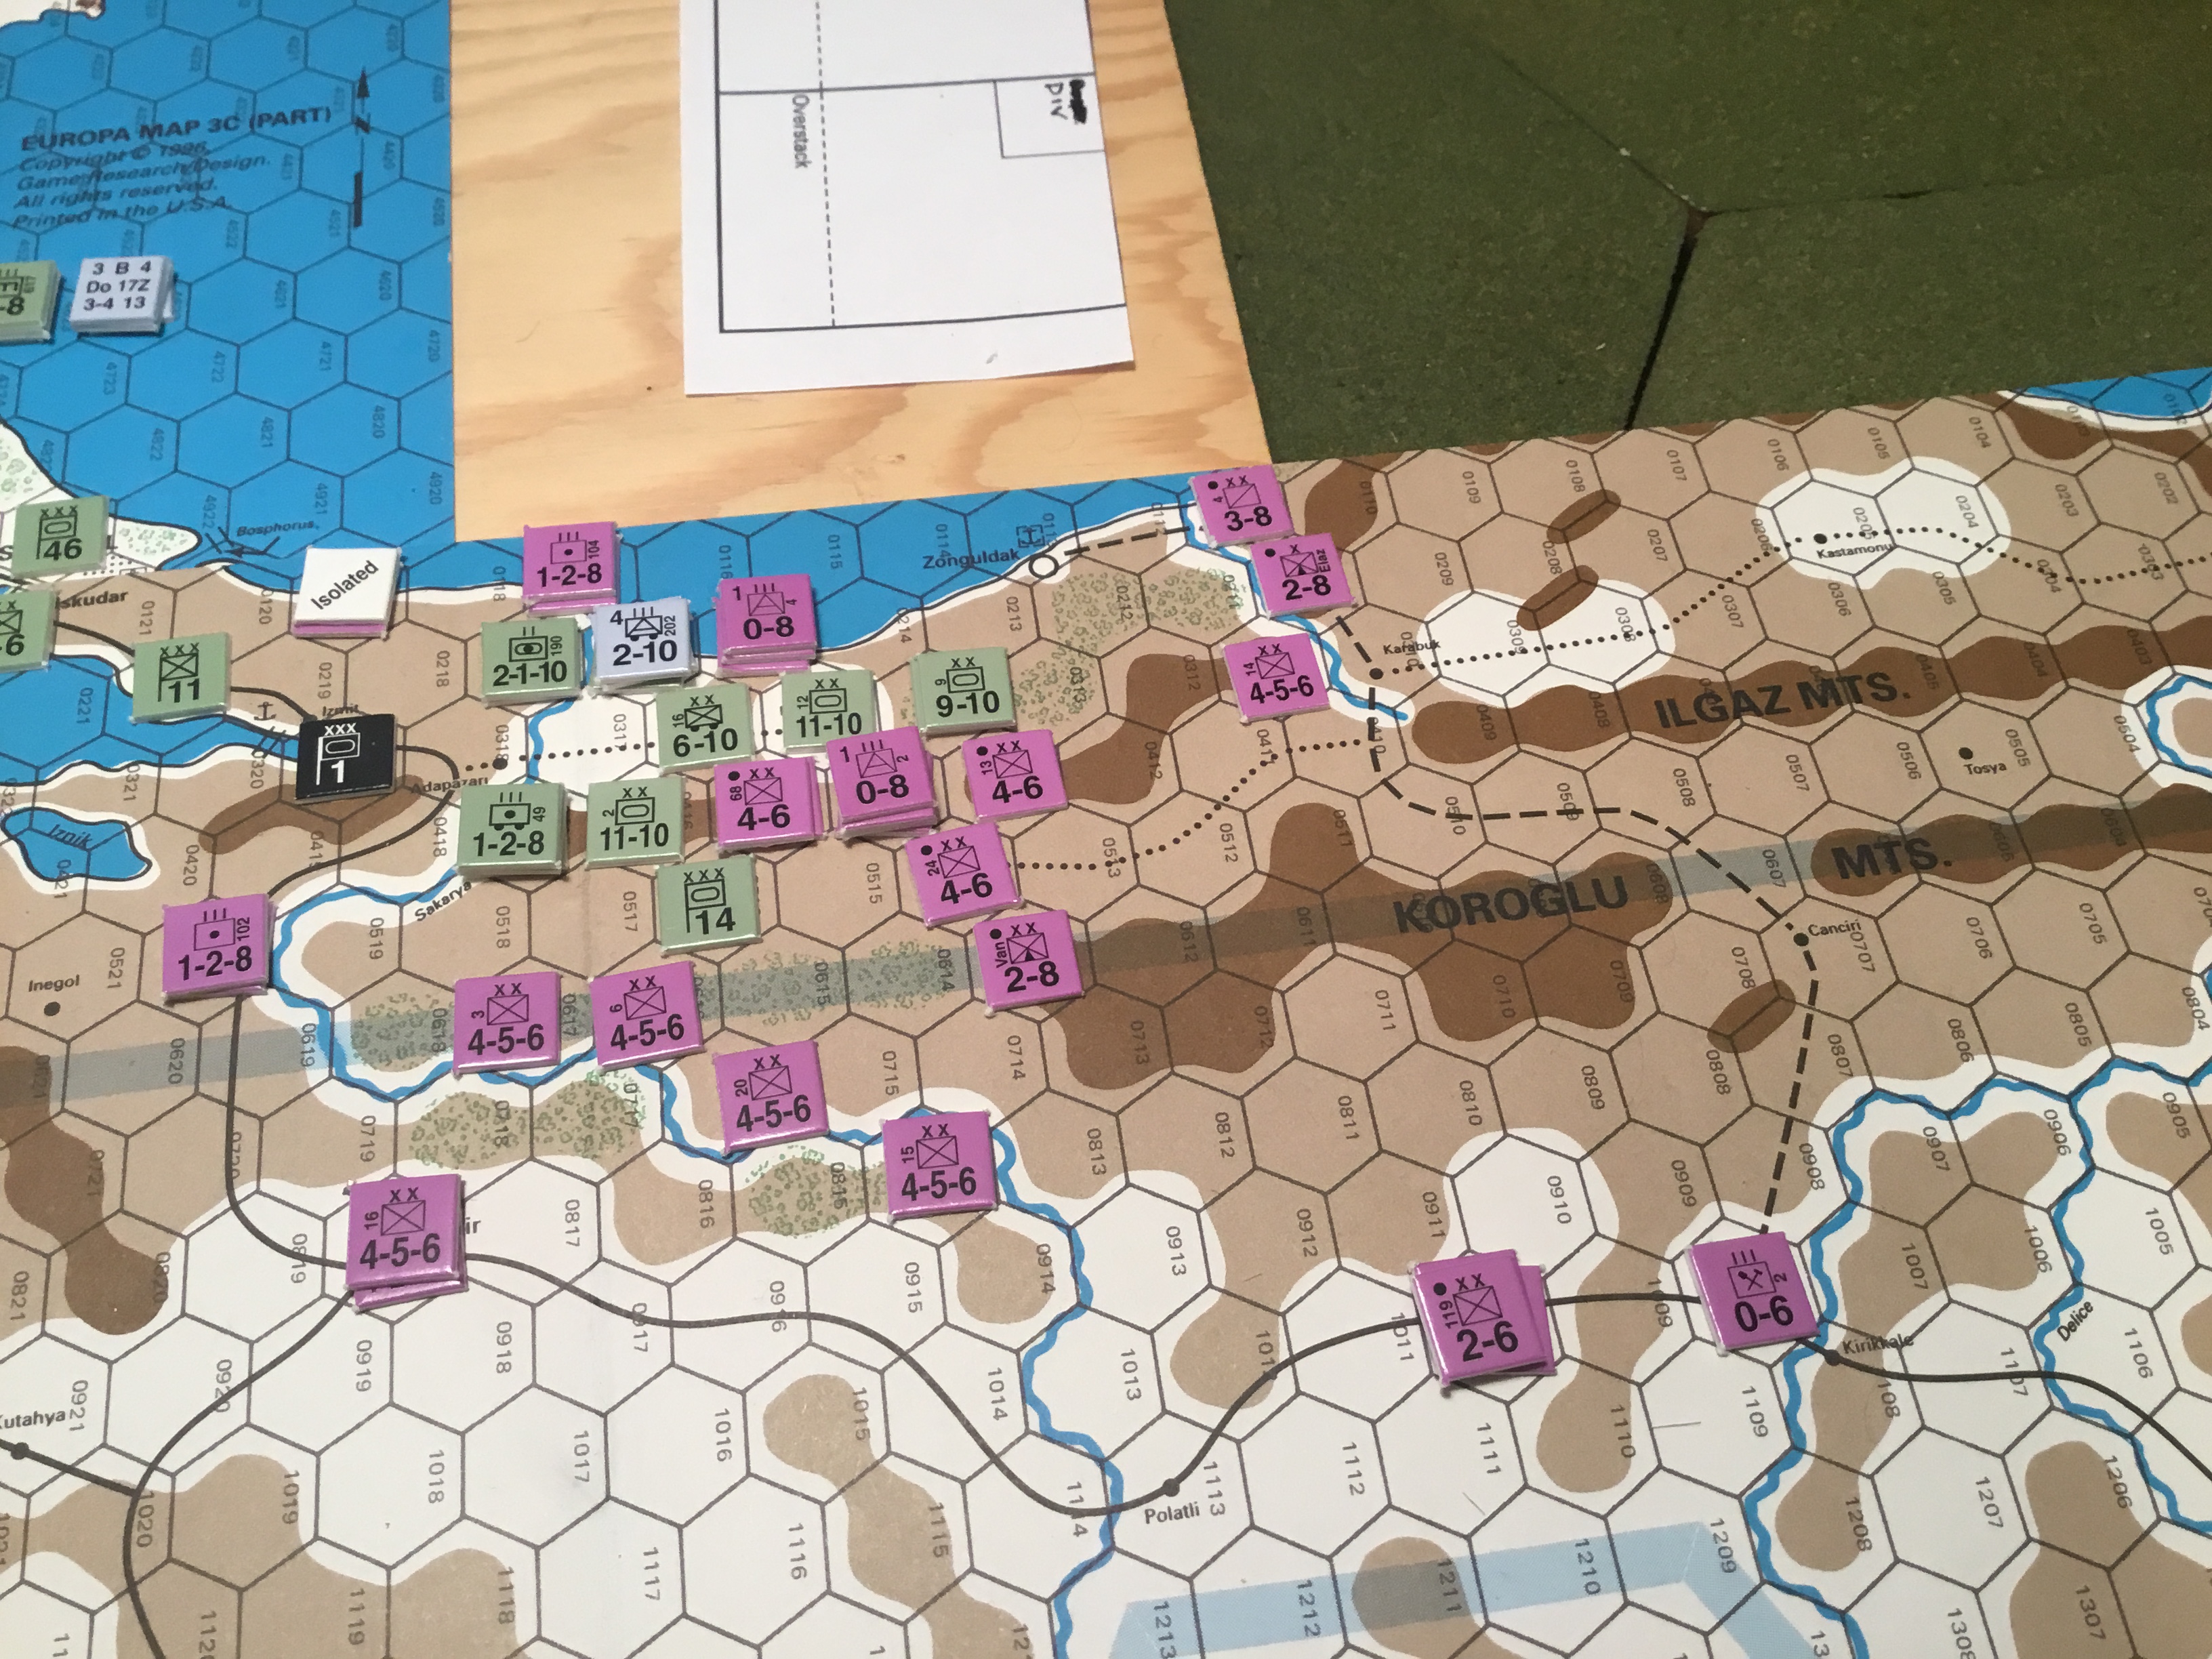
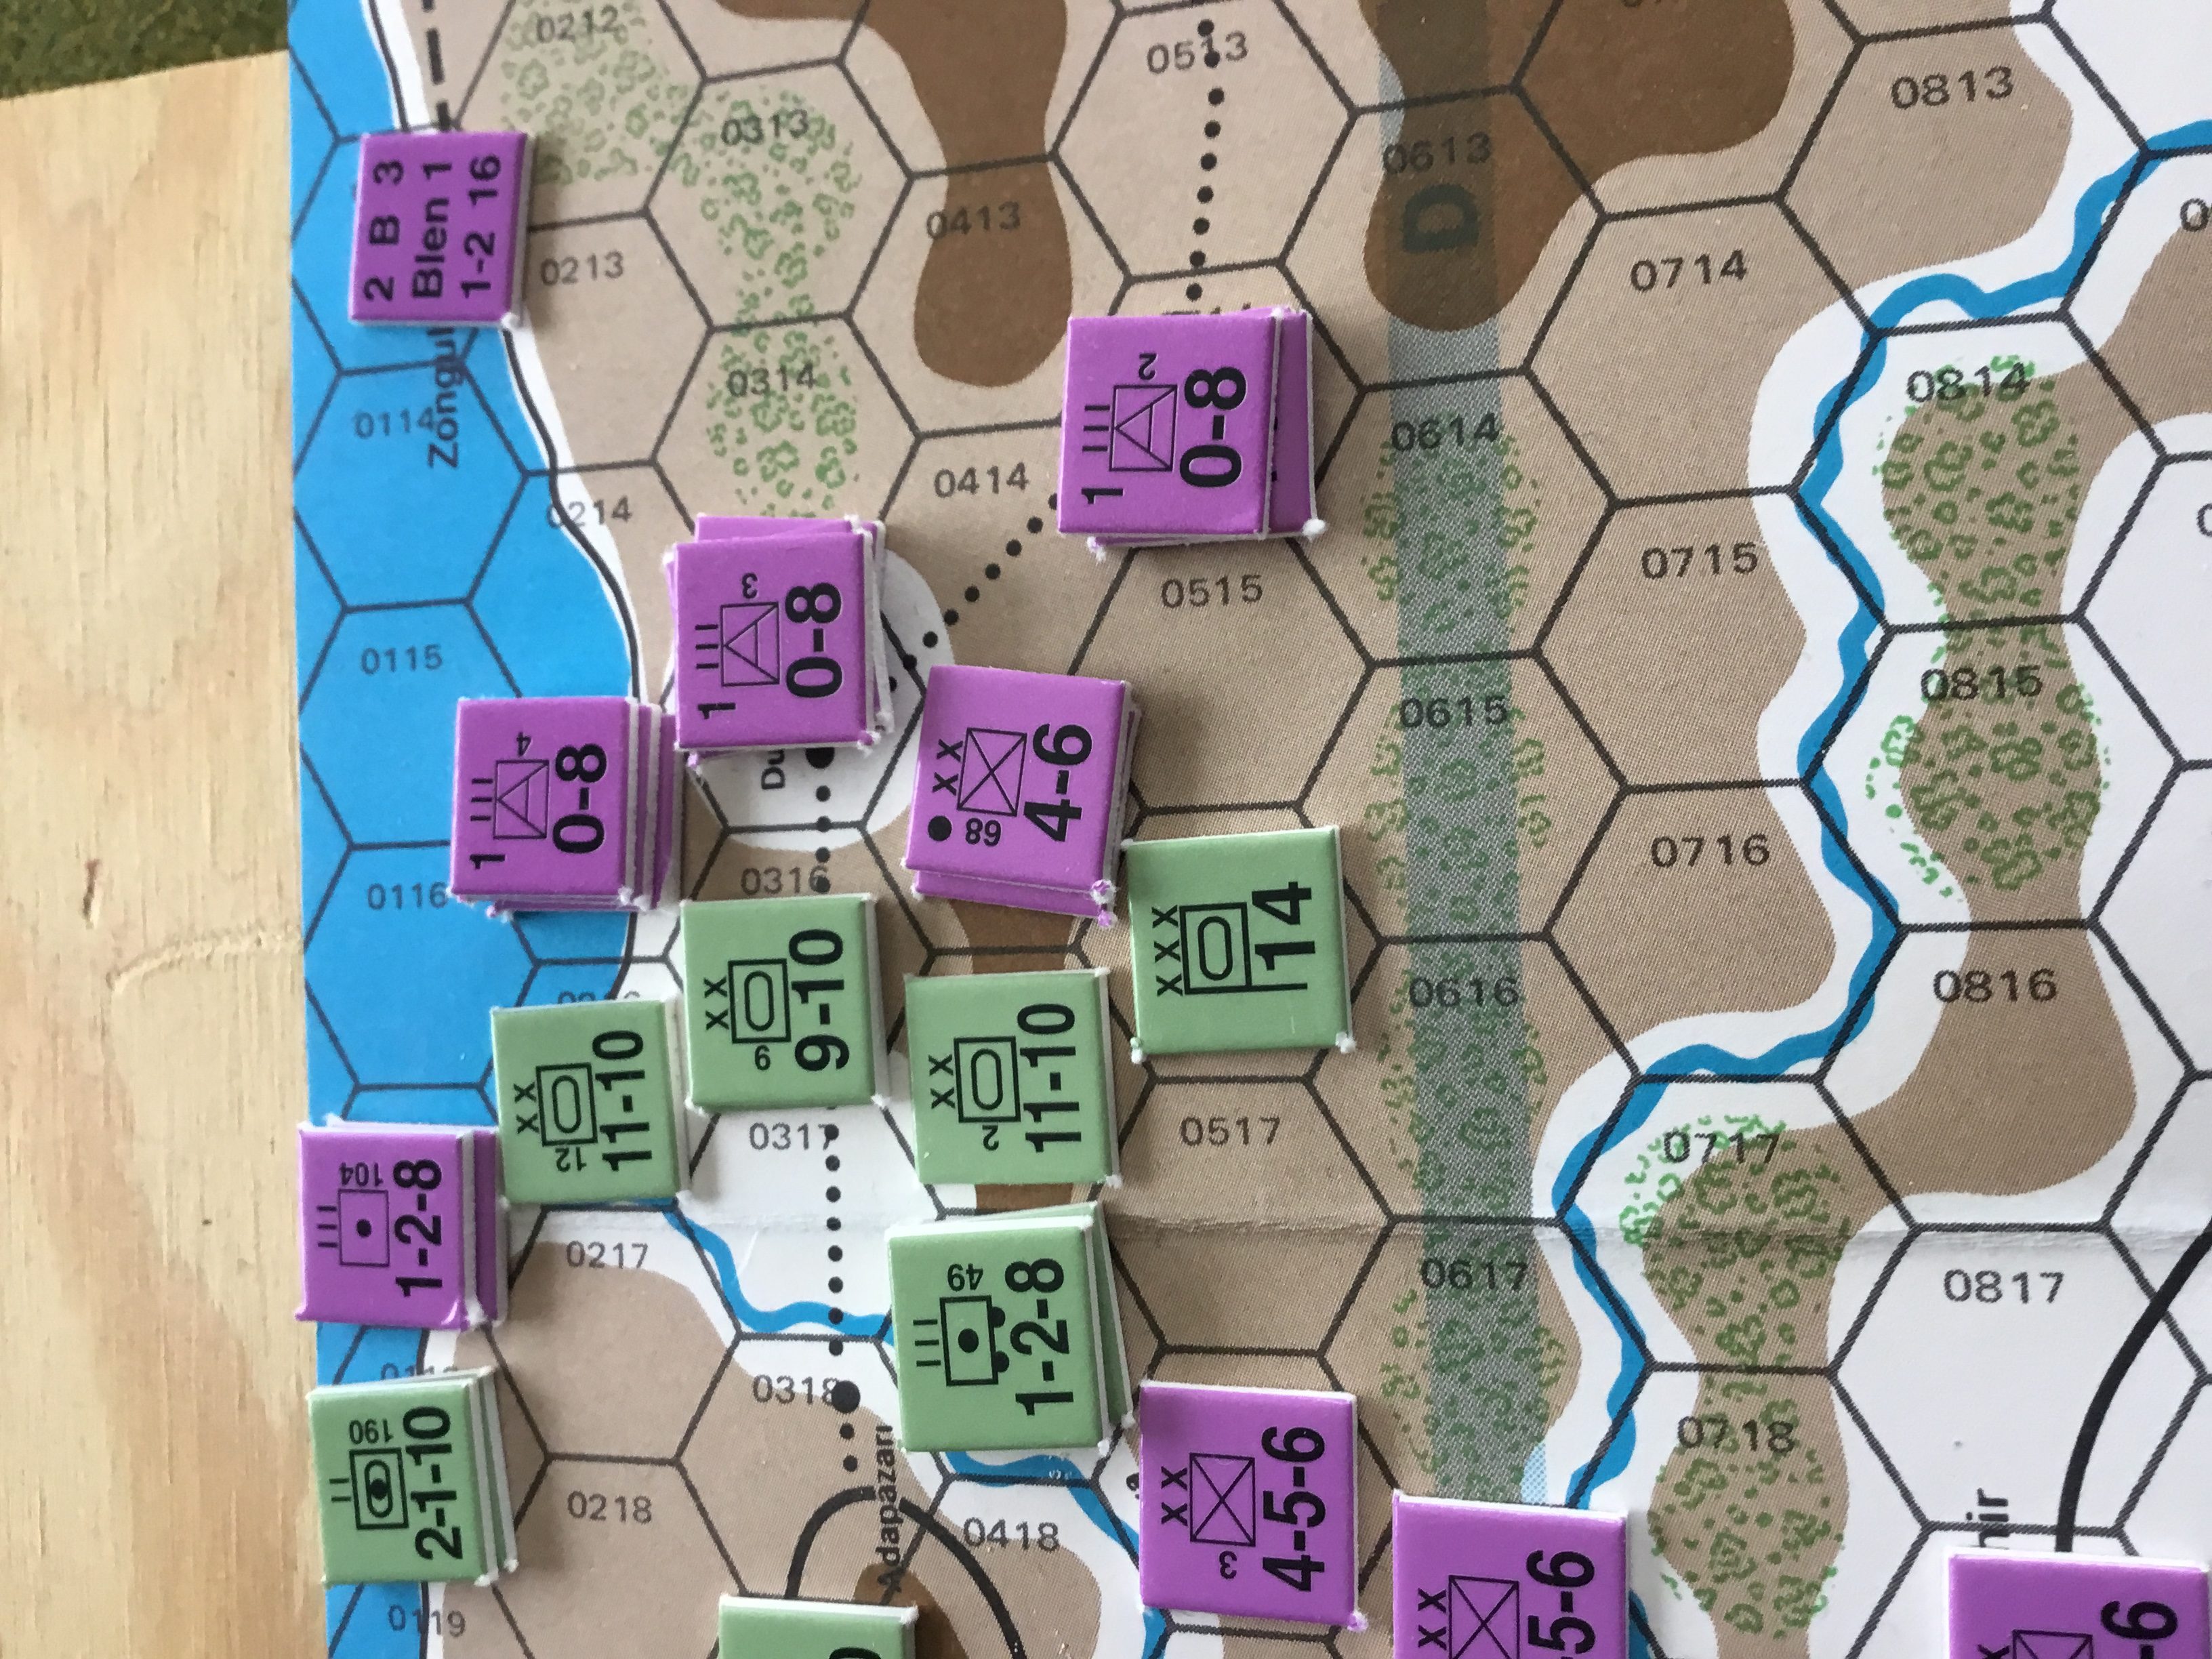
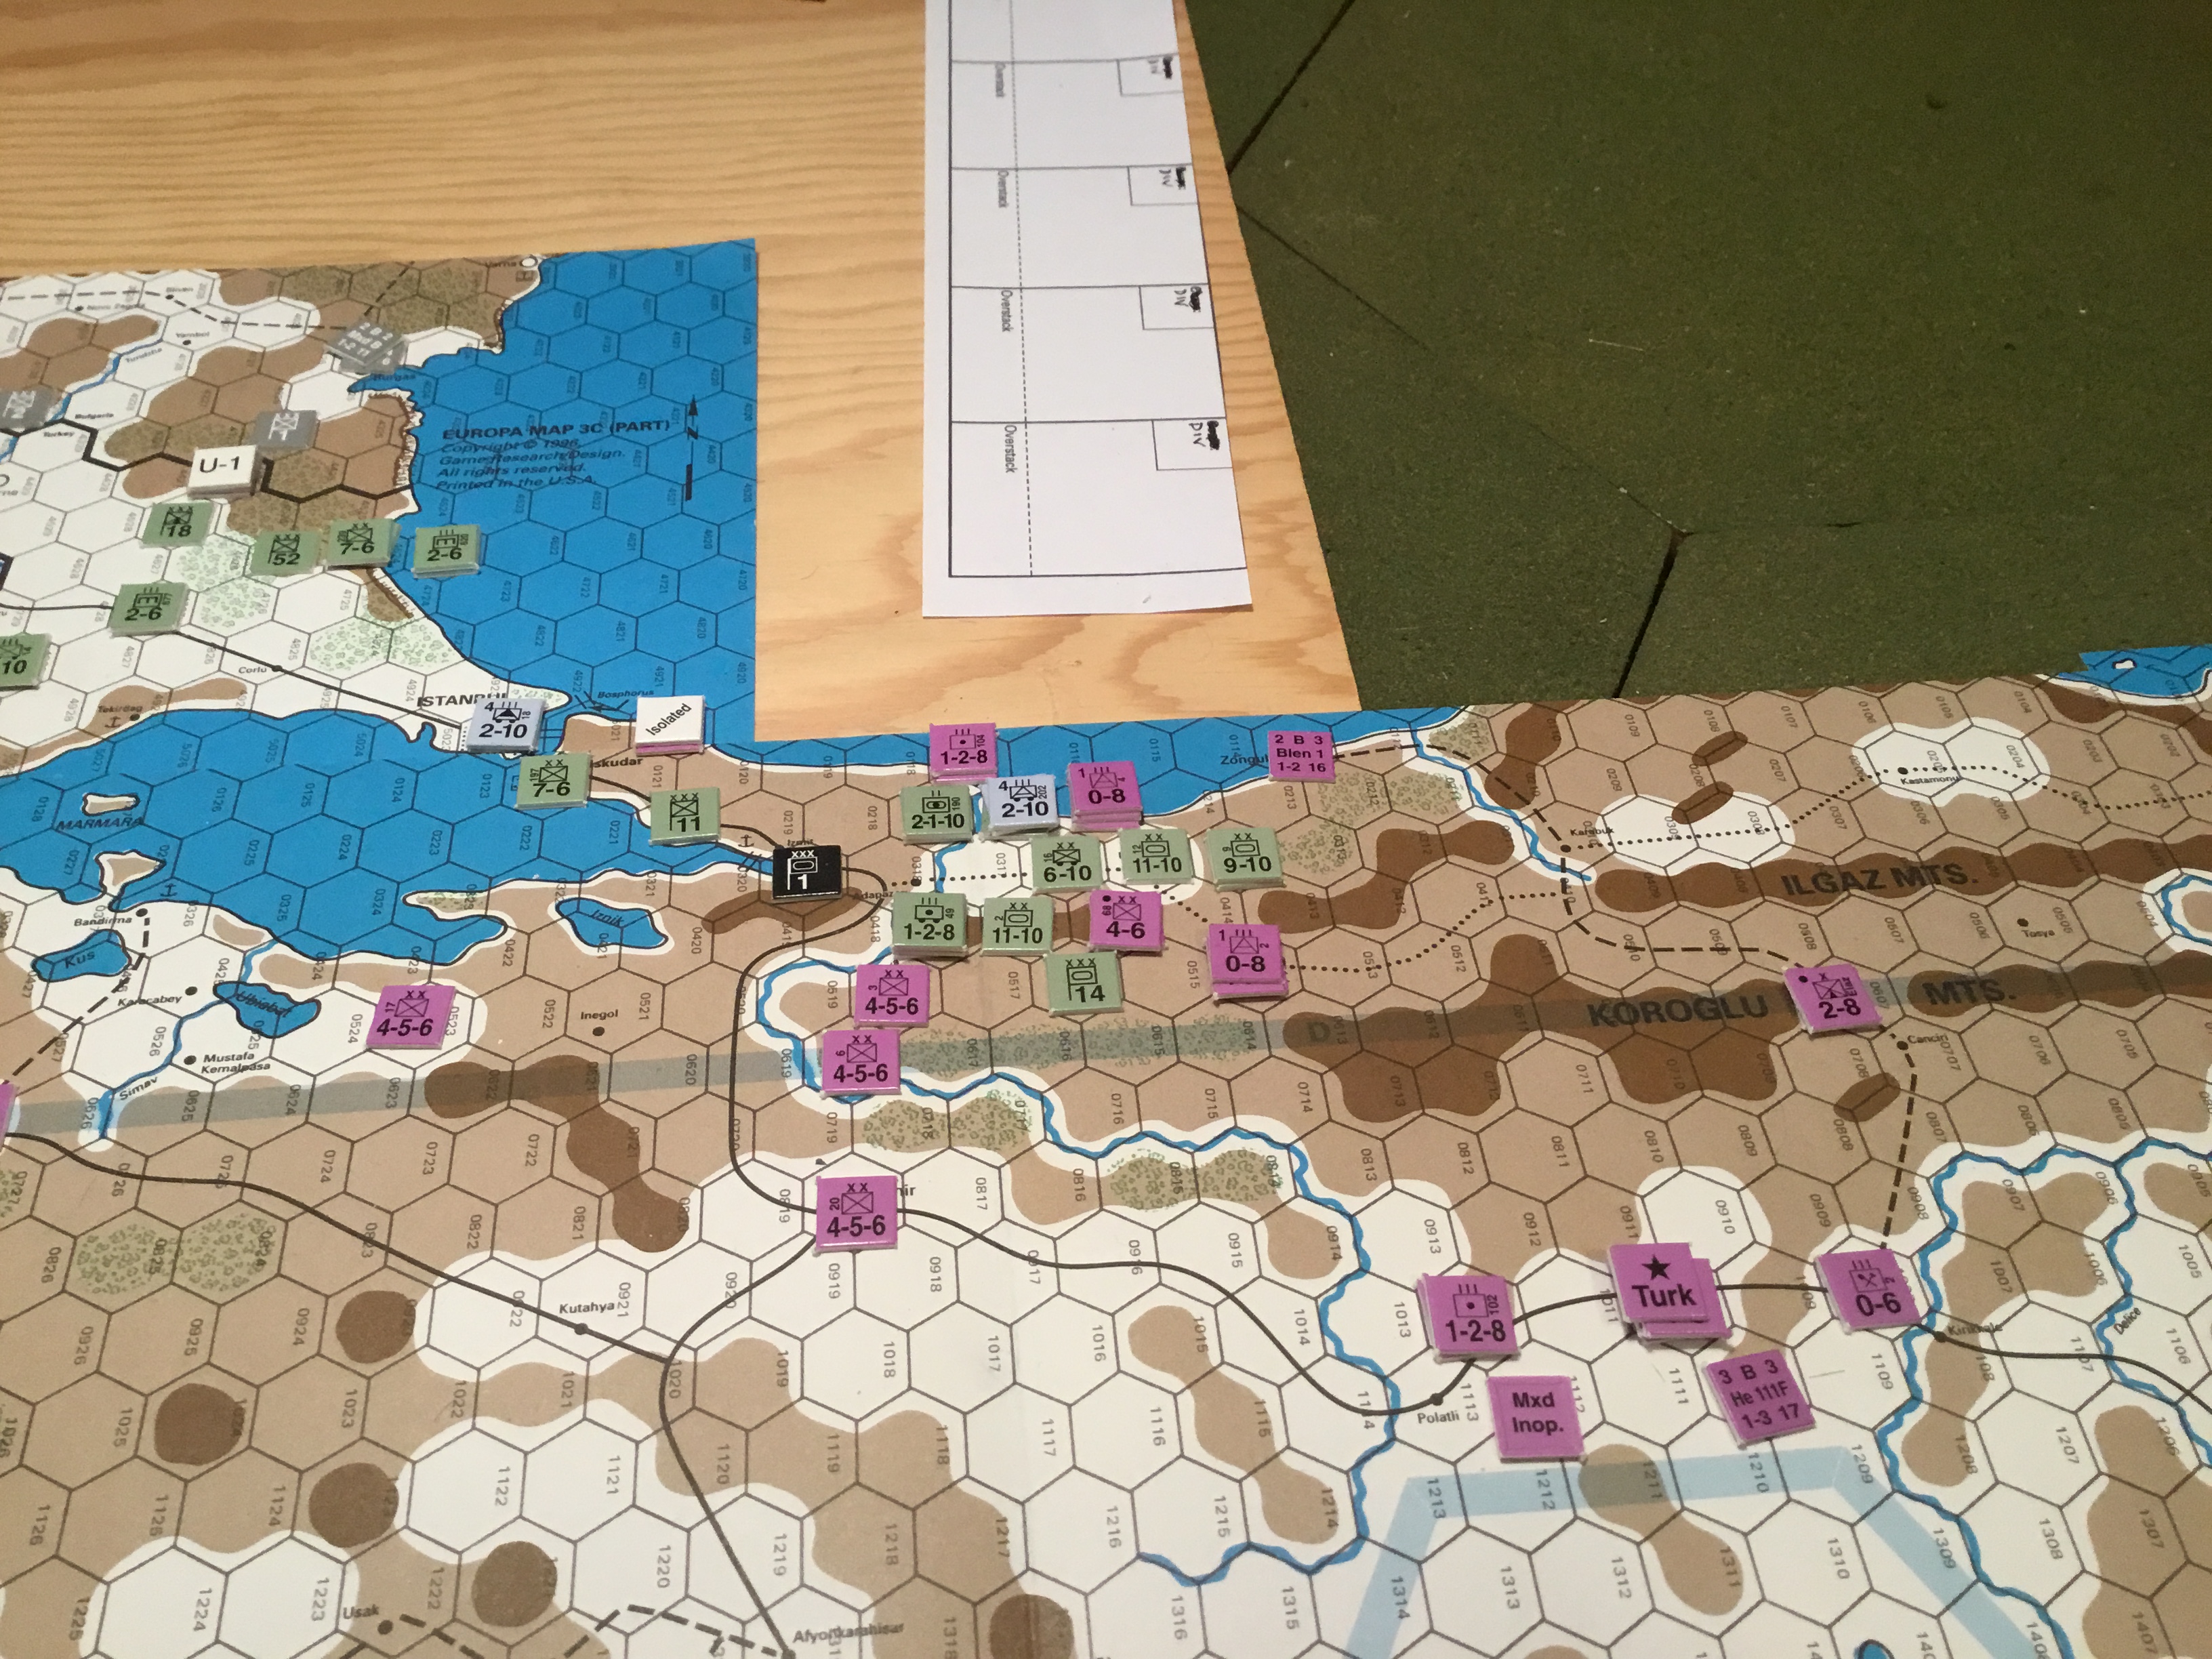
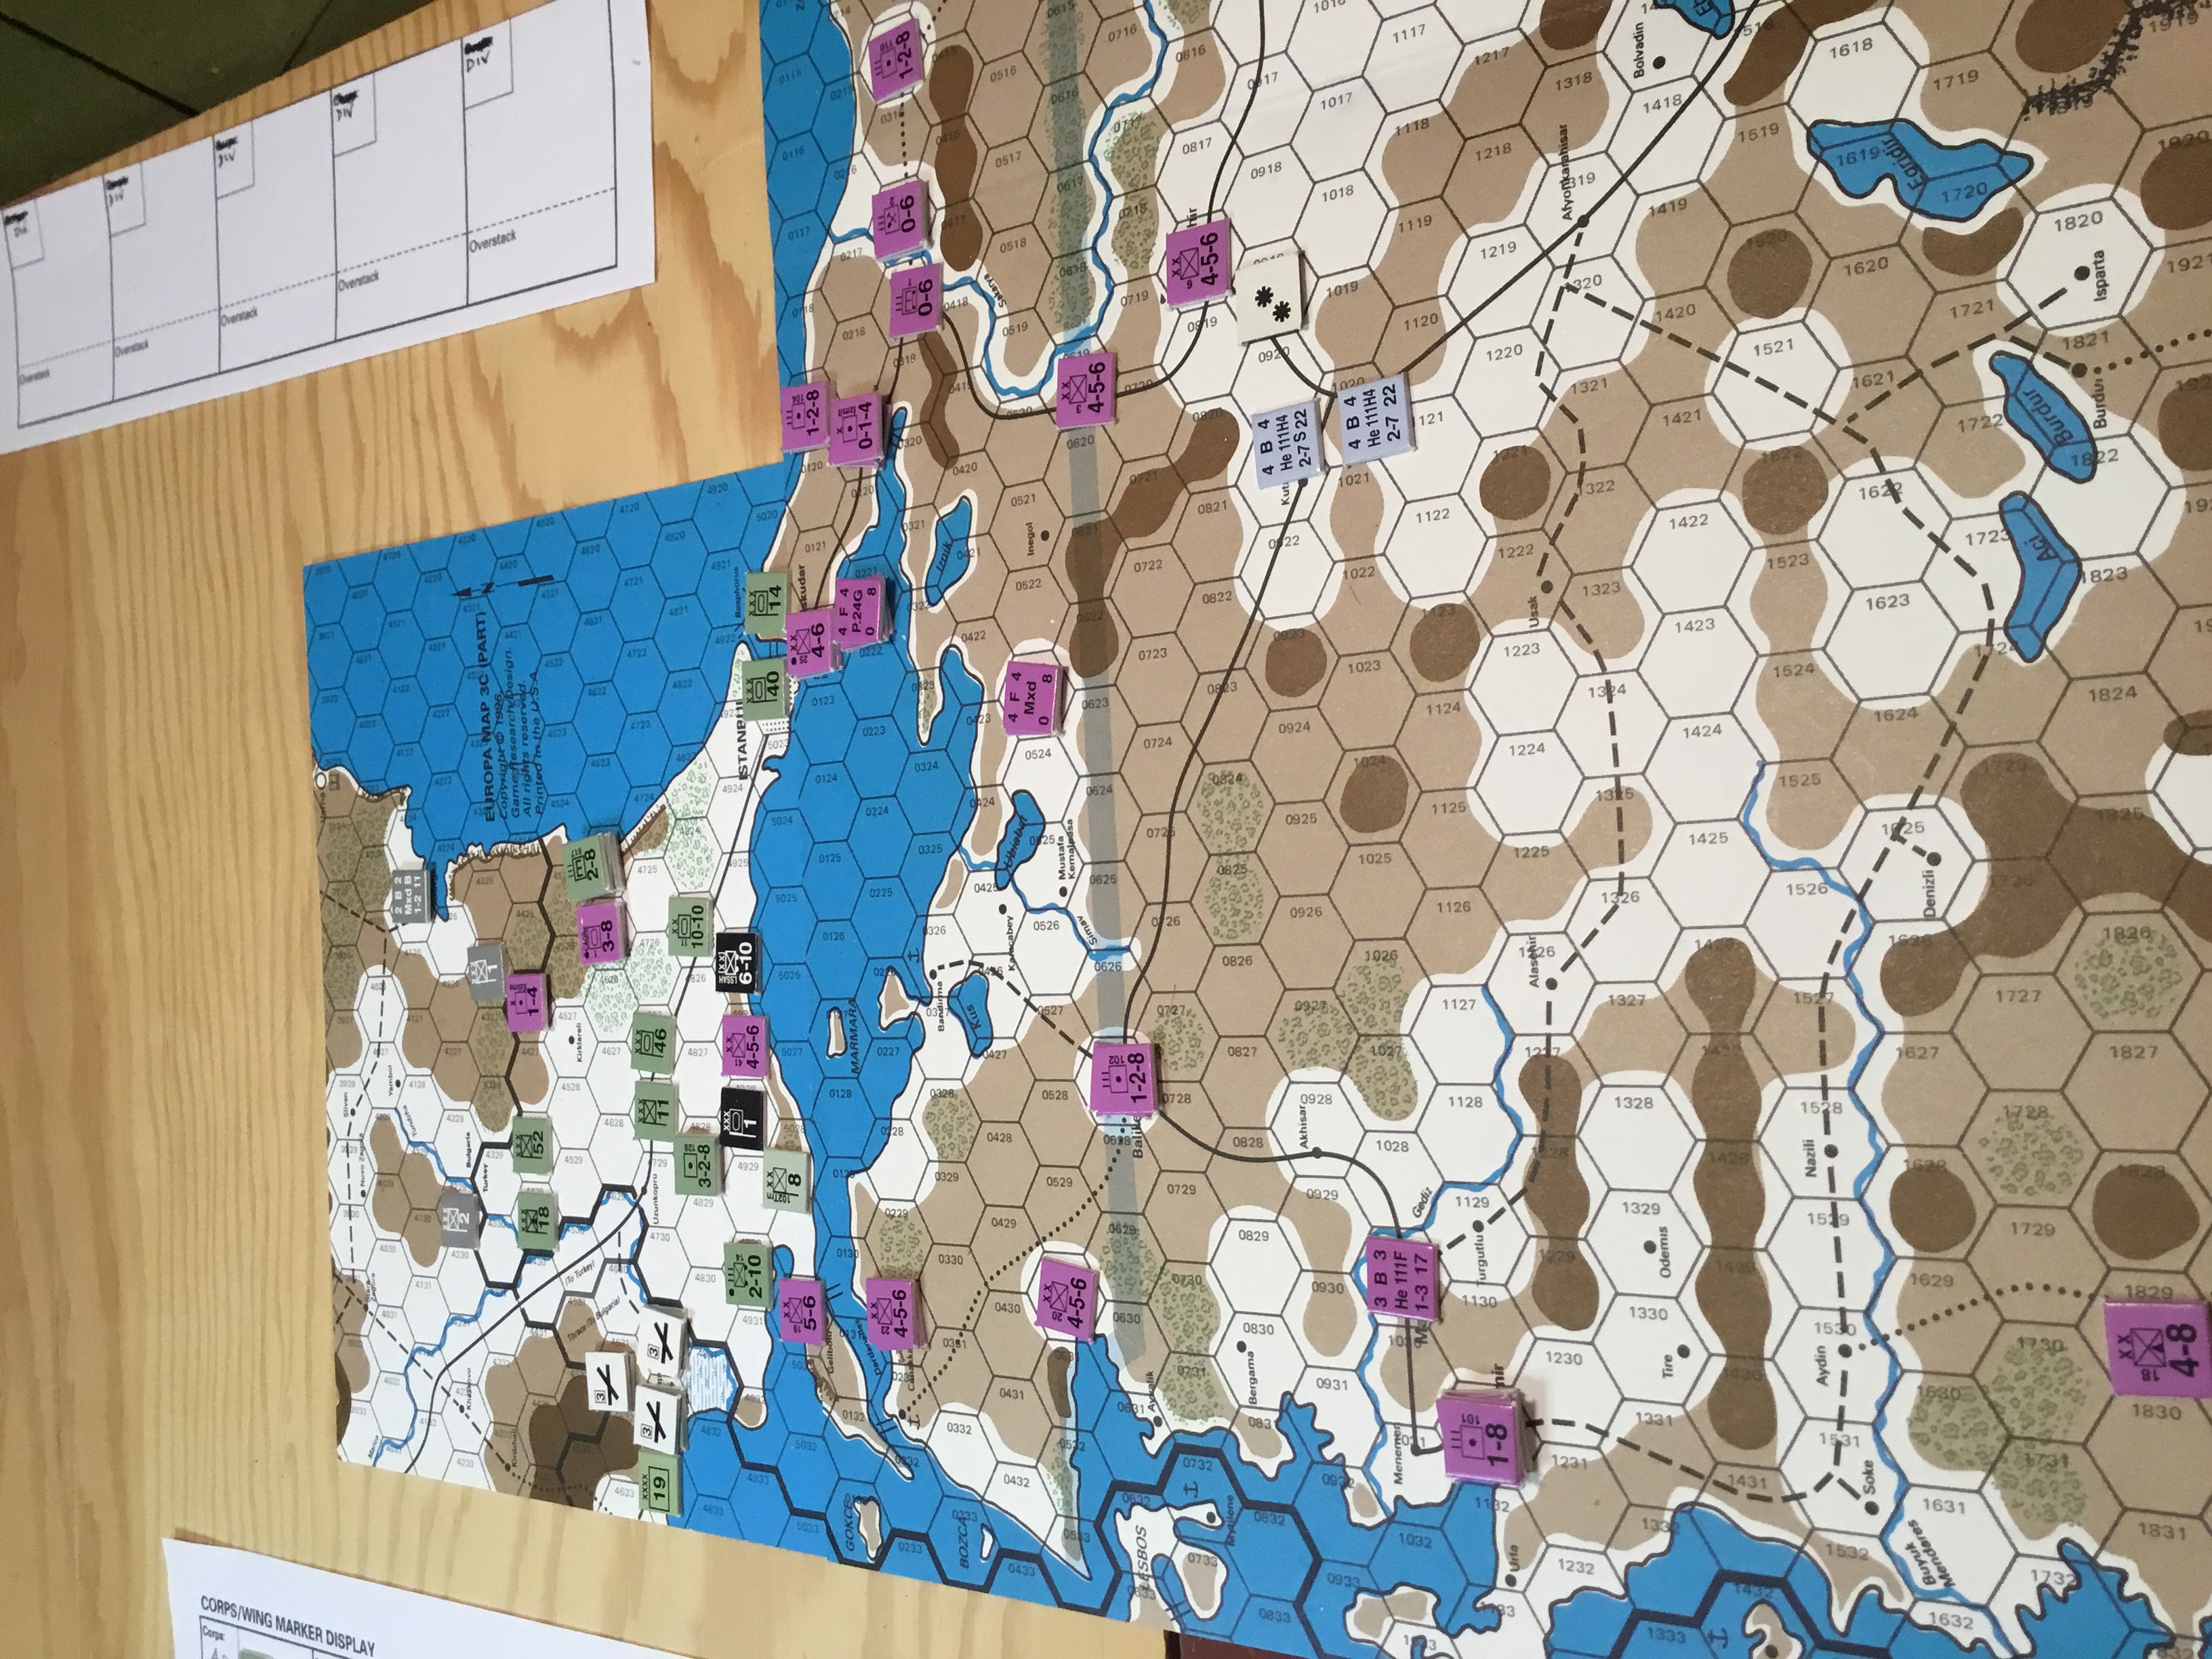
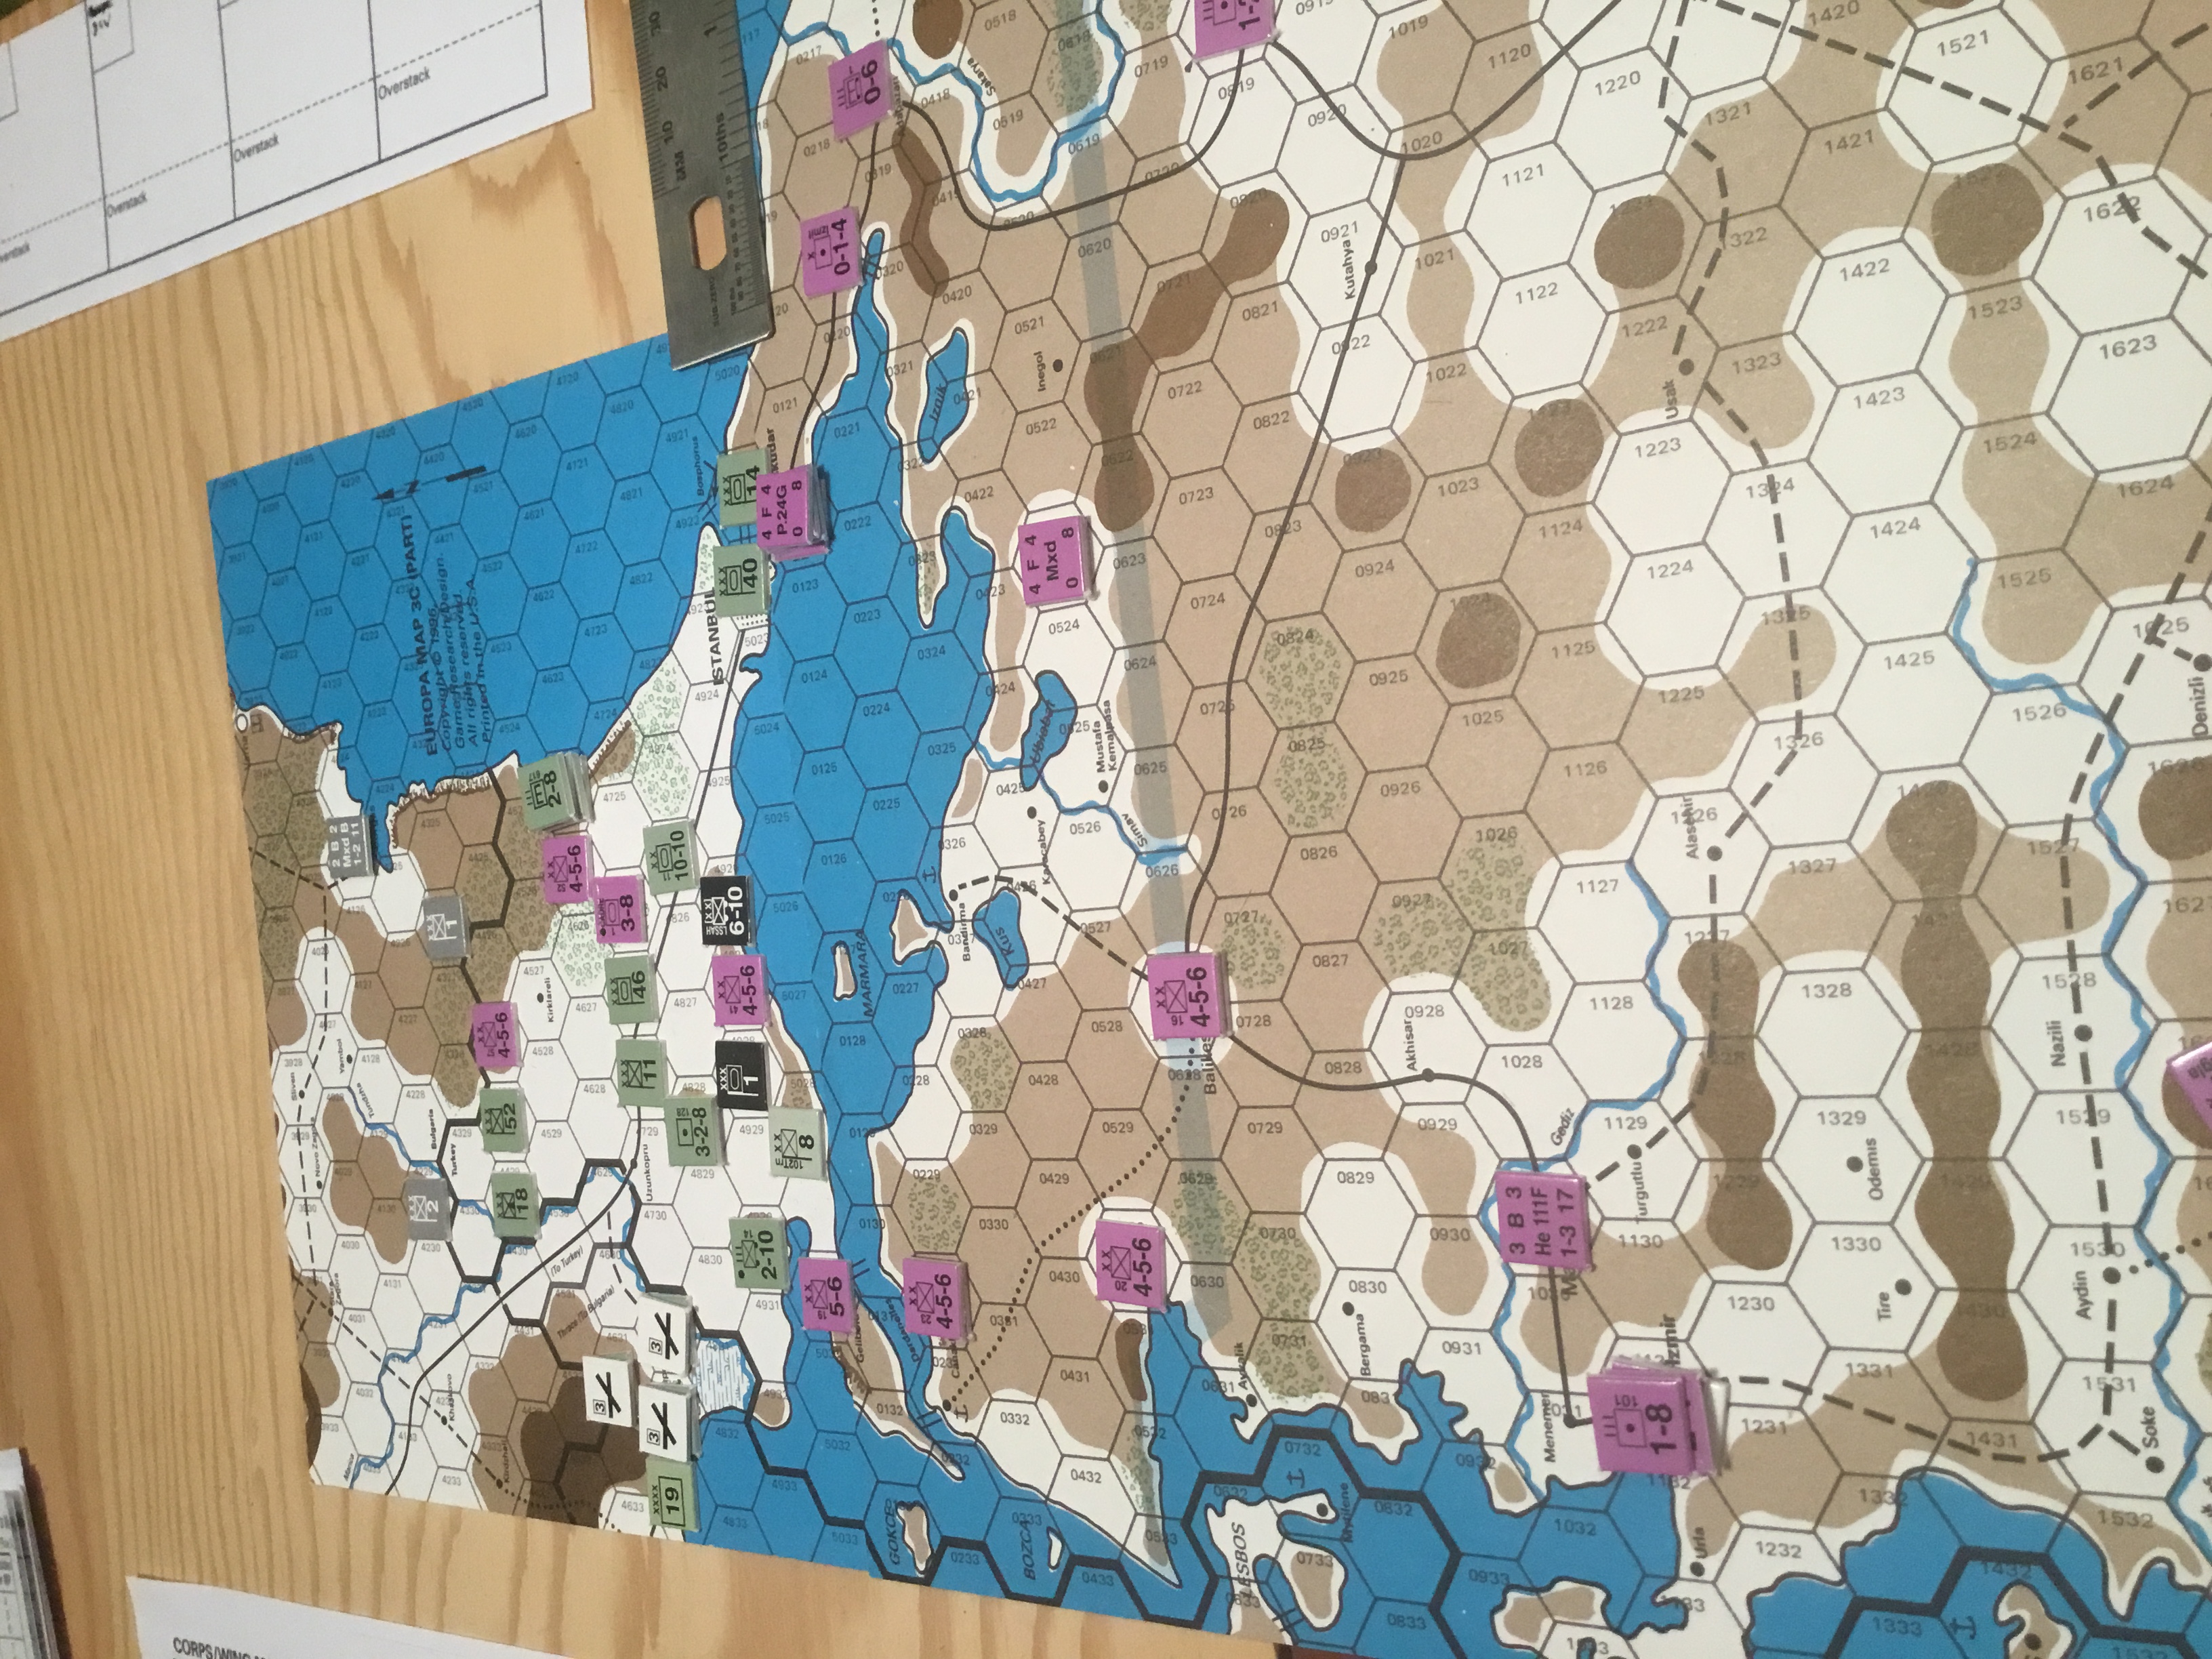
Undermanned, and with units scattered all over Anatolia, the Turks were barely able to build a defense line east of Uskudar. The limited rail capacity of 15 Regimental Equivalents (REs), was further degraded by a German harassment mission, interdicting the rail and road hub at Eskisehir.
Their best hope is that the units at Uskudar will delay the Germans, allowing the Turks to further build up defenses during Turn 2.
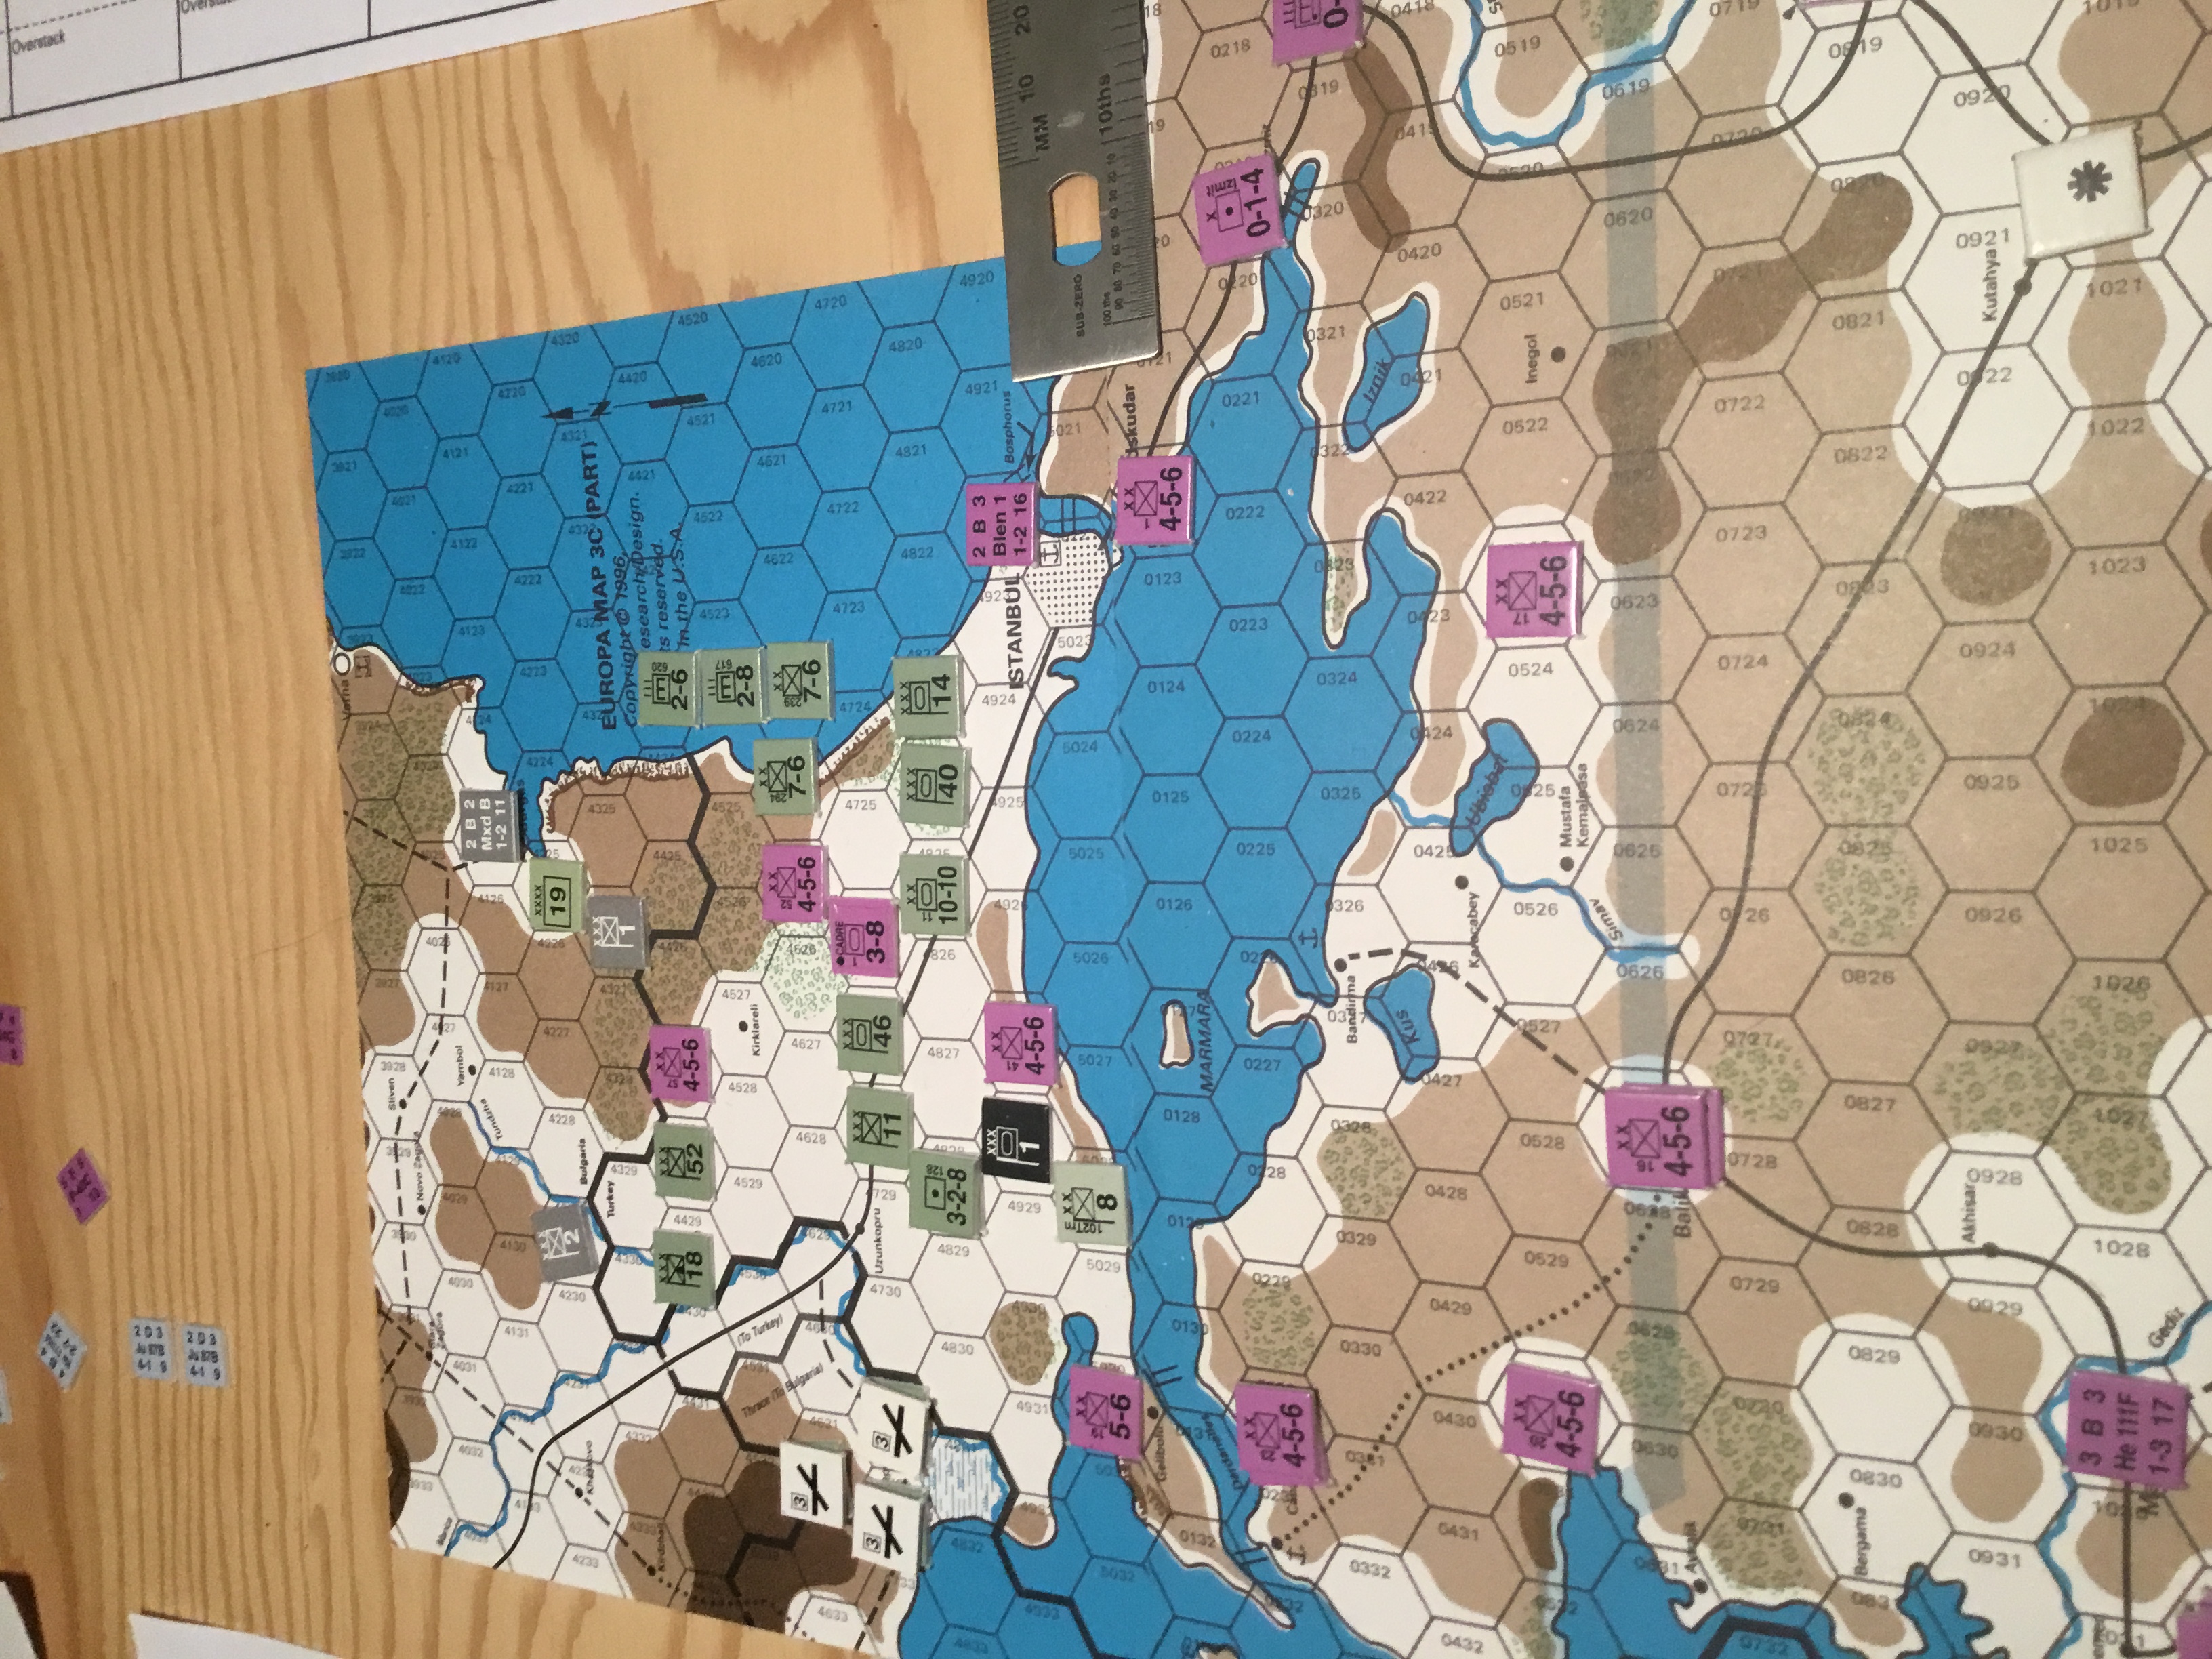
Turkish Turn 1 – There Are Divisions Under The Artillery Units East Of Uskudar. German Bombers Shown Flying Harassment. Isolated Turk Armored Cadre Moves East In Breakout Attempt.
Tim and I set up on last (1/5) Saturday afternoon, and spent the evening watching the Seahawks lose; and Spinal Tap….which is always a winner.
Started playing before 0900 on Sunday and didn’t quit until 2200 or so.
The game doesn’t have a lot of counters, and the map size is modest. But, it’s long slog. With Soviet and NATO turns involving double impulses, a very active air war, and some accounting, we had to push it to get three turns in. Yes, we had an emergency beer run, but we really maintained our focus.
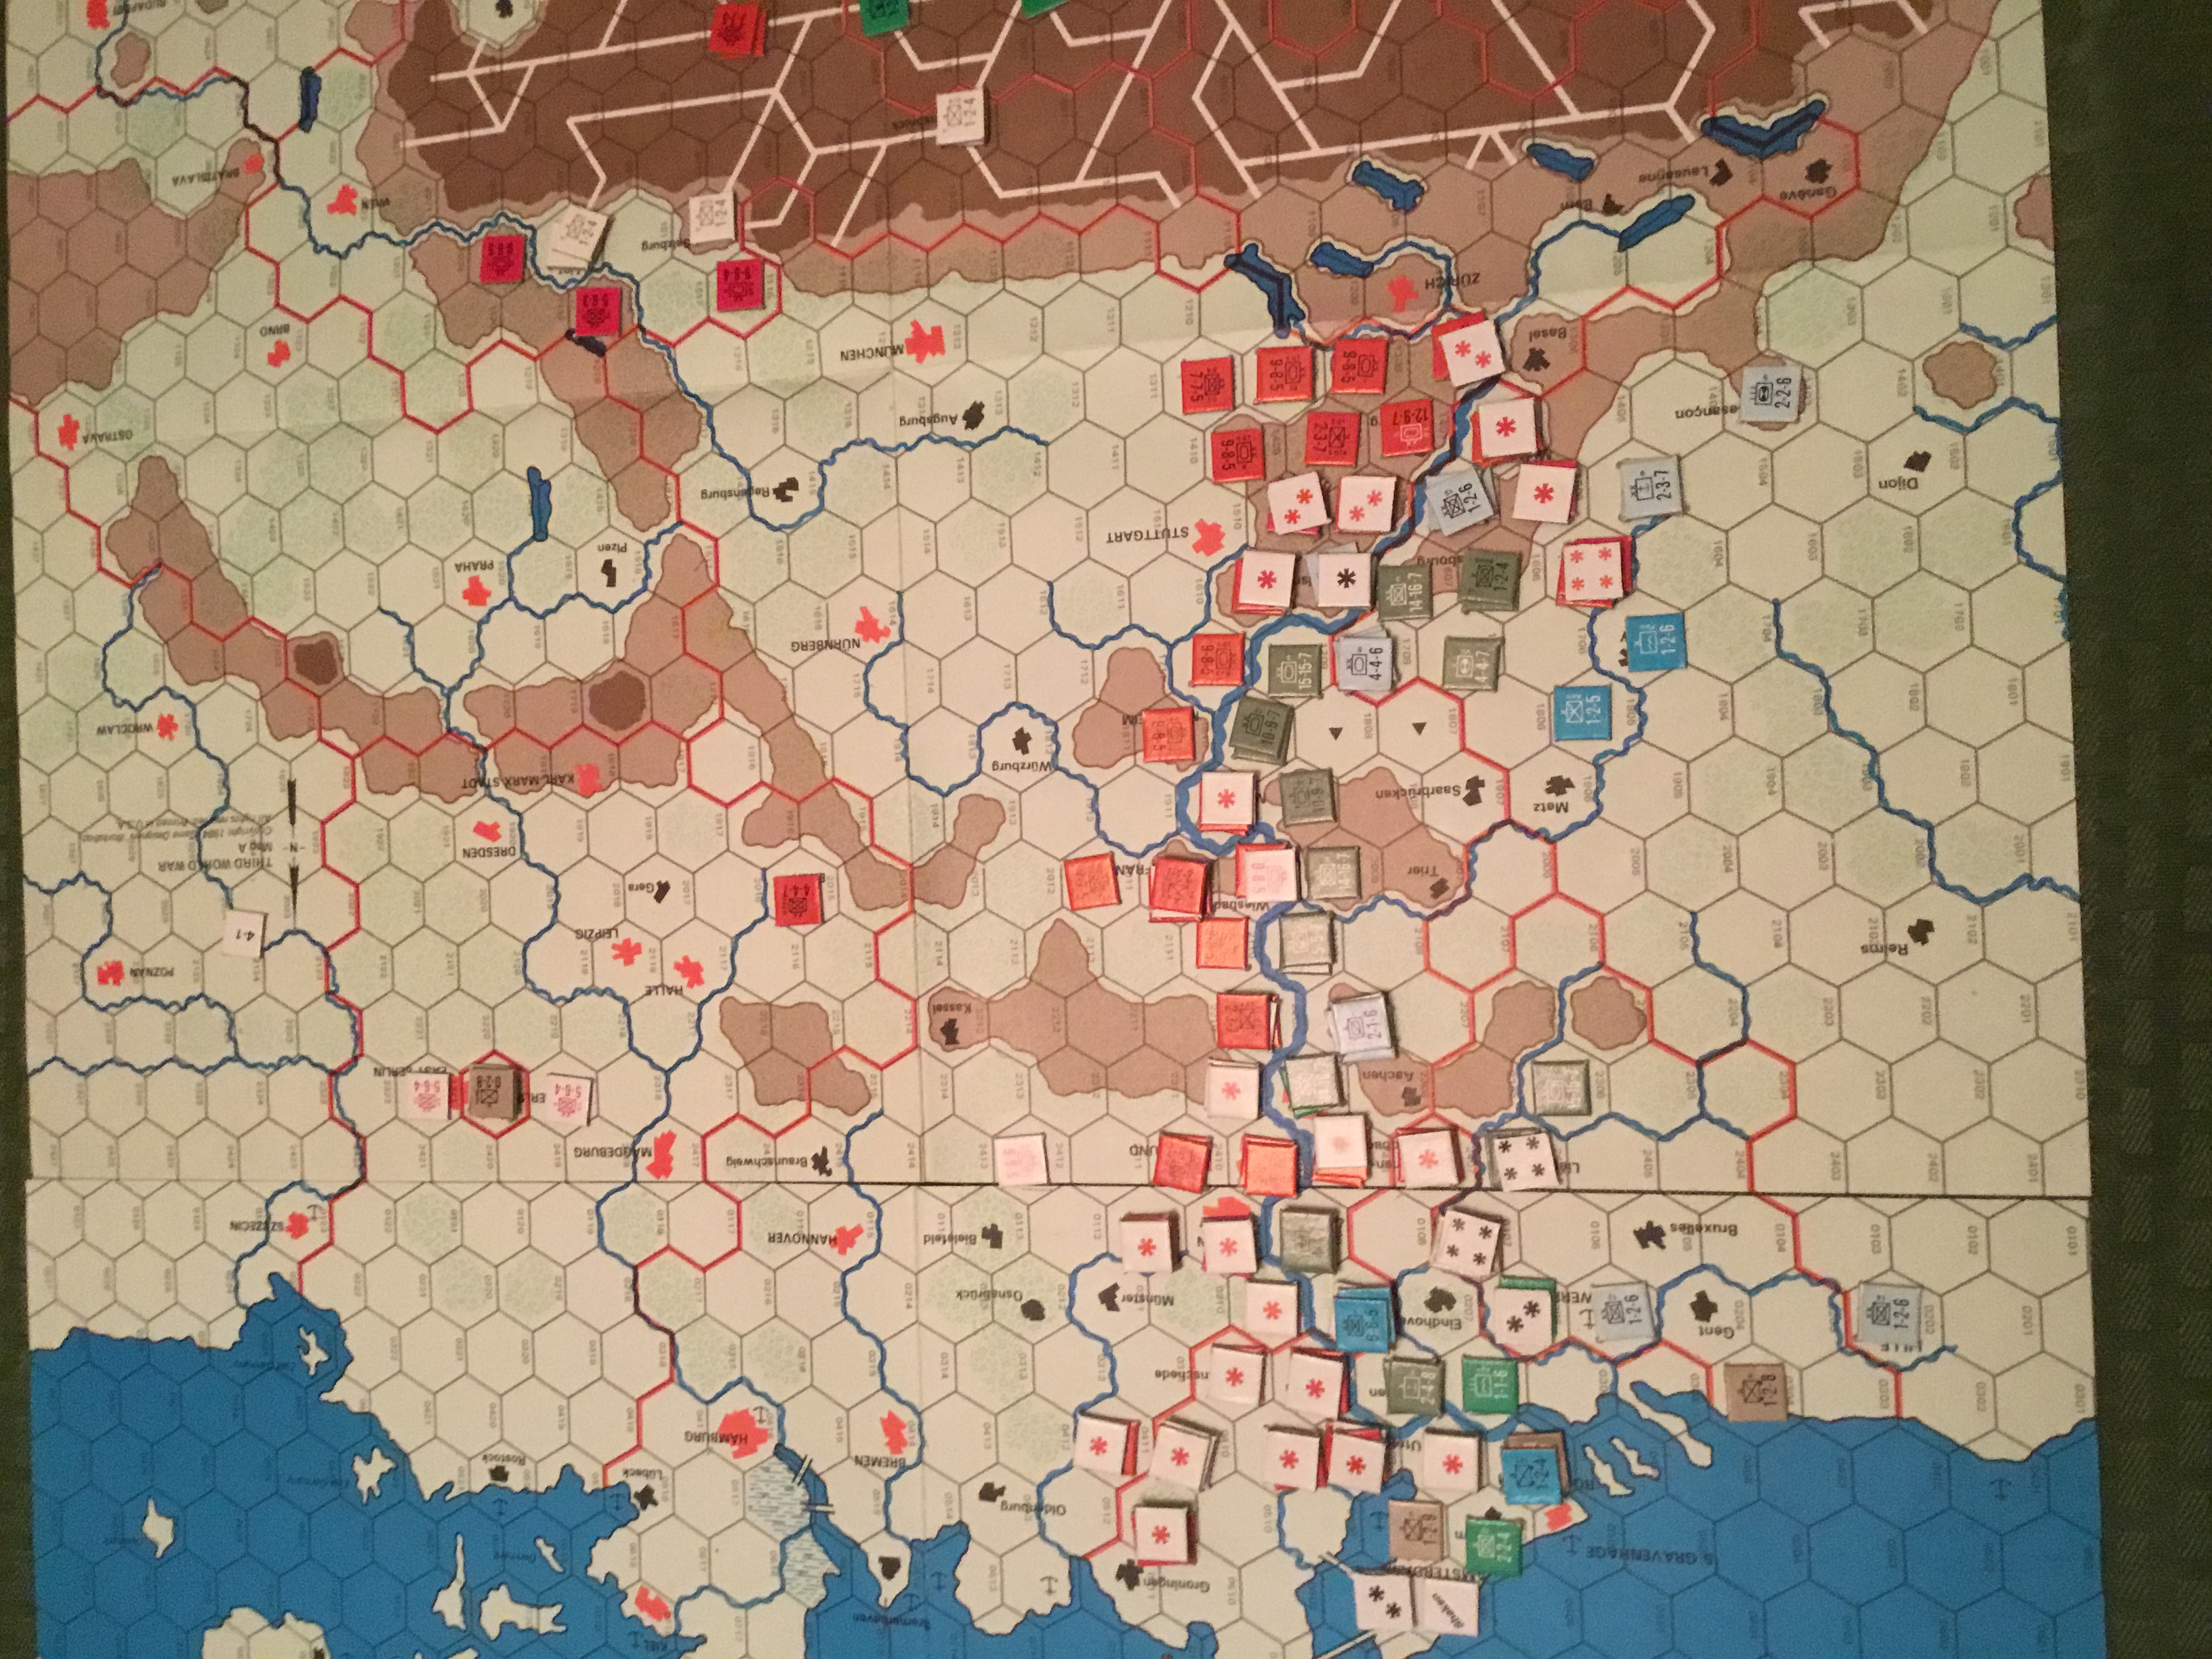
I fouled up by having several divisions advance towards the border in the NATO reaction phase after the Pact player intial set-up and before the first move. Can you say “envelopment”? Three would be eliminated in a series of exchanges that opened up a corridor for Soviet advances.
Nato Reaction Prior To Turn 1
On the other hand, the surviving units provided hedgehogs in full city hexes, where a unit ignores retreat results. US Divisions and airmobile units for all countries have zones of control (ZOC) that reach out two hexes. Entering and leaving ZOCs takes an extra movement point, so these units can really slow down the Soviets.
Other Pact attacks developed near Denmark and against Jugoslavian units in in the Southwestern Theater. The Austrians had the sense to (at least initially) remain neutral.
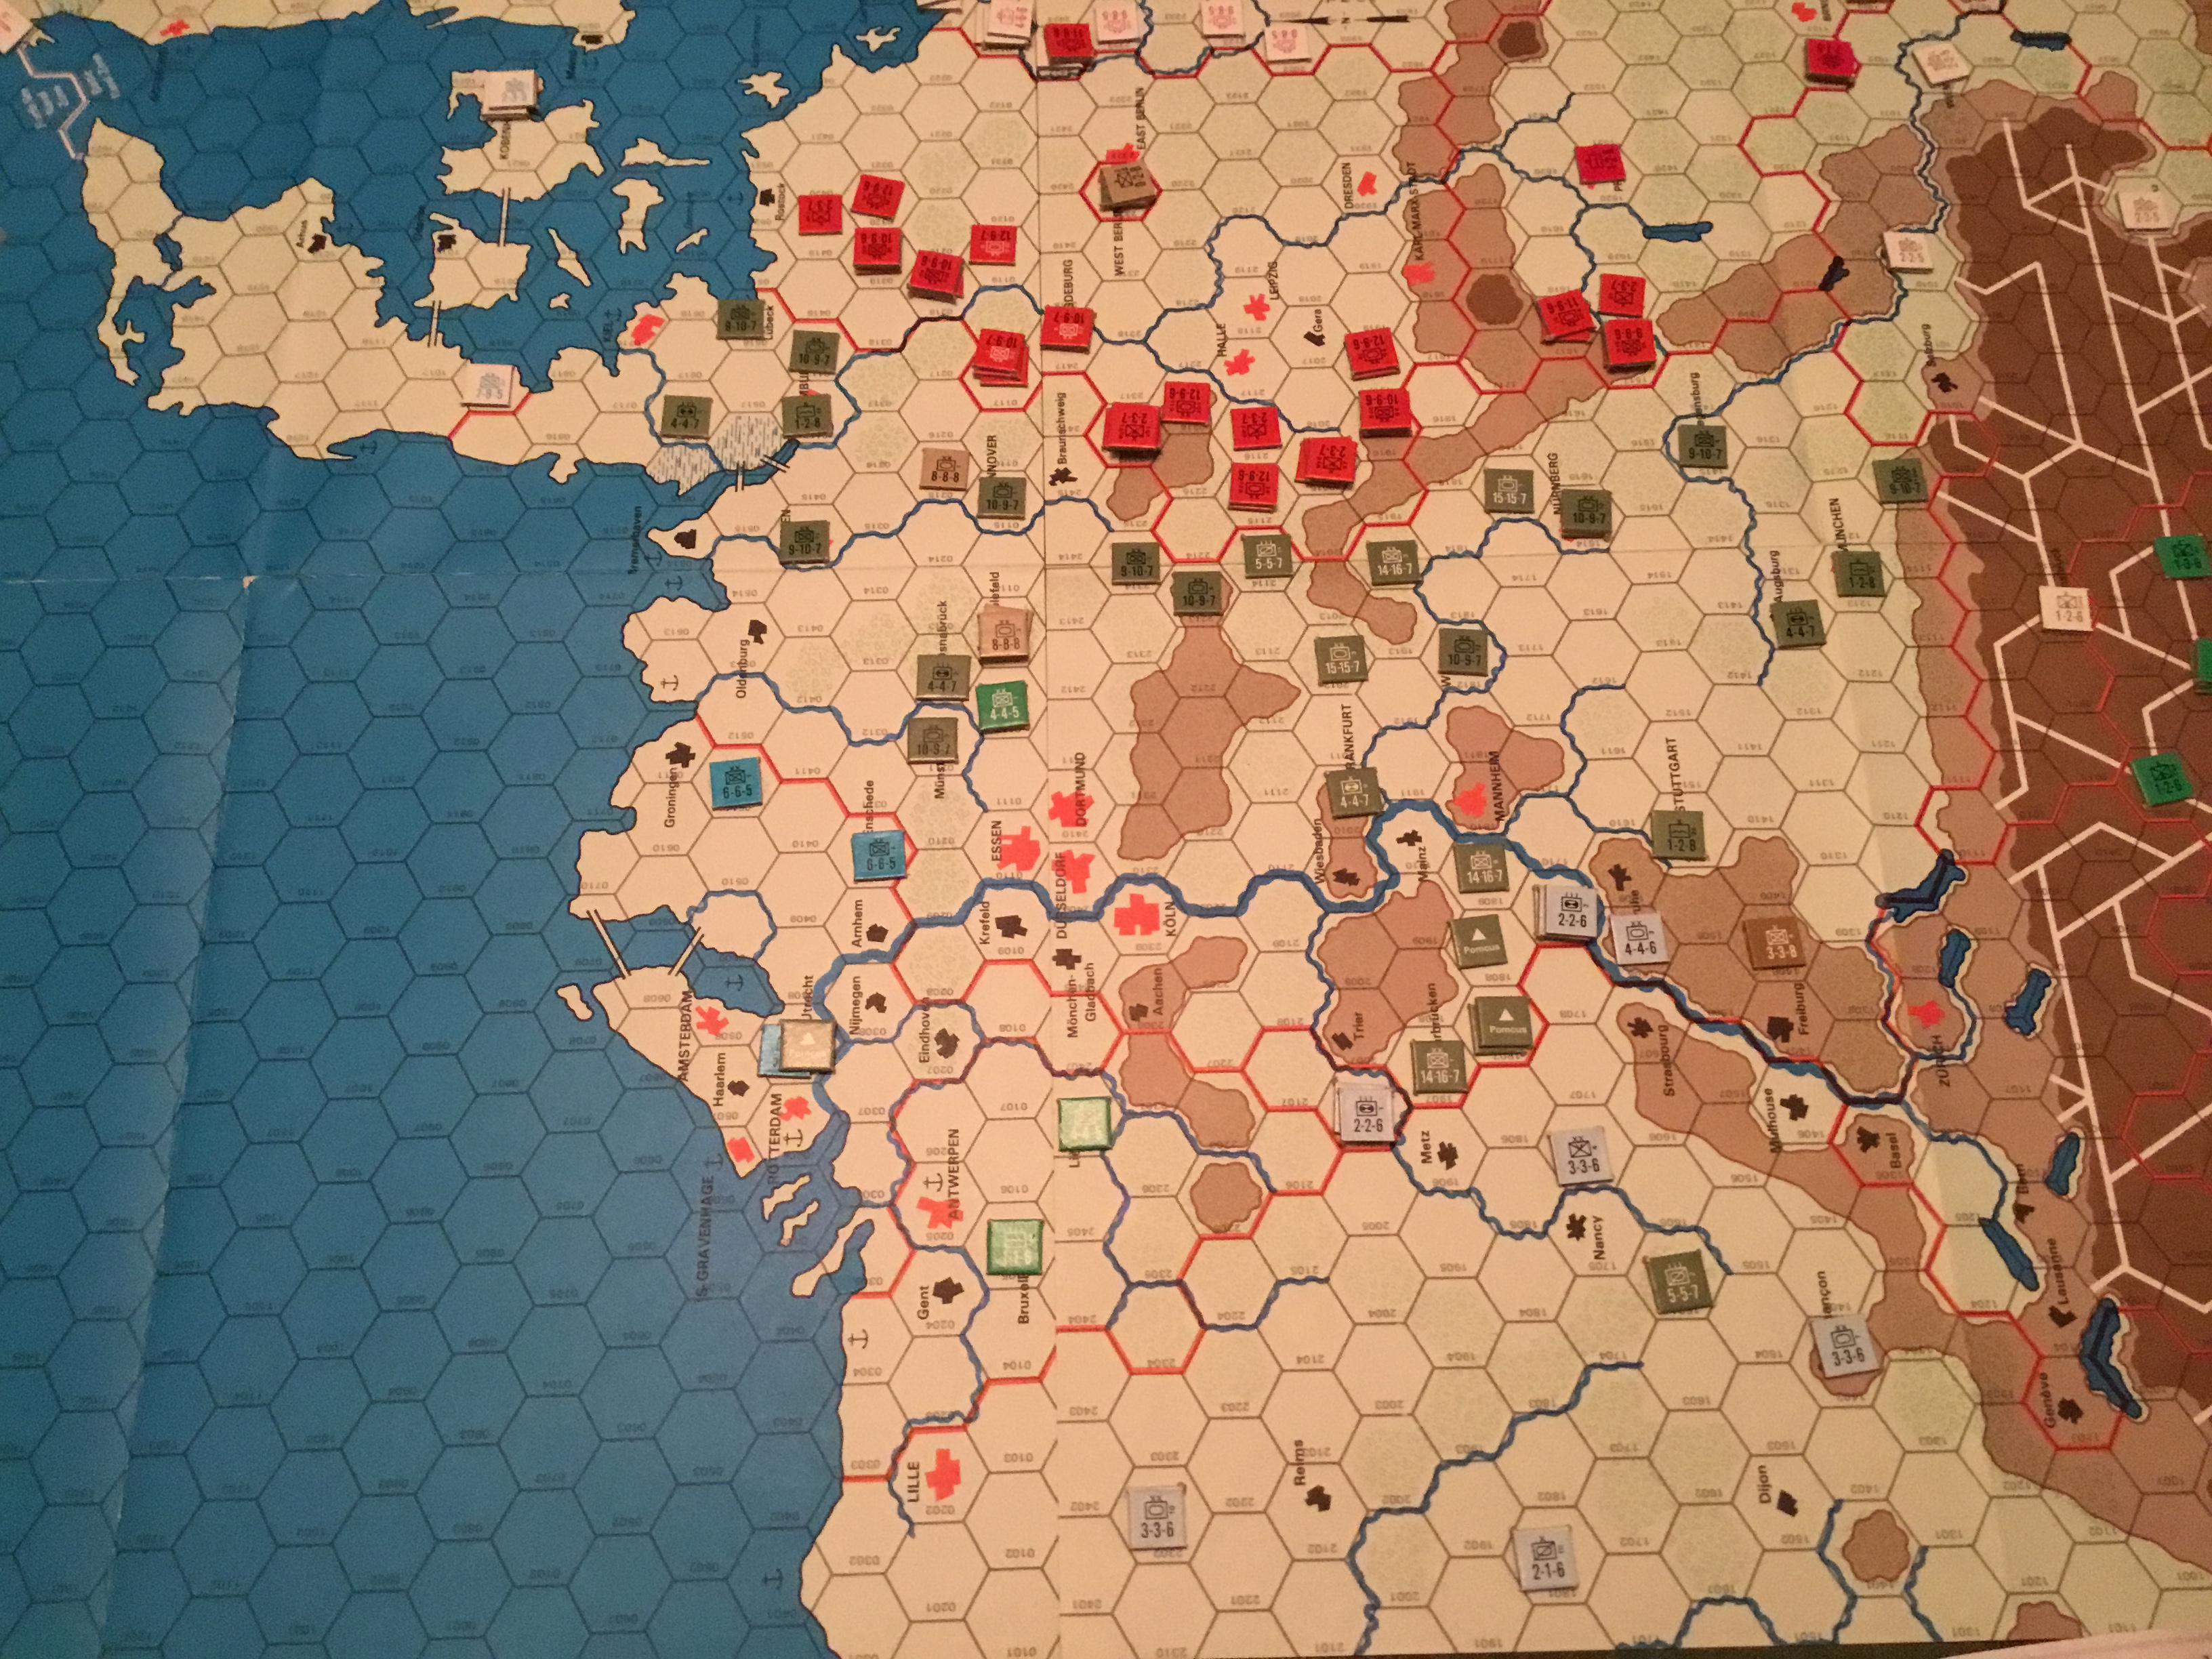
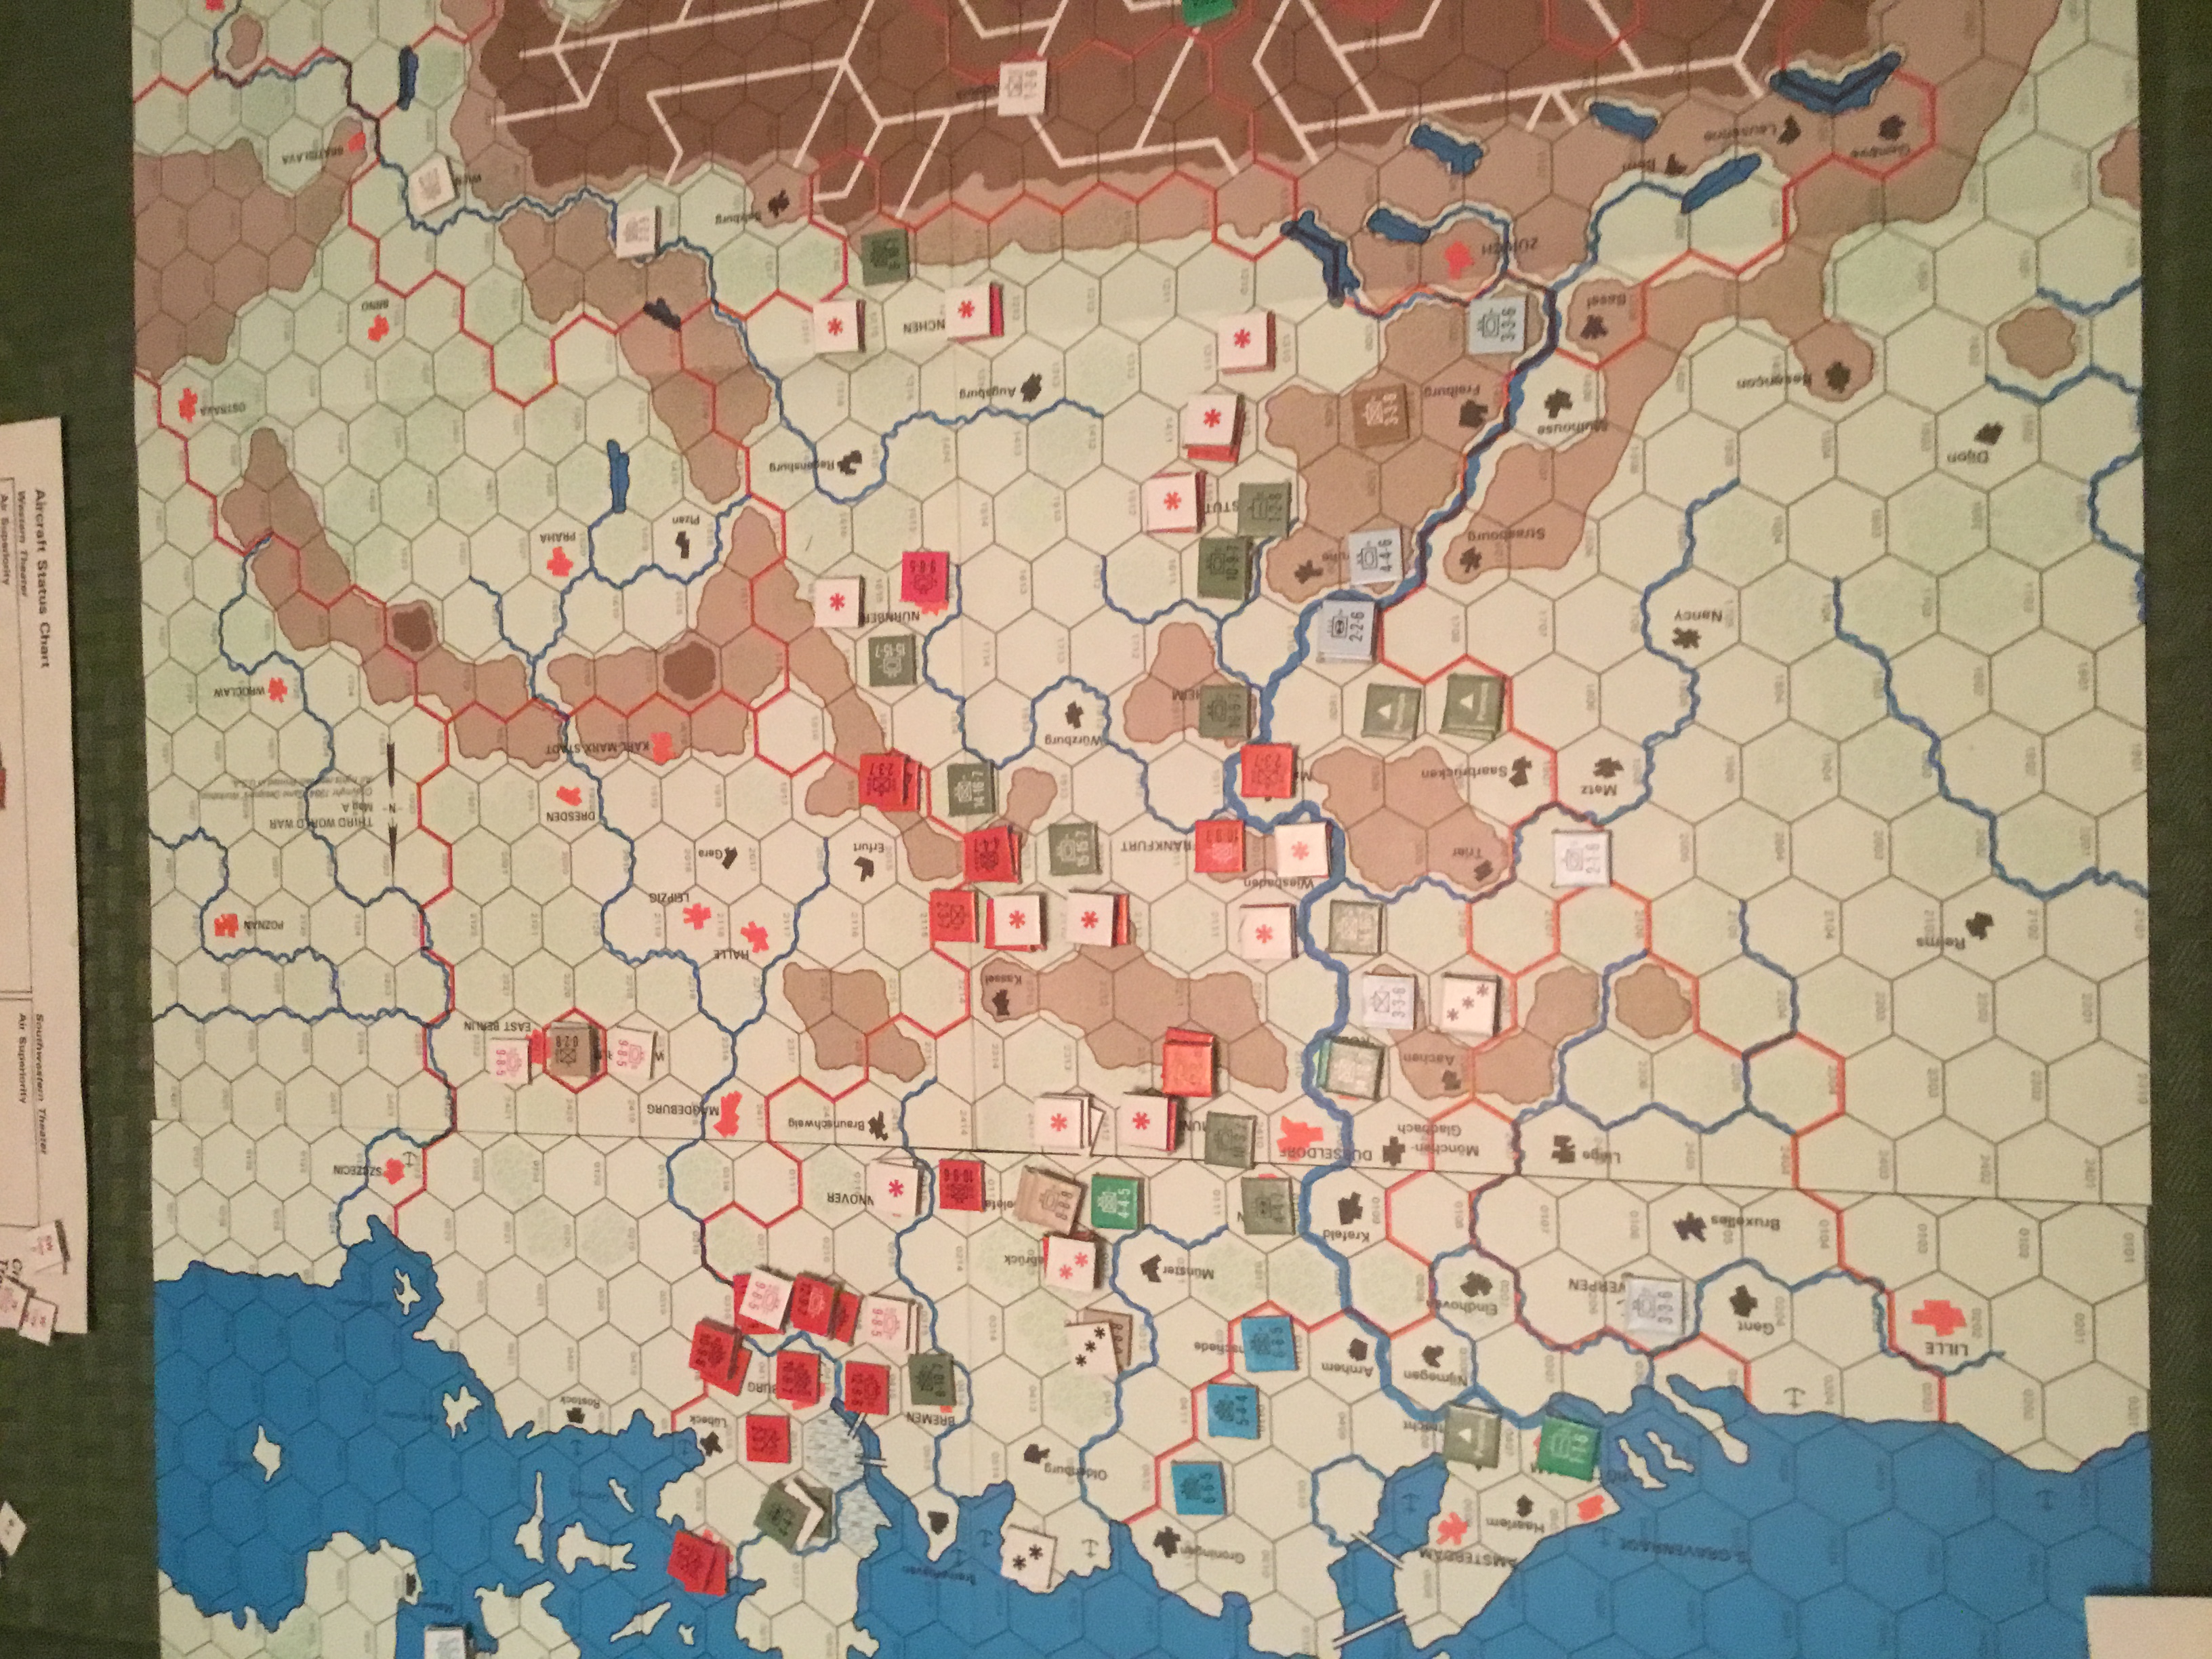
Turn 1 – End of Pact 1st Impulse
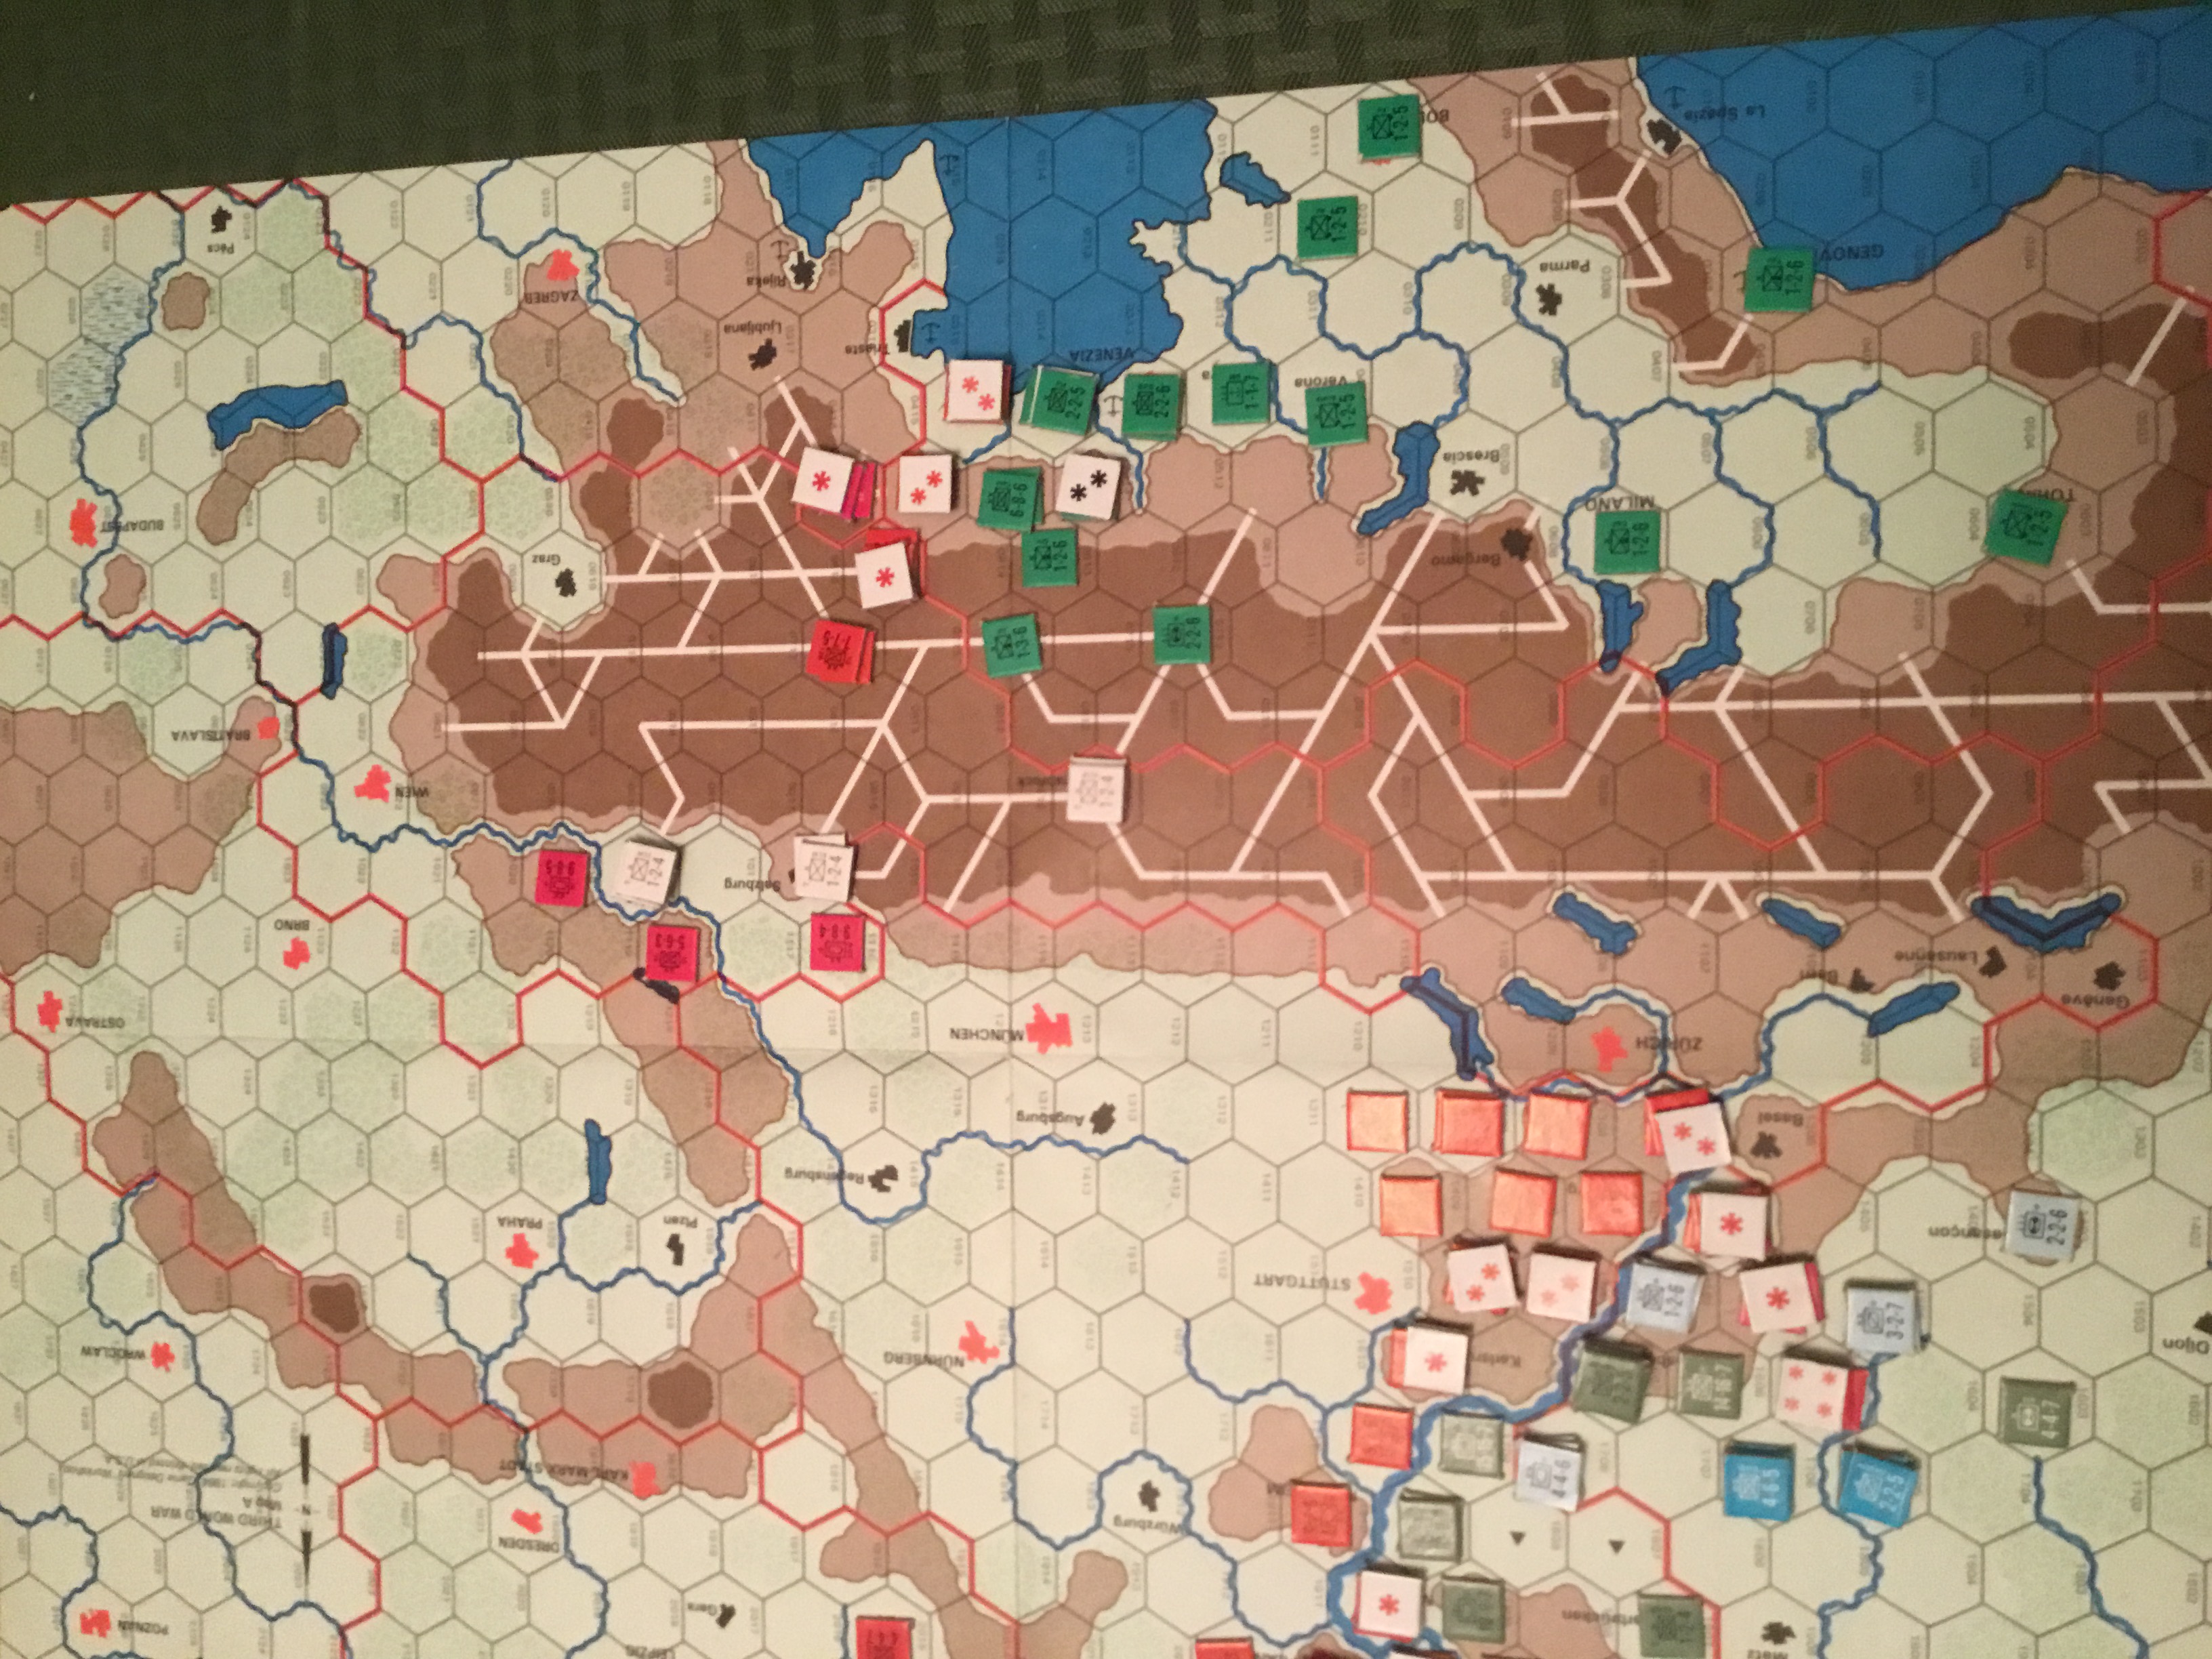
Turn 1 – End Pact 2nd Impulse. Note isolated NATO units, gap and unit across the Rhine
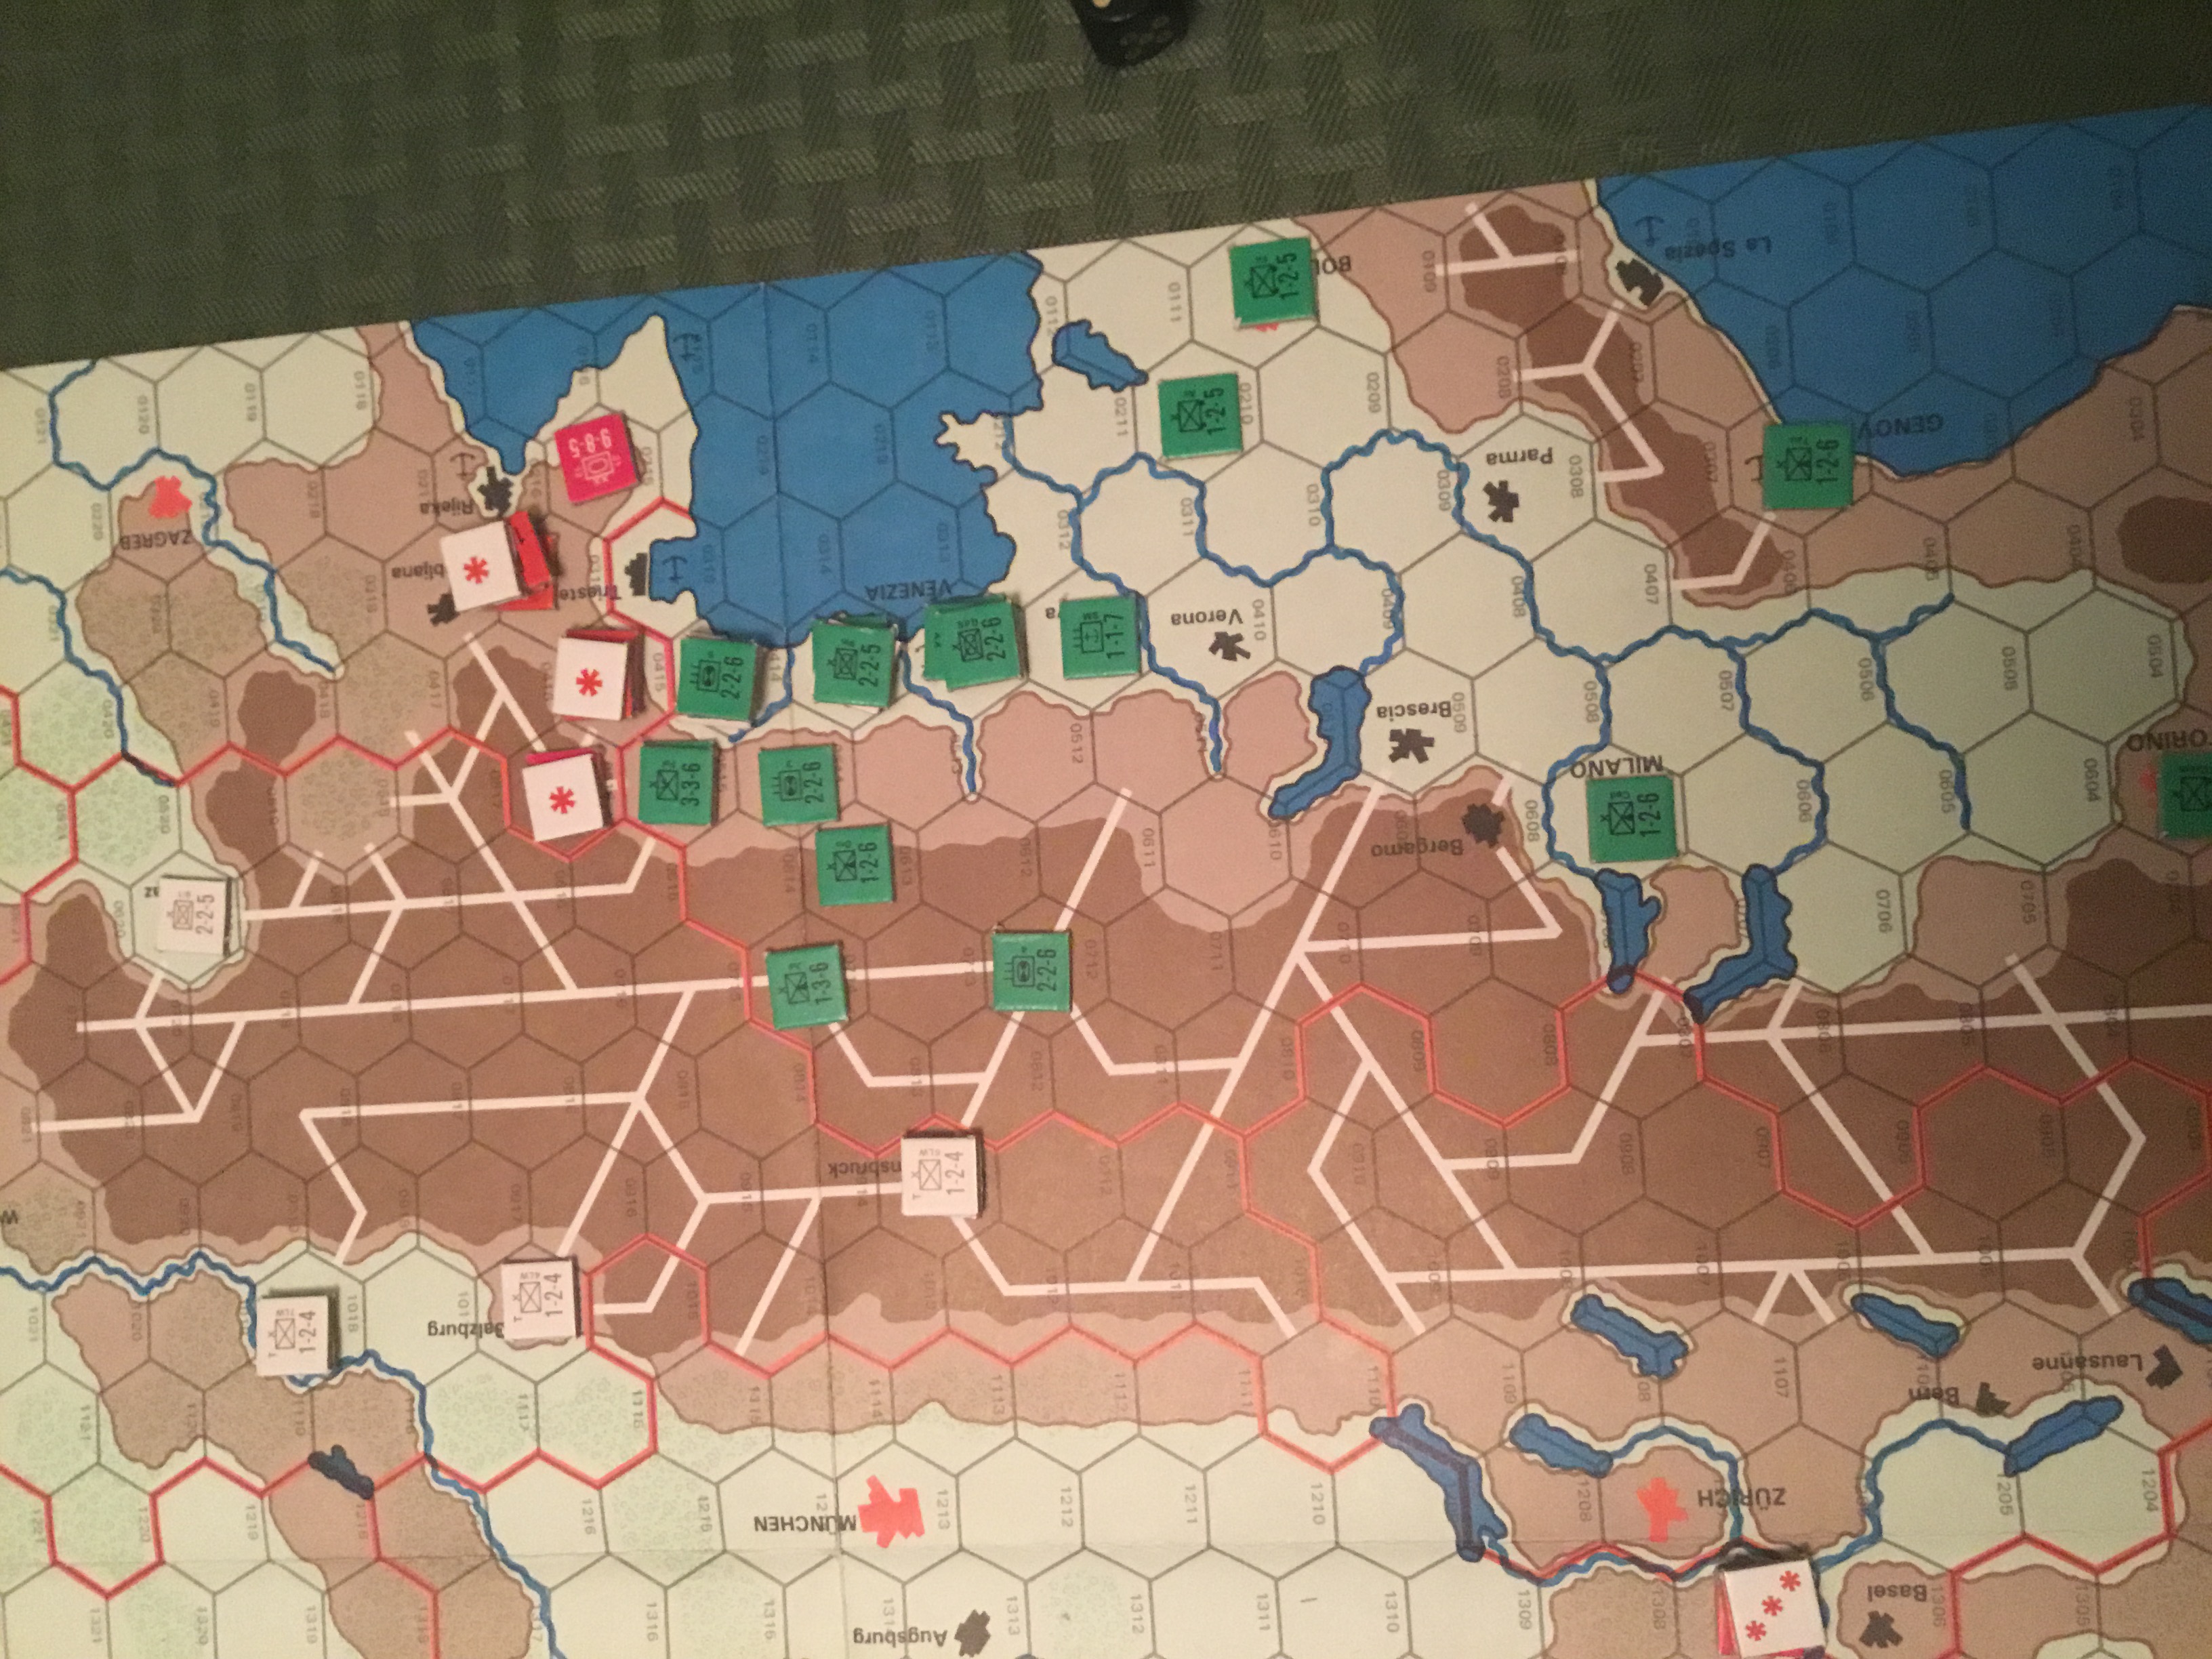
Turn 1 – Southeast Theater – Jugoslavian Units Overrun. Pact Entering Italy. White Counters Are Neutral Austrians
Nato used both of their Turn 1 impulses to patch together a MLR on both sides of the Rhine. Weaker units were used to garrison ports and cities to prevent a Pact vertical envelopment. Territorial units were slow to activate, hampering NATO efforts.
During the first impulse of the Turn 2, Warsaw Pact units surrounded isolated NATO units, eliminated them, and rapidly advanced to the Rhine, establishing a lodgement. Pact forces pushed NATO units out of Jutland, and slowly advanced in the Southwest Theater.
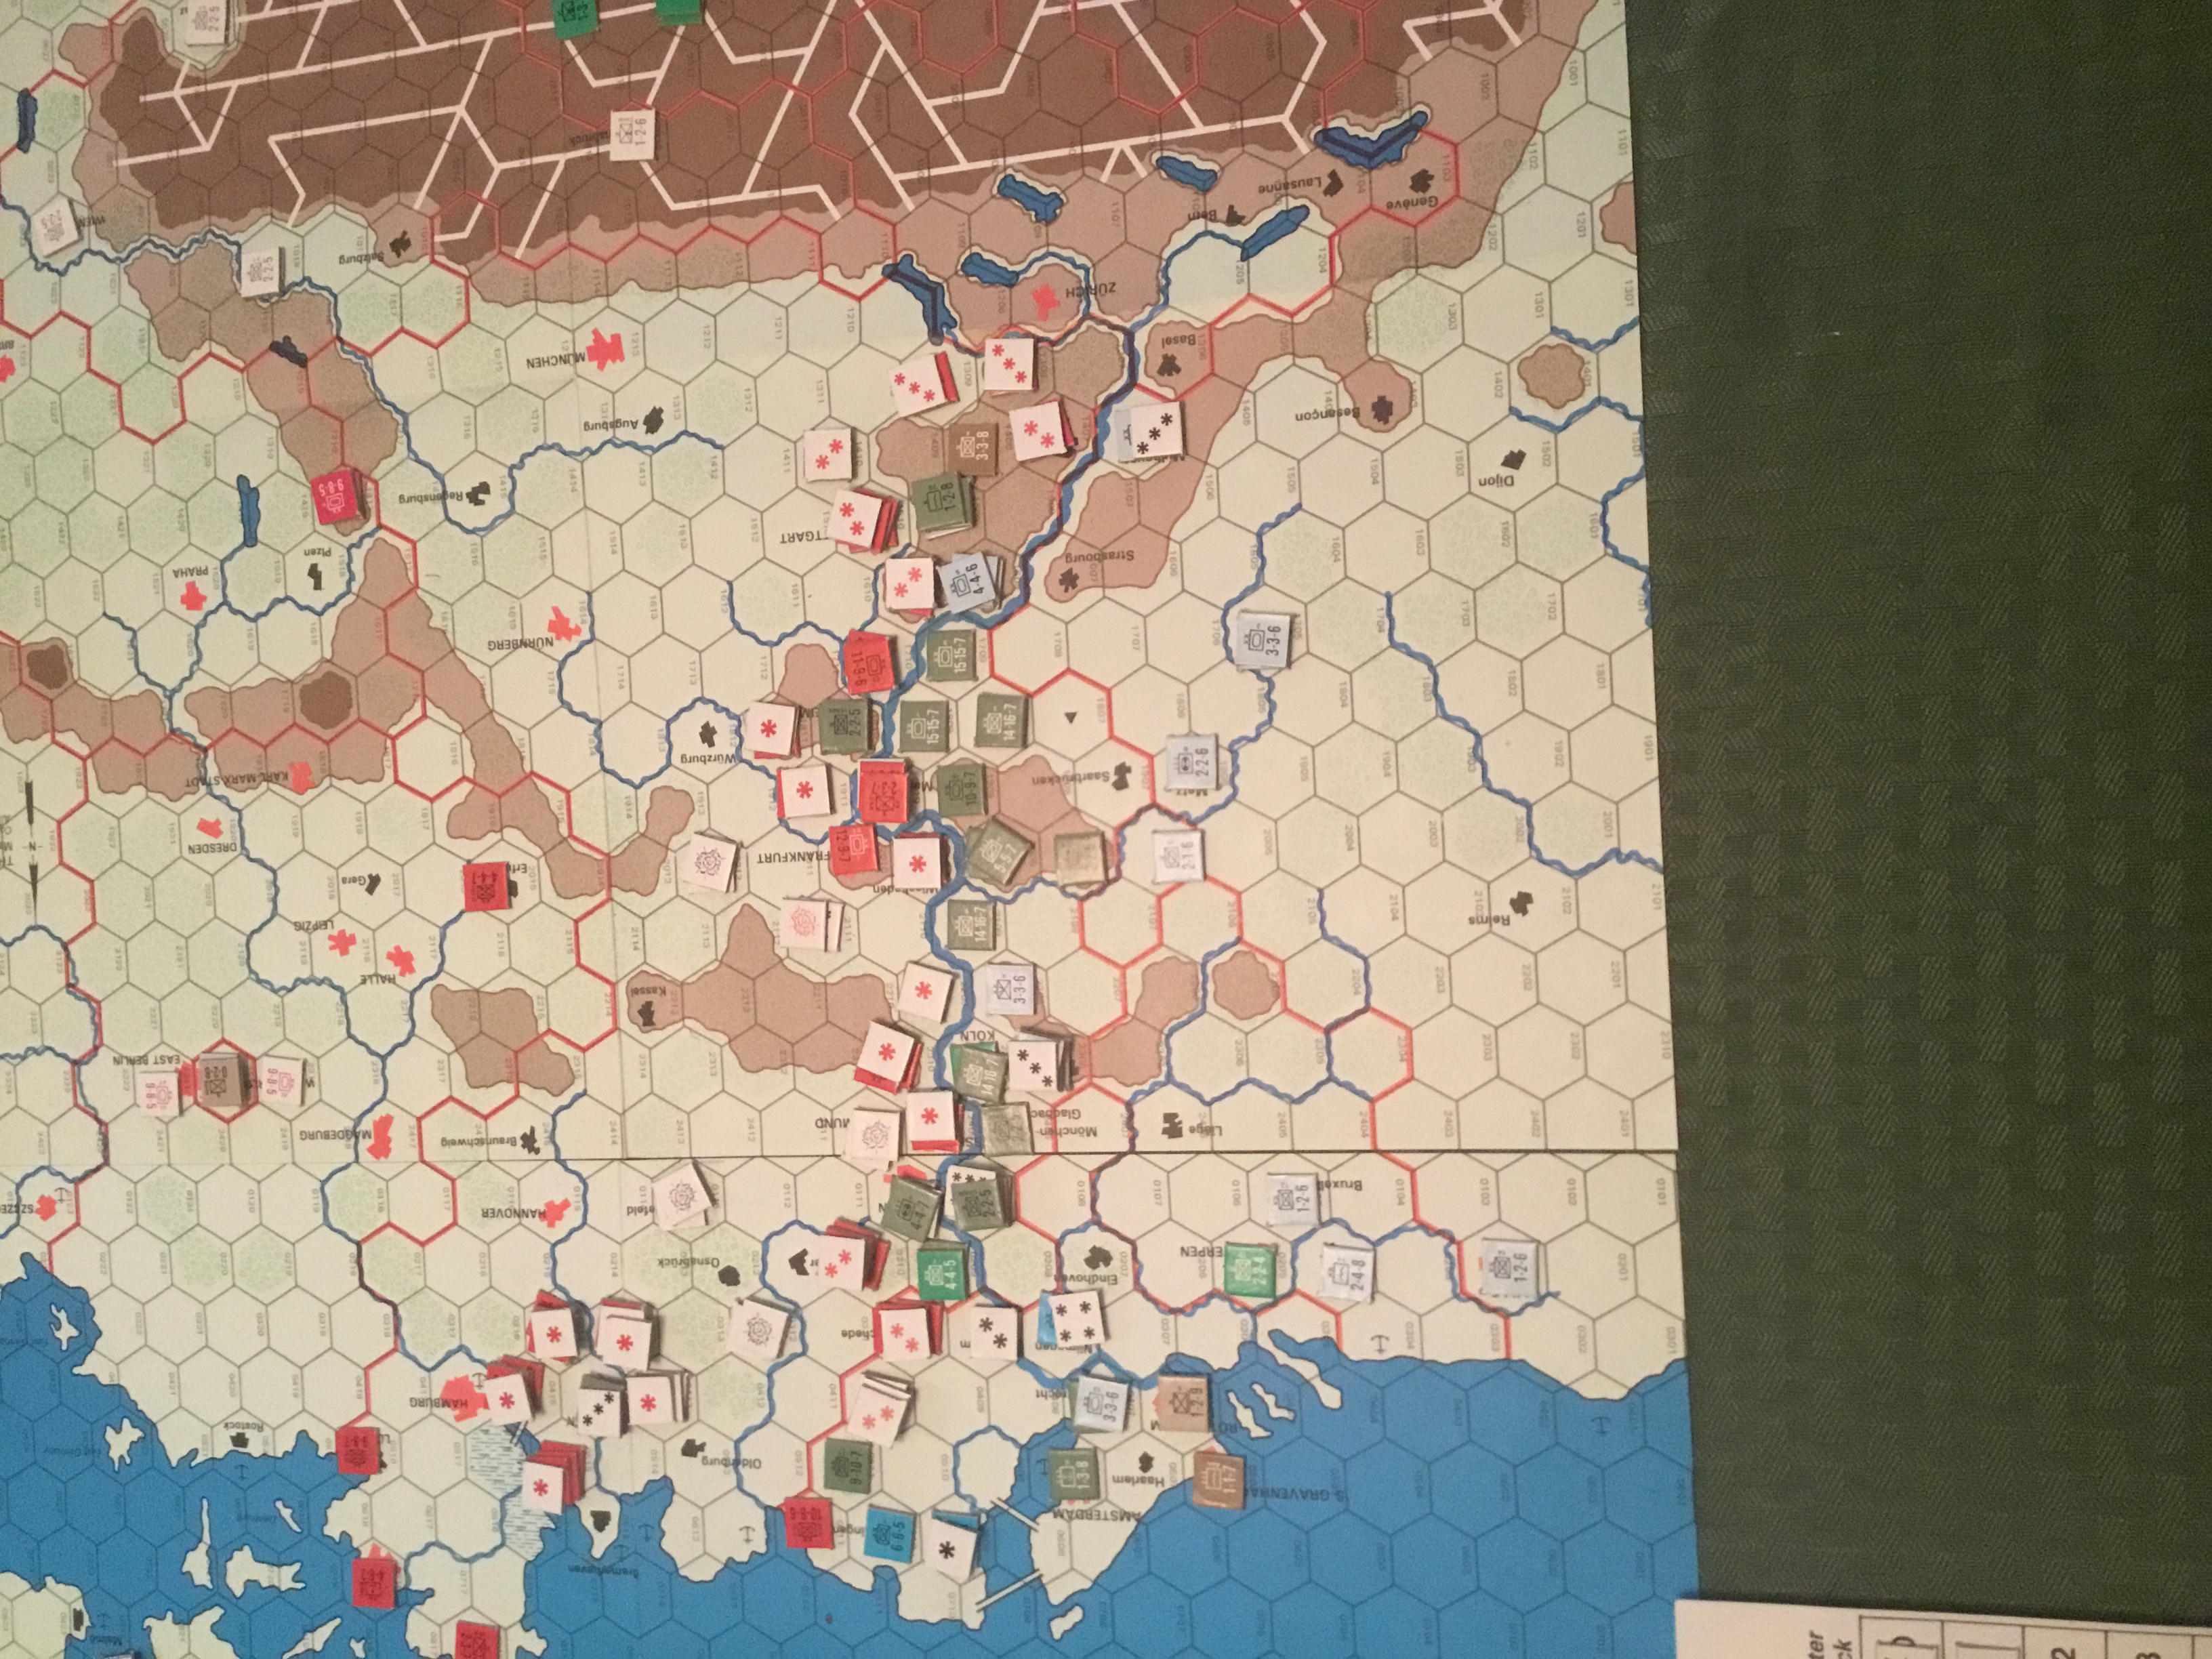
Turn 2 – Soviet Attacks During First Impulse
Turn 2 – After Soviet Attacks
Suprisingly, but maybe not, the Soviets pulled back their attrited units to reorganize. This increases combat proficieny, eliminating potential negative combat shifts.
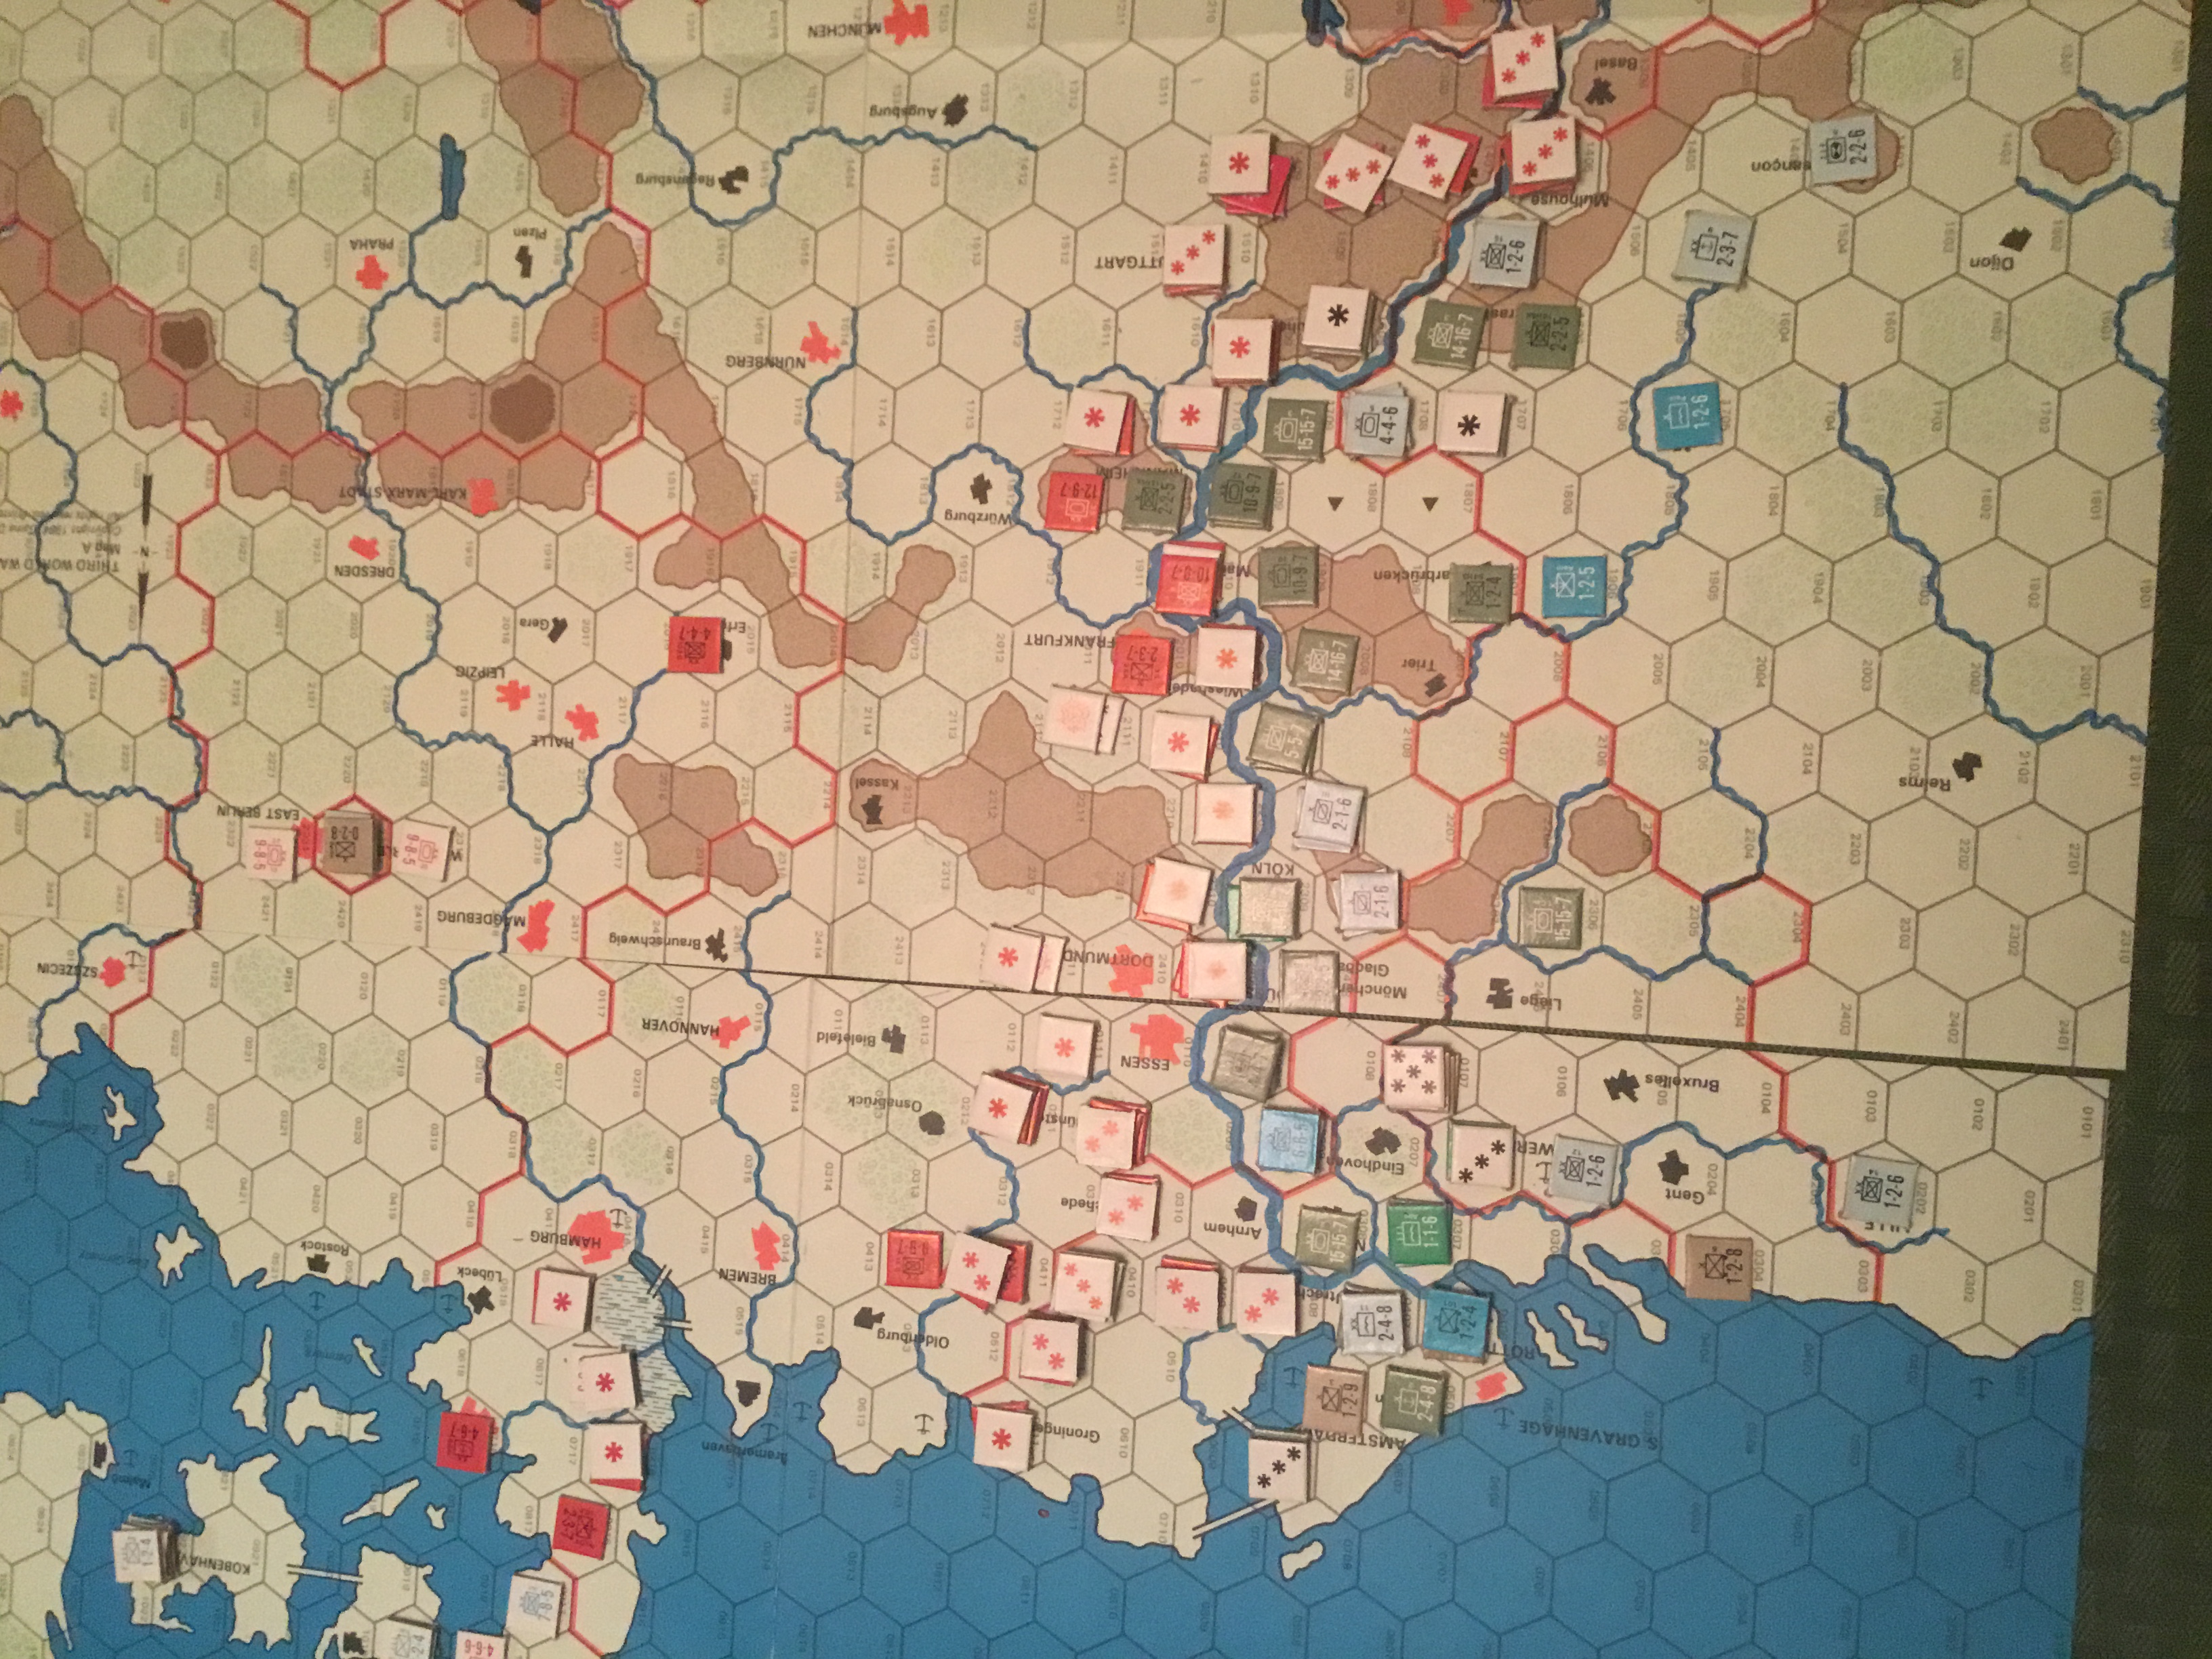
Turn 2 – Soviets North Of Essen Pull Back To Reorganize During 2nd Impulse
NATO units used their Turn 2 to continue bolstering their defenses along the Rhine, reacting to the Pact’s attempts to envelop from the South.
Soviet units assaulted along the Rhine River during Turn 3, but their successes were on the flanks, pushing back NATO units in The Netherlands, destroying a valuable POMCUS site, and continuing their envelopment to the South. It was only through bad die rolling that a Soviet airdrop in Belgium was foiled.
Again, NATO units could only react during their Turn, pulling in both flanks and trying to develop a defense in depth with smaller units to defend against the enveloped. NATO forces reduced, but were unsuccessful in eliminating the Pact lodgement over the Rhine. In the Southwest Theater Italian forces grudgingly gave ground against steady Soviet pressure.
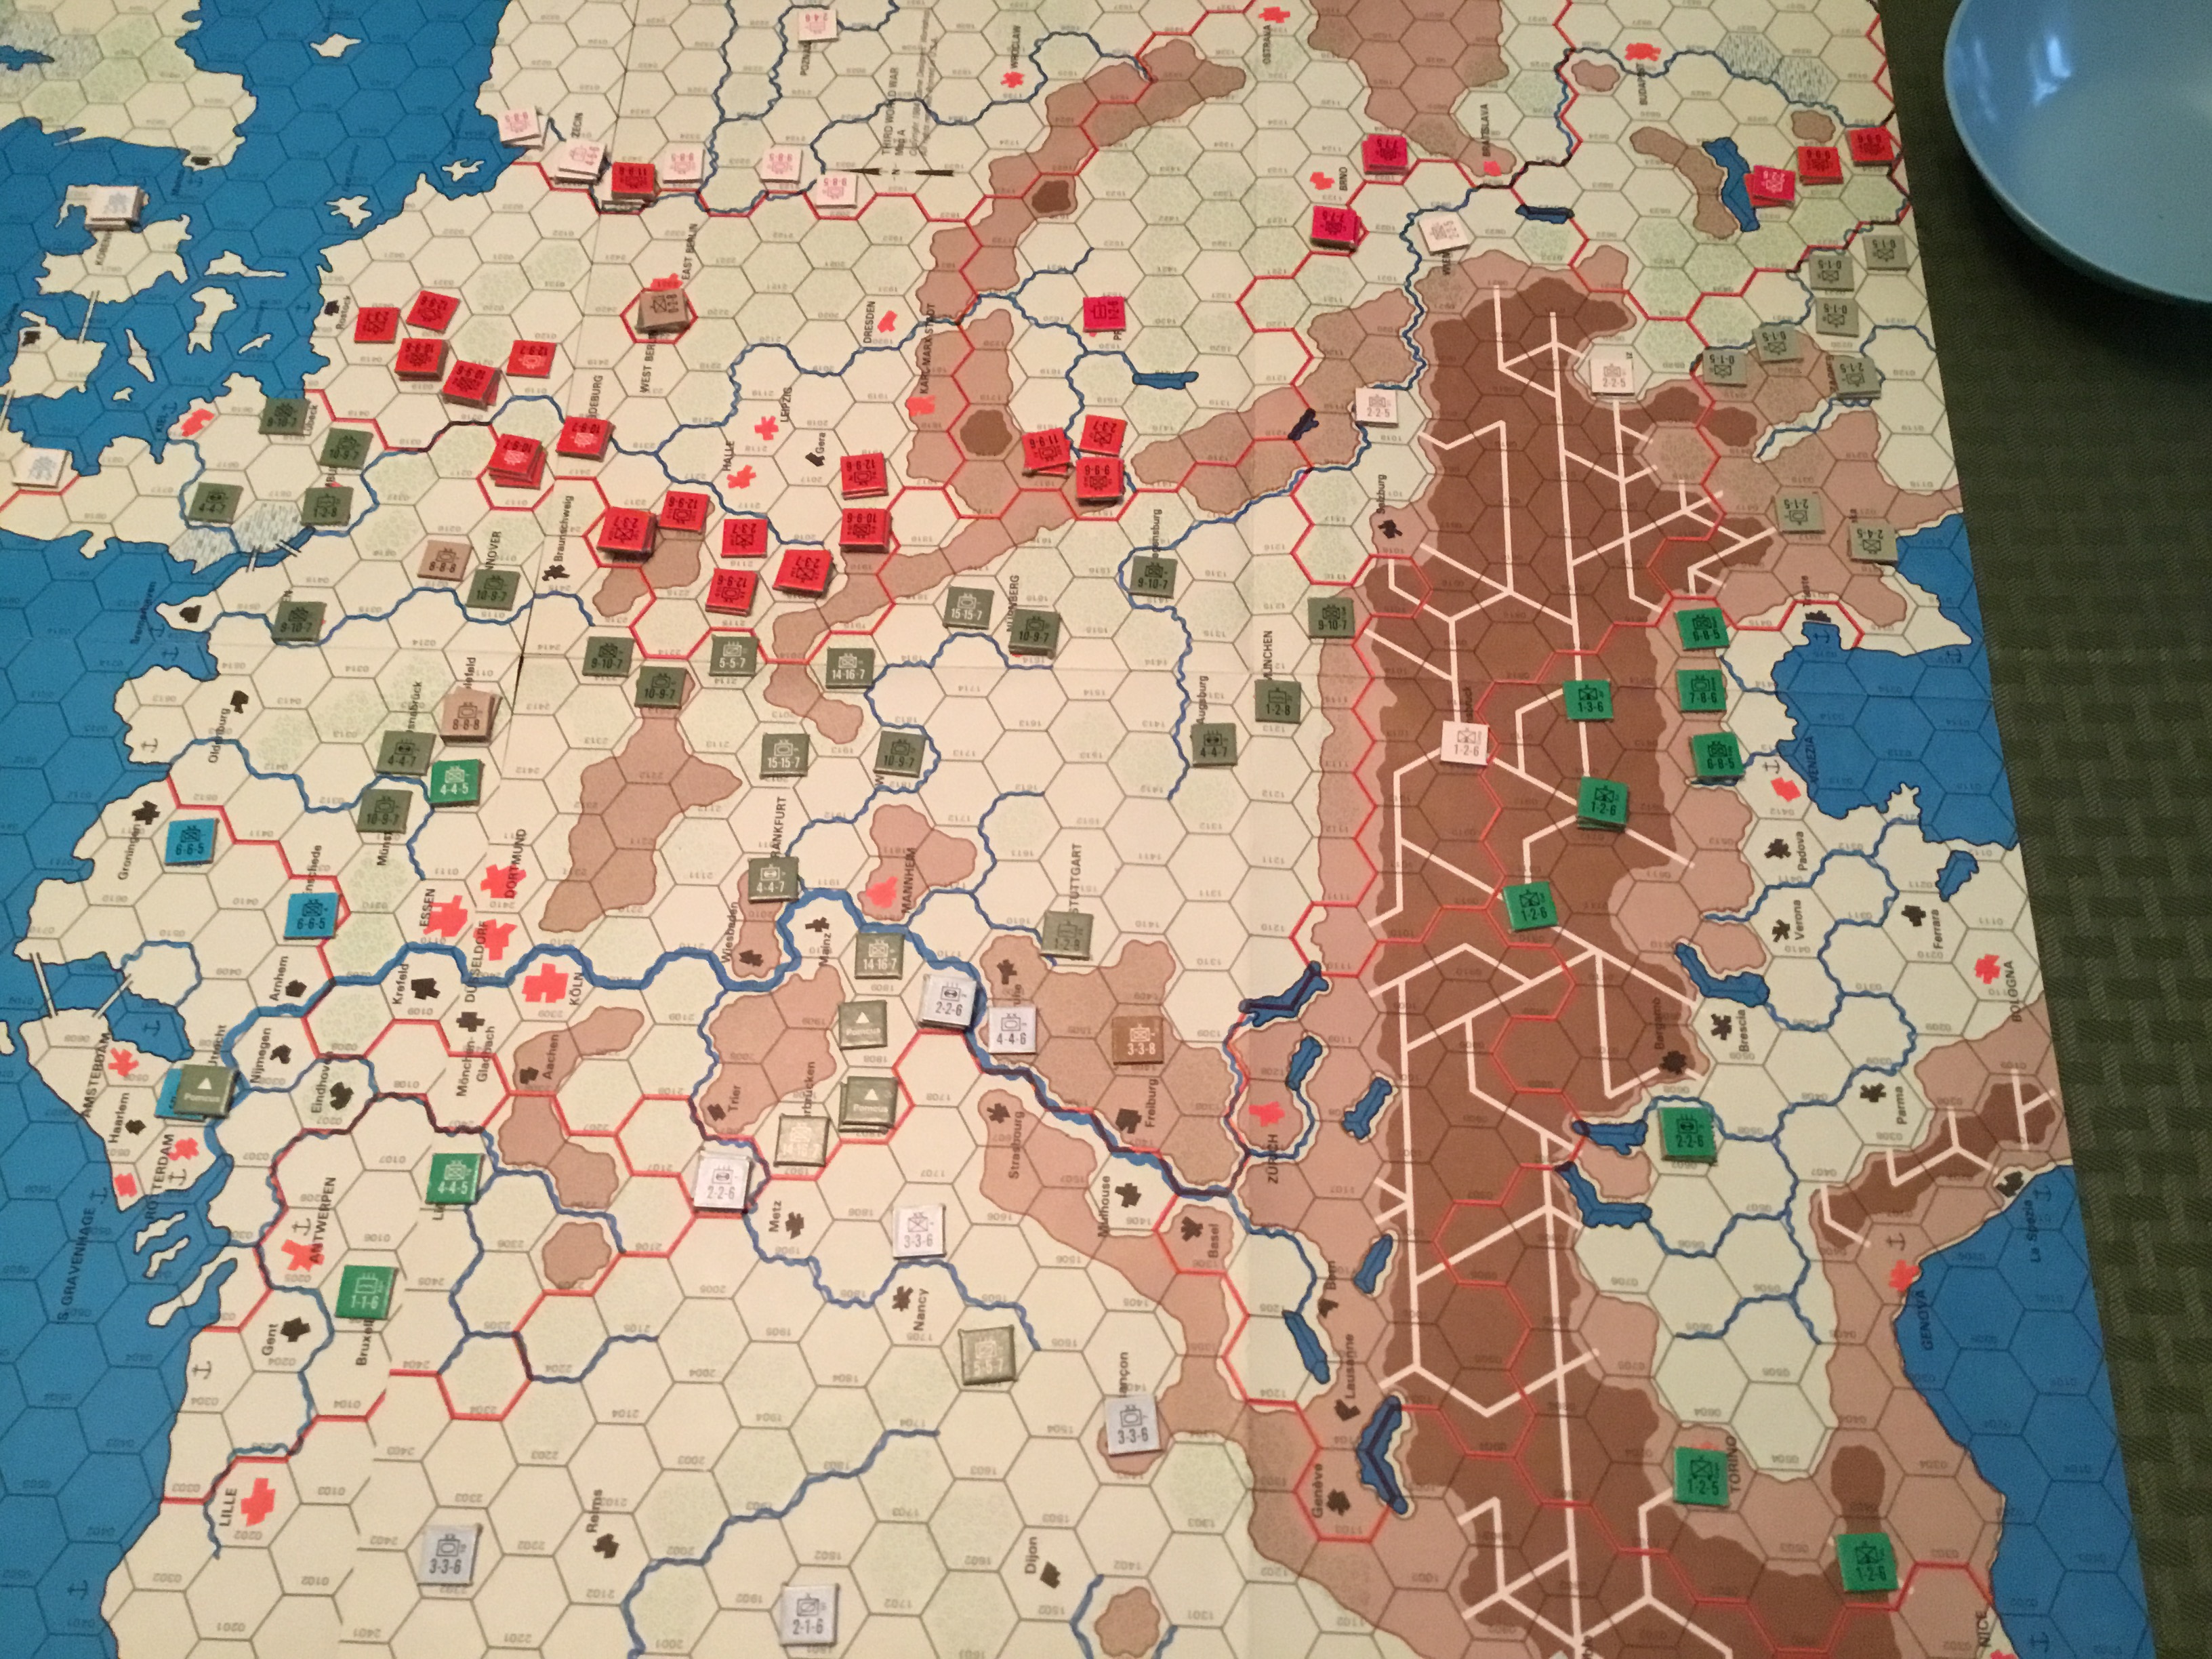
Turn 3 – End Of Nato Turn. Austria has now entered the war.
End Turn 3 – Southwest Theater
The Air War was bitterly contested. During his first turn, Tim used cratering missions to good effect. These eliminated sorely needed NATO aircraft. Both sides rolled poorly during the first turn’s maintenance phase, reducing aircraft availability. After that, serviceability rates improved, but missions were devoted to close-in support.
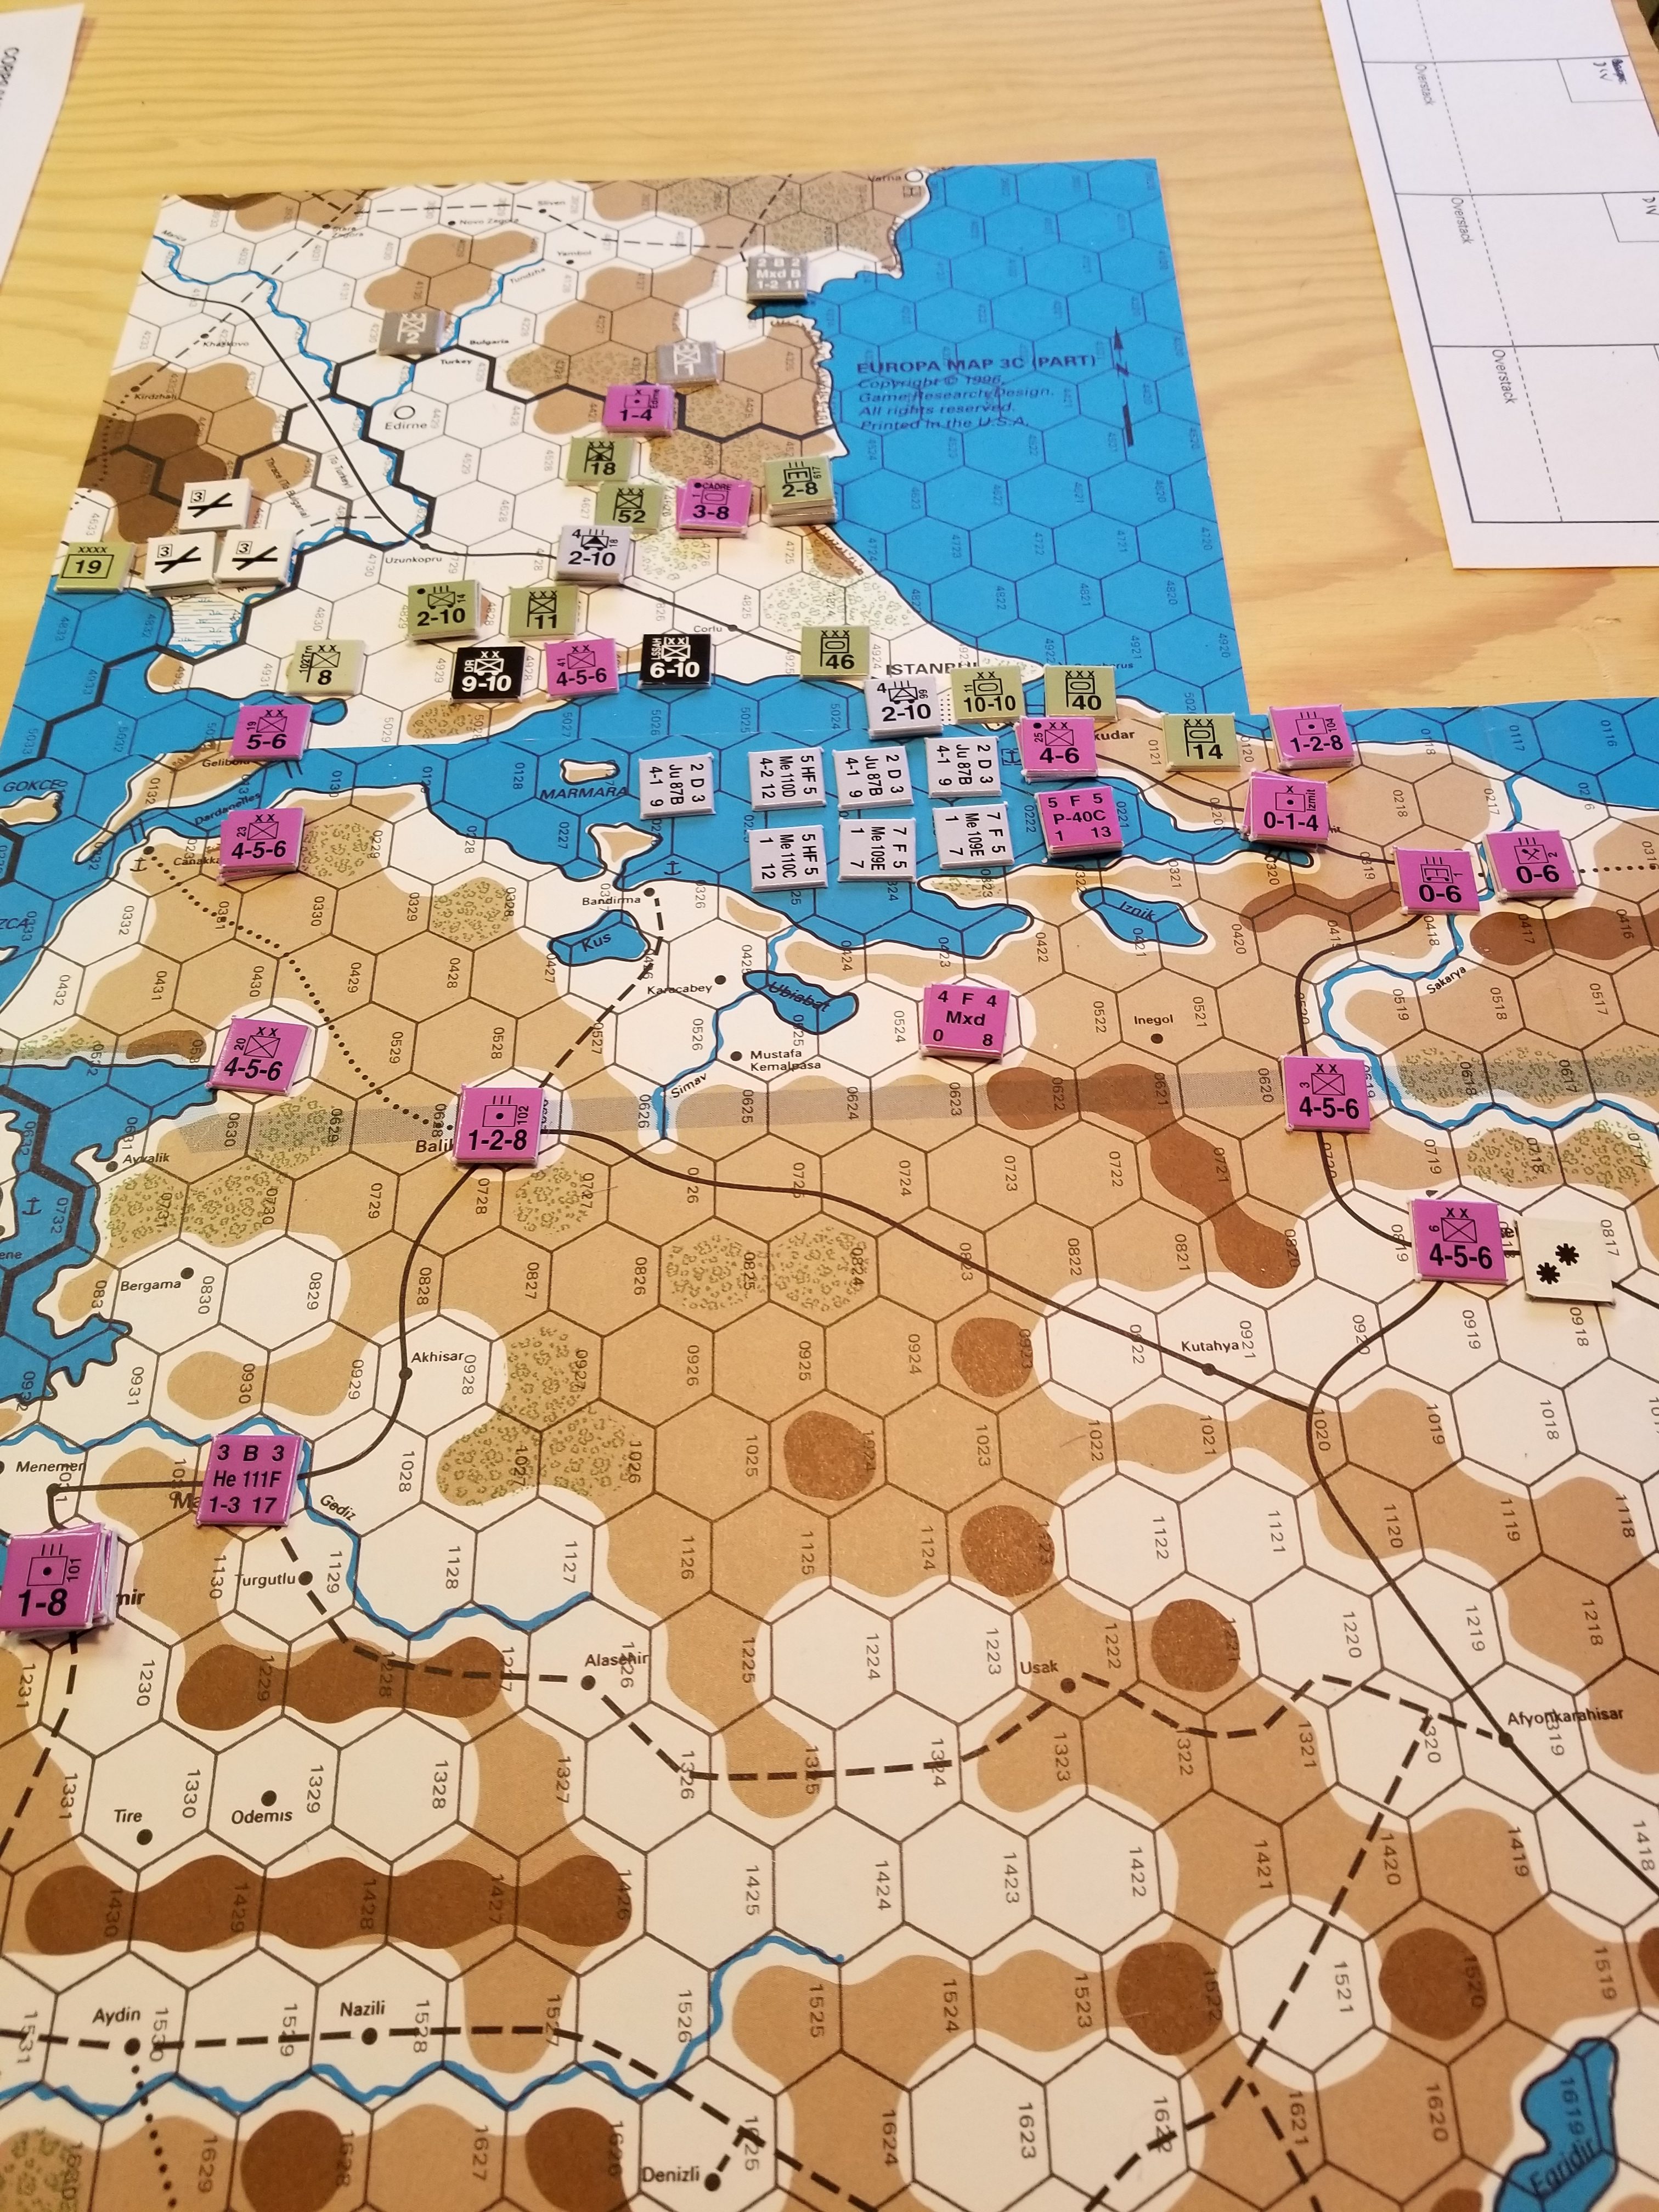
The Axis 40th and 14th Corps moved through Istanbul, with the 14th Corps establishing a lodgement across the Bosphorous. The Turkish Blenheim air unit escaped destruction. Both these corps were reinforced anticipating Turkish counterattacks.
The SS Corps moved to surround the Turkish infantry division to its front, while Luftwaffe and Army motorized infantry assets moved east to provide airfield security.
Turkish air units involved in the fighting west of Istanbul returned to a variety of interior locations, but the P-40, P-24 and A-19 squadrons remained at the front.
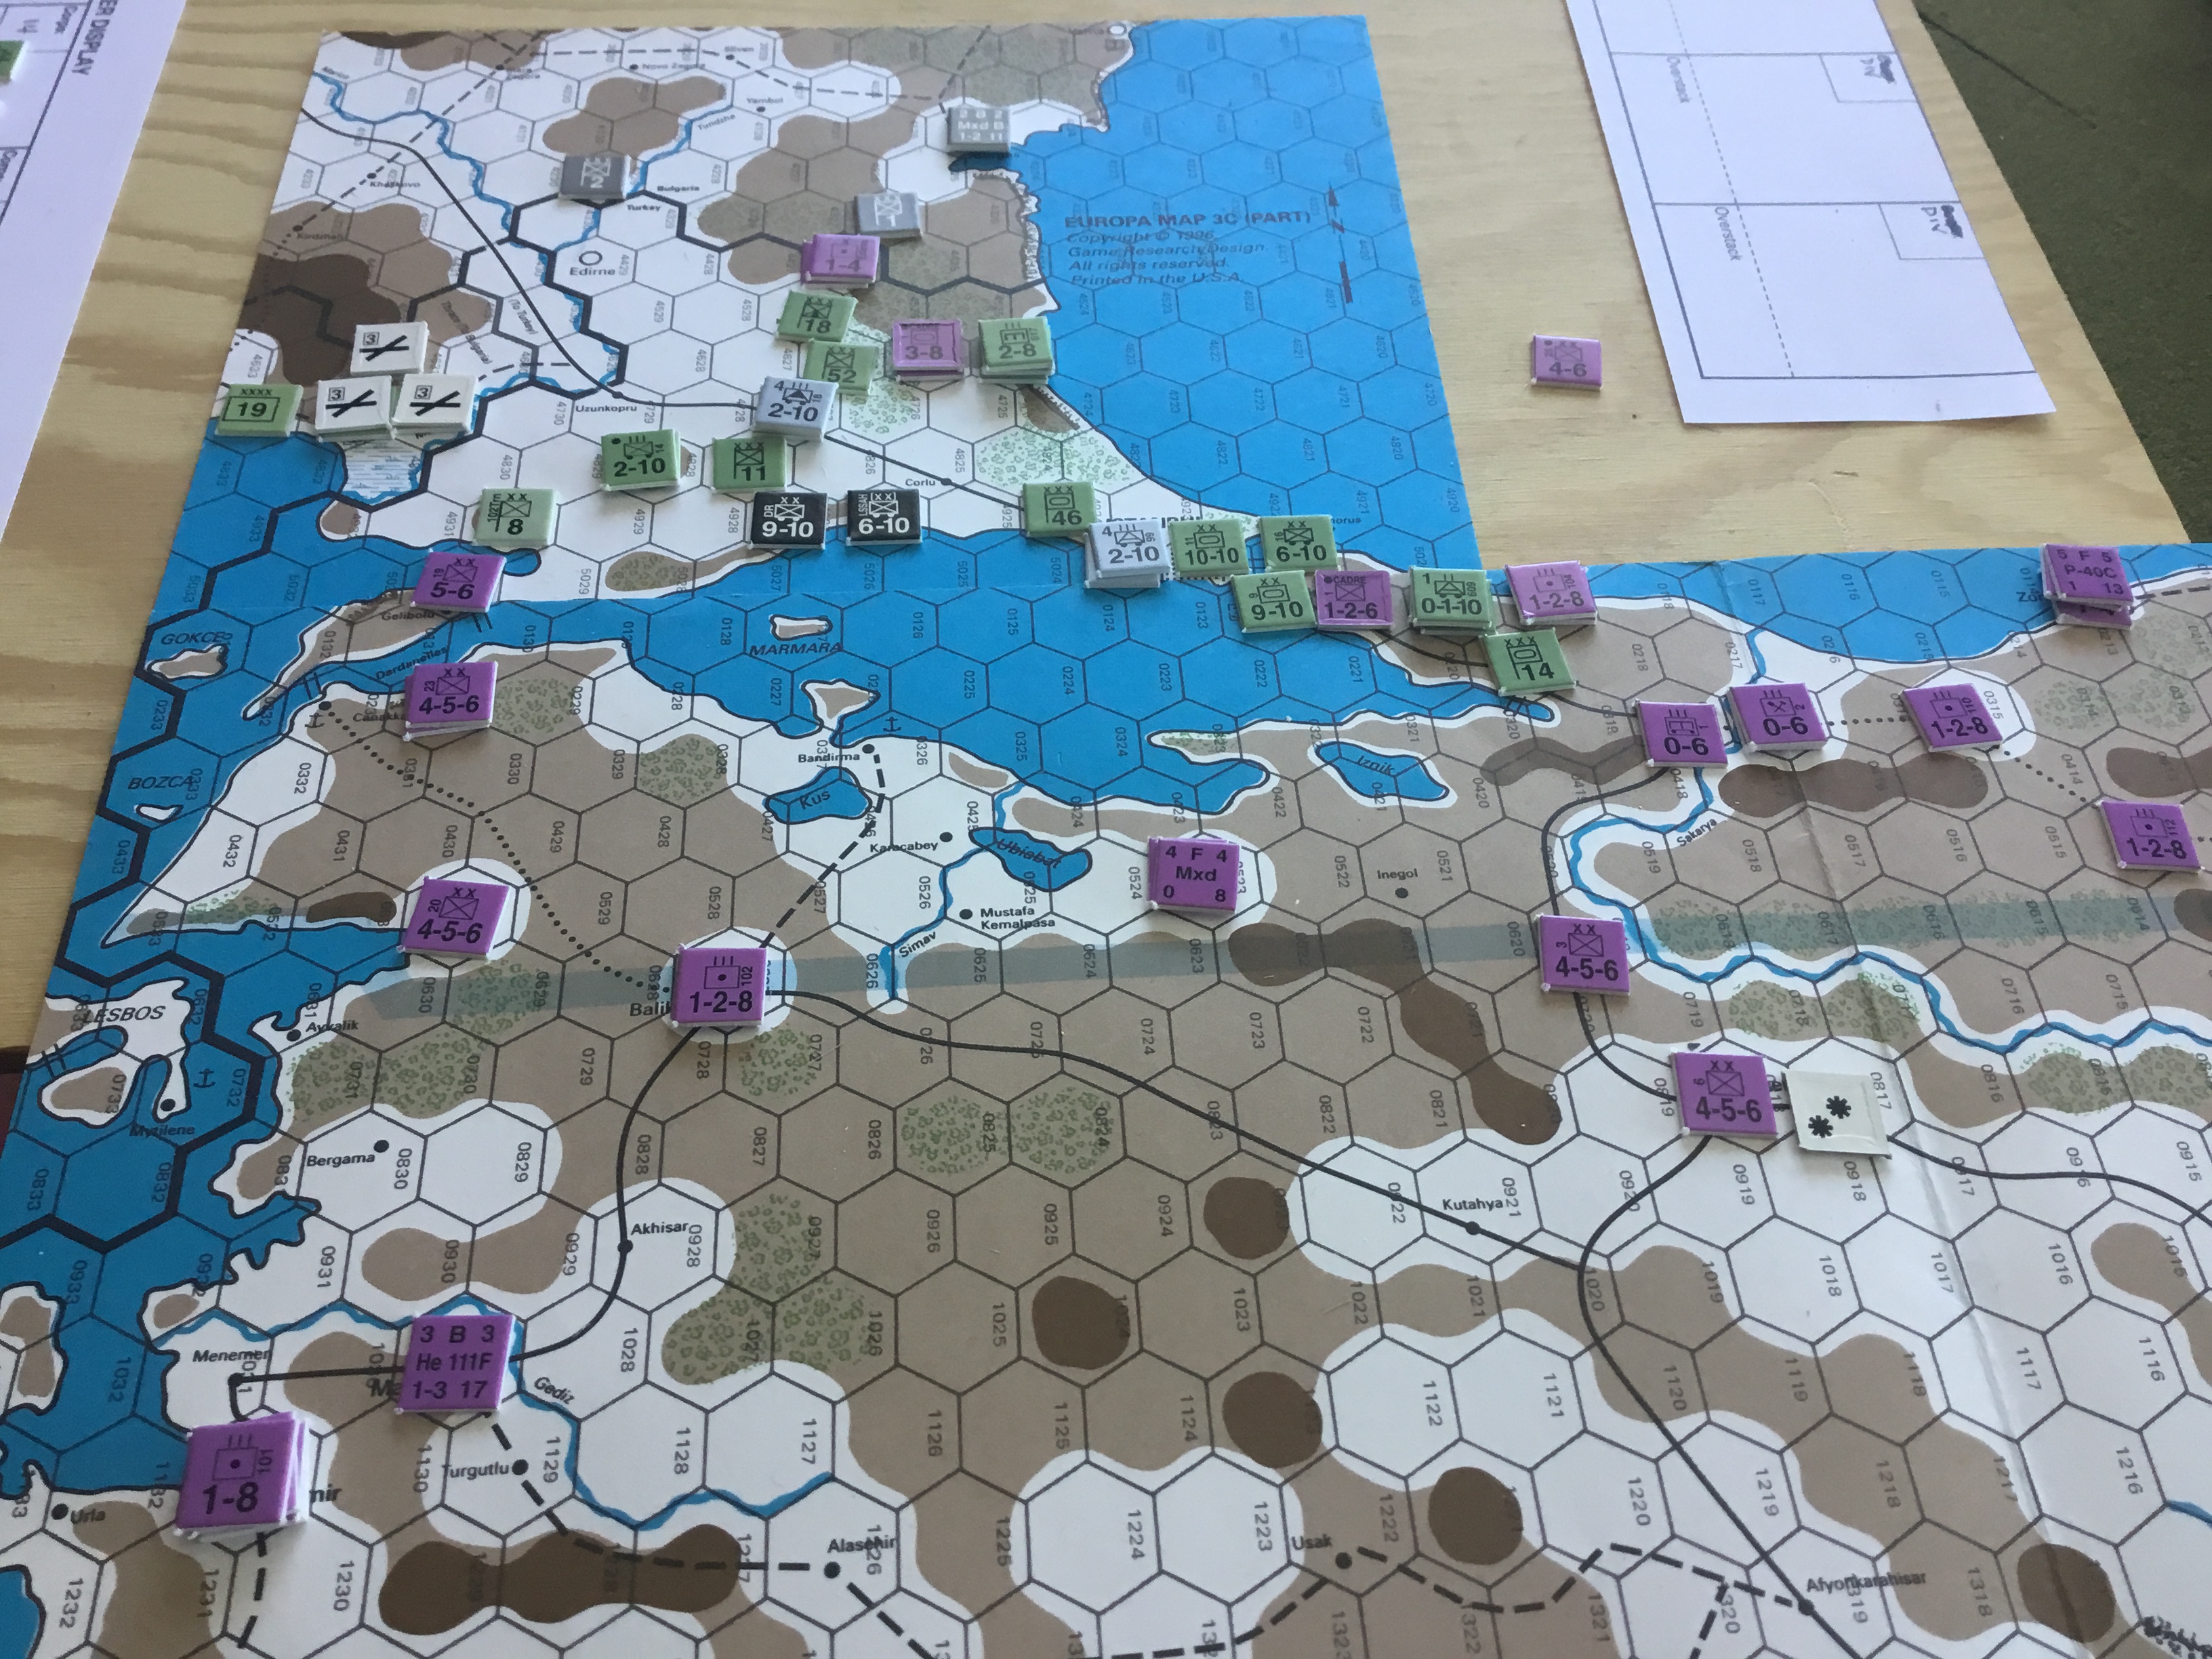
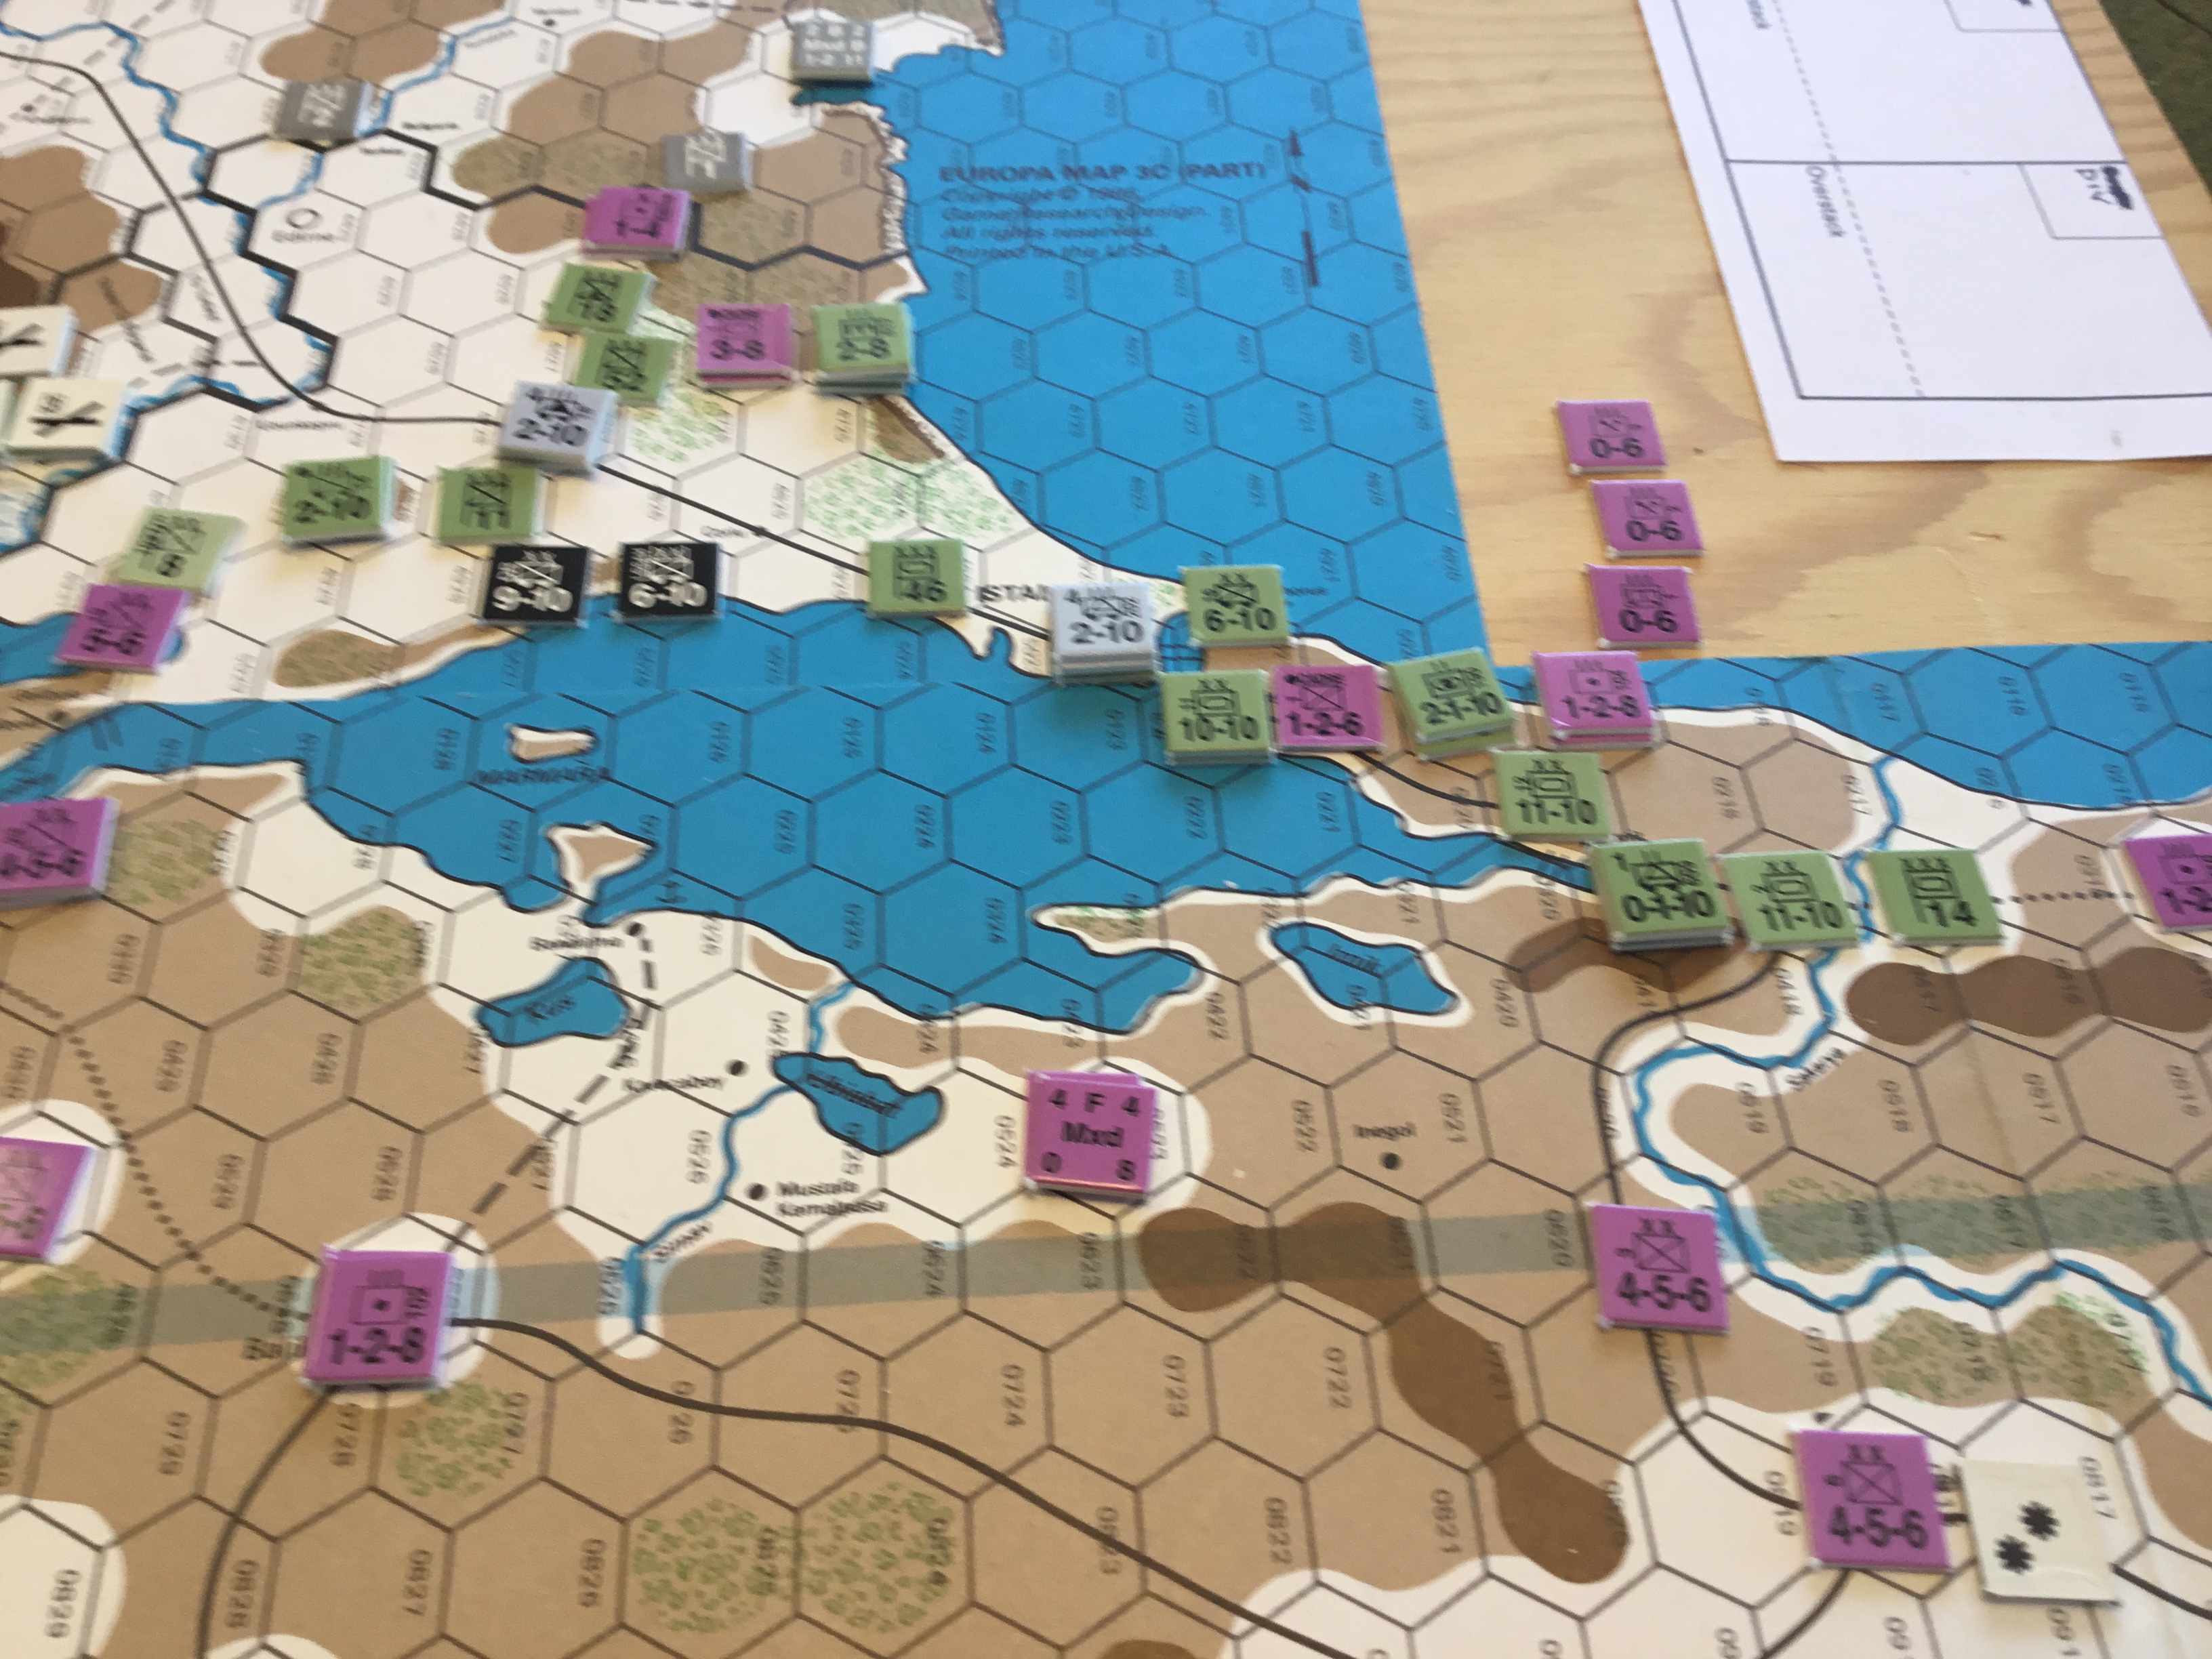
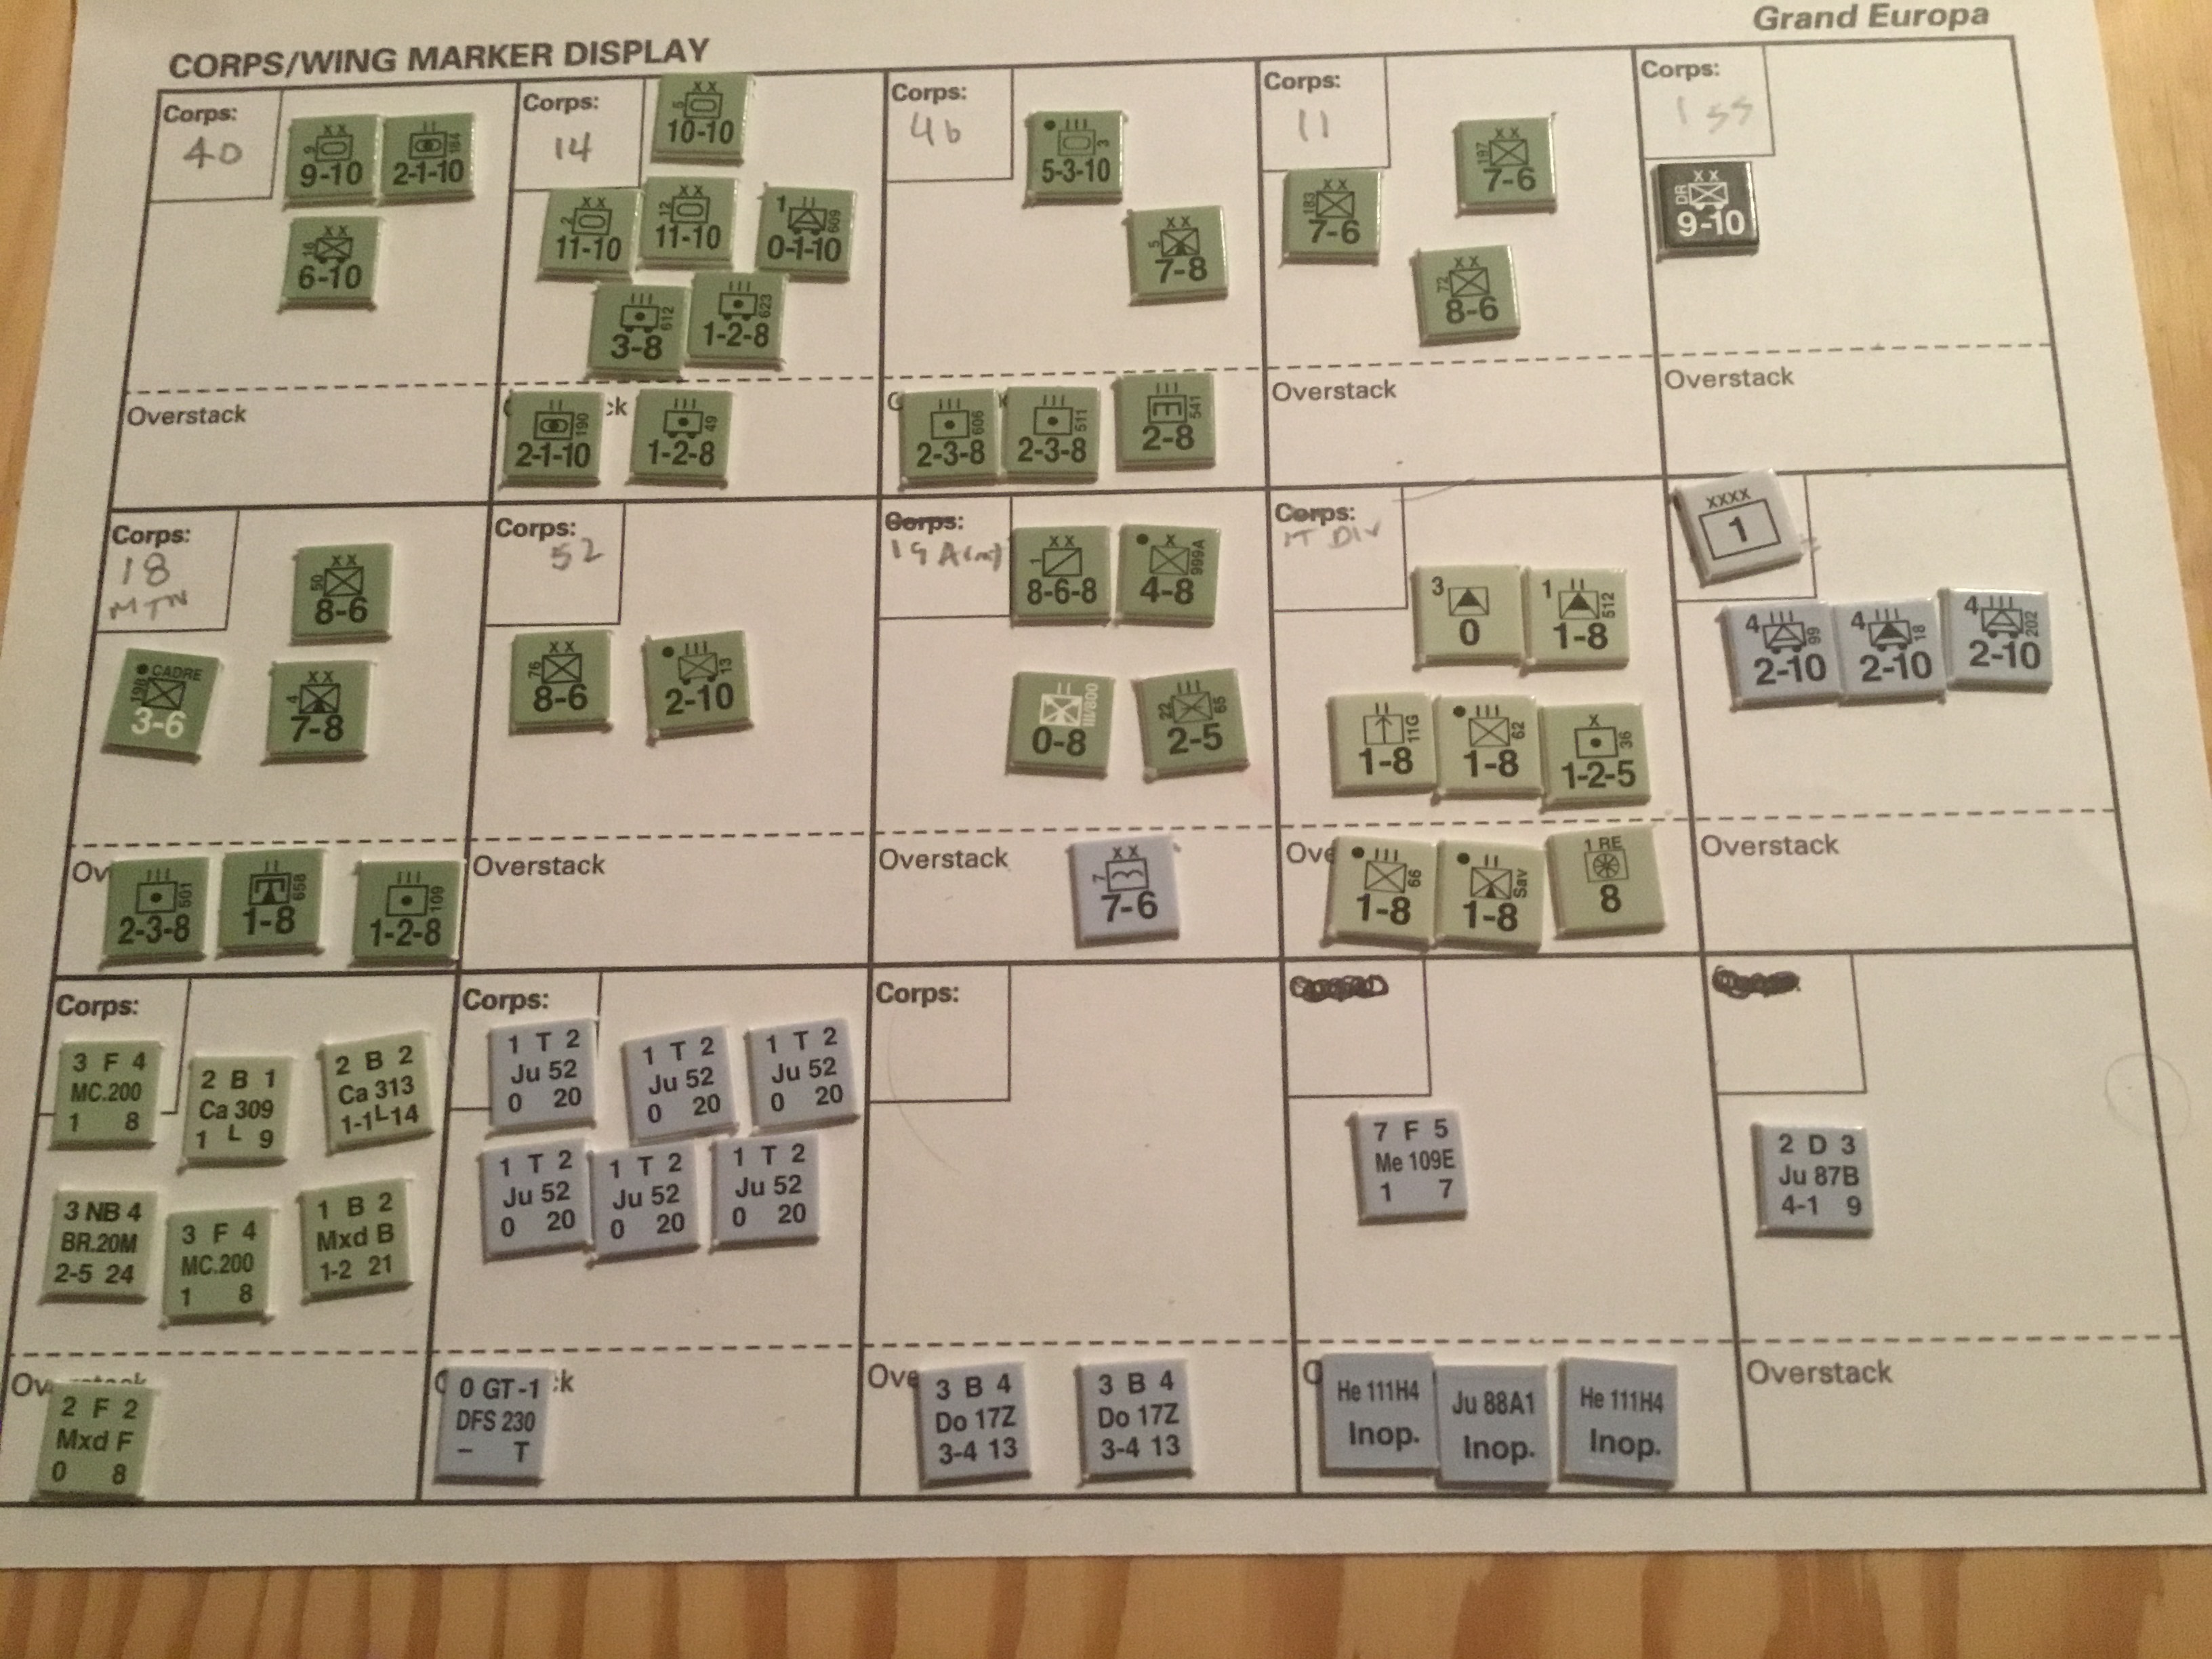
Situation After Air Return And Exploitation PhaseAxis Order Of Battle After Exploit. 40th And 14th Corps Receive Additional Assets
Seemed simple enough, but I went three iterations calculating basic ground combat odds, air support/escort allocation and air combat. Ugly. The final outcomes are disjointedly summarized below.
Hex 4825 – The 11th Armored Division attacked a lone artillery unit. The basic 5:1 odds were accompanied by an AECA of +3. Axis air support included 2 ME-110s flying escort for a DO-17 bomber and Mixed Attack Squadron. Both Turkish interceptors managed to penetrate the screen, but could not shoot down any bombers. The revised odds were 7:1, +3 to the die roll. The artillery unit was eliminated.
This attack set up the possibility of a ZOC kill for the attack on Hex 4727.
Hex 4727 – Axis 46th and 11th Corps with 54 total factors. Their AECA was 1/3 or a -1 die modifier. The Turks had an armored division and cavalry division with a total of 11 strength points. Their AECD was over 1/2 or a +2 modifier. The basic odds were 54:11 or 4:1, with a net +1 die modifier. Three JU-87s along with ME-109 and Me-110 escorts were assigned to the ground support mission. The Turks responded by flying their P-40 squadron on an intercept mission. The P-40 bypassed both escorts and shot down one JU-87. The final odds were 62:11, or 5:1, -1 die modifier. The die roll was a 4, -1 or 3, for a defender retreat result. The cavalry unit was eliminated during the retreat, and the armored division cadred.
Hex 4429 – The 18th Mountain Corps and 52nd Corps attacked with 35 factors, supported by two squadrons of He-111s and a Ju-88A1 squadron. The hex was guarded by an infanty division and border guards. The resulting odds were 42:7 or 6:1. The Axis rolled an exchange(!!!). The Turkish infantry division was cadred and then eliminated during retreat. The border unit was eliminated. The Axis cadred a winterized infantry division.
Hex 4924 – The 40th and 40 corps, with 45 strength points and an AECA of +3, attacked a Turkish division supported by an A-19 squadron. The final odds were 45:7, or 6:1 with a +3 die modifier. The Turkish division was eliminated.
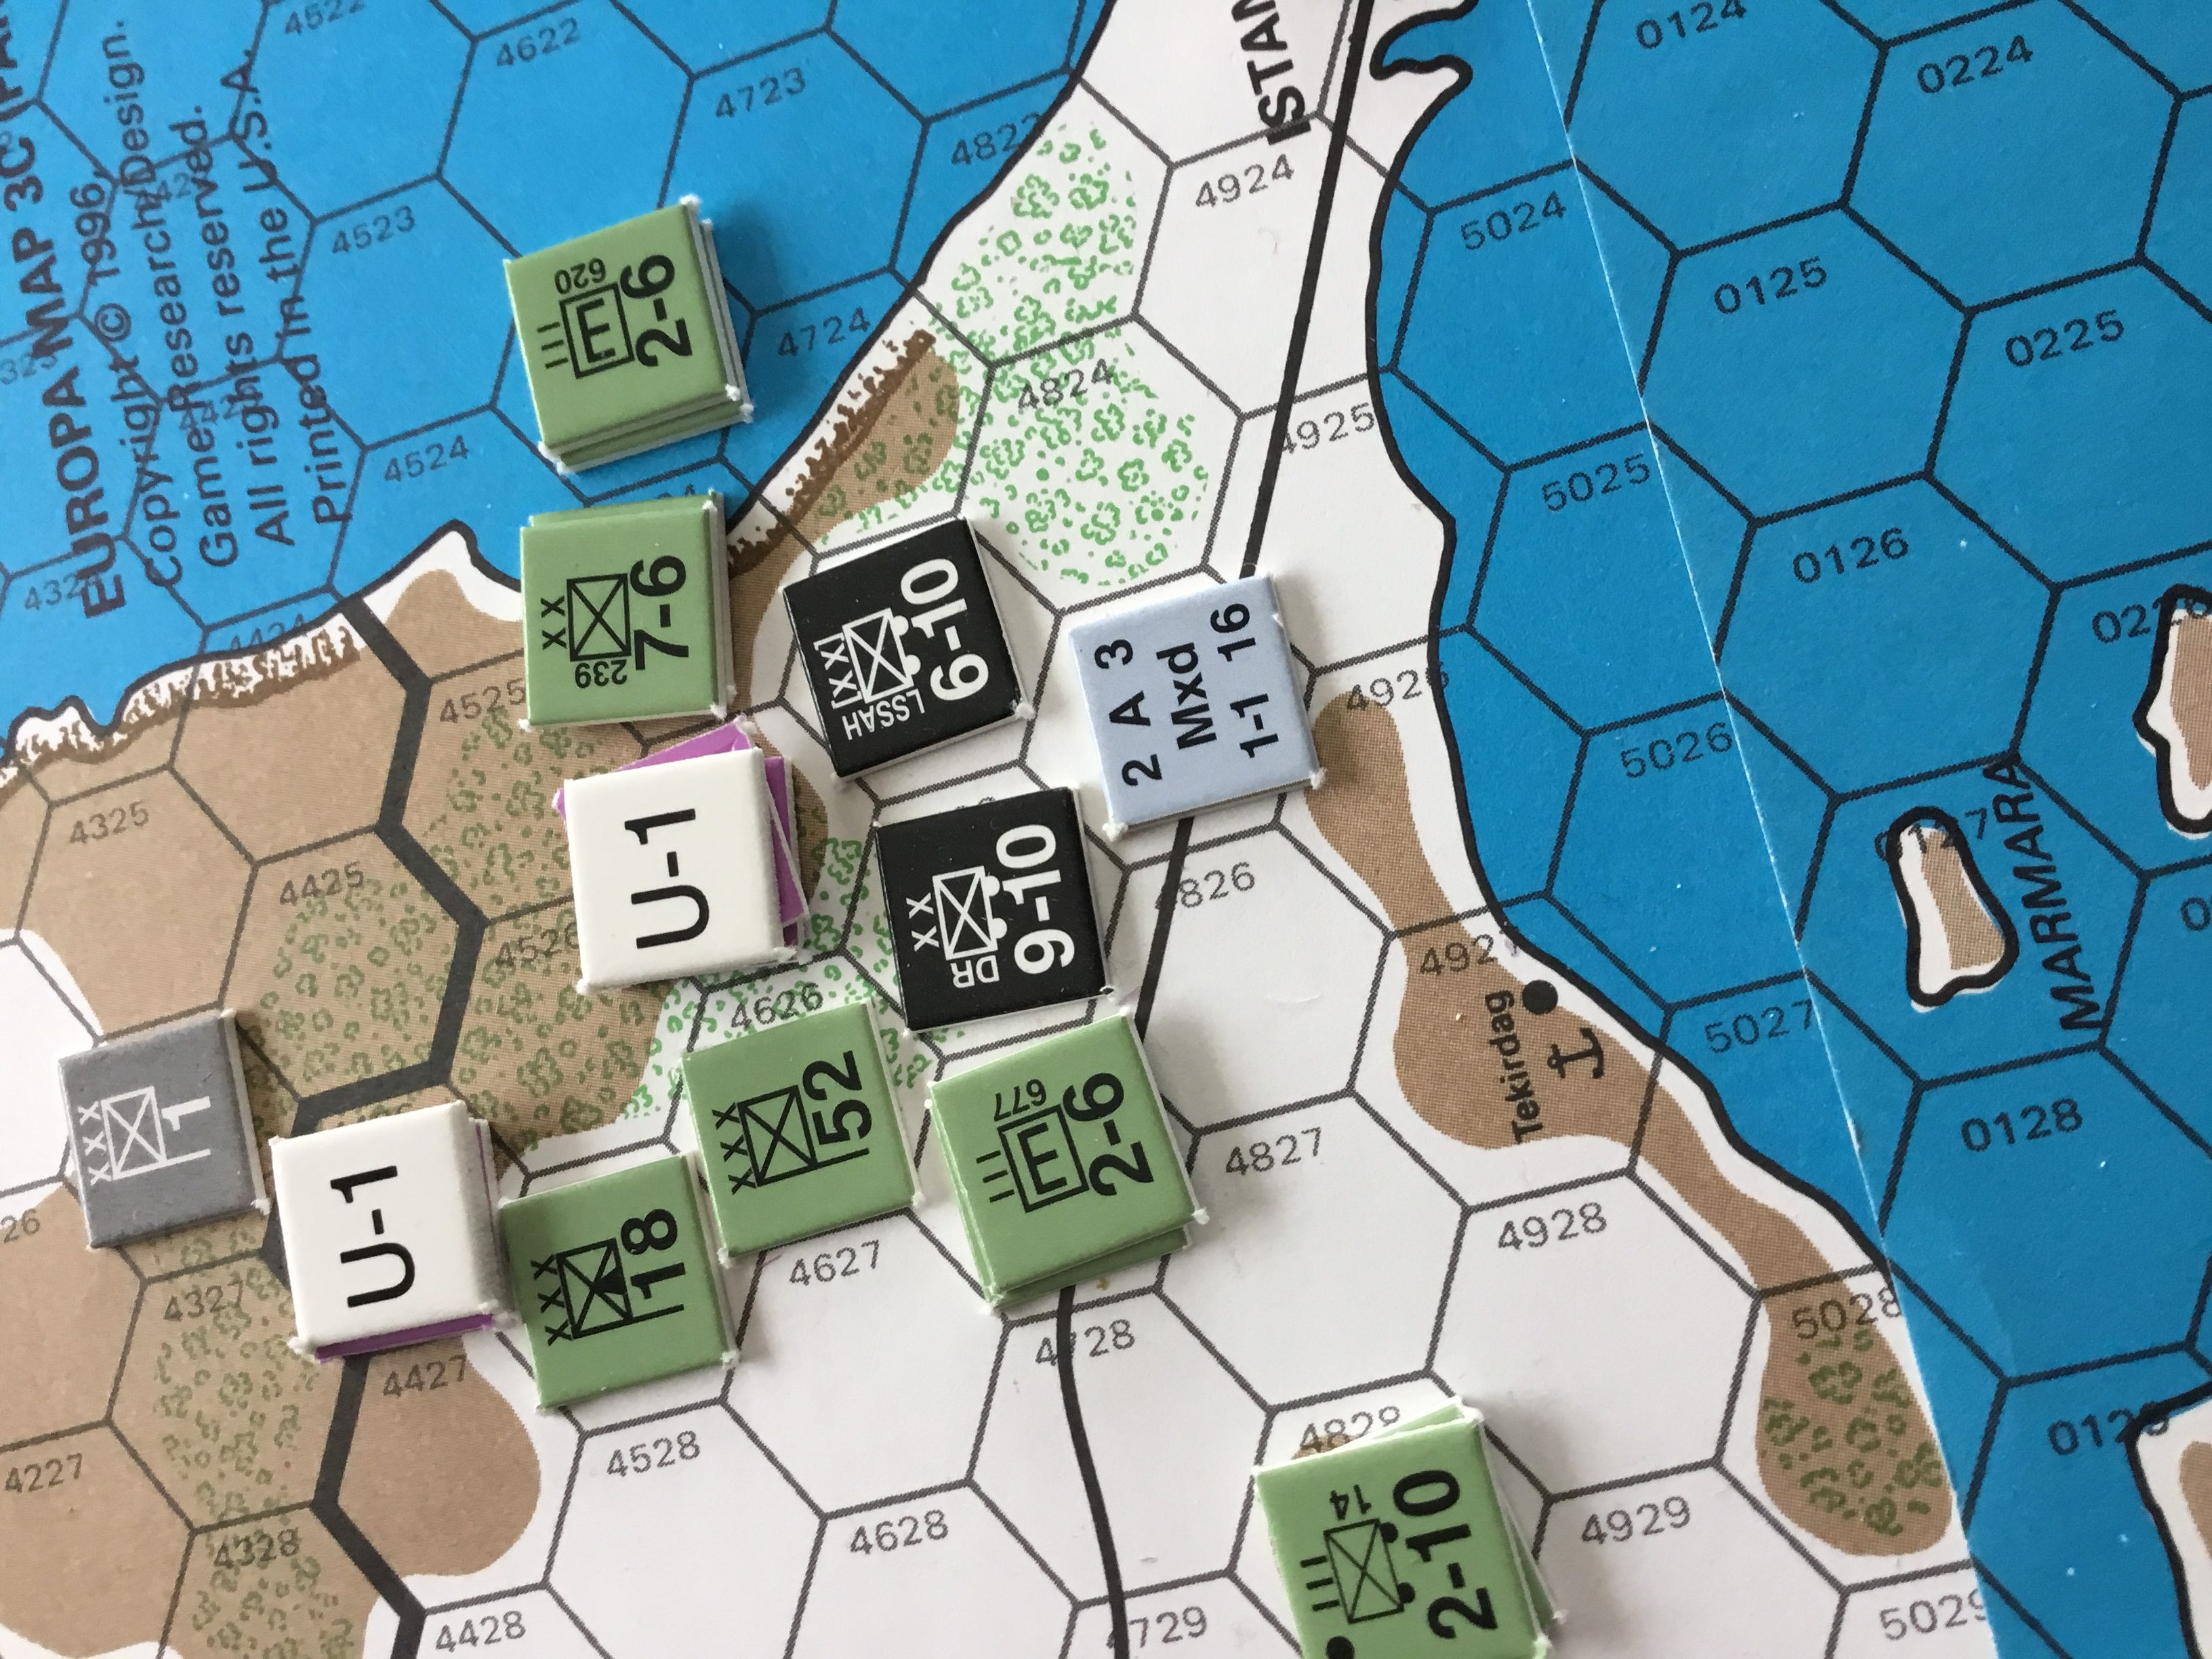
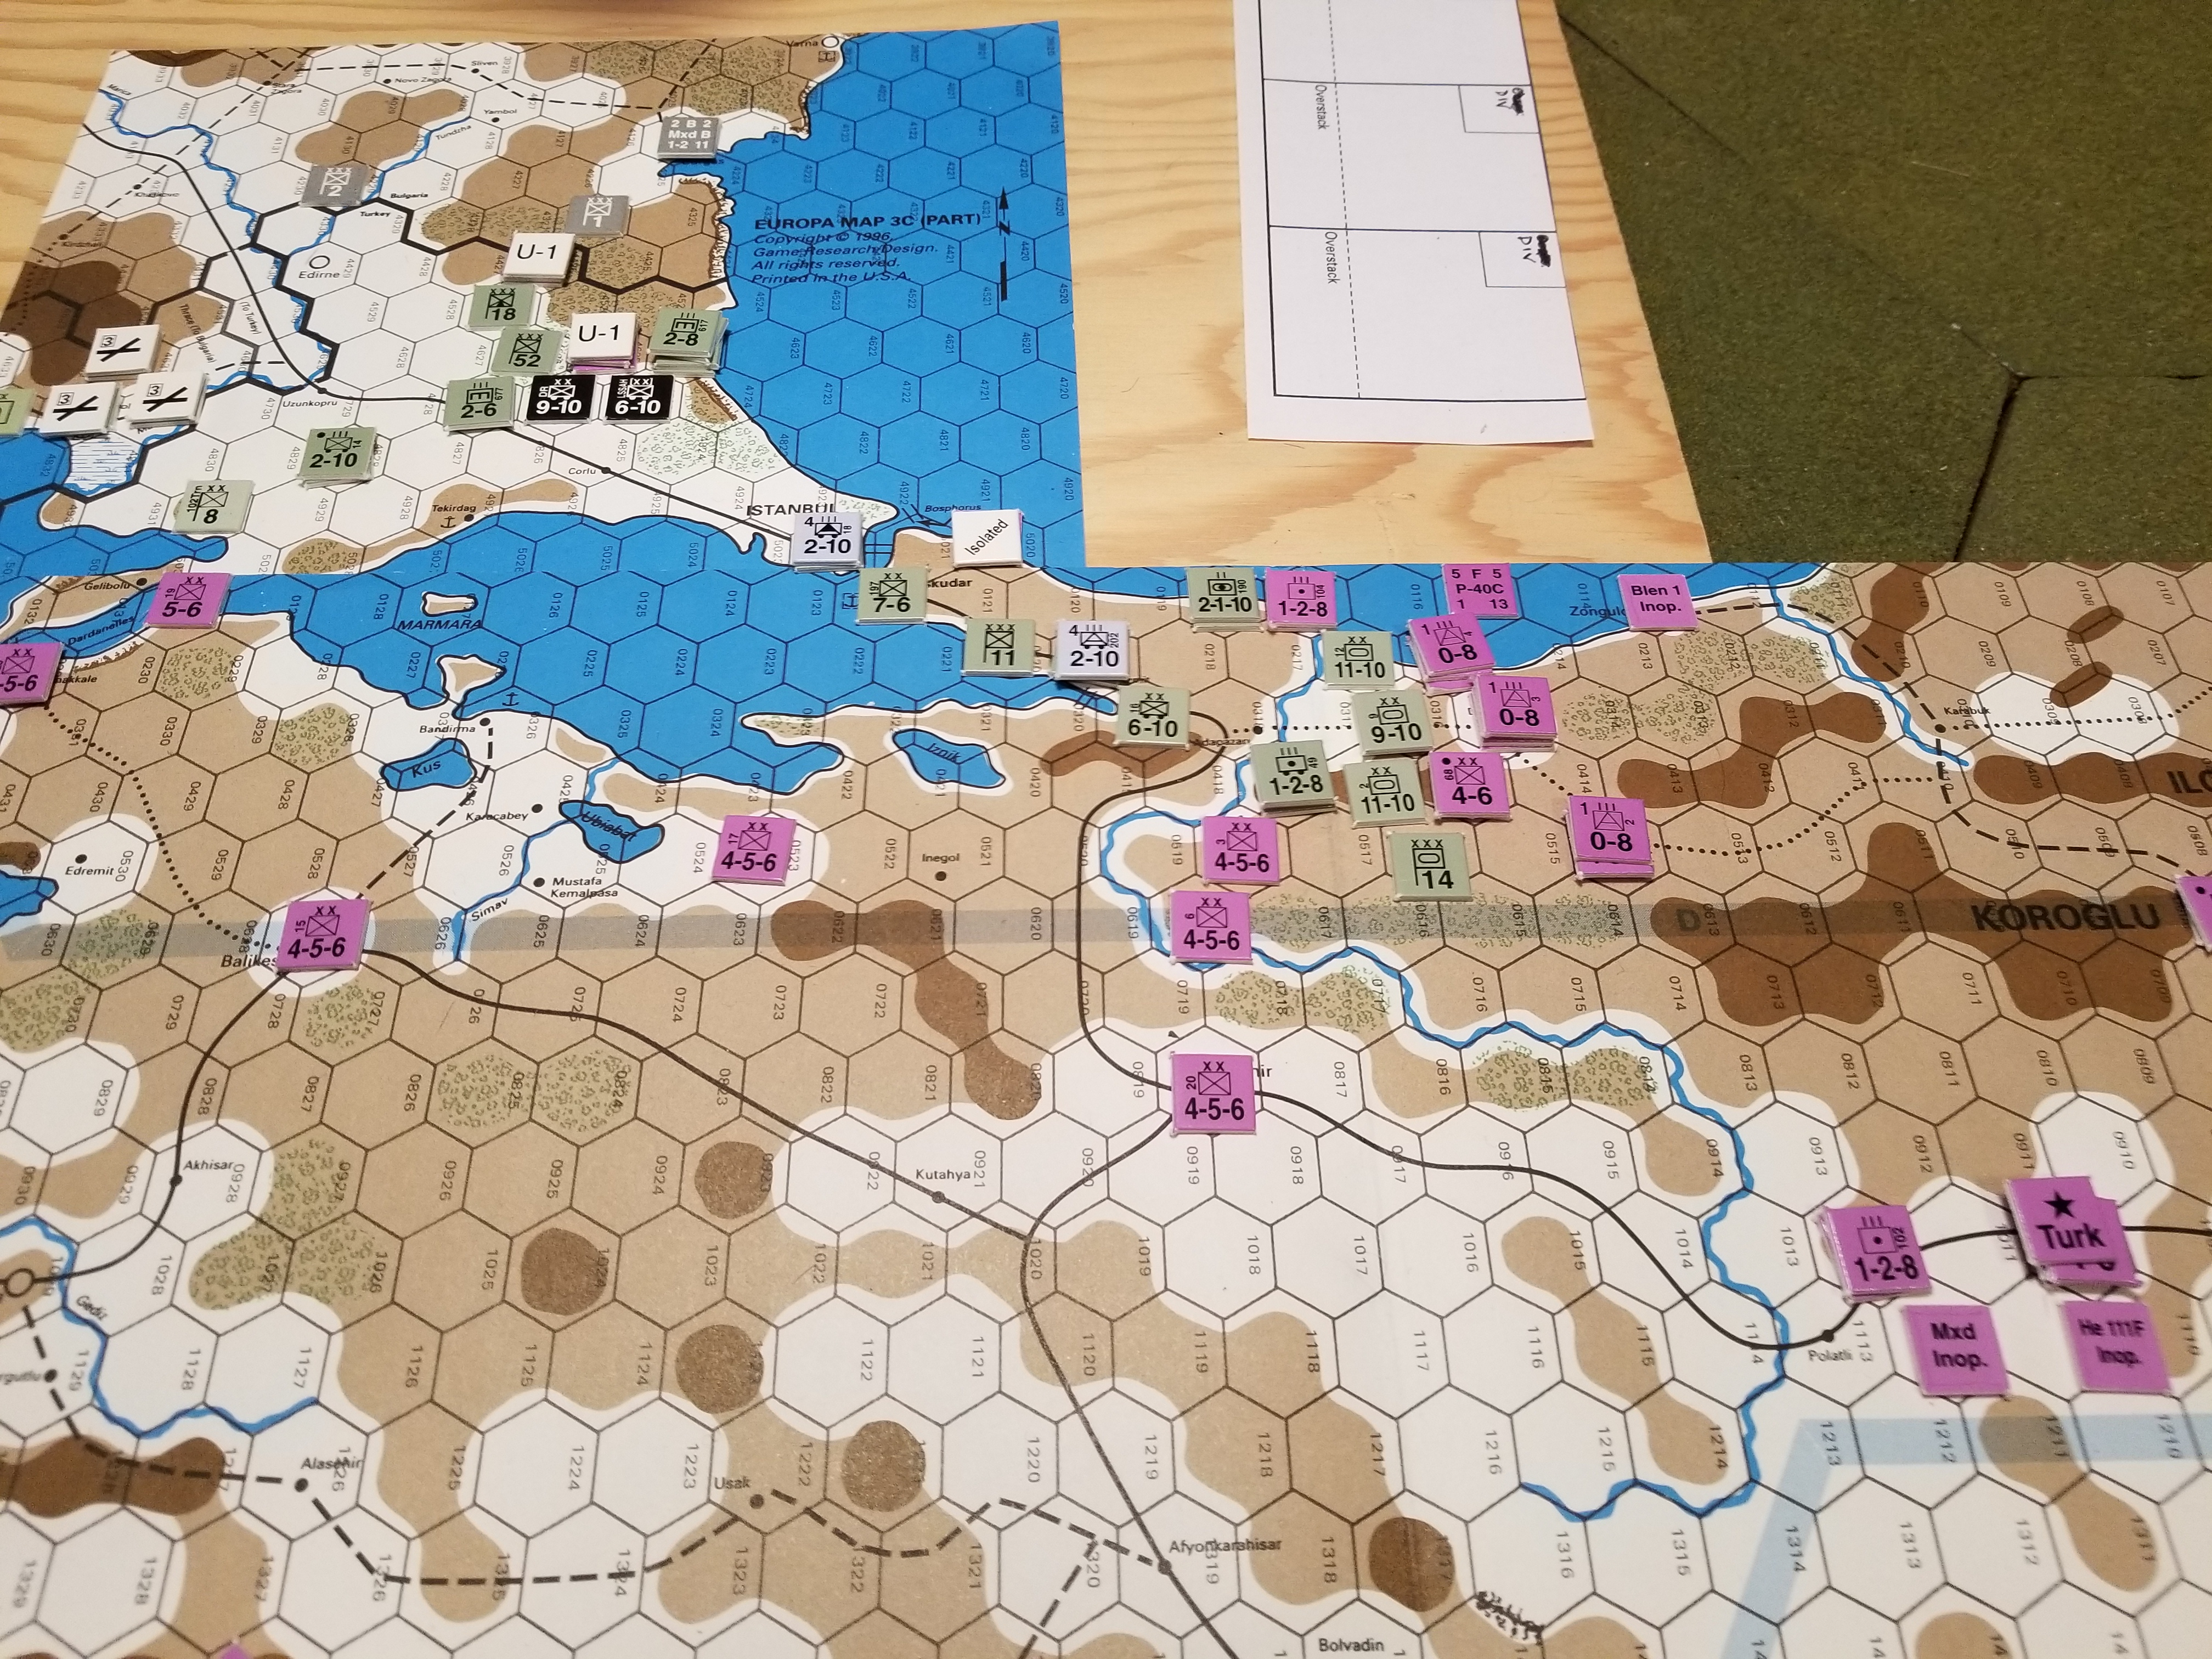
Axis Turn 1 – After Combat But Before Aircraft Return and Exploitation Phases