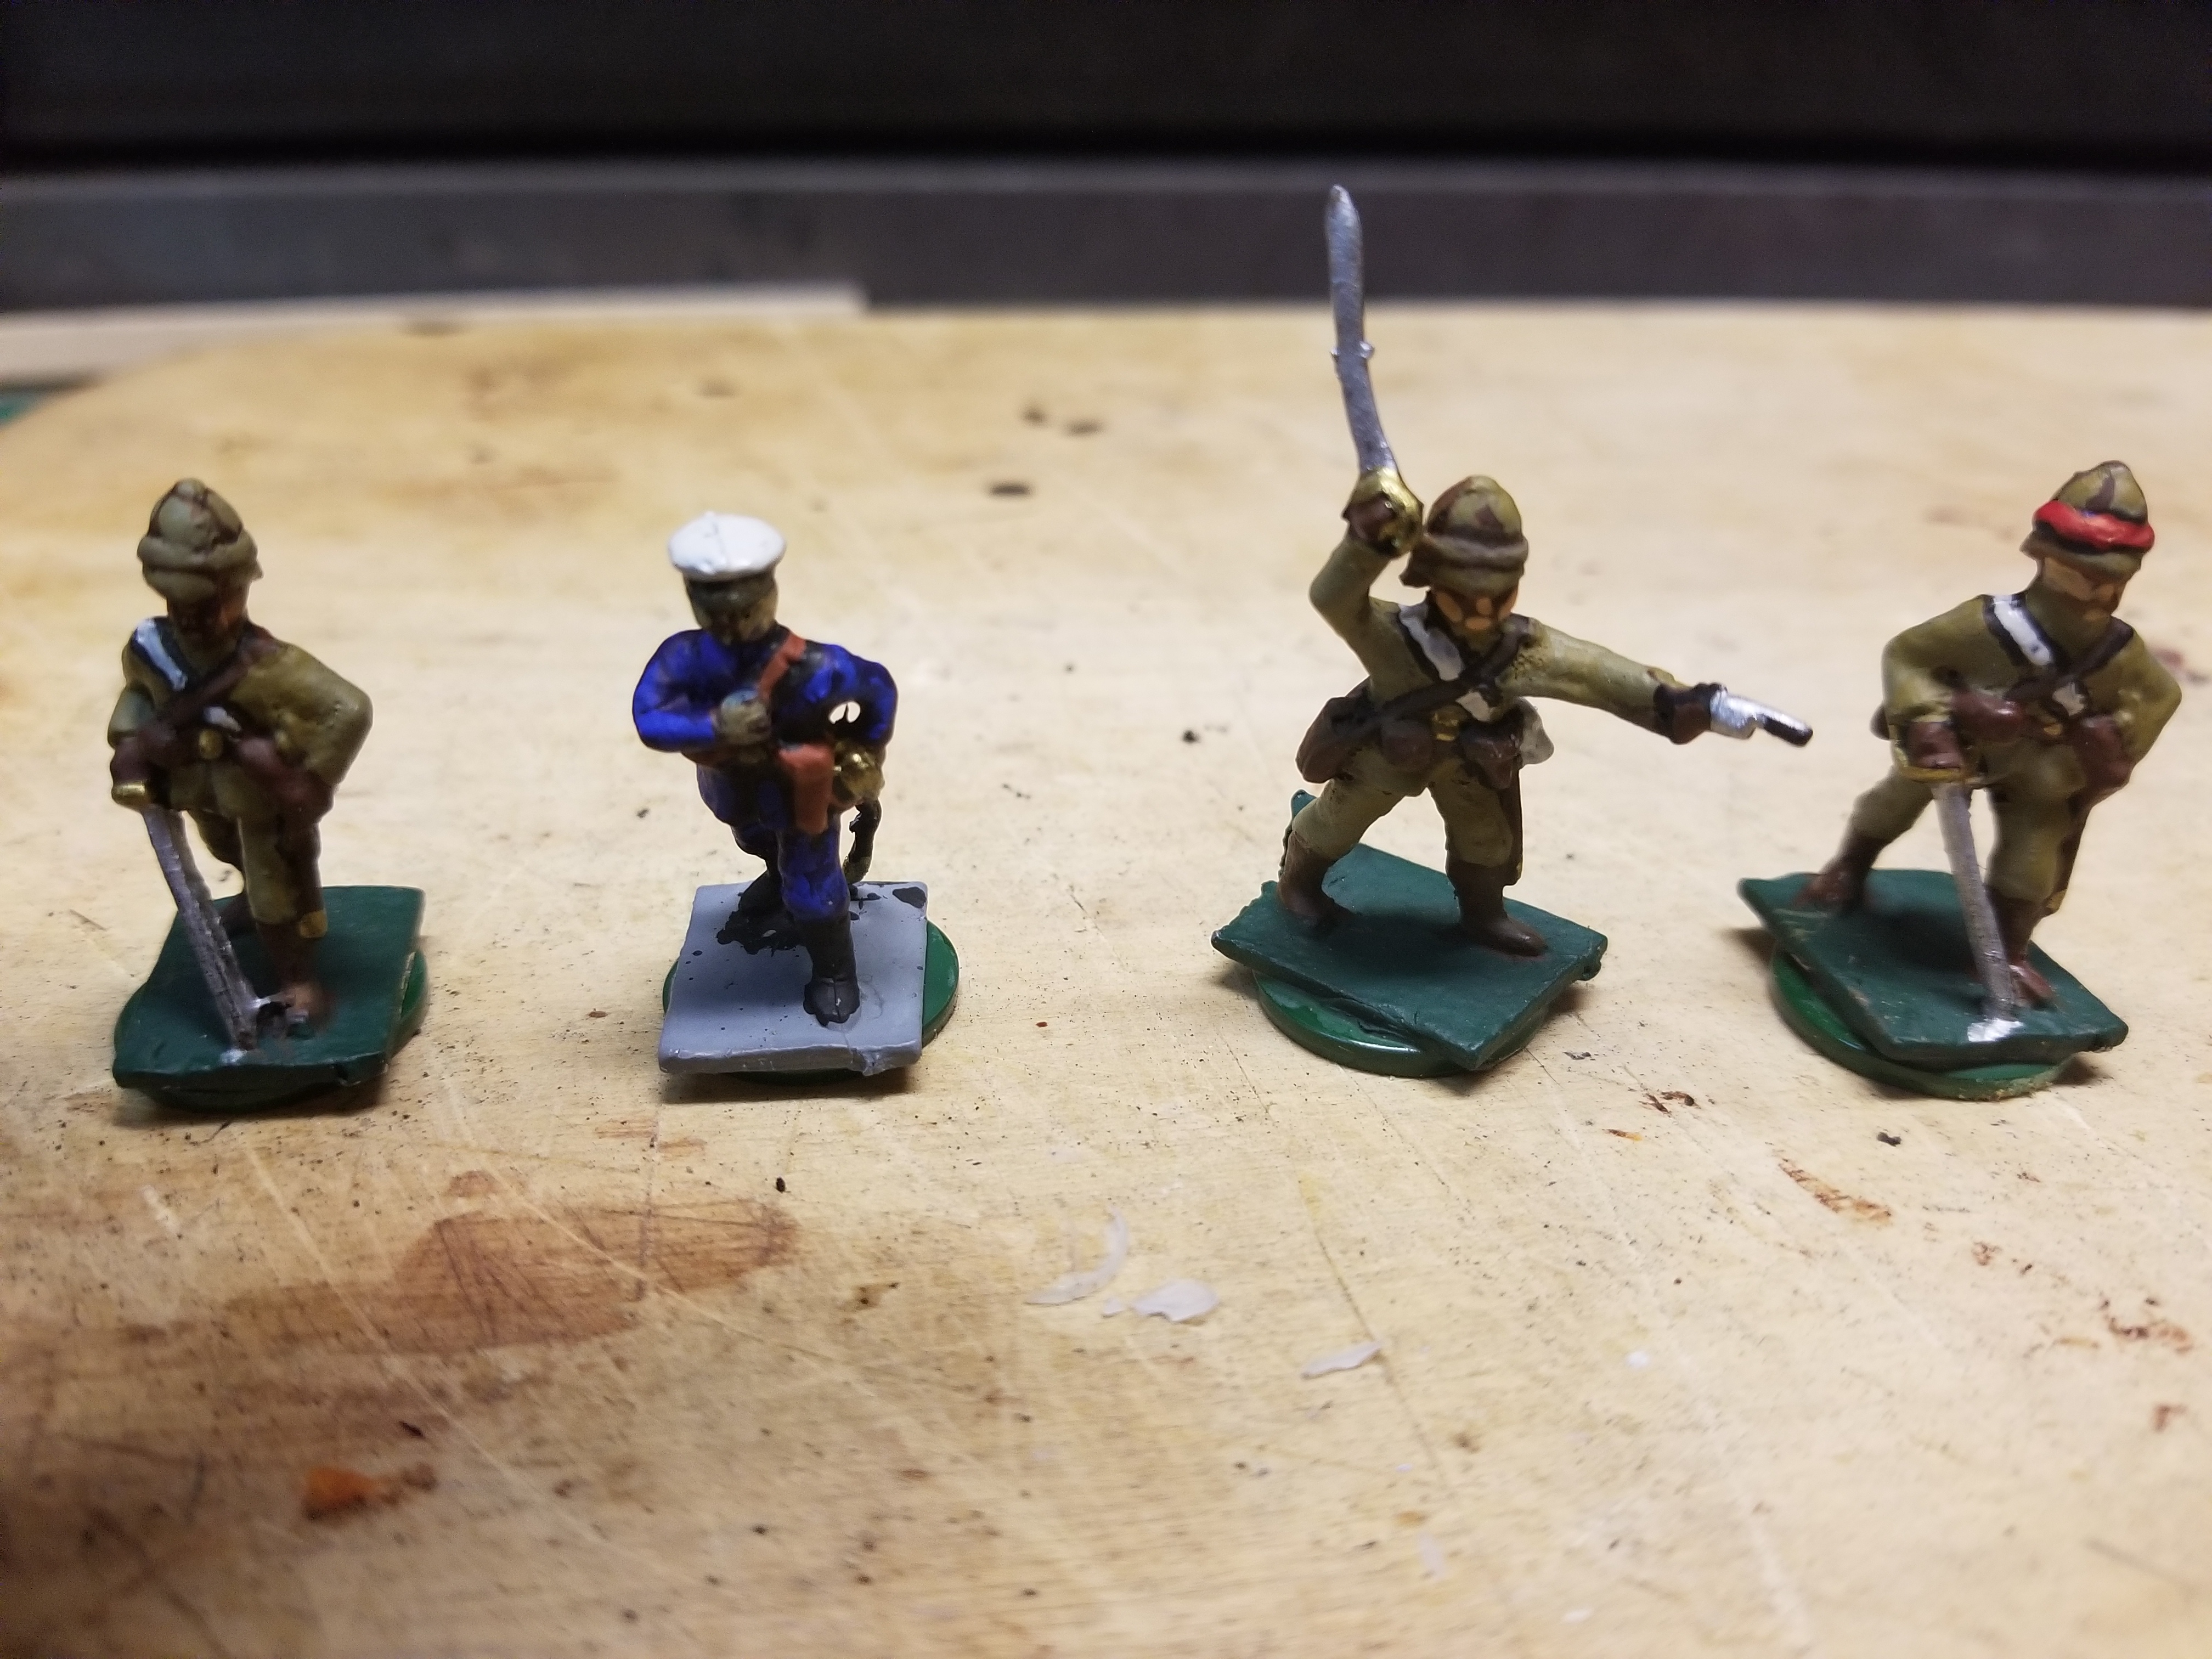
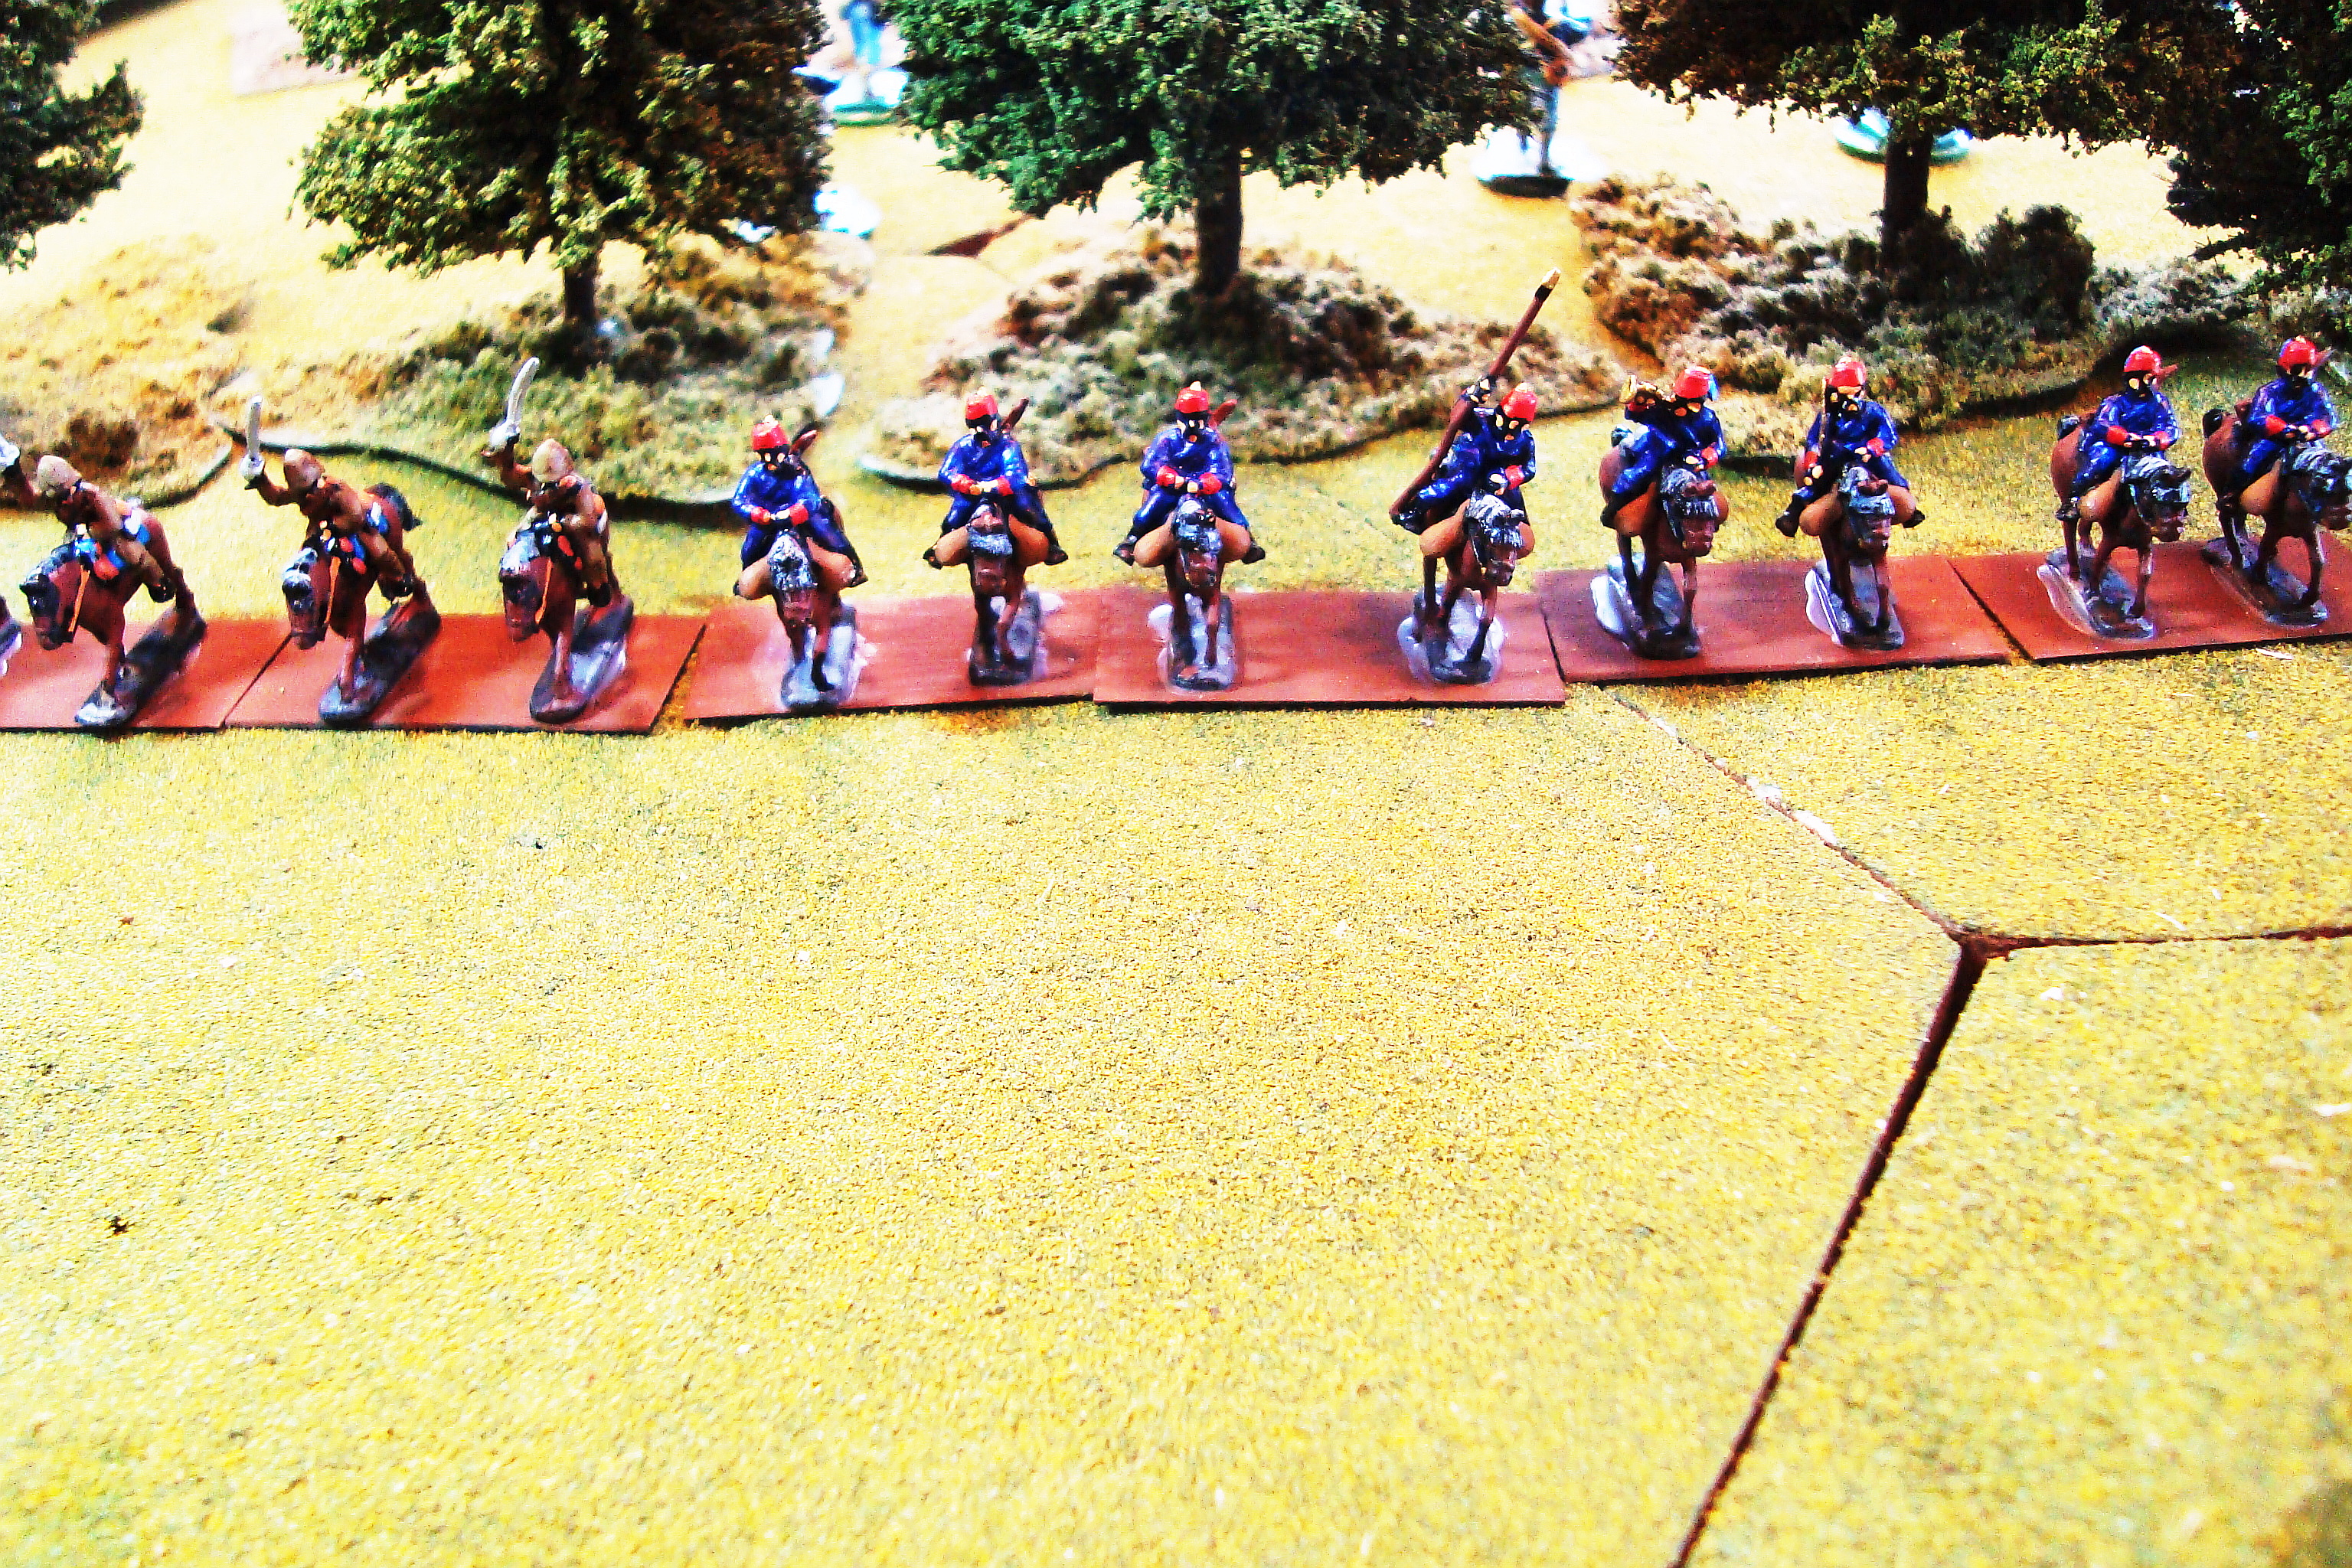
Finally got on it and finished up my four remaining The Sword and The Flame (TSATF) figures.
The quality of today’s sculpting is so much better than these Minifigs from the early ’80s. No comparison. And, the newer figures are so much easier to paint acceptably. With these old guys, it’s fairly grim work for a pedestrian painter like myself.
The problem now is whether or not I buy some more Boxers. I have too many Europeans, and TSATF rules call for fairly large units. If unit size is reduced, the CRT results distort, and I’d rather not make even a simply adjustment to it. But, even though old and poorly sculpted, 25mm Minifigs are not cheap.
I’ll keep scouring E-Bay and The Miniatures Page for cheap recruits.
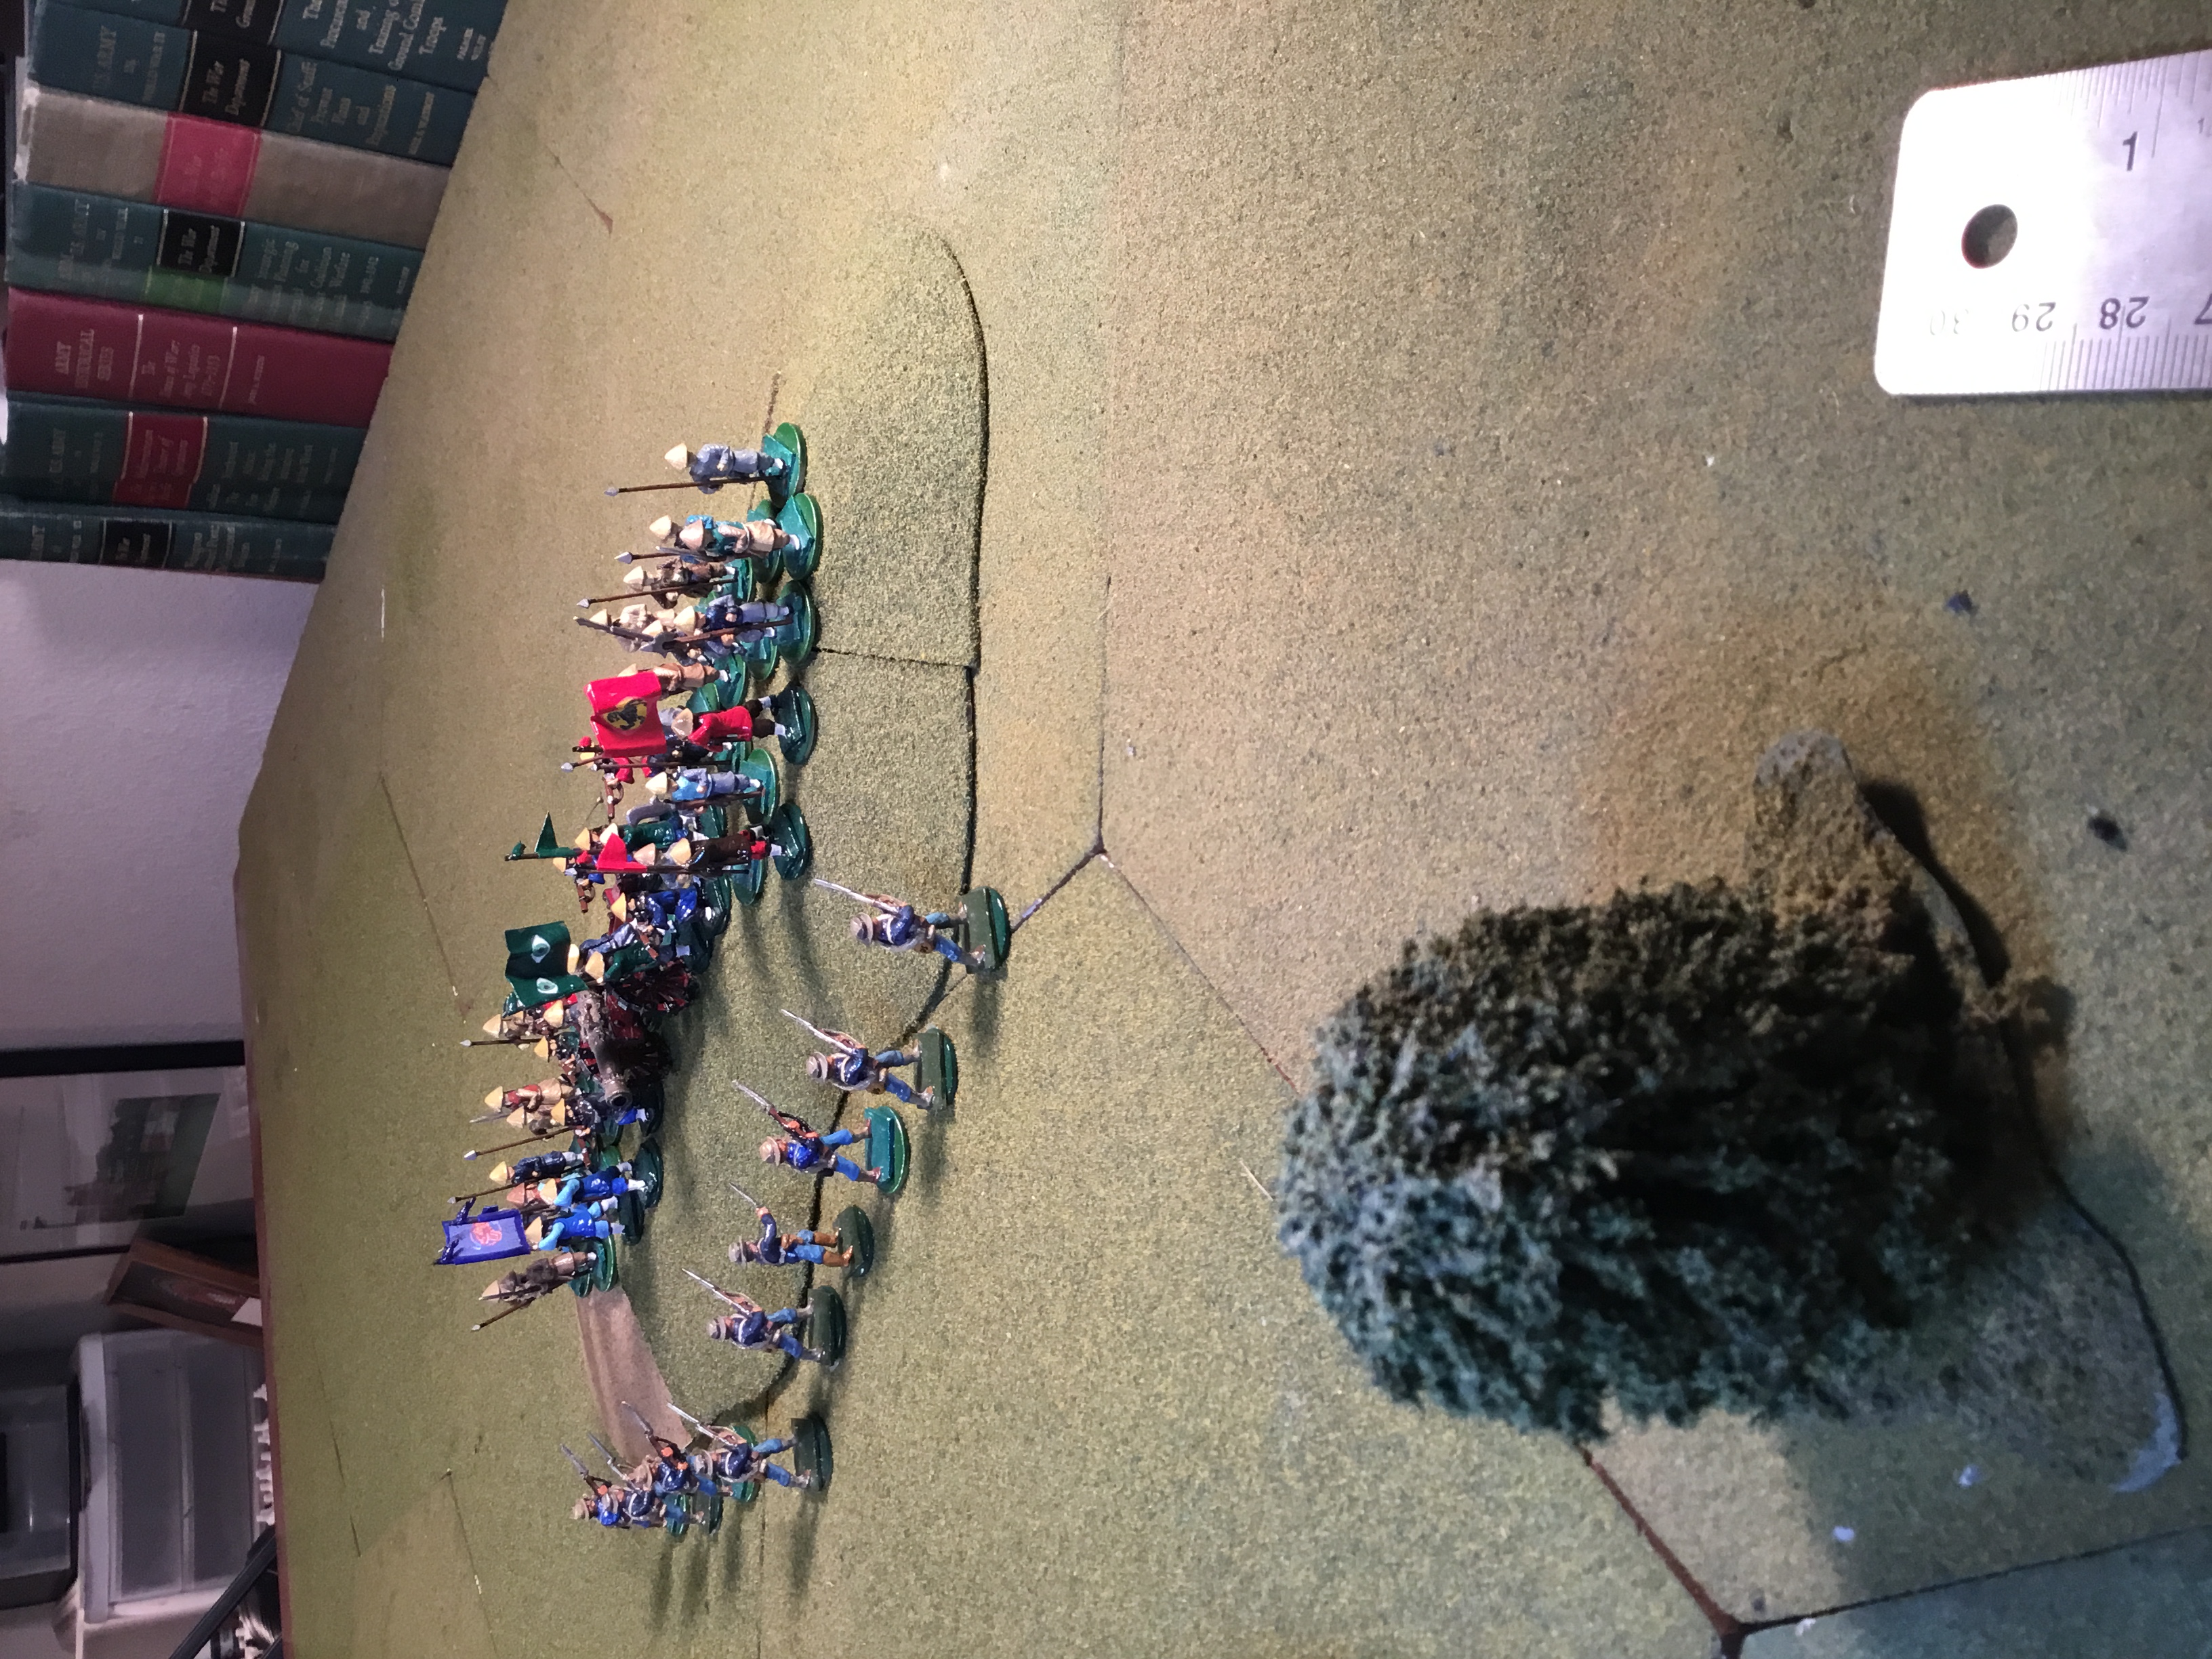
The Lieutenant’s options are pretty straightforward; if you think about them for 10 minutes rather than the minute or less he has to ponder the situation.
Withdraw – You’ve cleared the woods, now get the hell out of there.
Fire and Then Withdraw – Punish them. But, they might get the initiative and being only 12 inches away with a D6x4 charge roll, they can run you down in the Woods.
Fire and Hold – Same as (2) above, but you will be in melee, and the woods have no favorites.
Charge – Hope they break. If not….
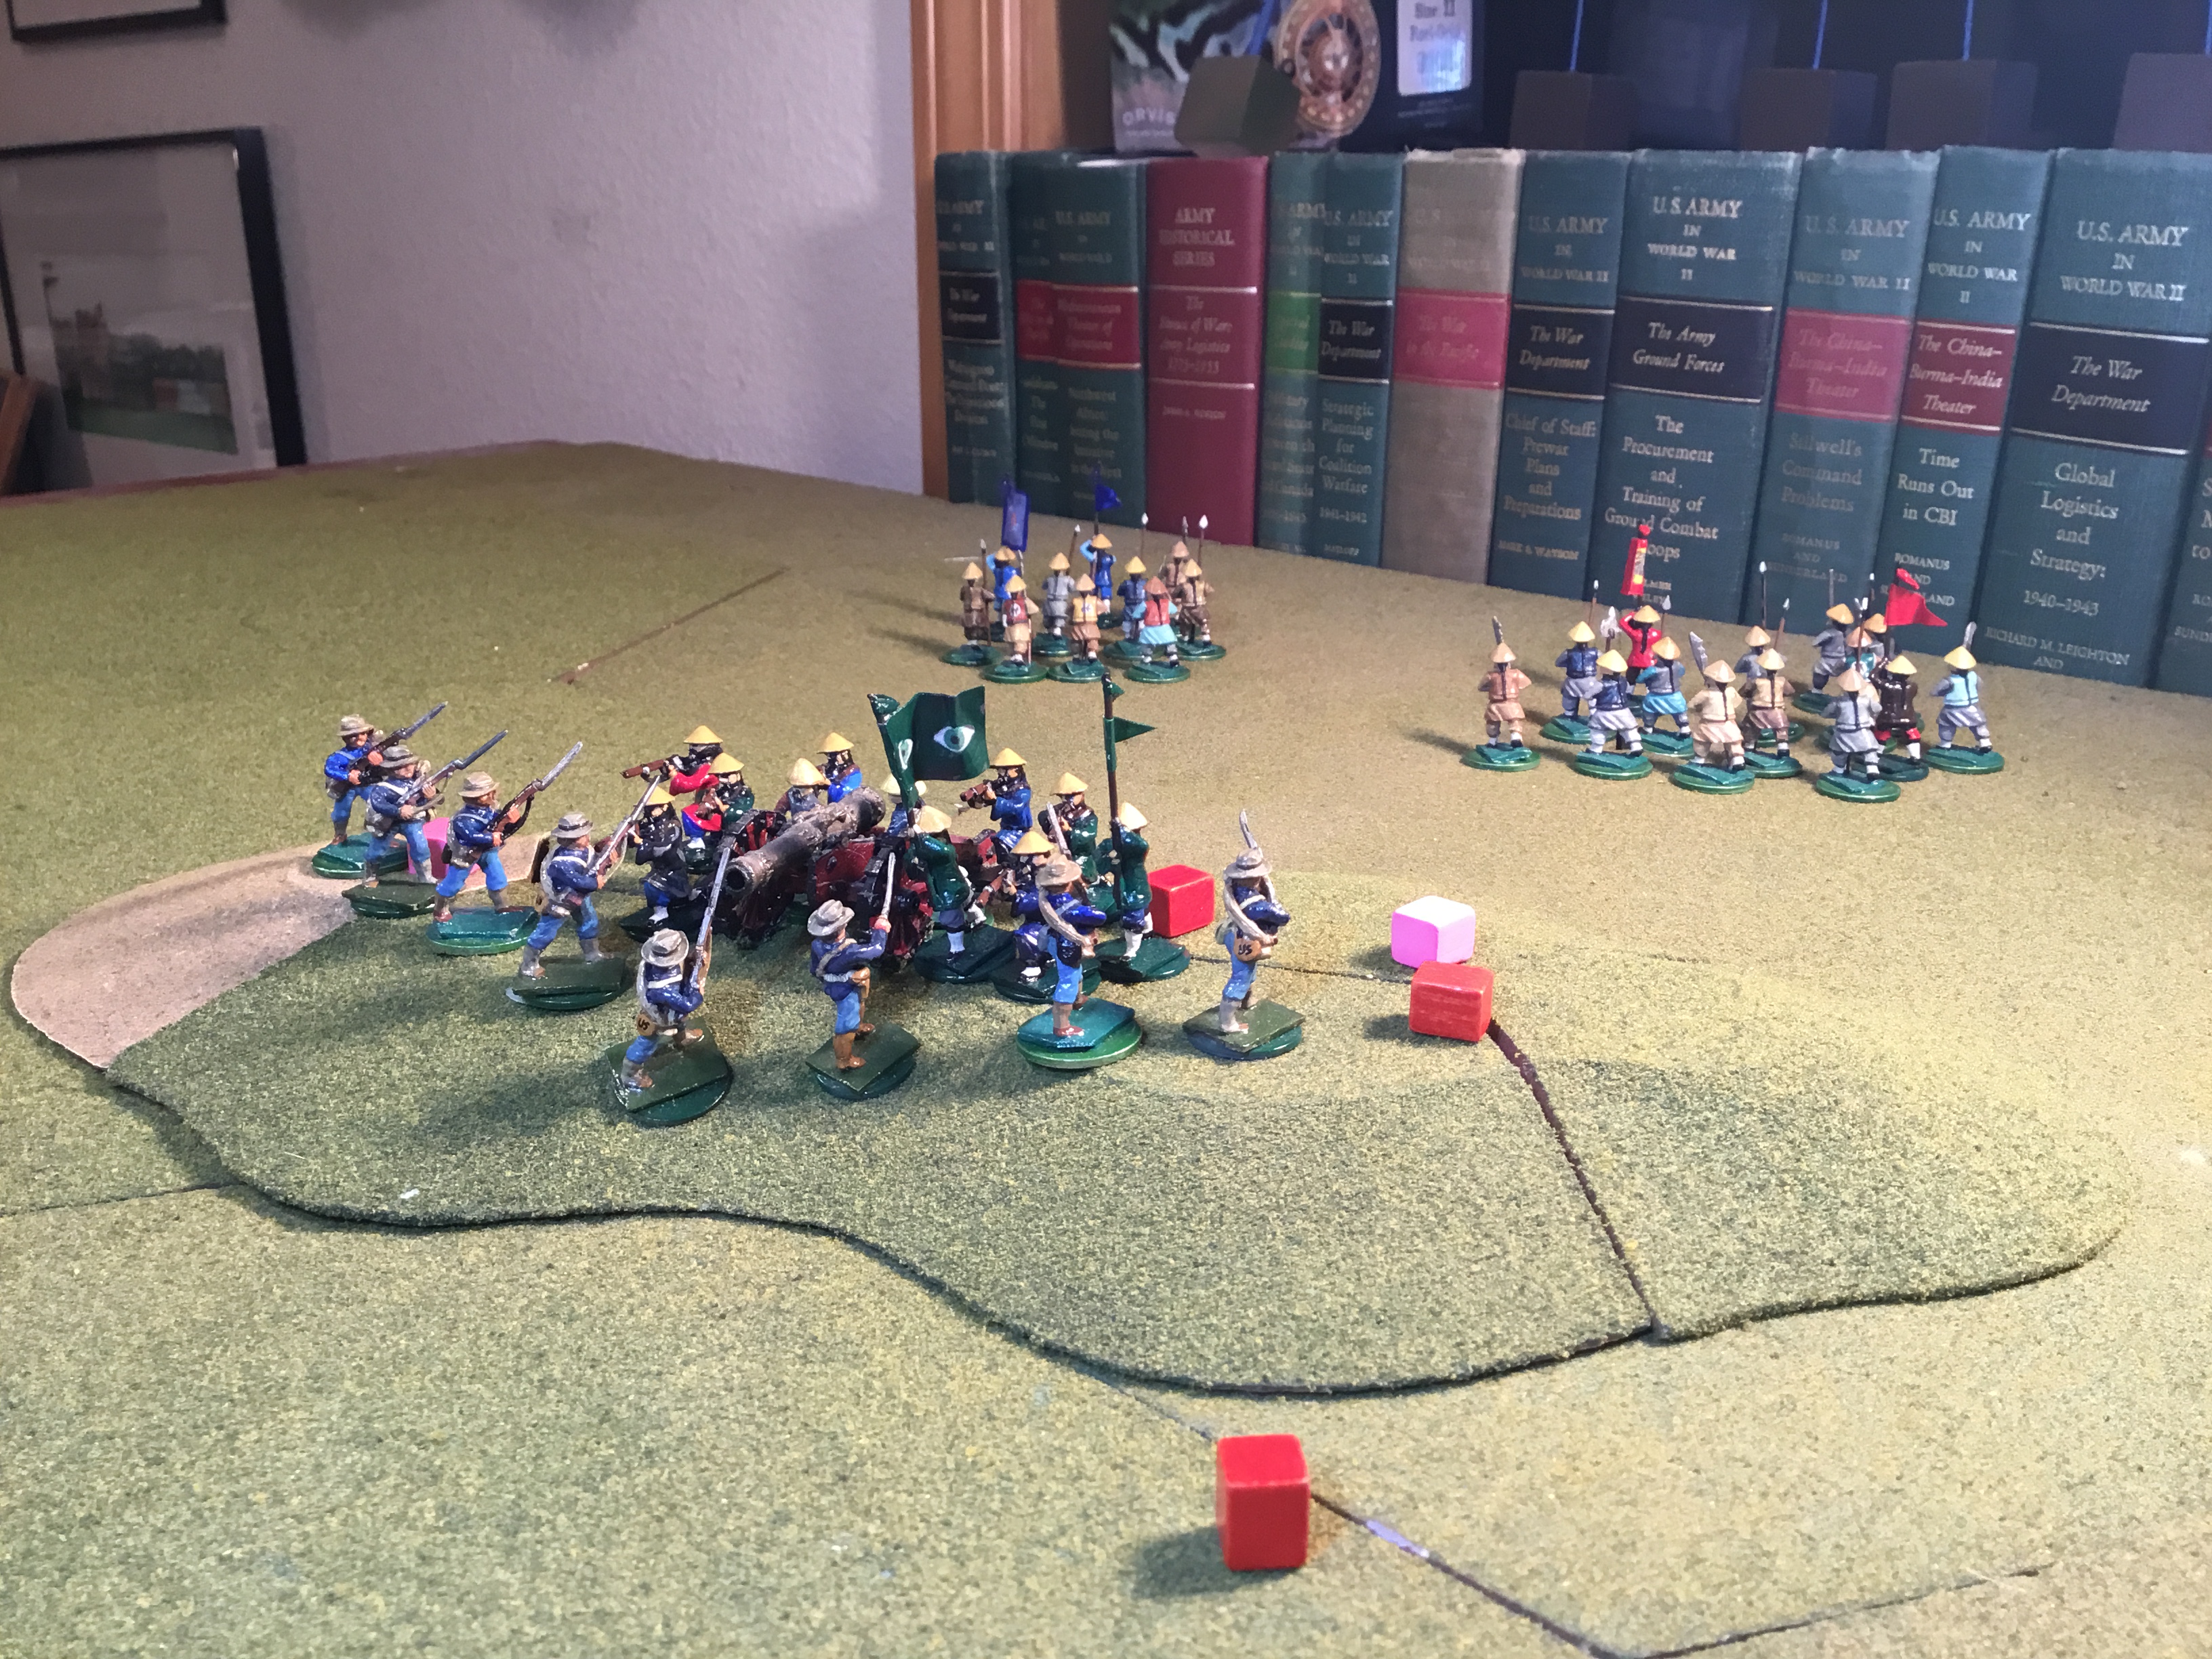
I cheated, playing both Options 1 and 4. In Option 1, the Marines successfully broke contact and moved towards camp.
Two of the three Boxer units fled the Marines’ Option 4 charge. Only the riflemen remained, killing one Marine before melee.
Marines Ready To Close. Die Roll of 1-5 Needed. Piece Of Cake.Two Boxer Units Fail Their Stand Die Roll of D6 1-3. Marines Close With Remaining Riflemen And Gunners.Into The Bastards!
The melee took two turns. The Marines had a +1 D6 modifier because of the rifle and artillerymen’s presumed ineptitude in hand-to-hand combat. OK….????
In the first round, two Marines retreated, with one Boxer killed, one wounded and three fleeing.
Five more Boxers, one lightly wounded, fell back during the second round.
The Boxers left the battlefield on a D6x4 roll of 14, leaving the bloodied and exhausted Marines holding the ridge.
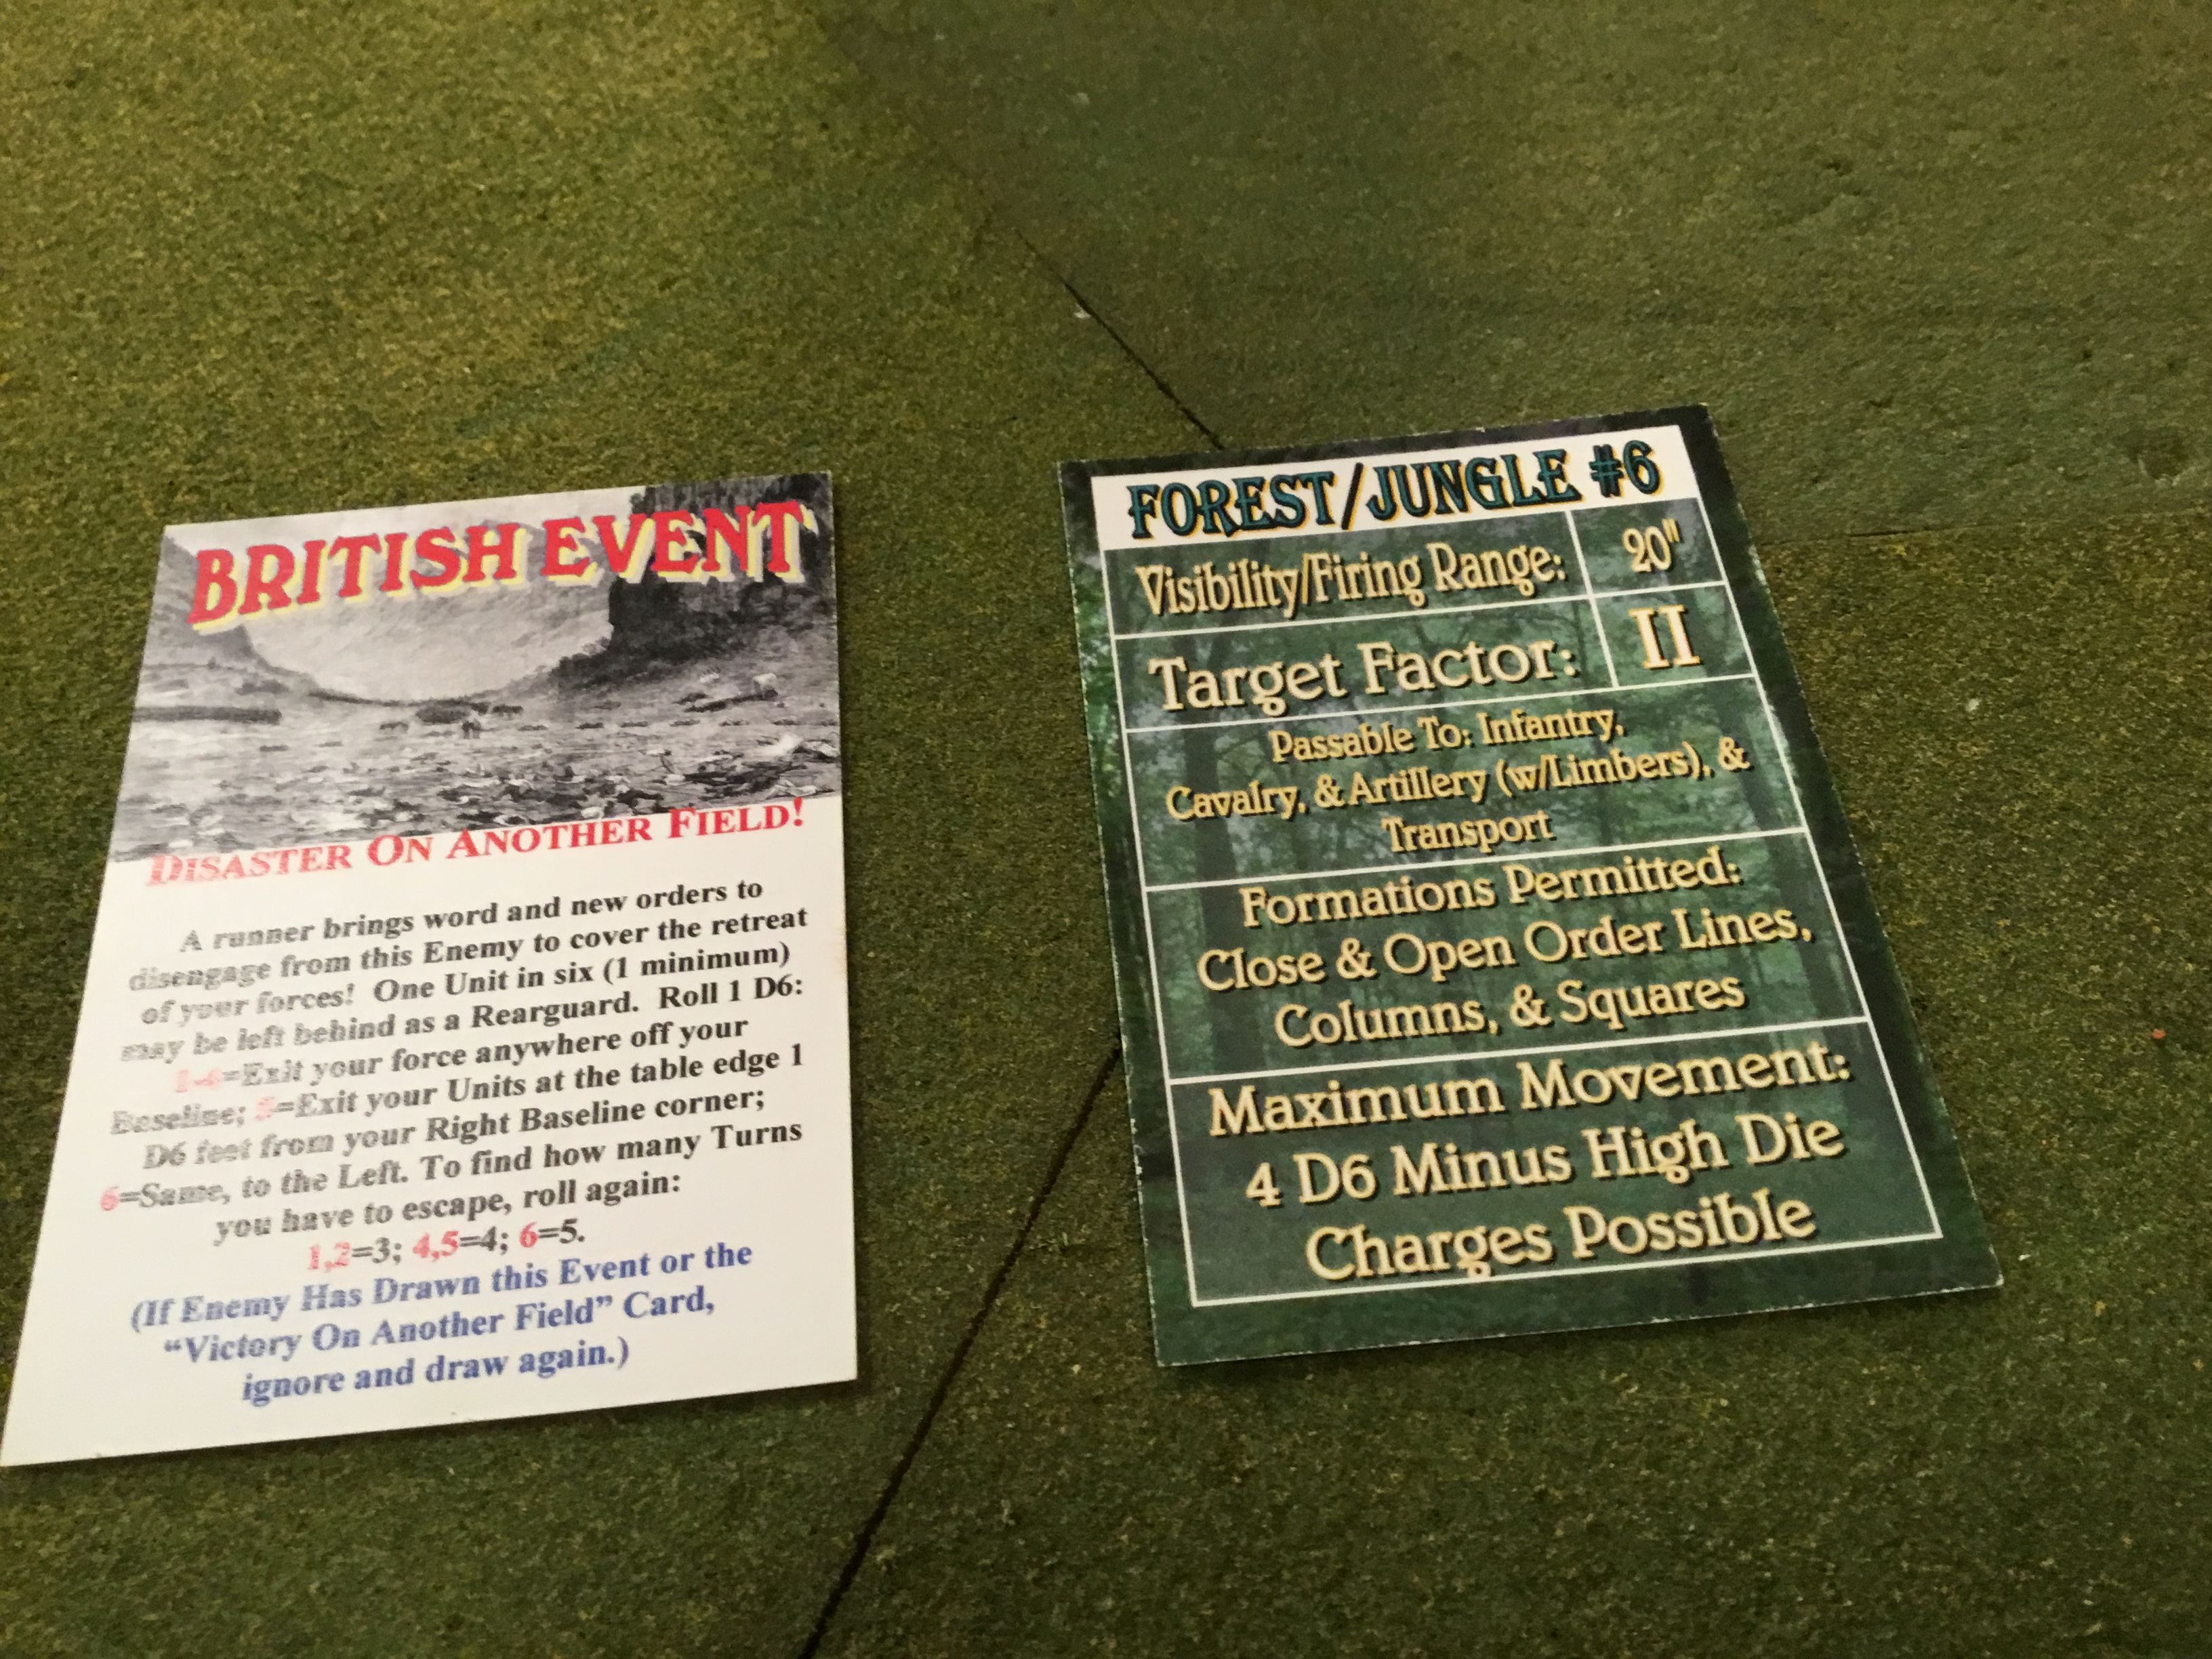
Event and Terrain Cards are played.The former limits visibility to 20 inches, while the latter causes a Marine to badly hurt his leg and fall behind the others.
Event Not Applicable, So I Changed It To One Marine Hurting Leg And Falling Behind.
The Boxers roll for reinforcements each Movement phase.A roll of “Yes” generates a number of units equal to a D4.
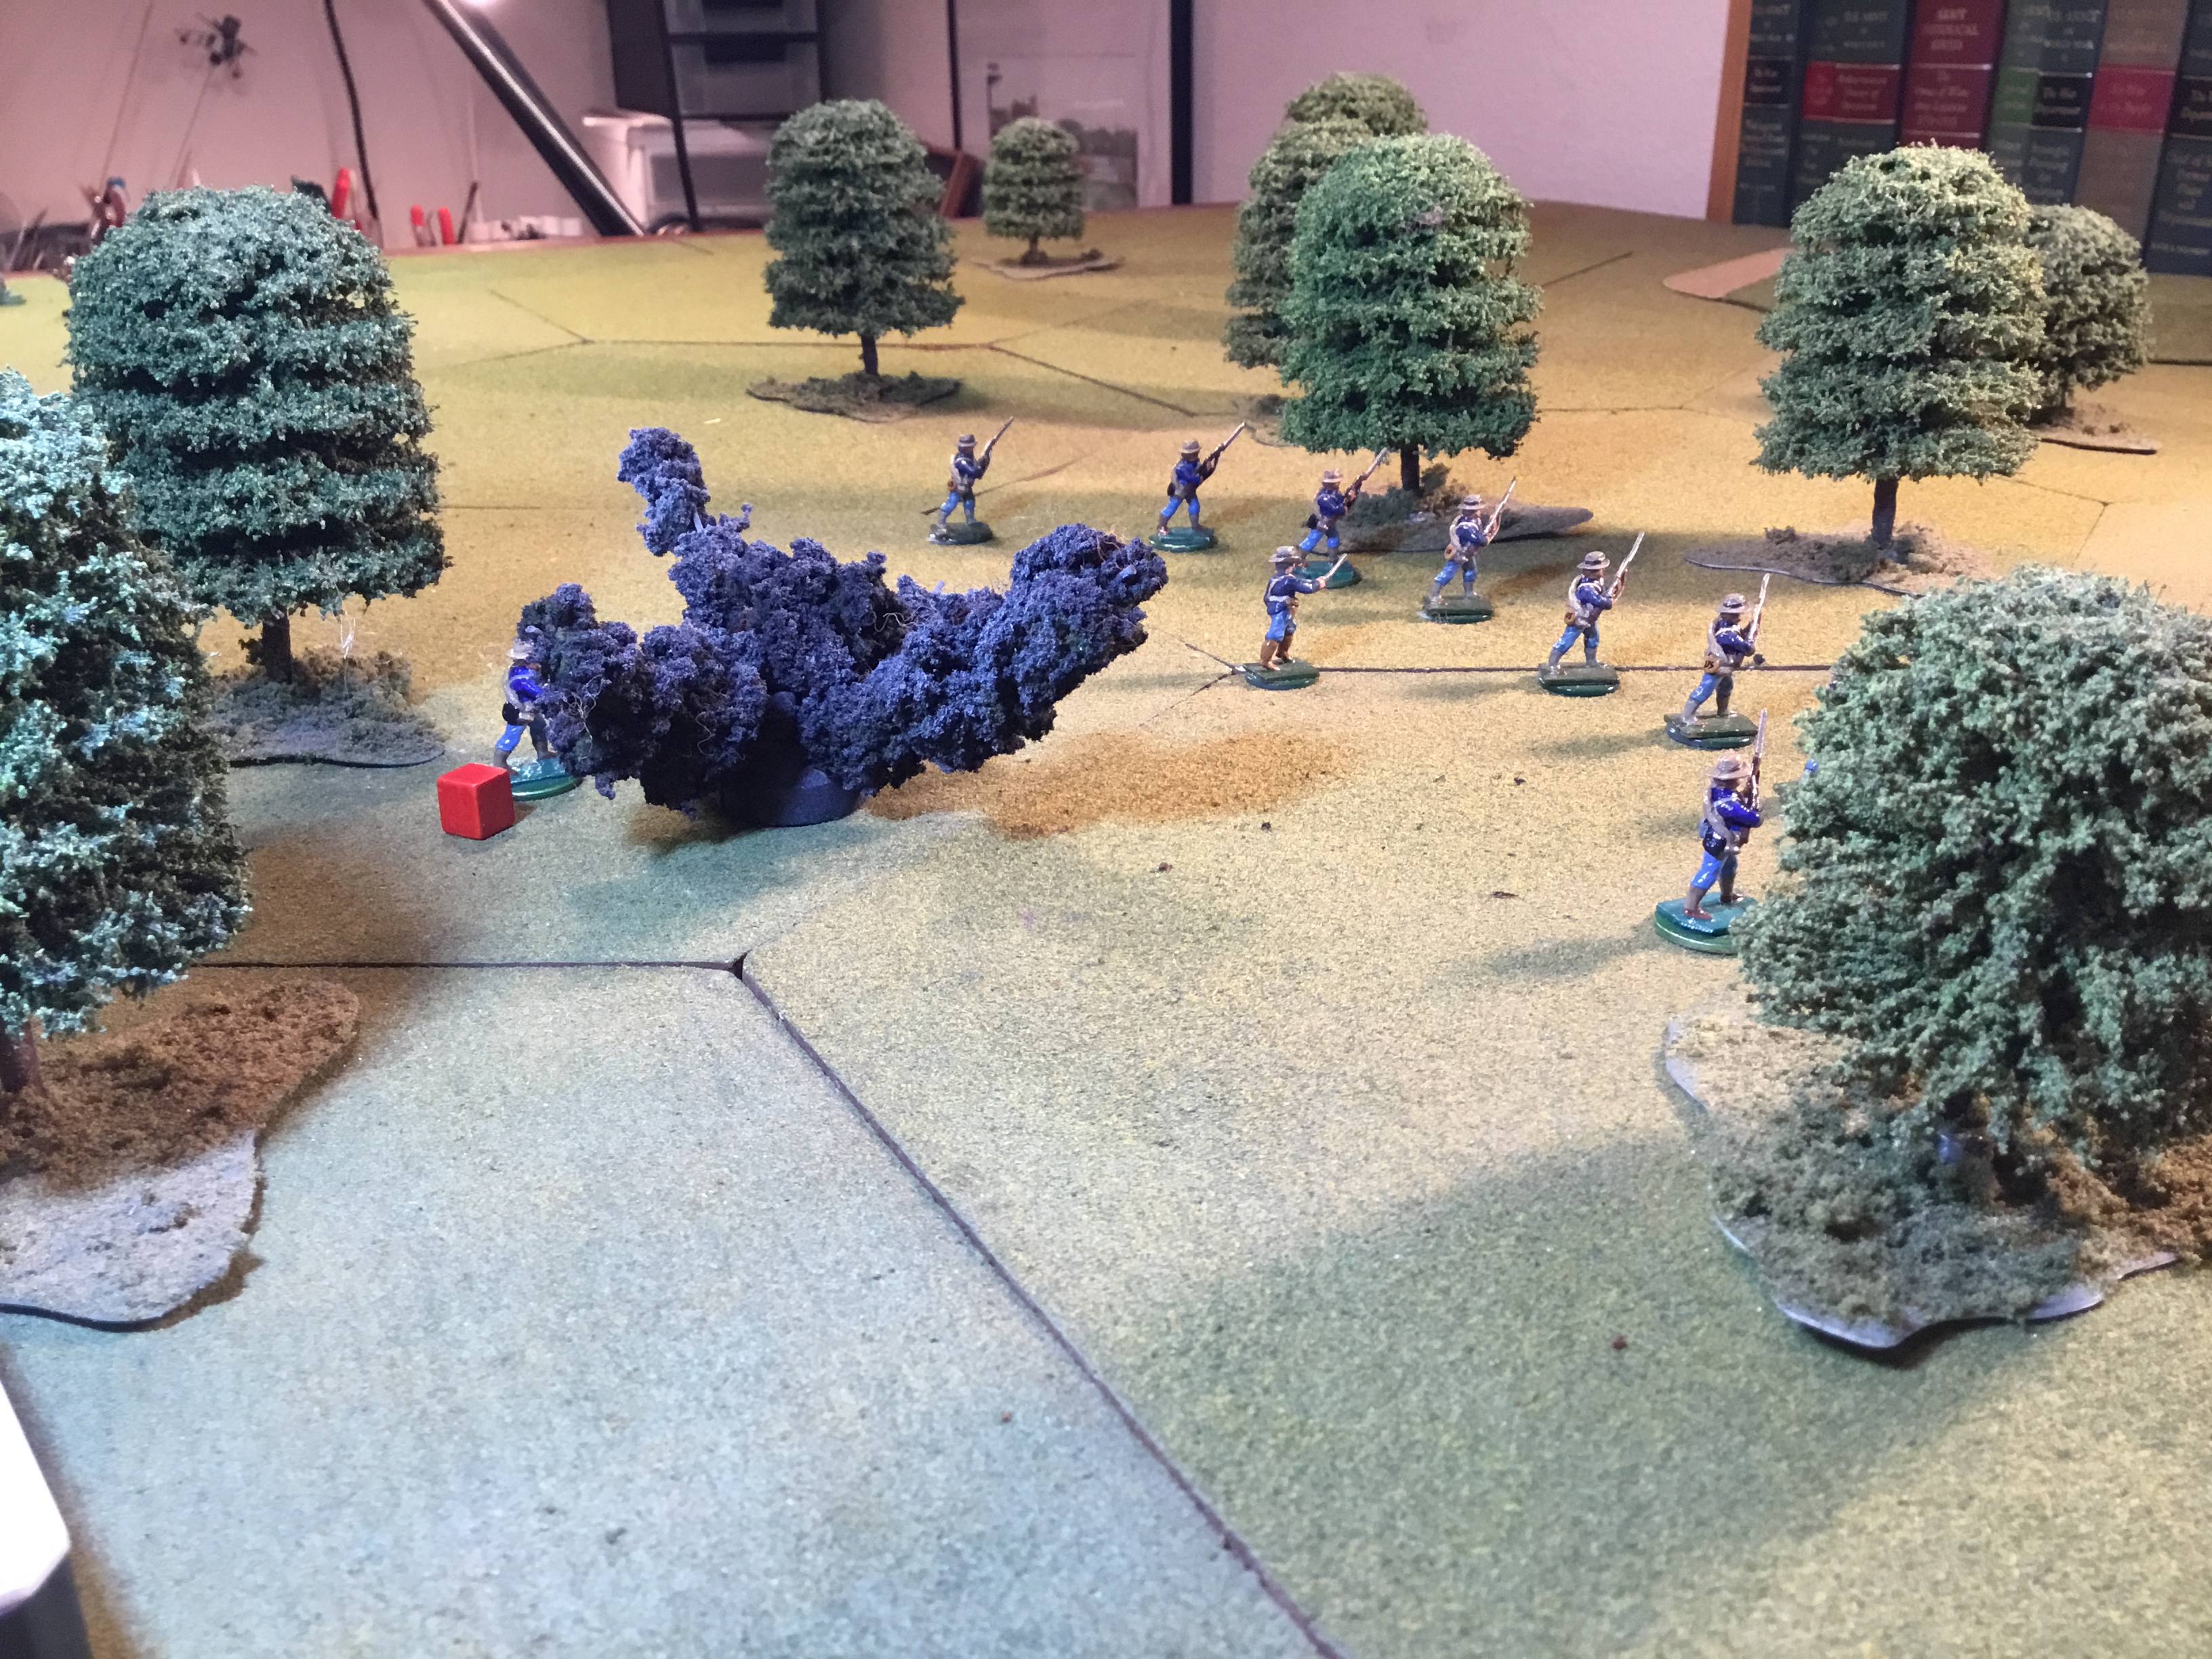
The Marines respond artillery fire by shifting to a skirmish line, but vegetation (bad die rolls) slows movement to the edge of the woods.
A second artillery round (the antiquated cannon can shoot every two moves), kills the limping Marine.
Limping Marine Killed By Artillery. Others Struggle To Extend Into Skirmish Line And Avoid Artillery Casualties By Bunching Up.
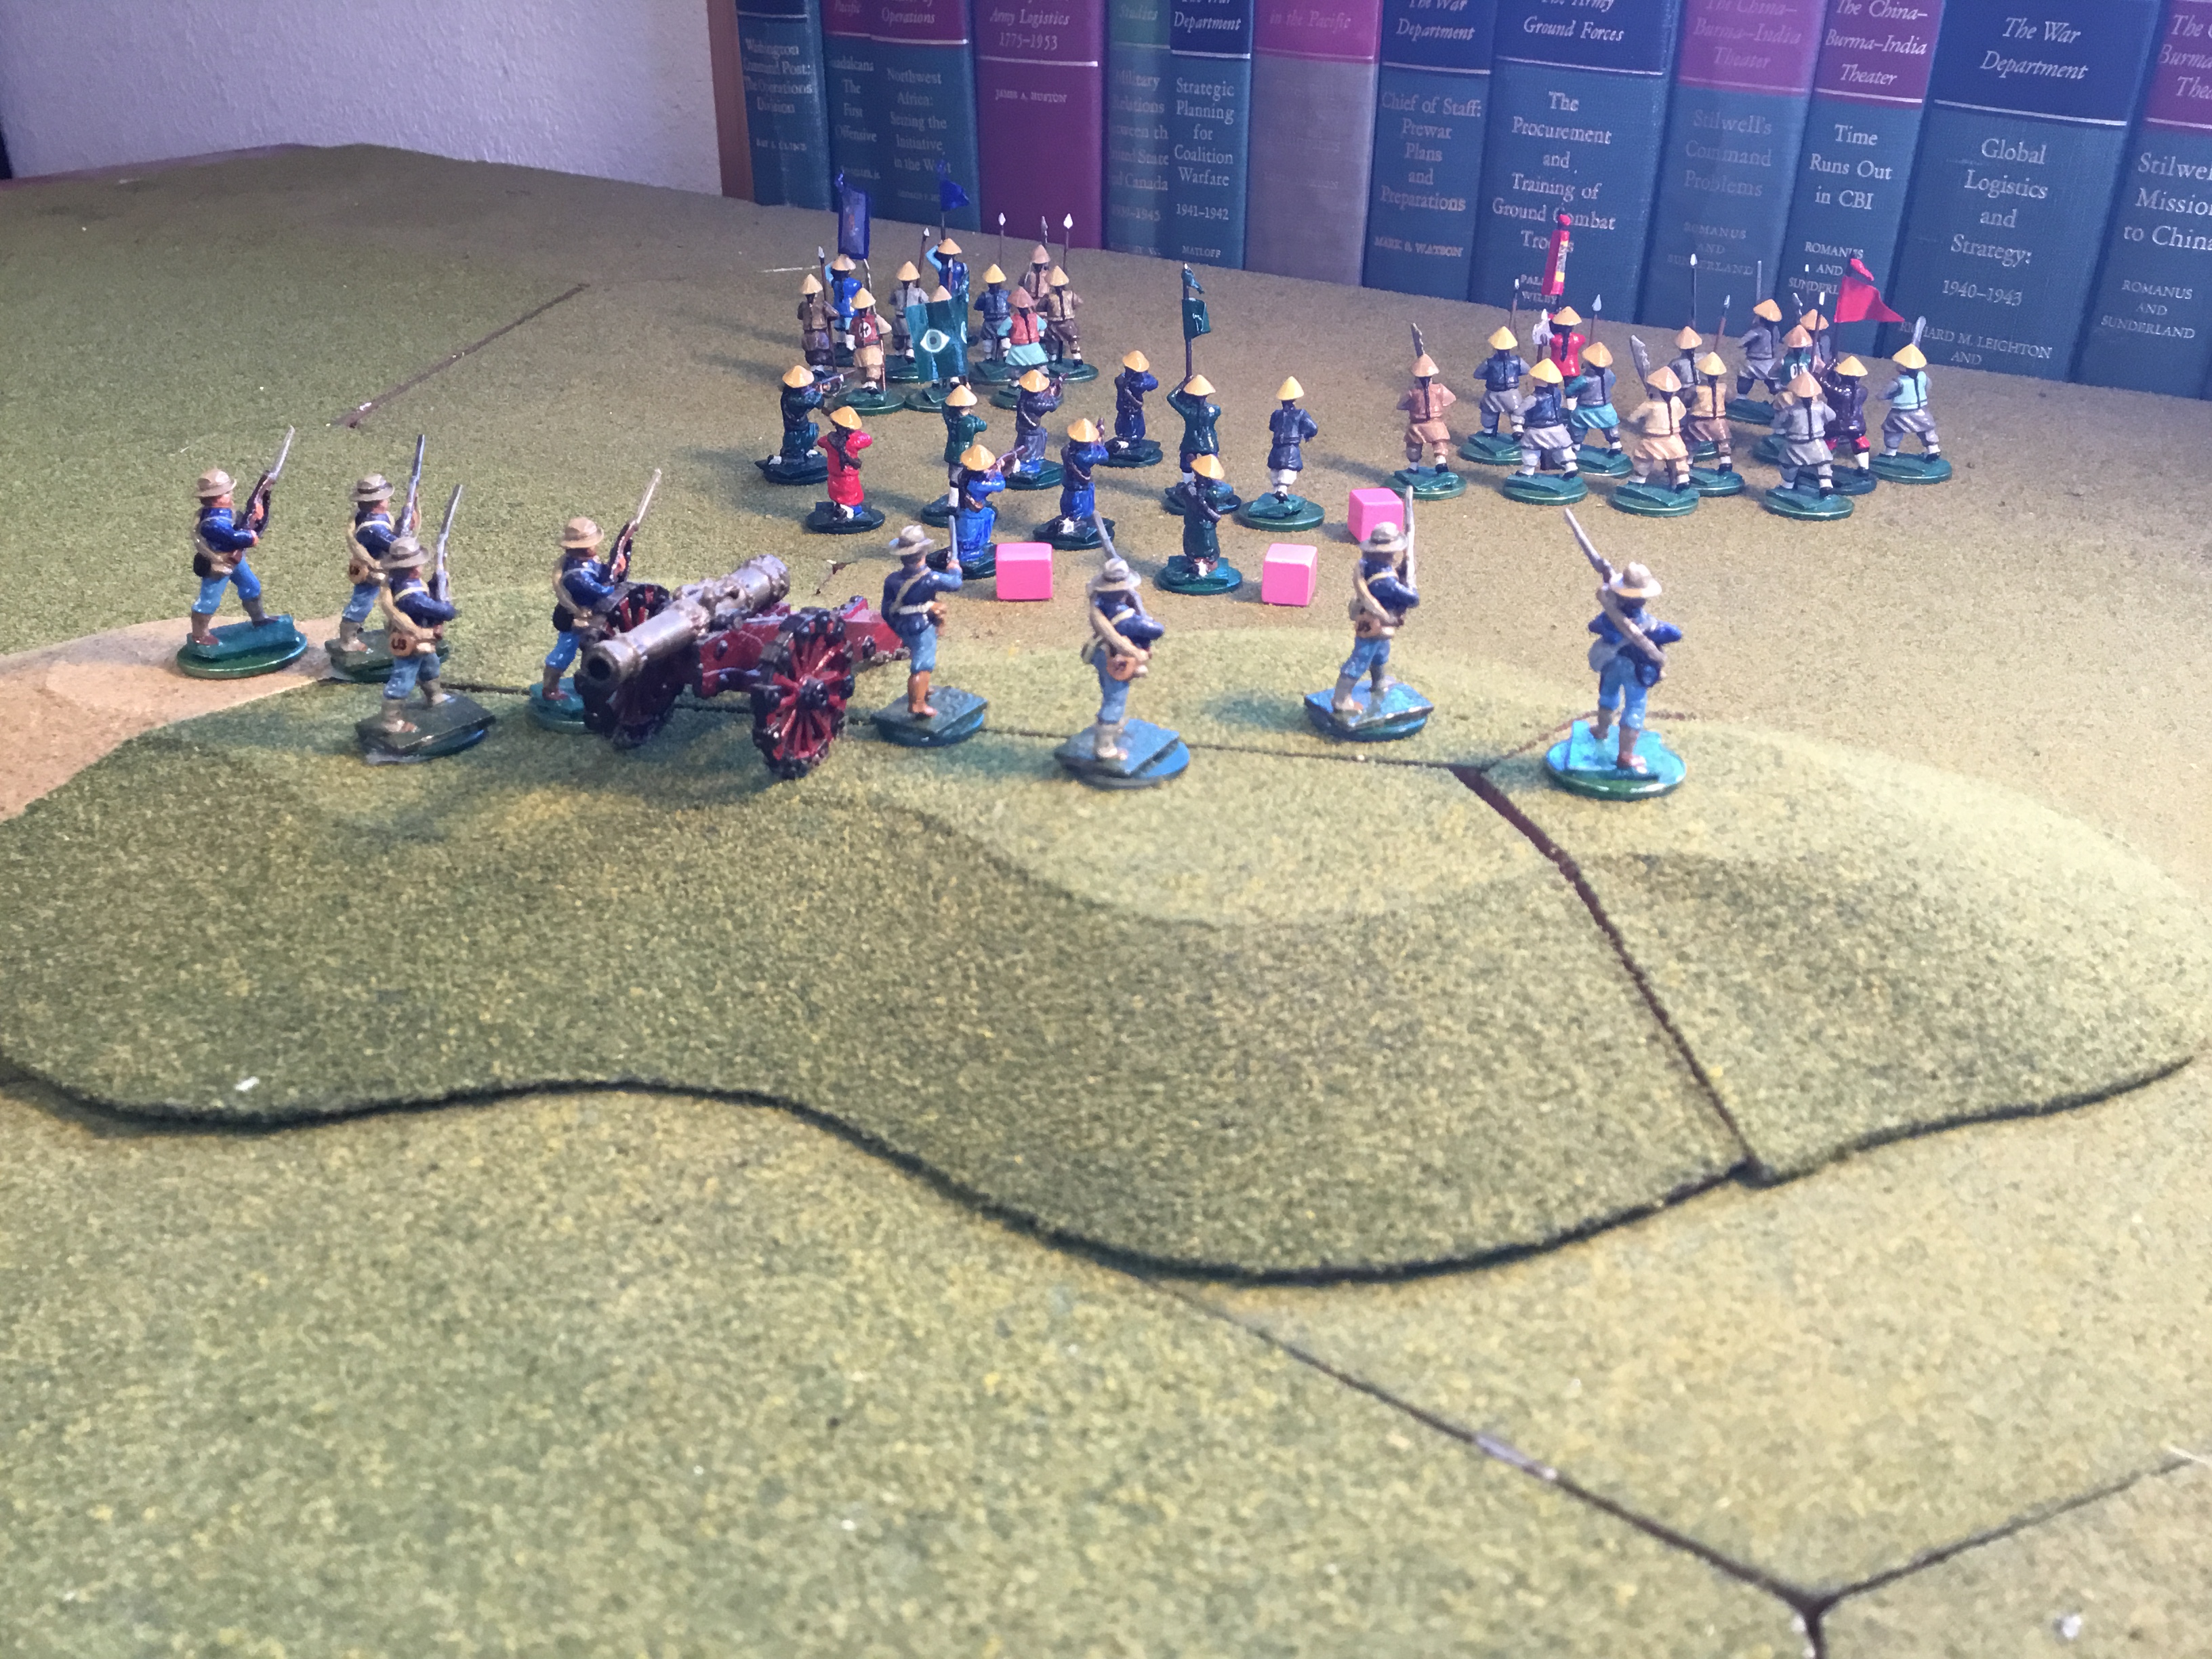
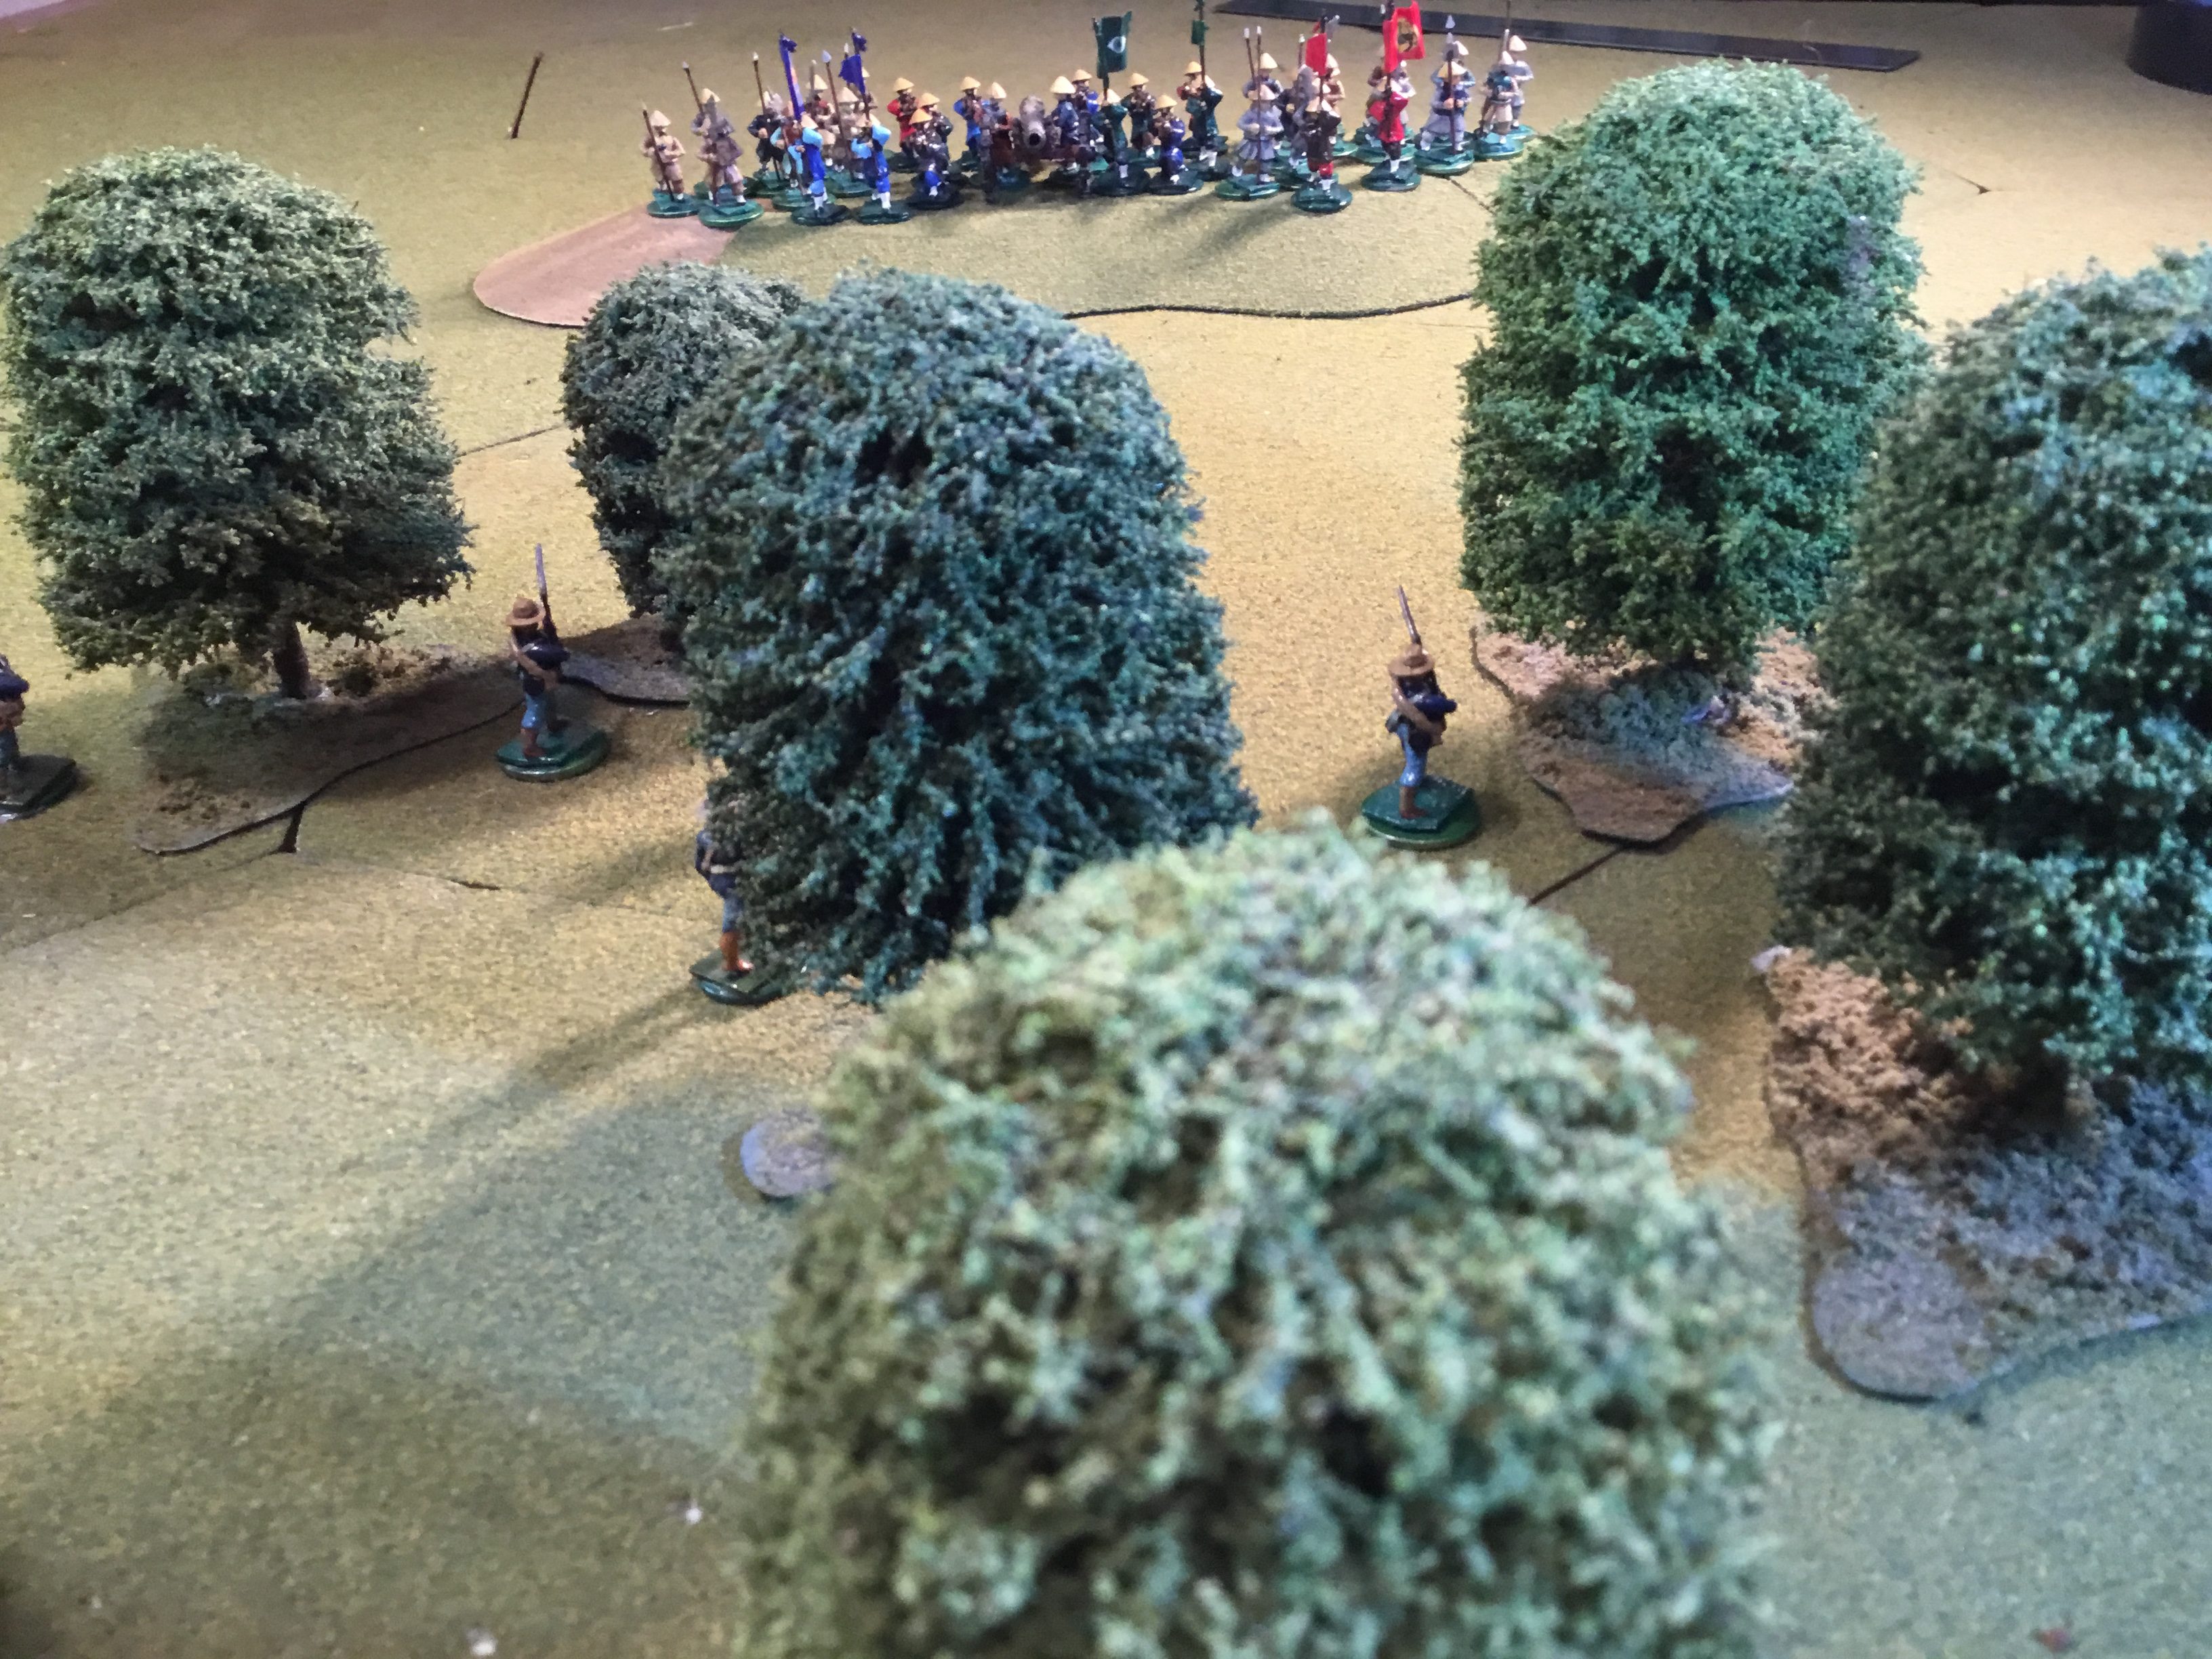
A combination of bad Boxer luck and two good movement rolls allow the Marines to reach the tree line.They can easily destroy the Boxer field gun if their luck can hold concerning Boxer reinforcements.But, NO. A “Yes” is rolled with a D4 of “3” calling for three Boxer units, one of which will be a rifle unit.
Will the Boxers be positioned on top of the ridge, or in defilade?A “Maybe” roll for top of the ridge leads to a 50-50 chance. The ensuing die roll indicates the Boxers are massed along the ridge. Such a tempting target!
This is a SERIOUS problem for the Marine Lieutenant. Does he engage or withdraw. His orders were to clear the woods. The Boxers have already had their Movement Phase. If the Marines fall back now, they can probably make it back to their camp and report the presence of this force. If they send a runner, he might summon reinforcements for support. Or, is it “Death Or Glory”?
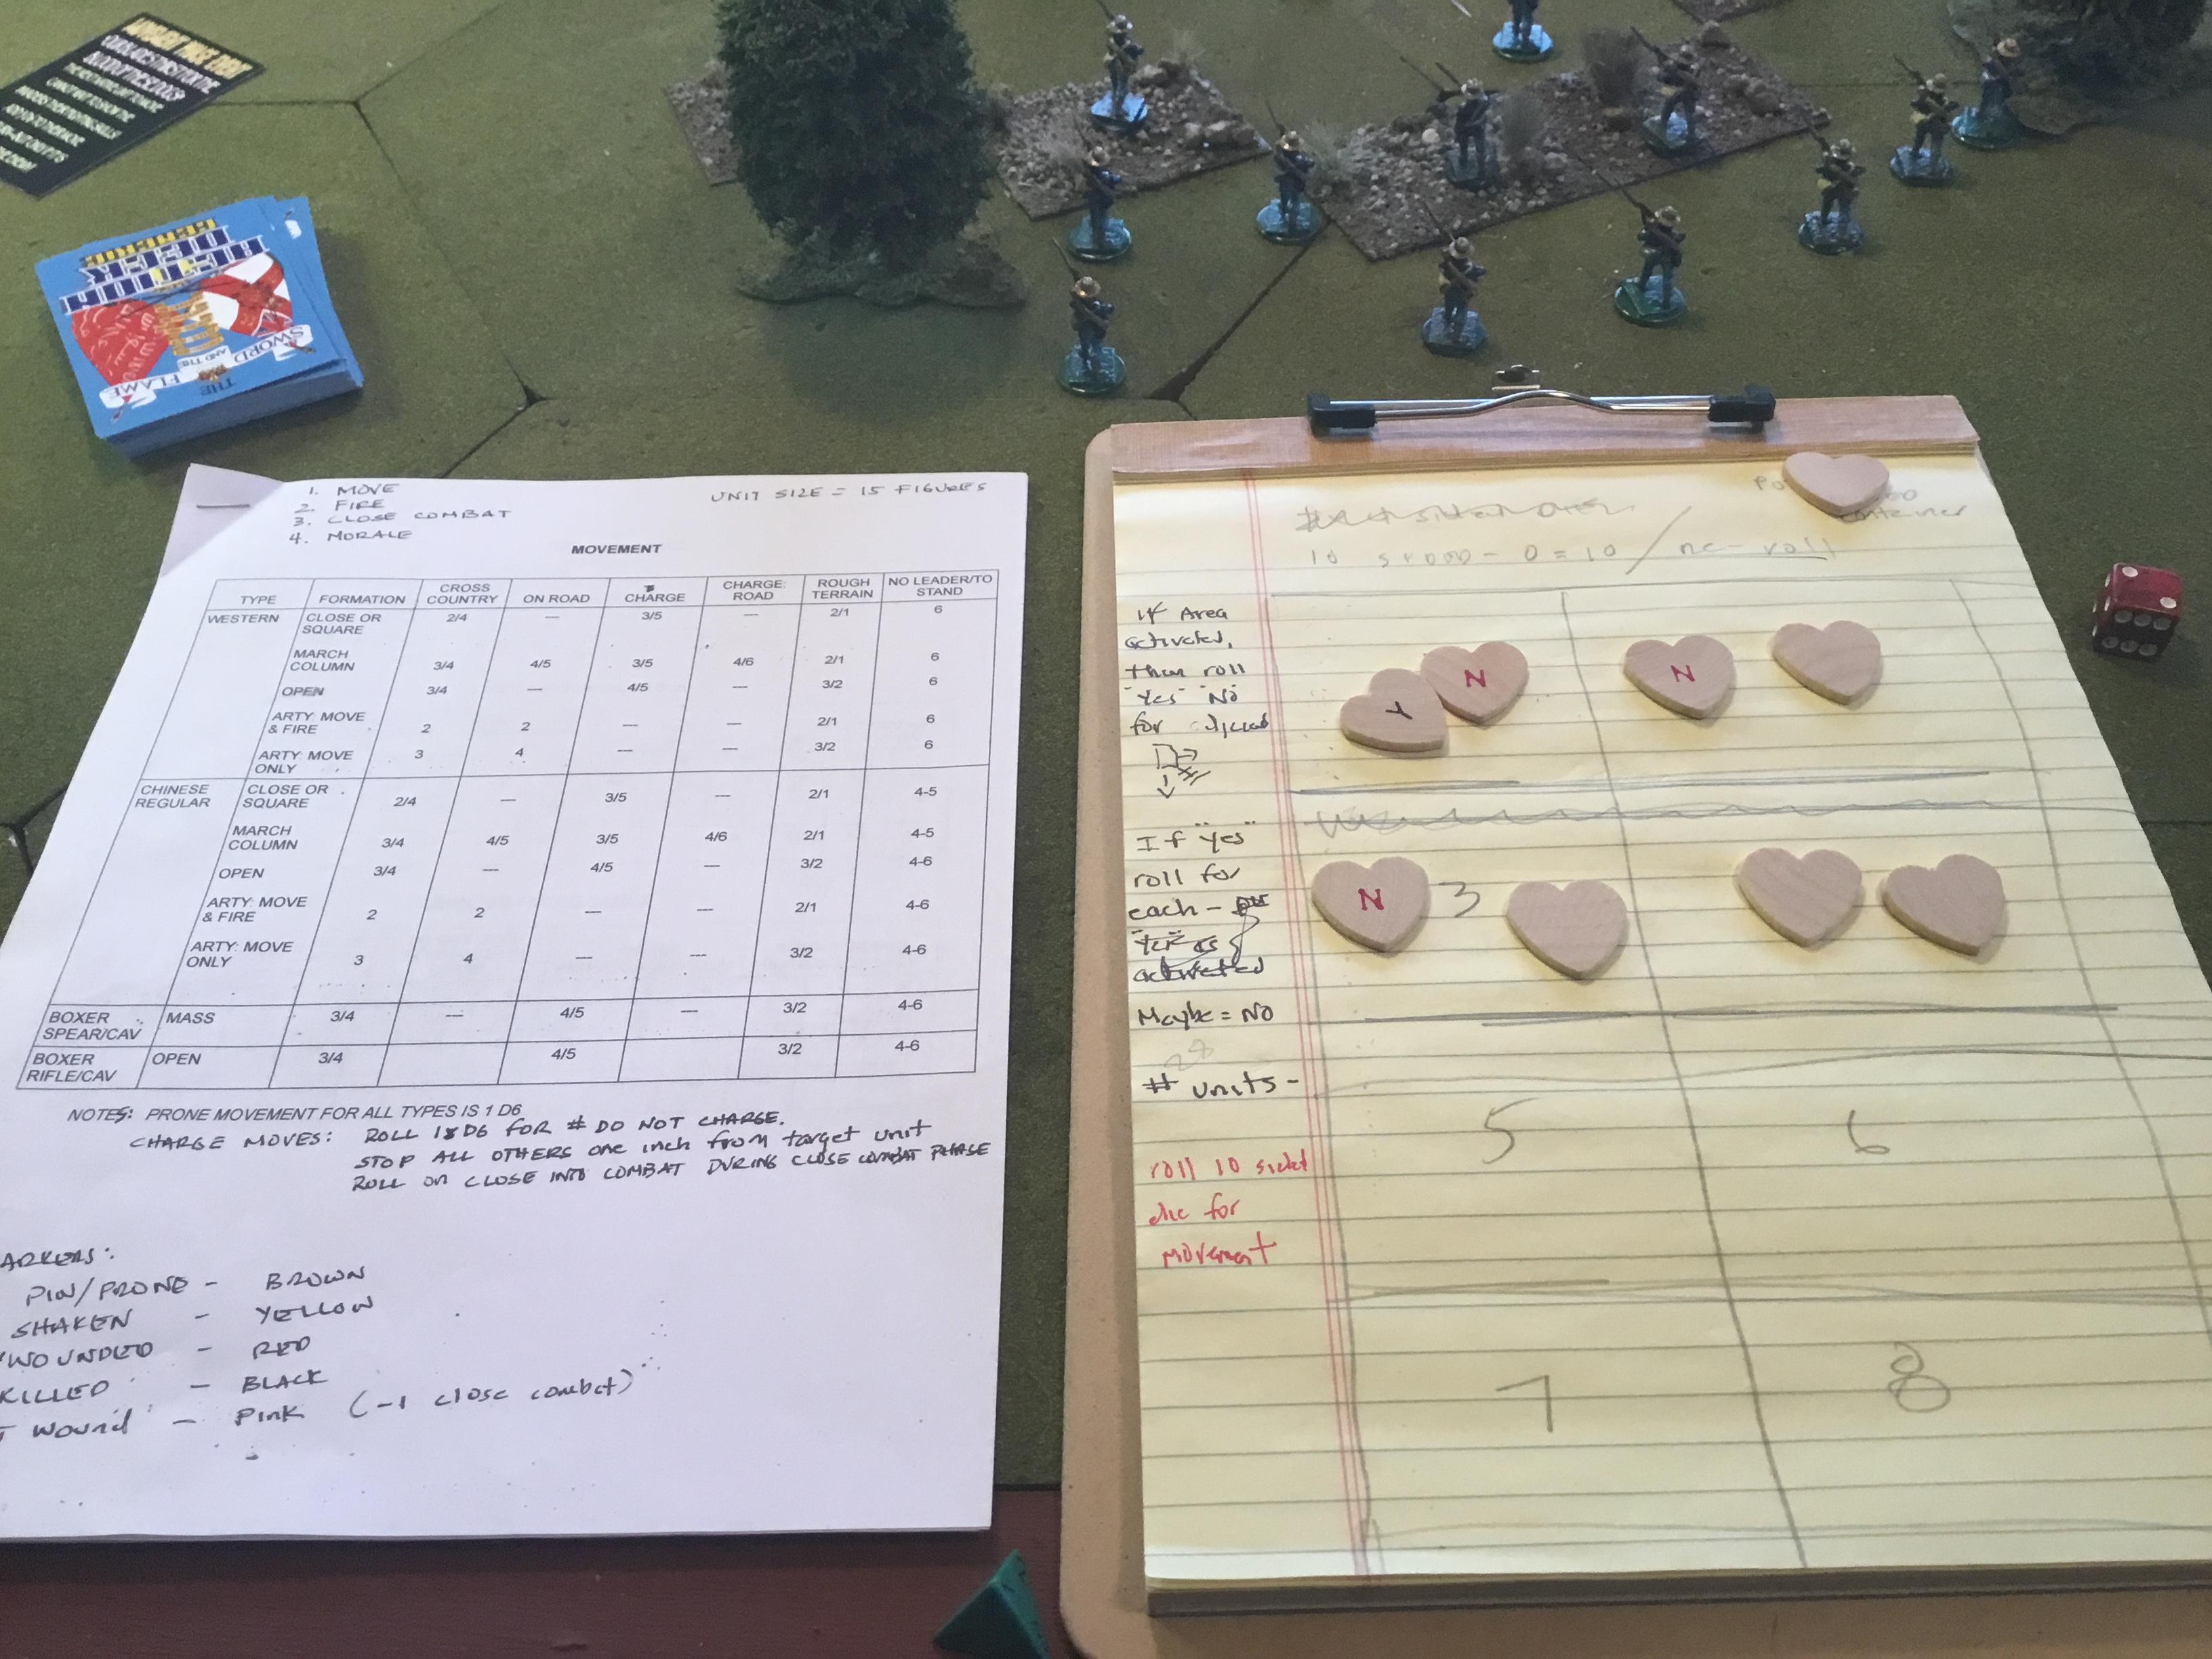
Still hacking away at this project. The rules and charts were becoming an annoyance, so I consolidated them into a three page cheat sheet. It’s a Beta, with charts limited to forces at hand rather than the rules’ presentation of all antagonists. The rule synopses are hand written.
Another problem working solo is random activation. My working scenario is a patrol action by a platoon of Western soldiers. It’s the classic situation; their movement triggers an enemy response.
Right now, I’m working with a crude grid, with two counters per grid hex randomly drawn. Each hex is marked for “yes” and “no” for activations.
Trying to figure out when to trigger a activation, as well as incorporating the event and terrain cards into the game flow. Somewhat vexing, but still enjoyable.
During the shed purge mentioned in my August 31 post, I found some old 15mm Minifig Sword and The Flame figures.
There’s some backstory. Back in the mid-80’s a few of the Kansas City stalwarts at Yankee Doodle Game and Hobby fantasized about a “World At War 1899” game. Easy to extrapolate with Fashoda and Panther incidents going sideways. I painted up some Brits and French. Game never happened, figures went into boxes, and decades passed. A couple years ago, I sold off all the French and most of the Brits. The exception was some very nice Highlanders that I figured could be used in a DBA knockoff game.
There was a package of Sihks, along with some stray British and Egyptian cavalry. Why not paint them up and play a big game. Can use all my Arab/East African figures for a mash-up campaign. Plus, this meshed well with my discovery over at Wargame Vault of the old Pluck vs. Science ruleset. It’s for big games, but I like the character creating possibilities for a campaign.
It’s not a big thing, but a good use of the old and forgotten to create some fun possibilities. Here’s a pictures of the recruits.
Very cold, bad TV, no sports, not even a movie to get excited about. So, I dove into a DBA variant, Hordes of Dervishes by Bob Cordery, that had been on the playlist for quite a while. Bob is a wargaming stalwart, with his own interesting site.
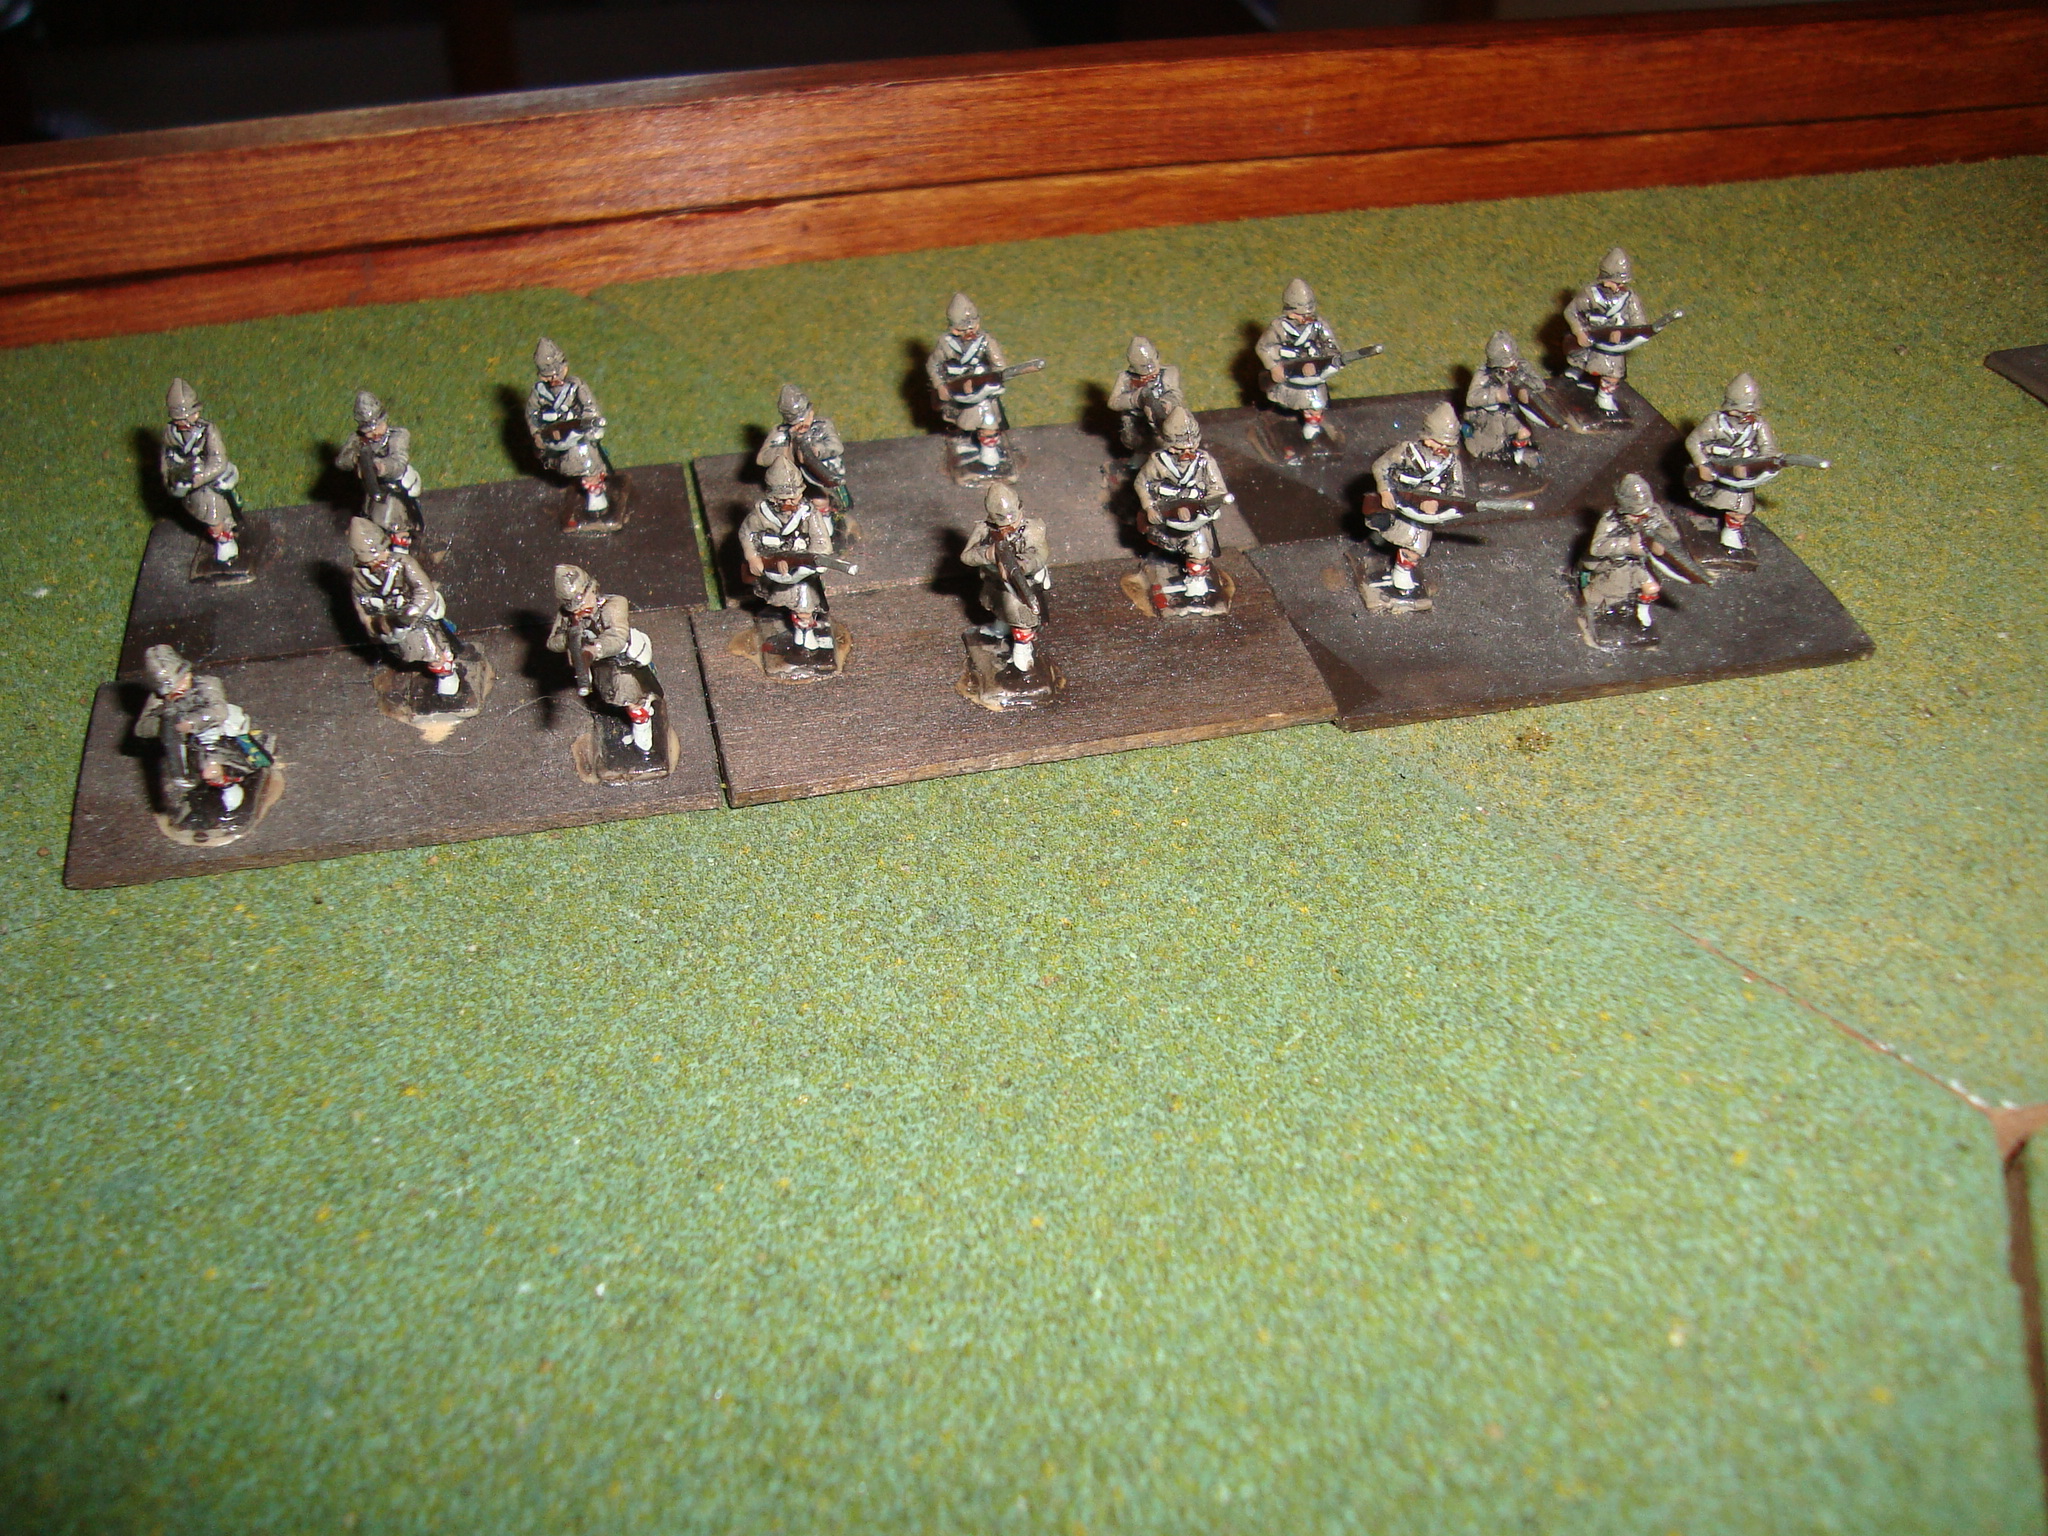
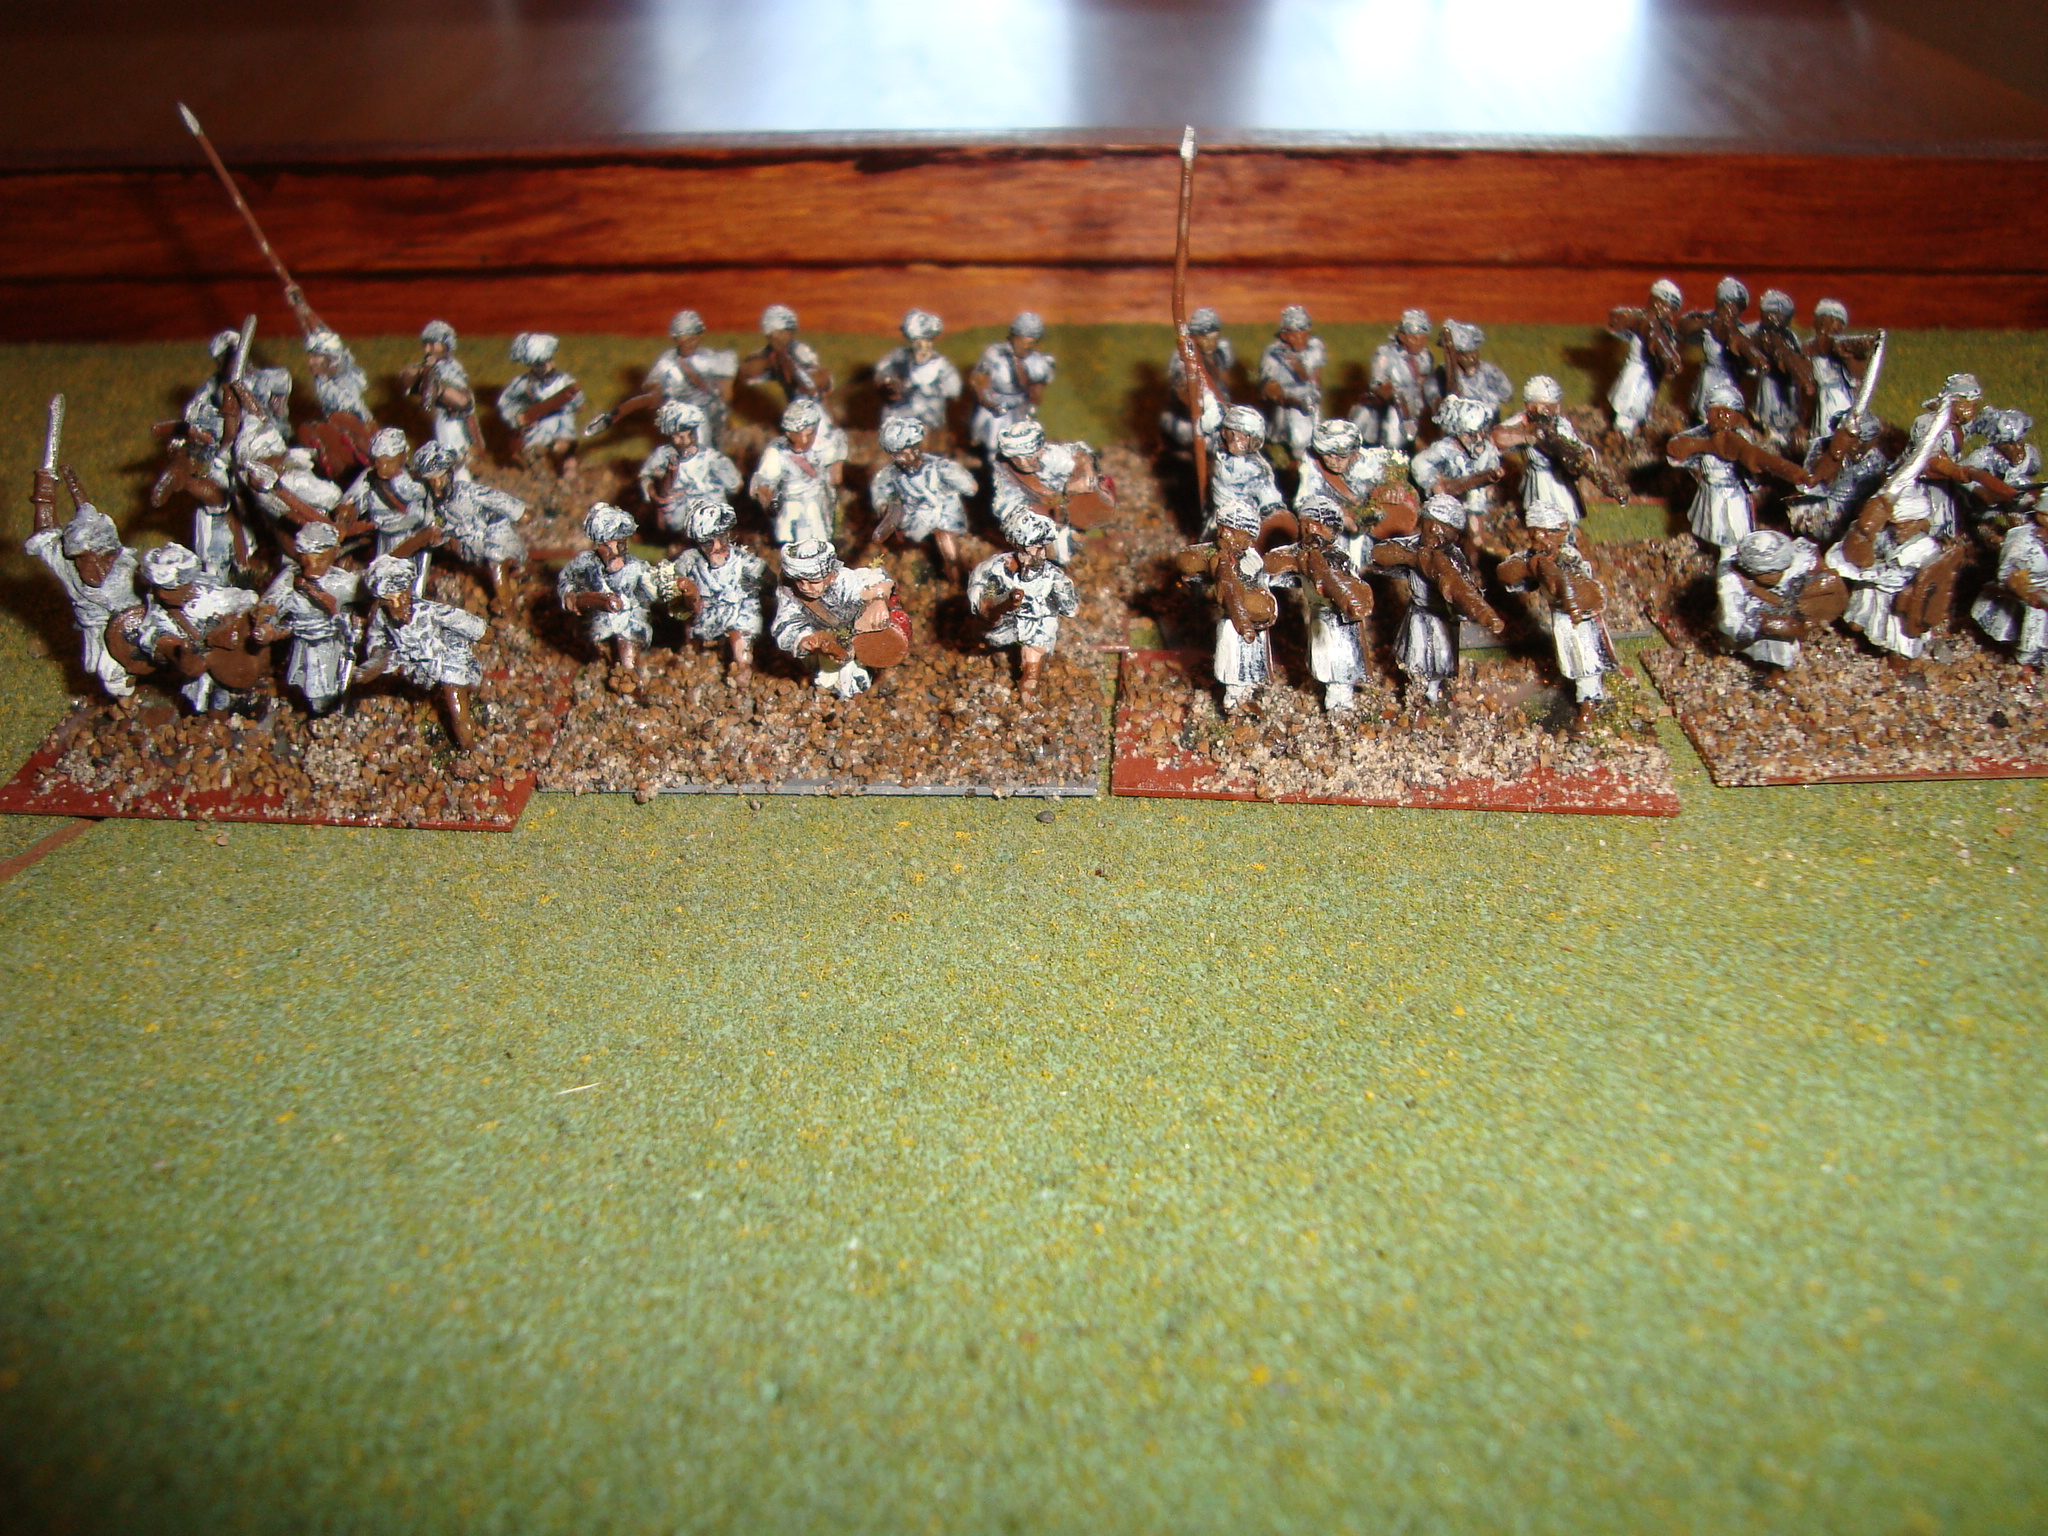
There are any number of DBA variants out there. This one is colonial. It’s an excuse to pull out the British 15mm troops that I’ve had for decades, and were lingering out in the shed, patiently waiting for this opportunity. They were all that was left of what had been a rather substantial force of British and French colonials, painted for the aborted World War 1896 campaign, that I sold off a few years ago. I used some of my 15mm figures painted up for the East African Renaissance as the “Dervishes”.
With all my usual finesse, I just lined them up at went at it.
As with DBA, there is a lot of wristage, and the Brits’ roles were horrendous. If the Dervishes get into contact, there is real trouble. While a Dervish element’s (I’m talking Lingua DBA here) combat factor is 3 as compared to 5 for the British, any favorable ratio – not the typical “kill” ratio of over half – will destroy the British element. So it is absolutely critical for the British player to roll well not only in melee but also for his rifle fire to be effective. Especially because the Dervishes are rated as Warband, and can use 2 pips to move 6 inches (600 paces), if that puts them into contact. Rifle range is 5 inches (500 paces).
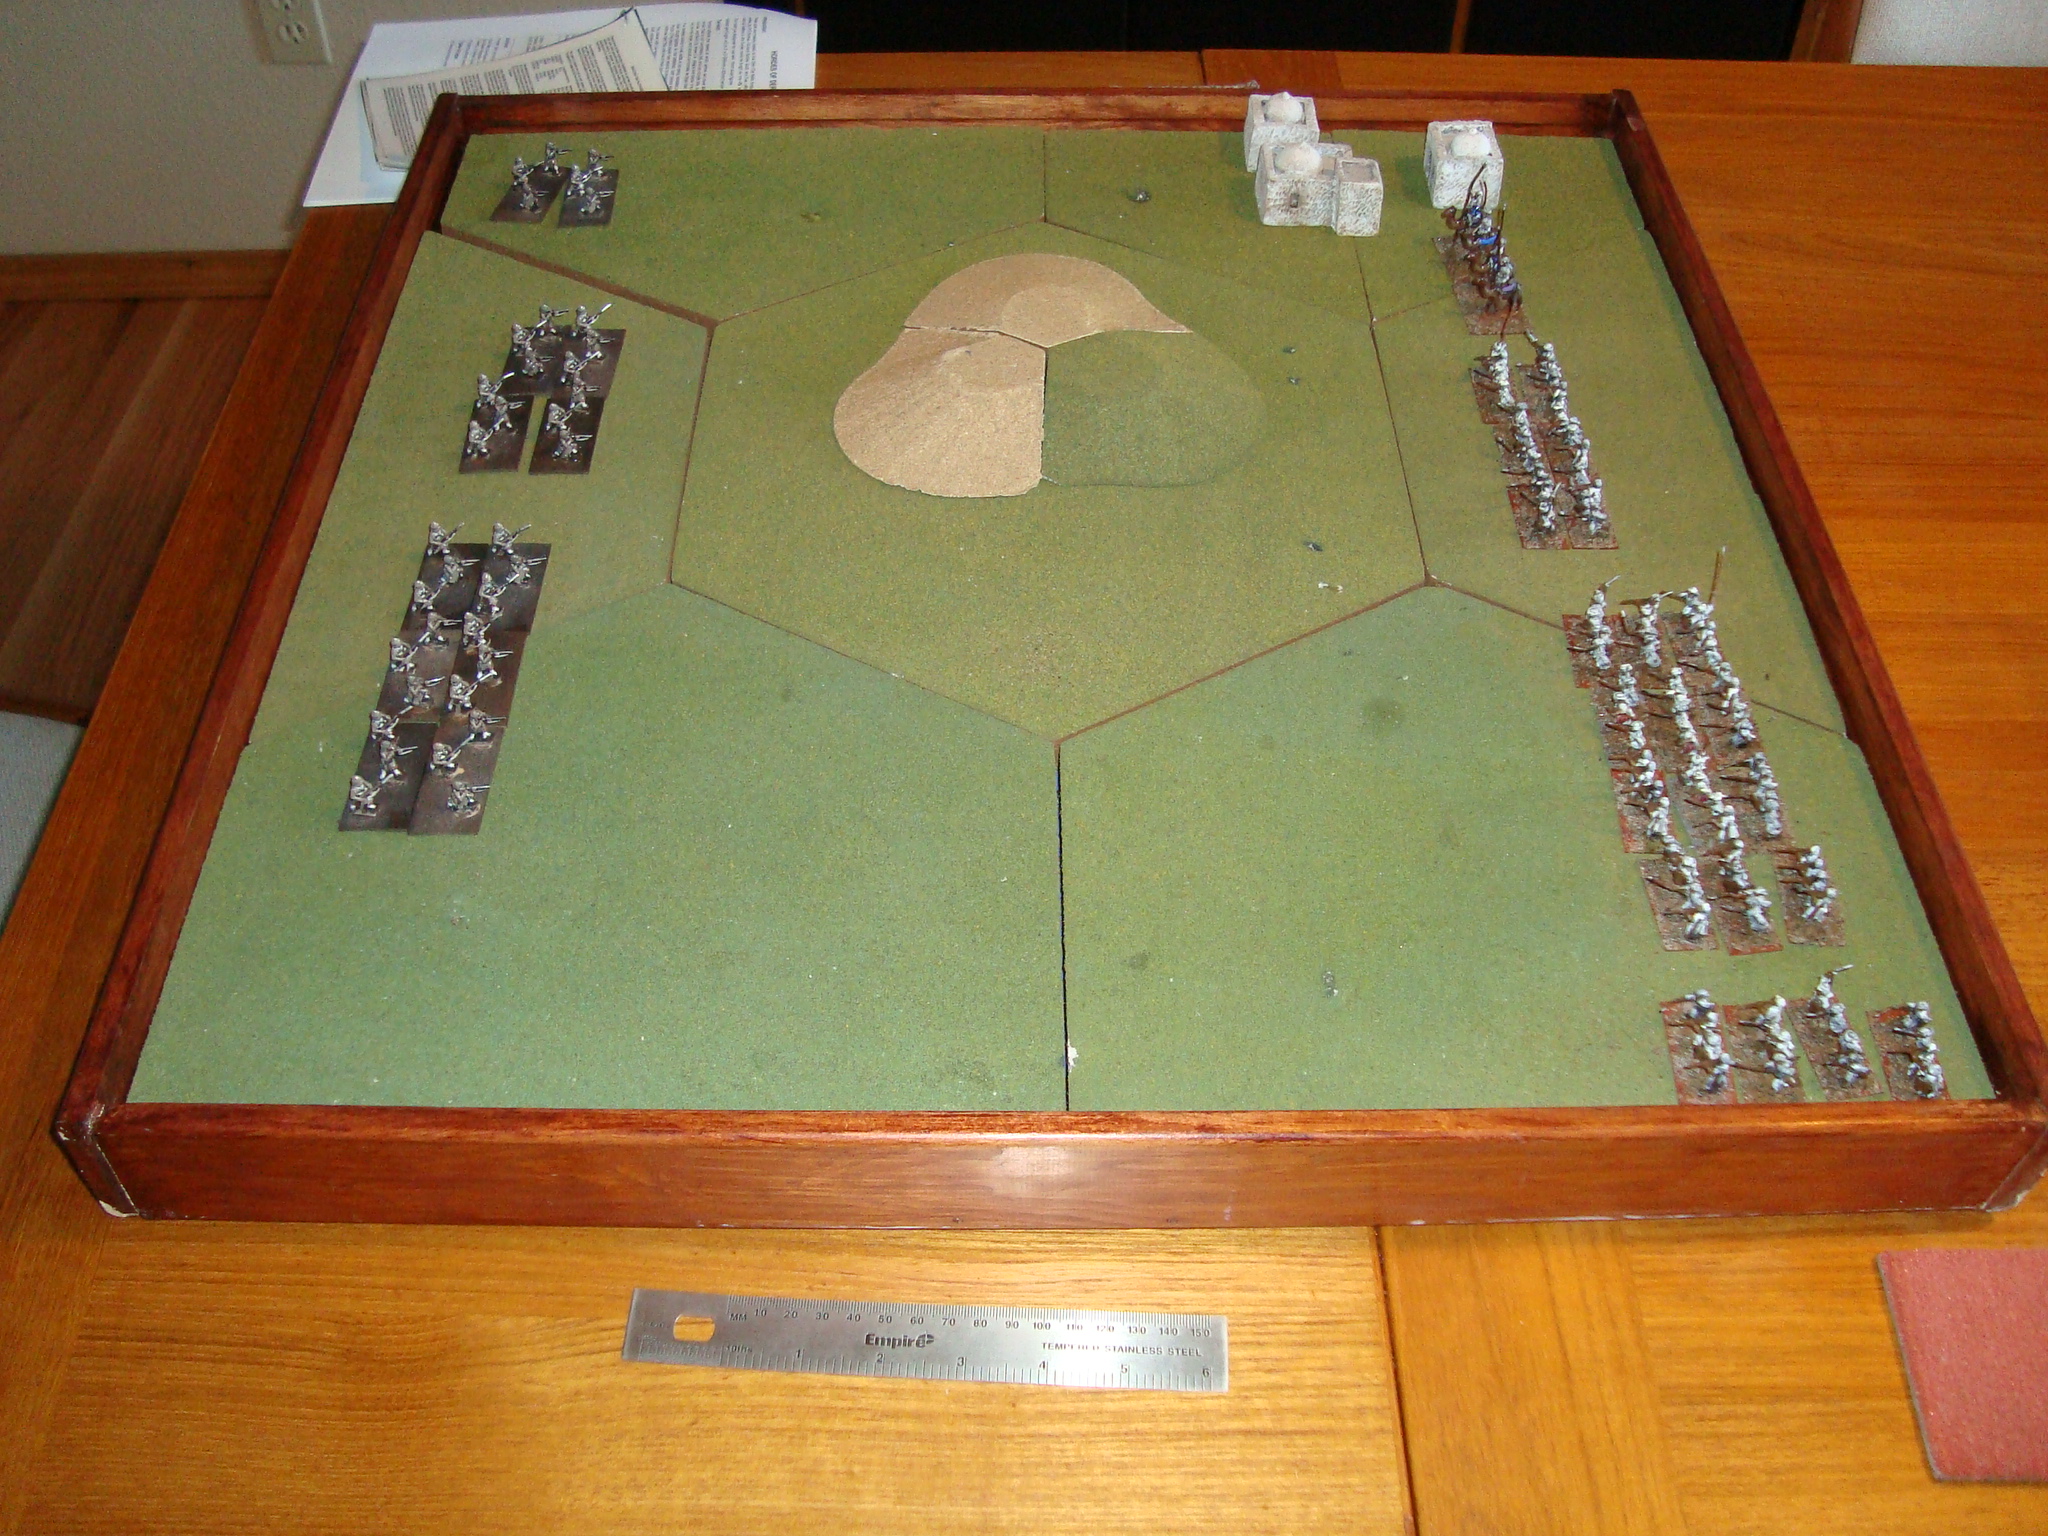
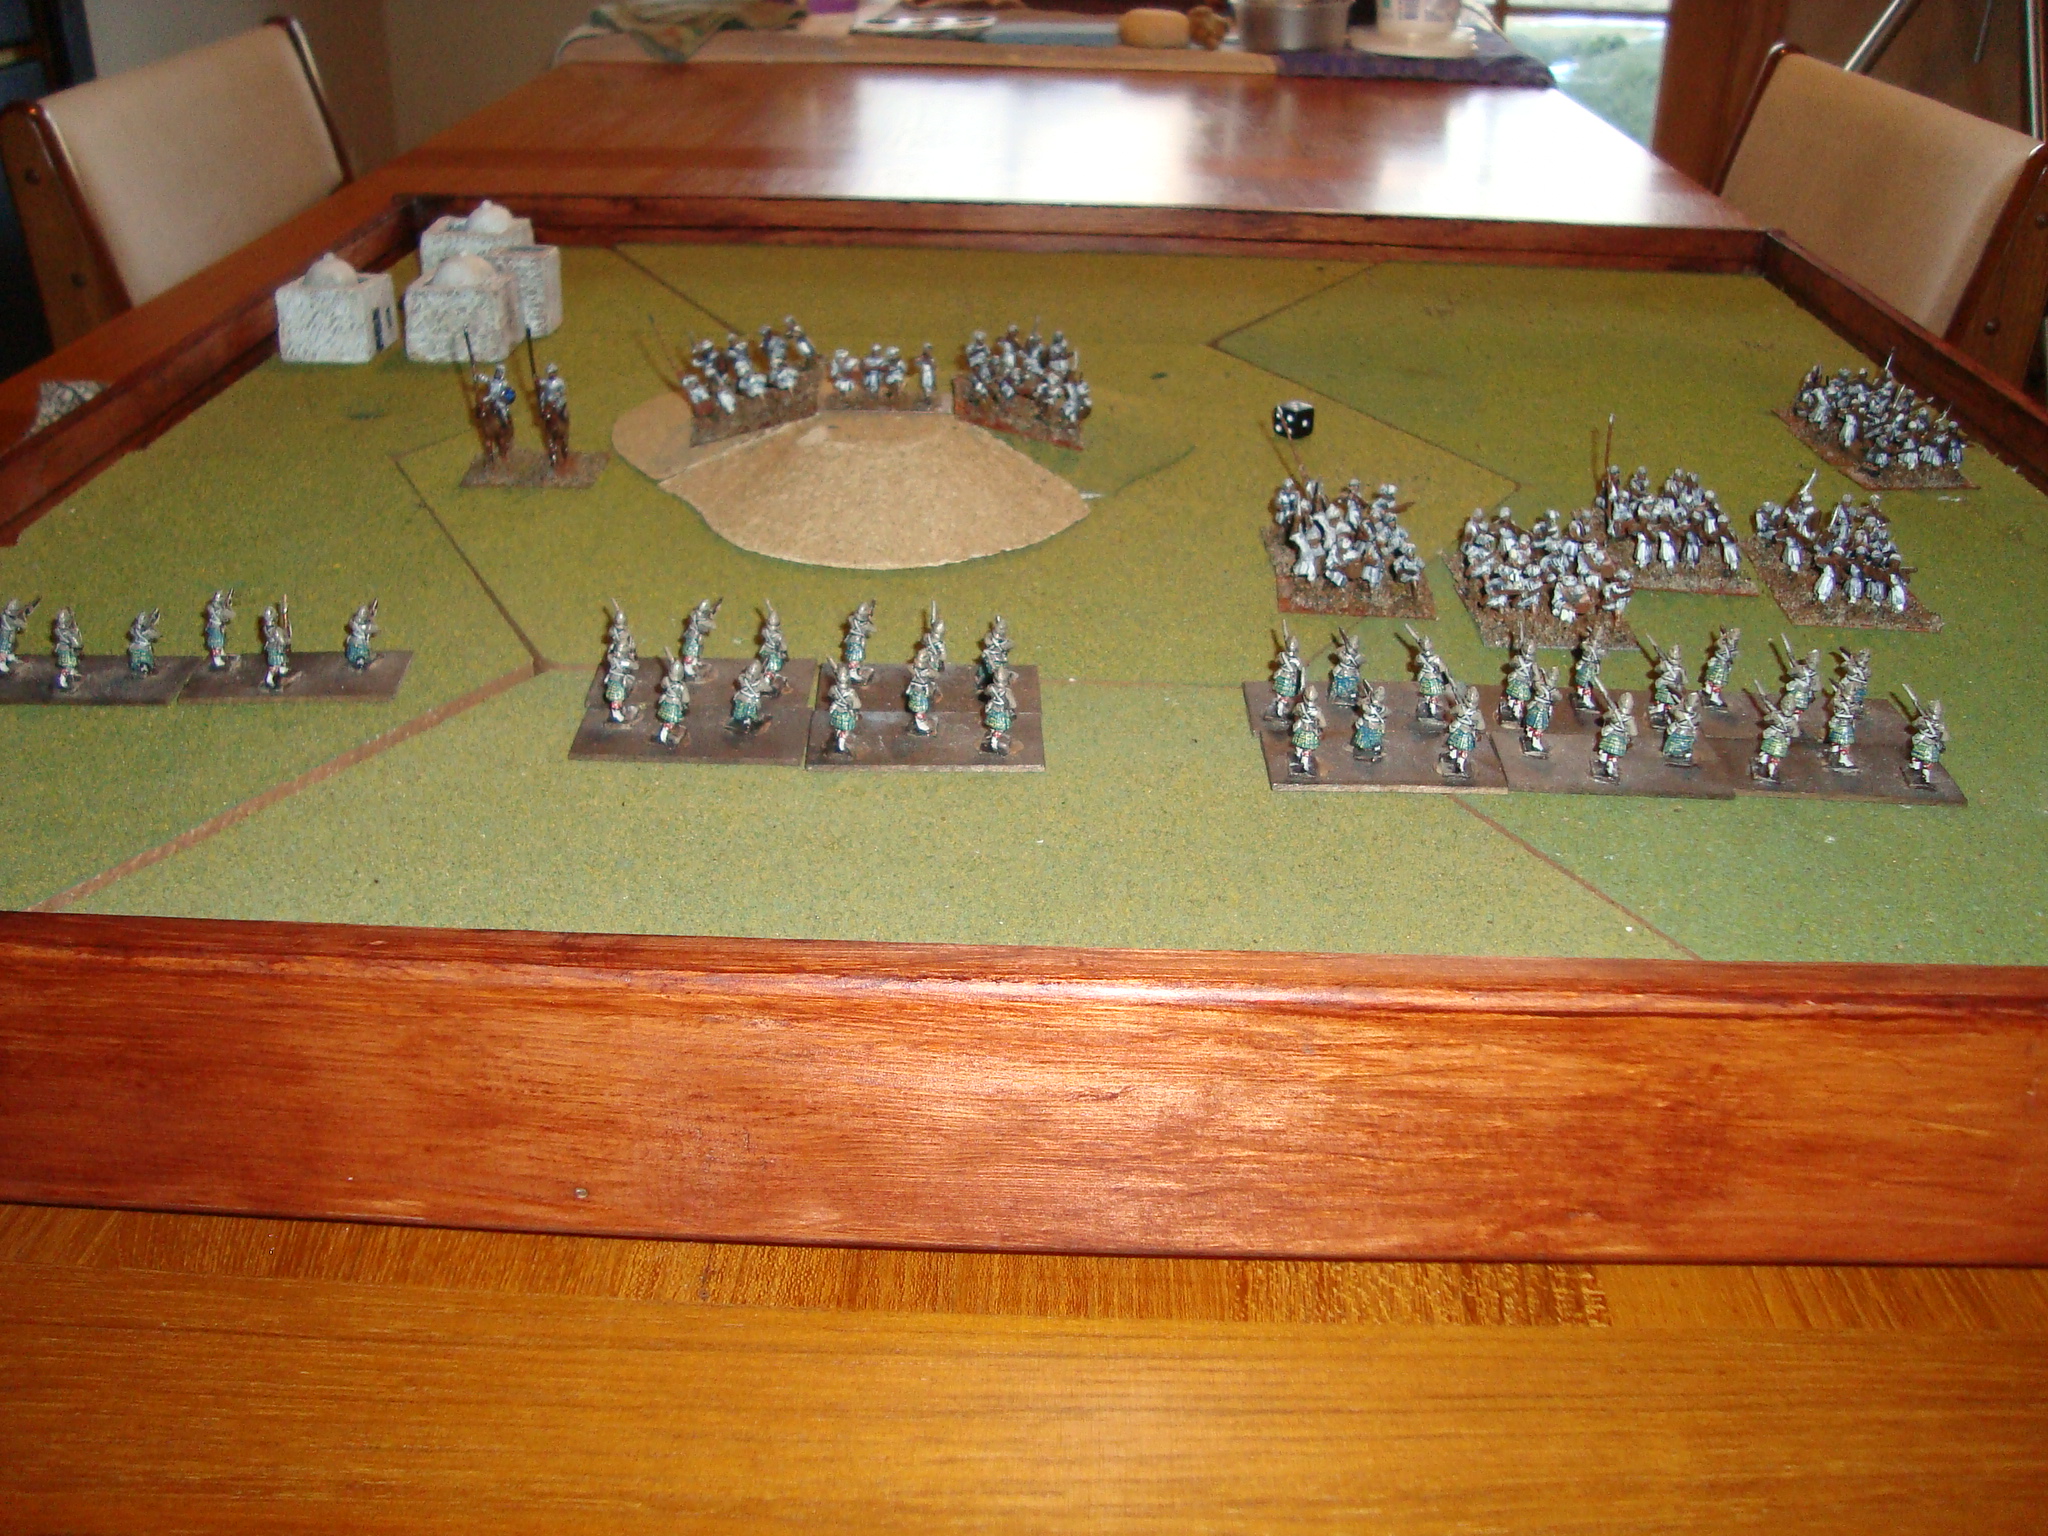
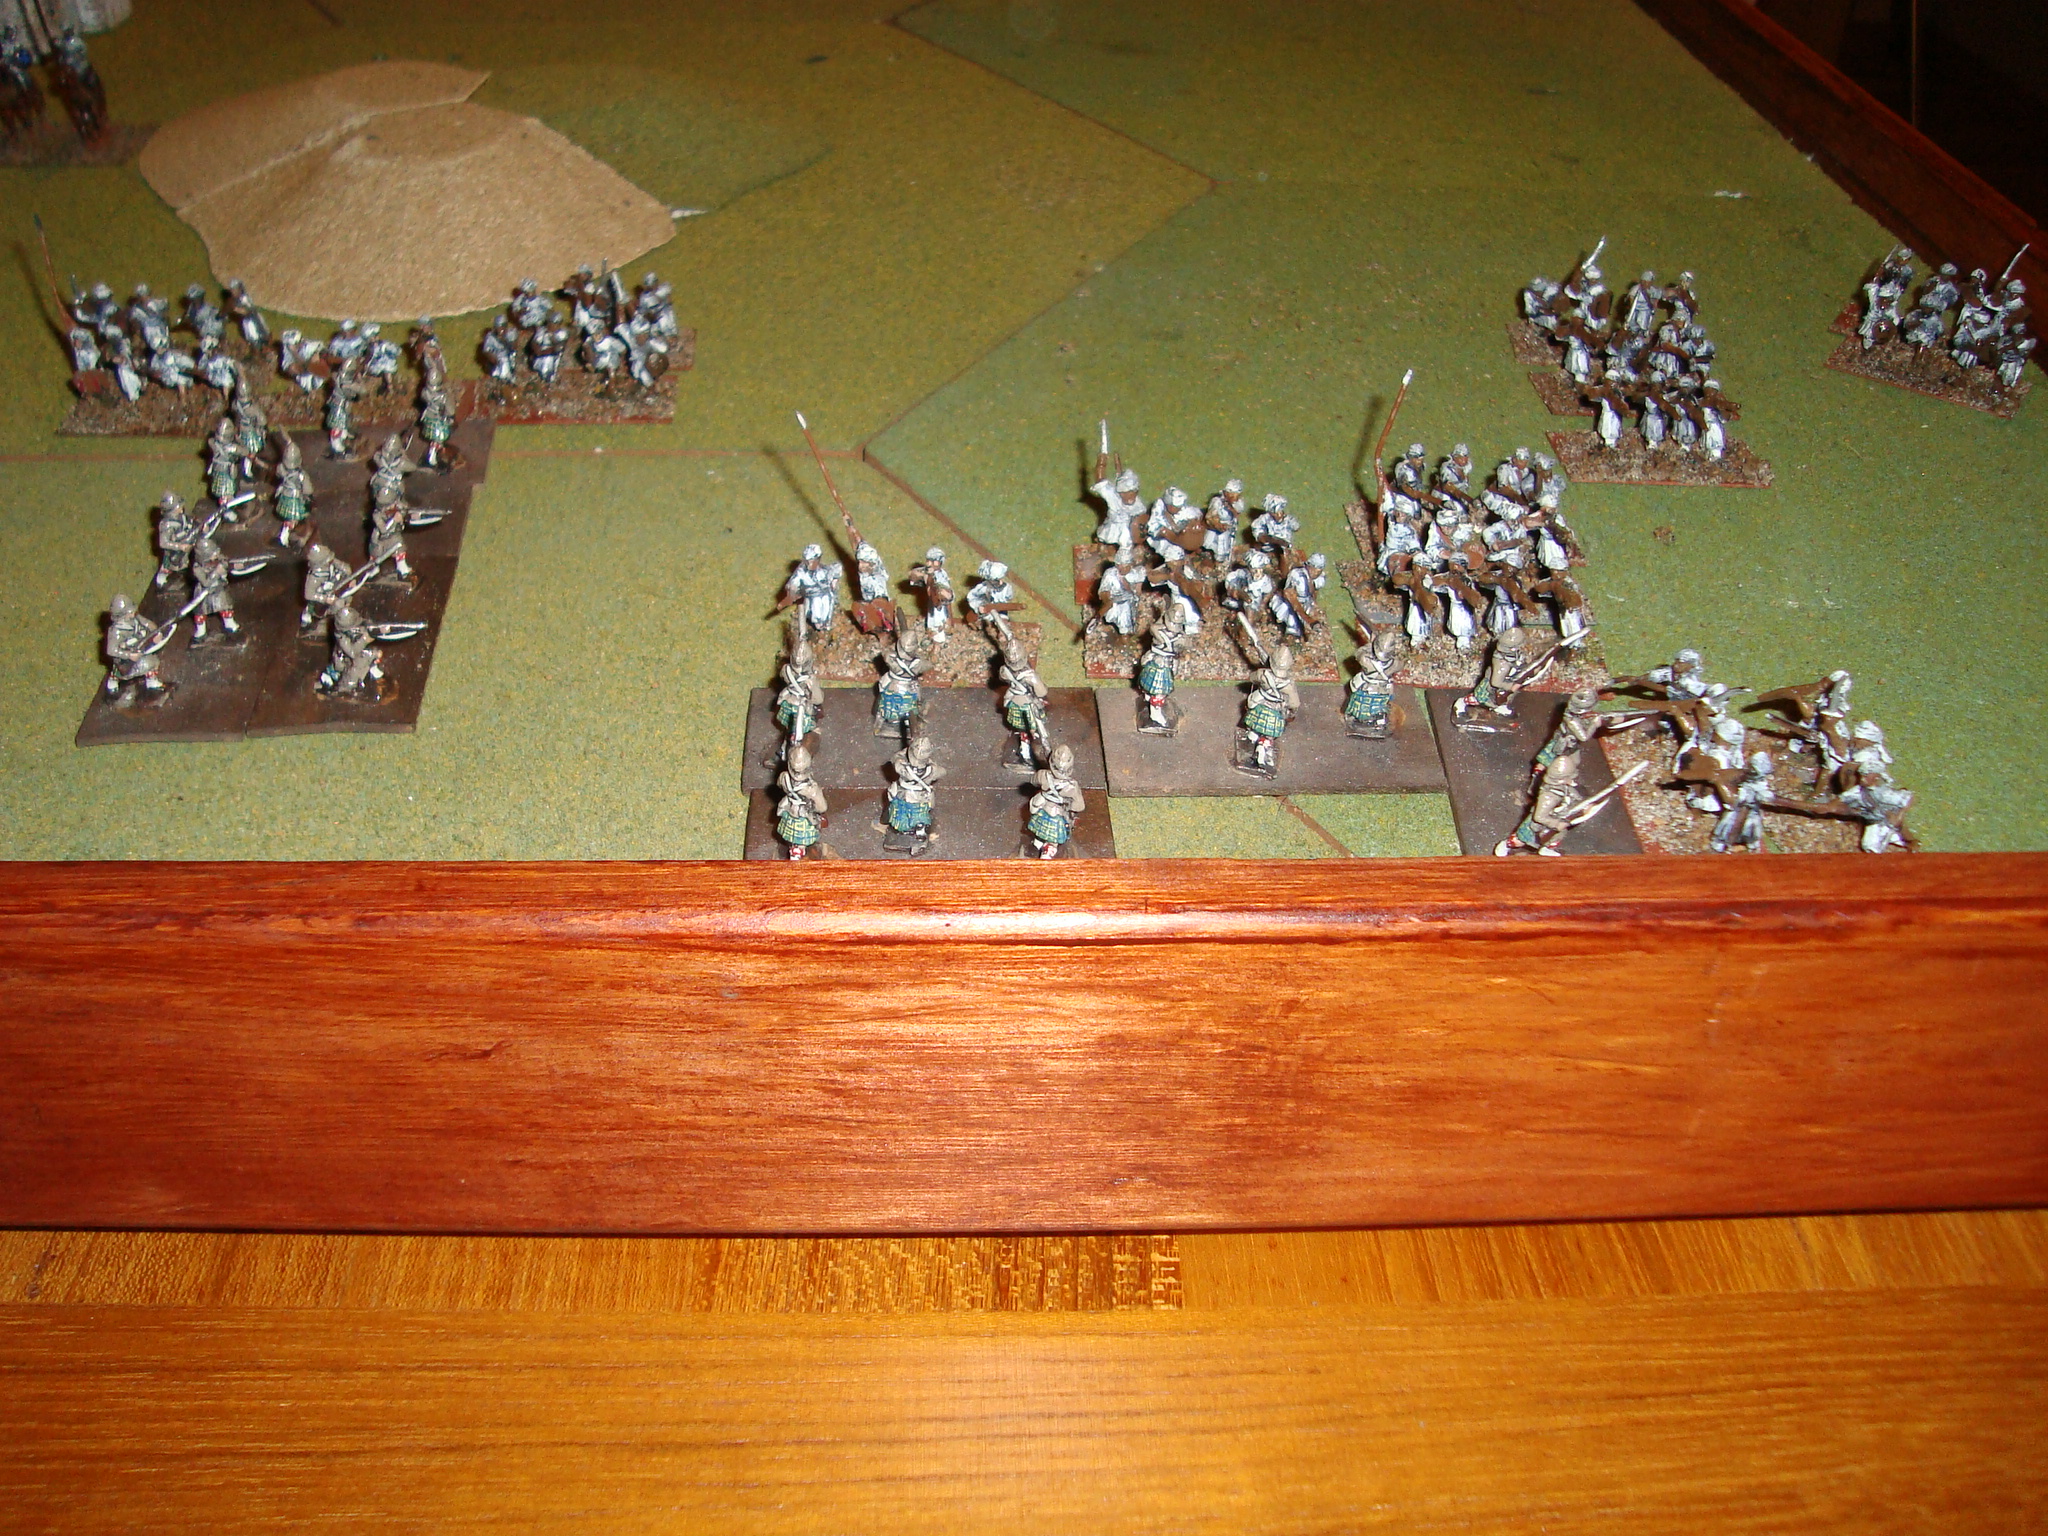
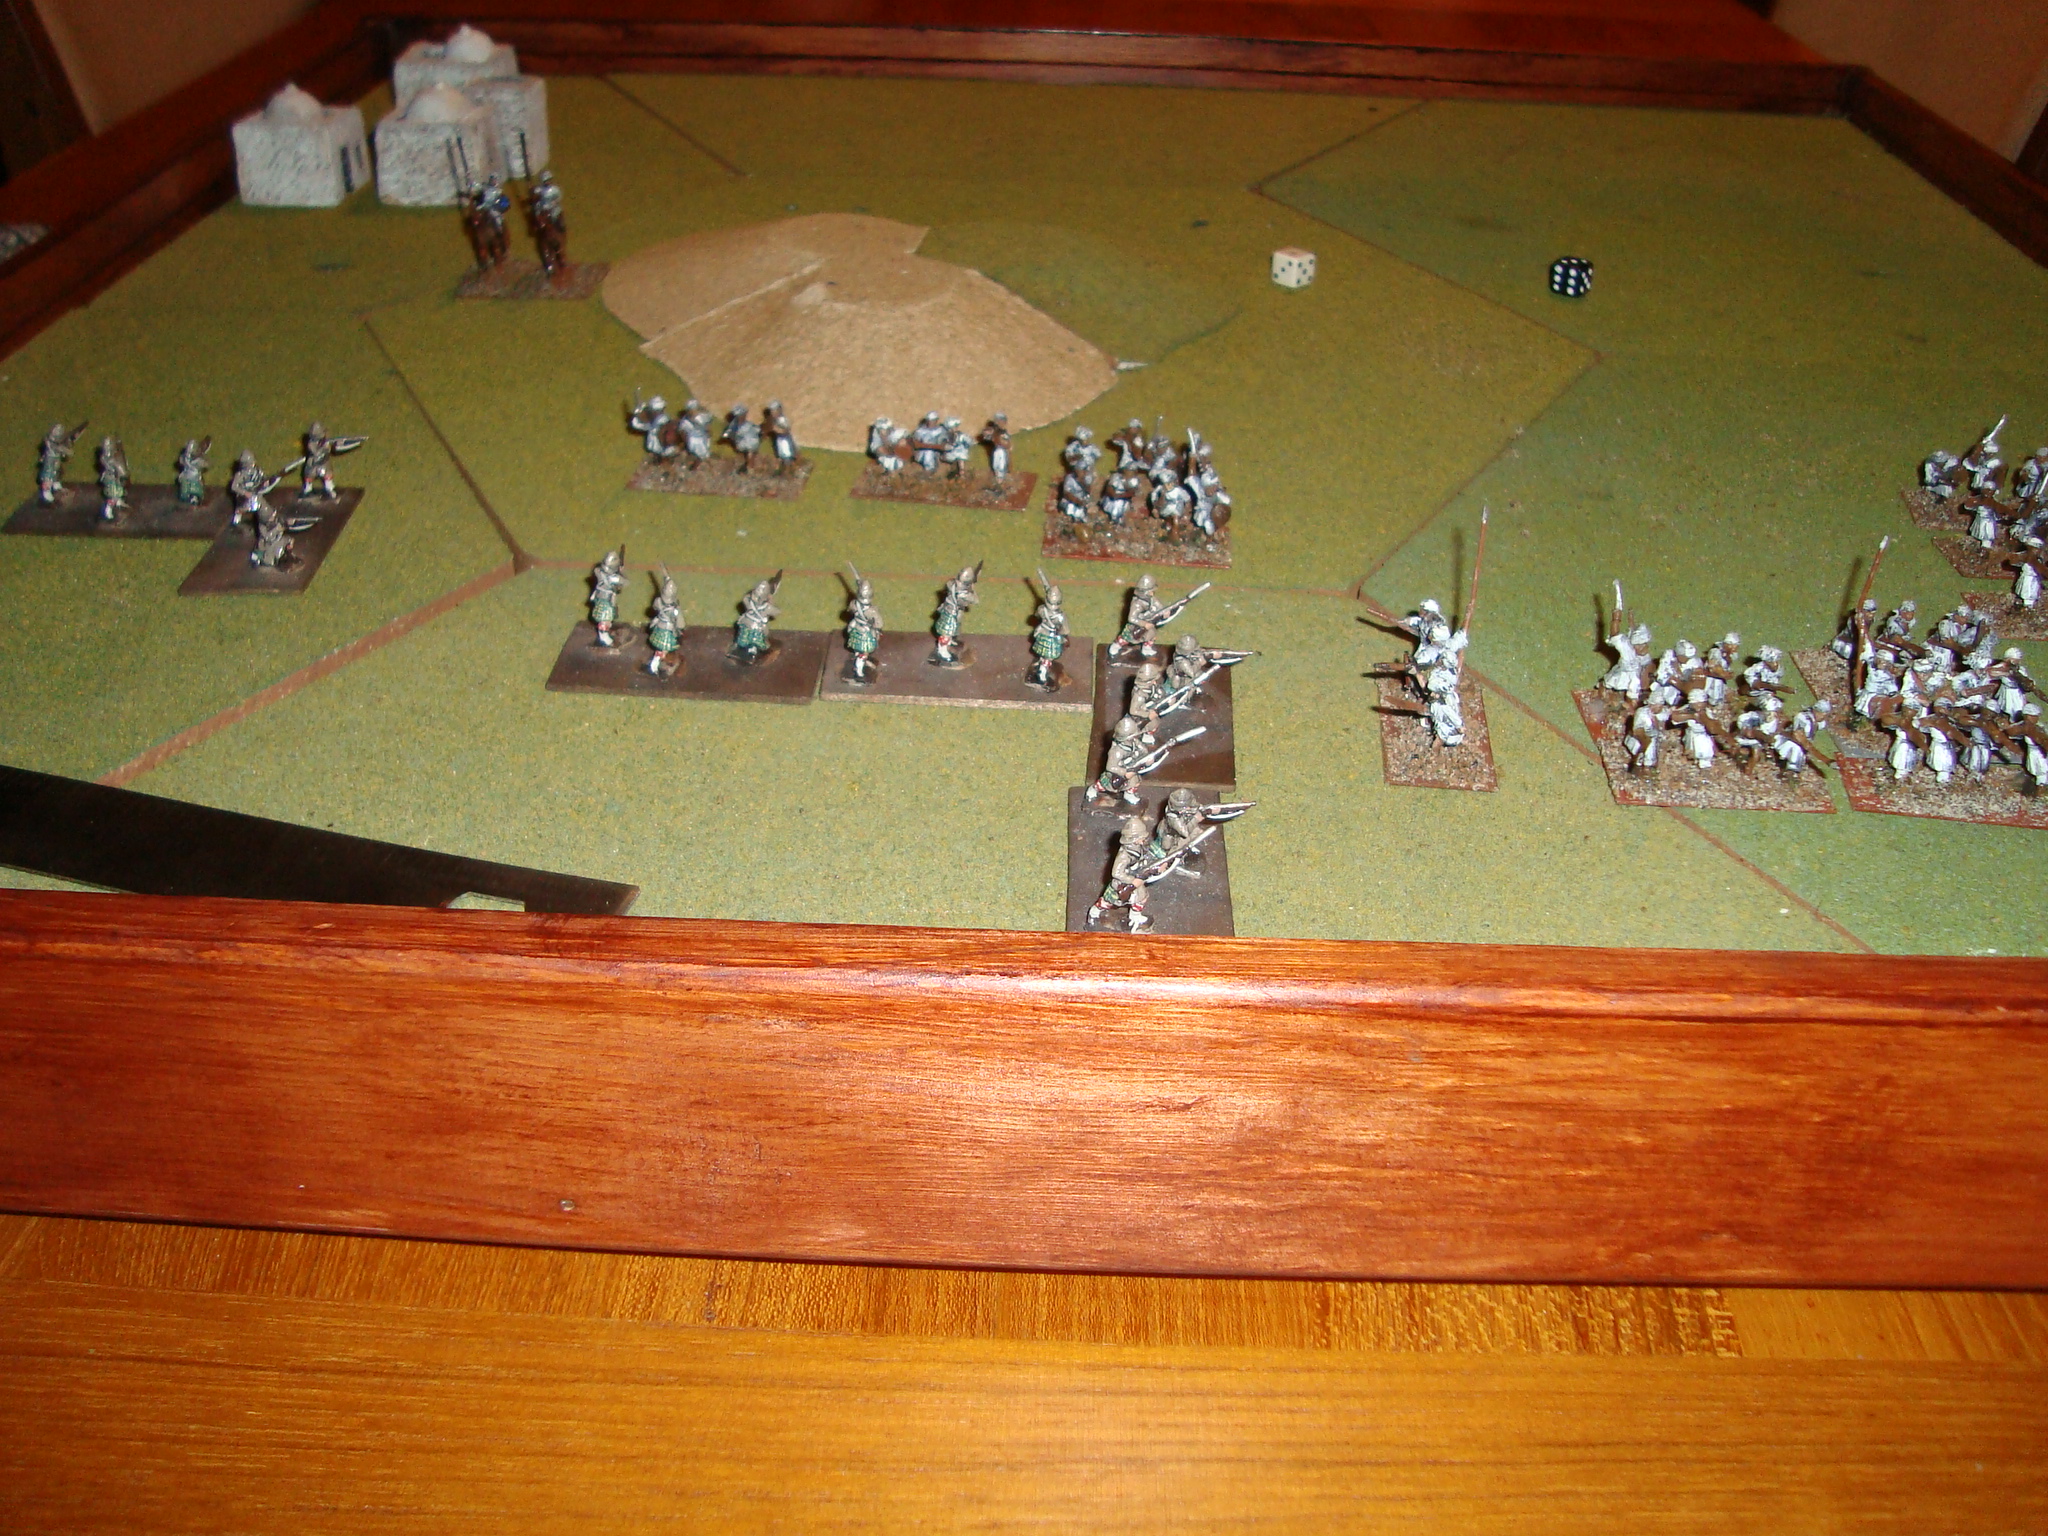
With the bad rolling, things did not go well for the Highlanders. Here’s a flashbulb view of the battle (the game was played after dark in bad lighting in the dining room). Good game, and I’ll probably play it again this evening.
Set Up. Hill Rated Bad Going. I Constructed The DBA Board Many Years Ago.Highlanders. Old MiniFigs.Dervish Horde. Old MiniFigs.Closing To ContactContact and Flanked!Highlanders Withdrawing. A Dervish Victory.