TAD at The Sunfish Capitol Of The World. It’s a holding area for some of my older AH games. Never know when there will be a couple of boring rainy days.
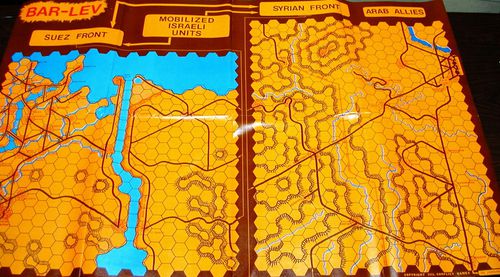
Set up The Arab-Israeli Wars, the final iteration of the Panzer Blitz Series. When I opened the box, I discovered three old envelopes containing the counters for Situations (they didn’t call them Scenarios back then) 2, 3 and 4. Have no idea when I last played. So….start at the beginning.
Before all of that, I read the rules. Three levels; Beginning, Standard and Advanced. Each layers on unit capabilities and additional types of units, even including fixed wing and rotary aircraft. The usual foodgroups for tactical armor games; direct fire, indirect fire, overrrun, and close assault.
Scenarios reflect increasing complexity and number of units. Counters are large and easy to read, maps are bland, but functional. On the other hand, what can you do with the desert? Well, someone did get creative with Bar Lev.
(In)Famously Psychadelic!
In short, what’s not to like for a reasonable armored combat simulation that doesn’t bog you down?
My only gripe is that the charts are on a double-faced fold out requiring all kinds of fiddling to work with…..and some genius included the turn track. But, the genius did add dotted lines so the track can be cut away from the charts.
It’s sunny now, but will still get in a few plays. Here’s a photo of the whole shooting match. Excuse the E-Bay Listing Approach.
After two gratuitous posts, here’s (hopefully) something of substance, and very late getting to the blog.
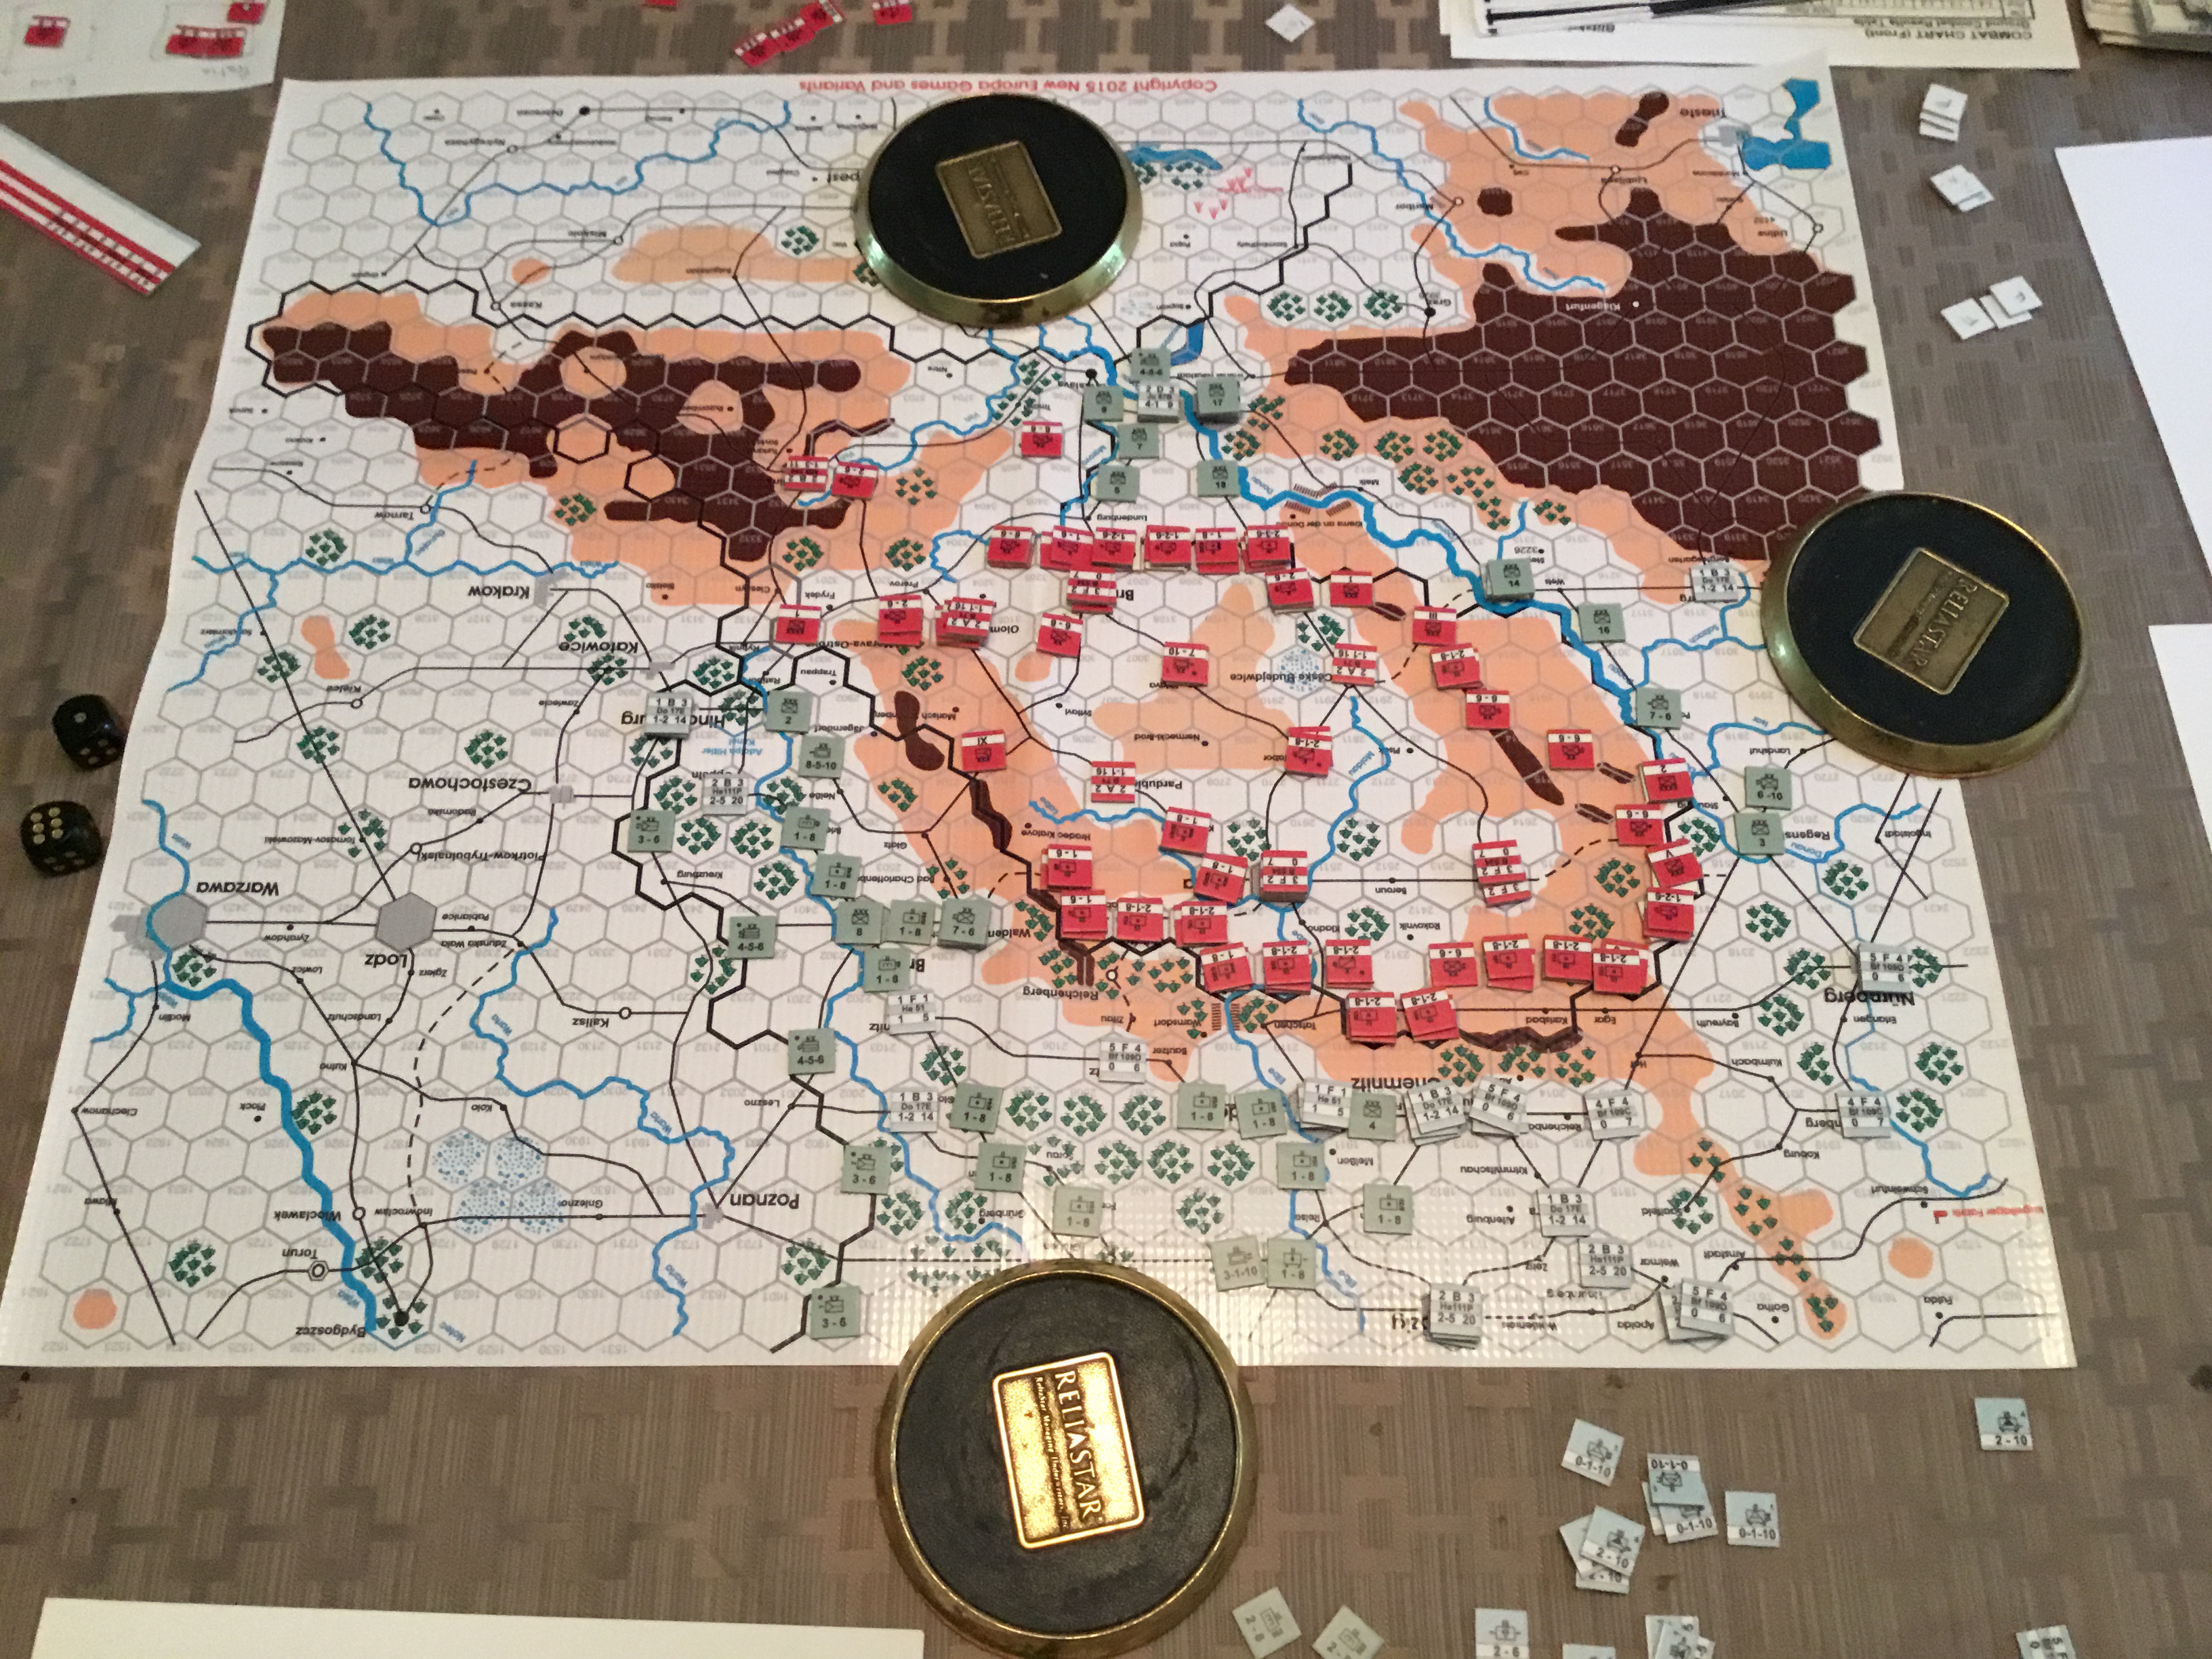
A couple of weeks ago, Tim and I played Fall Grun, a Europa game covering the proposed German invasion of Czechoslovakia in 1938. The hypothetical conflict was previously covered by both Command and Strategy and Tactics magazines. In each of our three “games”, Tim had the Czechs.
This iteration is published by New Europa Games, using John Astell’s Blitzkrieg Unleashed rules. Mr. Astell’s involvement with the Europa system goes back to, I think, the inception. The rules closely follow the Europa template, but involve some interesting changes to ZOCs and Overruns.
The New Europa website is apparently dormant, but has been an excellent source for variant counters. Also, a game anticipating a Hungarian-Roumanian war in wake of the Czech conflict is supposedly in the making. That would be fun.
The game components are of high quality, however the lack of comprehensive charts presupposes ownership of other Europa games. The map is vinyl. Apparently this is cheaper to produce than a paper map. The only downside is that the creases are more obstinate than paper, requiring some improvisational and forceful re-shaping
The Germans have their work cut out for them. The Czech’s have a quality army that receives strong infantry and armored reinforcements very early in the game. The German initial deployment is rather “even”, without any real point of main effort. Many German units, especially valuable engineers and artillery regiments, are placed some distance back from the Czech-German border, and require time to assemble or move to contributory locations. There is also the possibility of Soviet intervention of the Czech side, with also a desulatory appearance by the anti-Czech Poles obsessing over three hexes.
The real German strength is their airforce. Many units, well suited to ground support, but with fighter cover that lacks range and (initially) limited airfields close to the Czech border. Also, Astell’s latest rules (early war) allow positive combat modifiers for an armored mix as low as 10 percent of the attacking forces.
After setup, we played the initial two turns. I dutifully went through the Blitzkrieg playbook using the first turn to annilihate the Czech airforce and mass units for border attacks. Tim countered, and my attacks stalled. And, that was that. A learning experience. Reset for Saturday.
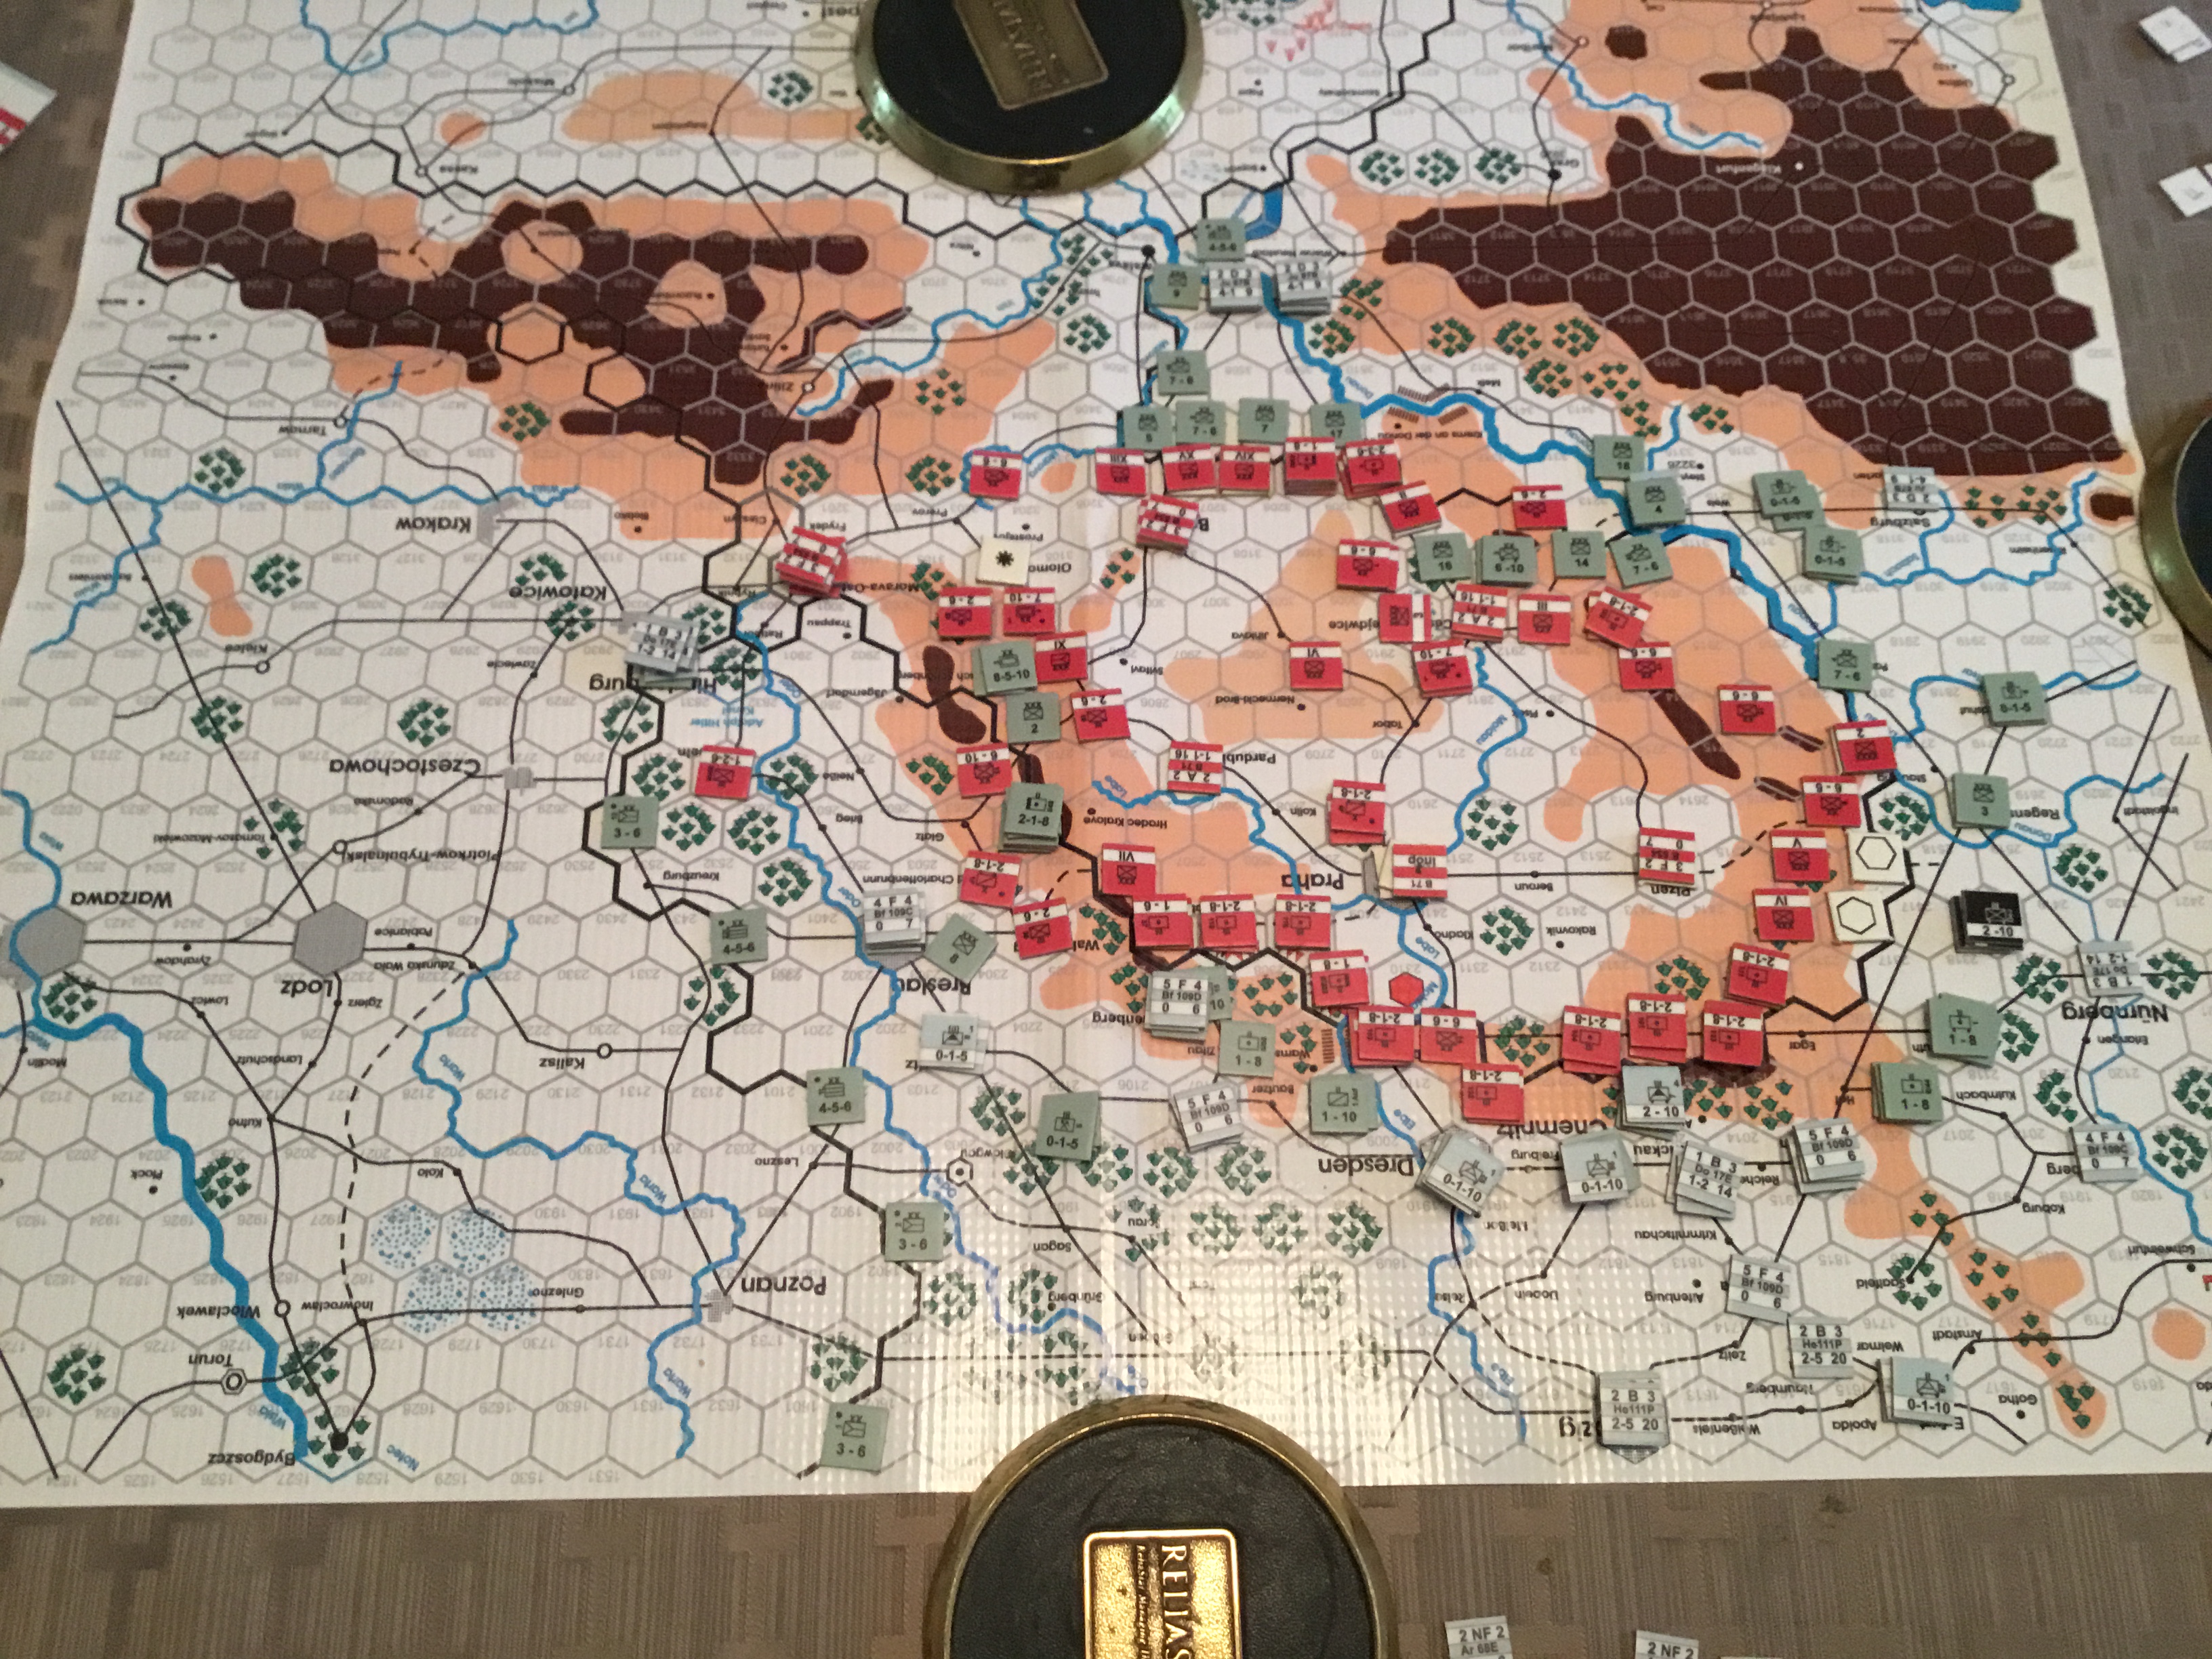
Well, Friday was a learning experience, but not a good one for me. Still allocated aircraft to airfield attacks, but this time I had deployed my engineer units to quick construct airfields, or move into positiion close to the border to construct them on Turn Two. I concentrated my attacks to the southeast and southwest of Prague, hoping to isolate Prague from the strong Czech units facing Vienna.
Initial Setup. That Vinyl Map Needed AnchoringGermans Attempt To Isolate PragueLimited Gains
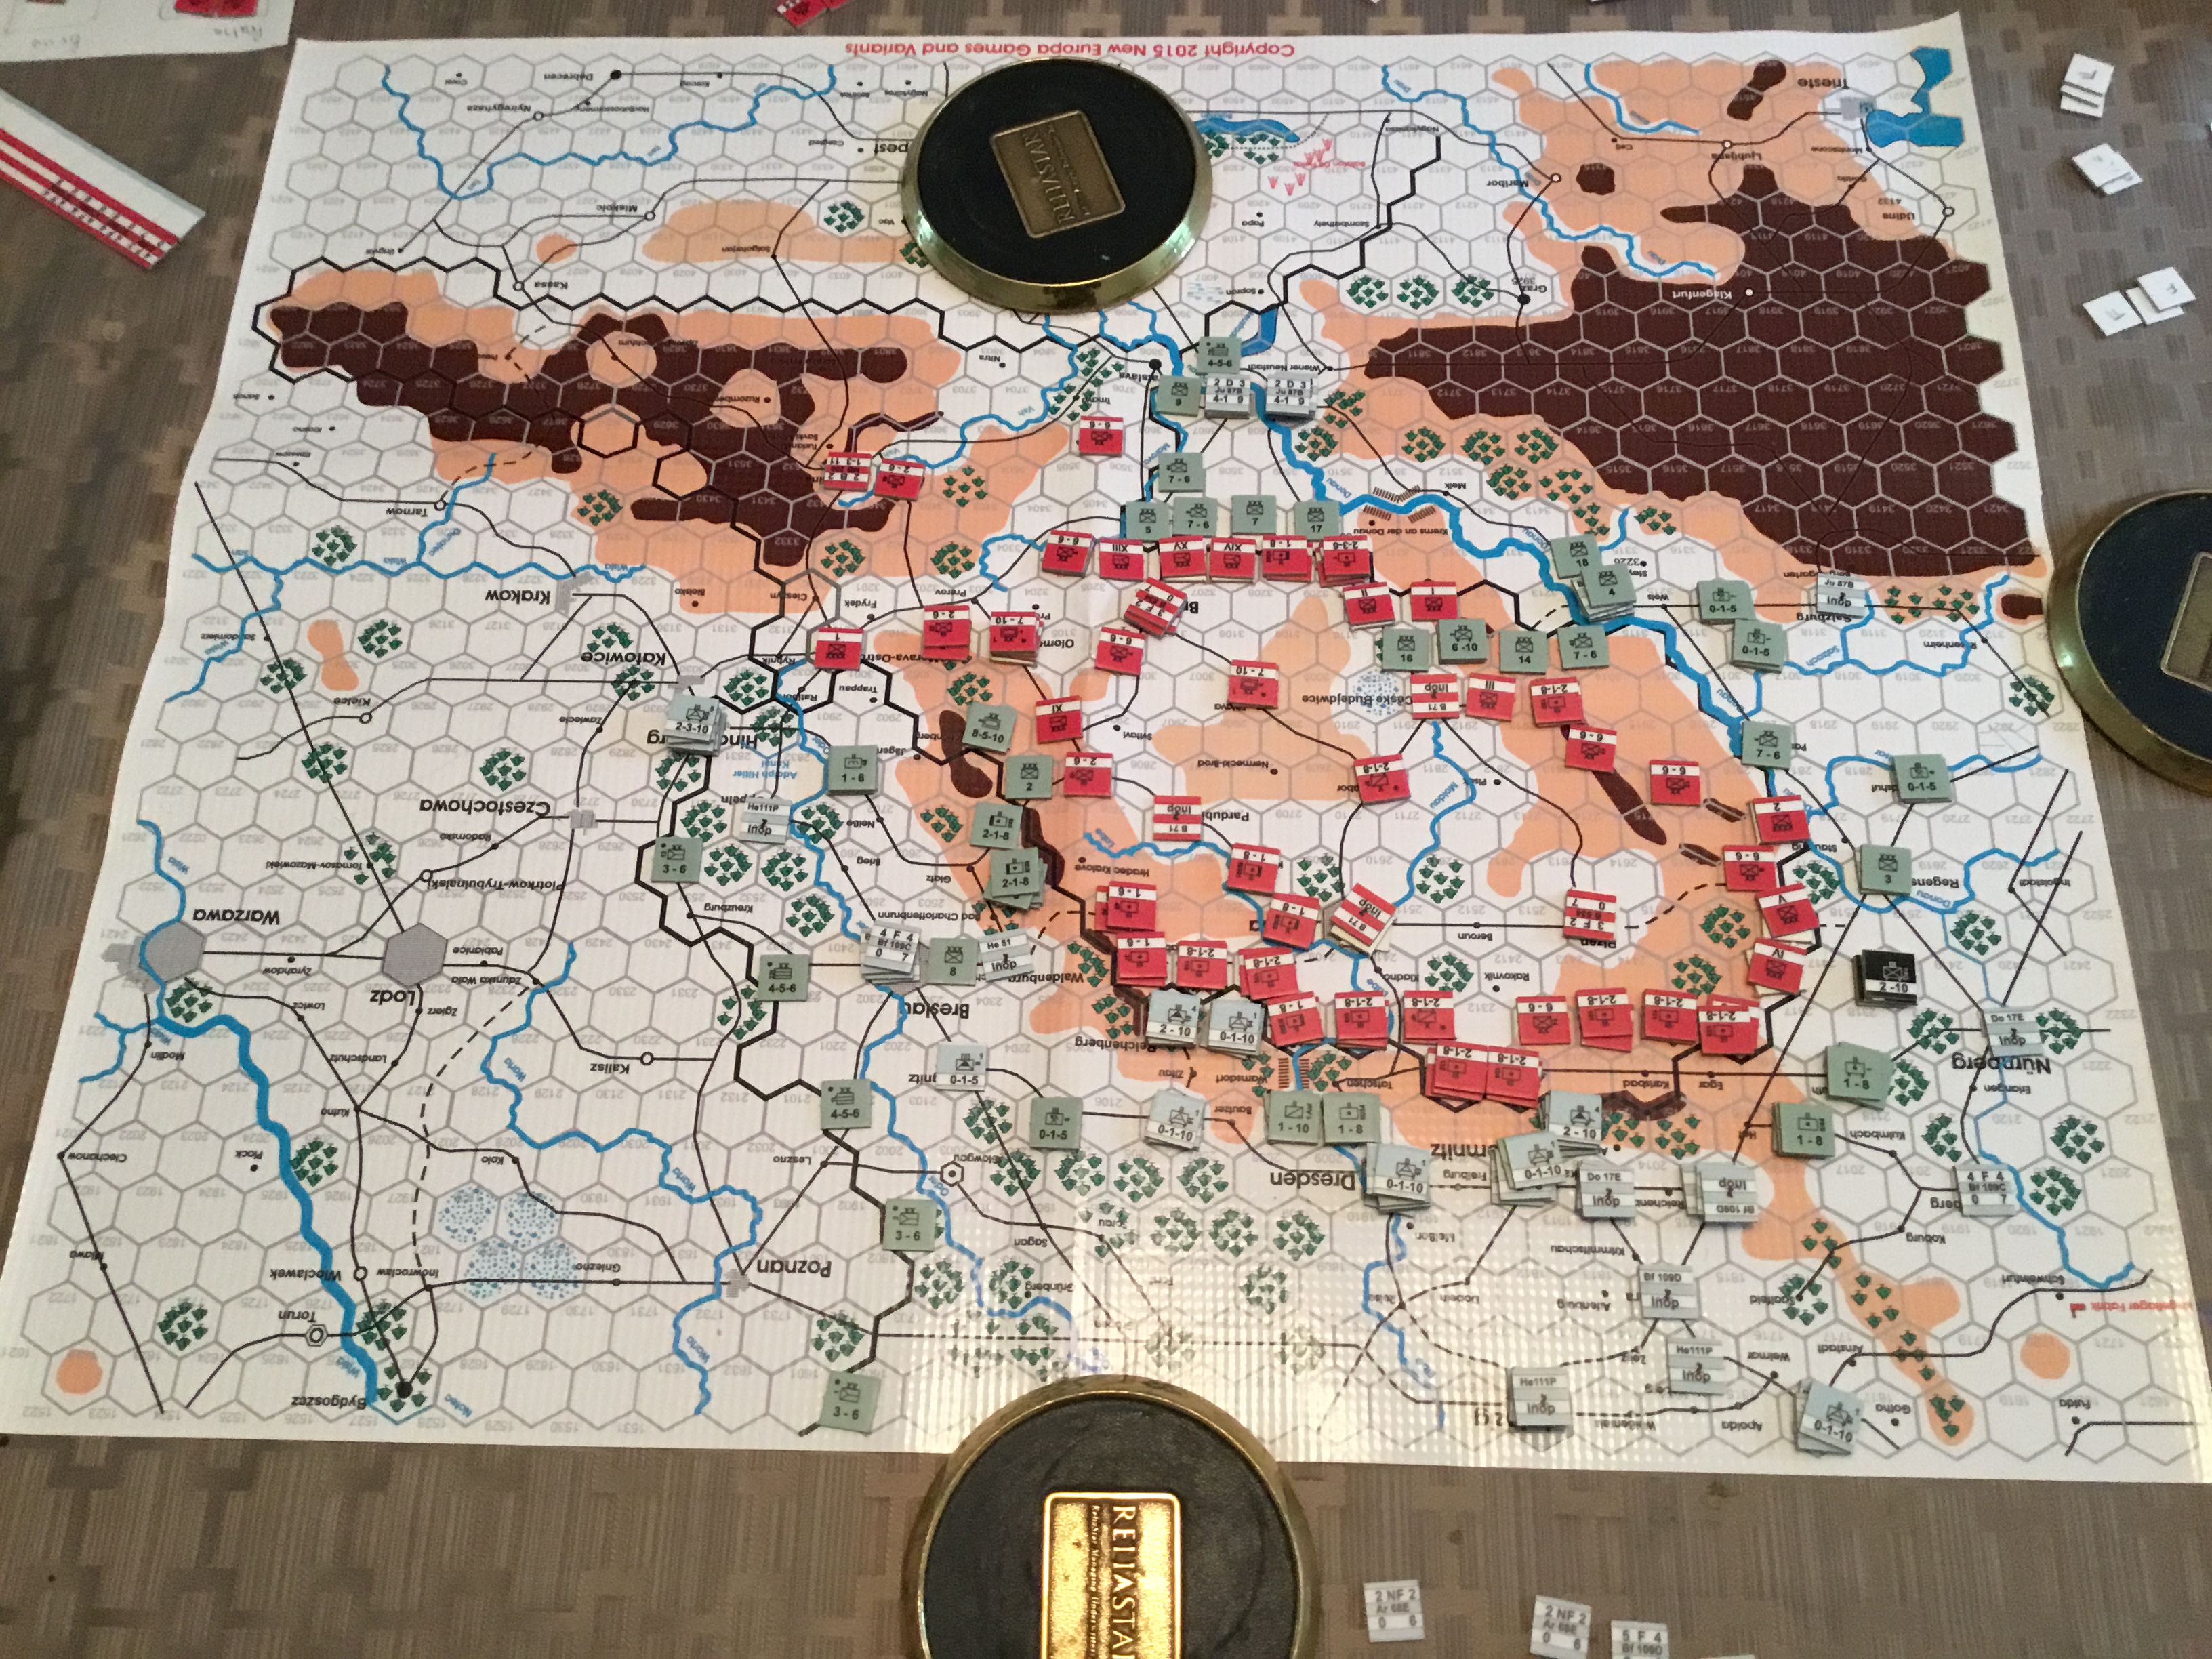
Weather. Why worry about it, right? Never a thought. It’s October…….crisp fall weather. Oh…….then just roll on the weather table for …..MUD. Ugh…..bad, bad amateur move. It stings even three weeks later.
OK, give it one more try. Another set up after dinner. Same bloody result. This time, more aggressive, greater gains. But, again, MUD.
New Game….Same Result….Stalled
No wonder the General Staff was ready for a putsch. Tough army, difficult terrain, limited mechanized advantage, and an untried airforce lacking airfields. And, also, MUD.
I don’t know if Tim is ready for it, but I’d like to switch sides and see what he can do. He’s good, very good. But this is quite a challenge.
Good game in the tradition that is all best about the Europa system. And, given the strange and terrible saga of this system, it’s best to remember the good.
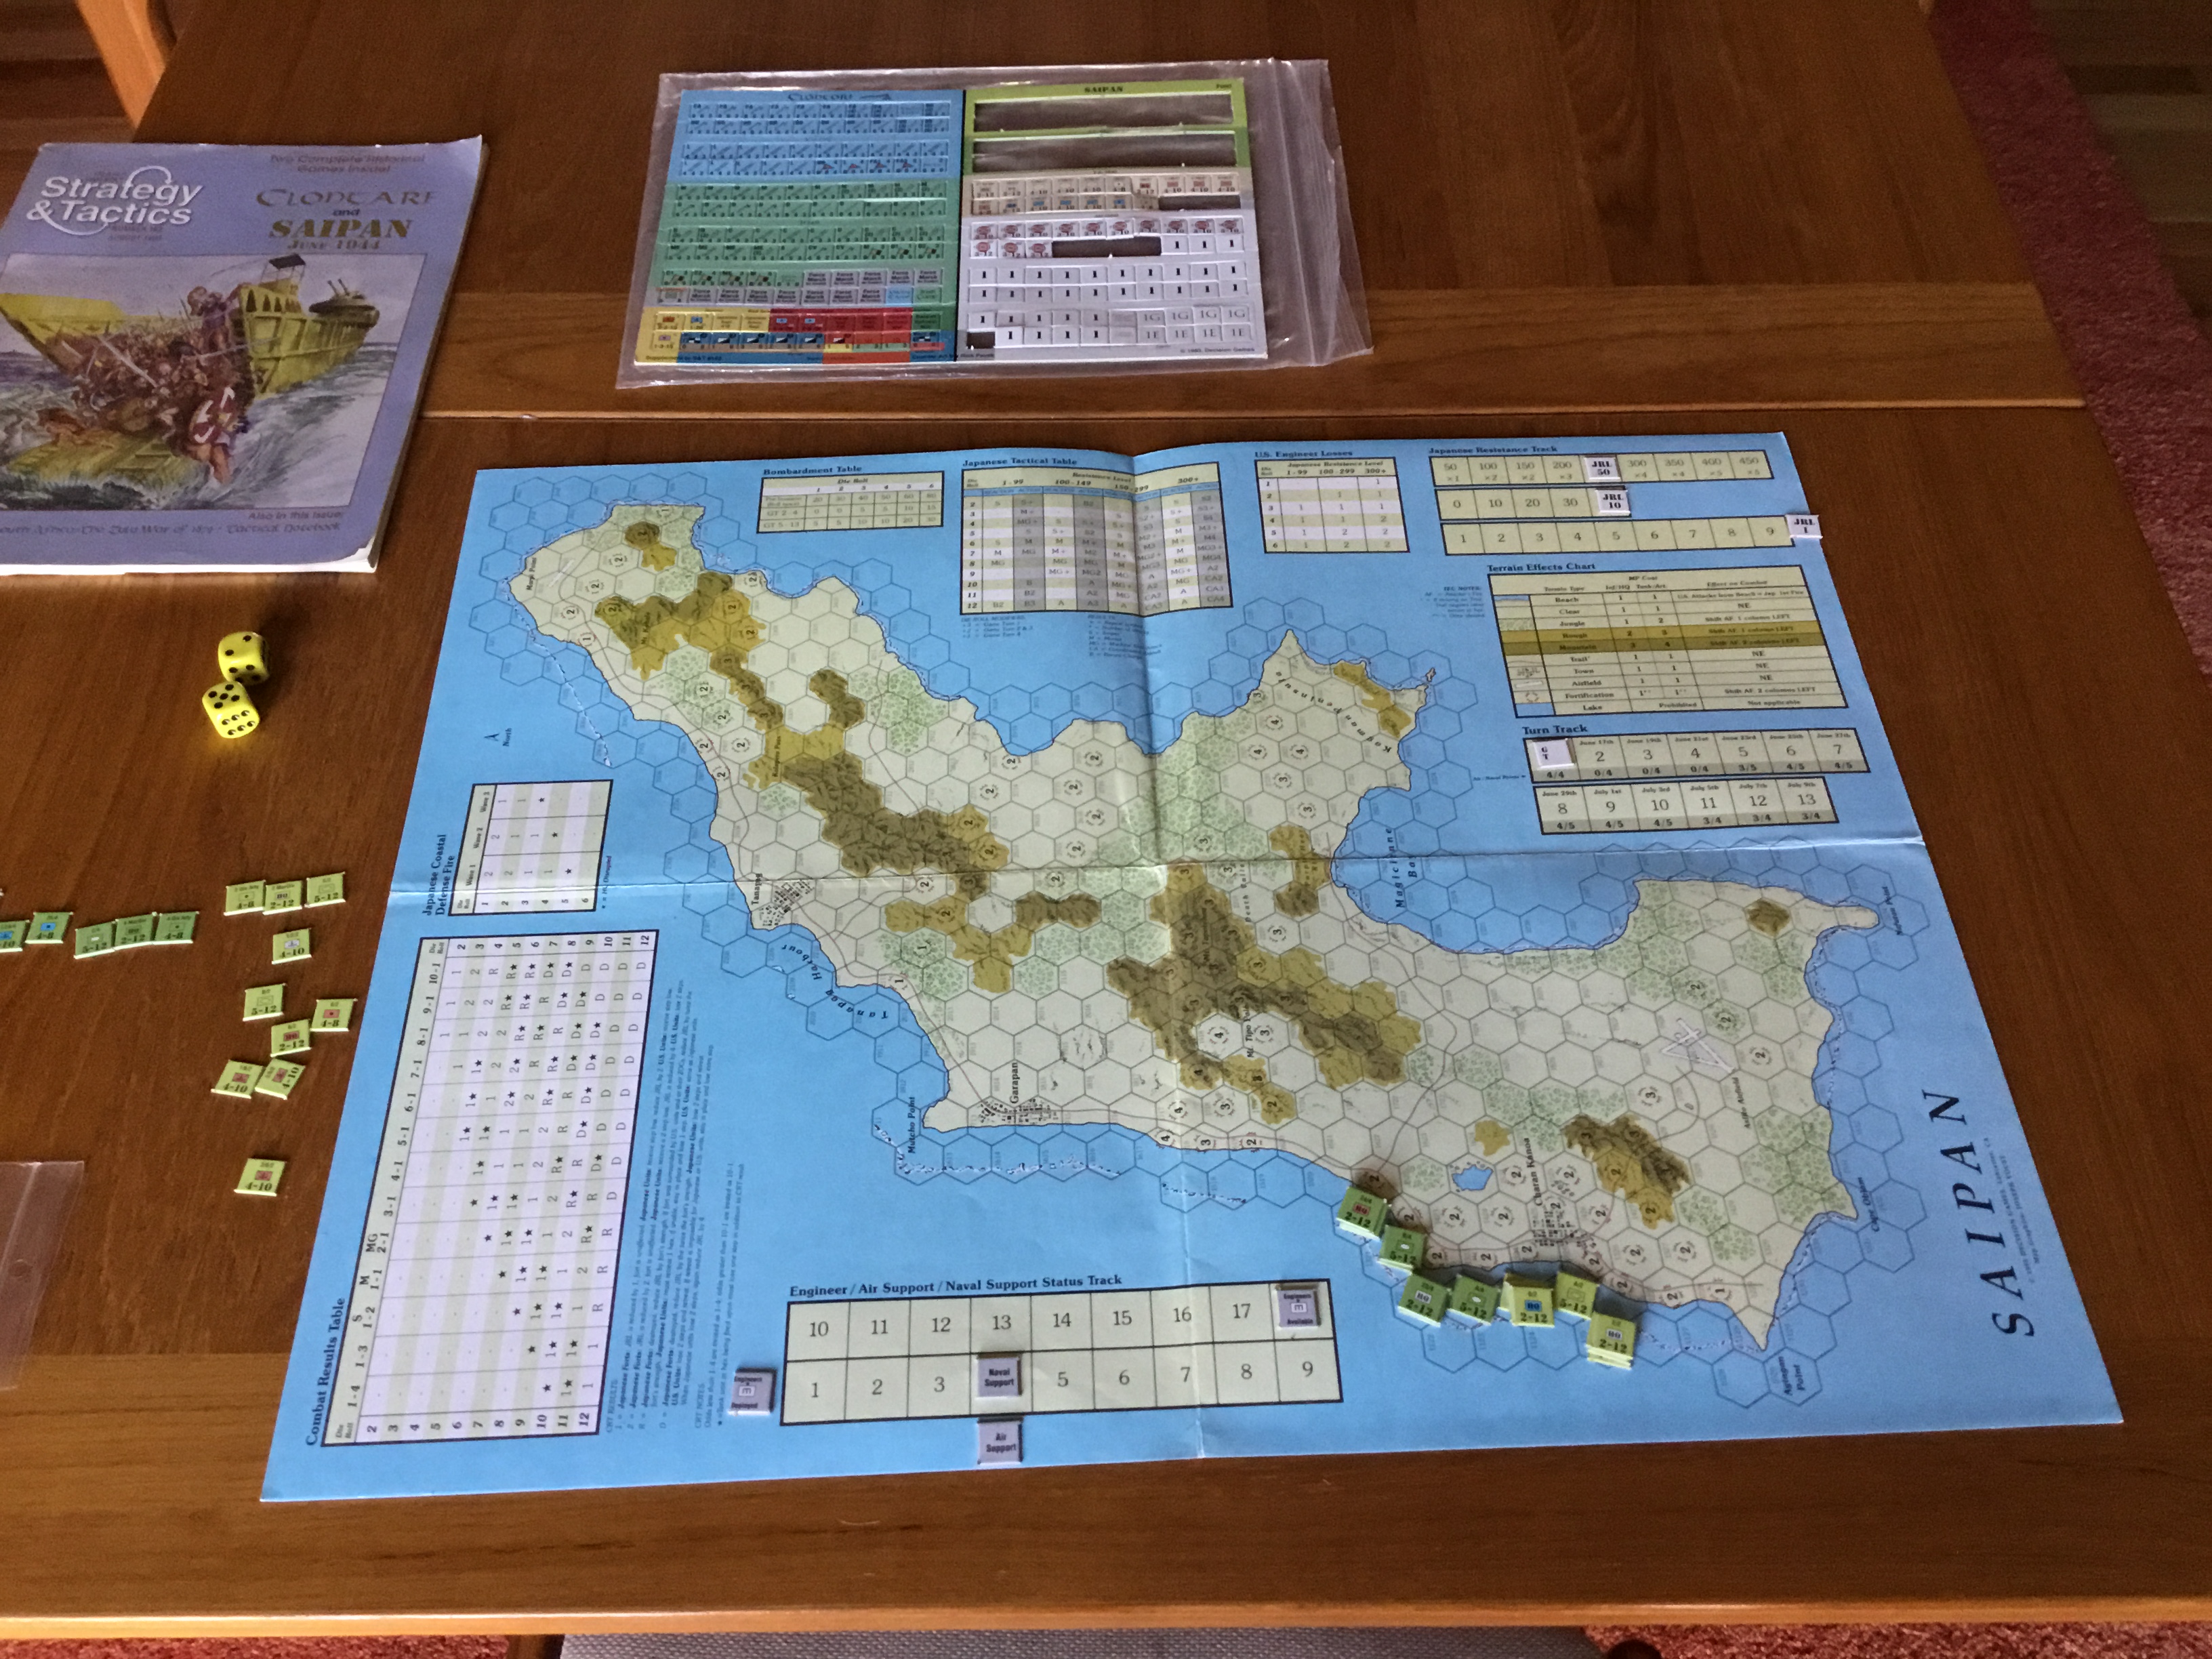
Opened up a box and it jumped right out at me! “It” is an old S&T magaizine game, Saipan.
Why not? It’s solitaire and is the first game I’ve ever played that has any of my old units in it (2/24 and HQ 24th Marines).
It’s another slog. Wristage and more wristage; have to reduce 88 (yes 88!), Japanese fortifications, plus the chance of encountering Japanese troops every hex you move into (except destroyed fortifications). Lots of rolling to do. I can handle that, but what’s vexing is the step losses. Yes, one has to use numbered chits to designate losses. Ugh.
All that griping aside, the system seems viable, with NGF, Air support, Japanese coastal defenses, and reasonable command and control (called Lines Of Communication) rules for Division and Regimental HQs. All in all, the game seems a reasonable representation of a meat grinder of a campaign.
I have Bloody Buna on the table and now this damn thing. It is a rut! Need to get an East Front game out (and not Stalingrad) next!
Mangled Turn 1, forgetting Japanese reactions to Marine movement. But, it was an easy re-set. Will try it again tonight.
Been playing another small game. It’s a game with a war theme, so I guess it is a war game. Realism…….not so much. Entertainment and Fun……so much.
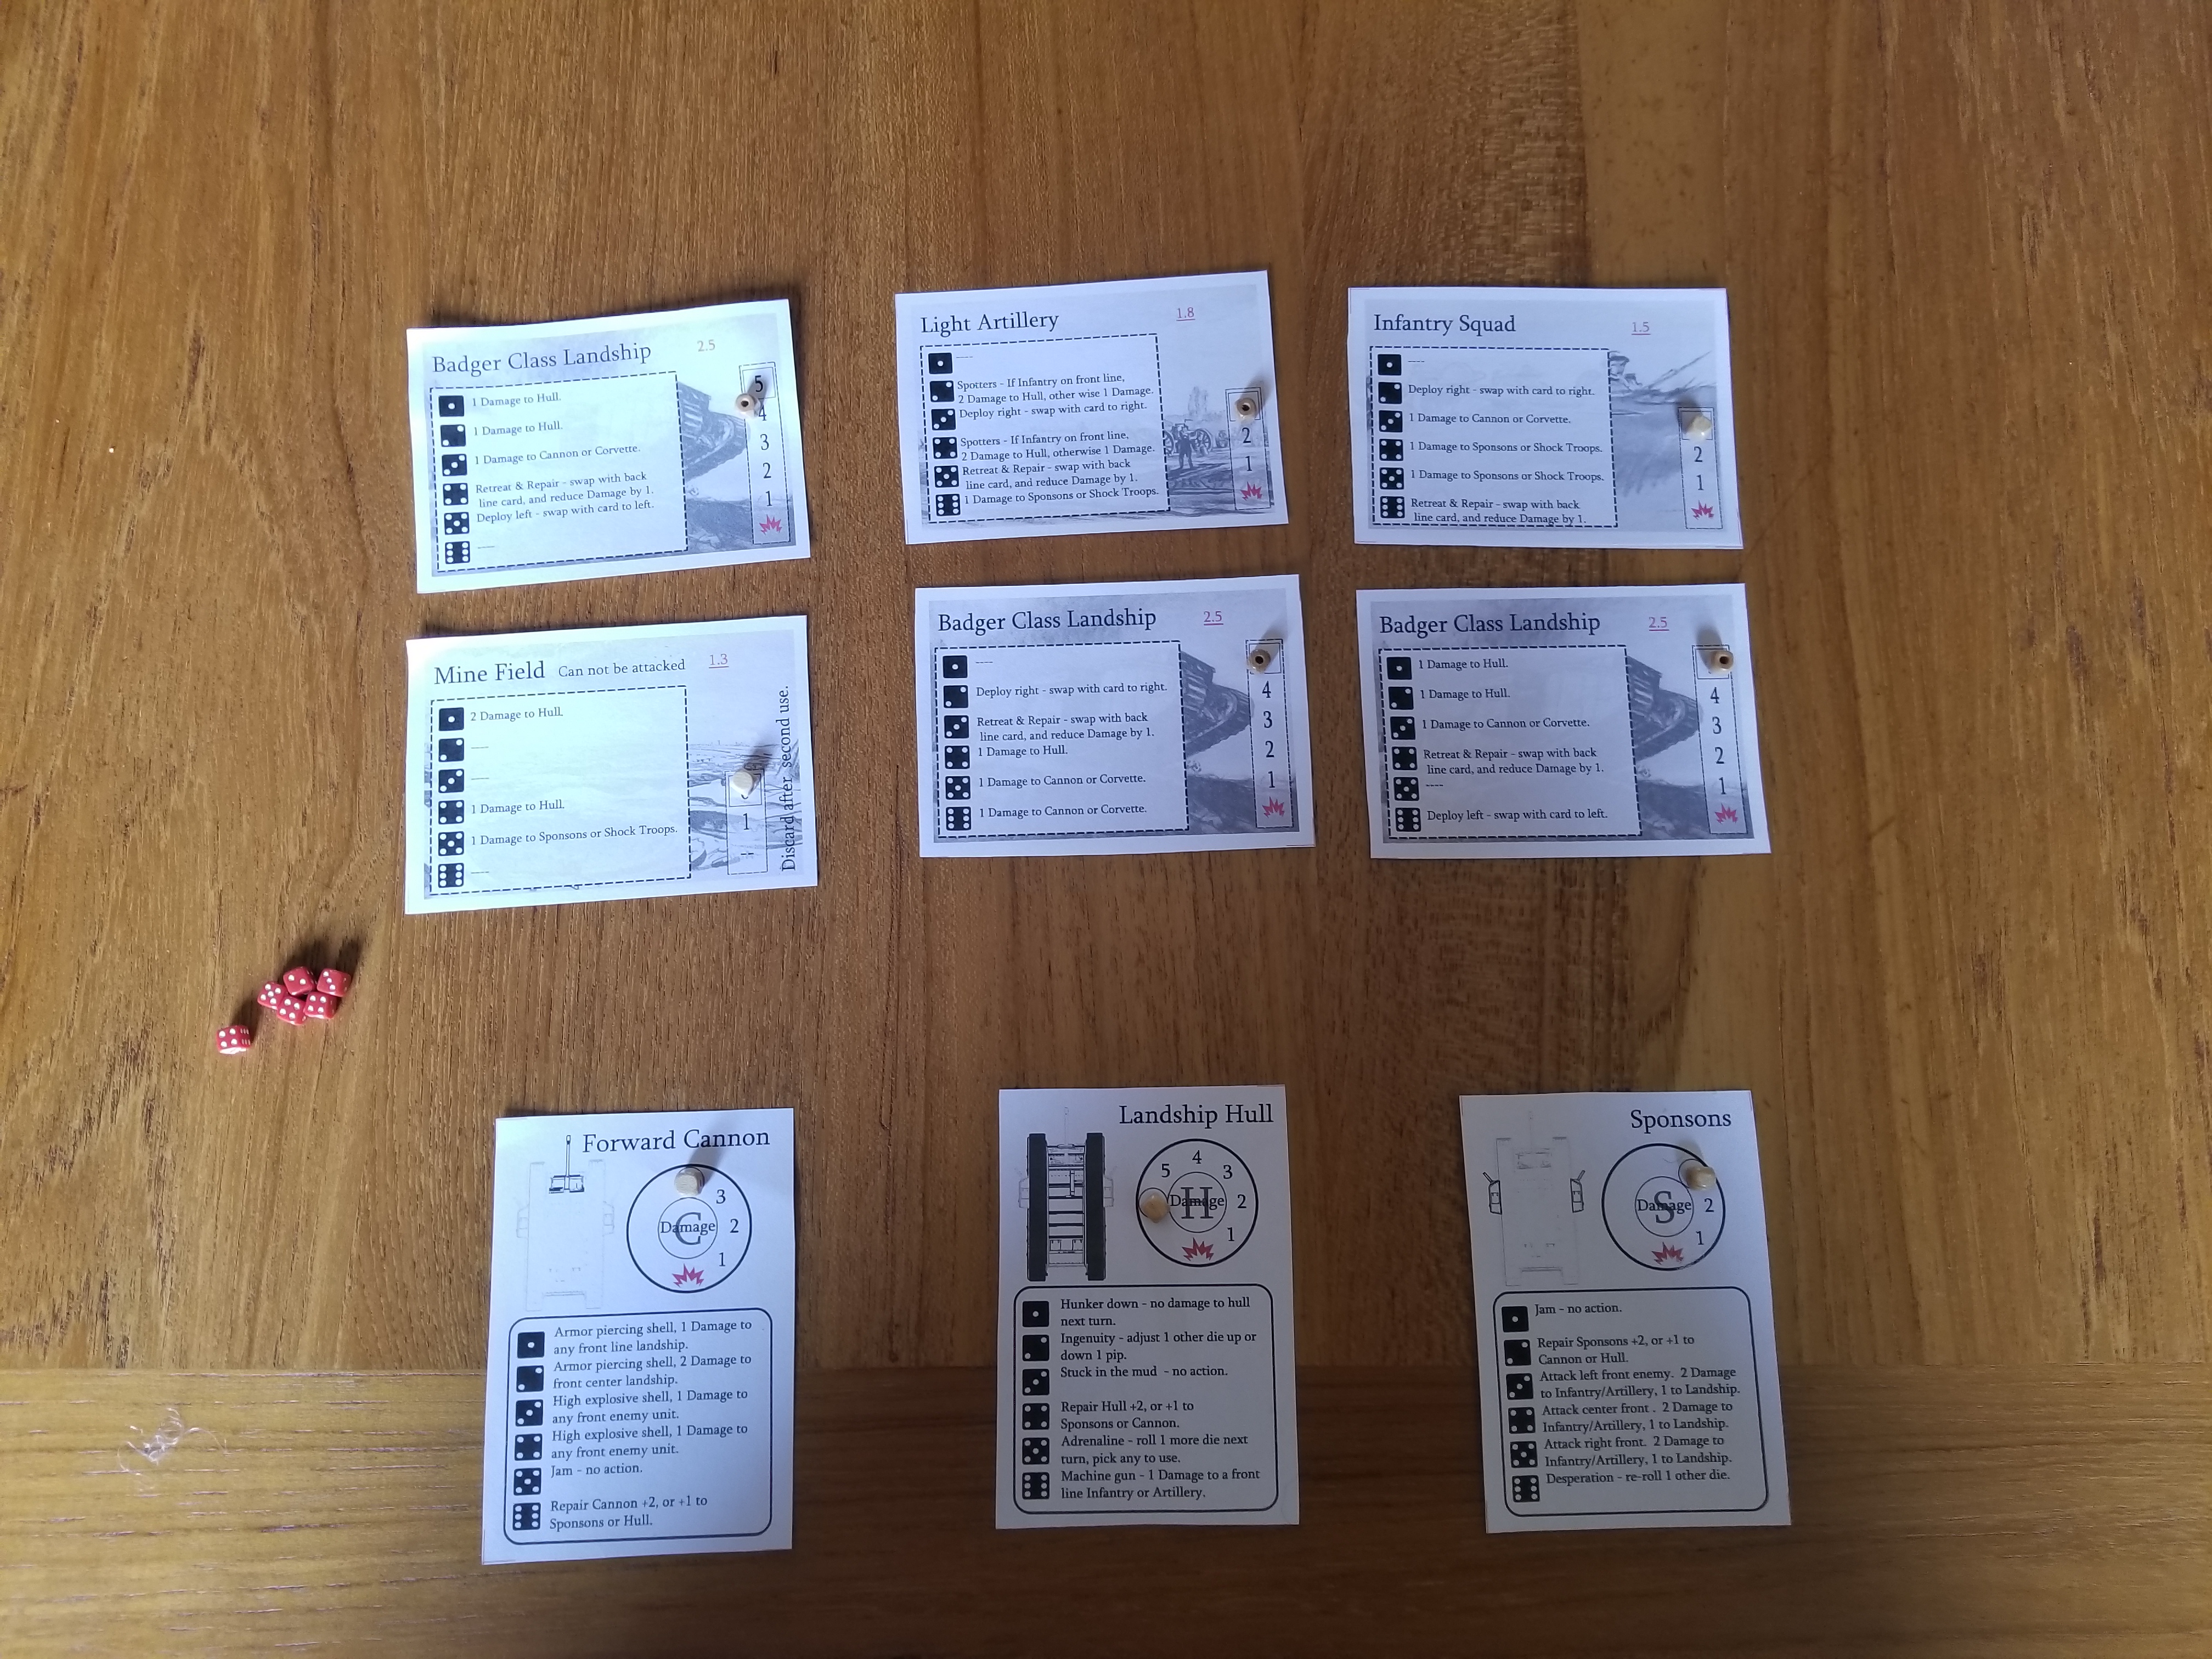
It’s Pocket Landship, a PNP game I stumbled across over at Boardgamegeek.
The link is for the updated version, with more options and better graphics. The original looks like this when set up.
No, The Cards Are Not Huge. Yes, The Dice Are Very, Very, Small.
Game is simple and elegant. In the basic game, you control one Landship, with three components – Hull, Sponson, and Gun. The enemy has six random elements, including infantry, artillery and other land ships. Only the front three are in play at any one time. Roll three die for the enemy. Assign lowest die to the left unit, and other two in ascending order. See what happens. For your Landship, roll three die and allocate as best you can. If you destroy one enemy element, another moves up. Last Man Standing wins.
Fun and compact. As the say, a great “filler” game. Just like TAC, buy this one before it gets snapped up, pimped up, and priced up!
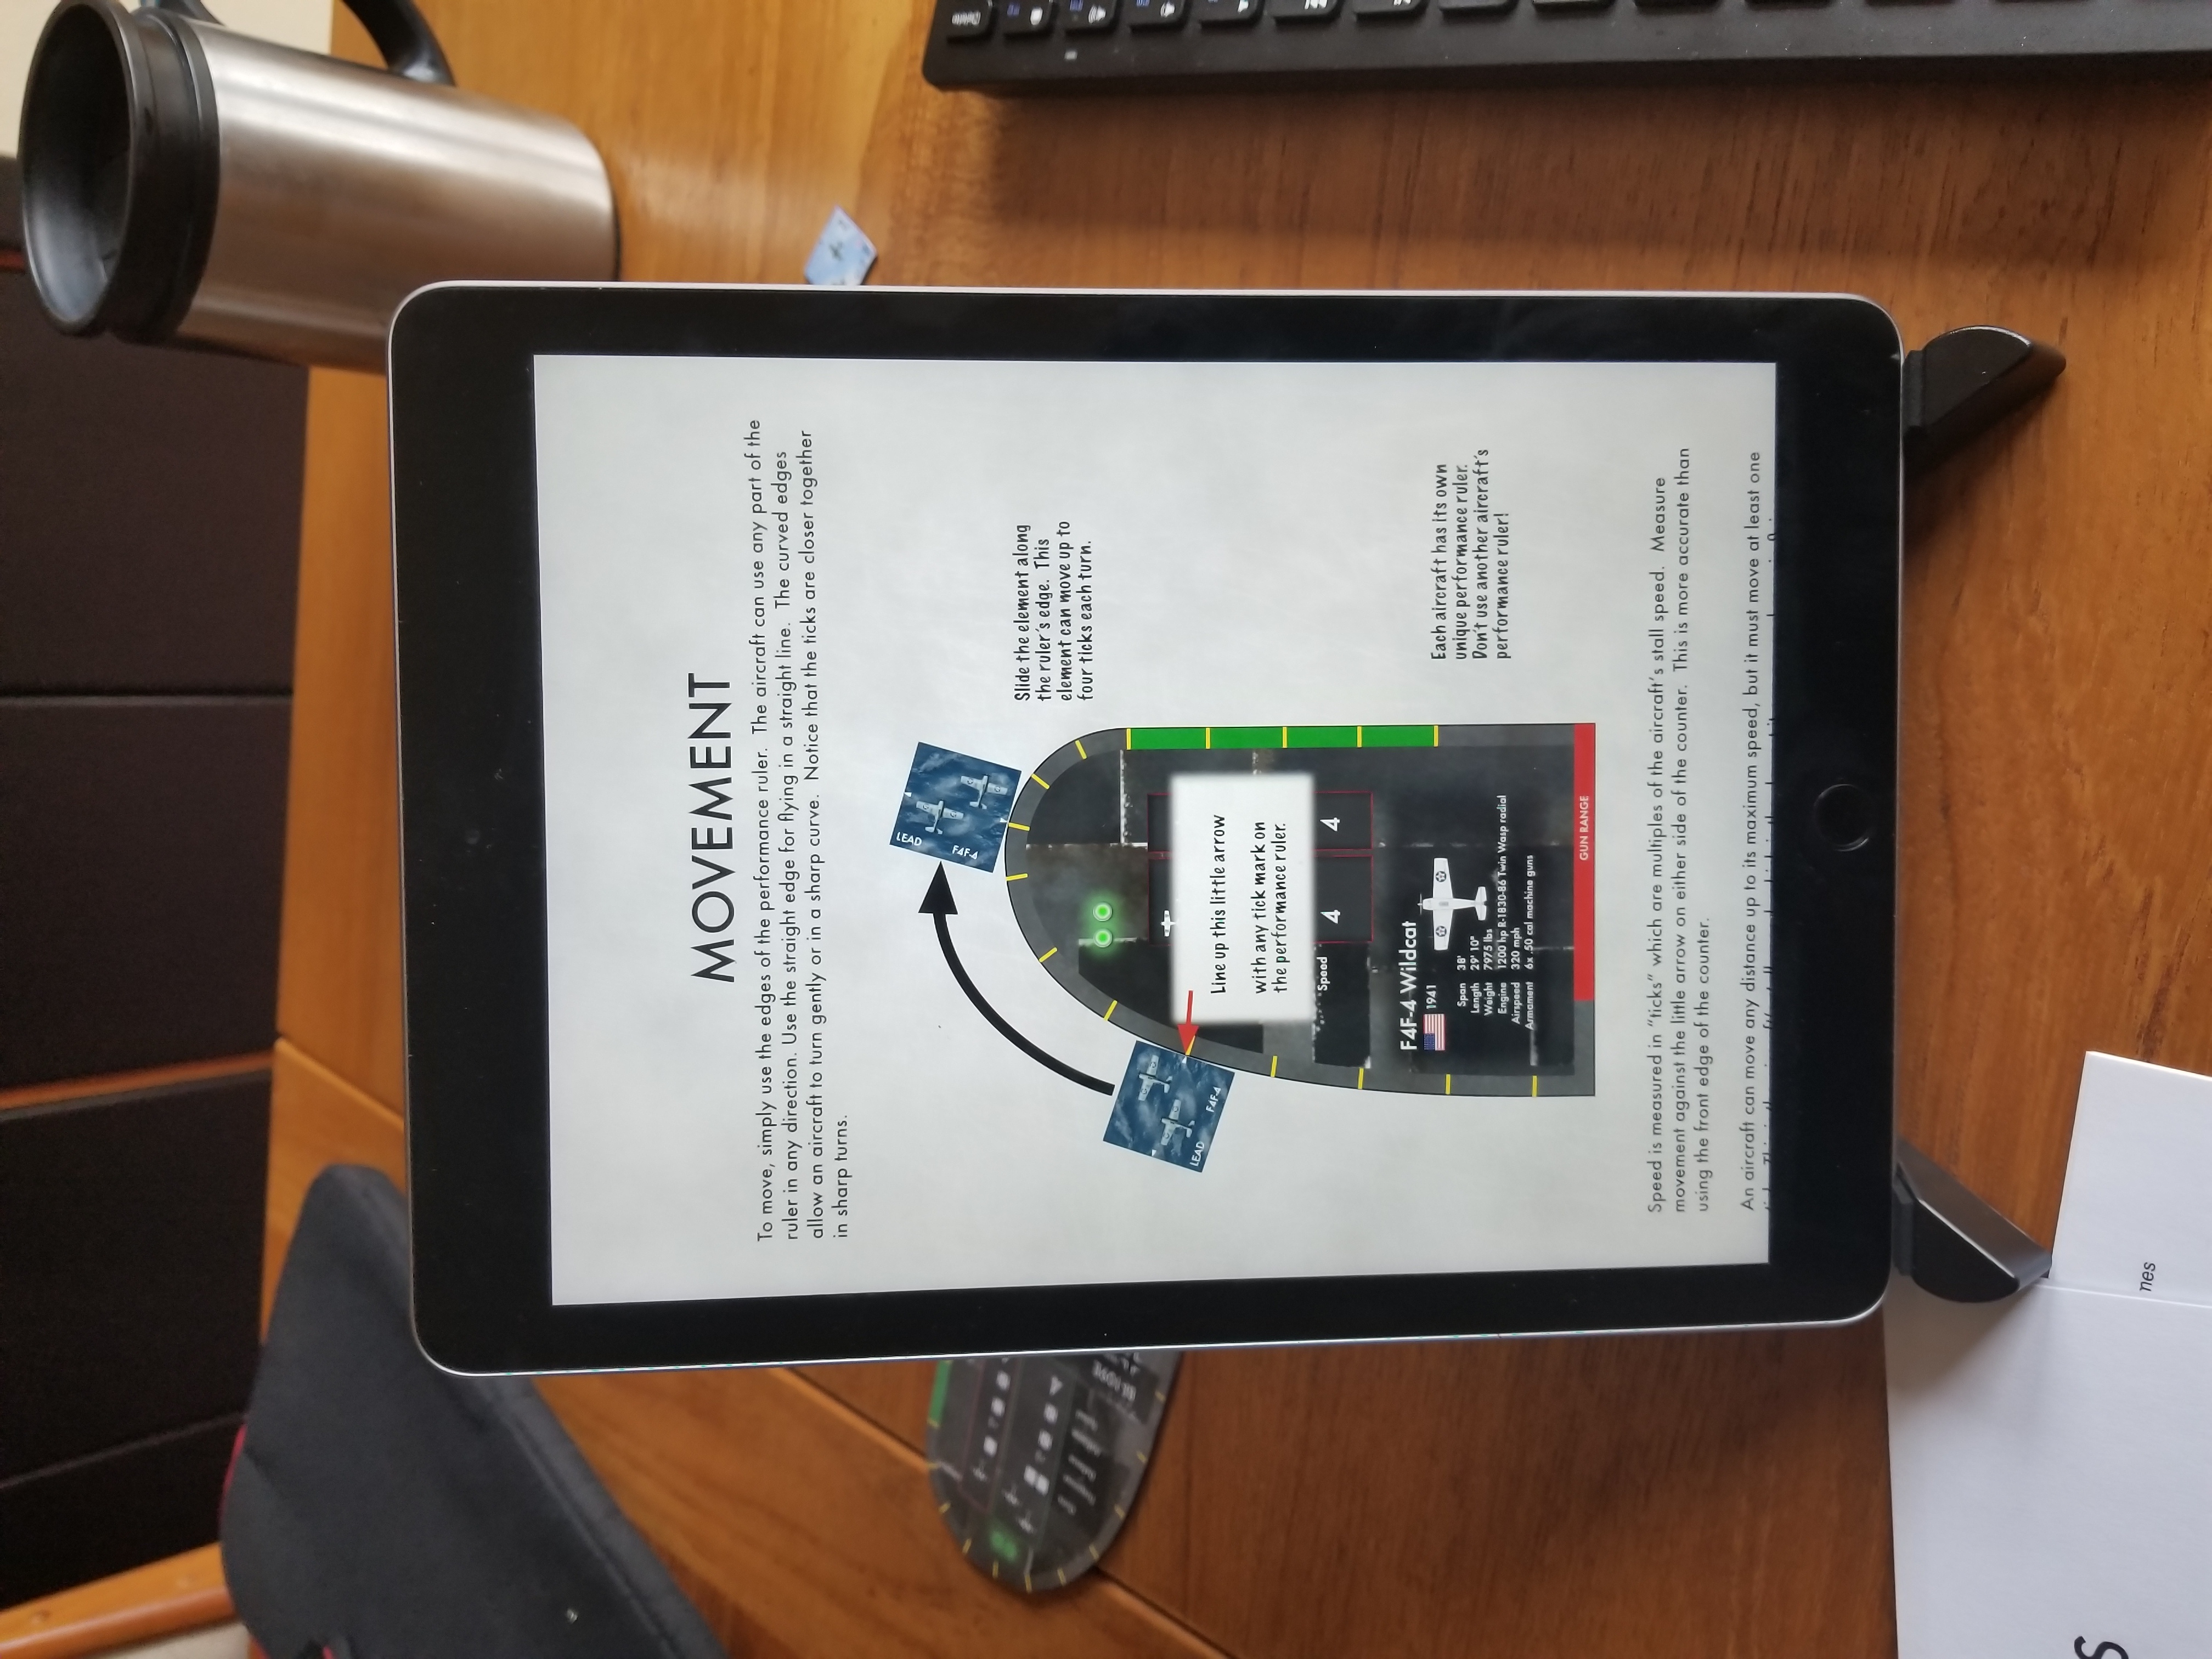
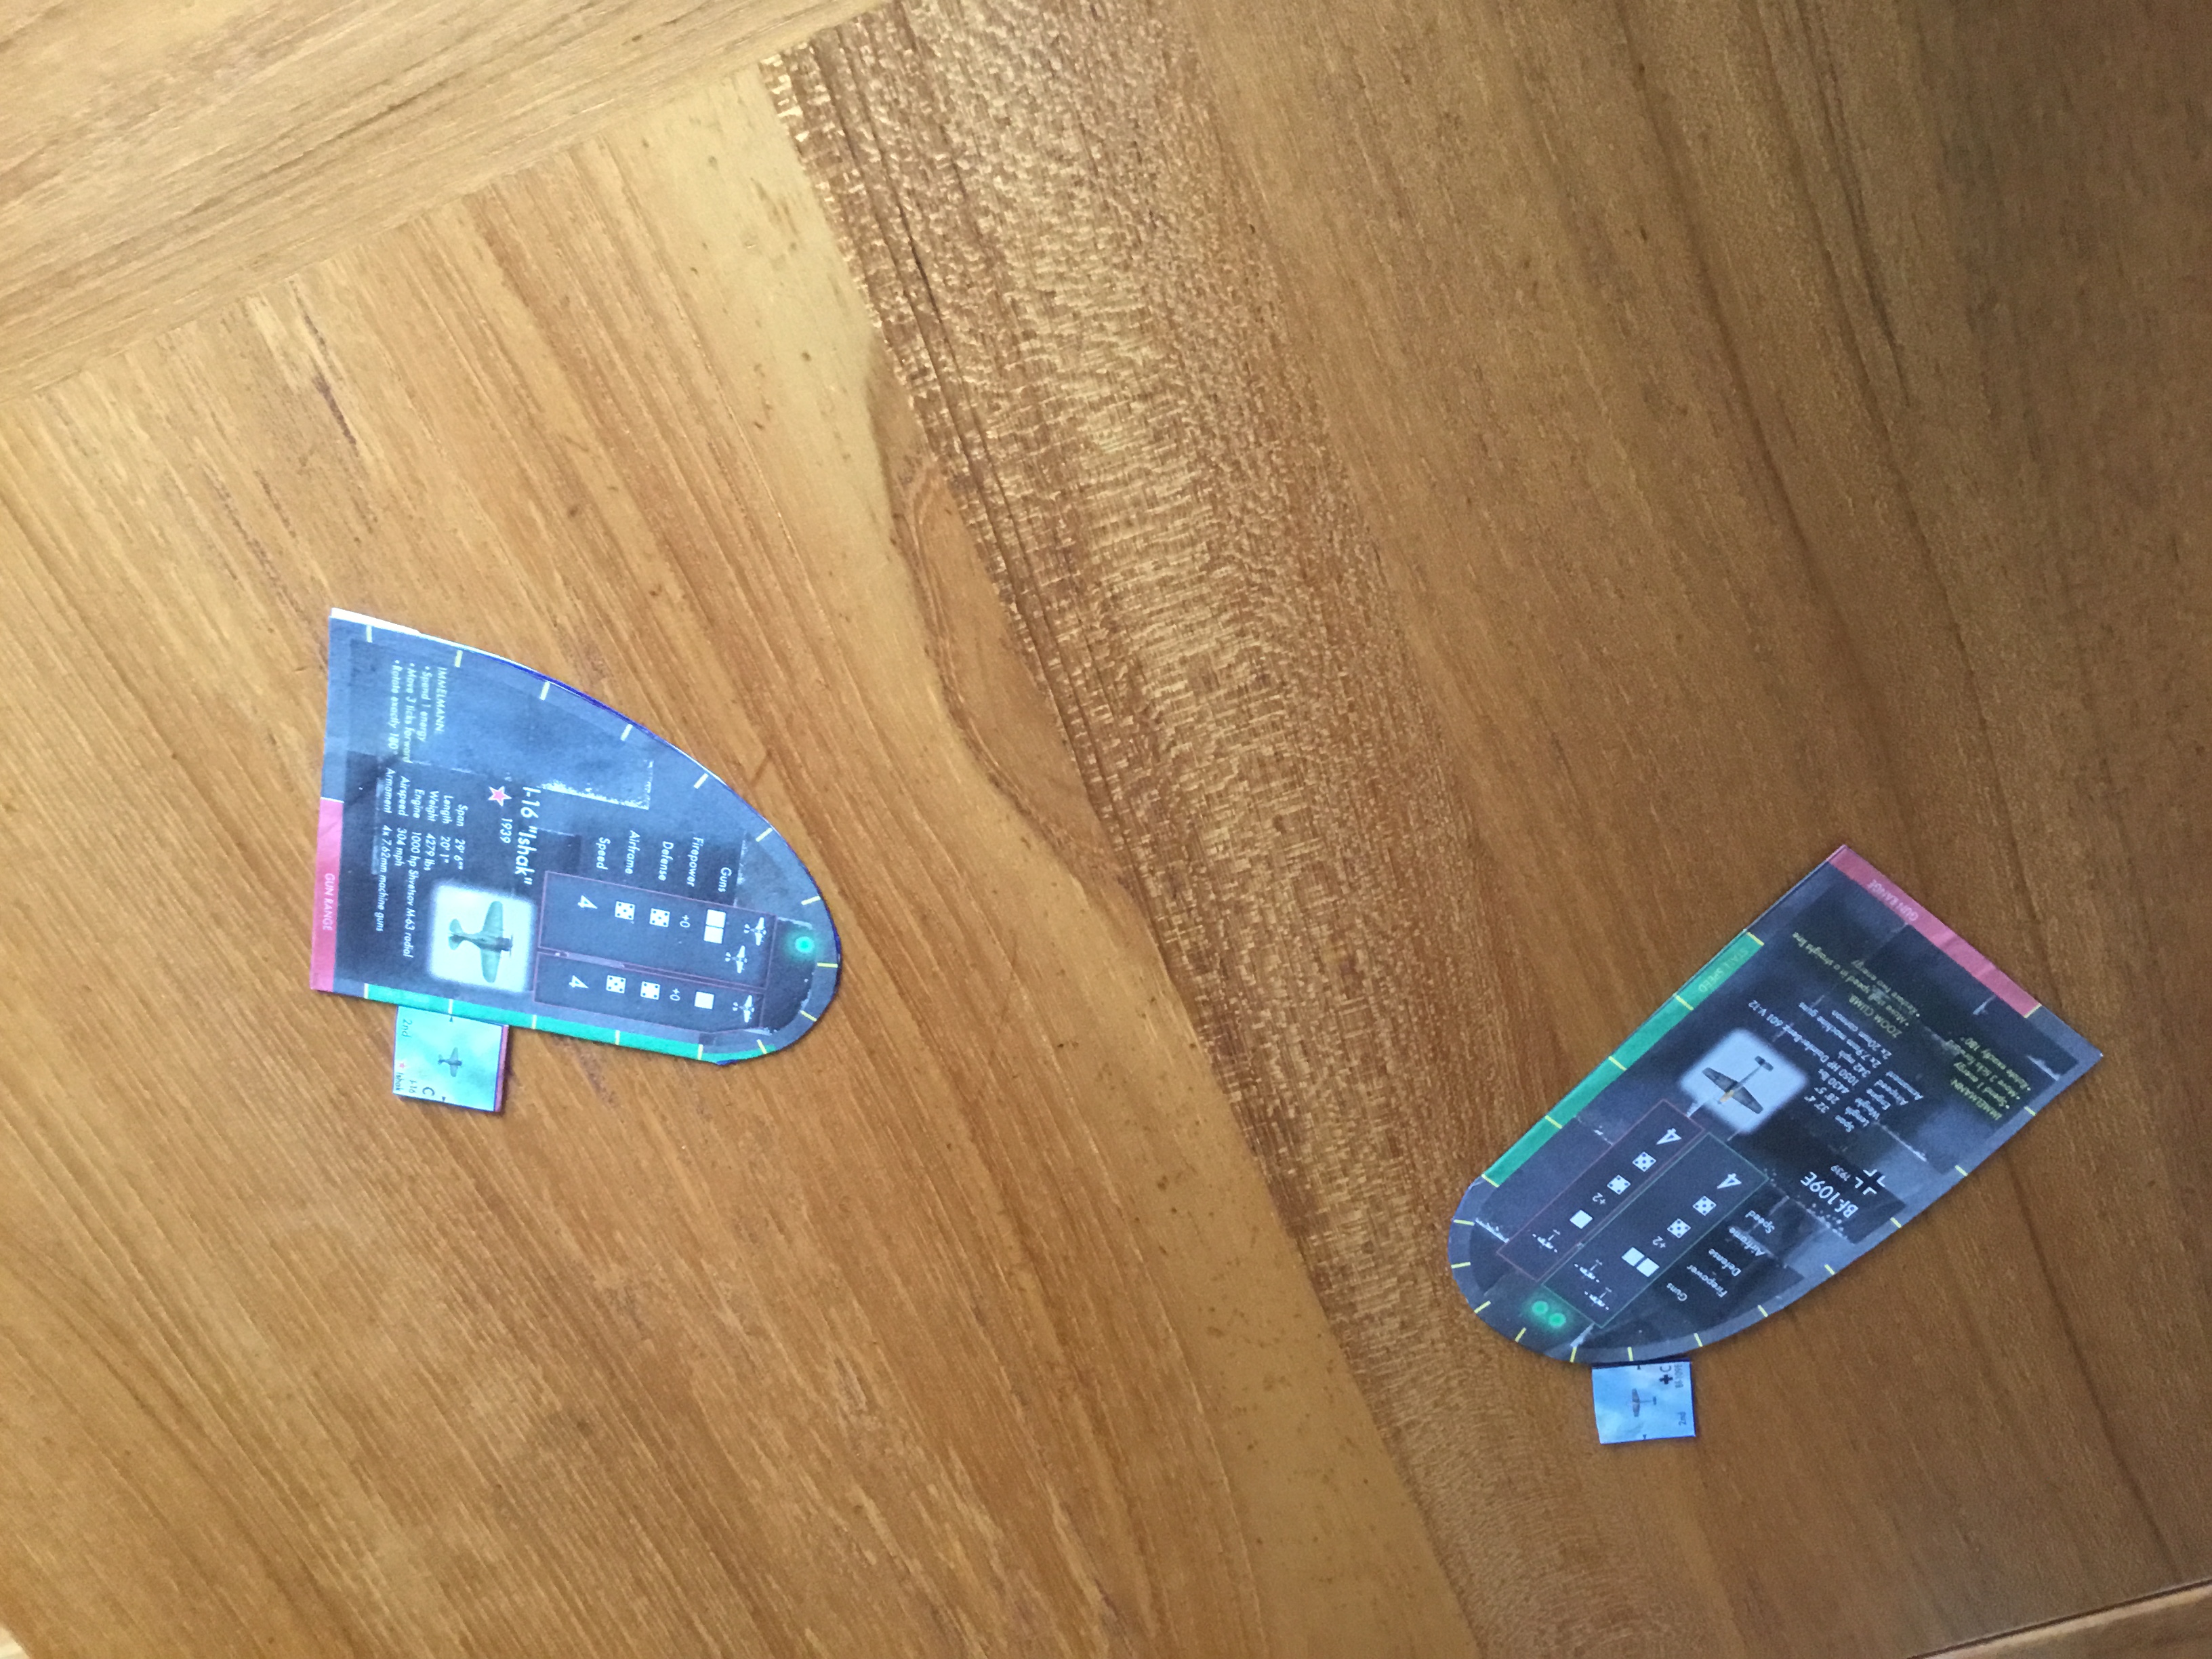
Undertook a mini project when TAD. It was TAC – Table Air Combat.
This is a simple, fun, inexpensive WWII aerial combat game with a wide variety of aircraft types. It can be found over at Wargamevault.
You get a PDF copy of the rules with each aircraft type. The PDF is very well done. Other help is available for free download.
The aircraft maneuvering card includes all the information you need to fly the aircraft, so after a few plays, and familiar with the general rules, you can seamlessly transition to any aircraft you like.
The counters show a single aircraft on one side, and two aircraft on the other I’m thinking about mounting 1/700 aircraft on a counter for a 3-D effect.
Speaking of 3-D, the system incorporates “energy” as a means of simulating vertical maneuver. The concept is simple, an aircraft can gain energy by climbing (reducing linear movement), which allows it to gain speed in a dive.
The footprint is very small, making it a great travel game.
For what it is…..it’s great!
Rules are well illustrated, easy to understand and have great graphic qualities.BF 109-E Turning Into A Polikarpov I-16. Note Data On Manuever Care.
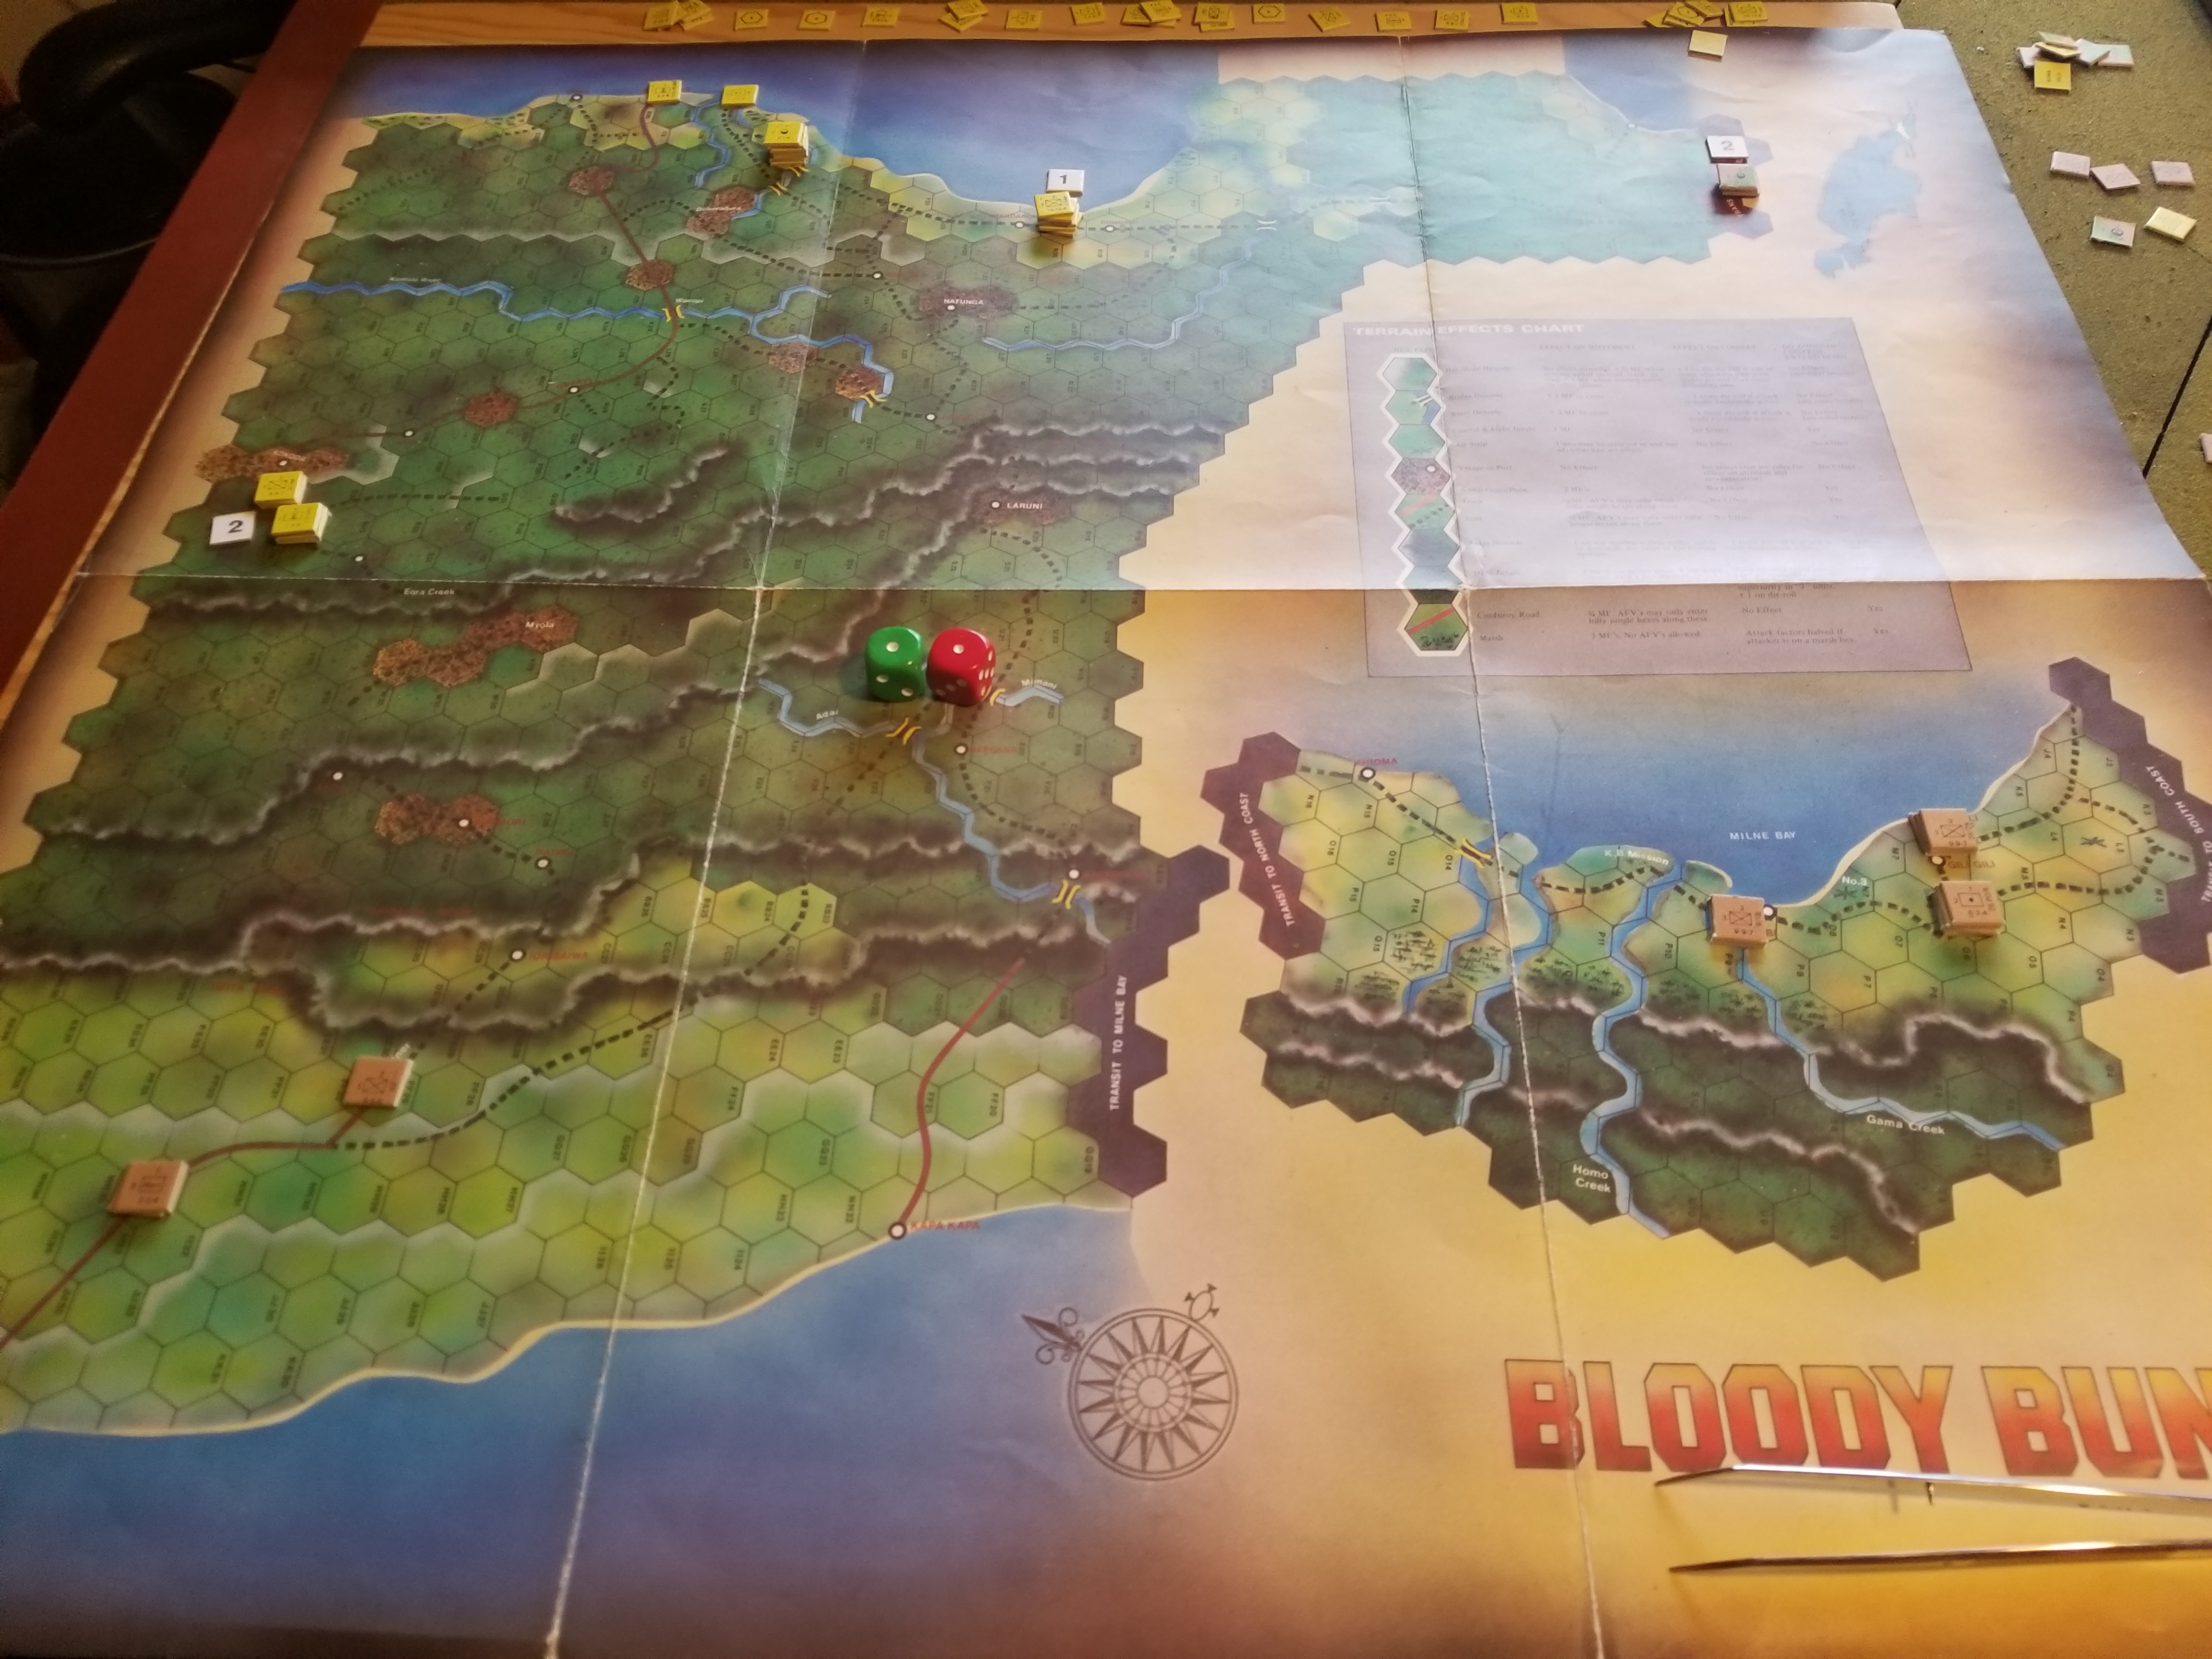
Was able to get through about 12 turns of Bloody Buna before I left for latest elder-care iteration.
It’s easy to understand why the response to this game was muted. Supply is everything, and there isn’t enough of it. Unlike many games where new supply counters are generated every turn, or MSRs linking supply sources to units are lengthy and developed, this game has short MSRs (2-4 hexes), and a very limited number of supply counters.
The result is the need to accept attrition die rolls as the cost of conducting business. While Allied units can huddle in defensive positions near supply sources, they will have to conduct operations far from these sources in order to win. The Japanese face a dwindling level of supply as the campaign progresses, and will have to hold on to their gains in order to eke out at least a marginal victory.
This isn’t the Western Desert. No booming and zooming.
So far, the Japanese were able to advance to Kokoda, eliminating Australian units that were tasked with a delay/defend mission. However, the Japanese are now on half-supply.
Another Japanese force moved east of Buna to cut off Allied forces that had moved west from Milne Bay. Again, both sides will soon be out of supply and subject to random attrition and accompanying loss of combat power.
I’m charmed by this game, if only because of the limitations created by factors taken for granted in so many other games.
Here’s a couple of bad pics depicting the Japanese attack on Kokoda, and the situation when I left. Number chits indicate supply turns remaining.
Back to playing the Campaign game for Bloody Buna. Not for the time challenged, as it extends for 43 turns. The game develops slowly, just like that Sloth/Pictionary commercial that is thankfully off the air now.
The potential for unit attrition dictates modest rates of advance and husbanding of supplies. Units are battalions or companies, so it is ant-tastic. But, these can be powerful ants, with the ability to generate high-odds attacks even in unfavorable terrain.
The Japanese have some interesting victory conditions that allow them to not have to take Port Moresby or Milne Bay, but simply threaten it. This puts the onus on the Allies to contain the Japanese advance, and then roll it back literally to their start point in the vicinity of Buna.
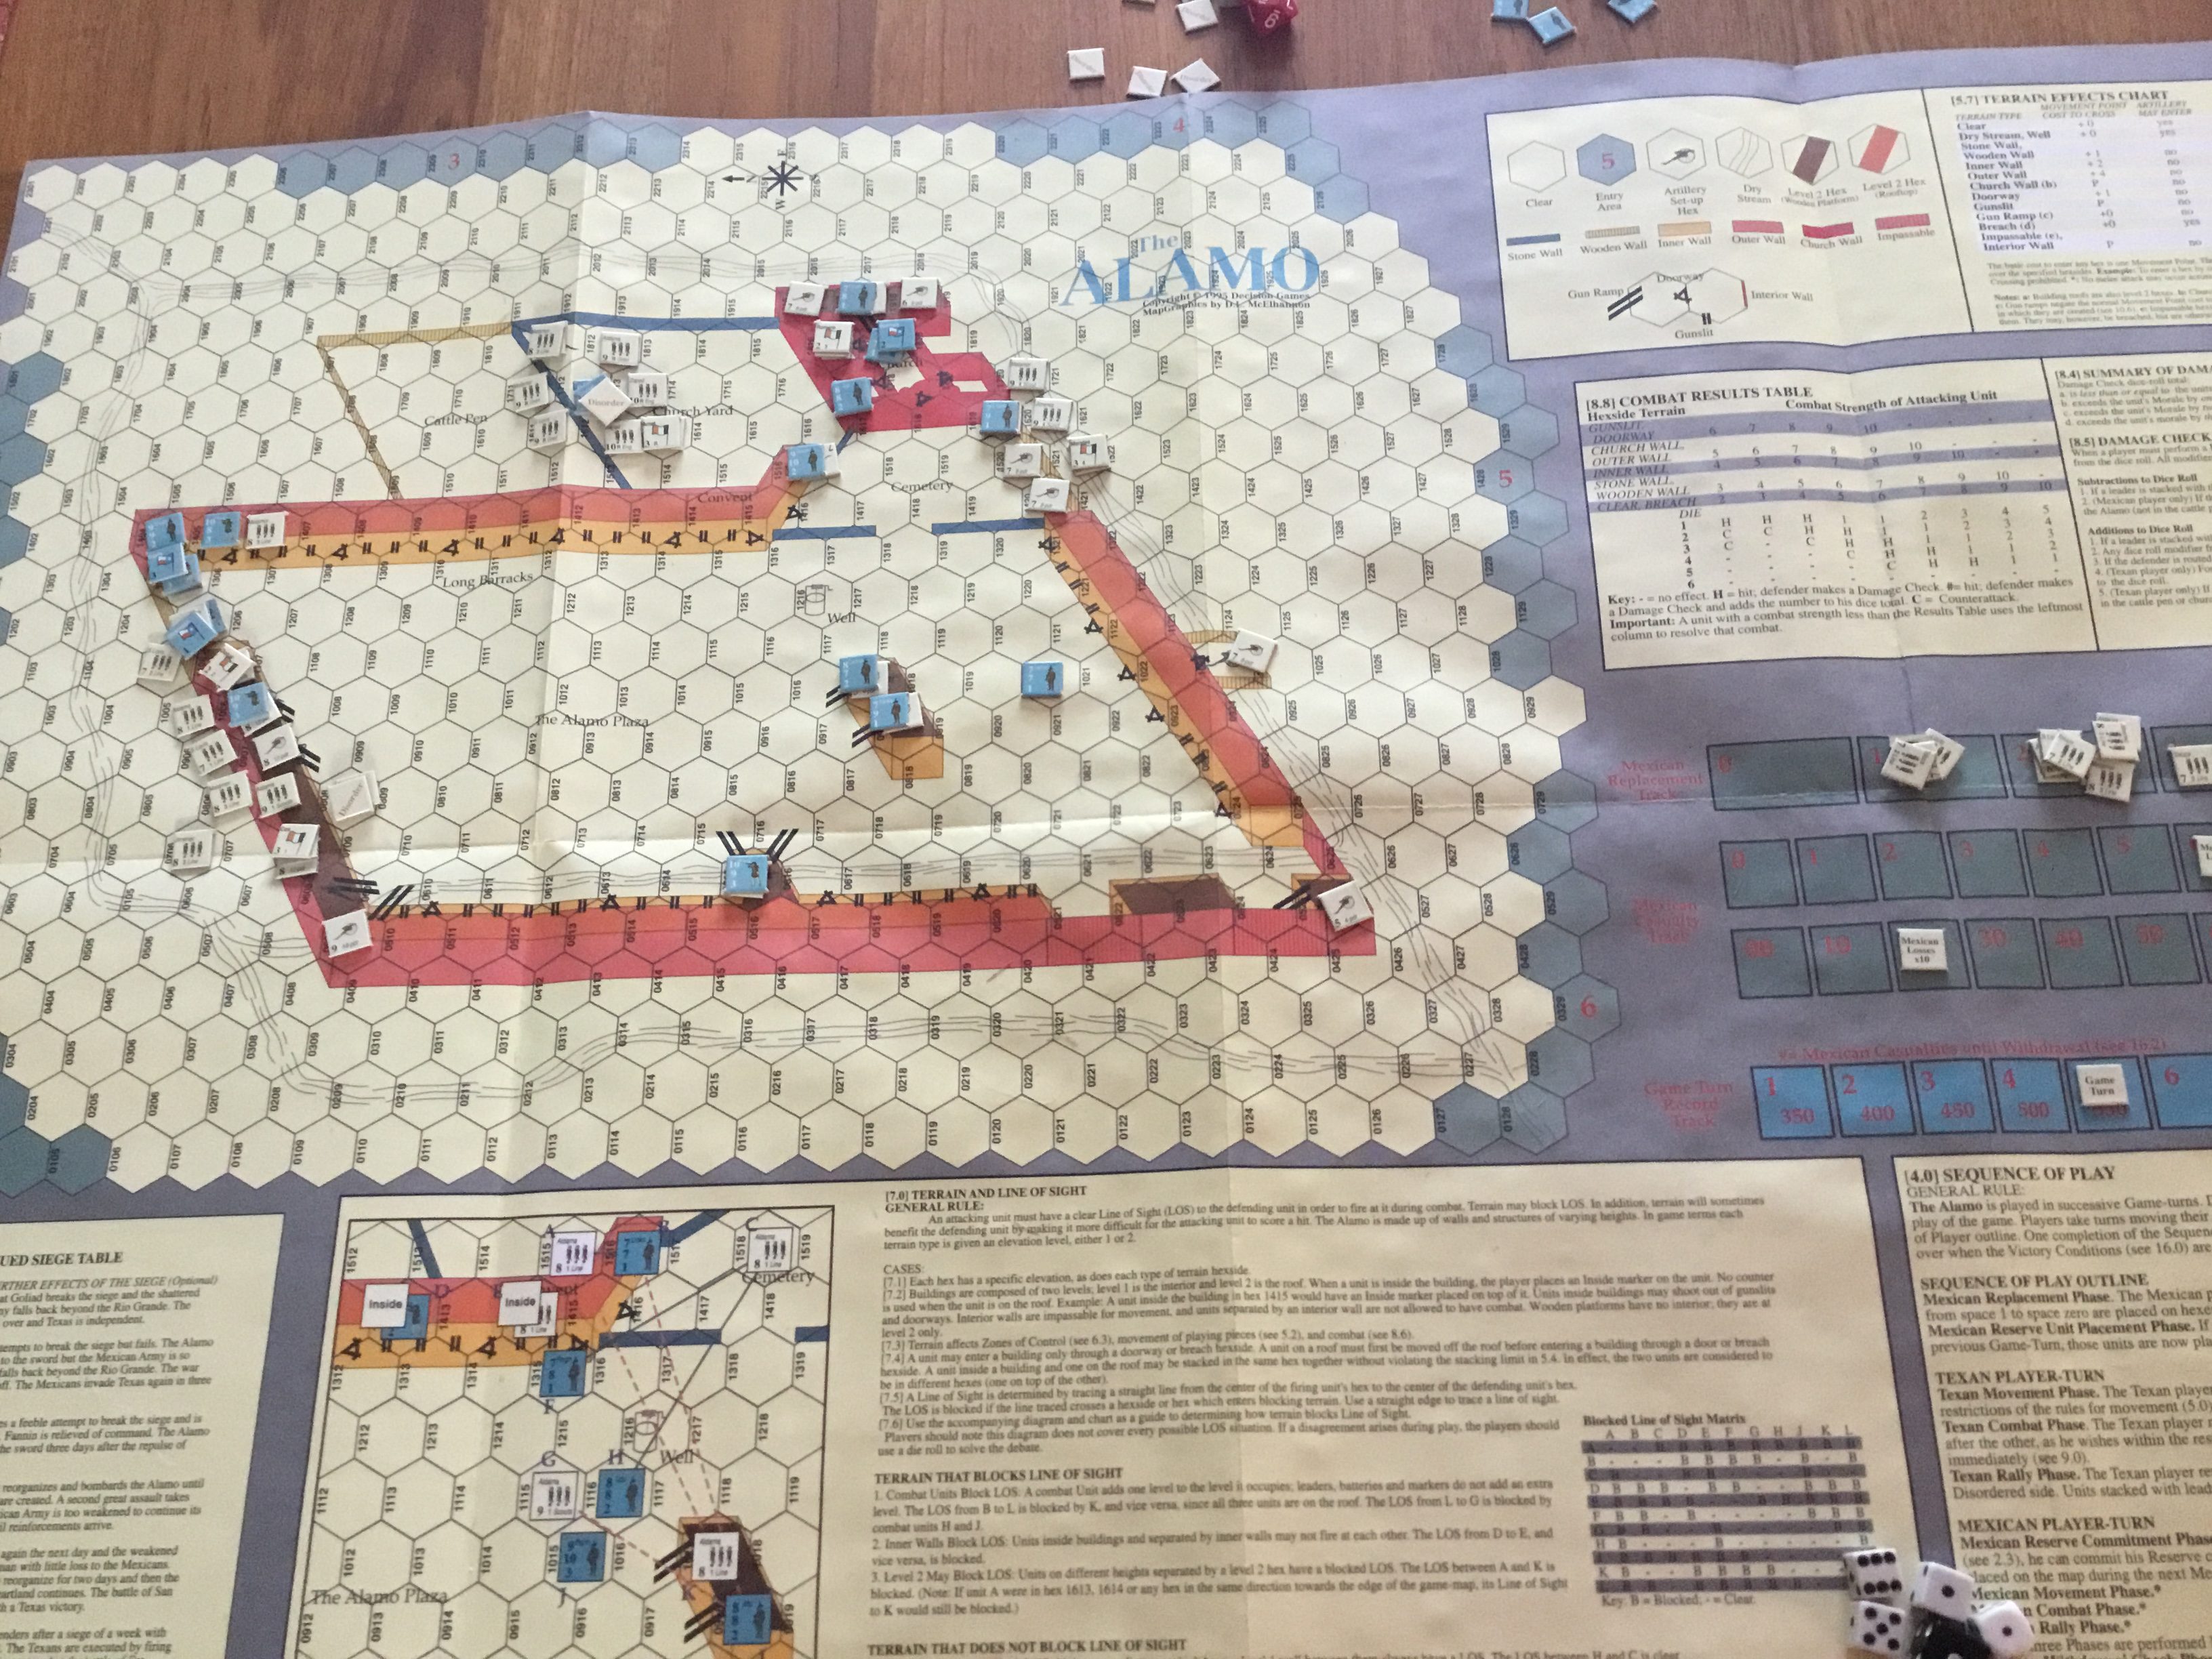
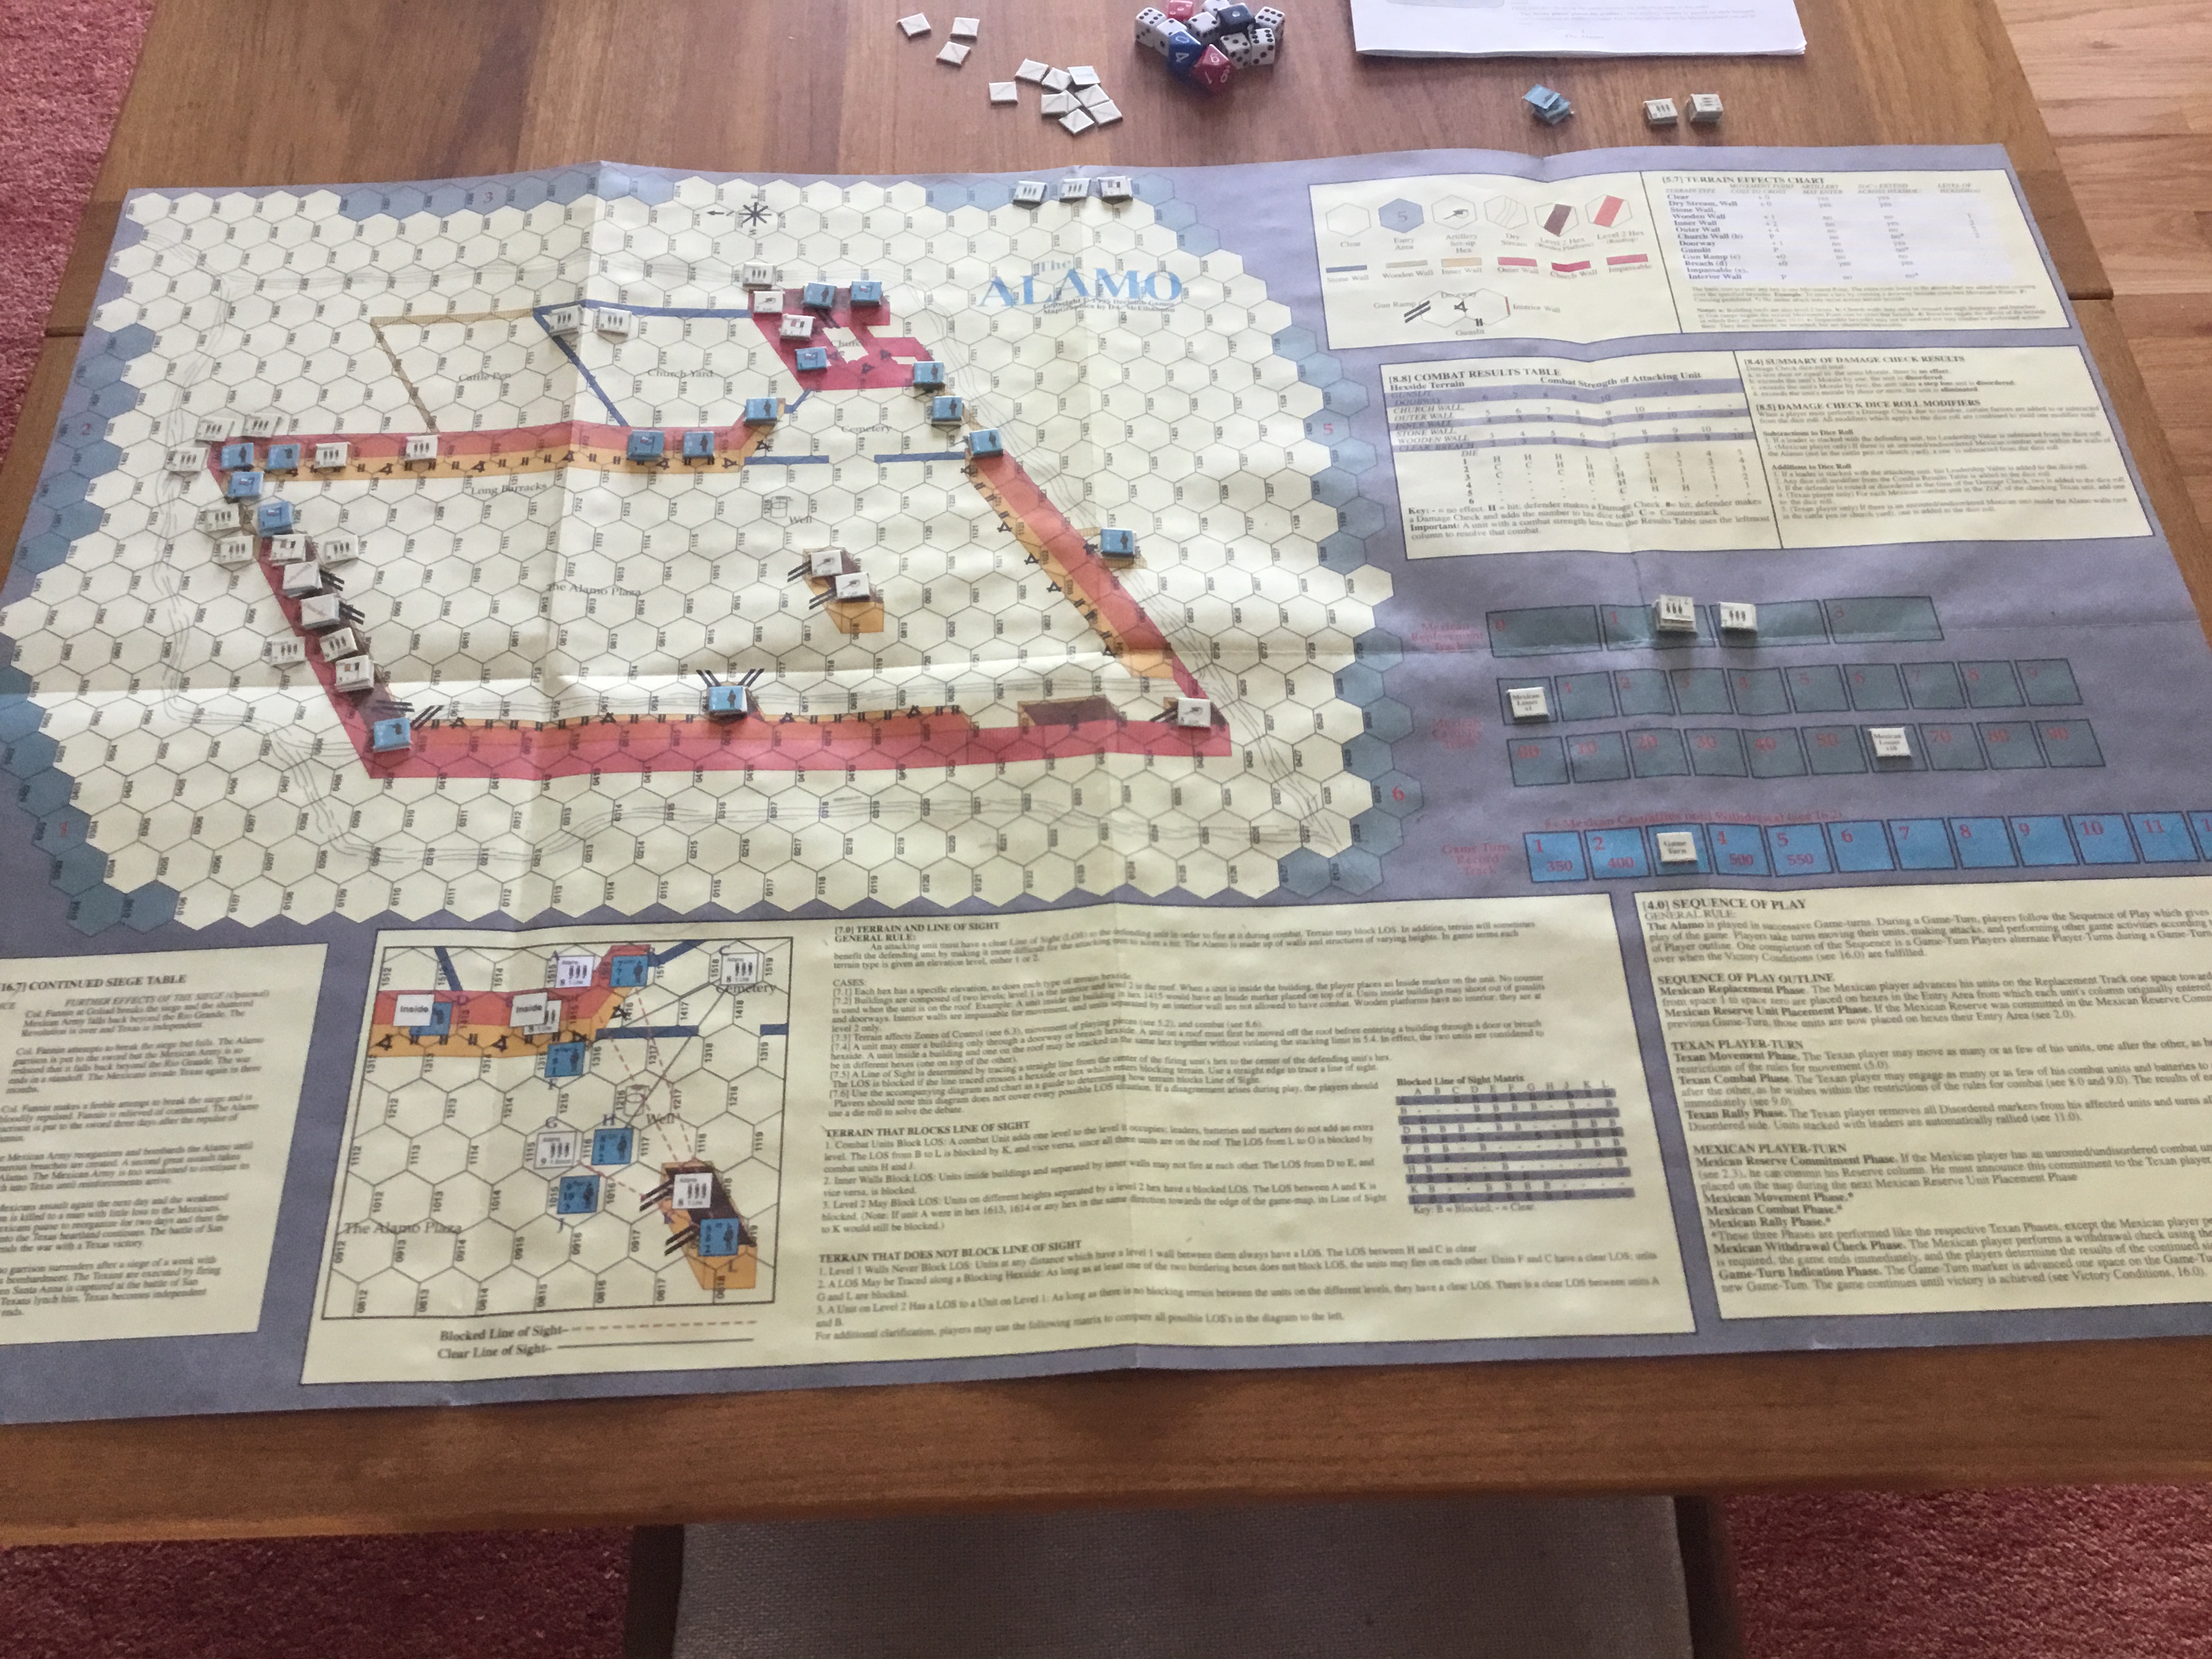
Finished up the fourth turn of The Alamo: Victory in Death.
Figured out the casualty rules that had baffled me. Silly me, just read the rules and interpret them literally. Things will work out.
Crockett’s attempt to push out beyond the walls was a foolish. Now surrounded and locked in , he’ll eventually be killed. The west wall has been overrun and now all that is left is the time consuming chore of isolating each Texan unit and destroying it. Reorganized Mexican units are flooding back onto the battlefield, and there seems little chance that the Texans can last another ten turns.
The initial setup is everything. The Texans have to react quickly to stop any massed Mexican attacks, and the Mexicans, in turn, must be creative to exploit any Texan attempt to reinforce a threatened area by judicious of their reserve units.
It’s a tense contest for the first several turns. Worth the time to play.
Crockett Surrounded Outside The Church. Church Isolated. North Wall Defenders Surrounded. Plenty of Mexican Replacement Units Ready To Come On Map. Pick It Up.
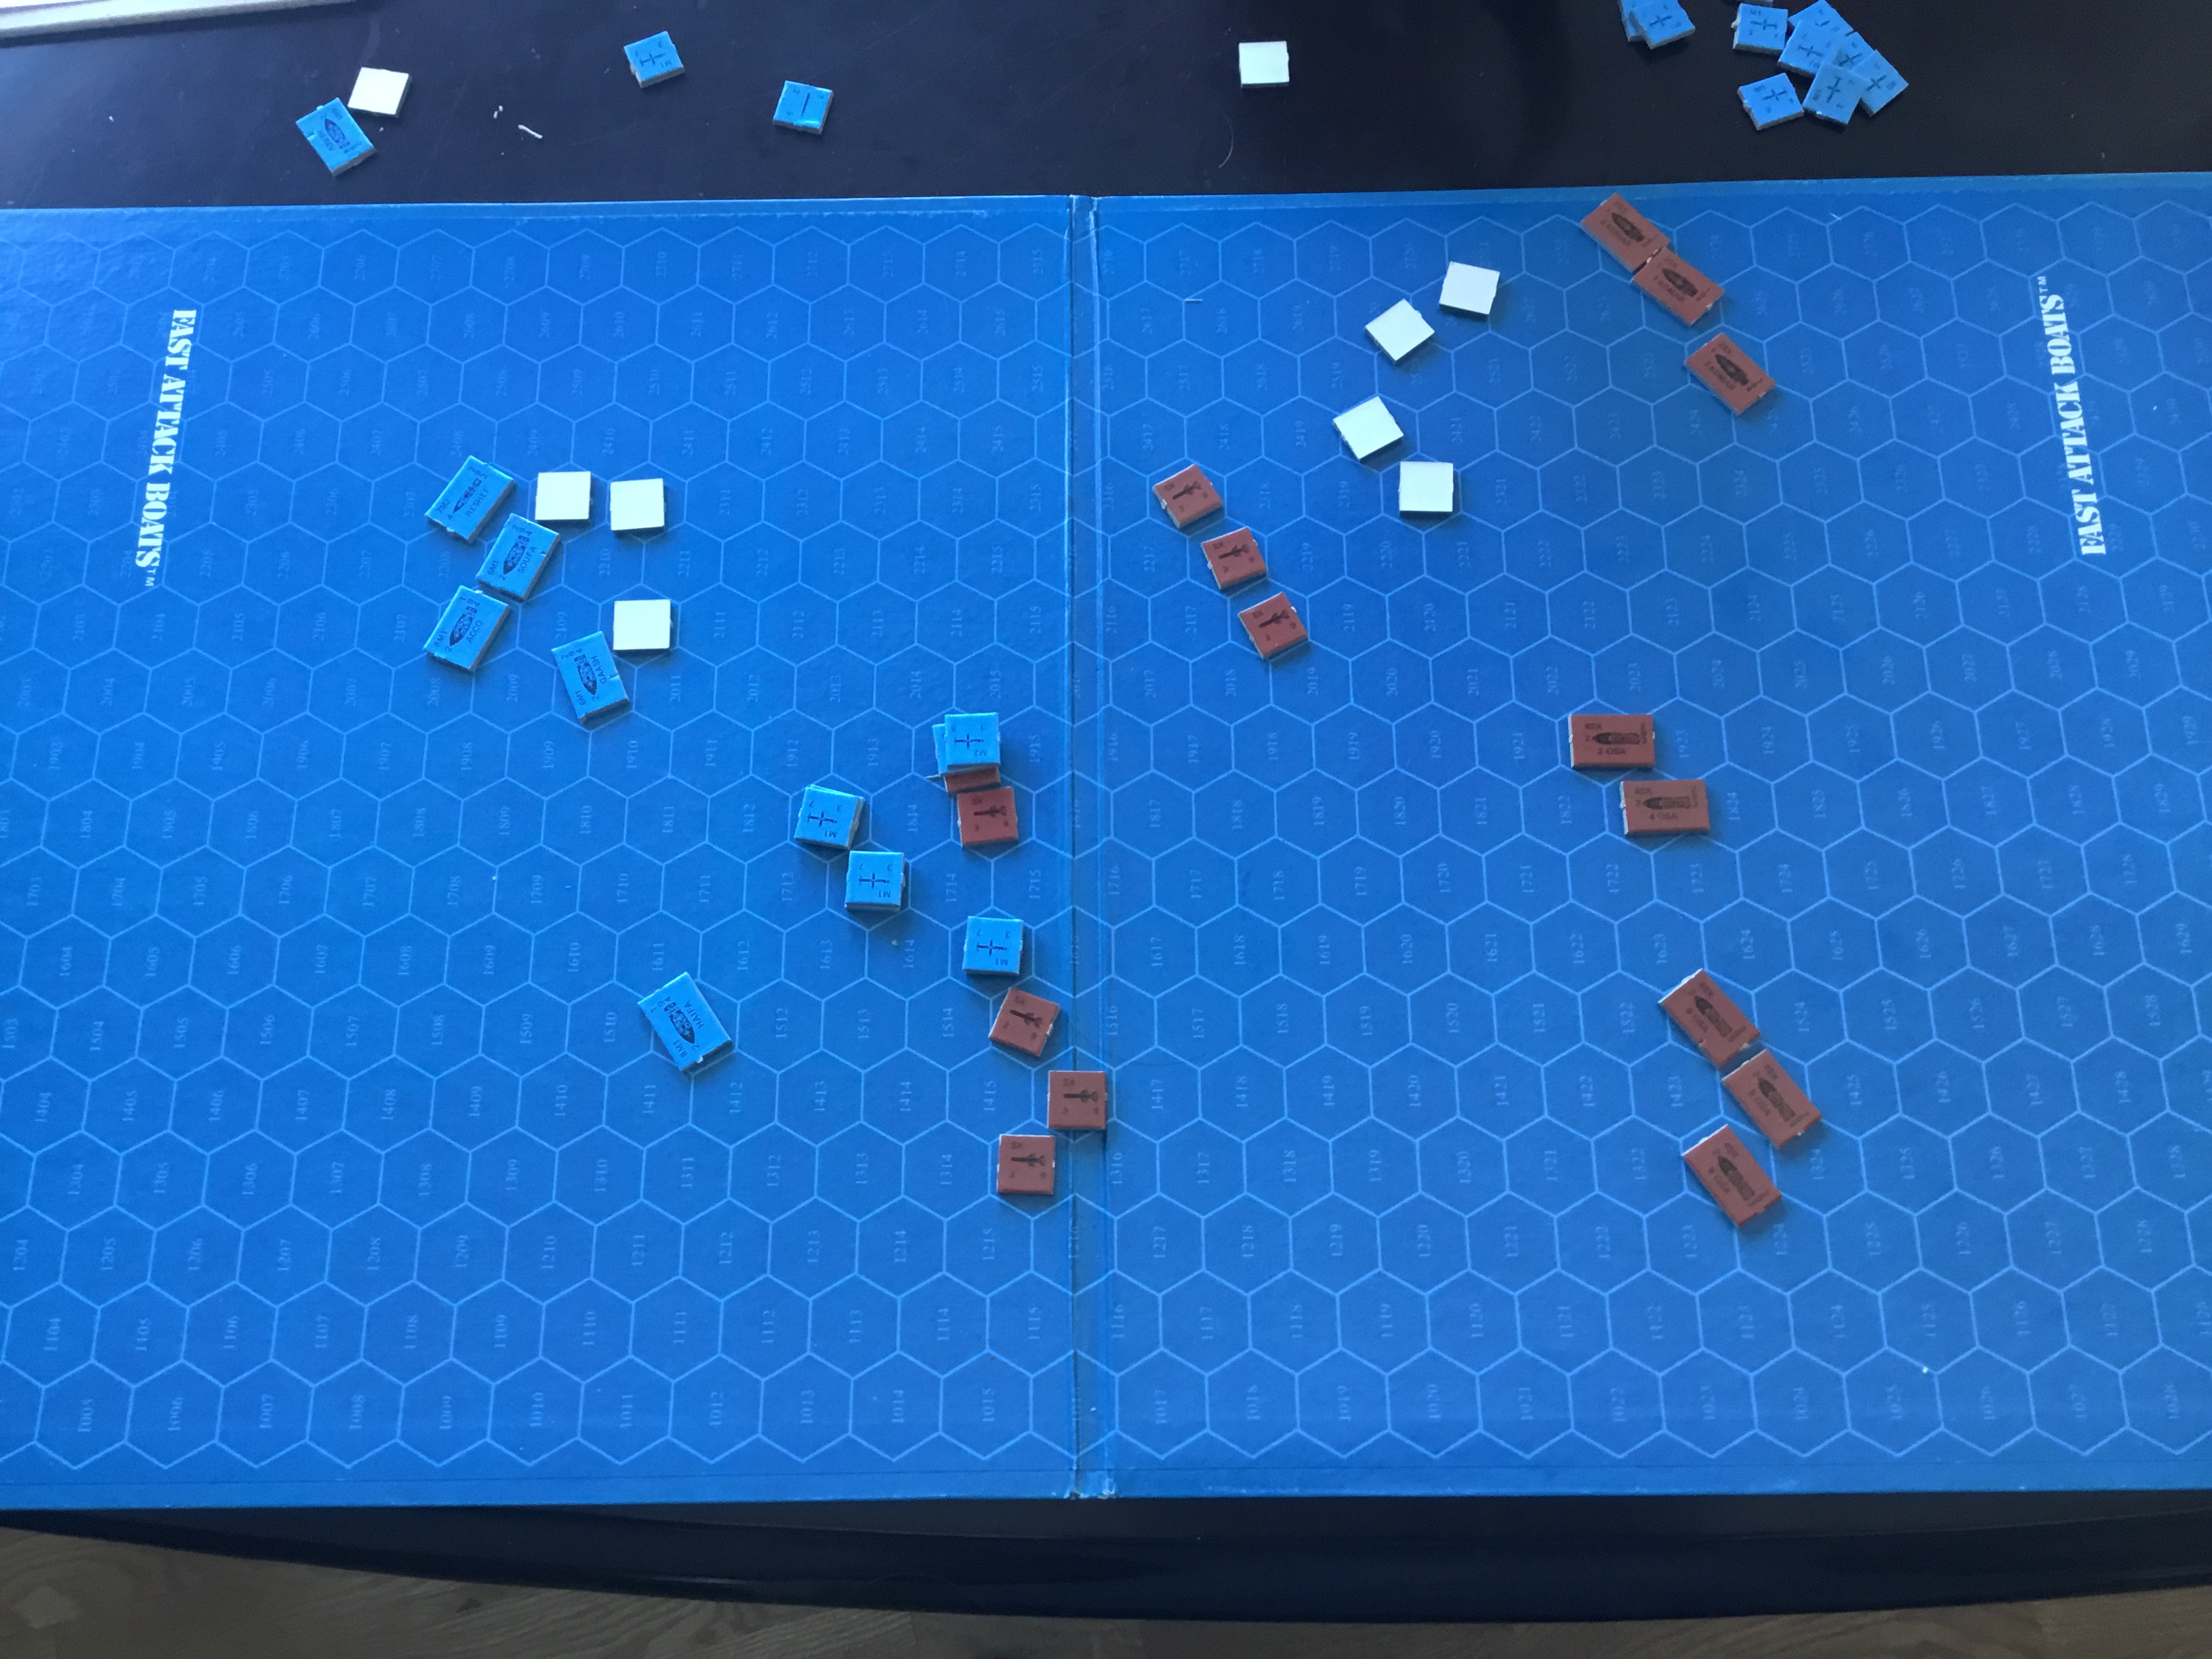
During Round One the Israelis aggressively engaged the Egyptian ships, while the Egyptians fired just one missile and turned away . Both tactics seem to work. The Egyptians enjoyed some good luck and sank two of the Israeli boats . The Israelis also sank two vessels and had one boat remaining on the map. By the rules this is a victory for the Israelis. But, give in an asterisk.
Round Two also went to the Israelis . Both sides fired at maximum range and moved off the board. After two rounds the Egyptians have lost three boats and the Israelis have lost two.
The Egyptians changed tactics in Round Three, aggressively pursuing the Israeli boats. This tactic backfired, with three vessels sunk, with only one Israeli boat lost. This loss required rolling cosmic boxcars for a missile on the third leg of its flight. However, the round went to the Egyptians for remaining on the board.
Incoming Missiles. Turned counters are on their third – last – leg of flight.
Both sides husbanded their resources during Round Four. The Israelis sent out only one boat against three opponents. Both sides were cautious. The Egyptians launched only two rounds of missiles before turning away, with the Israelis launching only one round of missiles. Ironically, the sole Egyptian boat remaining on the board was sunk by the last Israeli missile. By RAW, it’s a draw.
Round Five was a a decisive defeat for the Egyptians . They lost four boats to only one Israeli boat. The fifth Egyptian boat suffered significant damage. Once again, the Israeli tactic of staying far away enough to allow Egyptian missiles to hit at maximum range paid off. The Israeli missiles retain their destructive punch even on the third and last leg of flight.
Saturating Targets
Overall, the Israelis were the winners, but the Egyptians still have a operational fleet ready for more.
Snow and sickness can lead to some desperate measures. After FAB I opened a shrink wrapped time capsule…..The Alamo: Victory In Death.
It’s not like my recent games. Yes, there is a lot of wristage, but with counters and a map that contains all of the charts. So 1980’s, and so appreciated.
This game is well-suited for solitaire. I used a die to determine where the Mexicans were to attack.
But, it can be tedious, with many die rolls for shooting and melee combat. However, the tension factor is excellent, especially when the defenders have to fall back from the walls to defend the interior of the mission.
I still am badly confused by the rules concerning Mexican losses that result in an immediate Texas victory during the first five turns.