Real pleasant couple of days in Portland. Hotter than Hell, but we stayed refreshed and hydrated.
Maybe that’s one reason not a lot of gaming took place. Also a perceived need to view a few action films outweighed the desire to push cardboard.
We played “Operation Exporter” from War In The Desert. This is an operational simulation of the Allied invasion of Syria. Not exactly Tim’s cup of tea – low counter density, only a small portion of the map used and….gasp…..no real tanks (only a couple of Vichy light tank units with attack strengths of 1). The Allies will win, it’s just a matter of time. However, the victory point schedule makes time of the essence
Nonetheless, Tim did a great job as Allied Commander. He used his one motorized asset to harass the Vichy flanks and optimized the use of his limited air assets and naval gunfire. He also quickly assembled the two divisions available to him, with their enhanced combat power and zones of control. The regiments and brigades that make up all the Vichy forces cannot be formed into divisions.
I played my part by having a (typical) cavalier approach to victory conditions. While Tim didn’t win on VIPS, he certainly won the game.
I didn’t fare as well when we switched sides.
This is a good little scenario. It’s viewed as excellent starter game as it has all of the Europa food groups, but without the counter density to make the experience overwhelming.
He’ll be out at The Pinecone Lodge around Labor Day for Storm Over Scandanavia’s hypothetical scenarios involving the invasion of Sweden.
After two gratuitous posts, here’s (hopefully) something of substance, and very late getting to the blog.
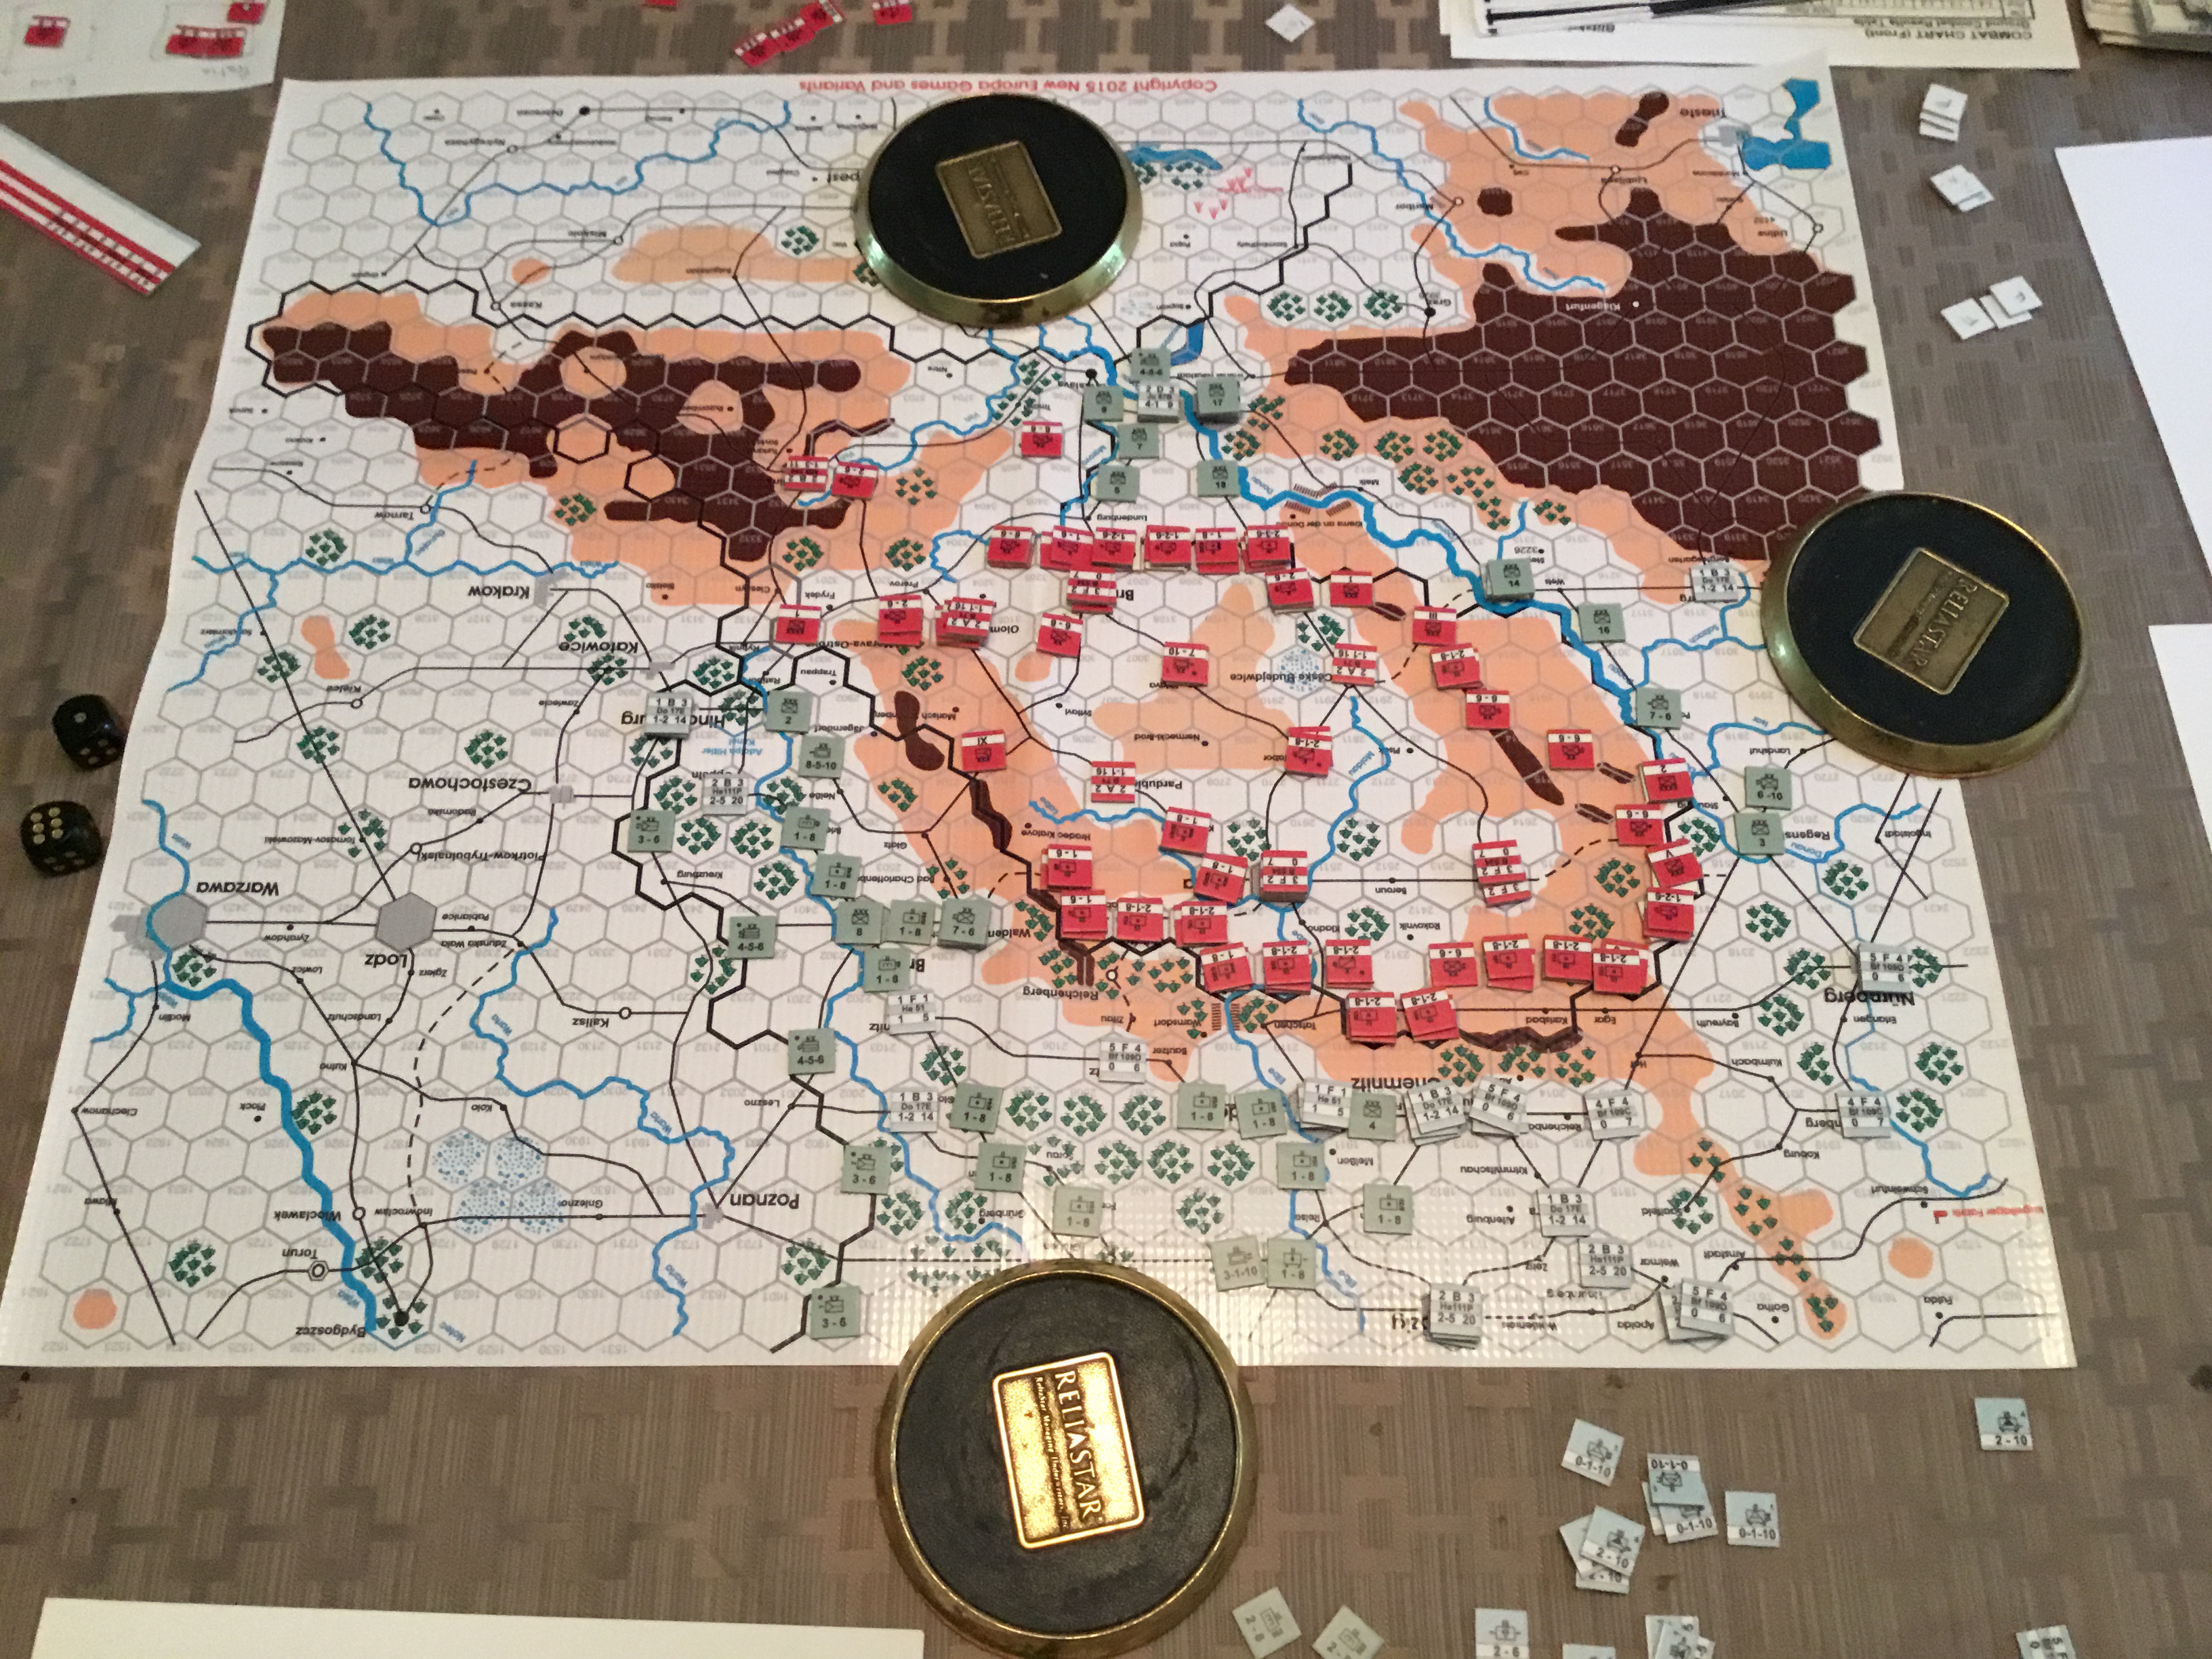
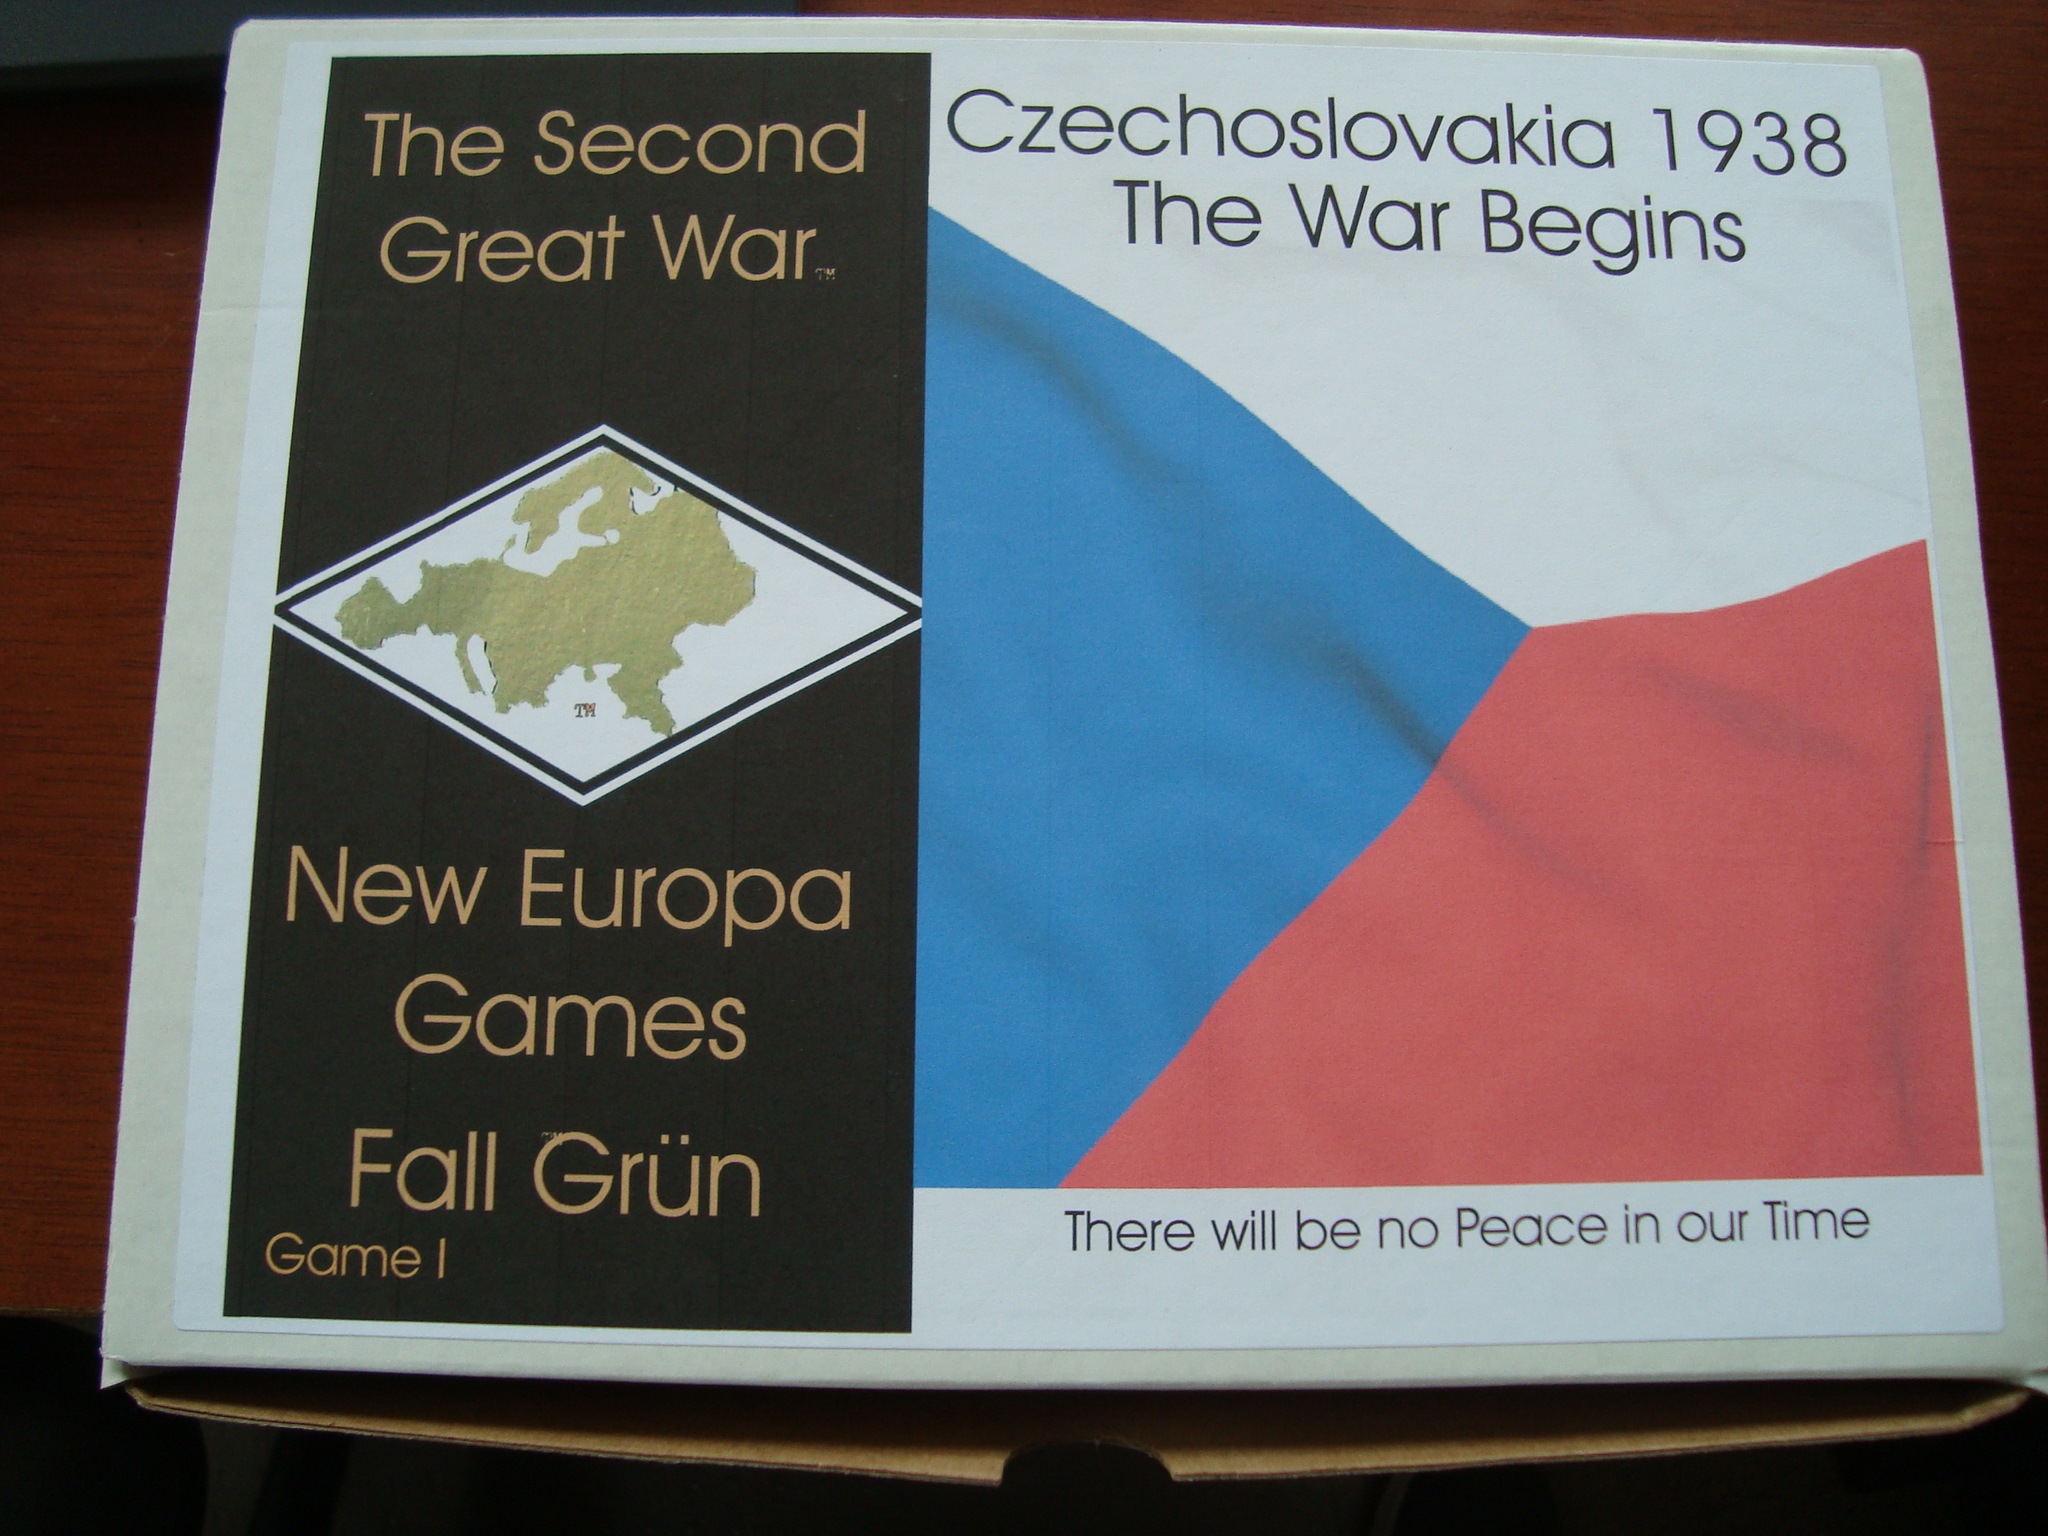
A couple of weeks ago, Tim and I played Fall Grun, a Europa game covering the proposed German invasion of Czechoslovakia in 1938. The hypothetical conflict was previously covered by both Command and Strategy and Tactics magazines. In each of our three “games”, Tim had the Czechs.
This iteration is published by New Europa Games, using John Astell’s Blitzkrieg Unleashed rules. Mr. Astell’s involvement with the Europa system goes back to, I think, the inception. The rules closely follow the Europa template, but involve some interesting changes to ZOCs and Overruns.
The New Europa website is apparently dormant, but has been an excellent source for variant counters. Also, a game anticipating a Hungarian-Roumanian war in wake of the Czech conflict is supposedly in the making. That would be fun.
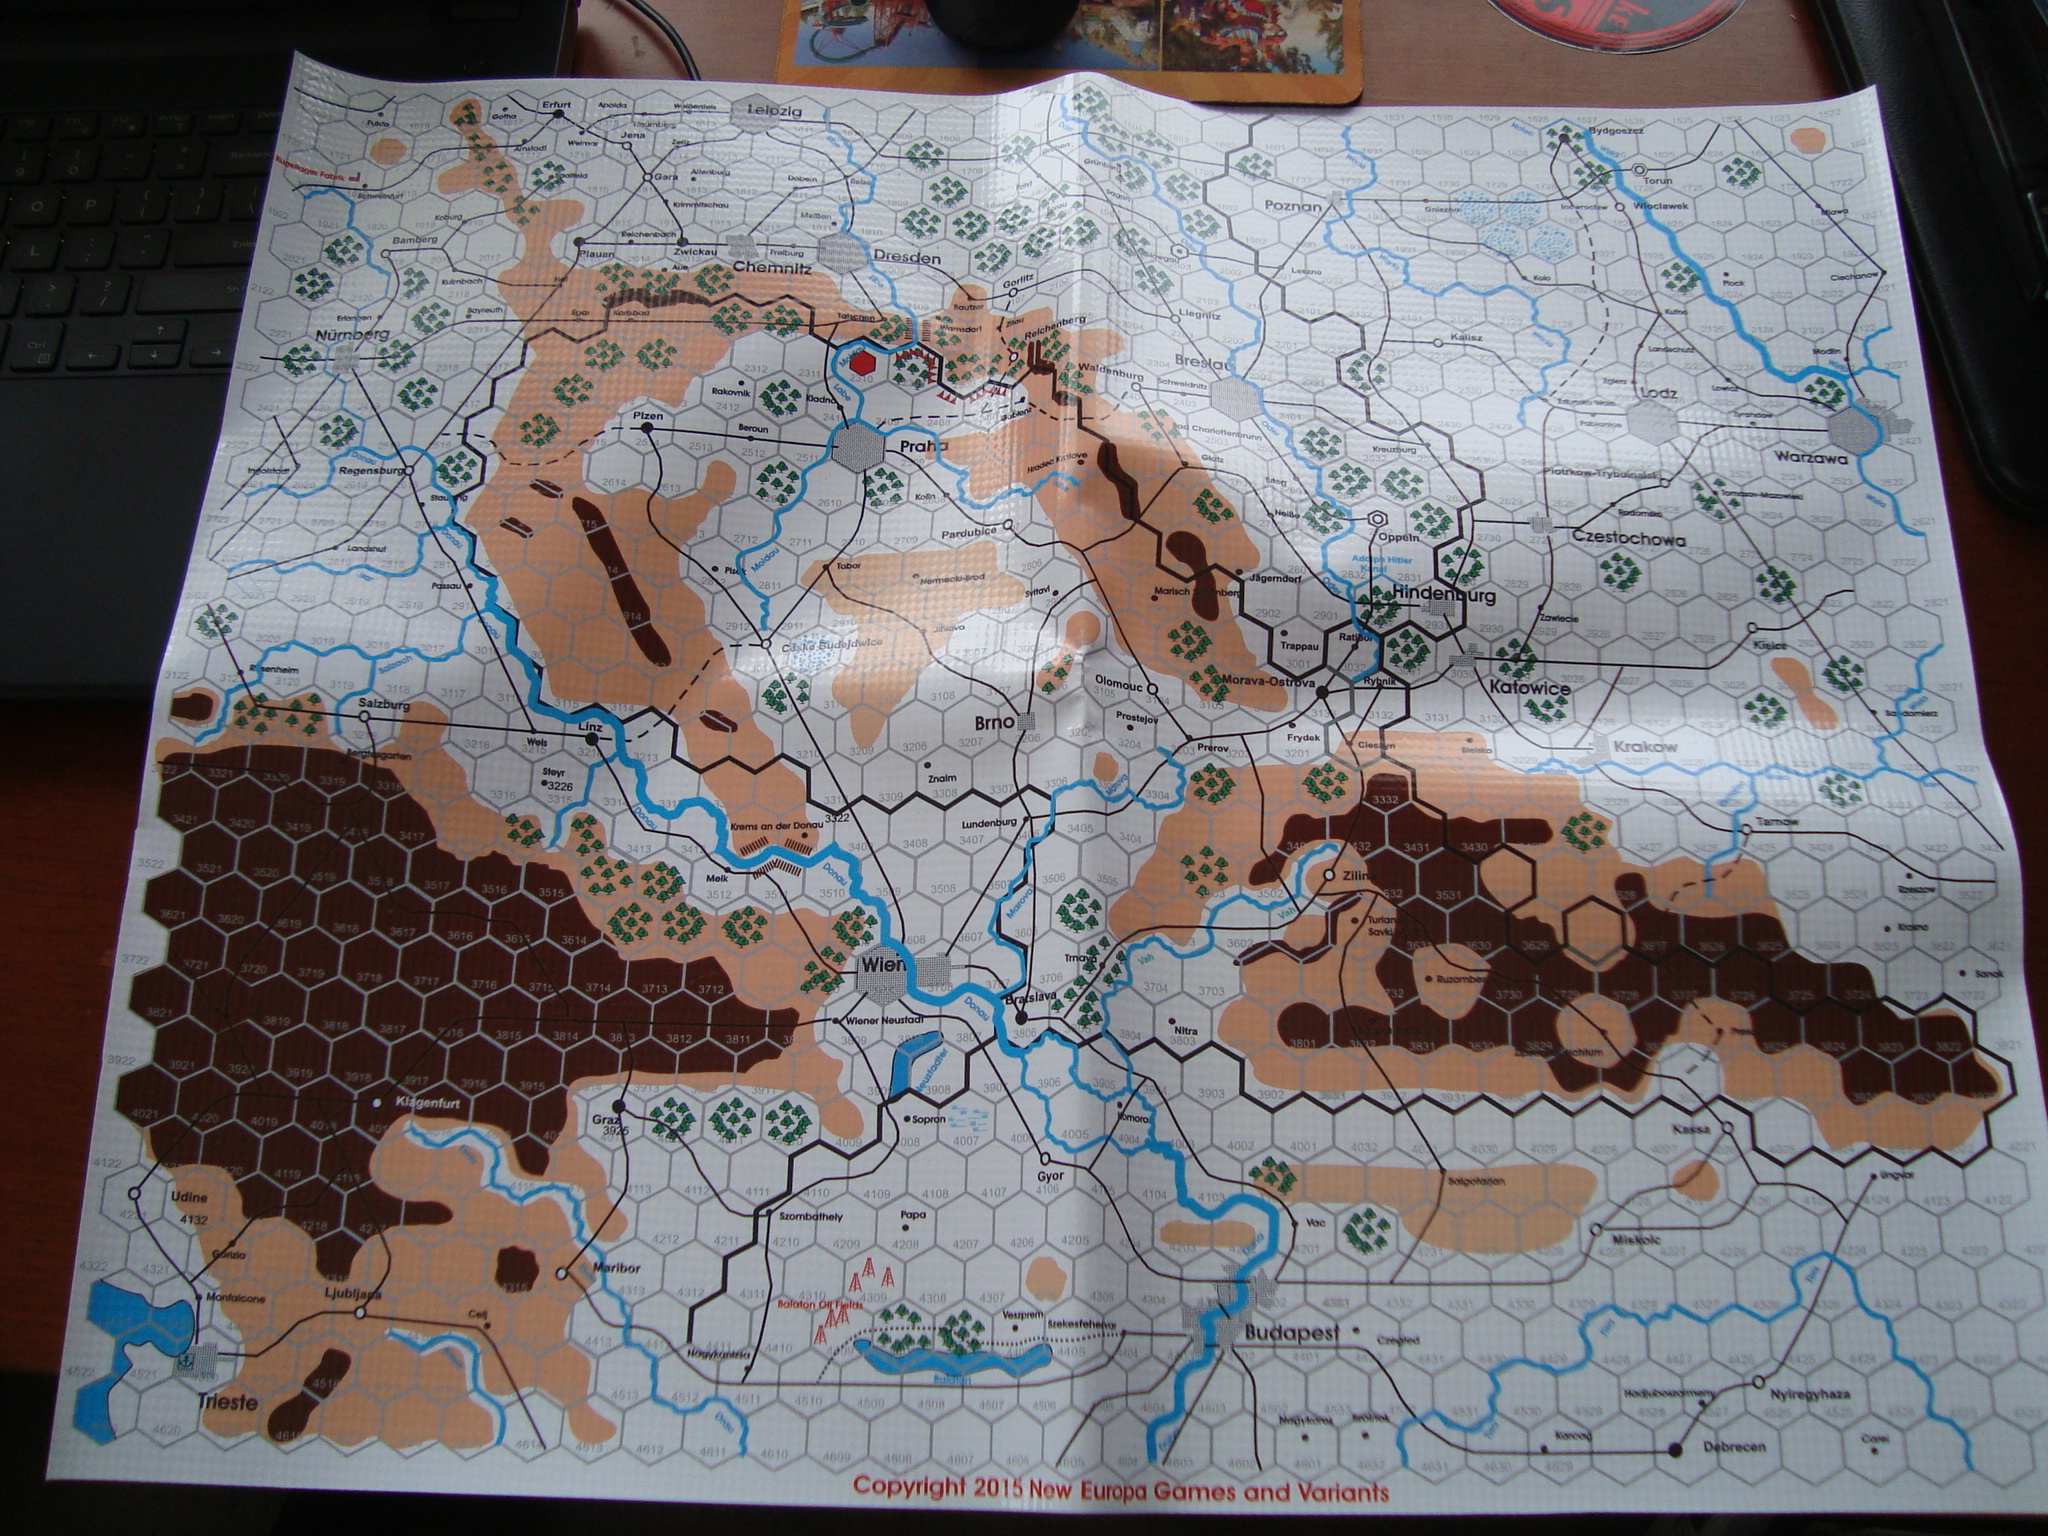
The game components are of high quality, however the lack of comprehensive charts presupposes ownership of other Europa games. The map is vinyl. Apparently this is cheaper to produce than a paper map. The only downside is that the creases are more obstinate than paper, requiring some improvisational and forceful re-shaping
The Germans have their work cut out for them. The Czech’s have a quality army that receives strong infantry and armored reinforcements very early in the game. The German initial deployment is rather “even”, without any real point of main effort. Many German units, especially valuable engineers and artillery regiments, are placed some distance back from the Czech-German border, and require time to assemble or move to contributory locations. There is also the possibility of Soviet intervention of the Czech side, with also a desulatory appearance by the anti-Czech Poles obsessing over three hexes.
The real German strength is their airforce. Many units, well suited to ground support, but with fighter cover that lacks range and (initially) limited airfields close to the Czech border. Also, Astell’s latest rules (early war) allow positive combat modifiers for an armored mix as low as 10 percent of the attacking forces.
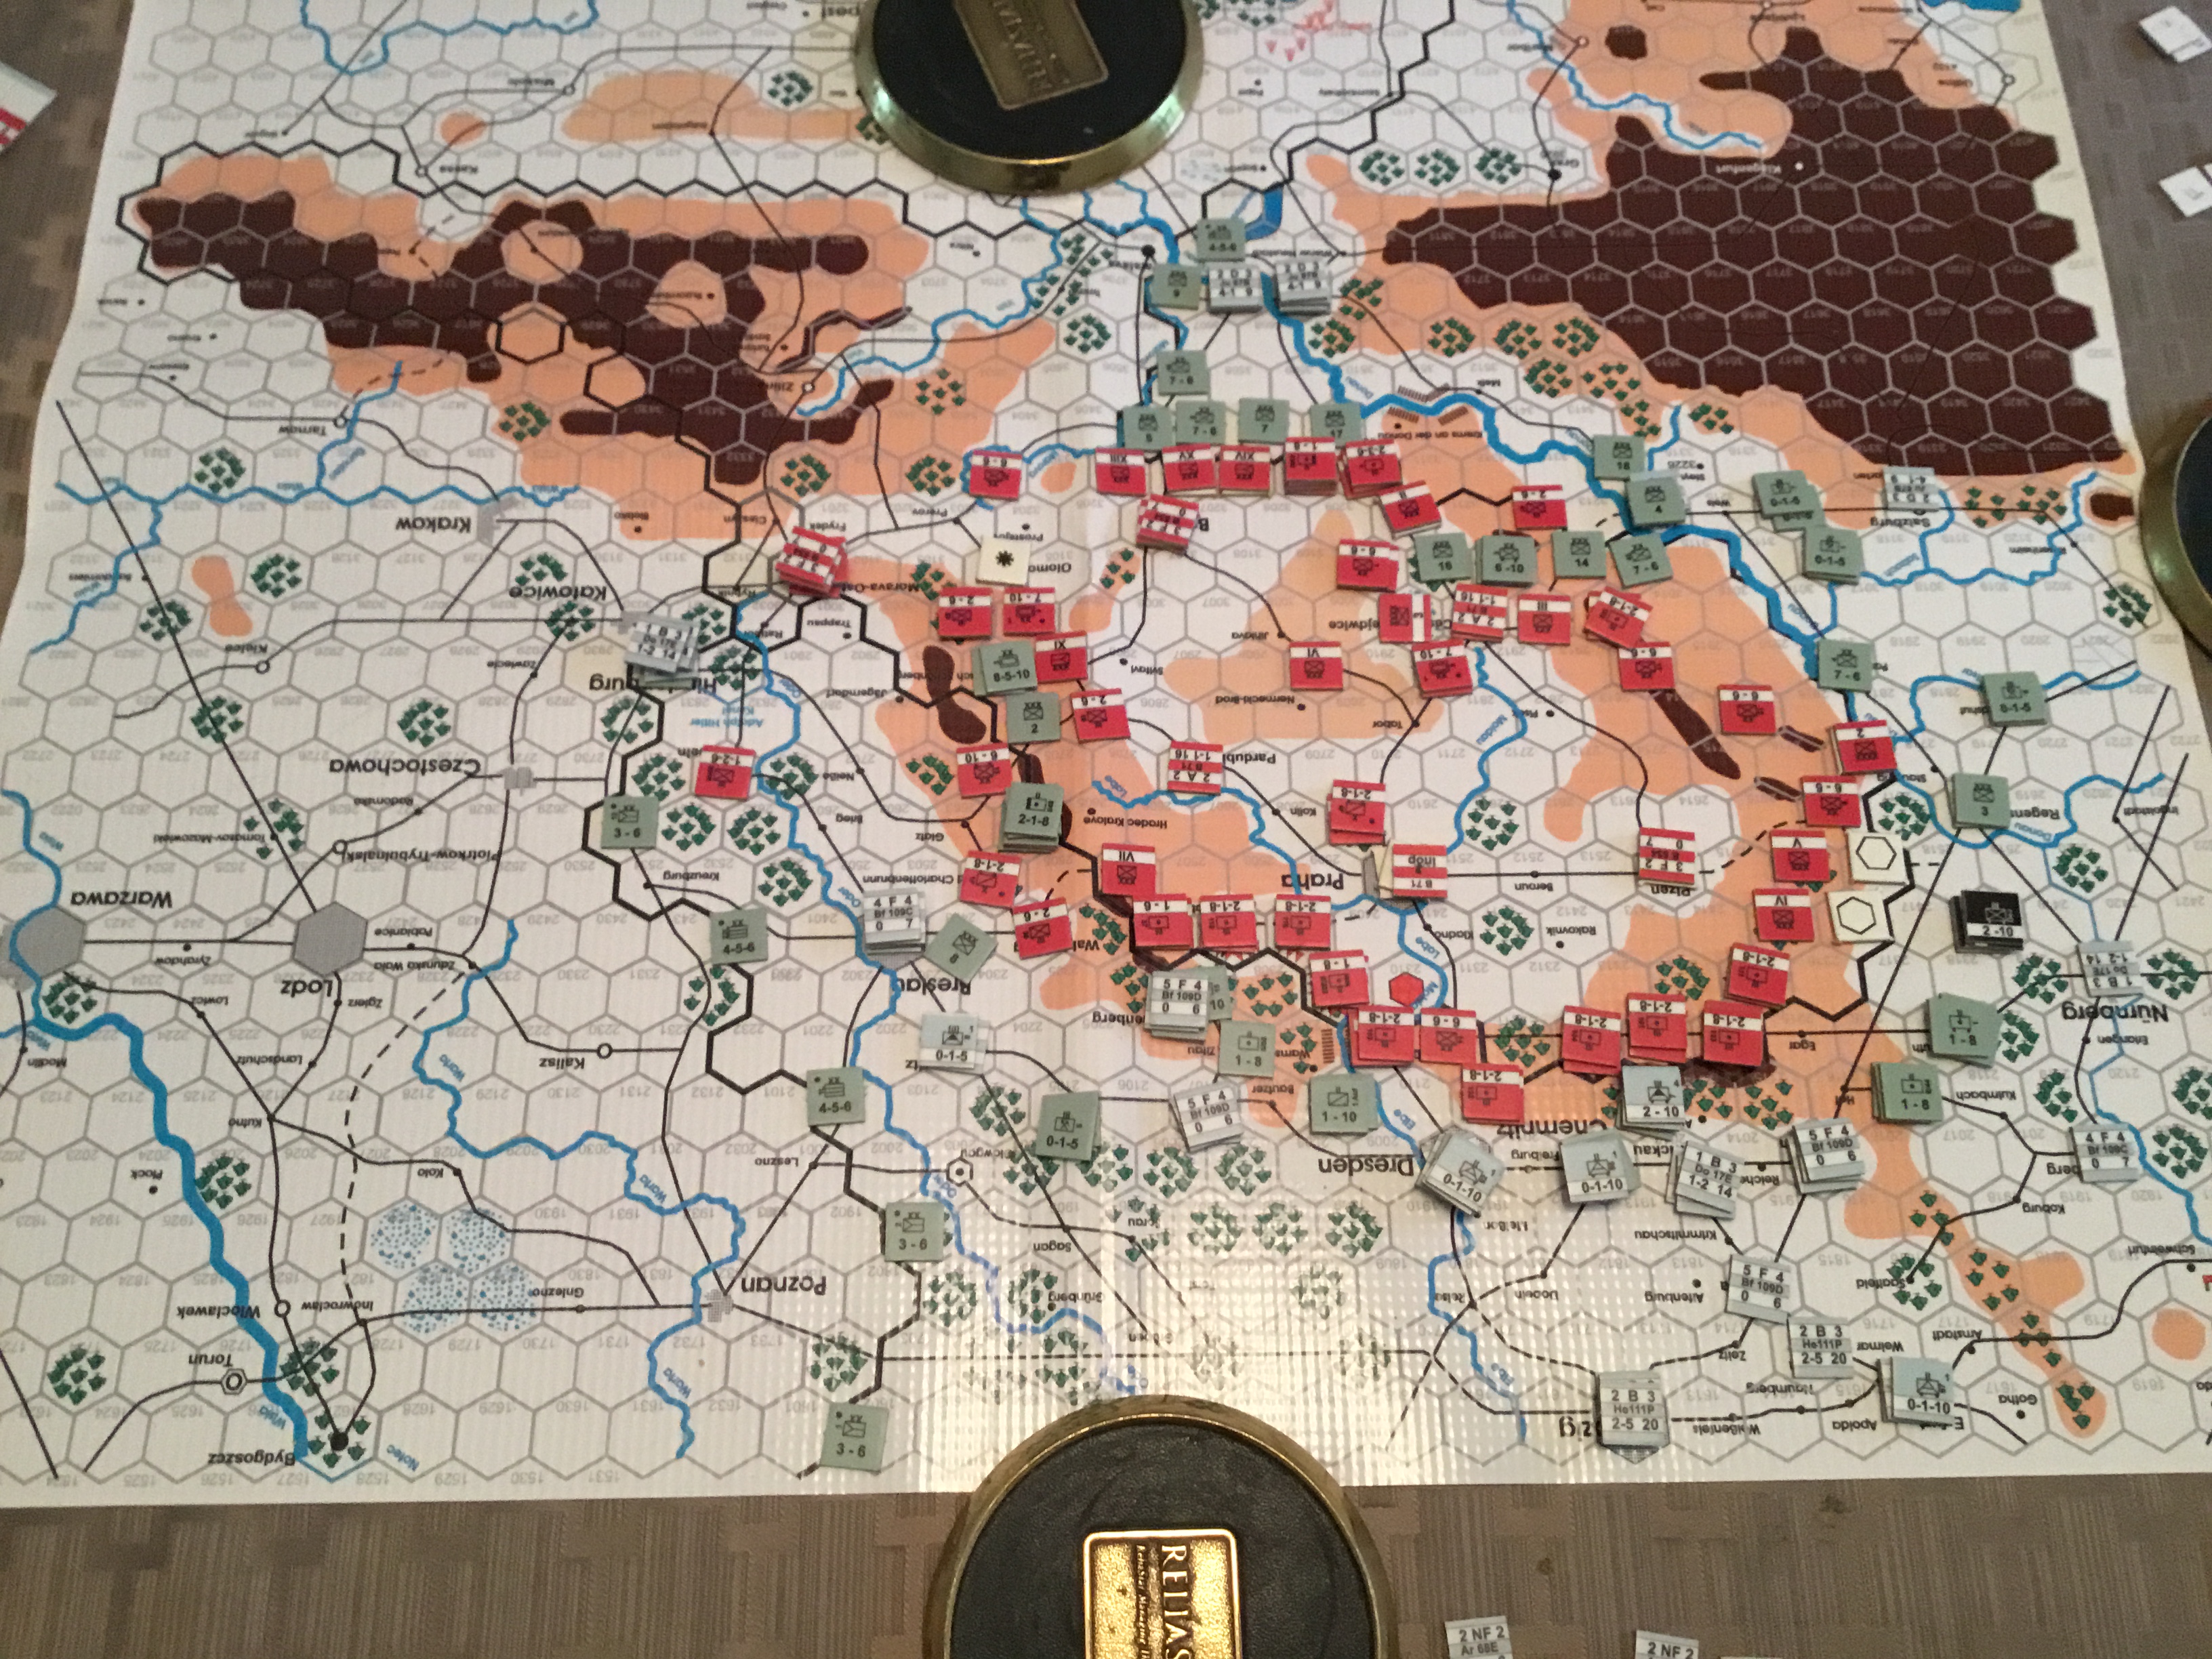
After setup, we played the initial two turns. I dutifully went through the Blitzkrieg playbook using the first turn to annilihate the Czech airforce and mass units for border attacks. Tim countered, and my attacks stalled. And, that was that. A learning experience. Reset for Saturday.
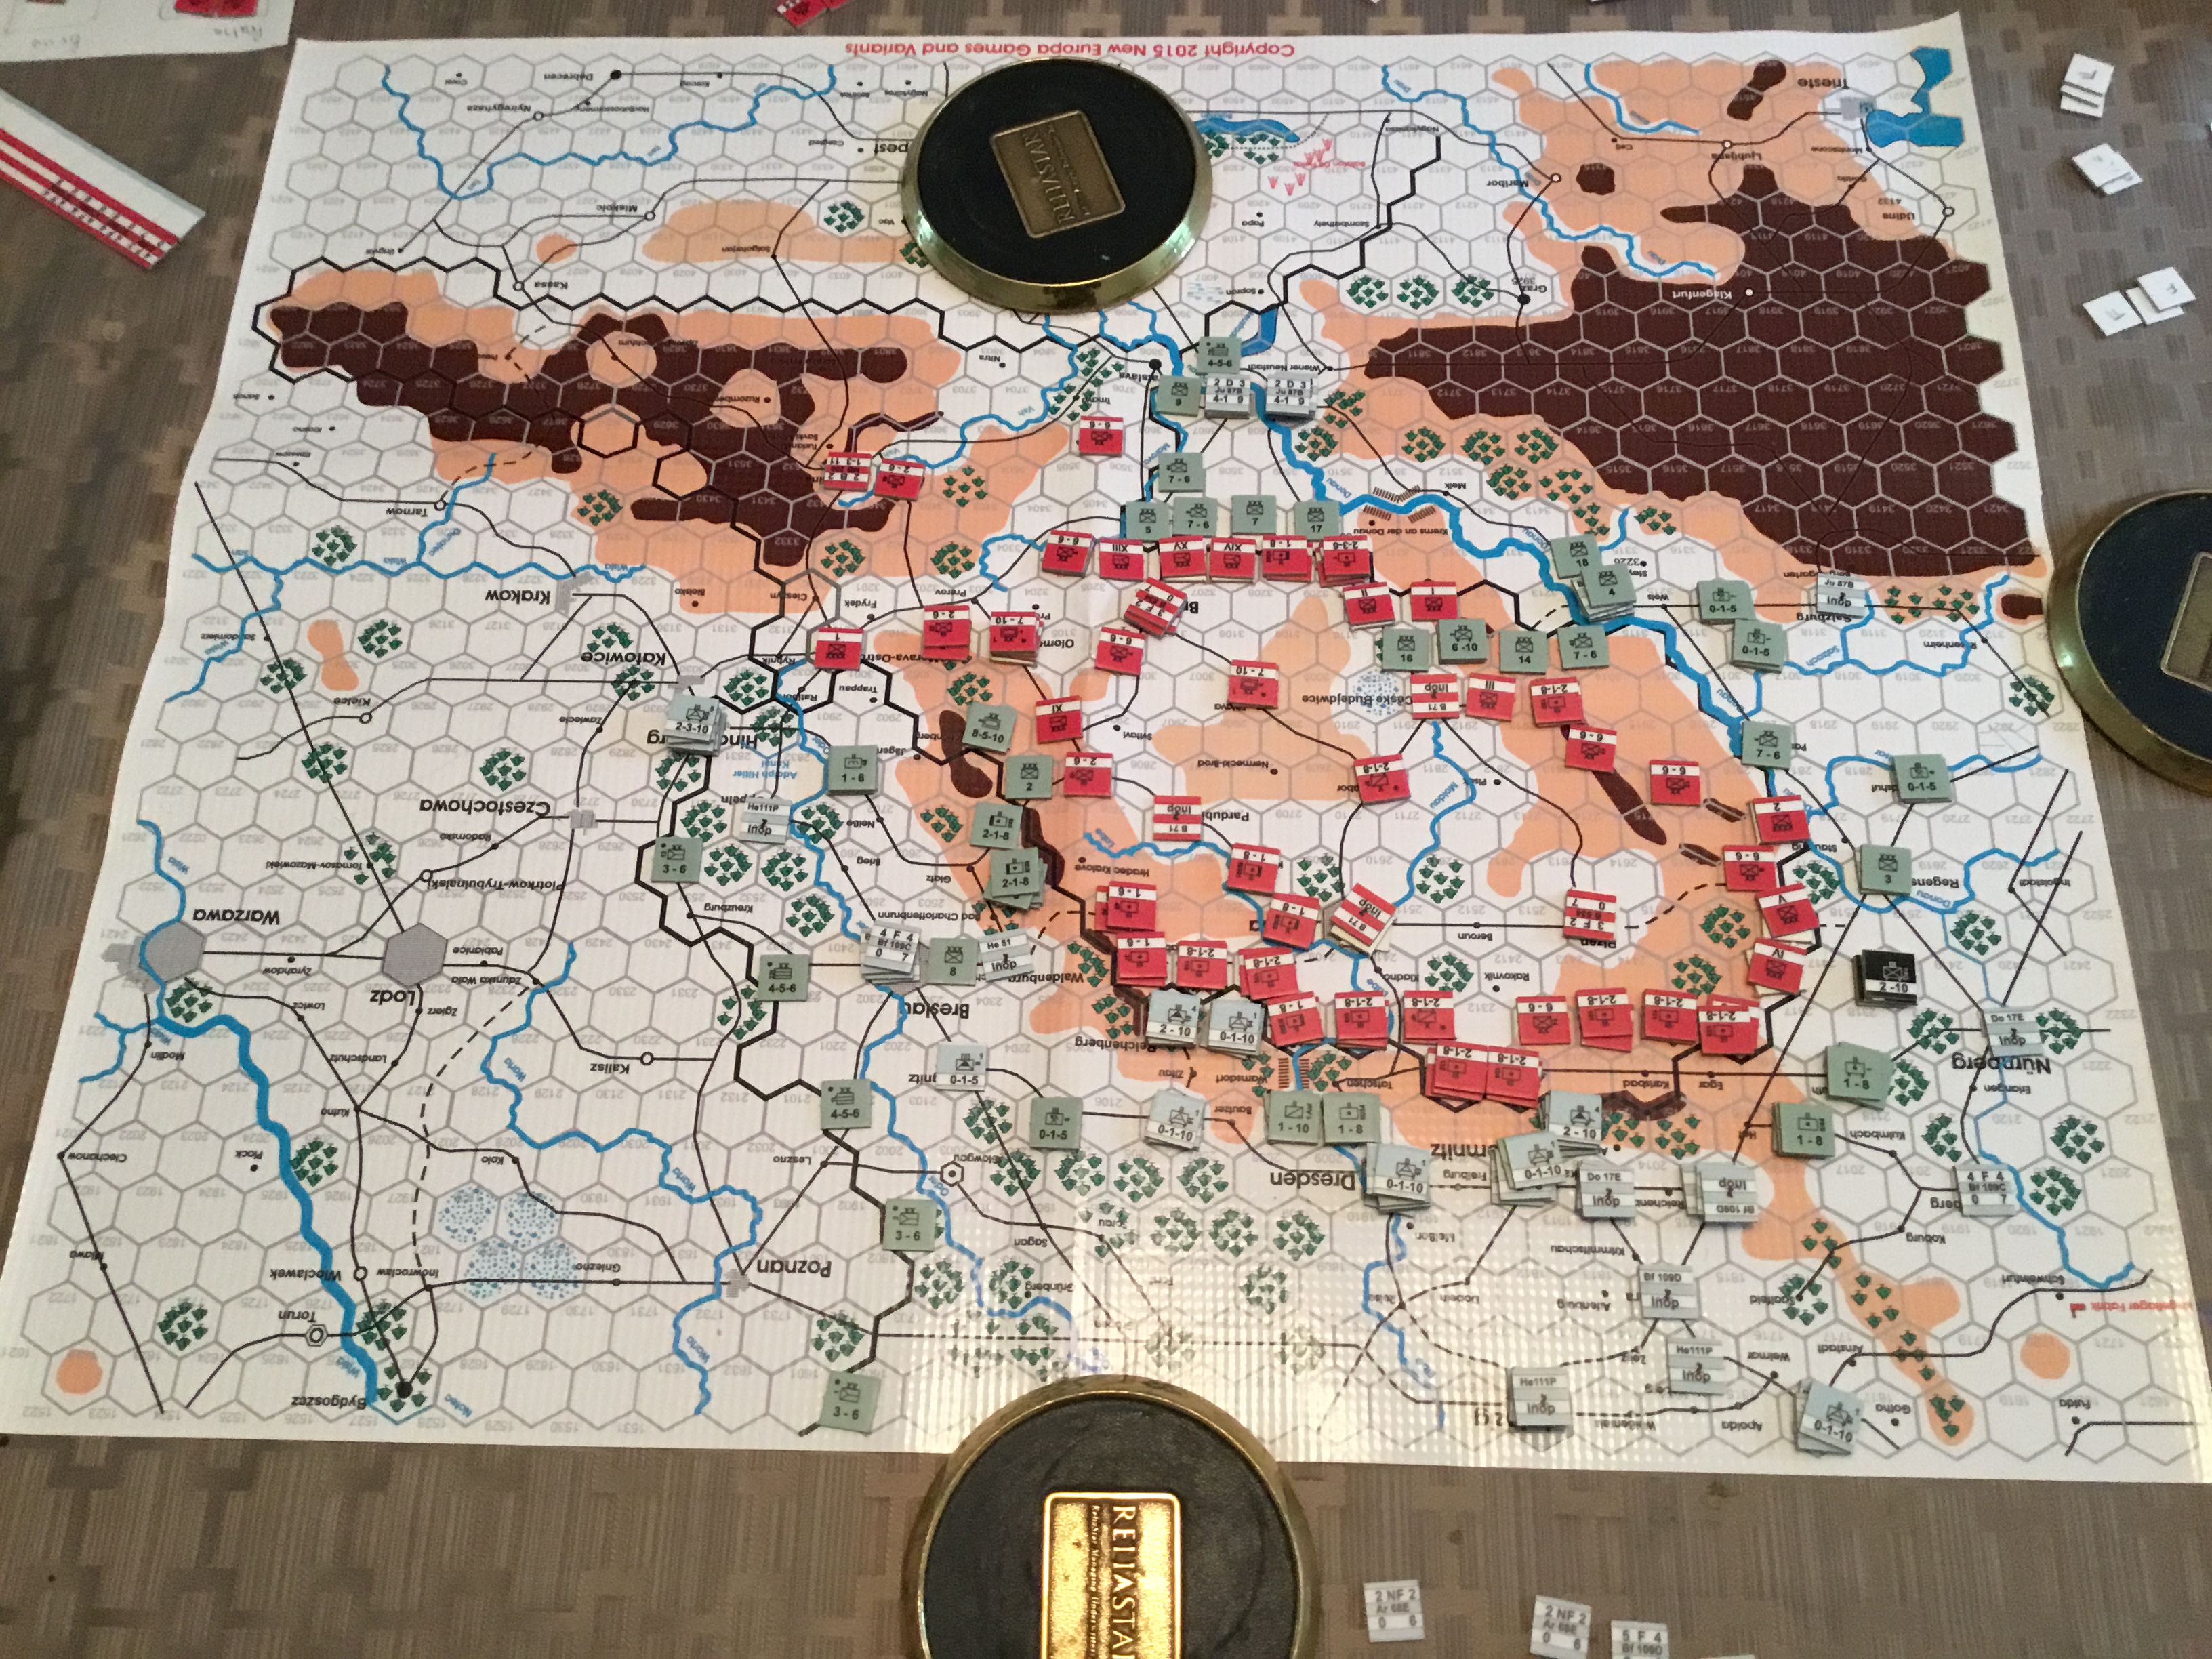
Well, Friday was a learning experience, but not a good one for me. Still allocated aircraft to airfield attacks, but this time I had deployed my engineer units to quick construct airfields, or move into positiion close to the border to construct them on Turn Two. I concentrated my attacks to the southeast and southwest of Prague, hoping to isolate Prague from the strong Czech units facing Vienna.
Initial Setup. That Vinyl Map Needed AnchoringGermans Attempt To Isolate PragueLimited Gains
Weather. Why worry about it, right? Never a thought. It’s October…….crisp fall weather. Oh…….then just roll on the weather table for …..MUD. Ugh…..bad, bad amateur move. It stings even three weeks later.
OK, give it one more try. Another set up after dinner. Same bloody result. This time, more aggressive, greater gains. But, again, MUD.
New Game….Same Result….Stalled
No wonder the General Staff was ready for a putsch. Tough army, difficult terrain, limited mechanized advantage, and an untried airforce lacking airfields. And, also, MUD.
I don’t know if Tim is ready for it, but I’d like to switch sides and see what he can do. He’s good, very good. But this is quite a challenge.
Good game in the tradition that is all best about the Europa system. And, given the strange and terrible saga of this system, it’s best to remember the good.
Tim arrived early Friday evening, just in time for the Stanford football game. I had the table set up and ready to go. We agreed to start playing early Saturday morning. Tim took the British (Allies) and I had the Italians (Axis) forces. The plan was an ambitious one. To play the entire scenario, and watch as many of the headline college football games as possible. Oh yes….and consume many Henry’s. This was a job for professionals.
The Italians face some serious operational challenges. They are considered Out of Supply (Status 4) from the beginning of the game. Attack strength is quartered, defense and movement halved, with reduced Zones of Control (ZOC). They have no General Supply sources, and must rely on a limited number of Attack Supply factors to create either General Supply Points, or use for attacks. Italian Colonial troops (which form the bulk of their forces) can have air support only if it involves ten regiments (REs). Air units must role on the Success Table to fly a mission, unless they are in General Supply. If not, they can be aborted, or fail to fly. To top it off, Italian movement is limited until the British enter Italian East Africa.
The British commander has his own problems involving time and space. Time is critical because the Order of Battle (OB) requires two divisions have to be withdrawn by early summer. The distances in the game are significant, and by Spring, the possibility exists that roads and terrain key areas will be reduced to muddy morasses, limiting movement and effecting combat.
Play started at 0830 with Game Day as background ambiance. Here’s a summary of play.
Dec I 1940 – Clear
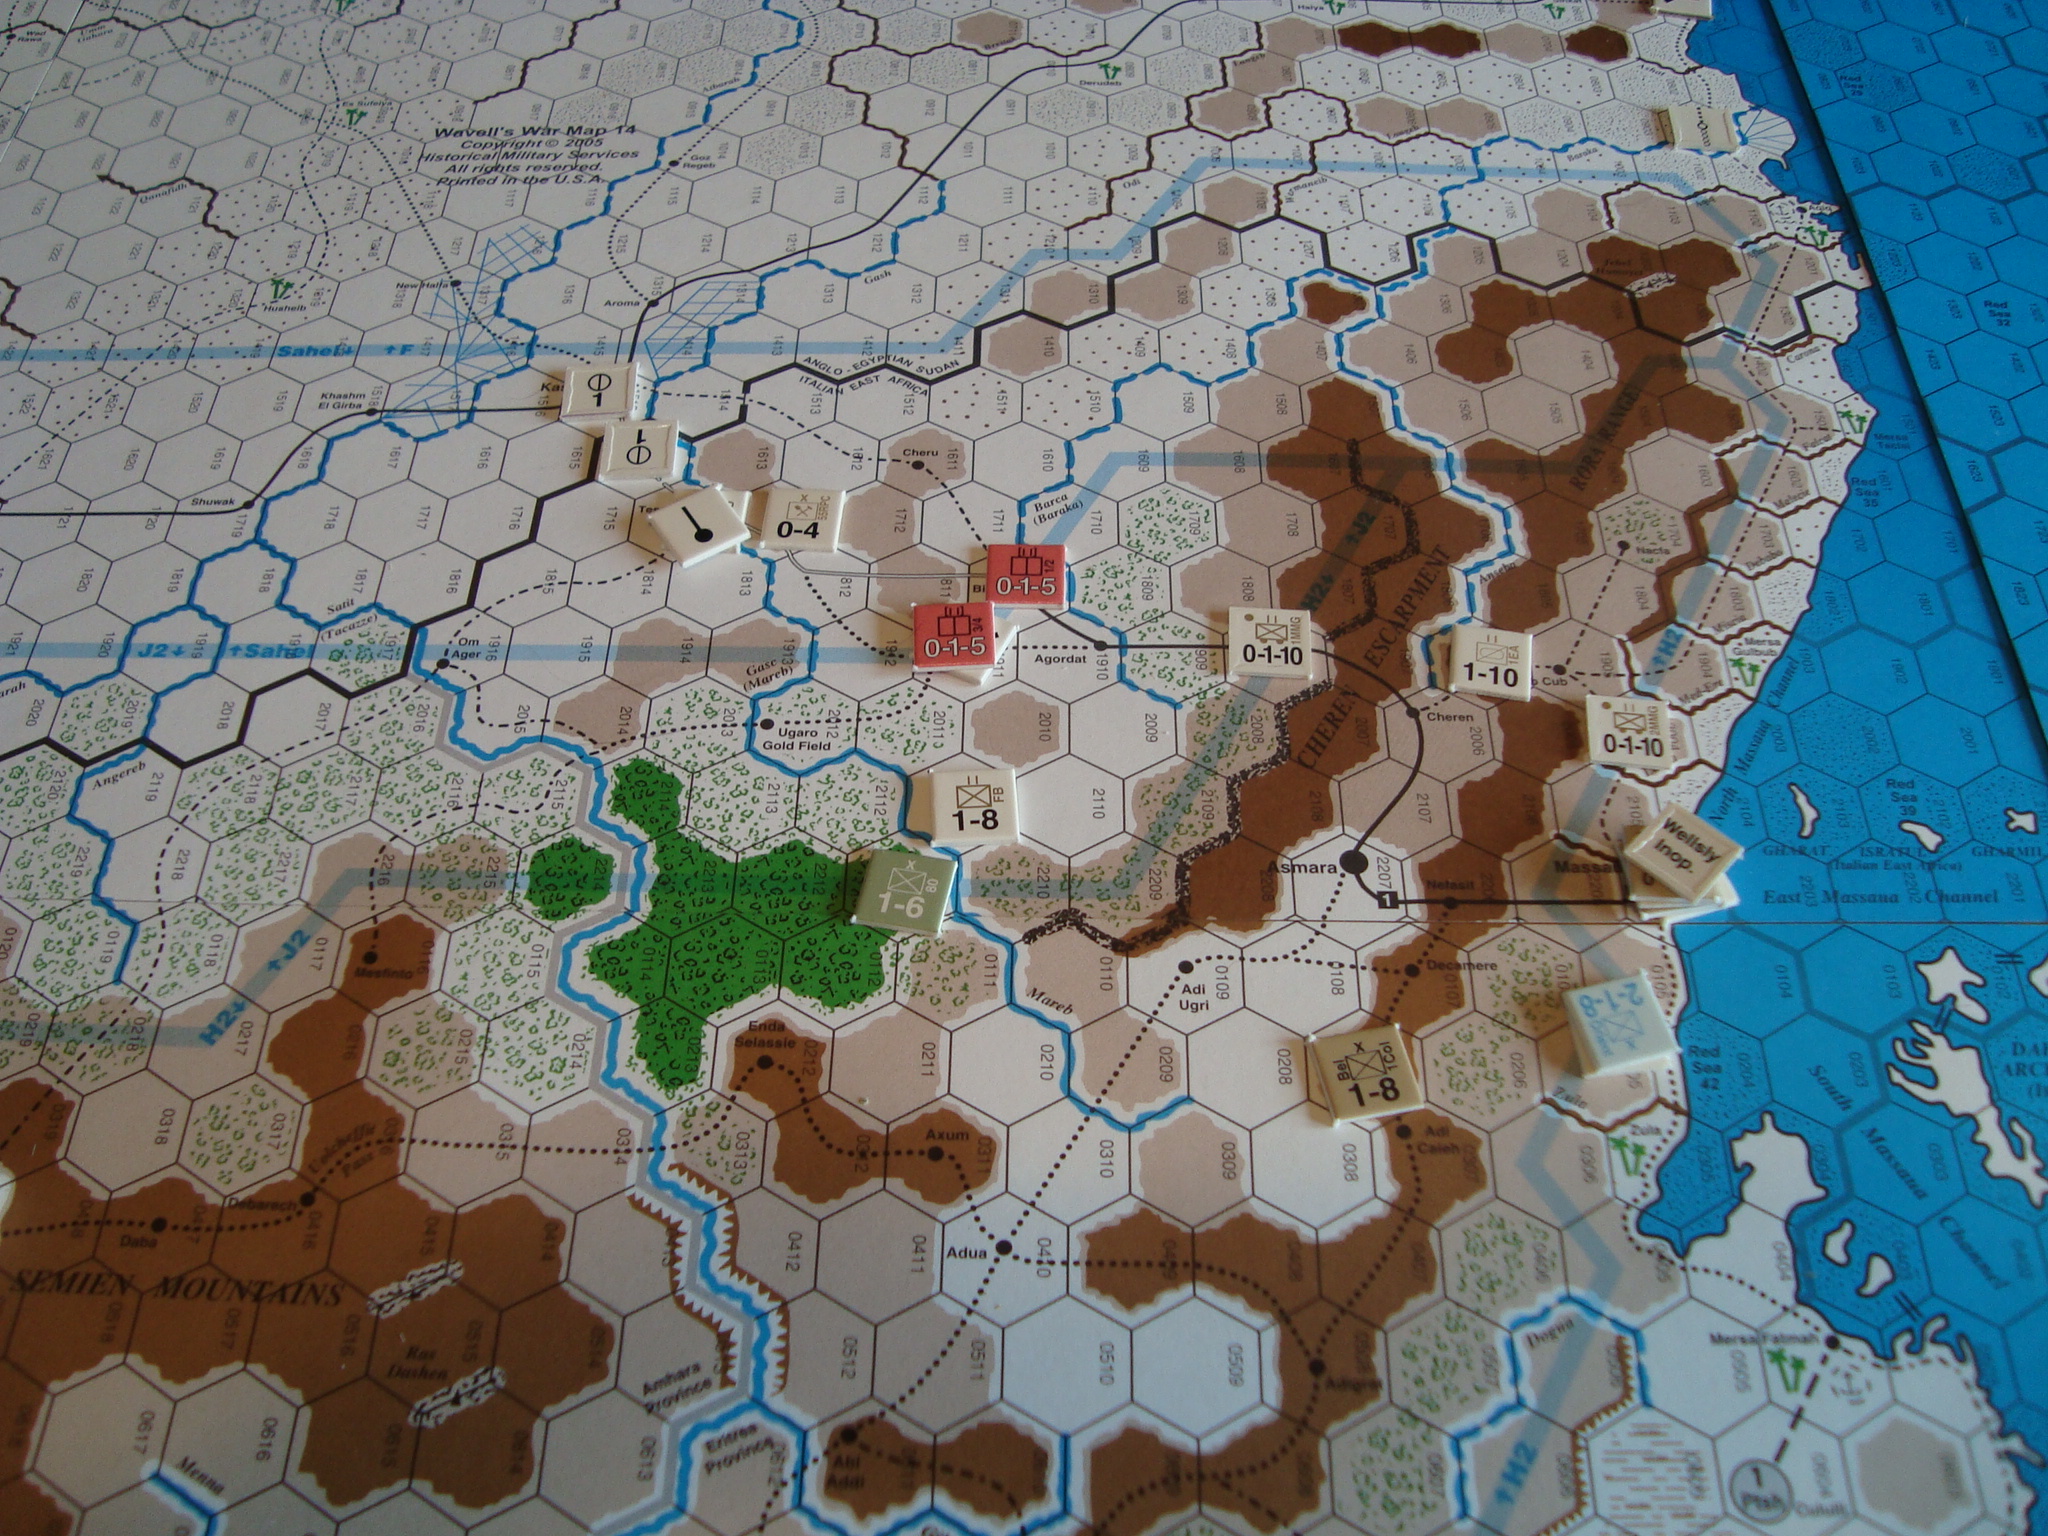
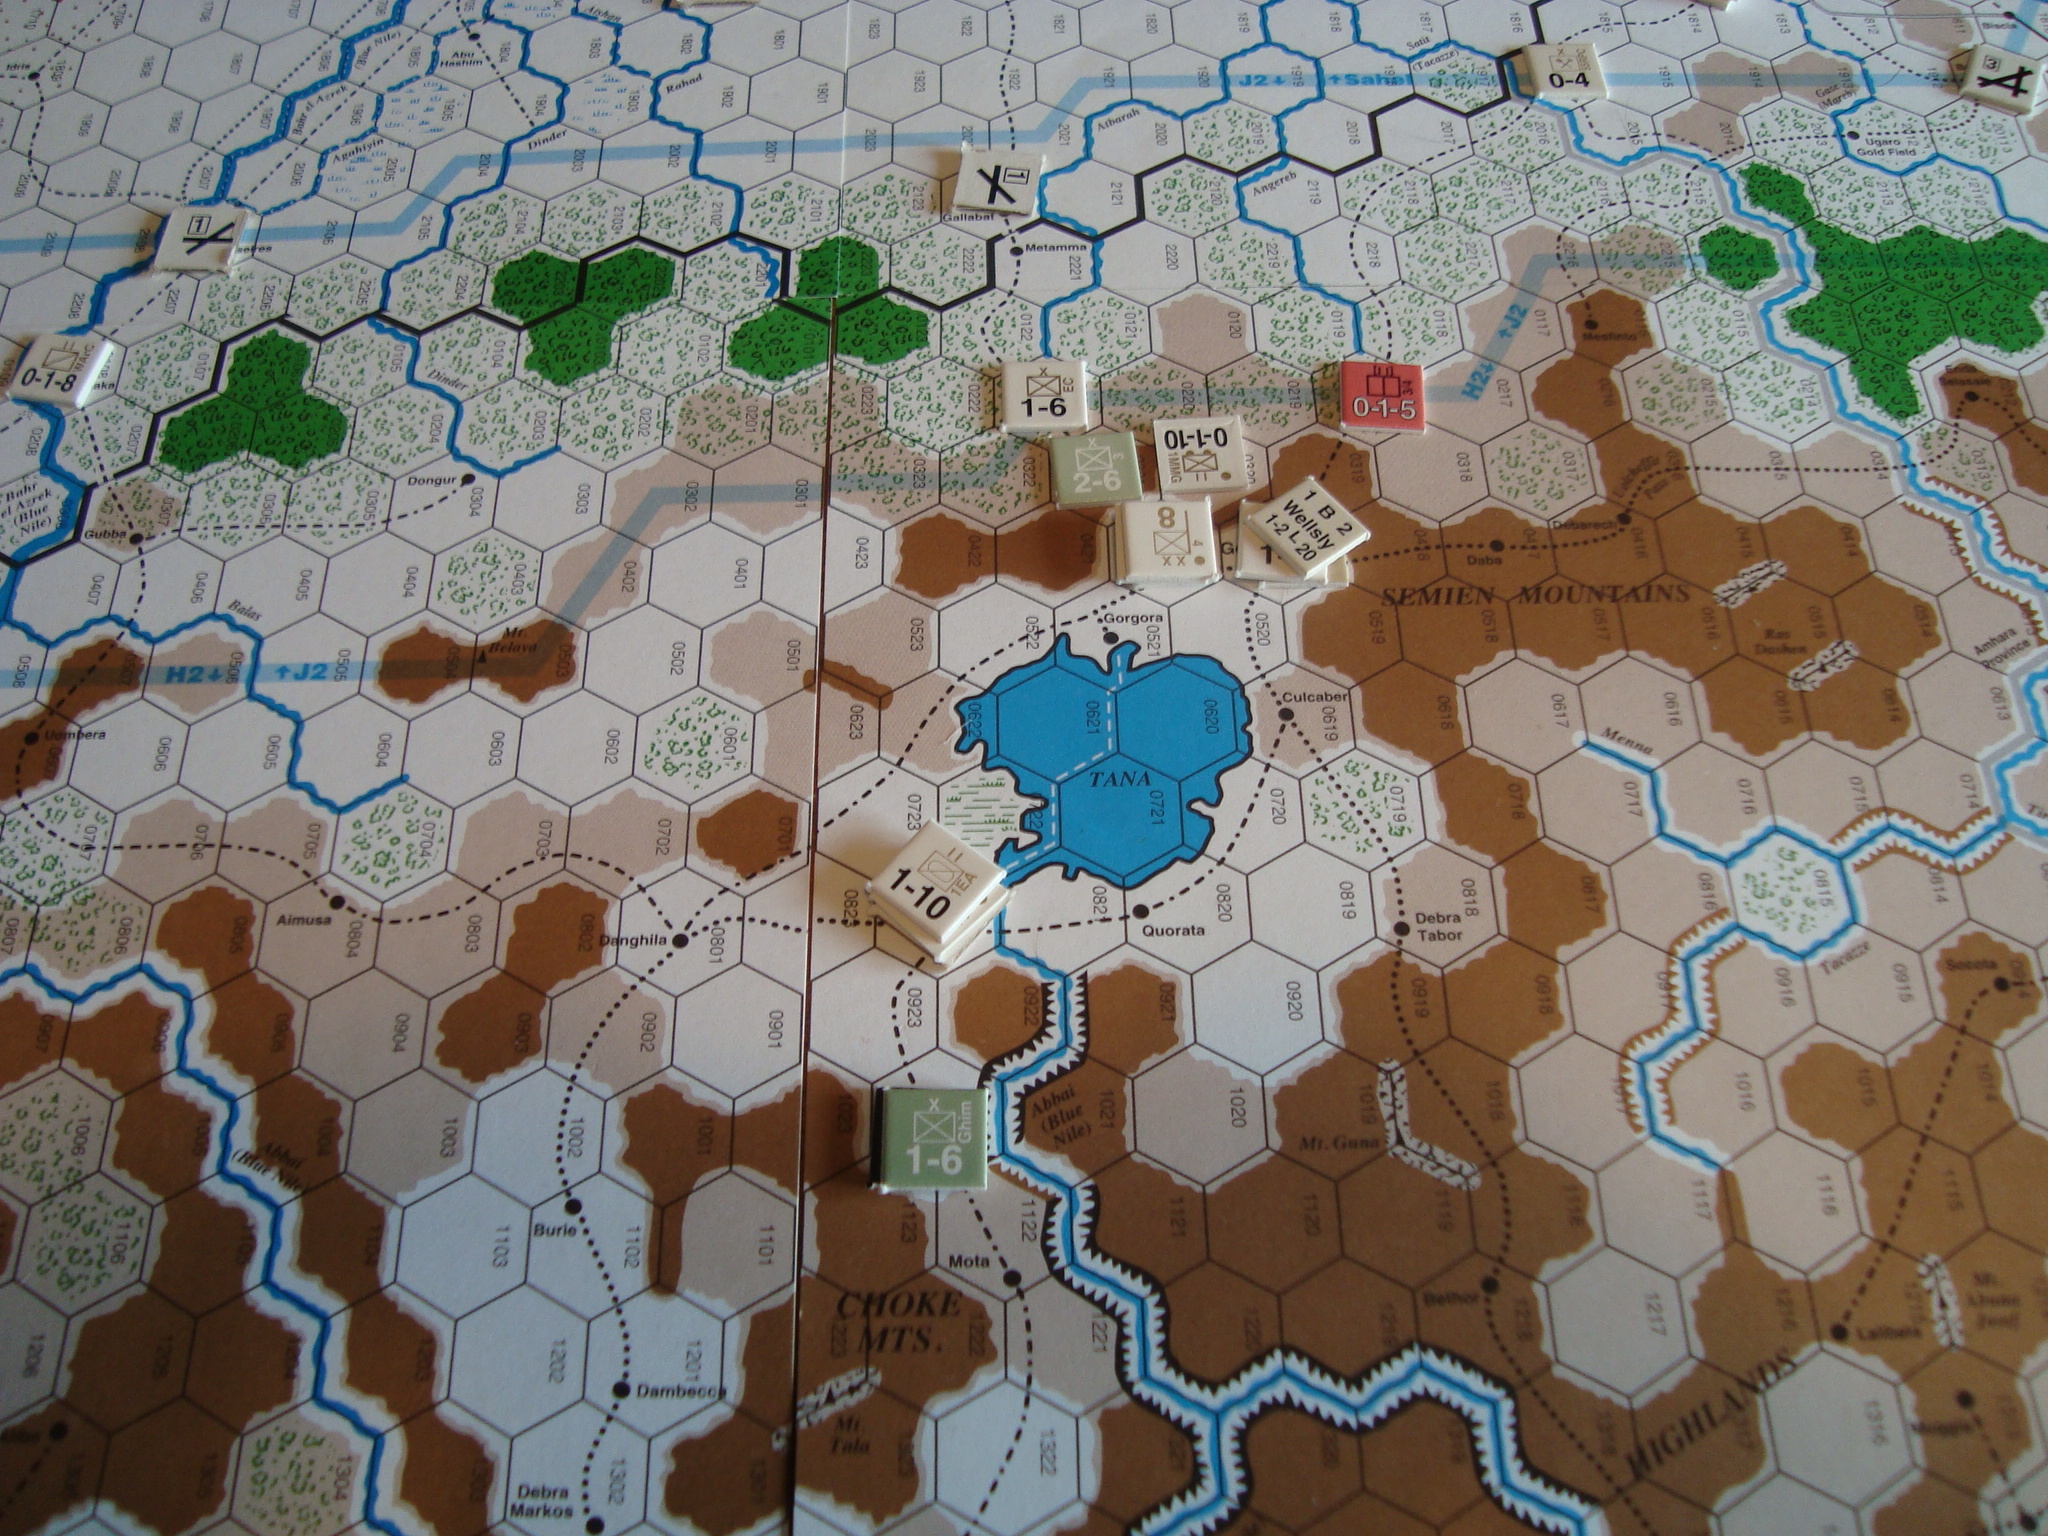
Allies: South Africans advance from Kenya in the south, with air units destroying a SM-79 I had unwisely deployed at a forward air field. Advances from Khartoum in the north southwards towards Kassala-Bascia-Massaula.
Axis: Consolidate scattered units in the vicinity of Kassala using HQs.
Dec II – Clear
Allies: Continue Kenya advance. Defeat Italian force at Kassala.
Axis: Retreat from Kassala to Bascia.
Jan I 1941 – Clear
Allies: Continue advance from Kenya in the south. Defeat Axis regiments holding vicinity of Bascia in the north, using motorized machine gun battalions to envelope for ZOC kill. Indian 4th Division advances south along coast from Port Saud.
Axis: Counter-attacks and destroys motorized machine gun battalions. Retreats east to mountains near Massaula.
Jan II – Clear
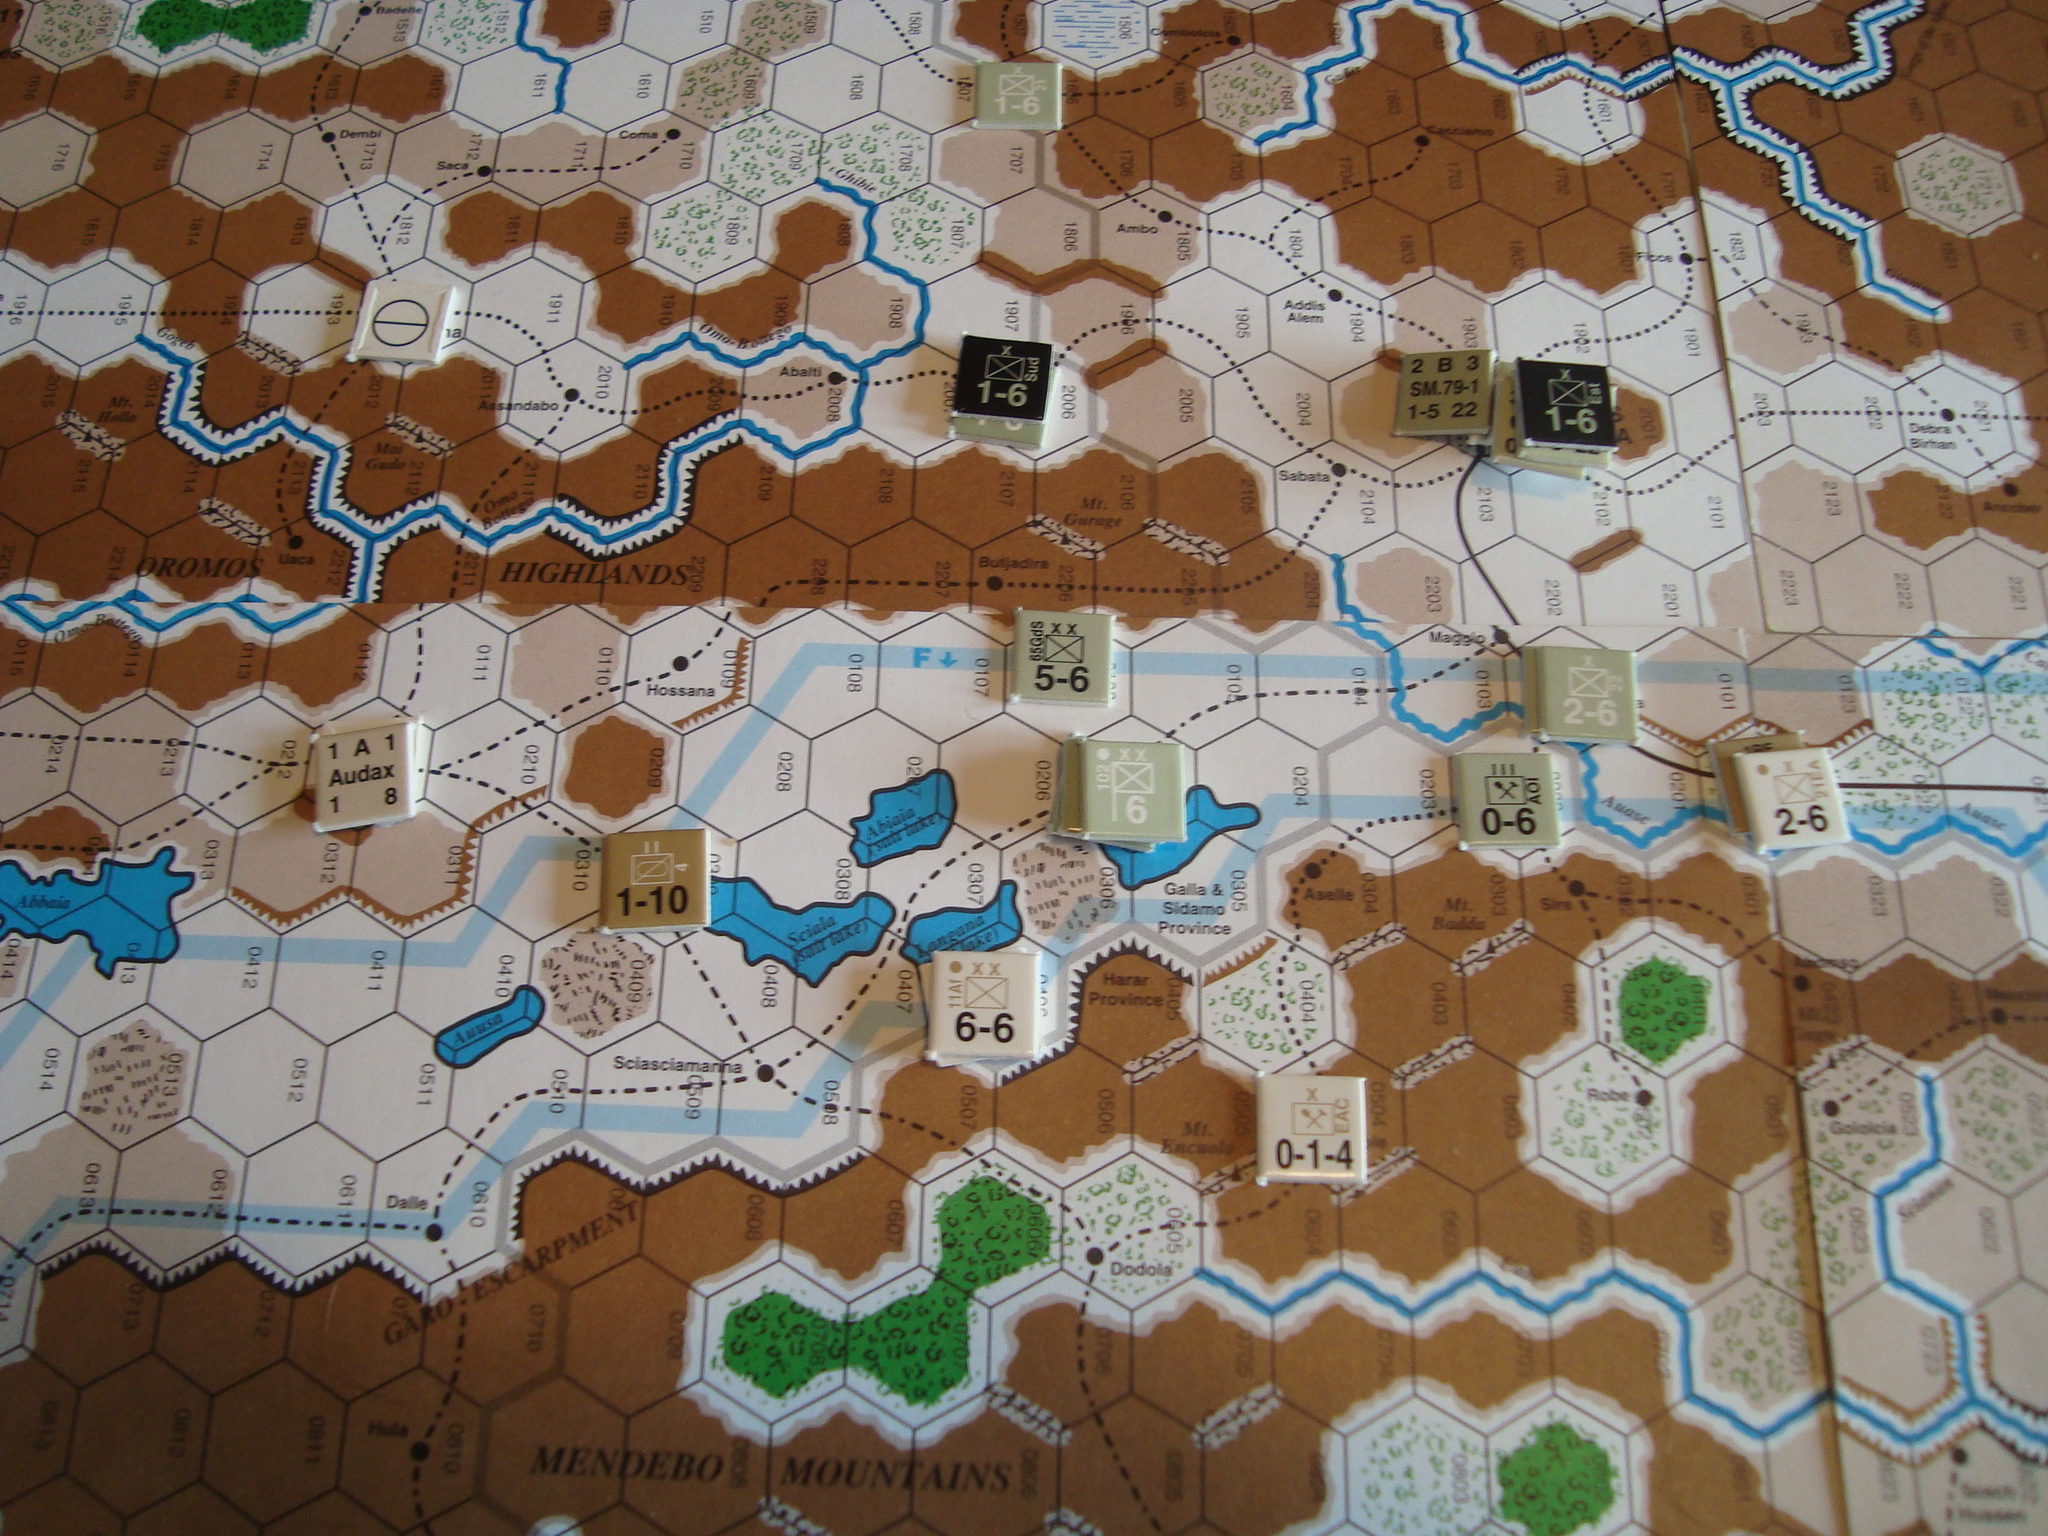
Allies: Advance along coast from Kenya, takes Mogadishu with amphibious assault. In the North, 4th Division continues advance shrugging off (over running) delaying Italian regiments.
Axis: Withdraws southern and eastern forces north towards Addis Ababa. Forms hasty defensive positions around Massaula. Air strike against British airfields unsuccessful.
Feb I – Clear
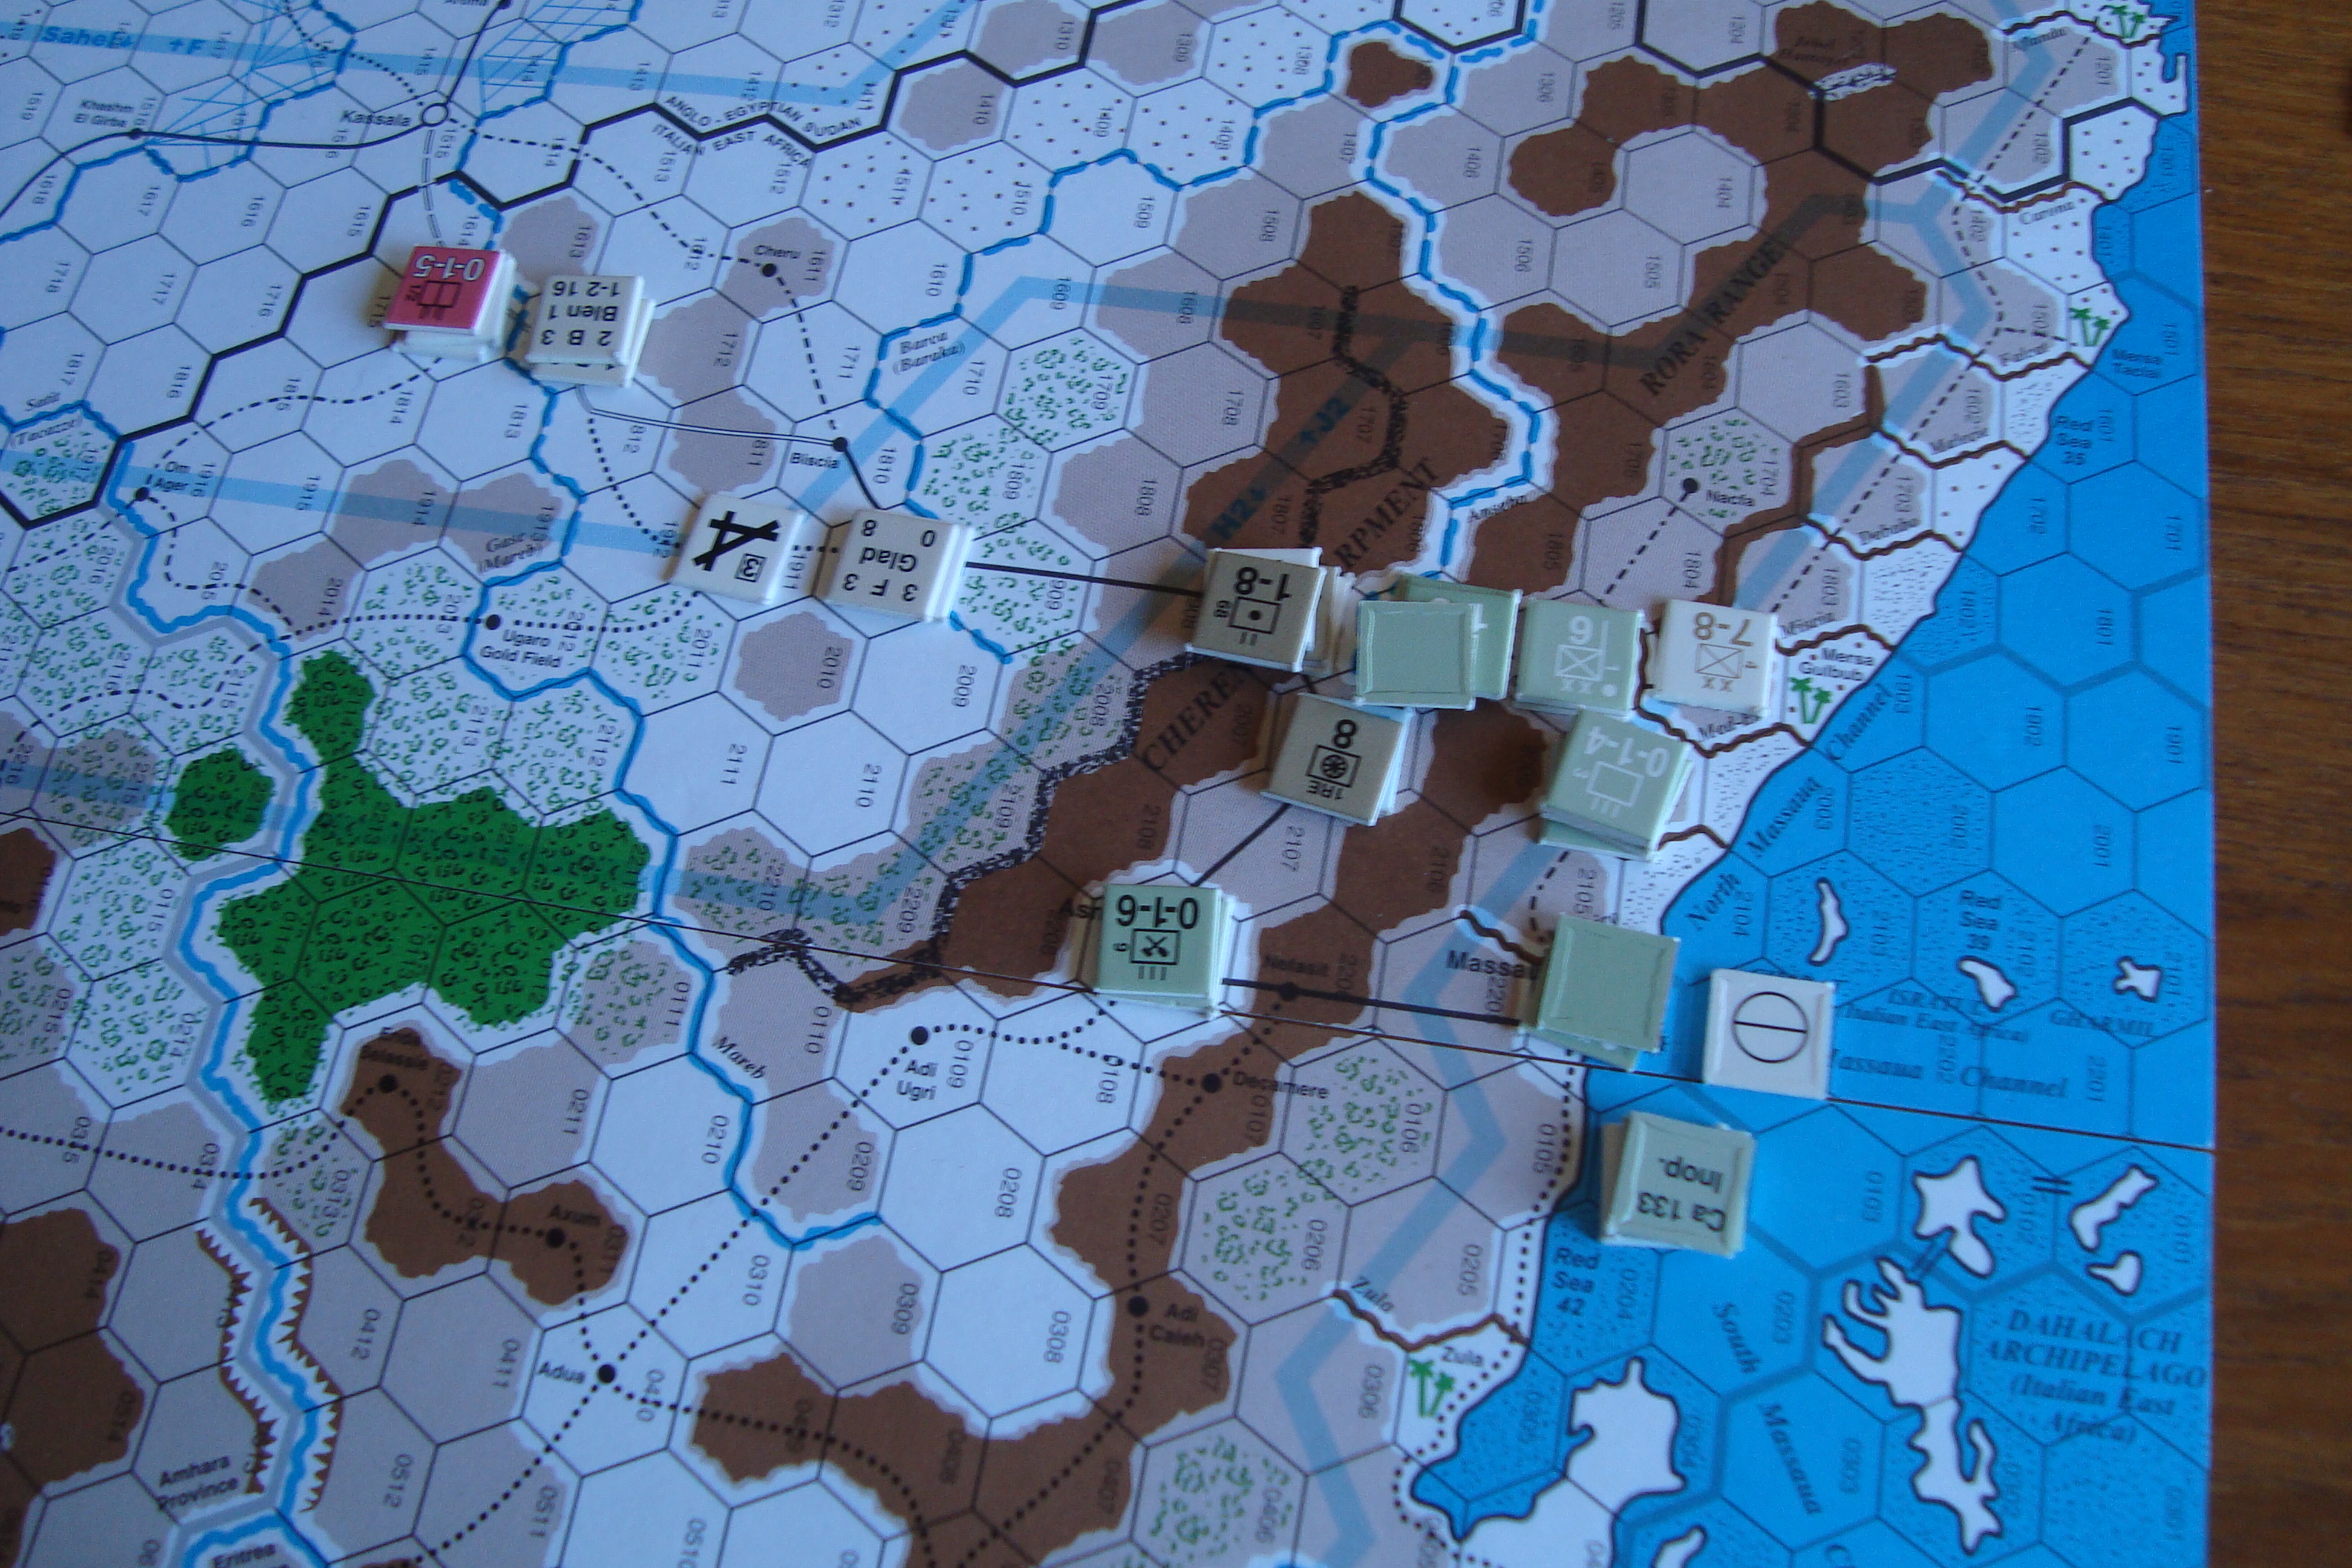
Allies: Takes Keren (key to breaching mountain defenses outside Massaula) on a half-exchange. Advances towards Addis Ababa.
Axis: Continues to withdraw towards Massaula, but hampered by British ZOCs.
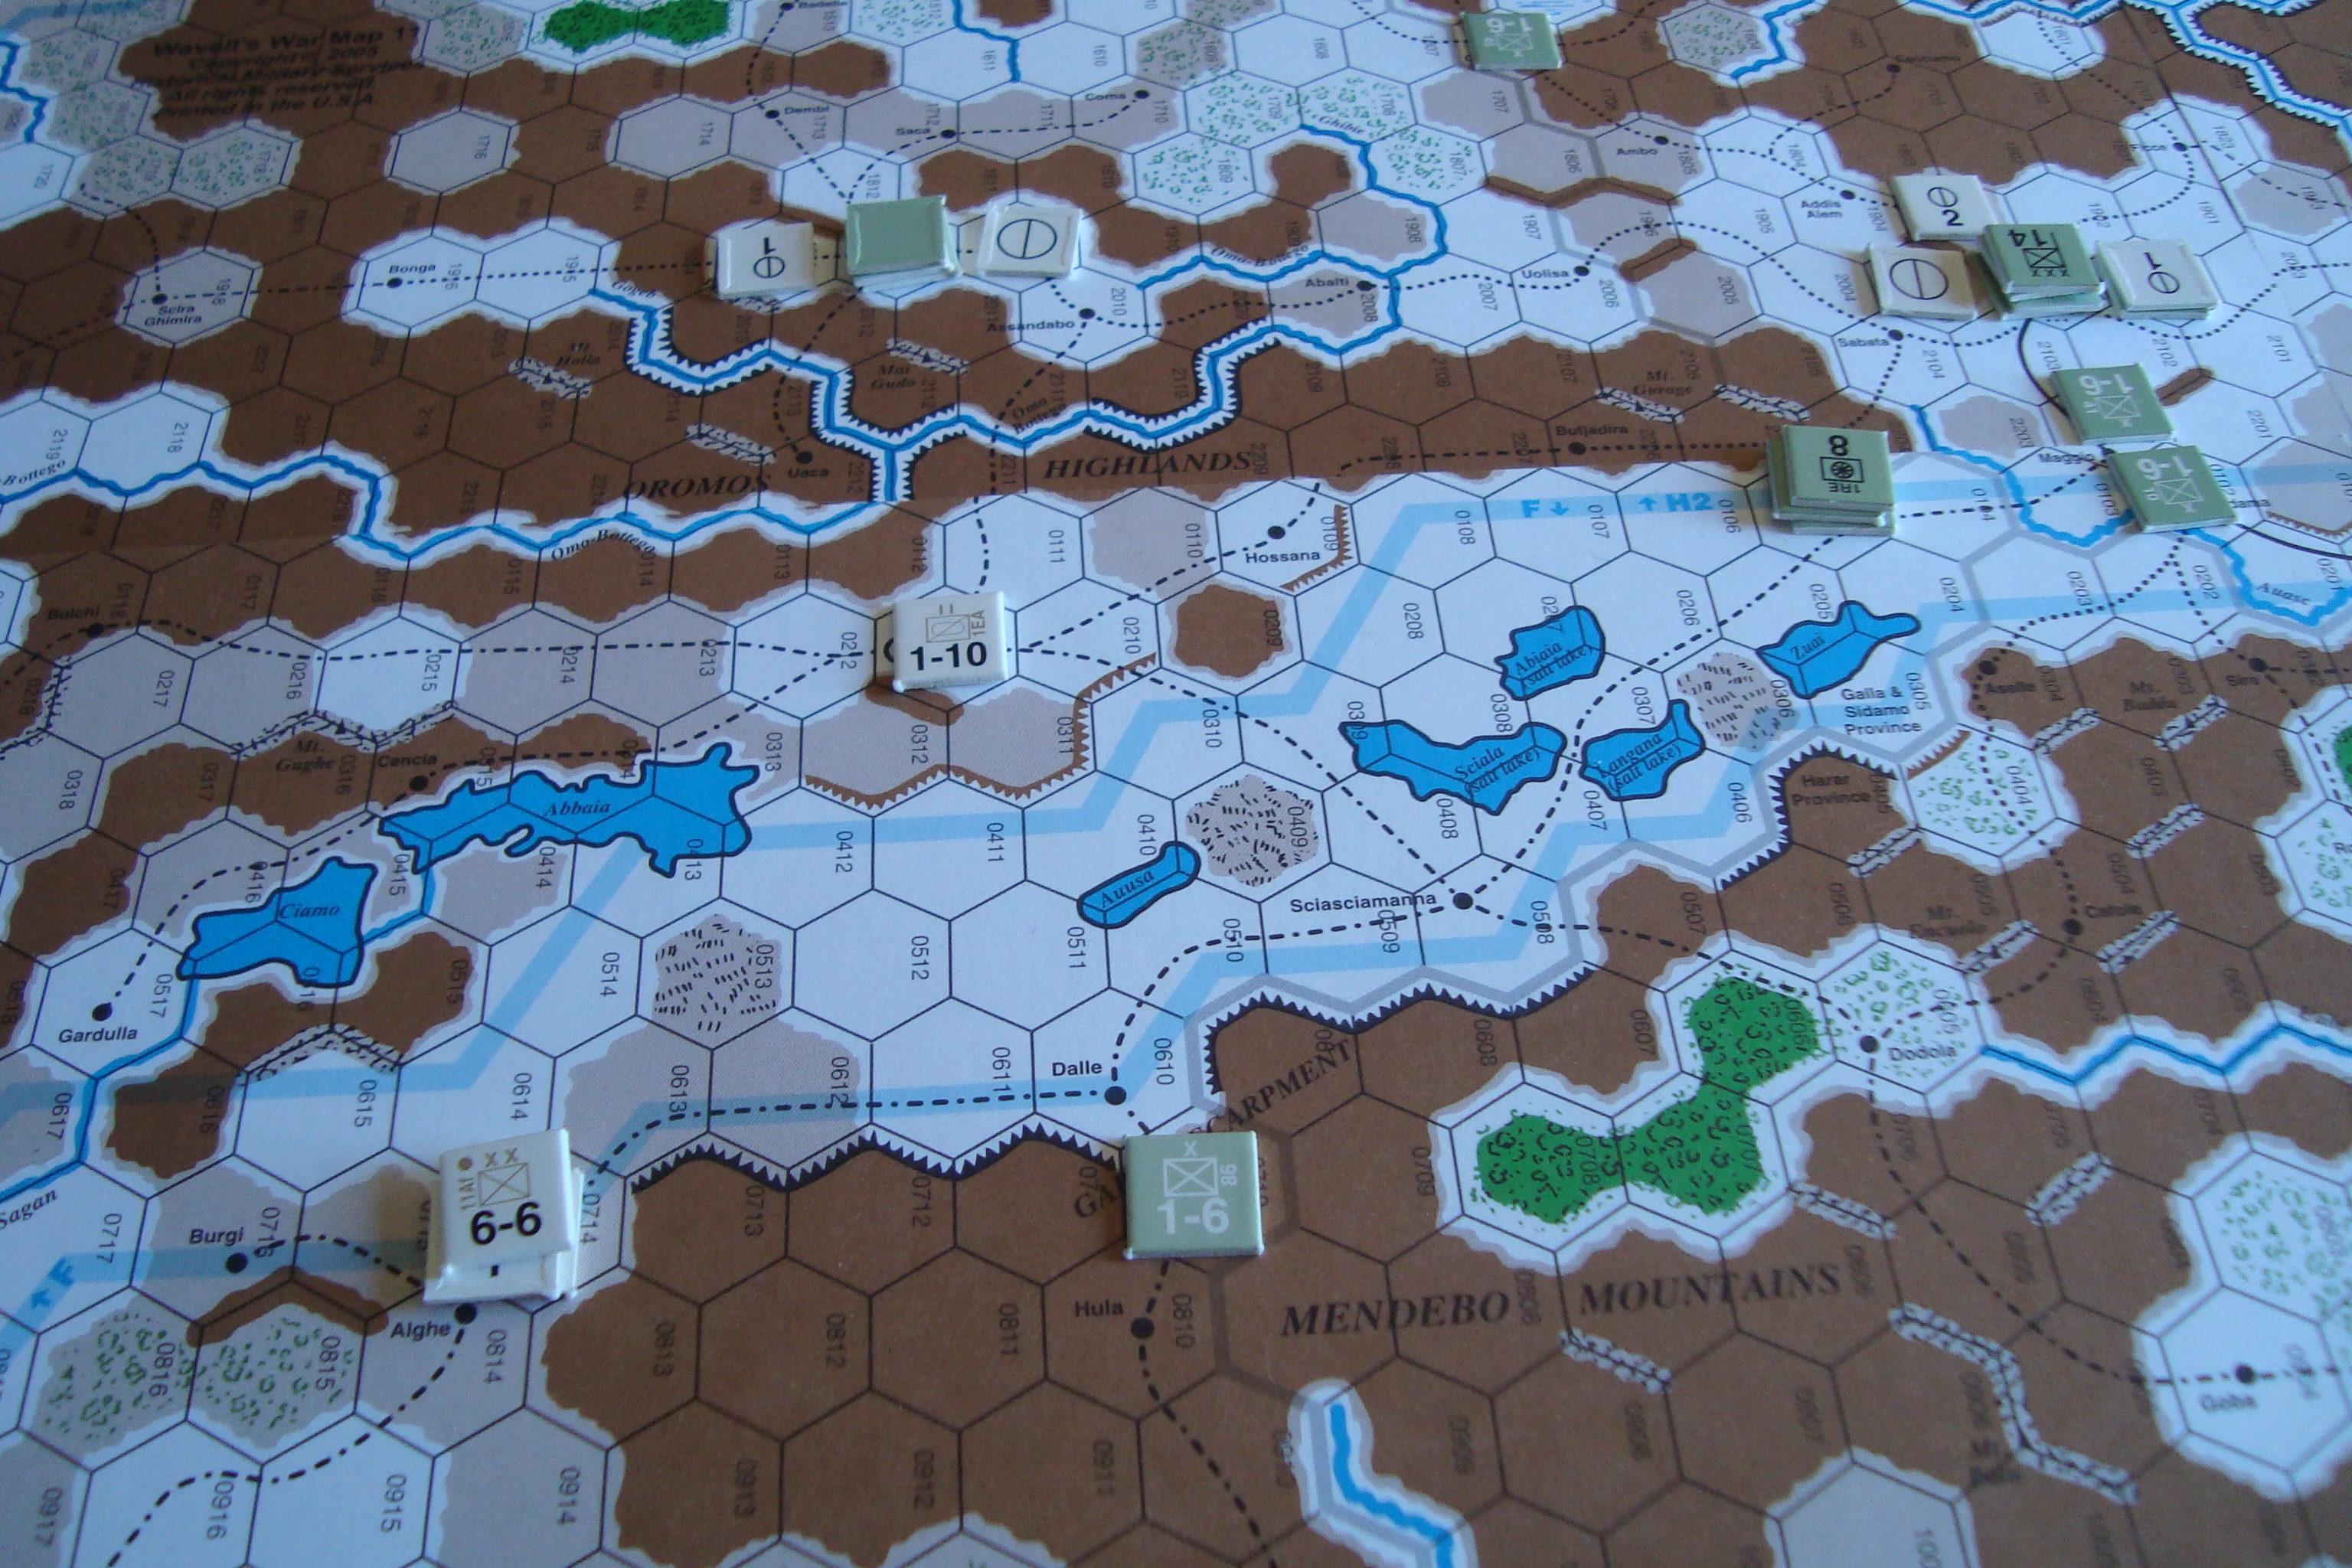
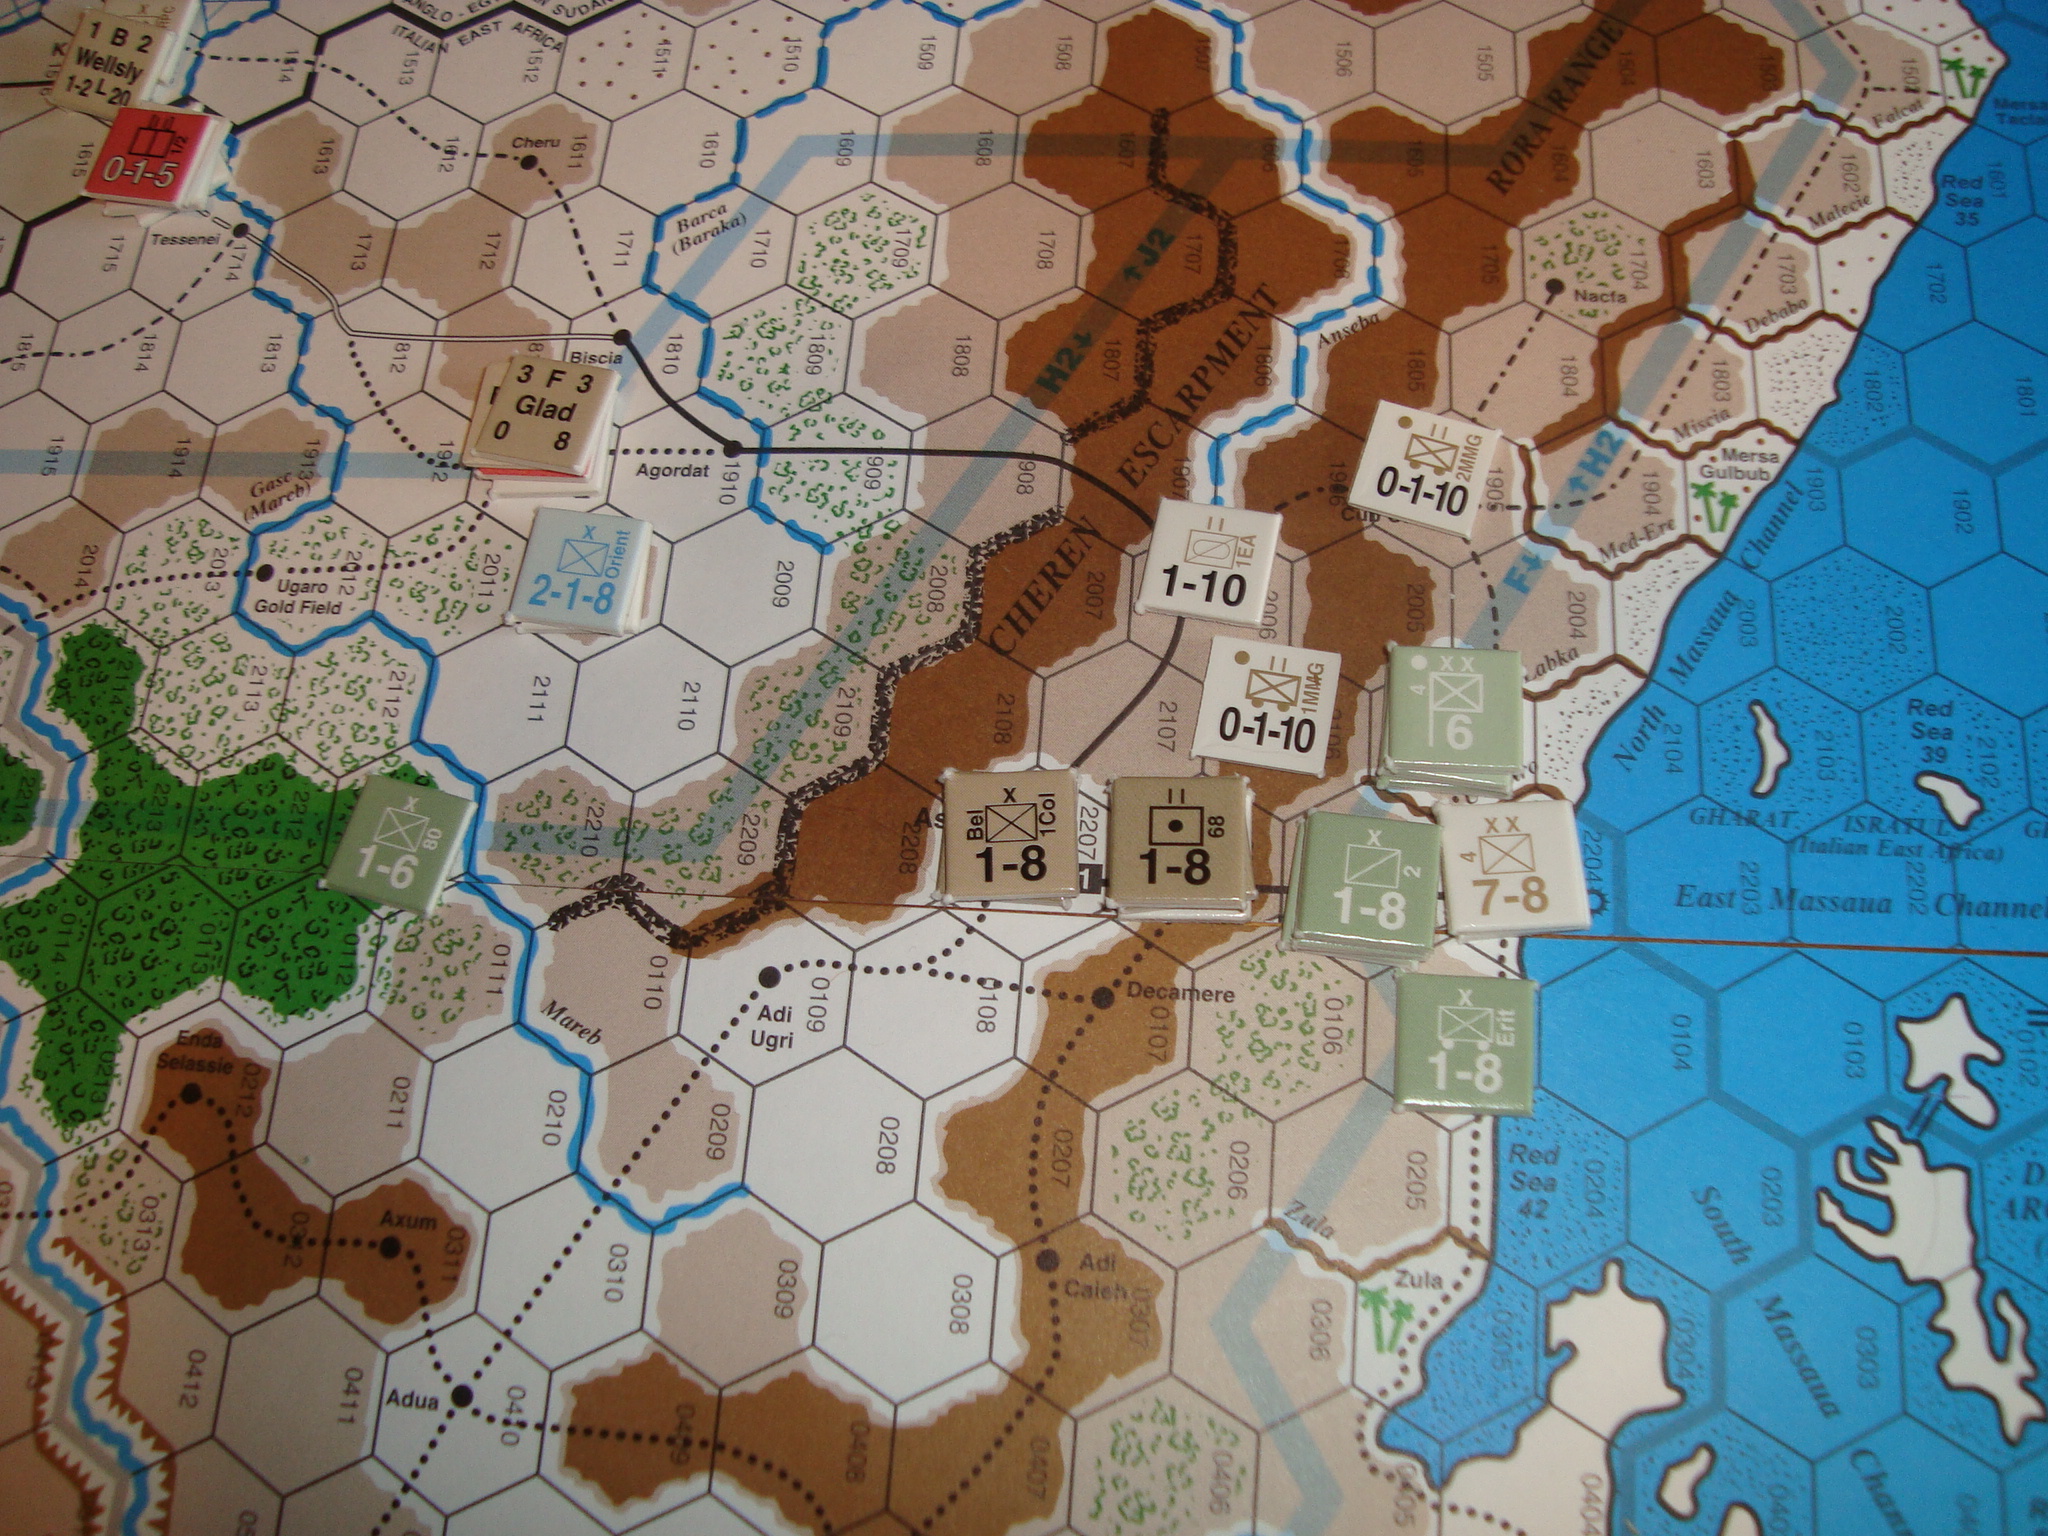
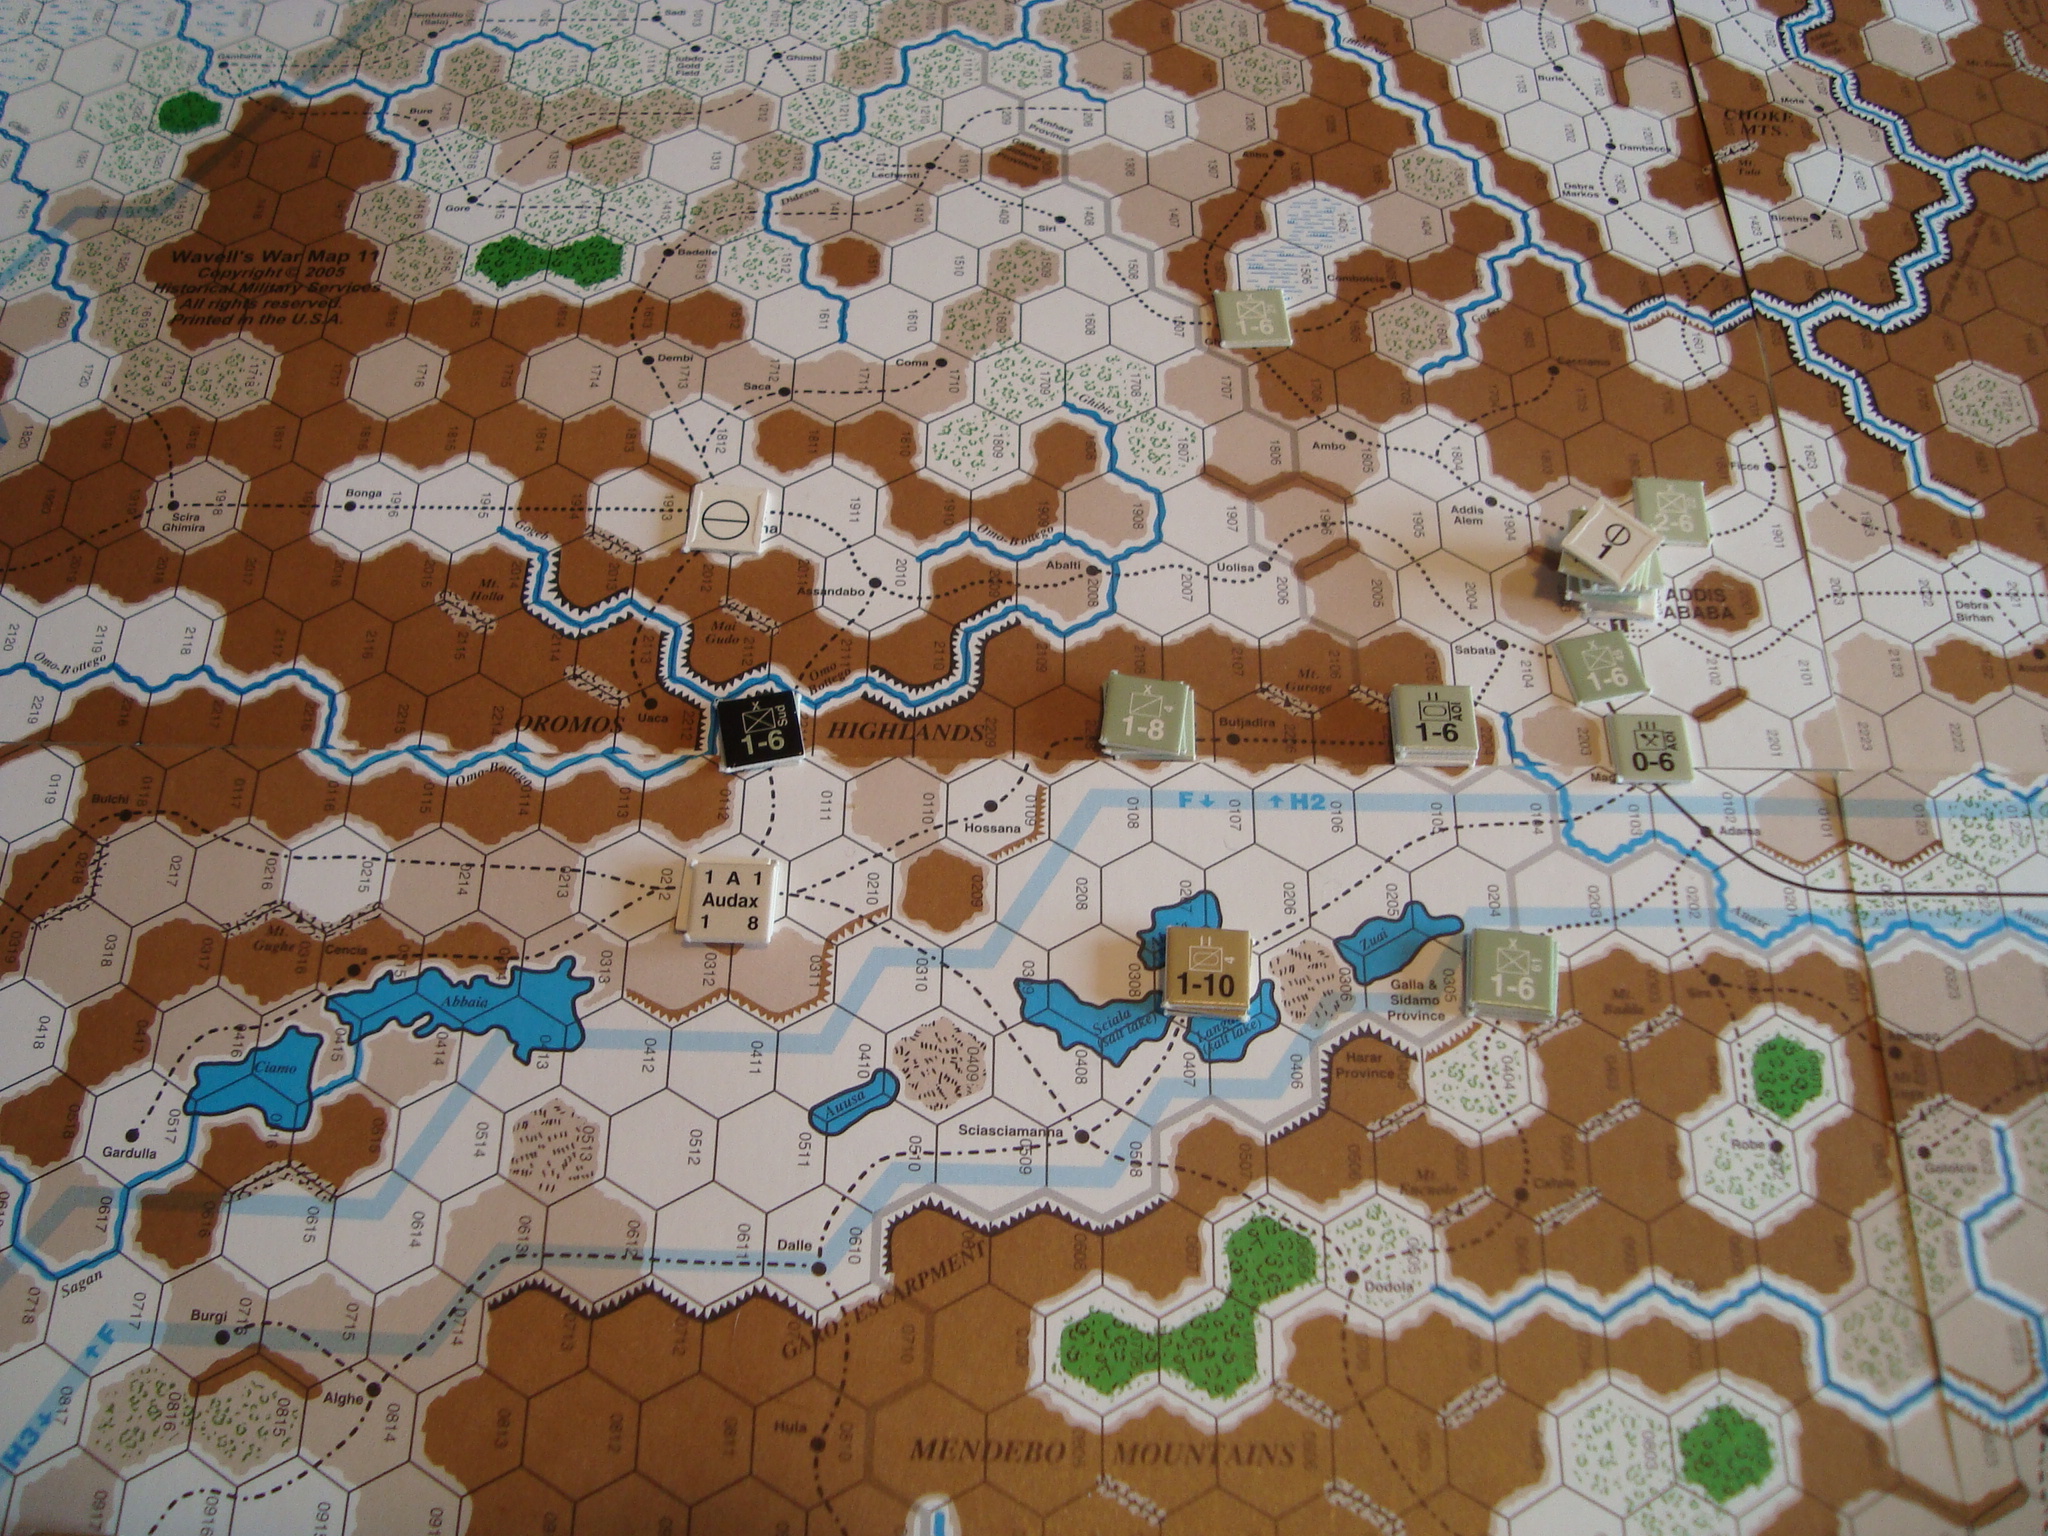
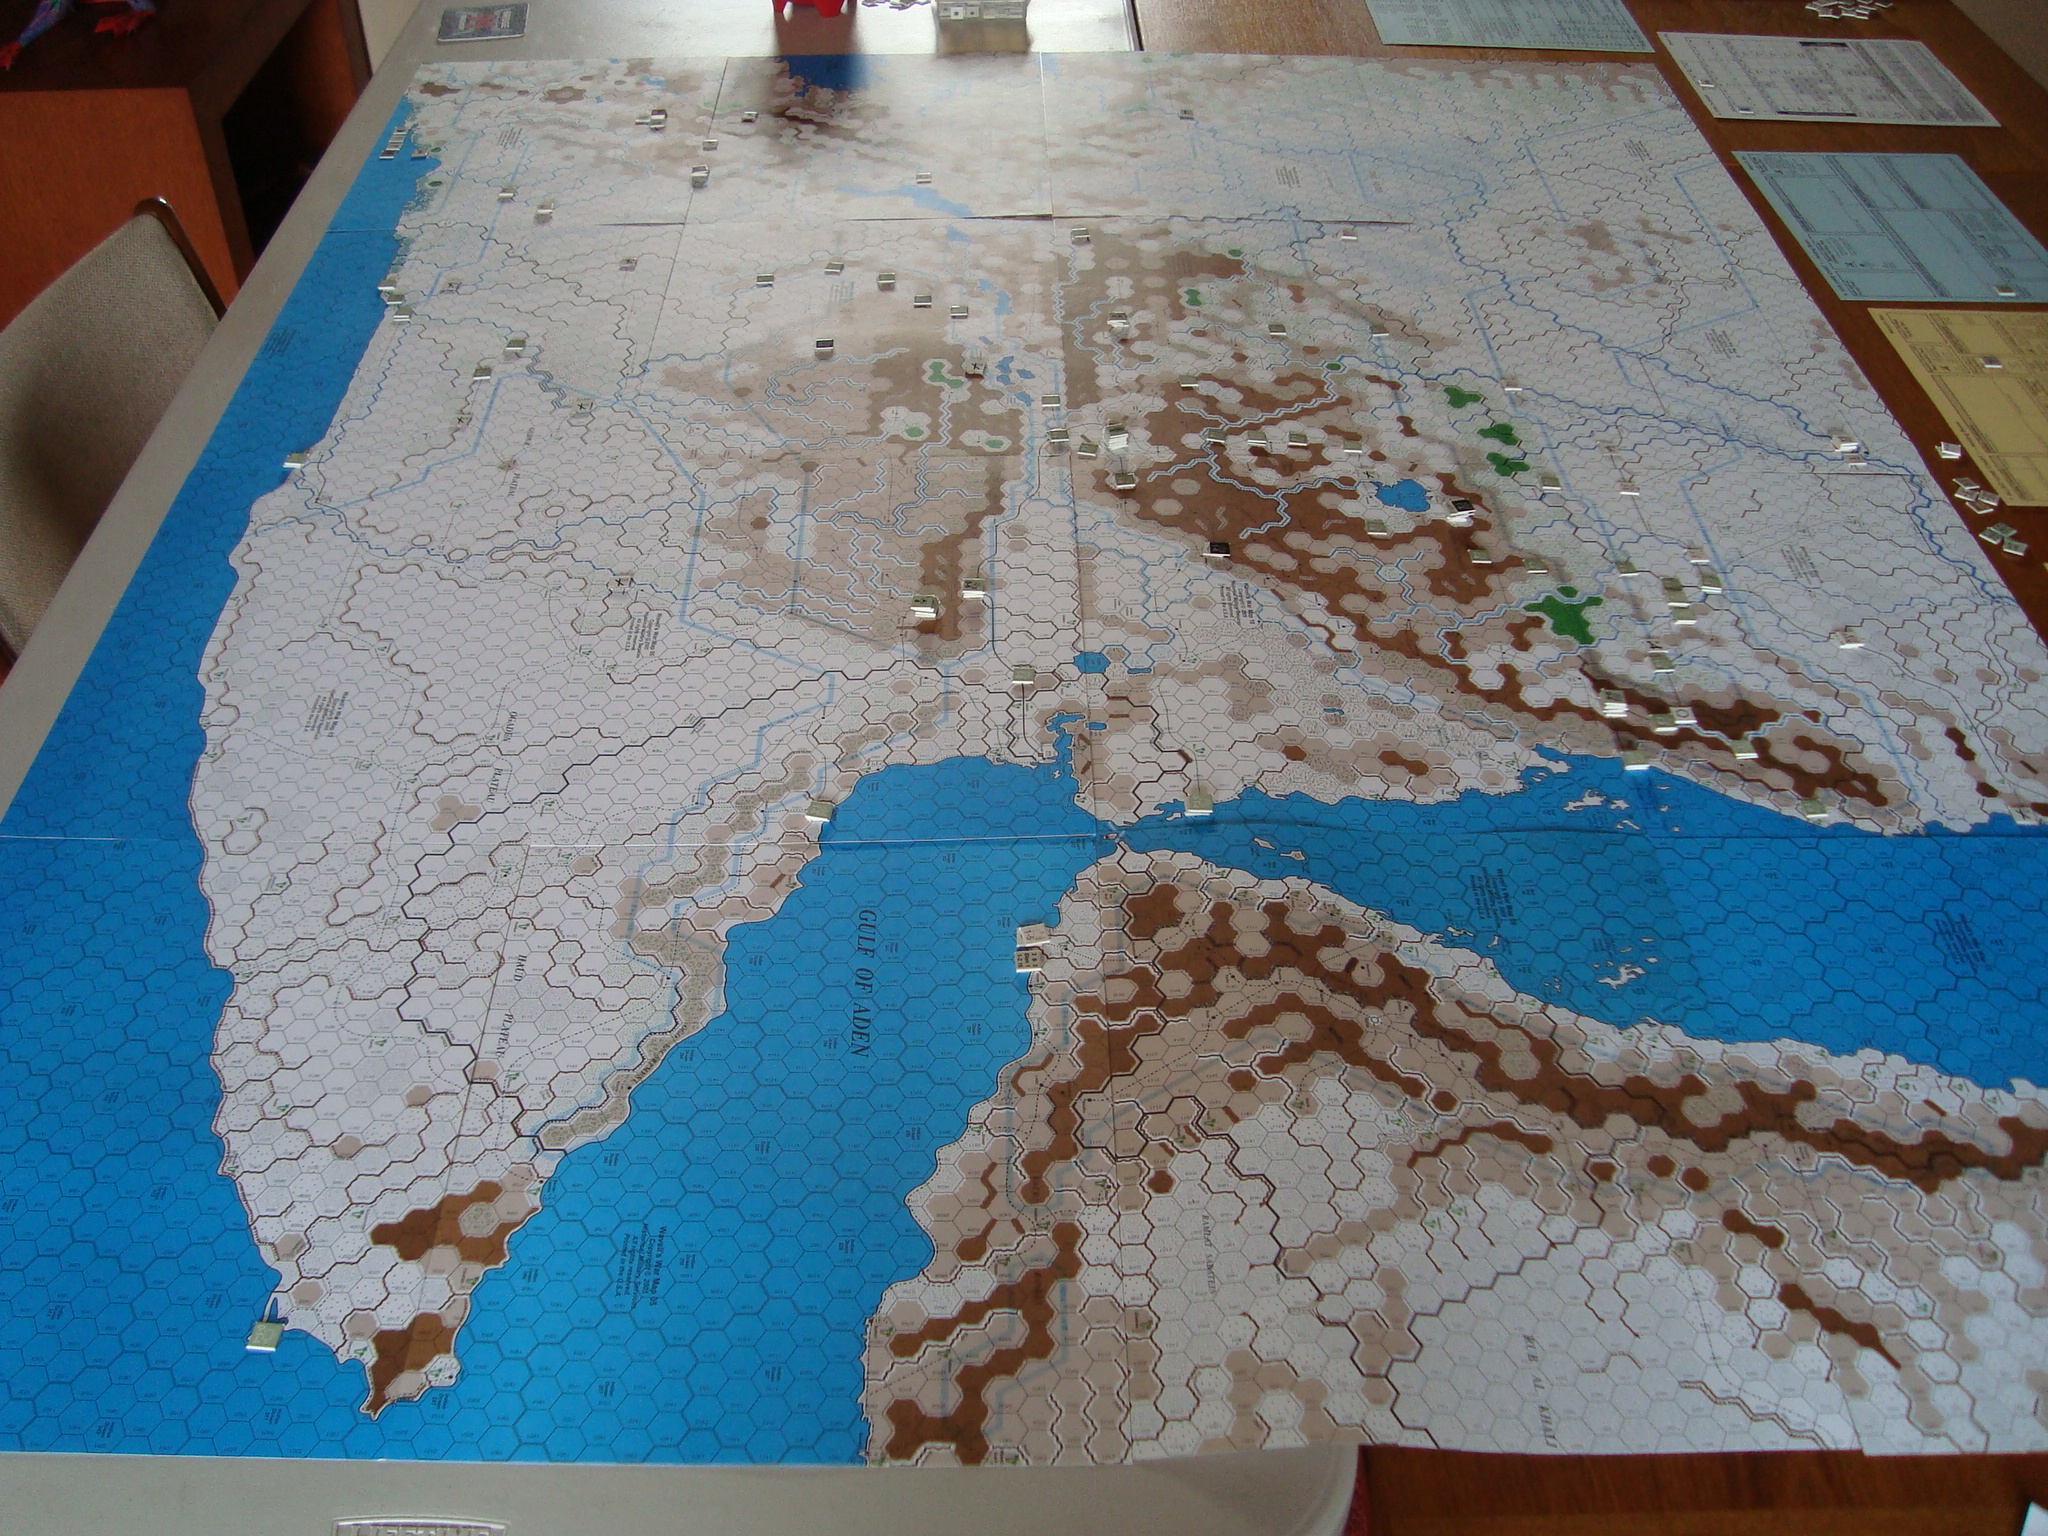
South Africans Advance Towards Addis Ababa (Upper Right).
Feb II – Mud
Allies: Consolidate near Keren. South Africans now slog in mud towards Addis Ababa.
Axis: Establish defense around Massaula, continues to move/consolidate units near Addis Ababa.
British Begin Assault On Massalua Defenders After Capturing Keren. Flipped Italian Units Are Out Of Supply.
At this point , VIPs were tallied, with each side having two (2).
March I – Mud
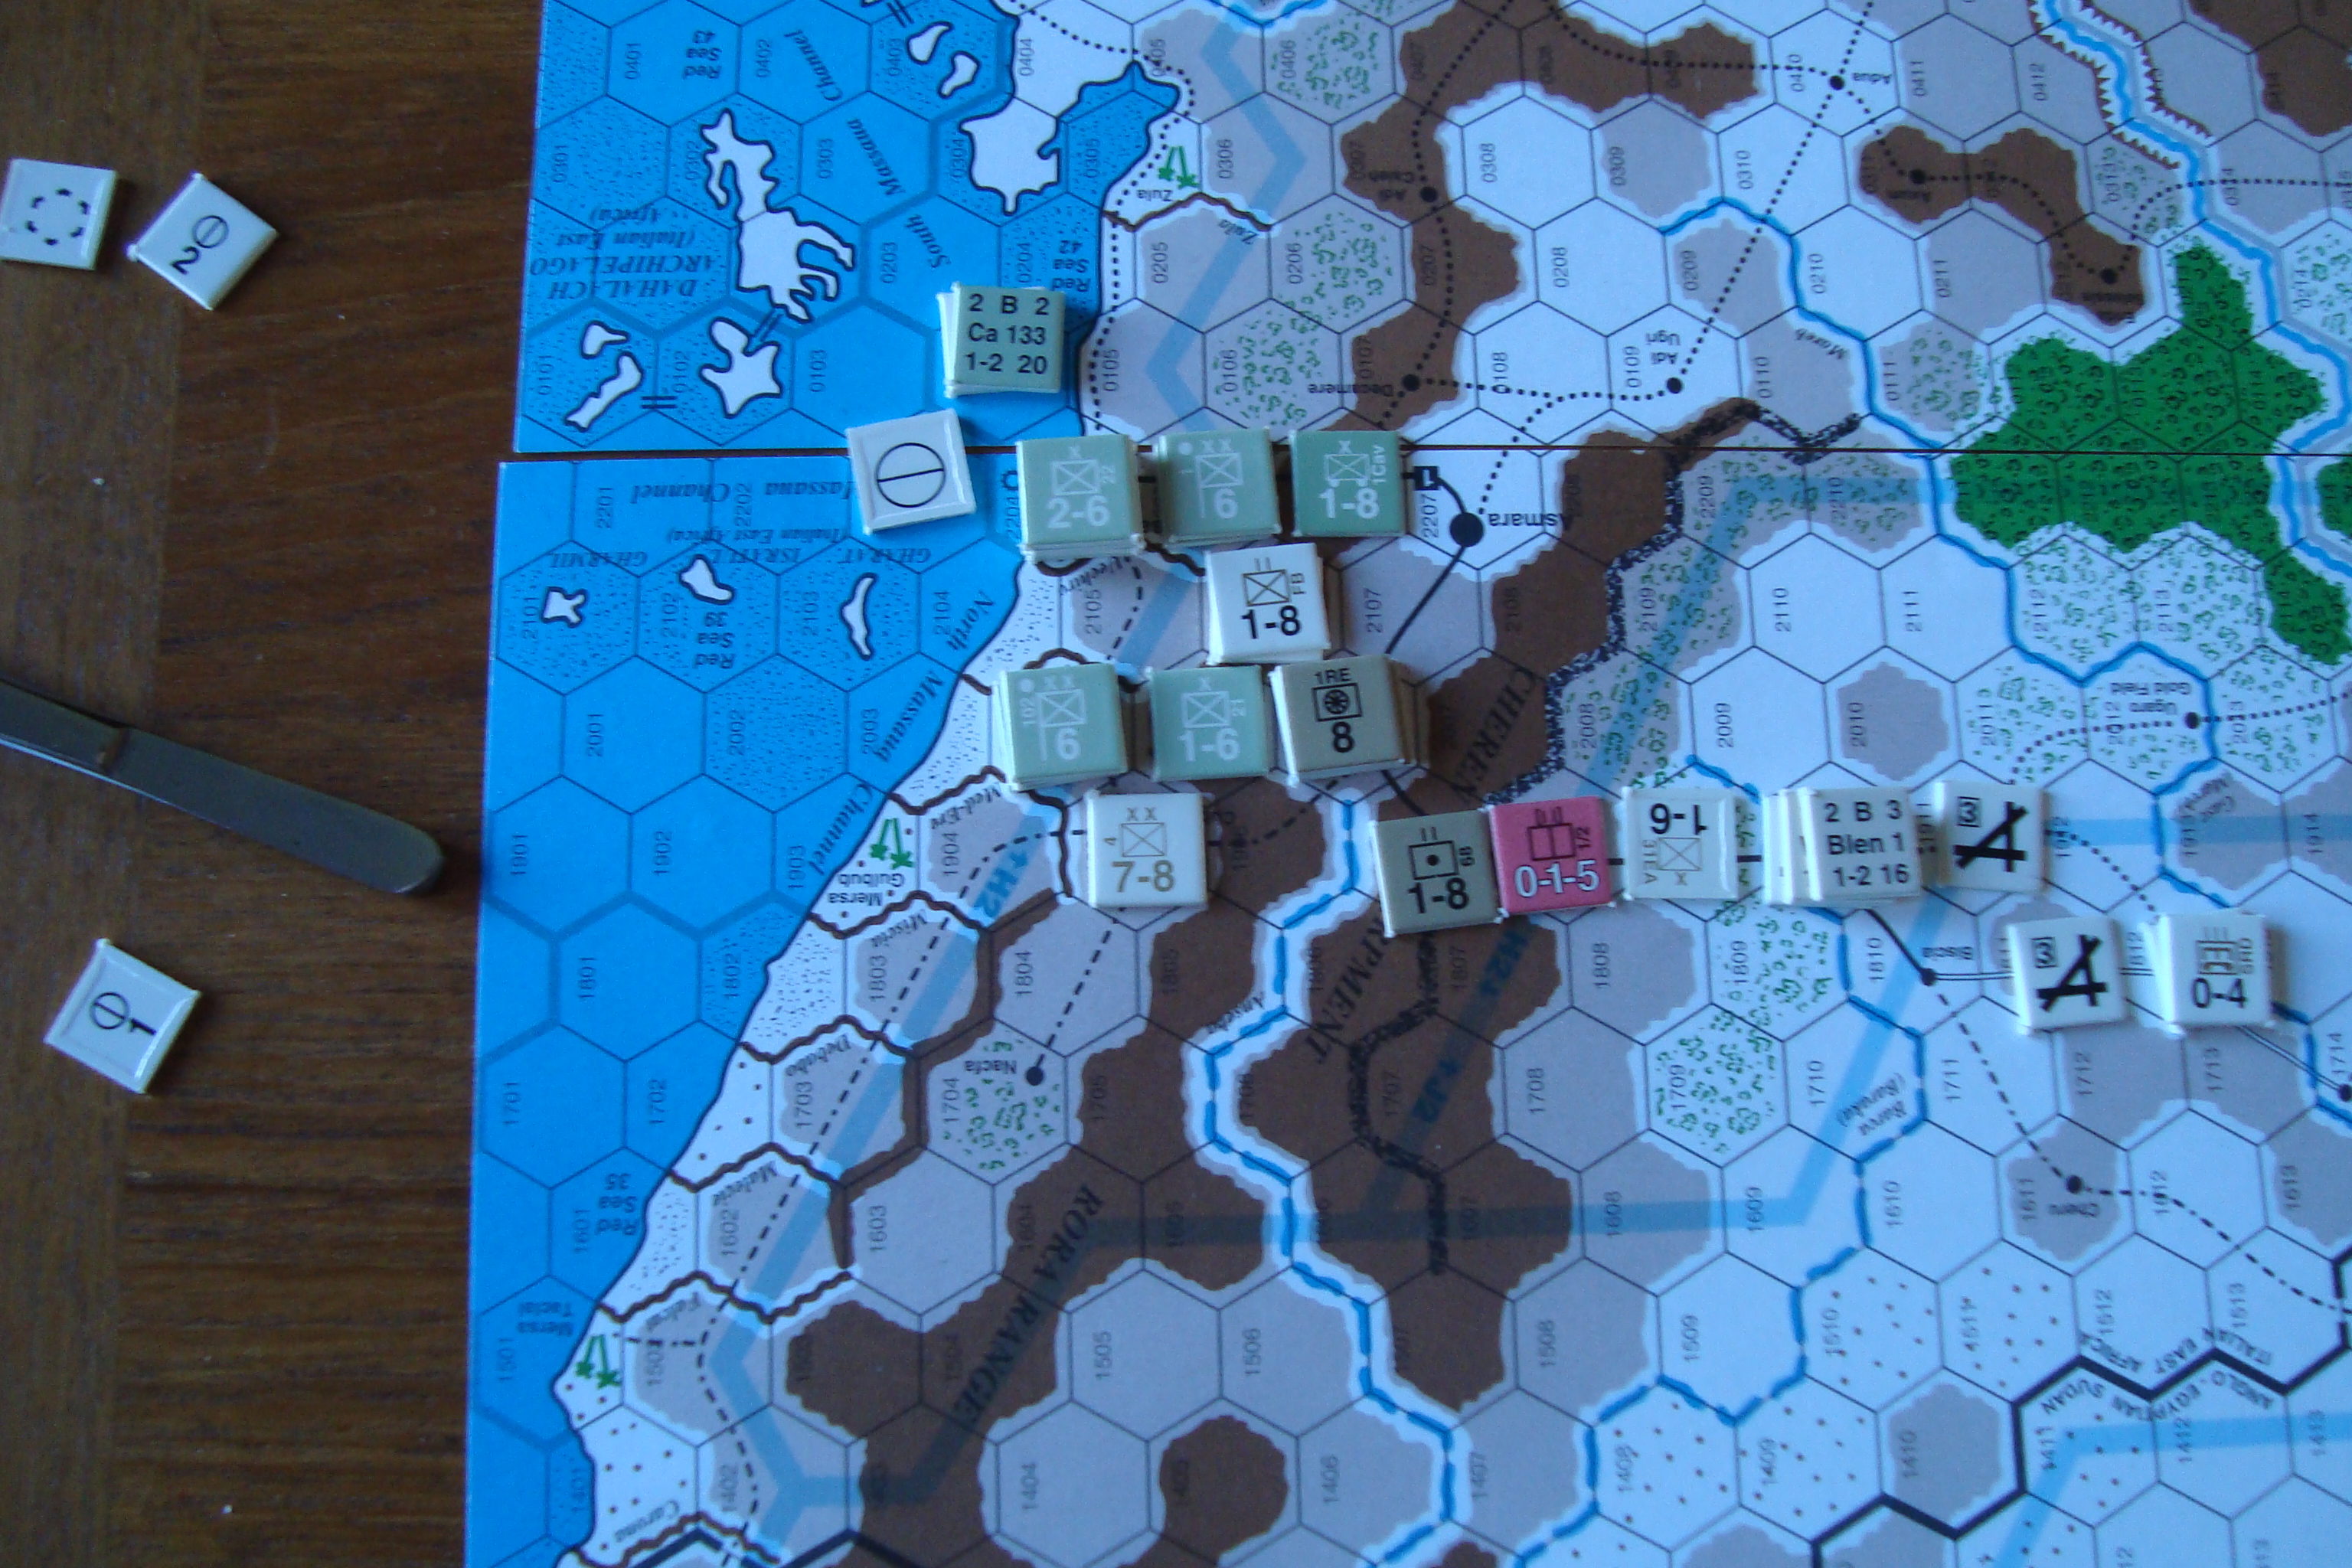
Allies: Launch assaults on Massaula perimeter defenses. Slog in south continues.
Axis: Now defending Massaula proper.
Final Defensive Perimeter For Massaula
March II – Mud
Allies: Capture Massaula (This will give them one (1) VIP), begin advance southwest towards Addis Abada. South Africans continue slog.
Axis: Forces in Addis Ababa deploy to forward defensive positions awaiting Allied advance.
April I – Mud (At this point Tim became understandably irritated by my uncanny ability to throw sixes. I pointed out to him that this was better for him with a weather role than a combat roll).
Allies and Axis: Same as March II.
At this point play stopped. We were engrossed in the Notre Dame-Texas game, and it appeared that the game would continue for more turns than time remaining to play.
Had a nice talk with Tim last night about our recent Wavell’s War game and, especially, his posted comments.
I had some real second thoughts about the validity of using scrapped unit replacement points to build new headquarters. Big sigh of relief when I checked the rules this morning and confirmed it is OK.
We also talked about the low level of victory point (VIP) totals in the game, especially since they are calculated, for the most part, in January and July, only. This makes the status of Massua absolutely critical. This city is worth three VIPs per initial phase on or after April I/II ’41 for the side that controls the city.
With this in mind, Tim’s analyses of his attack supply and railroad construction challenges are very pertinent to successful Allied play.
I think we agreed to try it again. The when is TBD.
Back from Spring Training. Tim forwarded his observations while I was in Arizona. Here they are:
I like your idea of using your RPs from scrapping units to buy back HQs. Clever!
Having no SMPs in the Sudan really hurts the British. Once I moved forward from my railheads, I couldn’t use my attack supply. My logistics problems were of distributing attack supply, rather than the Italian problem of not having any. It didn’t help that I didn’t know that I only had to build two hexes of rail line. It wasn’t until I read the appendix on transportation lines that I found out that the rest of that rail road connecting the Sudan and Eritrea had been built. Being able to rail supply into Eritrea would have really helped the British.
I was pleased with my use of the motorized SDF battalions. Those guys saved my butt more than once!
I didn’t read the OB as closely as I normally do, which hurt me. I missed the Blen 1 unit in Aden and could have built a light armored battalion several turns sooner than I actually did. I’m embarrassed as I normally carefully read the OBs, which always pays off.
I think I dispersed my forces too much. In retrospect I probably should have used both divisions together in the Sudan and moved some non divisional units down the coast (in my defense, I didn’t realize how bad those ravine hexsides were– they really help the defense). The same applies in the south where I should have stacked some colonial units with the South Africans since I had lots of colonial RPs.
I wonder if I should have taken festung Berbera and then moved into the interior…
That exchange on the South Africans really hurt! That attack came to a halt until I could bring up another division from the coast, which cost me at least a month when I really couldn’t afford it. I had a couple of other exchanges and they all hurt, especially once I had to start withdrawing units.
I didn’t use my amphibious landing ability. I wonder if I should have tried taking some of the ports from the sea or landed next to Massawa…
The weather was a real headache. In most games its pretty predictable but in this one, it wasn’t.
There are a lot of Italian ants. I’m sure from the Italian point of view, it feels like you’re getting wiped out but from the British point of view, it felt like the ants were getting ready to overwhelm the anteaters. Once the Italians can concentrate their units it gets harder to destroy them.
This weekend’s game was an adventure; with unfamiliar rules and daunting operational constraints, not to mention the sheer size of the area of operations. This will be a quick overview. Hopefully Tim will post up. I’ll add some additional observations once I get back into town.
Tim was stalled in the always unpredictable Friday Portland traffic and didn’t arrive until after 1800. We decided to spend the evening familiarizing ourselves with the East Africa specific/pertinent rules (we also decided to forgo all the optional rules as this was our first time through the game) and watching the NCAA Men’s Basketball Tournament. That was an adventure, too.
While we have been playing Europa for way too long, this game was something different, particularly the use of attack supply, and for the Italians, the need to convert limited attack supply resources to general supply. Without general supply, the Italians, who do not have any general supply sources (only limited ones), had their attack strengths quartered, movement halved, defense halved, and lost all armored effects. Their limited aircraft assets were subject to similar constraints when out of supply. In fact, each mission was a crap shoot. With bad rolls on the success table, the mission never occurred, or worse, the aircraft went into the aborted box. And with only one ARP, that meant it was gone. To make things even better, any use of SMPs reduced the remaining pool of SMPs, with Italian capabilities becoming even more pathetic as the game wore on.
However, the Italians weren’t the only ones handicapped by logistics. Even though the British are in general supply, they have limited attack supply resources and have to move them across East Africa before they can come to grip with the Italians. While the British can assemble divisions, their use is limited as they are withdrawn from use relatively early in the game.
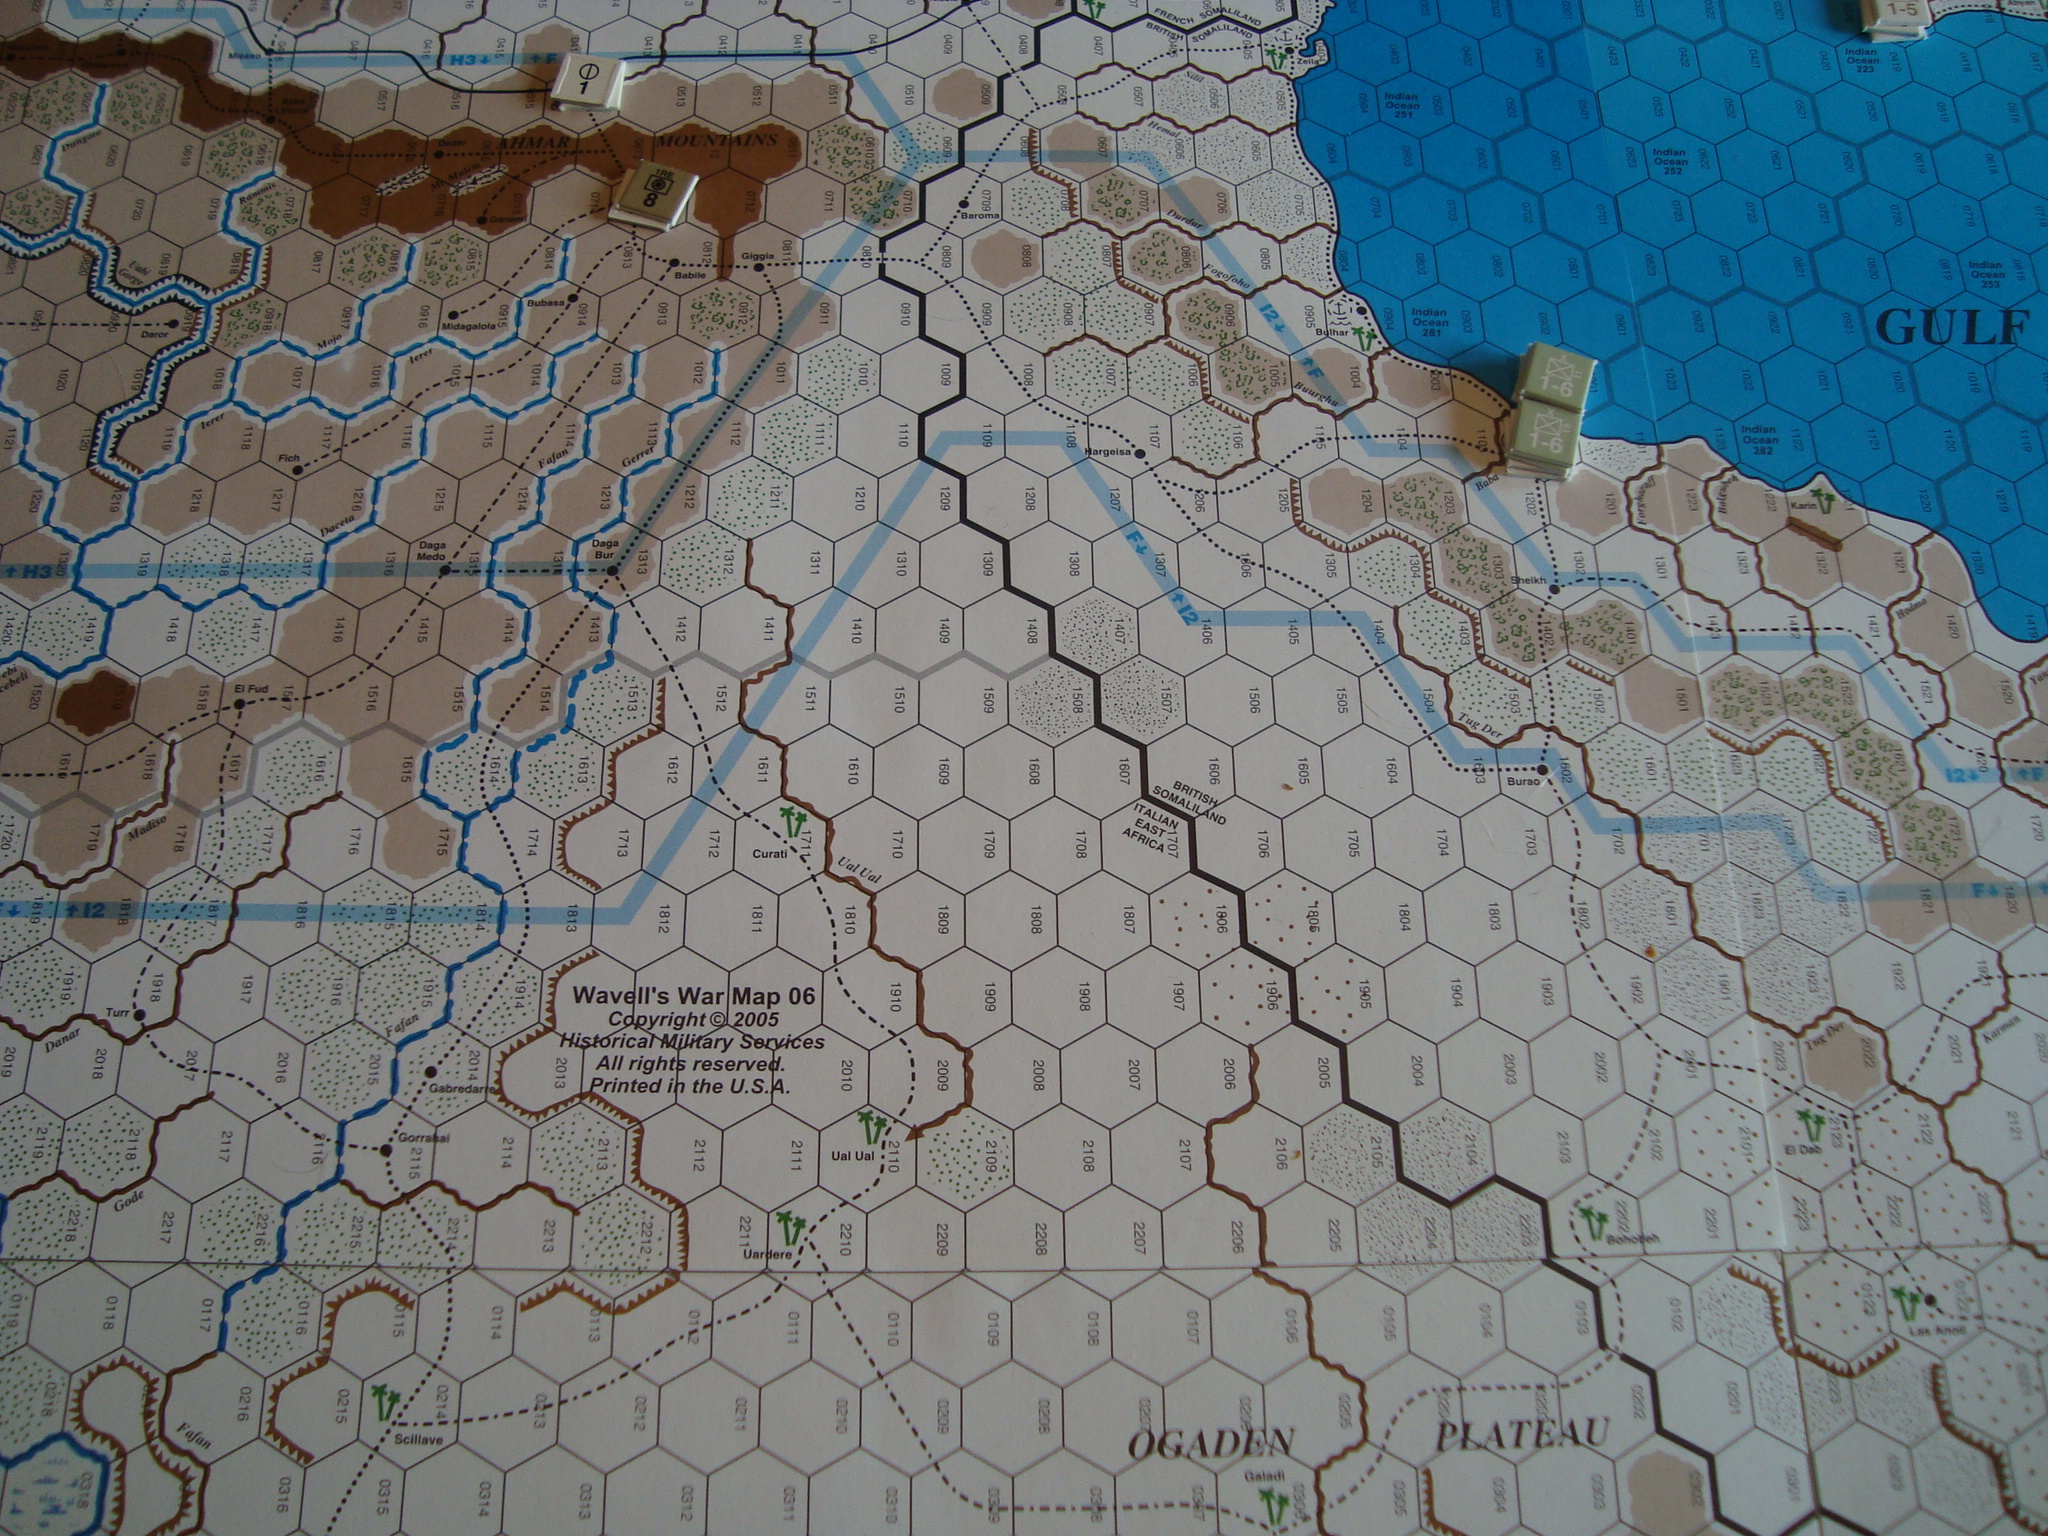
As you can see from the previous post, the area of operations is huge. The impact of size is compounded by the low movement rates of most units. There are very few mechanized units, and those that are in the OB have little combat power. Truck assets are worth their weight in gold. Not only can they increase an infantry’s units movements, but can also take advantage of exploitation movement. Once again, the combat power of a transportable unit (1 RE) is minimal, especially when halved if out of attack supply.
Rail capacity is low, and the amount of trackage limited. Tim will probably expand on this, but neither of us did a very good job of working with what we had.
To make even more fun, there are about 8 weather zones, and any and all of them can go from clear to grind-to-a-halt mud in a single turn.
Given all of these factors, events unfolded slowly.
Play began early Saturday. Tim had the Allies. He used three axis’ of advance. The first was down the Red Sea Coast from Sudan towards the port of Massaua (all spellings are from the maps), the second from Kenya to the southeast to secure the ports of Mogadiscio and Chismaio, with the third northeast from Kenya towards Addis Abbada. The first was aimed at gaining victory points before April II, while the second aimed at denying the Italians victory points as well as possible supplies. The third was to liberate the Ethiopian capital.
Tim made good progress on his first two axes of advance. Chismaio and Mogadiscio fell early, the Italians unable to muster more than a token defense, not helped by my unwillingness to convert a factor of attack supply into general supply. While the attack towards Massaua took more time to develop because Tim took the time to form divisions, by mid-game he was able to exploit a blunder on my part and take the city without loss. At this point, however, a combination of bad weather and sacrificial use of Italian regiments slowed the British.
The next day, Tim continued his attacks, but suffered an Exchange setback outside of Addis Abada. This, along with the need to remove some of his more powerful units for redeployment elsewhere in the Middle East, slowed his momentum and allowed me to cobble together a defensive cordon to stop his new advances towards Addis Abada from the north.
By the May II turn, we decided to devote ourselves to beer drinking and game viewing. Here’s a few photos to illustrate the course of the game. I’ll post up some other observations later.
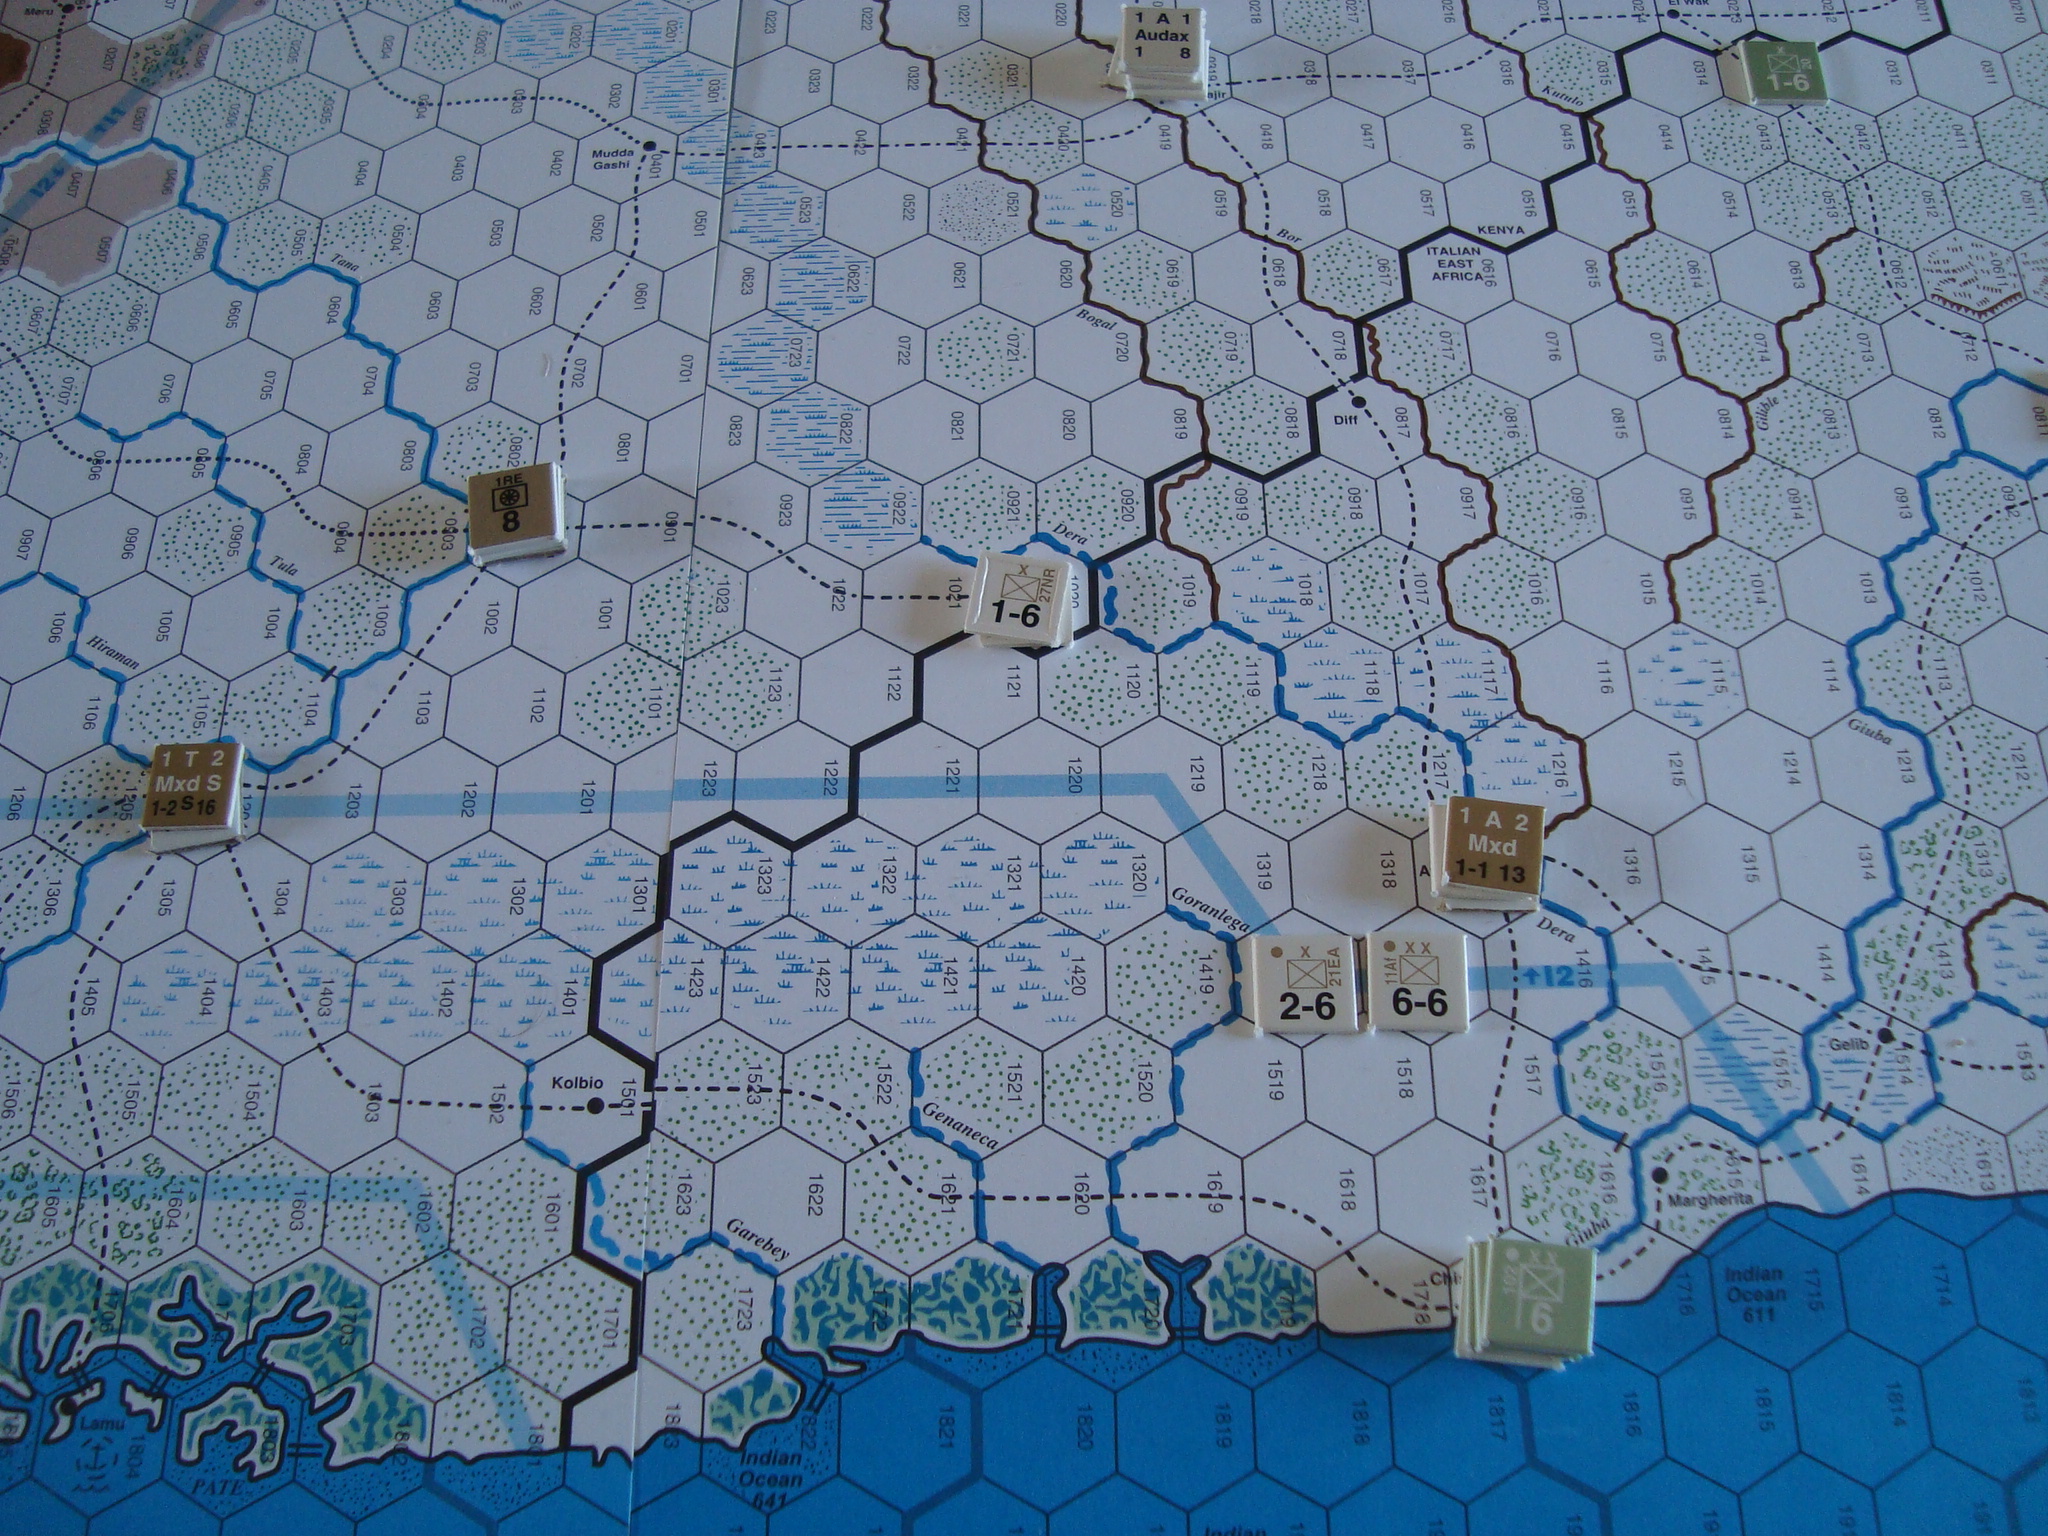
Early Game: British Advance Towards Chismaio
Early Game: British Advance North
Mid Game: Exploiting Gap, British Take Massaua and Cut Off Italian Perimeter Defense
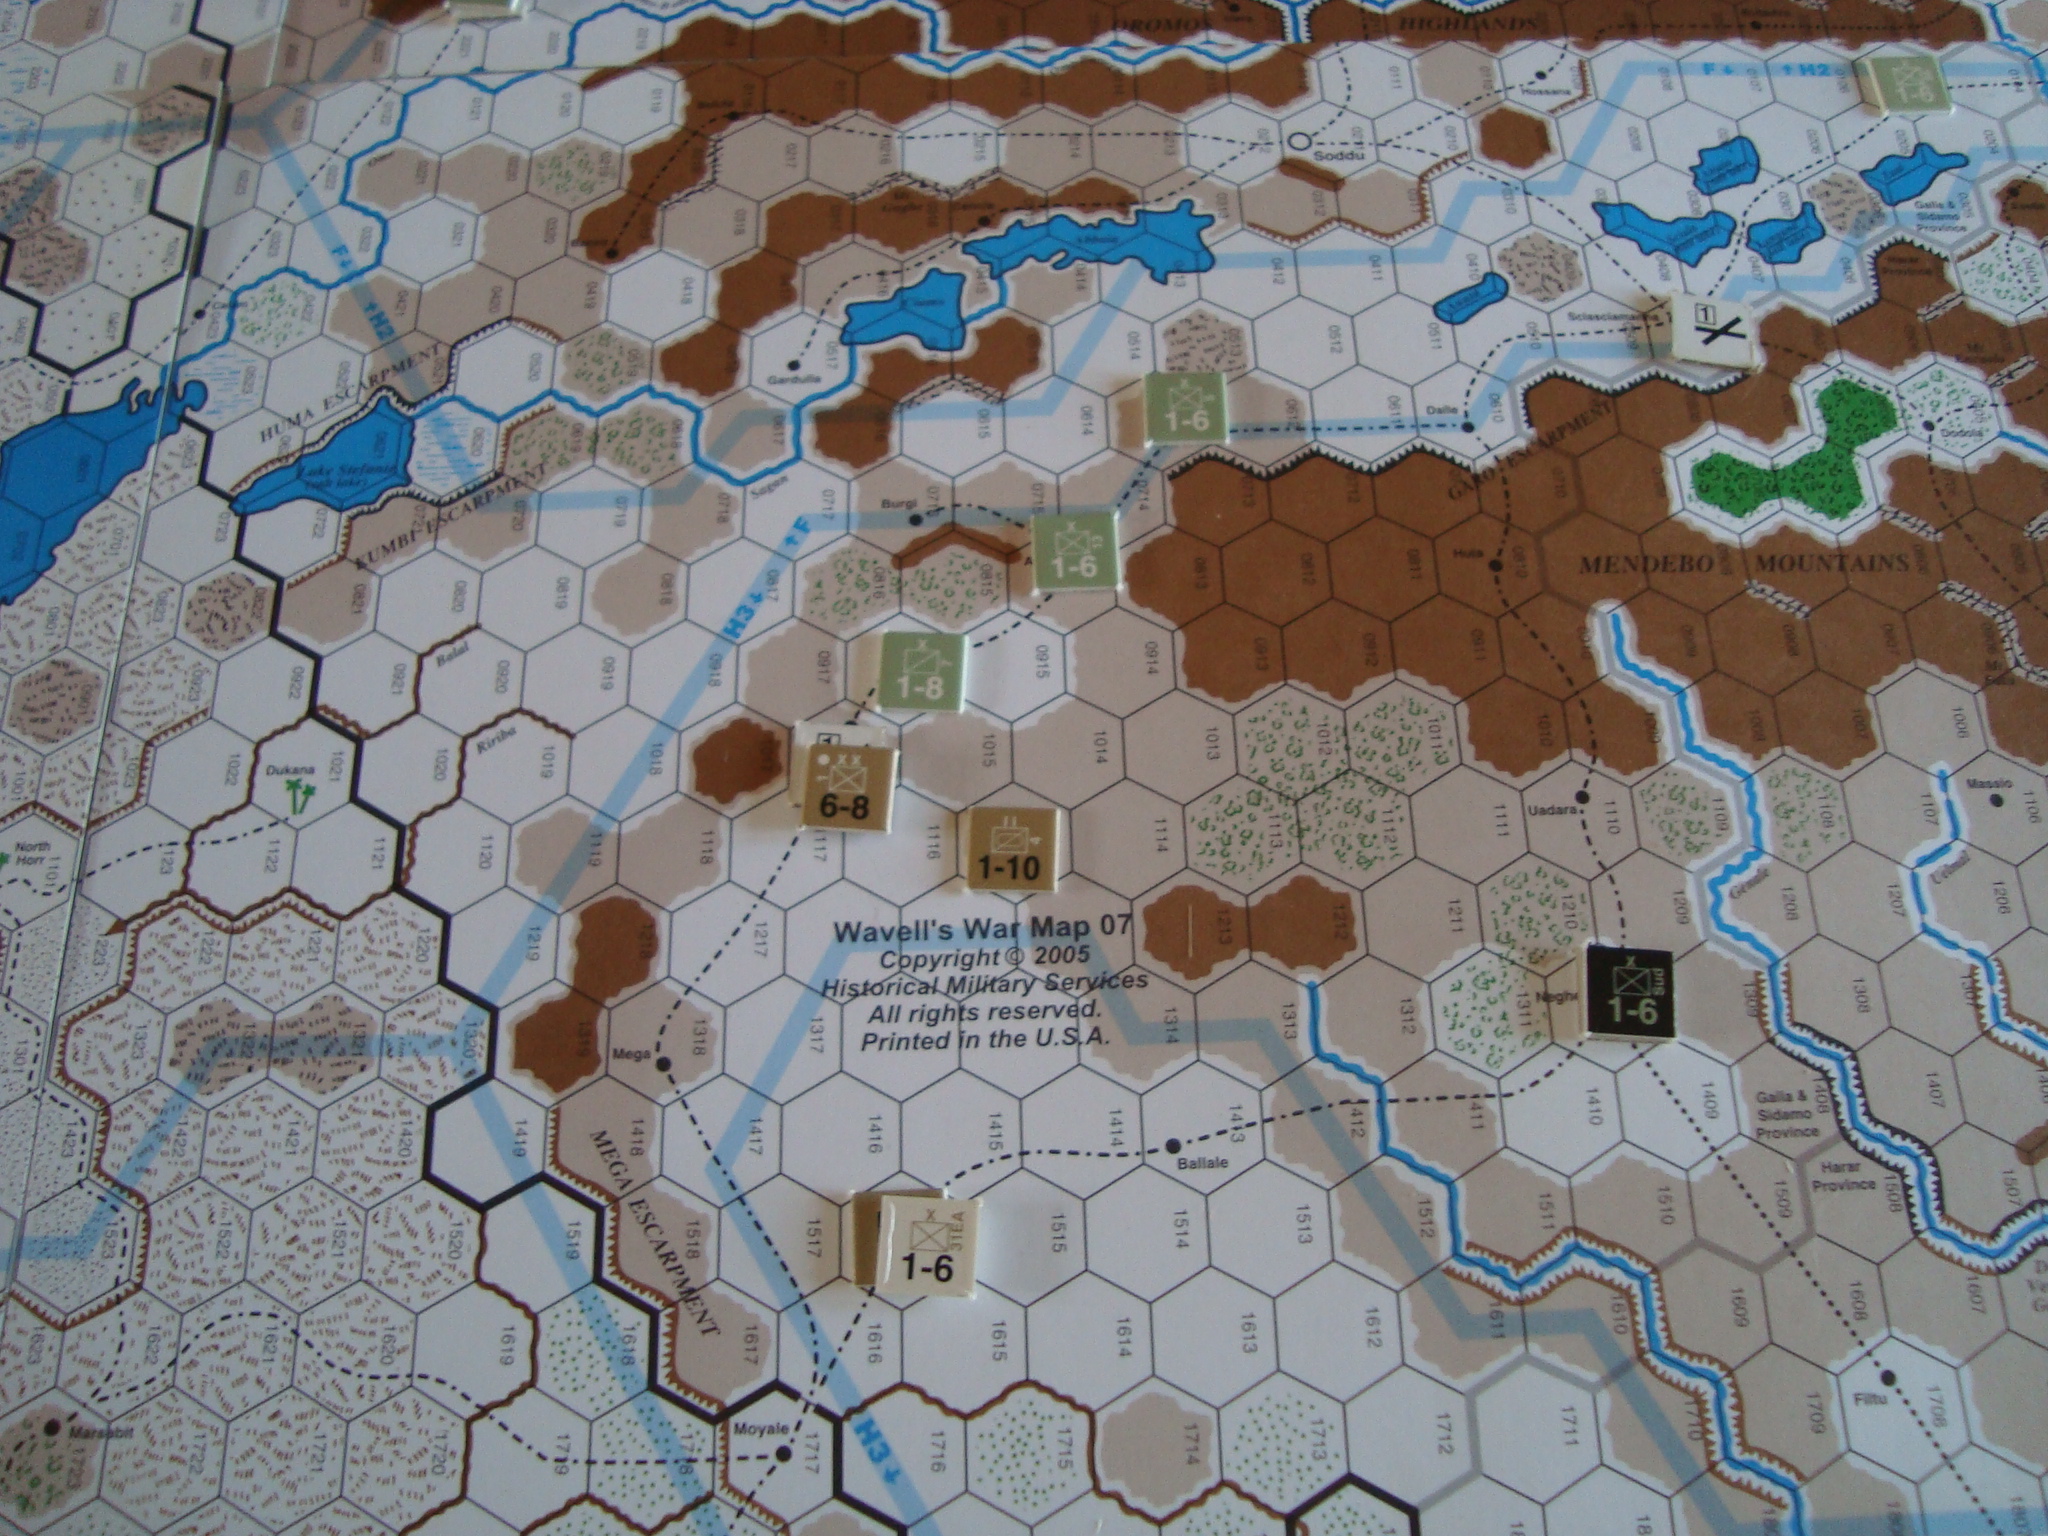
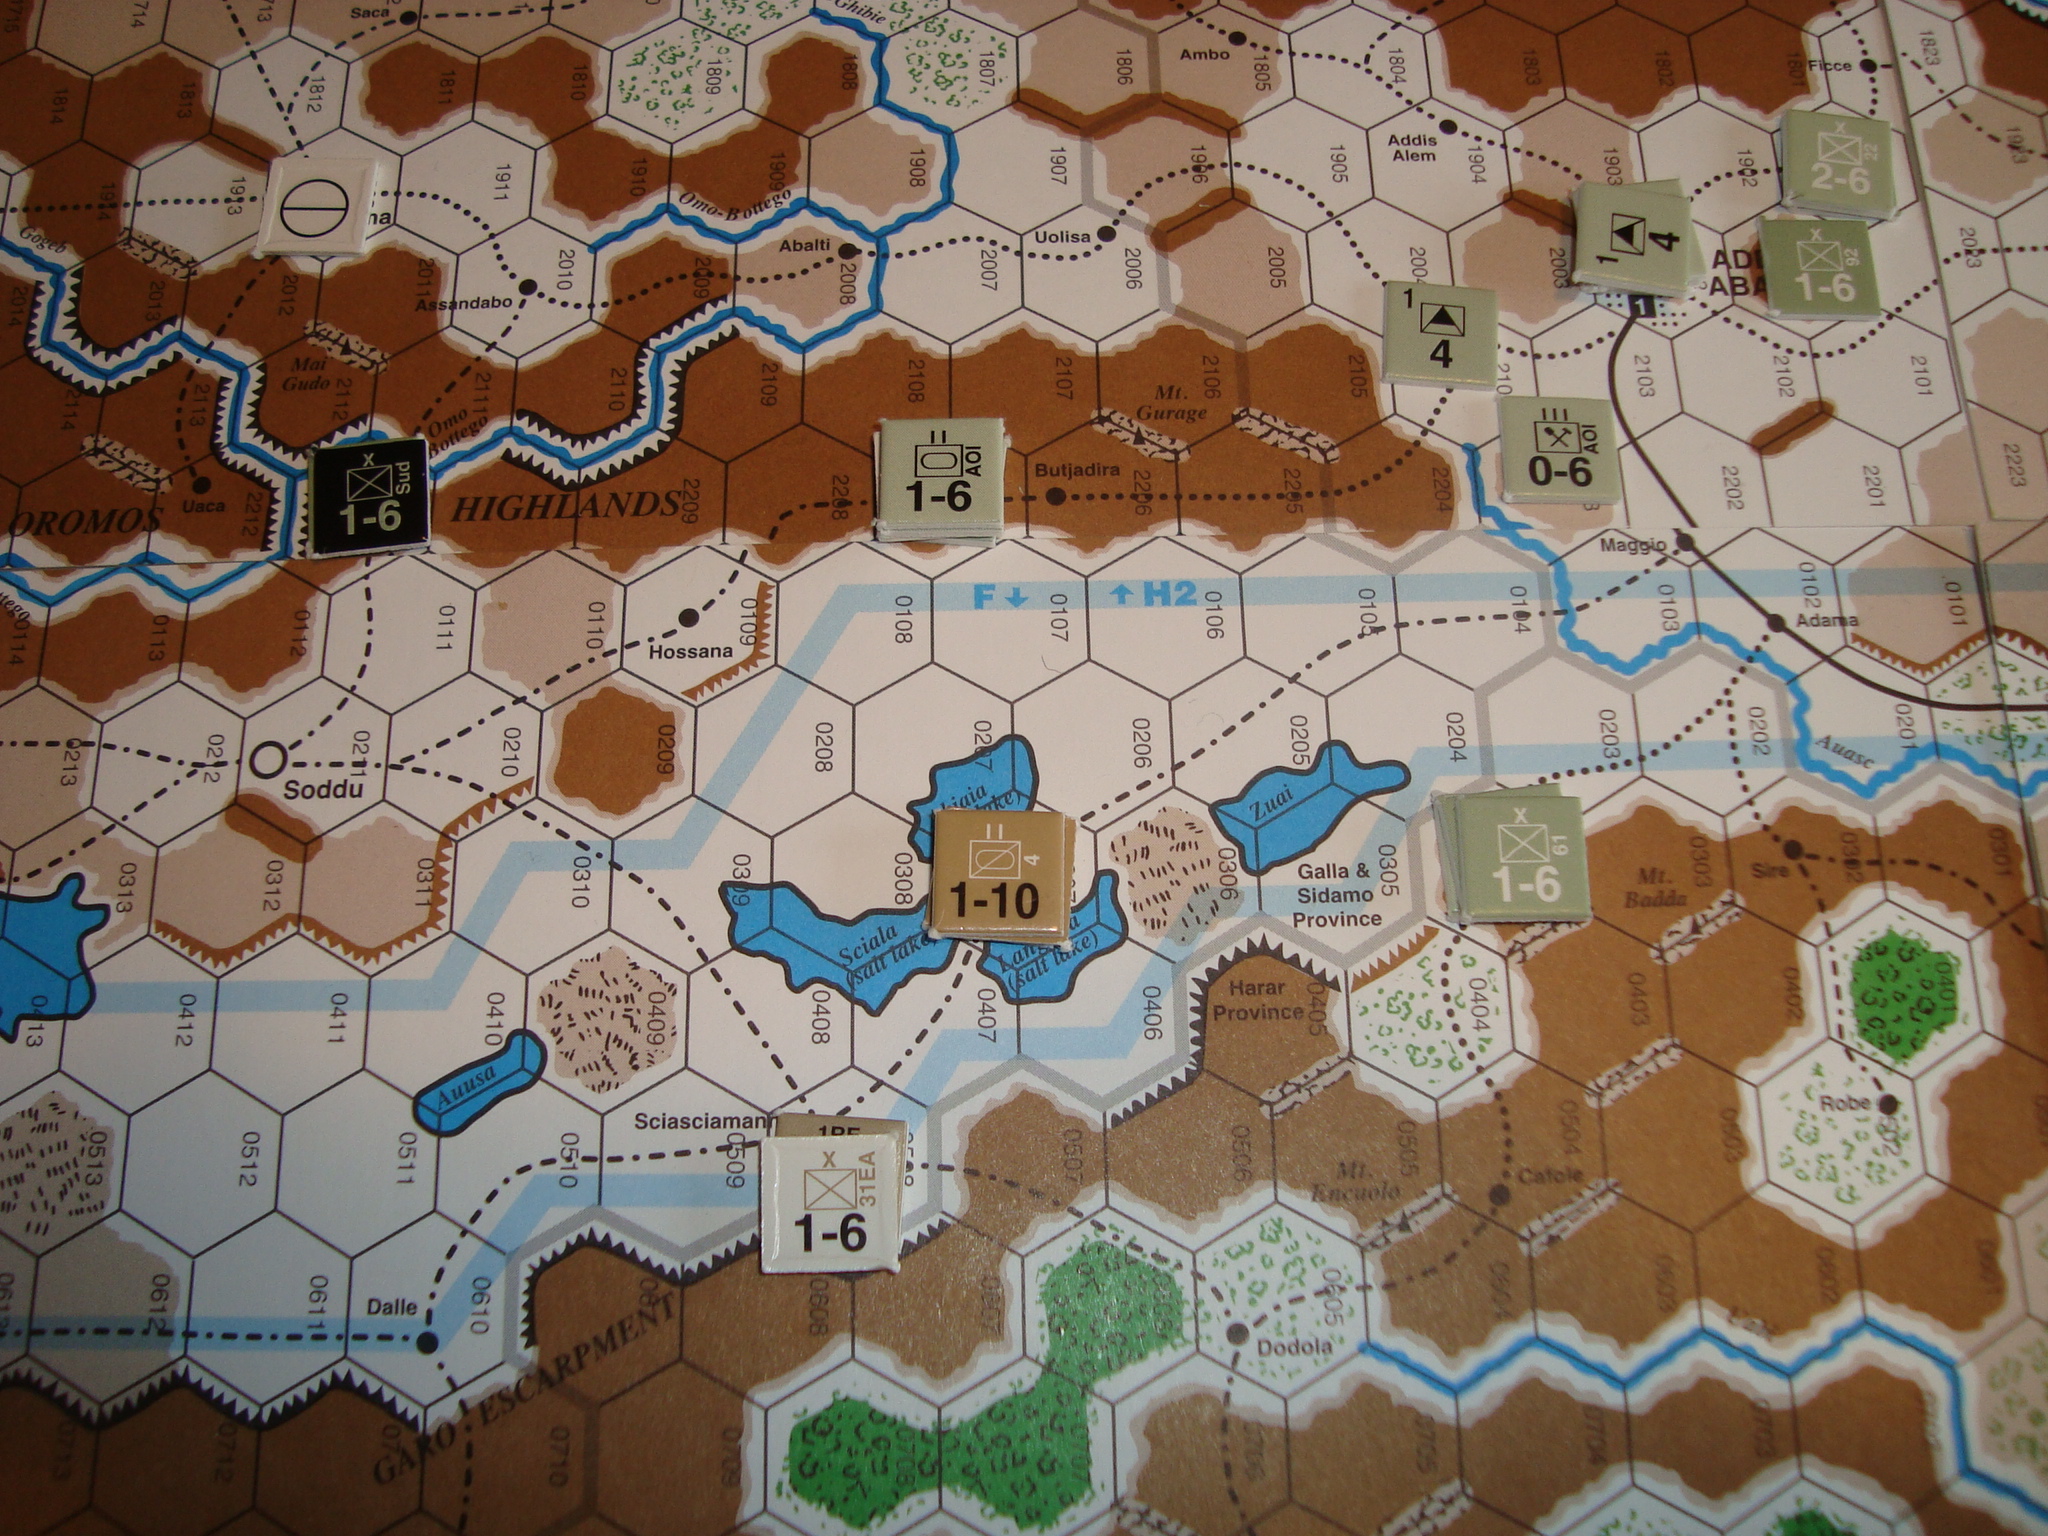
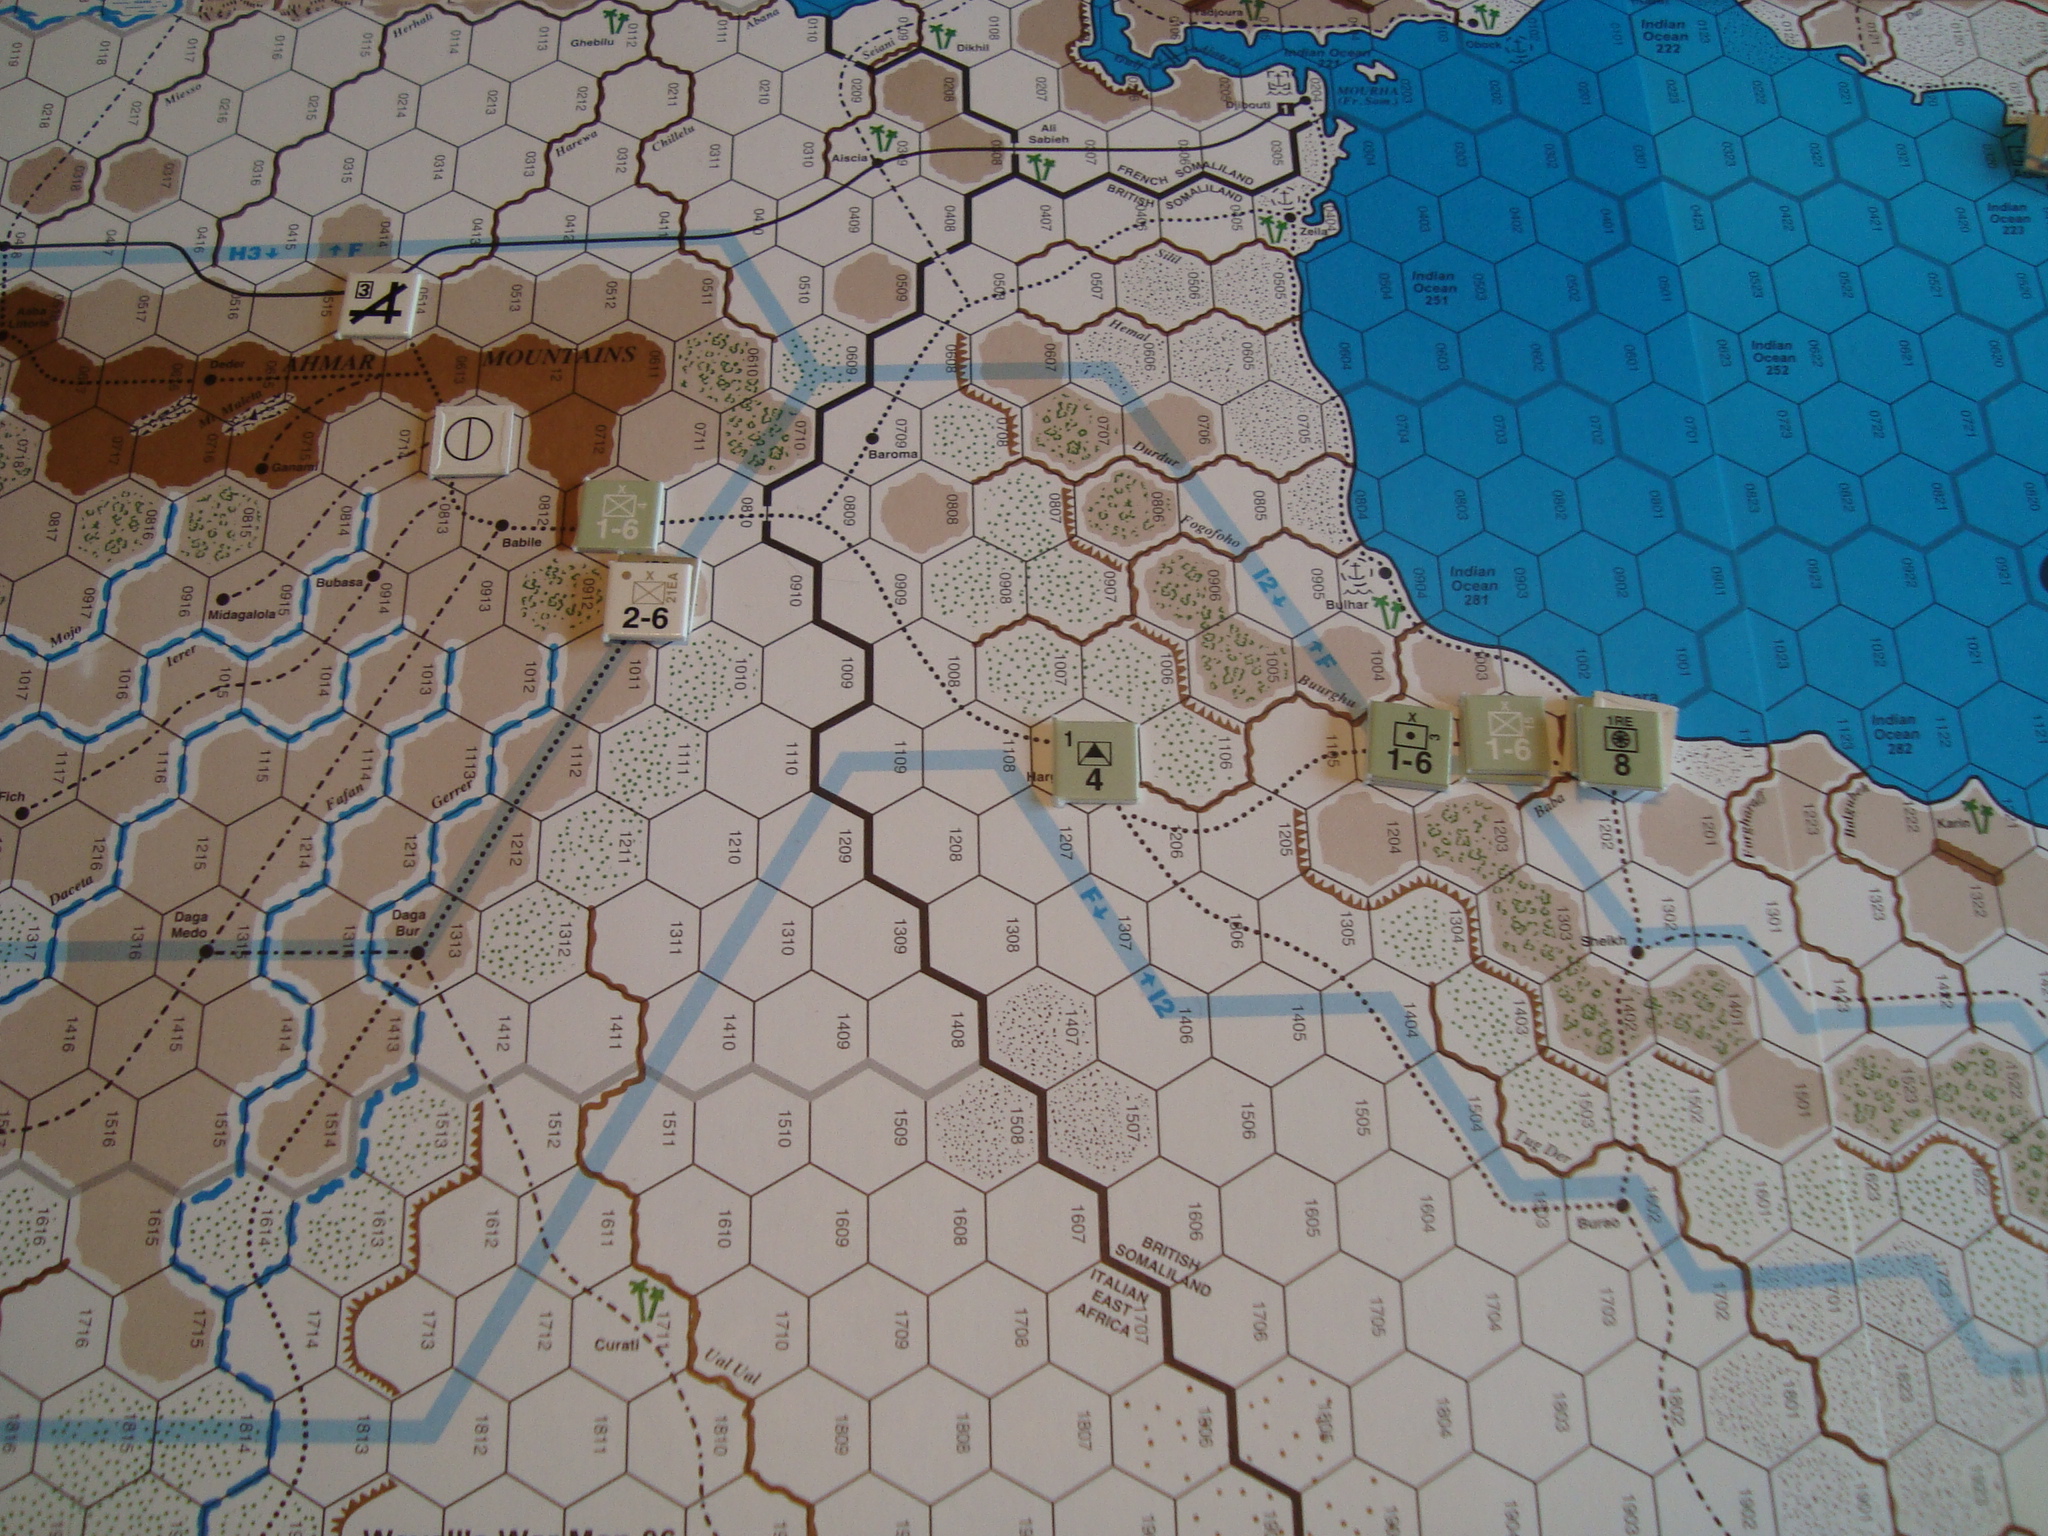
Mid Game: British Approach Addis AbadaMid Game: Italians Retreat Into SomalilandMid Game: British Advance South From MassauaMid Game: British Threaten Addis AbadaEnd Game: British Somaliland Still Held By Italians
End Game: British Advance Towards Addis Abada From The North
End Game: Italians Defenses Around Addis Abada
End Game: All Cleaned Up. Dogs of War Wonder What’s Next
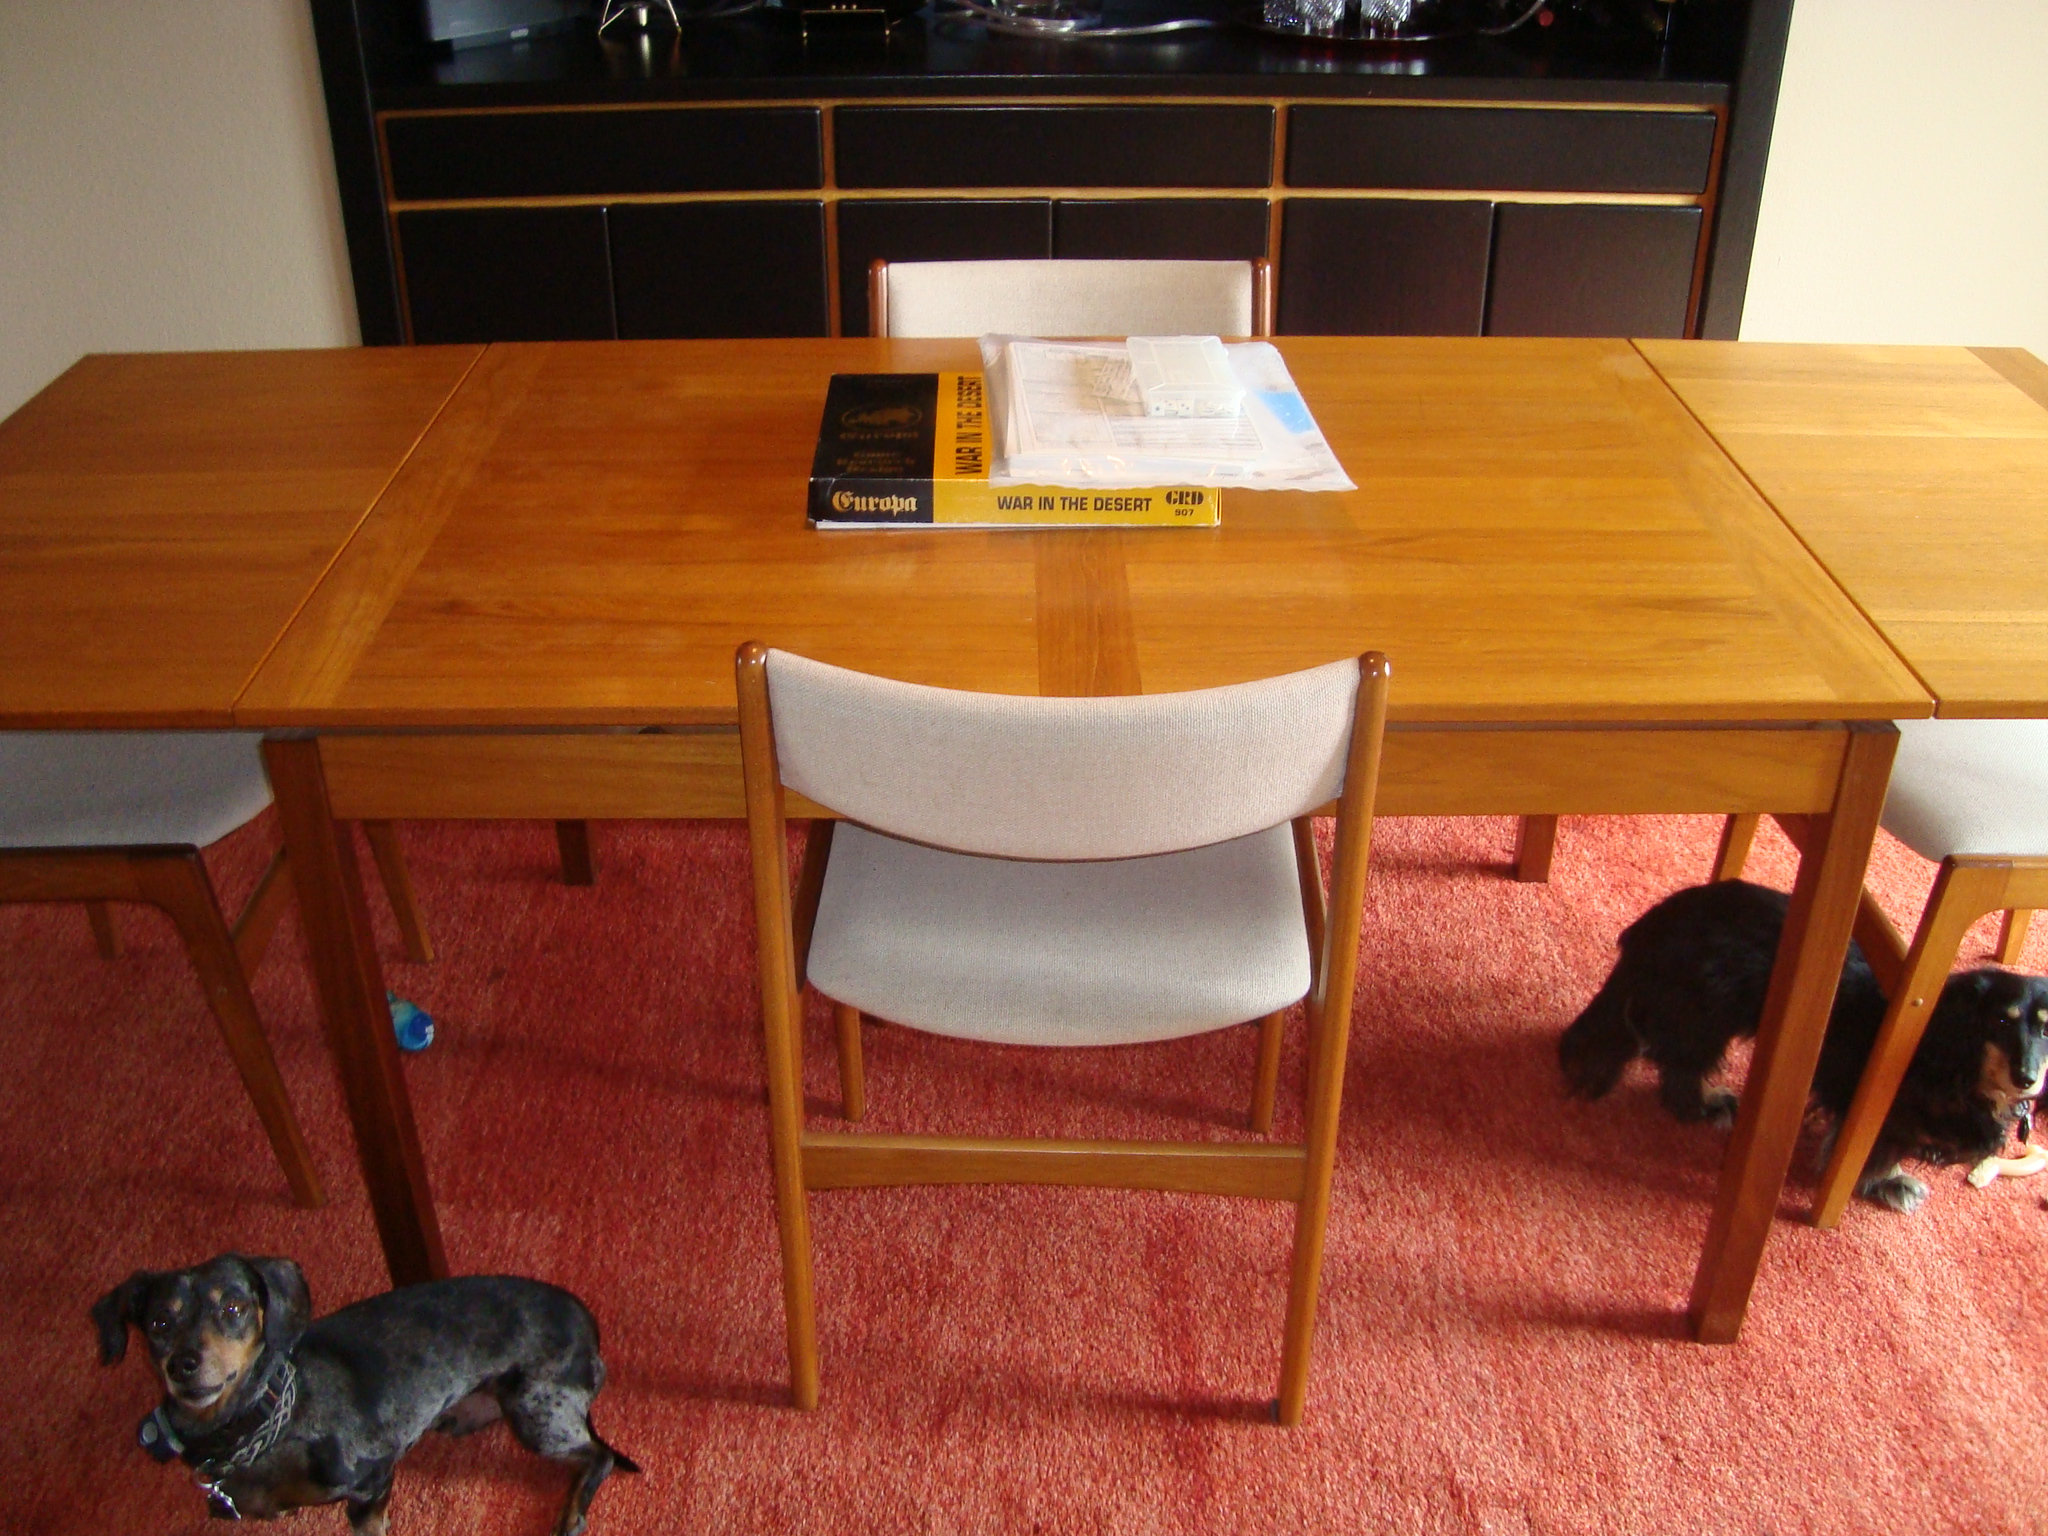
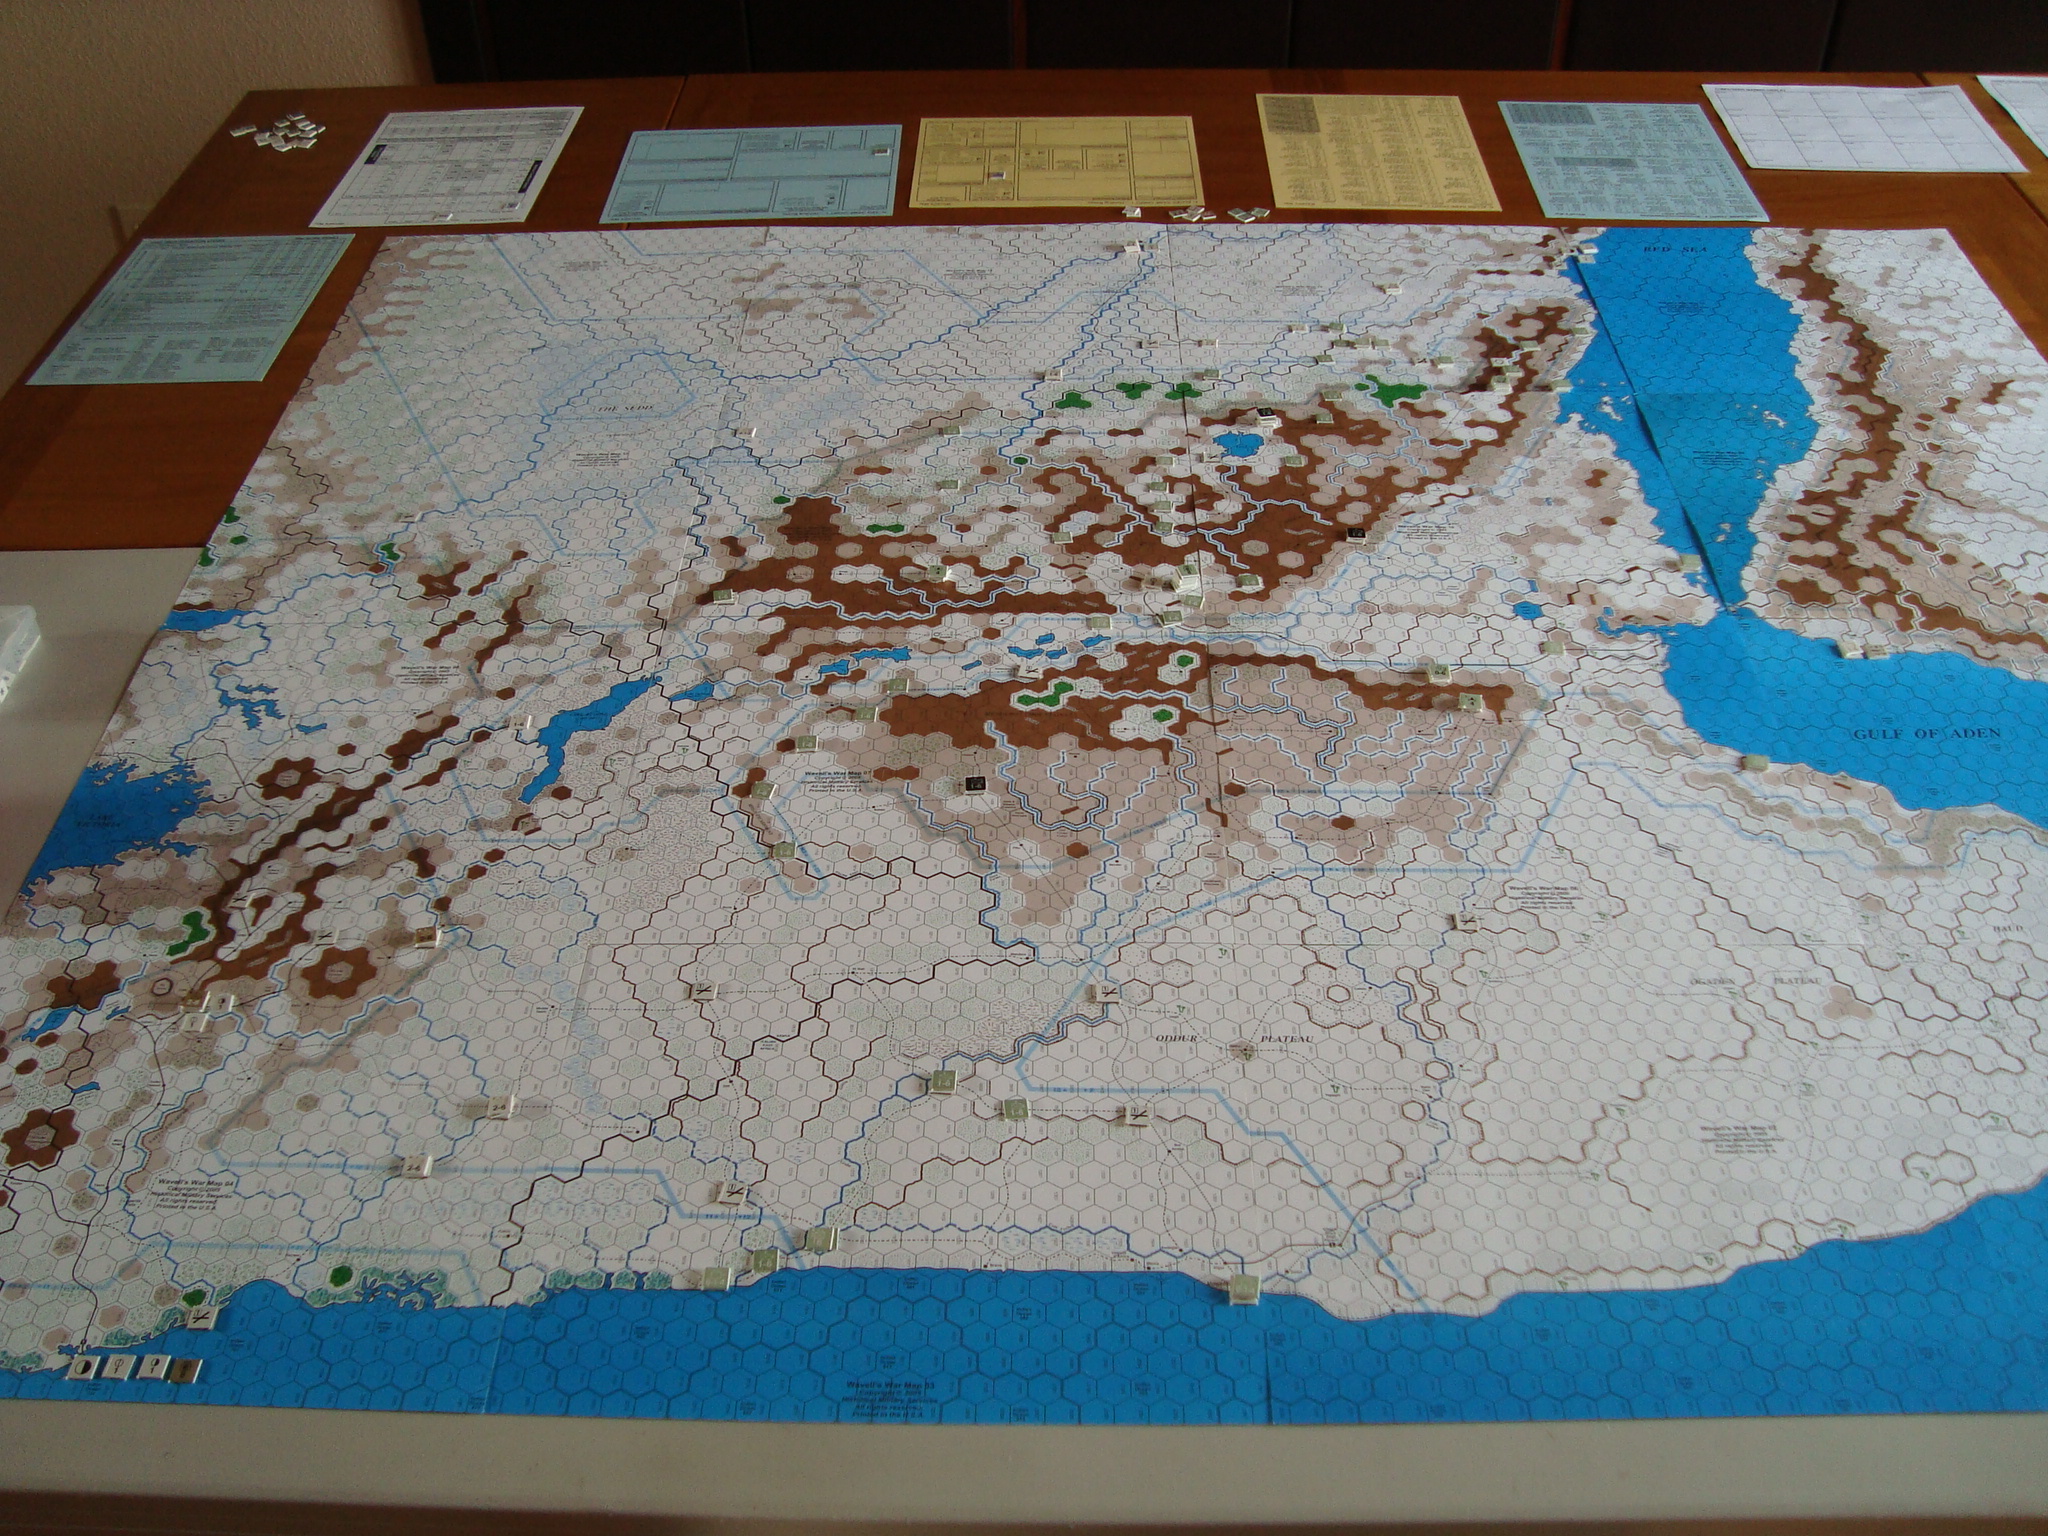
Set it up last night and this morning. Used stencil tape to keep the small map sheets from shifting around. Had to shim the utility table to get it to match up (kind of) with the dining room table.
Big map, lots of ants. Italians have limited supply sources, which severely effects both offensive and defensive capabilities, and very few steps of attack supply to compensate. Air support for colonial units is also limited.
This will be very interesting.
The TableMap Looking North. Where Are The Ants?Map Looking West
Most, if not all, Grognards are familiar with the strange and terrible saga of the Europa gaming system. For those of you who are not, here’s a summary of events up to 2013, as well as a trenchant series of exchanges about more recent developments. Their signature East Front game, Total War, has been in a strange legal-sloth-hand-of-fate purgatory for years. The website is virtually dormant, indicating no news is bad news.
Fortunately, there is some hope. A group of Europa Diehards have continued to play and discuss the game, with one intrepid soul actually publishing a new game.
Timothy Davis’ effort covers the hypothetical German invasion of Czechoslovakia in 1938 using rules published by John Astell. Astell was a major figure in the early days of the Europa system, and, apparently retained publishing rights. This rule set is “Blitzkrieg Unending.” Tim’s company is New Europa Games and Variants.
I contacted Tim through the company’s website last month. He was working his way through some printing/publishing problems with the Europa variant counters. However, he still found the time to ship me a copy of Fall Grun.
I like it!
It does have the feel of a Beta. The rules have some gaps, the charts are nothing extraordinary and the map is printed on less expensive vinyl. But it’s a quality job and very similar to Europa. So why in the hell couldn’t the HMS/GRD folks do this? Tim’s published a quality product – especially for experienced Europa players who can fill in the gaps – and offers it for a relatively low price. OK, the question is rhetorical since it’s well known that there are all kinds of legal/creditor/investor issues hobbling HMS/GRD…..but just get the bloody game out.
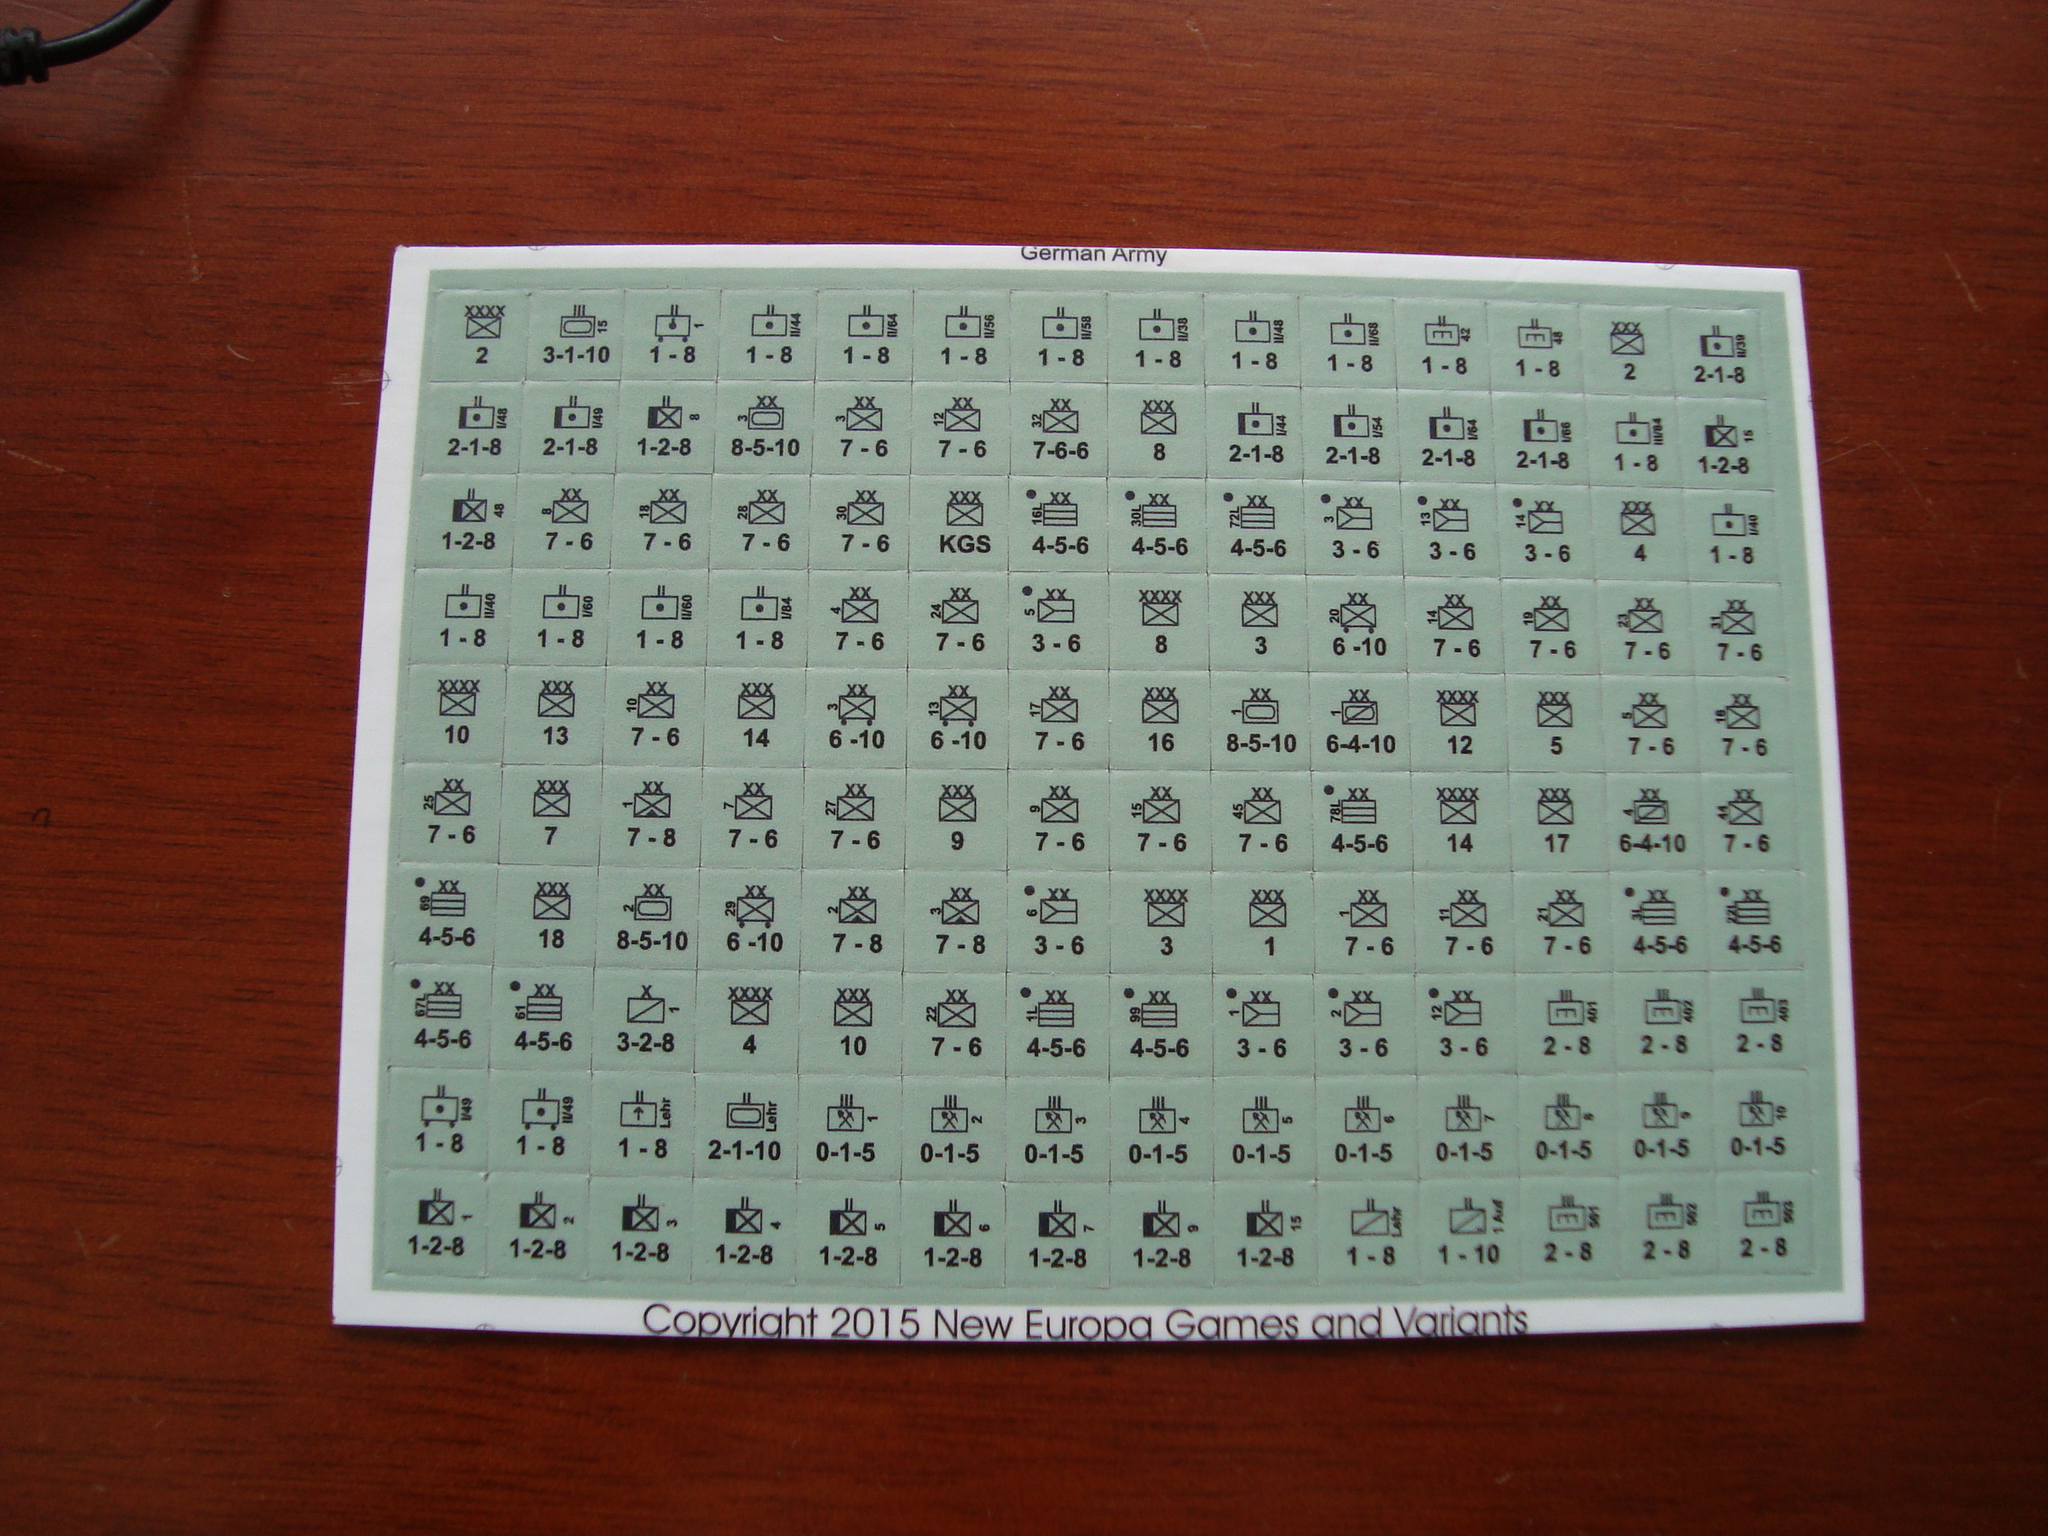
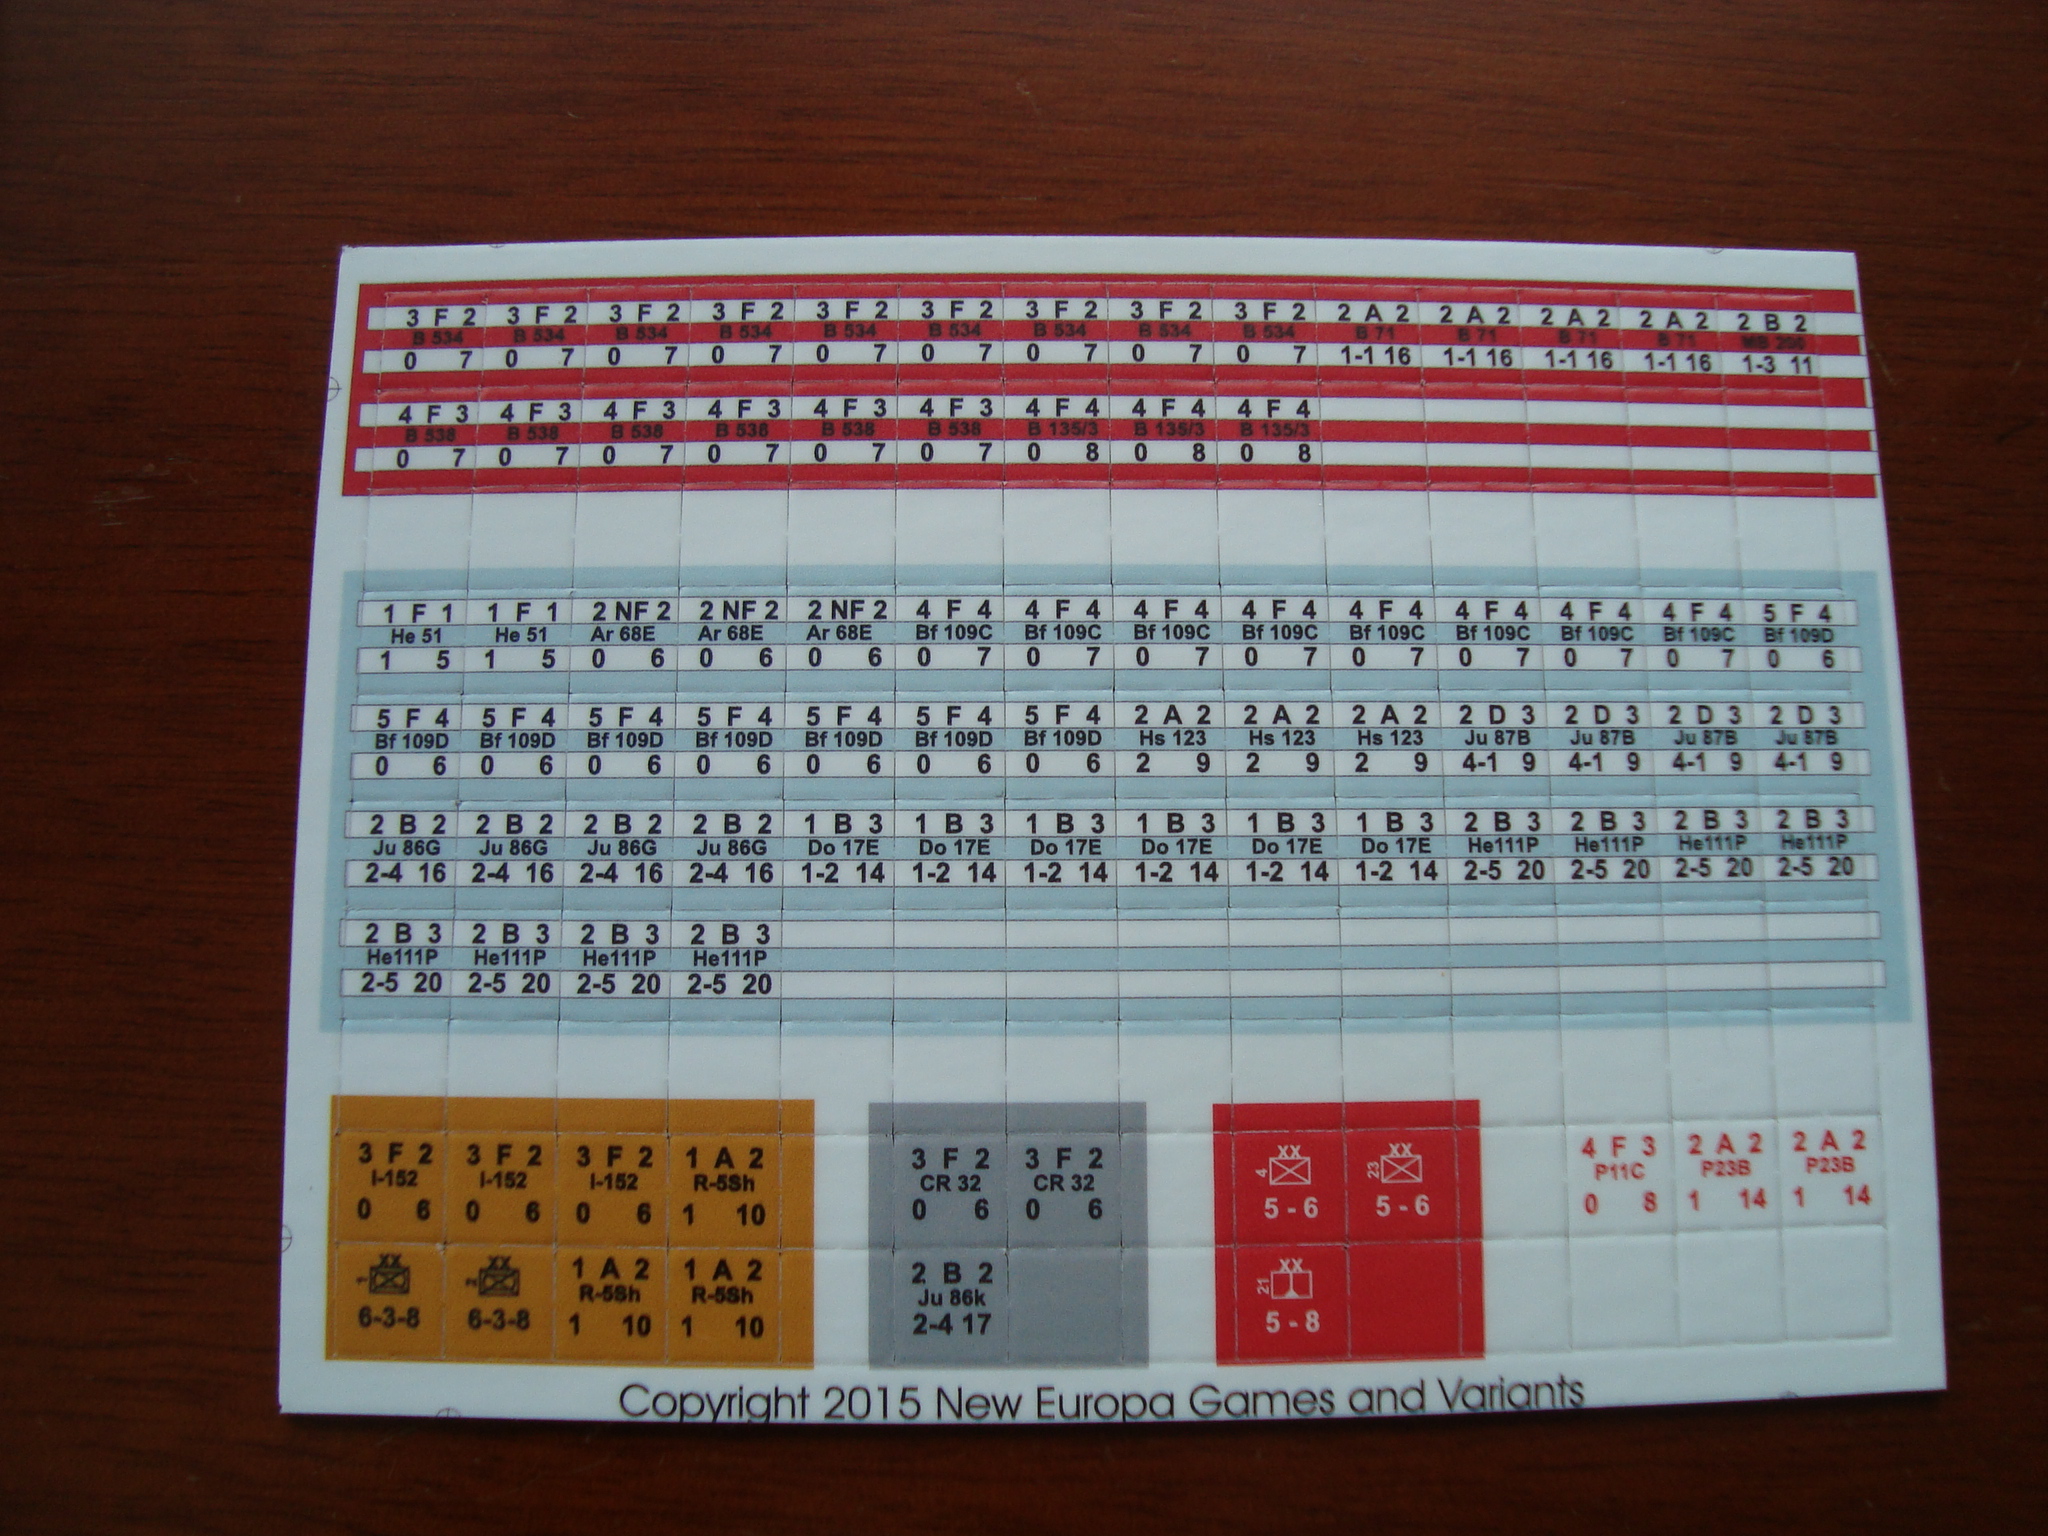
Back to Fall Grun. The counter symbols are slightly smaller than Europa, but the maps have the same feel with different colors for terrain and symbols for terrain features such as woods. Europa players would find most of the charts easy to work with. If one doesn’t like the vinyl map, use maps from the other games or contact Timothy about the availability of the more expensive paper maps. Yes, paper is more expensive than vinyl….Go Figure.
Timothy deserves kudos for his efforts! His variant counters also look pretty damn good.
I hope my wargaming accomplice Tim and I get this on the table soon. Dunno, since there is talk about playing the East Africa scenario from Wavells War next.
Here are pictures of the game’s components. These were not taken with my IPhone!
German CountersCzech and German Air Force Along With Soviet, Hungarian, Pole and Polish Air UnitsVinyl Map
Here are Tim’s comments….We plan to play this scenario one more time, hopefully between Xmas and New Year.
Weather was an issue. The rain, with the accompanying -1 die roll modifier and increased movement costs was a real problem for me. I was having to use units to cart supply to the front when I needed every body at the front.
I should have attacked your river transports much, much sooner. I was pleasantly surprised at how effective the one raid was.
I understand better why it is hard to use the factional units as cannon fodder. Even with their stacking limits, I still wonder if it would be possible to use them in good defensive terrain (rice paddies, or behind a river) hoping for an exchange or to buy time. I know its not really an issue in the context of the scenario but the Central Army 4-6 divisions can’t be replaced and the 3-5 divisions can be only replaced very slowly.
I hope you handed out lots of medals to your aviators. They gave their all and suffered accordingly! I wonder if the Chinese would be well advised to adopt a ‘fleet in being’ strategy for their air force. Having said that, I was sweating when your one naval patrol attack got through…
NGS is really important to the Japanese. I actually could have used it more than I did– I forgot that TFs can sail up the Yangtse as far as Nanjing.
Infantry having an exploit phase is nice. I often would launch an attack and then use the exploit phase to regroup my troops for your turn. I would create a big stack and then split them back up during the exploit phase.
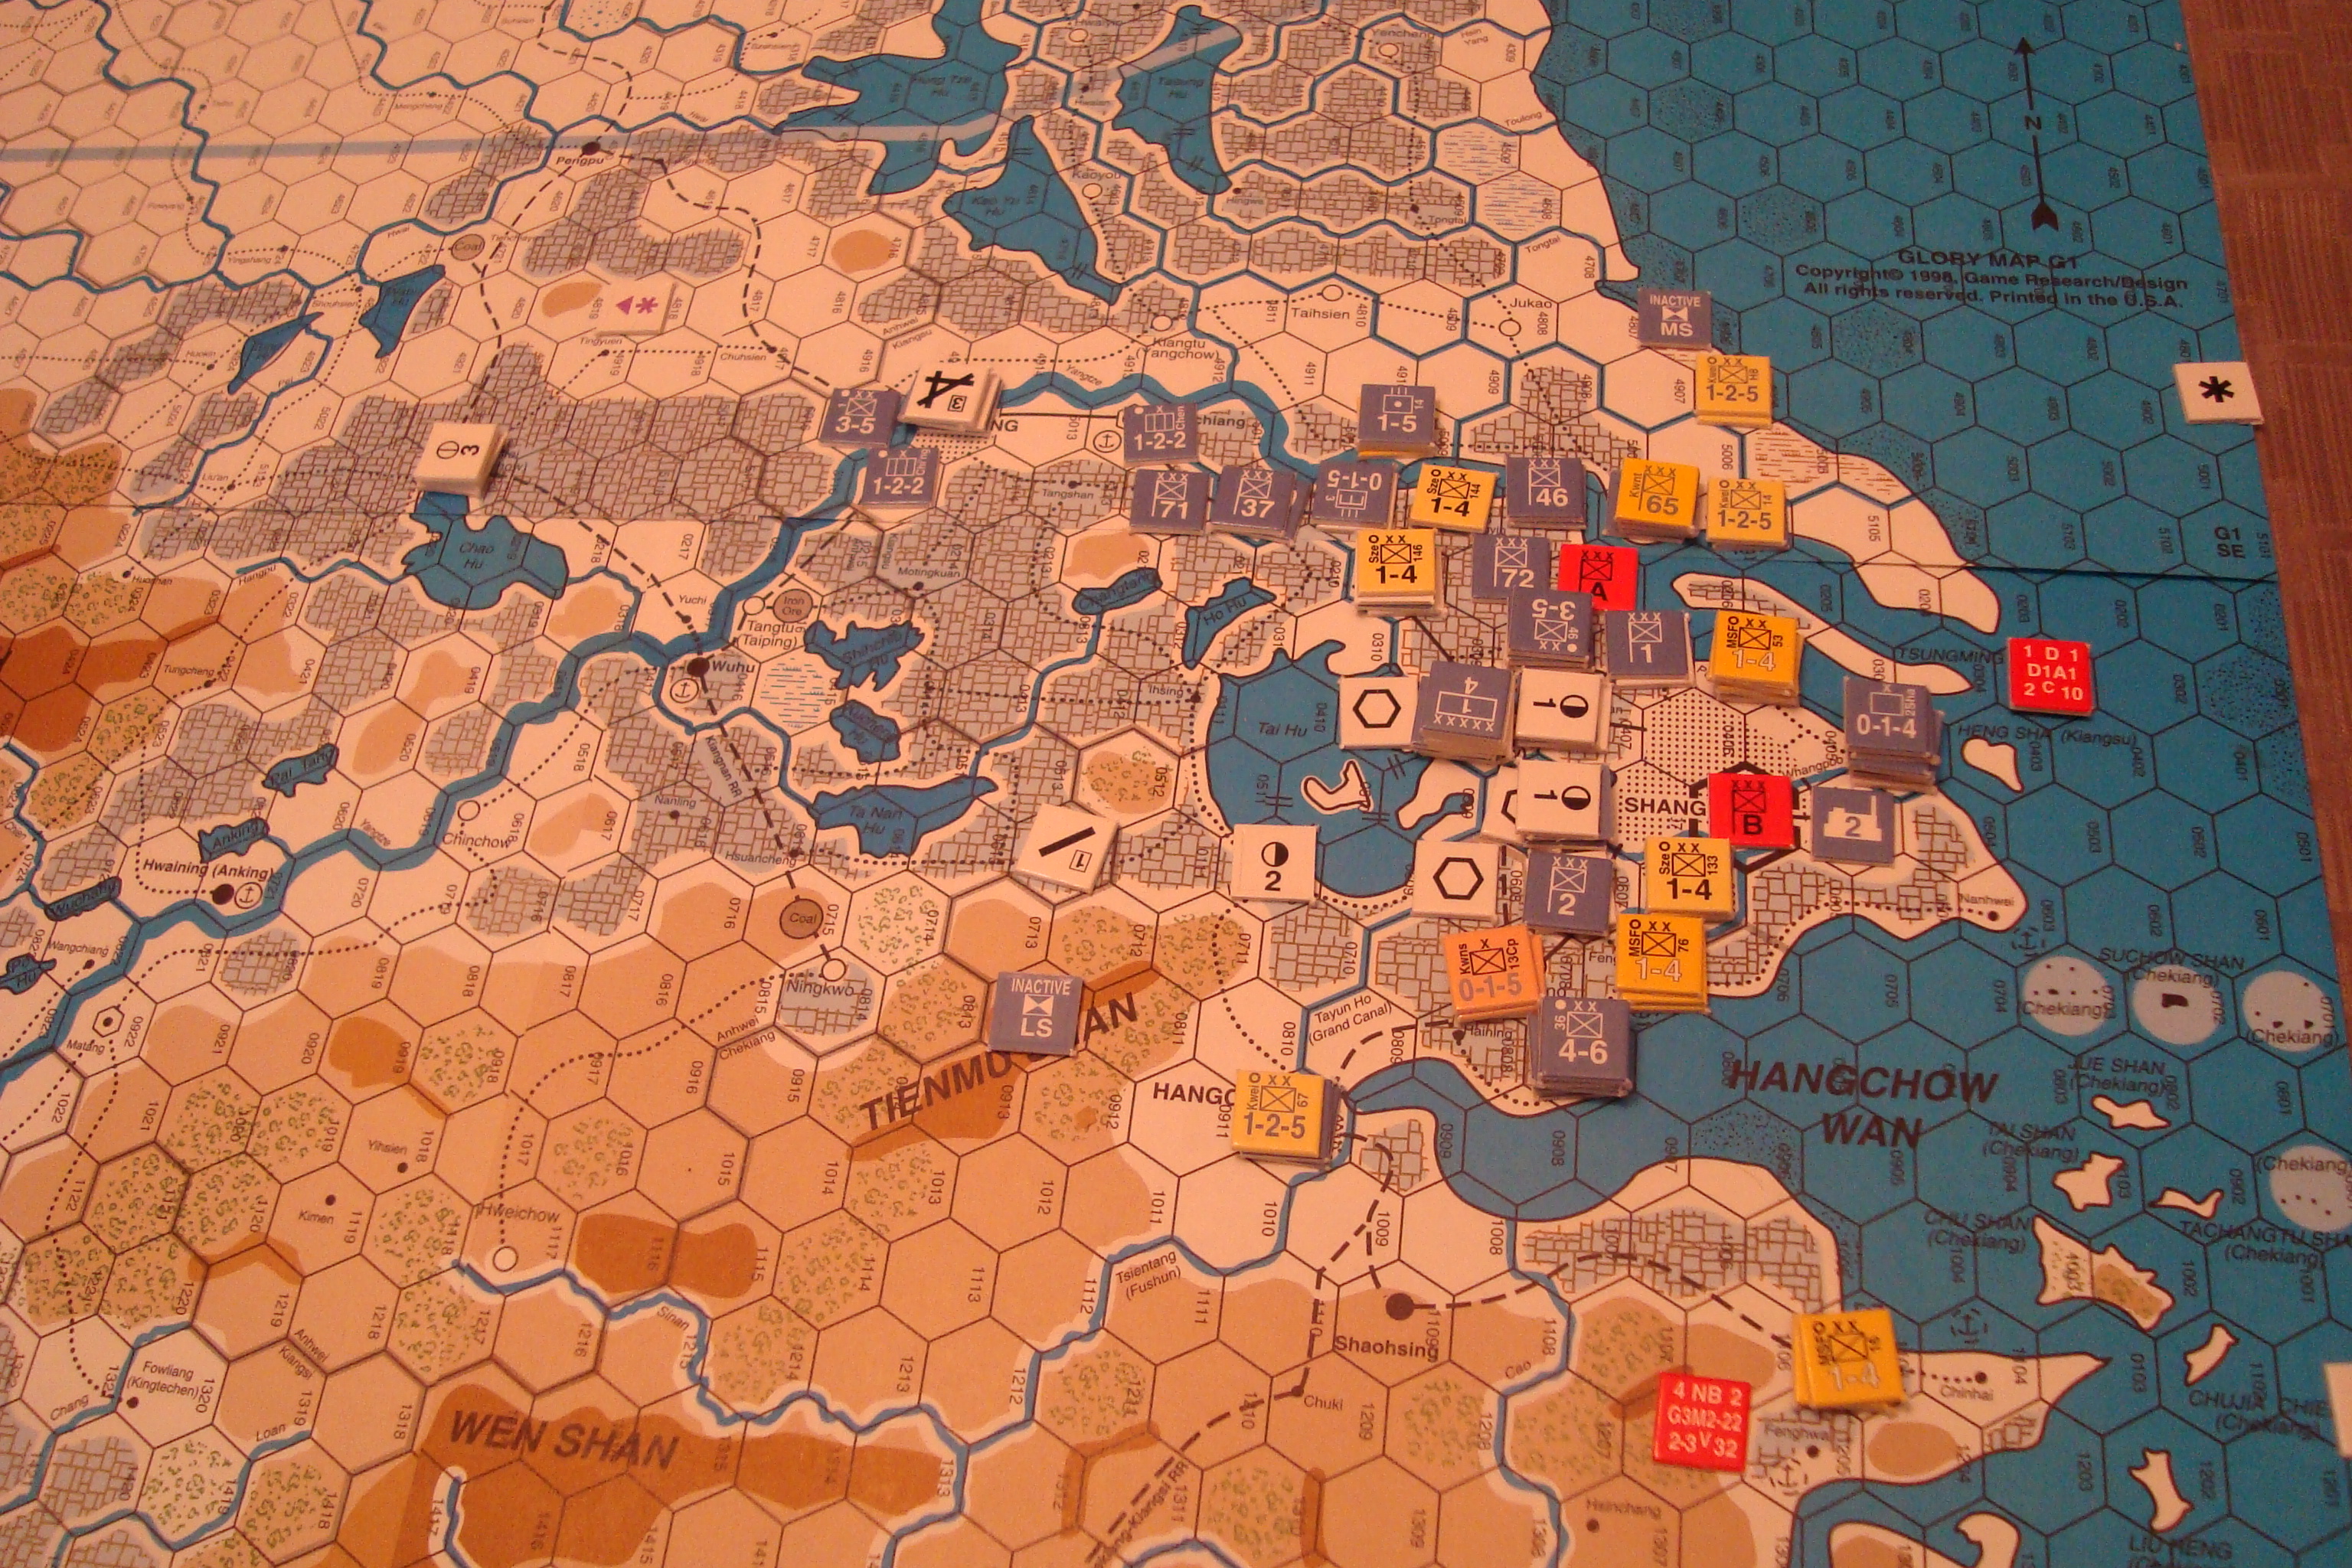
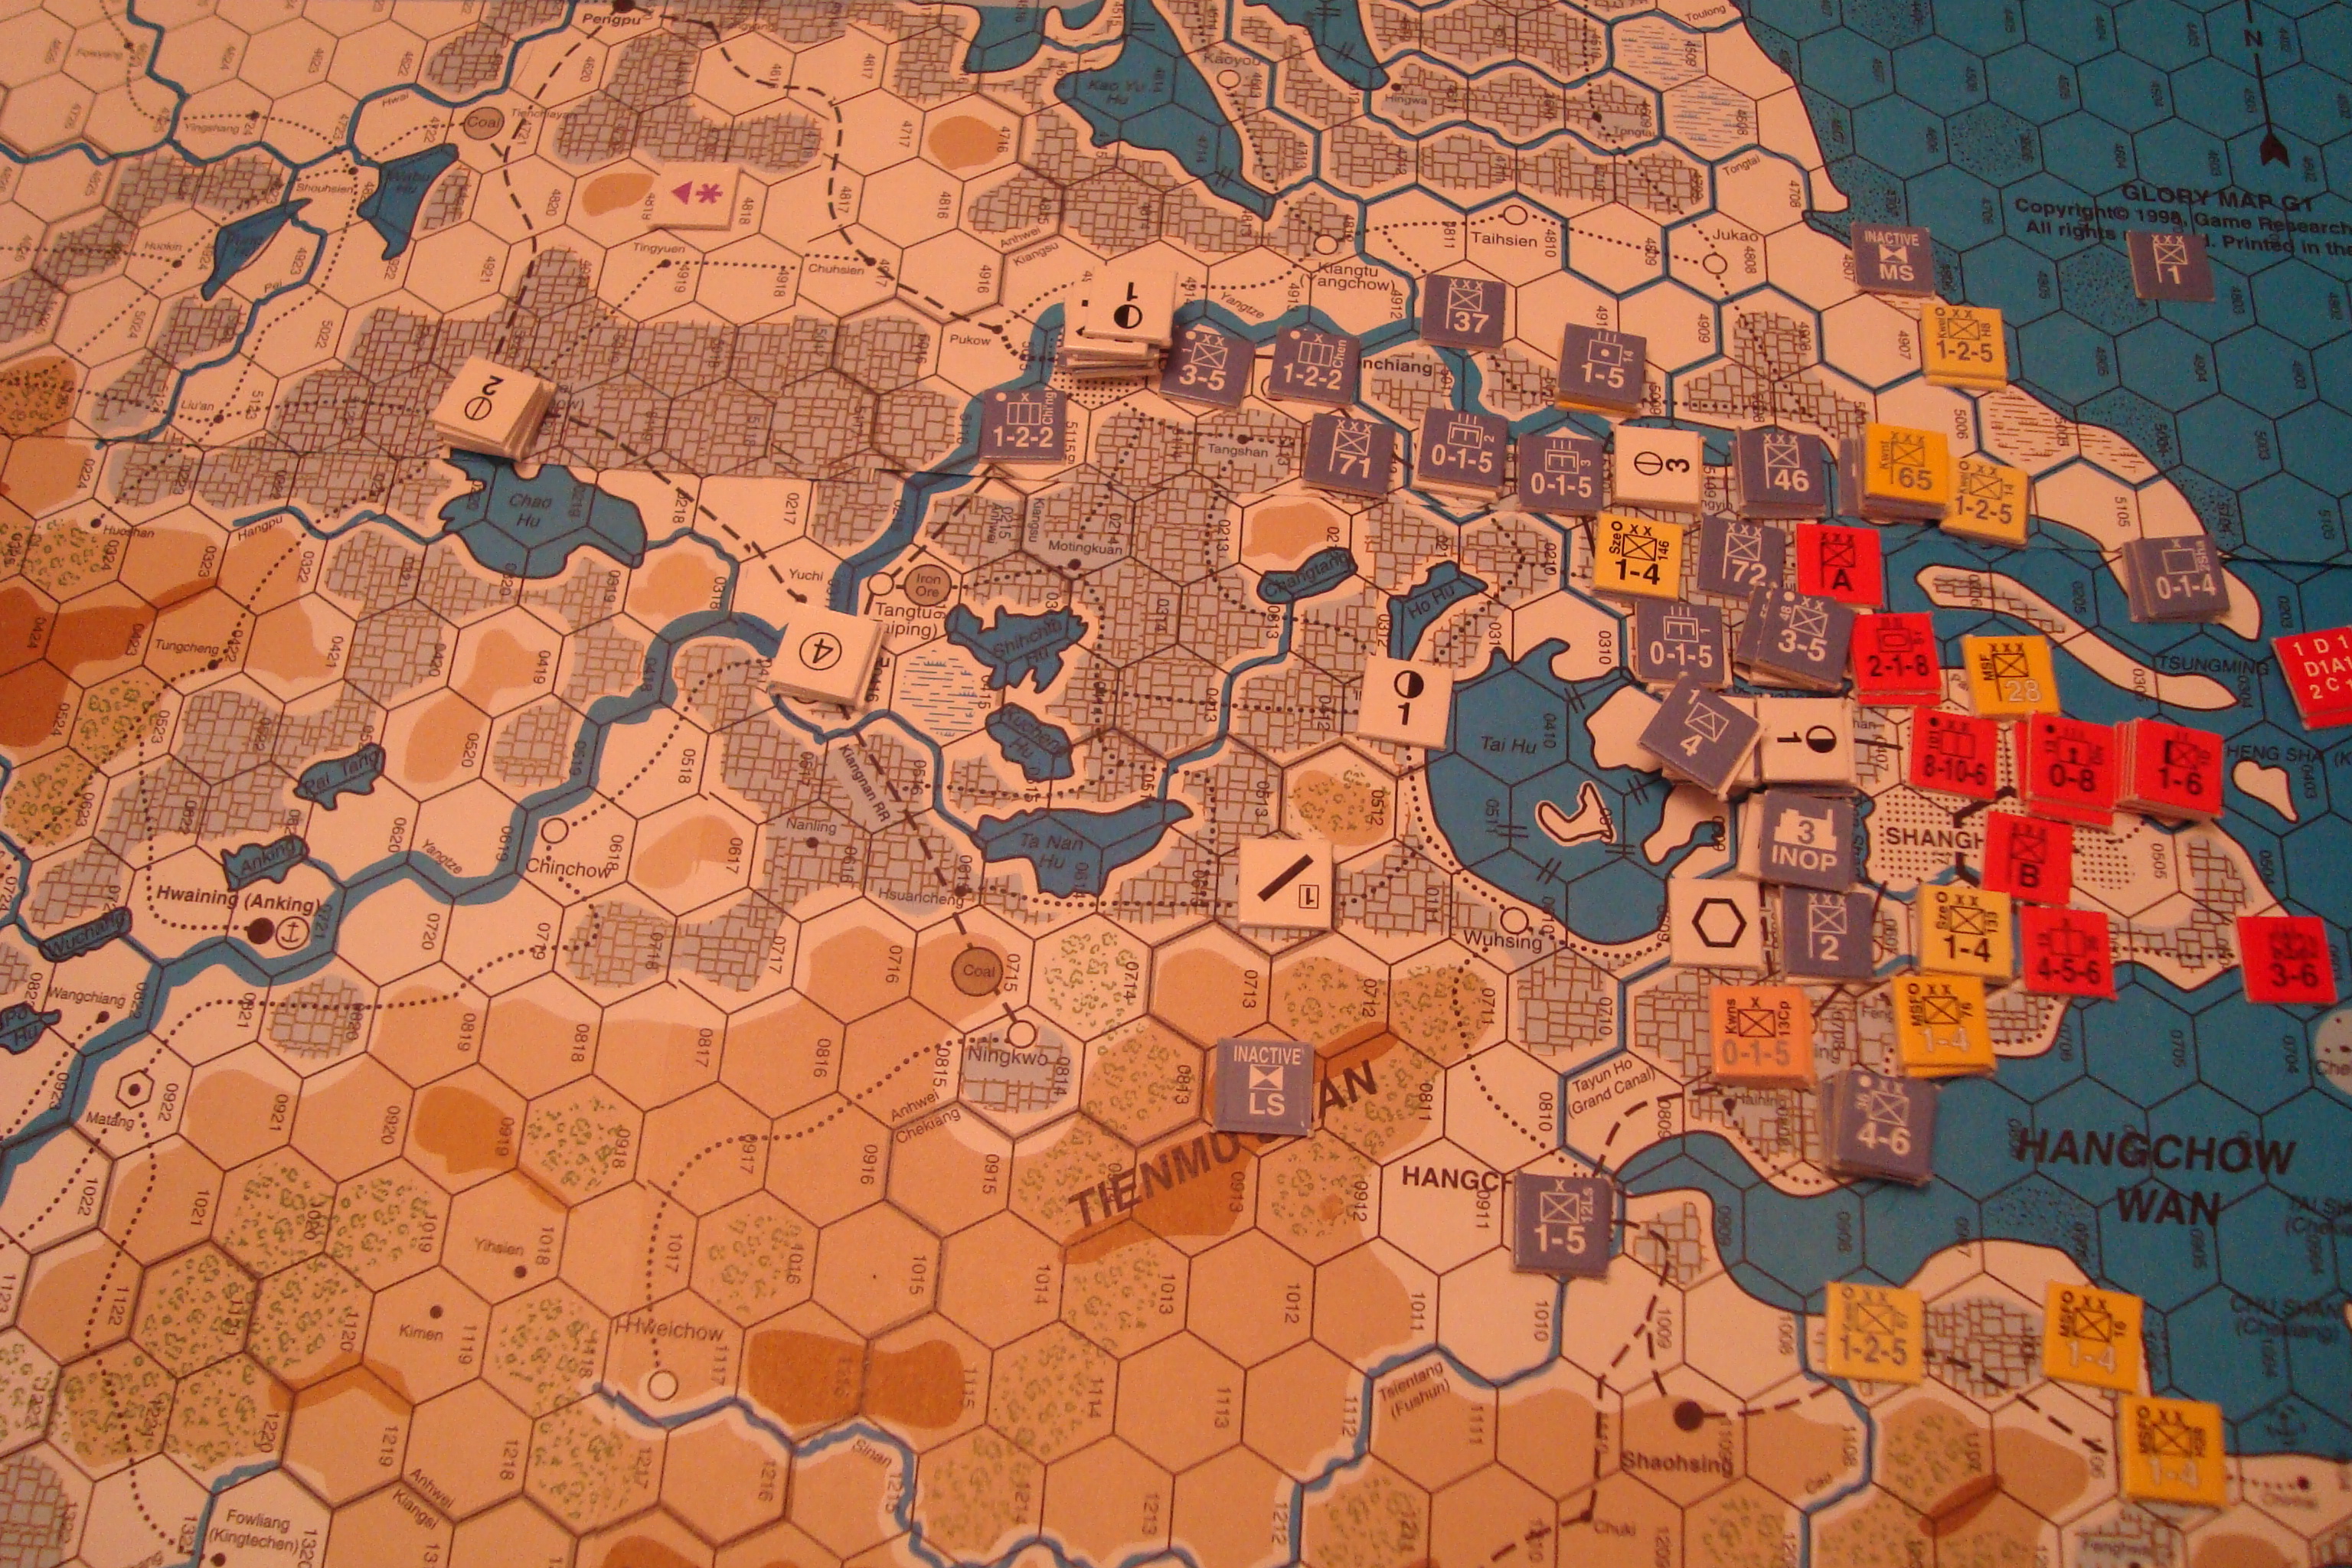
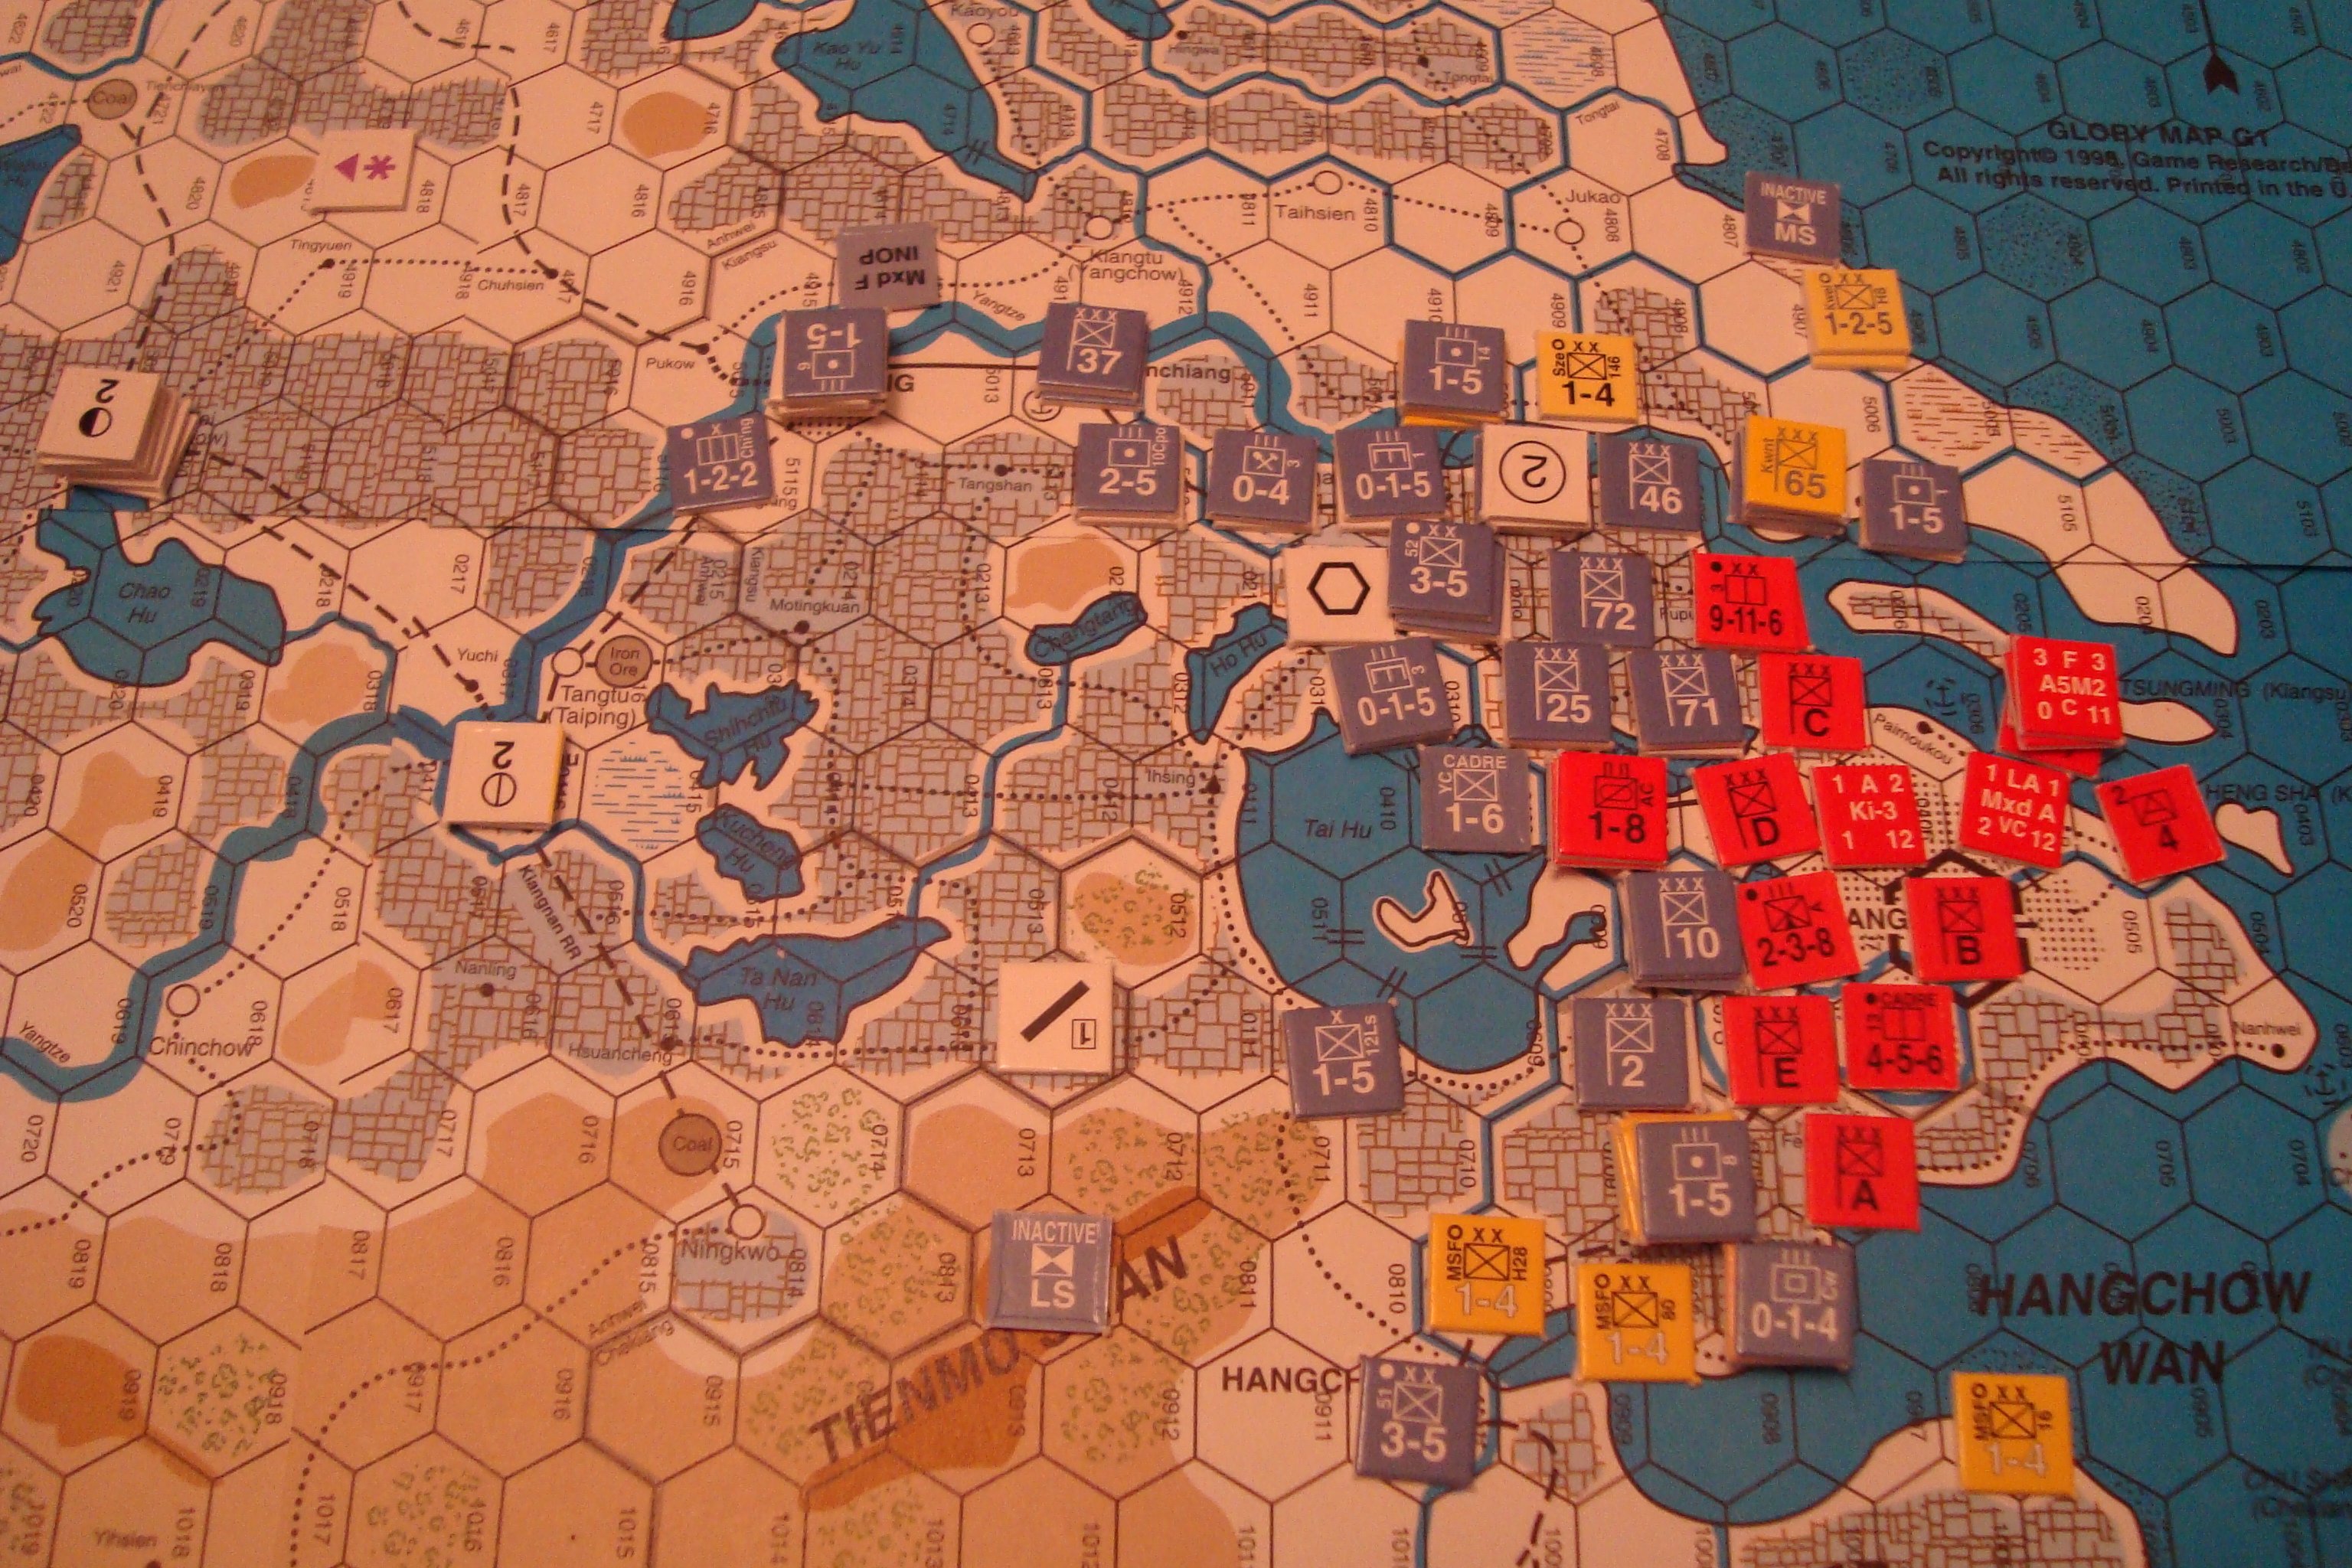
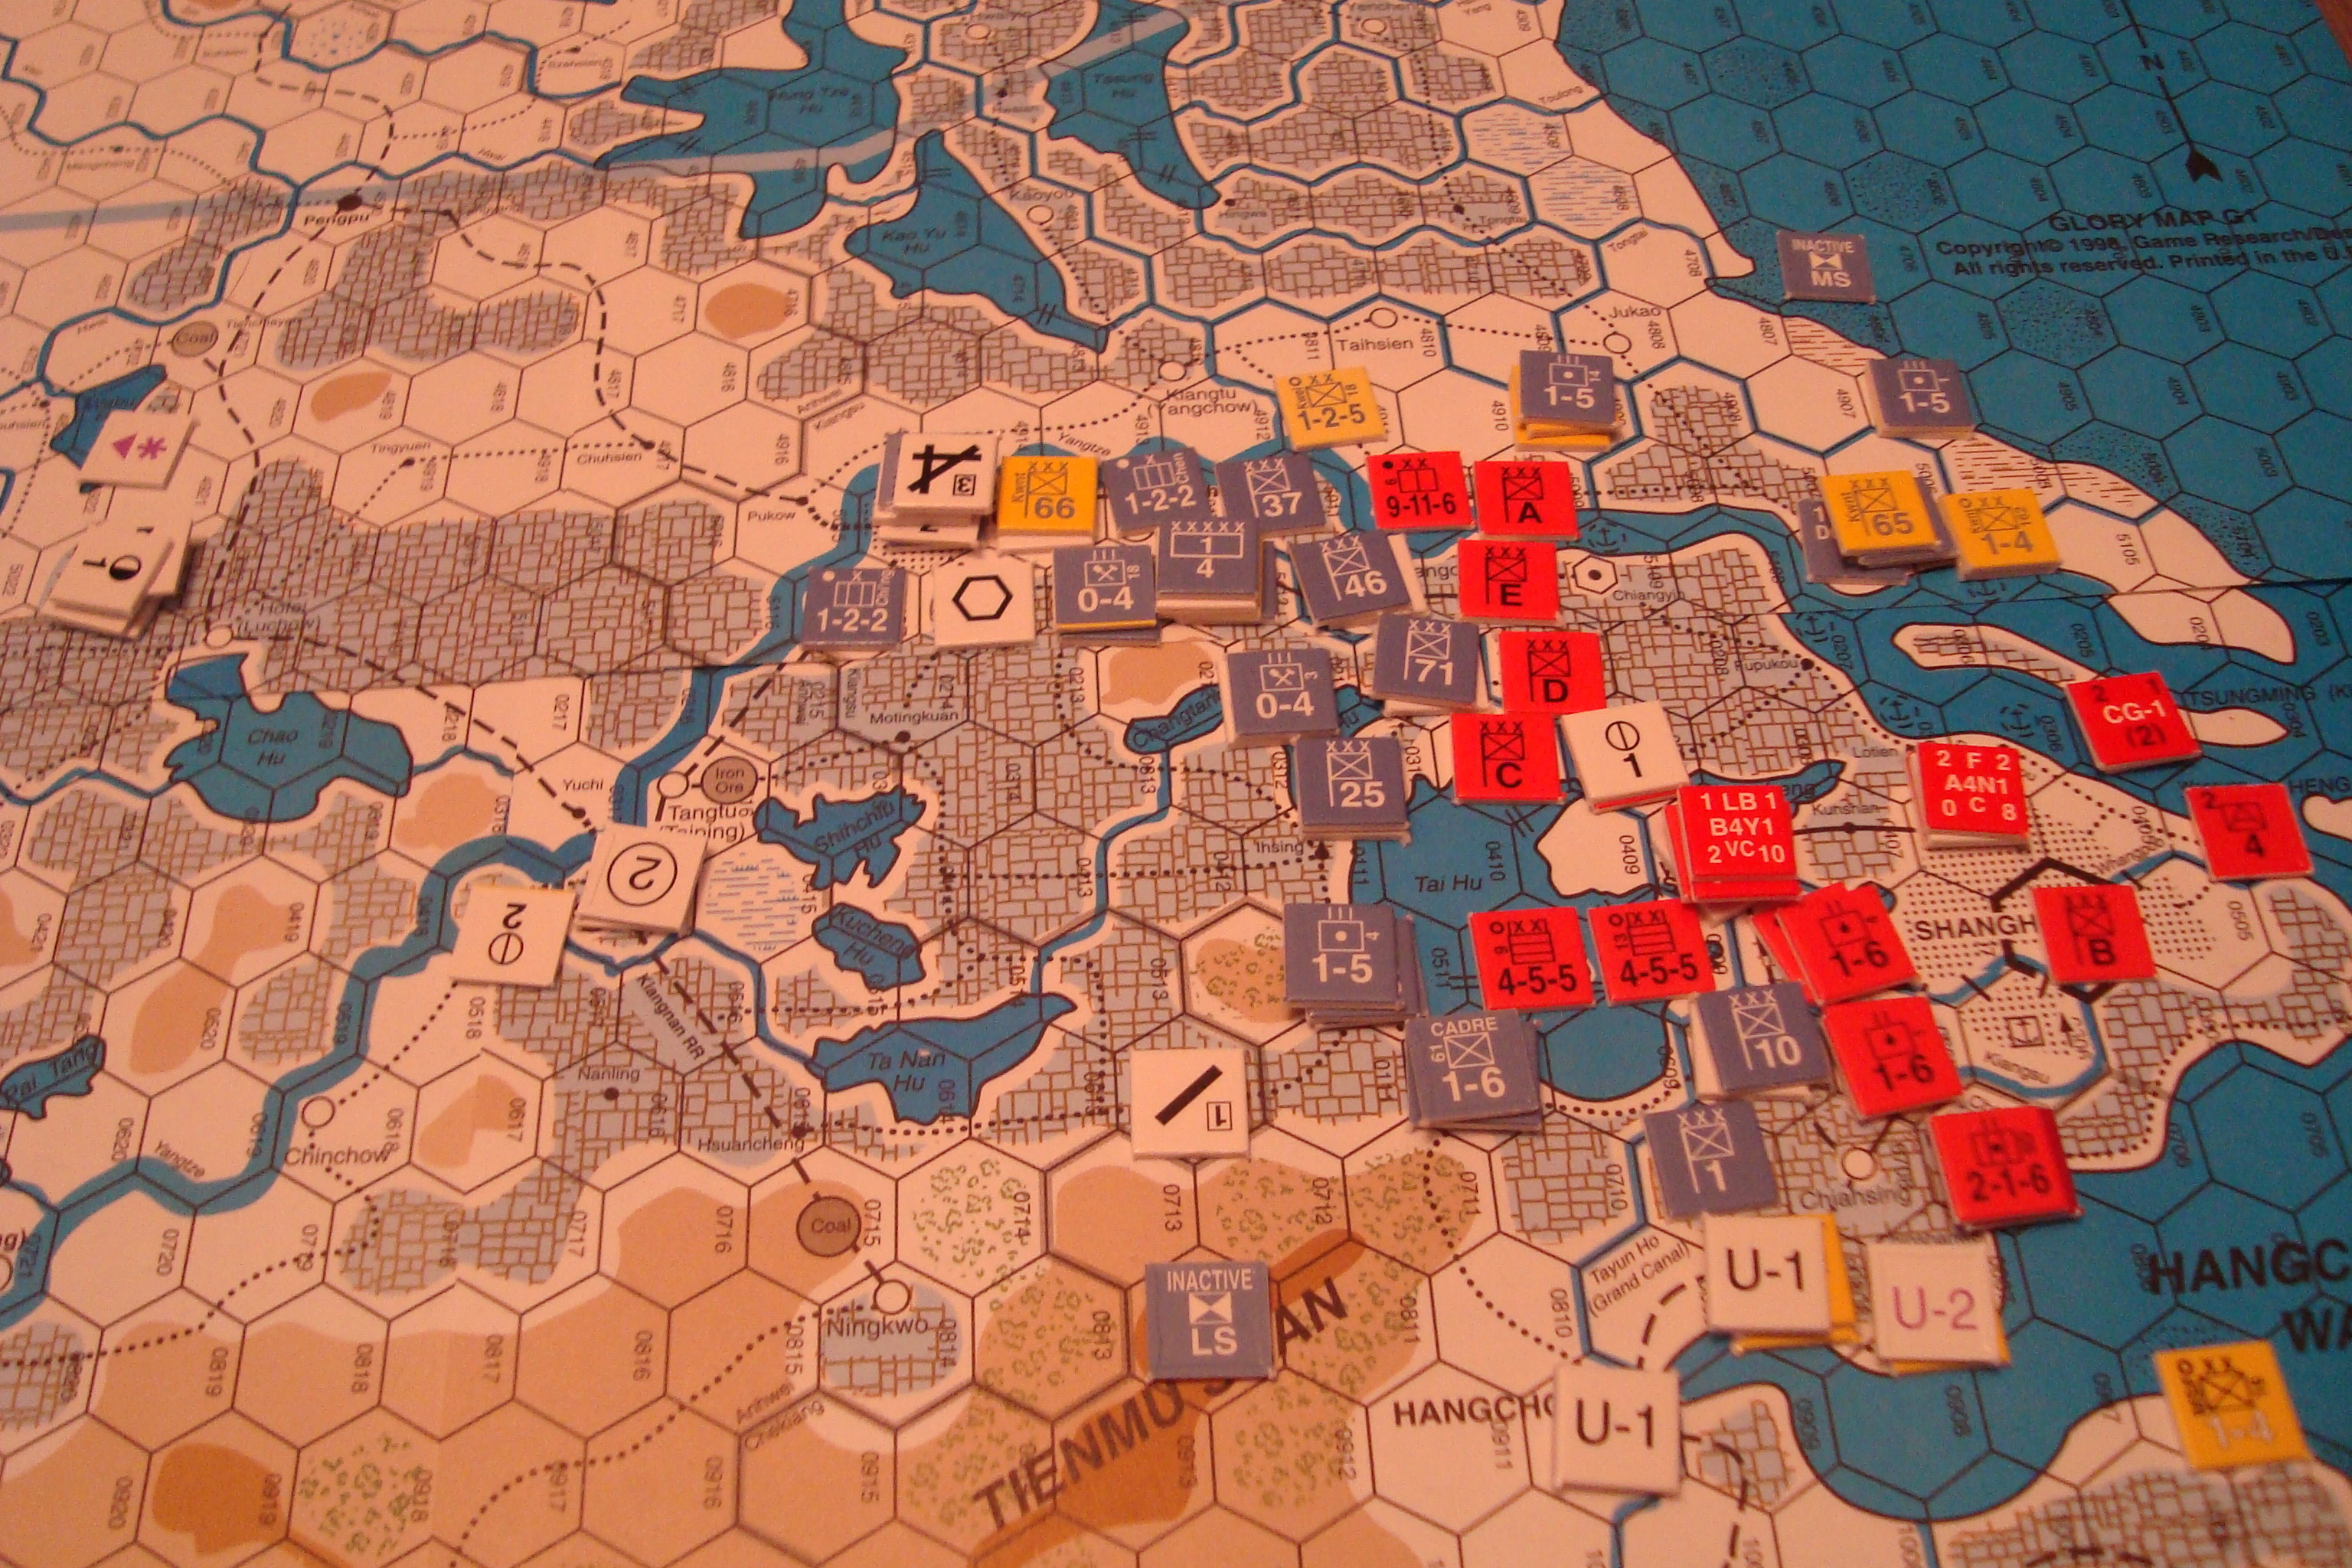
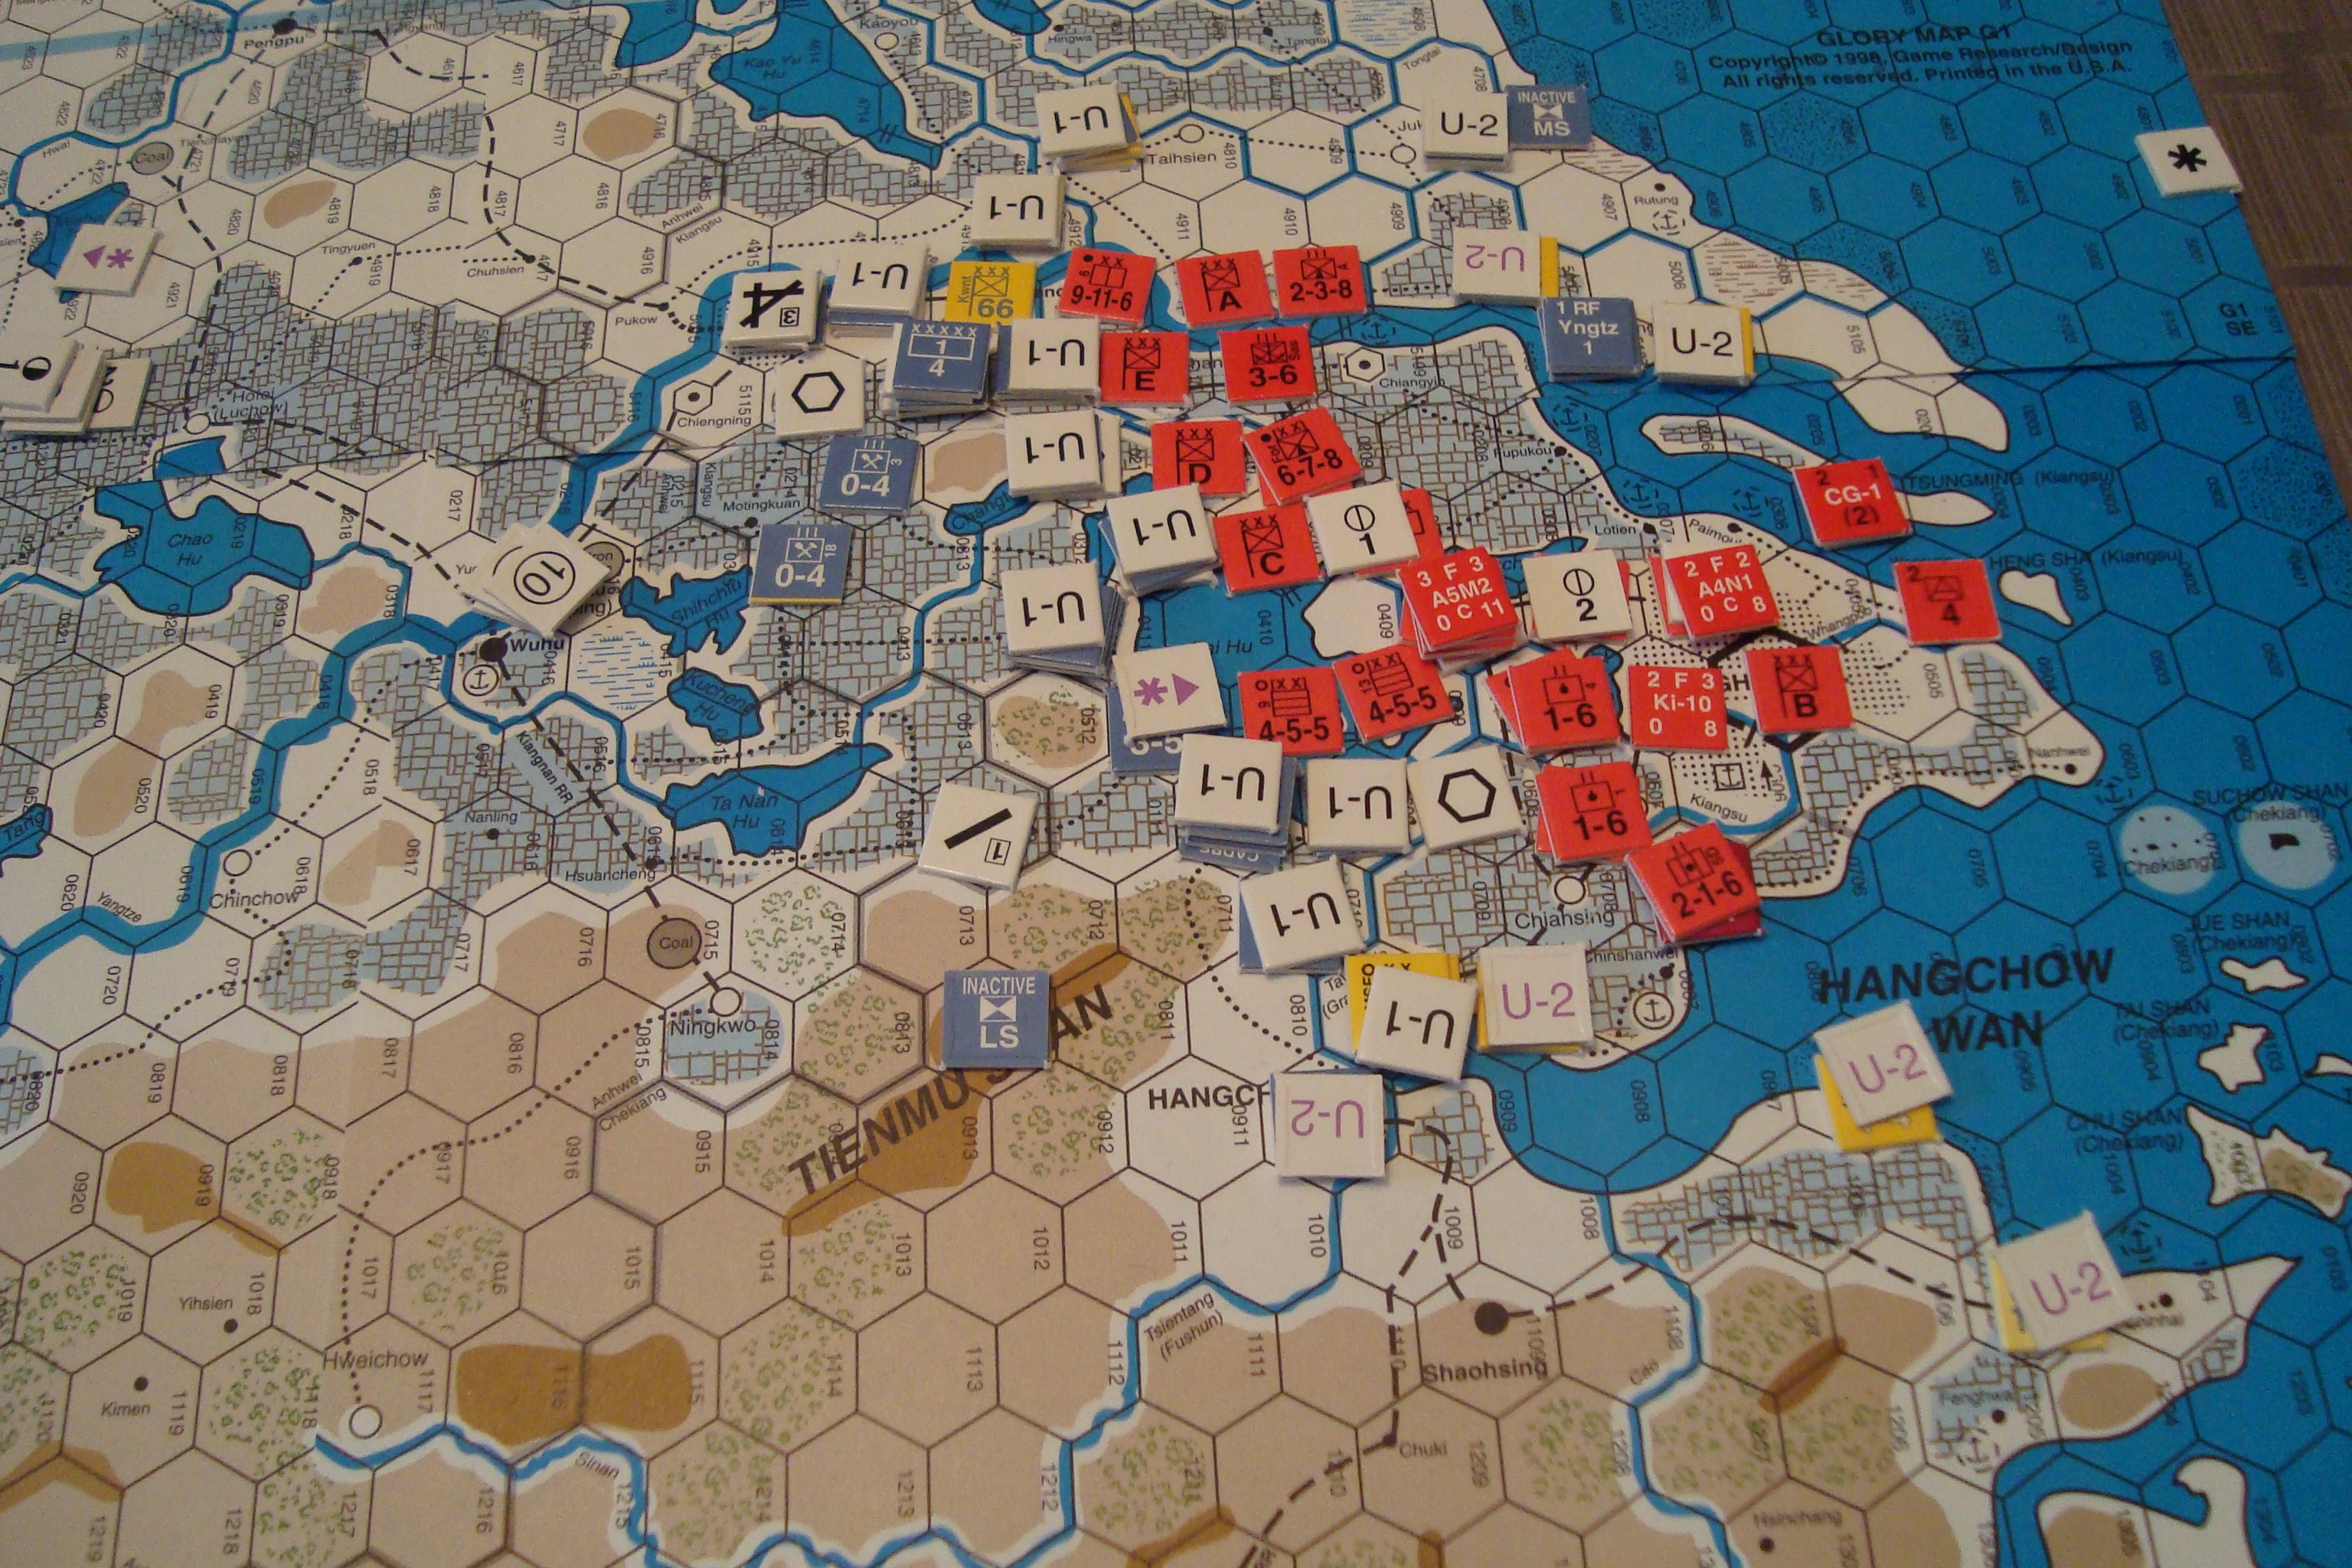
Had another War of Resistance (WOR) session with Tim over the weekend. Once again, it was the Fate of Nanking scenario, with Tim as the Japanese commander, and the Chinese committed to a forward defense of Shangai. This scenario starts with an abbreviated August I (1937) turn, and ends with the Jan II (1938) turn. By eschewing strong drink, and limiting our football viewing, we were able to play through the Dec II turn.
I had studied the logistics rules since our last session, and was much more comfortable allocating resource points and moving them from off map to where they could be used. Chinese engineers were kept busy building forts and repairing rail line hits. The limited rail net moved attack points to the theater headquarters, and strategic river movement was employed to augment the supply effort. As a result, I was able spend less time muddling through logistics, and more time on operational challenges.
Tim provided plenty of challenges. He quickly exploited a gap in my river defenses, and established an amphibious beachhead threatening my left flank. As a result, I had to pull back forces dug-in in Shangai, abandon my factories (which can create resource points) and establish a main line of resistance (MLR) in the suburbs. This was an important early move, since the Chinese player’s mission is to delay and defend, and Tim’s landing probably cost me at least one turn.
Tim’s operational problems are to utilize naval transport to move troops from Japan to China, while juggling the problems of limited port capacity and possible damage to his landing craft used for ship to shore movement. Taking advantage of the clear weather, smooth seas, and experience gained in our last session, he rapidly built up his combat power and began a series of attacks supported by strong naval gunfire and aviation assets.
The Chinese Airforce attempted to thwart this naval movement and also shoot down Japanese ground support aircraft. Their efforts were futile, and almost every Chinese air unit was eliminated or aborted.
As the methodical Japanese moved west, they encountered successive defensive lines built by engineers augmented with civillian labor. This increased manpower allows the construction of a fort in one turn. With narrow avenues of advance, and four construction capable units, the Chinese forces enjoyed consistent -1 modifiers when attacked. The Chinese defenders were also aided by flooded rice fields, which halved Japanese attack strength. However, by October, the rice growing season had ended, and the impact of intensely cultivated terrain was much reduced.
Tim was able to consistently create high odds attacks, taking advantage of the inability of the Chinese to mass combat power in any single hex. This is a function of the low strength Chinese divisions, and lack of regimental or brigade troops to augment the combat power of the divisions within stacking rules. In addition, the Chinese player has only four (4) artillery units, which I used to support stacks of unsupported divisions, which otherwise would defend at half strength, rather than augment the stronger, supported, divisions.
This attritional combat took a heavy toll on the Chinese, who are unable to rebuild lost supported divisions during this scenario. I didn’t help matters by failing to feed the lower strength elminiated units back into the fighting.
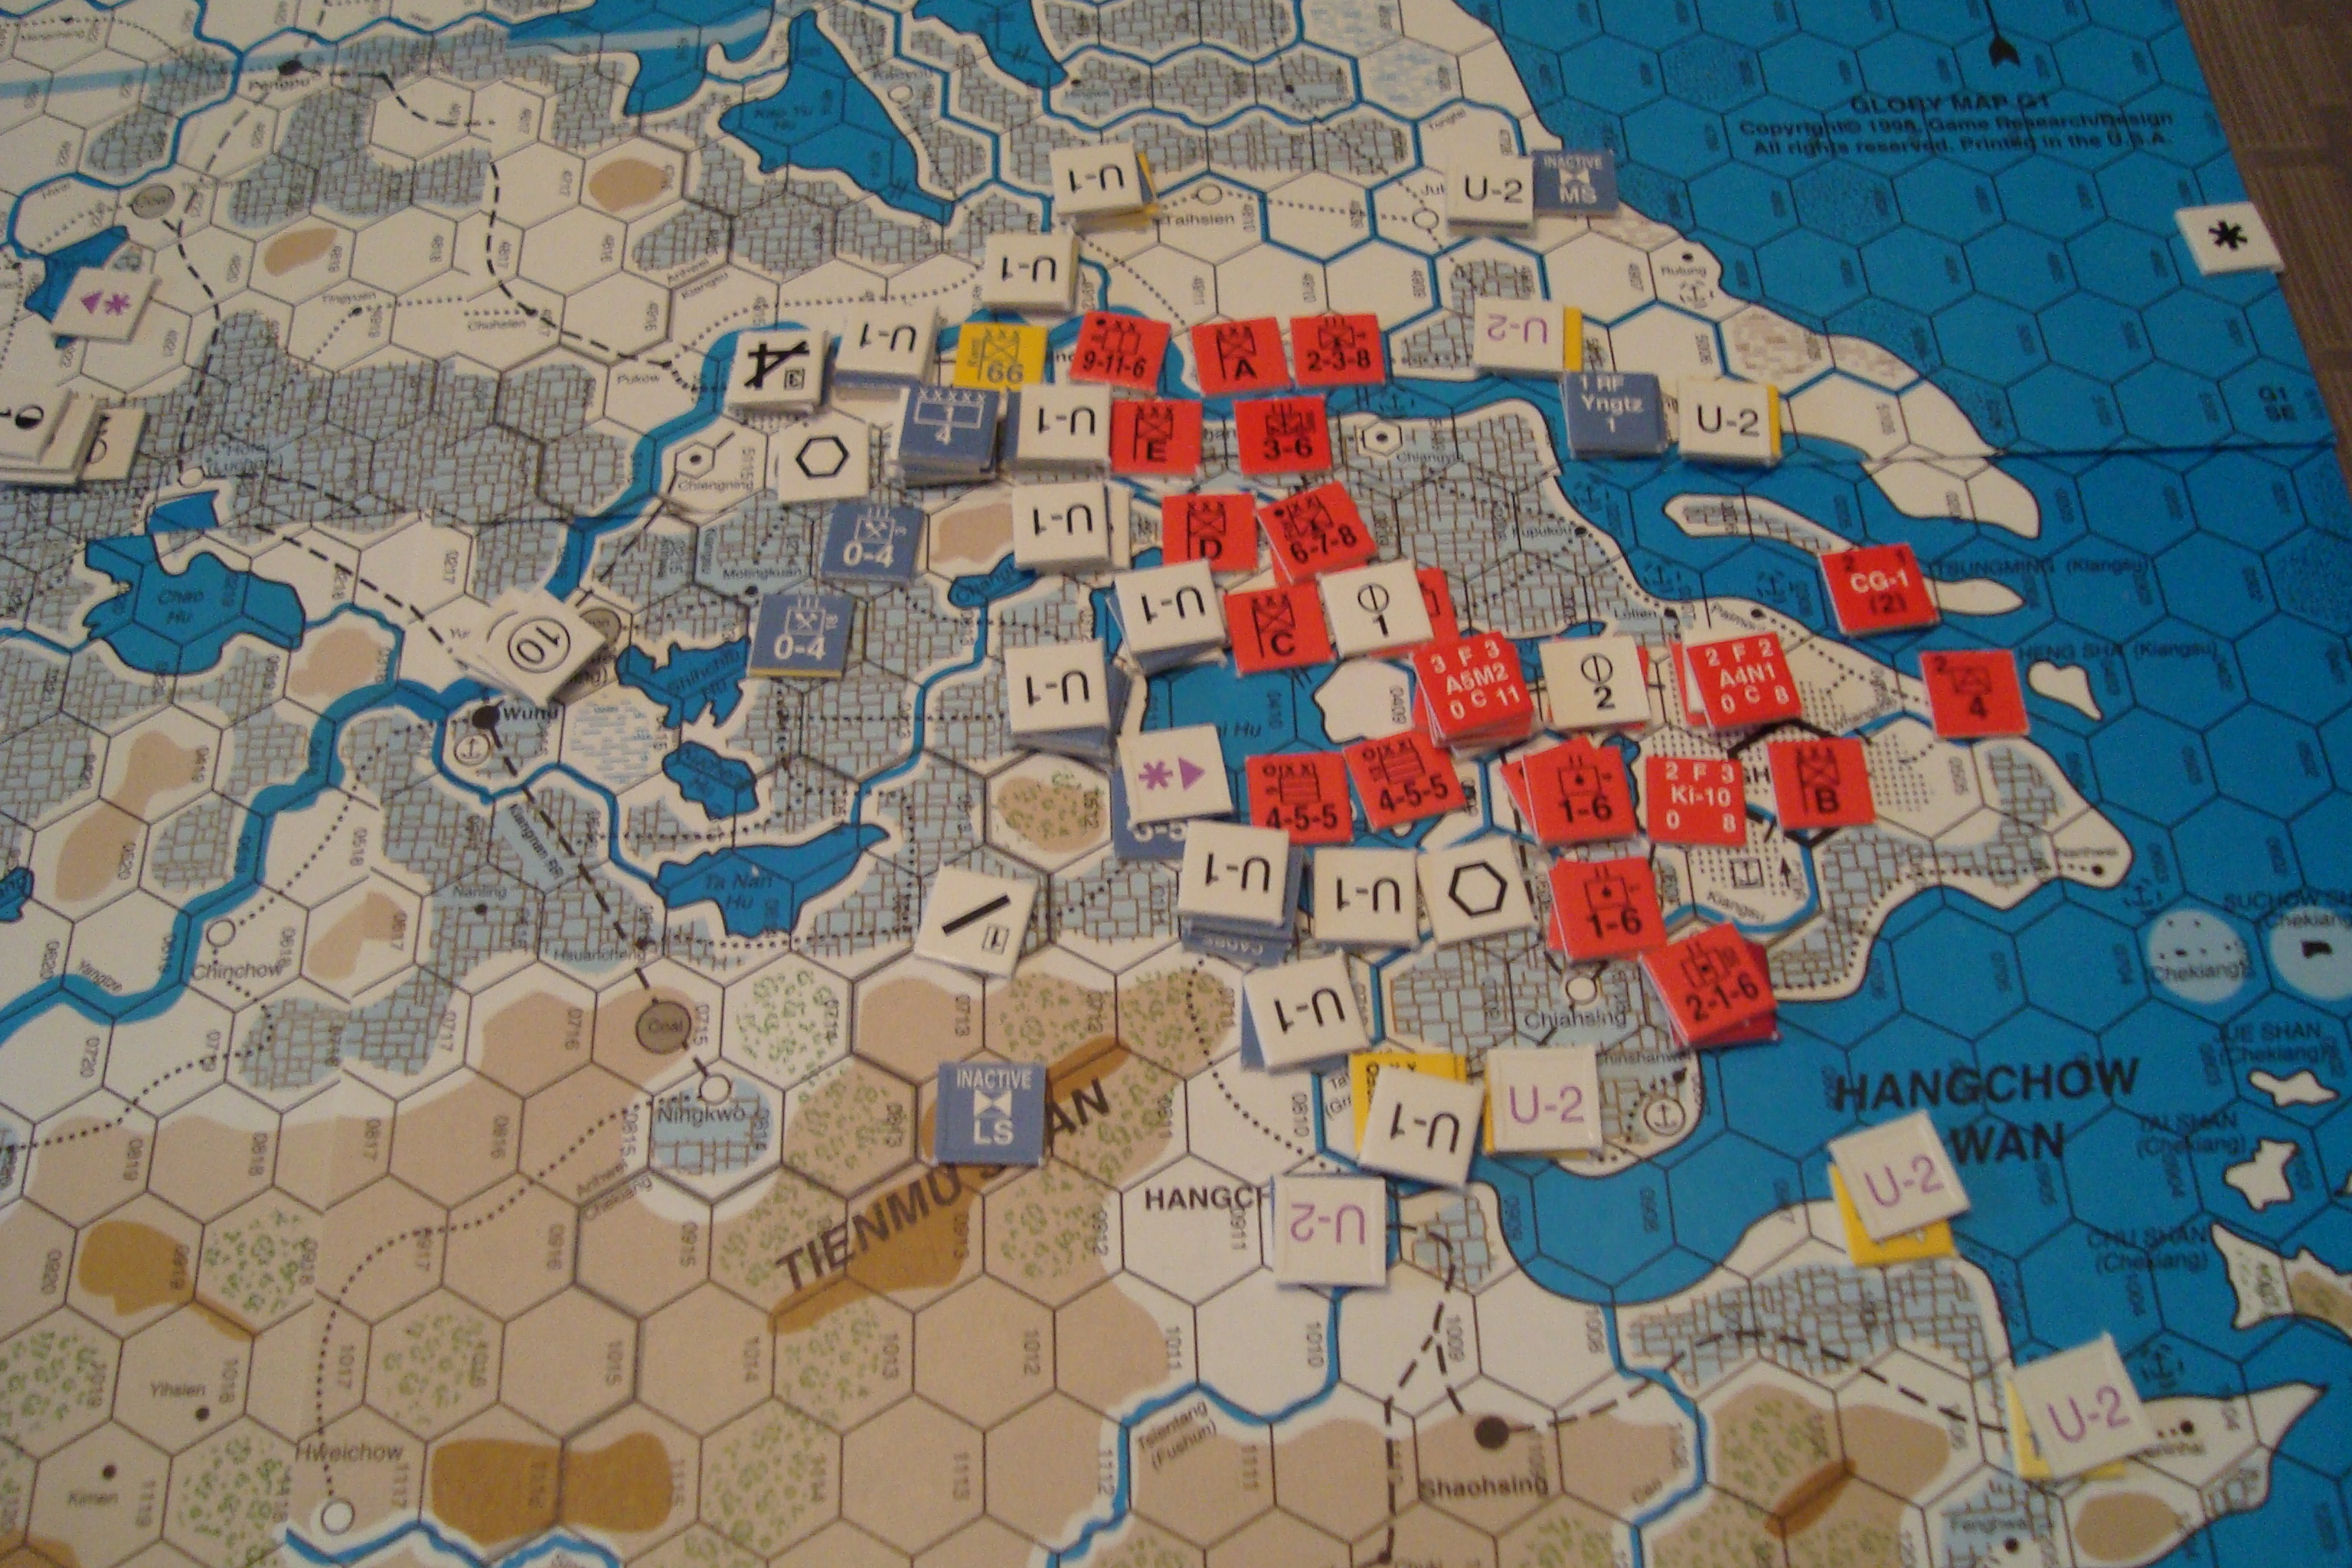
By November, Tim had split my defense, and established a beachhead on the north side of the Yangtze. He also destroyed my riverine supply capabilities along with their cargo in a devastating aerial attack. As a result, many of the Chinese units were un-supplied for a turn which, fortunately, did not effect their defensive capabilities. However, this slowed the Chinese withdrawal north of the Yangtze. At this point, China’s greatest ally was time. A patchwork defense in depth continued to slow the Japanese advance.
The game came down to a final roll of the dice by Tim to activate his two headquarters during the reaction phase of the Dec II turn. Had he made these rolls (1 or 2, d6), he would have had a chance to break through my last ditch defense of Nanking. Fortunately for the Chinese, this didn’t happen.
We’ll never know what the outcome would have been if the game had been played for one more month to the scenario’s conclusion. Our consensus is that it would have been a toss-up.
Here’s a series of photos to augment my narrative. I’ll hold off on any analysis until Tim forwards his thoughts on the game.
Initial Japanese Landing by A Corps on Yangtze.Japanese Reinforcements Arrive In Shangai and Move Into ContactJapanese Breakthrough Center, Split Chinese ForcesJapanese Penetration Sealed OffEffect of Naval Patrol Attack on Chinese SupplySituation At Game’s End