Tim and I were able to get in three sessions of War of Resistance (WOR) on Tuesday afternoon and Wednesday. It’s amazing how some level of moderation in beer consumption, and lack of viable evening movie options, can increase the time spent gaming.
We played two sessions of the Attack on Hong Kong scenario, with full Chinese intervention, and one using the Fate of Nanking scenario. I’ll use the “old” spellings throughout.
Hong Kong is referred to as the game’s introductory scenario. That’s true if you have never played the Europa system before. The Fate of Nanking involves all aspects of the Glory rules system used in WOR. I hoped my playing of The Damned Die Hard (TDDH) would prepare me for WOR. That was not the case, as the supply/logistics, guerilla, reaction and command rules are far more detailed and extensive than those featured in TDDH.
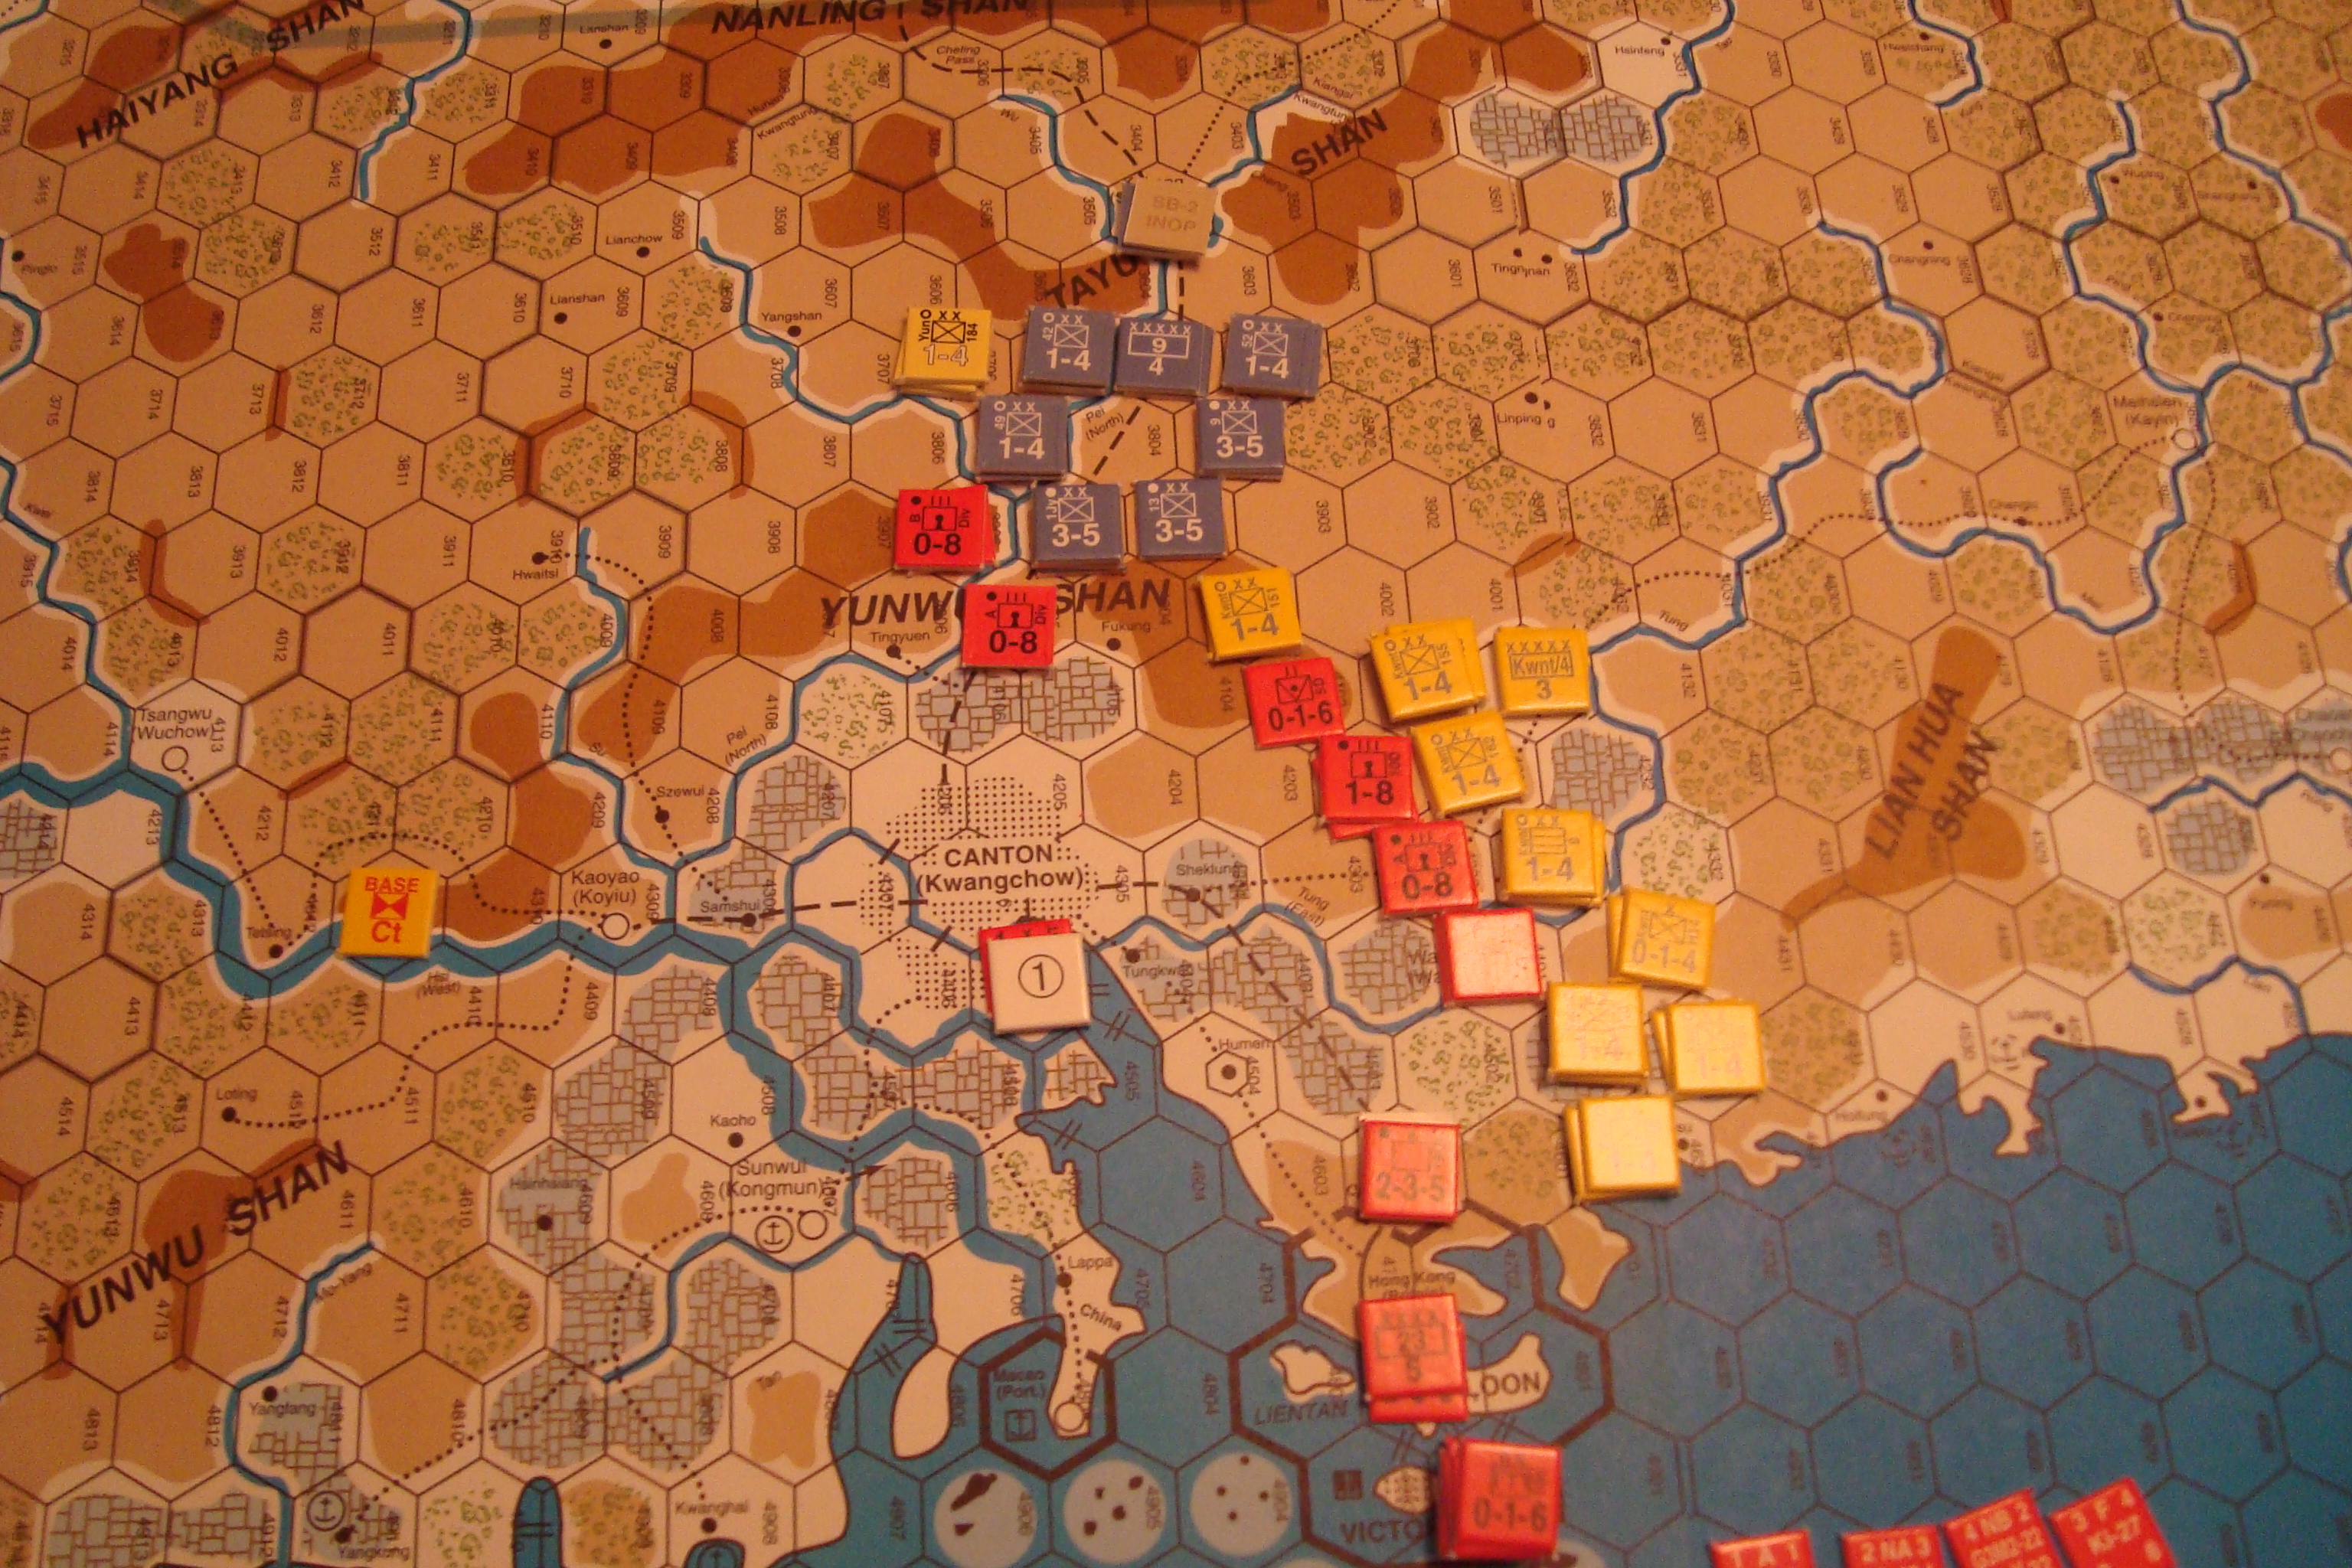
I played the Japanese in the first session, limiting the forces committed to attacking Hong Kong to the OB’s designated assault force. Too many troops were allocated to defend the assault force’s flanks and rear from the two Chinese armies situated to the east and north, as well as the guerrillas located to the west. In addition, I left out one attack supply factor, which limited my full strength assault attempts to two (2). The result was failure to take the city in the time allocated.
We switched sides for the second session. Tim loaded up his assault force and with a successful role for his reaction phase – which allows the non-phasing player to move and attack – during my first turn was able to take Hong Kong in two (2) complete game turns (because of the Reaction Phase and the Japanese player plays first, he had three (3) attack turns). My Chinese attack on his forces to the north had an initial success, but the game was over before they could attack again.
The Fate of Nanking was another matter.
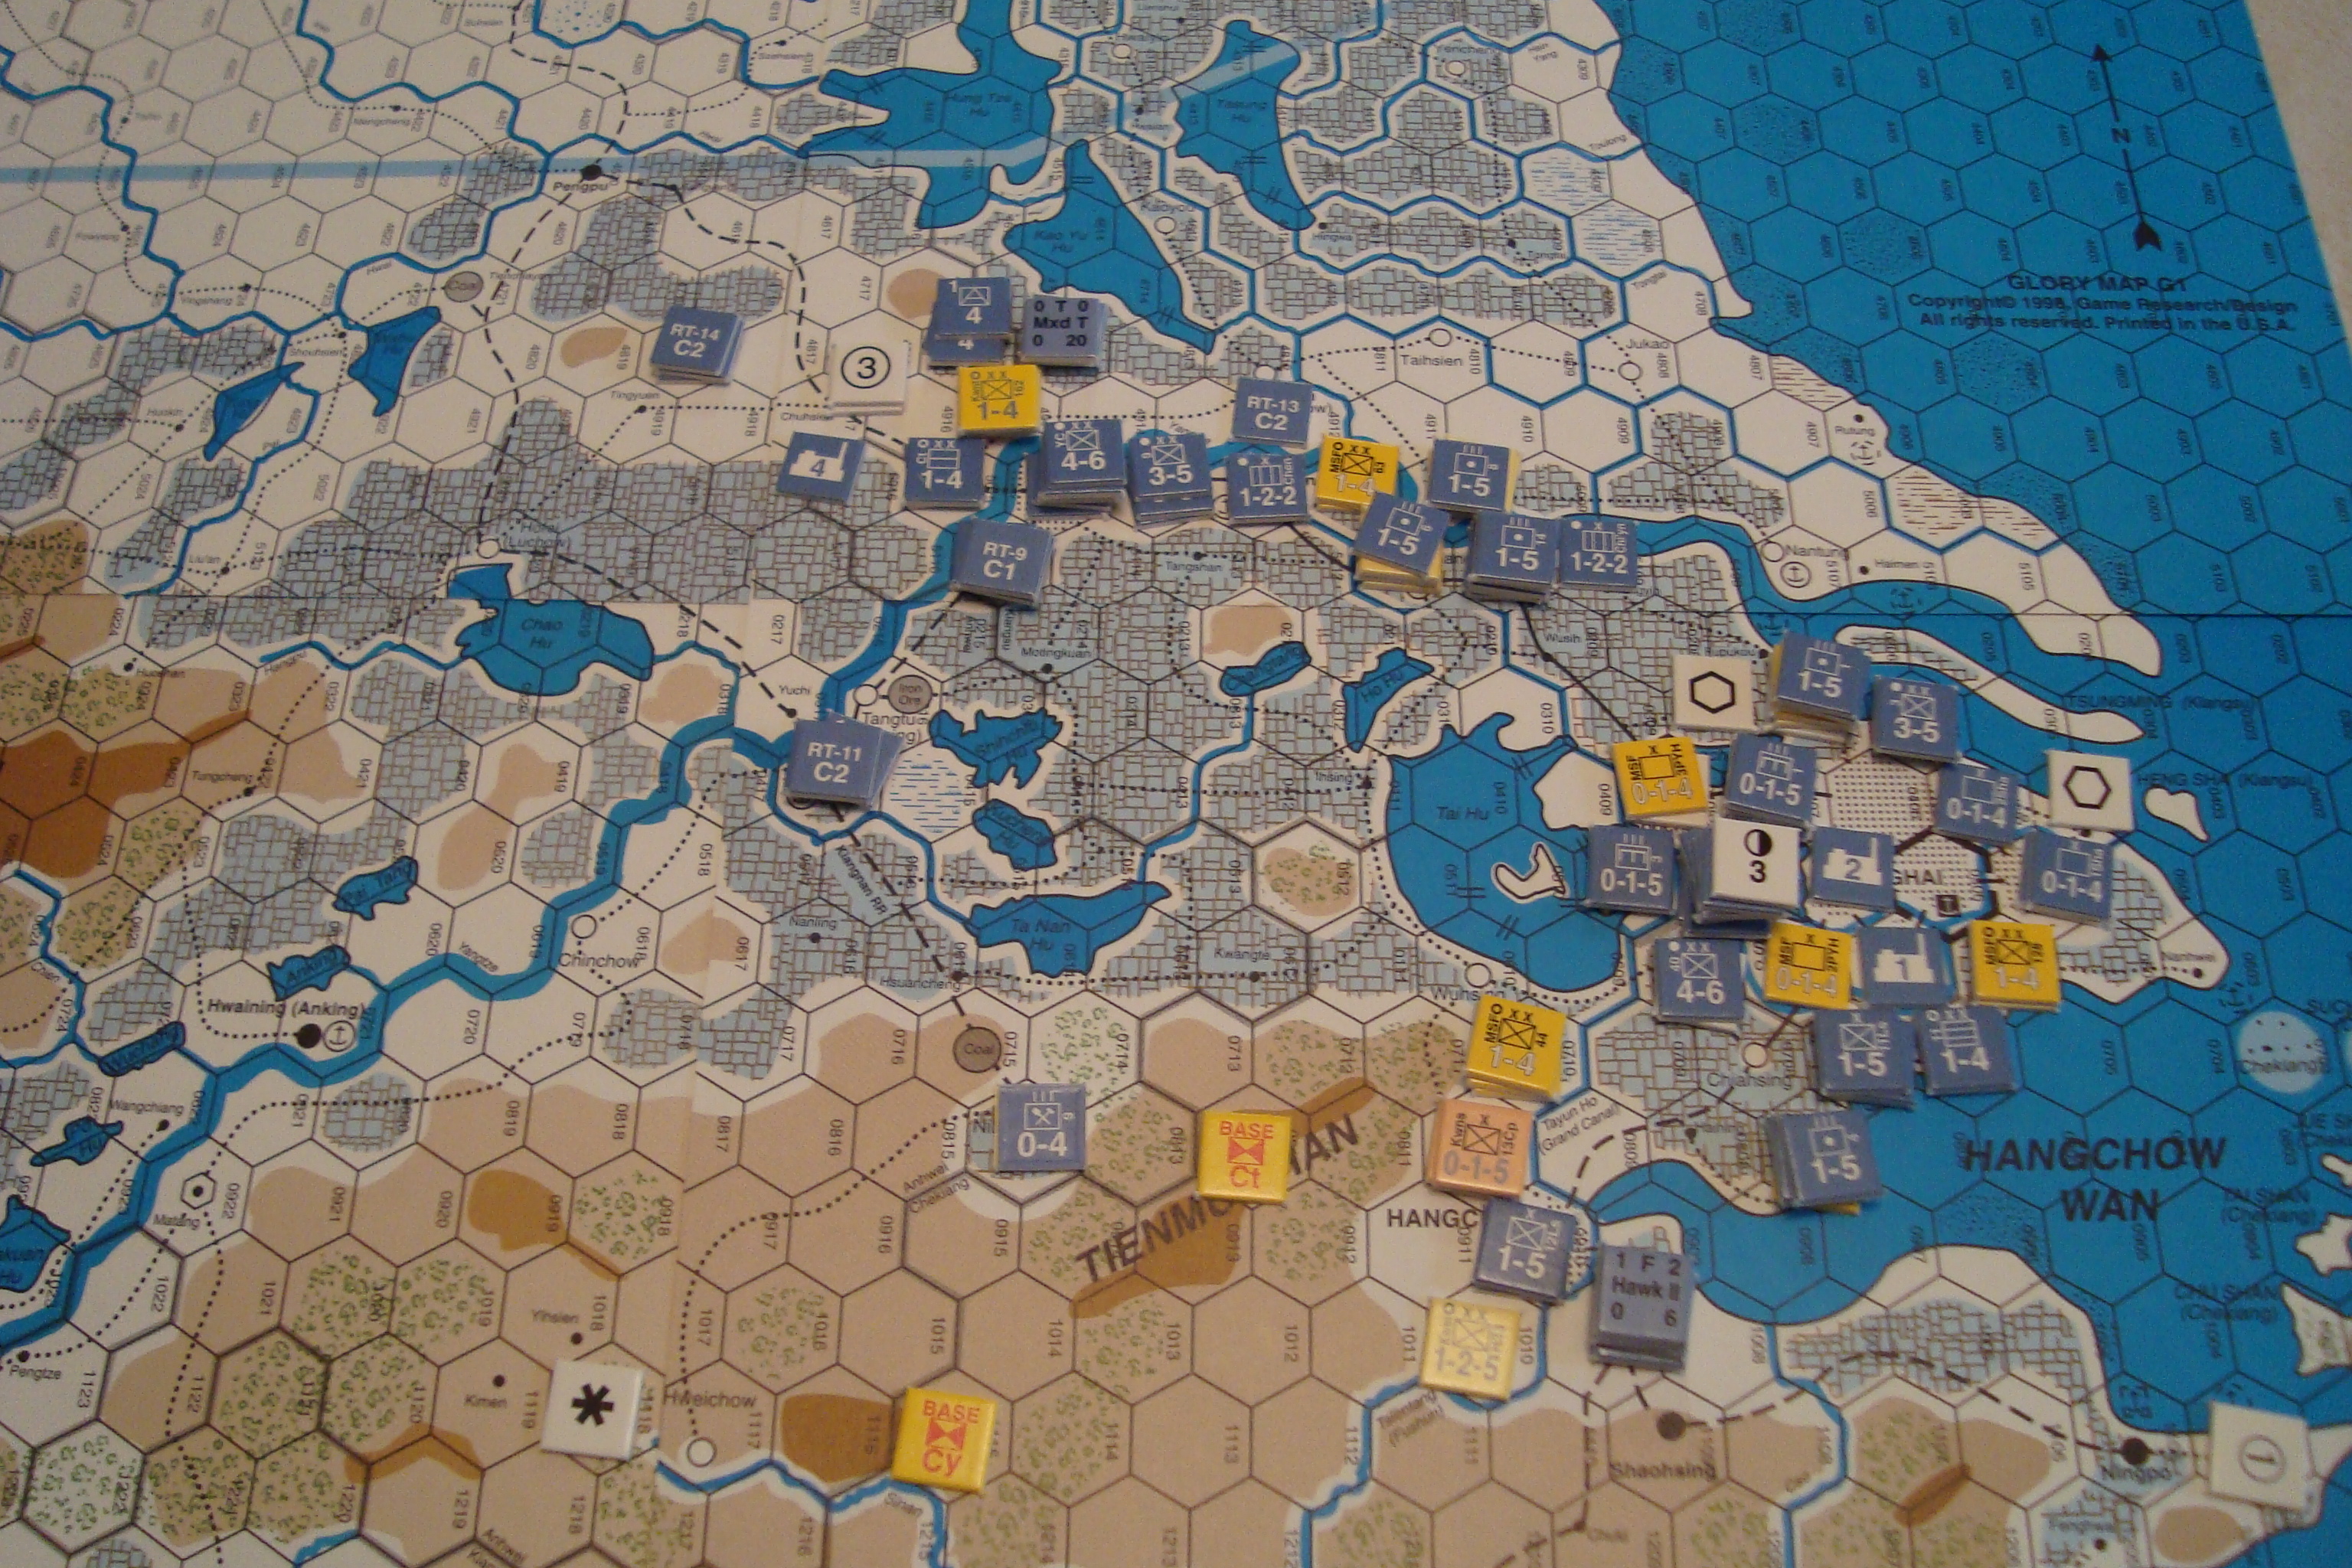
The Japanese must land, assualt and secure Shangai, and then move west and take Nanking. The Japanese have significant, but management intensive, naval resources. The Chinese player has strong forces near Shanghai, but weaker forces in the Nanking area.
Supply management is critical for the Chinese player, he must juggle the need for attack and general supply, as well as utillizing resource points for construction and repair. This is a typical challenge in Europa. But in WOR, the very limited number of resource points – which can be converted to attack suppy which, in turn, can be converted to general supply (yes, this is confusing… it confused the hell out of me) – combined with a problematic transportation network, has a direct and significant effect on what the Chinese player can and cannot do. Unless the player is thoroughly comfortable with these rules and their application, a disproportionate amount of time and effort is spent with logistics, with combat operational planning adversely affected.
Guerilla bases and units are another aspect of WOR that is a challenge. While these units were included in both scenarios, we didn’t use them. One reason was that we had our hands full with other aspects of the game. Another was that our games, for the most part, involved urban combat, and guerillas cannot enter cities. As we play longer scenarios, I’m sure we will start using bases to recruit guerillas, for attacking lines of communication.
Reaction can only be used if there is a Army (Japan) or War Zone (Chinese) command unit available. Each Army or War Zone has as command radius, and success die roll. If the die roll is successful, then all units within the command radius can move and fight in the reaction phase. This allows the non-phasing player to maintain momentum generated in his phase of the turn. Tim did an excellent job of applying continual pressure on my units defending Shanghai.
Attack and general supply points can also be stacked with a command unit. This is an effective way of efficiently using supply points, as the ratios needed are far less than the one (1) point per regimental equivalent (RE) typically used. Neither of us consistently took advantage of this capability to improve our logistical support.
With the exception of a small contingent stationed in the international section of Shanghai, all Japanese combat and logistics assets must be transported from Japan to China. The number of naval transports and landing craft vary from turn to turn. In addition, landing craft can be damaged during operations, and removed from further play. Tim said this was a constant concern, and limiting factor, in his operational planning.
I decided to hold Shanghai in strength, which is what happened in 1937. Tim built up combat power in Shanghai and methodically attacked my units at odds of 3:1 or greater.
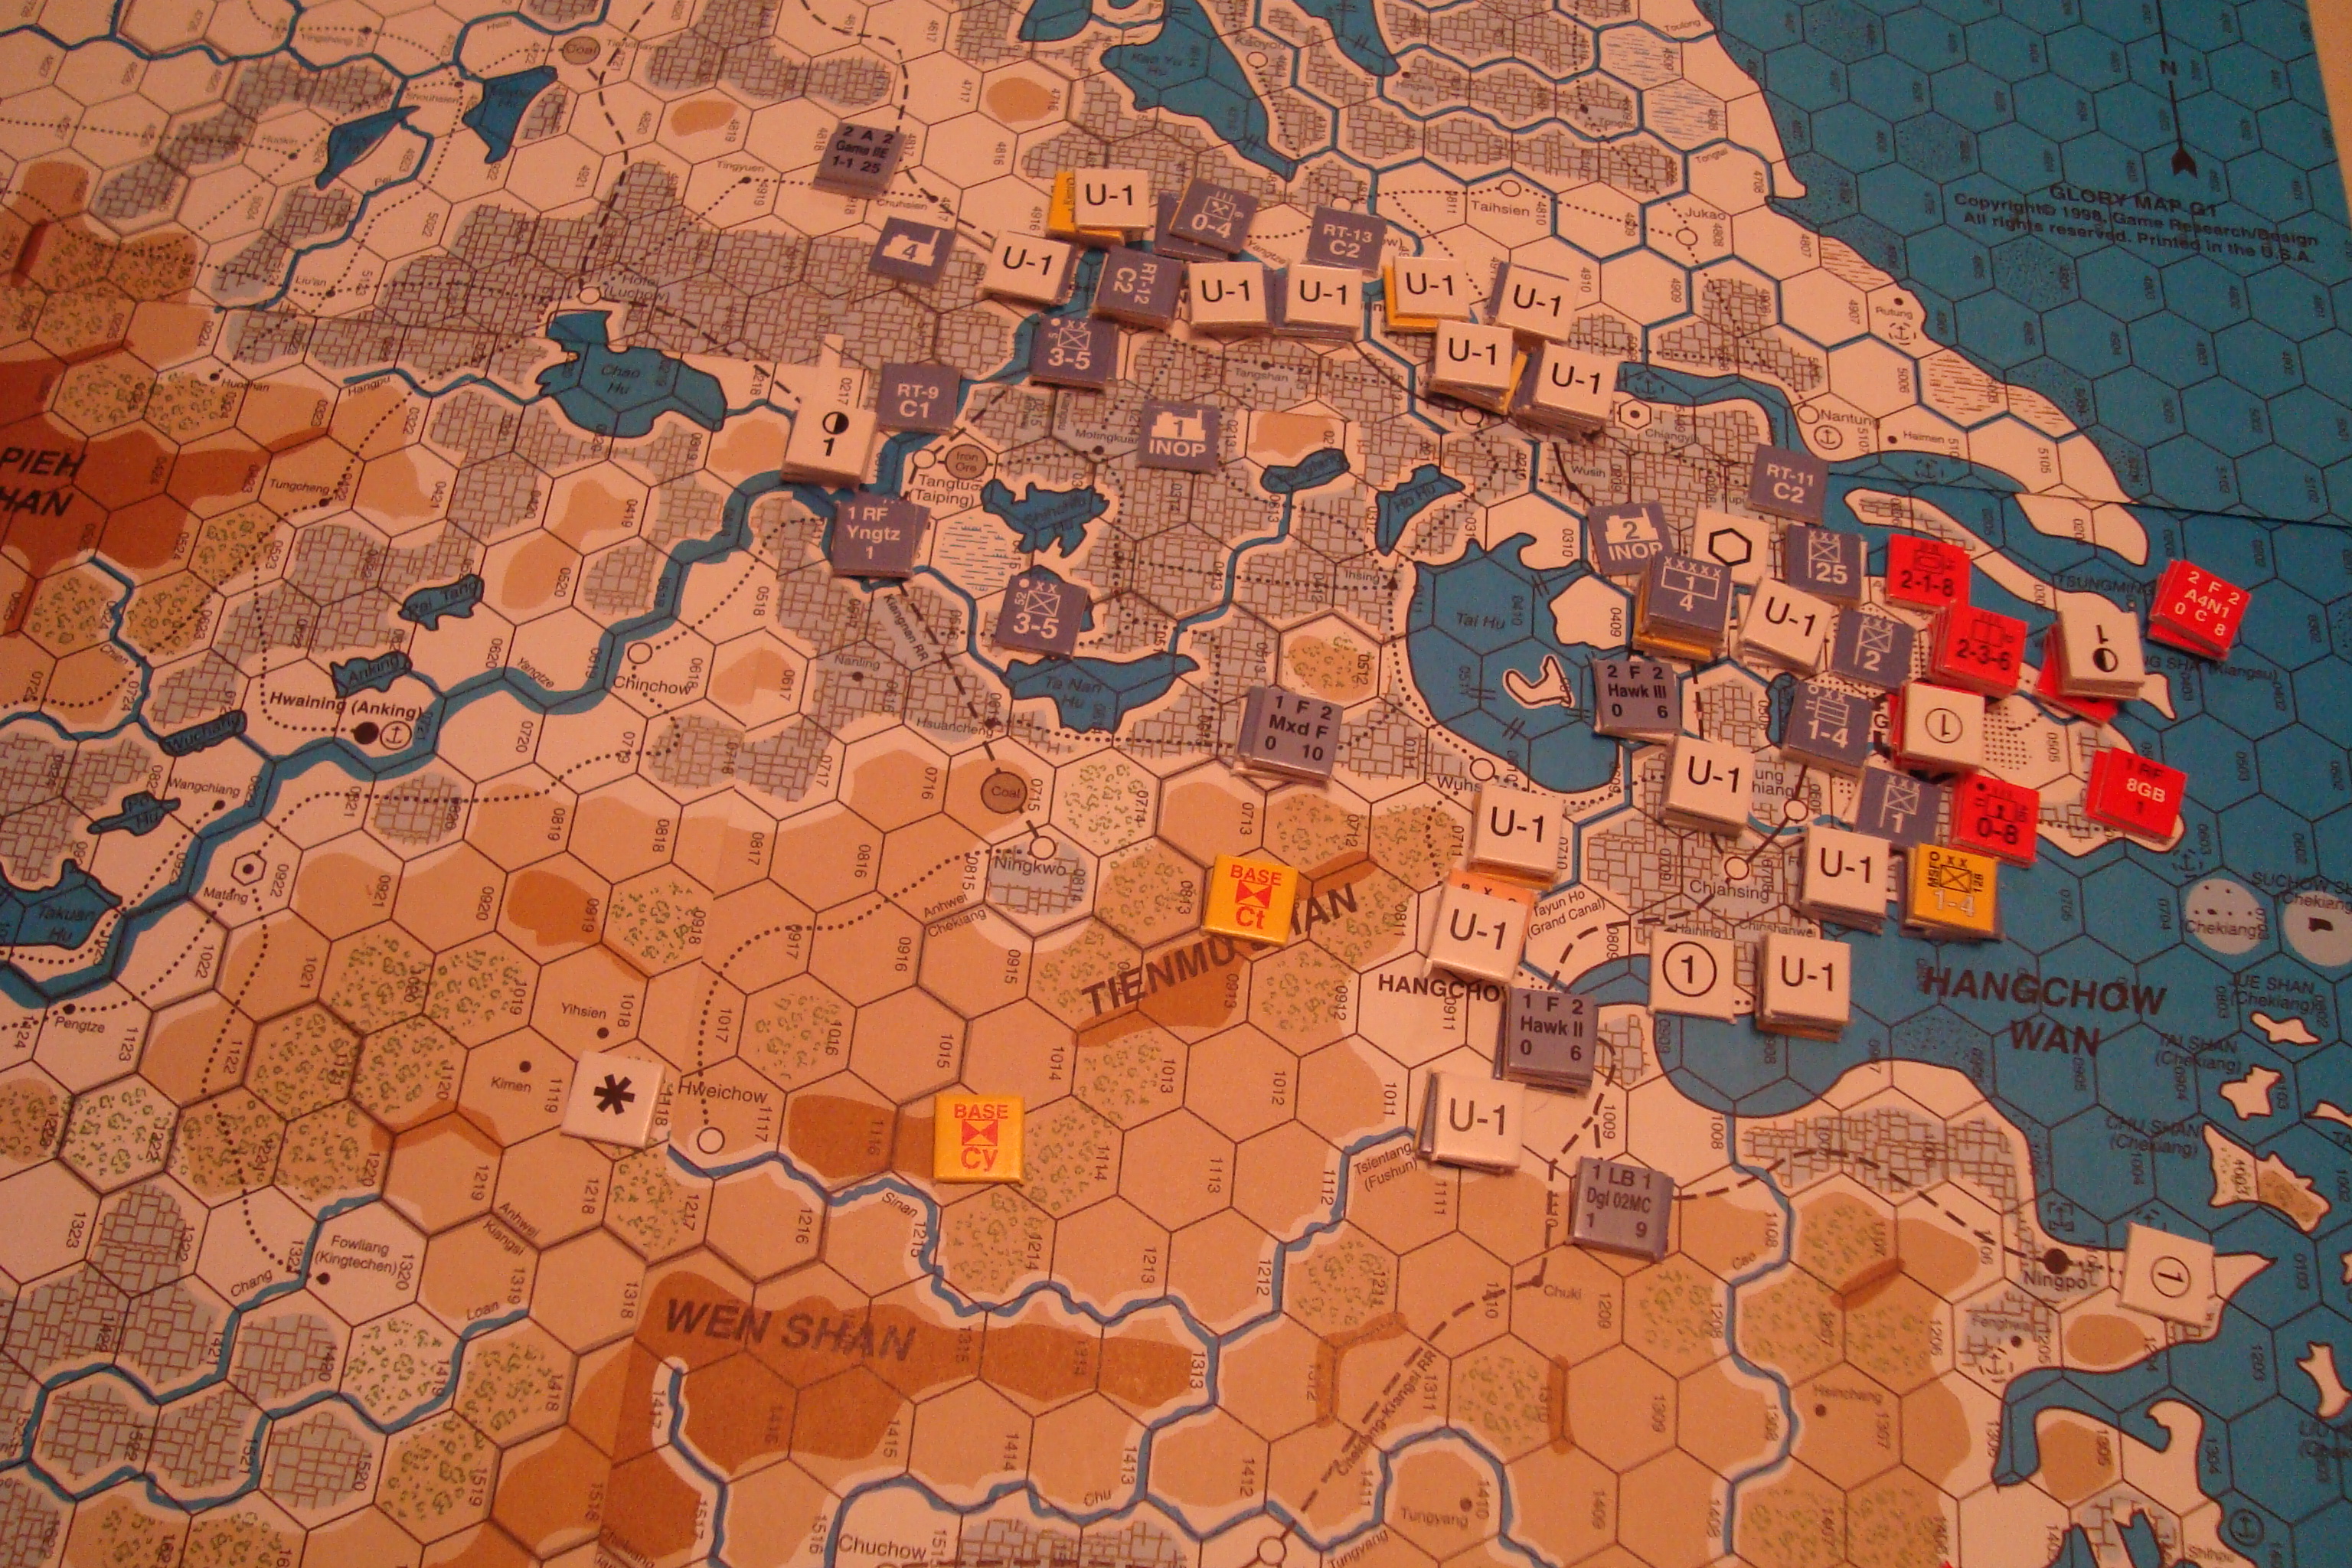
As the fighting in Shanghai developed into a battle of attrition, Tim launched an amphibious assault along the Yangtze River. This prompted a long discussion on the rule limitations on naval transport, river movement, and amphibious assault. We’re still thrashing this out.
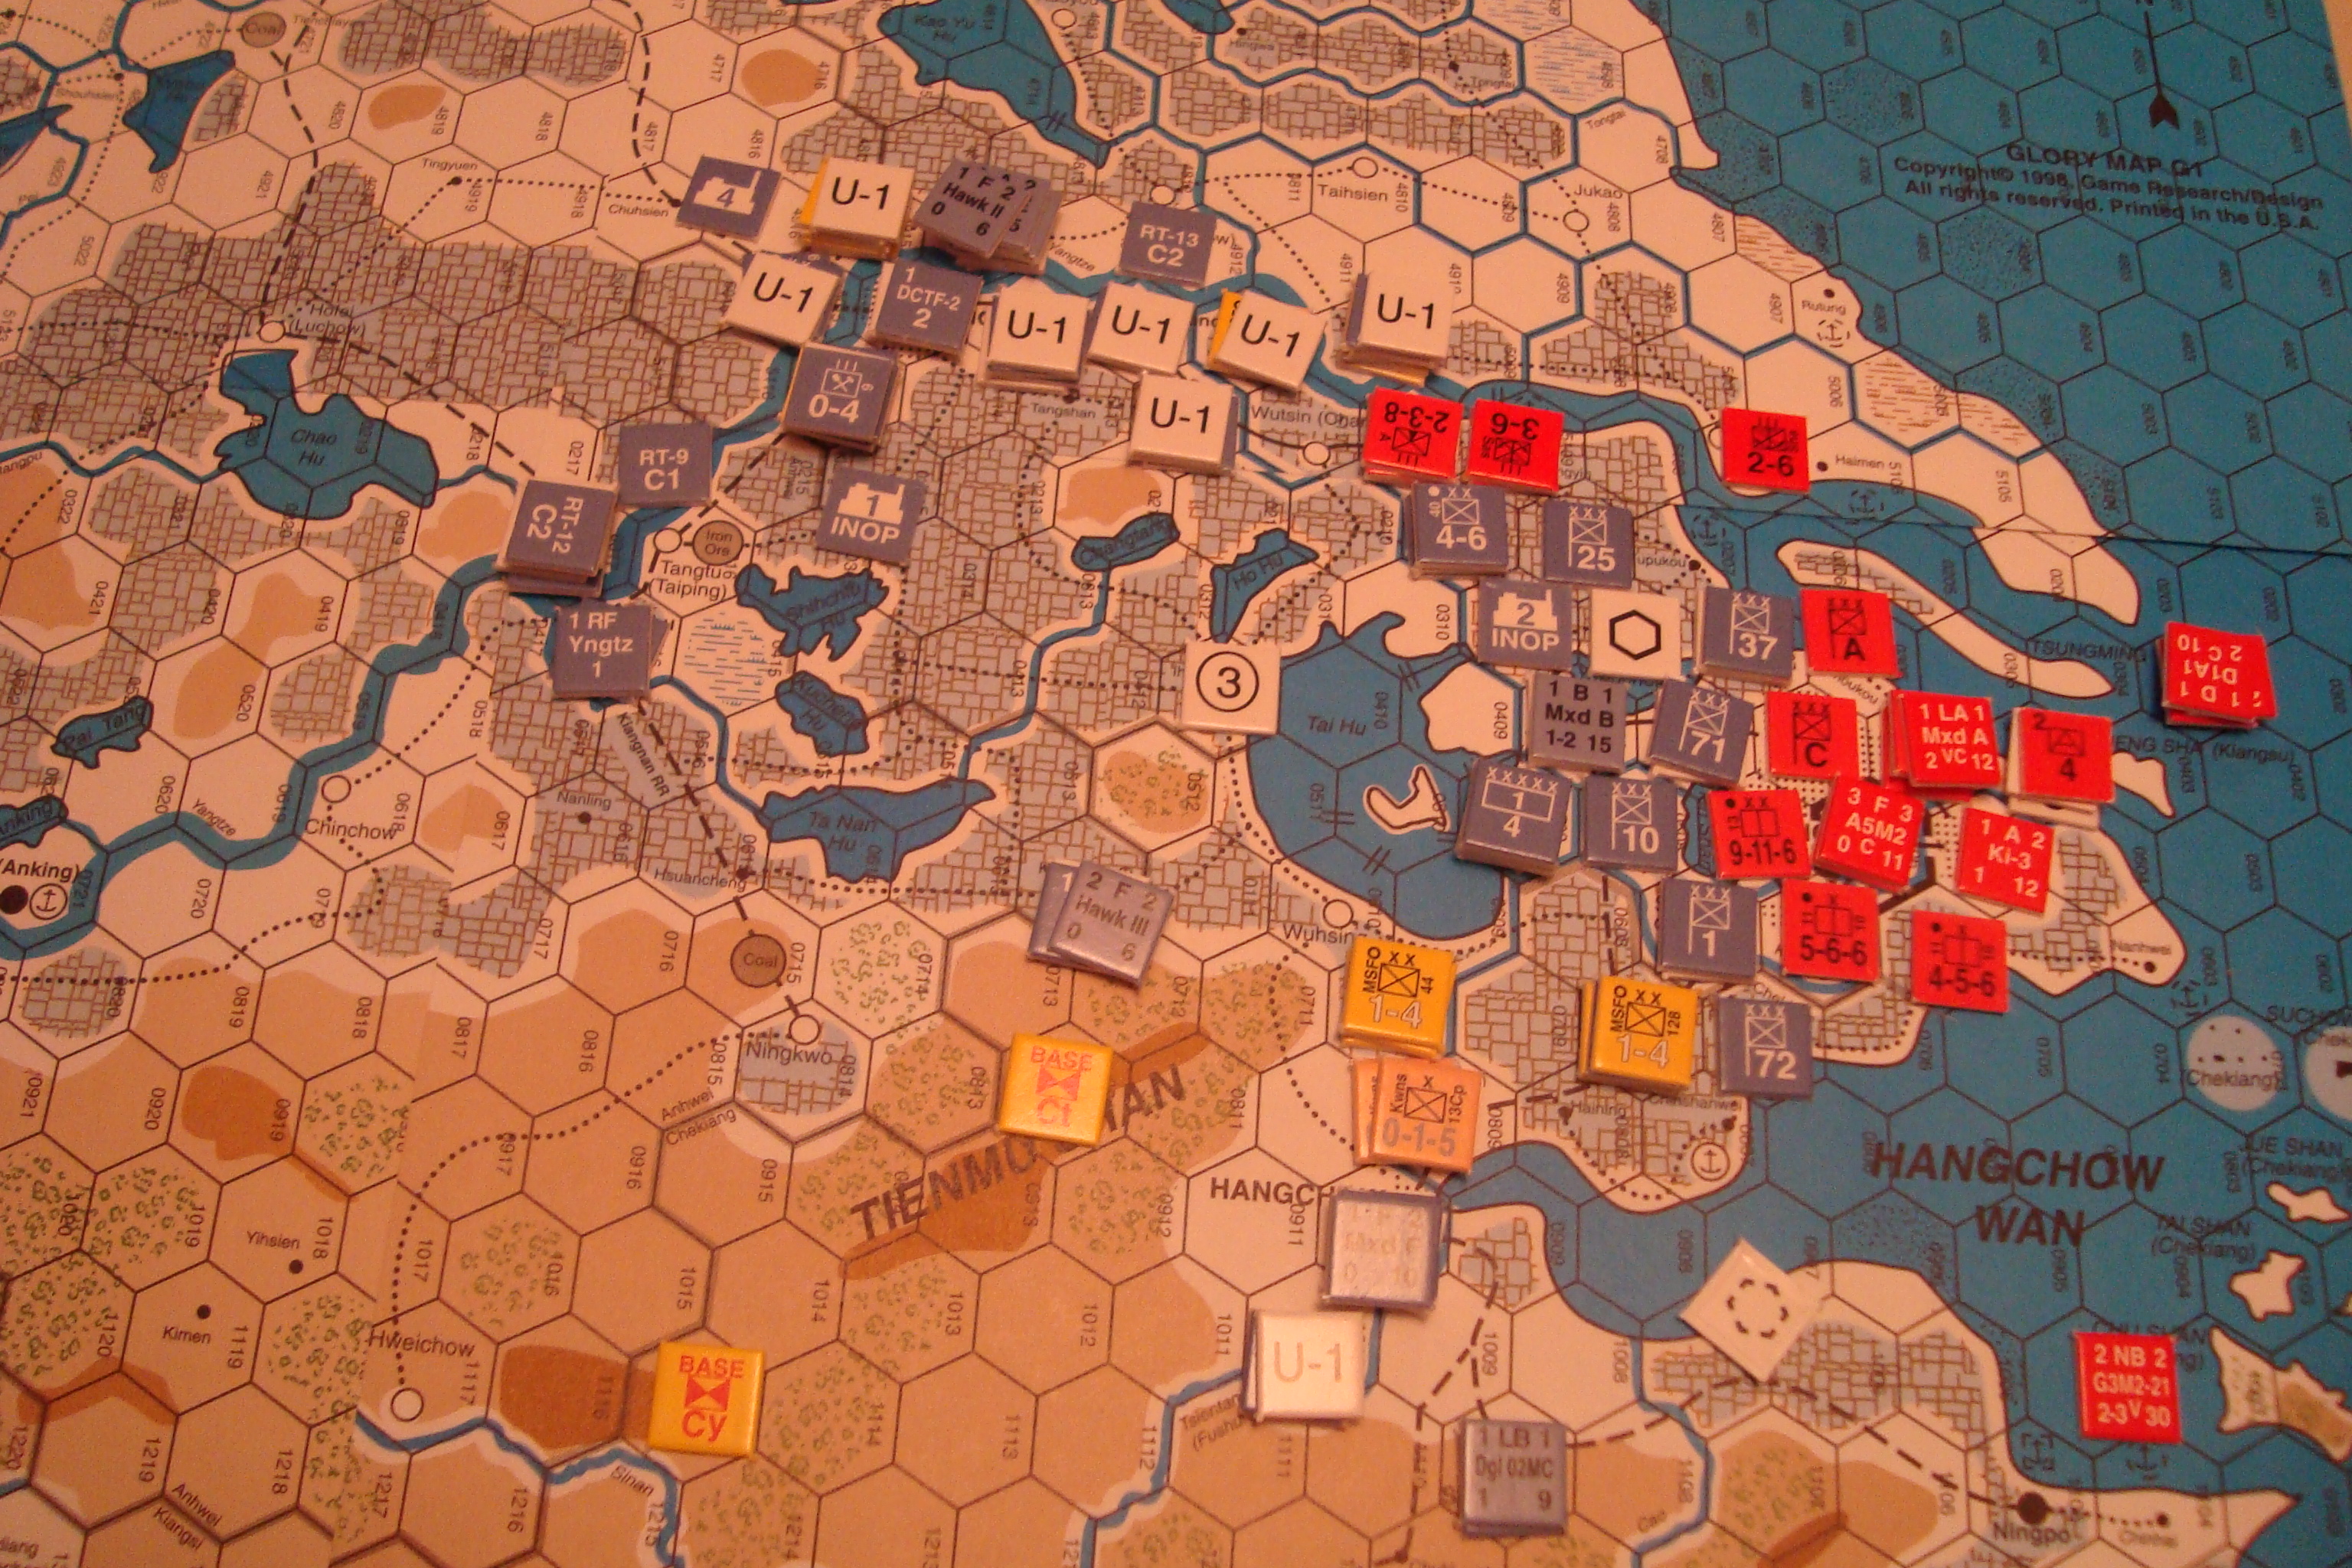
The game ended with Tim consolidating and building up his beachhead, and with me starting a fighting withdrawl from Shanghai to the west.

Lots of good game play and challenges. A fun time! We’re planning another go at the Nanking scenario in early December.