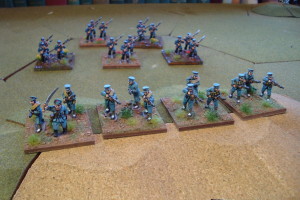
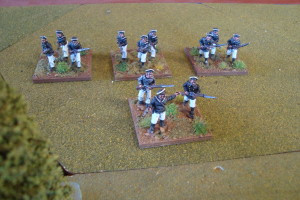
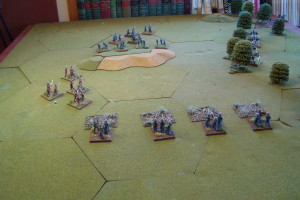
Tag Archives: Red Actions!

The General Is Pleased

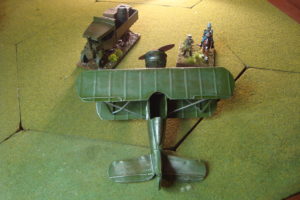
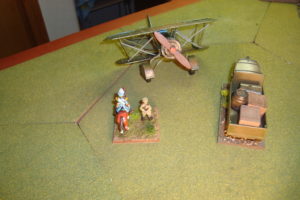
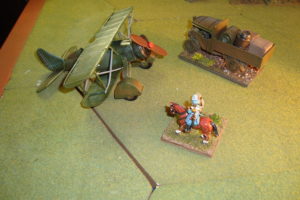
Added a force multiplier that will please any would-be Warlord.  Finally finished one of my Back of Beyond aircraft.  It’s the Hobby Lobby ship….not historically correct, but no assembly required and, after priming, painting and dry-brushing, it looks OK.  Should be nice on the table and add something extra to the scenario mix.  Will keep it in neutral colors/markings so it can be all things to all armies whenever the scenario deems it so.

DSC01448

DSC01450

DSC01449


Convoy Ambush – Red Actions! Pt 2

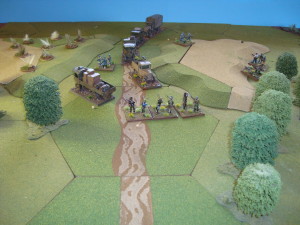
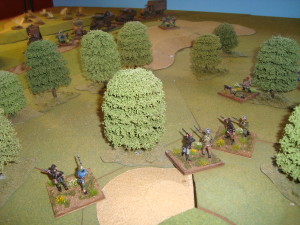
Turn 1:  German machine gun engaged the lead Machine Gun (MG) Truck.  The MG Truck failed the ambush morale check, causing it to rout.  Machine gun fire resulted in a terror result.  The Partisans moved out of the woods, one group to attack the convoy, the other to act as security to engage the escort and/or any reaction force.  The second vehicle in line failed the ambush morale check.  It routed and took a terror hit from the German Infantry’s rifle fire.   The Warlord Escort carried in the trail vehicle dismounted.  The MG truck Rallied.  However, the routed cargo truck did not.

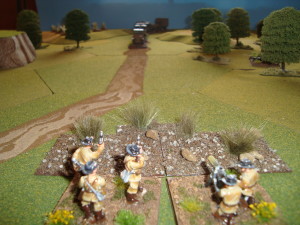
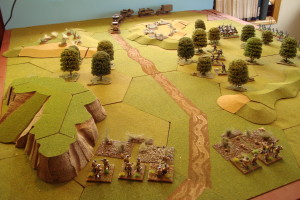
View From German Machine Gun Position As Convoy Approaches
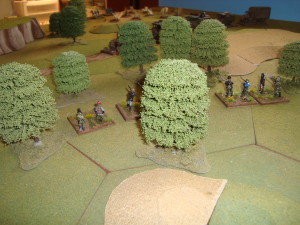
Partisans In The Woods. Ambush Group to Left (one stand behind tree), Security Group to Right

Turn 2:  Germans again engaged the MG Truck, but failed to inflict any damage.  Likewise with the advancing Ambush Group’s fire on the stalled cargo truck.  The Security Group reached the crest of its objective.  The Warlord Escort advanced down both sides of the road towards the front of the column.  The stalled cargo truck again failed its morale check, but the MG Truck maneuvered to engage the advancing Partisans.  The MG Truck’s fire was ineffective.

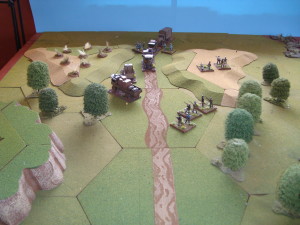
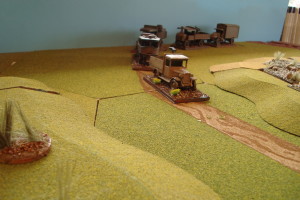
Partisans Emerge From Woods After Machine Gun Truck and Lead Cargo Truck Retire Due To German Fire
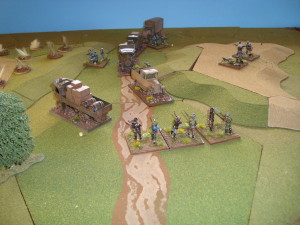
Partisans Engage Convoy and Move to Security Position.  Warlord Escort has Dismounted.

Turn 3:  The Partisans advanced,  masking  the Germans’ field of fire.   Once again, Partisan fire at the stalled cargo truck was ineffective.  The security group attacked the nearest Warlord Escort, inflicting a terror hit.  The MG Truck could not hit the Partisan ambush group.  The Warlord escort maneuvered towards and ineffectively engaged the security group.  The other Warlord Escort continued to advance to the head of the column.

Partisans Engage Convoy Escort

Turn 4:  Poor die rolling continued, as the Partisans once again could not damage any of their targets.  However,  both the Partisan Security Group and Warlord Escort recoiled in the fight for the hill.

Partisan Security Team Pushed Off Hill. Assault Group Continues to Engage Convoy Escort

Turn 5:  The Partisans again attacked both the stalled convoy and the escort.  Again, their fire was ineffective.  While the MG Truck and Escort both inflicted terror hits on the ambush and security group.

Turn 6:  According to plan, the Partisans disengaged, falling back to the woods, and prepared to move to the rally point.  The Chinese did not pursue.

Partisans Withdraw Into Woods

Comments:  Fun little scenario, horrific die rolling for both sides.  I thought the Partisans would make short work of the convoy, but their low firepower (4 factors for each stand) was consistently ineffective.  The Germans should have been able to do more damage to the convoy, but again, the marksmanship (die rolling) was bad.  The Warlord unit engaging the Security Group did its job, and the resilient MG Truck forced the Partisan Ambush Group to retire.  A decisive victory for the Warlord’s forces.

Convoy Ambush – Red Actions! Pt 1

After much procrastination, started playing this scenario.  I posted up some preliminary thoughts and photos of a couple of turns  back in December.

The scenario involves a Chinese Warlord convoy carrying all classes of supply.  The mission of the ambush force is to destroy the convoy and, if possible, remove weapons, ammunition and medical supplies.

Since the best ambush point was near a Warlord controlled town, there is the chance that a reaction force will appear.

The first step was to construct a simple situation generator, which hinged on the awareness level of the convoy.  The levels were clueless, cautious, and, know something will happen.  This status was settled by a die roll.

If clueless, the convoy had little discipline, moving at maximum speed and bumper-to-bumper.  If cautious, distance was greater, speed lower, with armed vehicles at head and front.  If an ambush was suspected, there was a reaction team attached, in addition to an escort.

In each case, there was the chance of a reaction force coming to the aid of the convoy, but again, a die roll settled that with modifiers to decrease the size of the force the less “aware” the convoy was.  The number of turns it took the reaction force to arrive on table was again a function of the Warlord force’s awareness level and die roll.

The required wristage created the following:

A clueless convoy, moving at maximum speed, with little dispersion and an escort of only two stands of troops.  Feeling sorry for these poor bastards, I threw in a light truck armed with a machine gun.

The ambush force consists of two stands of Germans, one machine gun, along with five stands of White Russian partisans.

It is a classic “L” shaped ambush.  The Germans are to engage the convoy, bringing it to a halt, and if possible, continue to support the Partisan attack.  The Partisans are to attack the convoy from the wooded flank alongside the road.  Two partisan stands will move to the rear of the convoy occupying a small hill taking up a position to engage either the convoy escort, or a reaction force.  The remaining Partisans will, using fire and maneuver, destroy the convoy and, if possible, retrieve needed supplies.

The Partisans are low on ammunition and cannot engage in a lengthy firefight with the convoy.  If this occurs, they are to withdraw back into the woods, covered by the Germans.  All units will then proceed to a rally point.

I’ll post up the results tomorrow.
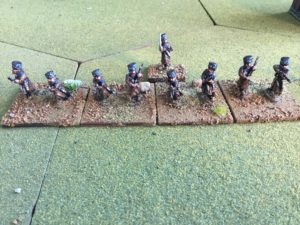
Demolition Derby

A couple of months ago, I posted up about using Matchbox vehicles for RedActions!

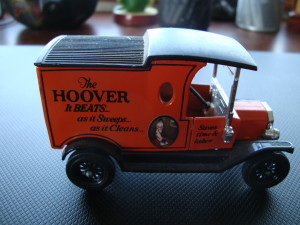
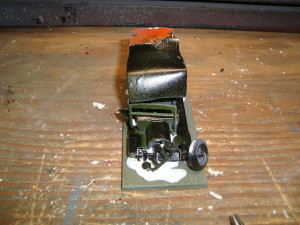
Need to fabricate destroyed vehicles, so I decided to experiment on a Matchbox truck that was too large for 25-28mm.  Here’s a picture.

DSC01335

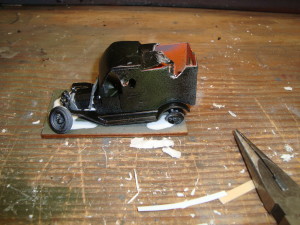
Here’s what it looks like now, in the process of, shall we say, “modification”?

DSC01341

DSC01342

After I experiment with painting the destroyed vehicle, I’ll scour E-Bay for a couple of low cost trucks for similar treatment.  Now I just have to work out the explosion/flame/smoke effects.

Red Actions! – Ambush Scenario

Since I’m suffering from a bad case of painter’s block, decided to work on a simple Red Actions! scenario.

This will involve a mixed force of Germans, Partisans and Cavalry attacking a Chinese armed convoy, including a reaction force.

To add some randomness and re-playability, I put together three scenarios for the convoy.  The convoy is either clueless, cautious, or know something will happen.  These readiness states dictate vehicle dispersion, speed and use of the reaction force.

For the attackers, I’ve assigned numbers to each terrain feature for some variability in setup.  Some combinations could be tactically ill-advised.  We’ll see.

Here’s some photos of the set-up and first time messing around with the action.

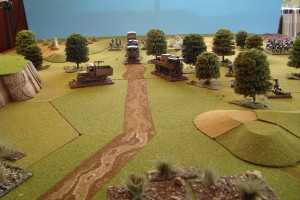
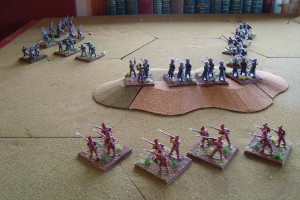
Convoy Approaches. Germans in foreground, Partisans in woods, and cavalry behind ridge.
Convoy Approaches. Germans in foreground, Partisans in woods, and Cavalry behind ridge.
Convoy Closeup. Need to get a crew for the MG Pickup.
Lead Vehicles blasted off road by German machine guns.
Lead vehicles blasted off road by German machine guns.  Reaction Force in background.


Tangled Up In Barbed

Now that I have a general grasp of Red Actions!, it’s time to work on game/period specific terrain and buildings to complement my old Geo Hex terrain system (here’s some  backstory on what happened to the company).

I’ve messed around with on-line research on Central Asian architecture, but just haven’t been ready to start working on structures.  So, I decided to focus on something that has a practical application to tactical situations; a trench system.  The challenge with this is GeoHex.  When you remove the tiles, you get a lower level of a little over 1/2 inch in depth.  Ugh…another design problem.

Seeking a path of least resistance, the decision was made to start work on the barbed wire entanglement placed in front of the trench.

Without going through all the bloody details, the entanglement has to be 36 inches long.  The longest available bass wood section is 24 inches by 3 inches.  So, two sections, with barely enough room for my troops.

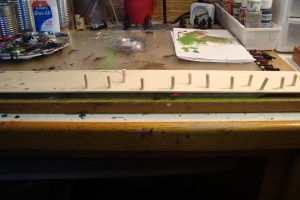
I started by marking 3/4 inch (and later 1 inch) sections on wood dowels.  I drilled two holes in each section, intending that wire would be run through each hole.  The next step was to cut the dowel sections and mount them on the 24 inch base Beta.

DSC01222

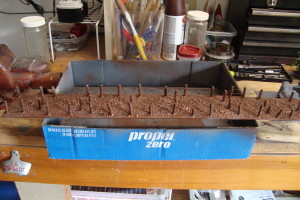
As I was gluing in the second row of posts, I realized that I needed to make room for individual stands. What’s the use of something like this if your troops can’t “use” it?   I was able to create separate “sections” of the entanglement by placing posts at intervals connecting each lateral post line.  I then ran thin metal wire through the holes.  This was tedious and somewhat frustrating – especially when I missed a post and had to restring.  Many expletives later, it was time to prime, add ballast and talus, painting all of this with a basic coat of brown and splotches of green.

DSC01236

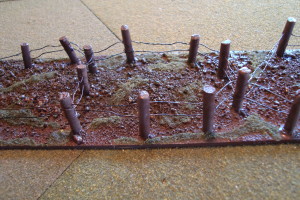
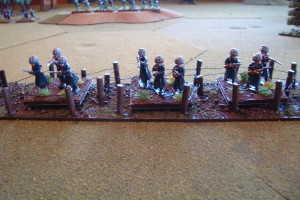
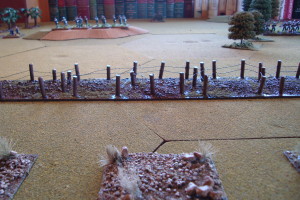
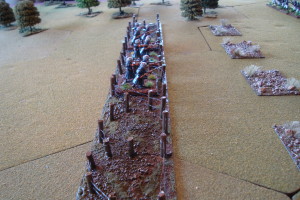
To finish things off, the posts and talus were dry brushed, and fine turf added.  Gunmetal was used to paint the wire.  Here’s a few shots of the finished product.

DSC01255DSC01256

DSC01254DSC01257

New challenge:  I have to complete the 12 inch section, and make it look like the 24 incher.  Good luck on that!  What’s that old saying…”Consistency is the Hobgoblin of Small Minds”

Red Actions! Machine Guns and Artillery

Played Red Actions! with artillery and machine guns earlier this week.

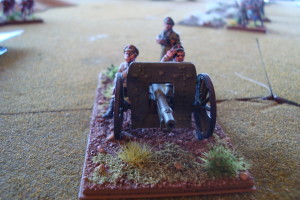
With the exception of the direct hit capability of the artillery, both weapons have the relative firepower of a platoon. My small playing surface (5×5) limits their range and therefore effectiveness.

DSC01220

I’ll probably abstract indirect fire artillery in the future. Any on-table artillery will have a direct fire role.

Machine guns can be killed relatively quickly (my arty wiped out the machine gun section with a direct hit on the very first roll of the game….reset/reboot), so I will allow them three (3) terror markers – treating them like a two (2) platoon company. This makes them a little more resilient

Next game will include an armored car and cavalry.

Red Actions! Second Try

Really windy here, gusts up at 30 mph.  Riding out of the question, college football schedule marginal, and World Series doesn’t start until 1700.  Decided to get another game in.  Same scenario, and tactics, but with Reds being more aggressive.

An aggressive wargamer really needs good die rolls.  That happened for the Soviets.

There was the usual push and shove between the Soviet company providing the base of fire and the Chinese regulars entrenched on the ridge.  However, the Soviet Sailor company advanced quickly  out of the woods and effectively attacked the Chinese Conscripts in reserve.

The Conscripts acquitted themselves well, maneuvering when called upon (they consistently rolled higher than two (2)),  shrugging off terror markers like regulars.  However, over time they were pushed back, losing one platoon.

Stolid Conscripts Supporting The Regulars

With the Chinese Regulars also pushed back, and with two (2) terror markers halving their fire strength, the Soviet Regulars advanced towards the ridge, supported by the Cheka company,  engaging in a firefight with the now weakened Chinese.

Cheka In Support
Cheka In Support

The overwhelmed Chinese had no choice but to conduct a fighting withdrawal, with the retreating Regulars covered by the Conscripts!

Soviet Leadership Comes From The Barrel Of A Gun
Chinese Withdrawl
Chinese Withdrawl

Good and quick game with plenty of action.

Next time, machine guns and artillery.


Red Actions! – Absolute Beginner

Started playing Red Actions! earlier this week. Since this was my first play-through, the scenario was simple, with just a few units, no machine guns, artillery or AFVs. I wanted to find out how the fire and manuever rules work and what their effects are.

Three Soviet Companies are tasked with taking a entrenched position on a ridge line. The Soviet force is comprised of regular, Cheka, and naval infantry companies. The opposing Chinese force consists of a regular company and conscript company.

The terrain is relatively open, with a wooded area to the east and rough terrain to the south of the ridge. I designated both the entrenched position on the ridge and rough terrain as hard cover, allowing a -1 column shift for the defenders. The intent for the rough terrain is to provide the Soviet force with some cover and concealment. The distance between the ridge and rough terrain allowed for long-range fire at one-half the fire factor.

The tactics are straightforward. The regular Soviet company is to advance and take cover in the rough terrain, and to then provide suppresive fire on the ridge. The naval company is to advance through the wooded area (providing cover and concealment) and attack the ridge from the flank. The Cheka company is in reserve.

The Chinese have their regular company entrenched on the ridge, with the conscripts in reserve behind the ridge. This deployment involved a trade-off. The regular company has a higher fire rating, but the conscripts are rated as a “Mob” and can only charge or fire without taking a special morale check. On a D6 role of 1-2 they will remain in place.

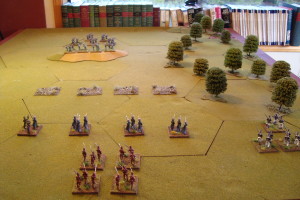
Terrain and Initial Deployments Looking North
Chinese Troop On Objective and In Reserve
Chinese Troops On Objective and In Reserve
Soviet Sailors Begin Moving Into The Woods

The first few turns saw sustained firing between the ridge and regular troops in the rough terrain. Both companies were pushed off due to retire results, but quickly returned to their positions. The naval troops worked their way through the woods, and began taking the reserve conscript company under fire. Due to the short range between the units, this developed into a firefight, with both units firing at each other at full strength during each turn, rather than the turn-by-turn long-range fire.

Growing impatient with this back-and-forth, and like an overenthusiastic Lieutenant at The Basic School, I ordered the Checka company to advance along the (Chinese) right flank or west side of the board. Double envelopment Little Schlieffen?

As this advance developed, the Chinese conscripts  sustained losses and were in bad shape morale wise, while the regular troops had retreated (again) from their trenches. The question for the Chinese was whether to fight it out, or retreat. Since I had not set this contingency up (delay/defend with turn limit), and had a good initial feel for rules and effects, I stopped the game.

Chinese Have Been Pushed Off Ridge With Cheka Preparing To Assualt

I like this rule set.  I think the morale rules using terror markers, as well as other outcomes are very playable. Infantry fire at long range is not particularly bloody, but short range fire – and its accompanying firefights- can decimate a unit quickly. Although using 28mm figuures, I kept the 15mm movement scale because of the small size of my “big board”. This scale seemed to work just fine, and made working with the rules easier.  While some folks have mentioned having trouble with the conversational dialogue of the rules, I think they are just fine.

For those of you interested in reading more about Red Actions!, here’s some links that might be of help. I know this is an older system (more on that in another post), but it is good one that can be played without miniatures. The link to the website and rules is here. A couple of viable reviews are here and here. The always entertaining Edinburgh Wargamers have a portions of their site devoted to this period. While they use another rule set, it’s a great source of fun and ideas.