Taking my time with the 1938 Balkans/Central Europe scenario. I’m using both regional names as they overlap – just ask Google.
Decided to start things off with a Bulgarian invasion of Romania, with Hungary and Yugoslavia content to wait and watch.
While Bulgaria can commit almost all their assets to the invasion, Romania has to keep several units on their borders with Hungary. In this battle of “Ants” (where 4-4s and 3-4s are few and far between), a handful of units can make a big difference.
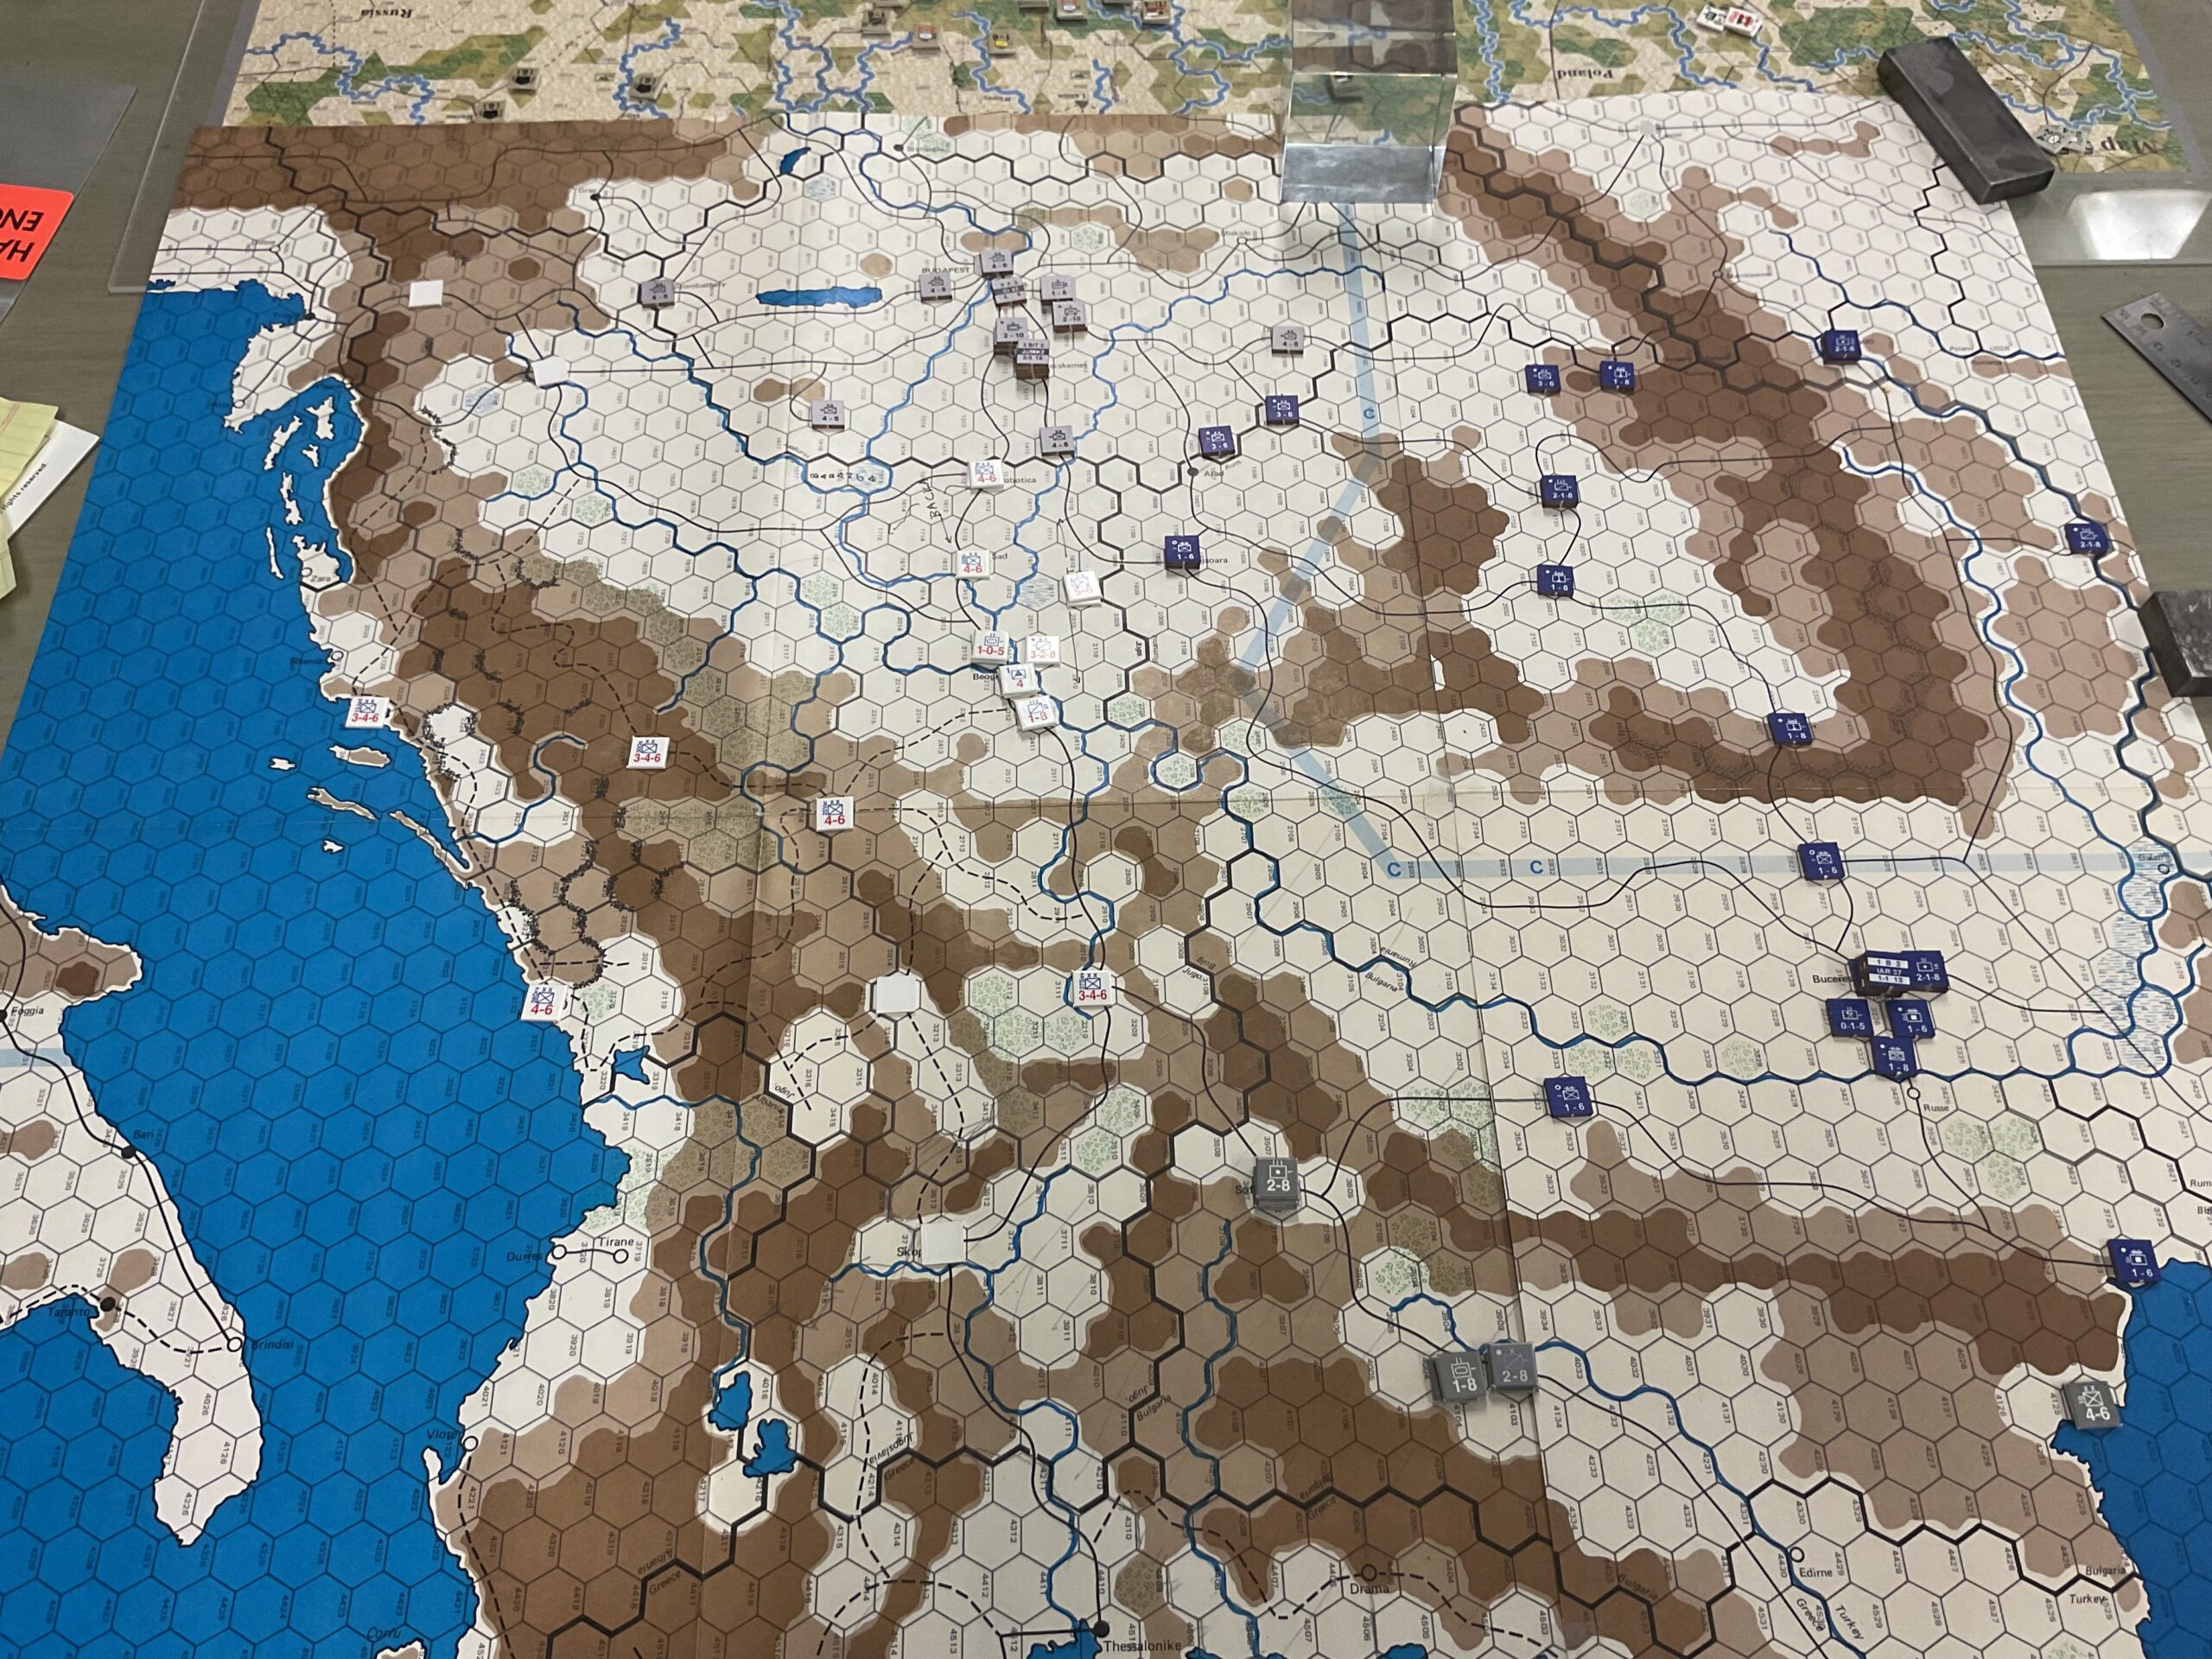
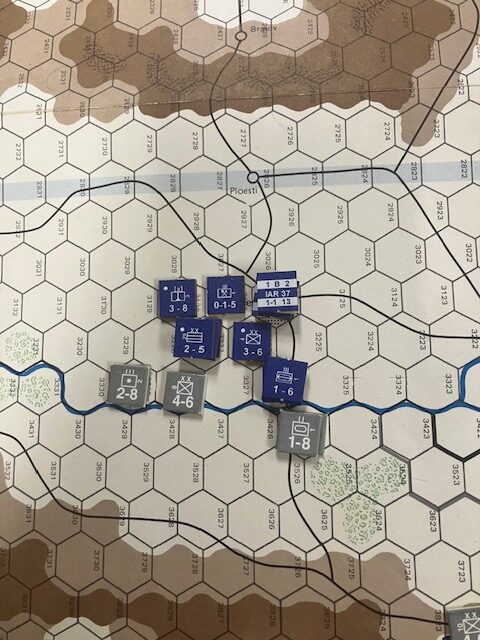
The Bulgarians have already seized both of their territorial objectives, but are bogged down in front of Bucharest. On the other hand, the Romanians are hard-pressed to defend their capital, much less launch any kind of offensive to retake their occupied cities. Here’s a quick snap. Bucharest lies below the blue Romanian air units.
Despite the low counter density, it’s just not an infantry and artillery fight.
Both countries do have limited air assets. The Bulgarians have a mixed bombing unit (one tactical and two strategic bombing factors), while the Romanians have a fighter unit and two bombing (one tactical and one strategic bombing factor) units. The Romanian fighters returned the first sorties by the Bulgarian bombers and destroyed it in a subsequent attack. The bomber units have supplemented Bucharest’s defense.
Each country has only one engineer unit, but each is active. The Bulgarian engineers constructed an airfield within range of Bucharest, while the Romanians have built a fort to buttress the capital’s defenses.
Armored battalions have also been involved in the combats around Bucharest.
This is a pretty vanilla scenario so far. I need to spend some time working on the mechanics for triggering Yugoslavian and Hungarian involvement.