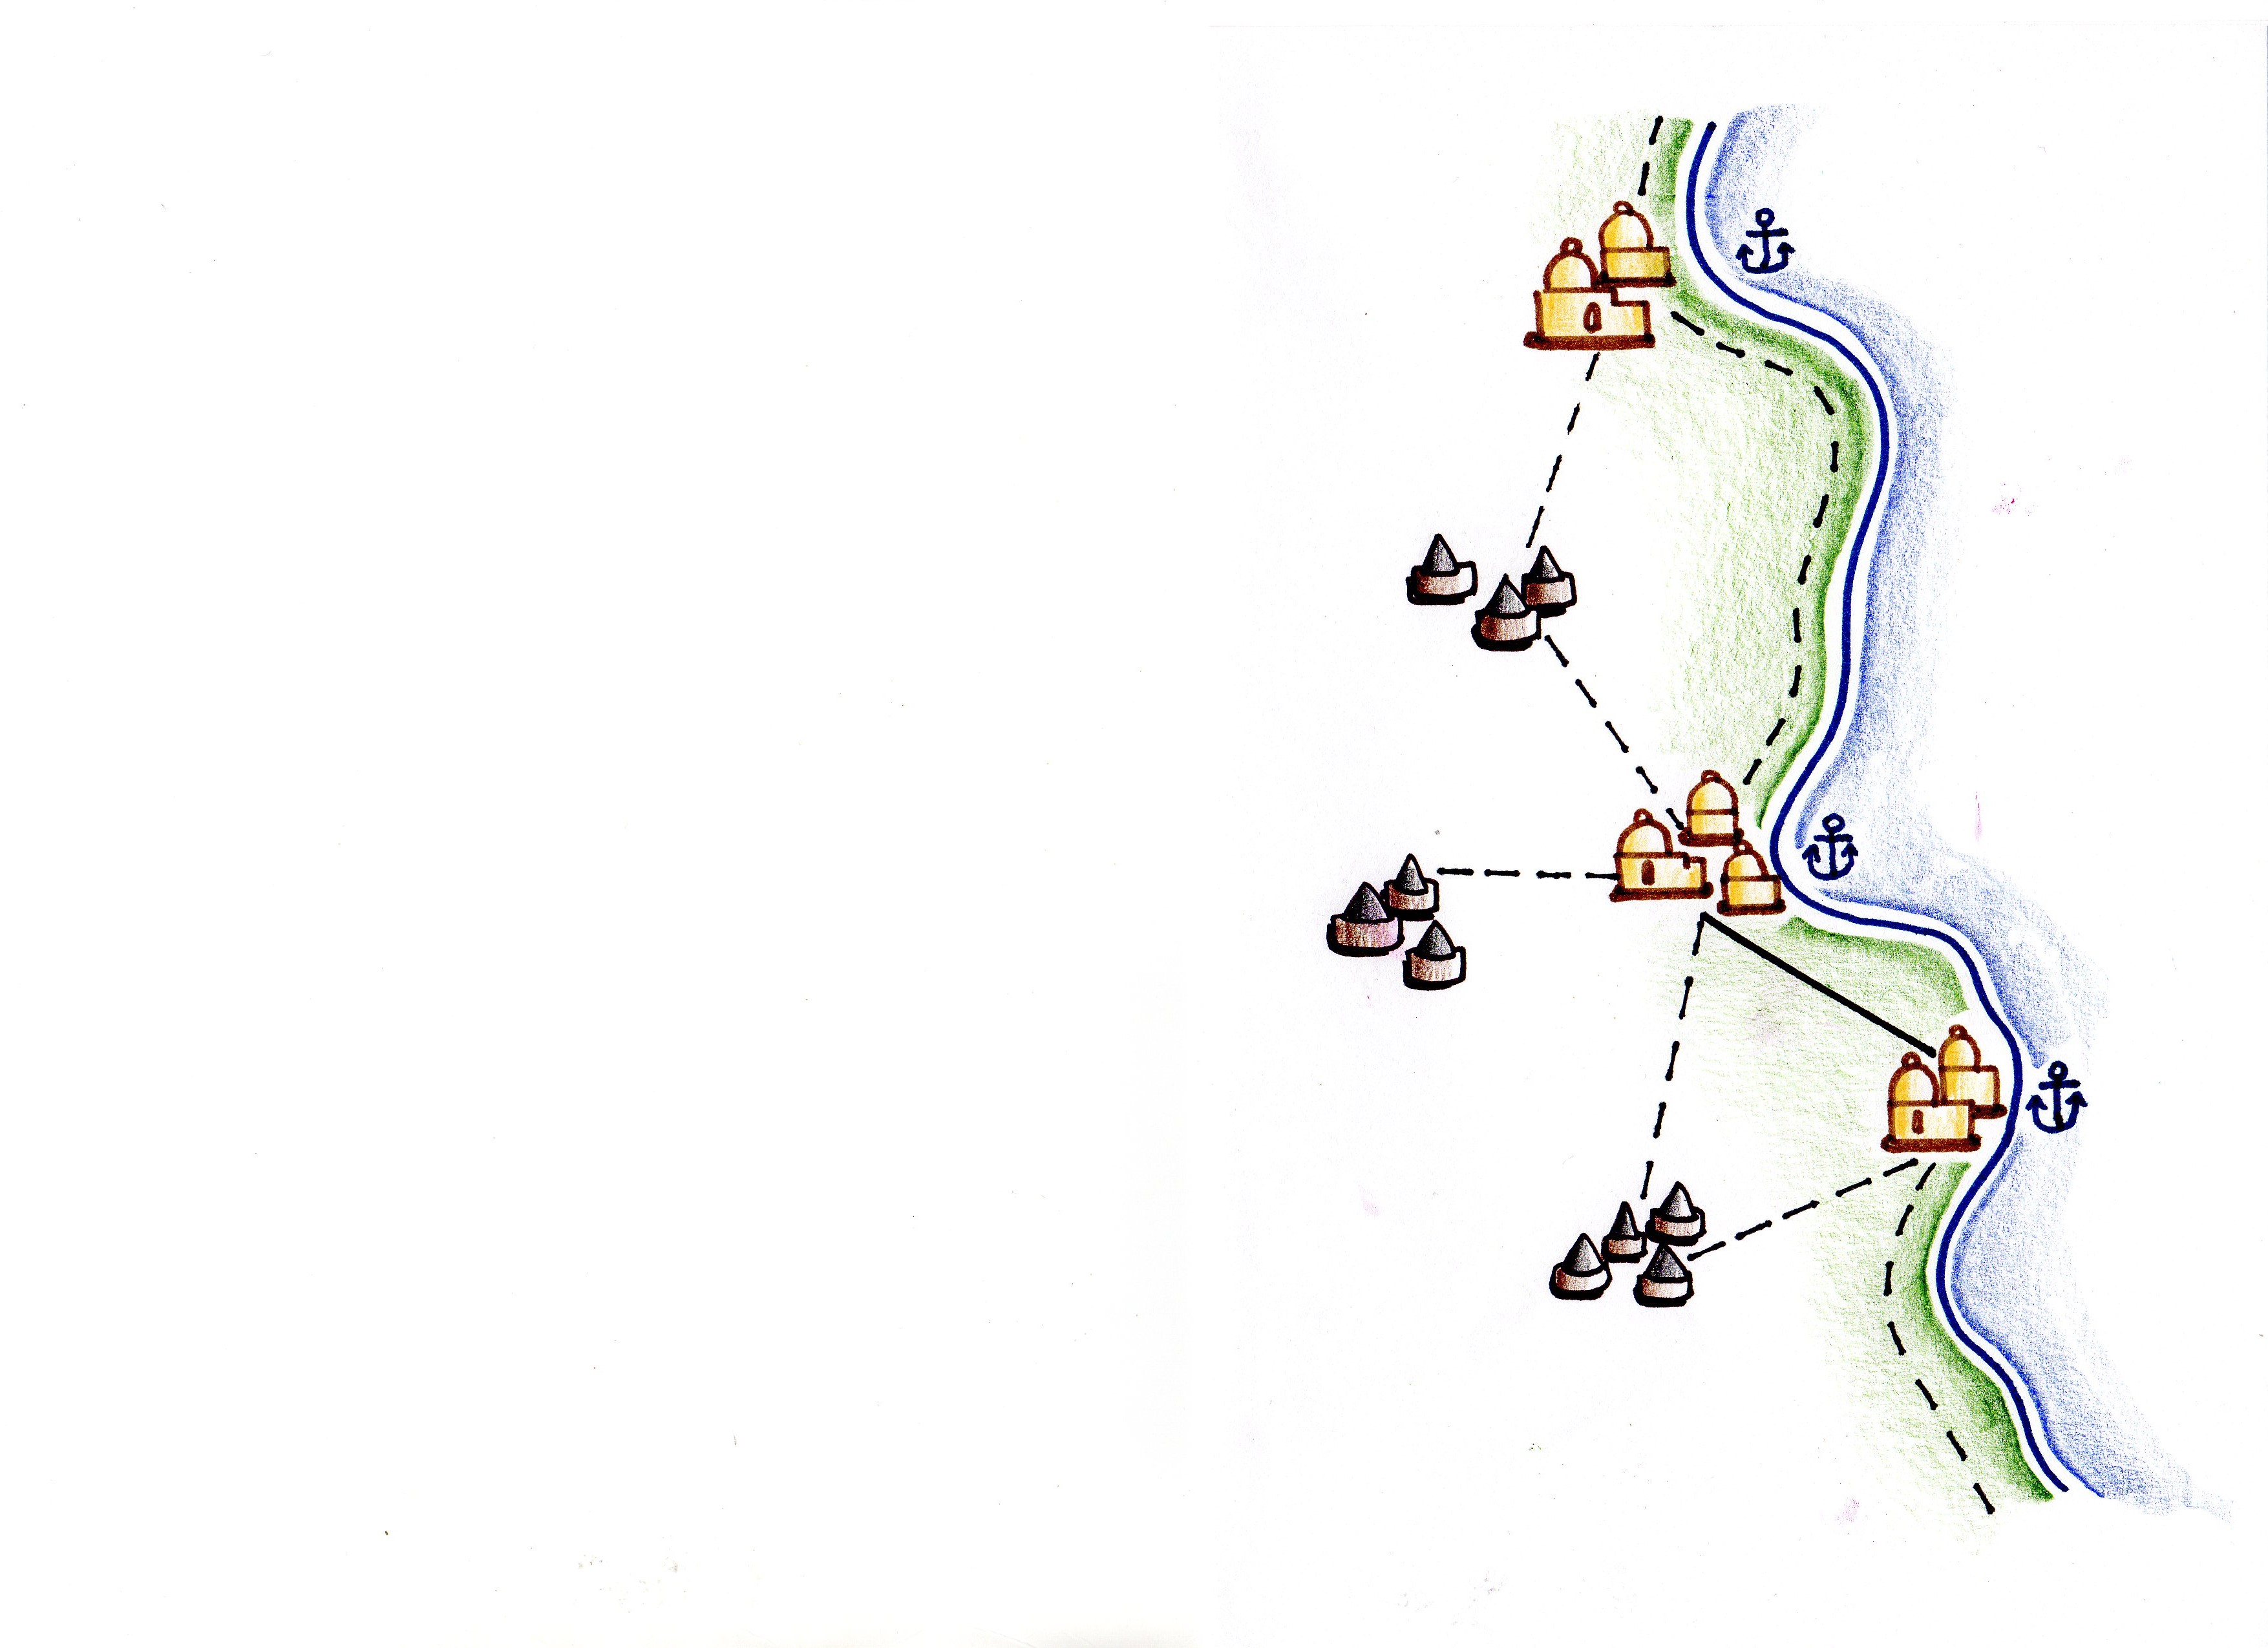
Rhonda drew up a nice generic campaign map based on my ham fisted scrawl. Put it on a half sheet so other half could be used for notes, etc. The southern two cities are connected by a good road, the others with tracks. Cities, road, tracks can be removed when necessary.
The Portuguese completed an unopposed landing, without loss, and advanced along the coastal track towards the northern port town of Mwenye (I used a random name generator which is found here). Since the inland natives’ relations with the coastal Zanj are bad, the Portuguese inland flank is secure.
A Zanj force moved to block the advance, with the two sides meeting at the forest/oasis of Ejiro. This would be a set piece battle with the Zanj occupying a fairly strong defensive position. However, some Zanj units were effected by an cholera epidemic. As a result, their resolve was lowered, while skilled medical care kept the Portuguese healthy.
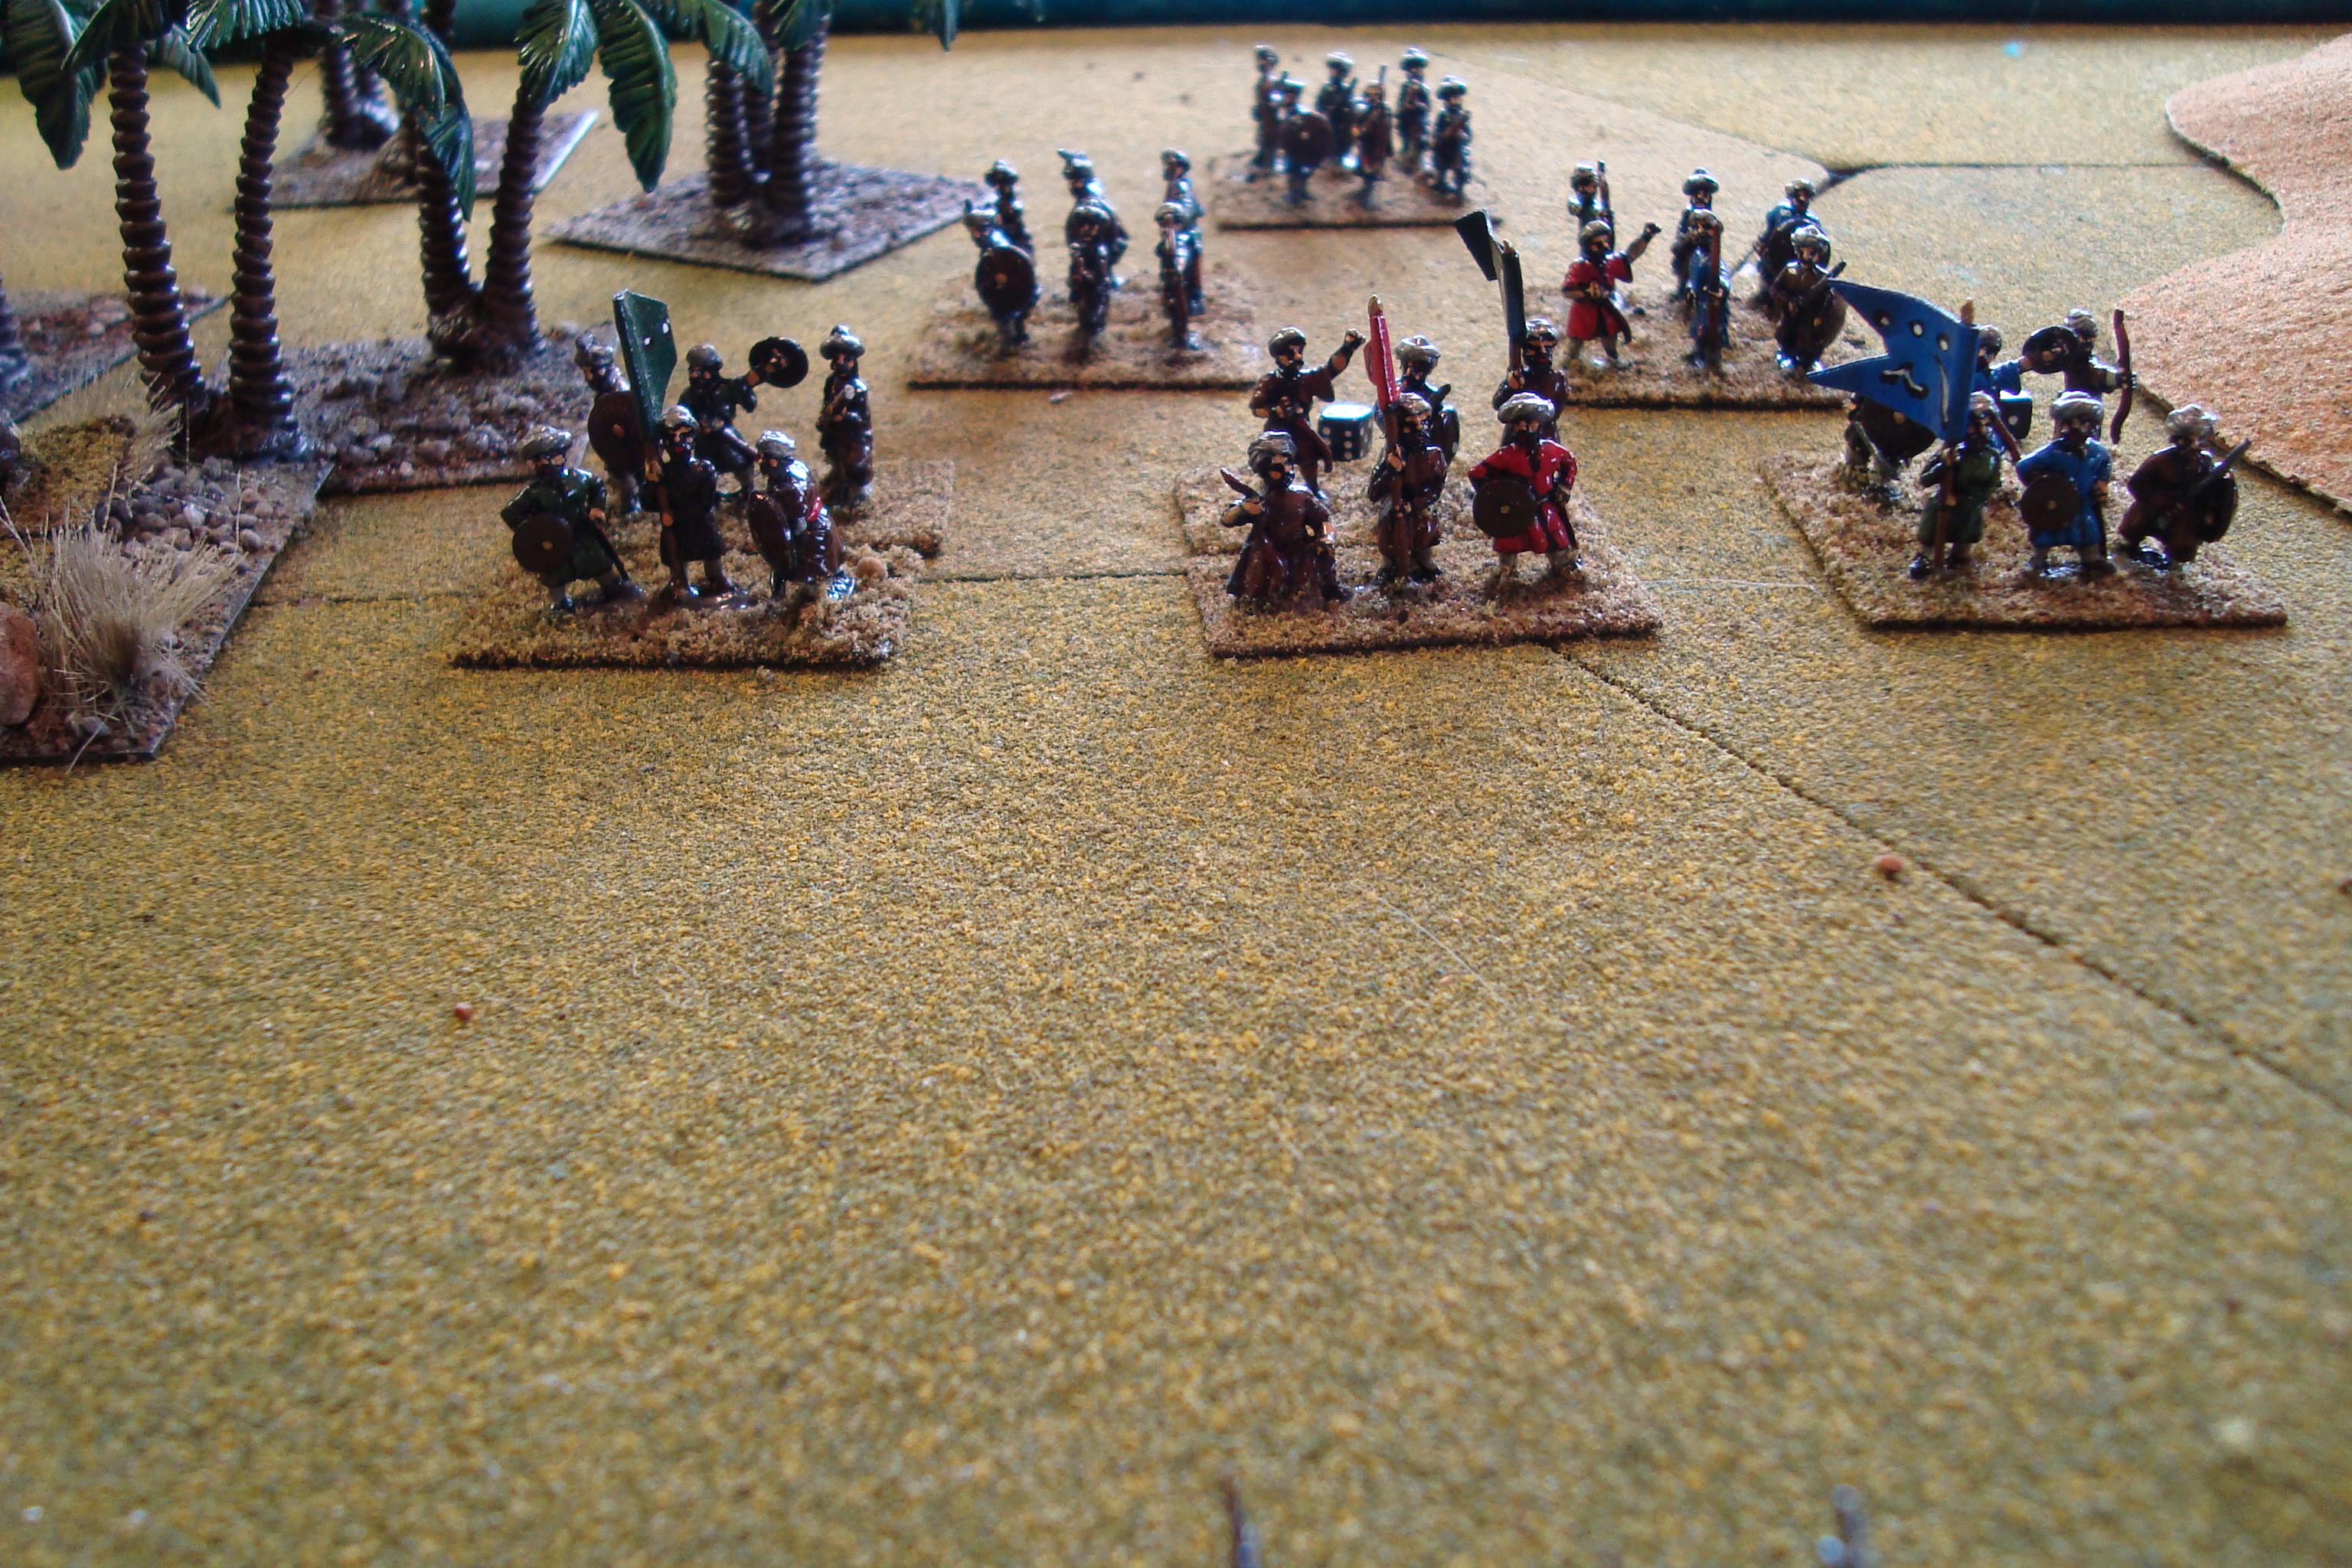
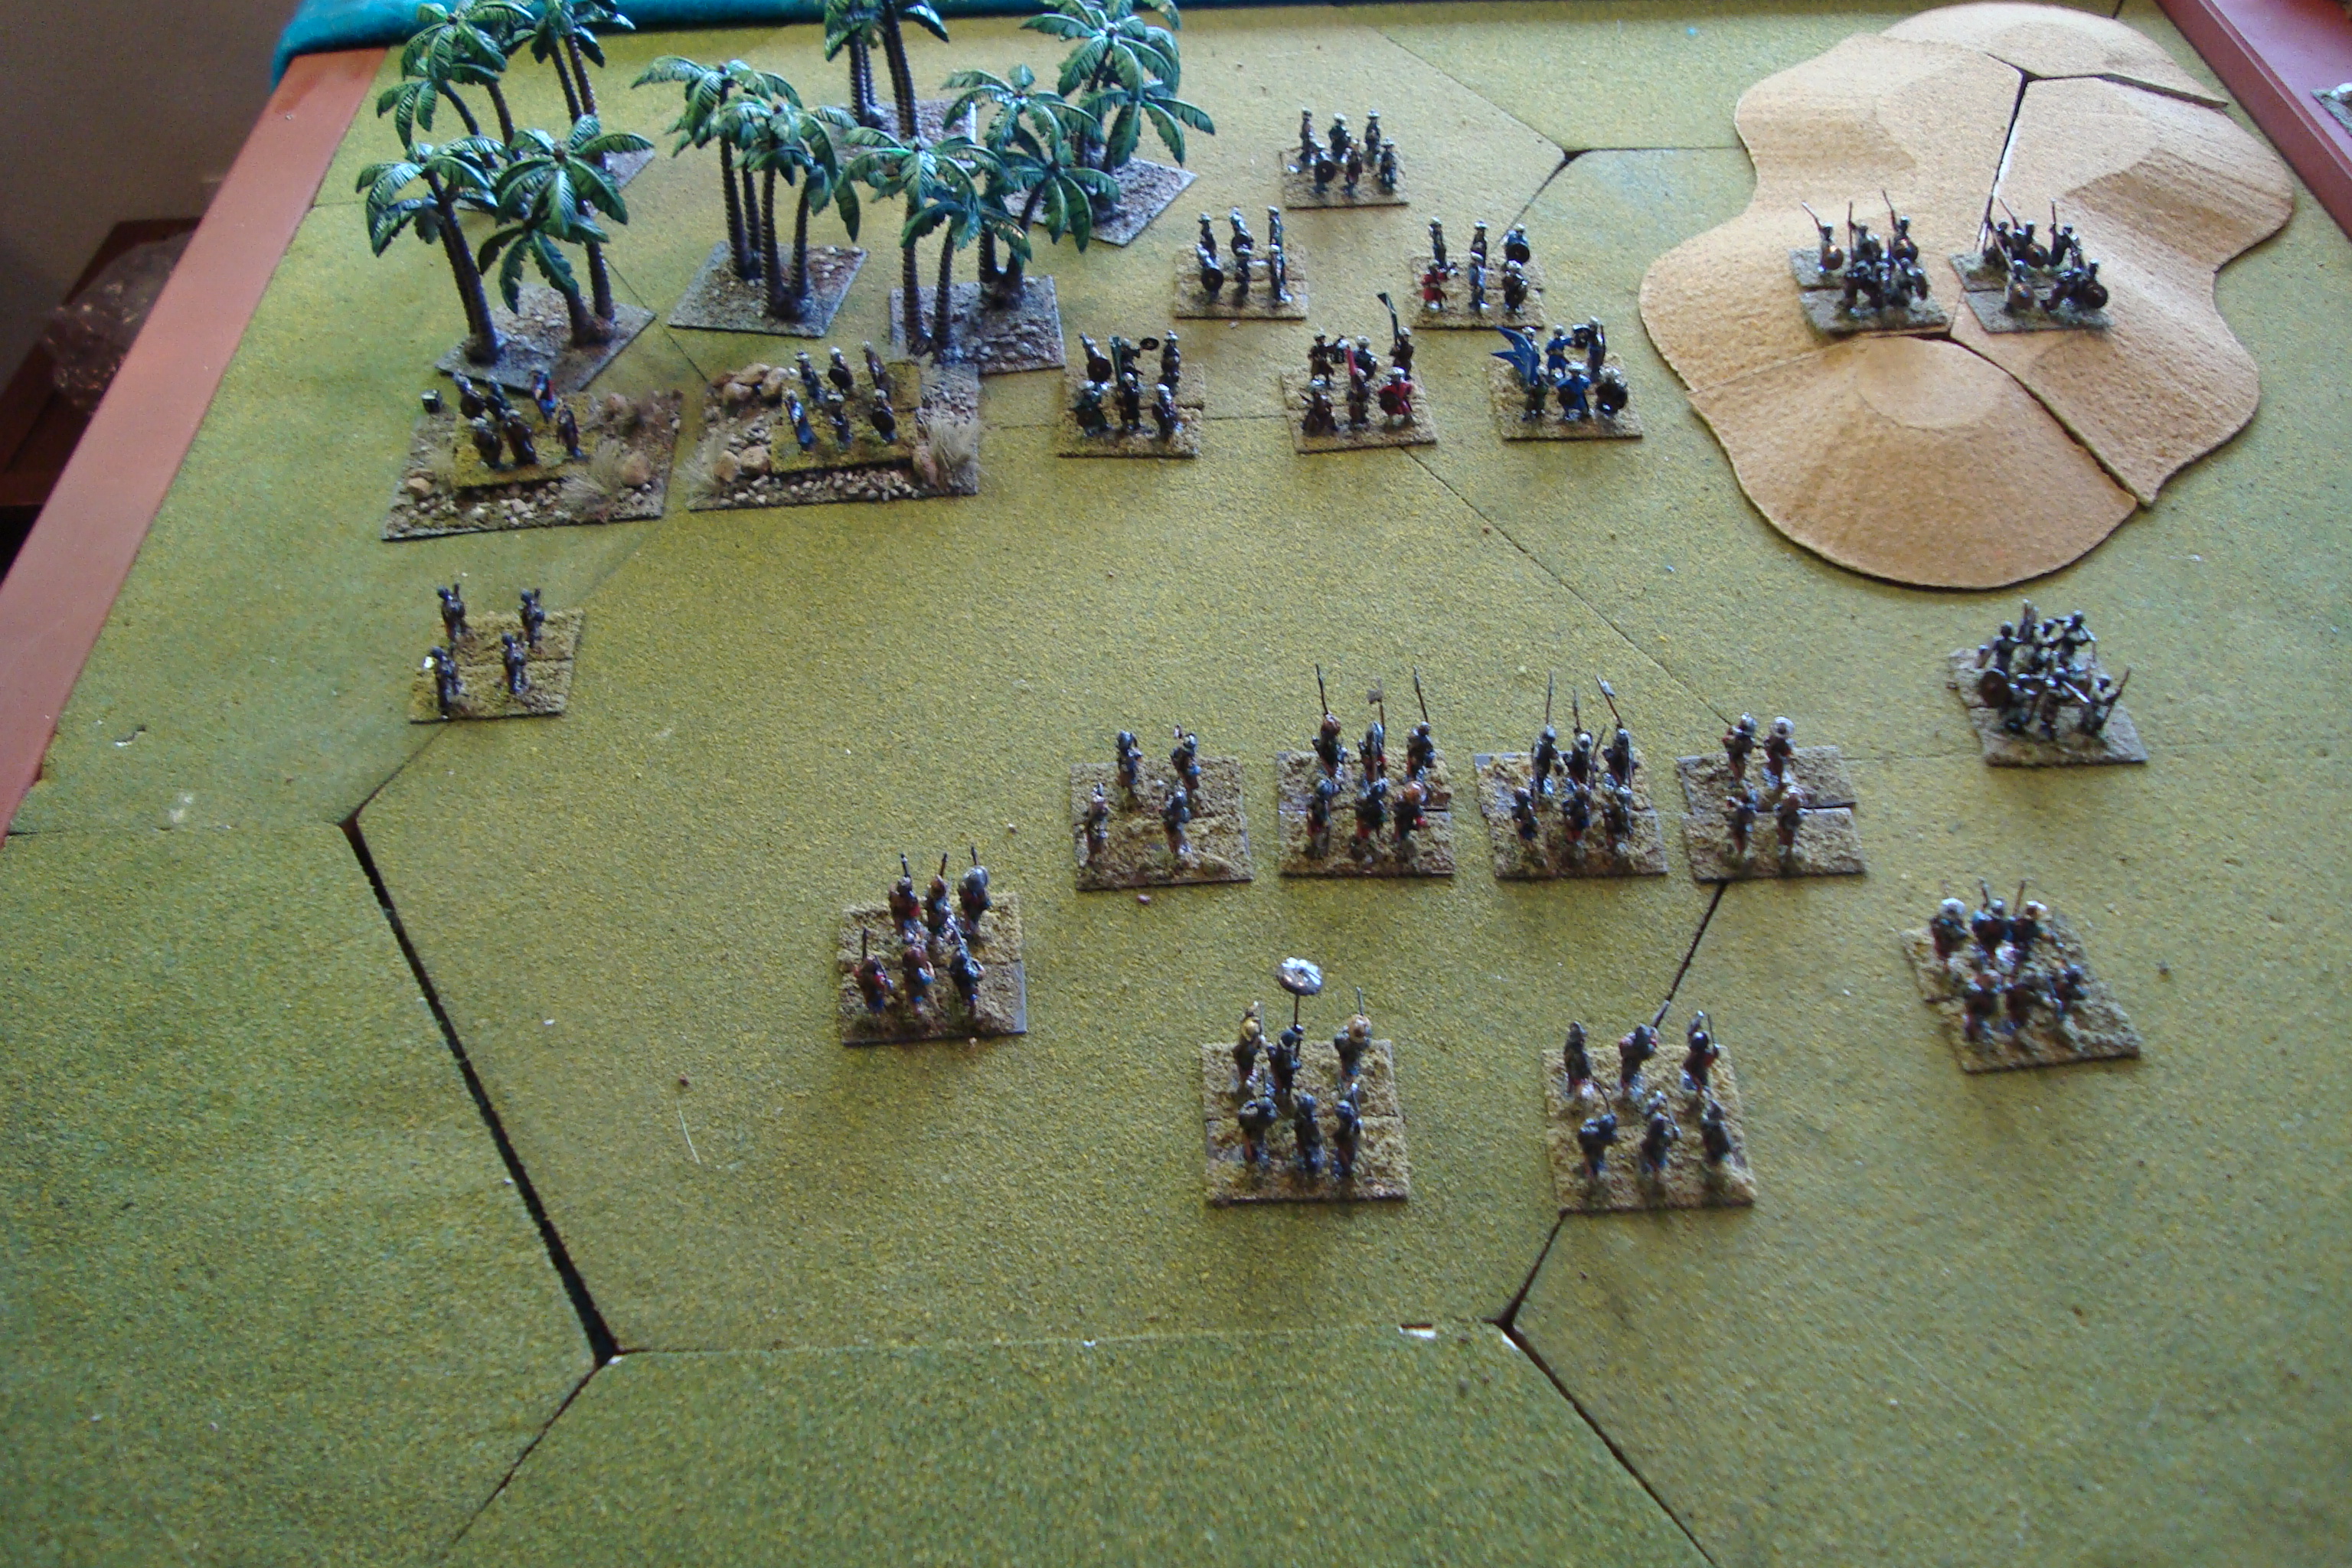
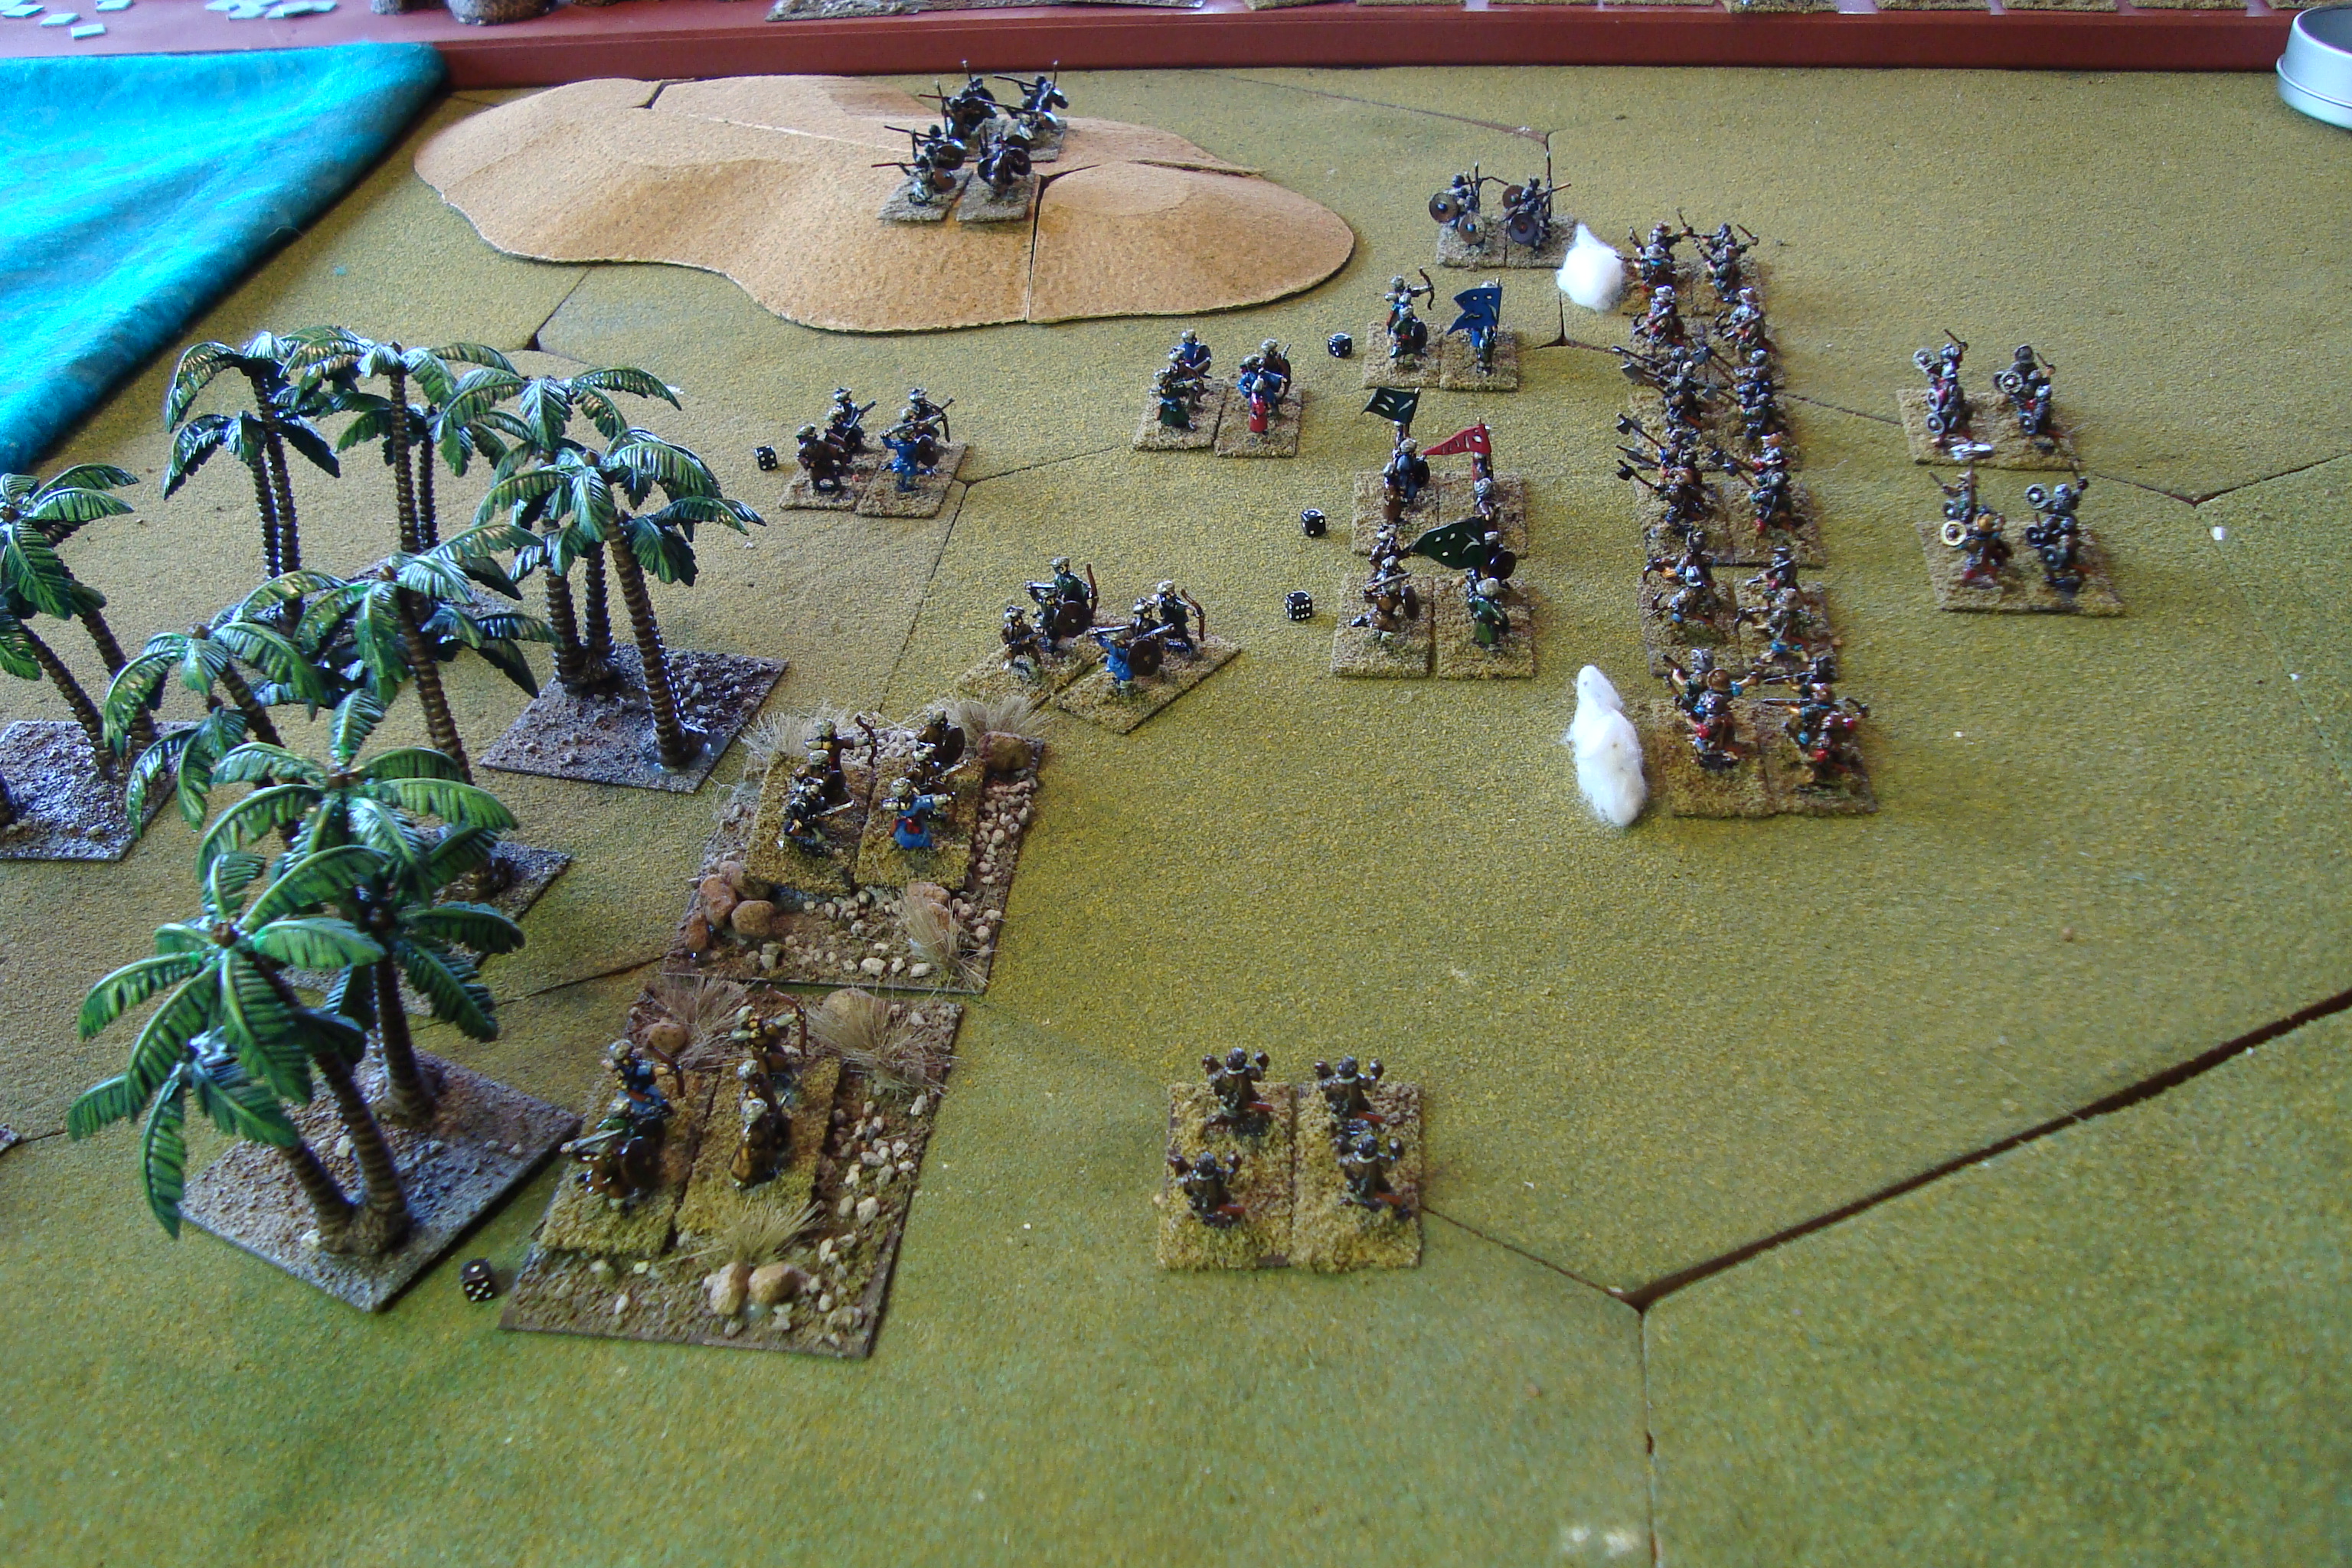
Here’s a pictorial overview of the initial stages of the battle.
Flanks Anchored By Rough Ground And Ridge, Zanj Tribal Warriors Await The Portuguese AdvancePortuguese Advance Begins. Grenadiers On LeftZanj Advance In Response To Portuguese FireAnother View Of Zanj Advance. Interpenetration Not Allowed By Rules.
Rolled for leader qualities and other parameters. Rather than insult you with another scan of scribbled fragments of index card, I’ll post up a “clean” copy of the tables/charts used. Tried to link the variables to the Irregular Wars Chance Cards, with outstanding aspects allowing for good DRMs, and poor aspects leading to bad DRMs. Normal is just normal, with no DRMs. Card use has been difficult to implement solitaire and I hope this is a viable alternative.
Ming Chinese:
Lei Qiu: An inexperienced leader, but bold. Staff includes a skilled logistician and physician.
Portuguese:
Eduardo Nicolau Rolando: Experienced and inspiring leader. Staff also includes skilled logistican and physician. Also, the Portuguese have good local knowledge, which negates many effects of unfavorable terrain.
Relations with natives are bad. They will fight if attacked. There is internal dissent, and government support is weak. This weak support limits their army to 10 elements.
Their leader, Jabir Efe, is inexperienced but bold. Being the home team, they have good local knowledge.
Neither side was able to recruit any natives to augment their forces.
The respective armies are based on both Irregular Wars and DBR lists, given what I have available. Oh My! I’m not following an army list. After years and years of therapy I’ve finally made the jump of just putting something together that has some historical basis and works. Thank Goodness for that.
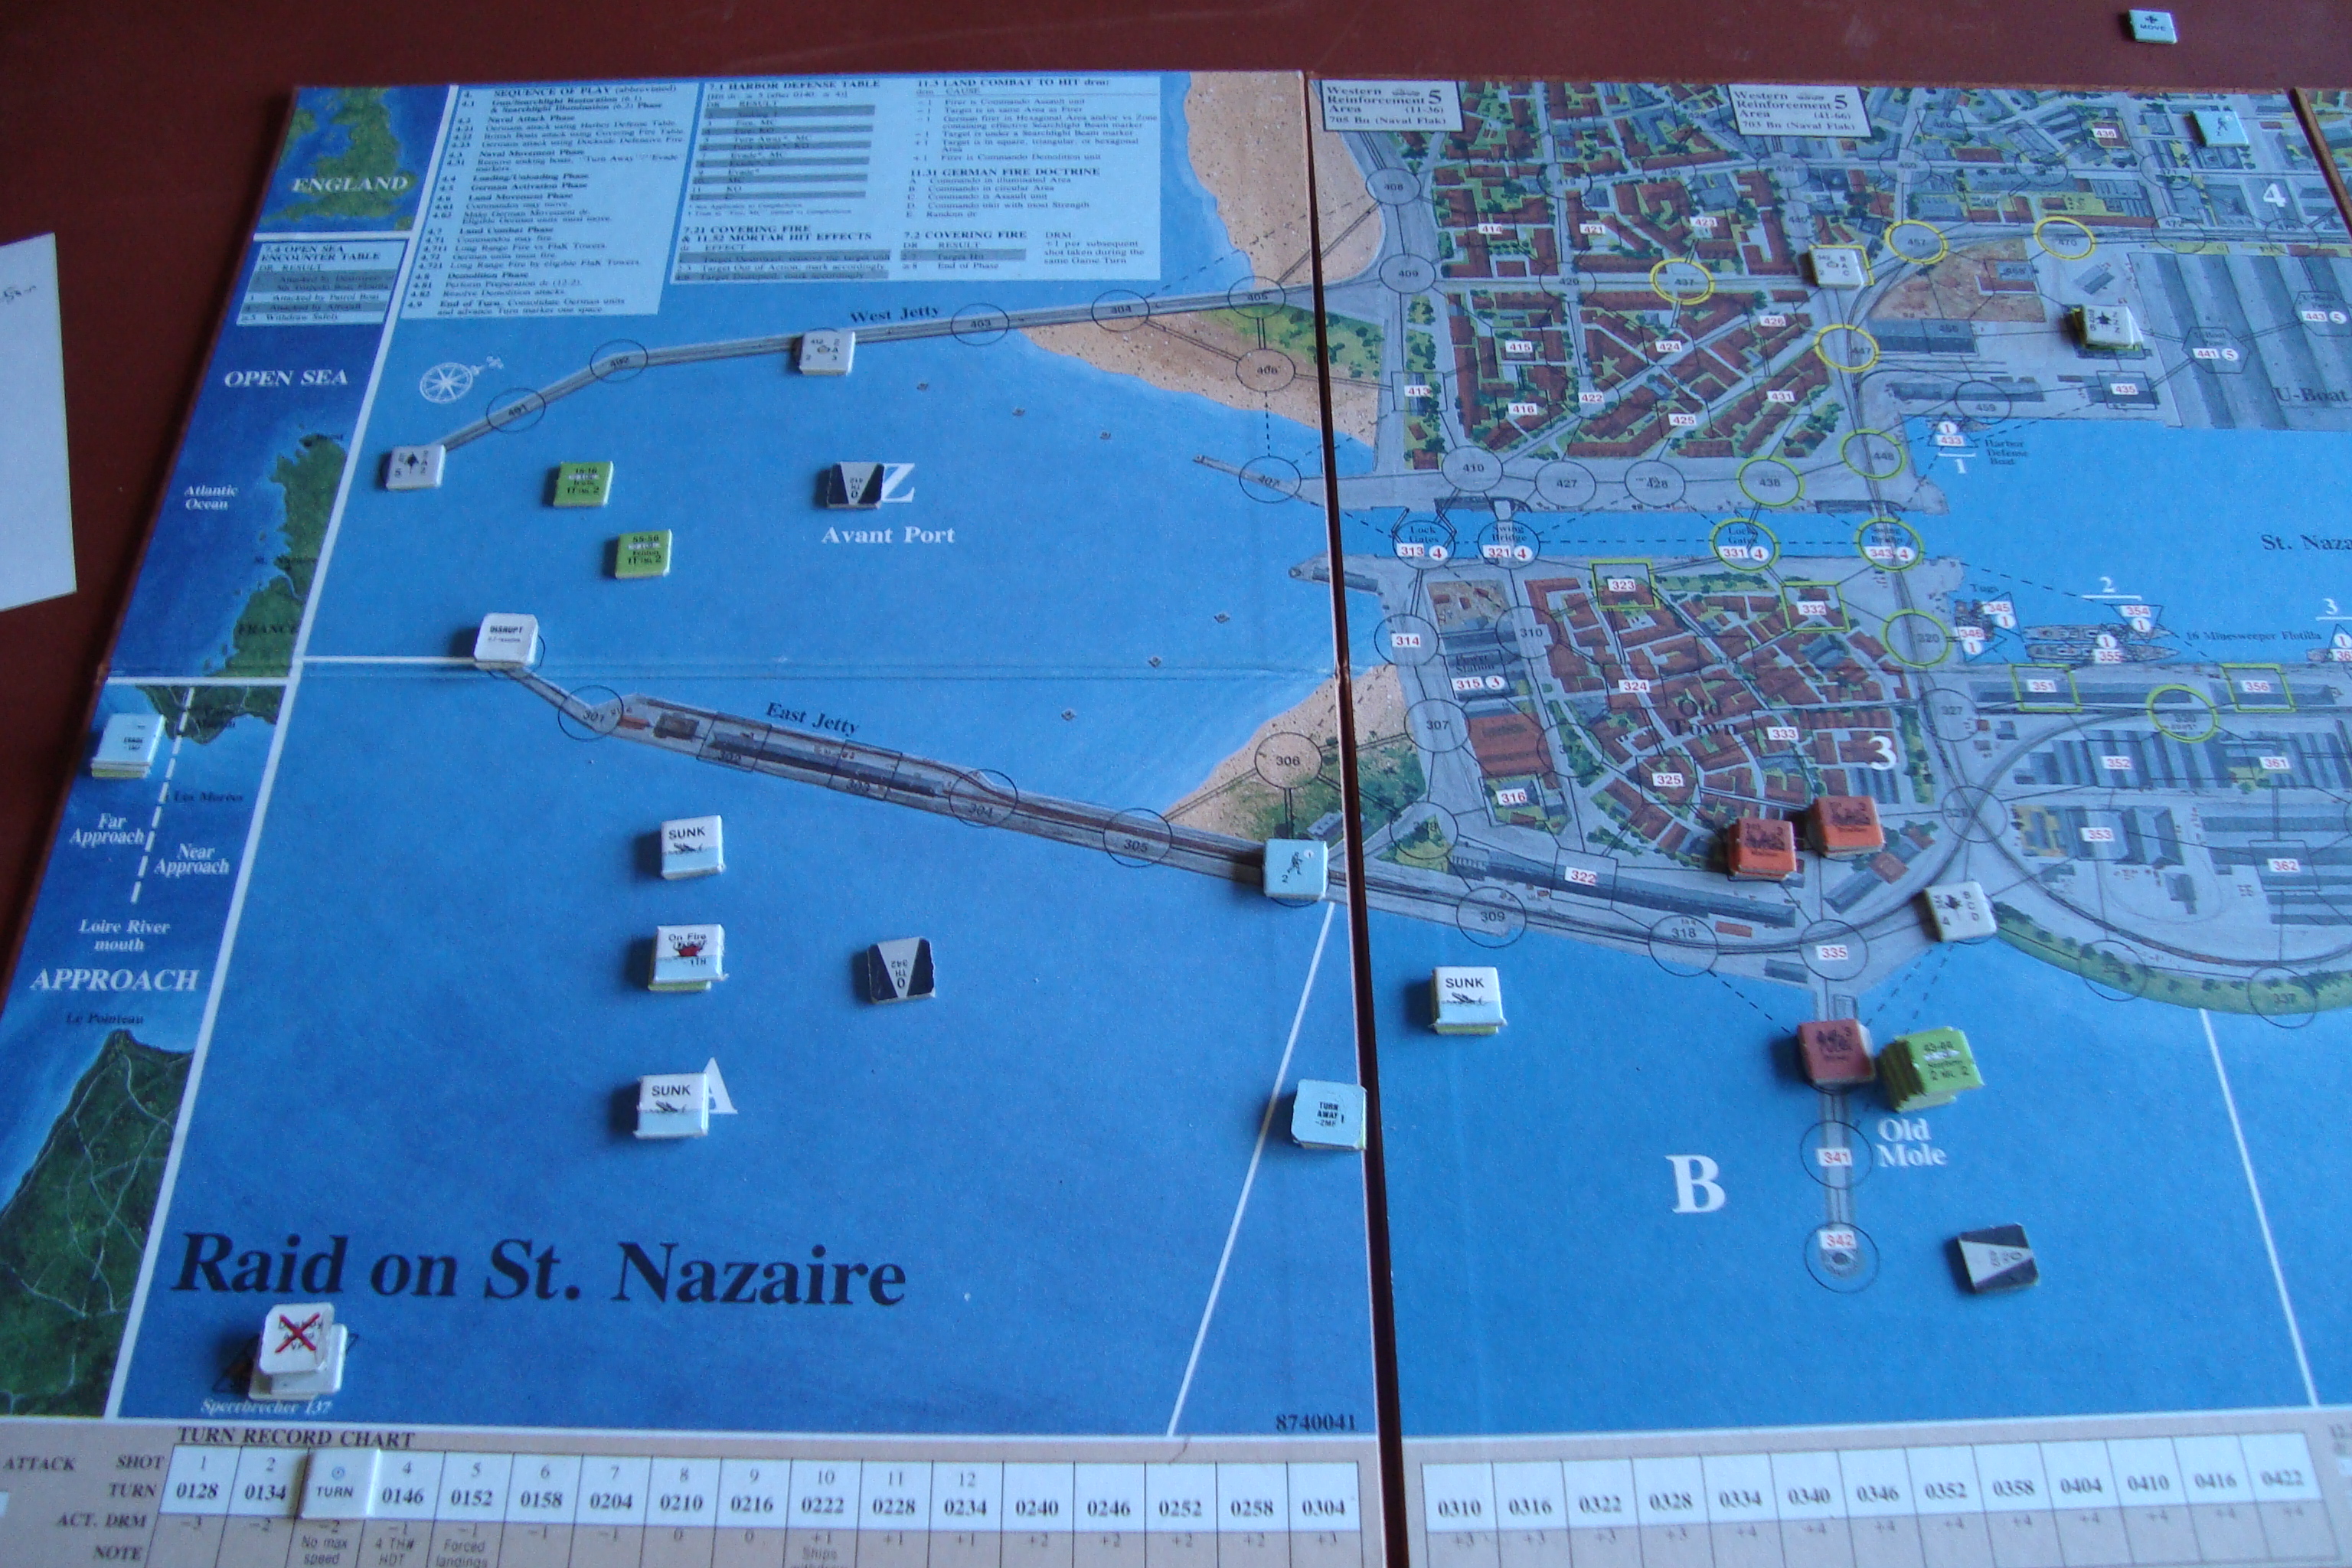
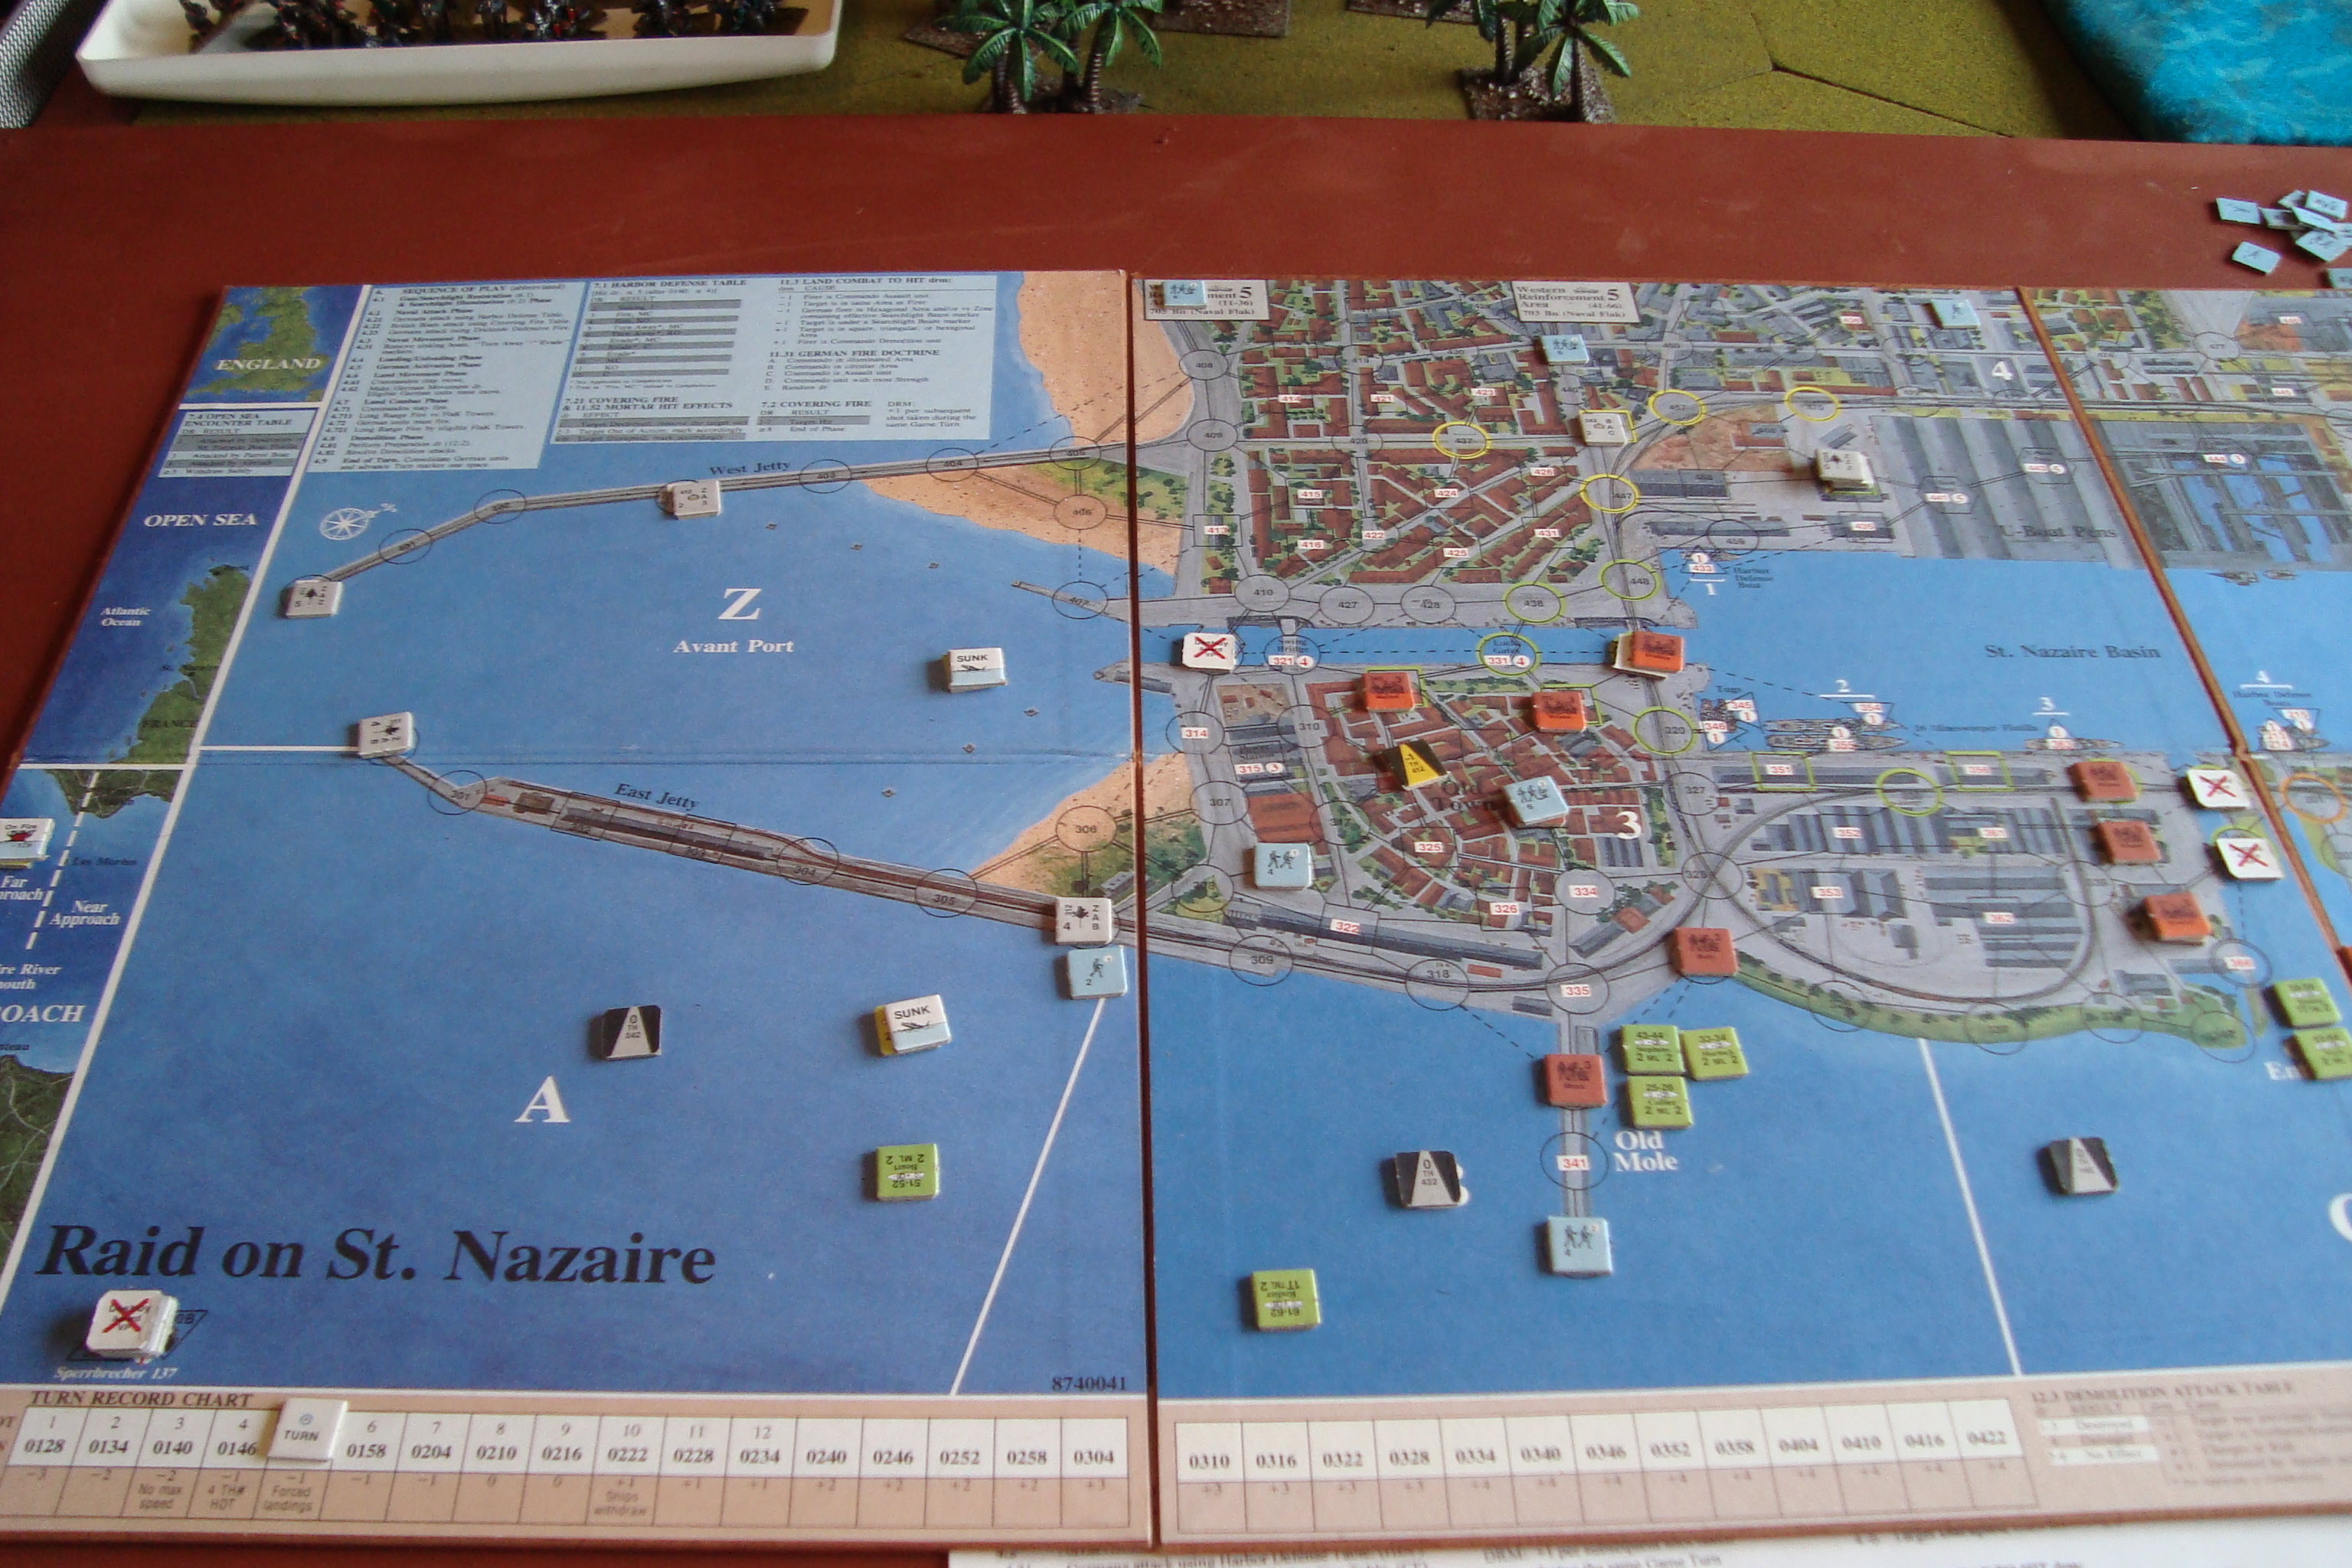
Decided to stop at Turn 12. British ships that had been standing off the port waiting to evacuate commandos had been destroyed, the demolition teams had, for the most part, expended all their charges, and the German reaction forces were sealing off any other VP targets. So, I blew up the Campbeltown and called it quits.
The tempo of the game really picked up with fewer targets and lower to hit DR for Harbor Defensive Fire.
Took turn-by-turn photos, but all they depict is the pummeling of MTBs by Harbor Defensive Fire, and gunfights between reaction forces and commandos. The highlight was the Turn 8 destruction of the Northern Caisson by Purdon’s commando using their last charge, after being attacked. They needed a D6 roll of “1” to do it, and they did. That was 12 VPs! On the other hand, Woodcock’s commando couldn’t destroy even one of the three storage tanks in Sector 1. Each tank was 3 VPs, and would have put me in range of a decisive victory.
I’m going to play it again. Here’s an overview of lessons learned and rules I need to pay more attention to.
Destroy searchlights and guns, or at least, hit the Power Station. The illumination effects make the already murderous Harbor Defensive Fire even worse. Grenade attacks on guns/searchlights are an excellent use of assault teams.
Do a better job of getting demolition teams to their historical targets. I just whiffed on this one and if they attack their assigned target, it’s a +1 DRM for demolition attacks.
Pay attention to the rules on ammunition depletion when a commando loses a strength point. This effects grenade/demolition capabilities.
Try to get the Wynn to accomplish its historical mission of destroying lock gates. I had to use other boats for this.
Don’t assume that the German reaction will be as slow and weak as the last game. Lots of D6 rolls of “6” really restricted reaction movement, and low rolls for activation reduced the number of German units.
Rather than grind through the move-by-move, here’s a few overall comments about the game play using the rules as a guide.
German Harbor Defense: Has been effective, especially during Turn 3, when 9 targets were hit using D6 to hit roll of 5 or less. The maximum possible is 12. Change to less/equal D6 of 4, literally saved the British.
Covering Fire: Useless for the British. Need a 2D6 of 8 or less, and I’ve been rolling 8+. Also, the mods due to loss of flotilla gun strength has not helped my rolls.
Dockside Defensive Fire: A mixed bag for the Germans. Some successes, but limited. Not the weapon that Harbor Defense is.
Open Sea Combat: So far, one British ship has escaped without contact. More to follow.
Scuttling: I scuttled the Campbeltown on Turn 4 and took off the surviving crew. While this will help with VIPs, it severely reduced the flotilla firepower (see Covering Fire, above). BTW, the Campbeltown took very little punishment before ramming the Southern Caisson.
Torpedo Attacks: Despite low probabilities (1-2 on D6), torpedo boats knocked out two swinging gates, for 8 total VIPs.
German Activation/Movement: Started slowly, but more and more Germans are available. Unfortunately for them, I’ve been rolling D6 6s, so only those units with a strength of 6 can move. This has severely hampered the reaction forces.
British Land Movement: Managed to foul up the objectives for some units, so some moves have been counterproductive, and have effected the ability of units to quickly get to lucrative targets – especially the 12 VIP Southern Caisson. I’ve not done a good job of mixing and matching assault (small arms and grenades) with demolition units, especially when attacking flak positions.
Grenade Attacks: Once I figured out that assault units can do these, they’ve been fairly successful taking out flak positions.
Demolition Attacks: Success on first try has been 50-50, with the key being to have the demolition unit end their move at the target and not take the +2 modification for entering the area during the turn.
German Ships: Haven’t messed with them.
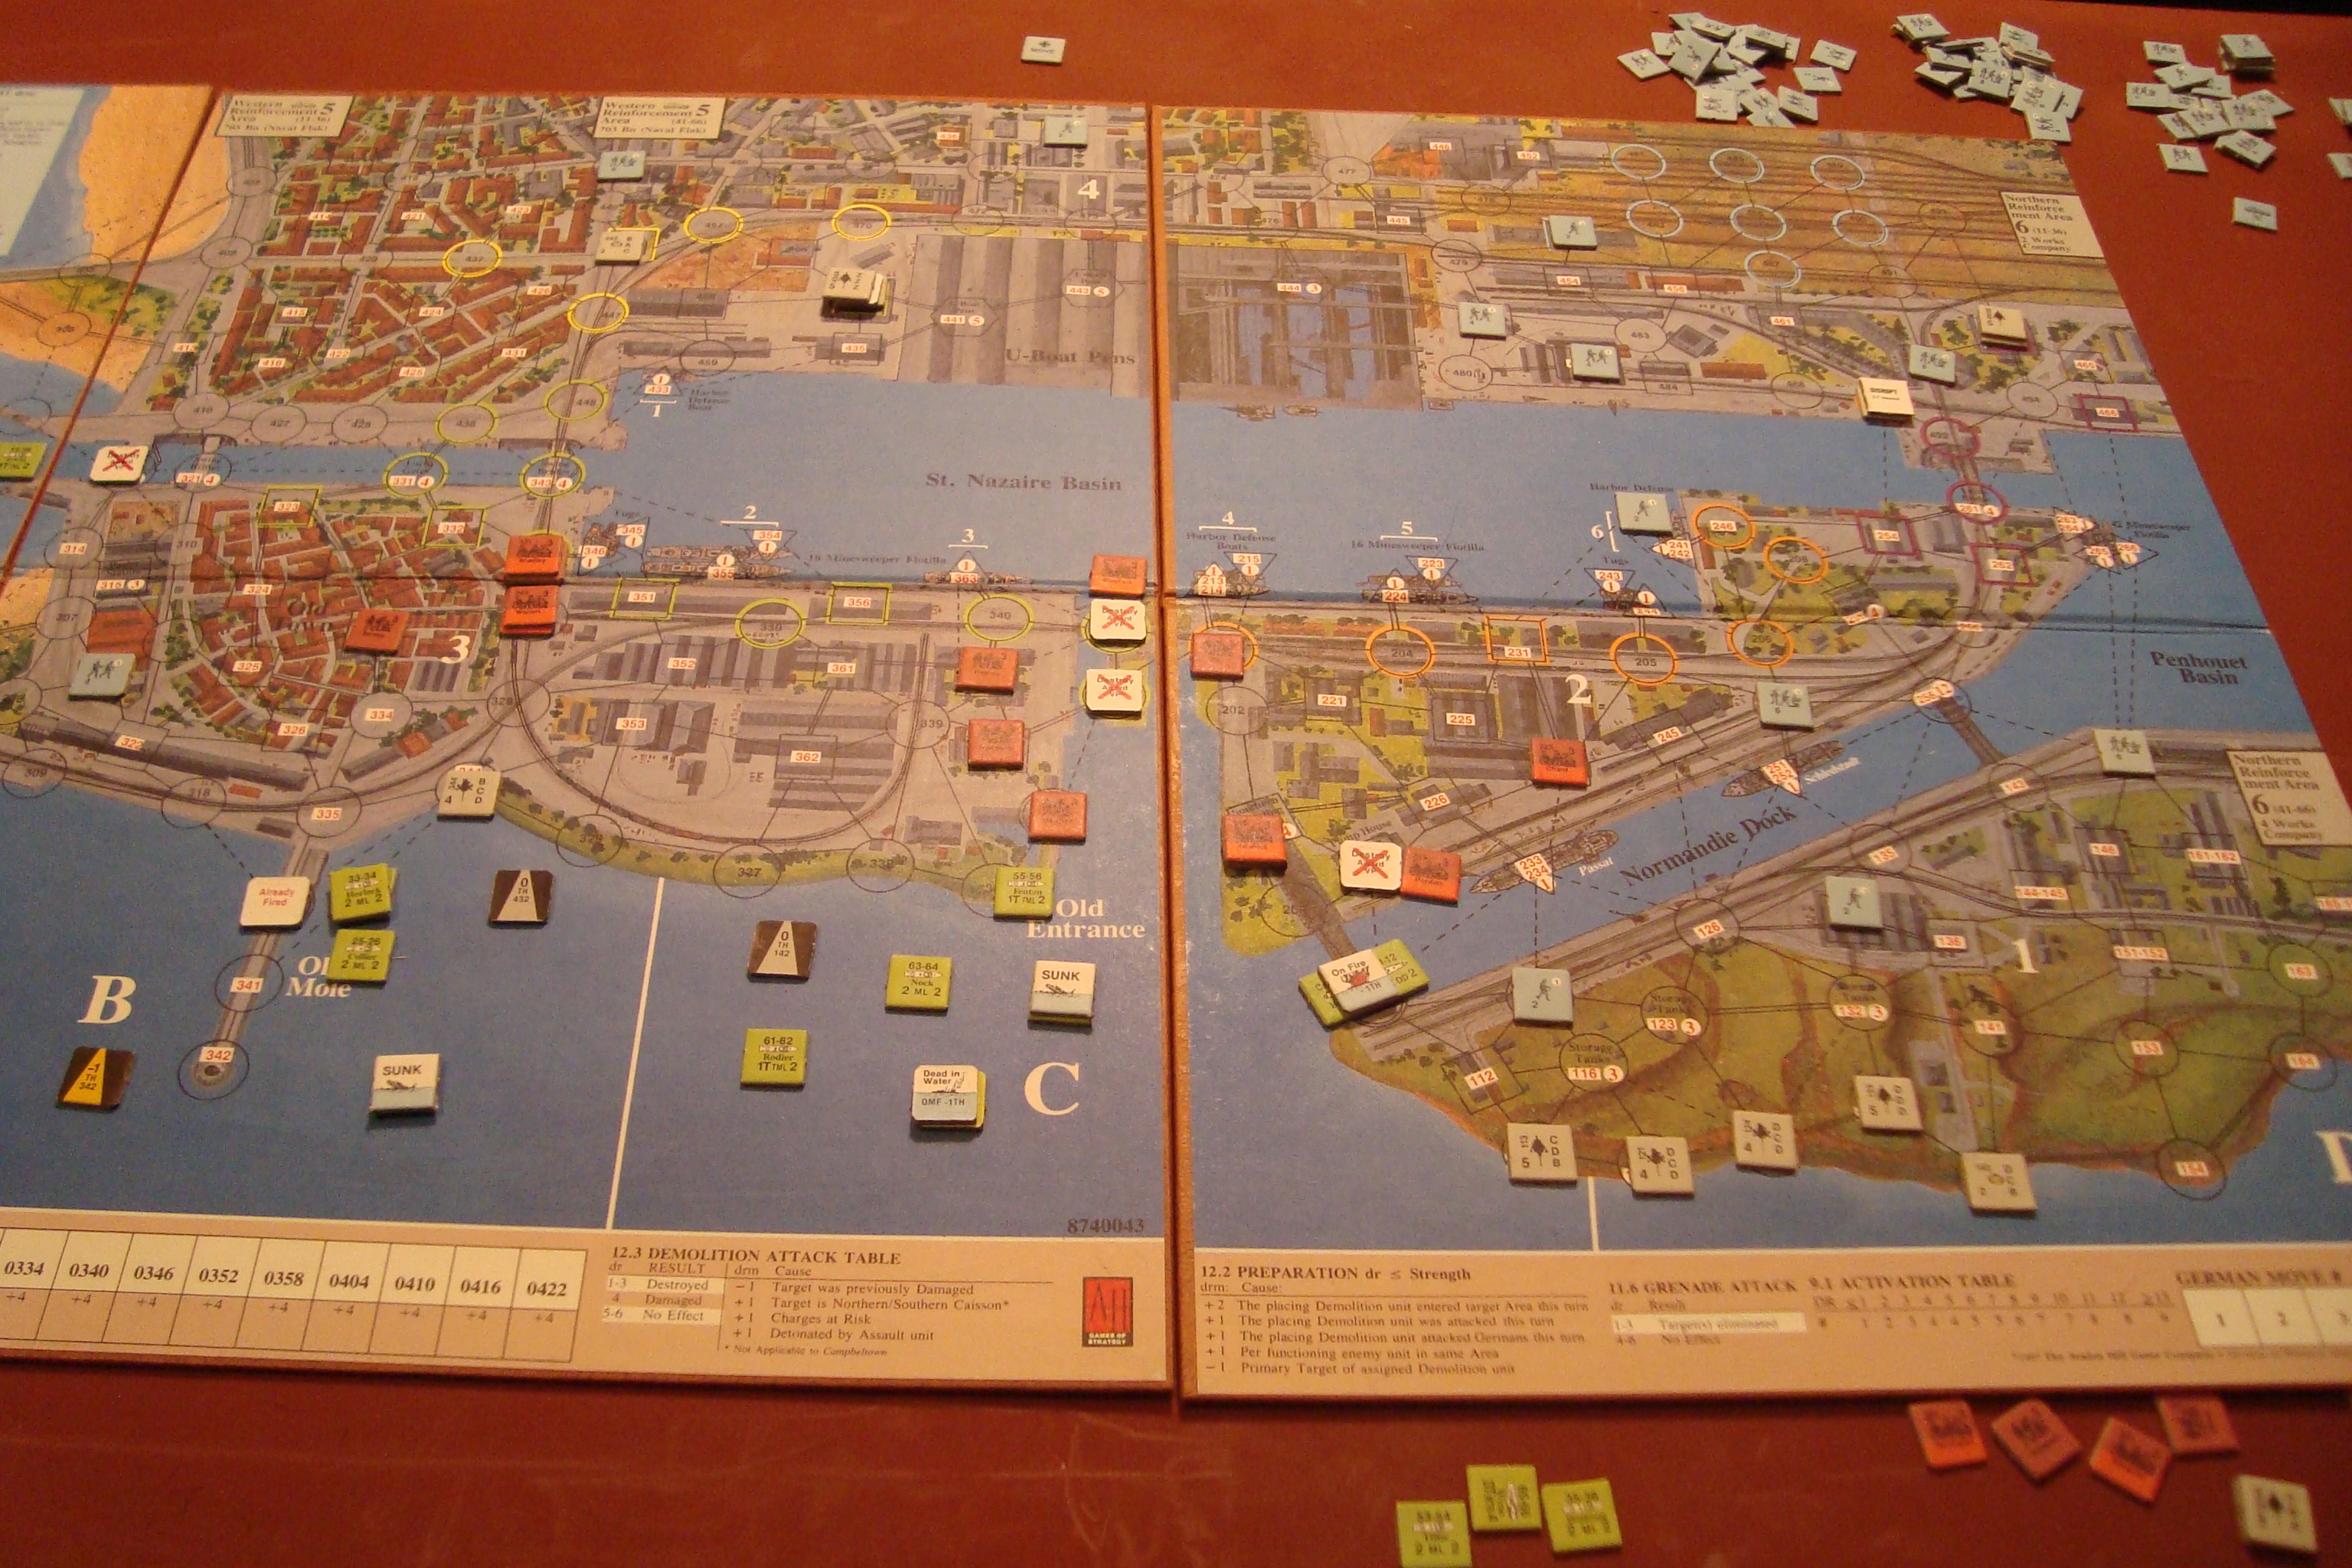
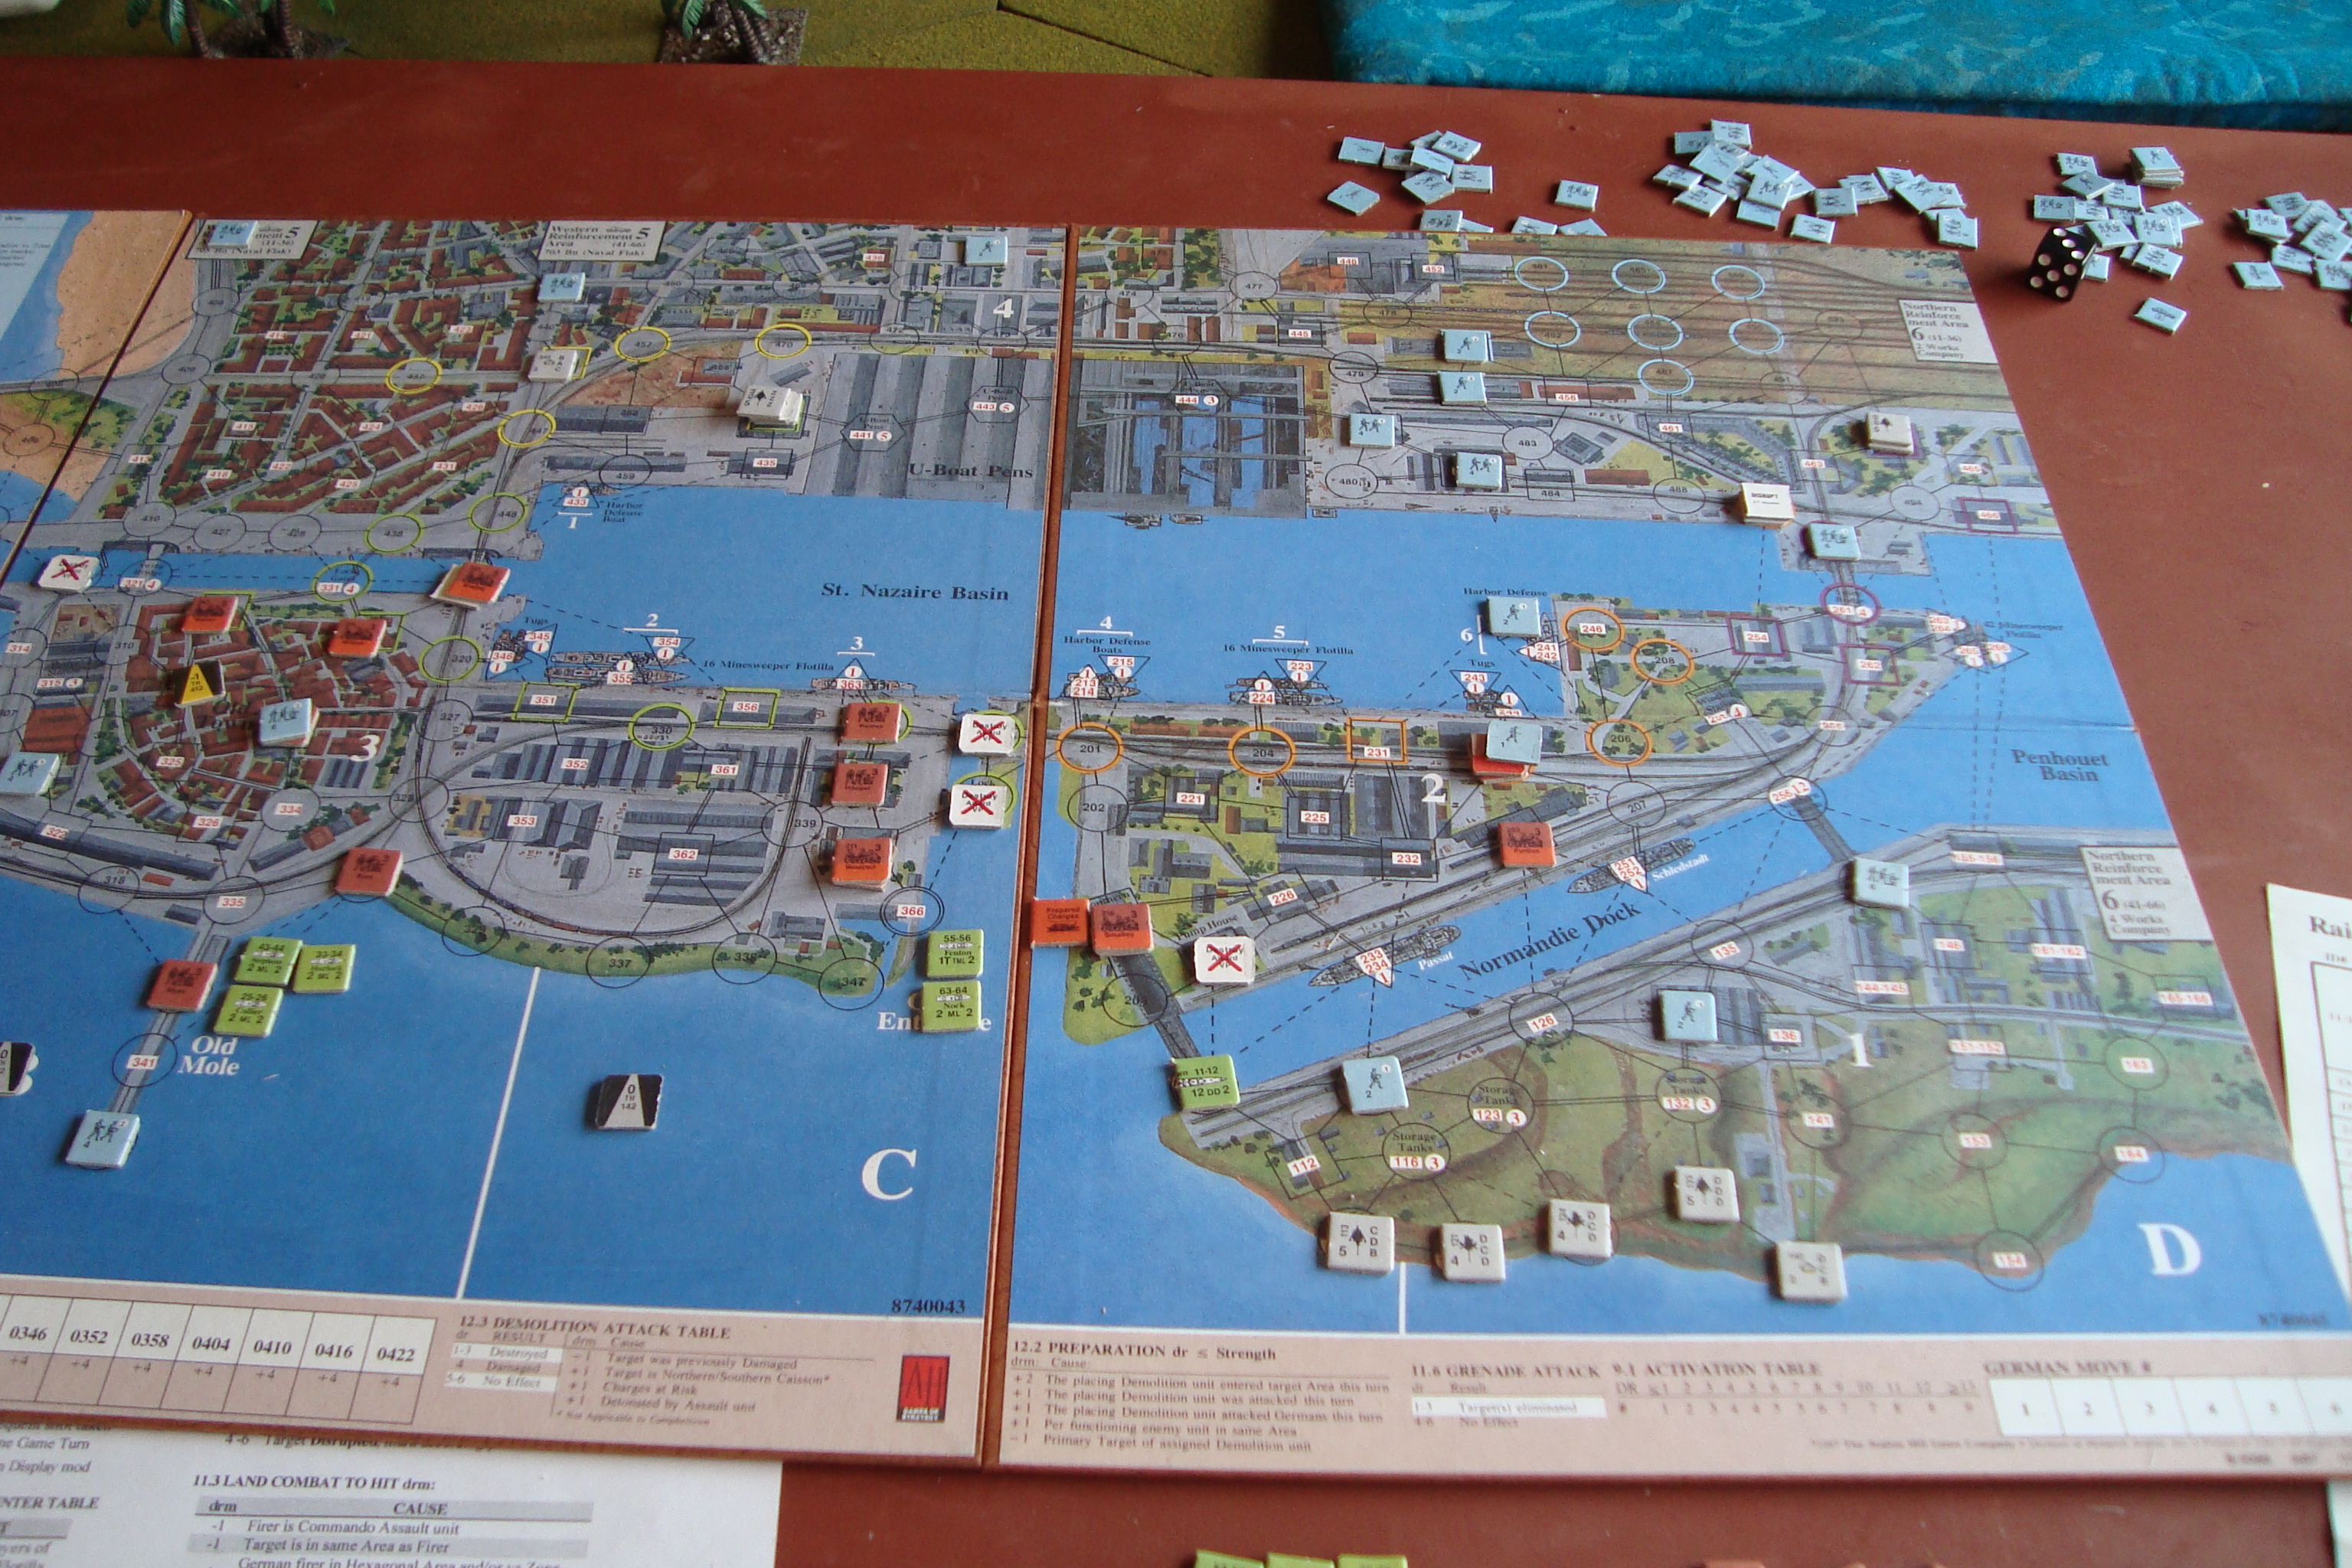
End Turn 3 Western Half of AOEnd Turn 3 Eastern Half of AO
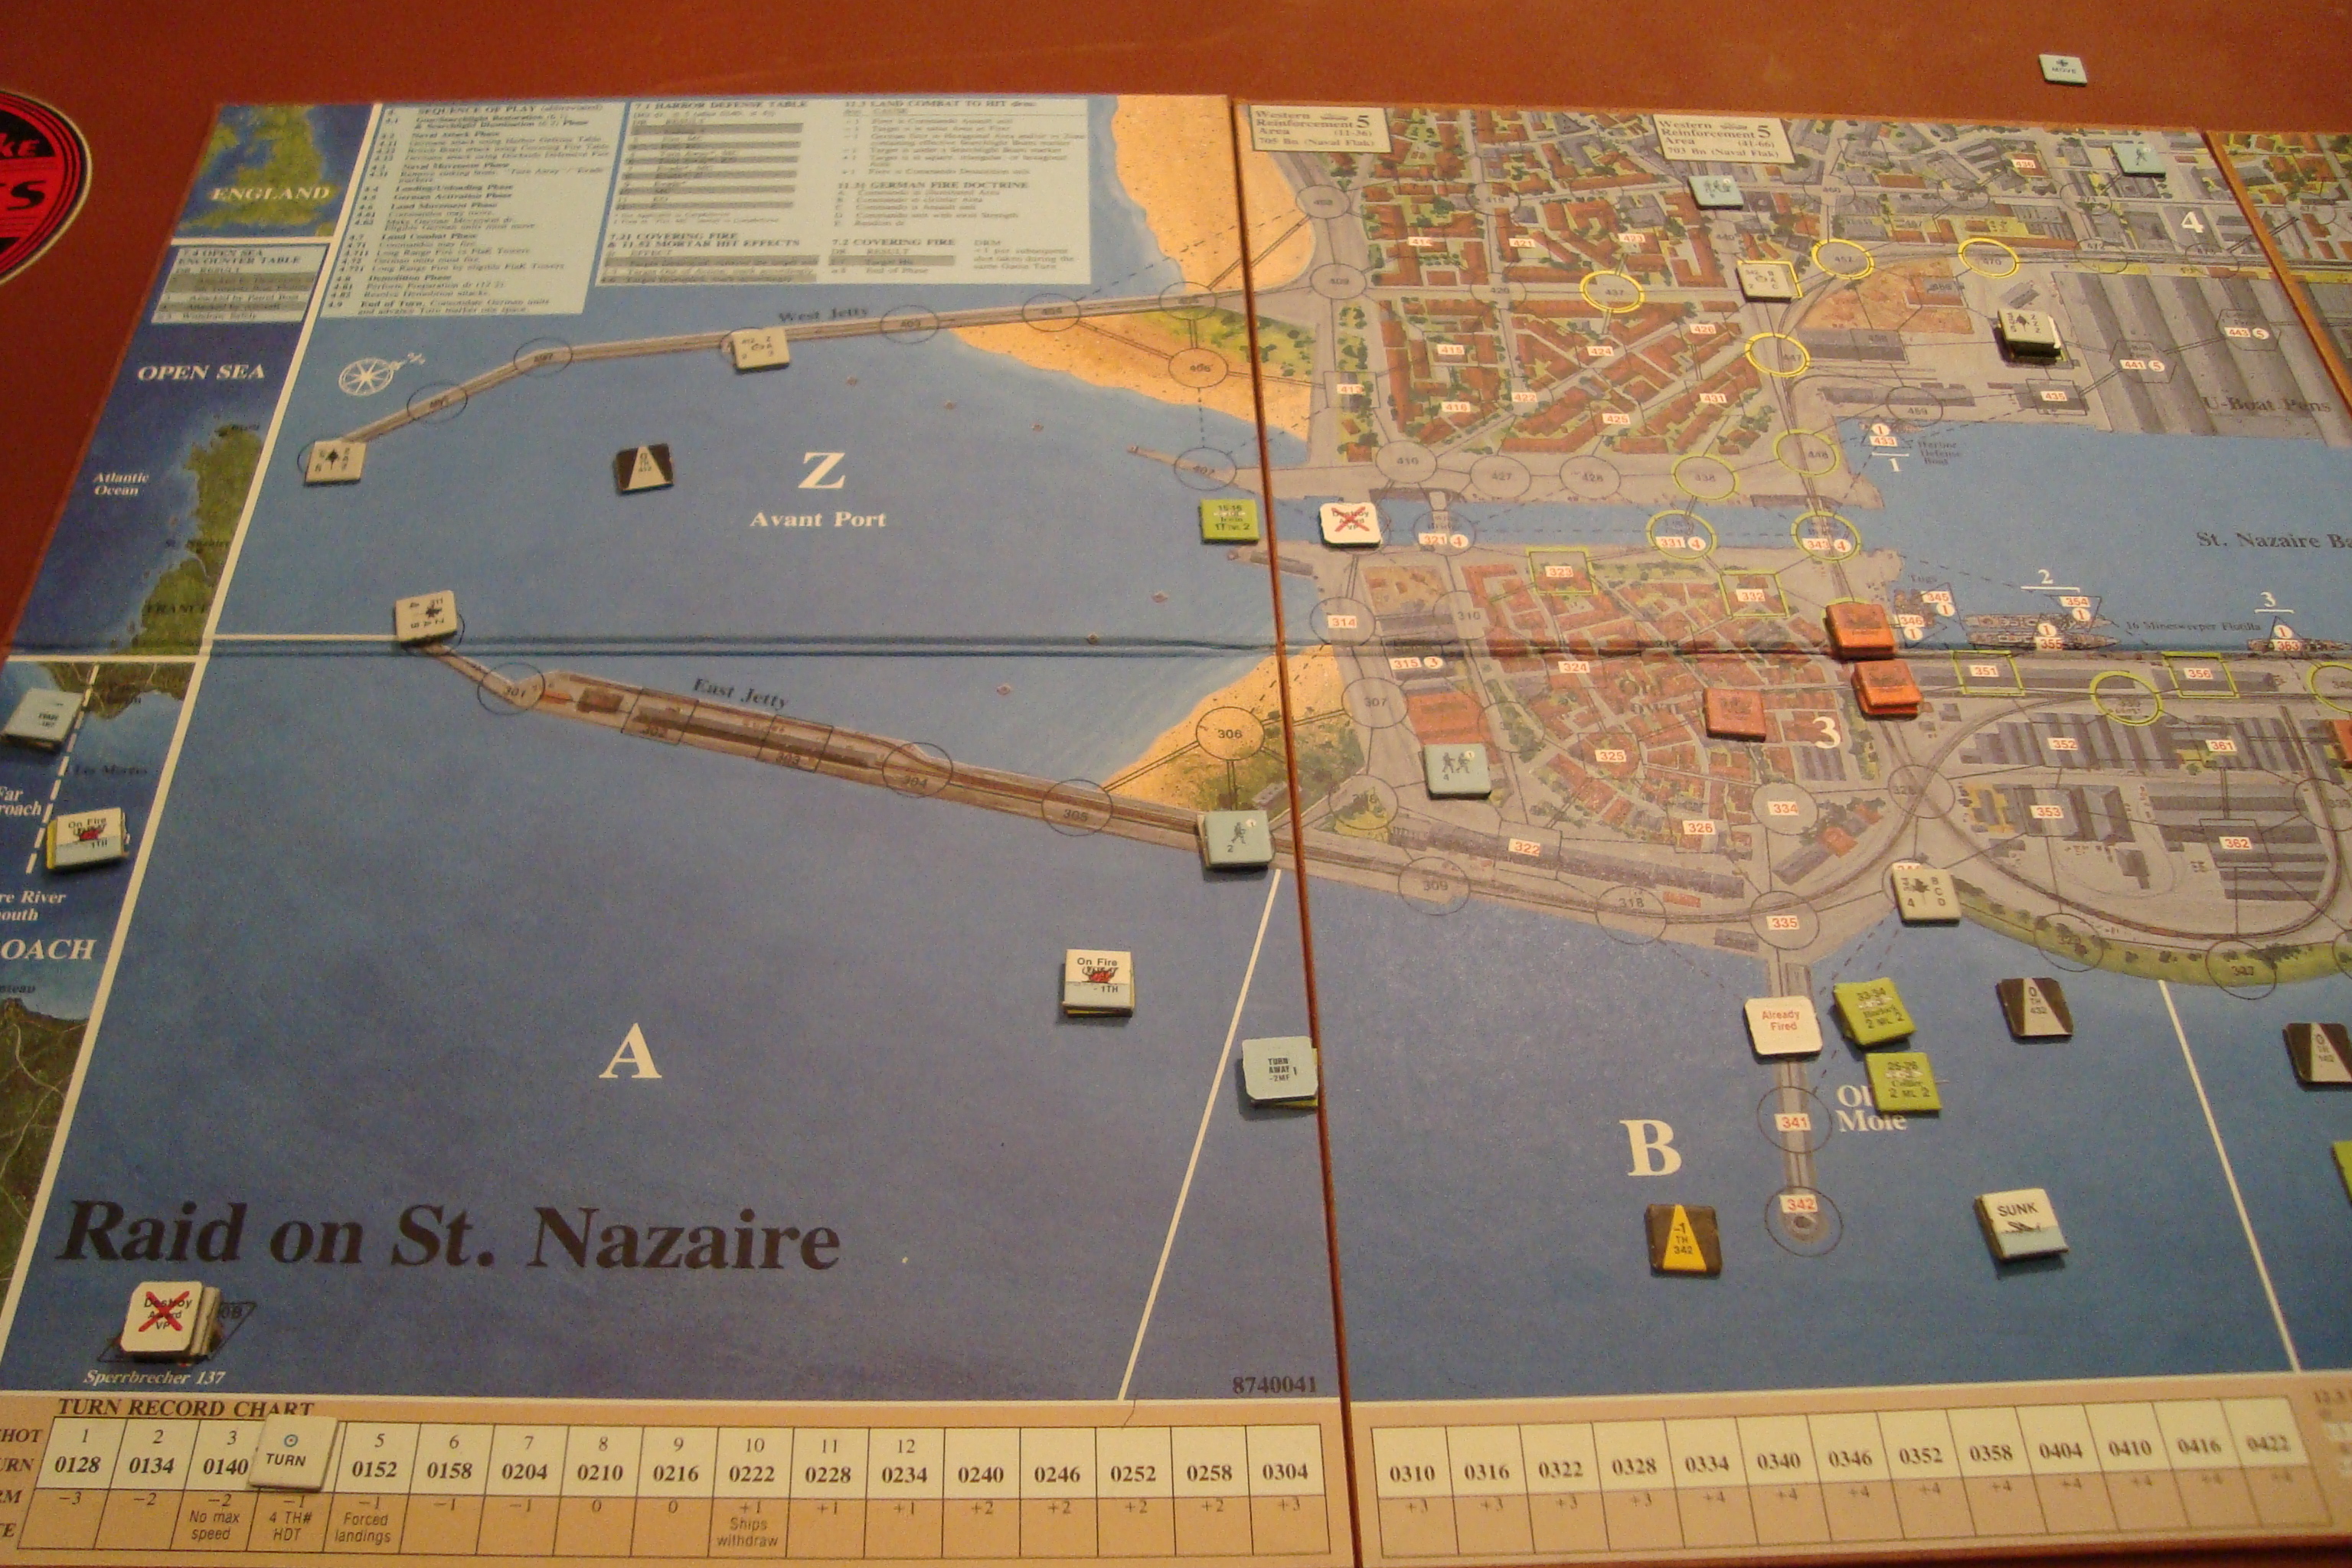
Started landing during Turn 3. Sent two MTBs into the Avant Port (Zone Z) to attack gates. Plenty of carnage from Harbor Defensive Fires.
End Turn 4 West Half of AOEnd Turn 4 East Half of AO
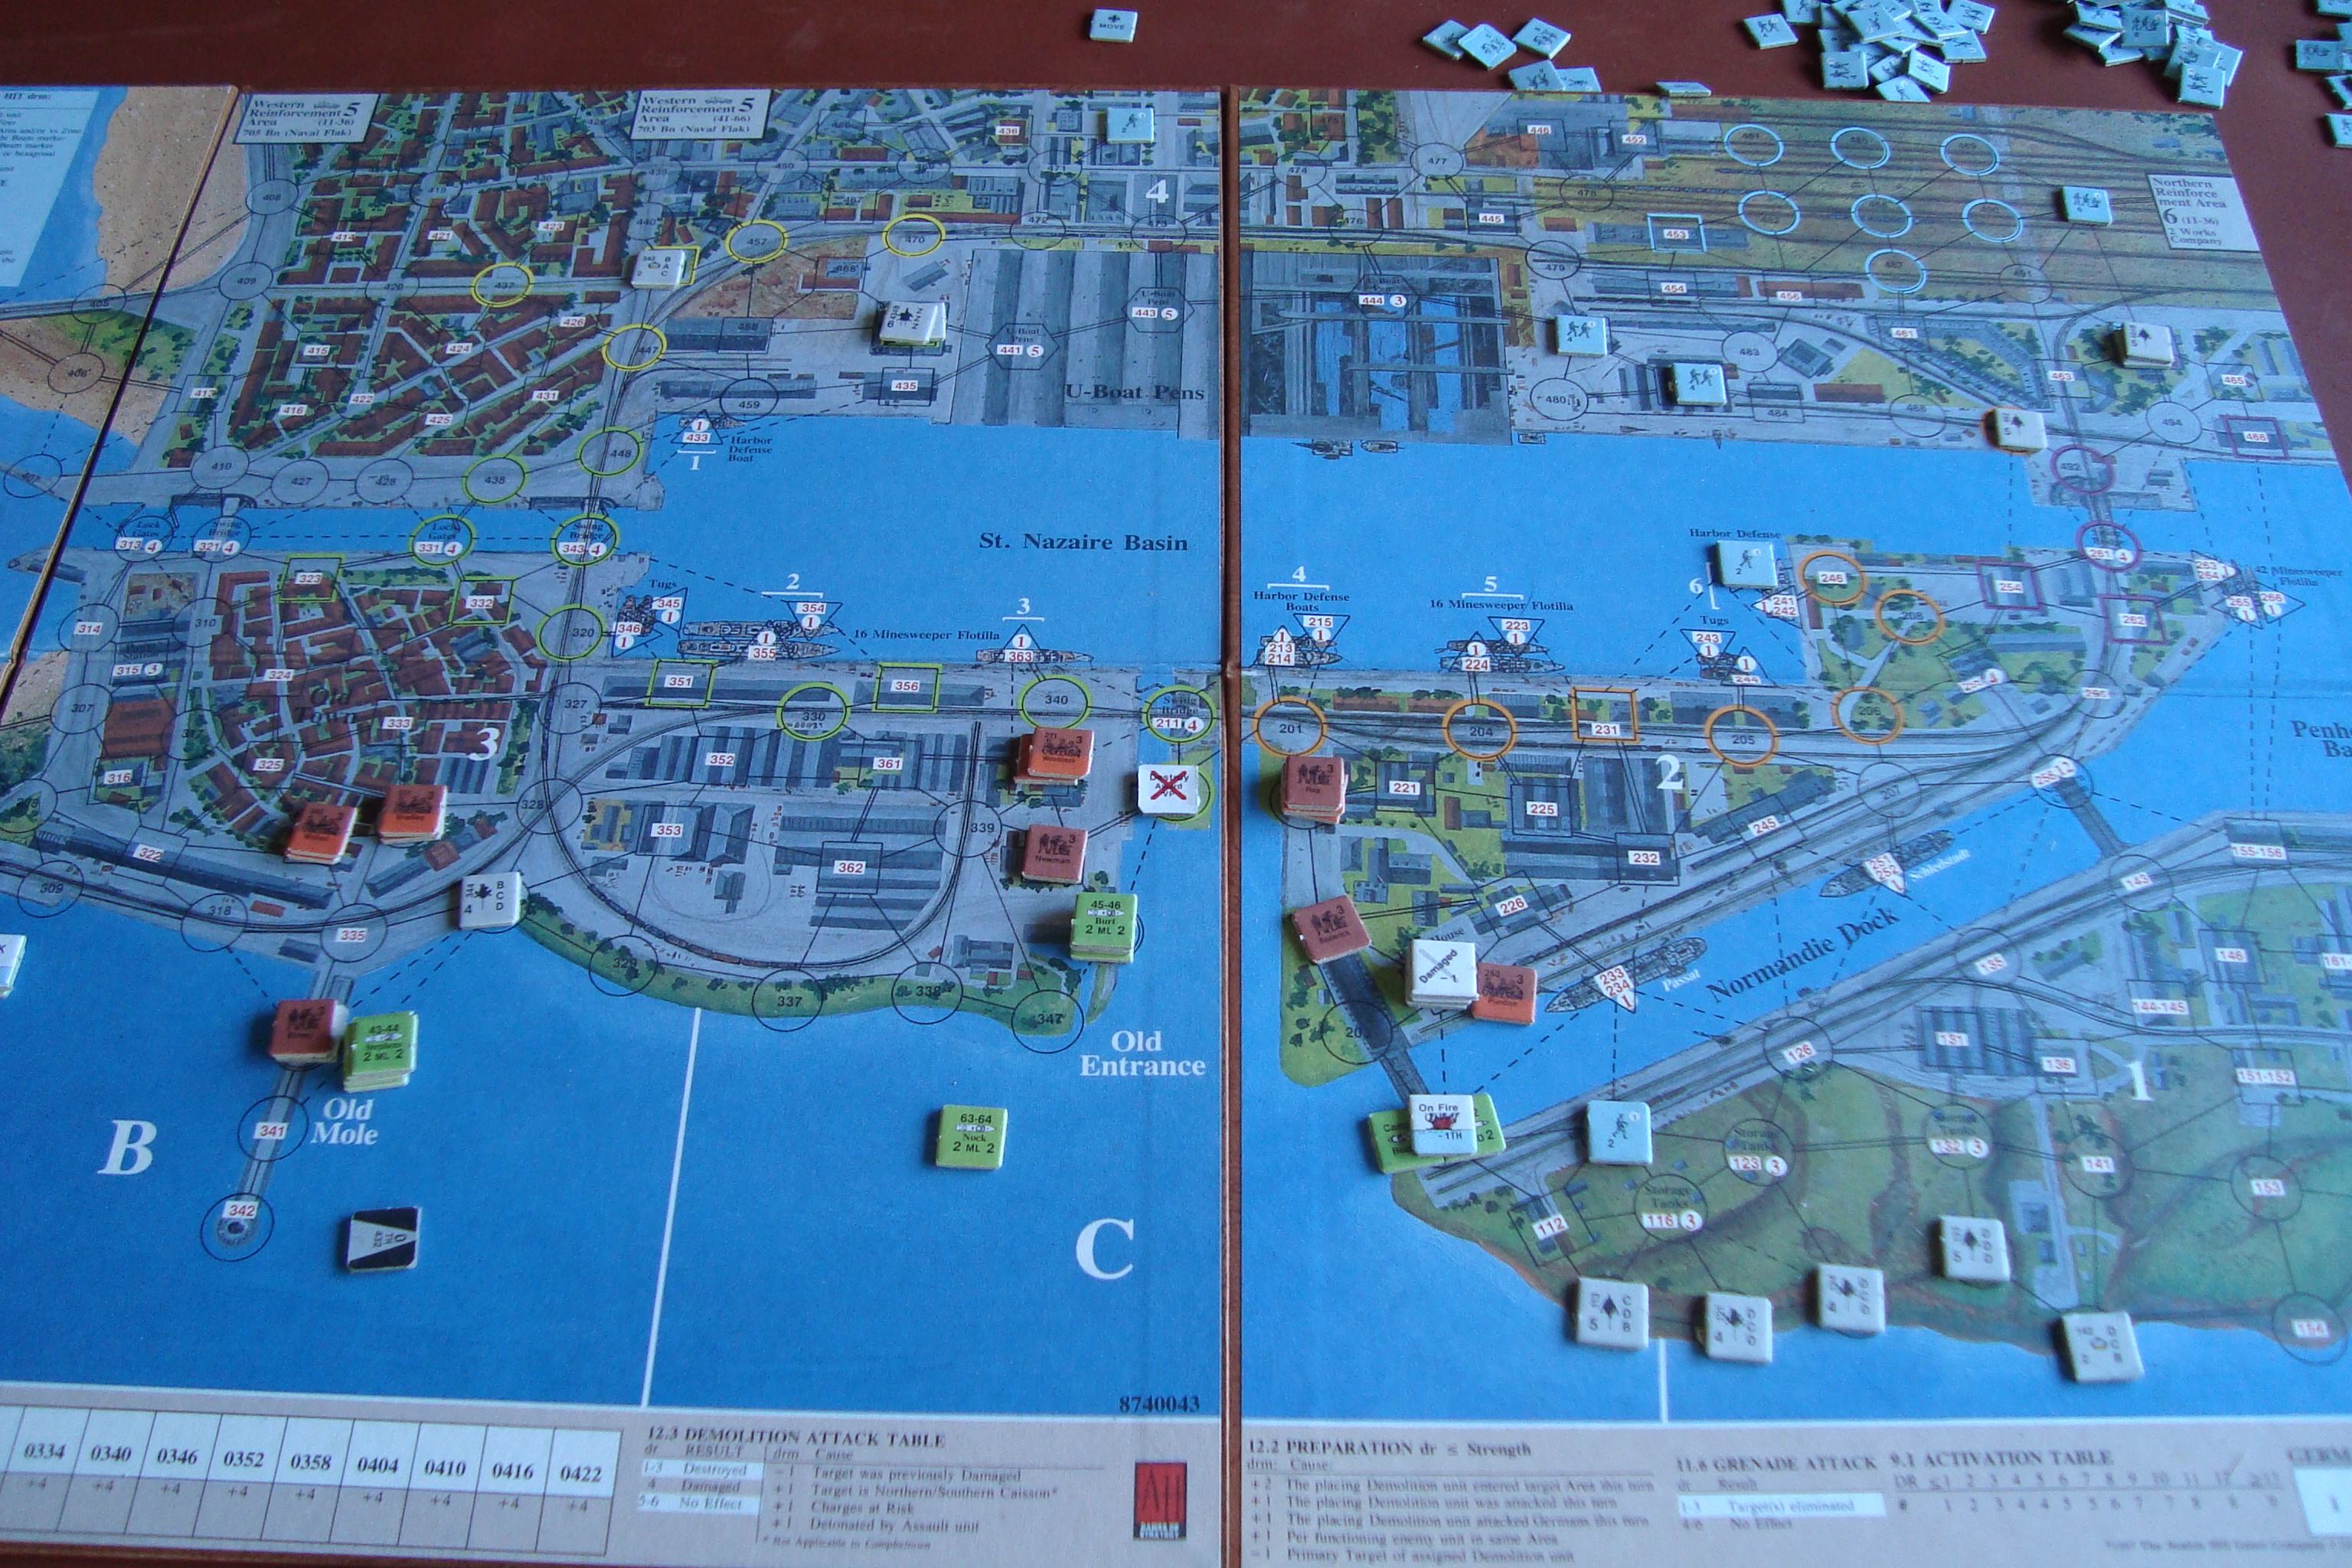
Carnage in Zone B and C, but most Commandos ashore with attacks developing with some successes. Effects of German reaction are minimal.
End Turn 5 West Half of AOEnd of Turn 5 East Half of AO
Started evacuating troops back to England, moving back to Zone A. Commando attacks spreading out, more targets destroyed, but German reaction is becoming a problem, with more troops flowing towards the assault and demolition teams and, especially, those moving towards the South Caisson. I have a few boats lurking at the embarkation points anticipating debarkation there.
Used the cards shown in my Zapped! post to get the East African Renaissance Campaign off dead center.
Worked fairly well, but the results were mundane. Had been hoping for a civil war situation, which is the result of both colonial powers being supported by the Zanj or Inland Natives.
Here’s the results:
Ming Chinese
Natives are helpful neutrals, and will provide access to their cities and supplies. The Zanj are neutral but open to other offers. Government support is weak, and their initial troop strength is 10 bases. Their primary objective is a port, with inland towns as their secondary and tertiary objectives.
Portuguese
The Natives are neutral, but open to others. The Zanj are uncooperative and will fight if attacked or territory occupied. The Portuguese also have weak government support, and only 10 bases. Their primary and tertiary objectives are ports, with an inland town a secondary objective.
I’ll start using the Irregular Wars rules to set up some operational parameters.
Just getting started is one of the toughest aspects of wargaming. Sometimes, reading the rules (or just skimming them) seems to be an end in-and-of itself. What a trap! No, you have to play the damn thing, and the first two turns will be laborious with the rules in one hand, and charts in the other, but, if it is a good game, you’ll start looking forward to playing it. If it’s not good…..either another try sometime in the future, or recycle it.
Had one very abortive half-turn, and then finally figured a few things out. Again, the replay really helped.
Took relatively few casualties on Turn 1 (and this game goes for undetermined period of time – until the last British unit is eliminated and/or withdrawn). This is part to two luck hits on German defenses. The Campbeltown is burning (inevitable), a few boats had turn-away results, but only the Falconar is on fire. The Boyd badly hurt the German defenses by managing to sink the flak ship Sperrbrecher, with its two cannon batteries. I’ve got four boats, and the Campbeltown moving towards their landing areas.
Not a bad start. Will start Turn 2 after today’s ballgames.
Tim arrived early Friday evening, just in time for the Stanford football game. I had the table set up and ready to go. We agreed to start playing early Saturday morning. Tim took the British (Allies) and I had the Italians (Axis) forces. The plan was an ambitious one. To play the entire scenario, and watch as many of the headline college football games as possible. Oh yes….and consume many Henry’s. This was a job for professionals.
The Italians face some serious operational challenges. They are considered Out of Supply (Status 4) from the beginning of the game. Attack strength is quartered, defense and movement halved, with reduced Zones of Control (ZOC). They have no General Supply sources, and must rely on a limited number of Attack Supply factors to create either General Supply Points, or use for attacks. Italian Colonial troops (which form the bulk of their forces) can have air support only if it involves ten regiments (REs). Air units must role on the Success Table to fly a mission, unless they are in General Supply. If not, they can be aborted, or fail to fly. To top it off, Italian movement is limited until the British enter Italian East Africa.
The British commander has his own problems involving time and space. Time is critical because the Order of Battle (OB) requires two divisions have to be withdrawn by early summer. The distances in the game are significant, and by Spring, the possibility exists that roads and terrain key areas will be reduced to muddy morasses, limiting movement and effecting combat.
Play started at 0830 with Game Day as background ambiance. Here’s a summary of play.
Dec I 1940 – Clear
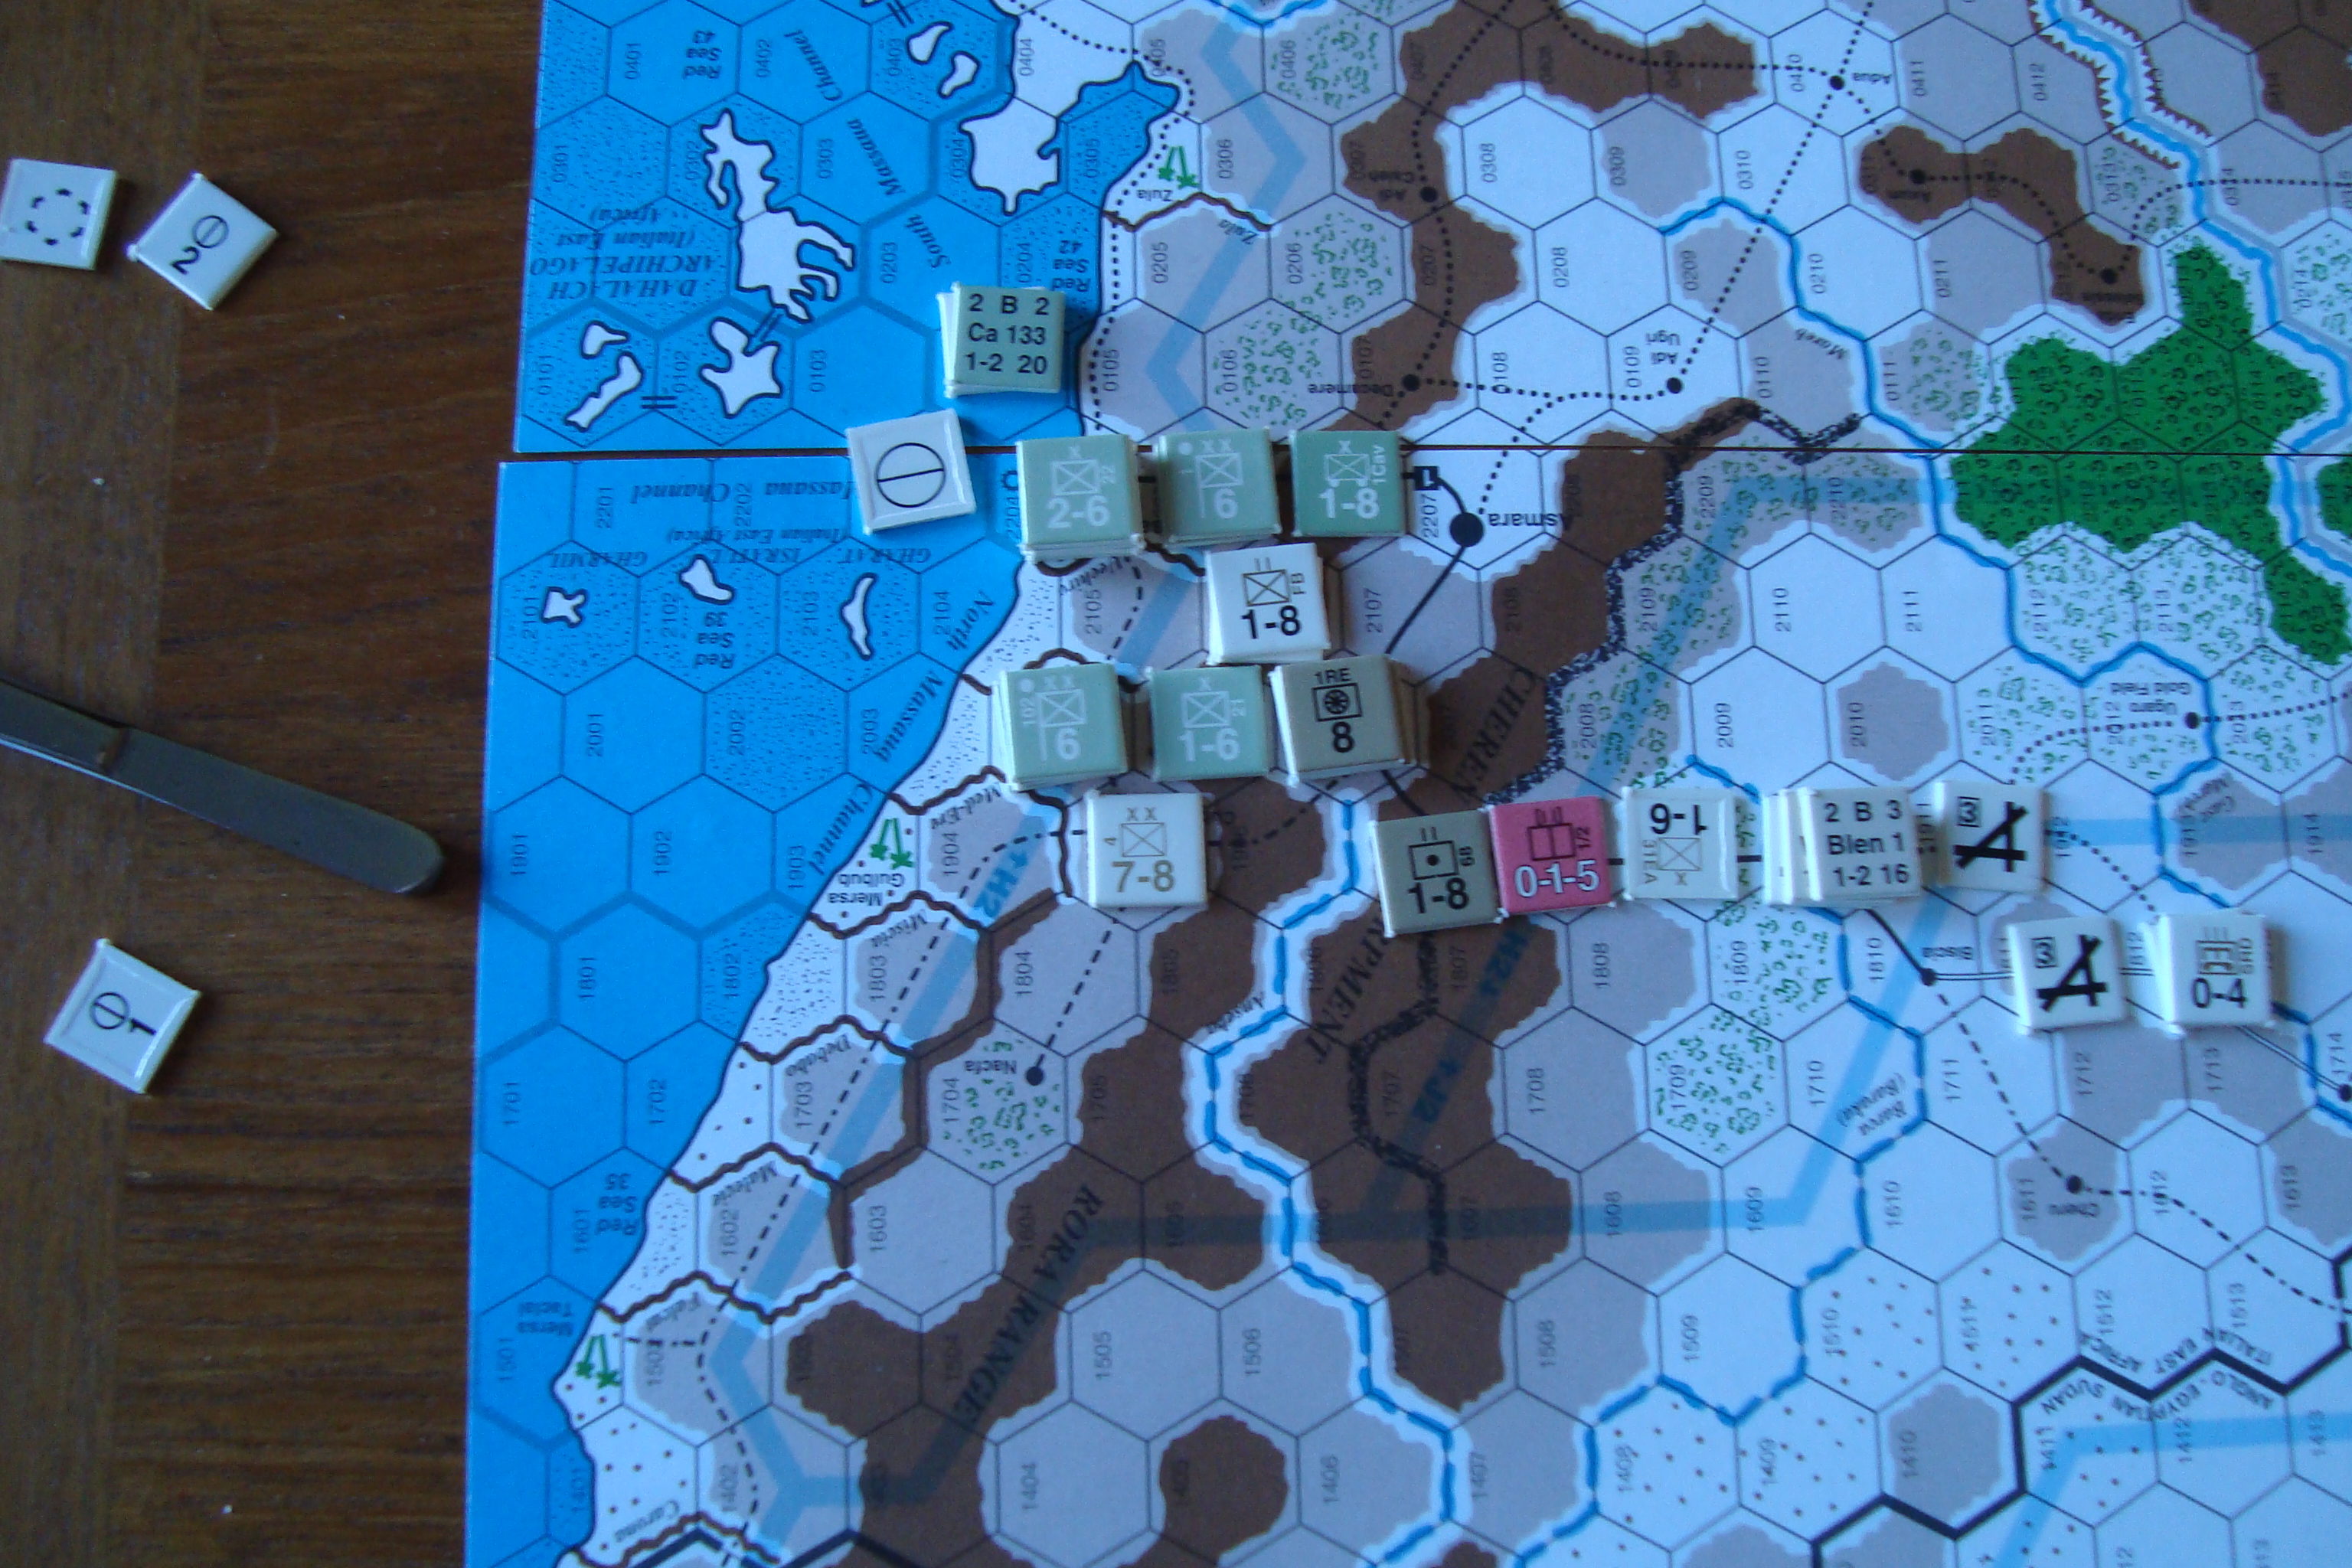
Allies: South Africans advance from Kenya in the south, with air units destroying a SM-79 I had unwisely deployed at a forward air field. Advances from Khartoum in the north southwards towards Kassala-Bascia-Massaula.
Axis: Consolidate scattered units in the vicinity of Kassala using HQs.
Dec II – Clear
Allies: Continue Kenya advance. Defeat Italian force at Kassala.
Axis: Retreat from Kassala to Bascia.
Jan I 1941 – Clear
Allies: Continue advance from Kenya in the south. Defeat Axis regiments holding vicinity of Bascia in the north, using motorized machine gun battalions to envelope for ZOC kill. Indian 4th Division advances south along coast from Port Saud.
Axis: Counter-attacks and destroys motorized machine gun battalions. Retreats east to mountains near Massaula.
Jan II – Clear
Allies: Advance along coast from Kenya, takes Mogadishu with amphibious assault. In the North, 4th Division continues advance shrugging off (over running) delaying Italian regiments.
Axis: Withdraws southern and eastern forces north towards Addis Ababa. Forms hasty defensive positions around Massaula. Air strike against British airfields unsuccessful.
Feb I – Clear
Allies: Takes Keren (key to breaching mountain defenses outside Massaula) on a half-exchange. Advances towards Addis Ababa.
Axis: Continues to withdraw towards Massaula, but hampered by British ZOCs.
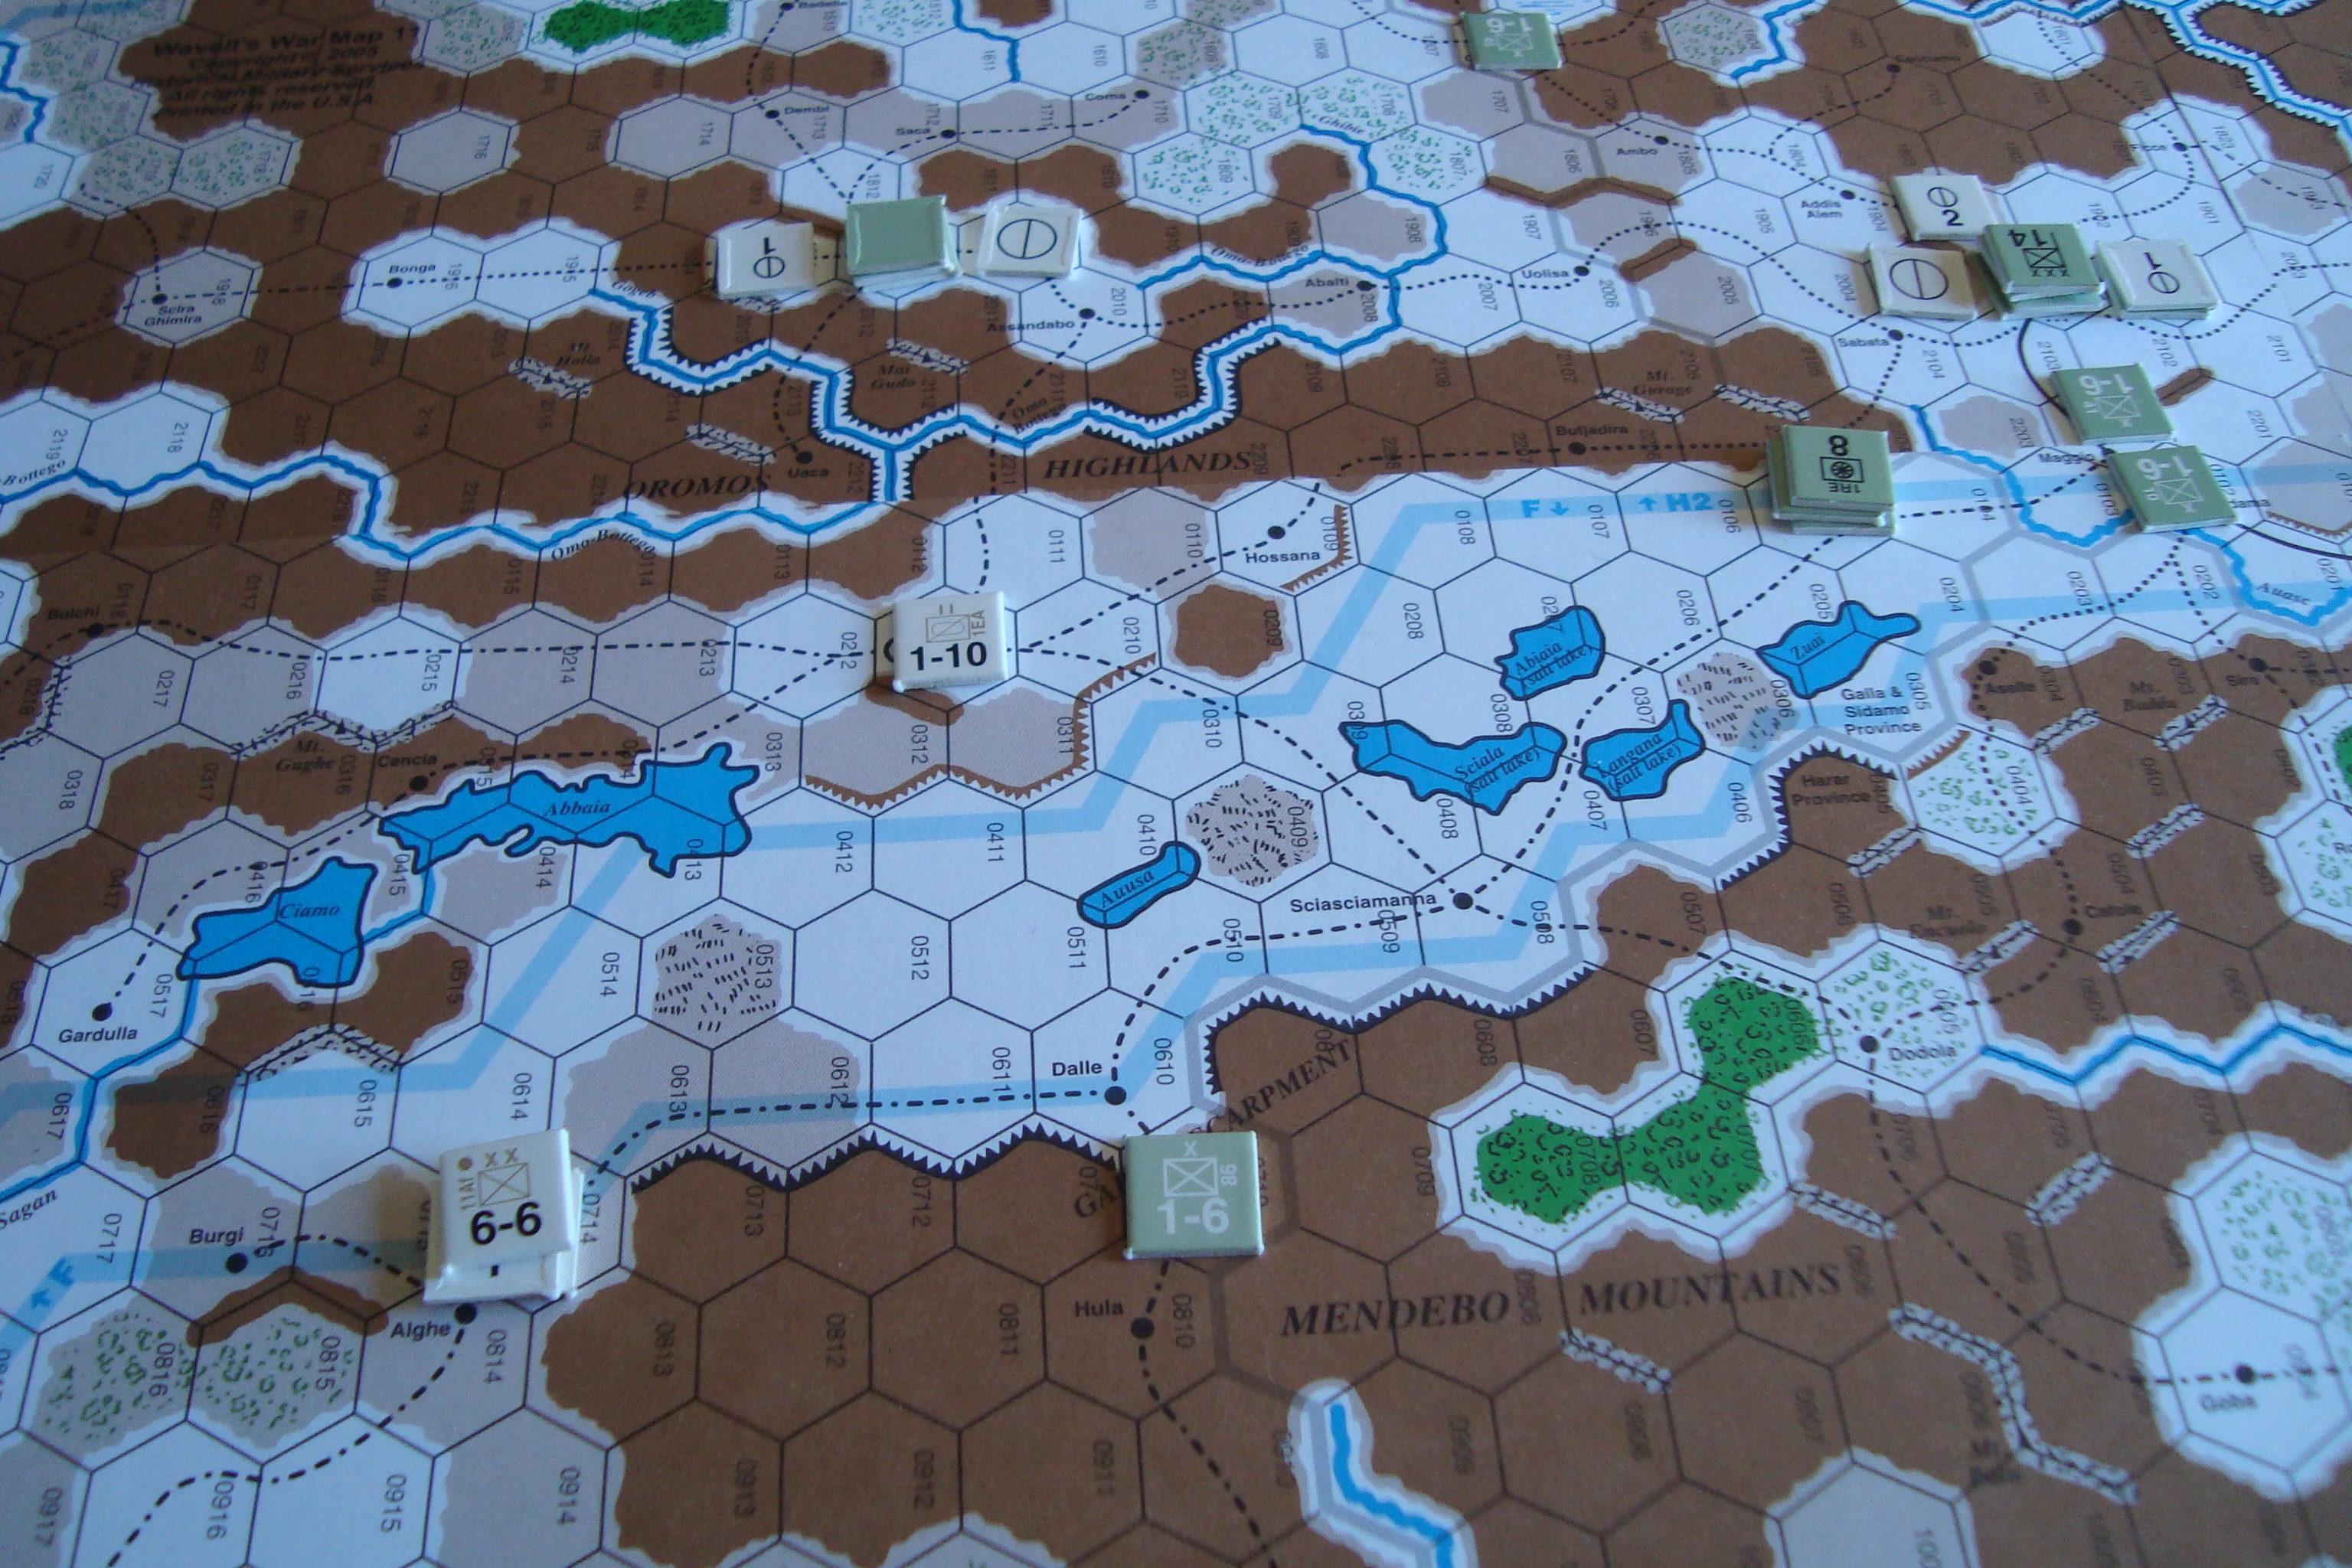
South Africans Advance Towards Addis Ababa (Upper Right).
Feb II – Mud
Allies: Consolidate near Keren. South Africans now slog in mud towards Addis Ababa.
Axis: Establish defense around Massaula, continues to move/consolidate units near Addis Ababa.
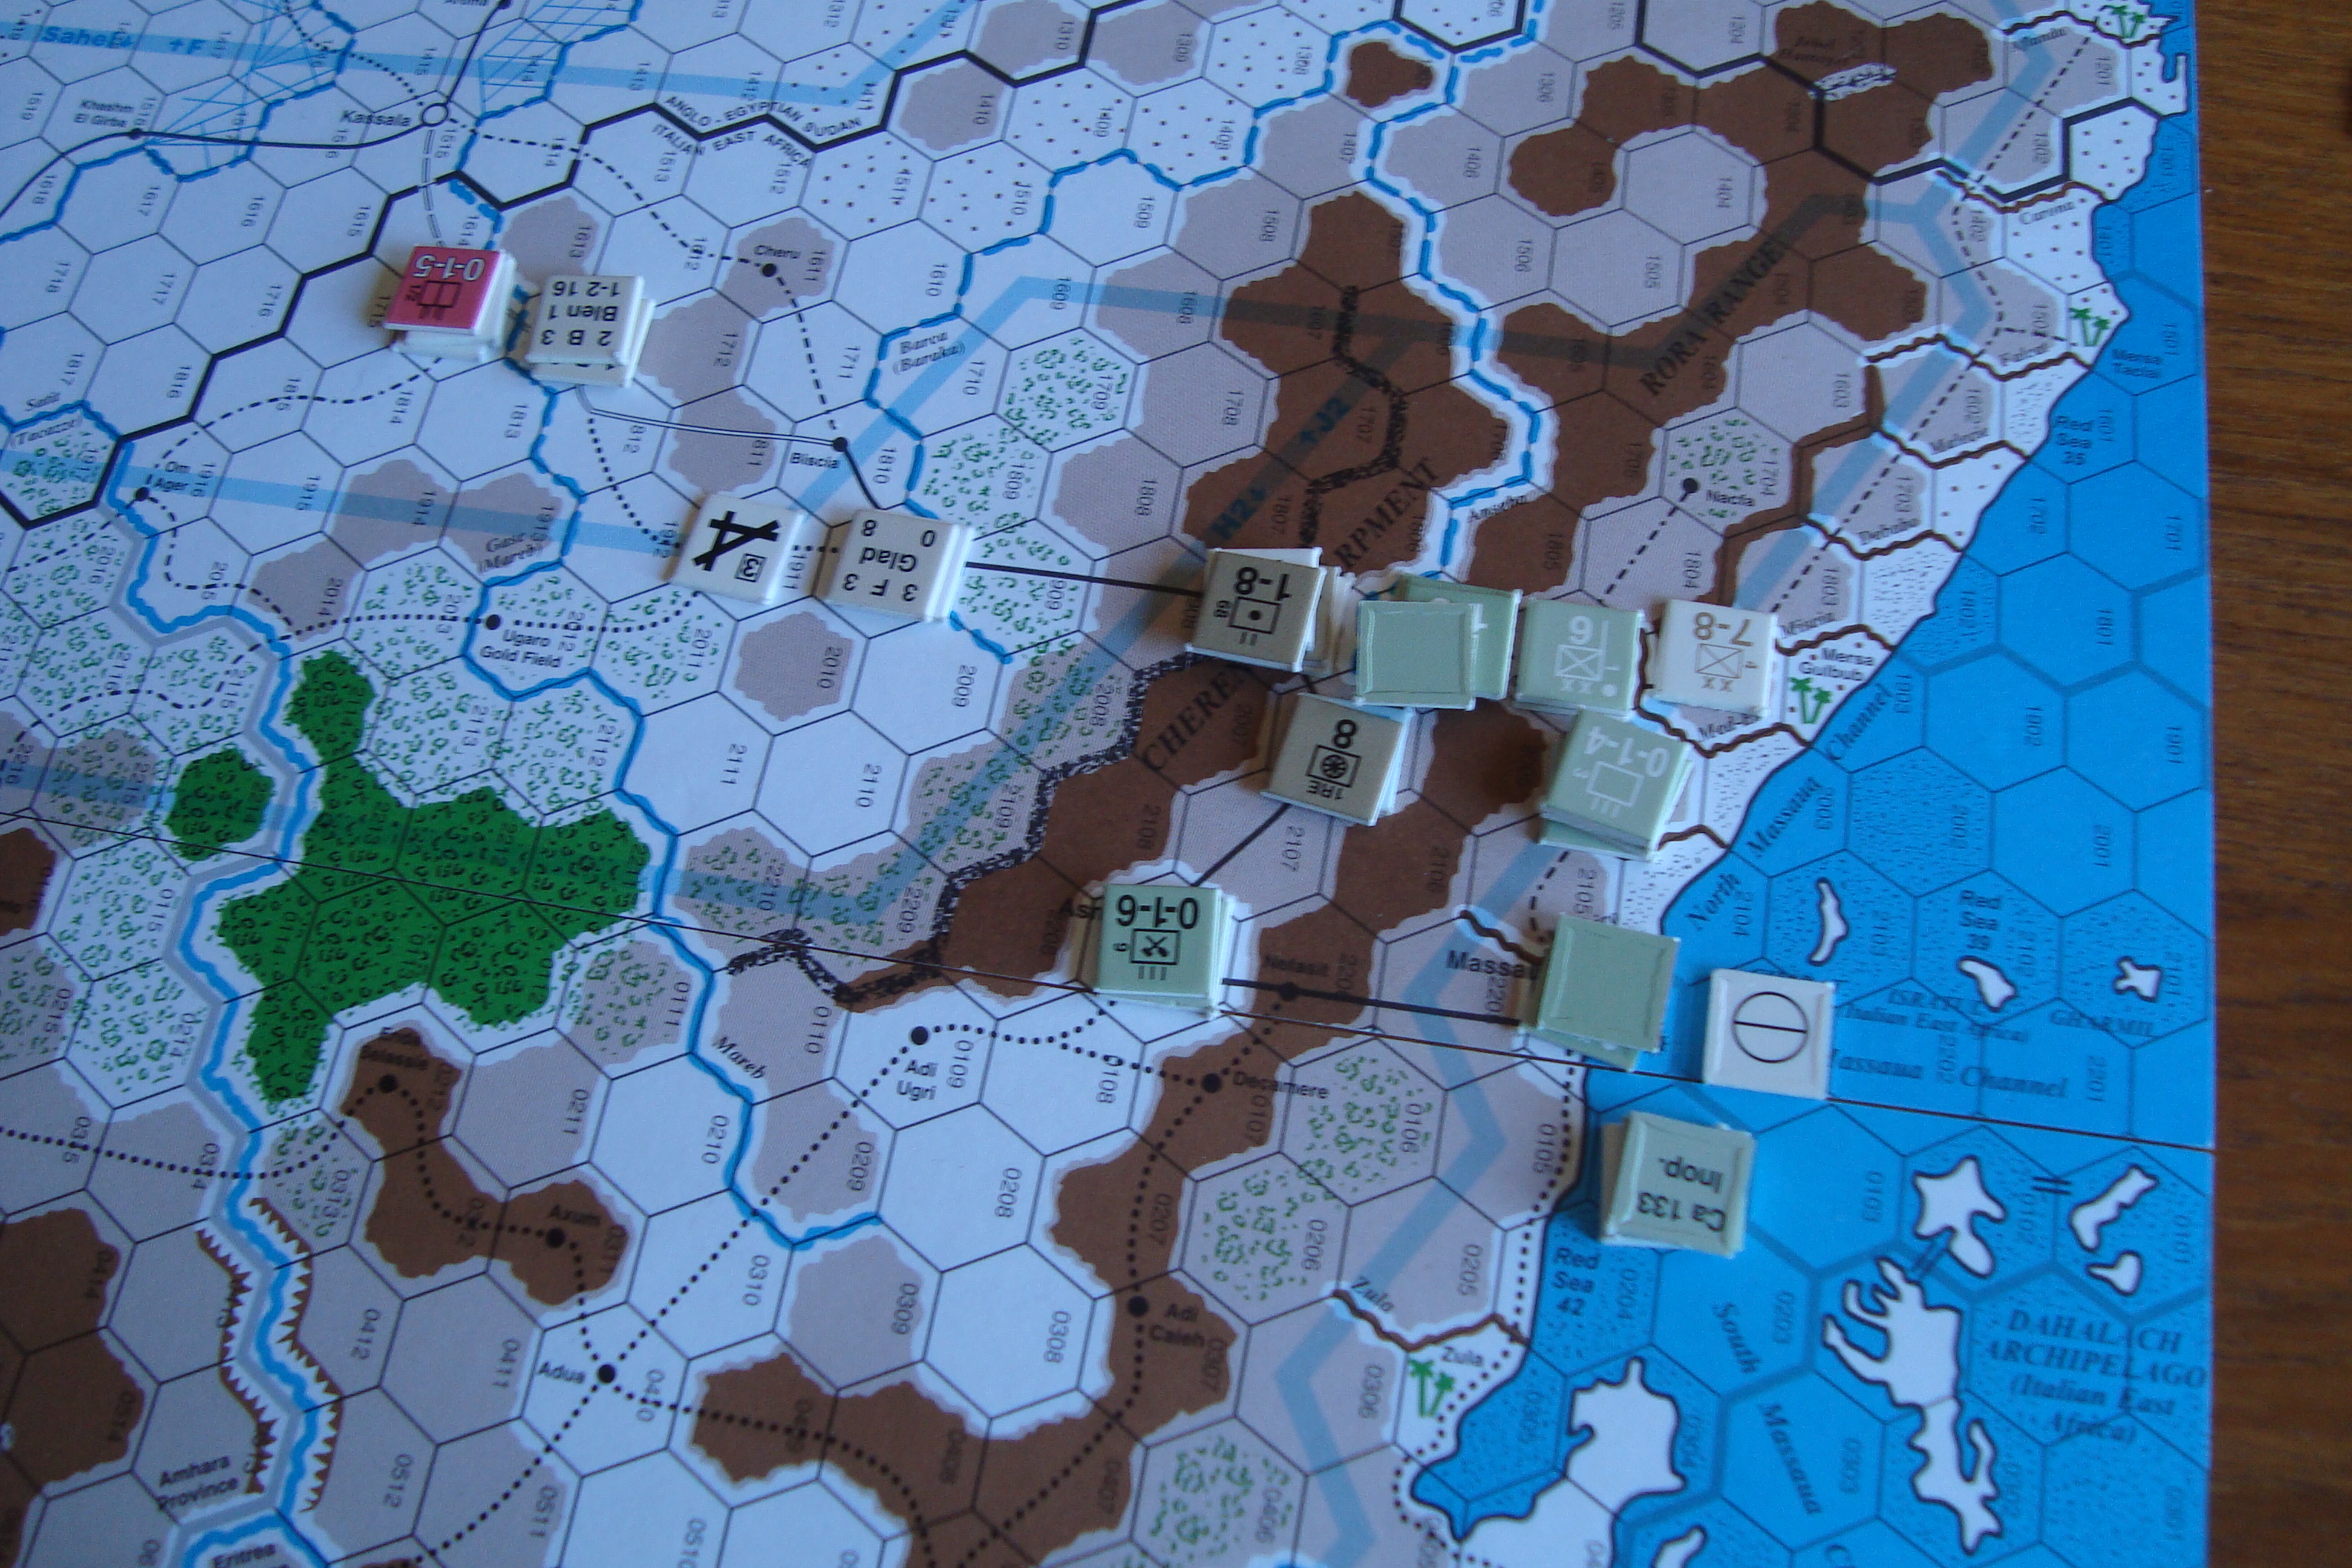
British Begin Assault On Massalua Defenders After Capturing Keren. Flipped Italian Units Are Out Of Supply.
At this point , VIPs were tallied, with each side having two (2).
March I – Mud
Allies: Launch assaults on Massaula perimeter defenses. Slog in south continues.
Axis: Now defending Massaula proper.
Final Defensive Perimeter For Massaula
March II – Mud
Allies: Capture Massaula (This will give them one (1) VIP), begin advance southwest towards Addis Abada. South Africans continue slog.
Axis: Forces in Addis Ababa deploy to forward defensive positions awaiting Allied advance.
April I – Mud (At this point Tim became understandably irritated by my uncanny ability to throw sixes. I pointed out to him that this was better for him with a weather role than a combat roll).
Allies and Axis: Same as March II.
At this point play stopped. We were engrossed in the Notre Dame-Texas game, and it appeared that the game would continue for more turns than time remaining to play.
You were much more aggressive in the second game. In prior games, you would use either the Bavarians or the Imperials, but not usually them both at the same time. Once you did, you were able to pick up a lot of territory. Either one of those forces are pretty strong and together they are a lot for the Protestants to handle.
I don’t know if you saw it or not, but there is a rule that if all of the cities in an area are at level 2 devastation, the VP for that area drop by one. It seems like a rule that wouldn’t come into play much, but both Saxony and Brandenburg might have lost VIPs in the last game. We rolled poorly for recovery and by the end of the game, central Germany was a howling wasteland.
I was a little gun shy with the Swedes. I had lost pretty much all of my other armies and leaders, so I didn’t want to get Gustavus killed in battle….Man, if I’d only had one more turn!
I probably should have been more aggressive against the Spanish and tried to attrit them down a little bit, so they couldn’t clobber the French. I thought about moving the army in the Netherlands out, but events always worked against it.
It occurs to me that I didn’t make particularly good use of my fortresses (it didn’t help that you rolled very well on your siege combats). I wonder if garrisoning them would force you to leave armies in place, rather than moving back to base areas at the end of the turn. Anything that slows down the Imperials in the early part of the game is worth trying…
Note: This was drafted last Friday morning, but due to sloth not posted until today.
Finally back from a month of travel.
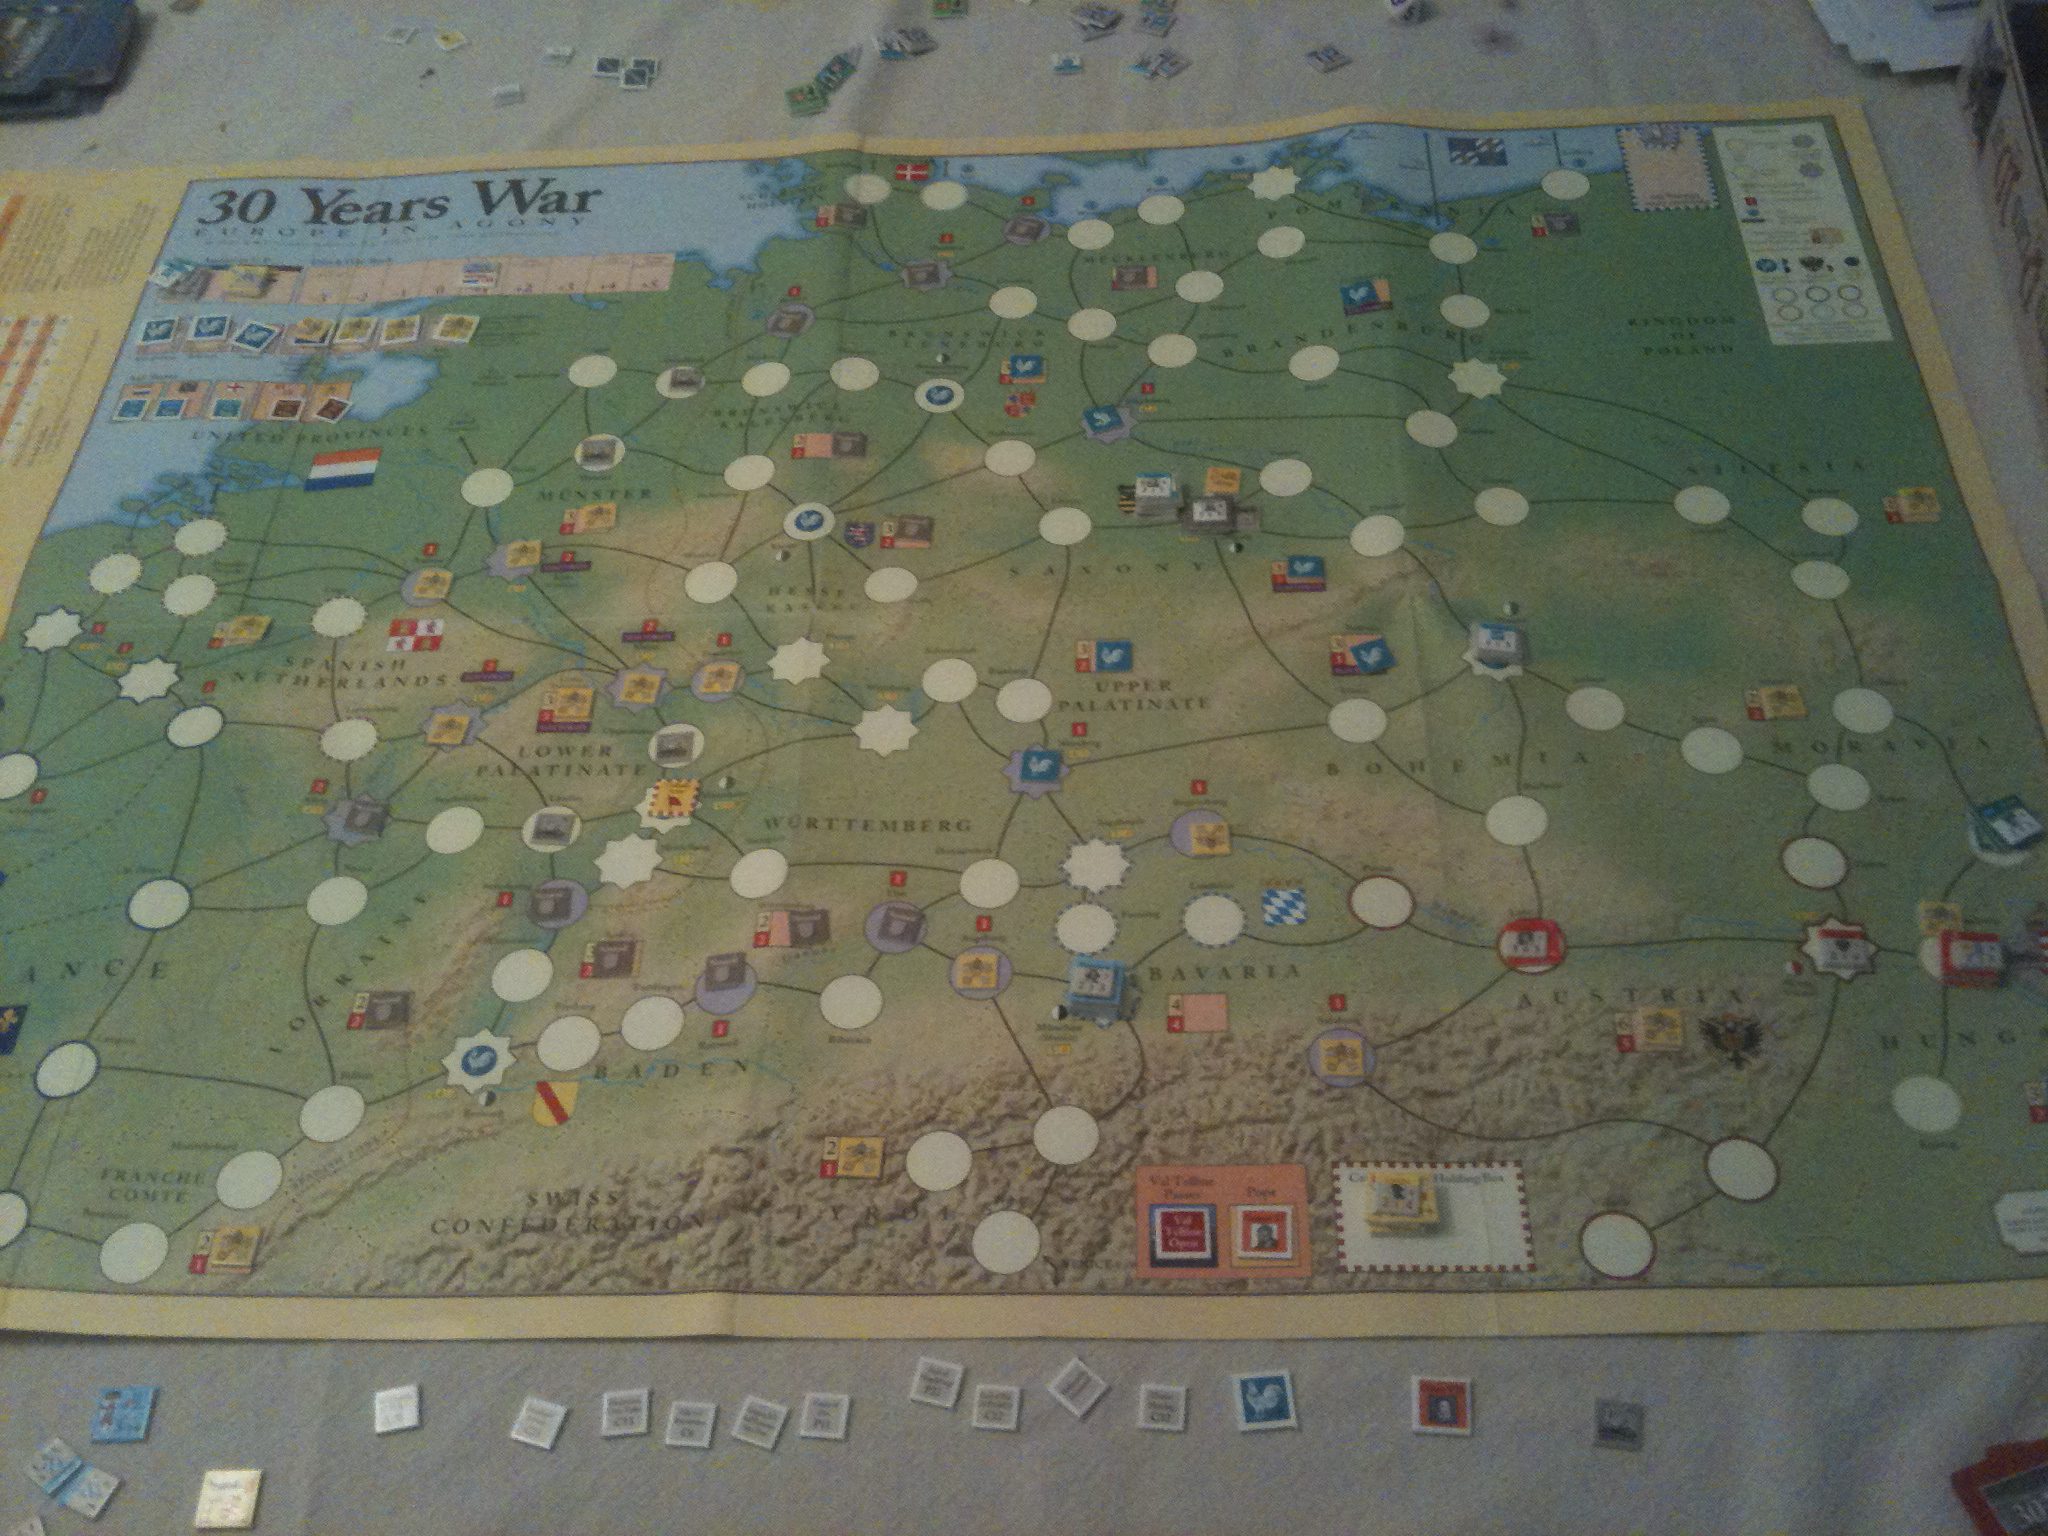
With Tim arriving later today for a game of Wavell’s War East African Campaign, I need to post up about our mid-August 30 Years War game. Tim took the Protestants, and I had the Catholics.
We played a few turns Friday afternoon/evening to re-familiarize ourselves. Lucky for me, we reset for a Saturday game. My play on Friday can best be described as cautious and inadequate.
Friday’s experience reinforced the lessons from our previous game. These were 1) Secure electorates for VIPs, 2) Recruit whenever possible 3) Try to pay as many of your forces as possible, rather than rolling for desertion, 4) Larger stacks of units are very effective and 5) The pillaging effects of movement can render large parts of the playing area almost untenable.
Both Lessons 2 and 3 involve the use of at least two cards per turn, leaving a maximum of four cards for operations. The Early War card deck has a large number of event cards, so the operational options are limited.
Play on Saturday had a good pace and tempo. Both of us adhered to the lessons learned.
By Turn Three I had been able to use my Spaniards (west of map, yellow counters) to secure the regions within their permitted area of operations.
By Turn 6, I had pushed Tim out of Hungary and advanced into the Palantine regions. France entered the war by Turn 8, pinning down my Spanish forces, with Tim’s Danes representing a threat from the North. Some electorates changed hands, but neither side could control the number required (all of them) to score significant VIPs.
I was very active with the Bavarian Forces (Blue counters in South). They took a beating, being wiped out and reconstituted twice. I was less aggressive with my Imperial veteran troops, taking losses from mercenaries. I rarely recruited militia.
Both sides used large stacks. Tim was especially adept at moving rapidly to destroy isolated units.
By game’s end Lesson 5 held true. Literally every province was devastated. Unfortunately, I did not take a photo of this.
The game’s last turn ended with a climatic battle between Imperial troops and Gustavus’ Swedes. Tim scored a tactical victory, but both sides were substantially reduced in size.
This is a good game that requires more than one playing to appreciate. Not as involved and mind numbing as Pursuit of Glory, but with far more nuance than Paths of Glory. We’ll put it on the table again.