Category Archives: Sessions

War of Resistance – Fate of Nanking

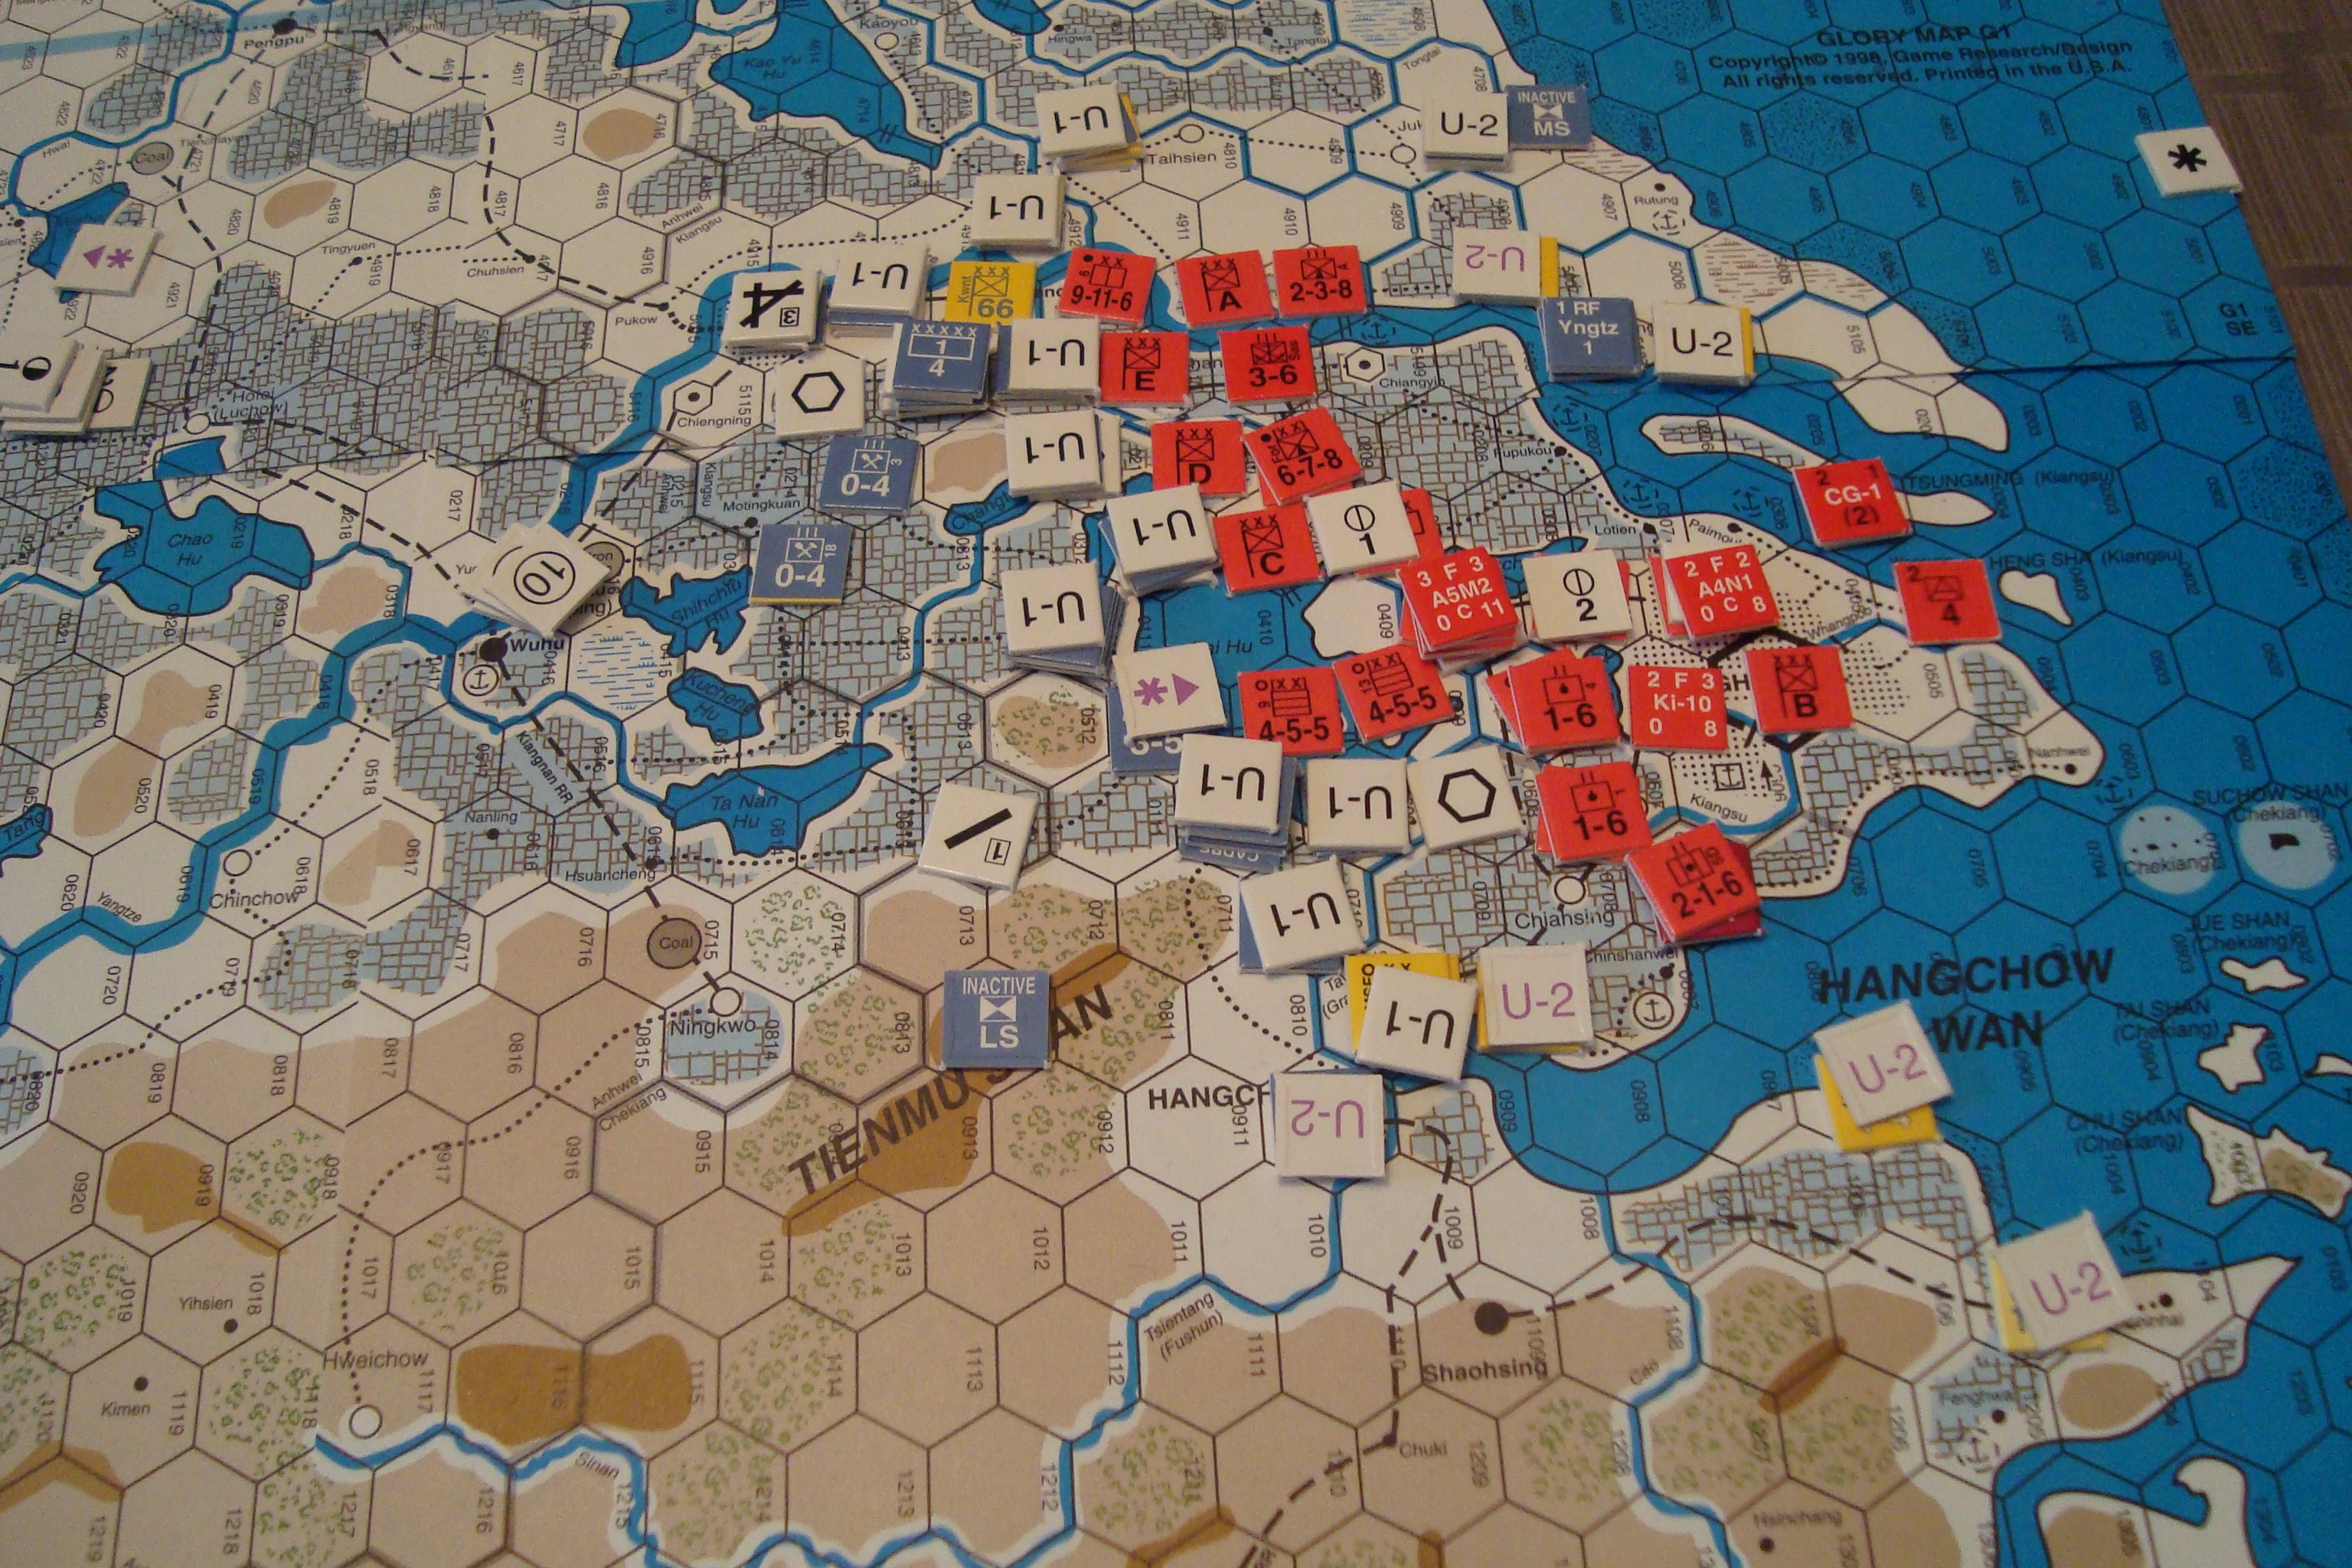
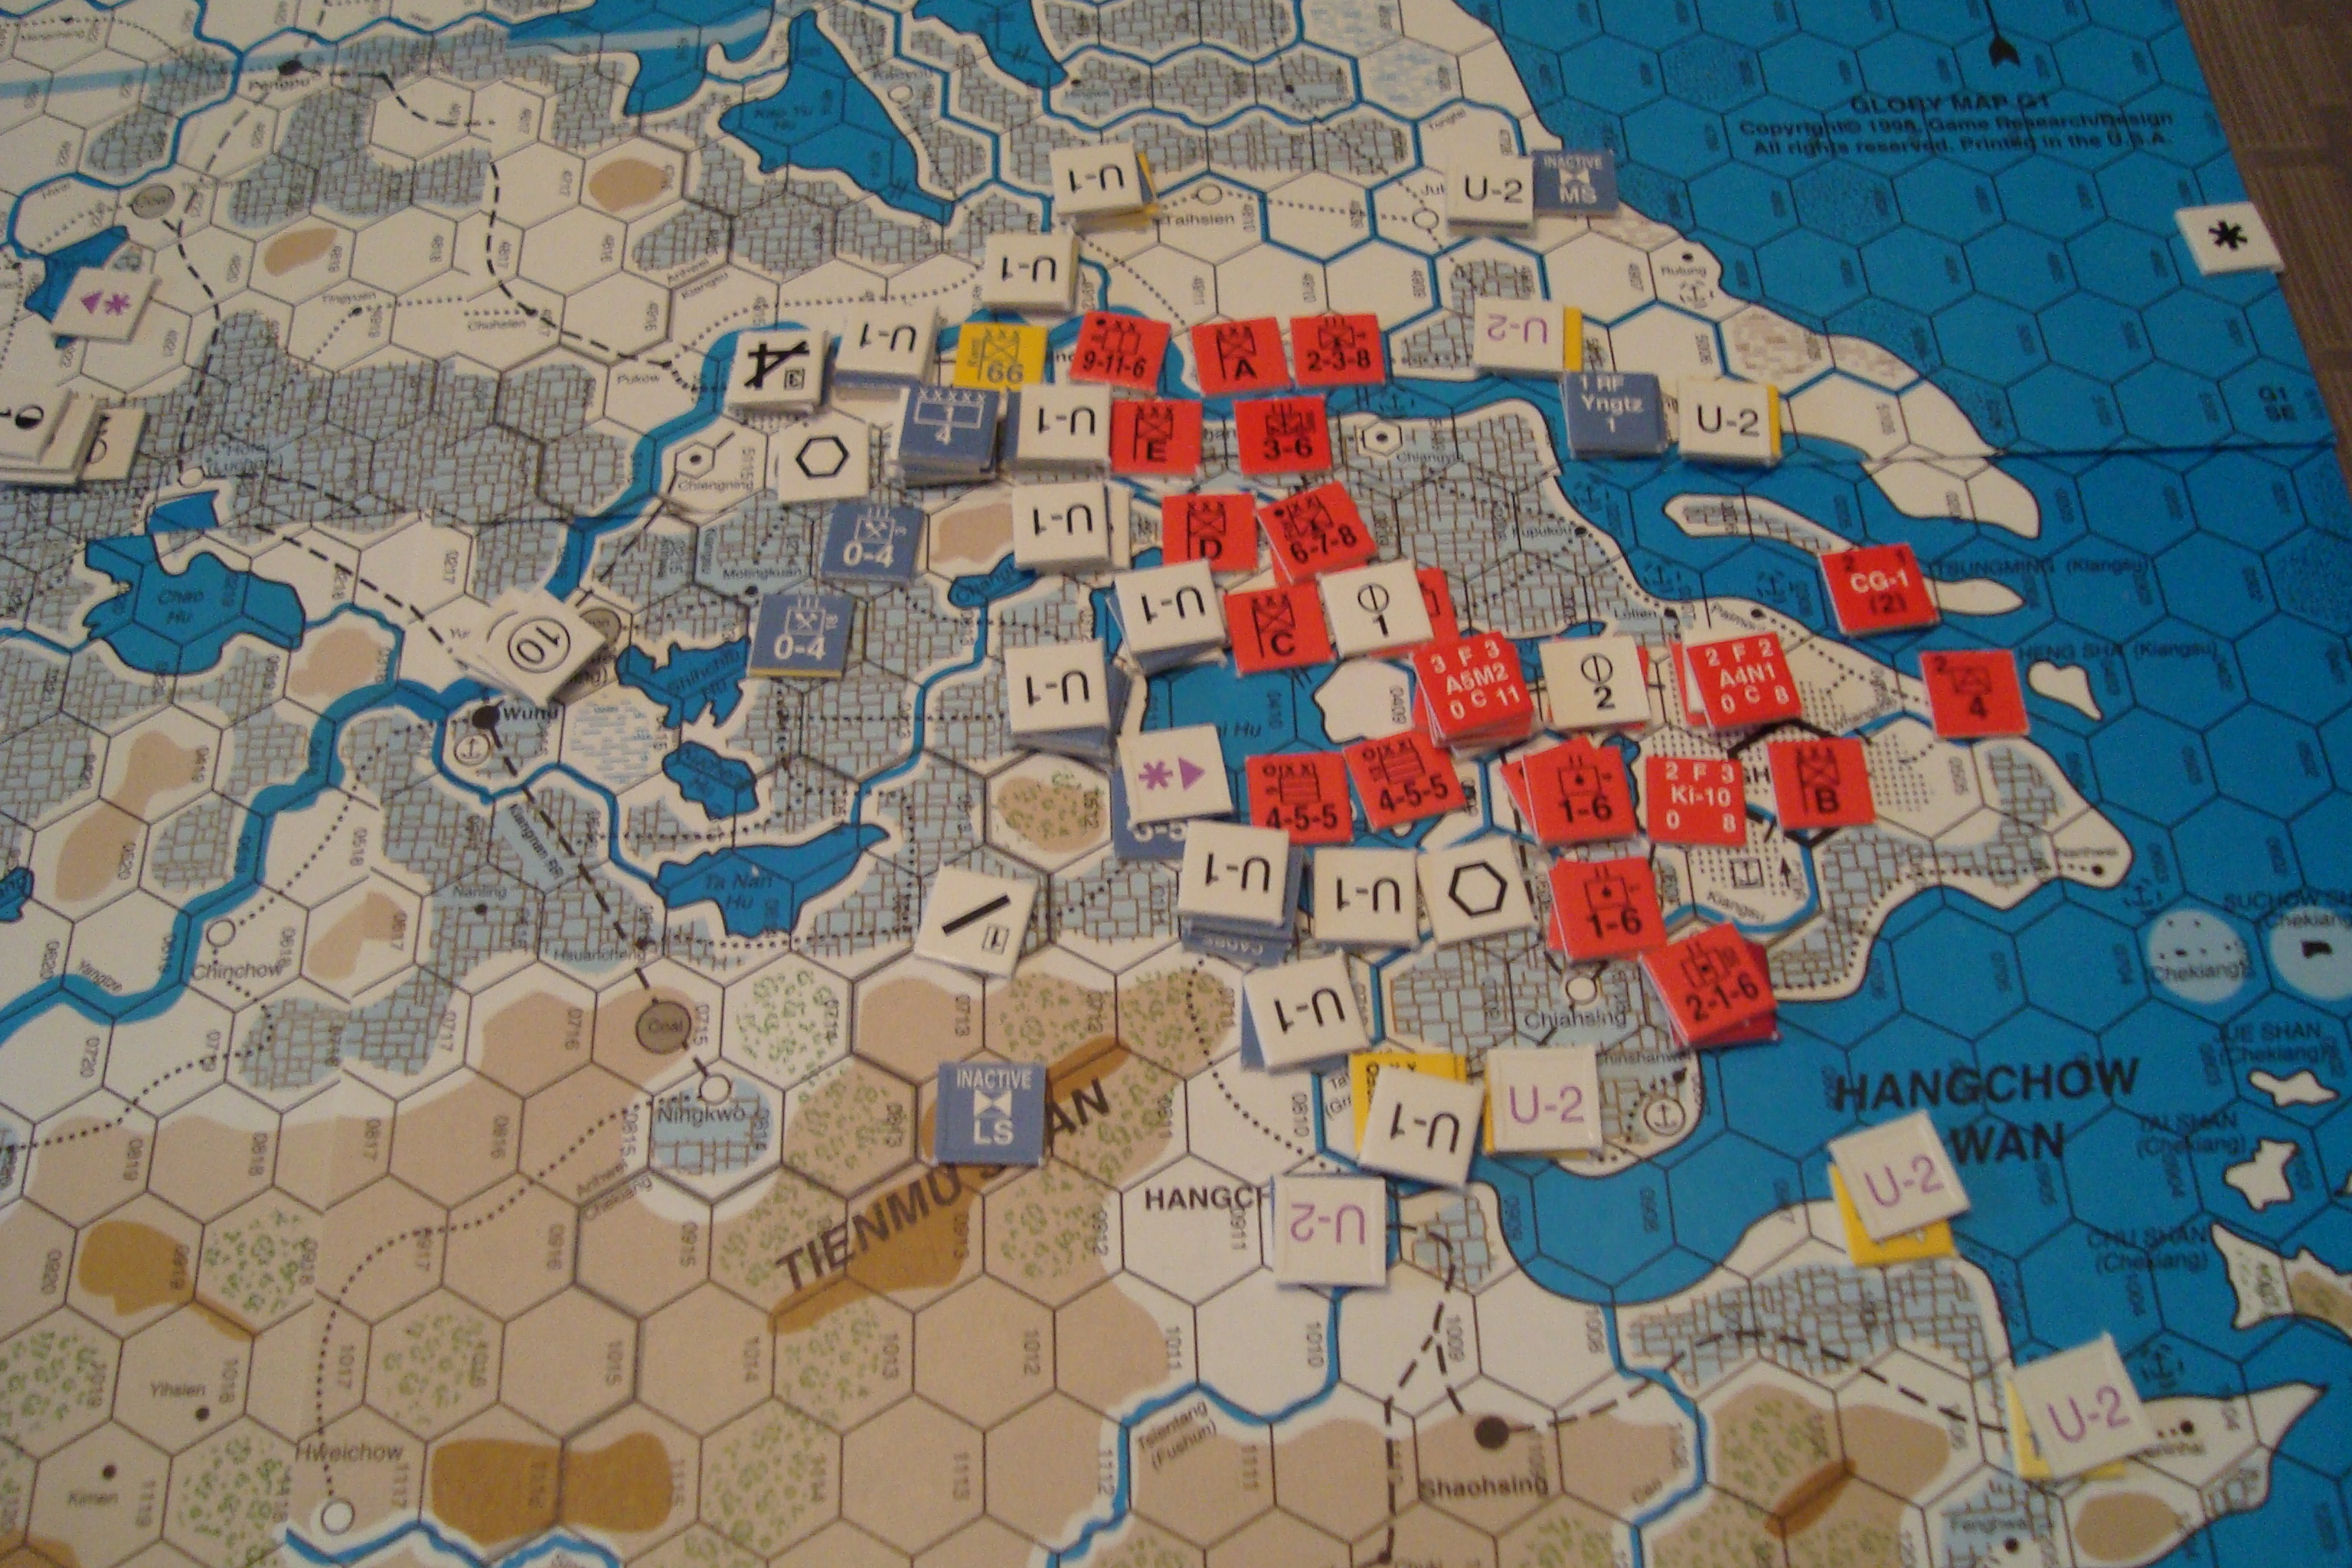
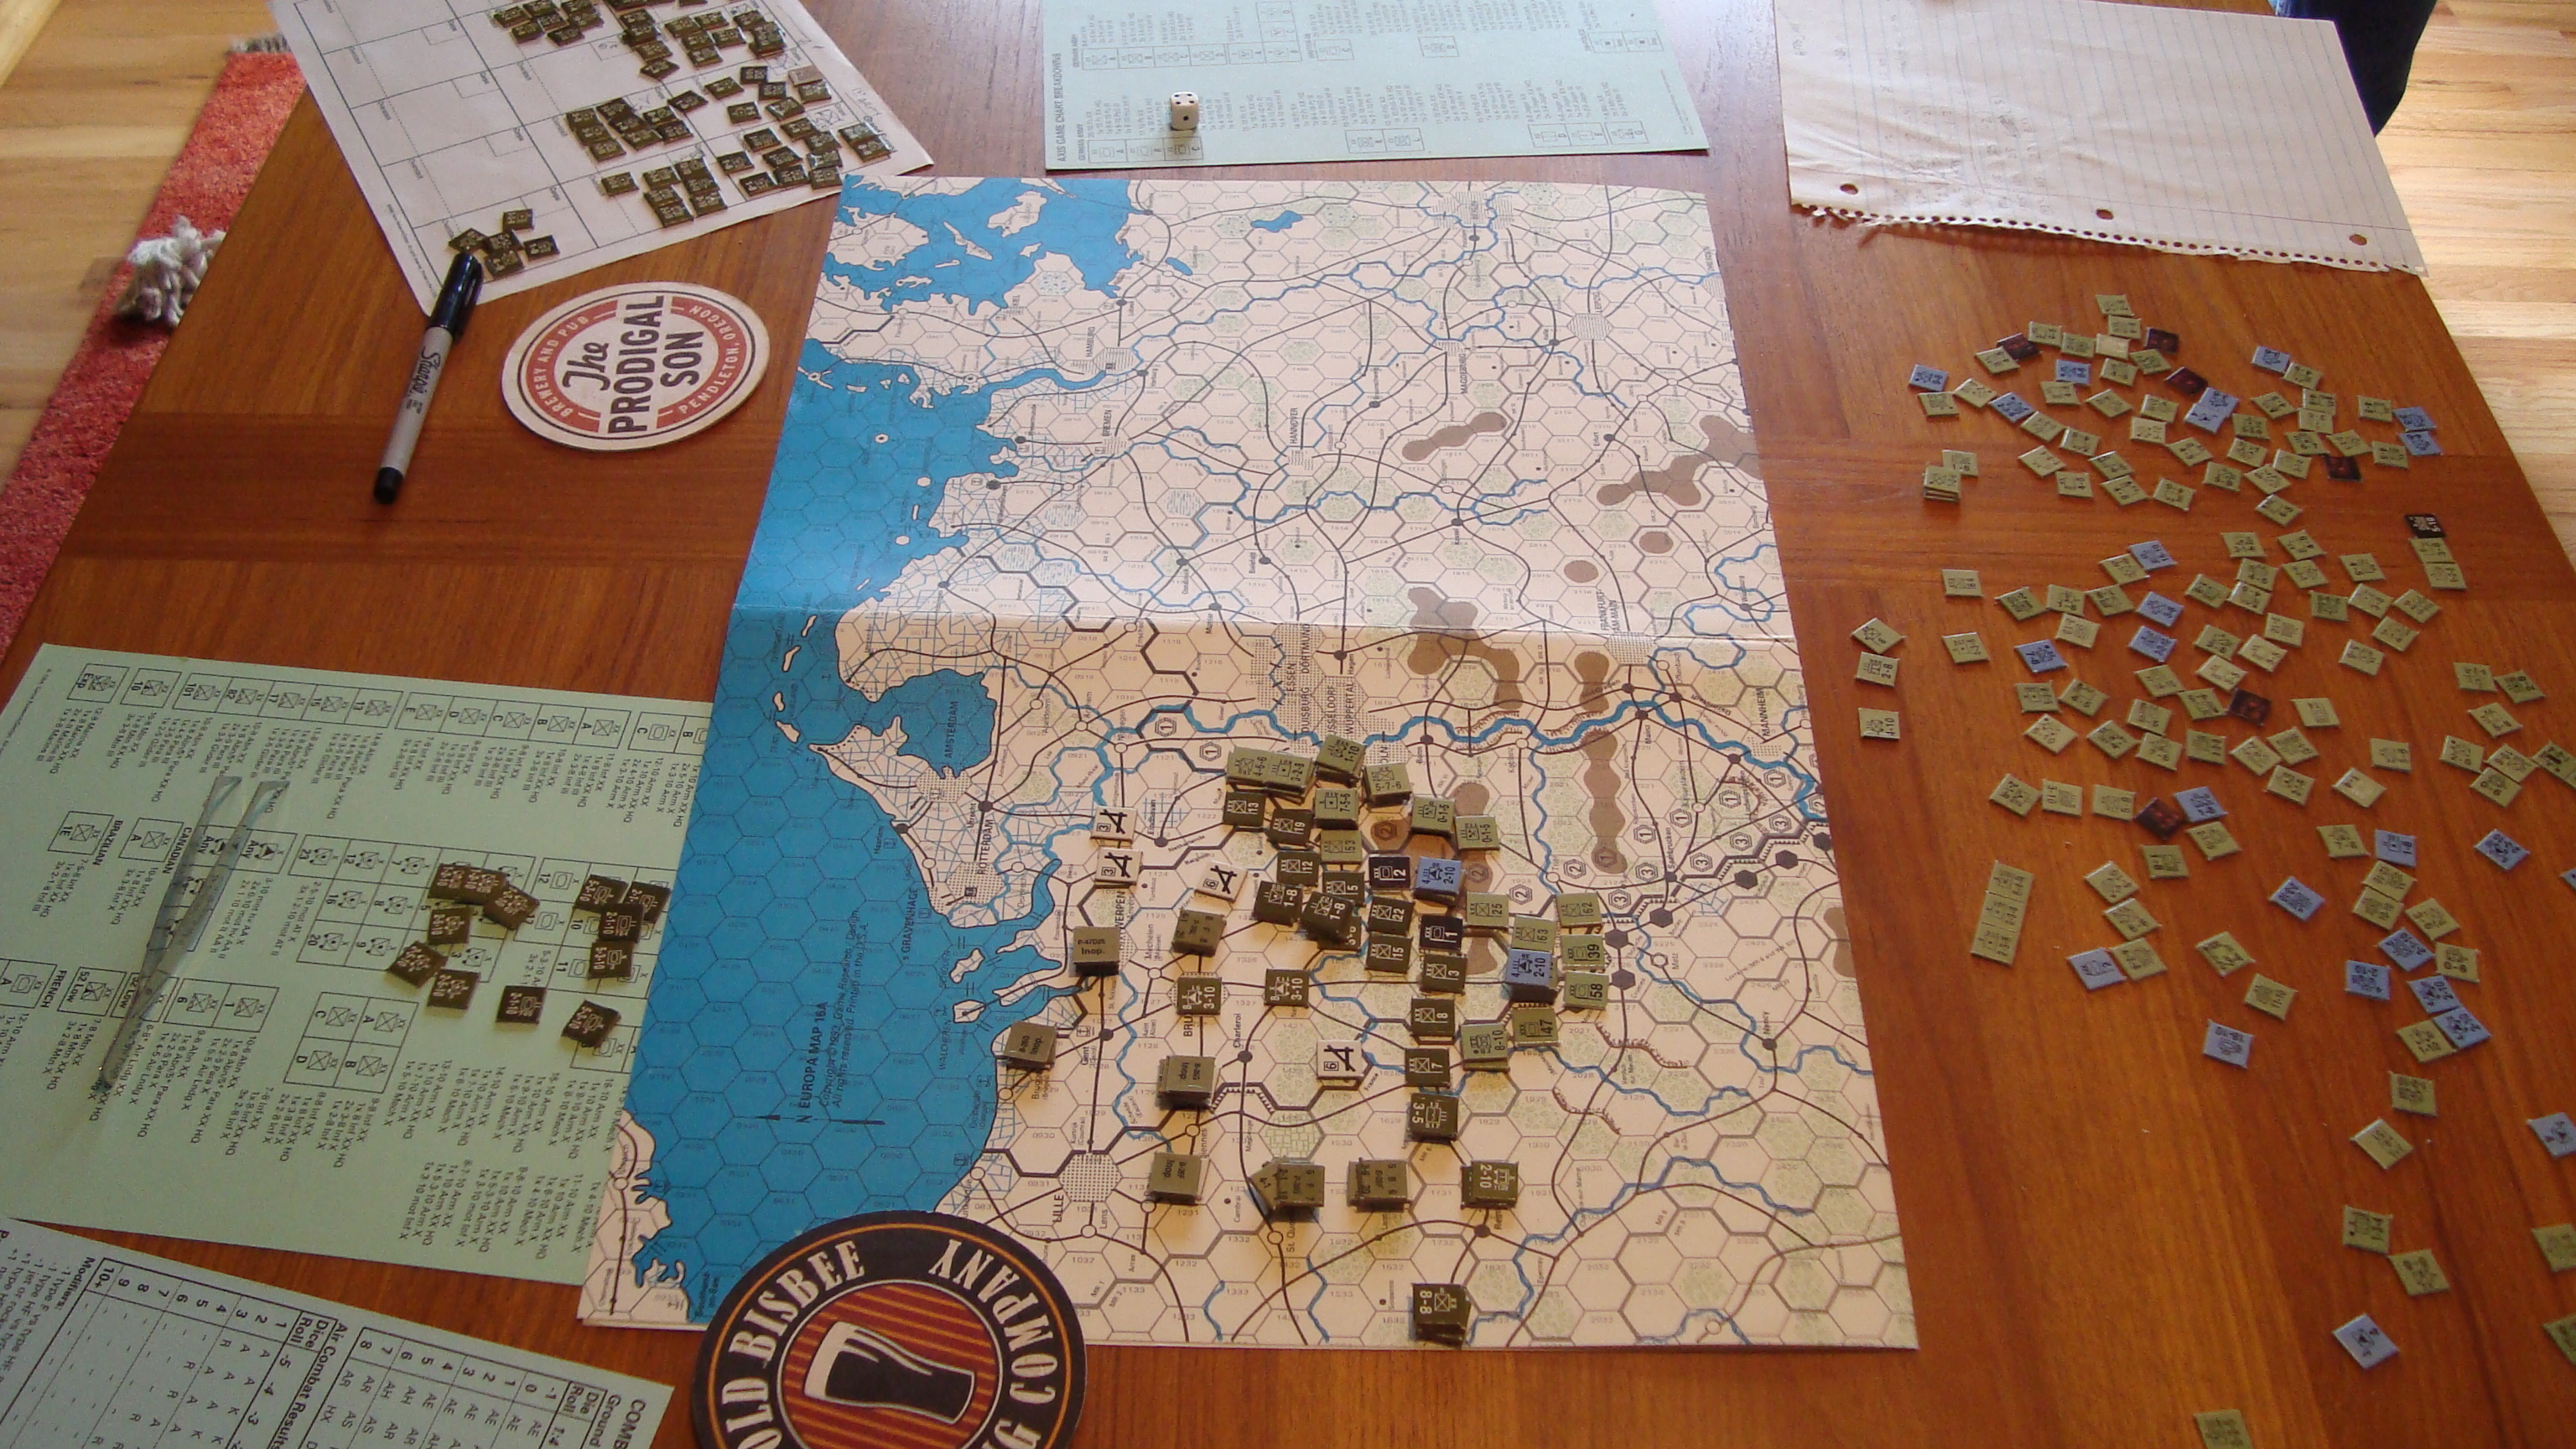
Had another War of Resistance (WOR) session with Tim over the weekend. Once again, it was the Fate of Nanking scenario, with Tim as the Japanese commander, and the Chinese committed to a forward defense of Shangai. This scenario starts with an abbreviated August I (1937) turn, and ends with the Jan II (1938) turn. By eschewing strong drink, and limiting our football viewing, we were able to play through the Dec II turn.

I had studied the logistics rules since our last session, and was much more comfortable allocating resource points and moving them from off map to where they could be used. Chinese engineers were kept busy building forts and repairing rail line hits. The limited rail net moved attack points to the theater headquarters, and strategic river movement was employed to augment the supply effort. As a result, I was able spend less time muddling through  logistics, and more time on operational challenges.

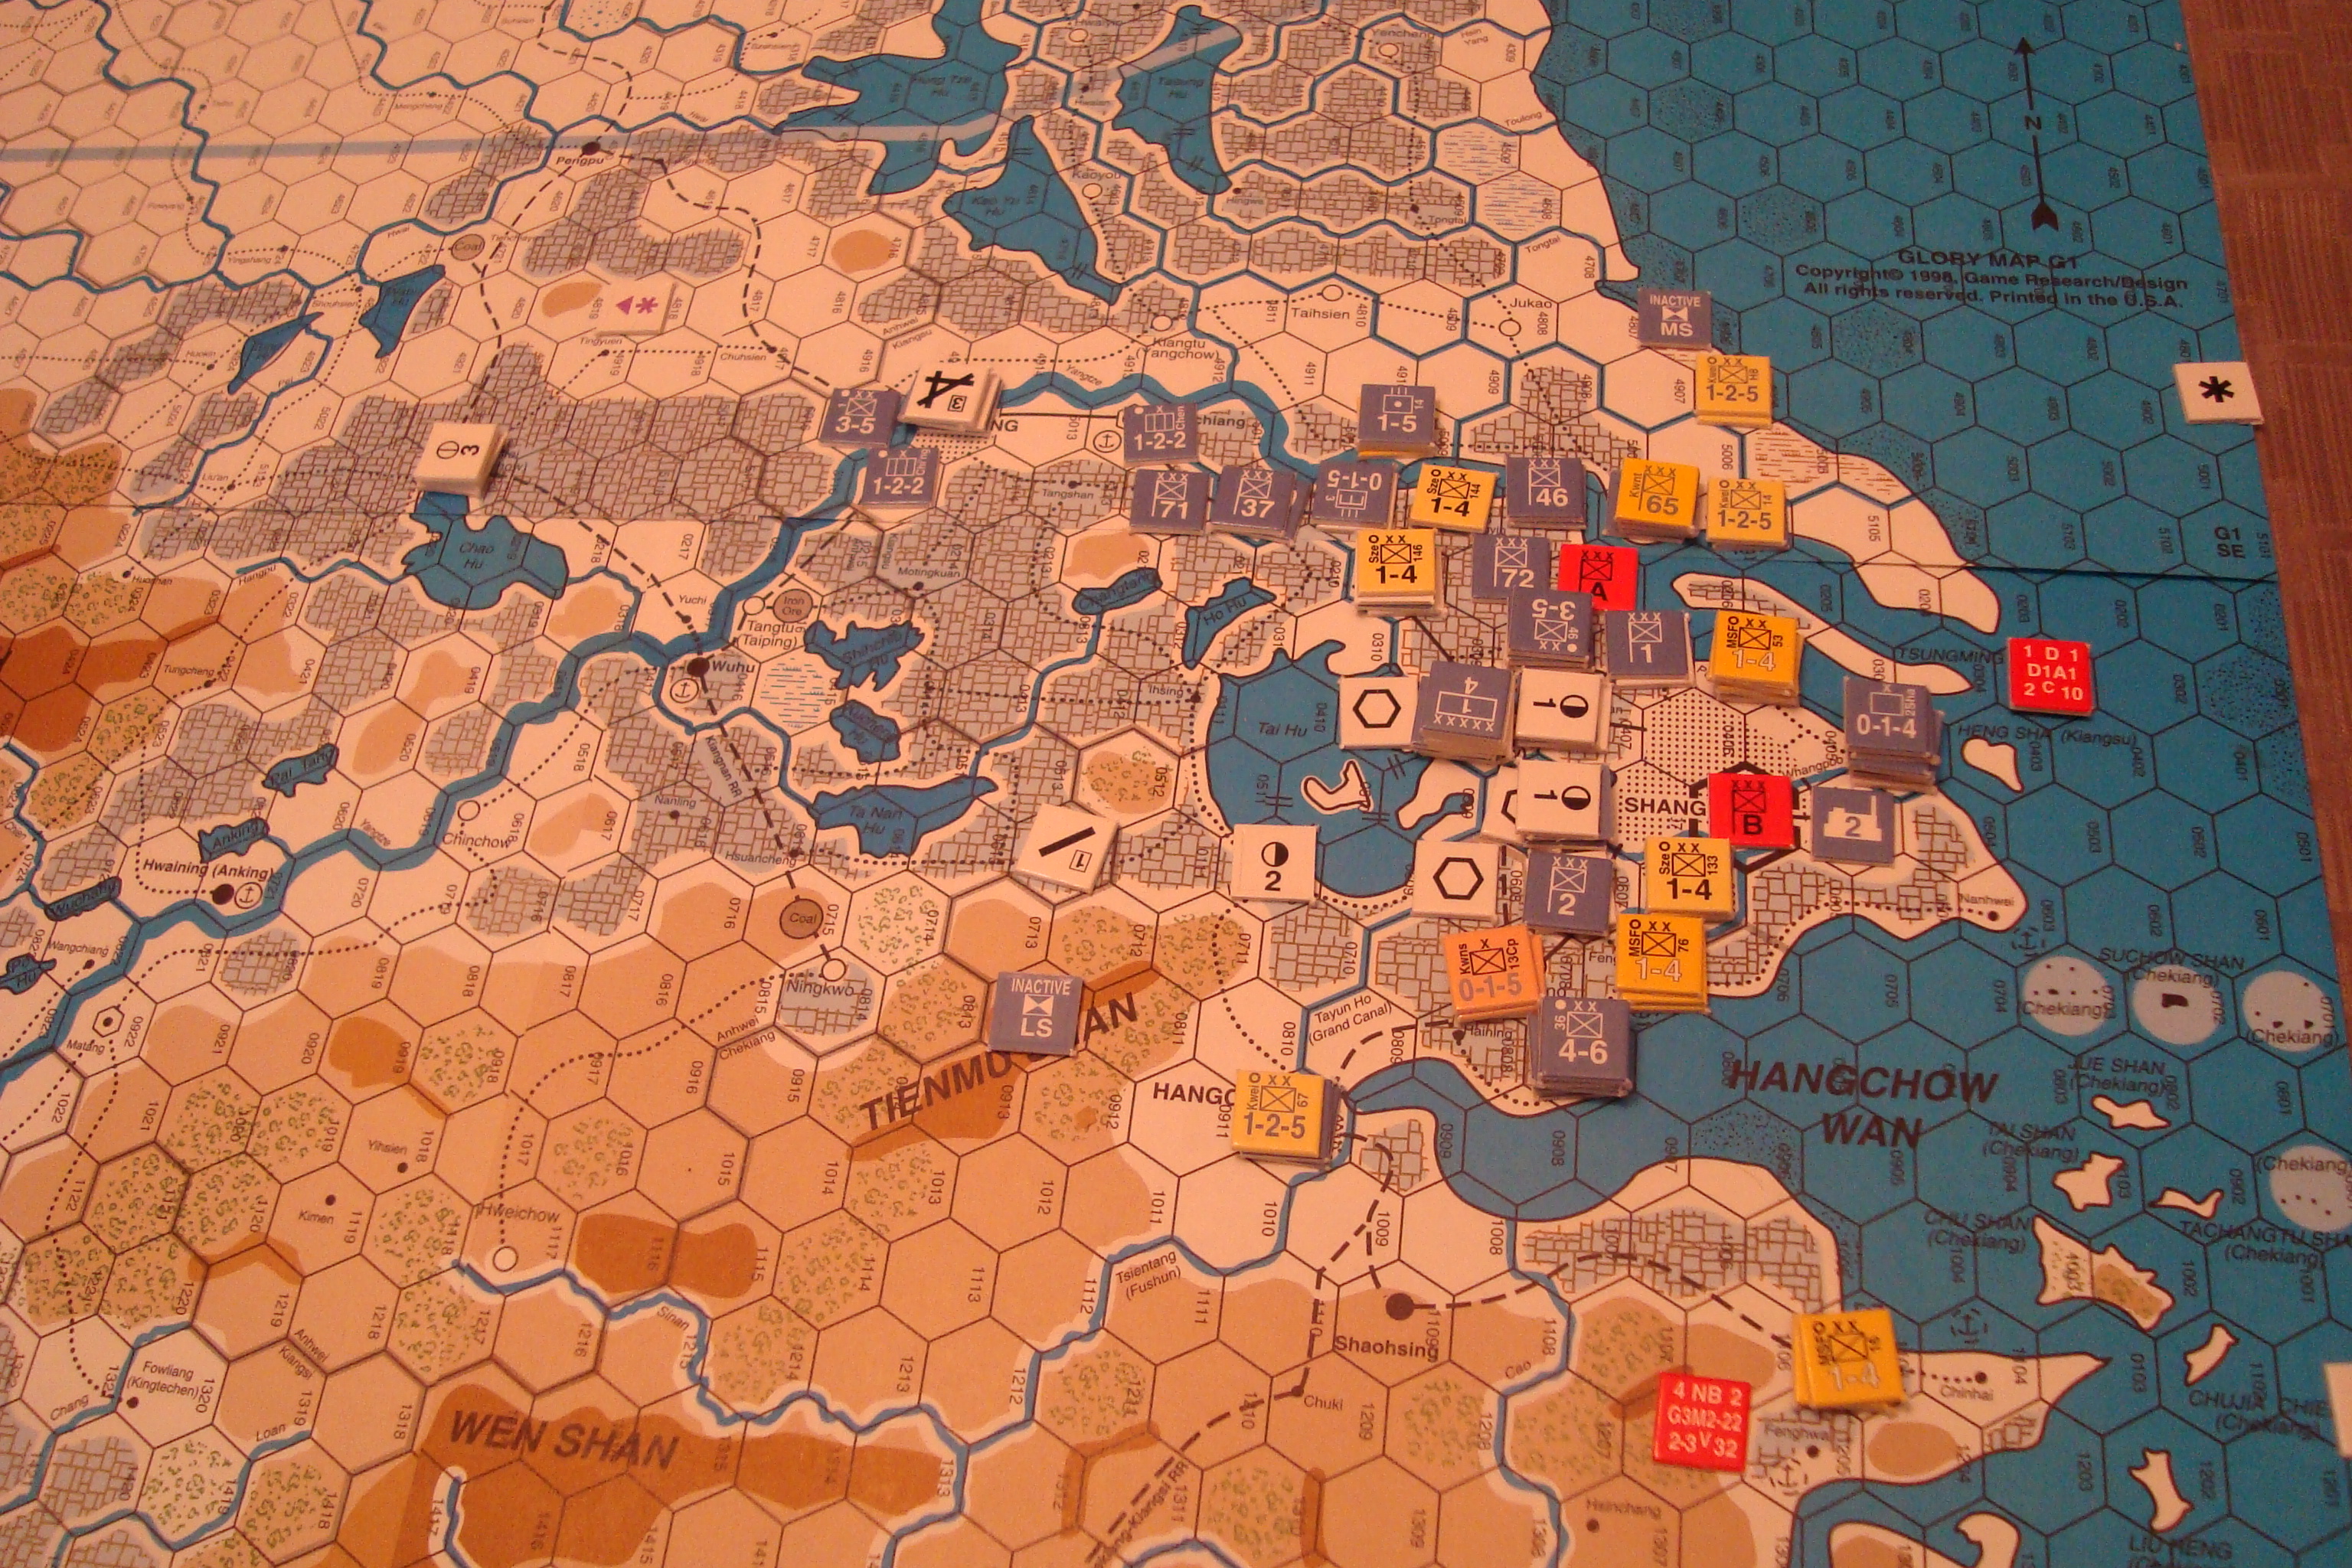
Tim provided plenty of challenges. He quickly exploited a gap in my river defenses, and established an amphibious beachhead threatening my left flank. As a result, I had to pull back forces dug-in in Shangai, abandon my factories (which can create resource points) and establish a main line of resistance (MLR) in the suburbs. This was an important early move, since the Chinese player’s mission is to delay and defend, and Tim’s landing probably cost me at least one turn.

Tim’s operational problems are to utilize naval transport to move troops from Japan to China, while juggling the problems of limited port capacity and possible damage to his landing craft used for ship to shore movement. Taking advantage of the clear weather, smooth seas, and experience gained in our last session, he rapidly built up his combat power and began a series of attacks supported by strong naval gunfire and aviation assets.

The Chinese Airforce attempted to thwart this naval movement and also shoot down Japanese ground support aircraft. Their efforts were futile, and almost every Chinese air unit was eliminated or aborted.

As the methodical Japanese moved west, they encountered successive defensive lines built by engineers augmented with civillian labor. This increased manpower allows the construction of a fort in one turn. With narrow avenues of advance, and four construction capable units, the Chinese forces enjoyed consistent -1 modifiers when attacked. The Chinese defenders were also aided by flooded rice fields, which halved Japanese attack strength. However, by October, the rice growing season had ended, and the impact of intensely cultivated terrain was much reduced.

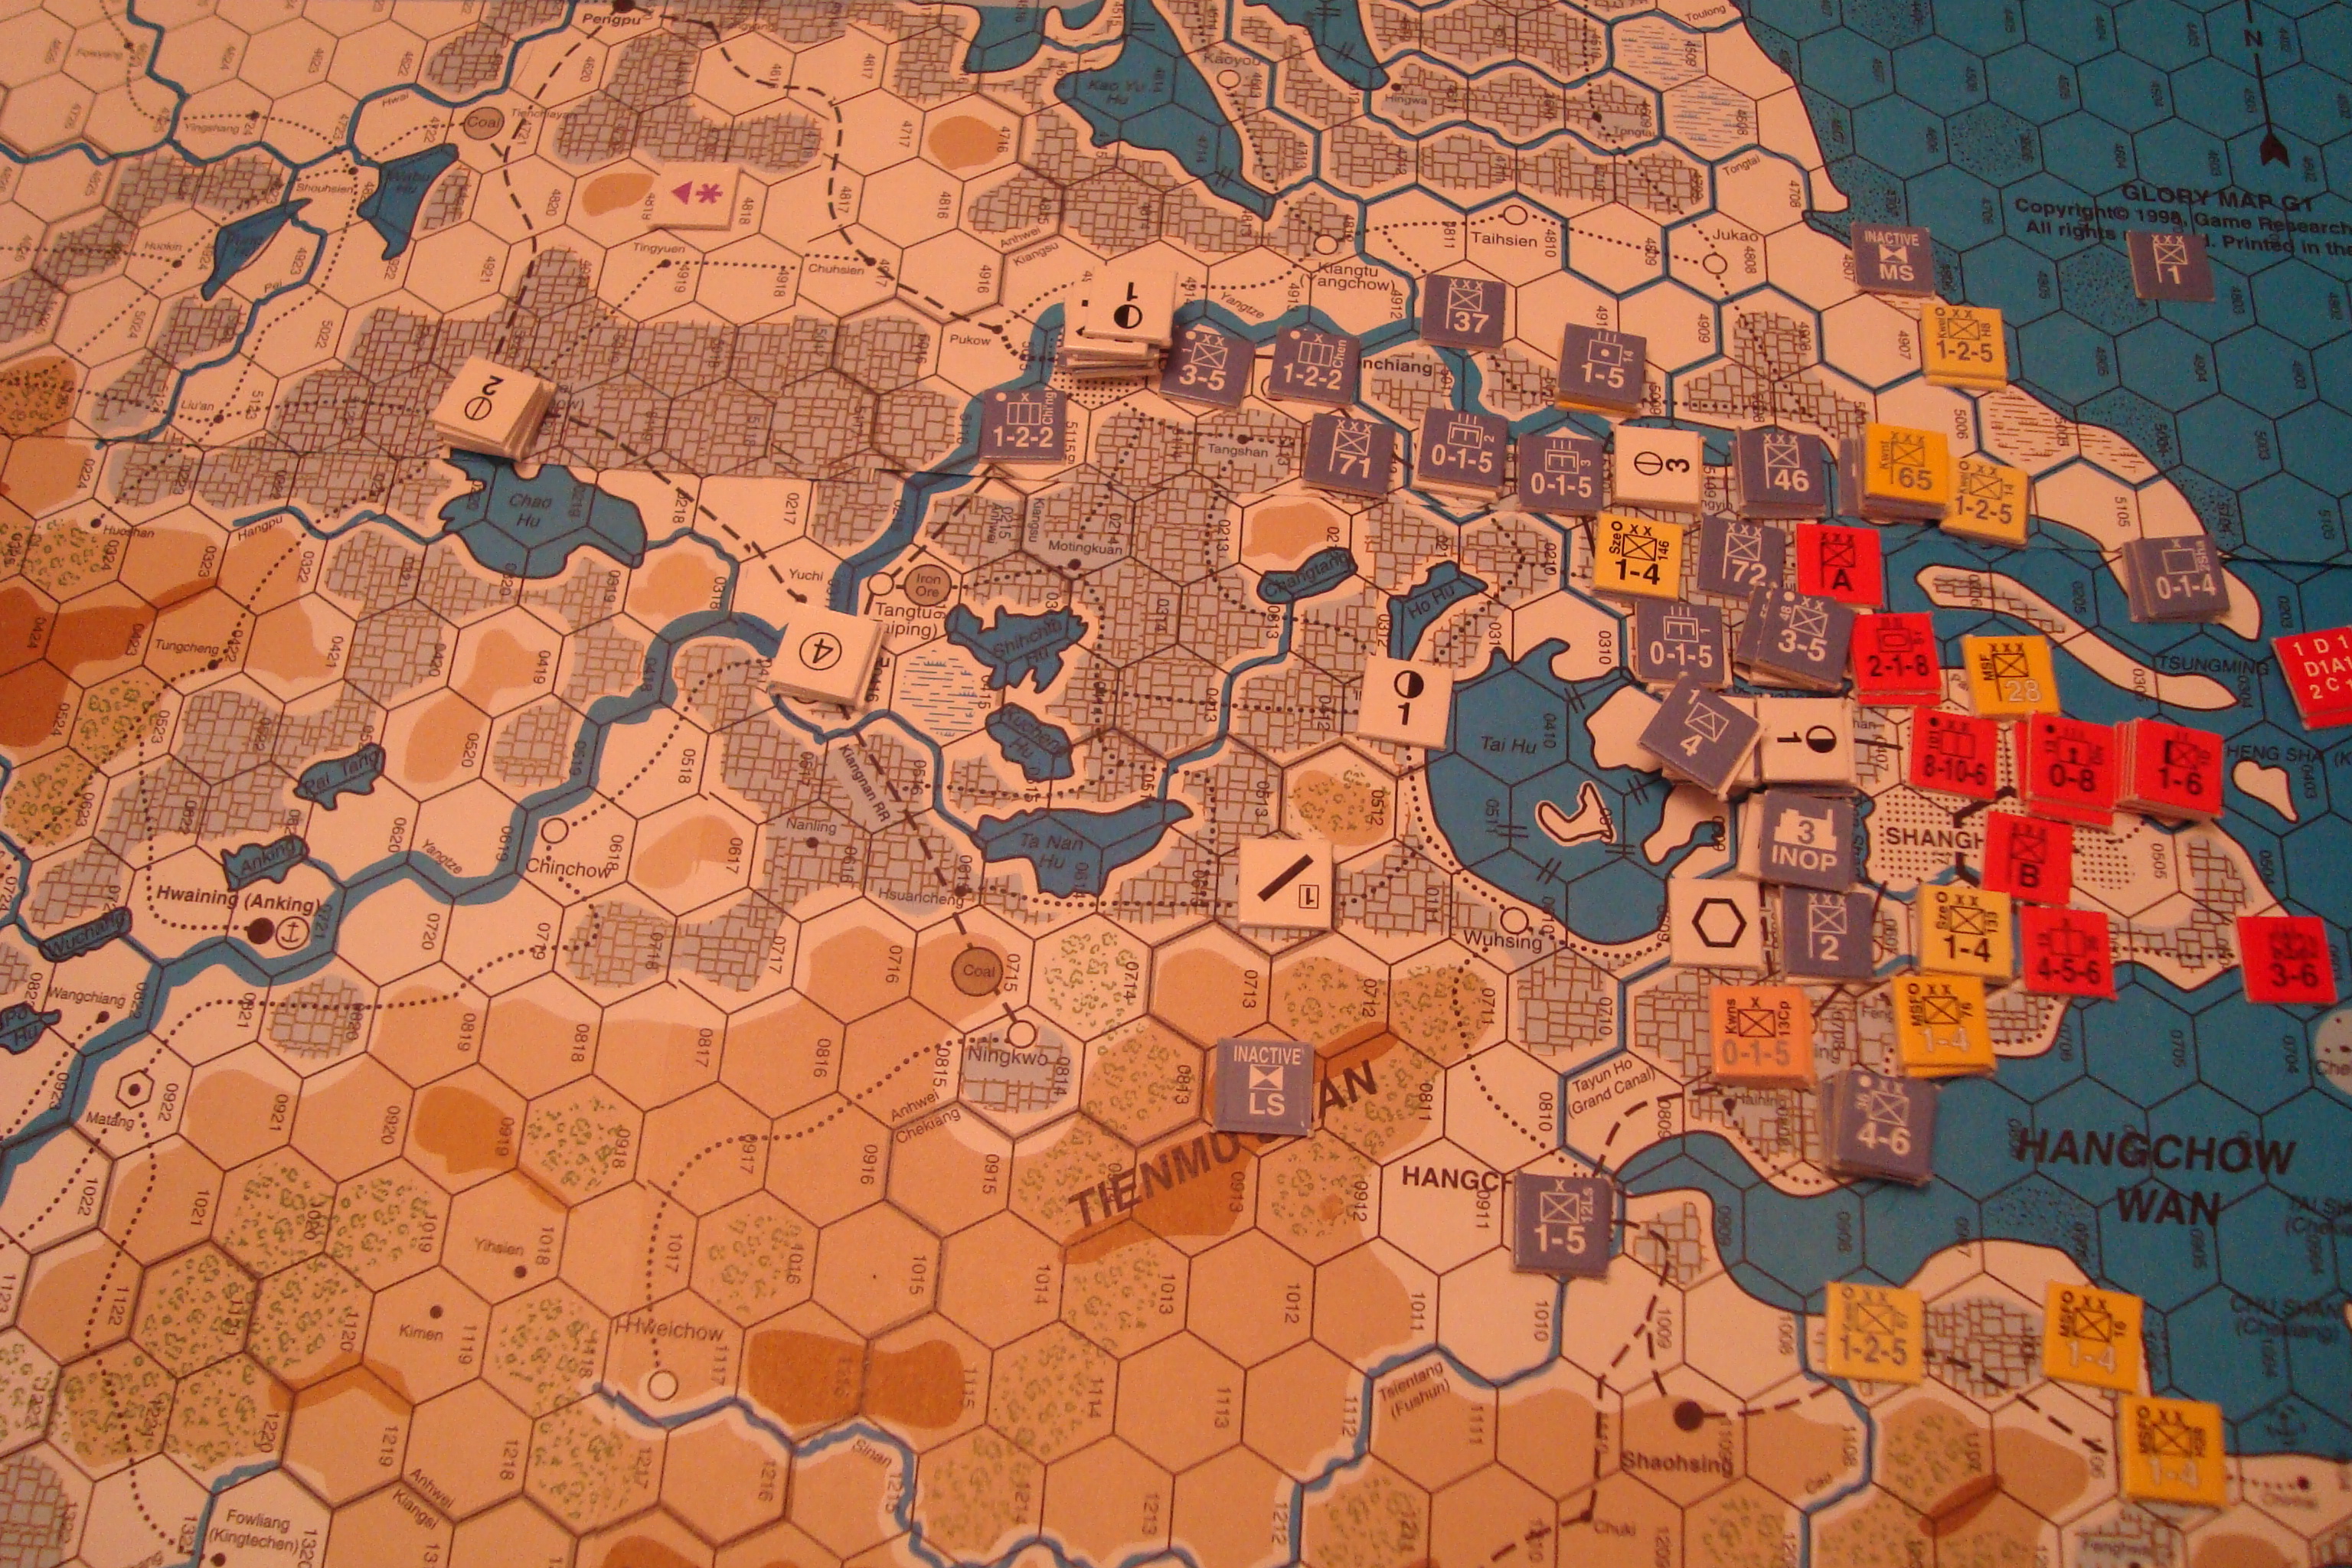
Tim was able to consistently create high odds attacks, taking advantage of the inability of the Chinese to mass combat power in any single hex. This is a function of the low strength Chinese divisions, and lack of regimental or brigade troops to augment the combat power of the divisions within stacking rules. In addition, the Chinese player has only four (4) artillery units, which I used to support stacks of unsupported divisions, which otherwise would defend at half strength, rather than augment the stronger, supported, divisions.

This attritional combat took a heavy toll on the Chinese, who are unable to rebuild lost supported divisions during this scenario. I didn’t help matters by failing to feed the lower strength elminiated units back into the fighting.

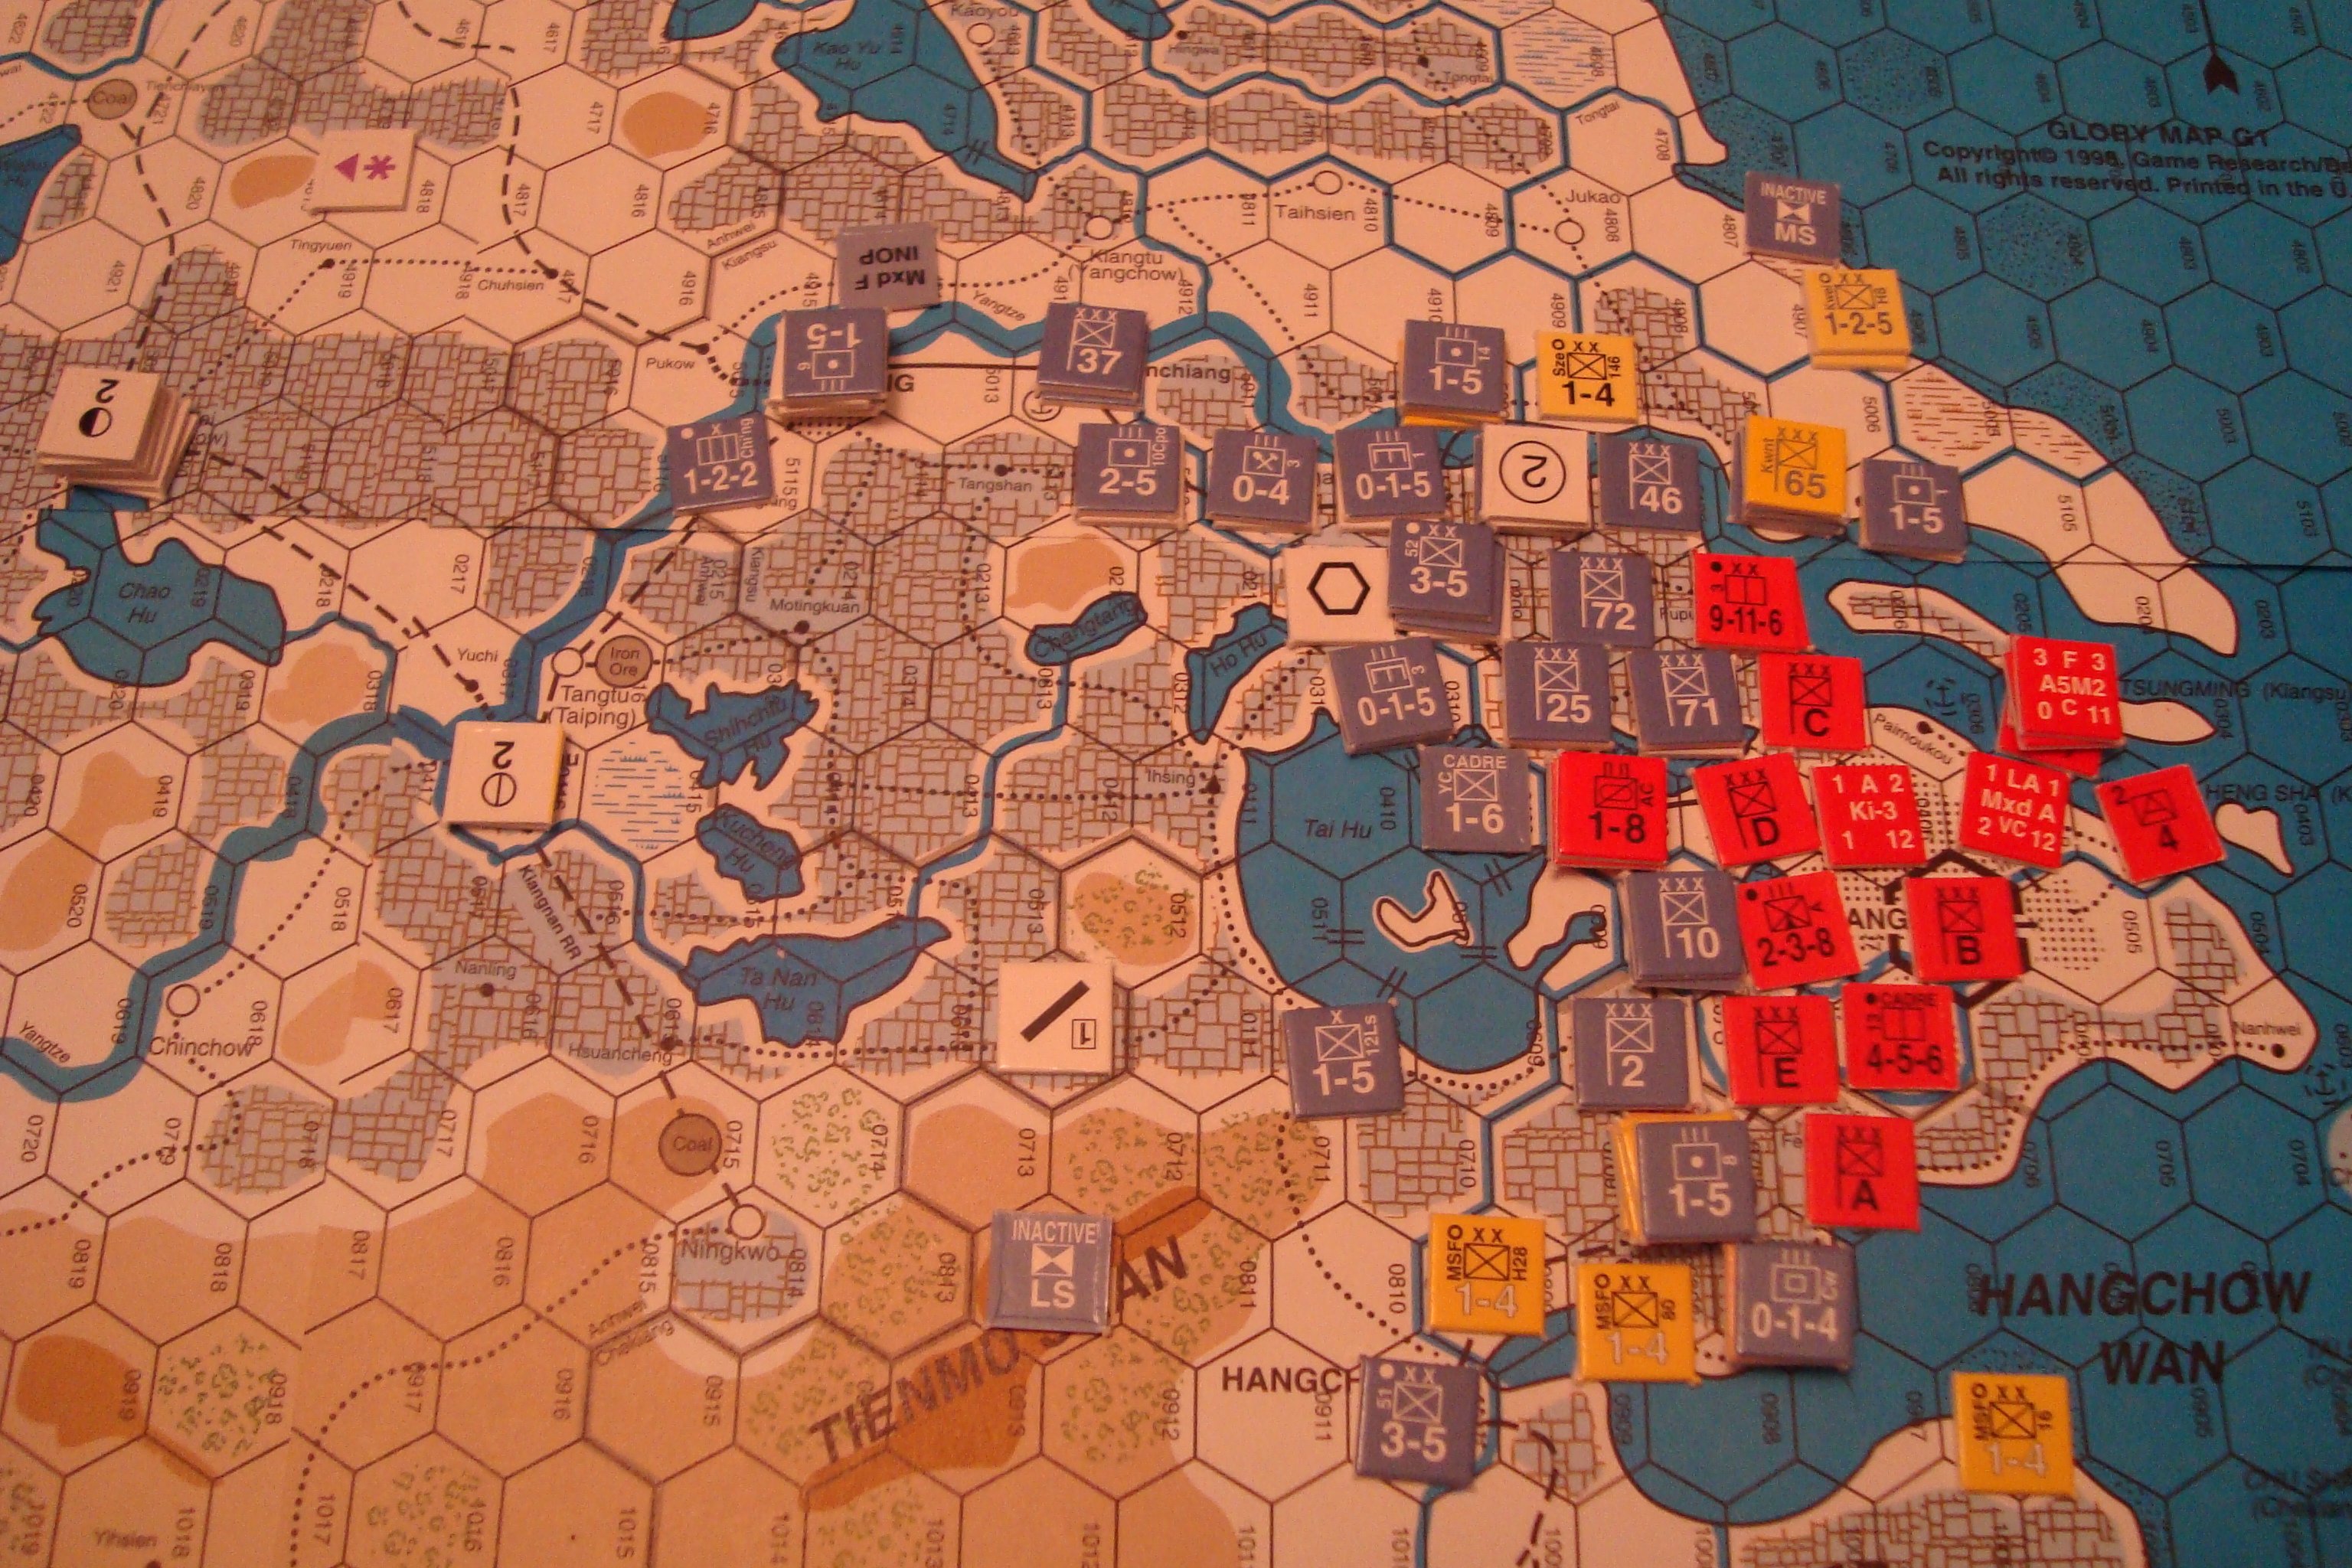
By November, Tim had split my defense, and established a beachhead on the north side of the Yangtze.  He also destroyed my riverine supply capabilities along with their cargo in a devastating aerial attack.  As a result, many of the Chinese units were un-supplied for a turn which, fortunately, did not effect their defensive capabilities.   However, this slowed the Chinese withdrawal north of the Yangtze.  At this point, China’s greatest ally was time.  A patchwork defense in depth  continued to slow the Japanese advance.

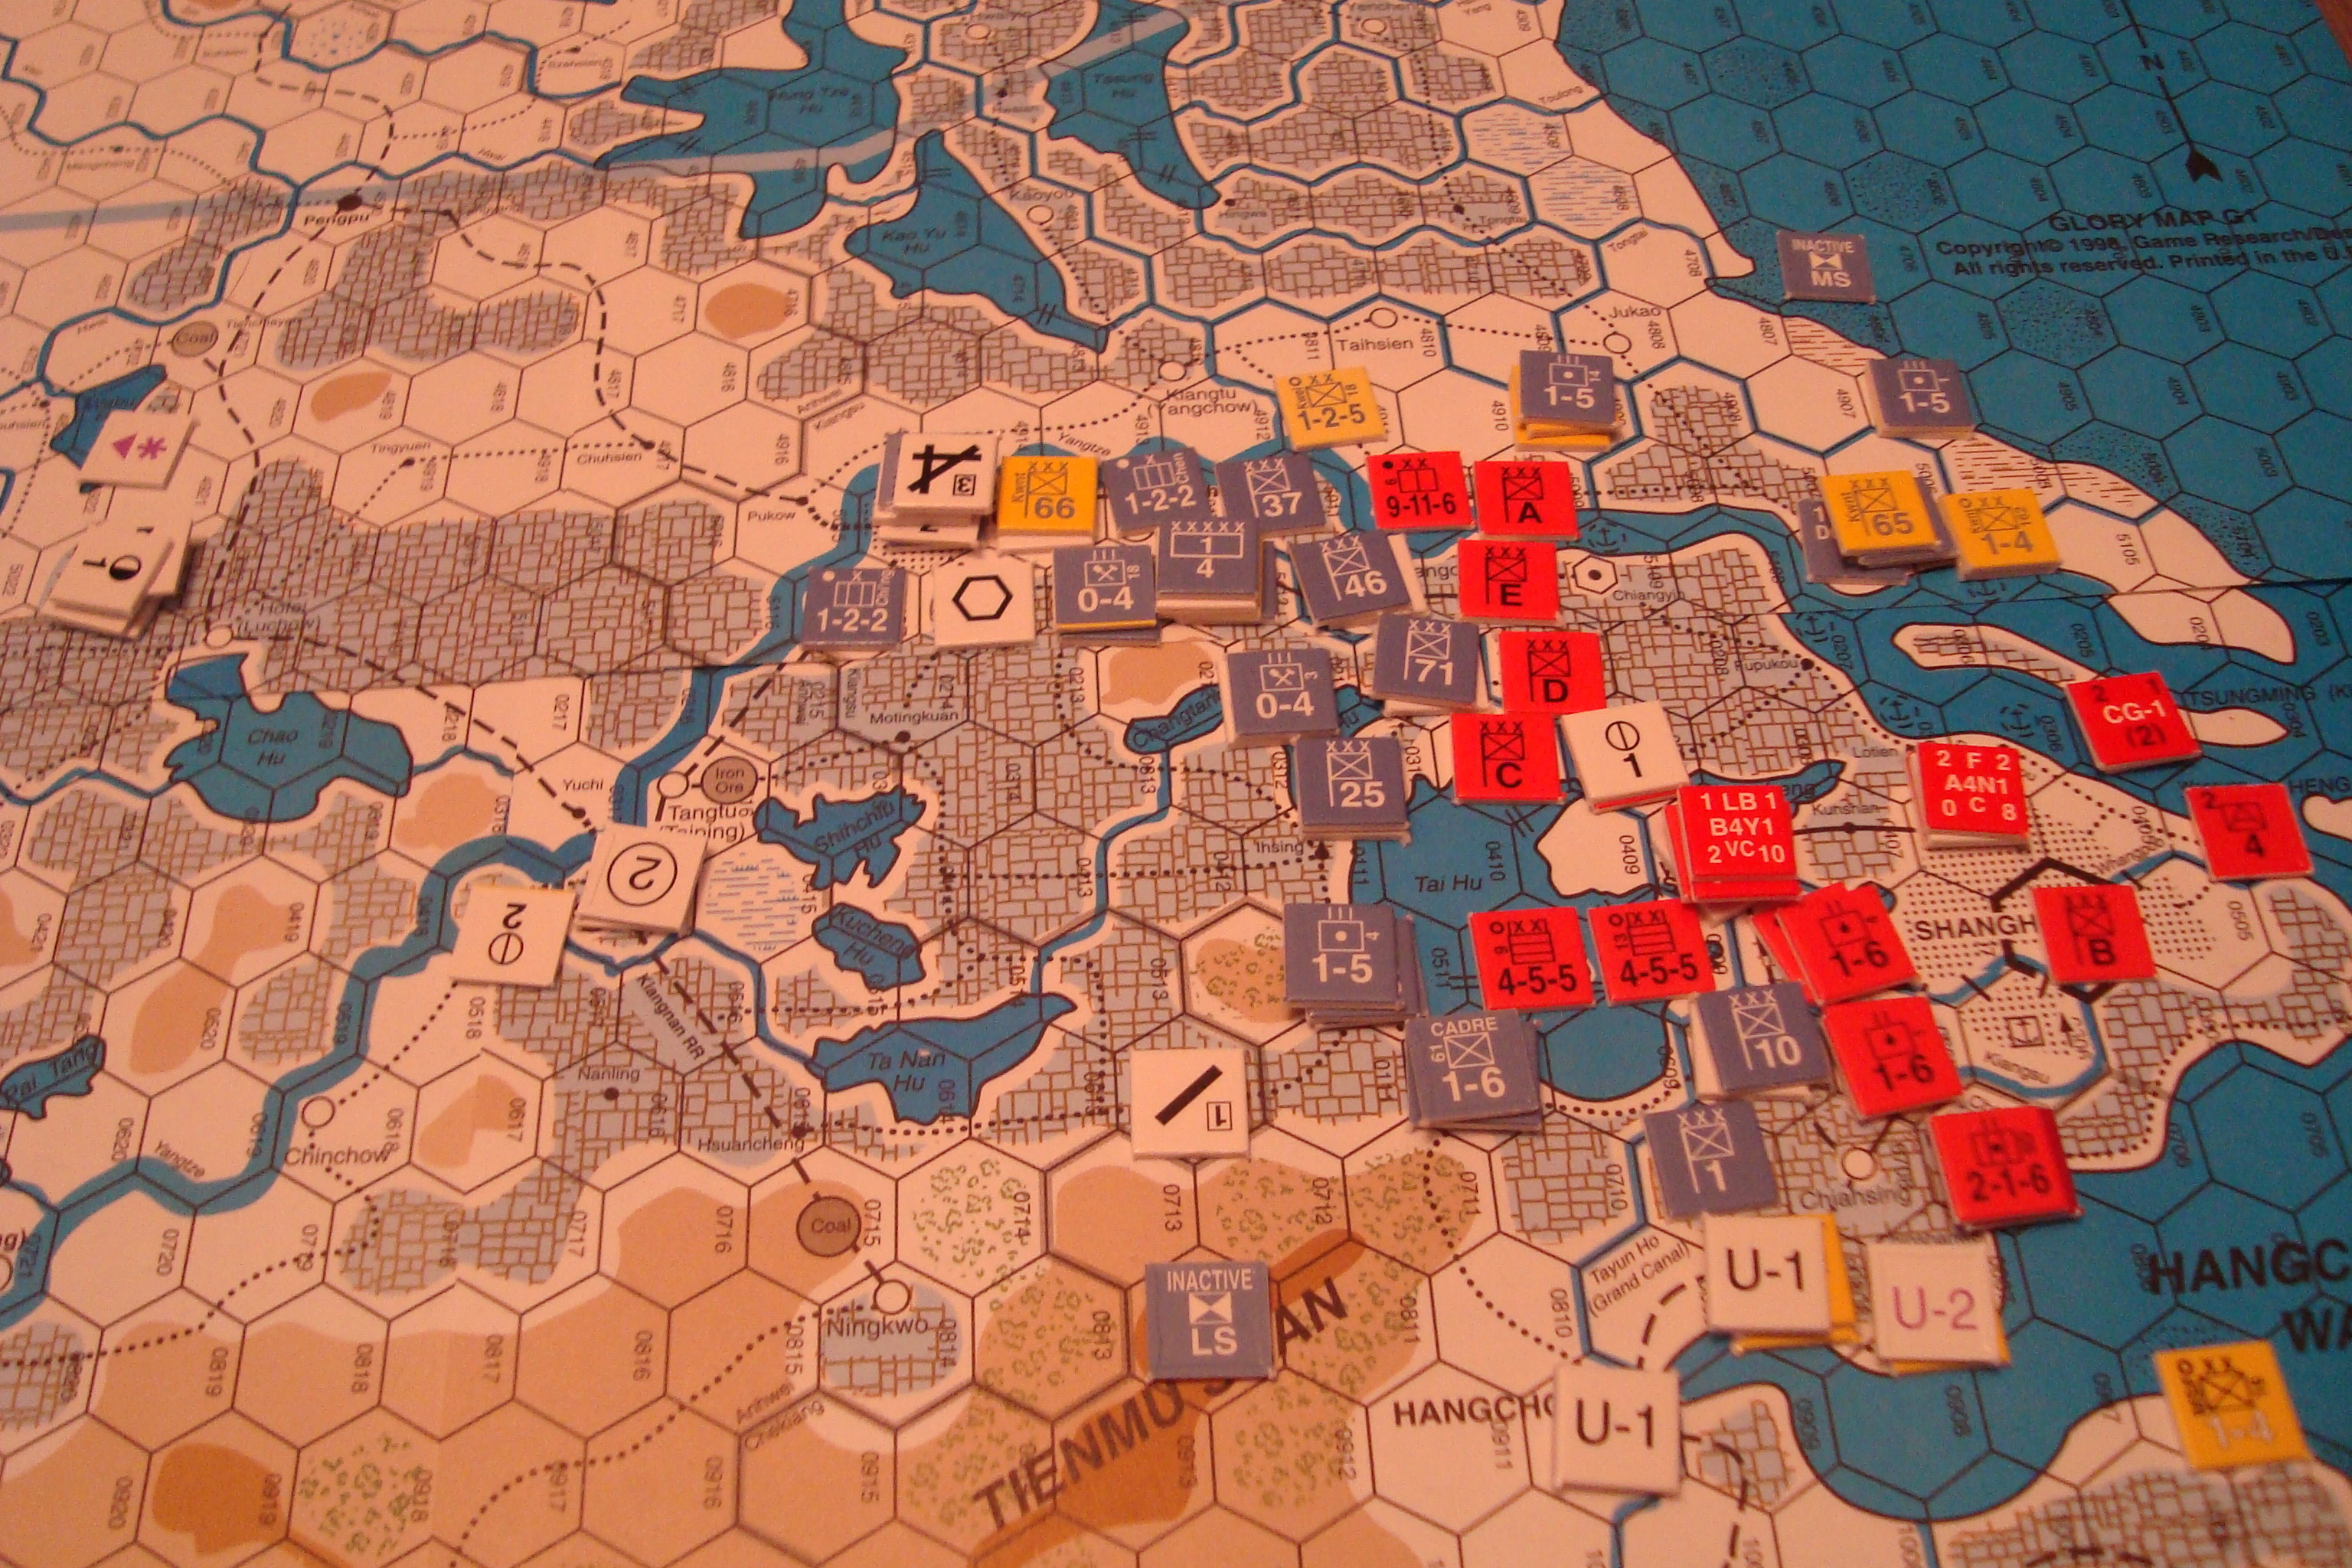
The game came down to a final roll of the dice by Tim to activate his two headquarters during the reaction phase of the Dec II turn. Had he made these rolls (1 or 2, d6), he would have had a chance to break through my last ditch defense of Nanking. Fortunately for the Chinese, this didn’t happen.

We’ll never know what the outcome would have been if the game had been played for one more month to the scenario’s conclusion.  Our consensus is that it would have been a toss-up.

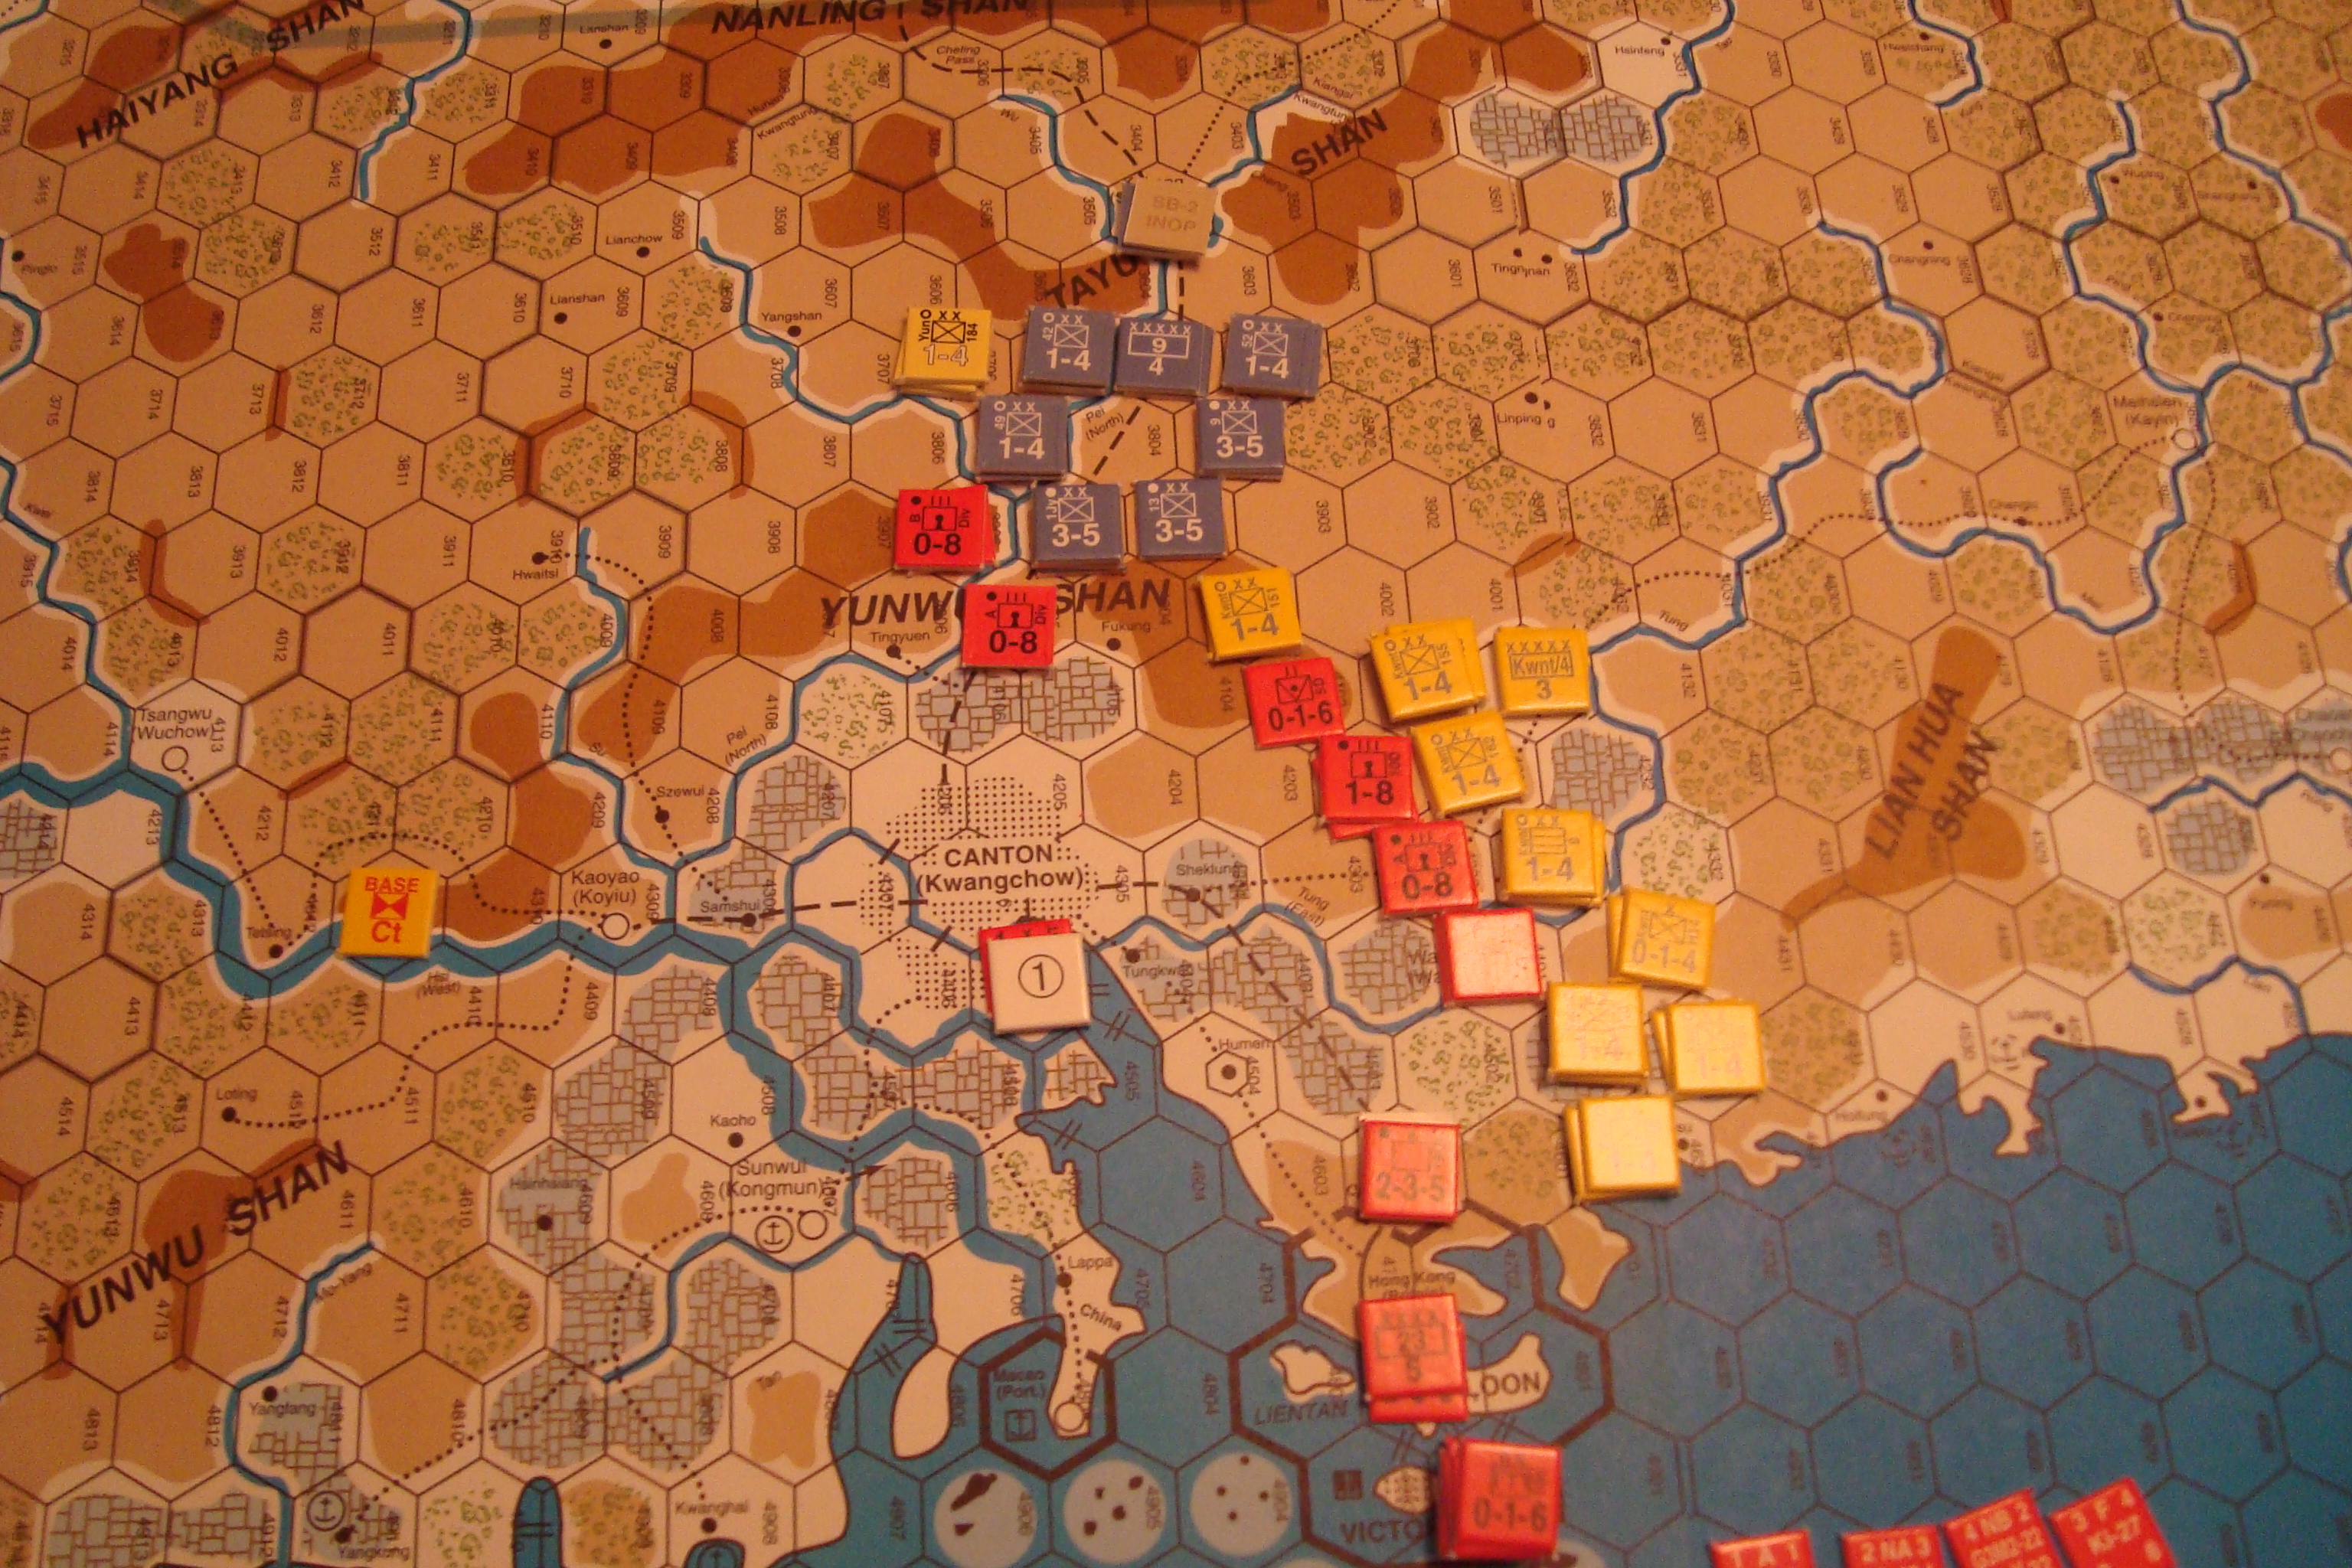
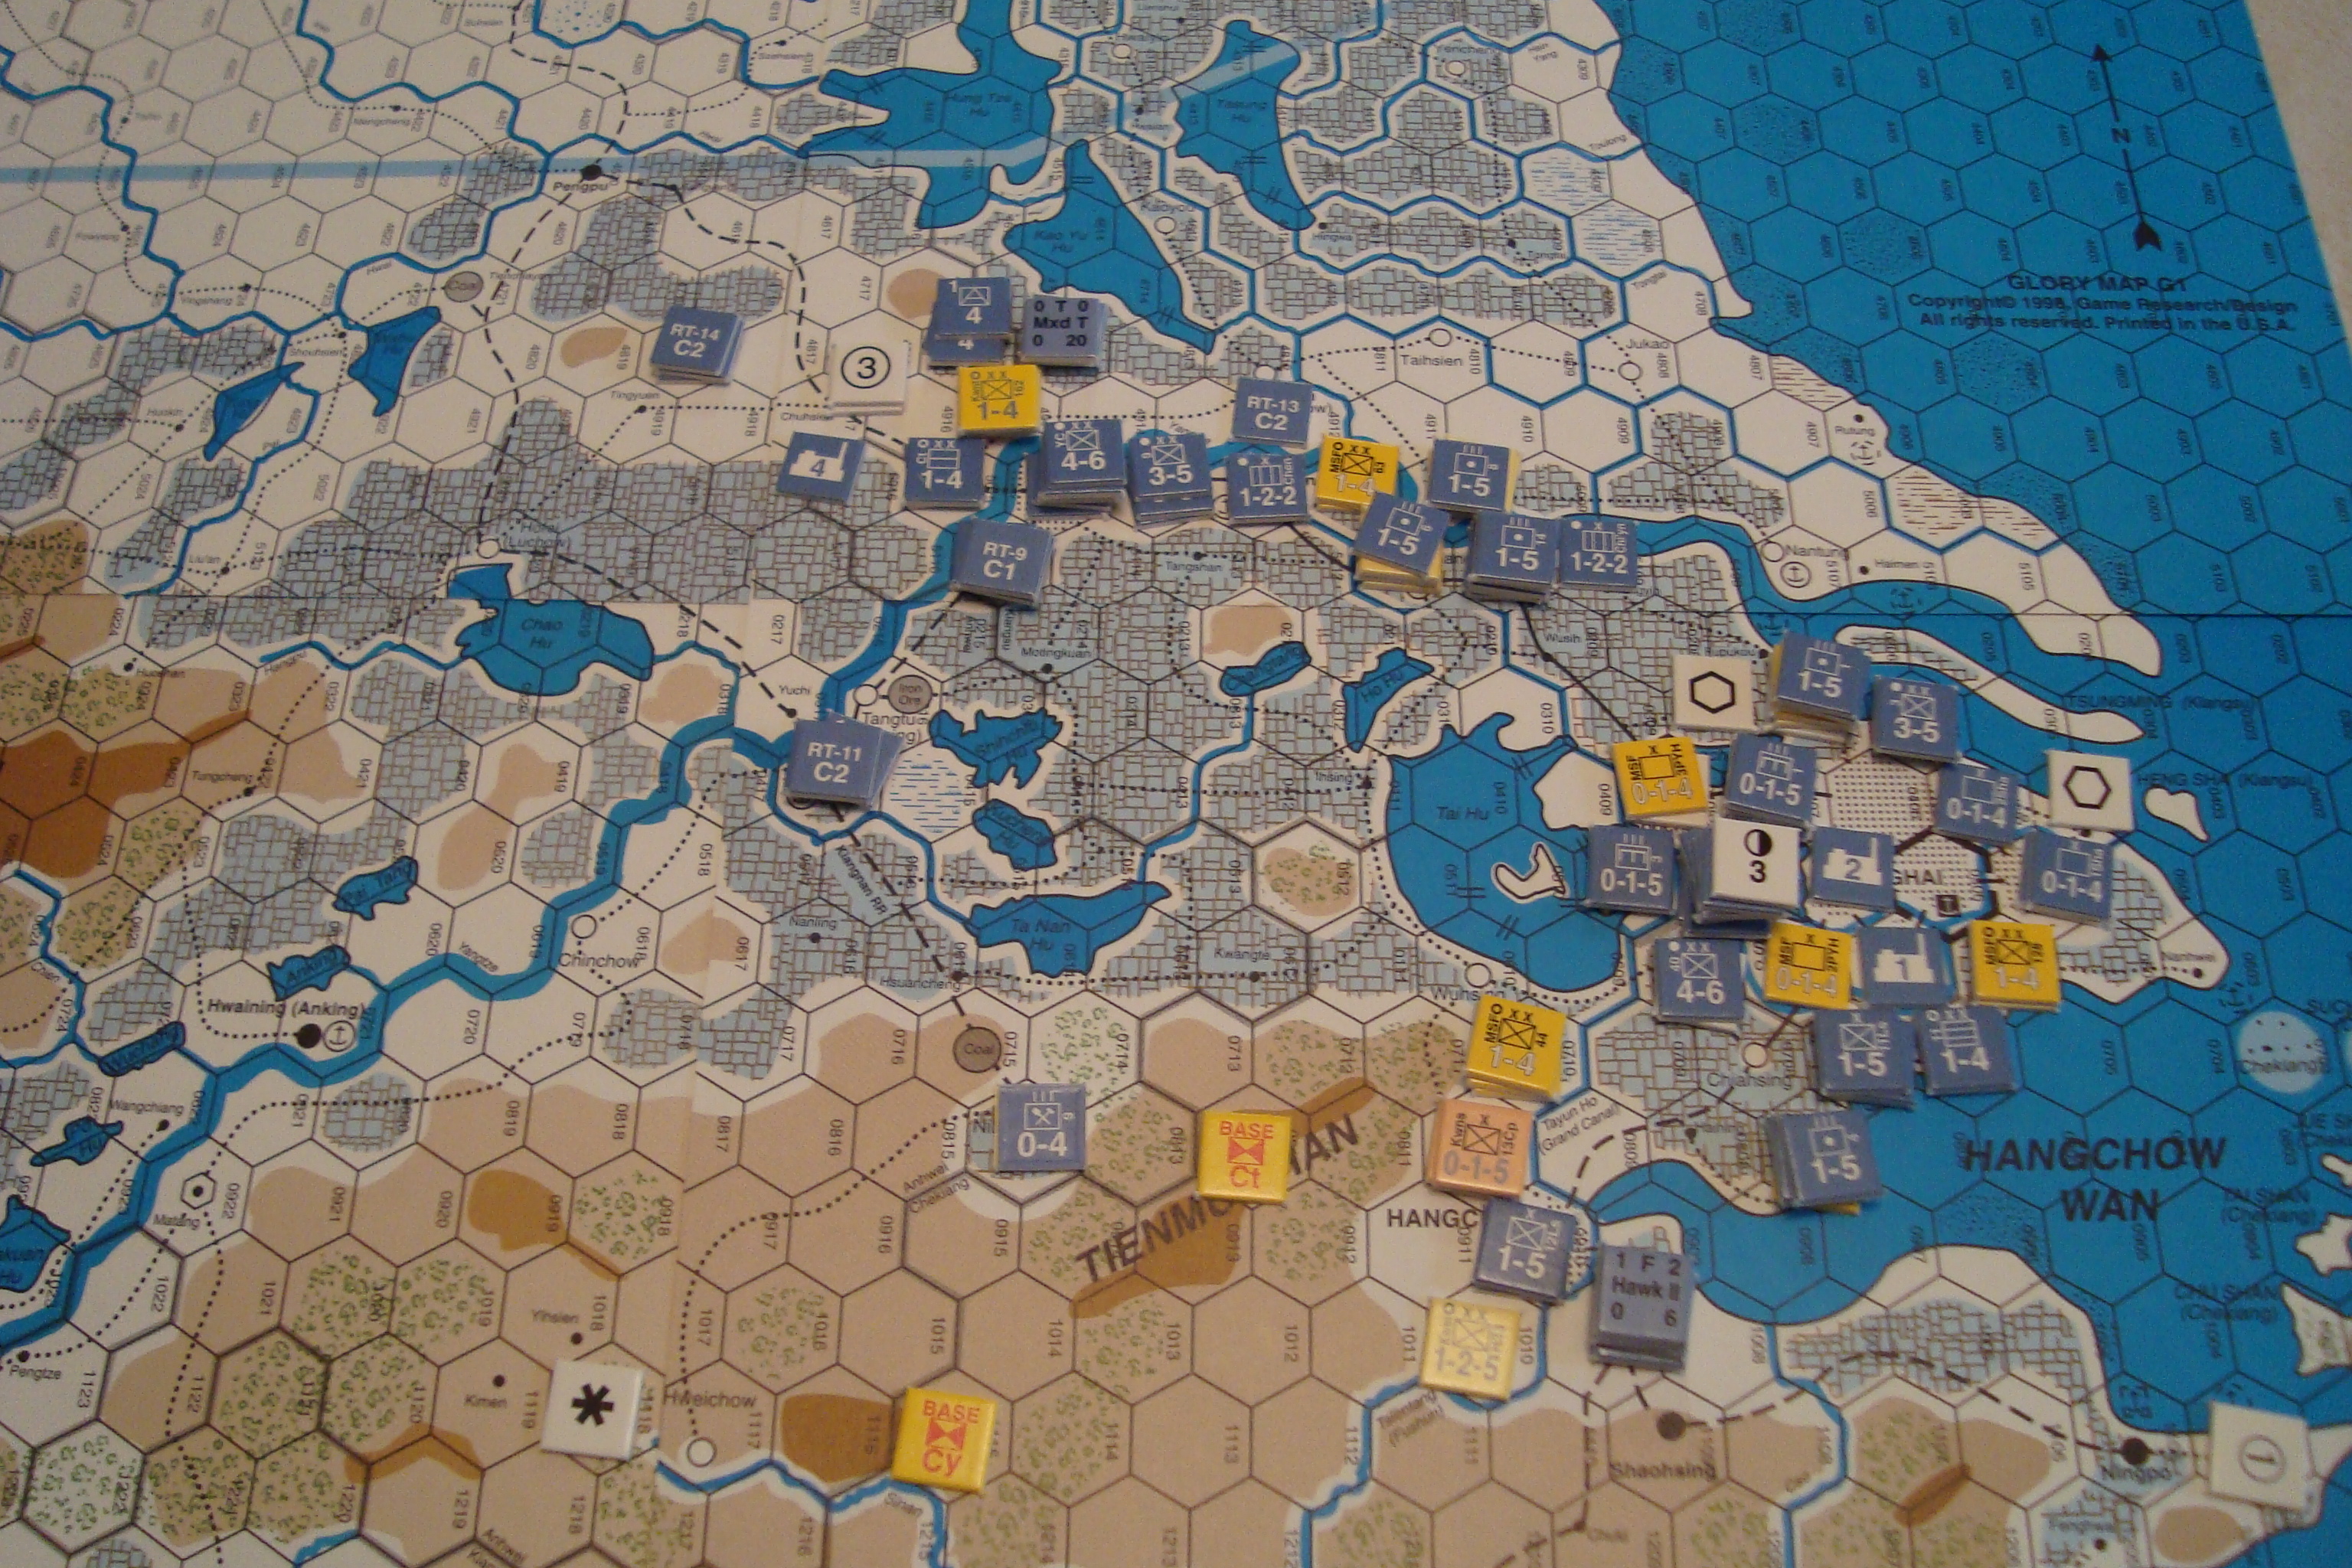
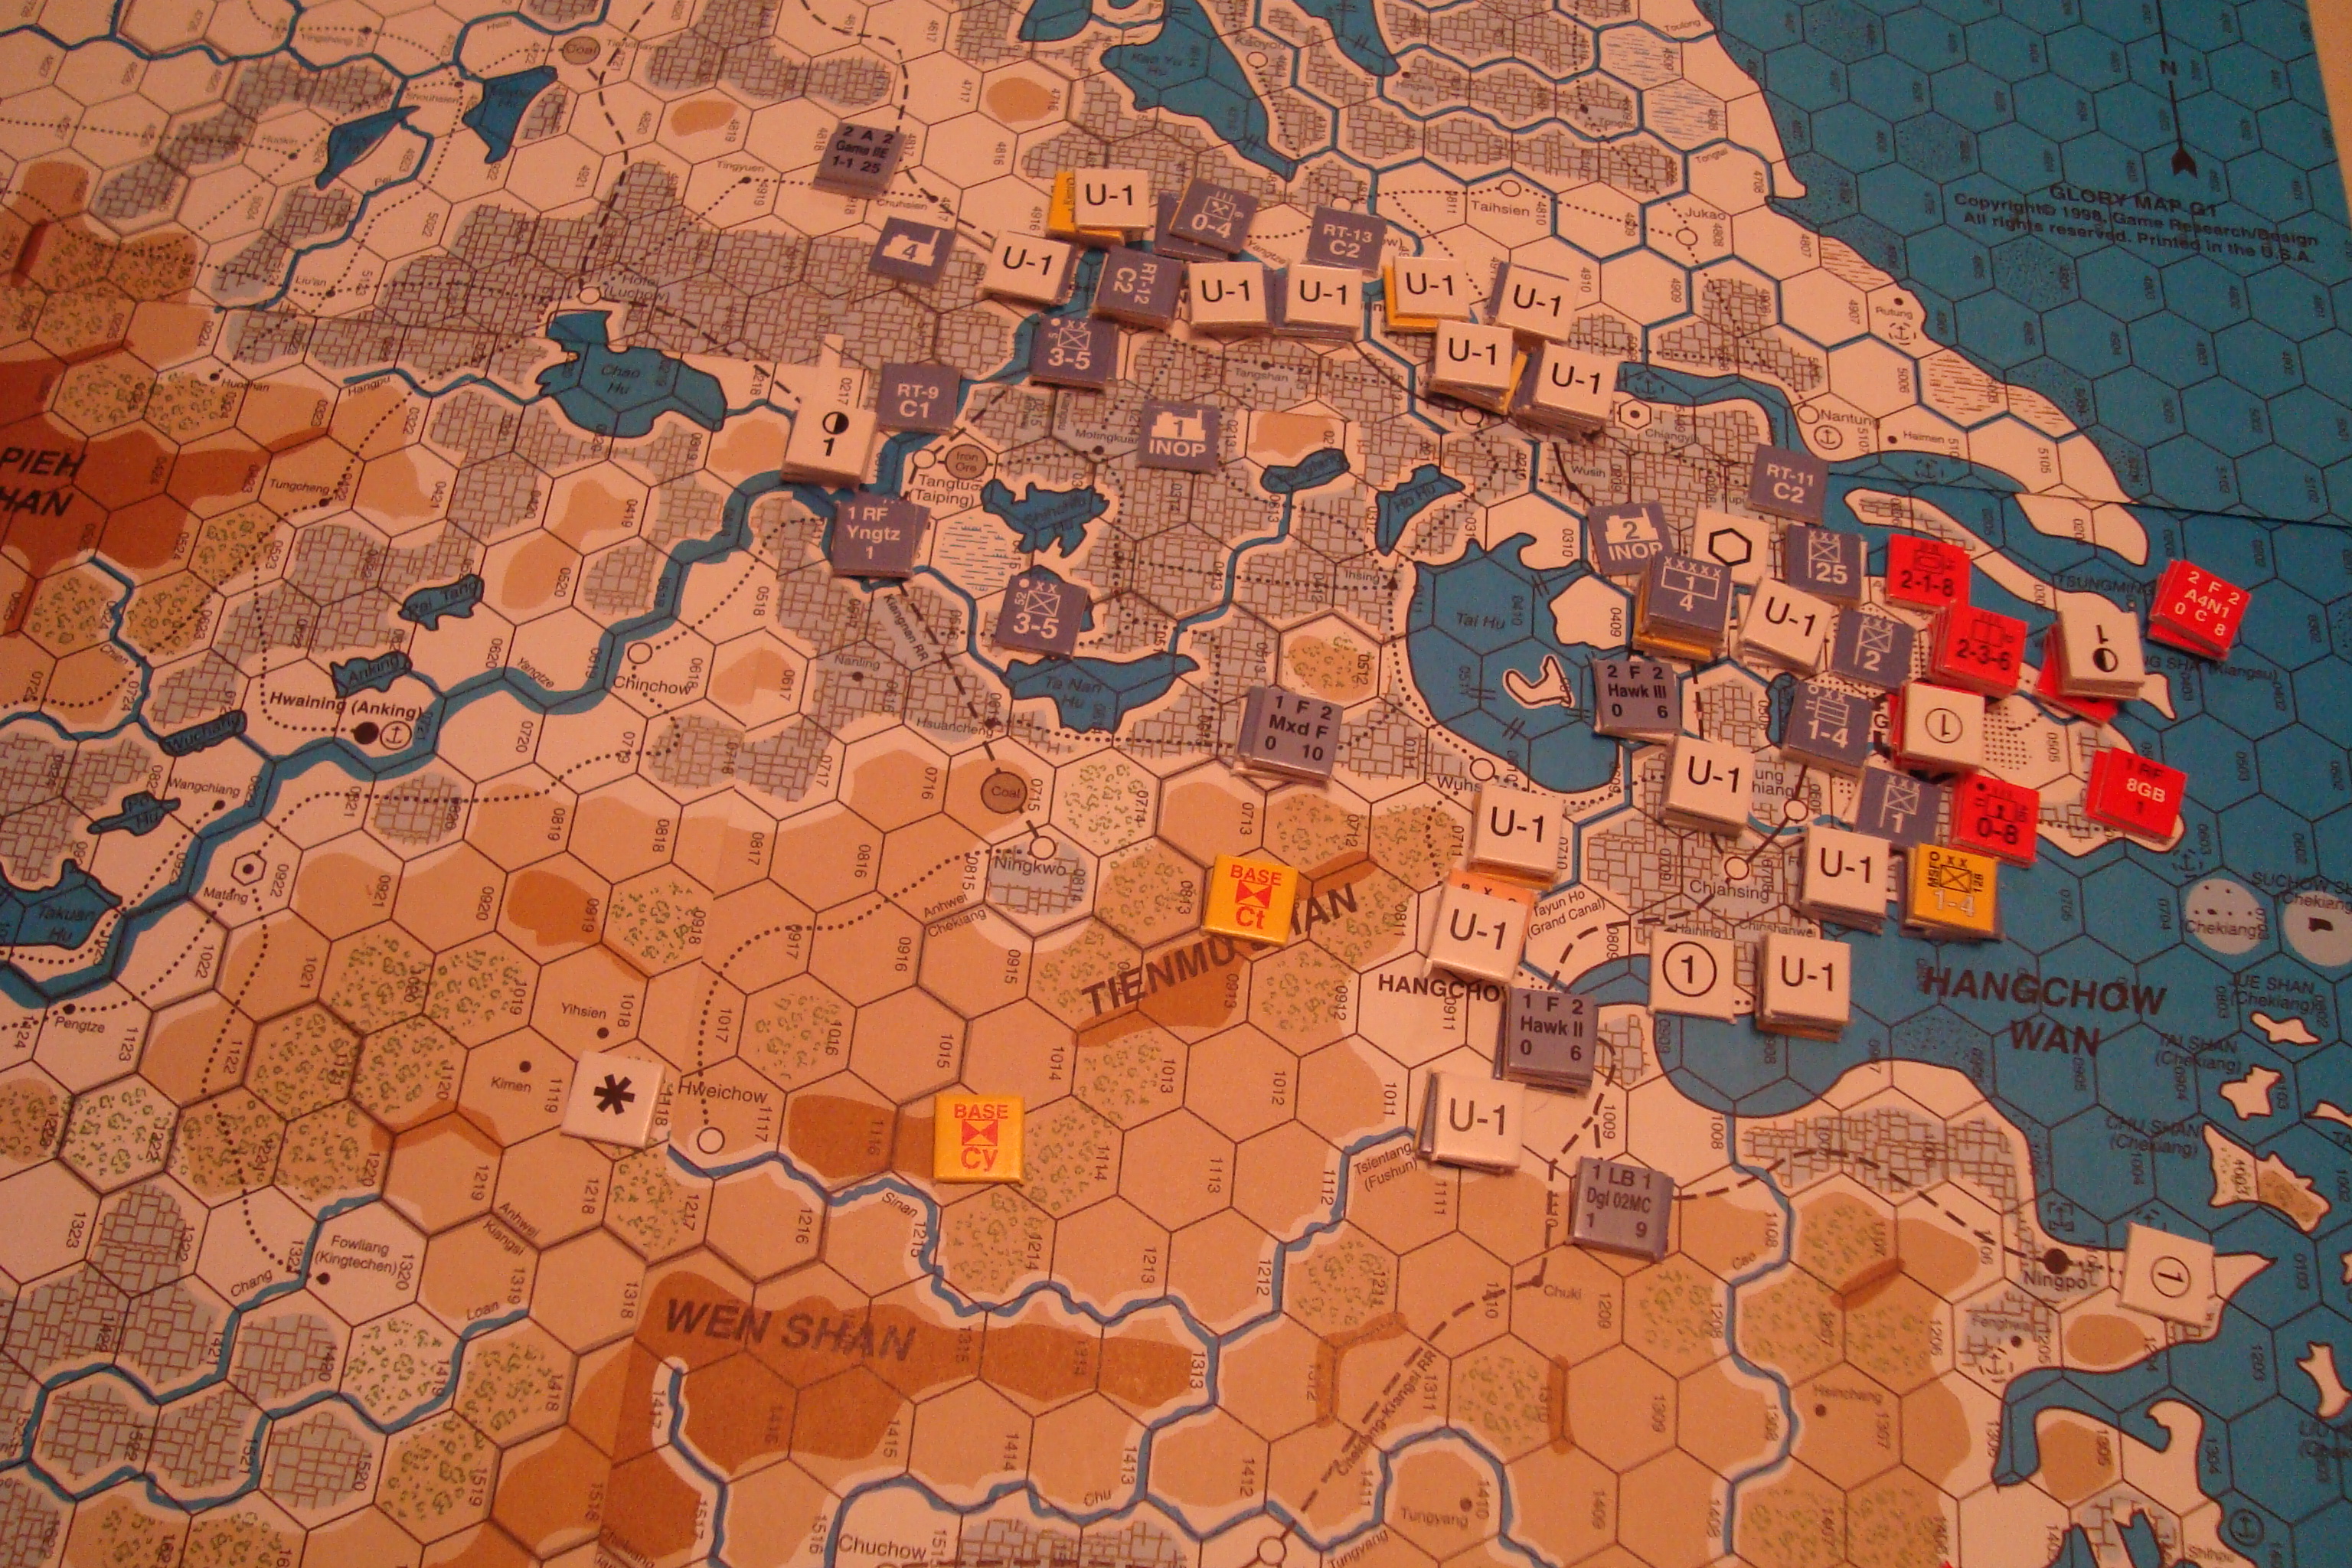
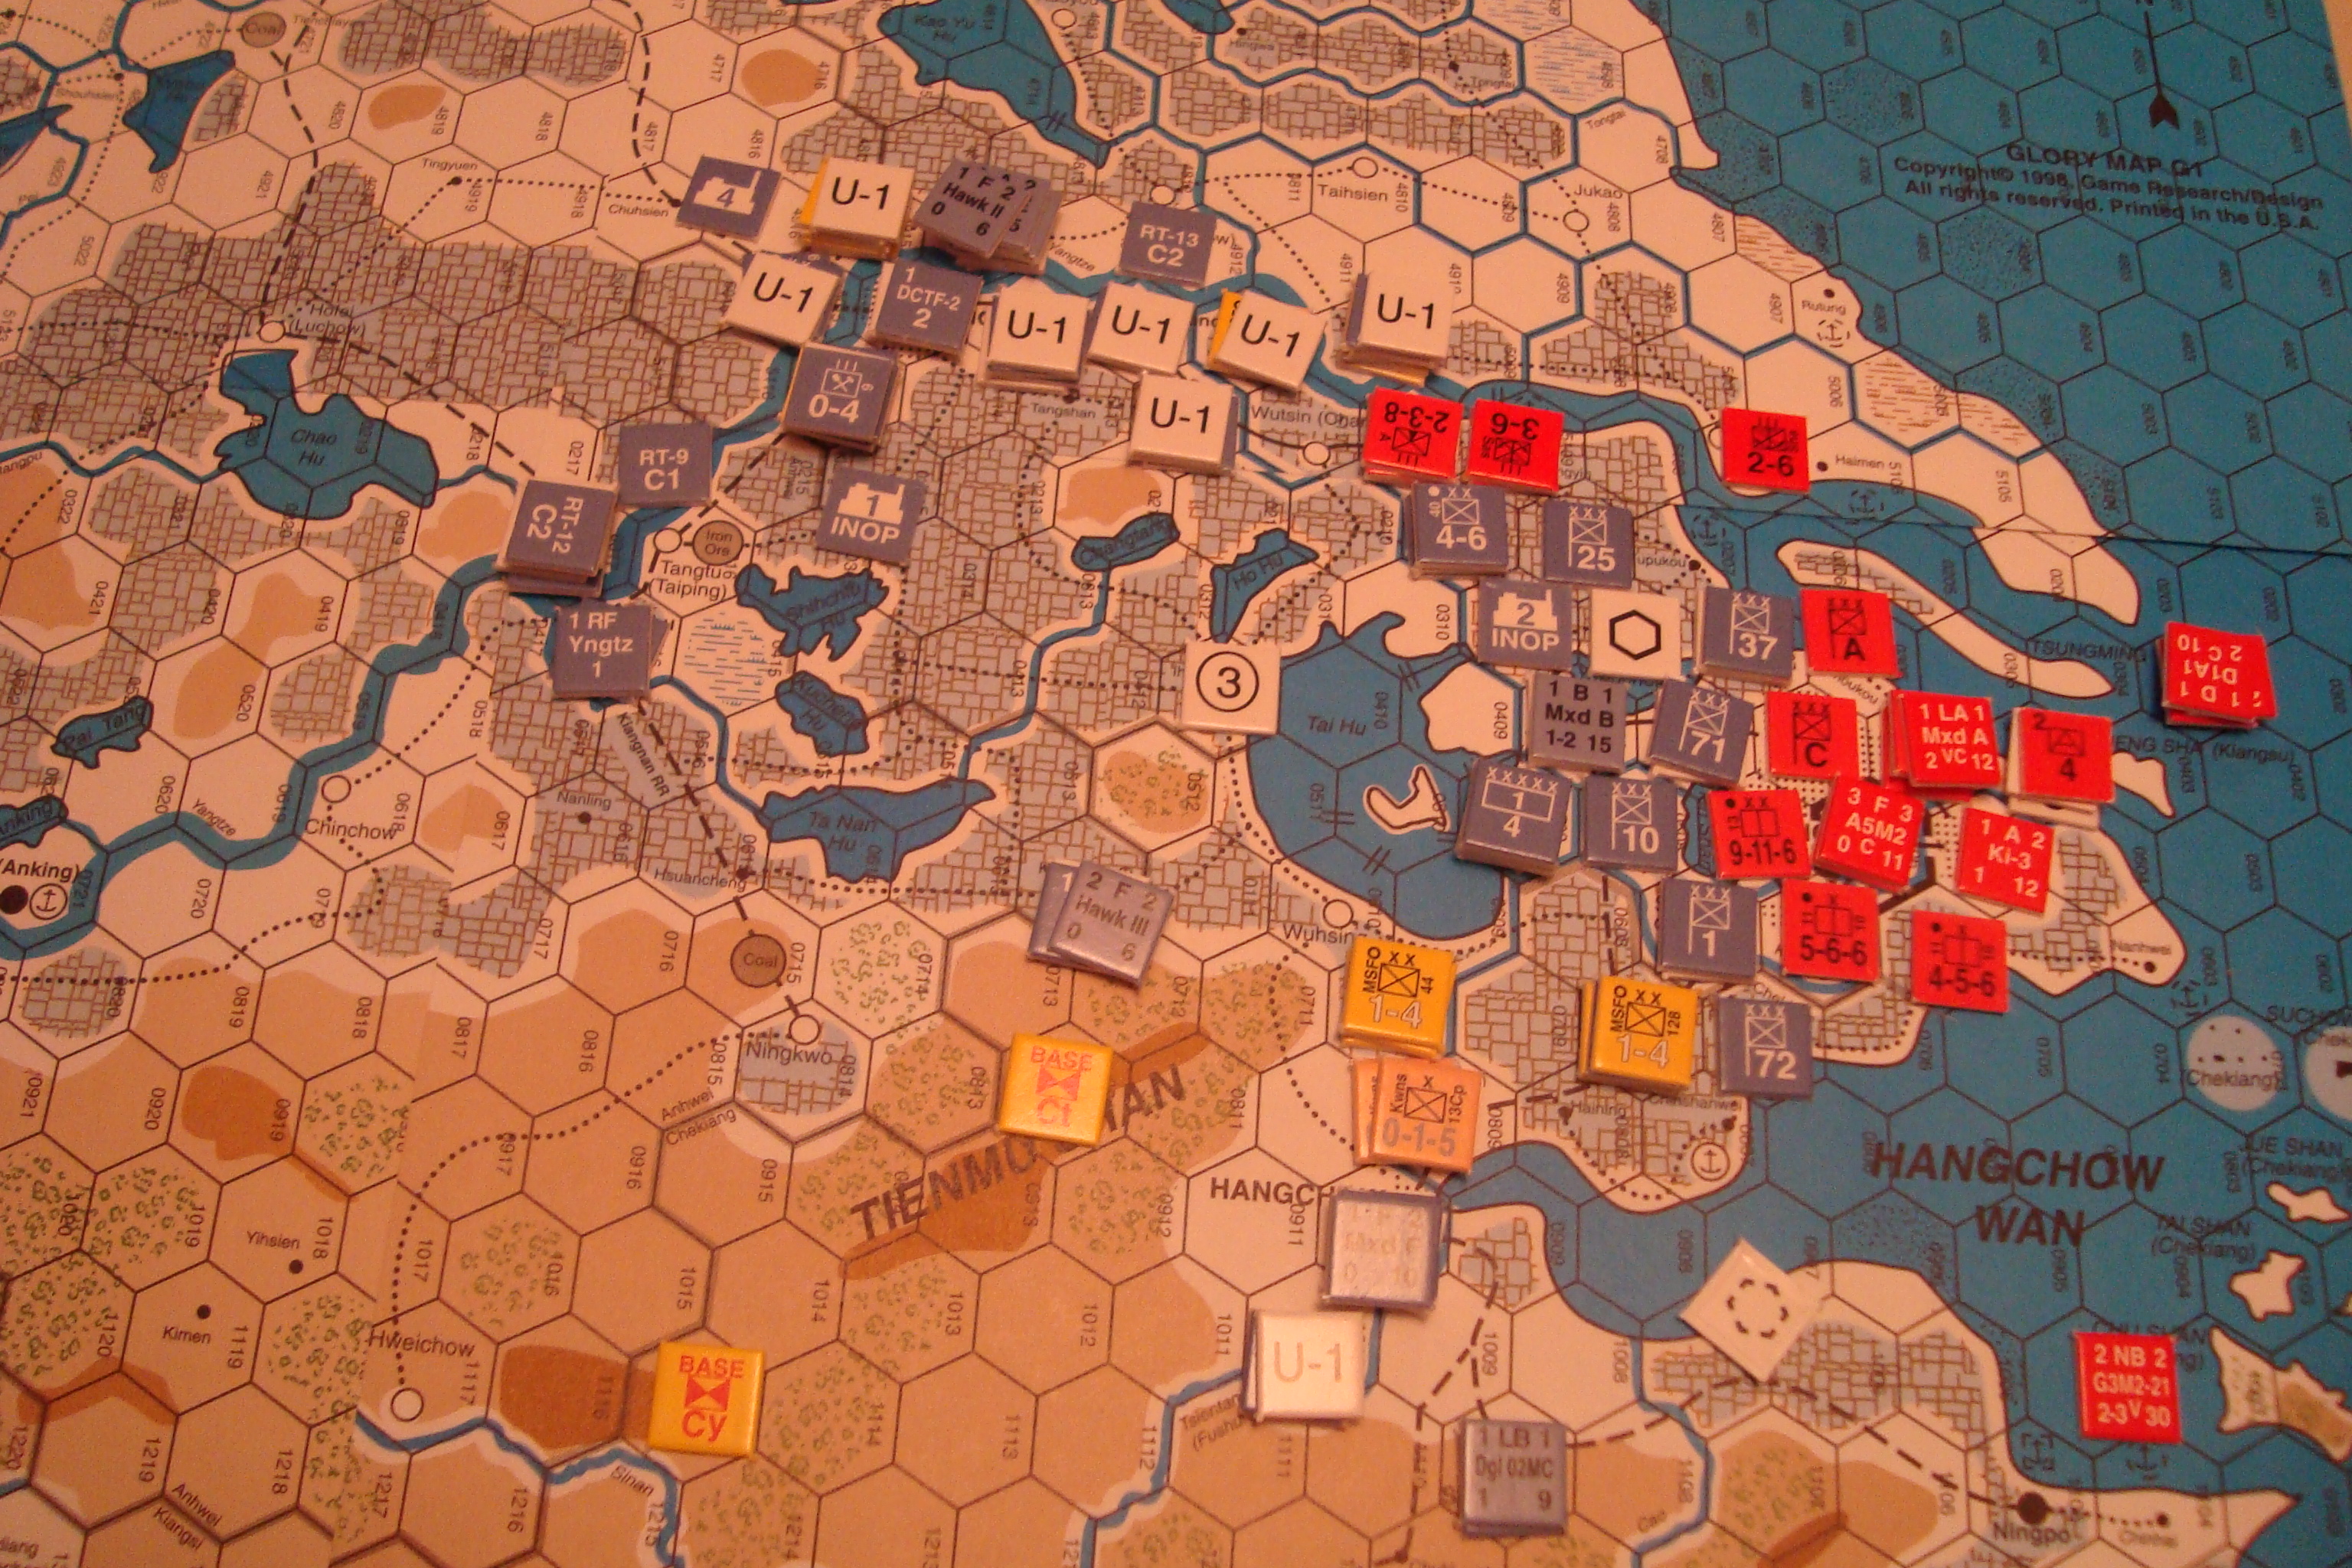
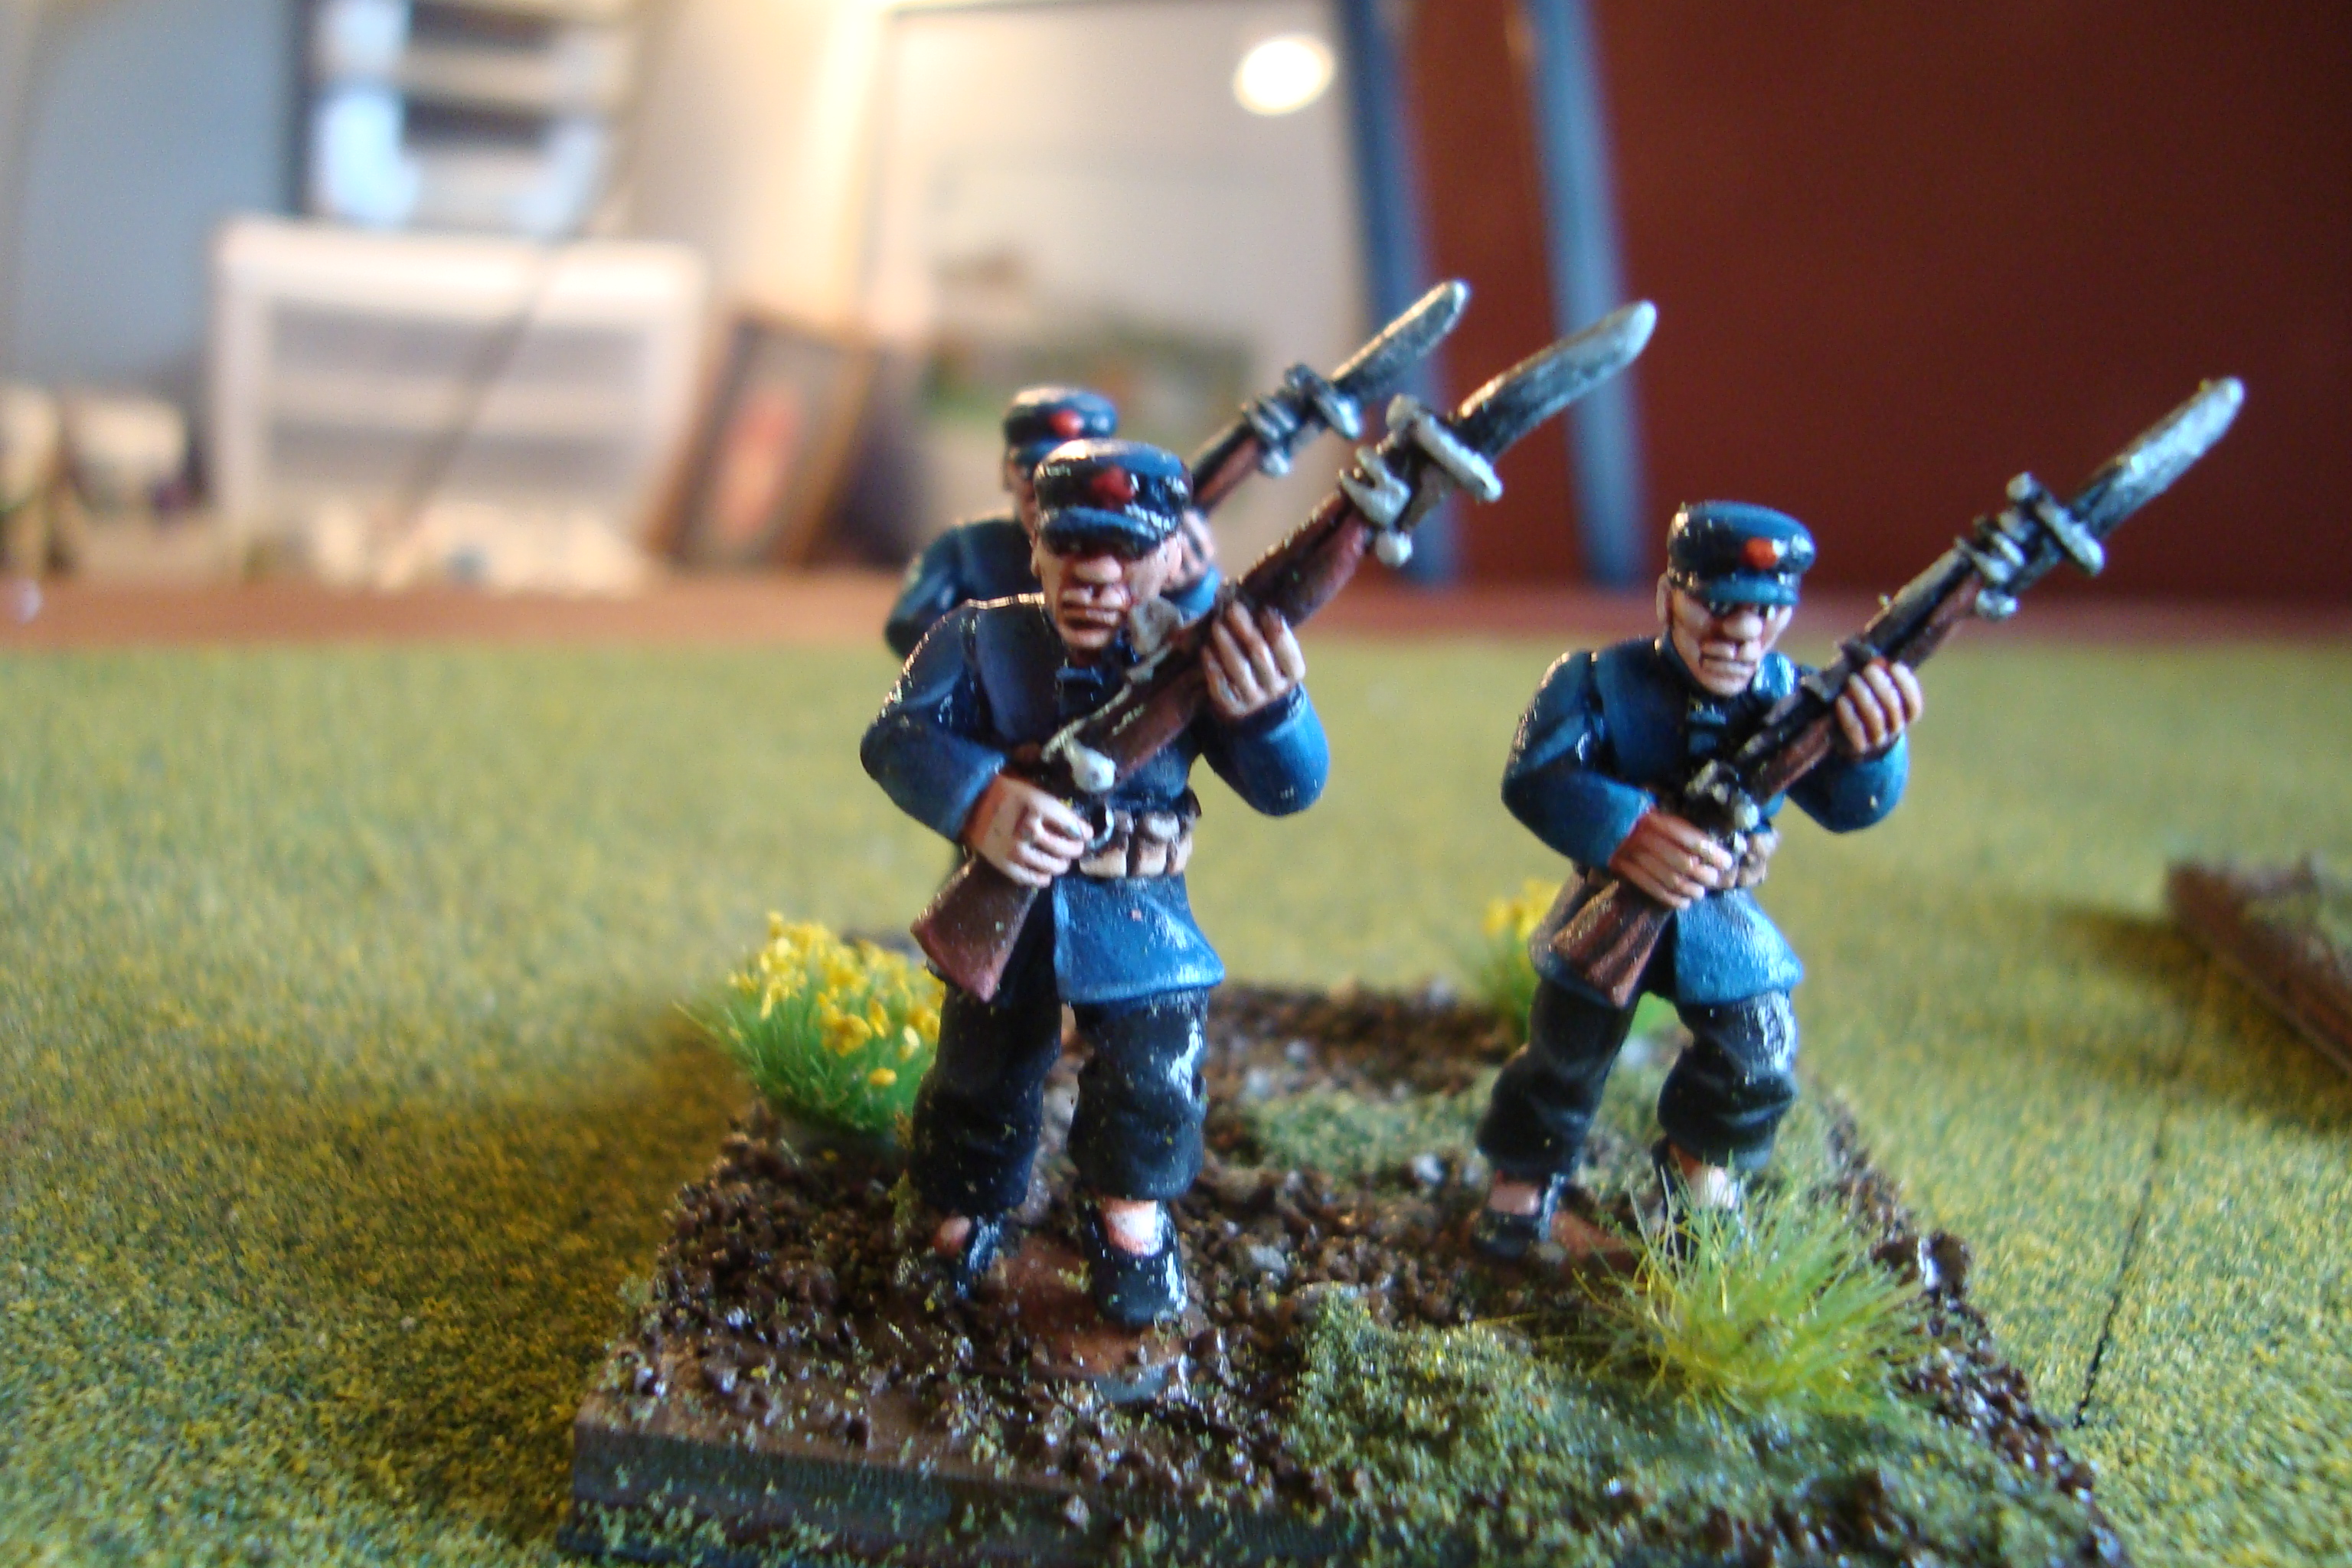
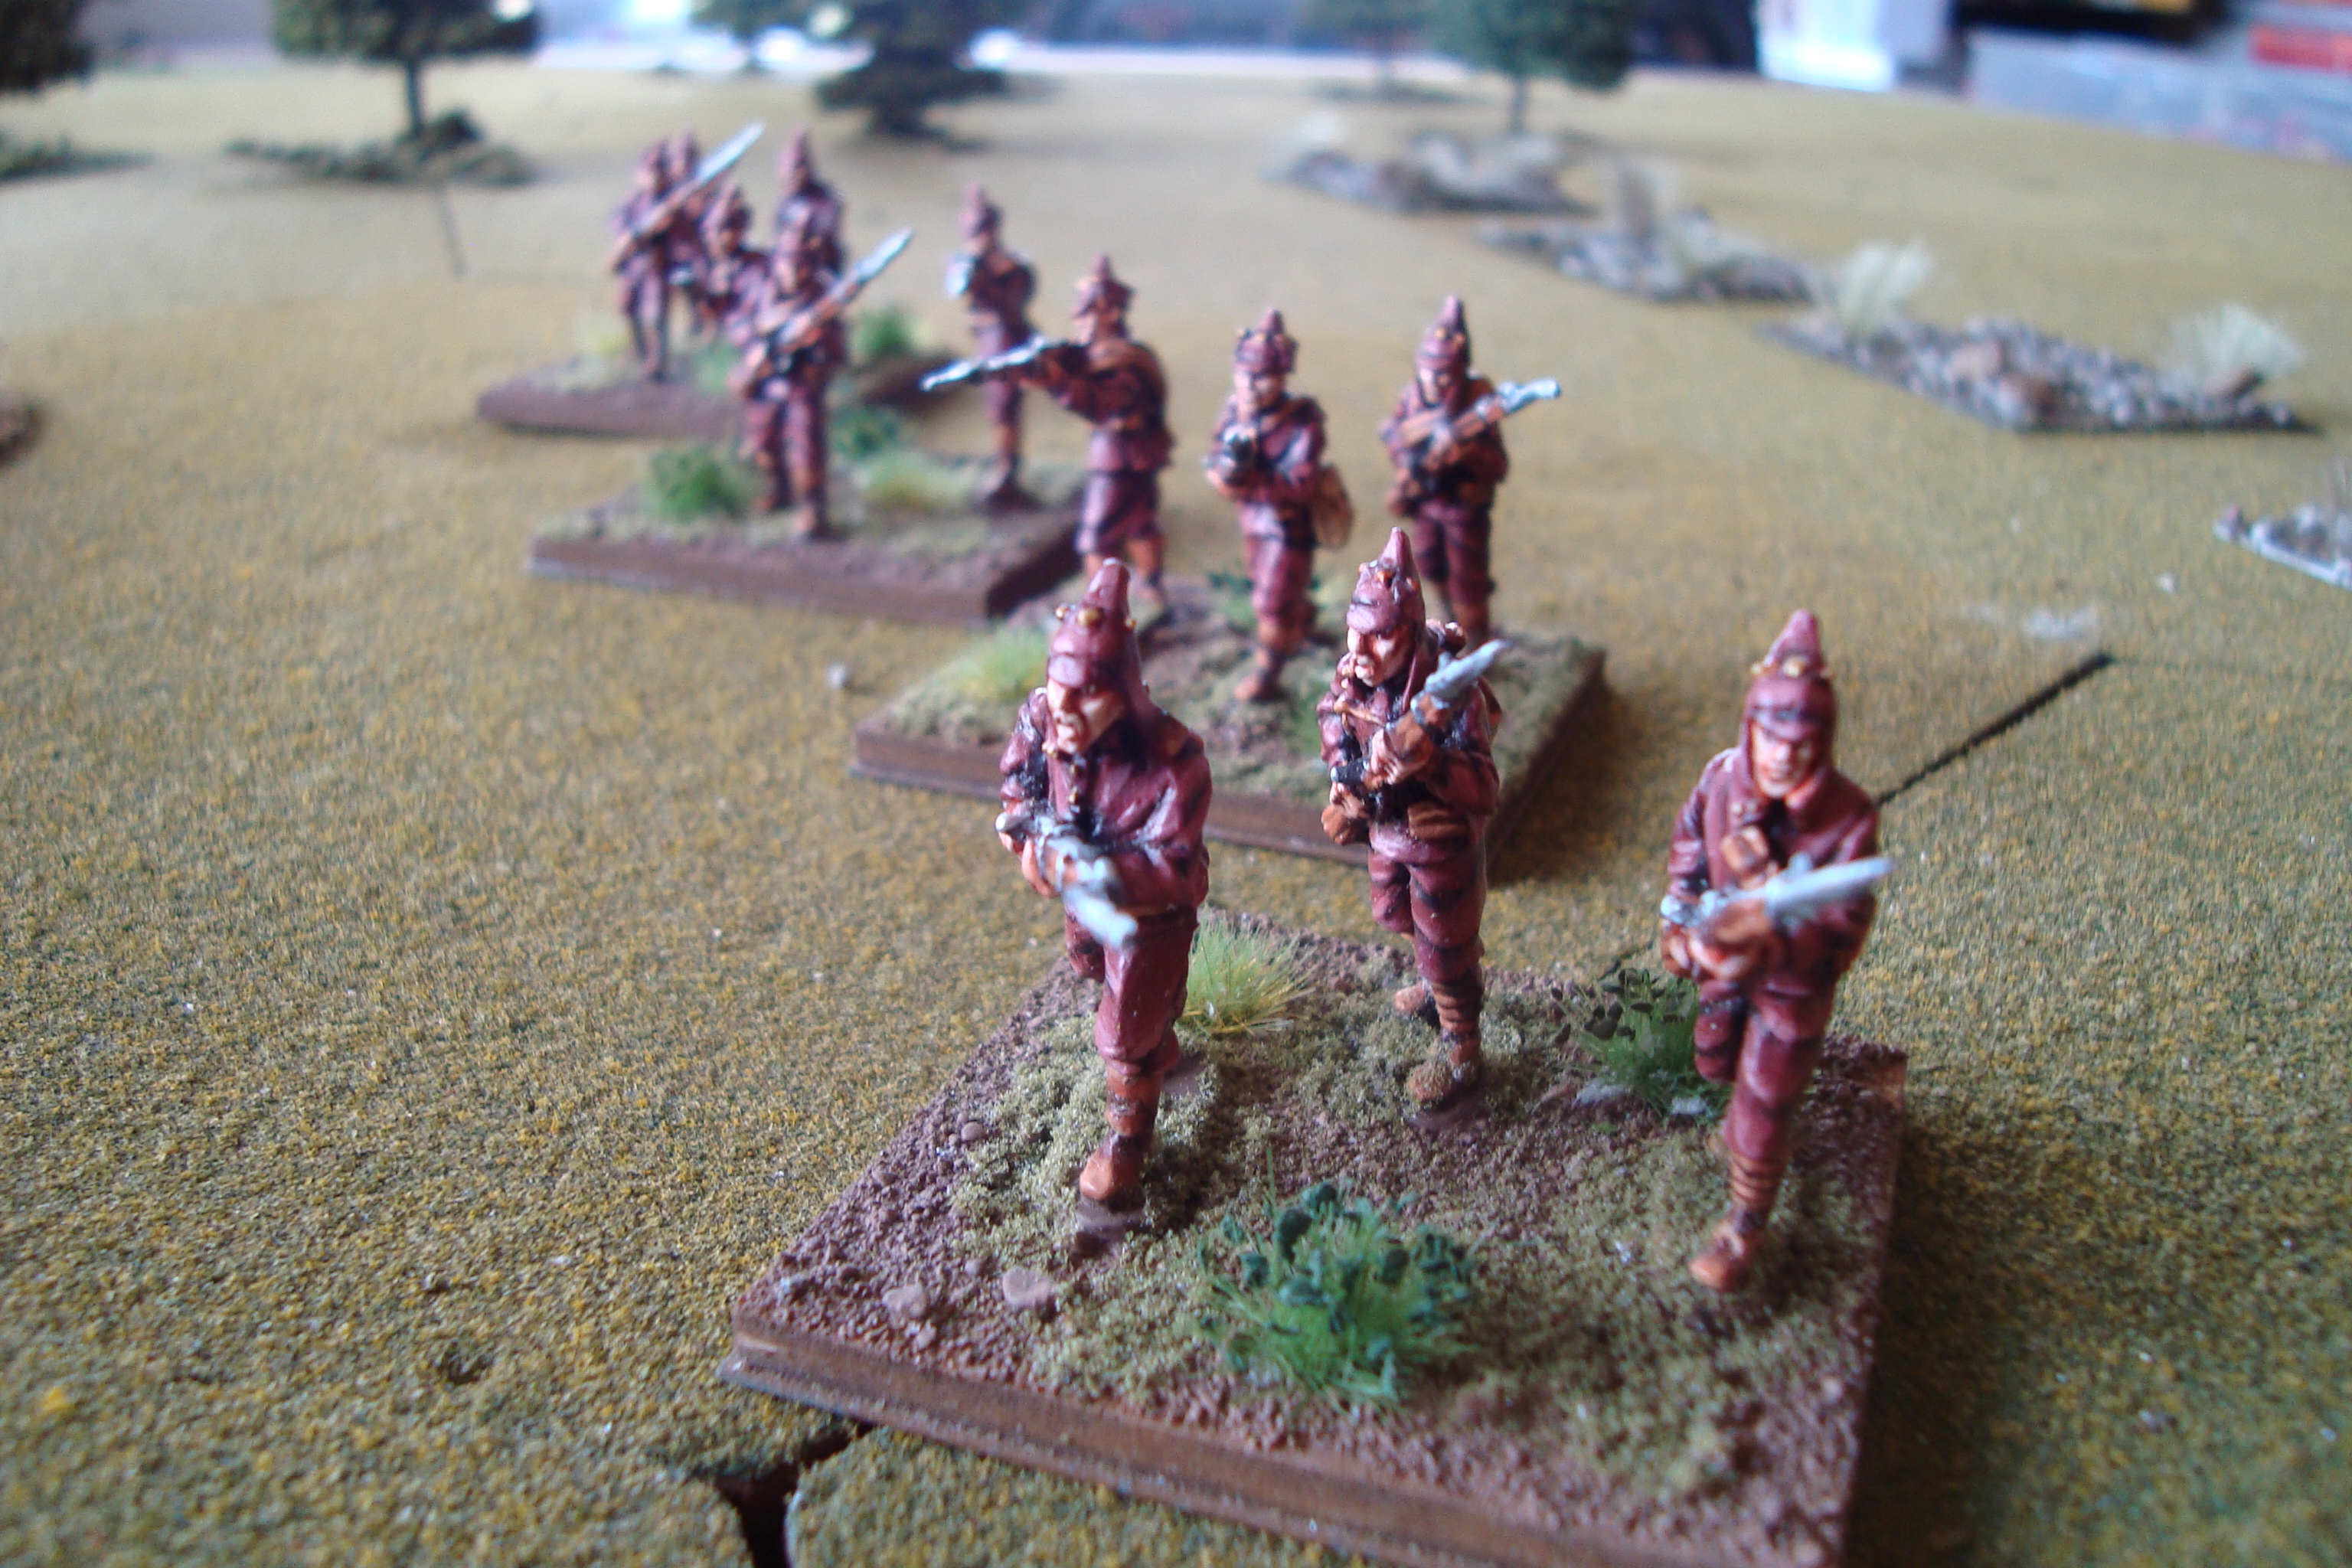
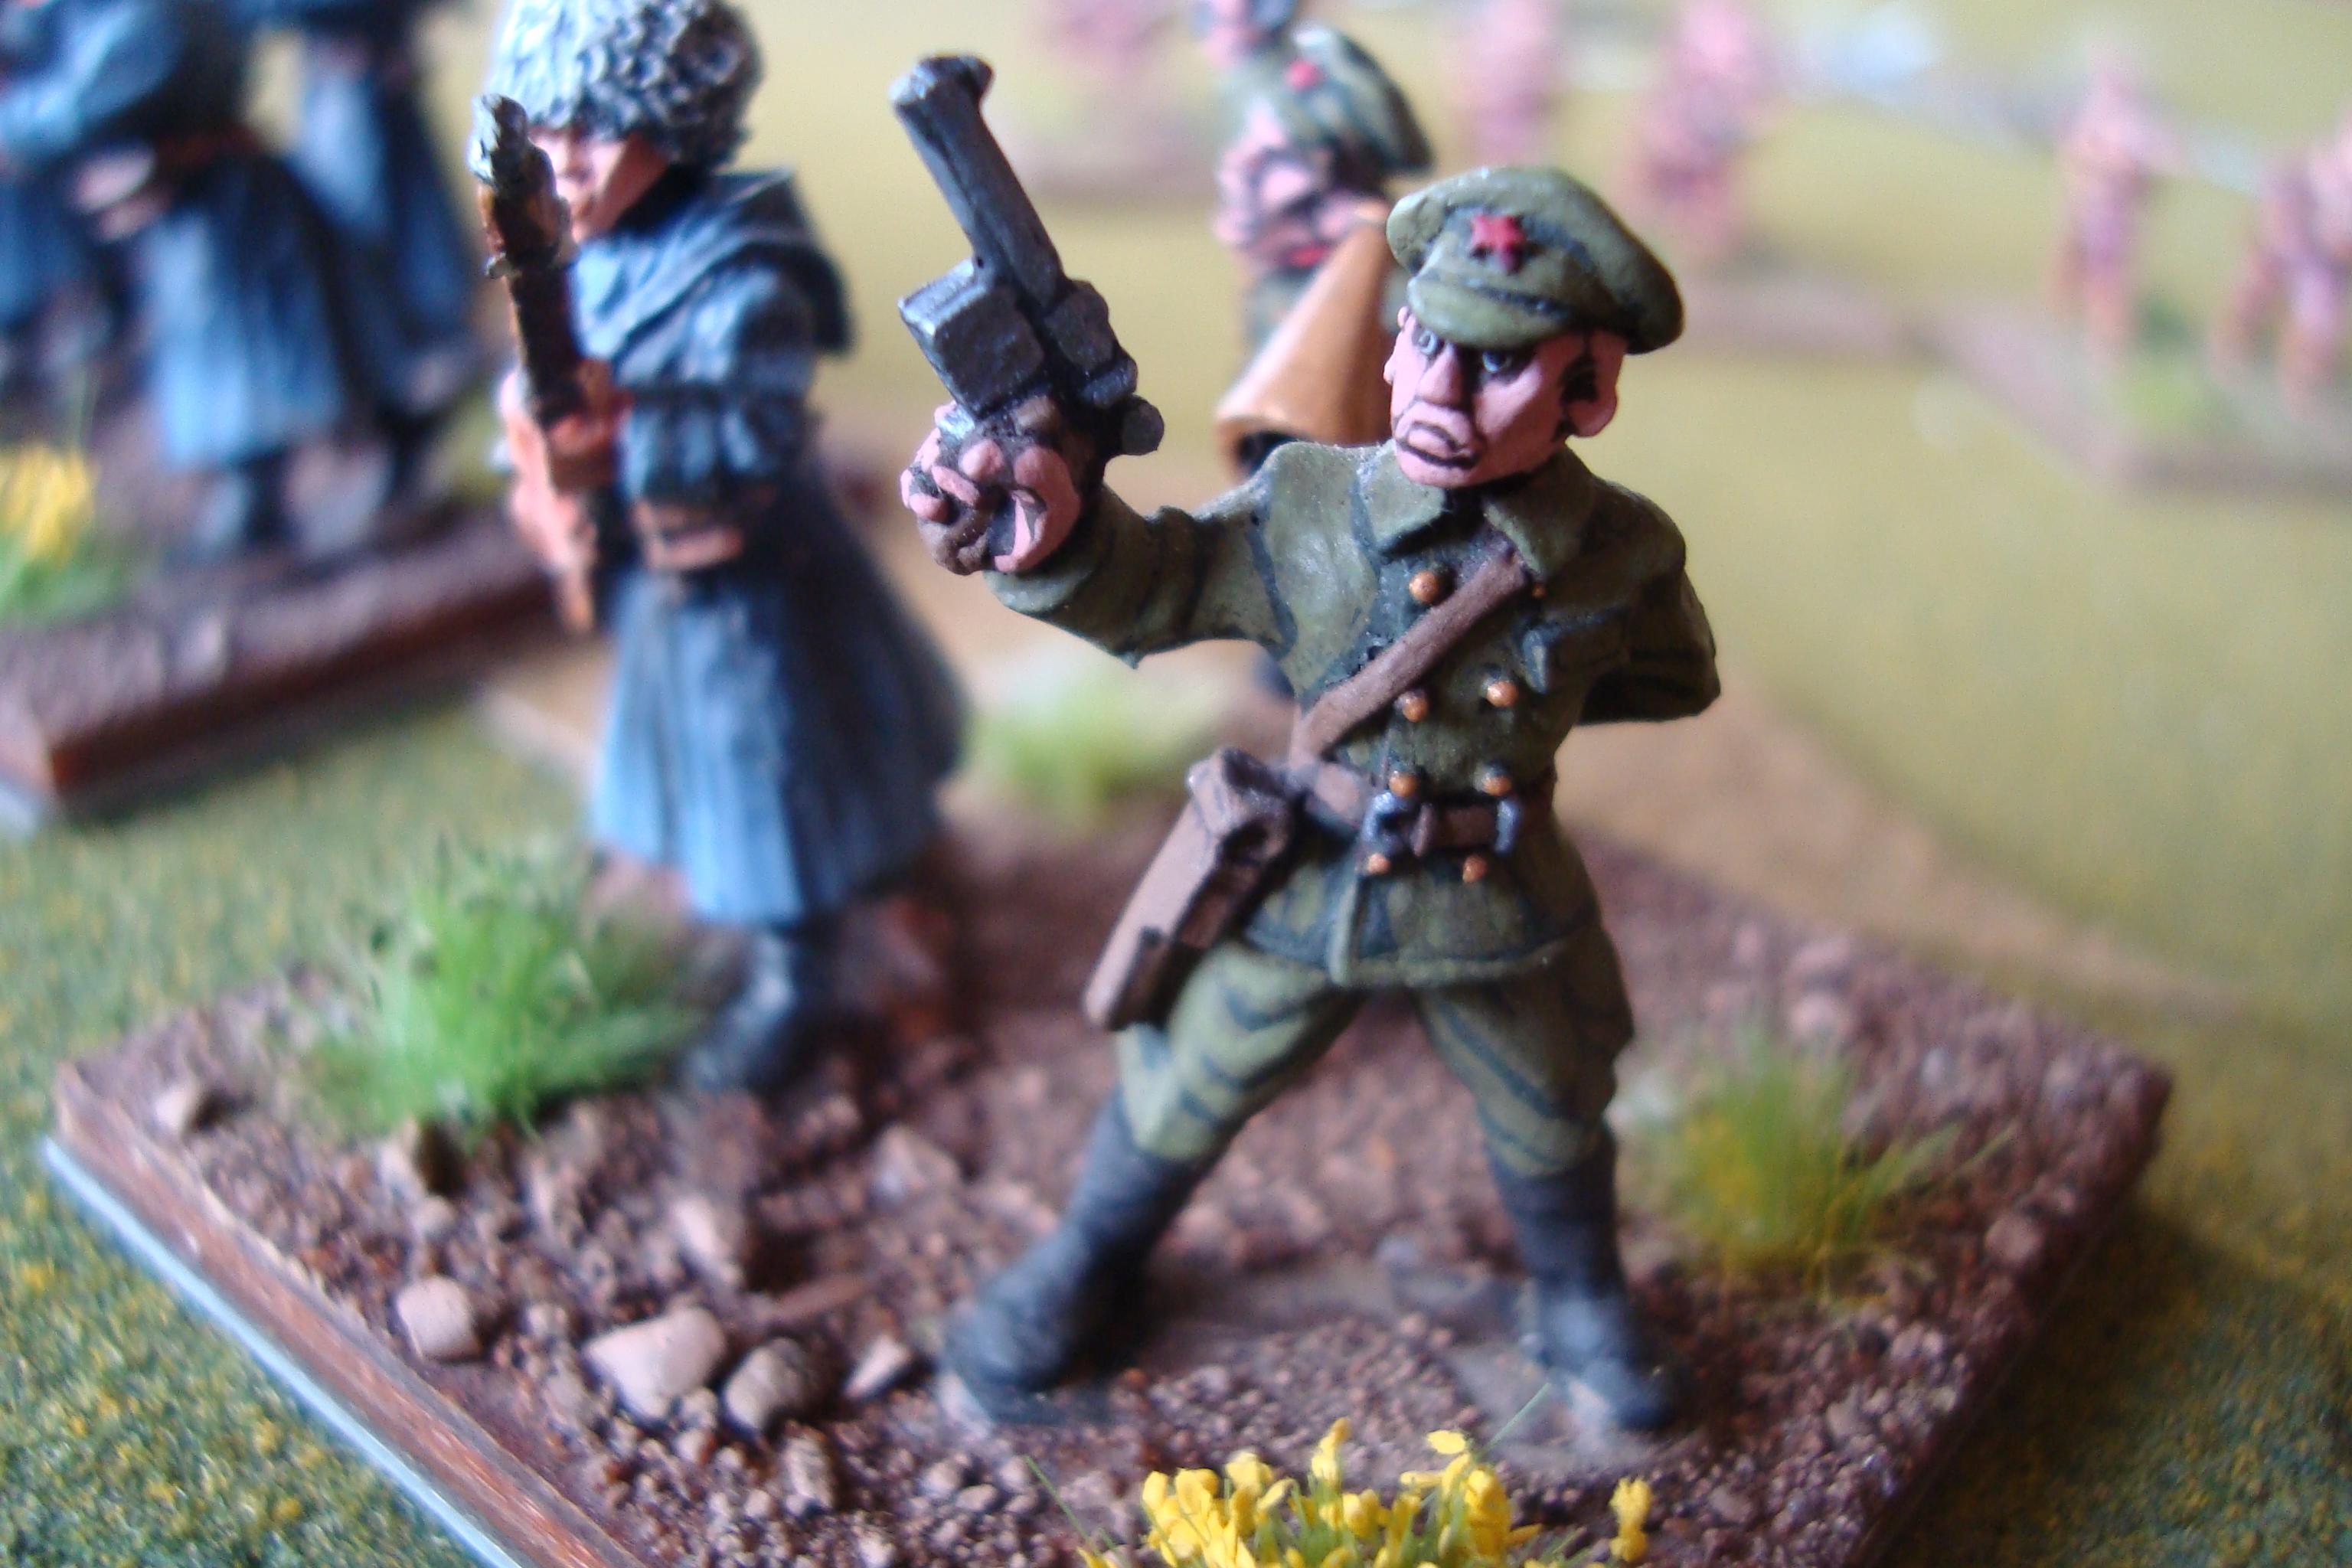
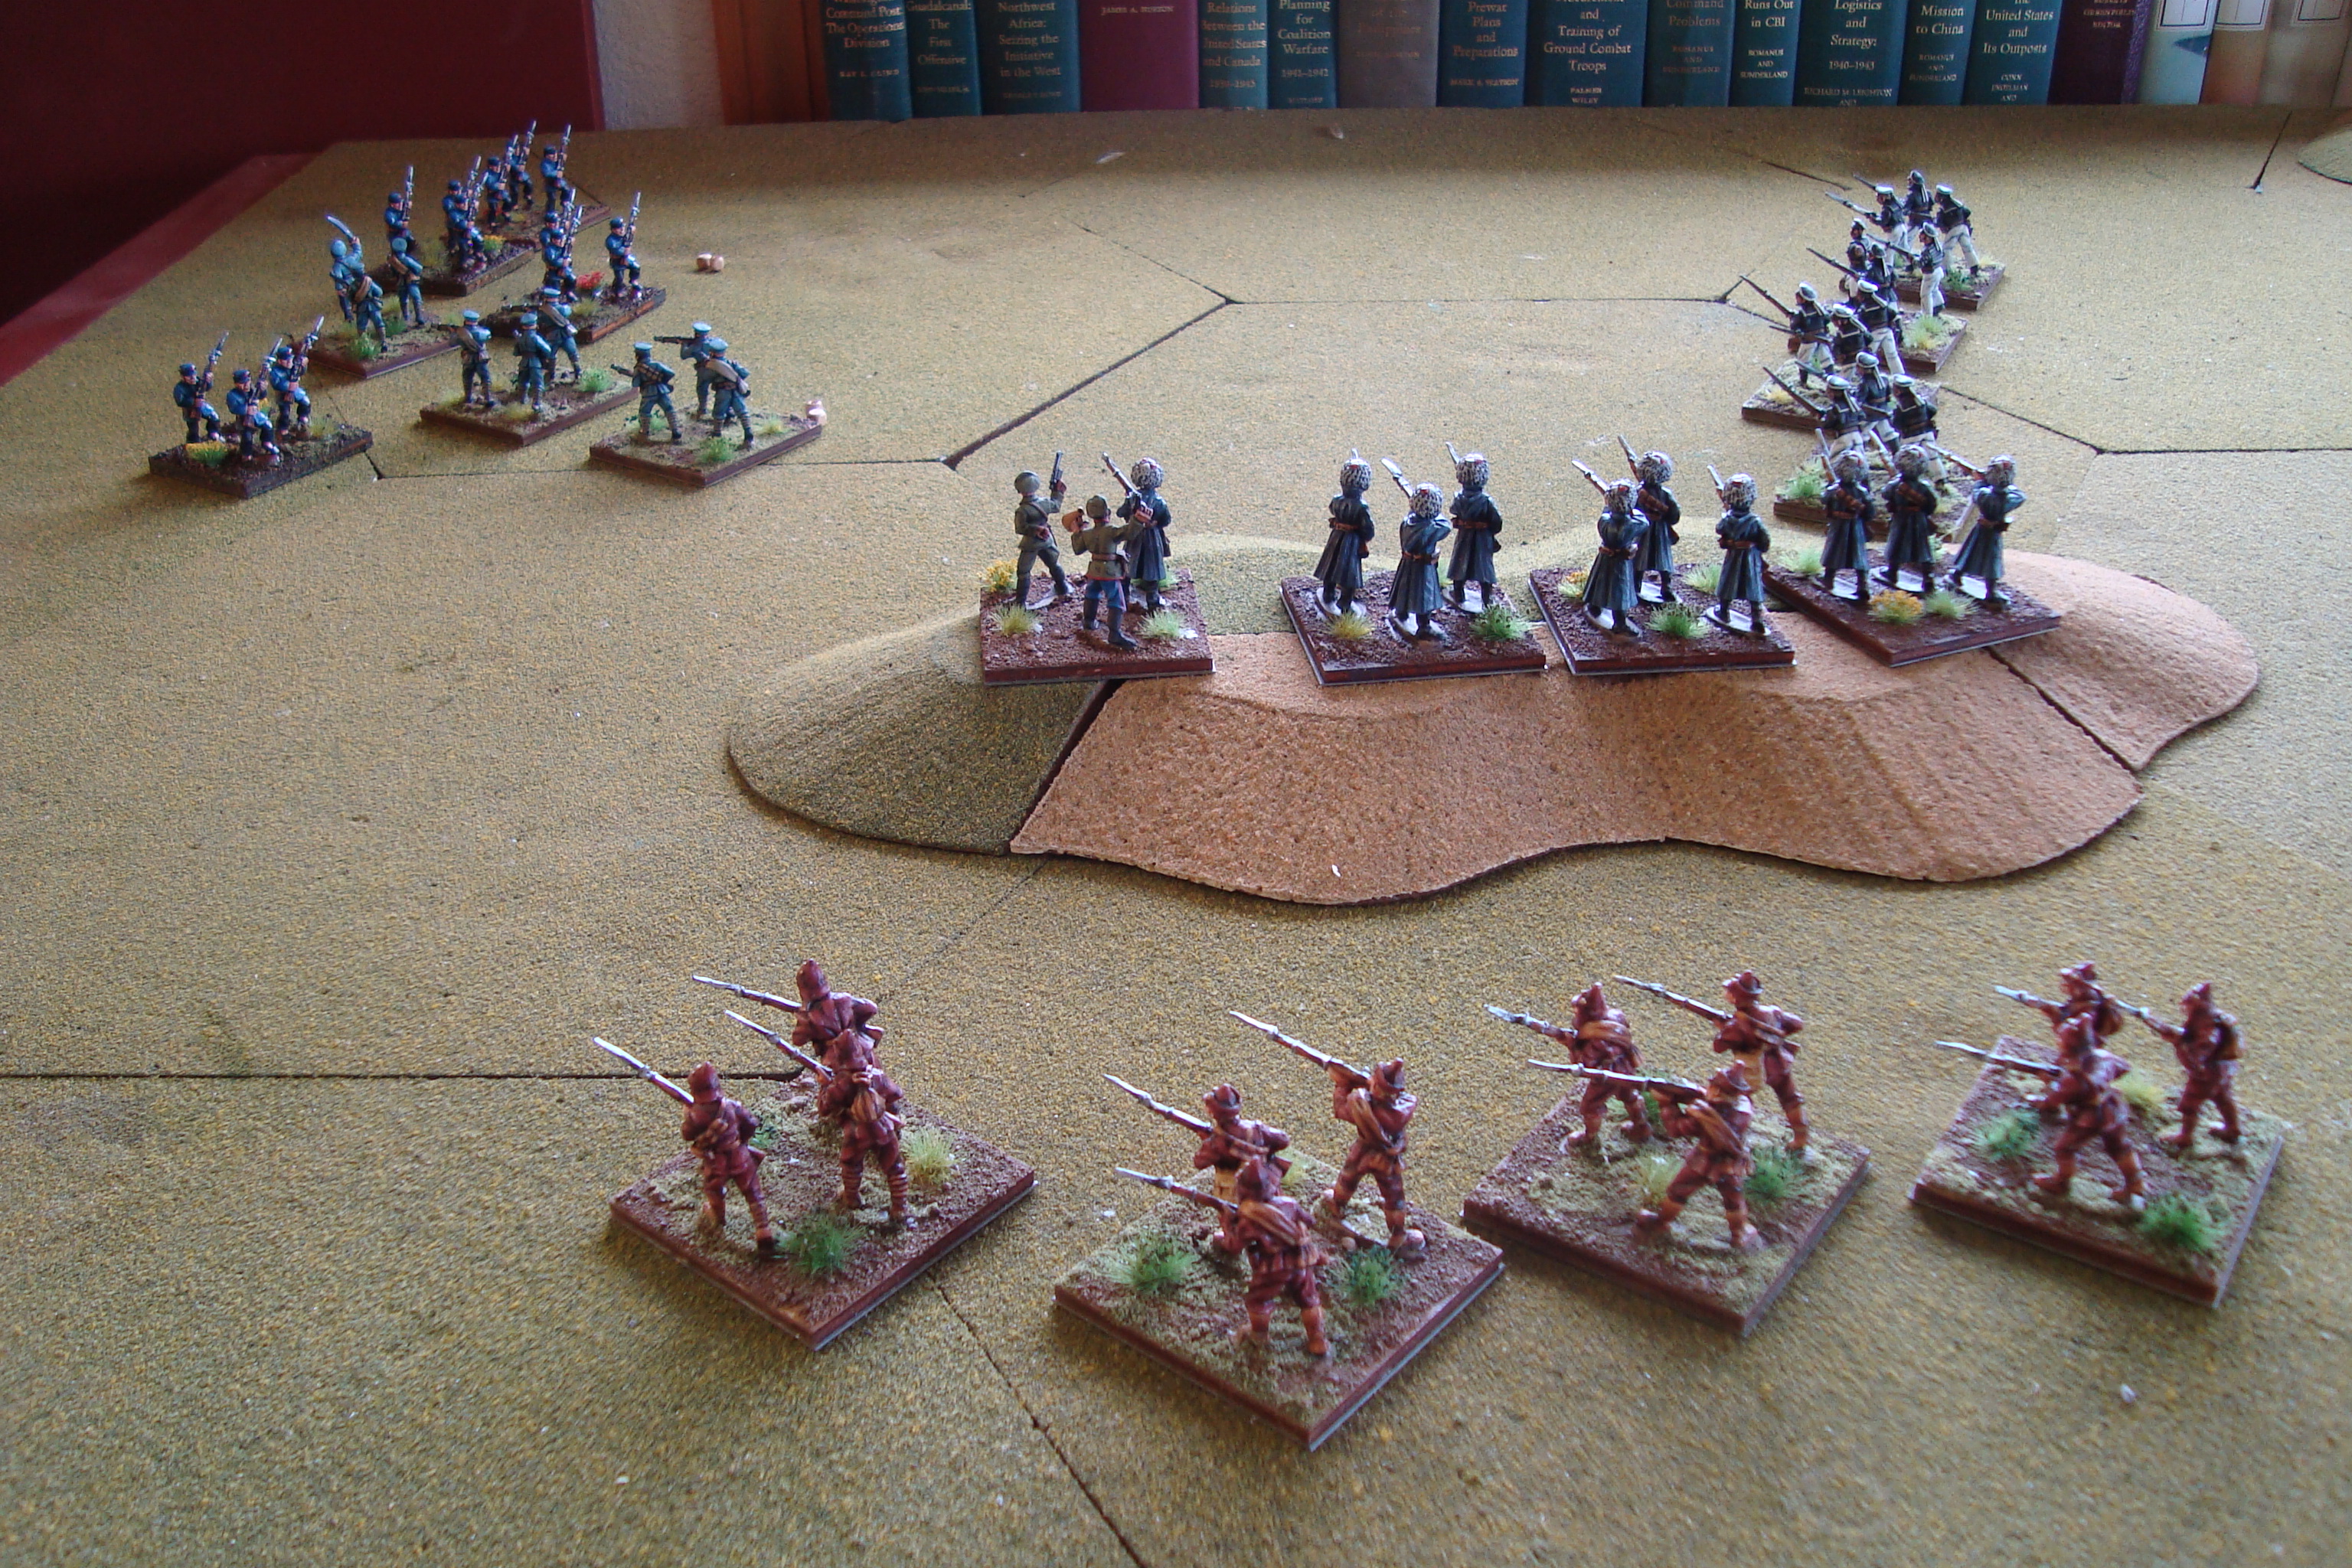
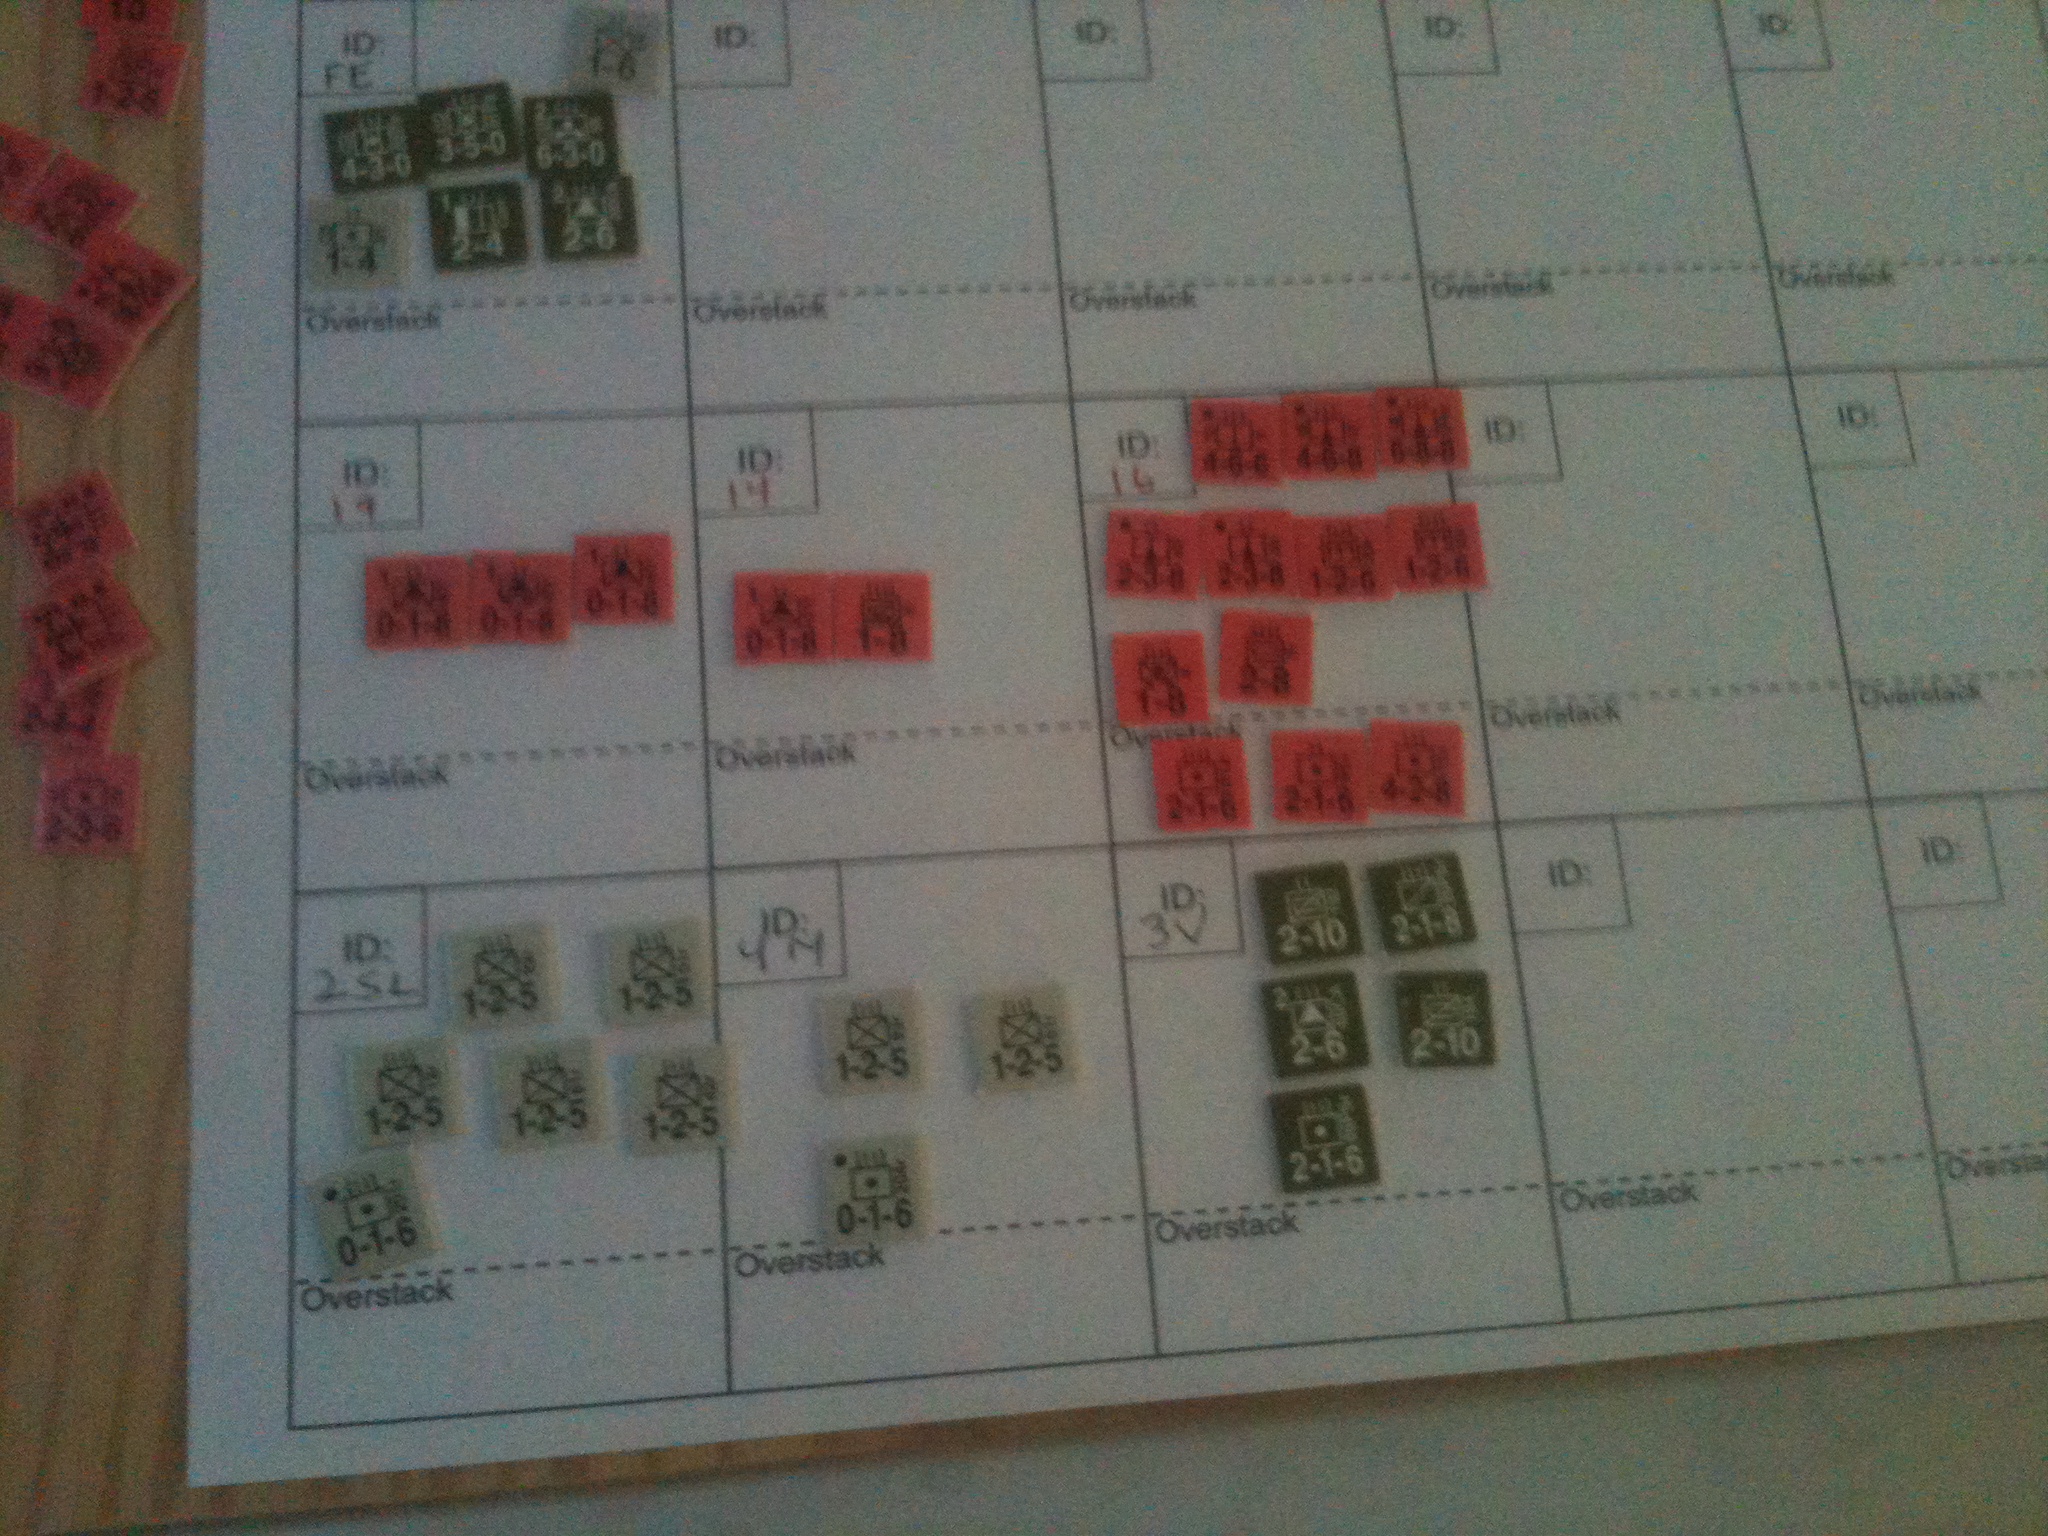
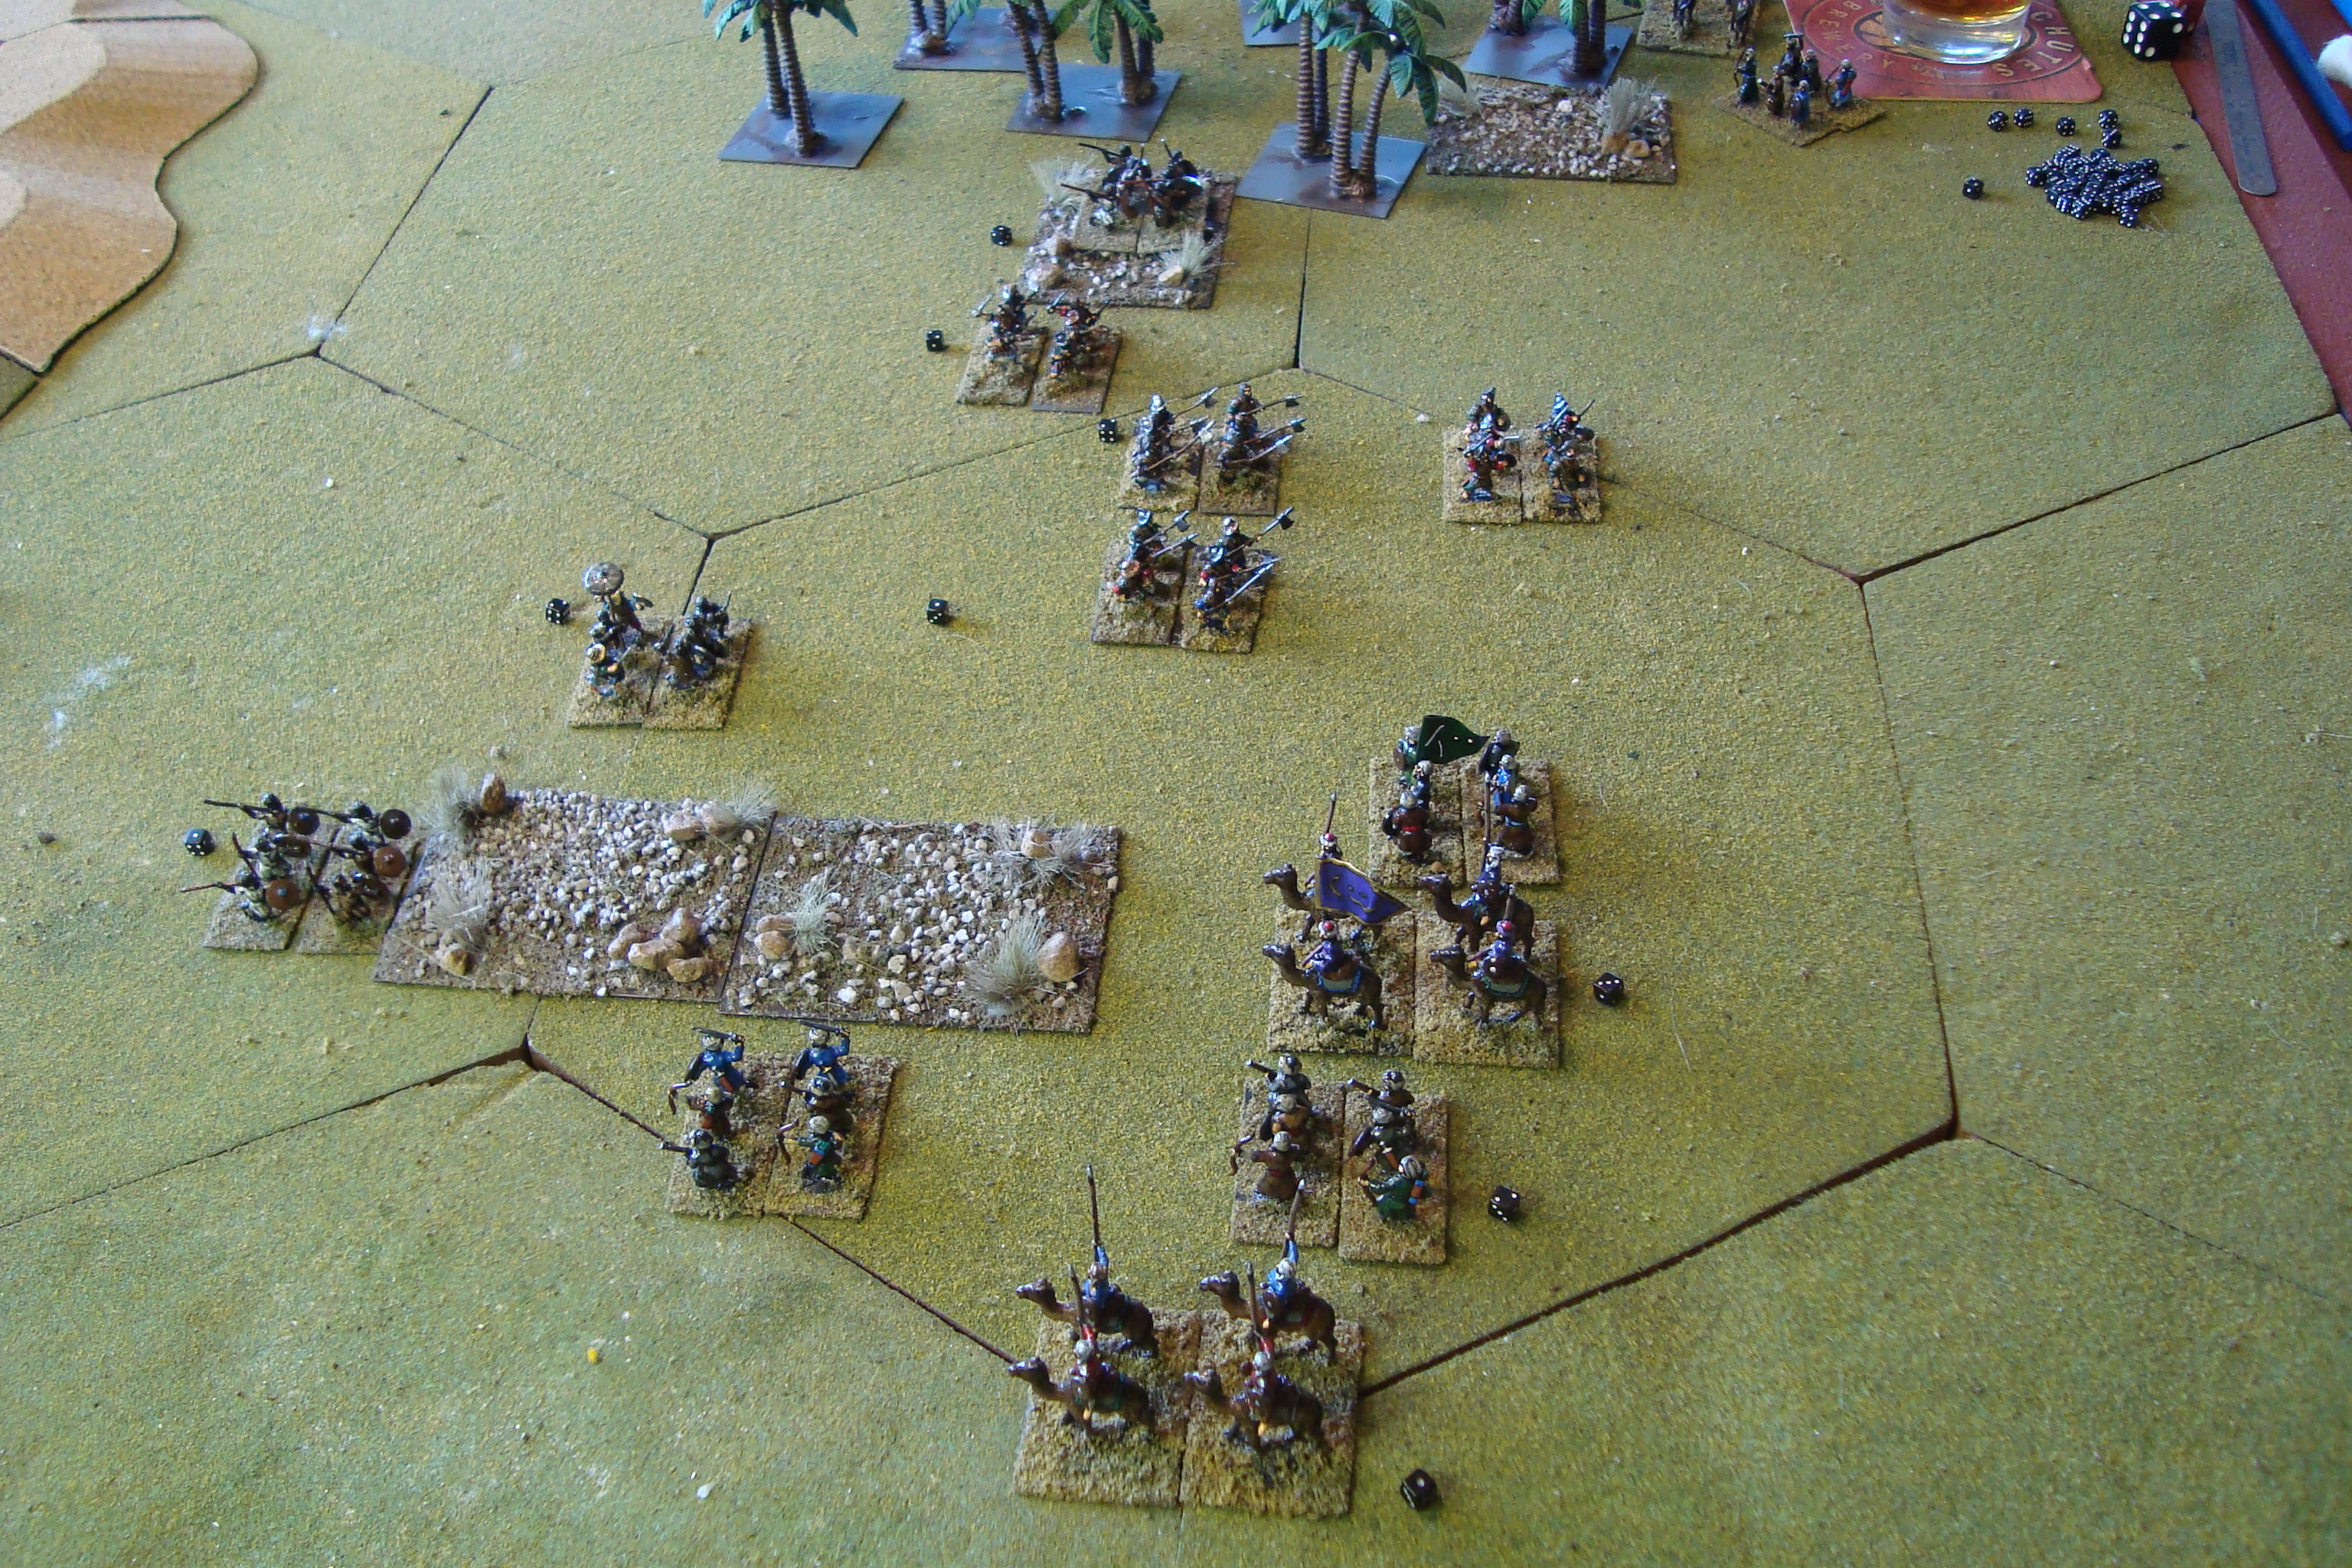
Here’s a series of photos to augment my narrative.  I’ll hold off on any analysis until Tim forwards his thoughts on the game.

Initial Japanese Landing by A Corps on Yangtze.
Japanese Arrive and Move Into Contact
Japanese Reinforcements Arrive In Shangai and Move Into Contact
Japanese Breakthrough Center, Split Chinese Forces
Japanese Penetration Sealed Off
Effect of Naval Patrol Attack on Chinese Supply
Situation At Game's End
Situation At Game’s End

Wilson’s Creek – GBACW

Finished up Wilson’s Creek just before I left for the weekend.

Opted for the rules’ historical Union entry points and task organization.  The bulk of General Lyon’s Union army enters from the north, with General Siegel’s reinforced brigade attacking the encamped Confederates from the east.  Here’s a map of the historical battle.

The opening of the game is something.  As soon as Union units are sighted, each Confederate unit has to pass a morale check.  Since many of the Confederate regiments have a morale factor of two (2), and the roll must be equal to or lower in order to pass, things become rather chaotic.  Confederate leaders scurry about trying to  rally routed troops, and then get them moving towards the two Union threats.  The two senior Confederate leaders, McCulloch and Price, cannot cooperate.  So, I had Ben’s brigade, which had the better soldiers, take on the Union main body, and Price try to handle Siegel’s smaller force.

Meanwhile, the Union troops were moving slowly towards the Rebels.  The entire battlefield is covered in brush, which reduces trail movement to a single hex per movement point, and 1/2 movement point if off trail.  No lightning thrust here.  Surprisingly, a number of Confederate militia units on pickett duty survived their initial morale check, and did yeoman work delaying the Union main body.  On top of it, I failed to read and incorporate the special rule that gave the Union forces two (2) extra movement points per turn.  Slowly, and more slowly than they should have, the opposing sides were able to form battle lines and engage.

Siegel's Union Force Engages Confederates
Siegel’s Union Force Engages Confederates
Union Main Body Begins To Deploy As Rallied Confederates Converge To Form A Defensive Line

The game became a series of firefights, with each side feeding in new troops as they arrived.  Lyon’s main body had moved in column, and took quite some time to fully deploy in the brush.  McCulloch had similar problems, and, given pressure from Lyon’s attempts to envelop, I added some of Price’s regiments to his left flank, even though they could not combine fire against Union targets.  Nonetheless, this was a bloody business, with three (3) brigade commanders killed.

I added to my rules transgressions by consistently misreading the CRT, using the less bloody artillery grapeshot results, rather than the small arms results.  Also, I misinterpreted the P/R result which does not allow the receiving unit to escape either a Pin or Rout through a favorable die roll.  The only mitigating factor was that these mistakes were effecting both sides, and not just one.

By game’s end, Siegel’s force was withdrawing, but not under any pressure from the battered Rebel units.   McCulloch’s brigade was grimly holding the Confederate right, while elements of Price’s forces were slowly giving way on the left.

Federal Main Body In Firefight

To top it all off, my reading of the victory conditions was flawed.  The Confederates gained VIPs by cutting off Union units from their supply source.  As you can (maybe) see in the photo above, I had Confederate cavalry units poised to envelope Lyon’s left.  Had I done this, perhaps it would not have been a Union victory.

All these screwups aside, a good game, with plenty of tension and lots of replayability due to the variety of entrance hexes for the Union forces as well as the randomness of the Confederate response after sightings.

An alternative historical setup can be found over at the spi.net website.

I want to play a couple more games in this series.  So, once the Airstream unfreezes (temps in single digits here), I’ll get going on Cedar Mountain.


Stonewall: Battle of Kernstown

Played through my first game of Stonewall: Battle of Kernstown. As stated in my previous post, this 1978 game was the second game to use the Terrible Swift Sword system developed by Richard Berg. The first game was a monster game of the Battle of Gettysburg entitled, strangely enough, Terrible Swift Sword.

While the system rules have gone through a number of permutations, here is quick and dirty overview of the basic rules for the first several games published by Simulations Publications Inc. Each game comes with its own special rules.

Turn Phase Sequence: Initial Command, Movement, Defensive Fire, Offensive Fire, Retreat Before Melee, Melee, Ammunition Resupply, Rally, Final Command.

Movement: Consistent rates for each unit type. Cavalry has mounted/unmounted; Artillery, limbered/unlimbered, Infantry, line/column.

Facing: Used and critical. Limits firing arc, zone of control (ZOC) and rear three hexes allow opponents to fire in enfilade.

Stacking: Limited to 8 strength points, with maximum of two units. Only top unit can fire, or take incoming small arms fire. Both units take incoming artillery fire. Both units count for melee, and both units are pinned when that combat result occurs. If top unit routs, second unit must roll for rout.

Fire Combat: Units can only be fired on once, firing units combine strengths. Artillery fires separately and at half strength against infantry. Line of sight rules are common sense, but beat to death in the rule book. Combat Results Table (CRT) uses firing strength points. Result are loss of strength, pin, or roll for rout.

Zones of Control (ZOC): Infantry, dismounted cavalry and artillery ZOCs extend to three frontal hexsides. Mounted cavalry all six. Supply wagons, and leaders none. Effect withdrawl fire, retreat fire, block both supply and command radius paths.

Withdrawl Fire: Takes place when unit leaves (typically retires before melee) a ZOC. Retreat fire occurs when a unit retreats into a unit’s ZOC.

Ammunition Supply: When small arms units roll to fire, either one (1) or six (6) die roll (depending on game) results in ammunition depletion. Unit cannot fire for rest of game unless re-supplied by a supply wagon (if available). Artillery units have a limited amount of ammunition. Hits on artillery units by other artillery units can explode cassions, resulting in ammunition depletion. Artillery batteries can redistribute ammunition. Infantry/Cavalry cannot.

Melee: Attacking unit ends movement phase in enemy ZOC. Takes fire, then advances into hex in melee phase. Melee CRT uses differential in strength points between units.

Rout: Based on morale rating. Three hexes, reduced movement and combat capabilities.

Rally: By leaders that are within their command radius. An expenditure of one rally rating point.

Brigade Combat Effectiveness (BCE): Each unit has a designated effectiveness strength. If it falls below that designated strength, it’s combat capabilities are dramatically reduced. BCEs are presented as a playing aide in the individual game rules.

Leadership: Units organized by brigade, with designated brigade commander. Brigade commander has an effectivenss rating, or hexes through which he can control his brigade, and a rally rating, which is used to rally units. One rally point rating automatically rallies one unit that is within its effectiveness rating. Divisional commanders have same ratings, but their effectiveness extends to their subordinates.

The game’s scenario is an interesting one. Jackson’s force is outnumbered, and has the mission of moving north from the south edge of the map. His three brigades can enter anywhere along the south edge of the map, east of (inclusive) of the turnpike. Objectives (for victory points) are securing a series of hills north of Kernstown, and/or exiting the map with as many units as possible.

The four Union brigades, while superior in strength, are spread out. An understrength cavalry brigade and an infantry brigade guards the river fords east of Kernstown, one brigade holds Pritchard’s Hill, which commands the town and turnpike providing a direct and rapid route for south-north movement, with another brigade in reserve near the north edge of the map. Here’s a link describing the historical battle.

Of course, I had to try something completely different and, as always, when given the opportunity, attempt to disregard at least one of the Principles of War. In this case, my most aggregious error was ignoring the principle of Mass.

I split the Confederate forces in three. The cavalry brigade was tasked to force the fords to the east, and make a run for the northern map edge. Garnett’s Brigade’s mission was to support the cavalry brigade to its right, force the fords immediately east of town, and advance along the turnpike placing pressure on the Union forces there. The remaining two Rebel brigades, along with Jackson, swung west of Kernstown (not has far west as historically) to outflank the forces on Pritchard’s Hill, to engage and destroy the northernmost Union force. Hopefully, the strong Union force on Pritchard’s Hill could be bypassed, and inflict minimal damage on the bypassing Confederate forces.

It was a Dog Fight.

The Confederate cavalry brigade wore down its weaker opponent, forcing the ford and eventually destroying the Union cavalry brigade. As ordered, it moved to the north.

Garnett’s Brigade engaged in a slugfest with its Union opponents east of Kernstown, forcing the ford, pinning them, while taking long range fire casualties from Pritchard’s Hill. Two Union regiments had the misfortune of suffering ammunition depletion on their very first turn! Resupply did occur, but the supply wagon was captured by the marauding Confederate cavalry brigade. Despite these mishaps, the Union forces stopped Garnett’s advance, with both sides suffering heavy casualties.

Jackson’s two brigade flanking force engaged elements of the Union’s reserve brigade which had moved south to prevent a flanking attack on Pritchard’s Hill. As this fight developed, the advancing Confederate forces were attacked in the flank by units from Pritchard’s Hill, barely beating off these attackers during the melee phase.

After these attacks, which disordered but failed to stop Jackson, the Union forces continued to hold Pritchard’s Hill, with the now depleted Union reserve units beginning a slow withdrawl to their original position, under some pressure from a beat-up Confederate force.

I didn’t go to the effort of counting up victory points, but I’m pretty sure this was, at least, a Union tactical victory.

More thoughts on the game and system in my next post. Have to set up Wilson’s Creek!

War of Resistance – The Other Side Of The Hill

Tim posted up about our WOR session.  As always, astute and spot-on.  Here they are…….

Logistics are a major constraint for both sides. While the Japanese get more resource points than the Chinese, they have to pay RPS to buy extra naval transports and landing craft units. I spent at least one RP per turn for more shipping and still had extra units in Japan at the end of the game. You did a better job of using your HQs for suppy than I did– I kept forgetting that you can use HQs when you are attacking. I should have remembered– the same rule is in March to Victory.

I think we both fell into the old trap of using our air forces for either Ground Support or Defensive Air Support. Looking back, I should have started attacking your railroads sooner, especially the one high volume rail line. I’m not sure what the Chinese should do, but I think it wouldn’t hurt to try some naval patrol missions or port strike attacks. While their bombers aren’t very good making their chances of sinking Japanese naval units pretty small, this isn’t Second Front and the Japanese don’t have very many Naval Repair Points (especially if they are having to repair damanged LCs), so any hits hurt. Attacks on port capacity might be a good idea, too. I know I ran into issues with port capacity.

Weather plays a big role in the game. The rainy weather really hurt you in the Hong Kong scenario and the clear weather helped me. I think in the longer scenarios, the Chinese would be well advised to try to run out the clock until the arrival of the monsoon.

I need to spend some time looking at the interactions of various naval units. The Chinese might be able to use their naval units to impede Japanese movement along rivers.

I think you put too many of your good troops in Shanghai and neglected your flanks. I think it would be worth using your factional or unsupported units in the full or partial city hexes, in the hopes of getting some exchanges and trading easily replaced units for Japanese casualties. Like we talked about, it would be very worthwhile putting some supported units along the rivers to discourage amphibious landings (I also realized after the game that you can’t move along rivers if the enemy controls both sides of the river– I don’t think this would have changed our game).

Having said that, you did do a good job of defending Shanghai. I launched the amphibious invasion because it was going to take a lot of time to dig out your troops. I don’t remember how many factional units you had, but it would have been worthwhile to have left some of them behind in Shangai to act as a rearguard when you pulled out.

Using engineers to negate or reduce negative modifiers for city hexes is really important. As usual, neither side has as many engineers as they would like…

I misunderstood the international concession rules, thinking that the hex was off limits for all combat…It also functions as a port, that would have really helped the Japanese. I don’t know if the Chinese could get enough strength to make an attack on it, but it might be worthwhile to try.

I probably should have landed north of the Yangtse sooner. Opening up a second front helps to stretch the Chinese.

Whampa (the port NE of Shanghai) is a really important hex. I don’t know if you can set up troops in it or if you can use the first turn to move troops to defend it, but making the Japanese fight for it is a good idea. Taking that port really simplified my logistics.

War of Resistance – Hong Kong and Fate of Nanking Scenarios

Tim and I were able to get in three sessions of War of Resistance (WOR) on Tuesday afternoon and Wednesday. It’s amazing how some level of moderation in beer consumption, and  lack of viable evening movie options, can increase the time spent gaming.

We played two sessions of the Attack on Hong Kong scenario, with full Chinese intervention, and one using the Fate of Nanking scenario. I’ll use the “old” spellings throughout.

Hong Kong is referred to as the game’s introductory scenario. That’s true if you have never played the Europa system before. The Fate of Nanking involves all aspects of the Glory rules system used in WOR. I hoped my playing of The Damned Die Hard (TDDH) would prepare me for WOR.   That was not the case, as the supply/logistics,  guerilla, reaction and command rules are far more detailed and extensive than those featured in TDDH.

I played the Japanese in the first session, limiting the forces committed to attacking  Hong Kong to the OB’s designated assault force. Too many troops were allocated to defend the assault force’s flanks and rear from the two Chinese armies situated to the east and north, as well as the guerrillas located to the west. In addition, I left out one attack supply factor, which limited my full strength assault attempts to two (2).  The result was failure to take the city in the time allocated.

We switched sides for the second session. Tim loaded up his assault force and with a successful role for his reaction phase – which allows the non-phasing player to move and attack – during my first turn was able to take Hong Kong in two (2) complete game turns (because of the Reaction Phase and the Japanese player plays first, he had three (3) attack turns). My Chinese attack on his forces to the north had an initial success, but the game was over before they could attack again.

Japanese Take Hong Kong (Why Have I Circled The Wagons in the North?)

The Fate of Nanking was another matter.

The Japanese must land, assualt and secure Shangai, and then move west and take Nanking. The Japanese have significant, but management intensive, naval resources. The Chinese player has strong forces near Shanghai, but weaker forces in the Nanking area.

Supply management is critical for the Chinese player, he must juggle the need for attack and general supply, as well as utillizing resource points for construction and repair. This is a typical challenge in Europa.  But in WOR, the very limited number of resource points – which can be converted to attack suppy which, in turn, can be converted to general supply (yes, this is confusing… it confused the hell out of me) – combined with a problematic transportation network, has a direct and significant effect on what the Chinese player can and cannot do. Unless the player is thoroughly comfortable with these rules and their application, a disproportionate amount of time and effort is spent with logistics, with combat operational planning adversely affected.

Guerilla bases and units are another aspect of WOR that is a challenge. While these units were included in both scenarios, we didn’t use them. One reason was that we had our hands full with other aspects of the game. Another was that our games, for the most part, involved urban combat, and guerillas cannot enter cities. As we play longer scenarios, I’m sure we will start using bases to recruit guerillas, for attacking lines of communication.

Reaction can only be used if there is a Army (Japan) or War Zone (Chinese) command unit available. Each Army or War Zone has as command radius, and success die roll. If the die roll is successful, then all units within the command radius can move and fight in the reaction phase. This allows the non-phasing player to maintain momentum generated in his phase of the turn. Tim did an excellent job of applying continual pressure on my units defending Shanghai.

Attack and general supply points can also be stacked with a command unit. This is an effective way of efficiently using supply points, as the ratios needed are far less than the one (1) point per regimental equivalent (RE) typically used. Neither of us consistently took advantage of this capability to improve our logistical support.

With the exception of a small contingent stationed in the international section of Shanghai, all Japanese combat and logistics assets must be transported from Japan to China. The number of naval transports and landing craft vary from turn to turn. In addition, landing craft can be damaged during operations, and removed from further play. Tim said this was a constant concern, and limiting factor, in his operational planning.

I decided to hold Shanghai in strength, which is what happened in 1937. Tim built up combat power in Shanghai and methodically attacked my units at odds of 3:1 or greater.

Initial Chinese Forces


Stalemate in Shanghai
Stalemate In Shanghai

As the fighting in Shanghai developed into a battle of attrition, Tim launched an amphibious assault along the Yangtze River.  This prompted a long discussion on the rule limitations on naval transport, river movement, and amphibious assault. We’re still thrashing this out.

Amphibious Landing Along The Yangtze

The game ended with Tim consolidating and building up his beachhead, and with me starting a fighting withdrawl from Shanghai to the west.

Japanese Advance Along The Yangtze & Chinese Withdraw From Shanghai
Japanese Advance Along The Yangtze Force Chinese Withdrawal From Shanghai

Lots of good game play and challenges. A fun time!  We’re planning another go at the Nanking scenario in early December.

Red Actions! Second Try

Really windy here, gusts up at 30 mph.  Riding out of the question, college football schedule marginal, and World Series doesn’t start until 1700.  Decided to get another game in.  Same scenario, and tactics, but with Reds being more aggressive.

An aggressive wargamer really needs good die rolls.  That happened for the Soviets.

There was the usual push and shove between the Soviet company providing the base of fire and the Chinese regulars entrenched on the ridge.  However, the Soviet Sailor company advanced quickly  out of the woods and effectively attacked the Chinese Conscripts in reserve.

The Conscripts acquitted themselves well, maneuvering when called upon (they consistently rolled higher than two (2)),  shrugging off terror markers like regulars.  However, over time they were pushed back, losing one platoon.

Stolid Conscripts Supporting The Regulars

With the Chinese Regulars also pushed back, and with two (2) terror markers halving their fire strength, the Soviet Regulars advanced towards the ridge, supported by the Cheka company,  engaging in a firefight with the now weakened Chinese.

Cheka In Support
Cheka In Support

The overwhelmed Chinese had no choice but to conduct a fighting withdrawal, with the retreating Regulars covered by the Conscripts!

Soviet Leadership Comes From The Barrel Of A Gun
Chinese Withdrawl
Chinese Withdrawl

Good and quick game with plenty of action.

Next time, machine guns and artillery.


Mission Impossible?

Finished up my last play thru of the Luzon Scenario in The Damned Die Hard. Earlier sessions are described in a previous post. I played this scenario at least six (6) times, and in each playing the Japanese fail to make any appreciable progress towards Manila. Seems ahistorical.

However, there are administrative reasons for the first few failures.  Which is a polite way of saying I displayed some, well, incompetence.

I neglected to thoroughly read the scenario rules. Not the first time this has happened. For the first couple of games I missed the mandatory US setup adjacent to the Japanese lodgment at Lingayen Gulf and then the mandatory two (2) regimental equivalents (RE) “within two (2) hexes of 1718”.  These constraints prevent any initial defense in strength along terrain blocking the axis of advance towards Manila,

OK, tried it again, assuming that “within” was inclusive of 1915. Once again, the Japanese made little progress. However, in the middle of the night it dawned (no pun intended) on me that maybe “within” wasn’t inclusive. In these situations I go to Experten, and the Experten in this case is Tim. His response was that “within” was not inclusive.

OK, tried it again, this time with 2 REs of units back from the MLR. Same bloody result.

OK, tried it again, this time making the assumption that units shown in T/O as “Battalion Groupings” were not “Small Battalions” that have lower RE strengths and reduce possible GS air strikes.  Same damn result.

There are several reasons for this. One, the best odds the Japanese can get are 4:1 on 1915, the hinge of the US defenses. This assumes that none of the Japanese forces are disrupted in the mandatory check before combat. Second, the impact of airpower is minimal since the rules limit ground support (GS) to one unit per two (2) REs, excluding artillery. Given the scale of the game, the Japanese have only 4.5 REs (exclusive of artillery) in their hex. Third, while the Japanese movement advantage in rough translates to a +1 to their die roll, it is negated by the -1 for the rough.  So, it takes a six (6) to blast a hole in the US line.


Initial Dispositions - See Next Photo For "Corps" Composition
Initial Dispositions – See Next Photo For “Corps” Composition


Corps Composition - OK, It Was Dark And I Was Using My Iphone
Corps Composition – OK, It Was Dark And I Was Using My Iphone

So, why the angst?

A successful disruptive Japanese attack during the first critical turn is highly unlikely.  Any result less than a DE allows the US Reserve Force (two (2) hexes north of Manila) to move up after the attack and plug any gaps as well as reinforce the MLR. The ability of the US player to begin assembling Philippine divisons and a light armor cadre further reduces the chance of any Japanese success.

According to The Fall of the Philippines, the official history of the campaign. The Japanese made significant progress before Jan 1, forcing the US forces to retire to Bataan. I confirmed this in the West Point Atlas of American Wars, which has several maps on the campaign. Based on my experience and reading of the scenario and rules, there is just no way this can happen.

Oh Well……My, My….

All told it was time well spent. I enjoyed the opportunity to really dig into the rules and replay a scenario several times rather than a more typical “one and done”.

I’m hoping this familiarity with The Glory game system will hold me in good stead when I travel to Portland next week to play the Hong Kong Scenario in War of Resistance with Tim.

Irregular Wars

Finished up my last game of Irregular Wars for awhile.  Another dust up between the Portuguese and Arabs.  This was a followup to an initial game, with the addition of chance cards and disease/mishaps.

The card draw effected the Portuguese.  They drew a weak leader, which is a -1 DRM to any rally rolls.  The disease and mishaps die rolls that take place for each unit right before the start caused a few units on each side to lose one resolve point.

This time the Arabs used their camel units to attack the crossbowmen manning the Portuguese right flank.  The crossbow fire was ineffective, and the camels closed with a +2 DRM for charge.  So, contrary to the  lessons learned in the initial game, camels can be effective.

The big take-away from this game was how an entire wing of your army can collapse after a series of melees.  This is a function of the game’s resolve (morale) mechanics.

When a unit’s resolve reaches one (1), it wavers.  A wavering unit must withdraw 1D3.  The opponent rolls for pursuit.  If allowed, it can contact the wavering unit again, receiving a charge bonus, if applicable.  If the wavering unit  contacts a friendly unit (no interpenetration in these rules), the contacted unit has an immediate loss of one (1) resolve.  When a unit’s resolve reaches 0, it scatters.  Any unit within two (2) movement units (2u in game terminology), suffers an immediate loss of one (1) resolve.  This can be quite a chain reaction, with waverers withdrawing into friendly units or being hacked at by pursuers.  Take a look at what happened to the Portuguese right flank.

DSC01187

In the top photo, several Portuguese units have already scattered.  In the next photo, the entire wing is gone.  However, you’ll notice the Arab center is in very bad shape, also.  Quite a game!

DSC01190

As reported earlier, Irregular Wars will come off the bigger table to make way for Red Actions!  However, it will be played this Winter, because it’s just too much fun.

Doubleheader

She’s away with the trailer this weekend and my salmon hunting expedition postponed (the biomass has not moved into the Columbia yet), so I’ve set up two games on the dining room table.

The first is another try at the Luzon Scenario from The Damned Die Hard (TDDH).  The second is an old Europa Magazine scenario, Operation Icarus.

I found a nice TDDH series replay at a fellow Oregonian’s site.

The Icarus scenario is one that I’ve played before.  As Hitler is quoted in The Eagle Has Landed, it’s a “simple matter of logistics”.  How to get German units from Norway to Iceland, repair ports, build airfields, resupply what units you have, and, yeah…….stop the British.  If only I had one more para unit!

I’ll post a session(s) report later on.

Europa: Battle Of The Bulge Scenario

Finally getting around to posting up about last weekend’s Europa game.  It was a hard-fought contest, coming down to the last impulse.  The scenario uses a modified Europa turn sequence, with a non-phasing reaction phase placed between the phasing player’s movement and exploitation phase.  It’s air-on-demand, regardless of impulse.  The scenario involved the Dec I  through Jan II turns.

Victory points are awarded to the German player if able to exit units off the North map side (Brussels/Antwerp), or if the Allied player activates either the 9th or 3rd Armies.  For the Allied player, it’s simply a matter of avoiding German VPs.   We did not play the Boddenplatte option – which also involves VPs. Too much for the time available.

Tim’s axis of advance was South to North, using high-odds armored attacks to shatter outlying US units.  As Allied commander, I decided to activate either the 9th and/or 3d Army only as a last resort, way too many VPs involved.  The Allied reinforcement schedule is fairly generous, and it looked as though it was worth the risk to attempt a bend-but-not-break defense.

By mid-game, Tim’s pressure forced me to abandon Aachen in order to shorten up my defensive line, in order to create minimal reserves if needed to plug gaps of support weakened units.  The modified turn sequence saved me.  His January I attack attrited my unsupported southern units, forcing them to fall back.  However, during the reaction phase, I was able to reinforce these faltering units and seal off a penetration that would have given him access to the road grid leading to Brussels and Antwerp, and victory.

Early last week, Tim sent me an e-mail summarizing his impressions of the game.  Here they are…..

  1.   We forgot to halve the bombing factors of aircraft during the snow weather turns….oops…one for your rules screw-up files. We’d even talked about it during the set up.
  2. I wonder if it would be more useful to have the Luftwaffe fly harassment. They did help some on the attacks, but if they’d been halved, they wouldn’t have been all that useful (of course, they’d be halved for harassment, too). Making it harder for the allies to move up reserves would be a very good thing.
  3. I didn’t do a very good job of handling negative modifiers– I should have been a more cognizant of whether a defending stack was capable of AECD and if it wasn’t, used enough infantry to bring the attack below the threshold for ATEC. ATEC is very hard to overcome during bad weather. Of course, using more infantry lowers the German combat power. The other option, which I did use later in the scenario was to throw in more half capable units (I guess the Germans knew what they were doing when they made their panzer divisions into panzergrenadier divisions by detaching the panther battalions).
  4. I know we talked about it, but I was really surprised when you gave up Aachen. I was thinking that the allies would be very reluctant to abandon the first German city they’d captured and a west wall hex to boot. Given that the scenario didn’t penalize that decision, it was a good one.
  5. It was a bummer that my commandos got killed…I was hoping they would negate some of the negative modifiers from terrain and weather.
  6. I think I spent too much energy attacking the weak southern part of your line. I like to think I’m pretty good about focusing about what wins a scenario or a game, but not this time. In better weather, I might have been able to turn your flank, but its hard in the snow (and the axis fuel shortages hurt, too).
  7. I think you’re right that the Germans have to take some low odds attacks in order to try to crack the allied line.

BTW, the game involves a lot of counters in a very small area.  Tim liked that.  We did not use the black and white larger hex insert that accompanying the magazine.  Here’s the usual crummy picture, shot early in the day, so the beer mats are not yet in use.


DSC01158

Fun game, Fun Time…….