Category Archives: Sessions

Another Try

Back to Portland for a long-awaited replay of the new version of Red Star/White Eagle (RSWE).  This  Deluxe Edition  is published by Compass Games.

Tim and I played the old GDW version several times (follow the tag) and always enjoyed it, despite some serious rules screw ups.  We started playing the  new version back in early February, but ran afoul of the Super Bowl and some accompanying wackiness.

The Compass edition of this classic Polish-Soviet War game is improved in every way, with a better map, thicker and larger counters (too large for our tweezers), as well as very functional set-up and reinforcement displays.  These displays, combined with  counters that include campaign set up designations, really help the set-up.

One aspect that hasn’t changed is the very bloody Combat Results Table (CRT).  The CRT also allows the attacker to advance multiple hexes after combat.  With good die rolls, an aggressive attacker can generate plenty of operational movement with opportunities for deep and wide envelopments.

But, these envelopments  must be judiciously evaluated, since they also provide an opponent with opportunities to sever exposed supply lines or cutoff extended units.

Another game element that hasn’t changed, and one that significantly effects (maybe “shapes” would be a better term) play is how zones of control (ZOC) are treated.  In RSWE, passing through the ZOCs costs additional movement points. The exact costs are shown on the unit’s counter.  Also, enemy ZOCs cut supply lines, and the presence of friendly units doesn’t offset the effects of enemy ZOCs.

The attractive and functional map is divided into Soviet South and Southwest Fronts.  The central area is heavily wooded, while the  topography to each side is  both sides is open, but with river barriers, especially in the South Front.   Soviet units must remain in their respective fronts, and cannot be transferred from one front to another.

The game abstracts concurrent Soviet operations against White Russian forces.  The primary tool for this is a mandatory  “stand down” for the South Front units.  During this stand down, these units cannot attack Polish forces unless Polish attacks occur, and then, only on a one-for-one basis.  There are also mandatory unit withdrawals representing other developments during the Russian Civil War.

April IV (1920) the first of the weekly campaign turns.  The Soviet player conducts his reinforcement/replacements, movement and combat first (except for the April IV turn!).

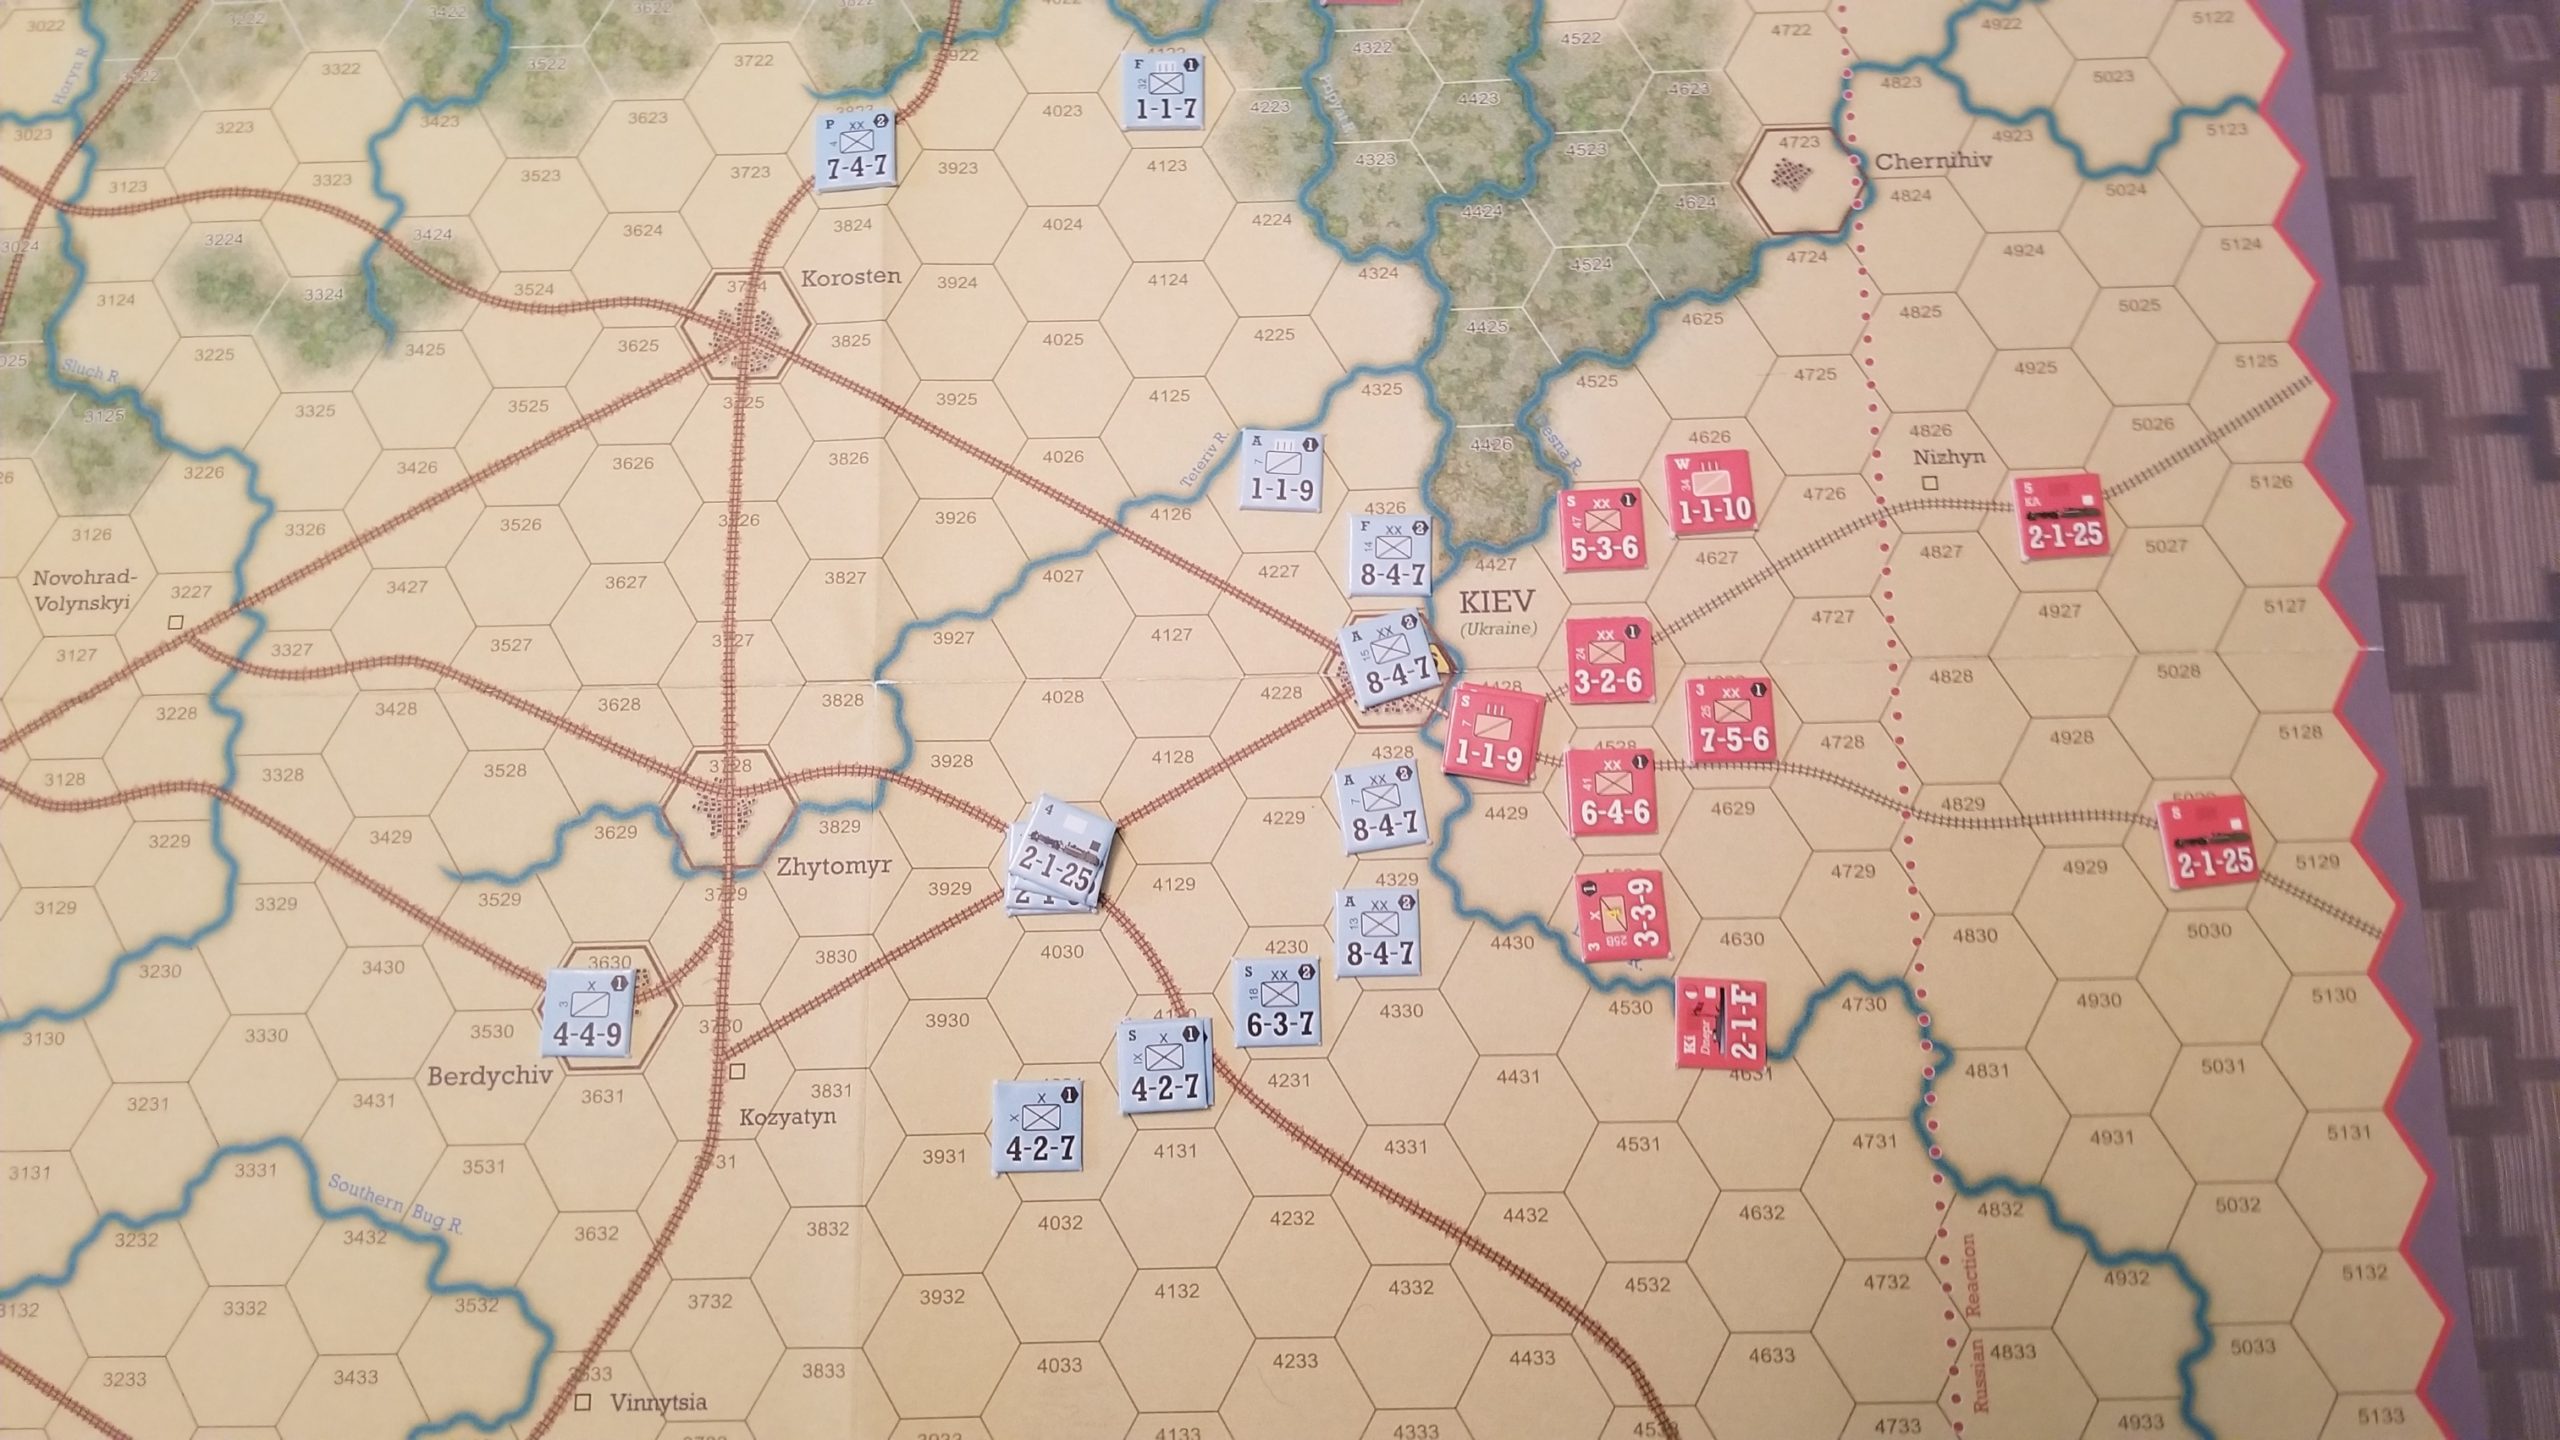
The Polish player has the initiative for the first few turns.  The Soviet player must initially cover each hex along both fronts with either a unit or a ZOC;  a very real  Thin Red Line.  The Poles set up last and can pick and choose where to attack.  This creates several opportunities, especially around Kiev in the Southwest.  Taking Kiev produces victory points as well as Ukrainian reinforcements.  But any advance beyond Kiev faces  a flood of Soviet replacements and reinforcements.

The management and placement of these replacements (within their assigned Front) is a critical aspect of the game, allowing the Soviet player to not only stabilize the Southwest Front, but also counterattack, especially after the arrival of the First Cavalry Army (Konarmia).

Replacements arrive as generic units placed either on the map, to rebuild reduced (divisions and some brigades have full strength and reduced combat values) units, or held off map to recreate eliminated units during the next turn.

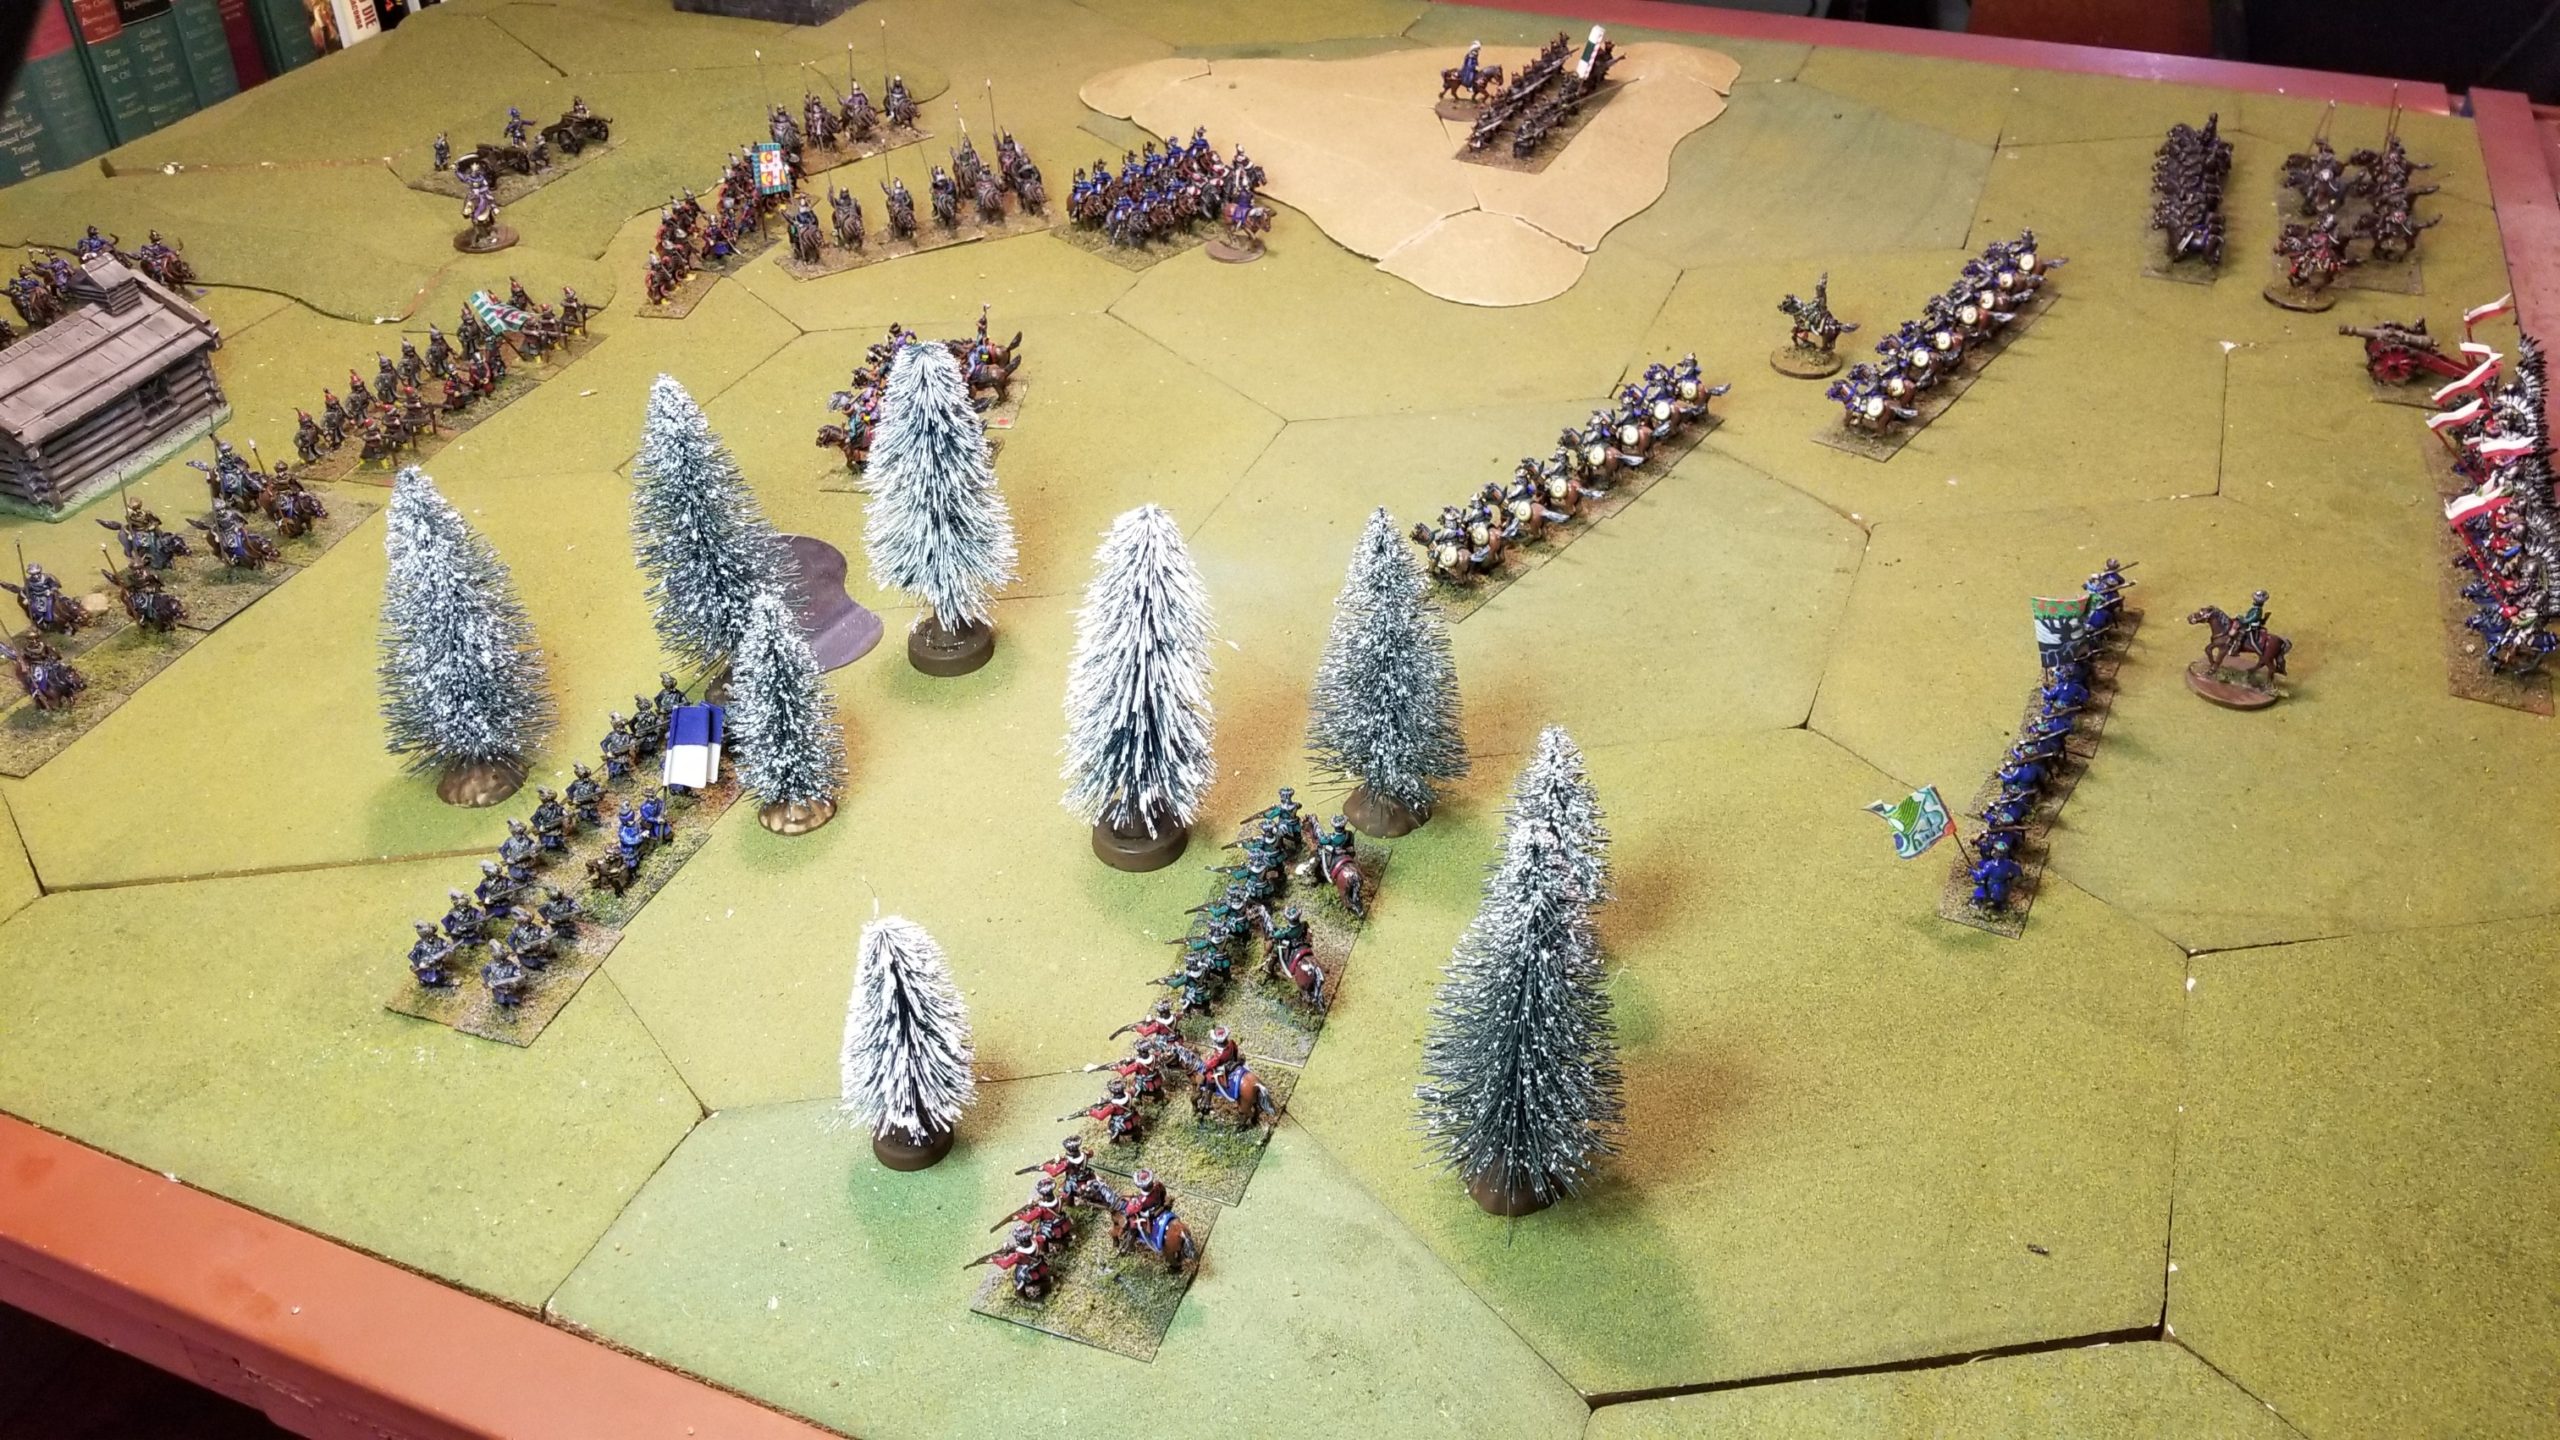
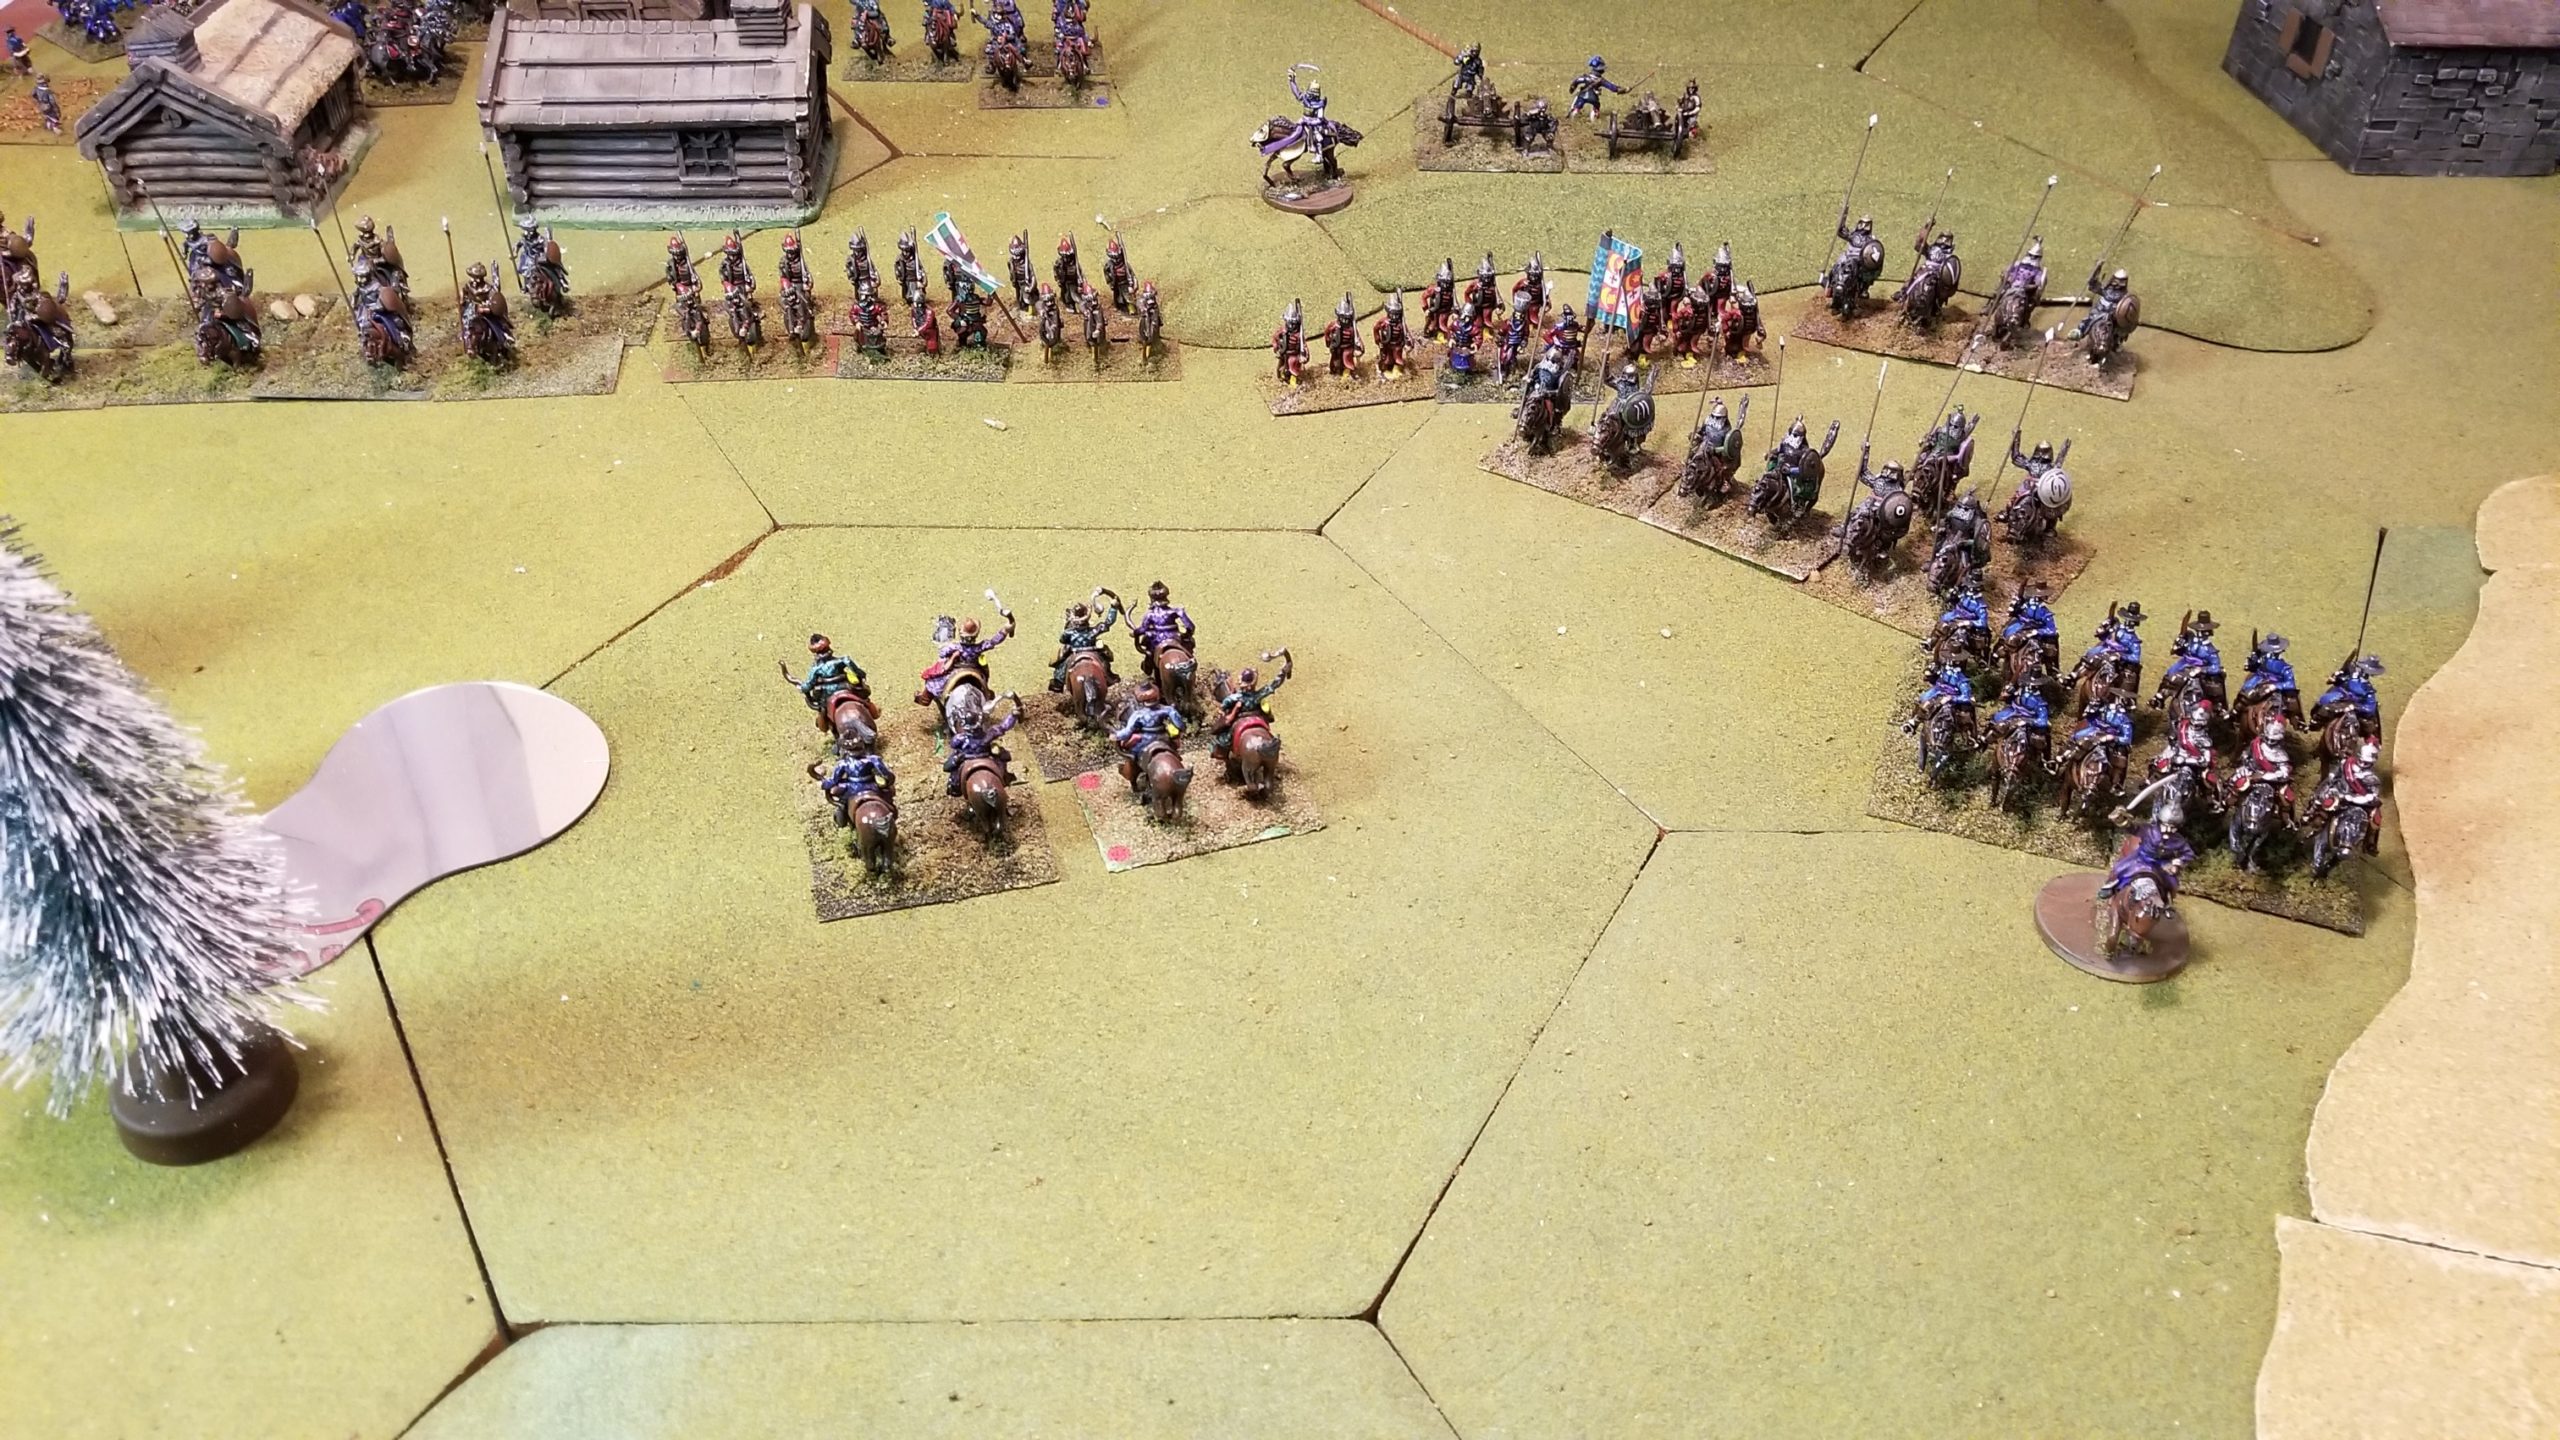
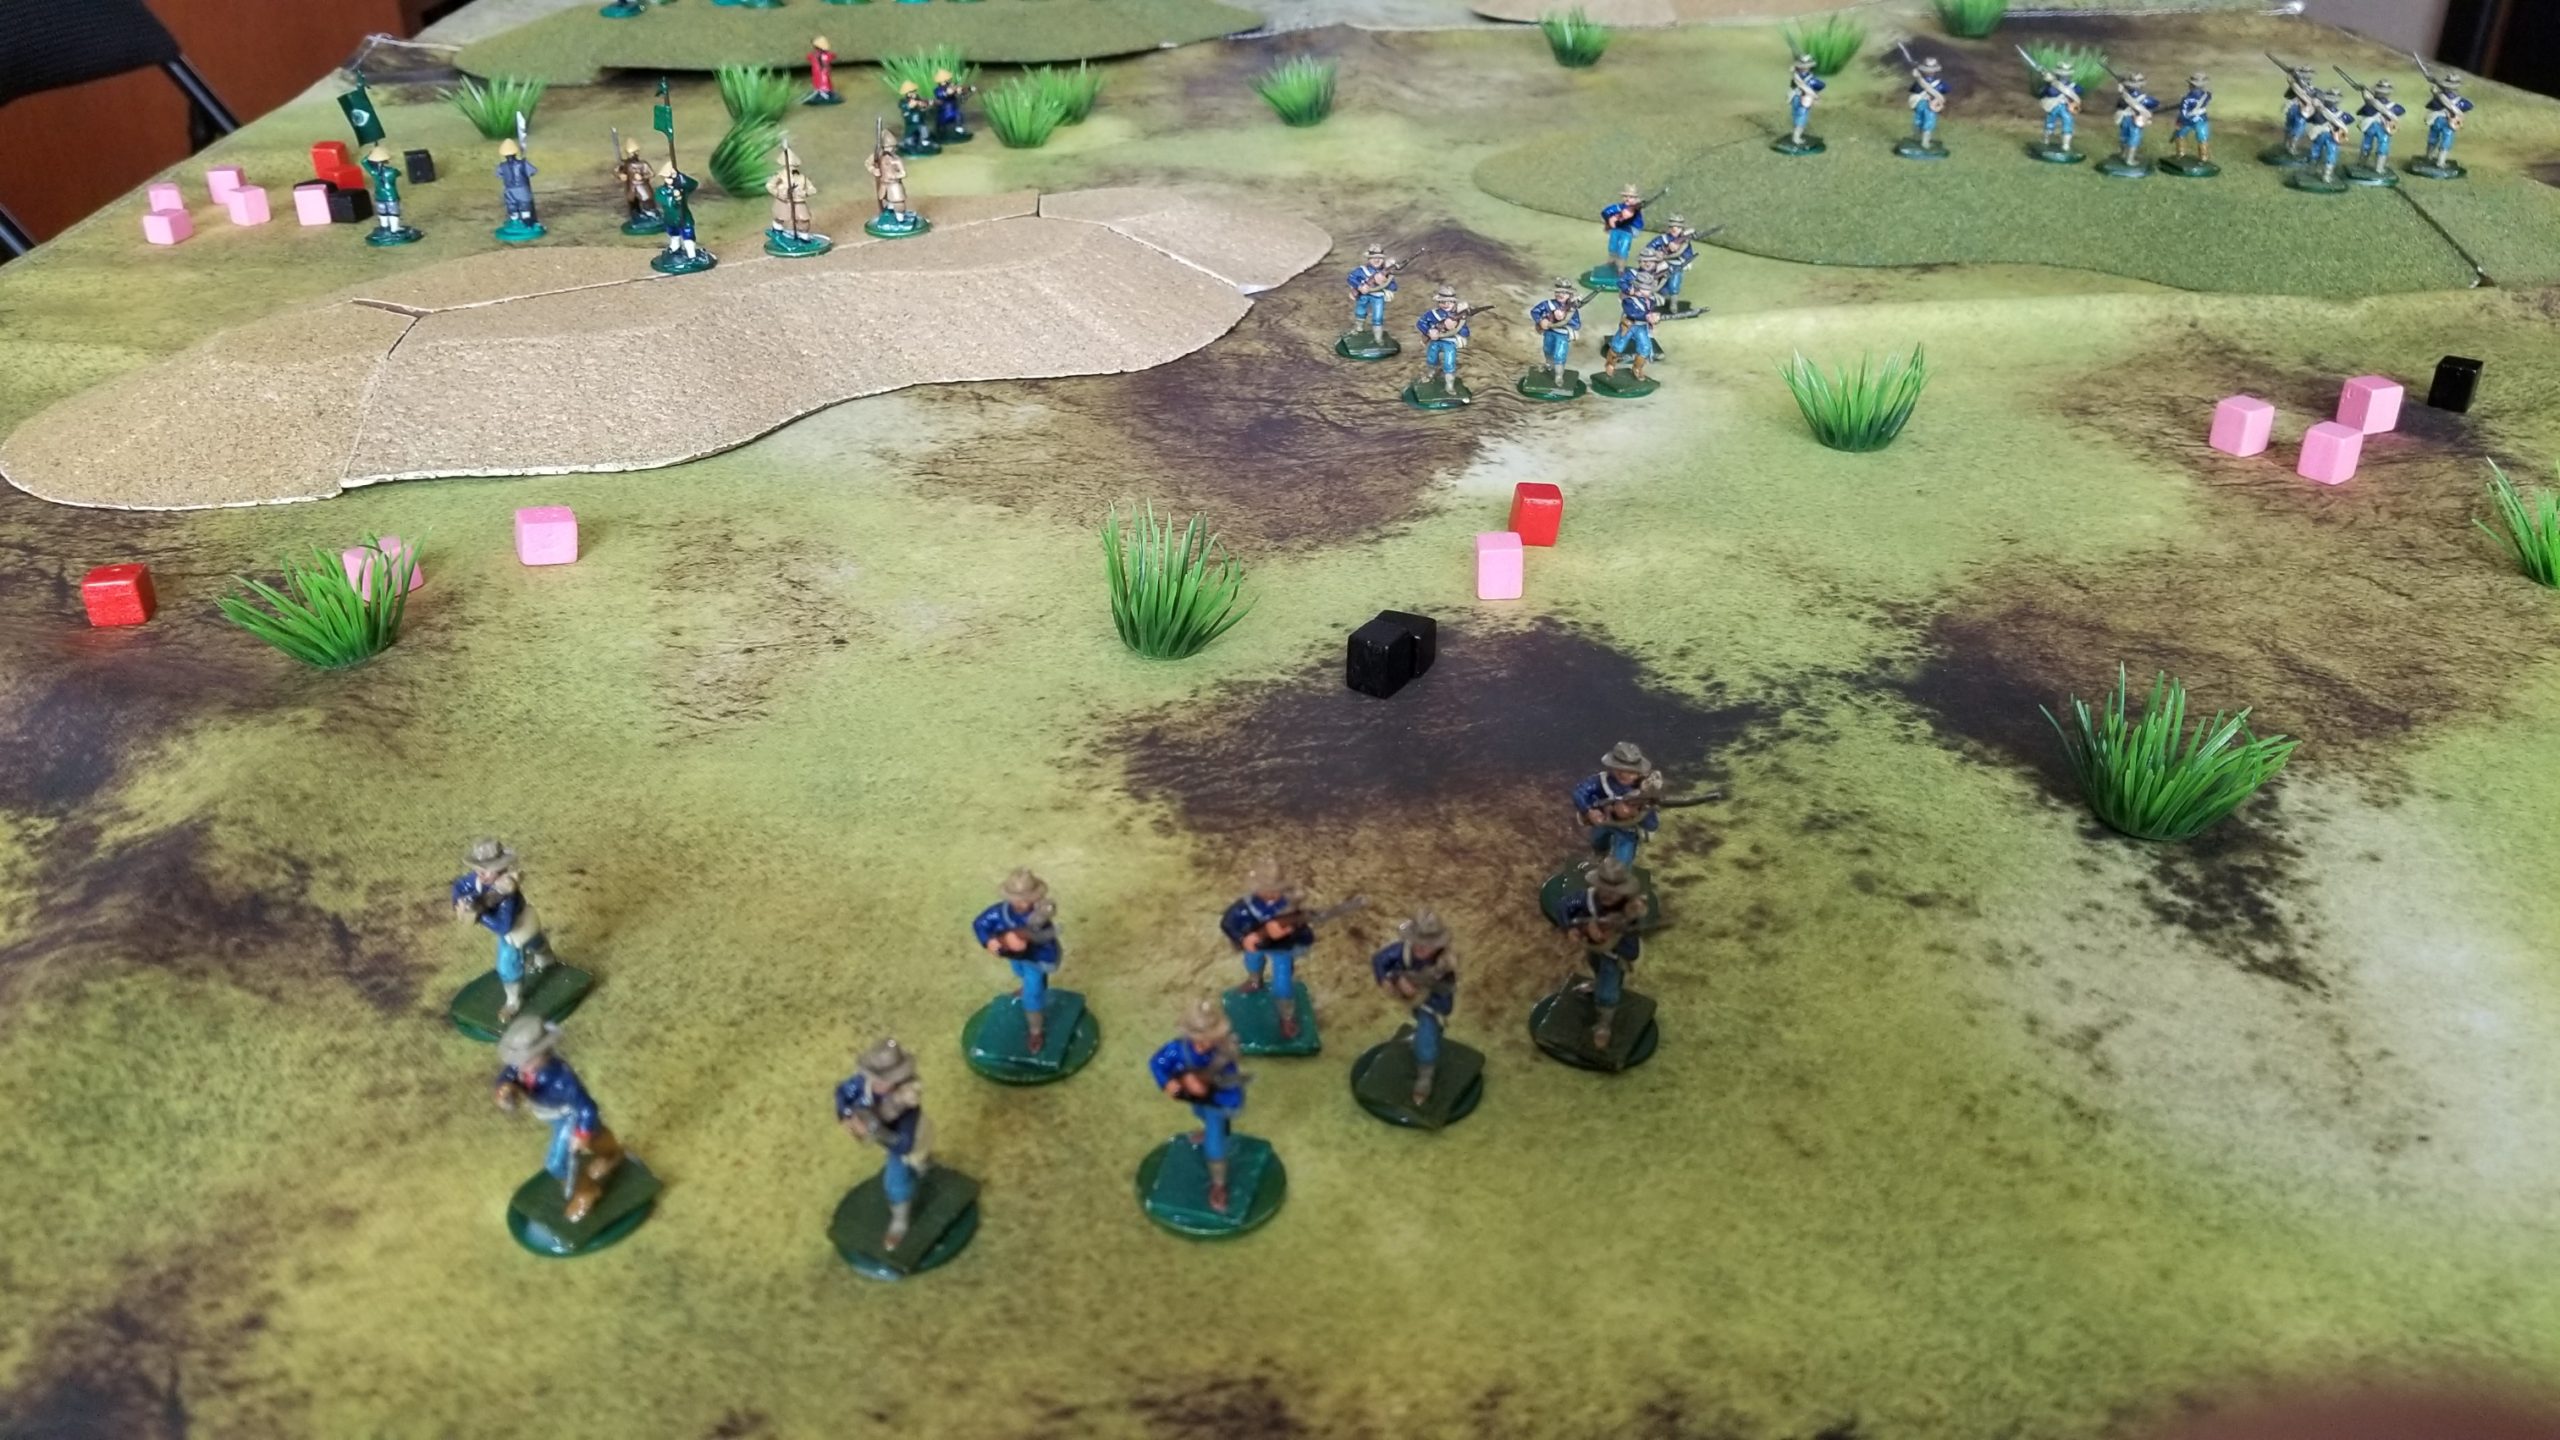
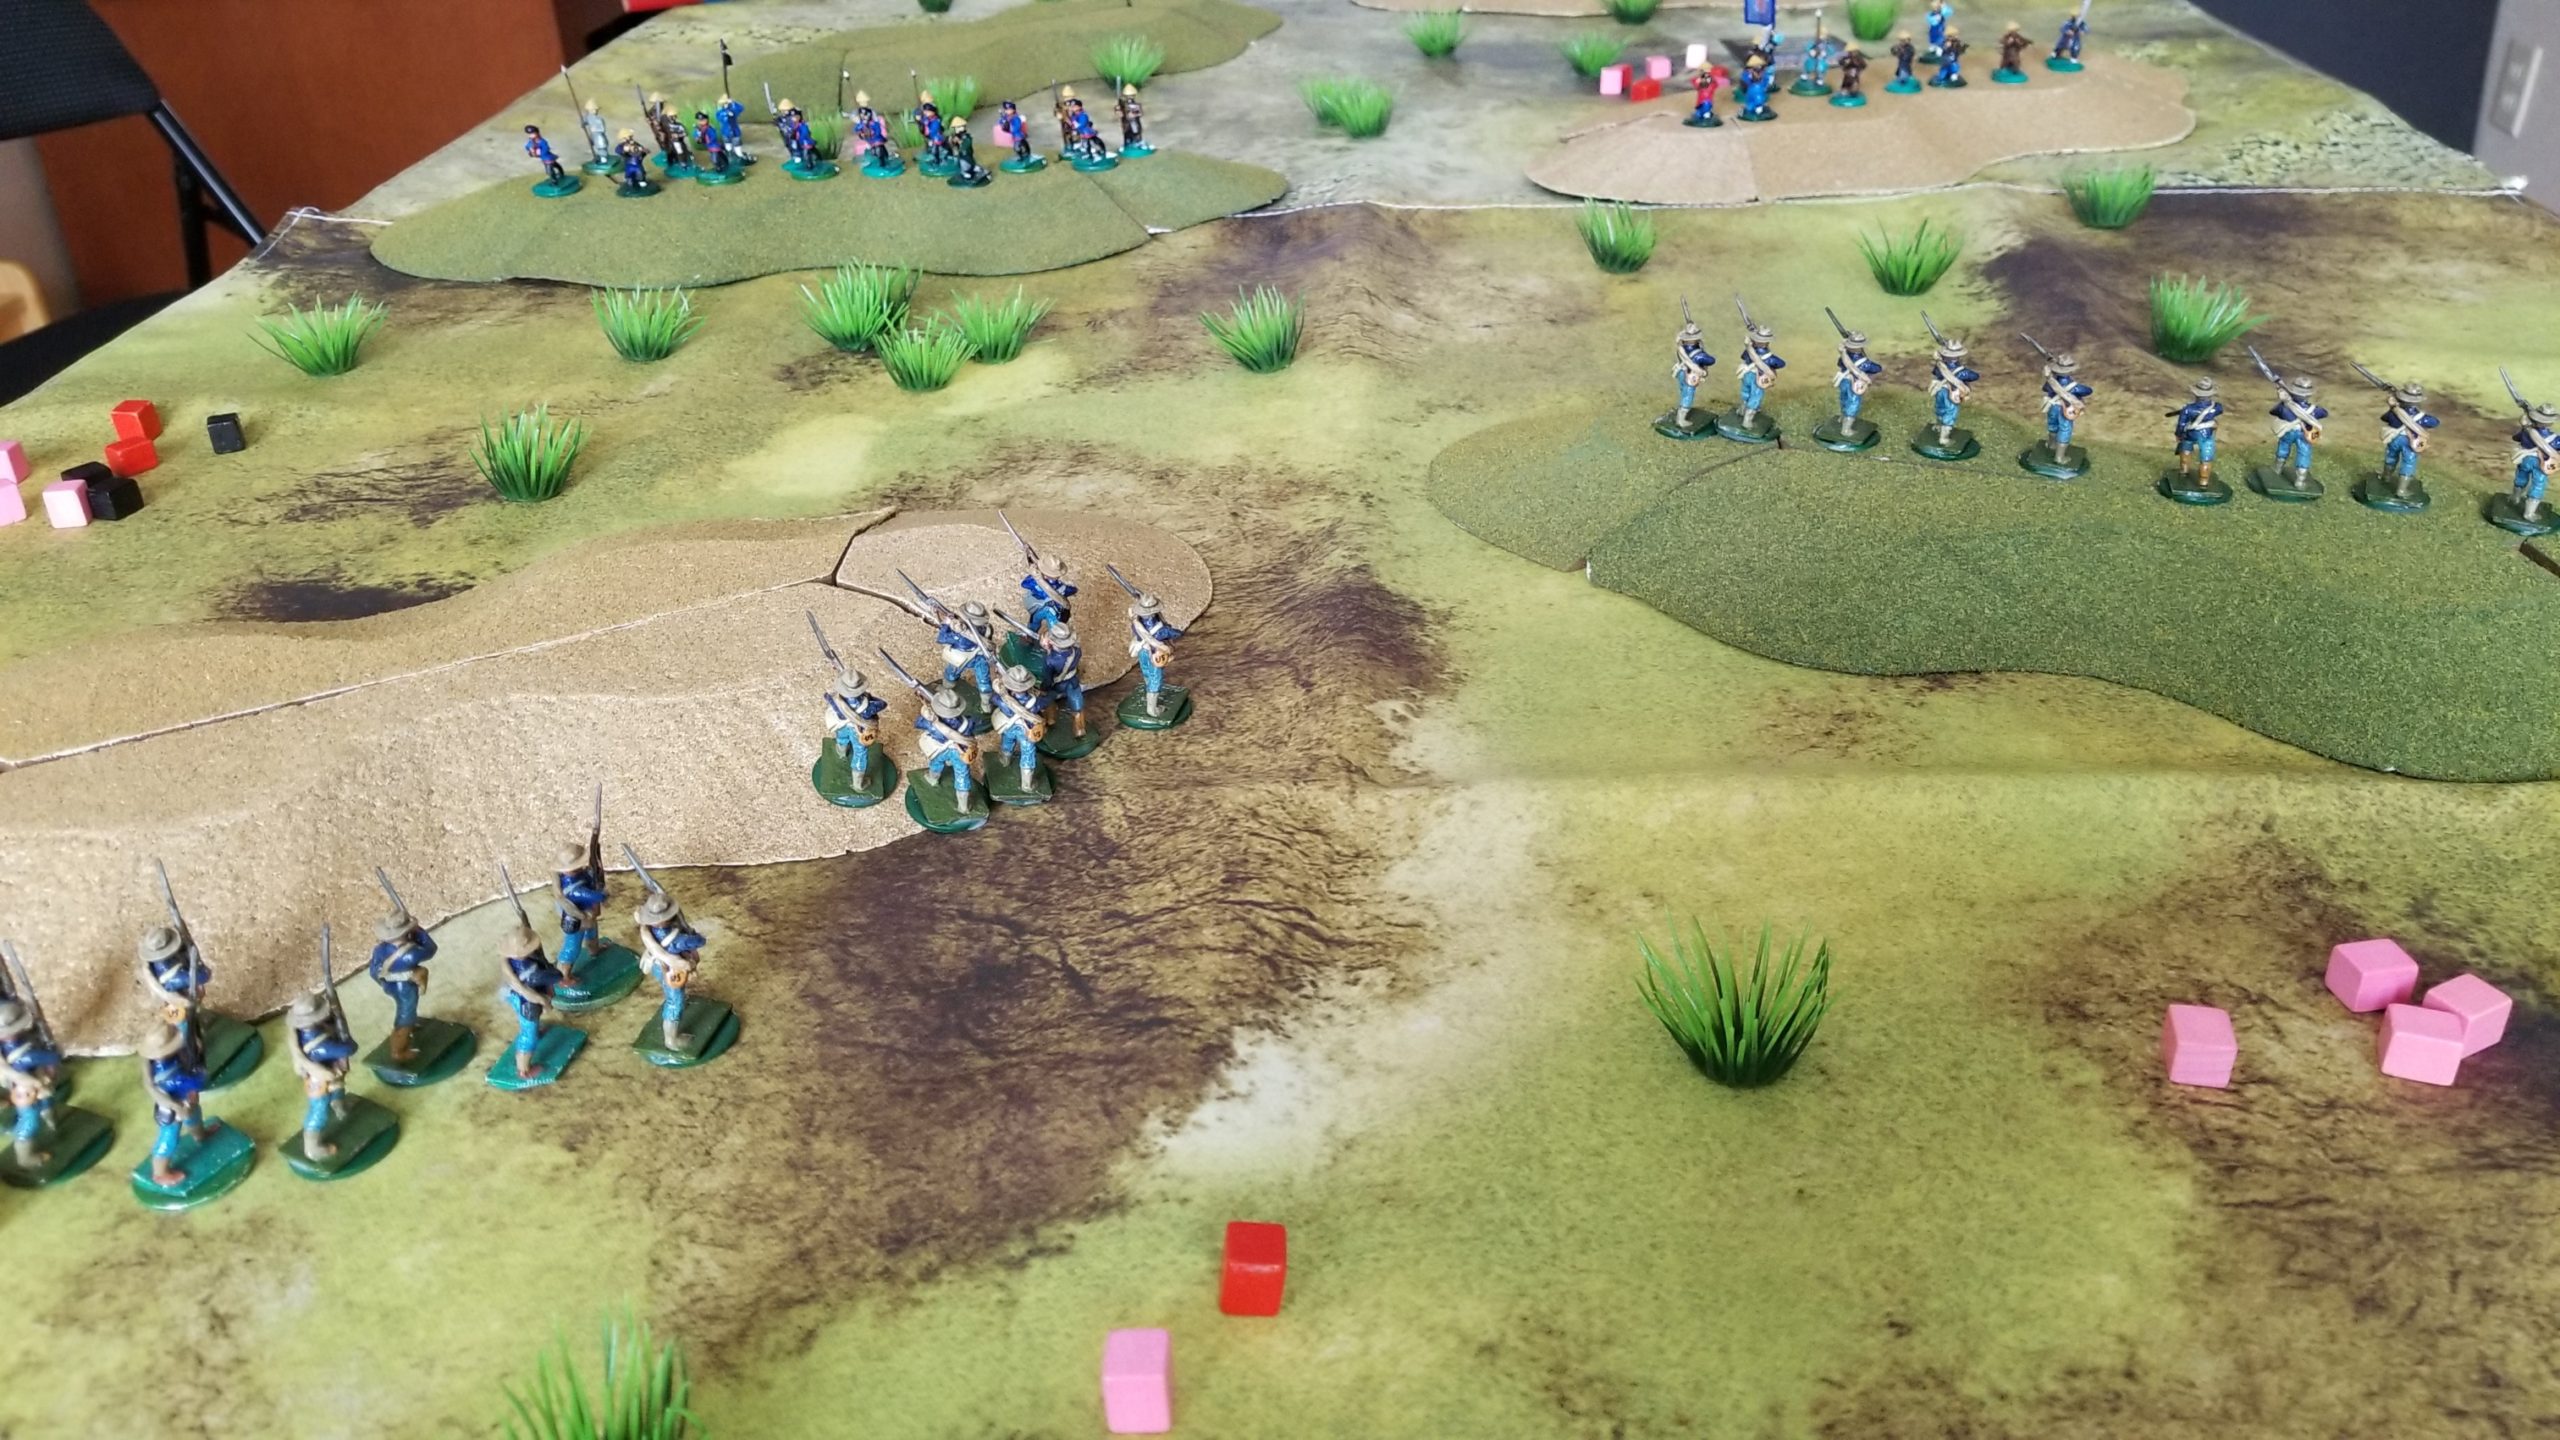
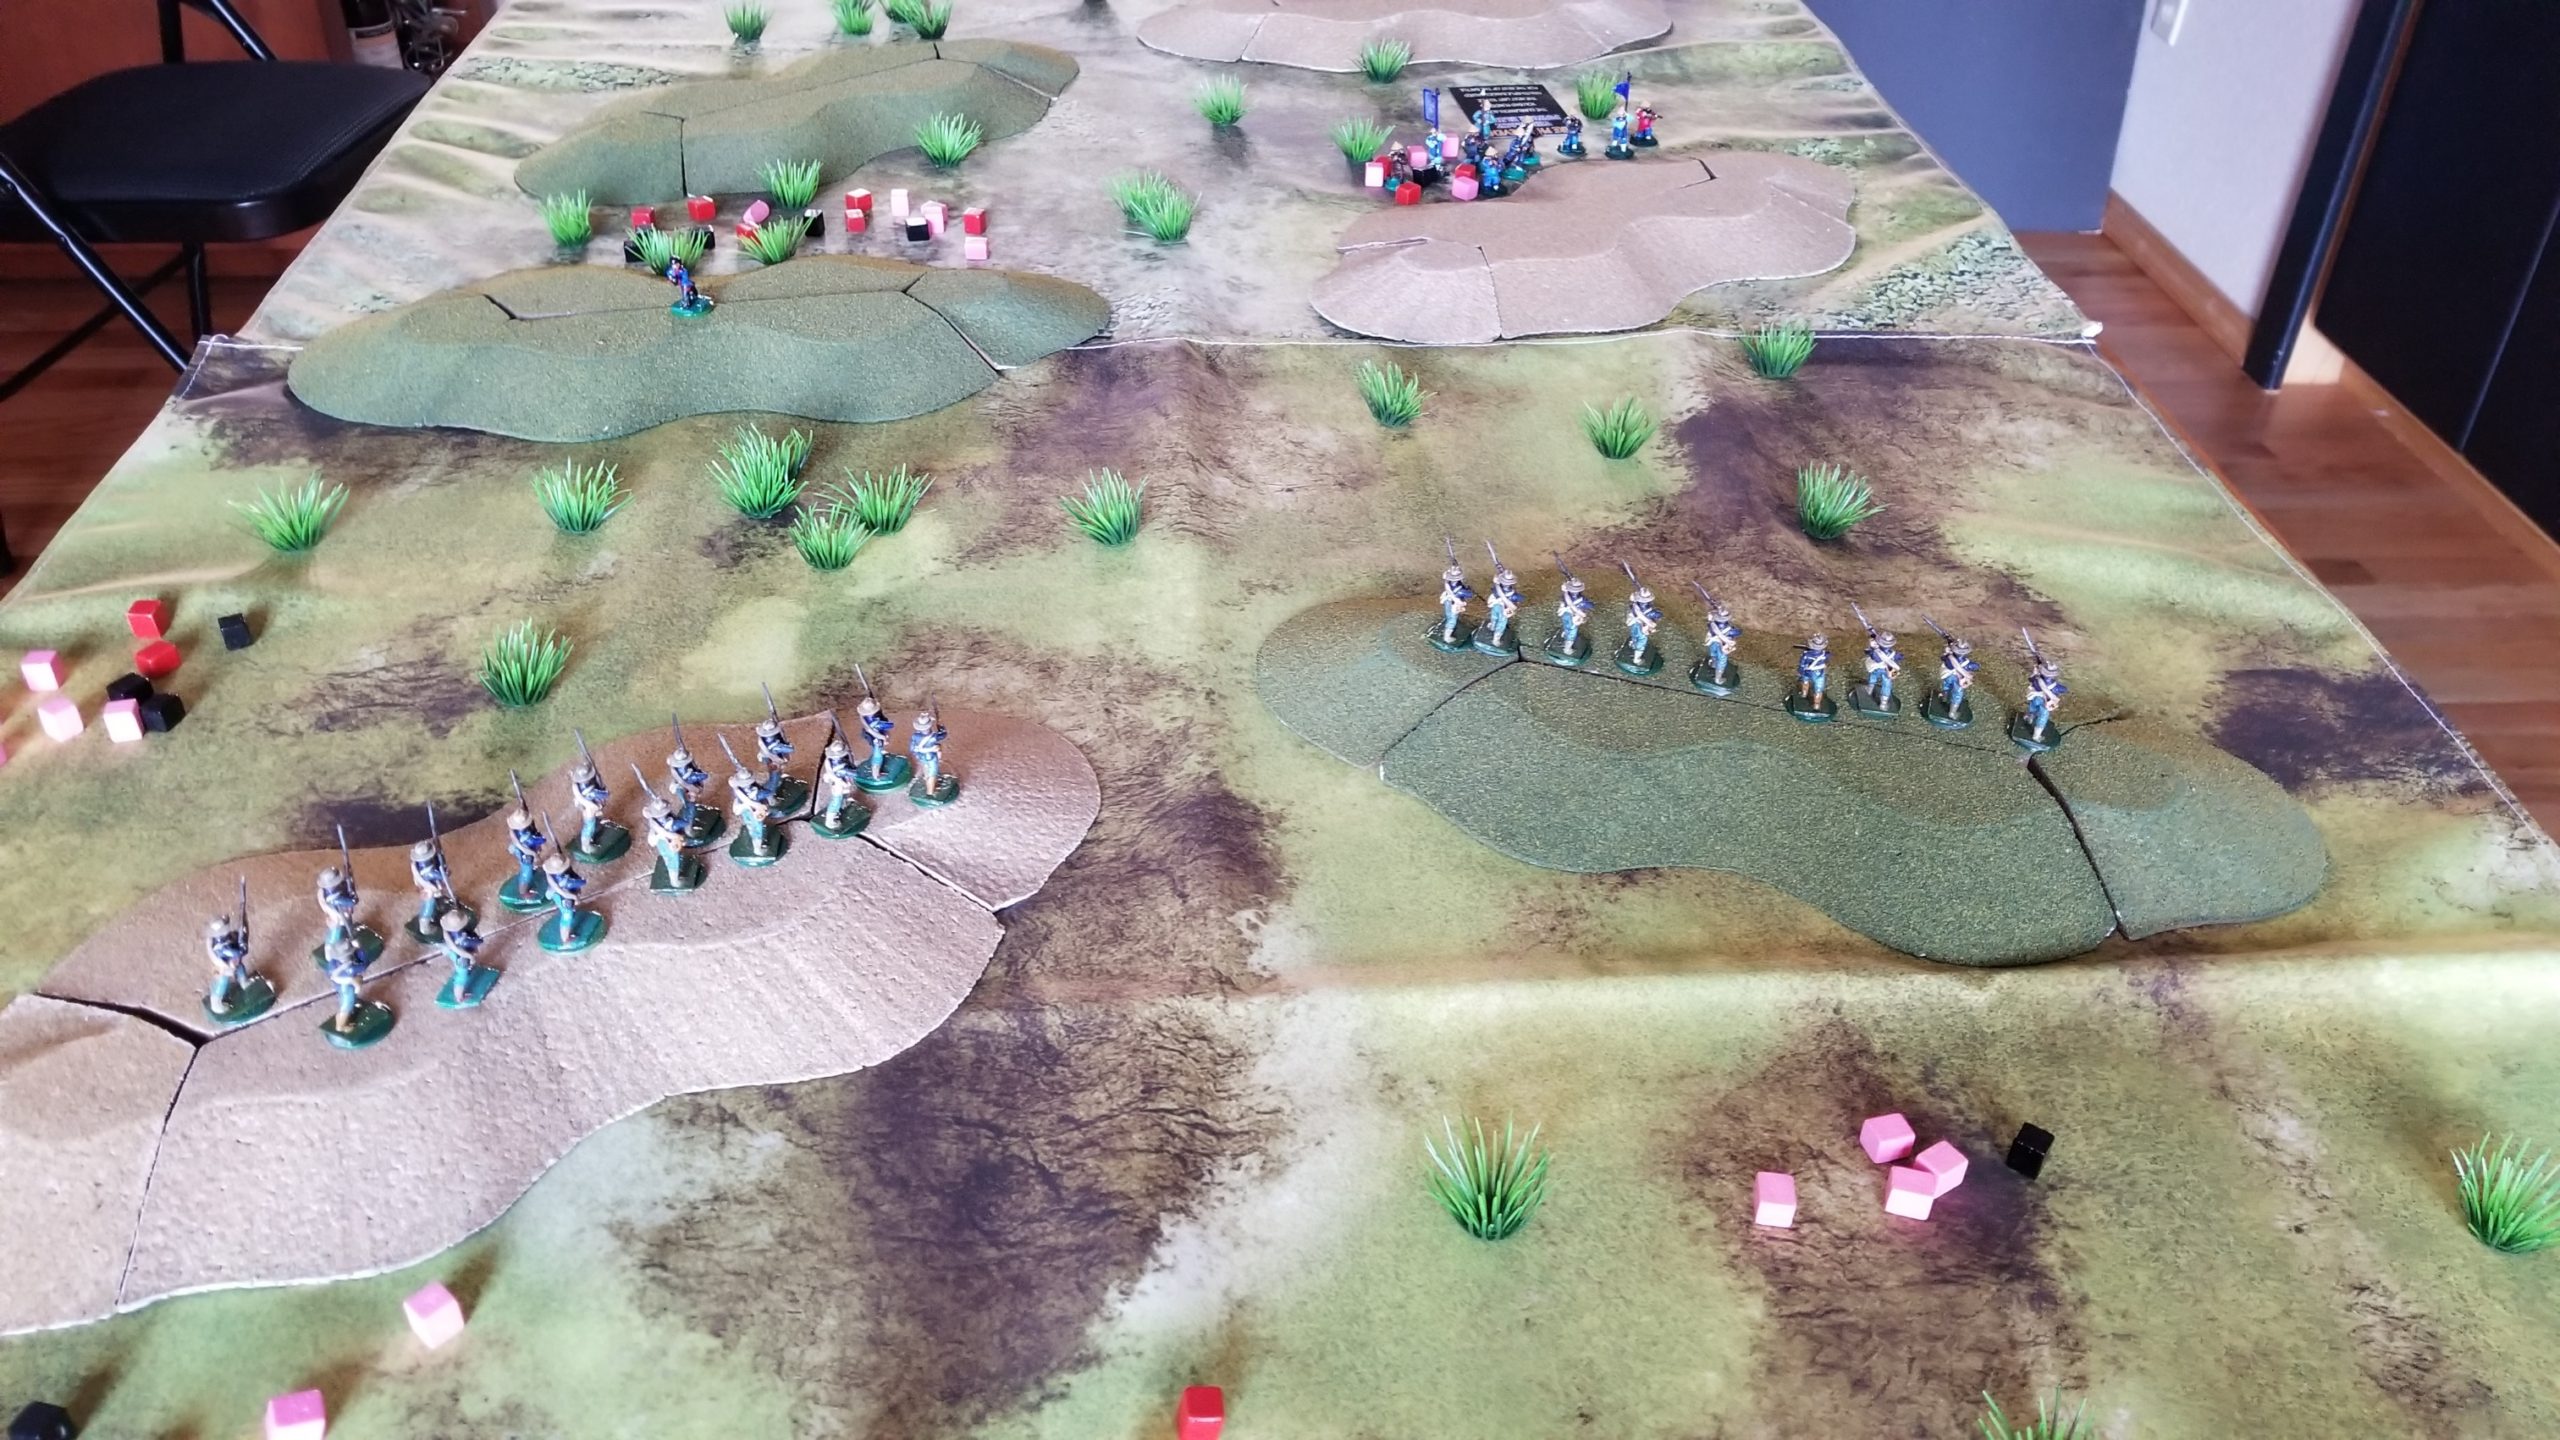
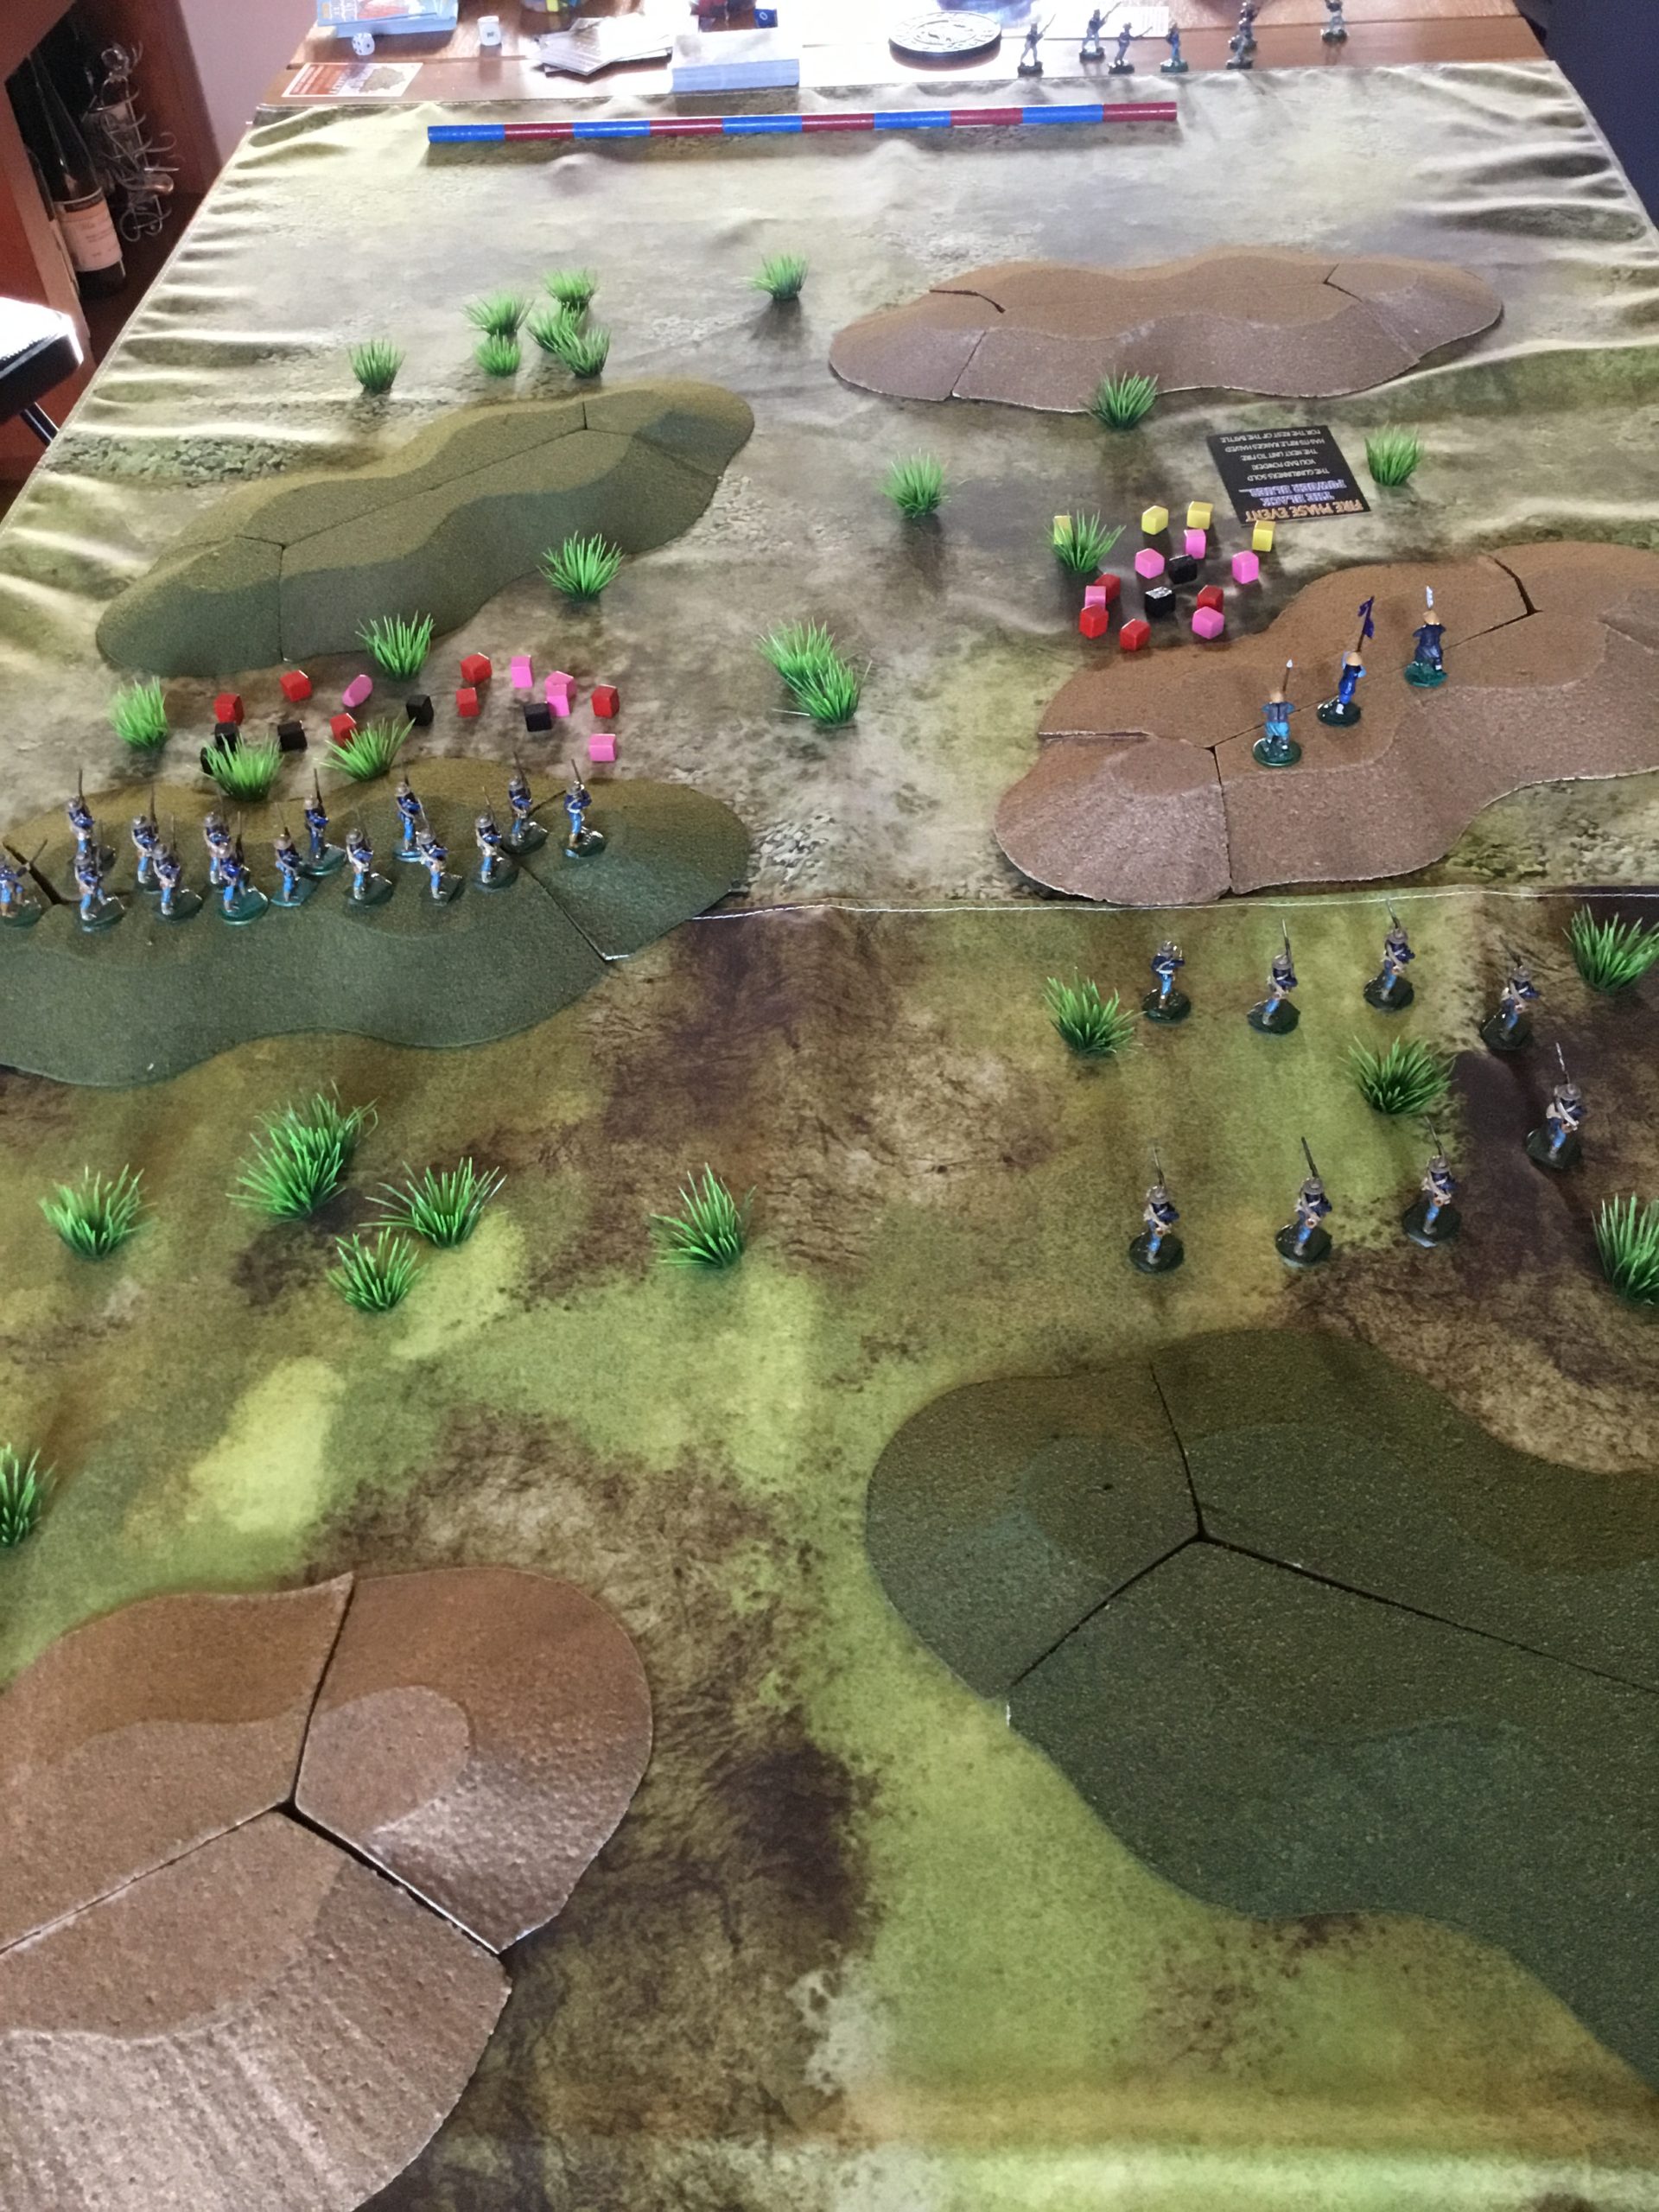
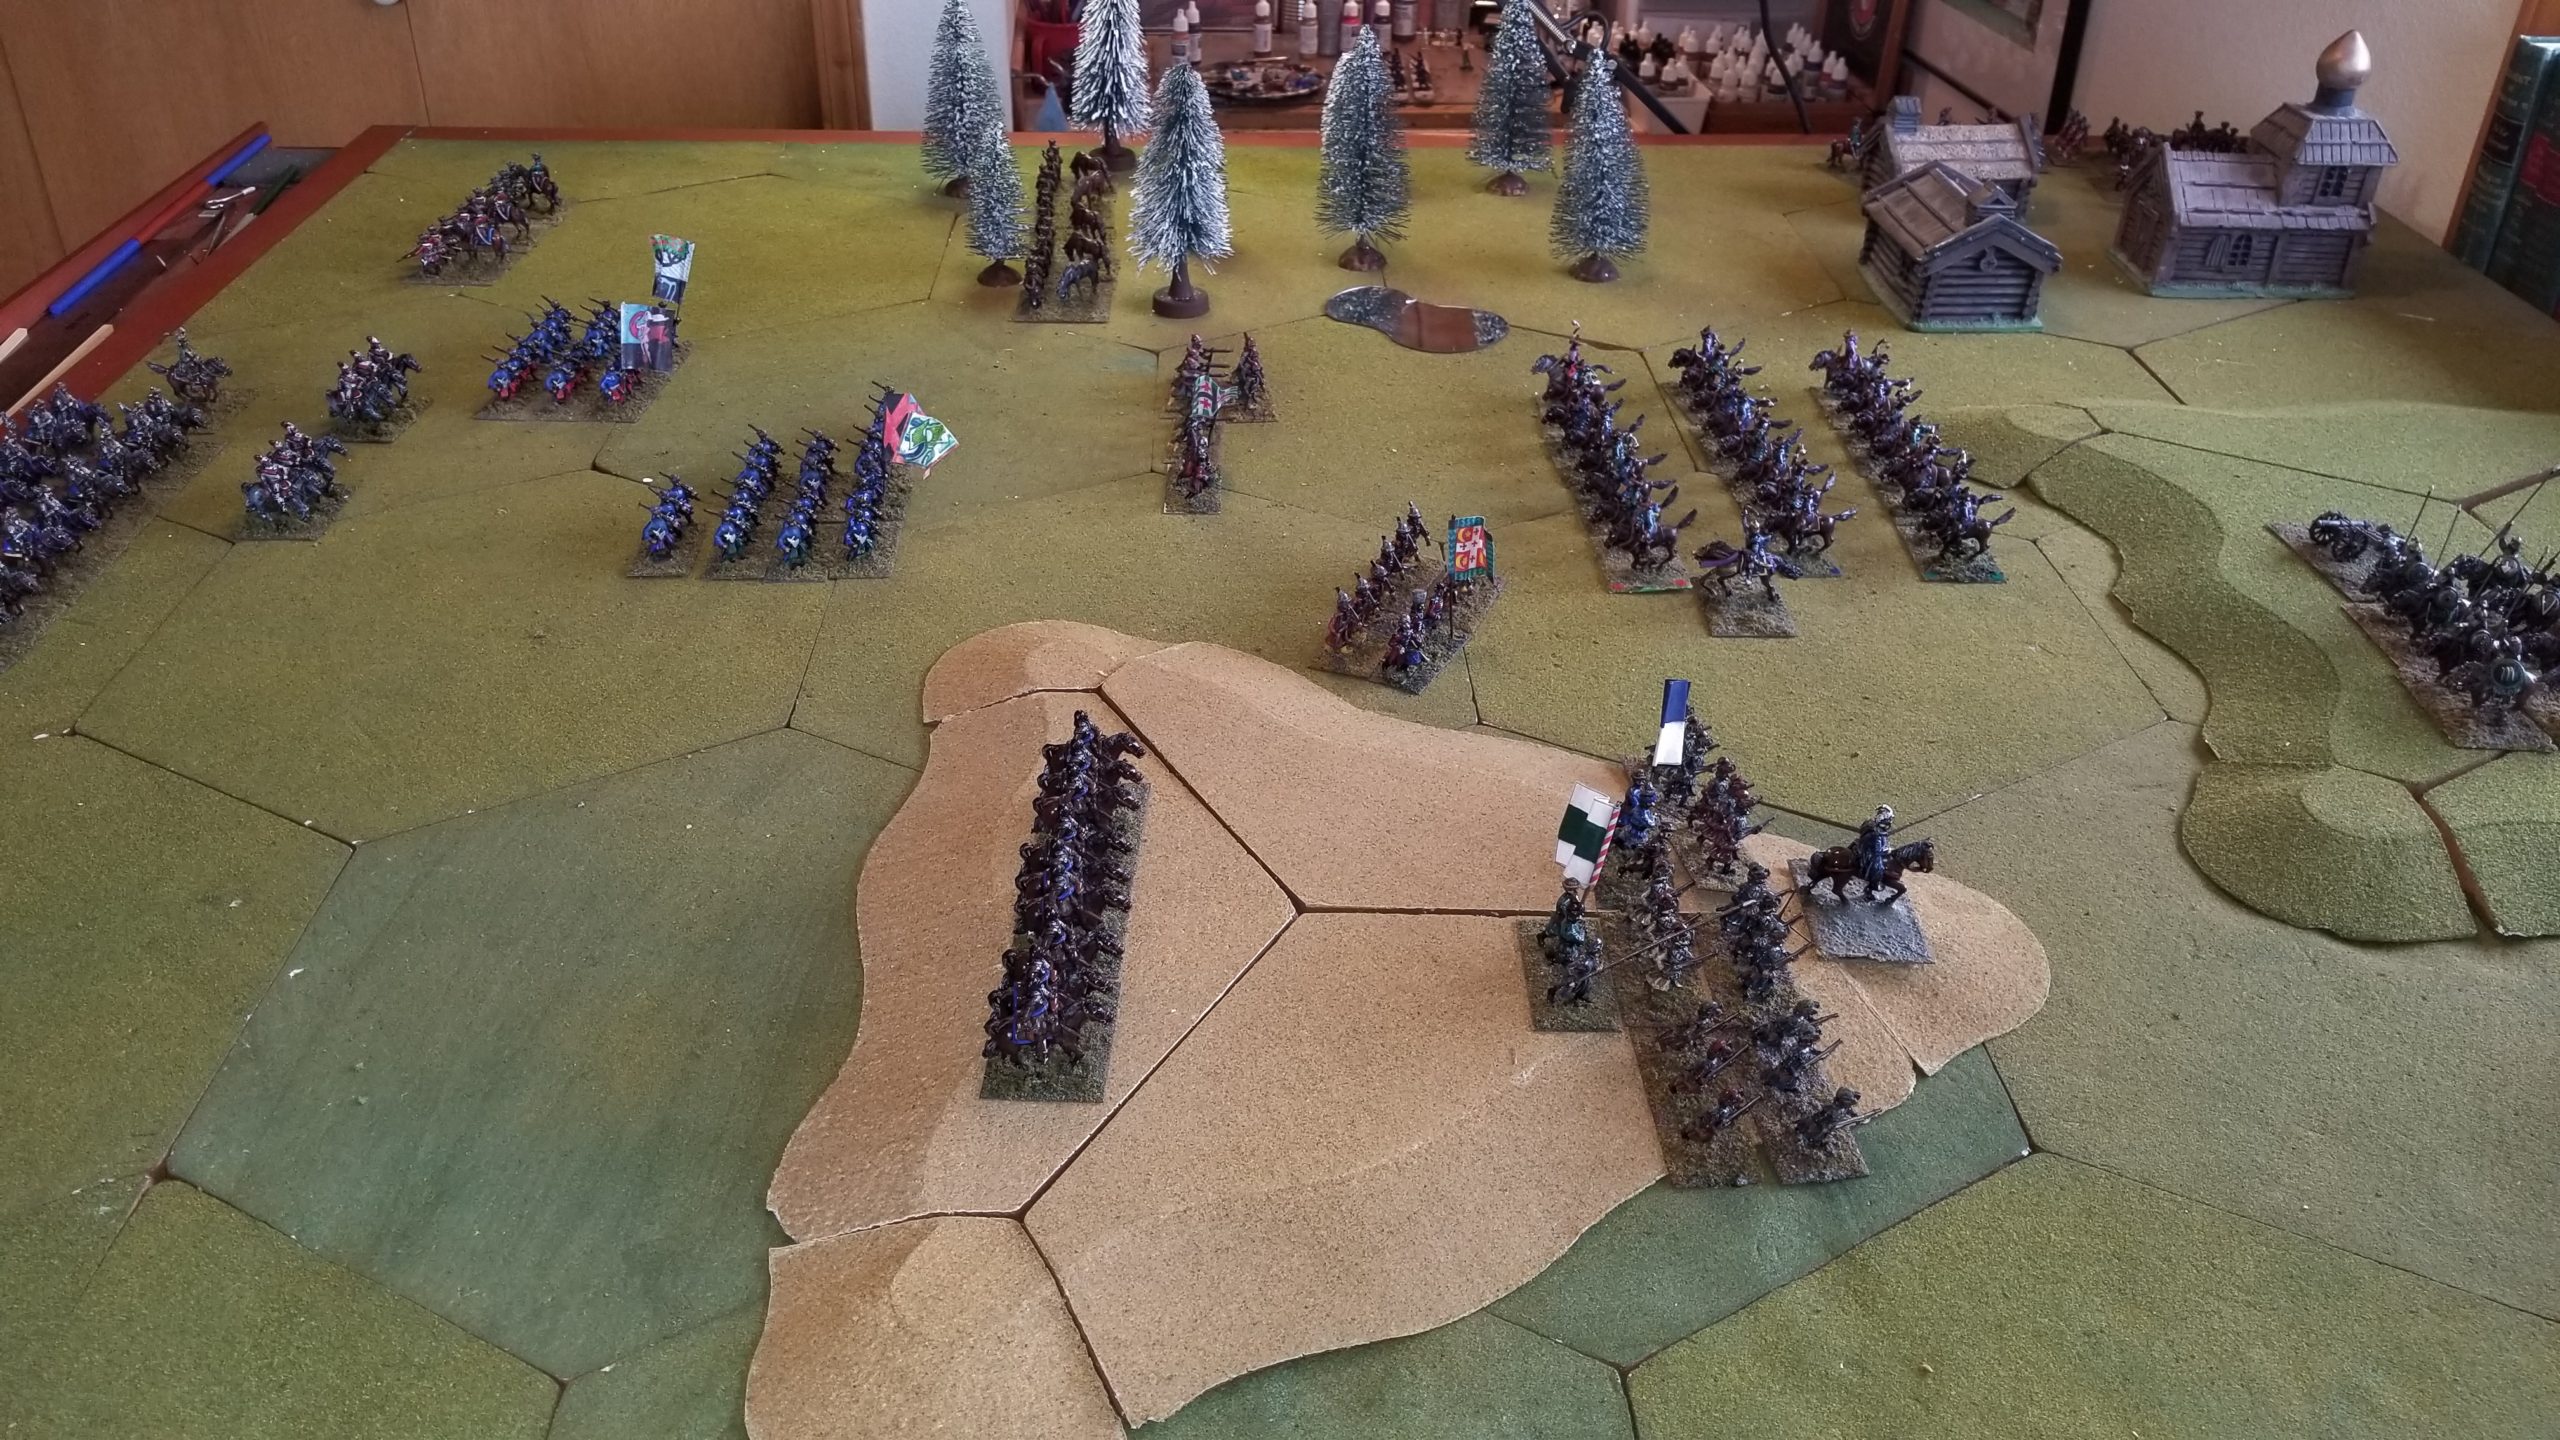
Here is a quick visual summary of our game.

End May 3 Turn

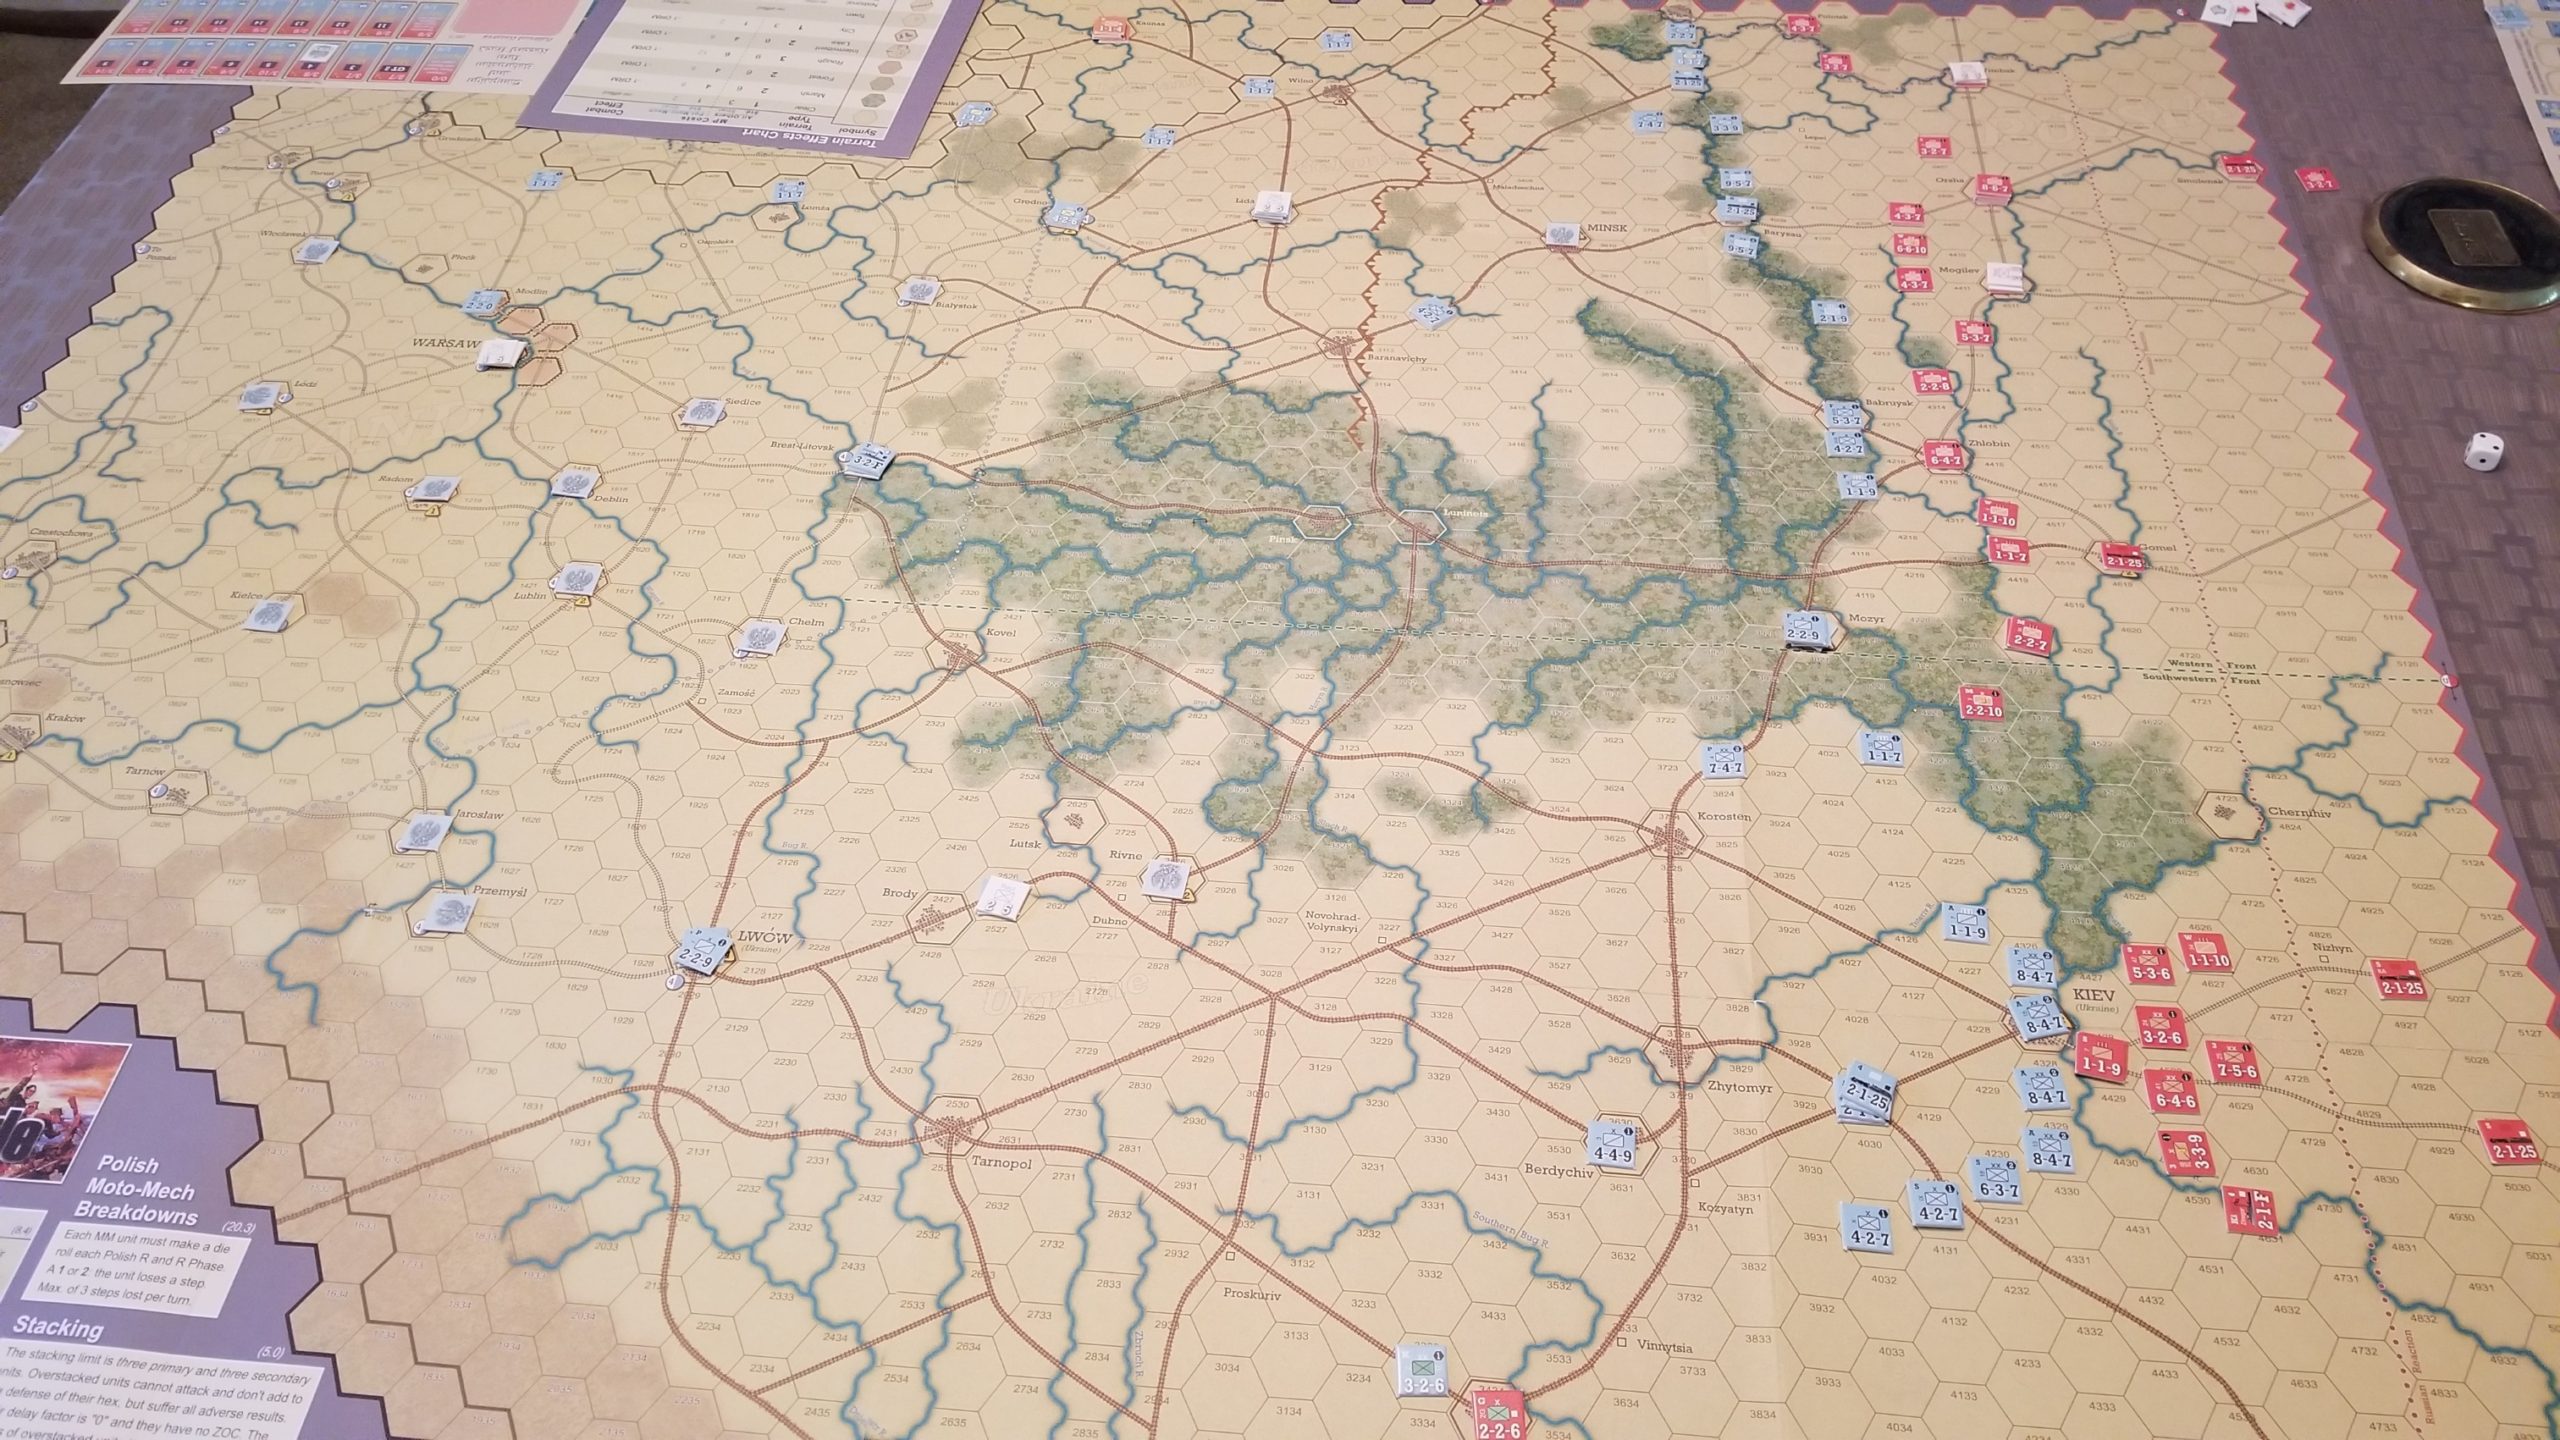
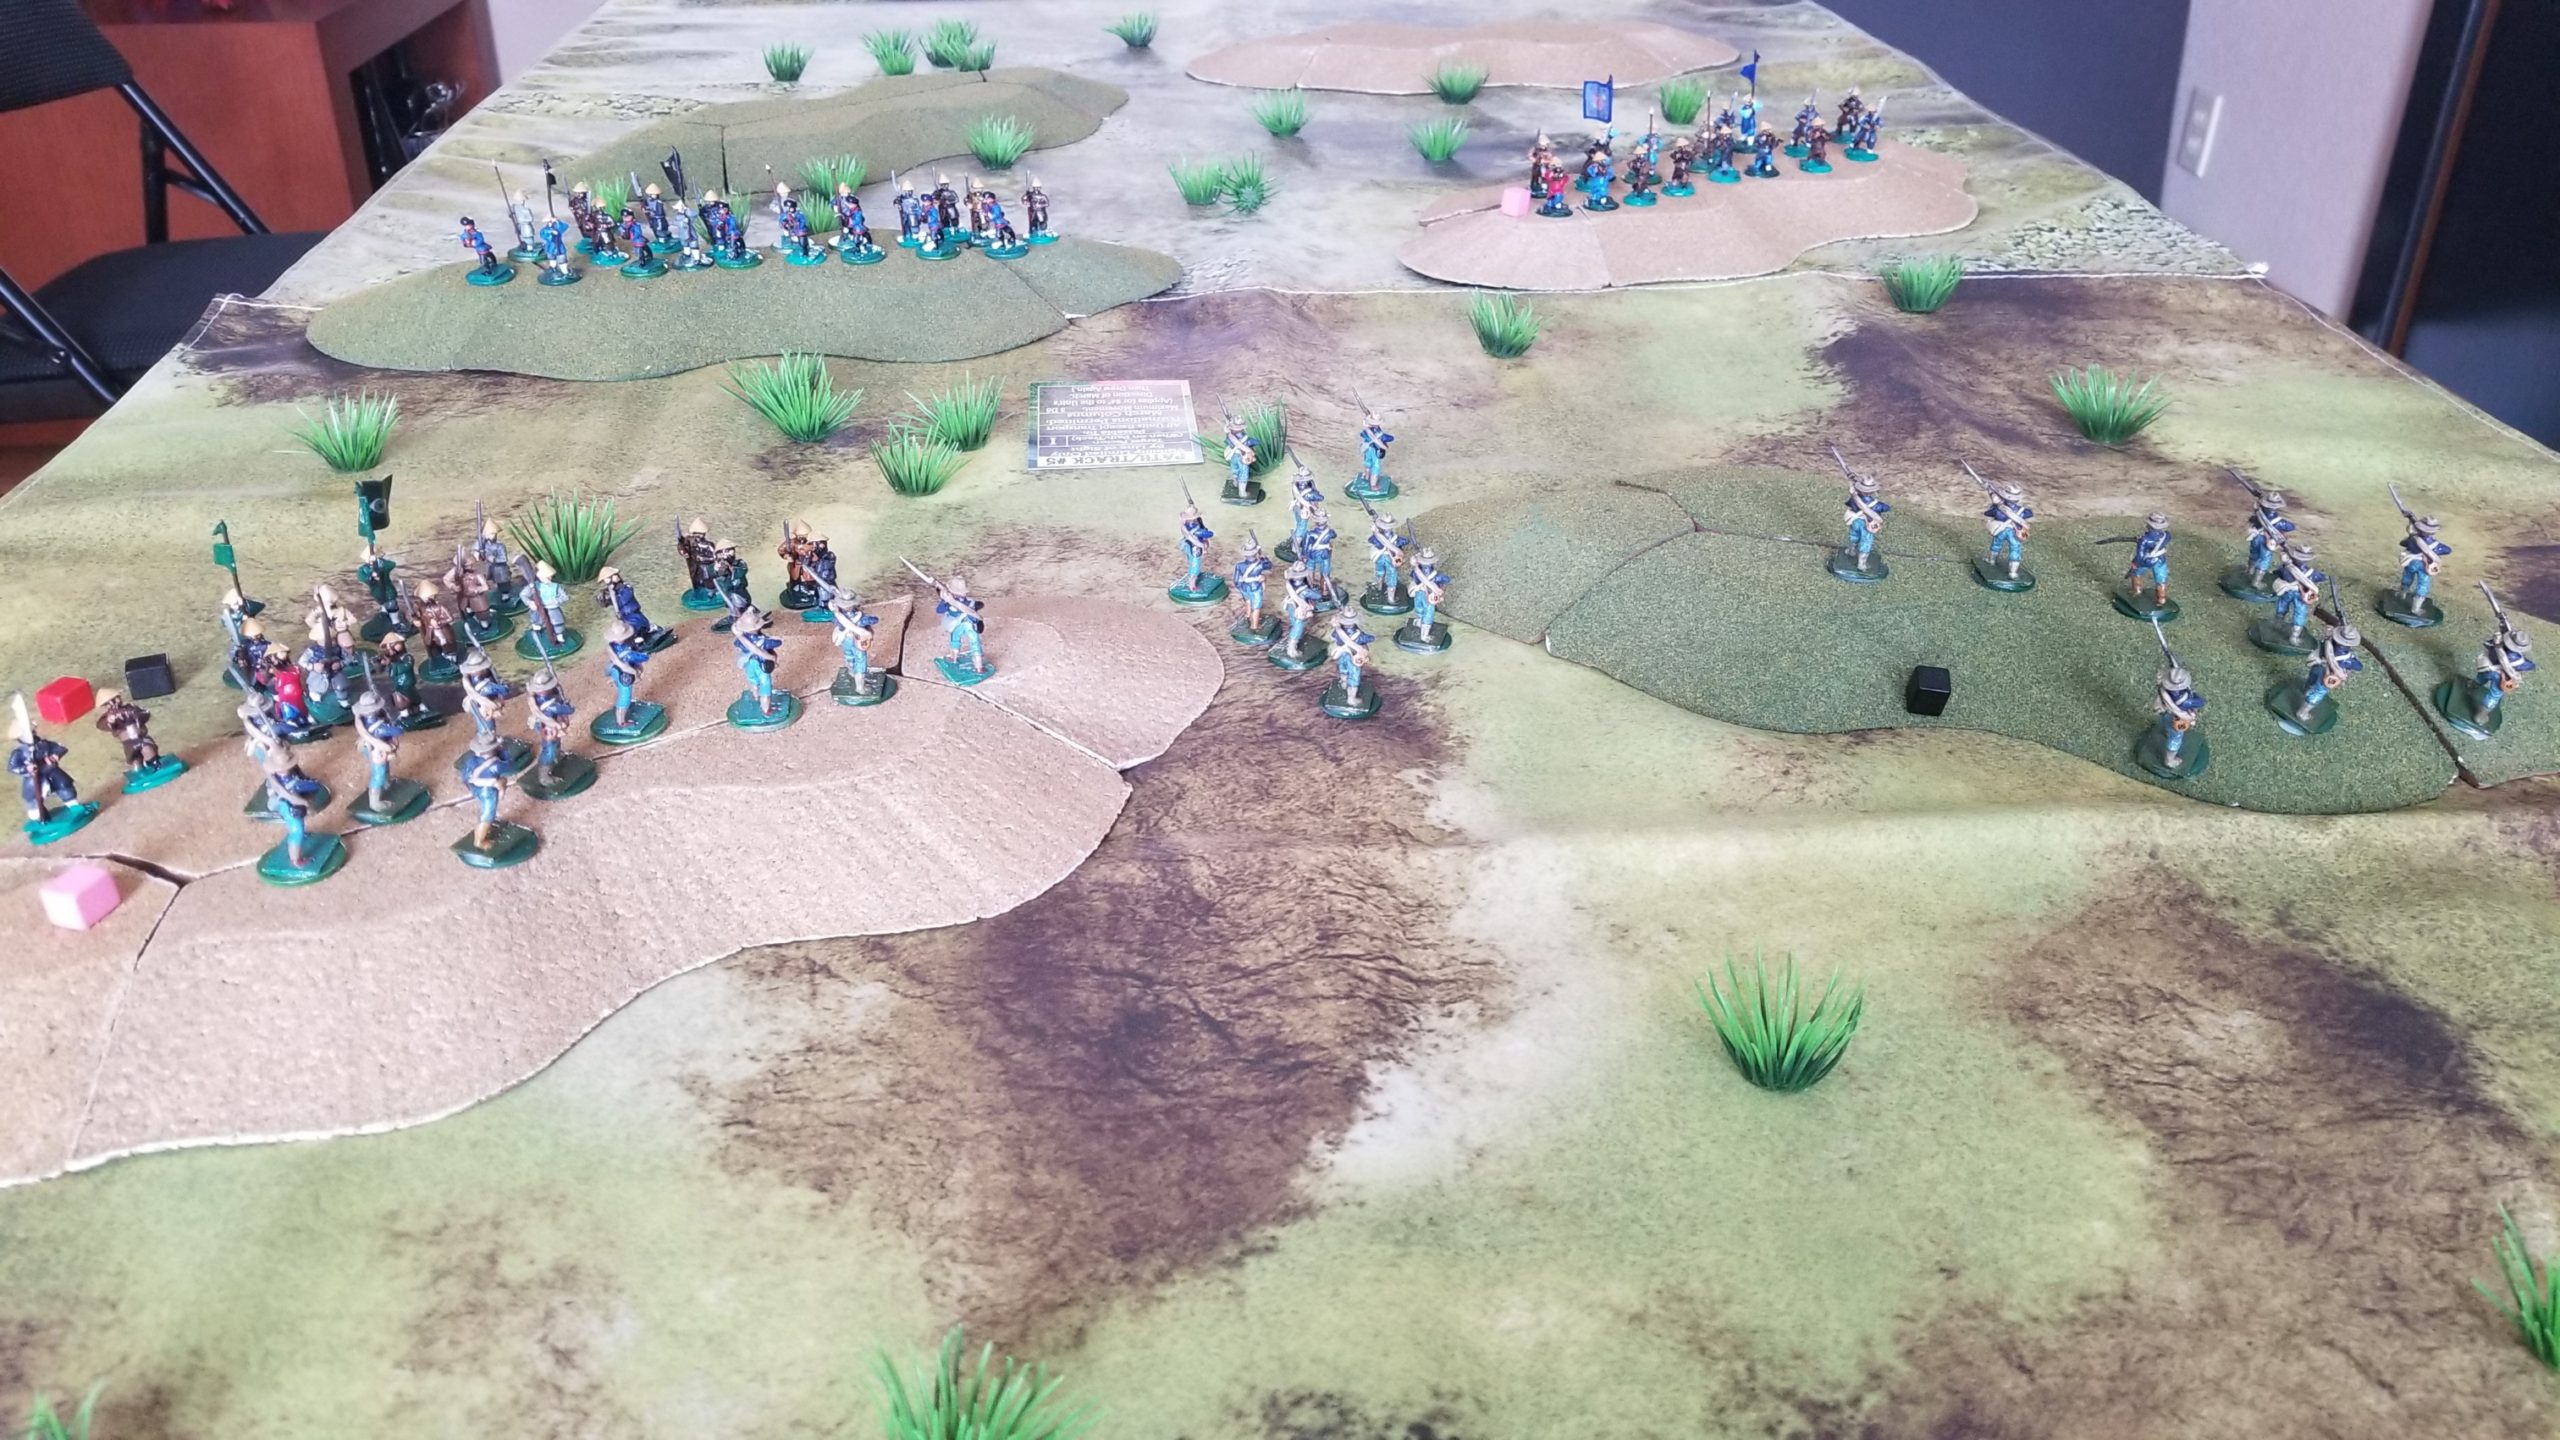
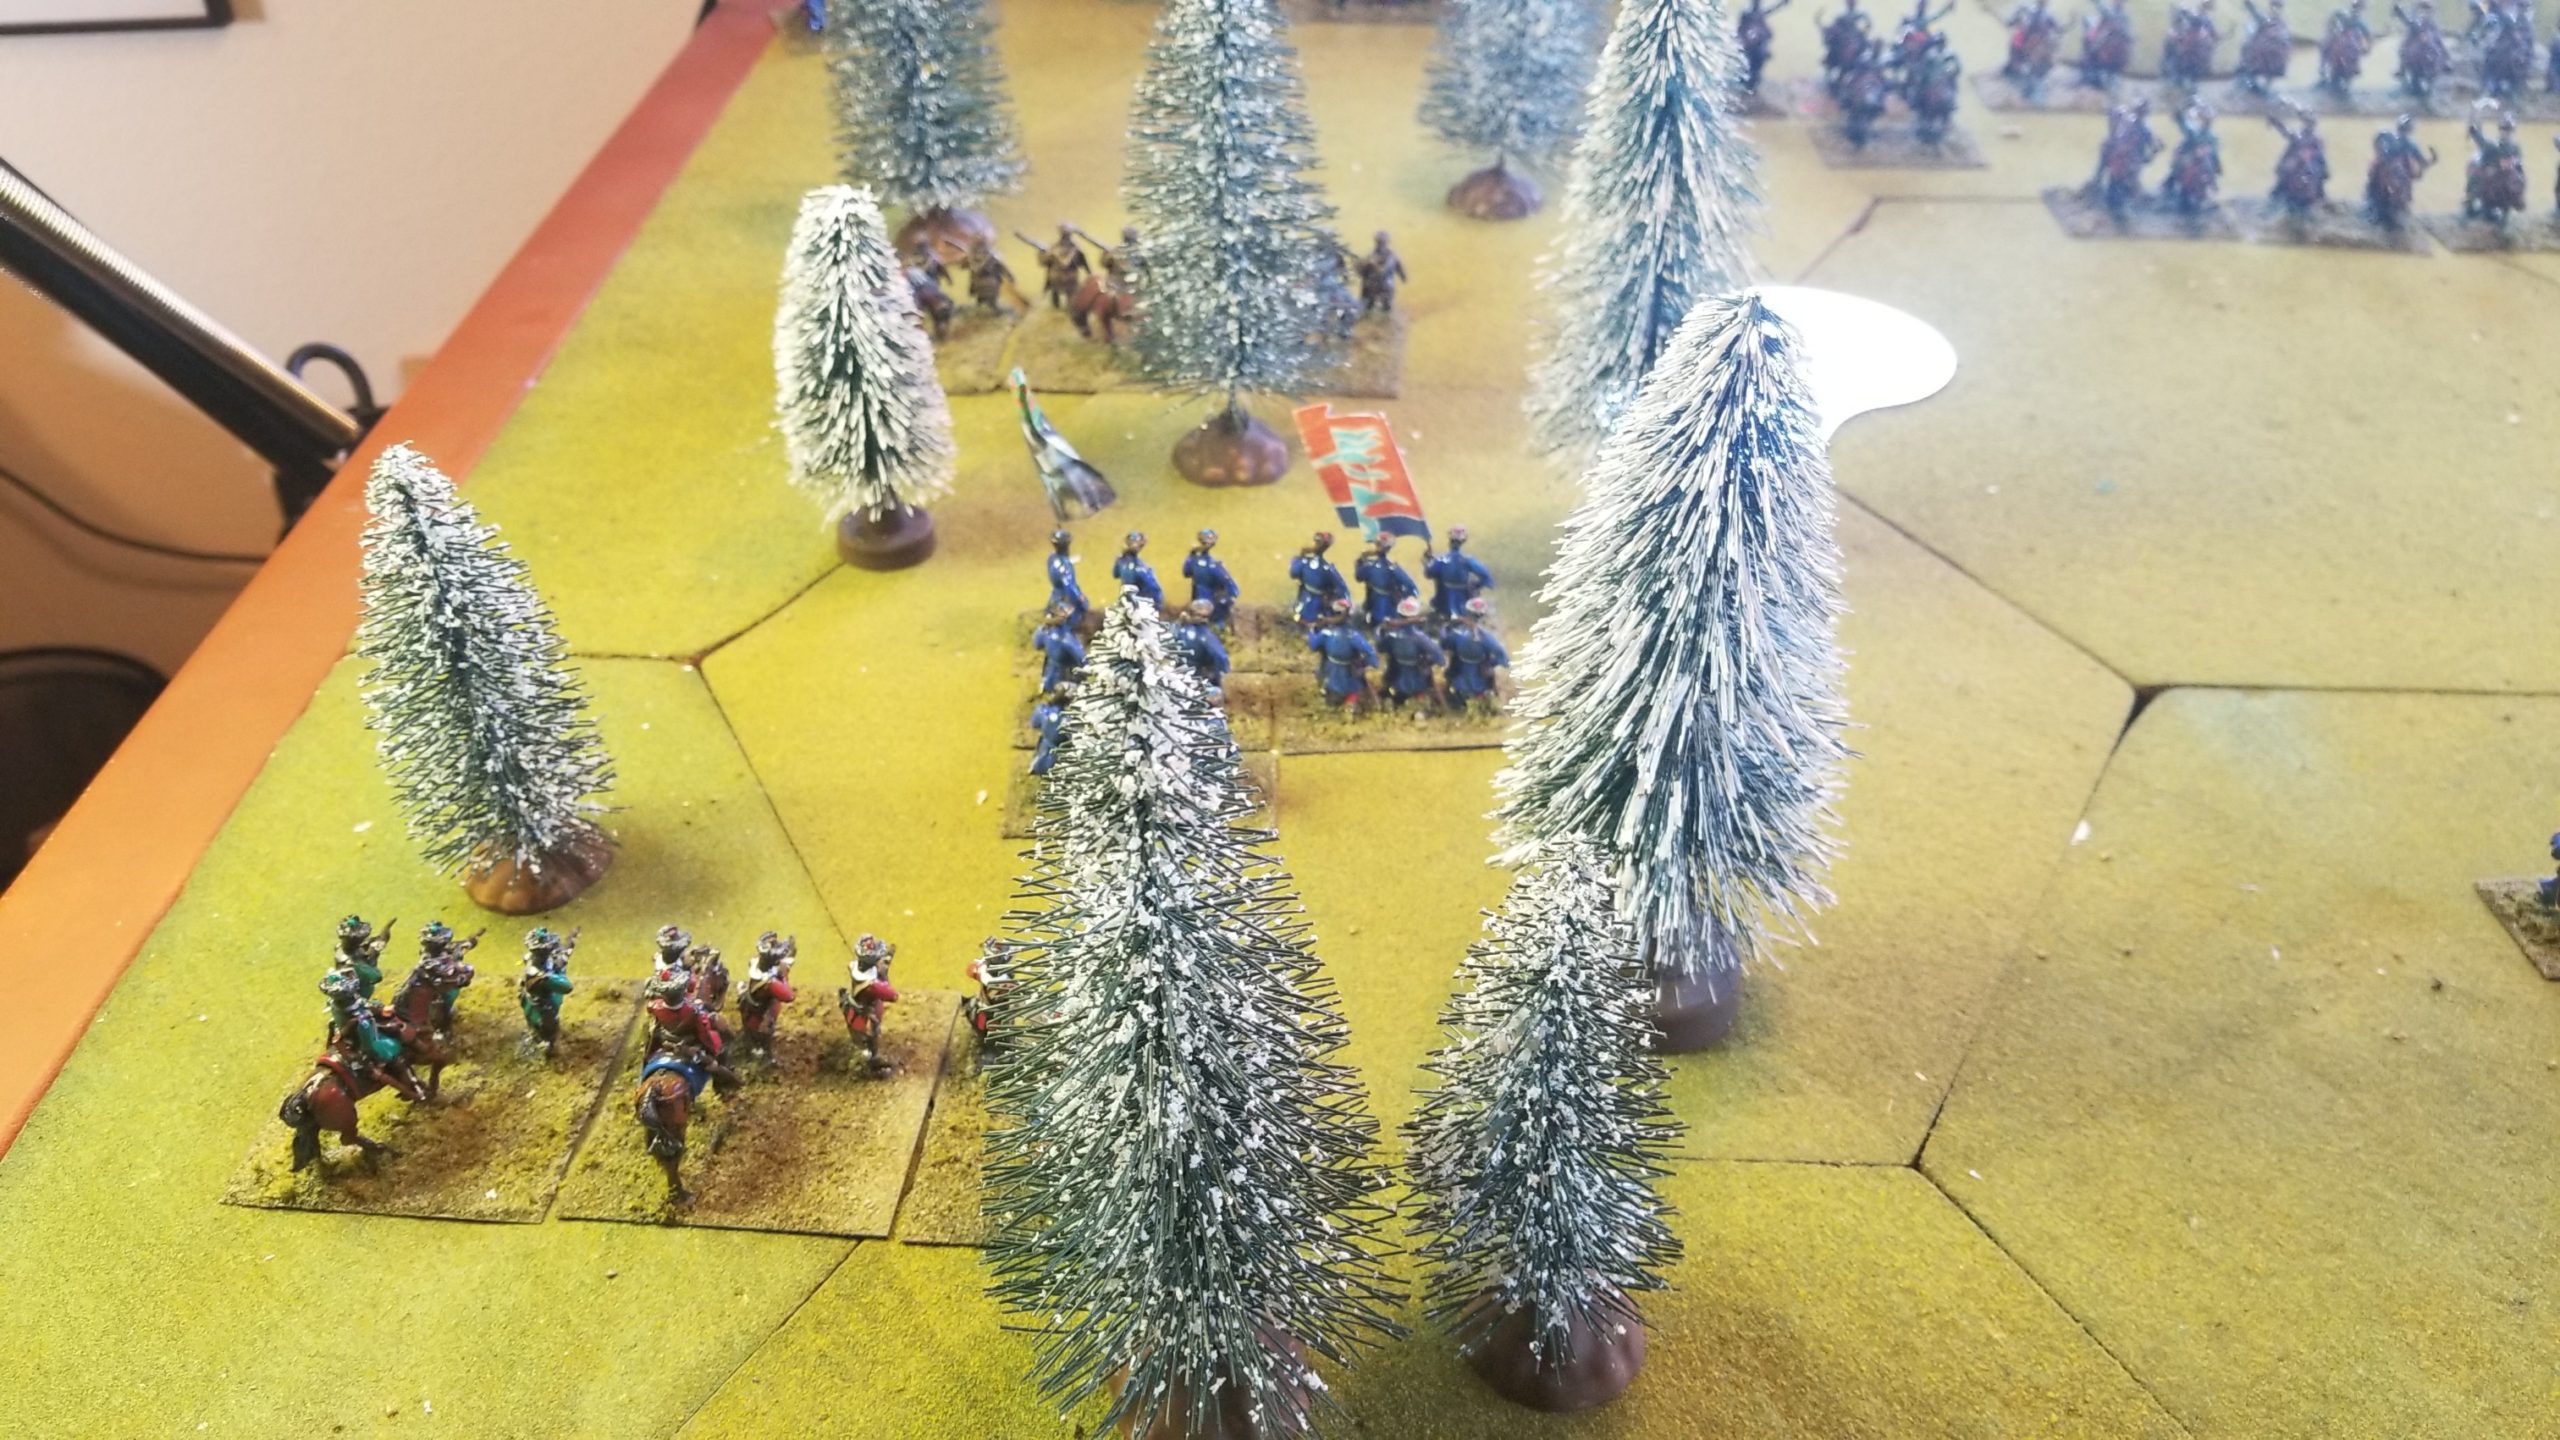
The Poles are in Kiev (lower right hand corner), with the Soviets cobbling together a cordon defense.

End May 3 Turn – Southwest Front Only

Armored trains cannot be rebuilt and are kept out of harm’s way until they can be productively used.

End June 1 Turn

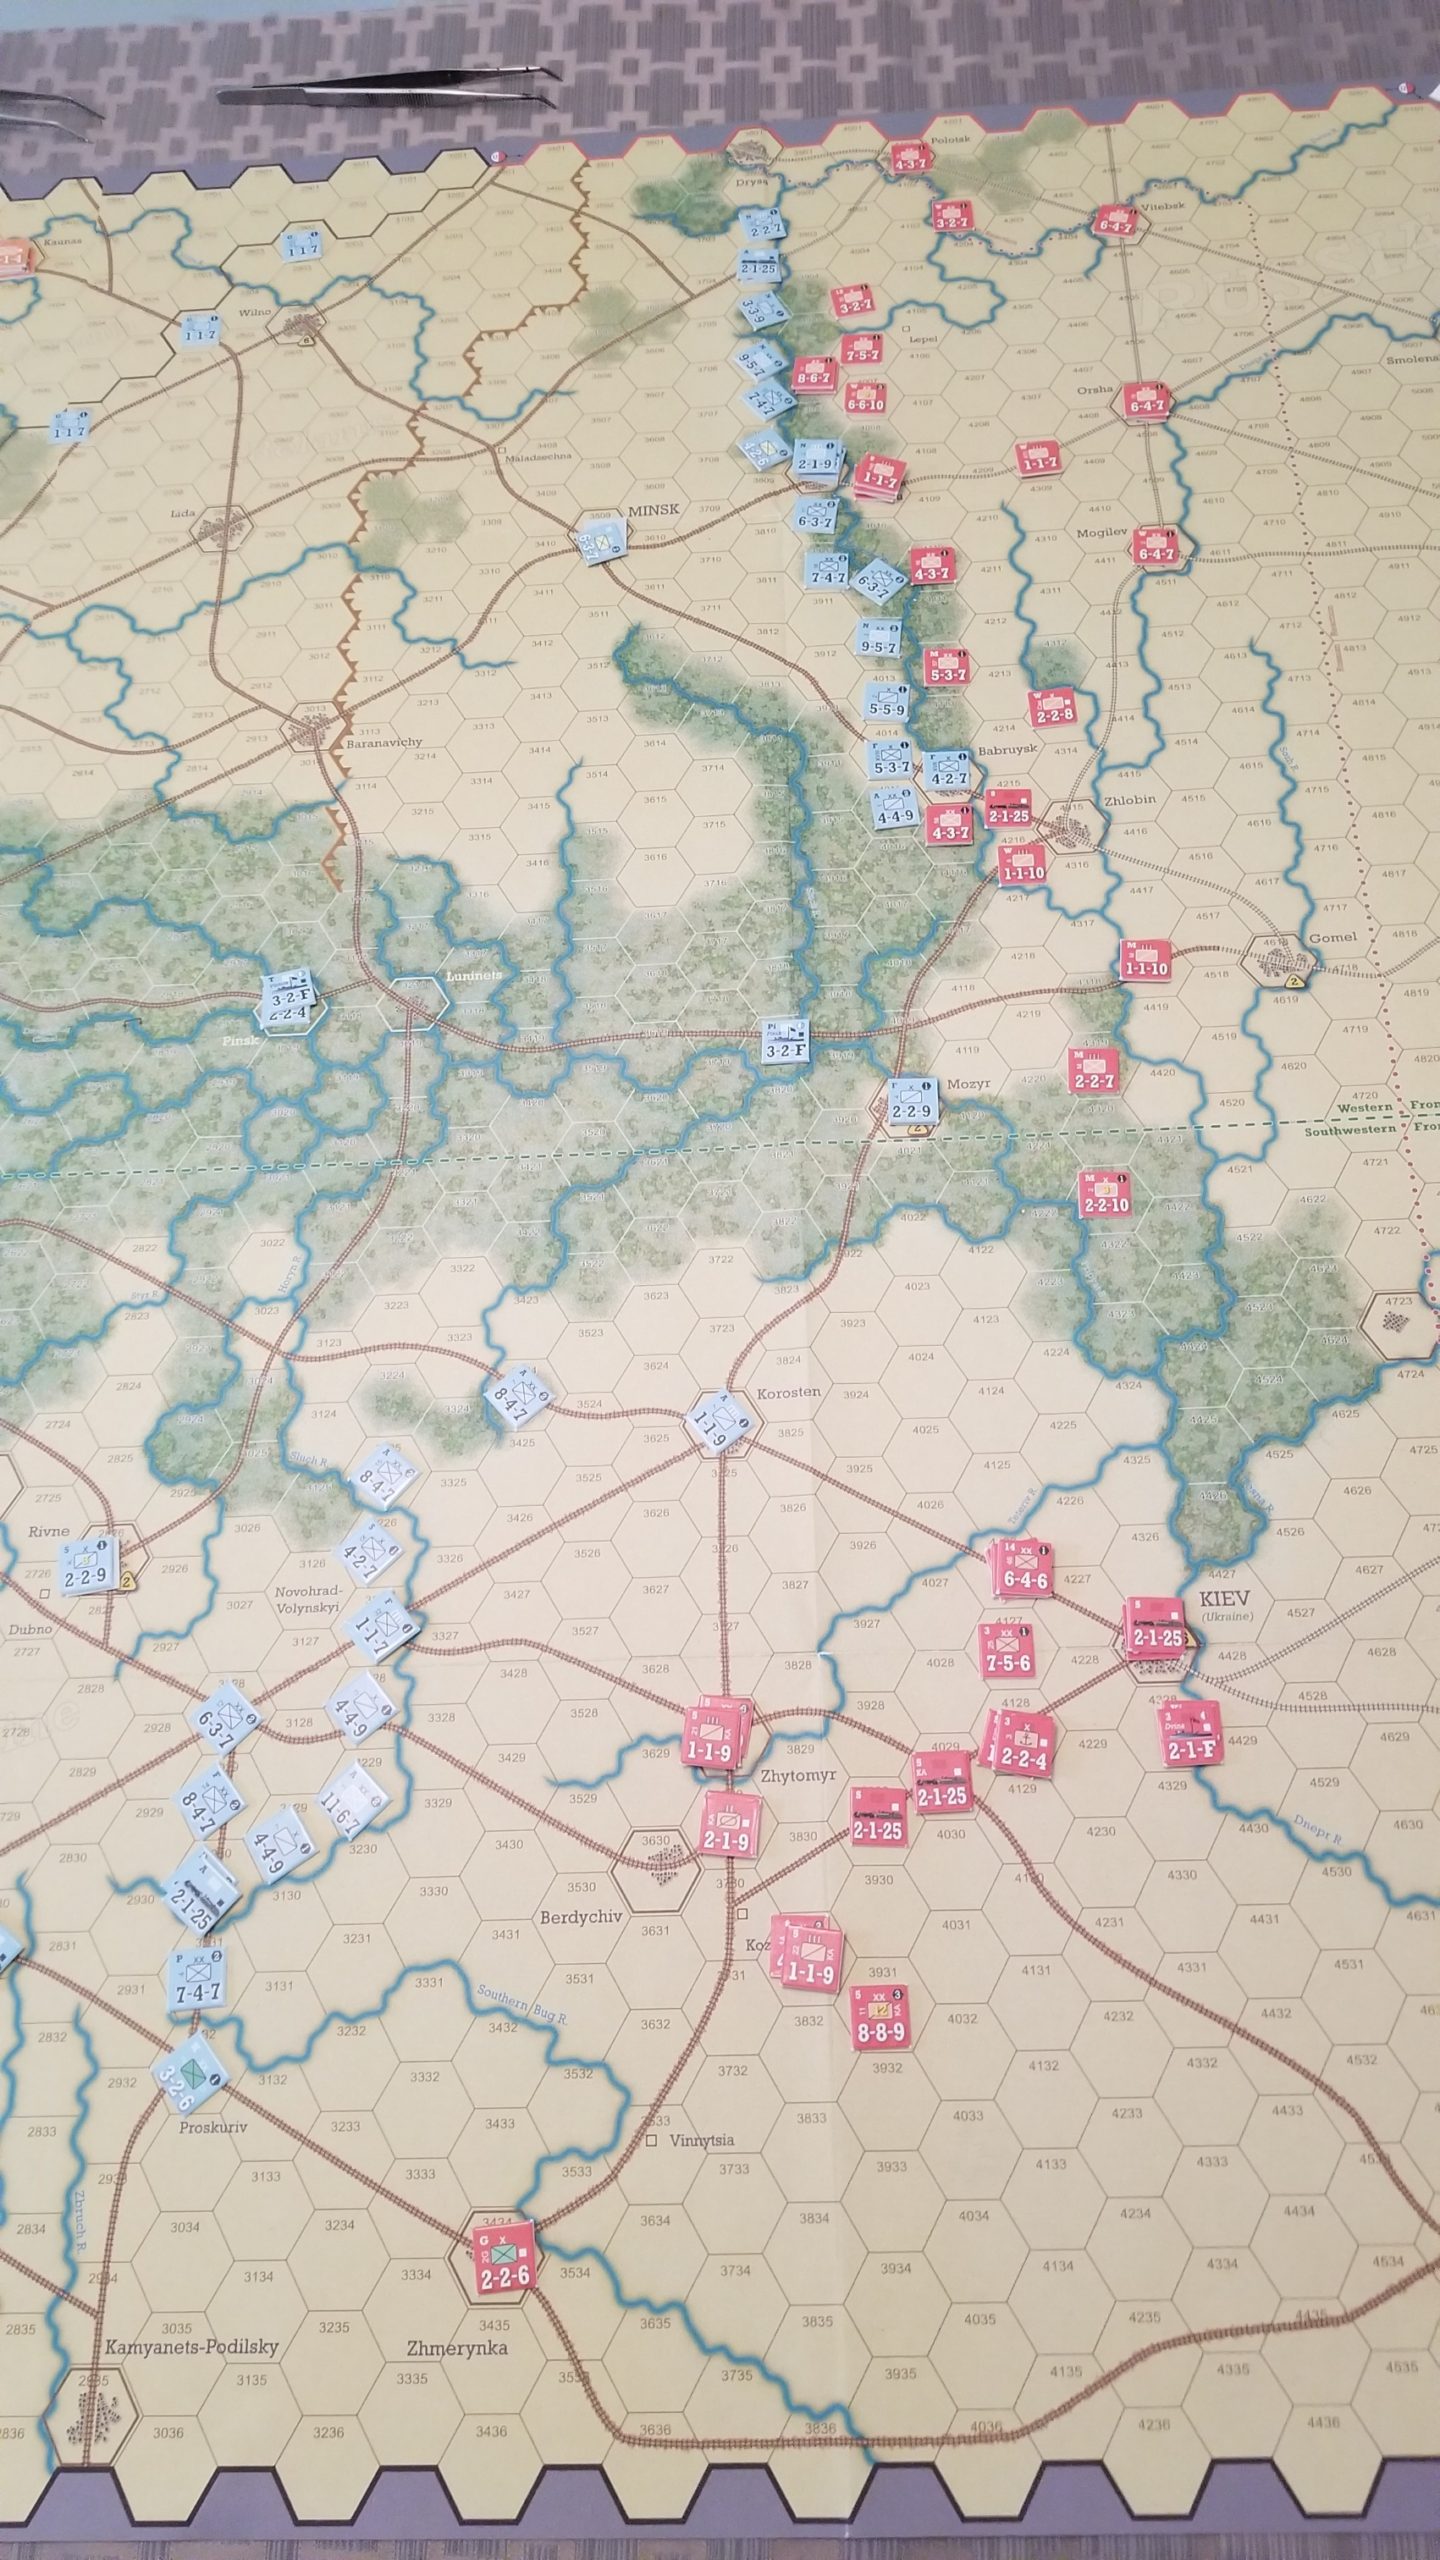
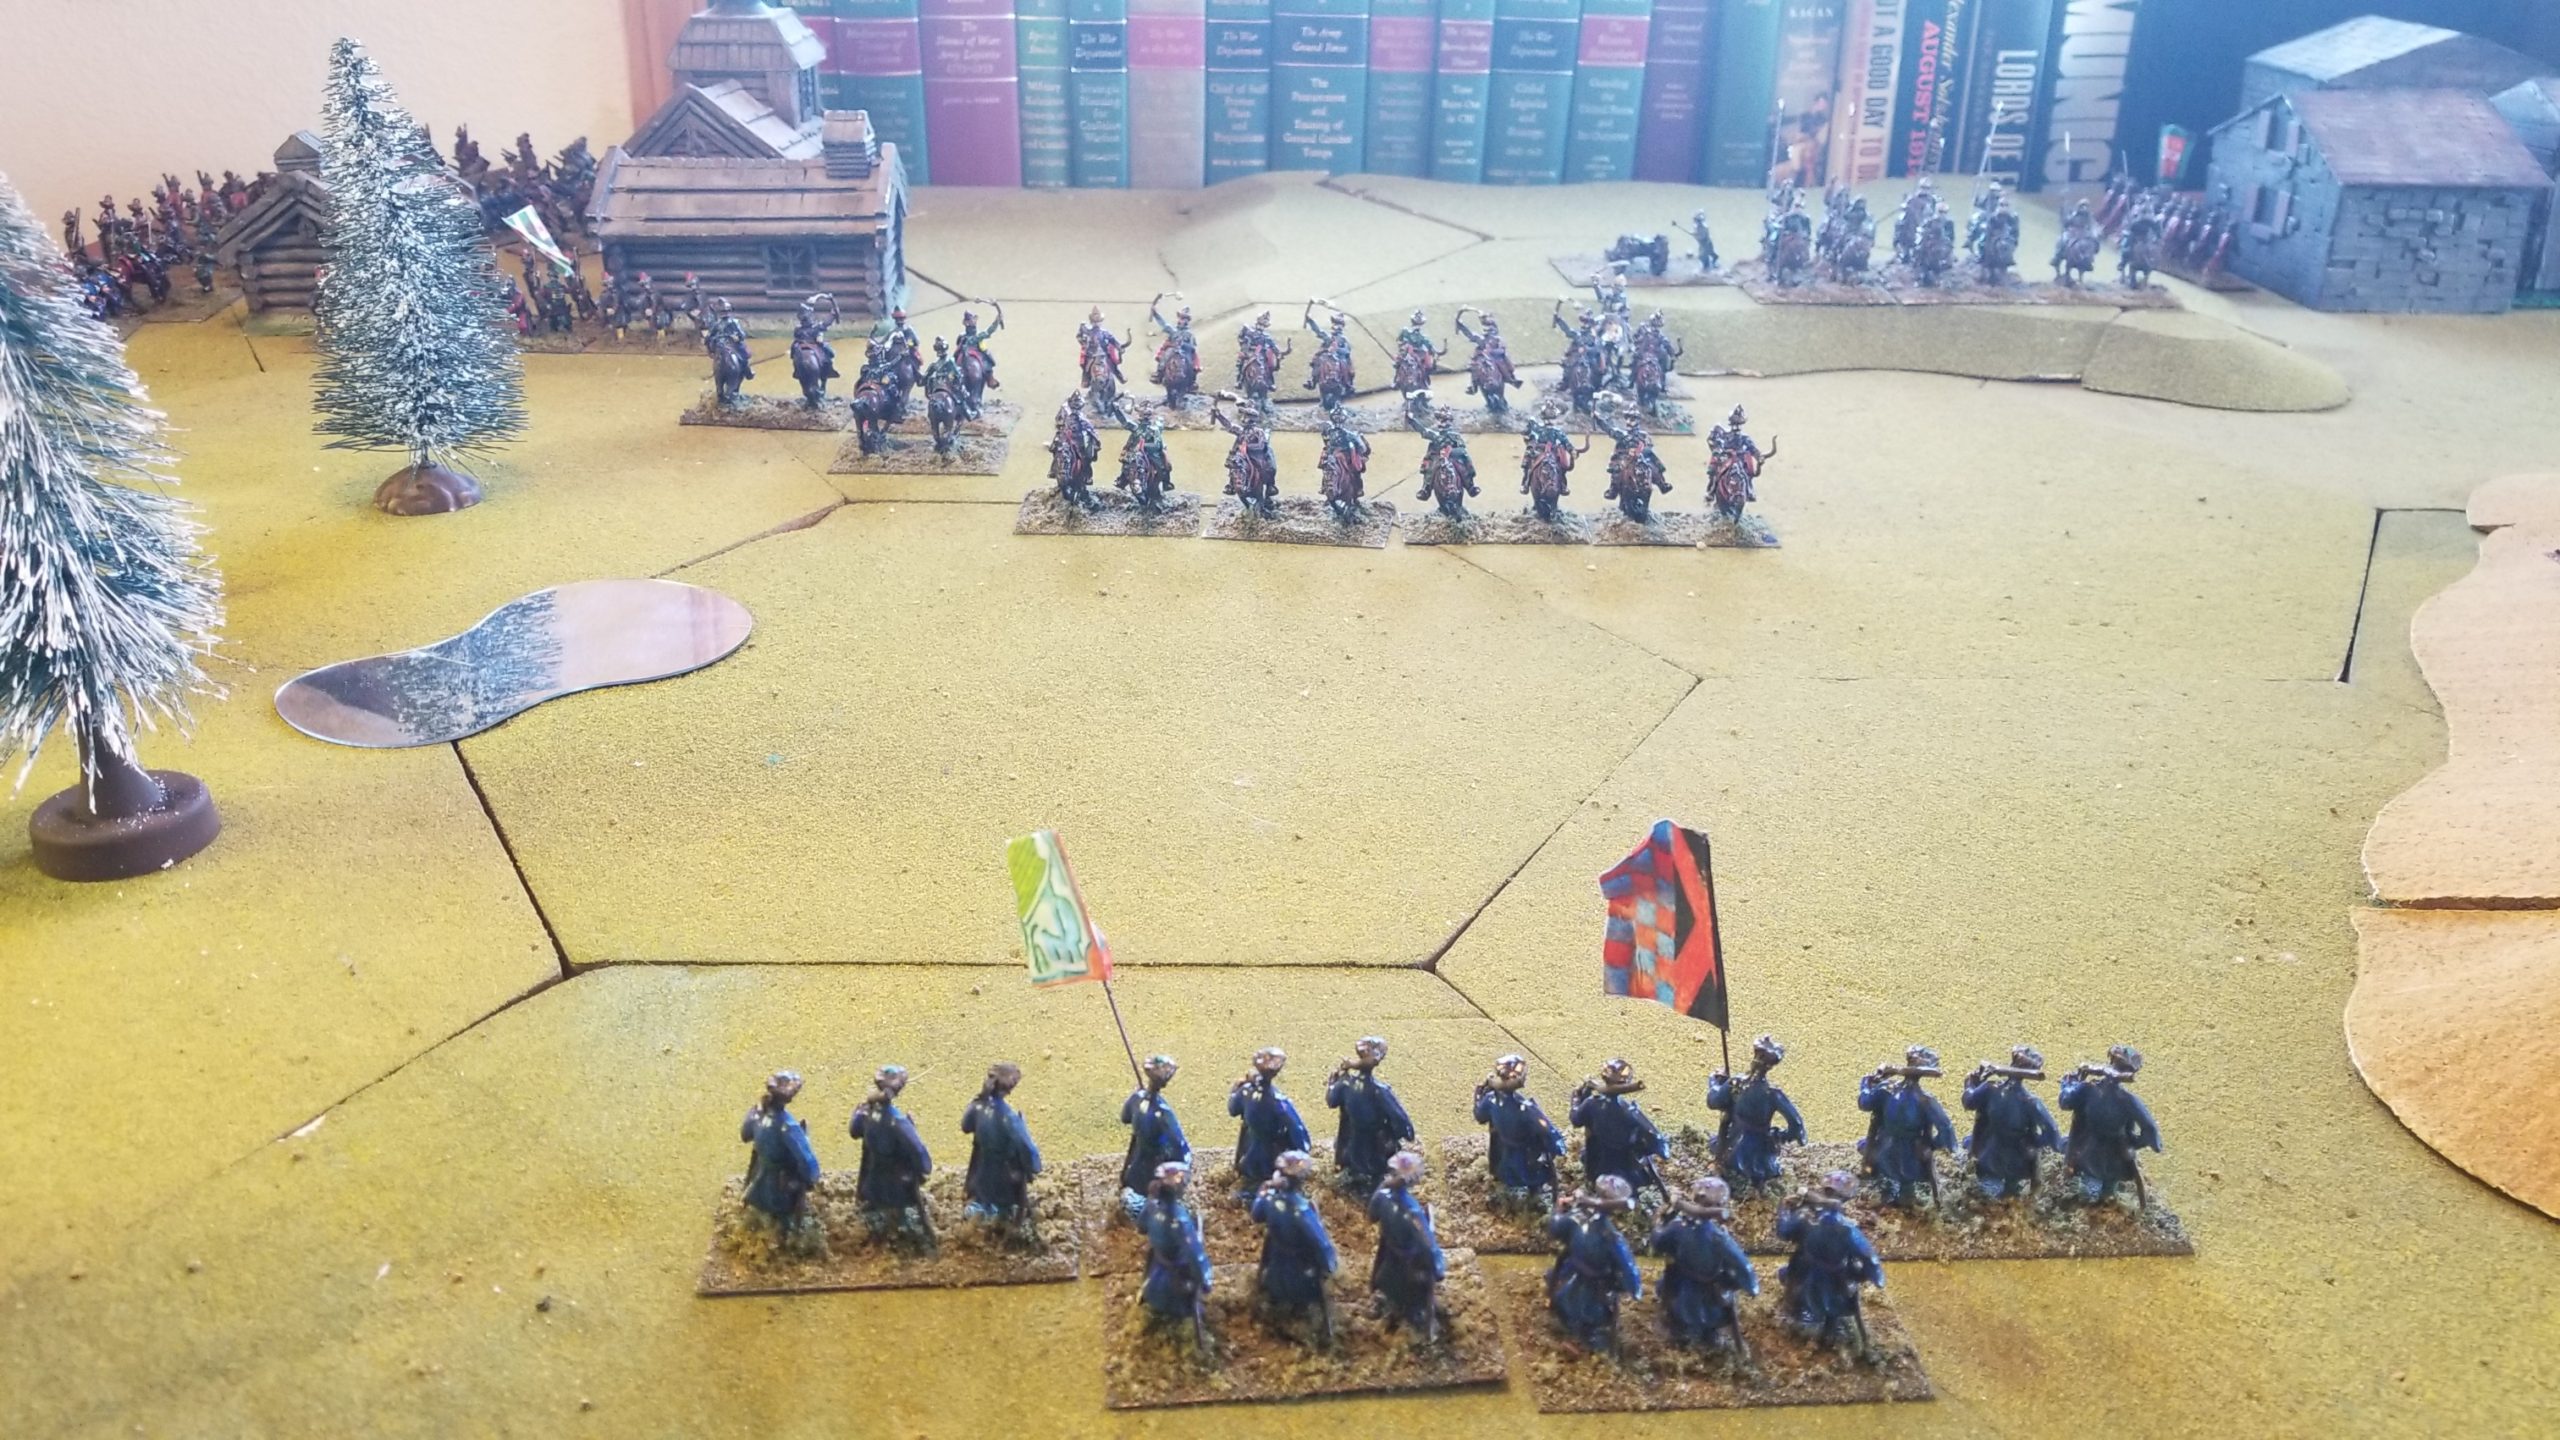
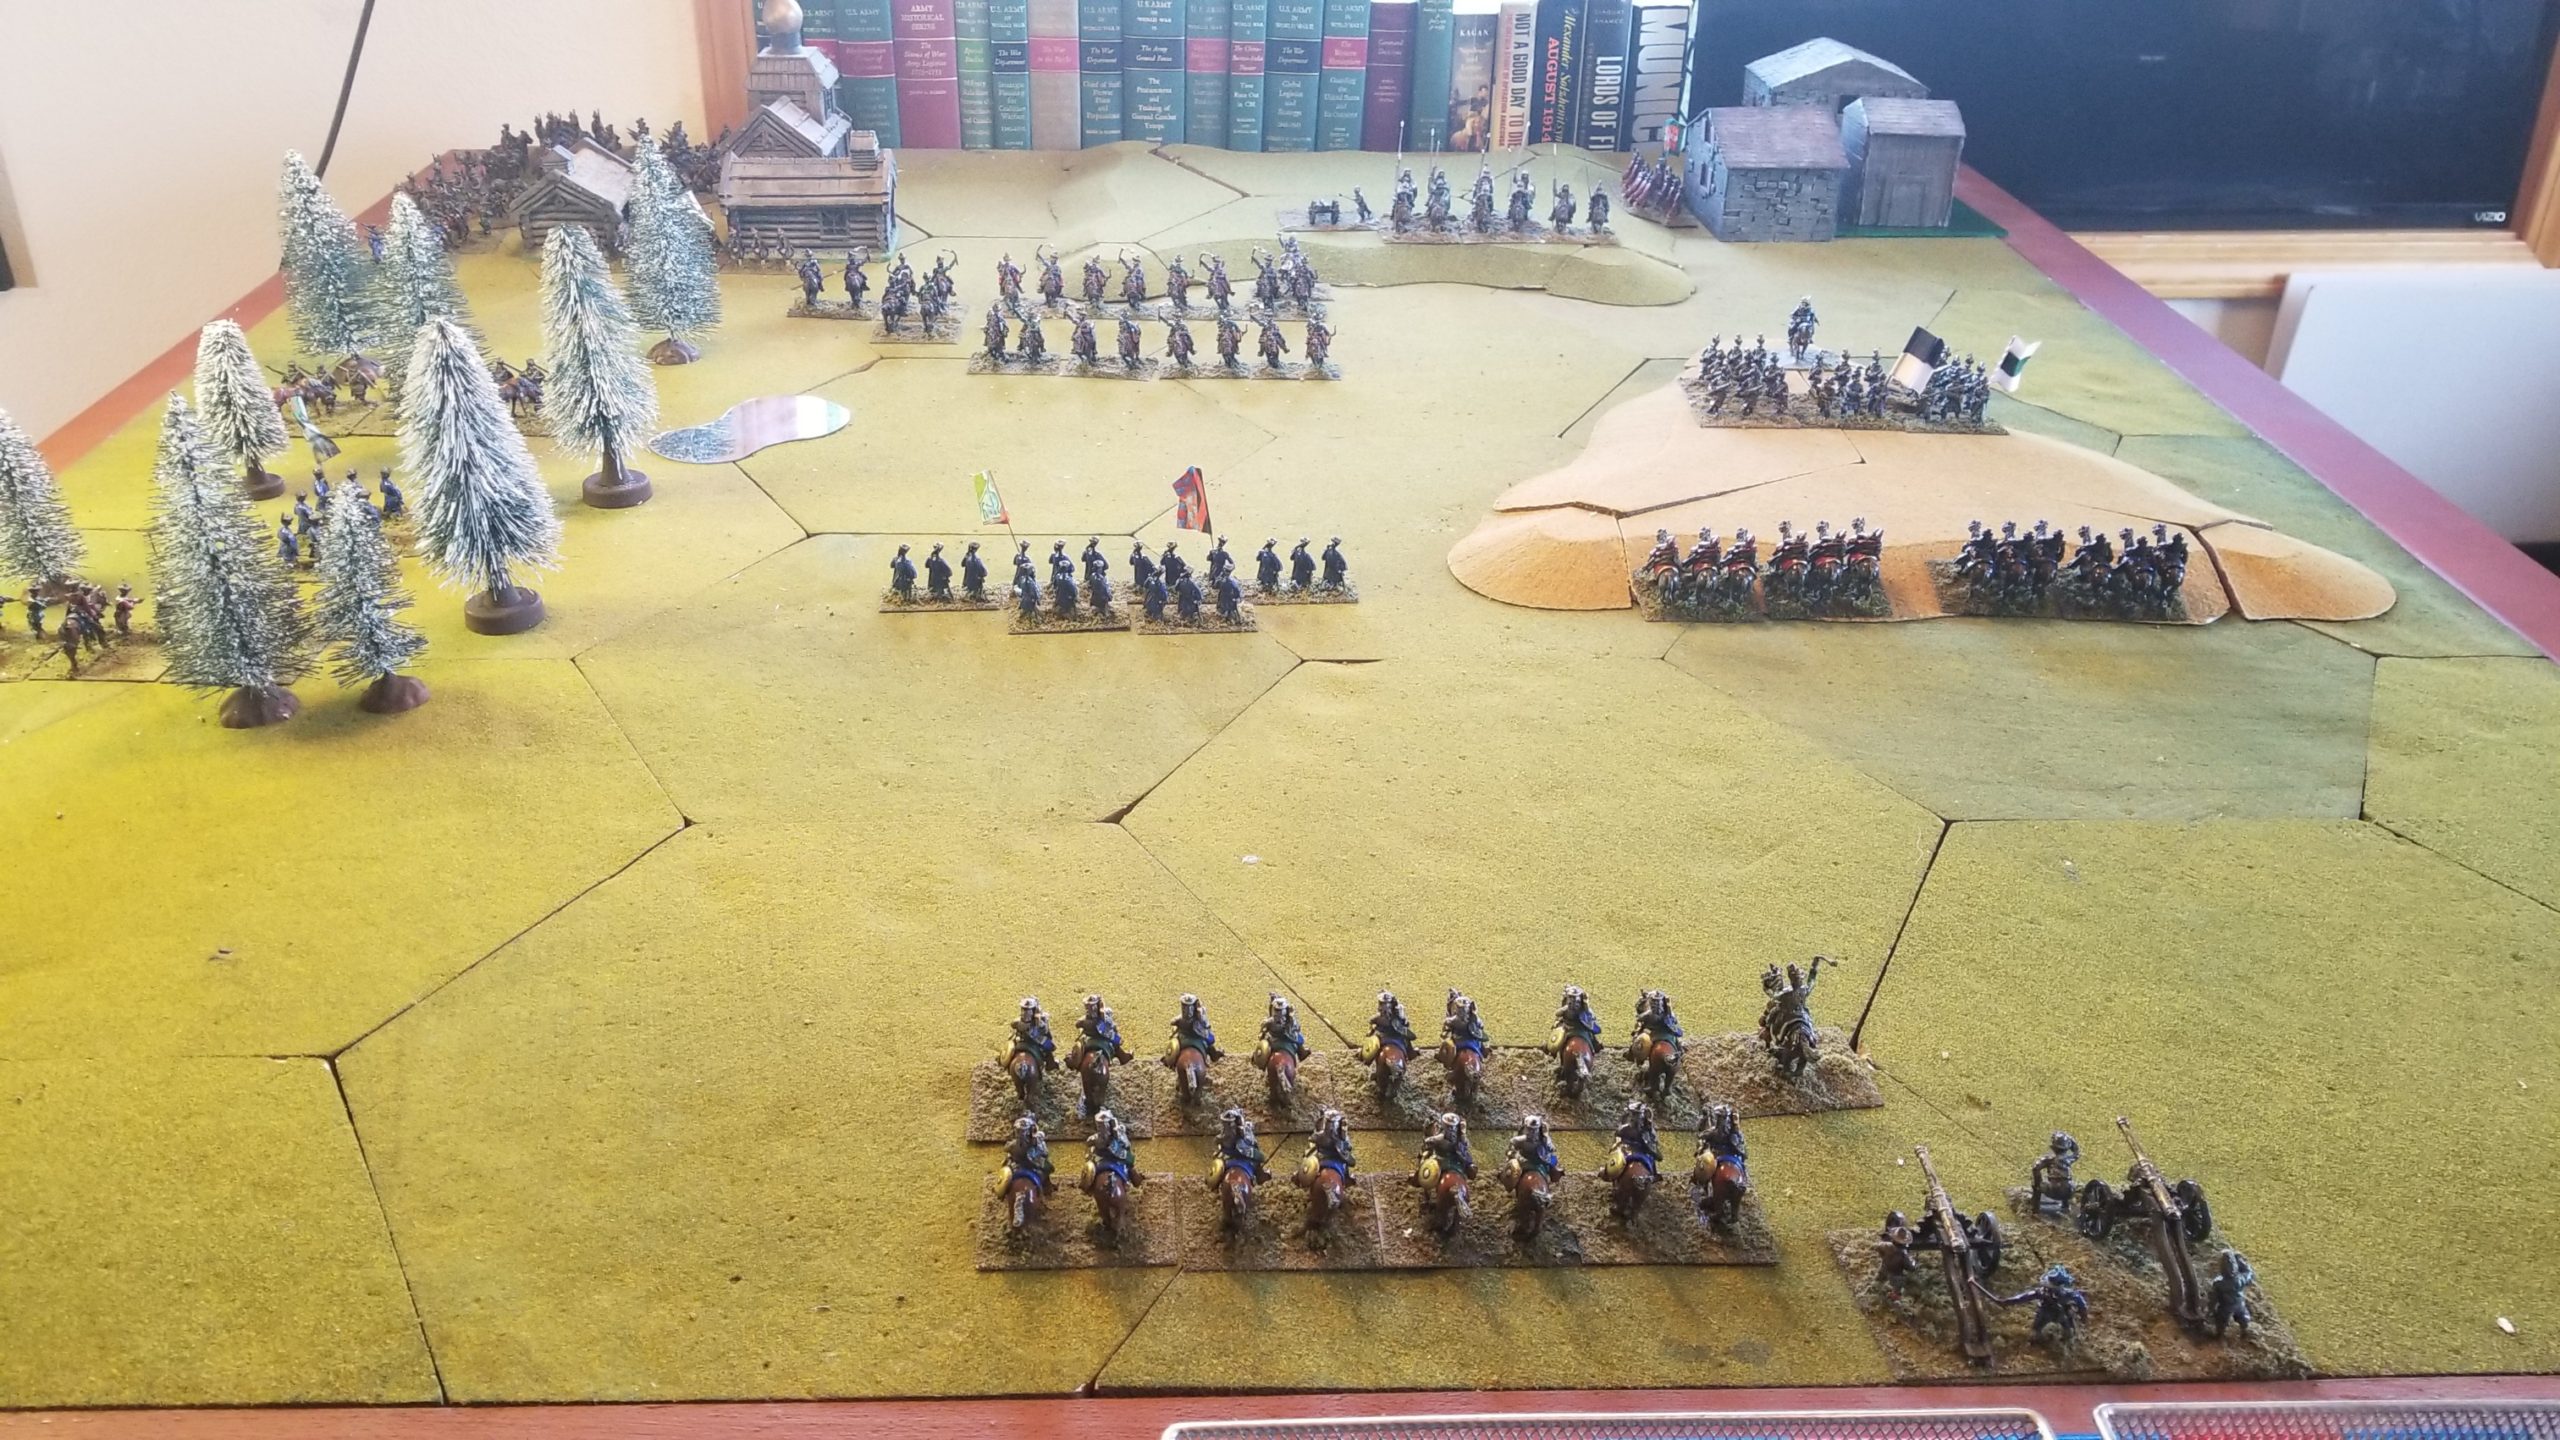
The Poles have pulled back from Kiev, anticipating the arrival of the First Cavalry Army.

End June 3 Soviet Turn

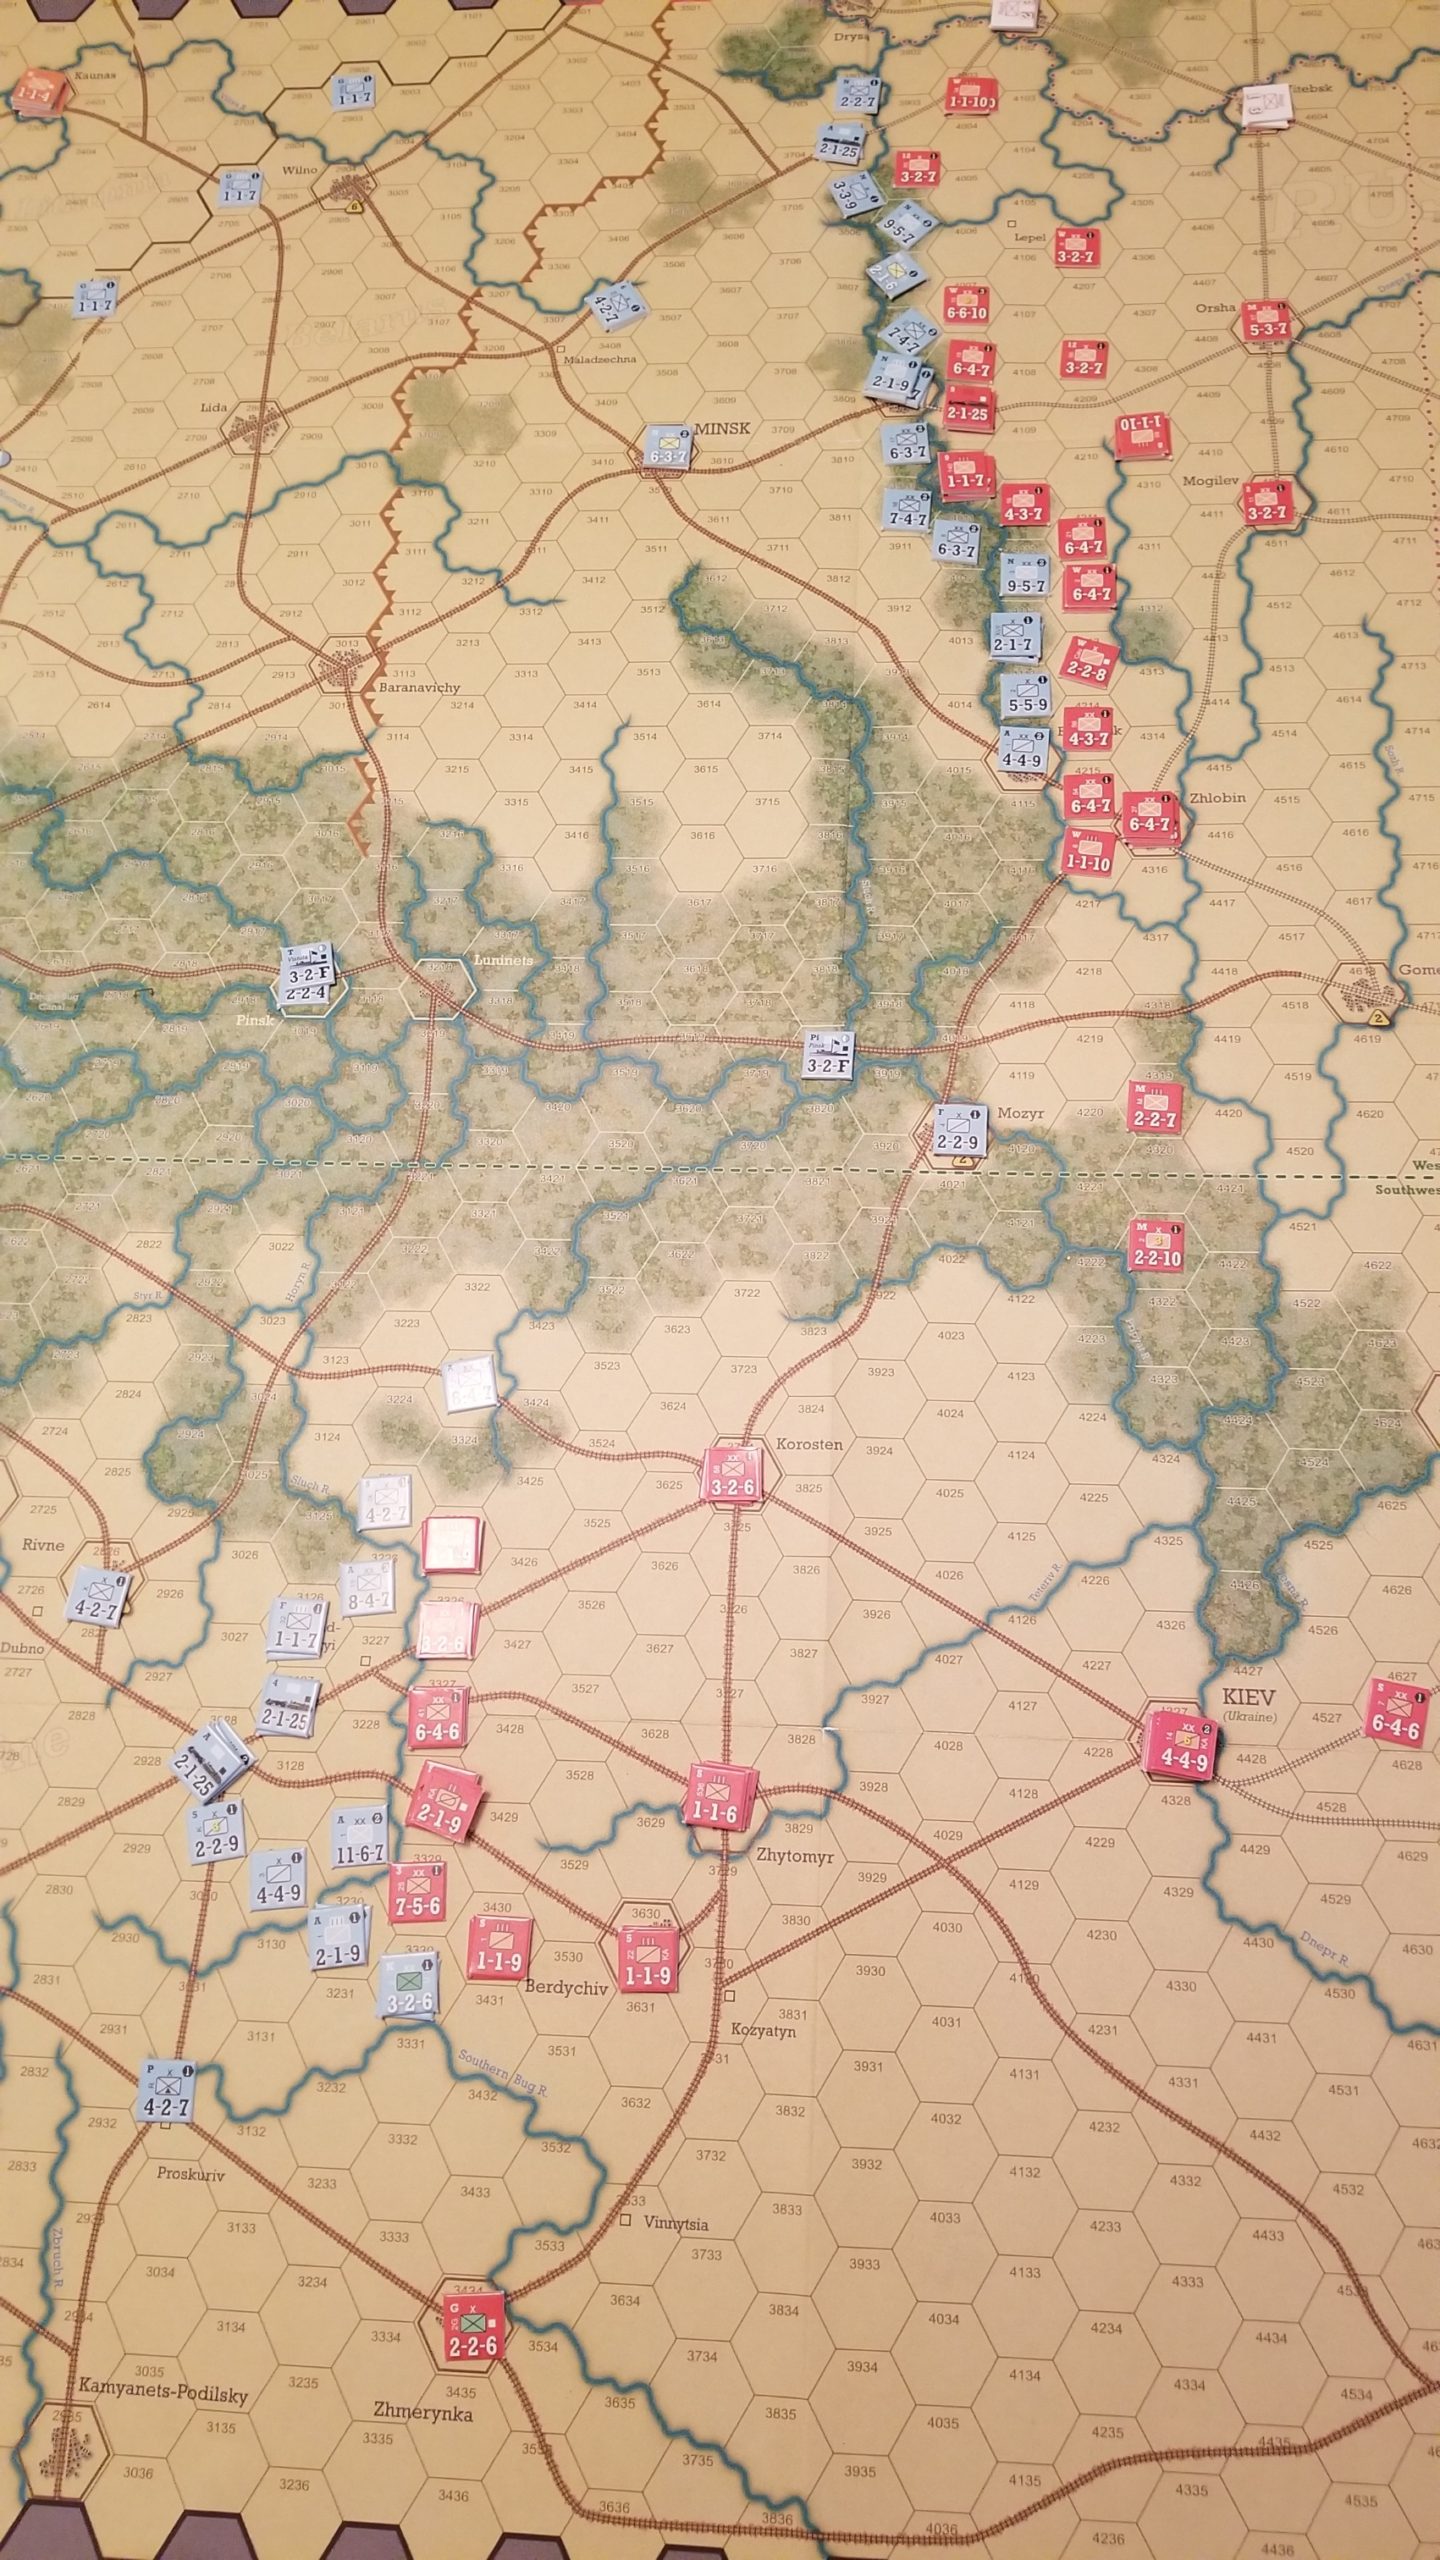
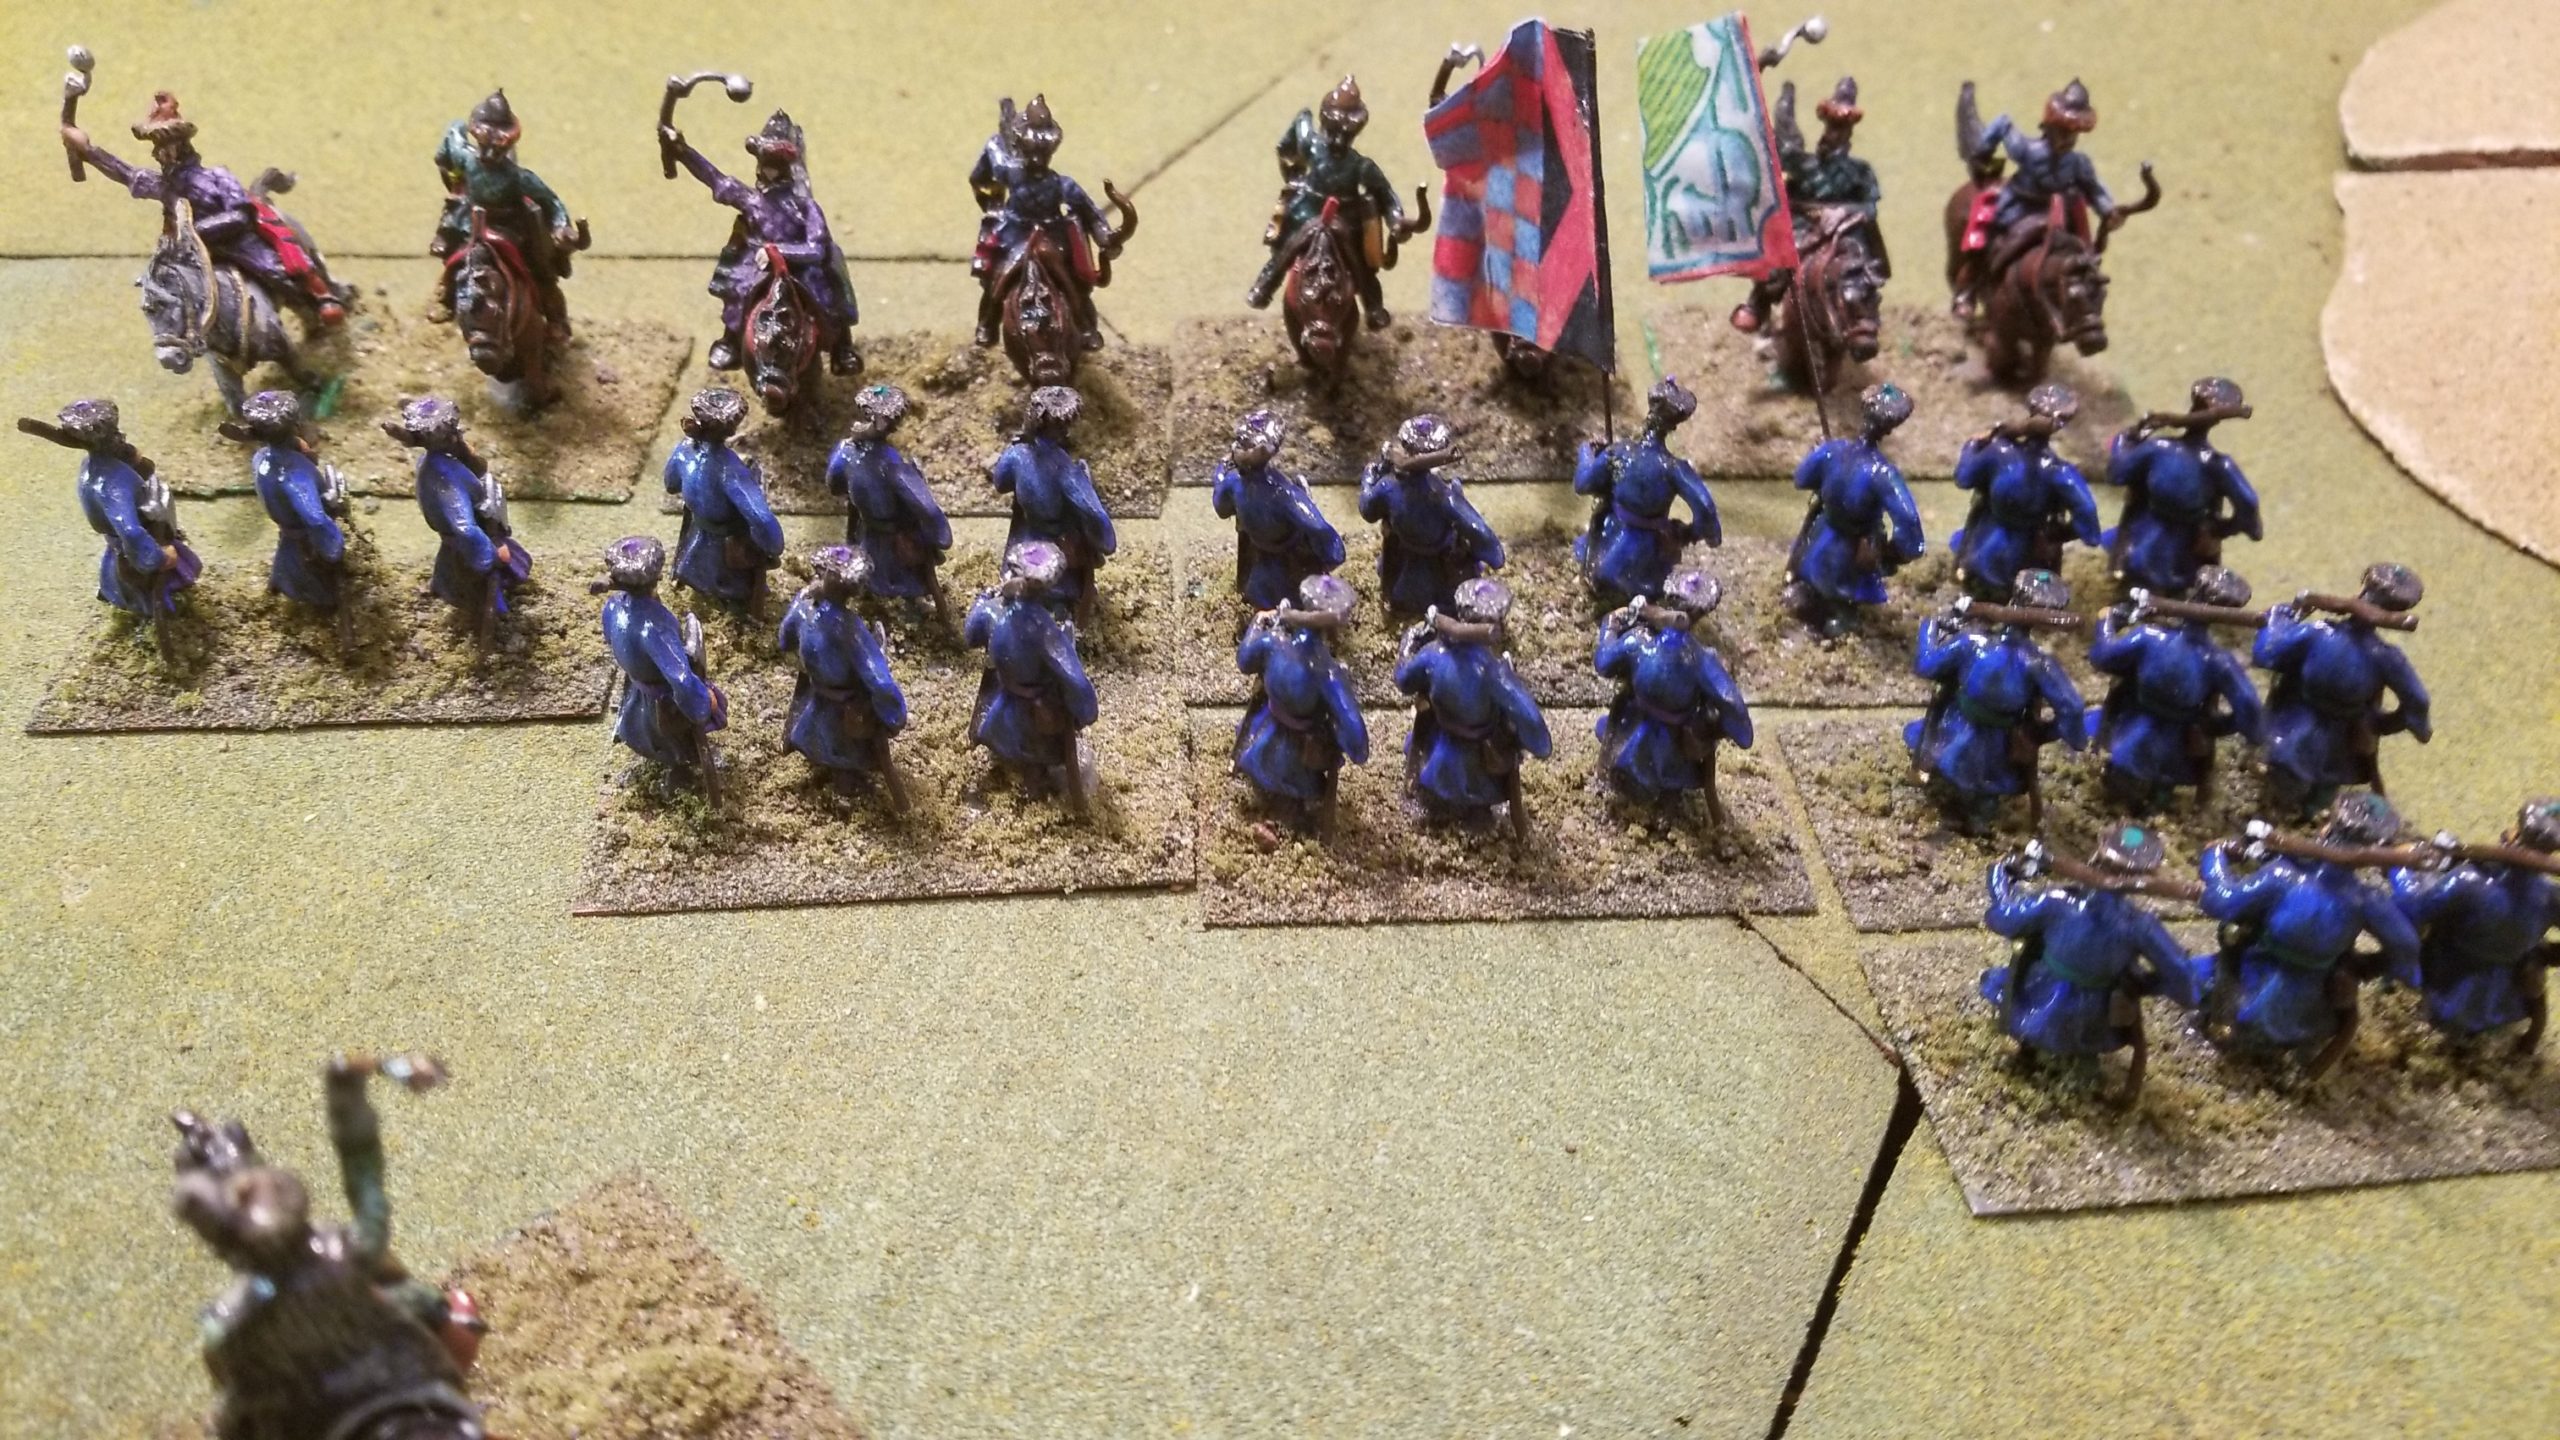
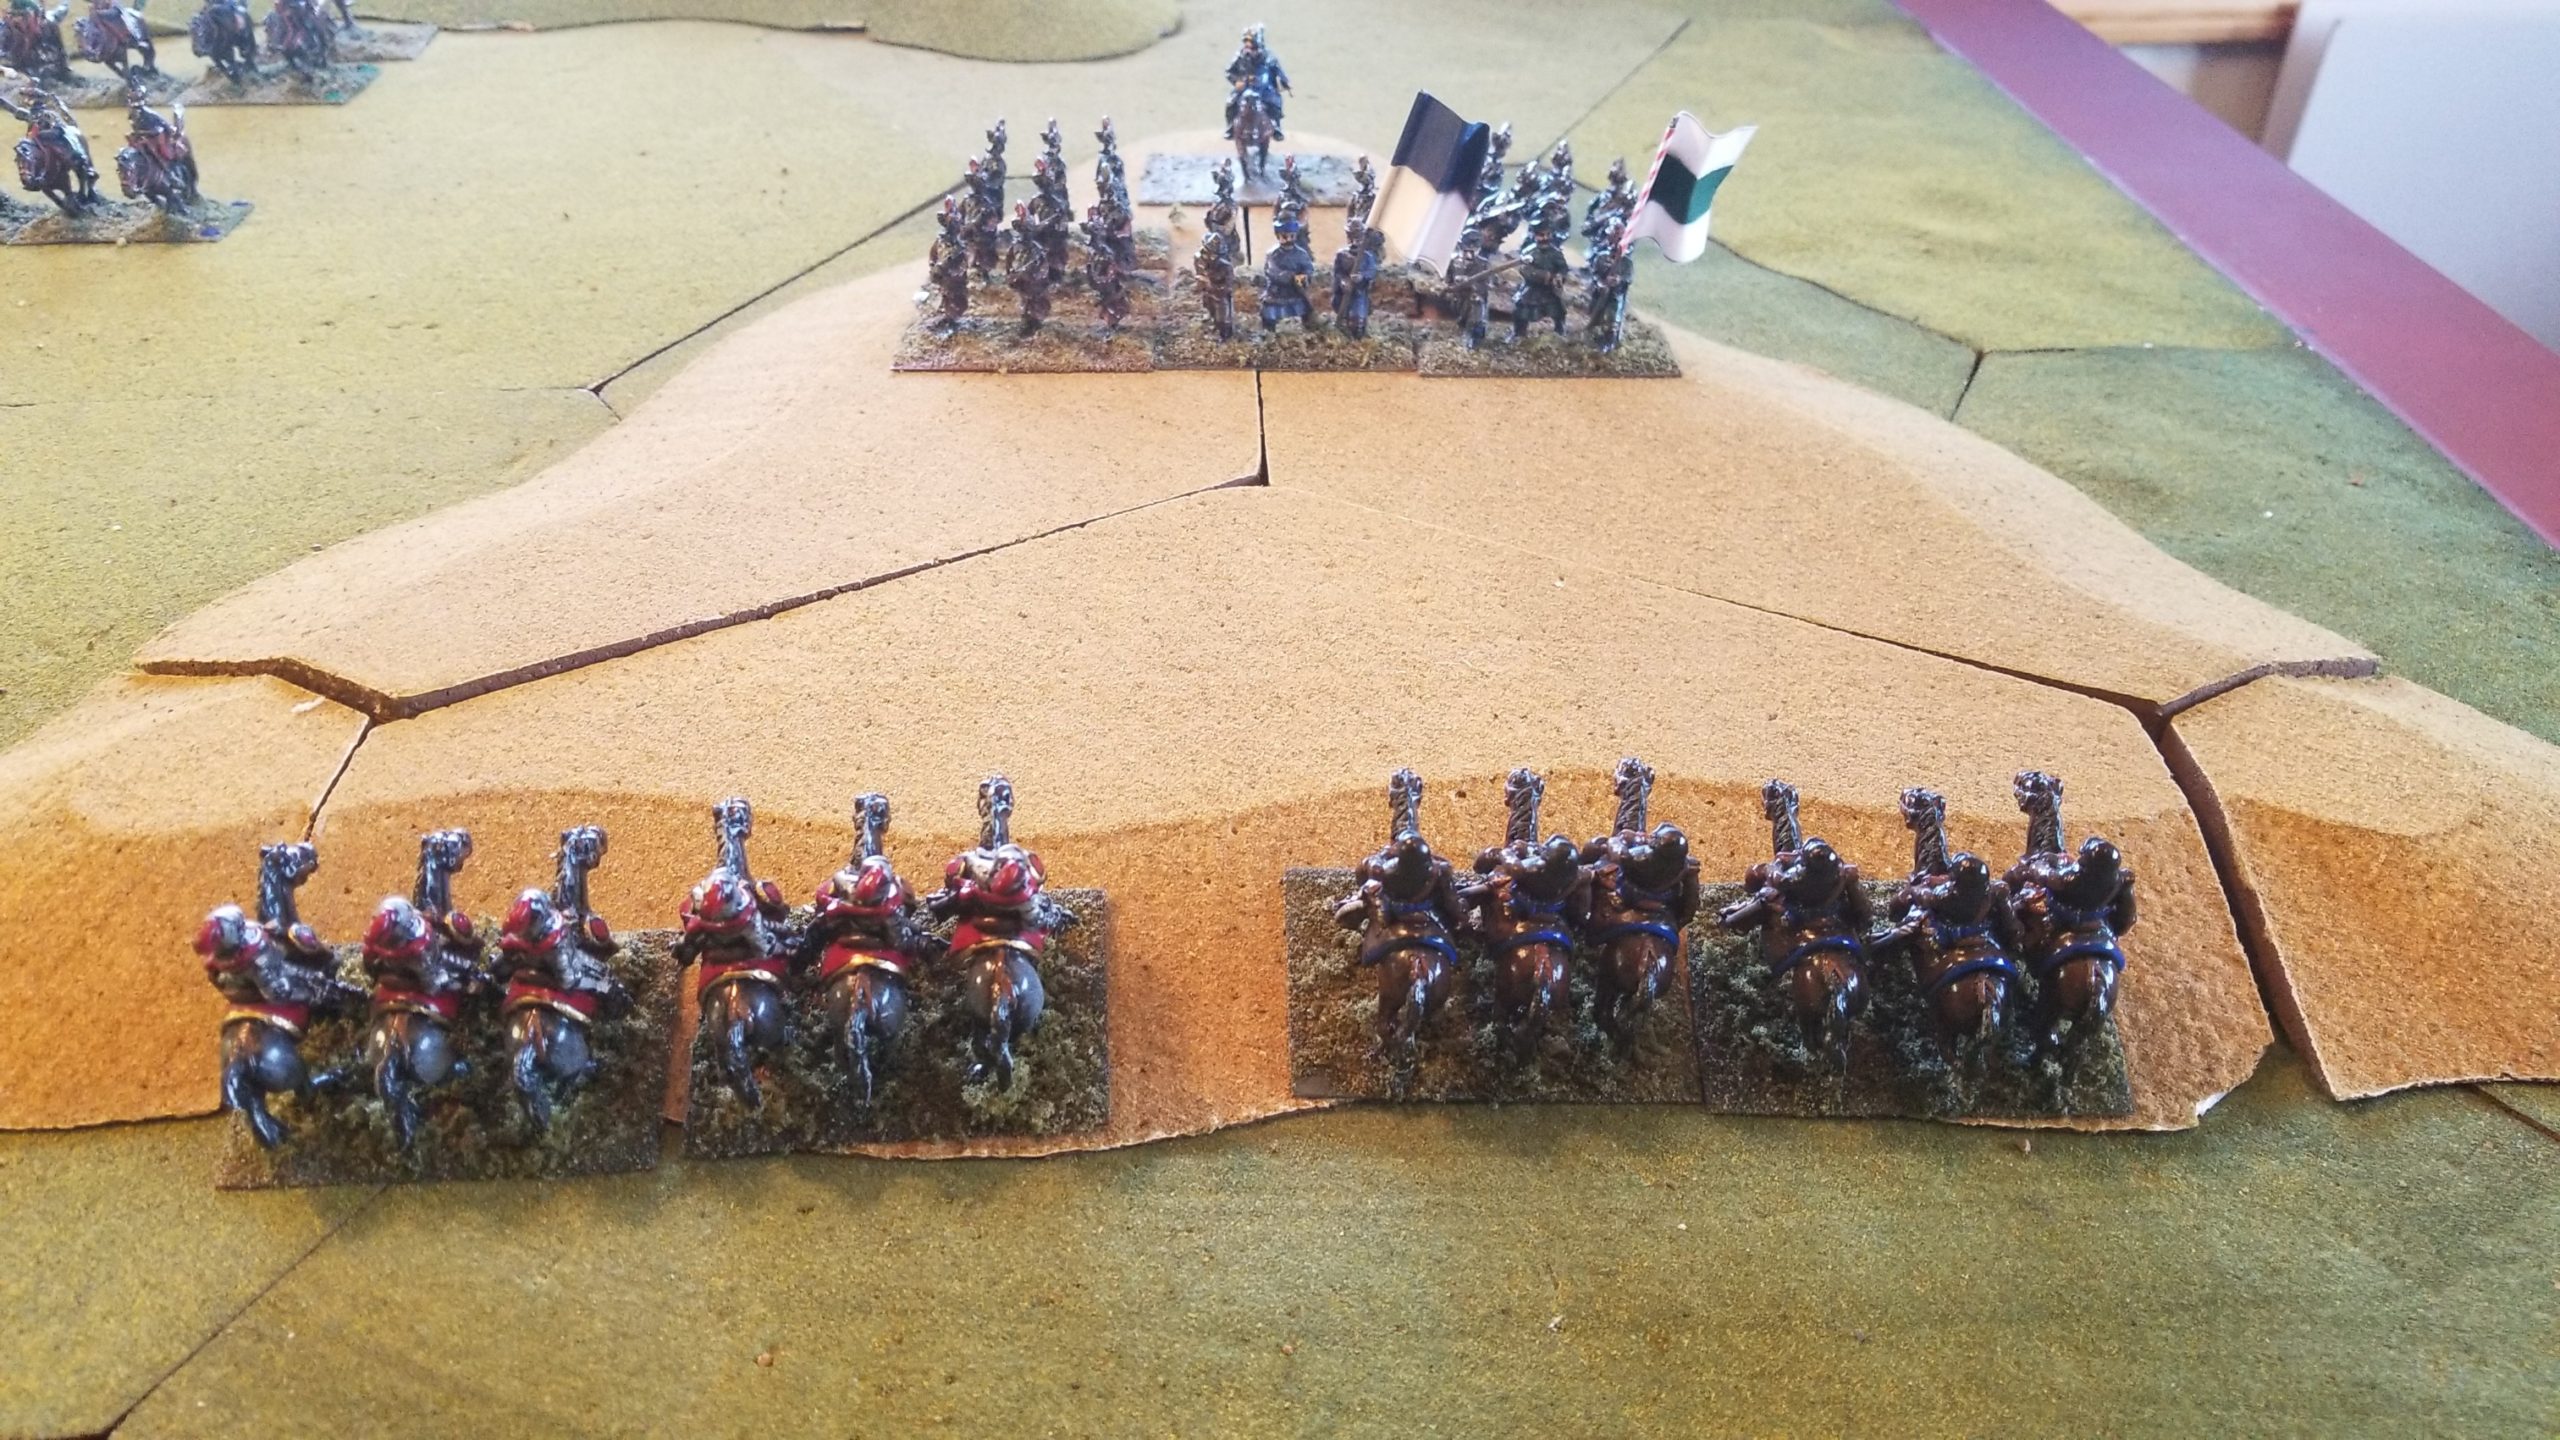
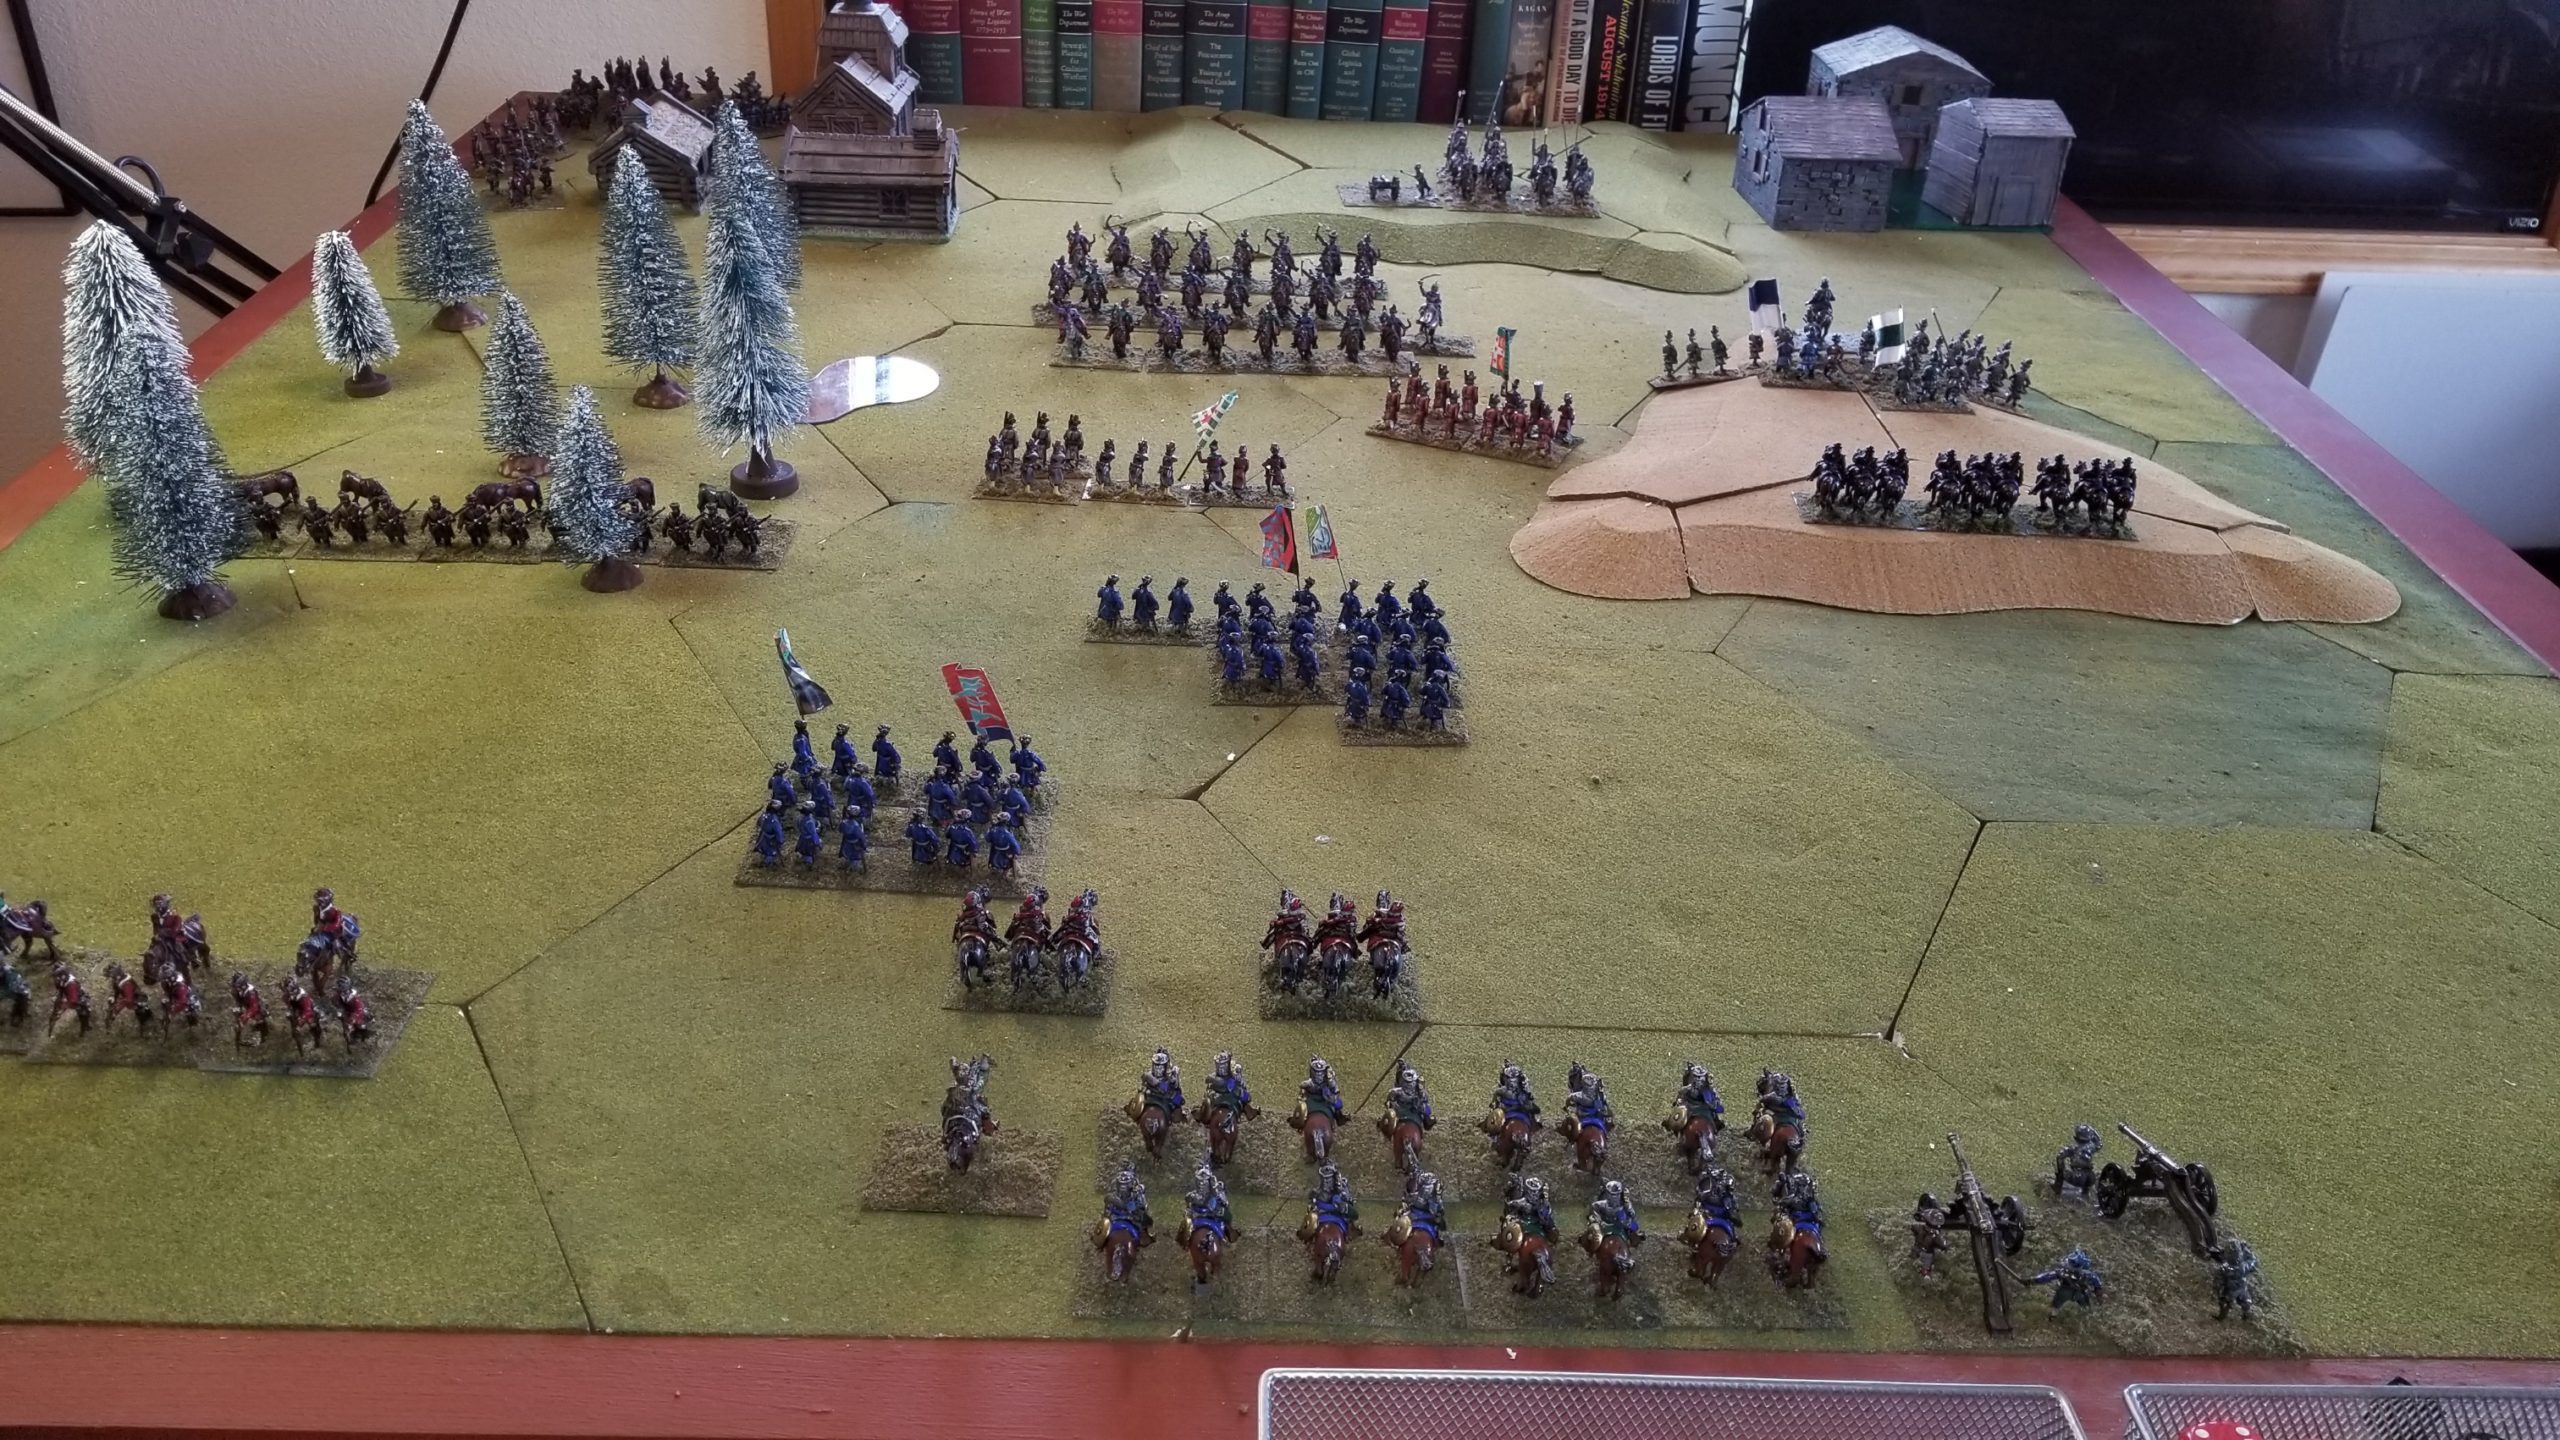
Fighting now taking place along the river lines.  The Soviet player now has the First Cavalry Army on the map.

A big meal and a tendency to bullshit led to an early end of play.  A rematch is scheduled for the second week in June.

Showdown!

Decided enough is enough with my Husaria contest between Poles and Muscovites.

Just “guided” units to set up cavalry confrontations in the center.  Guiding is my polite term for “to hell with the rules, let’s get these units into position.”  Yes, to do so would have involved finagling figures through expansion/contraction of frontage gyrations, as well as the timing of said moves.  Said finaglings would have expanded my deeper knowledge of the rules, but in my current bloody mood, it would have just been another experience tantamount to a telephone hold (thank goodness for the speaker setting on cellphones).

Now that the units are in general position, I can pick up the game using Rules As Written (RAW), and see what happens with cavalry combat.  To this point, all combats have involved infantry units.

Here’s the overall situation:

Poles to the right, Muscovites to the left.  The flanks are secure for both sides.  The Polish Pancerni are moving into attack position, as are the Muscovite heavy cavalry and Ratjars.  The center area is narrow and becoming congested for the Muscovites.  Since both sides are now within charge distance (28 cm), the Muscovites may not be able to expand their frontage before first contact.   In this rule set, only the front rank of Cavalry fights in melee.  However, rear ranks can overlap after the initial melee turn.

This photo gives  little better view of the Muscovite situation.  The cavalry in the foreground is retreating (not routing) and will pass through, and disrupt, the Streltsy infantry.

The Polish objectives are the two villages.  With that in mind, the Muscovite CinC (single figure top center)  has moved to rally the withdrawing cavalry units and direct the reorganization of  each village’s defenses.

I’ll pick this one up with the usual turn sequence, starting with declaration of charges for whichever side wins the initiative die roll.


TSATF – Last Move

Rolled for Boxer resistance on the last two ridges.  None on one ridge, and one, passive, unit -with only four riflemen, on the other.

Don’t need to play this out.  Marines will simply engage at a distance, and force them off.

This game turned out well.  I’m fairly satisfied with my solo adjustments for Boxer placement, strength and aggressiveness.

I did roll for Marine casualties.  Four of the eleven lightly wounded are now considered seriously wounded.  Add those to the four KIA and other three seriously wounded, and the Marines took roughly 1/3 casualties.  High price.

Well, time to put them back in their cabinet and start playing Husaria.

TSATF Skirmish Continues

Well, maybe not that interesting at first, but later the situation became too interesting for the Marines.

The Boxers failed the morale check needed to charge the Marines occupying the west ridge line;  ran off the ridge and went prone/pinned.  Elsewhere the firefight continued, with both sides sustaining casualties.  Surprisingly, the retreating Boxer unit rallied on a die roll of “1”.

Here’s photo of the situation.

The riflemen of the rallied Boxers turned to engage the Marines moving through the saddle, while the remainder charged and closed with the Marines to their front.  The Marines moving through the saddle, in turn, charged the detached riflemen.

Both Marine units were pushed back!  In TSATF, hand-to-hand combat is simply a comparison of die rolls, and the Boxers were rolling well.  Despite losses, the Boxers  held the west hill.

However, the Boxers unit losses were now greater than fifty percent.  The detachment on the hill failed the required morale check and fled (final turn phase after shooting). The riflemen, however,  passed their check and remained in place.

In the following turn, the two Marine squads rallied and moved back towards the west ridge, staying in defilade. The Boxer riflemen focused on the remaining Marine unit, but their fire was ineffective.  Here’s a photo of the situation at the end of this turn.

Quick Note:  I’m keeping the casualty cubes in-place for an end-of-game count.  Red indicates a serious wound, pink a light wound, and black for death

The Marines regained the crest of the west ridge and engaged the Boxers to their front.  The Boxers literally fought to the last man.  The Boxers holding the east ridge drew an event card reducing their effective firing range to only 12 inches, or not far enough to engage the Marines to their front.  They wisely withdrew to the reverse slope.

The Marines advanced through the open ground to take the east ridge.  Here, the  Boxers emerged from defilade, but retreated after taking casualties and failing  their morale check.

While this action was taking place, Marines occupied the west ridge.  Here’s a photo of the current situation.

Lots of wristage before next turn’s action.  Have to determine who and what will be on the final two ridges.  I will also inventory all losses, clean up the casualty cubes, and maybe die to see which of the lightly wounded Marines can no longer continue.

Two Ring Circus

High winds with rain turning to snow.  Focus at a time like this?  Just TSATF?  Why not get the Husaria re-set going?

I have the roster sheets filled out, and the armies deployed.  All I need to do is annotate each unit’s initial orders.

Very curious to see the impact of the additional generals,  new light horse units, and a  morale upgrade  to veteran status for selected units will have on the game.

A couple of marginal photos to document preparations.

This marginal shot is looking north.

The Muscovites now have Cossack infantry instead of Dragoons in the woods, with Kalmuck light horse in support.  Ratjars will support the Cossack infantry deployed on the east hill.  Also, there are two medium guns emplaced on the hill between the villages.  Streltsy infantry, supported by cavalry, hold the center.

The Poles have fewer dragoons facing the woods, only one heavy gun (instead of the multiple batteries in the previous game), and Cossack cavalry – supported by Ratjars – on their right flank.  Again, the Hussars are off-table and situated to the rear of the Pancerni (now upgraded to Veteran status) supporting the Haiduks in the center.

Skirmish Adjustments

Making adjustments in my search for appropriate solo randomness  for The Sword And The Flame (TSATF).

The most pressing problem was the reaction of Chinese forces placed on reverse slopes.  After playing through a couple of turns decided to go with dicing for passive, aggressive and fanatic designations for all Chinese units when placed on the table.

Passive will hold in place until enemy is  no more than six (6) inches away.  Aggressive units will move as the situation dictates, and Fanatics will move to contact towards the nearest enemy unit regardless of situation, distance, etc.  A percentage die roll of 10 or less (0 =0) results in a passive designation, with 20-70 creating an aggressive unit, and fanatics at a higher roll.

Given the high number of Boxer riflemen  (probably higher than historical), any lightly wounded Marine casualties are recorded, but the figure stays in the fight.

The Marines encountered resistance while approaching the ridge to the west.  The ridge to the east was unoccupied.

The passive Boxers emerged from the reverse slope, and engaged the Marines with firearms.  Their next move will be into melee.

The other two Marine squads continued to advance, occupying the east hill and advancing through the saddle between ridgelines.

Force composition die rolls were made as  both units were within twelve (12) inches of the next two ridges.  The results were not pretty, with two aggressive units, each equipped with a high number of firearms,  are now situated on each ridge crest.

Tomorrow’s  turns should prove interesting.

Skirmish Mission

Rhonda’s enjoying Palm Springs weather, so I’ve set up The Sword And The Flame (TSATF) on the dining room table.

The scenario calls for the Marines to clear a series of ridges.

I’m considering all ground to be rough ground for shooting, so there is a -1 DRM for all firing.  However, the ground will be considered clear for movement, so without penalty.

Visibility is twelve (12) inches from ground to crest, unlimited from crest to crest, and crest to base of next hill.

The challenge is coming up with some solo-friendly randomness.  Here’s a quick and sketchy overview.

My initial stab at this problem is to use the Action, Event and Terrain cards published by The Virtual Armchair General.

An Event will be triggered by a die roll of six (6), and confirmed by a Yes/Maybe die roll.

Whether or not a terrain feature is occupied will be determined by a 10 sided  die.  A roll of four (4) or less means the feature is unoccupied.  A roll of five (5) to eight (8) means a Boxer force is occupying the crest.  A roll higher means the Boxers are on the reverse slope.

Another percentage die roll determines force composition.  A roll of four (4) or less means Regulars.  Another outcome results in a Boxer force.  For the Boxers, another roll gives the number of figures with firearms.  All Regulars carry rifles.

Terrain cards will be drawn when Marines enter a “new” terrain feature – either a slope or the “new” ground beyond a ridge line.  These cards will indicate if movement is slowed.

Any casualties are considered to be out of this game.  Wounded figures will be diced for at the end of the game, anticipating a follow up contest.

A Sputtering Broken Record

Game is sputtering along, with my bleatings about Initiative and Response checks a broken record , especially with the Experienced level units  forming the bulk of both armies.

Sat down last night and worked my way through these problems.

Experienced units need a modified Initiative percentage die  roll of 40 or lower to charge or respond to a new order (not to mention fire or move for the first time in the game).

Without command figures in close proximity, the chances of passing are pretty low.

Response tests are also problematic, especially for units with over ten percent casualties (that’s the loss of only one (1) figure for most units).   This test involves a base Morale Value Against Percentage Losses Suffered, added an average die roll, then modified.

Once again, the proximity of a unit’s General and unengaged friendly units is helpful.

An example:  An Experienced unit with ten percent casualties has a base morale value of 5.  In order to remain “Steady”, in response to an event,  it must have a modified score of eleven (11).  Assuming a die roll of three (3), it still needs a net of three positive modifiers to remain “Steady”.

The lesson learned is to increase the number of generals per army, and keep troops close proximity to one another.

If this doesn’t happen, most units will refuse to charge or hold, instead retreating or routing after absorbing a limited number of casualties.

In this game, the Cossacks continue to march up “their” hill, come into contact (or threat of contact), and retreat back down.  Same for the Muscovite cavalry in the center.  They absorb a casualty loss from Haiduk musketry, and then fall back.

Very tempted to reset.  On the other hand, I’d like to get my Transylvanians on the table.

More Progress

The daily game playing momentum has slowed. Surprising, because once I get going, the game’s very enjoyable.

Interesting set of rules.  Despite the many charts and modifiers, the play is quick, and far less procedural than Wargames Research Group (WRG)  6th  Edition.  Husaria’s narrative allows some latitude in application.

For example: How far does a unit retreat? Is it full move, move modified for formation changes, does the unit deduct for turning 180 degrees, or what? Not complaining because it allows for applying some common sense.

Another puzzler is what happens when a unit fails its Charge Initiative Test? Does the target unit still have to take a Response Test. The answer is “Yes” in WRG 6th .  Here, I’m not so sure. I’ve tried it both ways and have decided that if the unit fails its Initiative Test, the target does not have to test. An outcome of both units retreating is, while possible, not that plausible.

This game is full of frictions. First off, it is very difficult for “Experienced” units (which make up the bulk of units in this game) to pass the Initiative Test to charge and also difficult for them to roll for positive Response Test outcome. As a result, and I’m sure this was intended, plans do not go as anticipated.

This breakdown has caused both generals to scamper around the battlefield changing orders. The order changes are not formulated until the last phase of the turn, communicated during the next turn’s movement phase, and take effect the following turn. By that time, events may have rendered the new order moot or even counter-productive.

One interesting rule involves following up a unit that “gives ground” after losing Combat (melee). The victorious unit can only follow if it has the distance needed remaining from its charge movement allowance. If not, the victorious unit must charge again the next turn. This happened to the Russian cavalry in the center. They failed the subsequent charge test, remained stationary, and were then forced to retreat as a result of Polish musketry.

If you enjoy some chaos in your gaming, this rule set provides it. For me, especially playing solo, this is not a bad thing. And, I don’t mind working within a relatively loose framework. Again, this is after playing the very scripted WRG 6th Edition Rules.

Here’s a summary of the past five (5) turns.

The Polish attempt to hold the east hill using Ratjars failed. However, the Cossack Infantry also withdrew (see comments about mutual failed tests, above). The Cossacks are now working their way back up the hill, but staying on the reverse slope to avoid artillery bombardment. The Polish commander has sent his remaining Ratjars to drive off the Cossacks.

The Haiduks drove off the first wave of Russian cavalry, and holds the center. The Polish Pancerni remain uncommitted, with the Hussars still to their rear and off the table.

The Russian Dragoons holding the forest have been forced to withdraw, with Polish Haiduks advancing through the forest towards the East village.

The Russian Streltsy have retreated to the villages, with orders to defend. The Russian heavy cavalry is beginning to deploy to support another attempt to break the Haiducks holding the center.

Progress Report

Into Turn 10 now.

Artillery fire has driven off the Cossacks. Seemed too easy. But it doesn’t take too long for a unit to have a 10% casualties morale check. And, the morale chart is unforgiving, especially for the Experienced units that constitute each side’s infantry.

Same for the musketry in the center. Strelsky now retreating, with Haiduks following up even after being pushed back for one turn by gunfire.

Recovering from retreat is different. No rallying, just turning around. However, most units will take two turns to do so, with 90 degree turns each turn. I like it. No markers, easy to see a unit’s status on the table.

Command is another adjustment. Not from a rules standpoint, but from a player’s perspective. Orders are given at the end of a turn, carried during the Movement Phase of the following turn, and communicated at the end of that following turn.

A Solo player must demonstrate a more than usual sense of discipline here. Looser rule sets allow more latitude. In this case, as with WRG 6th, you have to force yourself to stick to the rules – well, within the spirit of the rigorous rules, and really anticipate.

The Muscovite Commander has ordered his cavalry to attack the advancing Polish Haiduks. The Polish Pancerni are now in support. To their flank, the Cossacks have rallied, but are now facing a unit of Ratjars, under orders to hold, and not be drawn into a charge. It will be interesting to see how they respond to musketry.

Here are a couple of low-light photos from the Second Story Game Cave.