Category Archives: Boardgames

Der Weltkrieg – World War I Operational Combat

Since World War One is no longer trending, the contrarian in me says it’s safe to start playing this operational series.

I’ve purchased several of the titles, and have been waiting for some time to engage with, get comfortable with the rules, and play a bunch of them.  What initially attracted me to the series was the number of East Front games (now consolidated into a single package) and its coverage of the Ottomans.  I also picked up the Italian Front game (really cheap on E-Bay) for when I feel like just bogging down in attritional nihilism.

Each game comes with a copy of the basic rules, along with scenario(s) specific rules

At first glance, this appears to be a typical hex and counter operational series.  Railroads enhance movement, headquarters effect supply, supply and supply lines effect combat, units have zones of control, fortresses and trenches aide the defender, and artillery units have special rules.   Turns are monthly, with each month starting with a trench completion and initiation phase, and then four phases per side.  Both players have reinforcement arrival, movement, combat, and replacement/recombination phases.  Reinforcement schedules are shown along with the initial orders of battle.

But, there are two major and one minor differences from other operational games.

The first involves terrain.  Each hex side can have multiple types of terrain.  The defender is allowed to choose the terrain through which he is attacked. For example, if the  attack hex side has both clear and rough terrain, the defender can choose the rough terrain, and enjoy the appropriate combat modifier.  Terrain also effects movement, in that the player can “weave” his way through clear or lower cost hex sides.  To me, this non-linear “weaving” is like following a valley that twists between hillsides.

Closeup Showing Multiple Terrain Types Per Hex Side

The second difference involves combat.  The attacker uses a standard means of calculating attack strength; adding attack points and modifying for (defender chosen) terrain.  A single die is rolled and cross referenced with the Combat Results Table (CRT) Before any losses are taken, the defender can choose to retreat one hex and reduce his losses by 1/3.  If not, the defender counterattacks.  The defender totals his strength points, multiplies them by three (artillery only doubled), and makes the appropriate adjust for terrain (that he initially picked).  The effects are again cross referenced on the CRT.  The triple strength counterattacks can really give the attacker a bloody nose.

The minor difference is how replacements are handled.  Replacement points are received, but must be formed into “battalions of march” and either marched or railroaded to a headquarters for integration into a co-located unit.  Recombination is simply combining two co-located below strength units into one.

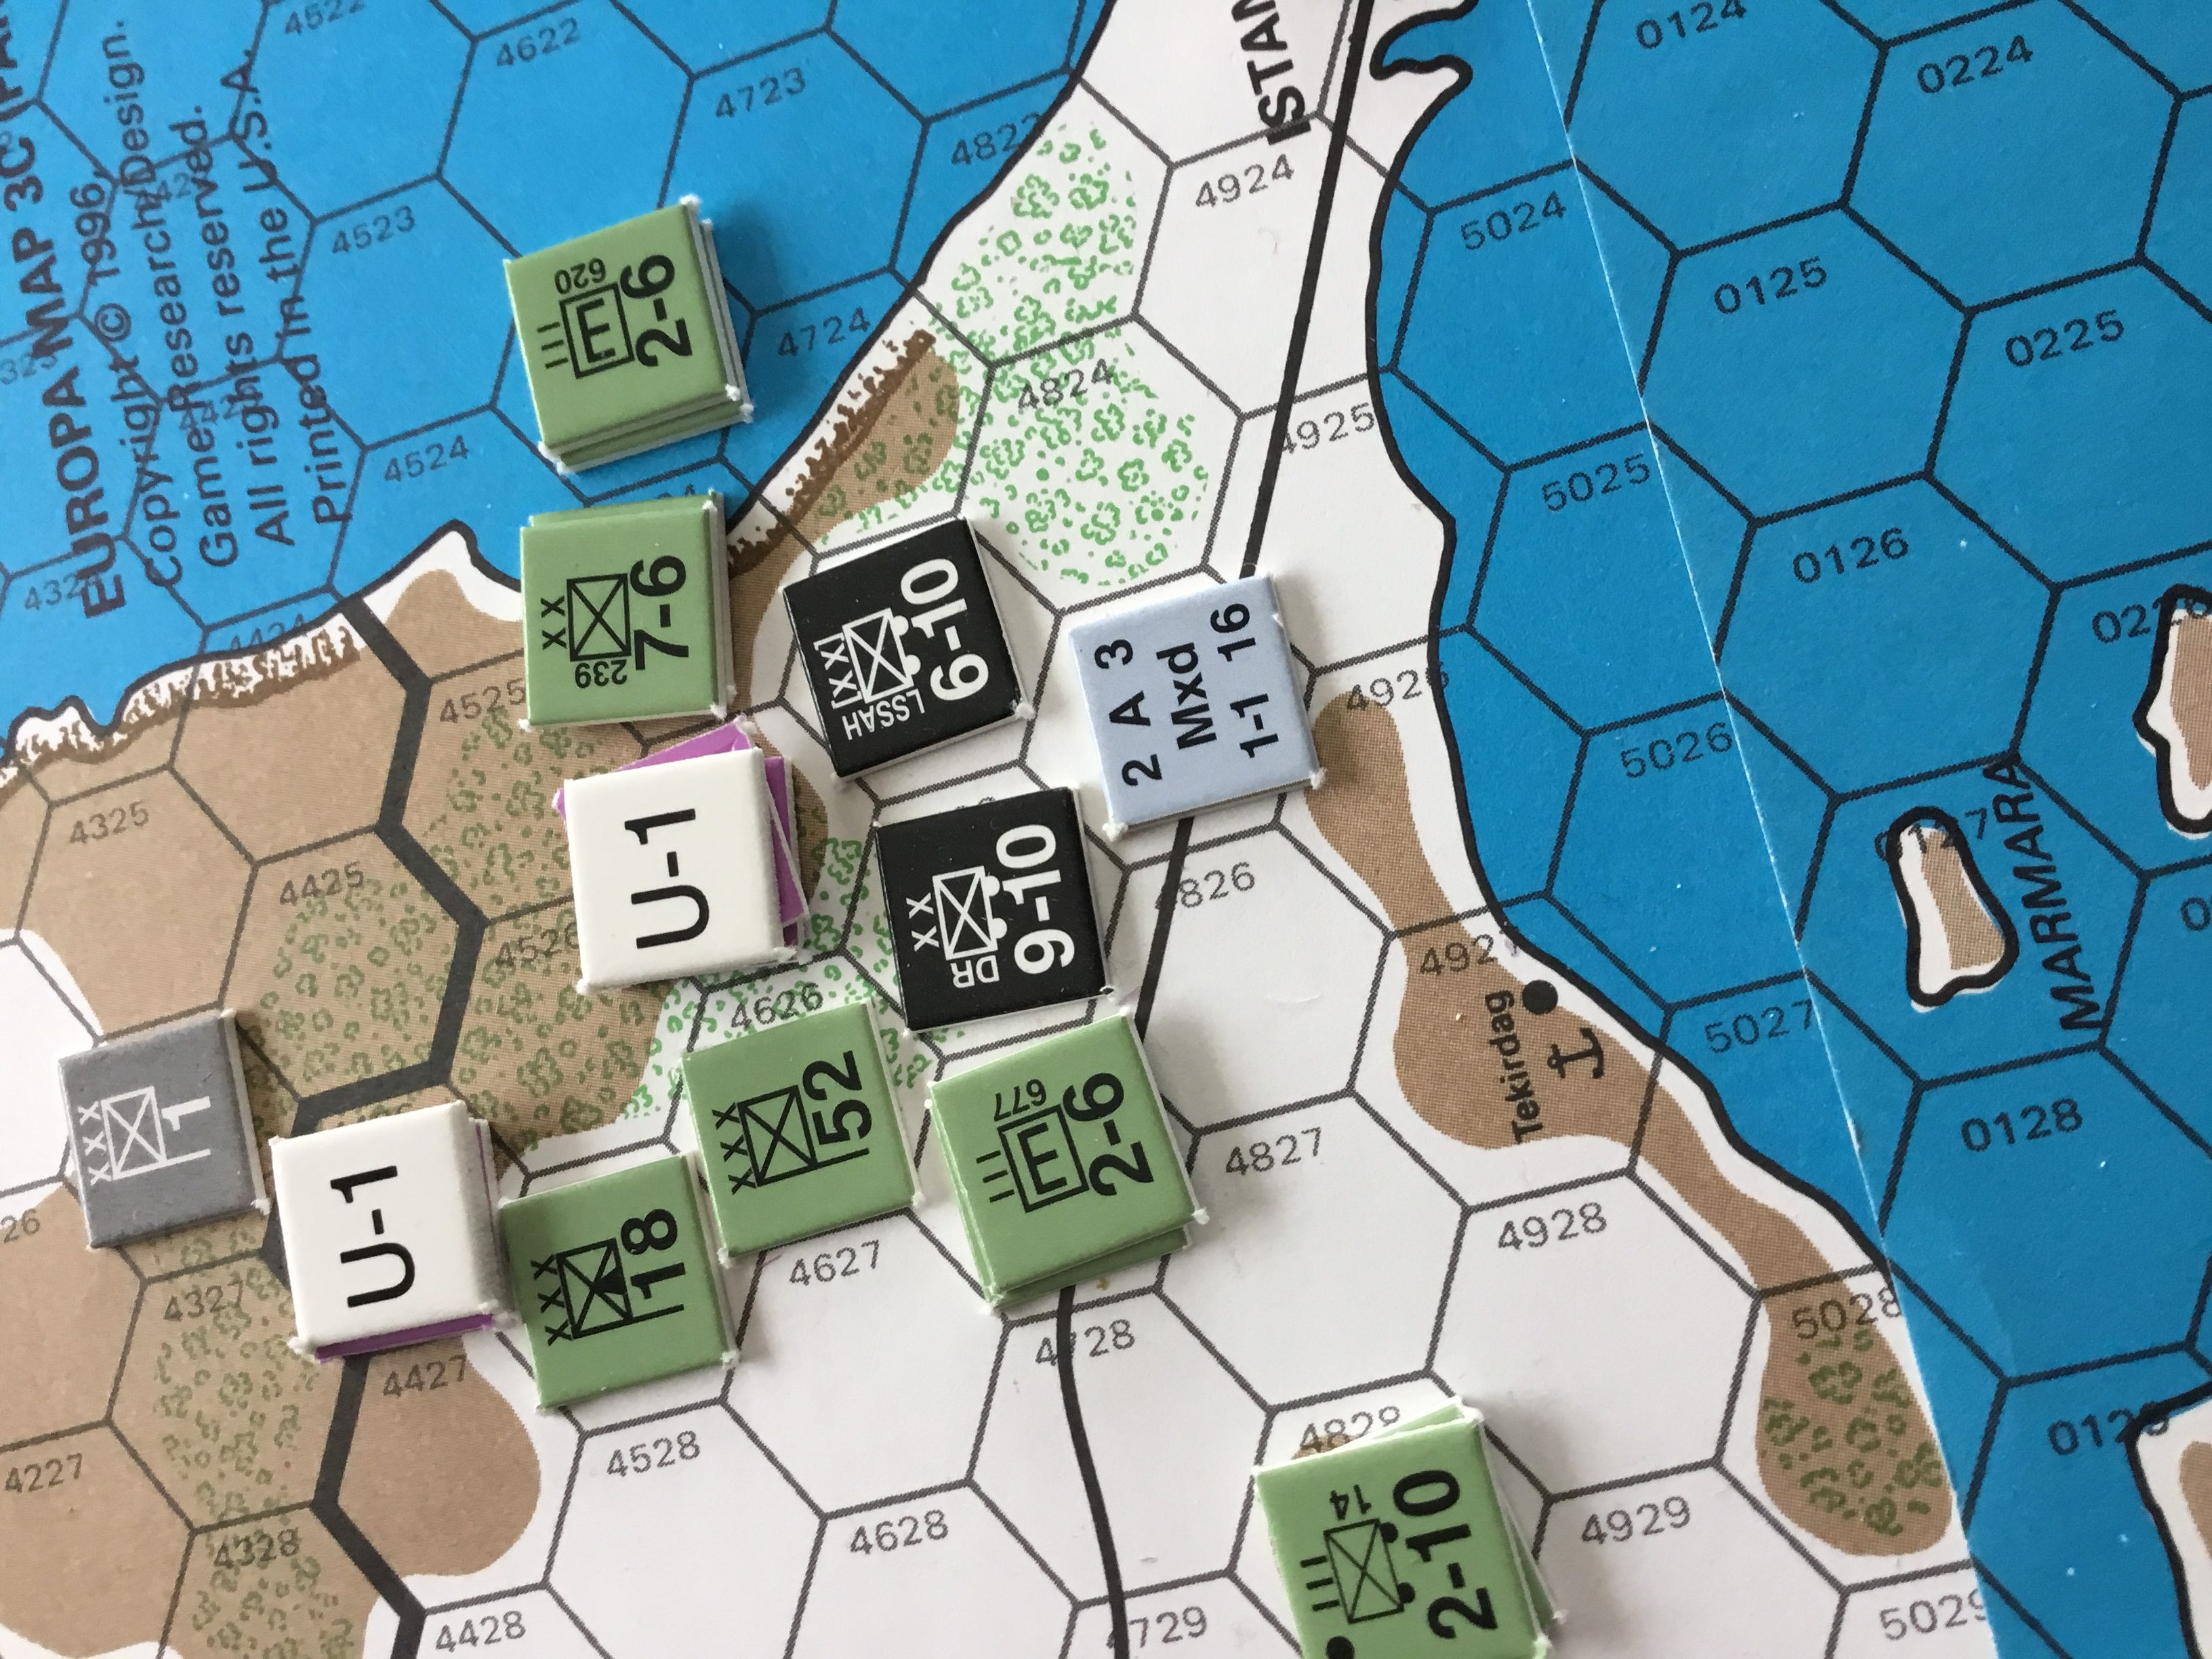
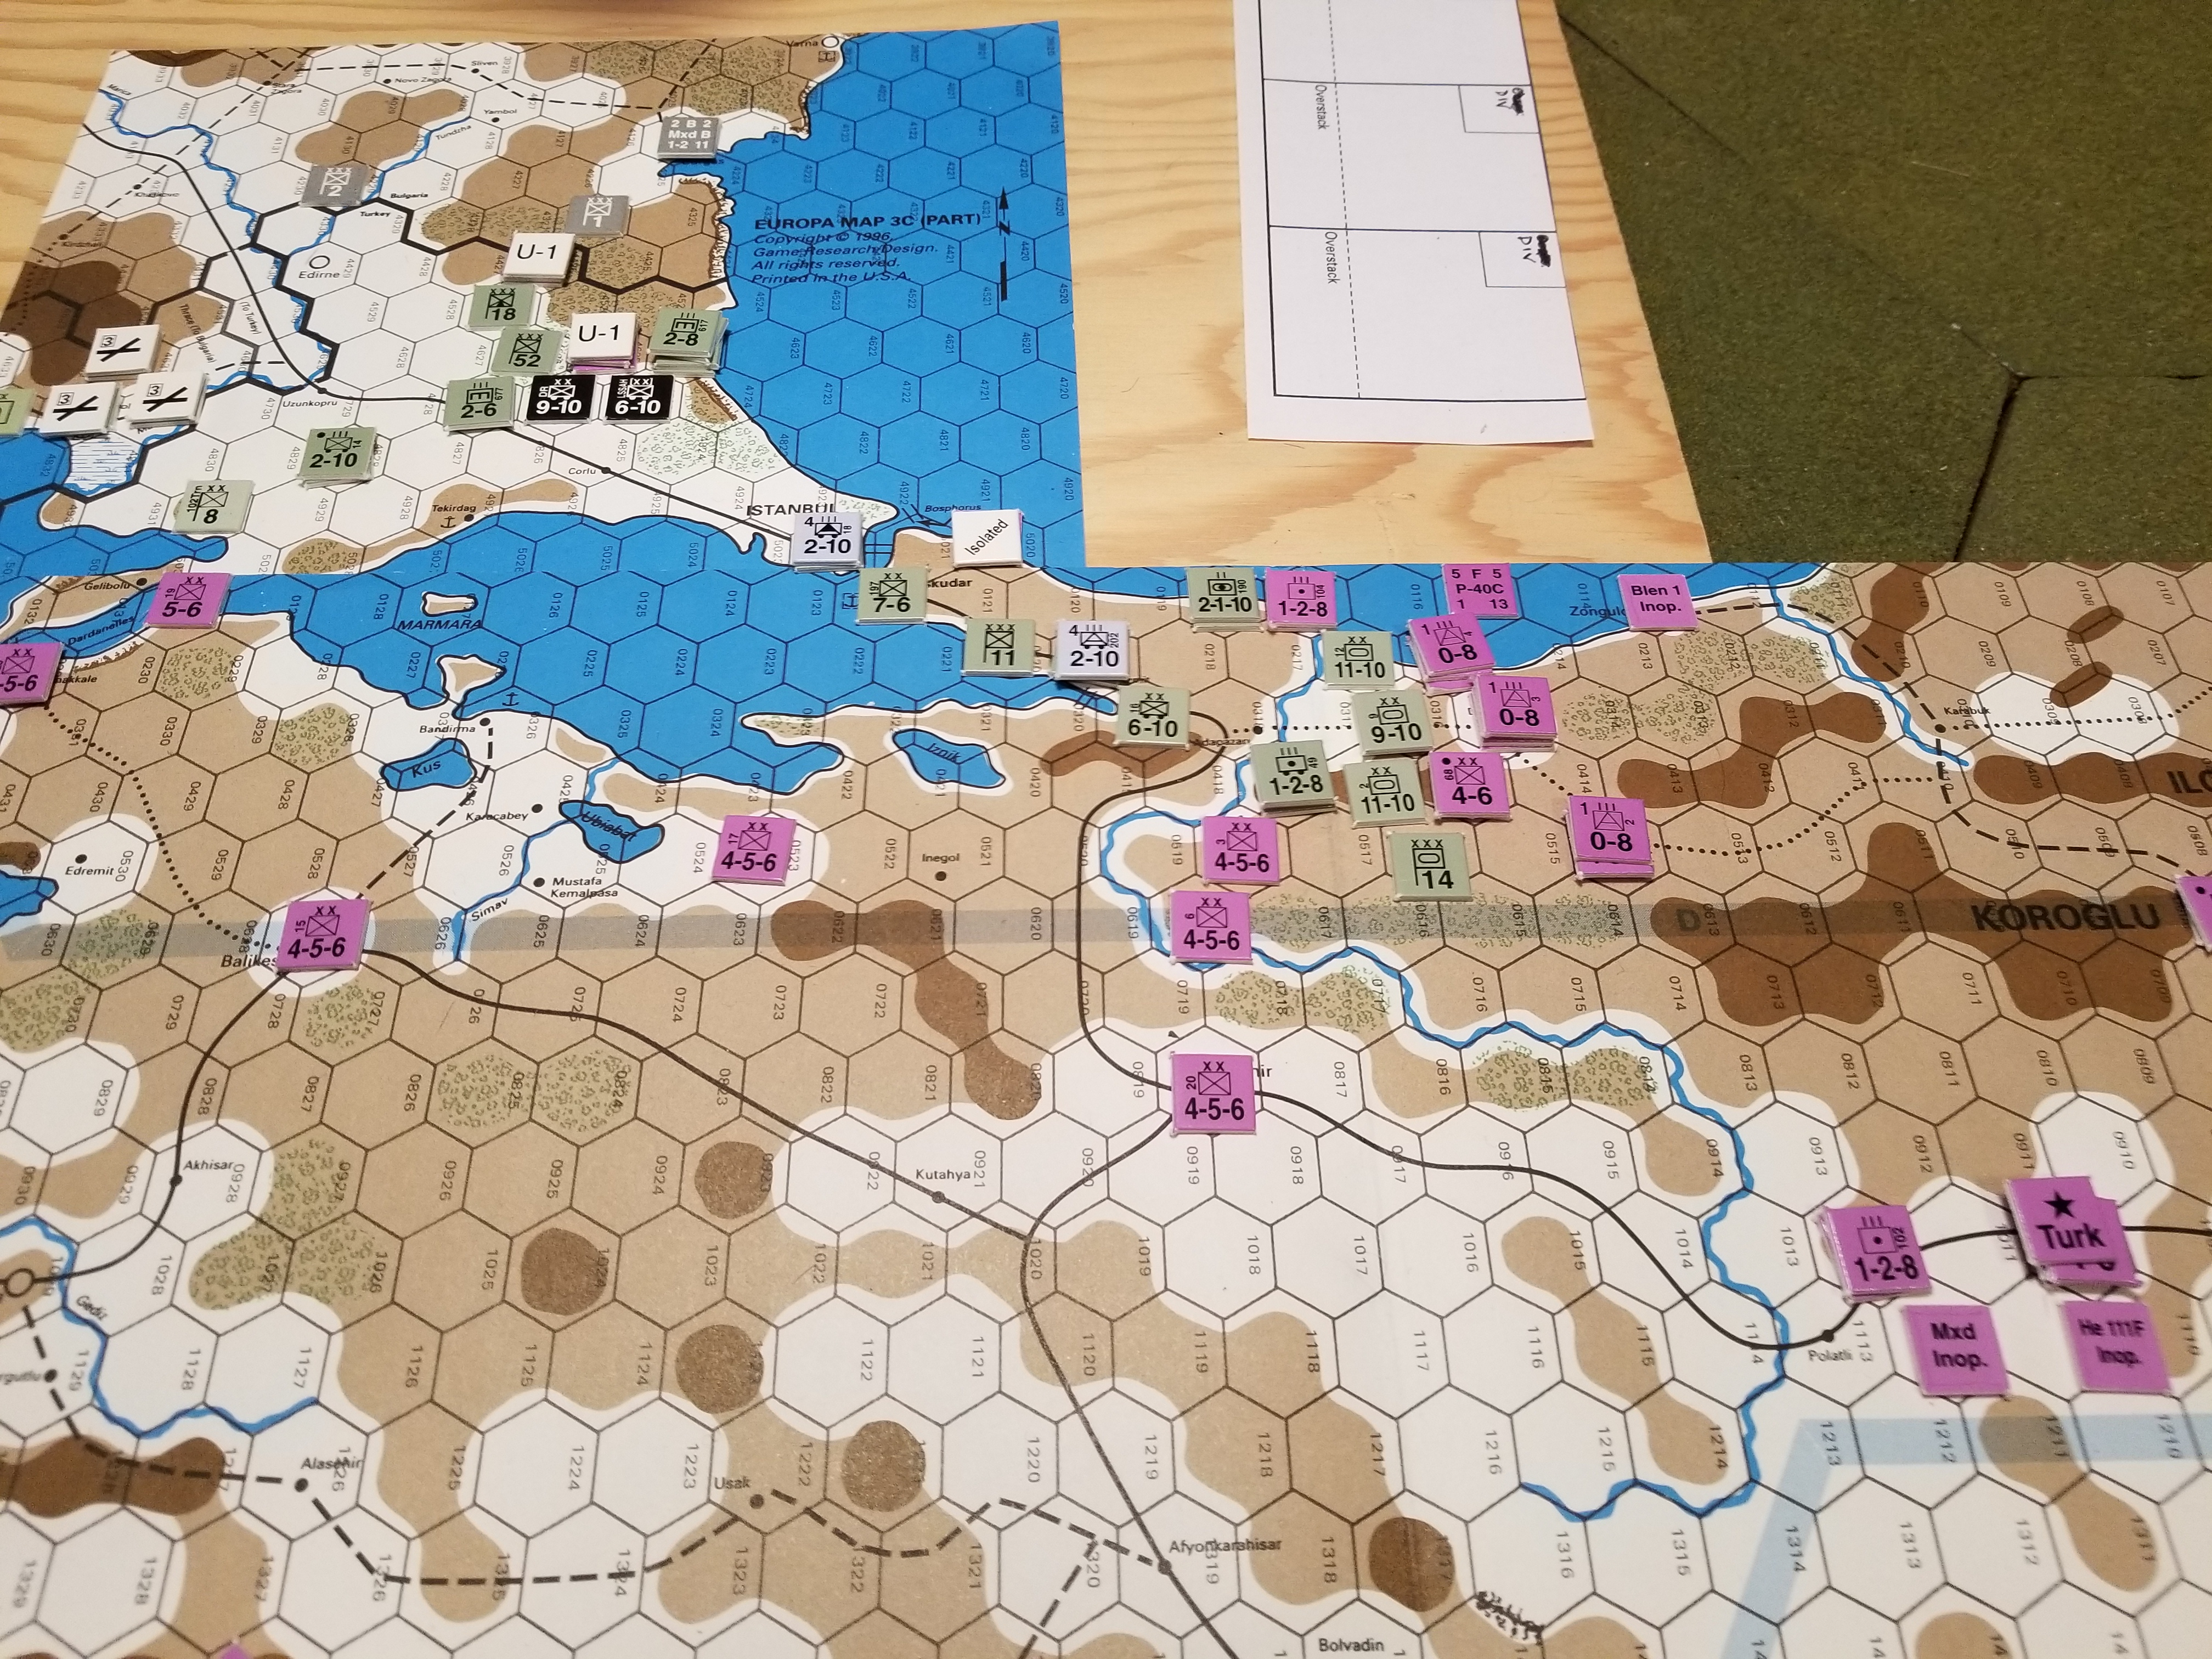
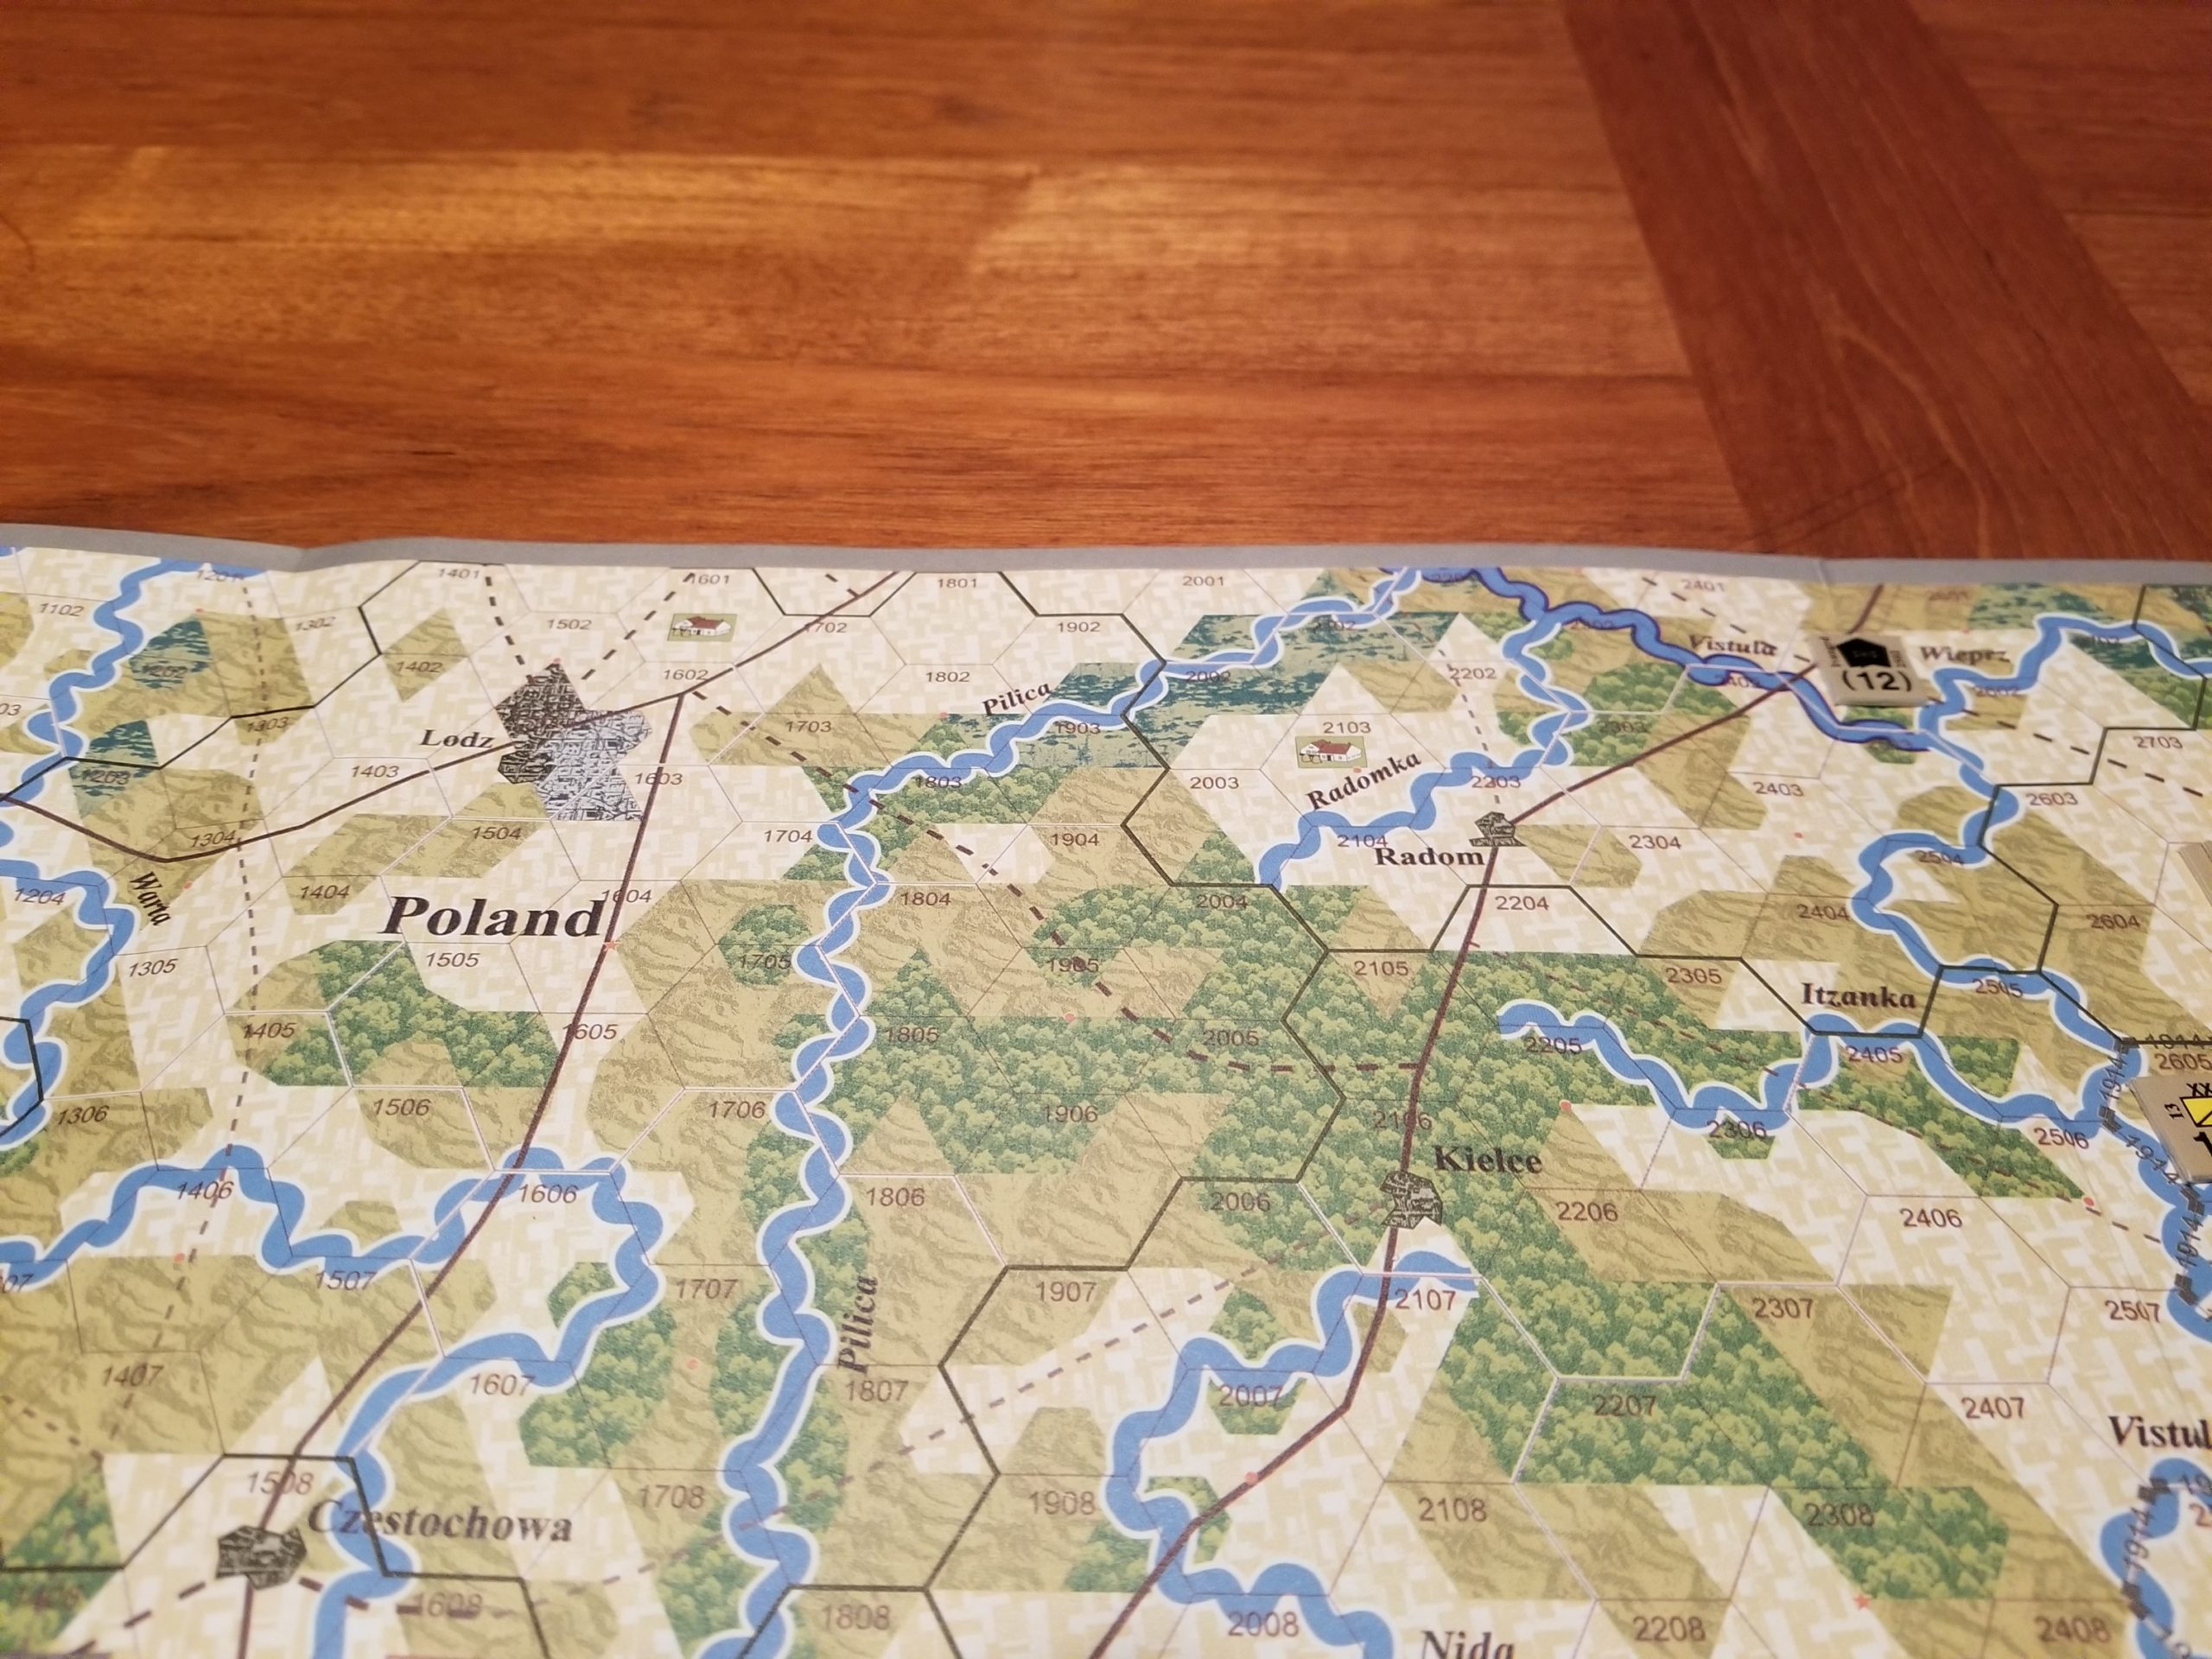
I’ve set up Galicia: The Forgotten Cauldron  twice now.  Both times on surfaces that had to be cleared to accommodate guests.  This time it’s going up in “my” room and it will be completed.  It is also to enjoyable and educational to follow the narrative of both Collision of Empires and Written In Blood on the maps.  I was able to pick up both titles on Kindle for $1.99 each last Fall.  The only problem is that some of the towns in the narrative are not represented in the game battle maps.

Initial Set Up. Pre-Mobilization August 1914.

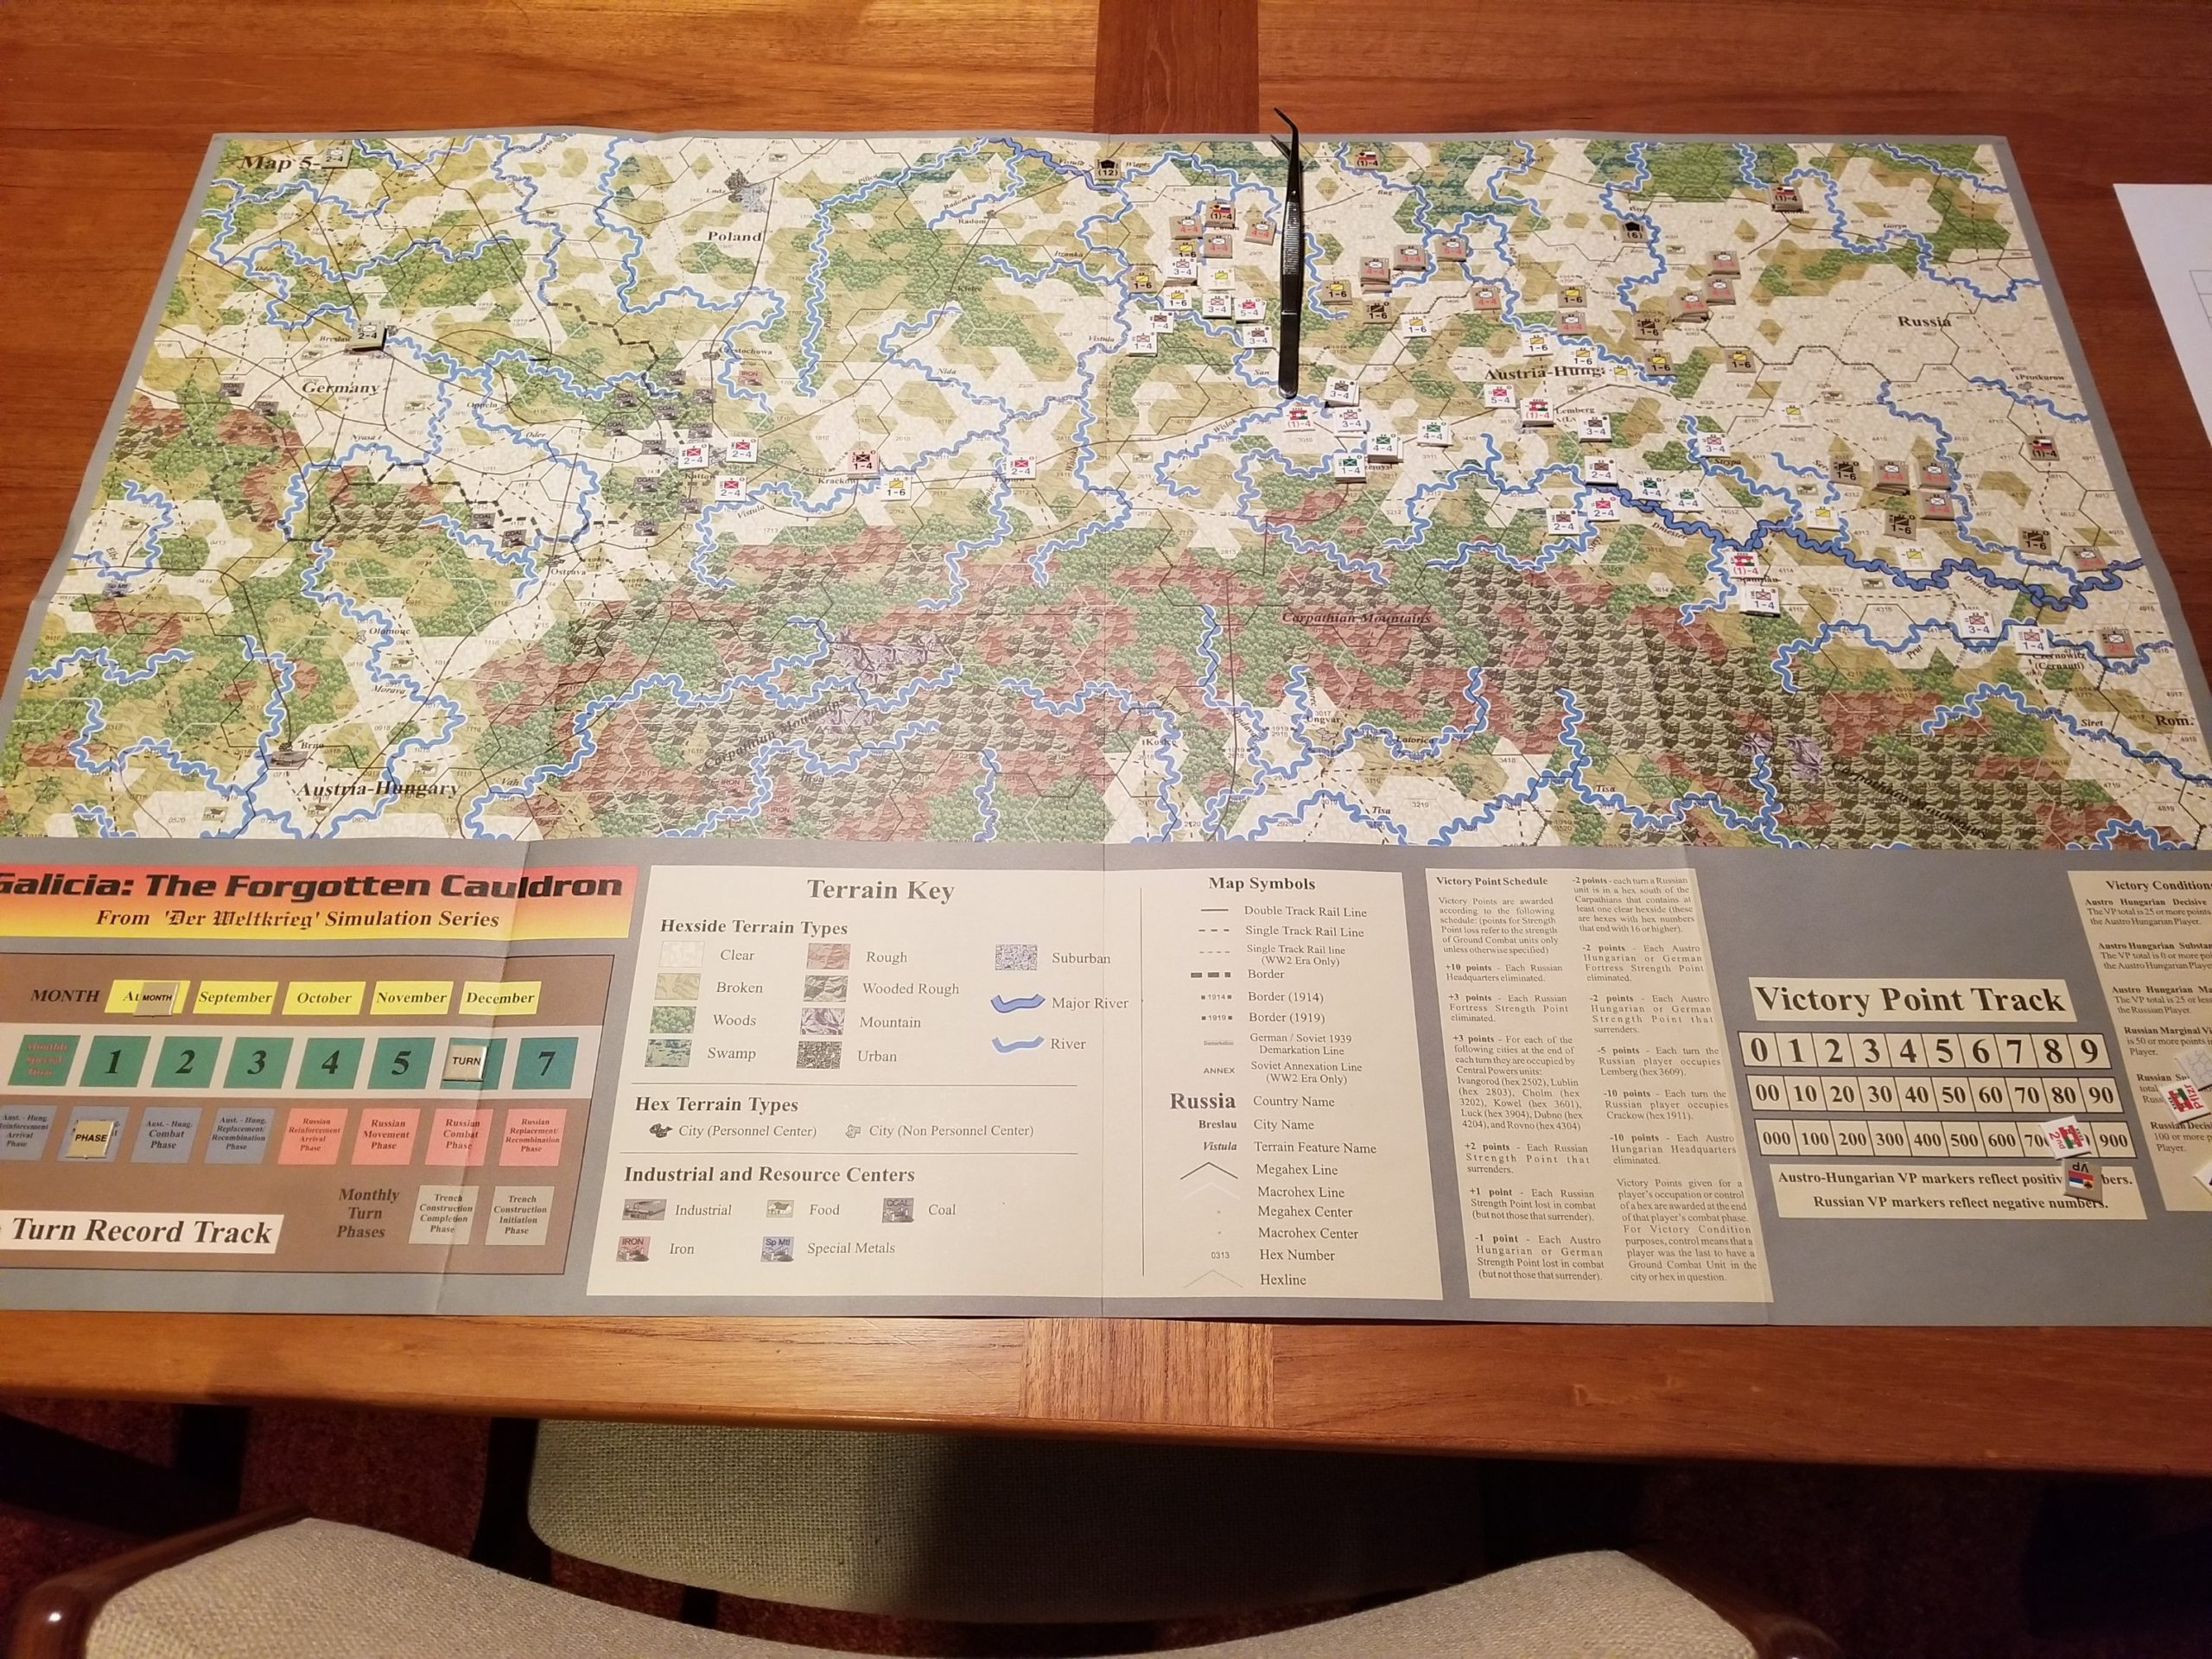
I really like what Designer David Schroeder has done.  He still maintains a website, but the series is now distributed by Decision Games.

Go-To Game

That’s Paths of Glory (POG) for Tim and I  Rules are easy to remember, play is pretty quick, and it is always a tense struggle.  The perfect game when football, beer or just plain sloth renders Europa, Third World War or Pursuit of Glory (POG’s demonic brother) too difficult.

Our latest game was right before Thanksgiving.  Tim took the Allies and I had the Central Powers.

In our past games, Tim’s Allied play has always featured the Russians’ rude handling of the Hapless Hapsburgs.  This time, I was determined not to let the Austrians lose the game.  This would involved a cautious approach on the Western Front, with German reinforcements moving to the East.

August 1914

Standard opening for the August 1914 first game turn.  I played the Liege card but not much else.

The Russian Steamroller gathered speed during the September 1914 turn.  I was forced to funnel what few reinforcements I had  East to stave off Tim’s hordes.  He also started his War Status track moving by playing the Blockade card.

Fall 1914

In the Fall 1914 turn, Tim continued to hammer away at the Austrians in the East, while my activities focused on patching together a defensive line,  and entrenching in the West.

During the Winter 1915 turn, the Austrians came under new pressure from the Southeast.  The Serbs launched a local attack that eliminated an Austrian Corps, and Romania’s entry into the war forced the Austrians to divert units.  The Austrian Eastern front was now buttressed by four German units.

The Italians entered the war during the Spring 1915  turn.  Fortunately, the Austrians finally drew reinforcement cards allowing them to stop the Italian offensive south of Vienna and continue to frustrate the Russians, with heavy see-saw  fighting around Warsaw.

While the situation remained the same in the East, Turkey’s entry into the war during Summer 1915 created new problems for the Central Powers.  As luck would have it, the Ottomans had a mandated offensive that resulted in defeat and opportunites for the Russians and British.

The Central Powers used Bulgaria’s entry into the war to pressure the Romanians and Serbs.  Both the East and West fronts had stabilized, but the British had mustered a force off of Gallipoli.

At this point, we shut down the game.  The prospects for a dramatic breakthrough by either side were bleak, and, more importantly, food and football beckoned.

While the map indicates a relatively “even” situation for both sides, I believe Tim’s Allies had an advantage for two reasons.  First, the Central Powers had gained very few victory points in the East.  These are needed to start the Russians on the road to revolution and disintegration.  Secondly, there was a very possibility of a successful British landing at Gallipoli.

Another fun contest…….

Fall Gertrude – Botched……..And Boxed.

To borrow from Christopher Shores….a “Bloody Shambles.”  And as bad as the TV Show.

Axis forces now in a cul-de-sac.  I’m sure there is a way out of this (desperate airborne divisional drop?), but lack the time and patience.

So, where did it all go wrong?  Feel like Jeff Goff looking at Super Bowl film.  I’m so Kubler-Ross.

Think this sequence sums it up……

Ready to Break Into Asia

Too Many Units Mopping Up

Go South, Not East!

Instead of East, I should have moved the Panzers South and East, to the Anatolian Plateau, and tank country.  Needed to either quickly eliminate,  or mask,  the by-passed Turks west of Istanbul, and move the bulk of the infantry east  to maintain pressure there.  Too much reliance on speed and luck.

Still, it was way too much fun getting the Turks on the Europa Table, and exploring a might-have-been scenario.  Persia next?  I think there is a Europa Scenario for that…………

Fall Gertrude – Axis Turn 5 Movement and Combat

Axis armored units contined to move east into the teeth of the Turk defenses.  Slower moving infantry units moved to the southeast.

Overall View End Of Axis Movement. Air Units Shown Near GS/DS Hexes

The attack on Hex 0619 was at 49:8, or 6:1, -1 for Rough Terrain.  A “6” was rolled, for a DE result.

Infantry Attacks Hex 0619

The riskier, but necessary armored attack at Hex 0513 was at lower odds, or 4:1.  The Turk mixed fighter unit did abort an He-111 unit, but a roll of “6” makes up for that kind of setback.  This was a DE result.

Armor Advances After Successful Attack On 0513

Fall Gertrude – Tim’s Take

I was looking at your last post on your blog and I thought I would pass along some comments.

  • If the unit in 0119 has a ZOC the German spearhead is out of supply.  Either way, I would move that unit onto hex 0219 to block the rail line.  Can the Turks use any naval supply?  There is a port in 0219.
  • I would move the 3rd Infantry Division from hex 0617 to hex 0417.  Occupying that hex cuts the supply to the German spearhead.  Since it is a mountain hex behind a river, it will be a tough nut to crack.  Hex 0417 is a pretty important one.  It has good defensive terrain and divisions there have ZOCs which will make it tough to move though the chokepoint in hex 0418.
  • I would think about throwing somebody into hex 0418, just to make it harder to attack 0417.
  • I would move the Fifth infantry XX into hex 0517.  This will support hex 0417 by making it harder to redeploy German units to attack it.
  • I would move the 20th Infantry XX into 0615 or pull it back across the river into 0717.  The former move puts more German units in enemy ZOCs and might make it more difficult to attack 0417.  The latter puts it in a better defensive position.
  • From an operational POV, I would have attacked along the railroad towards 0816.  You’re going to need that RR to supply any deep thrust into anatolia and the terrain is more open, which helps your armor.  It also would have the benefit of making the Turks come to you if they are going to cut your supply line.  I would have grabbed 0417, but left the rest of any attacking force on the west bank of the Sakarya (is that the new name for the Meander?).  Once hex 0417 is occupied, any prospective counterattack on your supply line would be across a river and coming from either rough or clear terrain (and would be vulnerable to counterattacks).
  • Do you have any engineers with the spearhead that could build temp airfields?  I always forget to use them, but they can be really handy supporting a rapid advance.


Fall Gertrude – Turkish Movement Phase Turn 4

The reinforcements delayed during Turn 3, now appear on the battlefield, providing desperately needed support to the Turk MLR, allowing for some defense in depth.

The  fighting has moved far enough east that many of the best Axis air assets are either out of range, or have to stage up to reach the battlefield, and return to Istanbul’s overcrowded airfields.

This will be a difficult turn for the Axis, as Fall and possible bad weather is approaching.

Fall Gertrude – Axis Combat And Exploitation Phase Turn 4

Axis forces continued to move aggressively towards Ankara via the narrow valley  just north and west of the capital.  In addition, the SS Corps drove south in an attempt to flank the main Turk defenses.

The main effort was against Hex 0414.  The basic odds were 41:8 with a -1 for rough terrain, and a +3 for AECA.  Turkish A-19 and H-111 squadrons flew DS, but were countered by Luftwaffe assets staging up through Istanbul.  The final odds were 5-1, +2.  The die roll was a 2, modified to a 4, for a DH result.  The surviving Turkish units retreated one hex.

The SS attack fared eaven worse.  Despite 6:1 odds with a +1 modifier, a 1 was rolled, for a DR result.  Ugh!

Rather than continue blasting away in the south, the SS corps exploited back northeast to assist in the now tenuous main effort.

Turkish Forces At 0414 Have Retreated To 0514. Axis Forces Will Occupy Vacated Hex. SS Corps Has Already Occupied Hex 0520 Vacated by Turkish Division.


End Axis Exploitation

Fall Gertrude – Axis Turn 3 Combat and Exploit

Two attacks for the turn.

The first was against Hex 0315, Duzce.

Initial odds were 19:8, +3 for AECA.  Threw a lot of air at the hex in order to increase the odds to 5:1.  The Turks came up to fight, and attempted to bypass the two escorts.  The P-40 was shot down on a roll of 2 (!).  The Mixed Fighter unit got through, but could not shoot down the targeted Stuka unit.  Turkish flak was ineffective.  The combat die roll of 2, was modified to 5, for a DE result.

Here’s the air matchup.  Note that only six air units were eligible for the mission (one per RE), not the eight shown.

Illustrating My Mistake Using Sophisticated Photo Editing Skills

The second attack was against Hex 4625.  The odds were 5:1 (with some help from a single Axis air unit), with a -2 for wooded rough terrain, and -1 for the defending armor cadre’s AECD.  The die roll of 6 was modified to 3, for a DR result and a ZOC kill.

The Axis pushed up through the Turk defenses during the Exploitation Phase.