Resperitory ailment, snow and an empty house makes for interesting decisions.
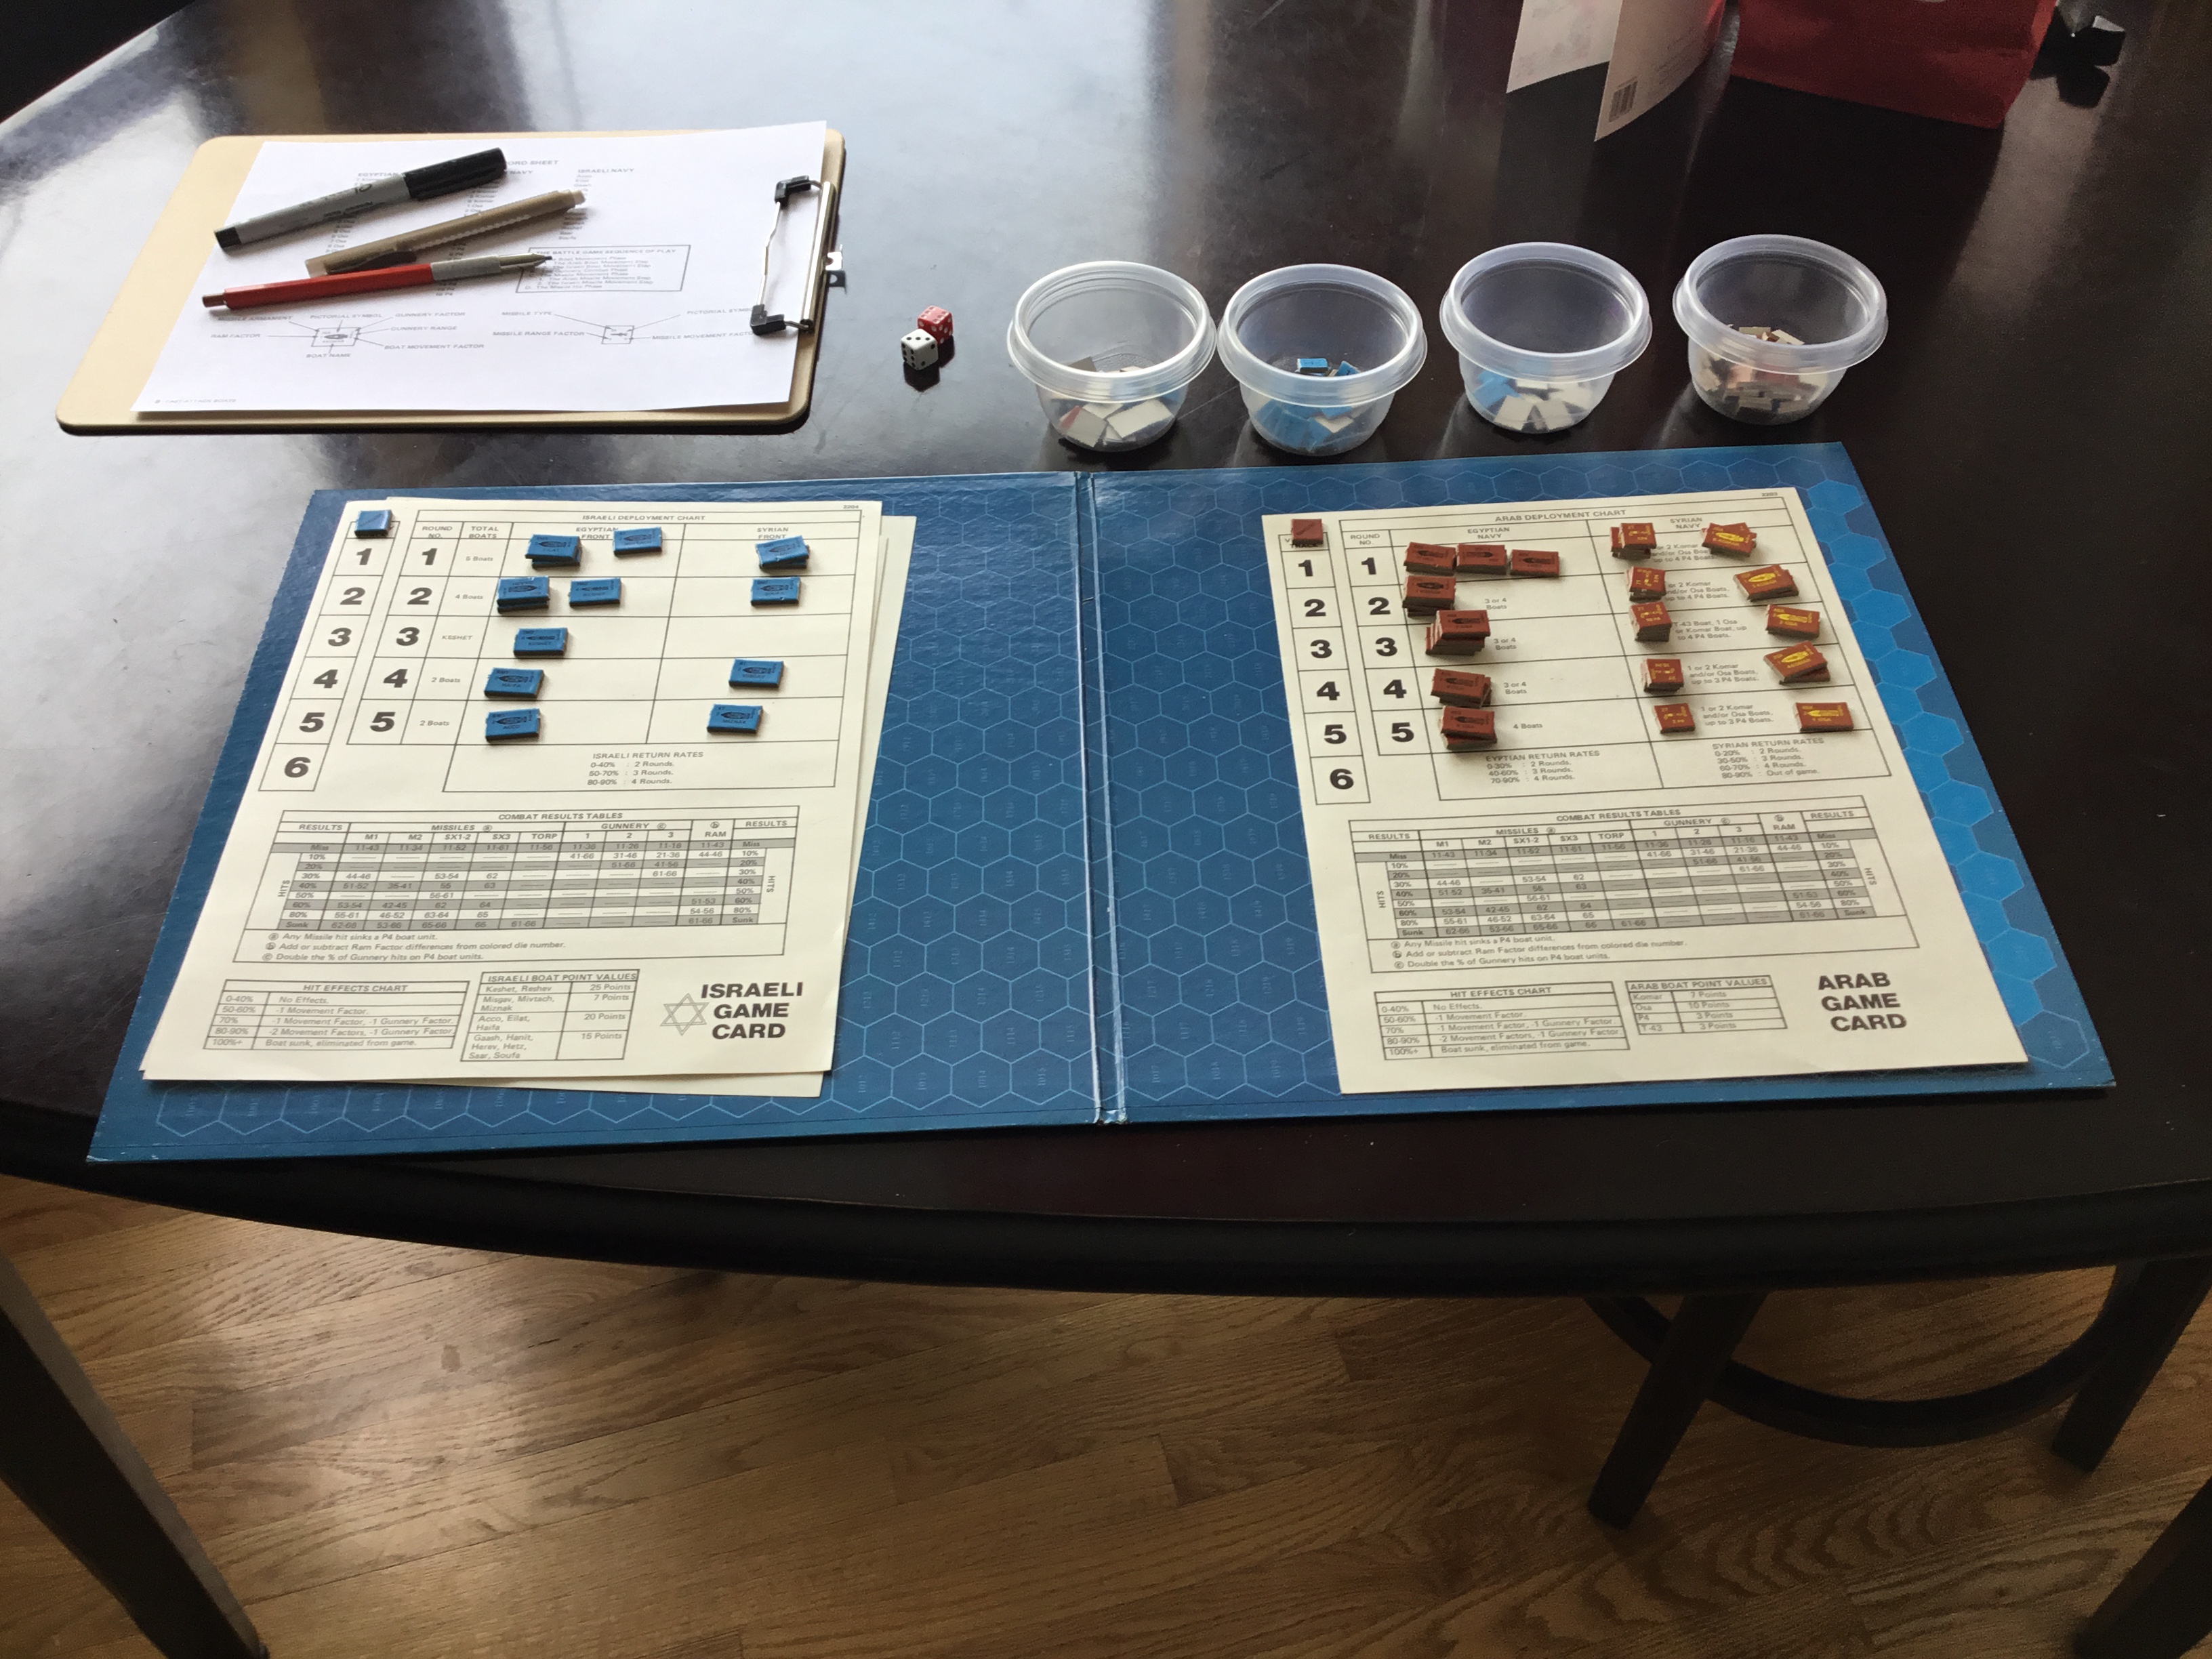
Grabbed a copy of Yaquinto’s Fast Attack Boats (FAB) and set it up. Reviews aren’t that kind, but there is some agreement that the campaign game shows FAB in its best light.
Agreed. Plus there are some other attributes. Game is quick to set up, has plenty of action, minimal bookeeping and poses some real tactical quandaries.
I’m not a big naval wargamer, despite my fetish for Avalanche Press’ Great War and Second World War At Sea series(s). Tactically, it all seems a bunch of line ‘em and go at ‘em. While GWWAS and SWWAS provides an operational context for battle scenarios, FAB does not.
I tried finding doctrinal information on modern fast boat tactics, but it’s pretty slim out there. What I did discover within the context of this game’s play is that it’s “shoot and scoot”. Crank off missiles at max range and get the hell out of the way.
Problem is, and this is a nice design feature, that victory in each of the five segments comprising the campaign game are based on last force to have craft on the board. While this would lend itself to all kind of gamesmanship in a FTF contest, when playing solo it requires a level of steadfastness and willingness to accept damage.
Egyptian and Israeli boats have their respective advantages. The Egyptian boats are more numerous, can be faster, and have a longer missile range. On the other hand, the Israeli boats can launch more missiles per turn, and have greater hitting power at longer ranges.
Each force will get hit with missiles. The CRT is simple, but for this type of game, reasonable. The longer the range, the less the effect. Even at close range, the chances of a miss approximate 40 percent. Missile fire is “fire and forget”, as they will hit a target if it is in range. Missiles have a running time of three turns.
Boat maneuver is simple, but, again, fitting for this game. All ships must move their maximum distance each turn. Any turn must occur after one hex of straight-ahead movement, and is limited to 60 degrees (or a change in hex orientation). This leads to some interesting group maneuvers.
My first campaign finished as a marginal Egyptian victory. The Israeli’s got shy and decided to get ready for the next go-around. I’m looking forward to it.
Ready To Get On It………
