One reason to play wargames is to gain historical insight. I had one the other day.
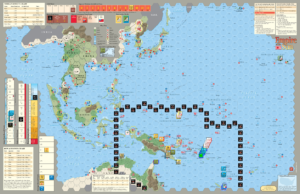
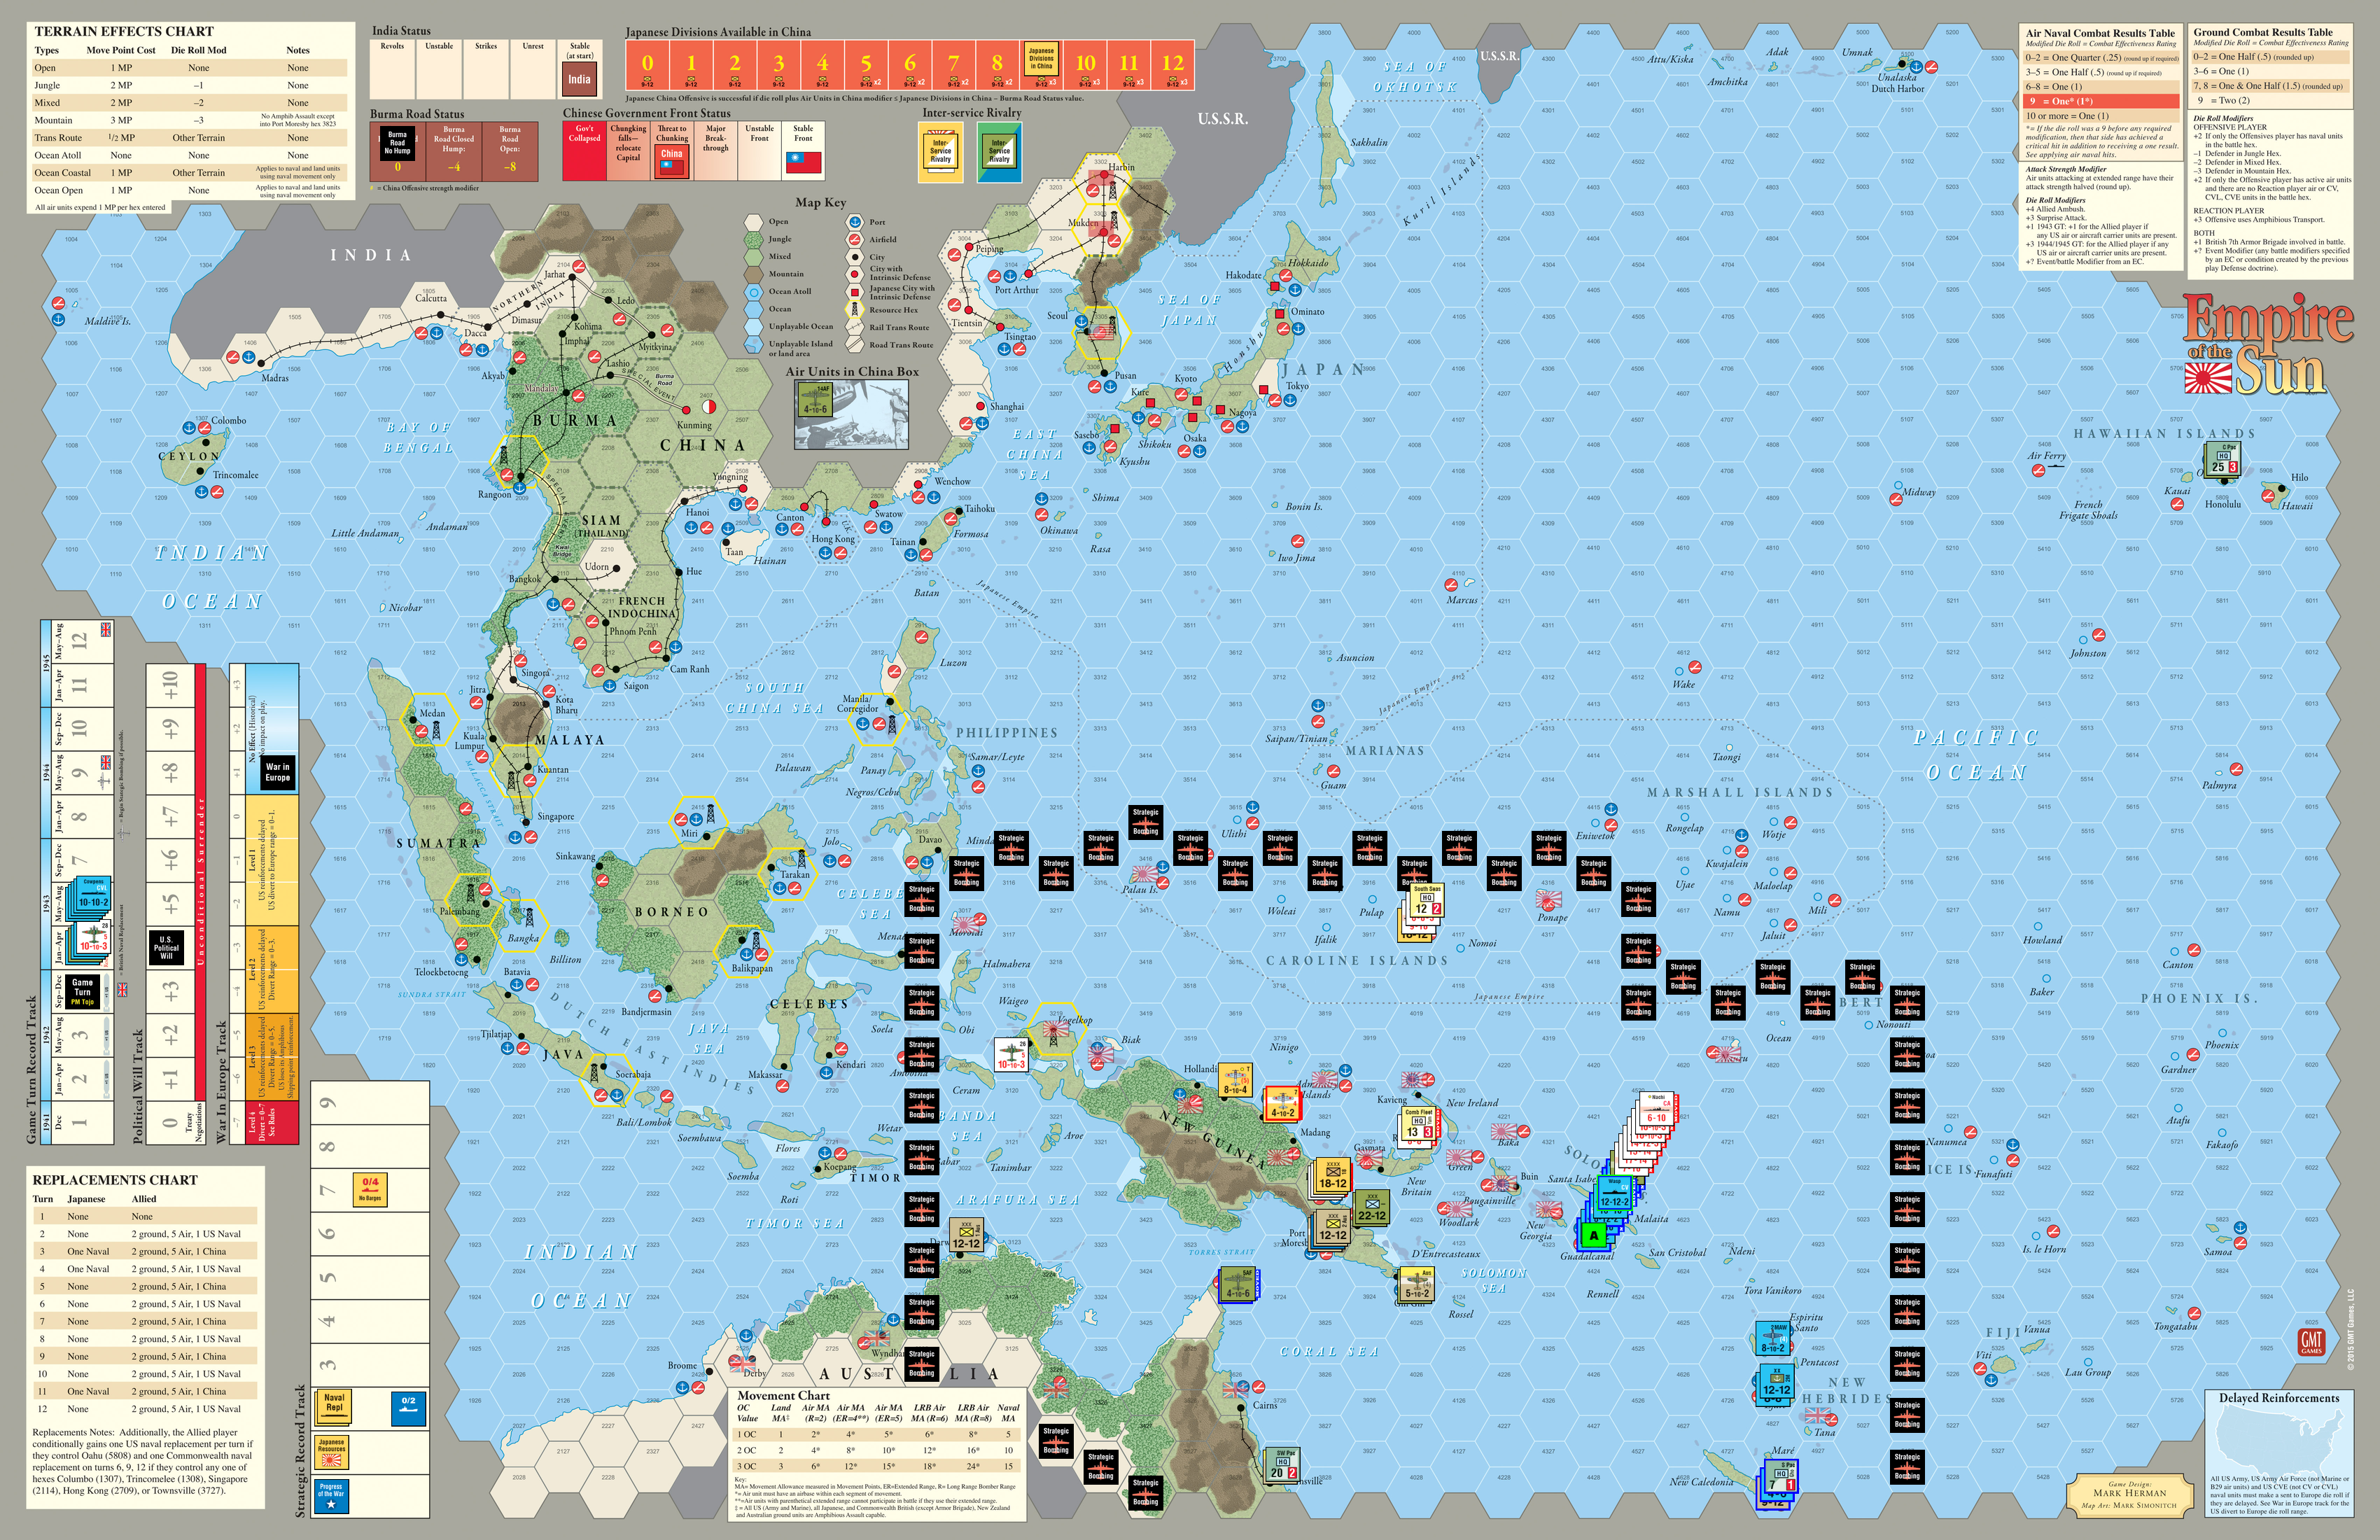
Started Turn 4 of my SOPAC scenario. Unlike Turn 3, several powerful units of the Japanese Combined Fleet are available for deployment from Truk.
I had held on to Japan’s Naval Battle For Guadalcanal card for a Future Offensive. One of the historical criticisms of Japanese strategy was its husbanding of the Combined Fleet for a climatic fleet encounter, somewhere east (the general location changed as their defensive perimeter was pushed outward in 1942) of the Home Islands.
So, what the hell, let’s play it…NOW!
This is a powerful card. The Japanese can activate seven (7) units. A task force with two (2) battleships and two (2) carriers sailed south, augmented by surface and air units from Rabaul. The battle hex was Guadalcanal.
Allied forces successfully rolled to intercept the Japanese fleet, dispatching two (2) battleships, three (3) carriers, a cruiser and air units. A critical element in the fleet composition was that all three (3) carriers were at reduced offensive and defensive strengths.
The Allies should have stayed home and let the Japanese pound the Marines and Henderson Field.
The Japanese had 69 strength points compared to 62 for the Allies. I’d call that a straight-up fight. But, in EOTS, you roll for Combat Effectiveness – or what percentage of the strength points deployed actually count for the combat.
The Japanese rolled high, so all of their strength points could be used. The Allies rolled low, so only a quarter of their strength points counted. On top of this, the Japanese rolled very high – a nine (9). This result creates a “Critical Hit”. In EOTS, all units in a combat have to be reduced before a unit can be eliminated. A Critical Hit allows for units to be eliminated without others reduced first.
The Allied fleet was, for all intents and purposes, destroyed. All carriers were lost. A catastrophic defeat.
So, one can see why, at this point (unlike the situation at Midway) both sides were reluctant to engage in a decisive fleet action. The fear of catastrophic loss outweighed the possibility of decisive success.
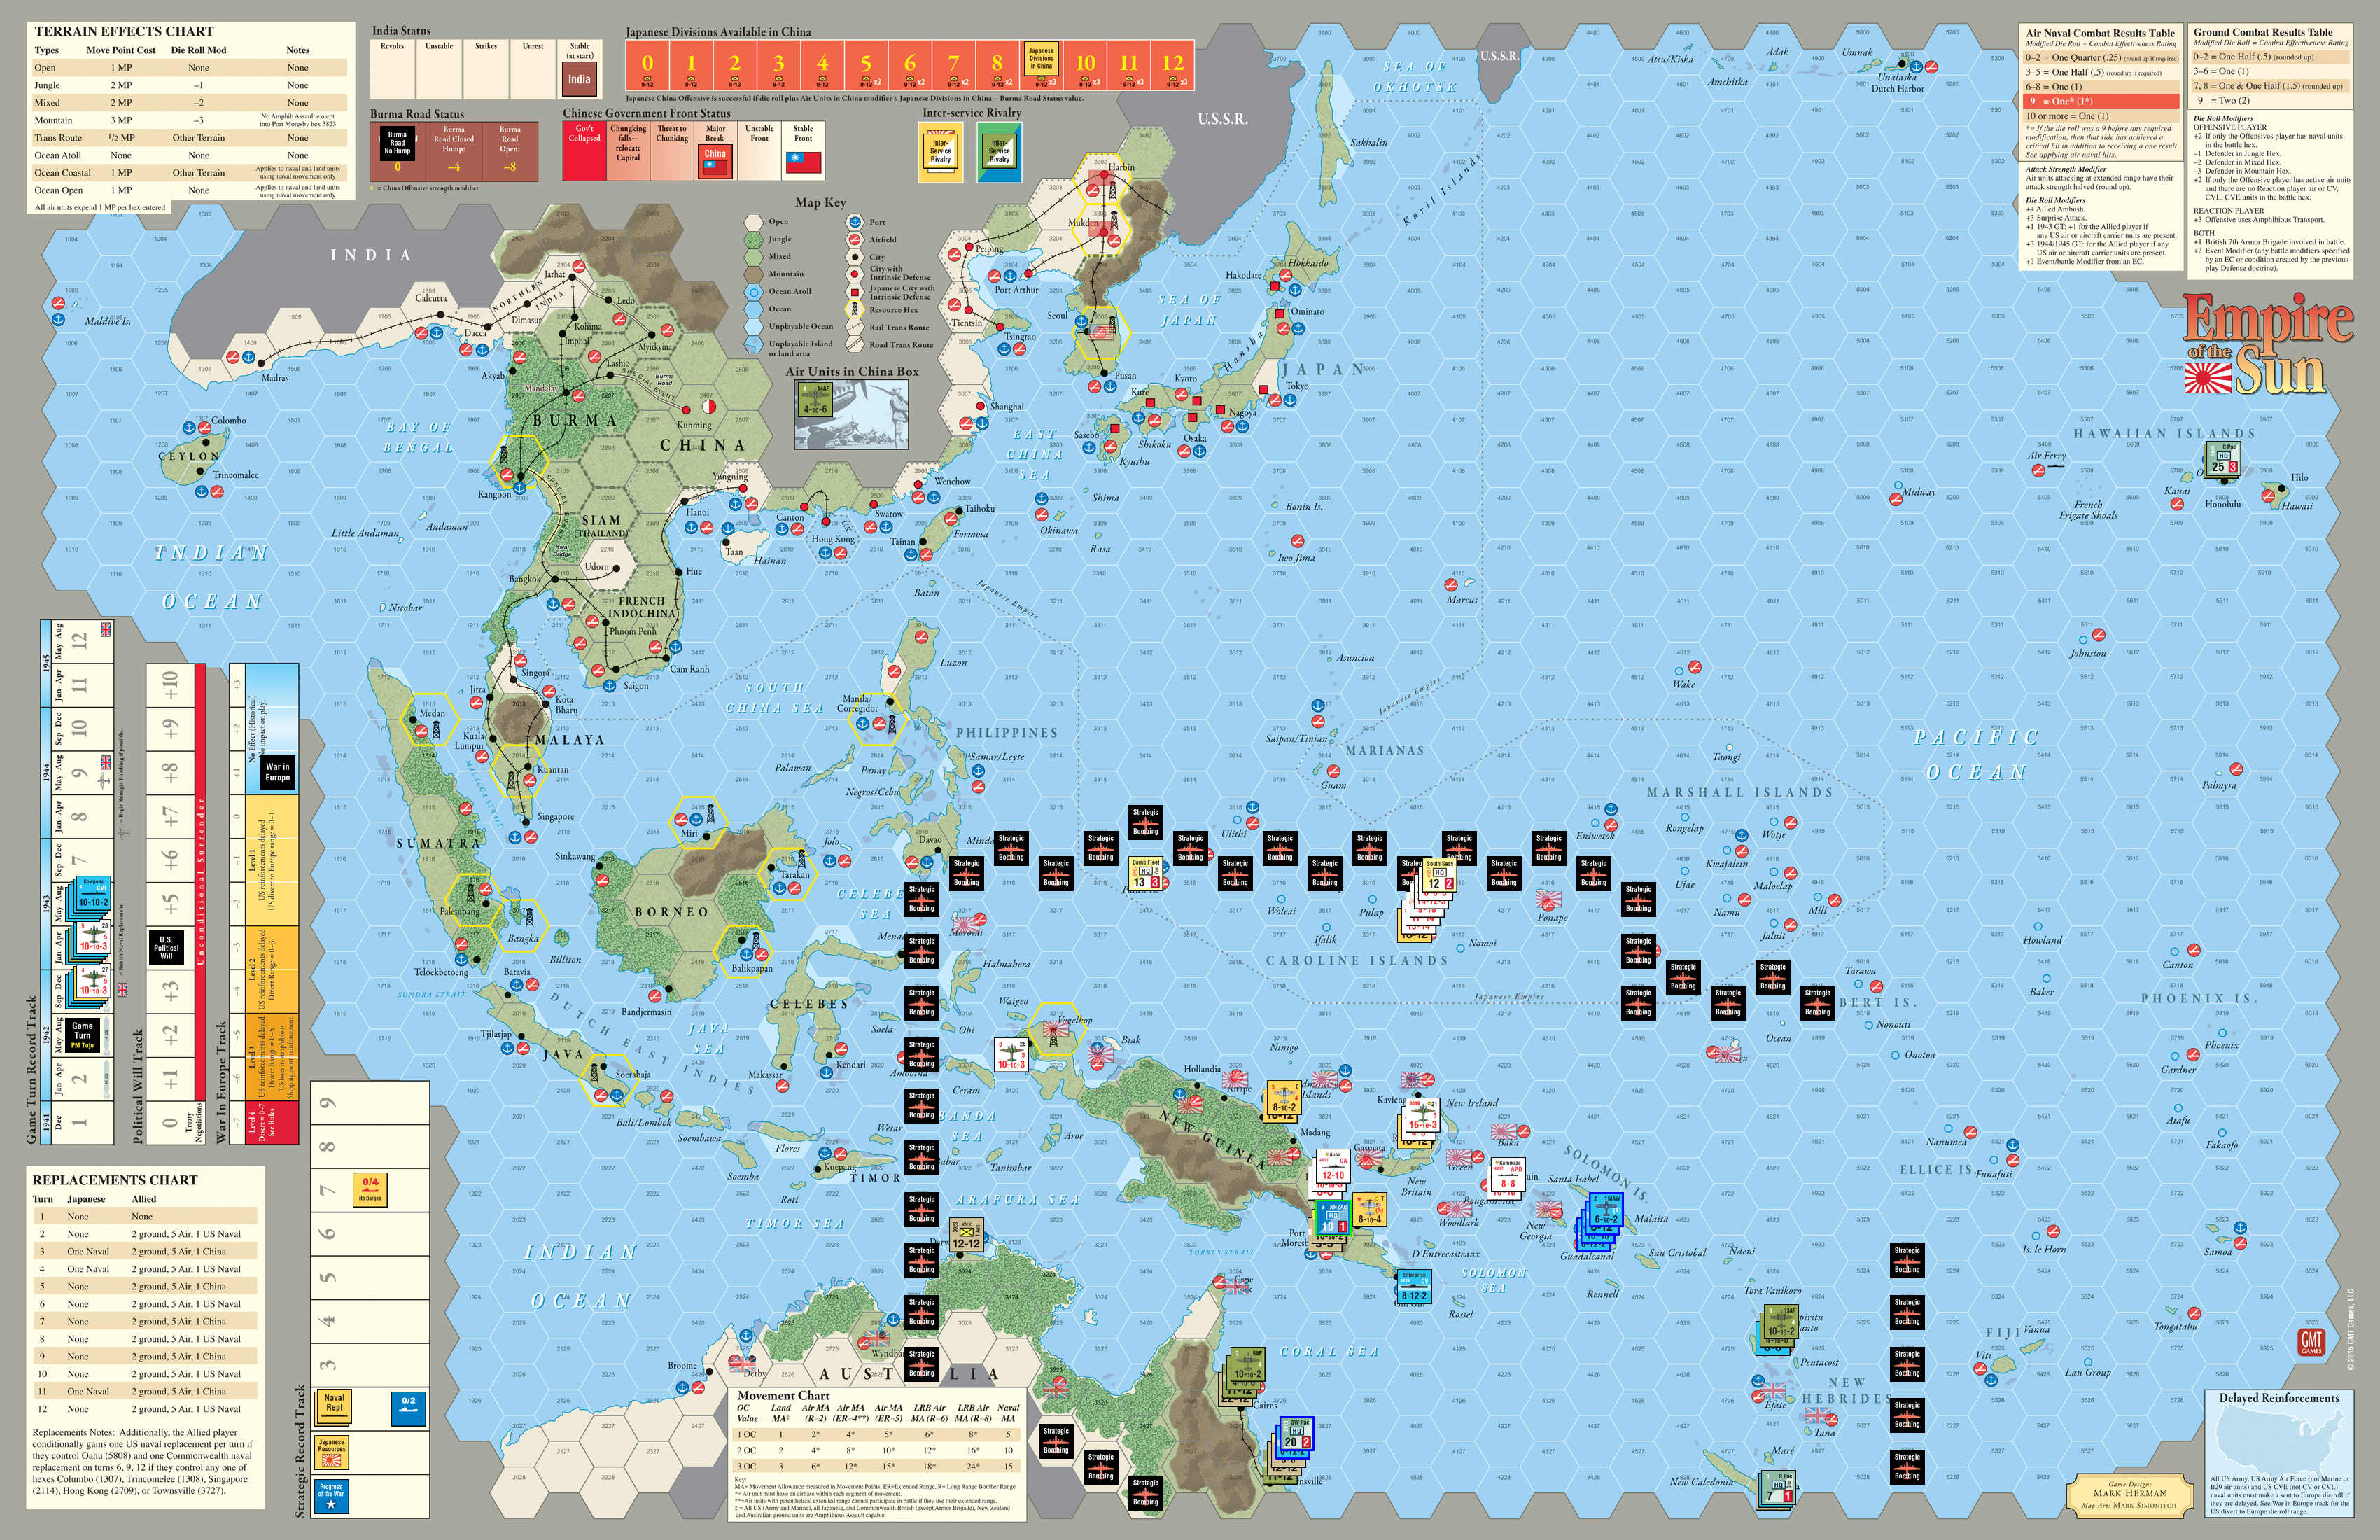
Here’s a screenshot.