Finally played a game after my earlier in the month misadventures with scale.
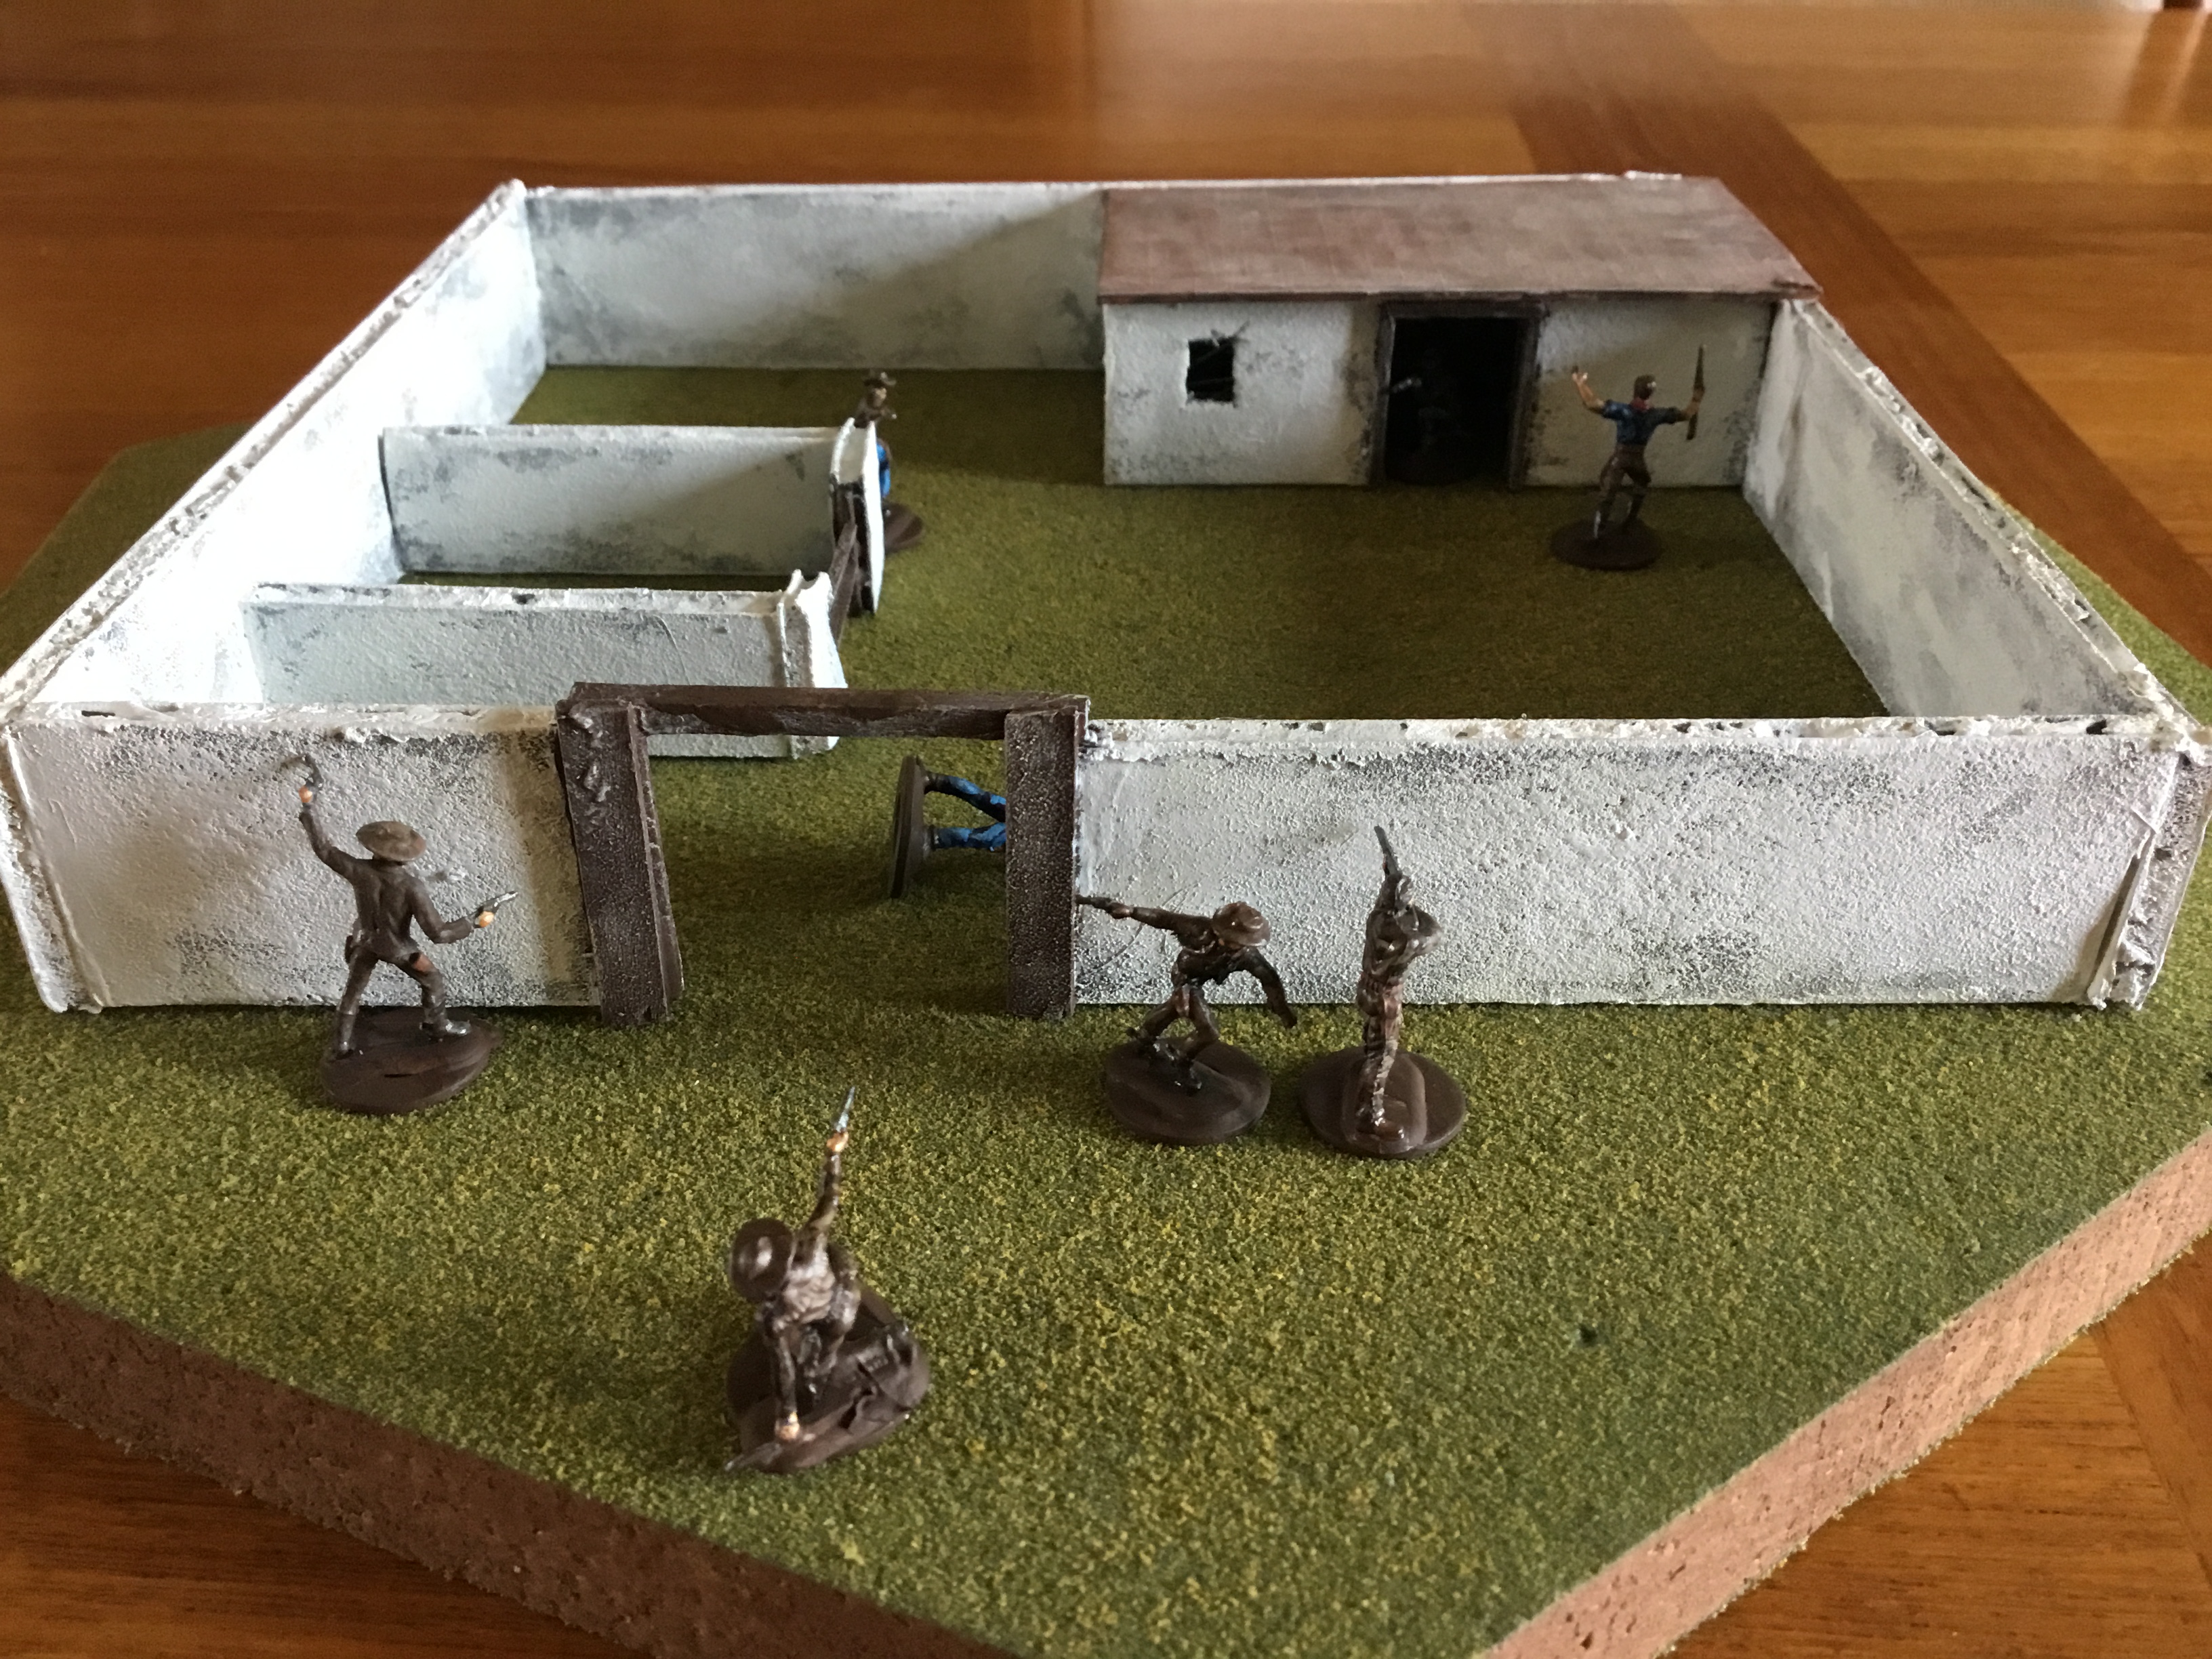
Scenario borrowed from the Butch & Sundance final fight. Had four figures each for the “Blue” Gang and “Brown” Posse. Blue Gang hiding in small ranch complex, when Posse approaches and dismounts.
First random actions were to determine if the Blue’s sentry spotted the Posse before the first turn started and at what distance. He did, at a distance of 12 inches. There’s no running in the Rules As Written (RAW), only walk (5″) and crawl (2″). I use a run move of 7 inches.
A card is dealt for each figure. The card values (face etc) are called out in sequence with the highest card going first. For solo play, I just lay them out, and then pick in the appropriate order.
Turn 1: The outlaws are warned and get the first three plays. The sentry runs to the house to give the warning. One gets out of the building, rushing to the gate, and another moves to the corral wall. The posse shoots down the cowboy at the gate, and takes cover behind the ranch wall.
Turn 2: One outlaw runs out of ammunition (firing roll of “1”). The posse’s rifleman shoots down the outlaw at the corral. The remaining outlaws are now in the building.
Turn 3: The outlaws have the first two turns and both miss aimed fire (one action to aim and one action to fire). One of the outlaws is then pinned by gunfire. A posse member moves next to the house, anticipating a rush.
Turn 4: The two posse shooters at the corral run out of ammunition. A bold attempt to rush the building leaves the one posse member wounded.
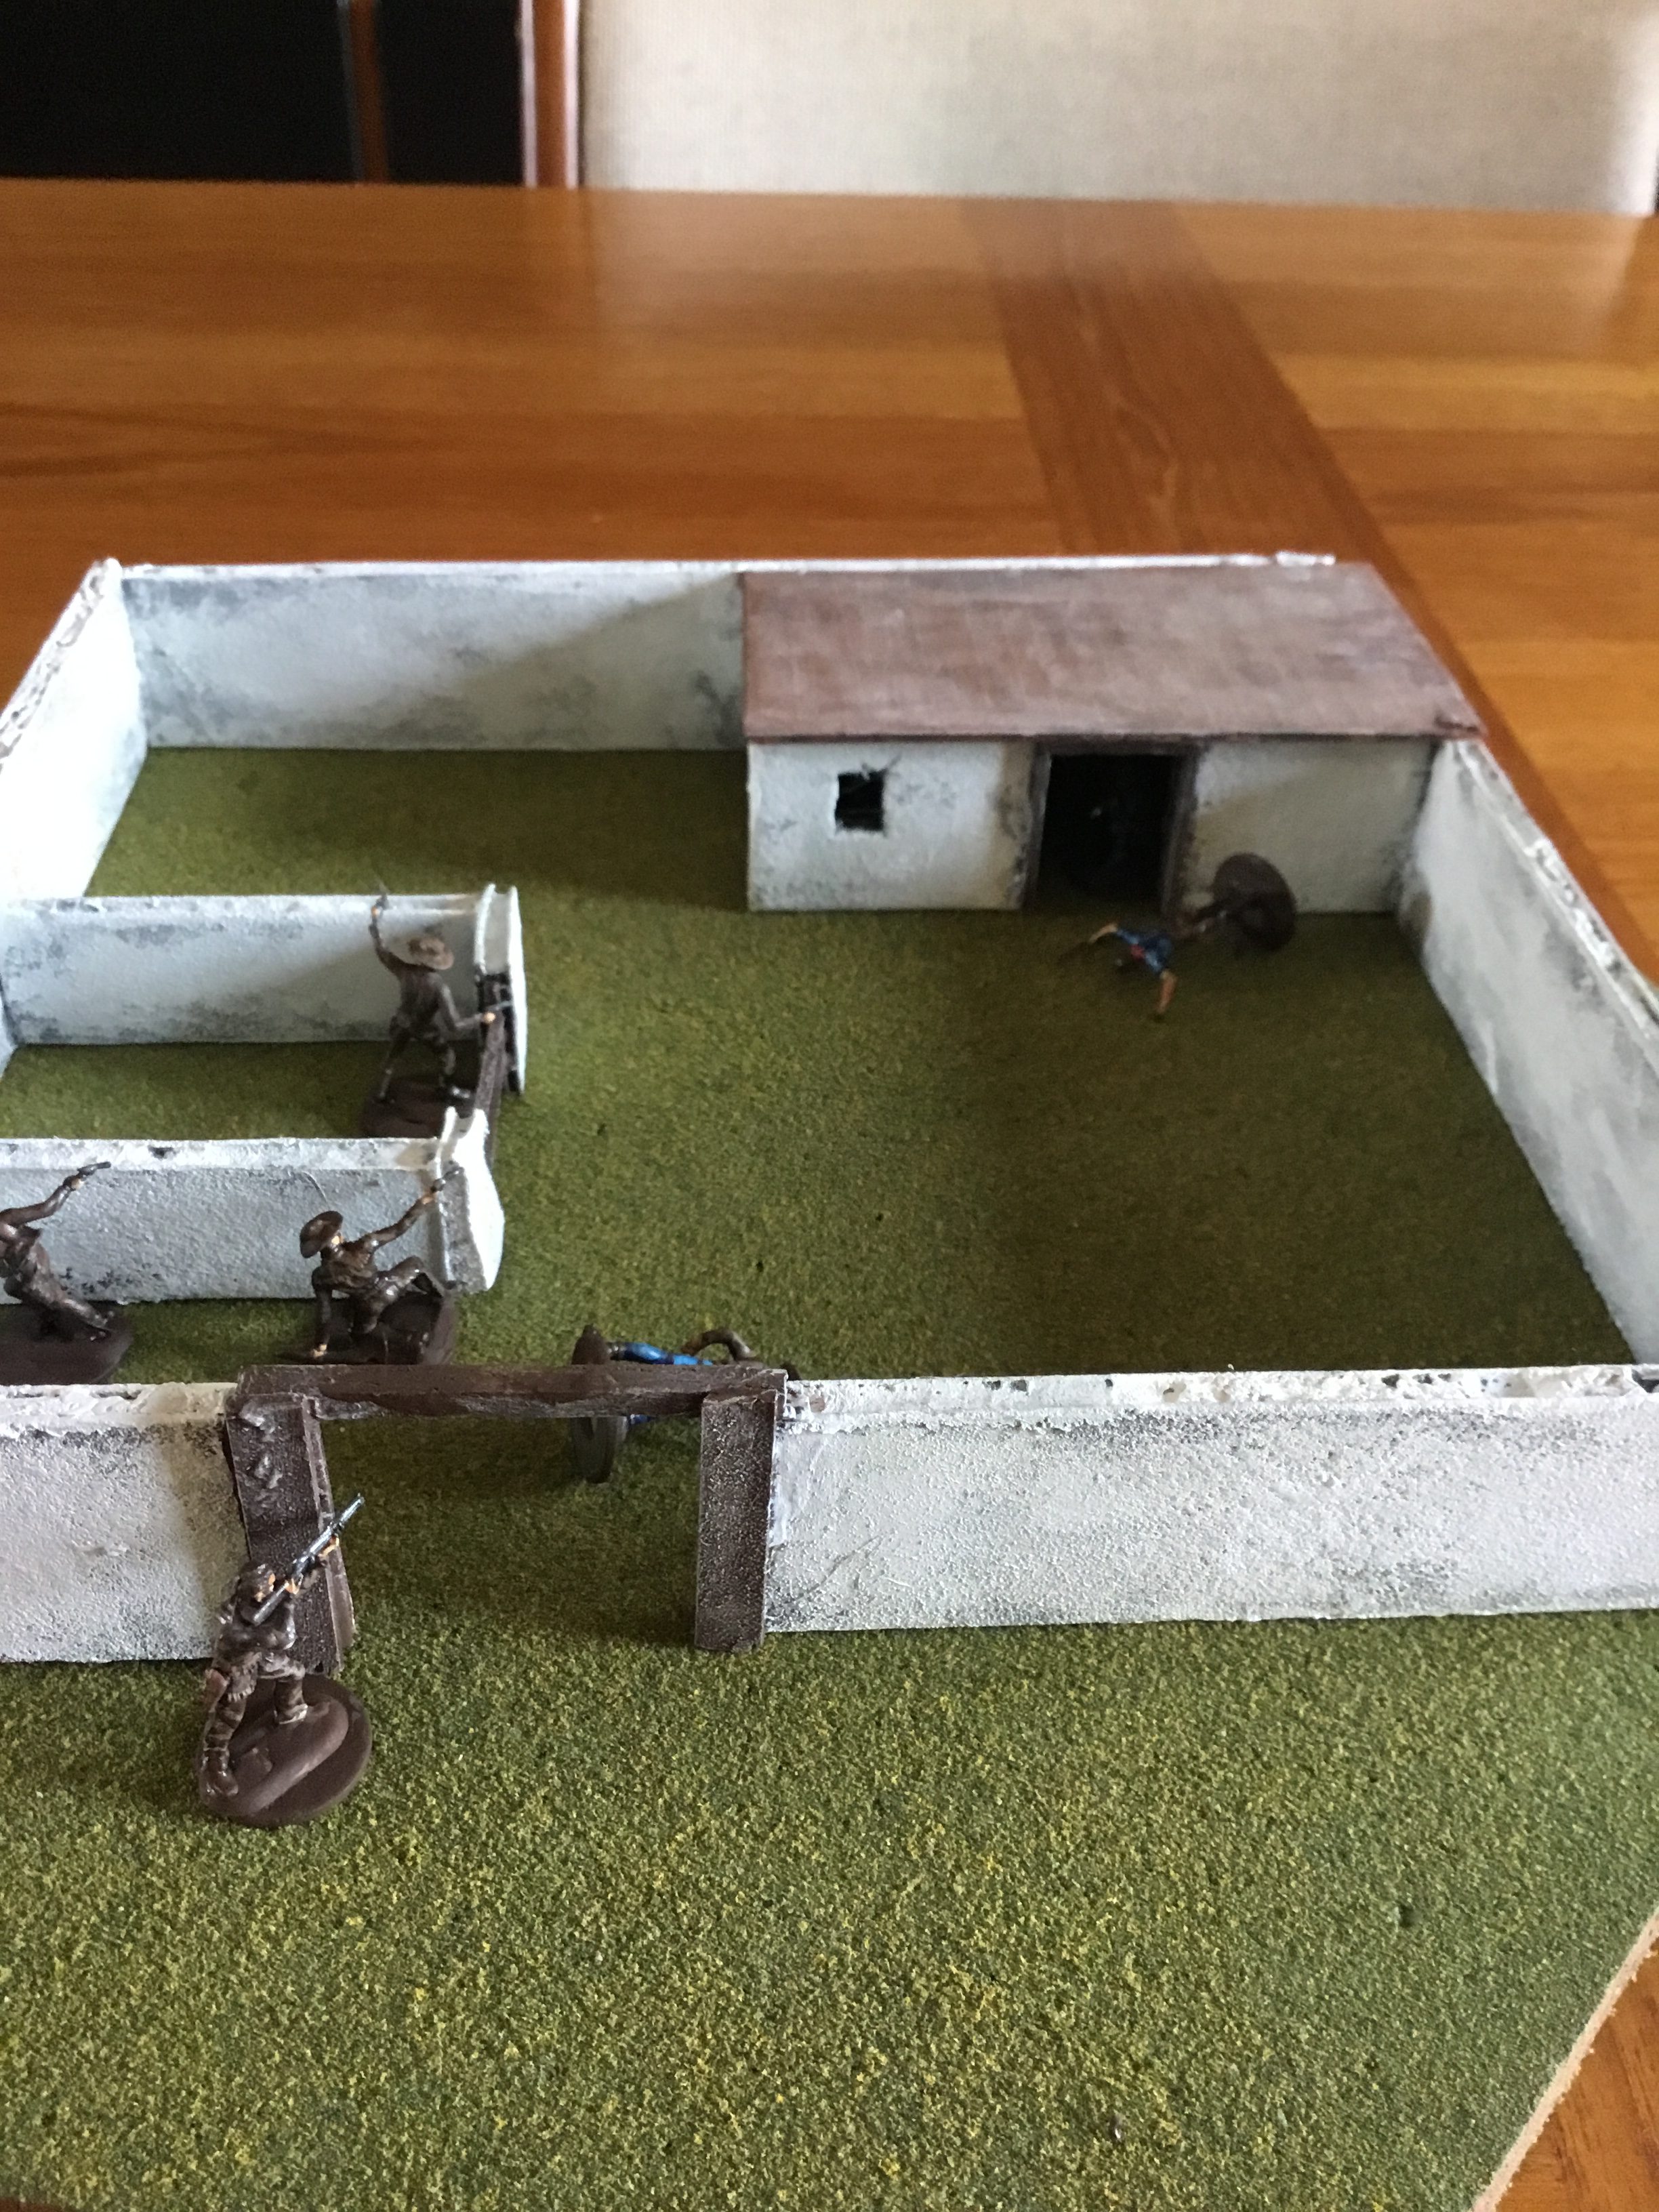
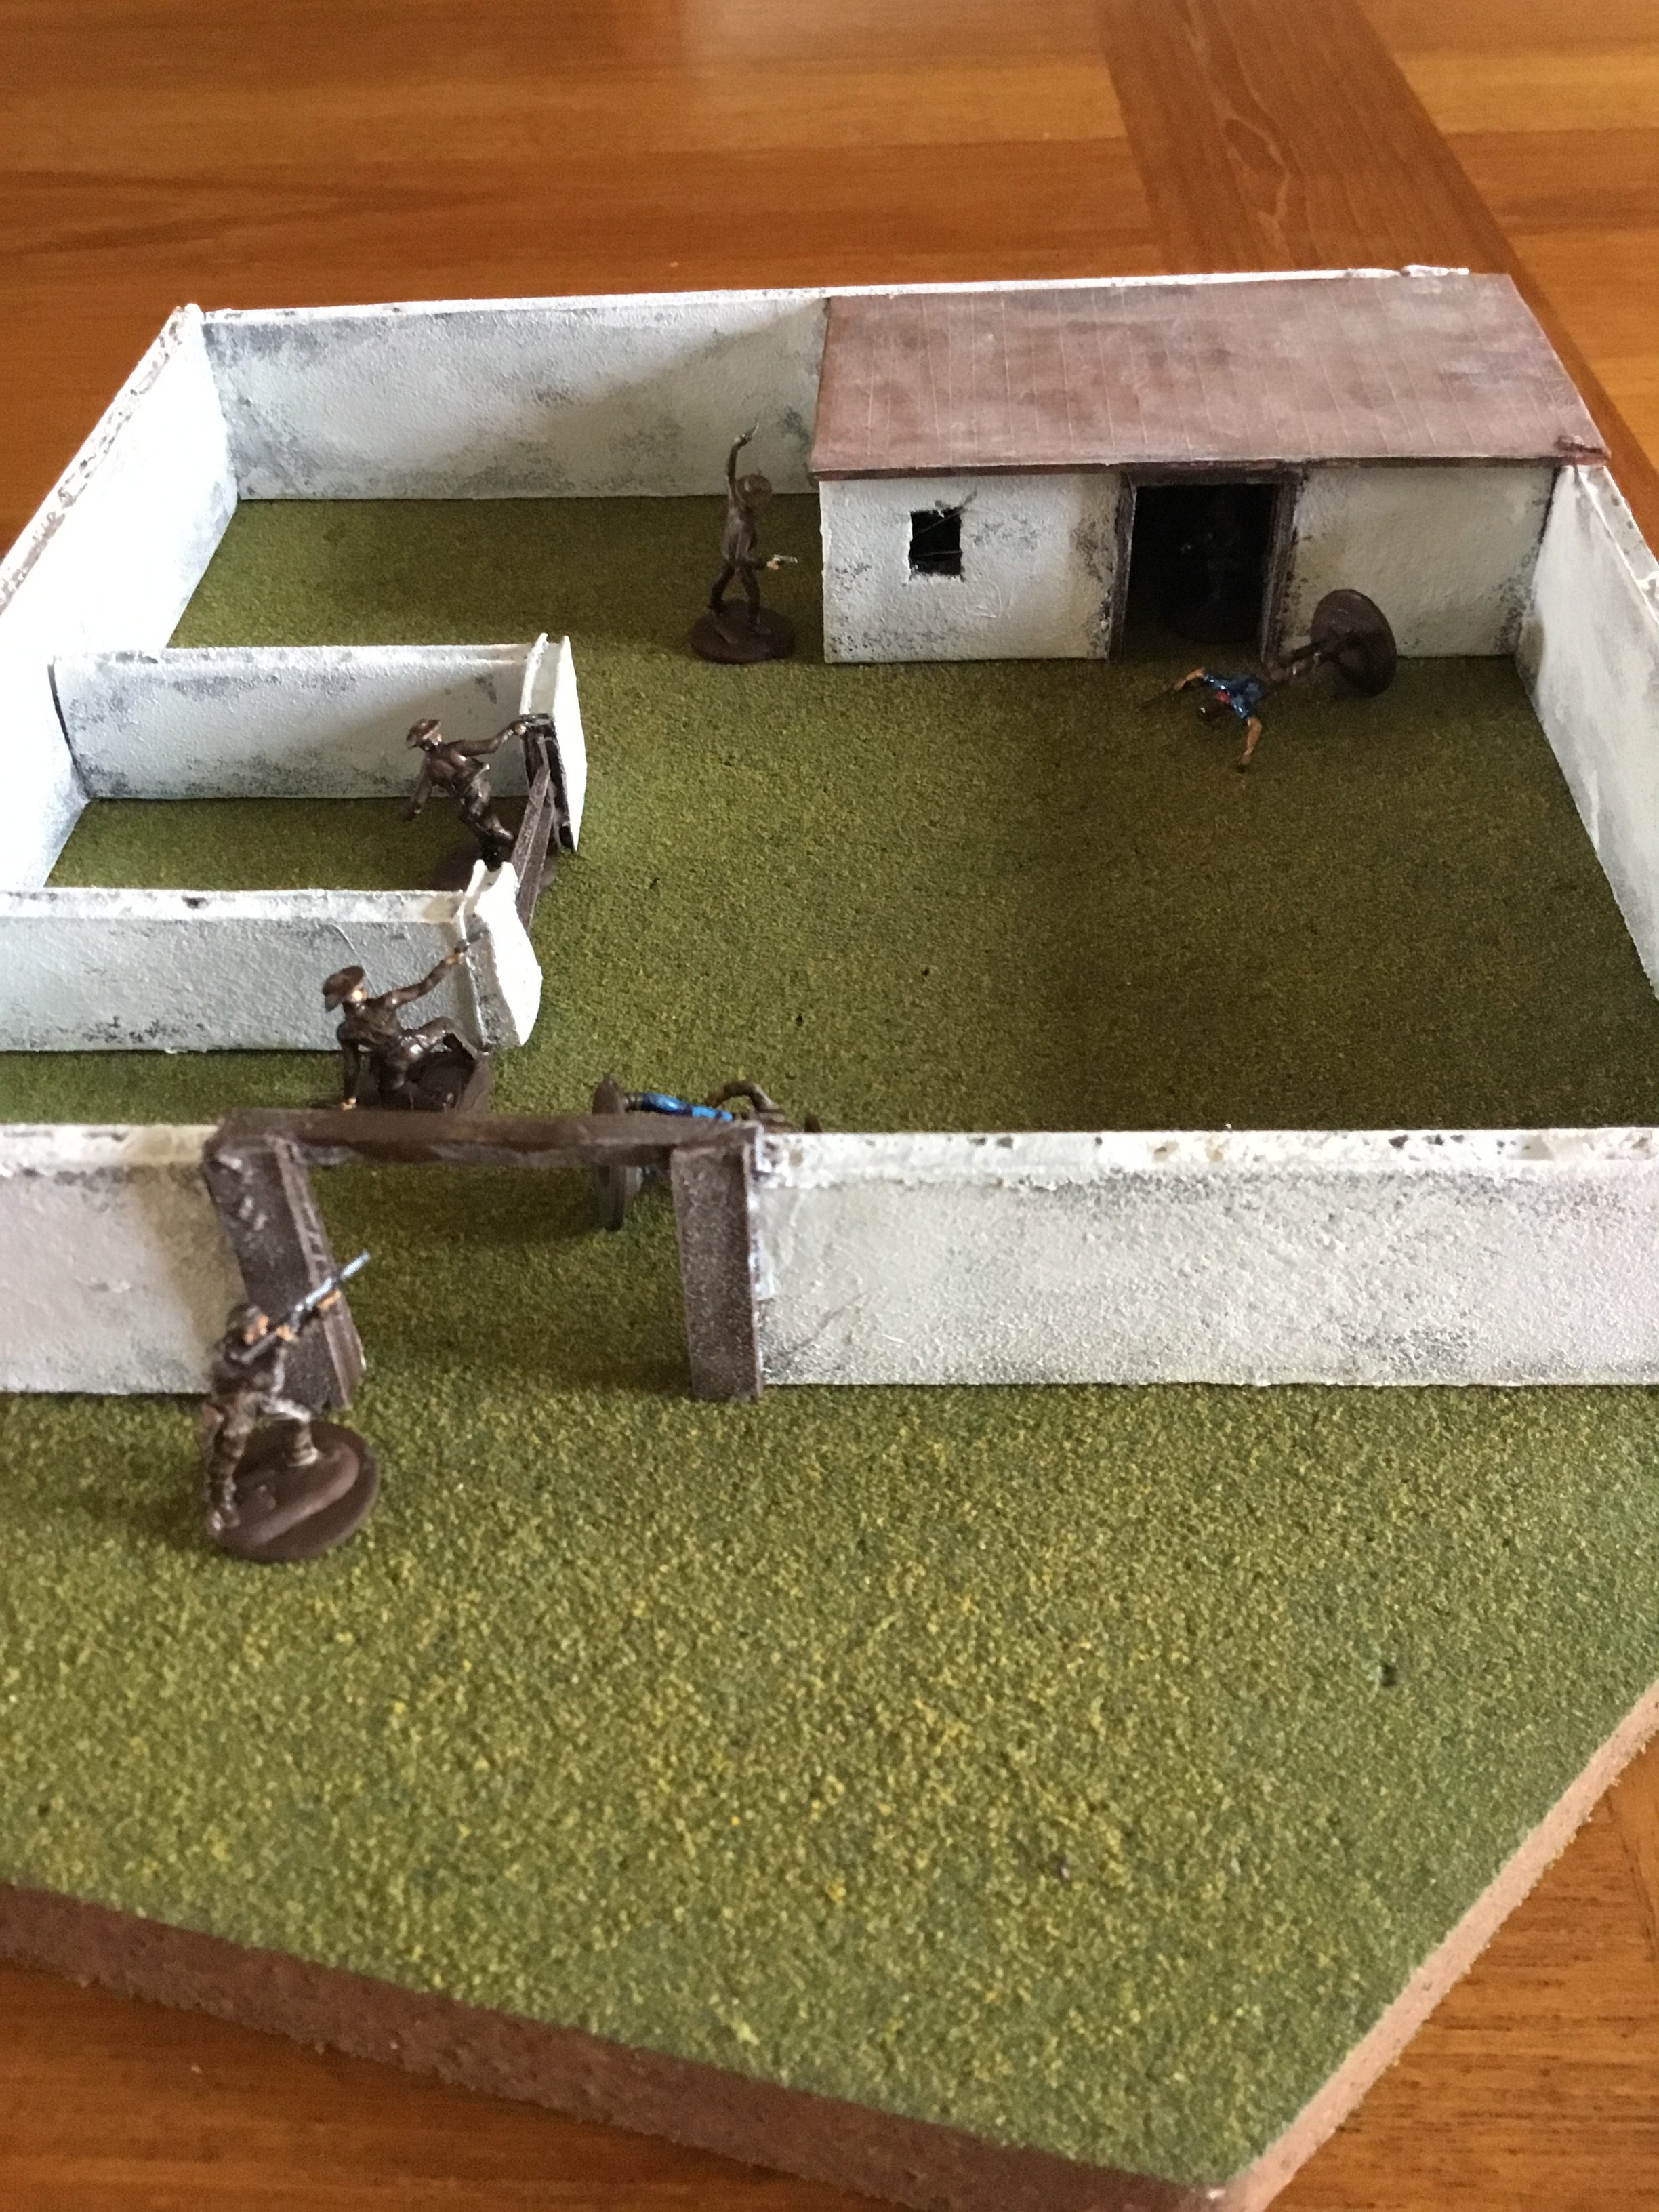
Turn 5: The outlaws manage to kill two posse members despite partial cover.
At this point, I had to shut the game down.
As advertised, Fistful of Lead is “fast and furious”. You can nitpick the rules, particularly the inability to shoot at a moving target, but you can’t dispute this is a fun skirmish game.
Posse shoots down one of the outlaws at the front gate. Another outlaw is outside the house using the corral wall’s partial cover.Two outlaws down!One member of the posse ready to rush the house.
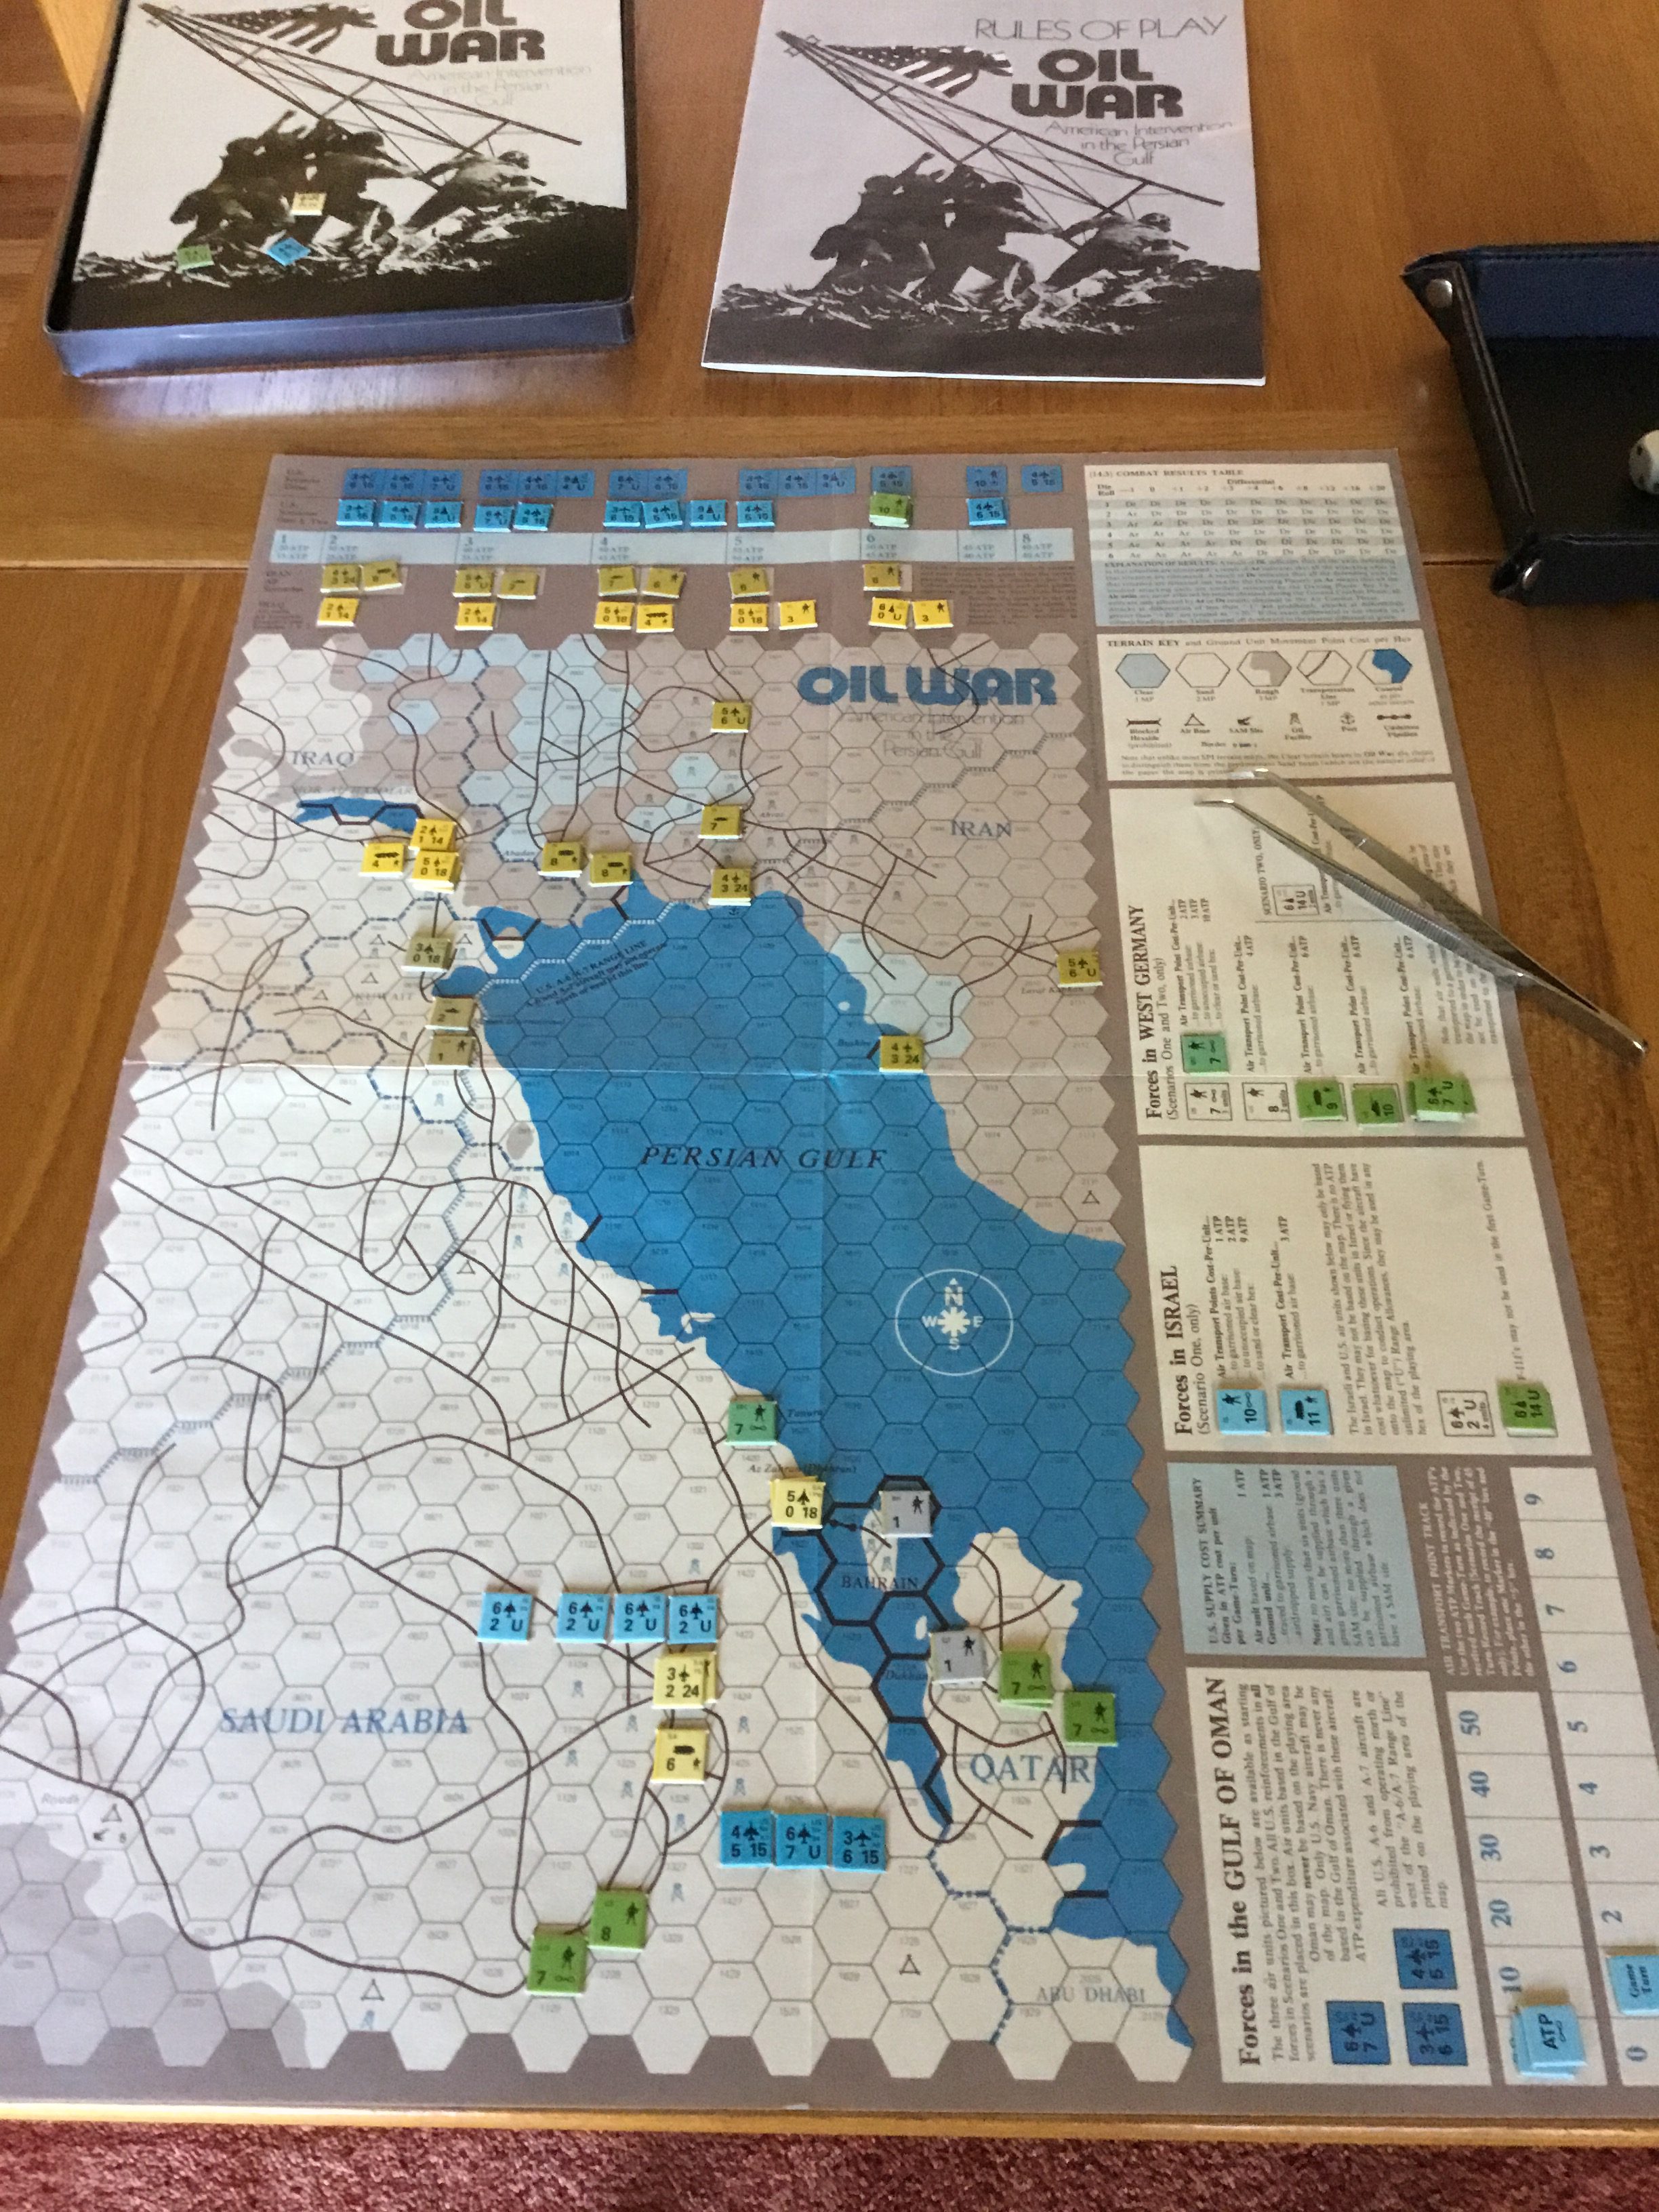
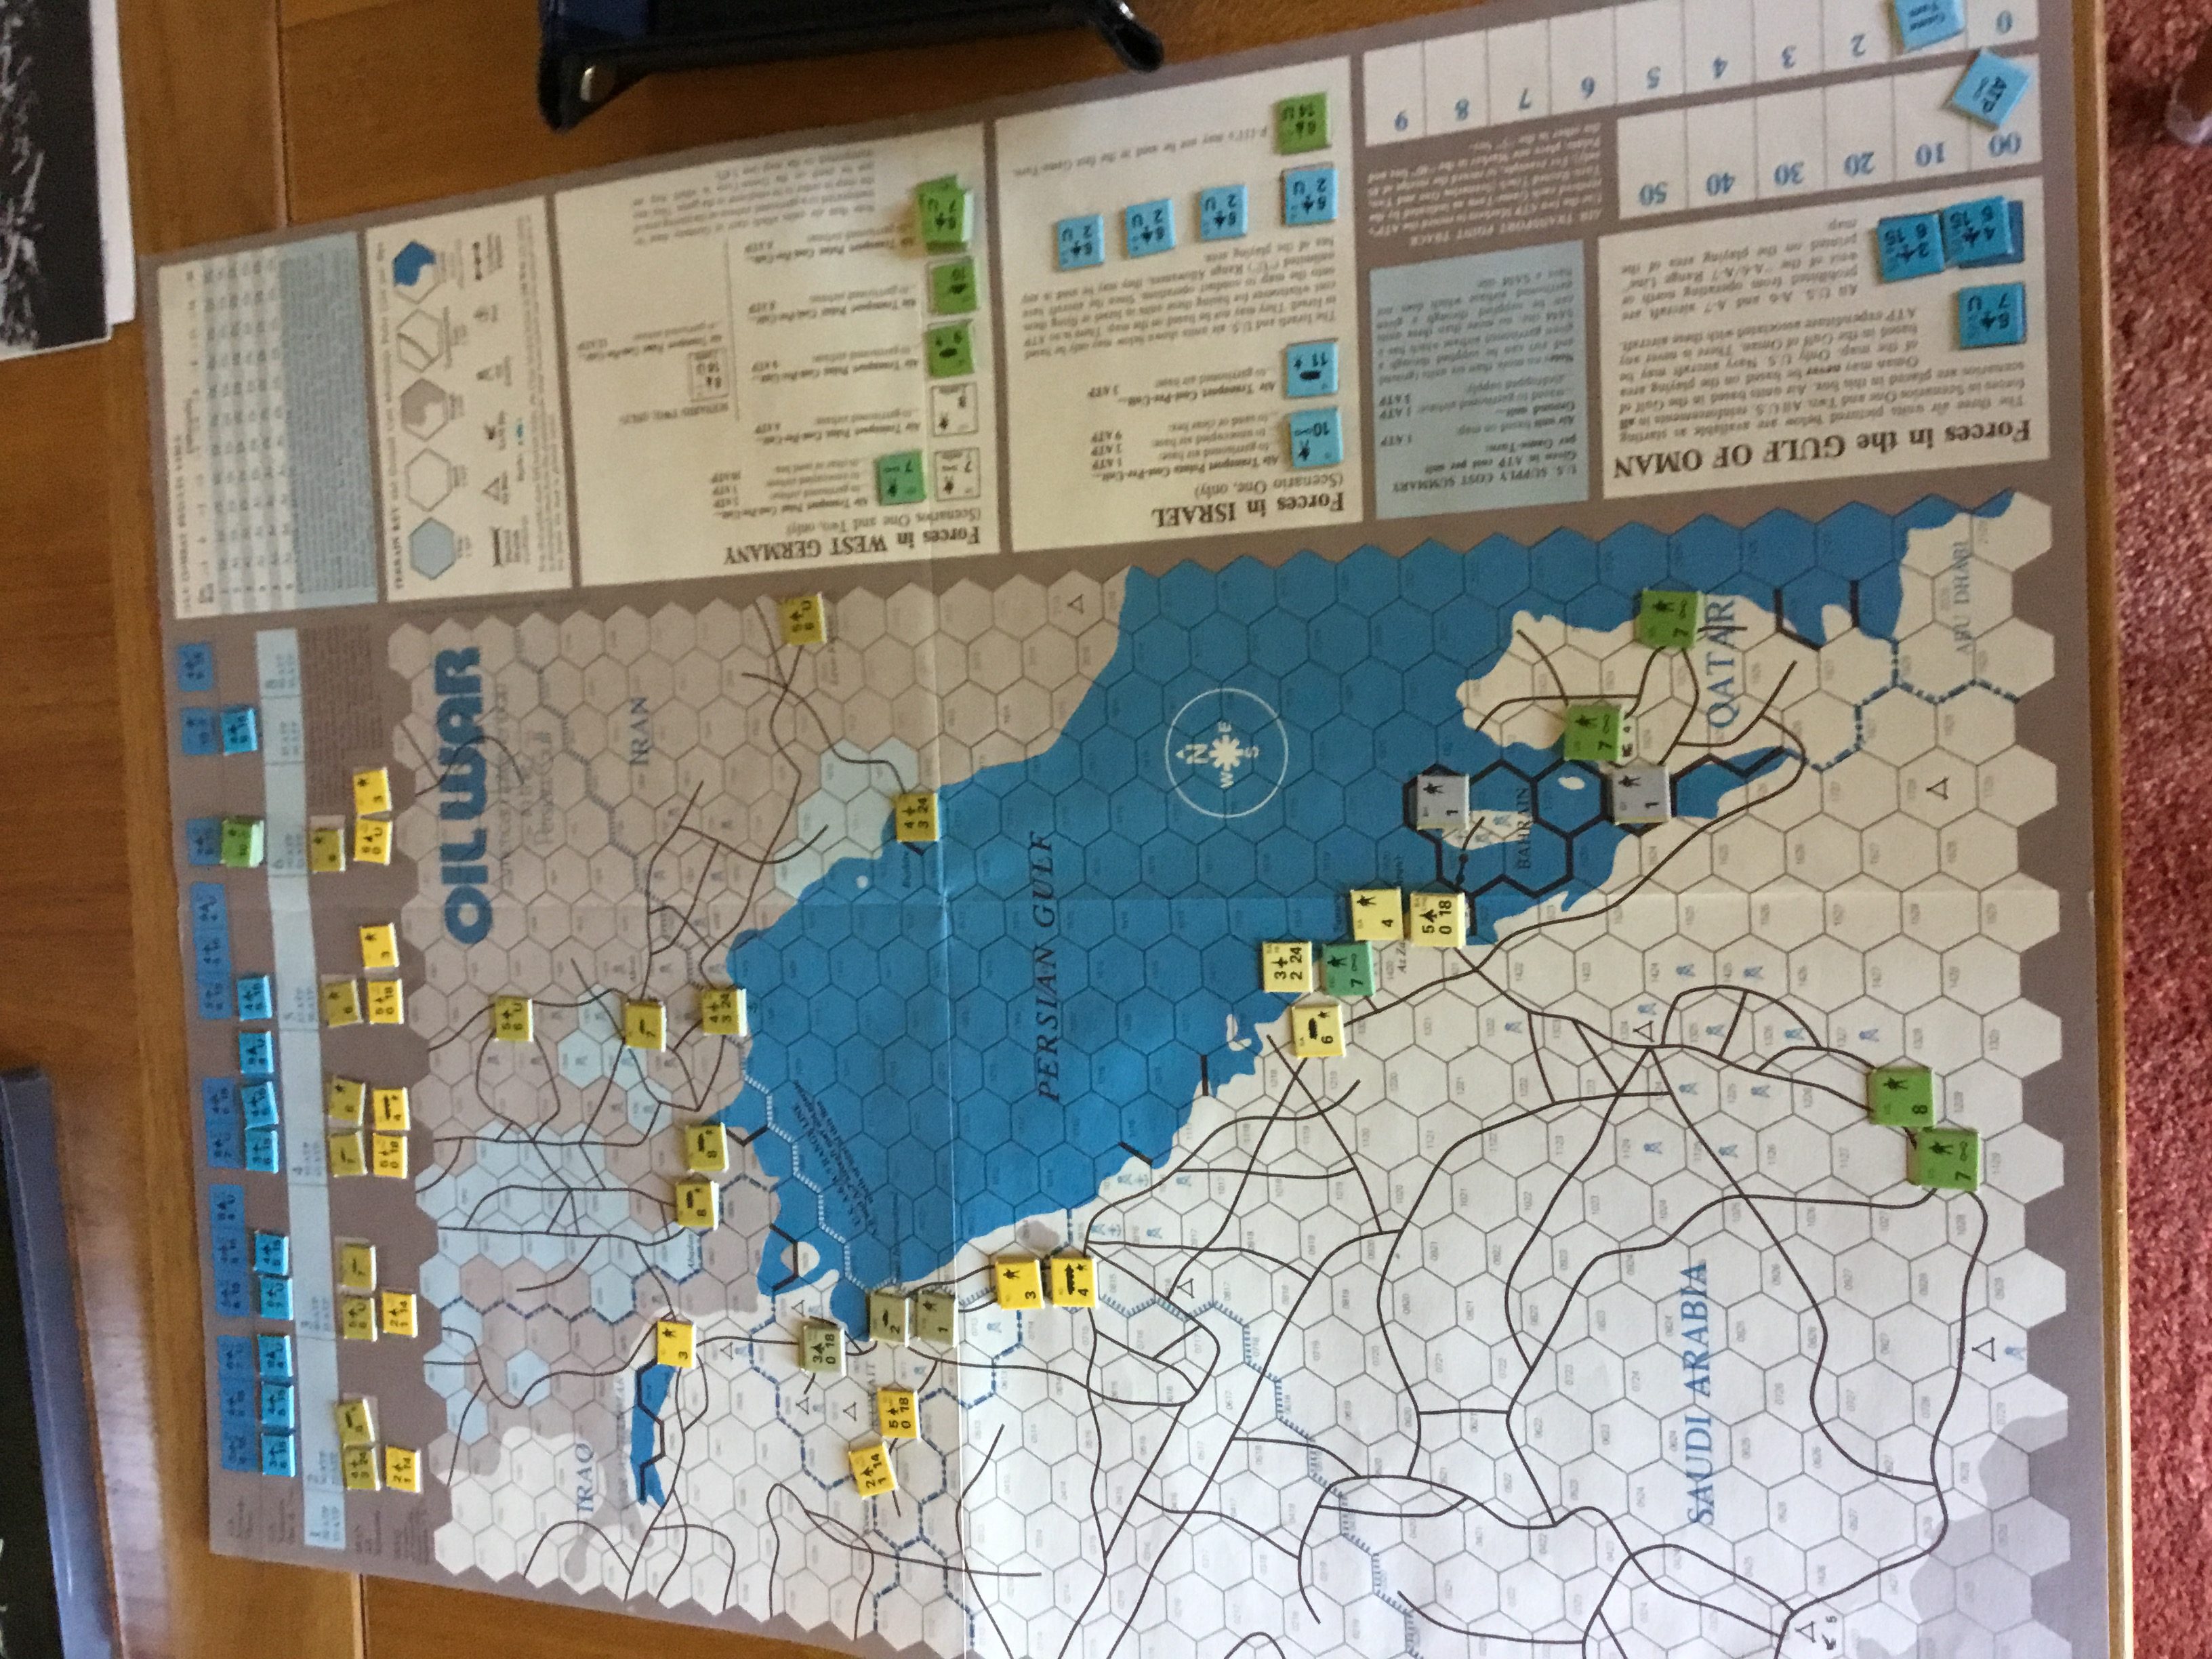
One of the lost games that I have fond memories of is SPI’s Oil War. Don’t know where it went, but probably in a late 70’s purge along with the also lamented World War I.
Been looking for both on E-Bay but the high prices were off-putting. Recently found a reasonably priced folio game and snapped it up.
Fairly quick to set up, moves along at a brisk pace, but there is one problem. The Western nations have to really screw it up to lose. Why? Airpower. Air attacks simply crush the combined Arab forces. It will take time….but victory conditions will be attained.
My approach was to establish airheads in southern Saudi Arabia, reducing logistical demands, snap up the Saudi oil fields, then gradually move north. Yes, Kuwait has to be captured to assure a substantial victory, but that is an eventuality.
Arab forces need to defend airbases to deny the West their logistics benefits, and to give ground grudgingly, hoping that the game will end before losing the 25 oil fields signifying a substantial Western victory.
At the time, it was a challenging and fun game, dealing with a very current topic. Now…..not so much, but I enjoyed playing it, and that’s the main thing. Here’s a couple of photos.
First Time Through: Aggressiveairlanding on the coast. Air units staged to savage Saudis defending oil fields. Significant assets attacking Qatar.First Time Through: Too aggressive. Coastal unit just before ZOC kill.Second Time Through: Slow and Steady. No distractions and no sudden moves.
After two gratuitous posts, here’s (hopefully) something of substance, and very late getting to the blog.
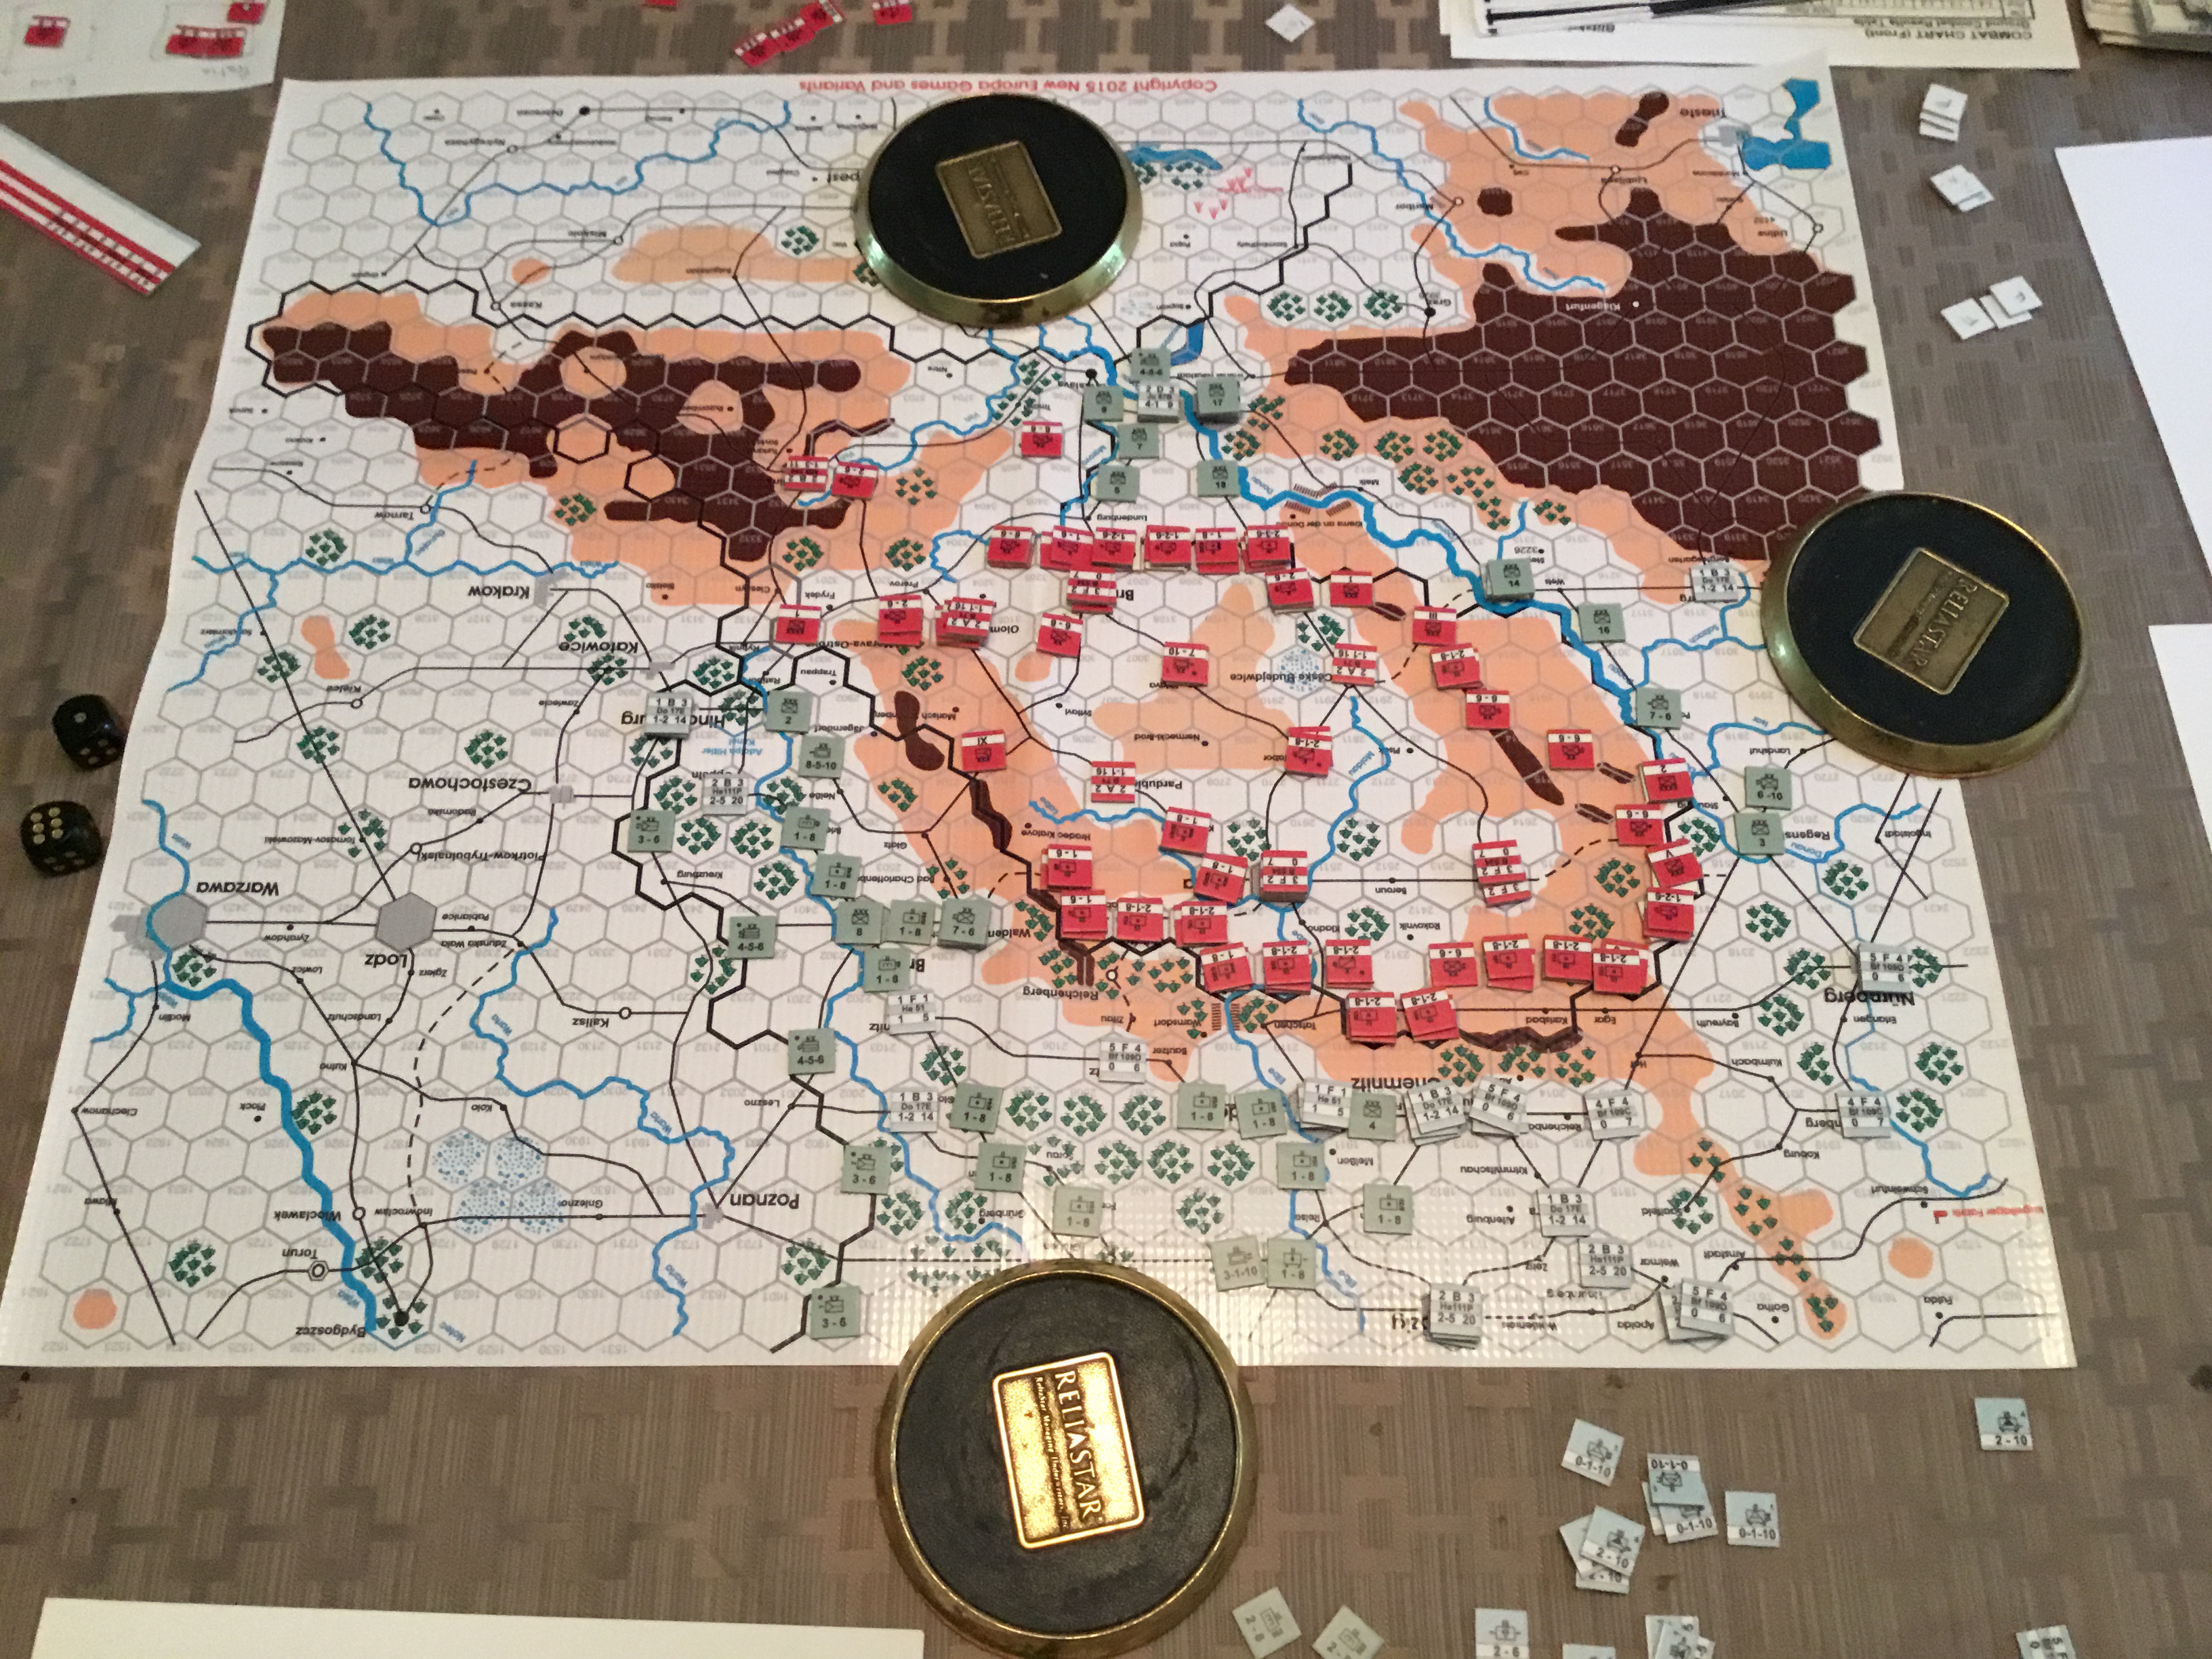
A couple of weeks ago, Tim and I played Fall Grun, a Europa game covering the proposed German invasion of Czechoslovakia in 1938. The hypothetical conflict was previously covered by both Command and Strategy and Tactics magazines. In each of our three “games”, Tim had the Czechs.
This iteration is published by New Europa Games, using John Astell’s Blitzkrieg Unleashed rules. Mr. Astell’s involvement with the Europa system goes back to, I think, the inception. The rules closely follow the Europa template, but involve some interesting changes to ZOCs and Overruns.
The New Europa website is apparently dormant, but has been an excellent source for variant counters. Also, a game anticipating a Hungarian-Roumanian war in wake of the Czech conflict is supposedly in the making. That would be fun.
The game components are of high quality, however the lack of comprehensive charts presupposes ownership of other Europa games. The map is vinyl. Apparently this is cheaper to produce than a paper map. The only downside is that the creases are more obstinate than paper, requiring some improvisational and forceful re-shaping
The Germans have their work cut out for them. The Czech’s have a quality army that receives strong infantry and armored reinforcements very early in the game. The German initial deployment is rather “even”, without any real point of main effort. Many German units, especially valuable engineers and artillery regiments, are placed some distance back from the Czech-German border, and require time to assemble or move to contributory locations. There is also the possibility of Soviet intervention of the Czech side, with also a desulatory appearance by the anti-Czech Poles obsessing over three hexes.
The real German strength is their airforce. Many units, well suited to ground support, but with fighter cover that lacks range and (initially) limited airfields close to the Czech border. Also, Astell’s latest rules (early war) allow positive combat modifiers for an armored mix as low as 10 percent of the attacking forces.
After setup, we played the initial two turns. I dutifully went through the Blitzkrieg playbook using the first turn to annilihate the Czech airforce and mass units for border attacks. Tim countered, and my attacks stalled. And, that was that. A learning experience. Reset for Saturday.
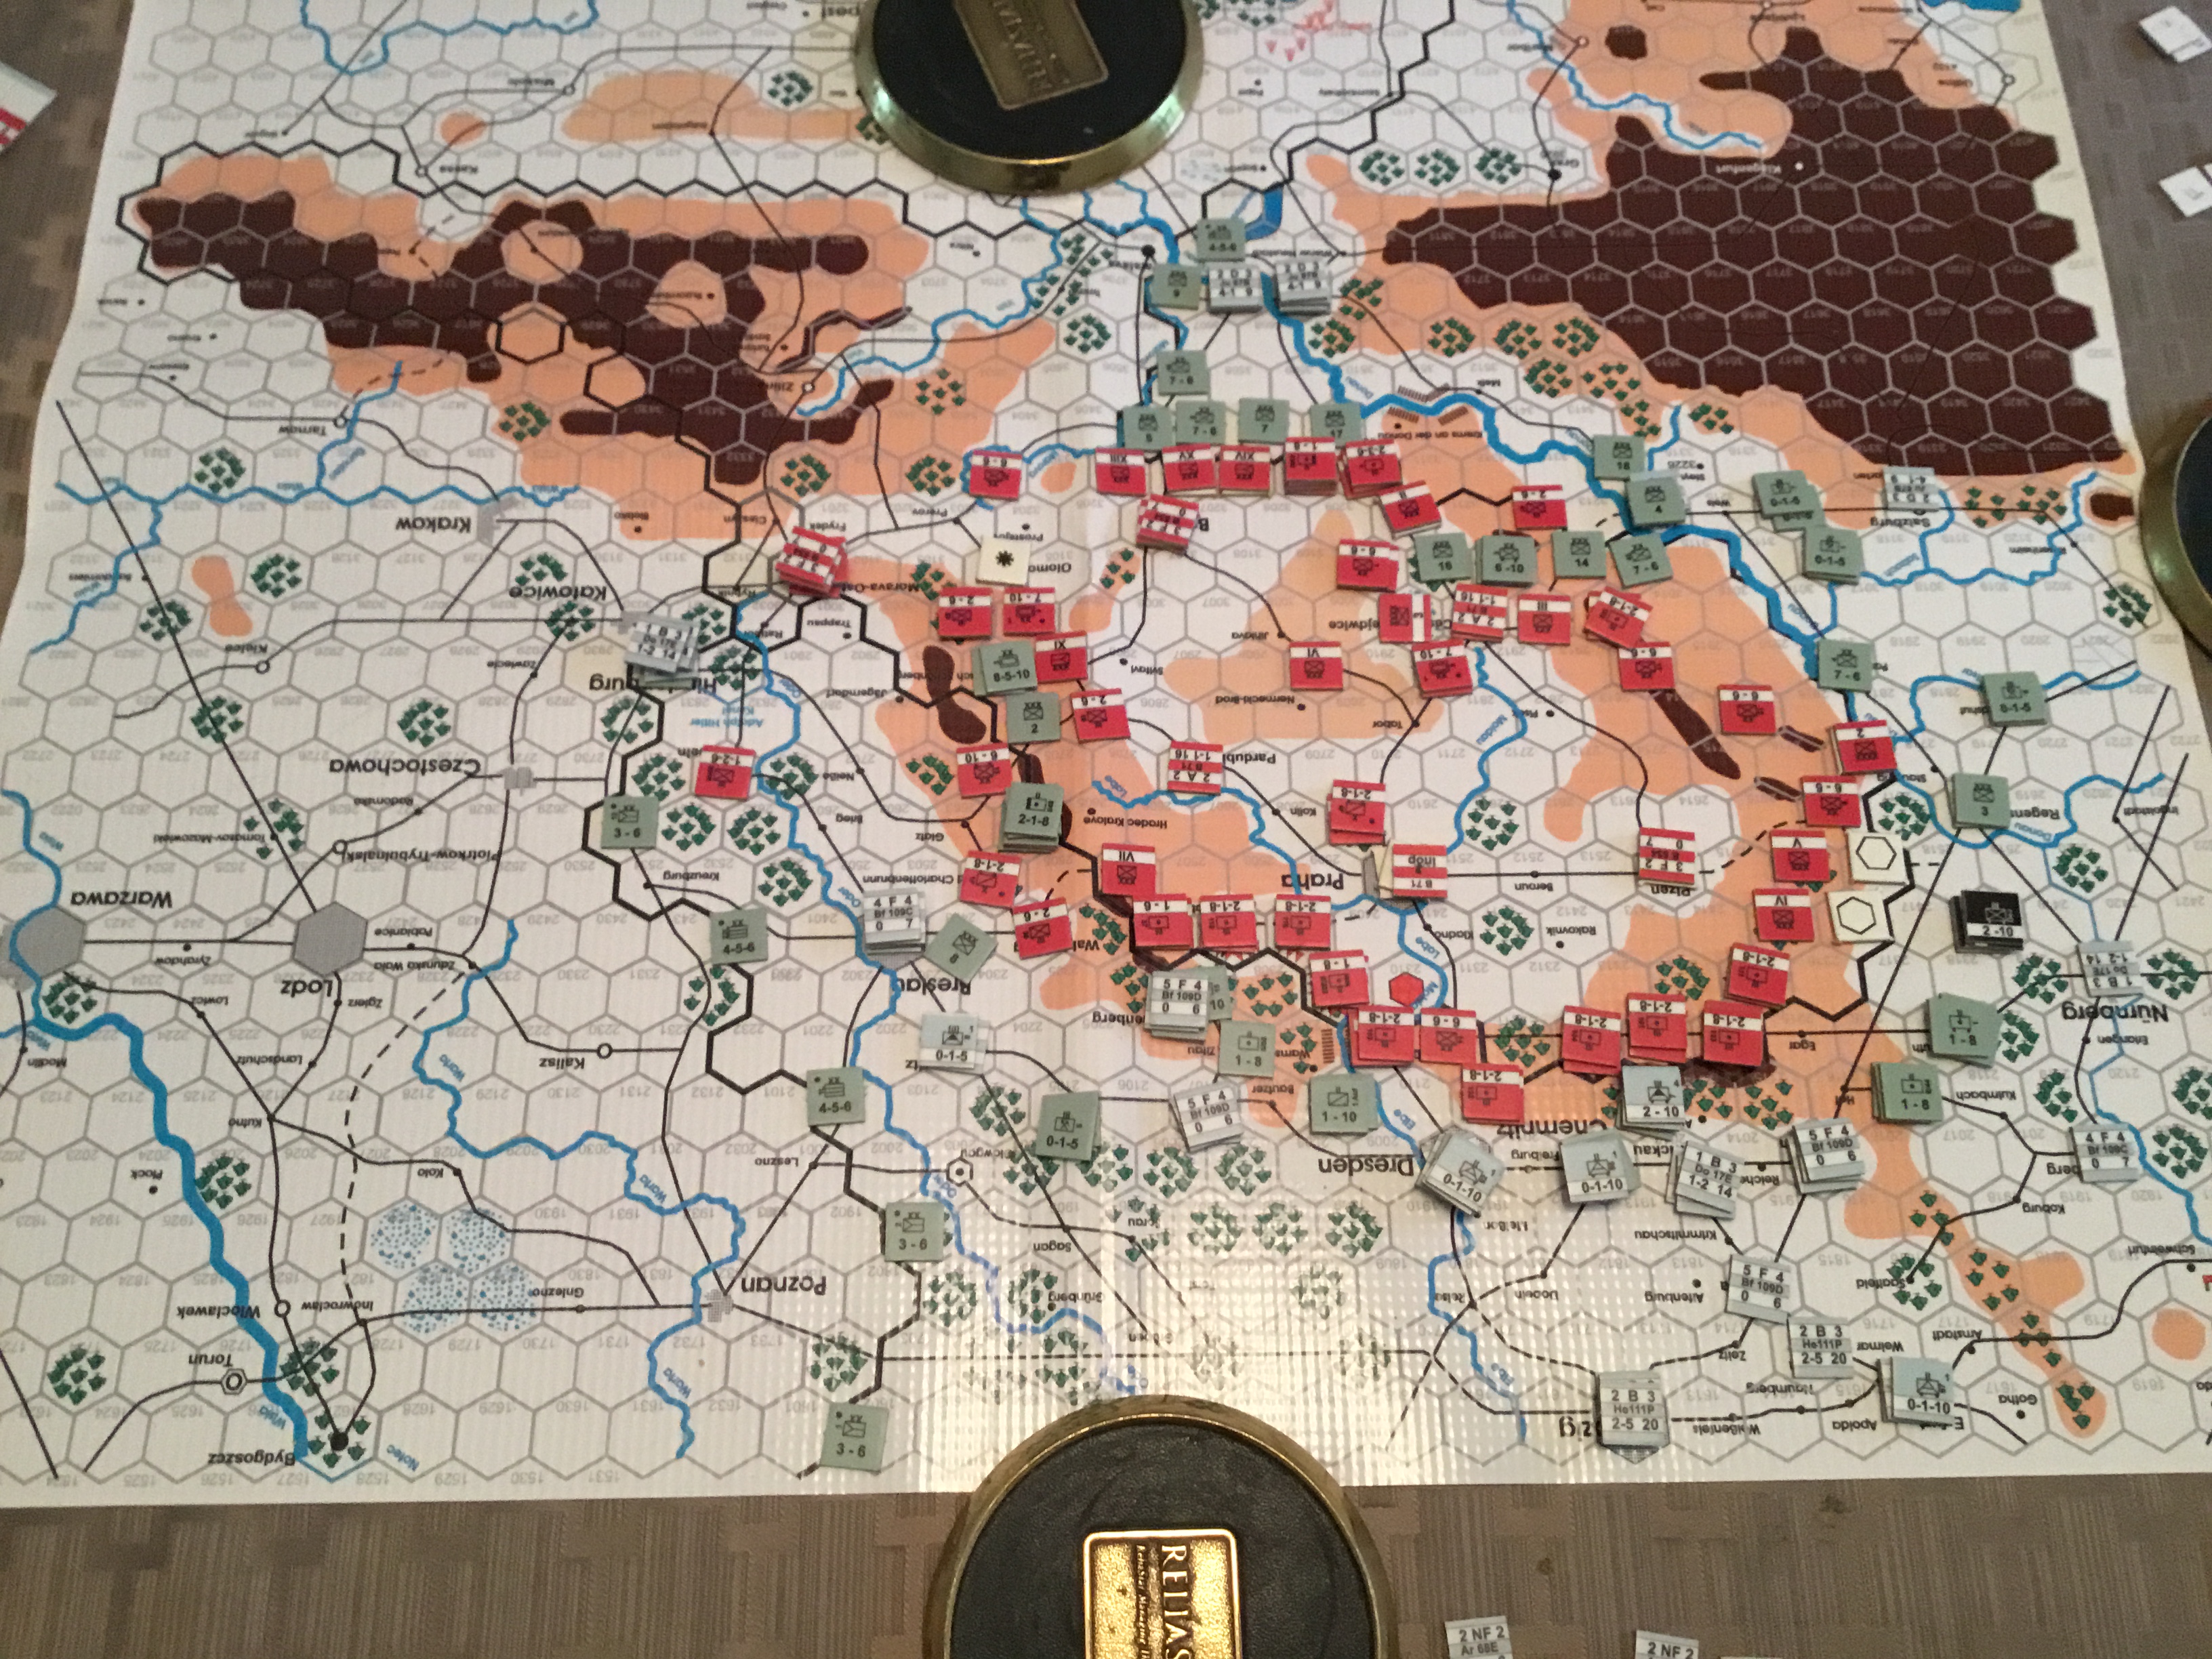
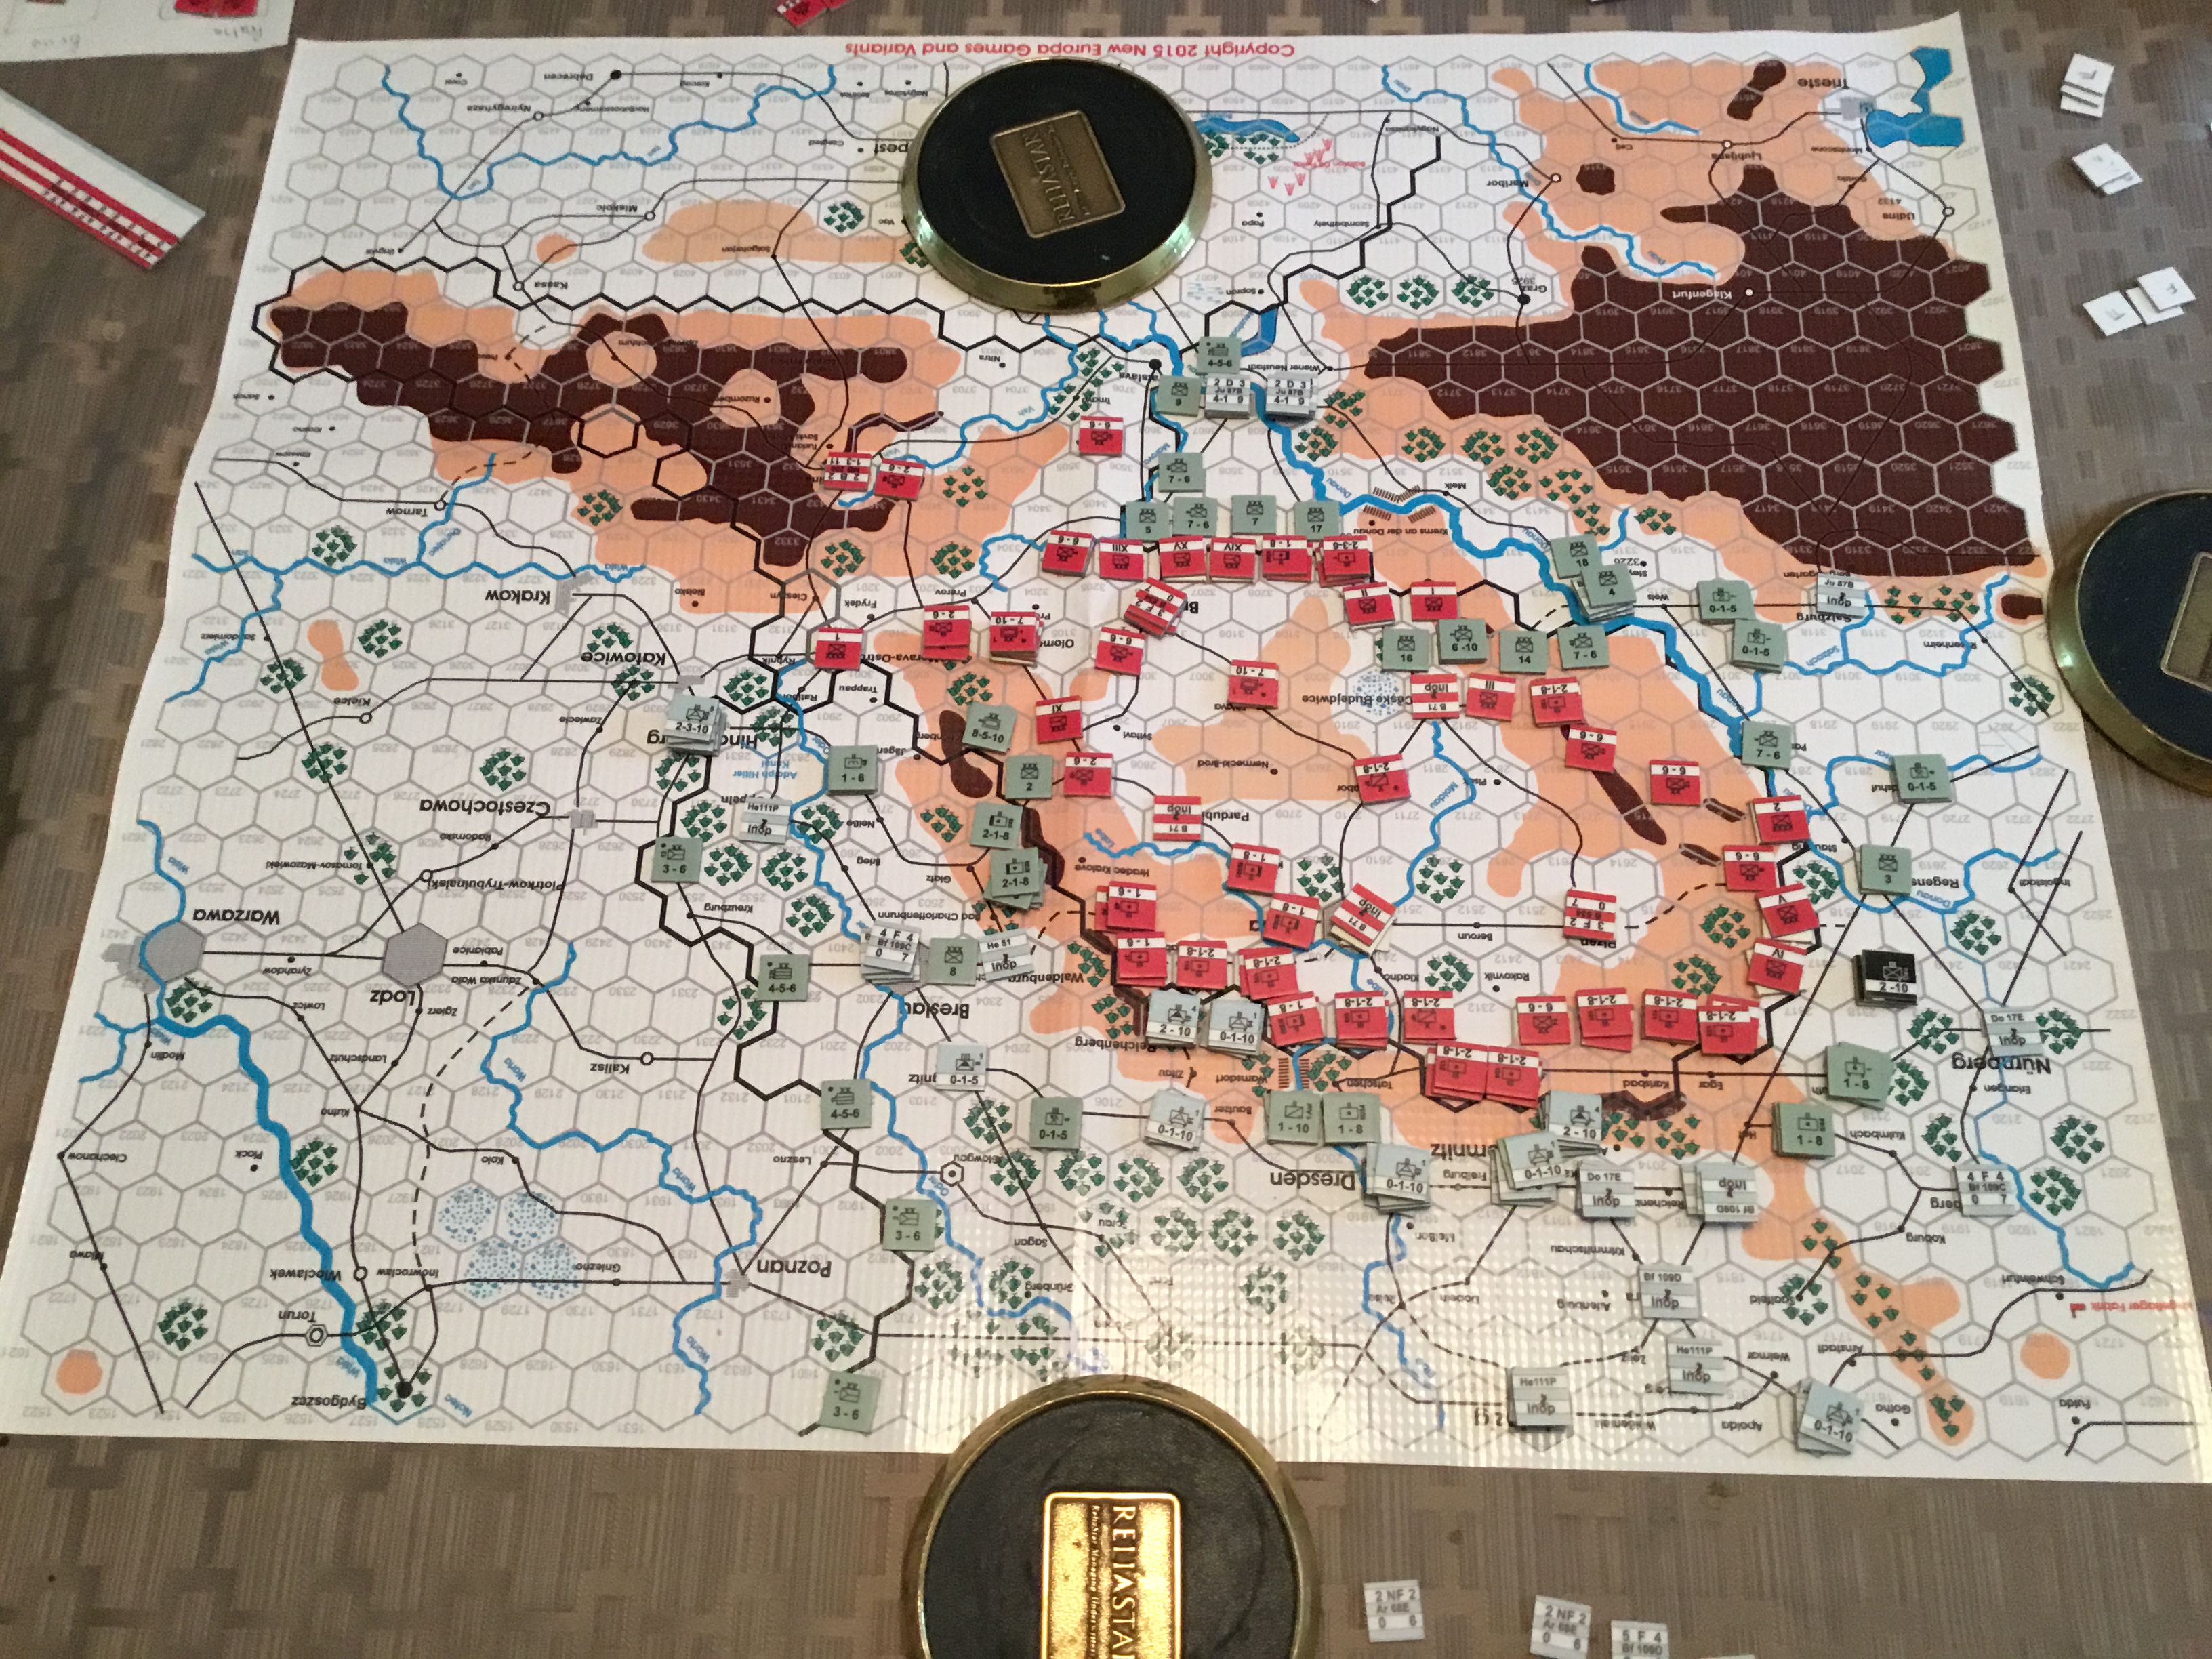
Well, Friday was a learning experience, but not a good one for me. Still allocated aircraft to airfield attacks, but this time I had deployed my engineer units to quick construct airfields, or move into positiion close to the border to construct them on Turn Two. I concentrated my attacks to the southeast and southwest of Prague, hoping to isolate Prague from the strong Czech units facing Vienna.
Initial Setup. That Vinyl Map Needed AnchoringGermans Attempt To Isolate PragueLimited Gains
Weather. Why worry about it, right? Never a thought. It’s October…….crisp fall weather. Oh…….then just roll on the weather table for …..MUD. Ugh…..bad, bad amateur move. It stings even three weeks later.
OK, give it one more try. Another set up after dinner. Same bloody result. This time, more aggressive, greater gains. But, again, MUD.
New Game….Same Result….Stalled
No wonder the General Staff was ready for a putsch. Tough army, difficult terrain, limited mechanized advantage, and an untried airforce lacking airfields. And, also, MUD.
I don’t know if Tim is ready for it, but I’d like to switch sides and see what he can do. He’s good, very good. But this is quite a challenge.
Good game in the tradition that is all best about the Europa system. And, given the strange and terrible saga of this system, it’s best to remember the good.
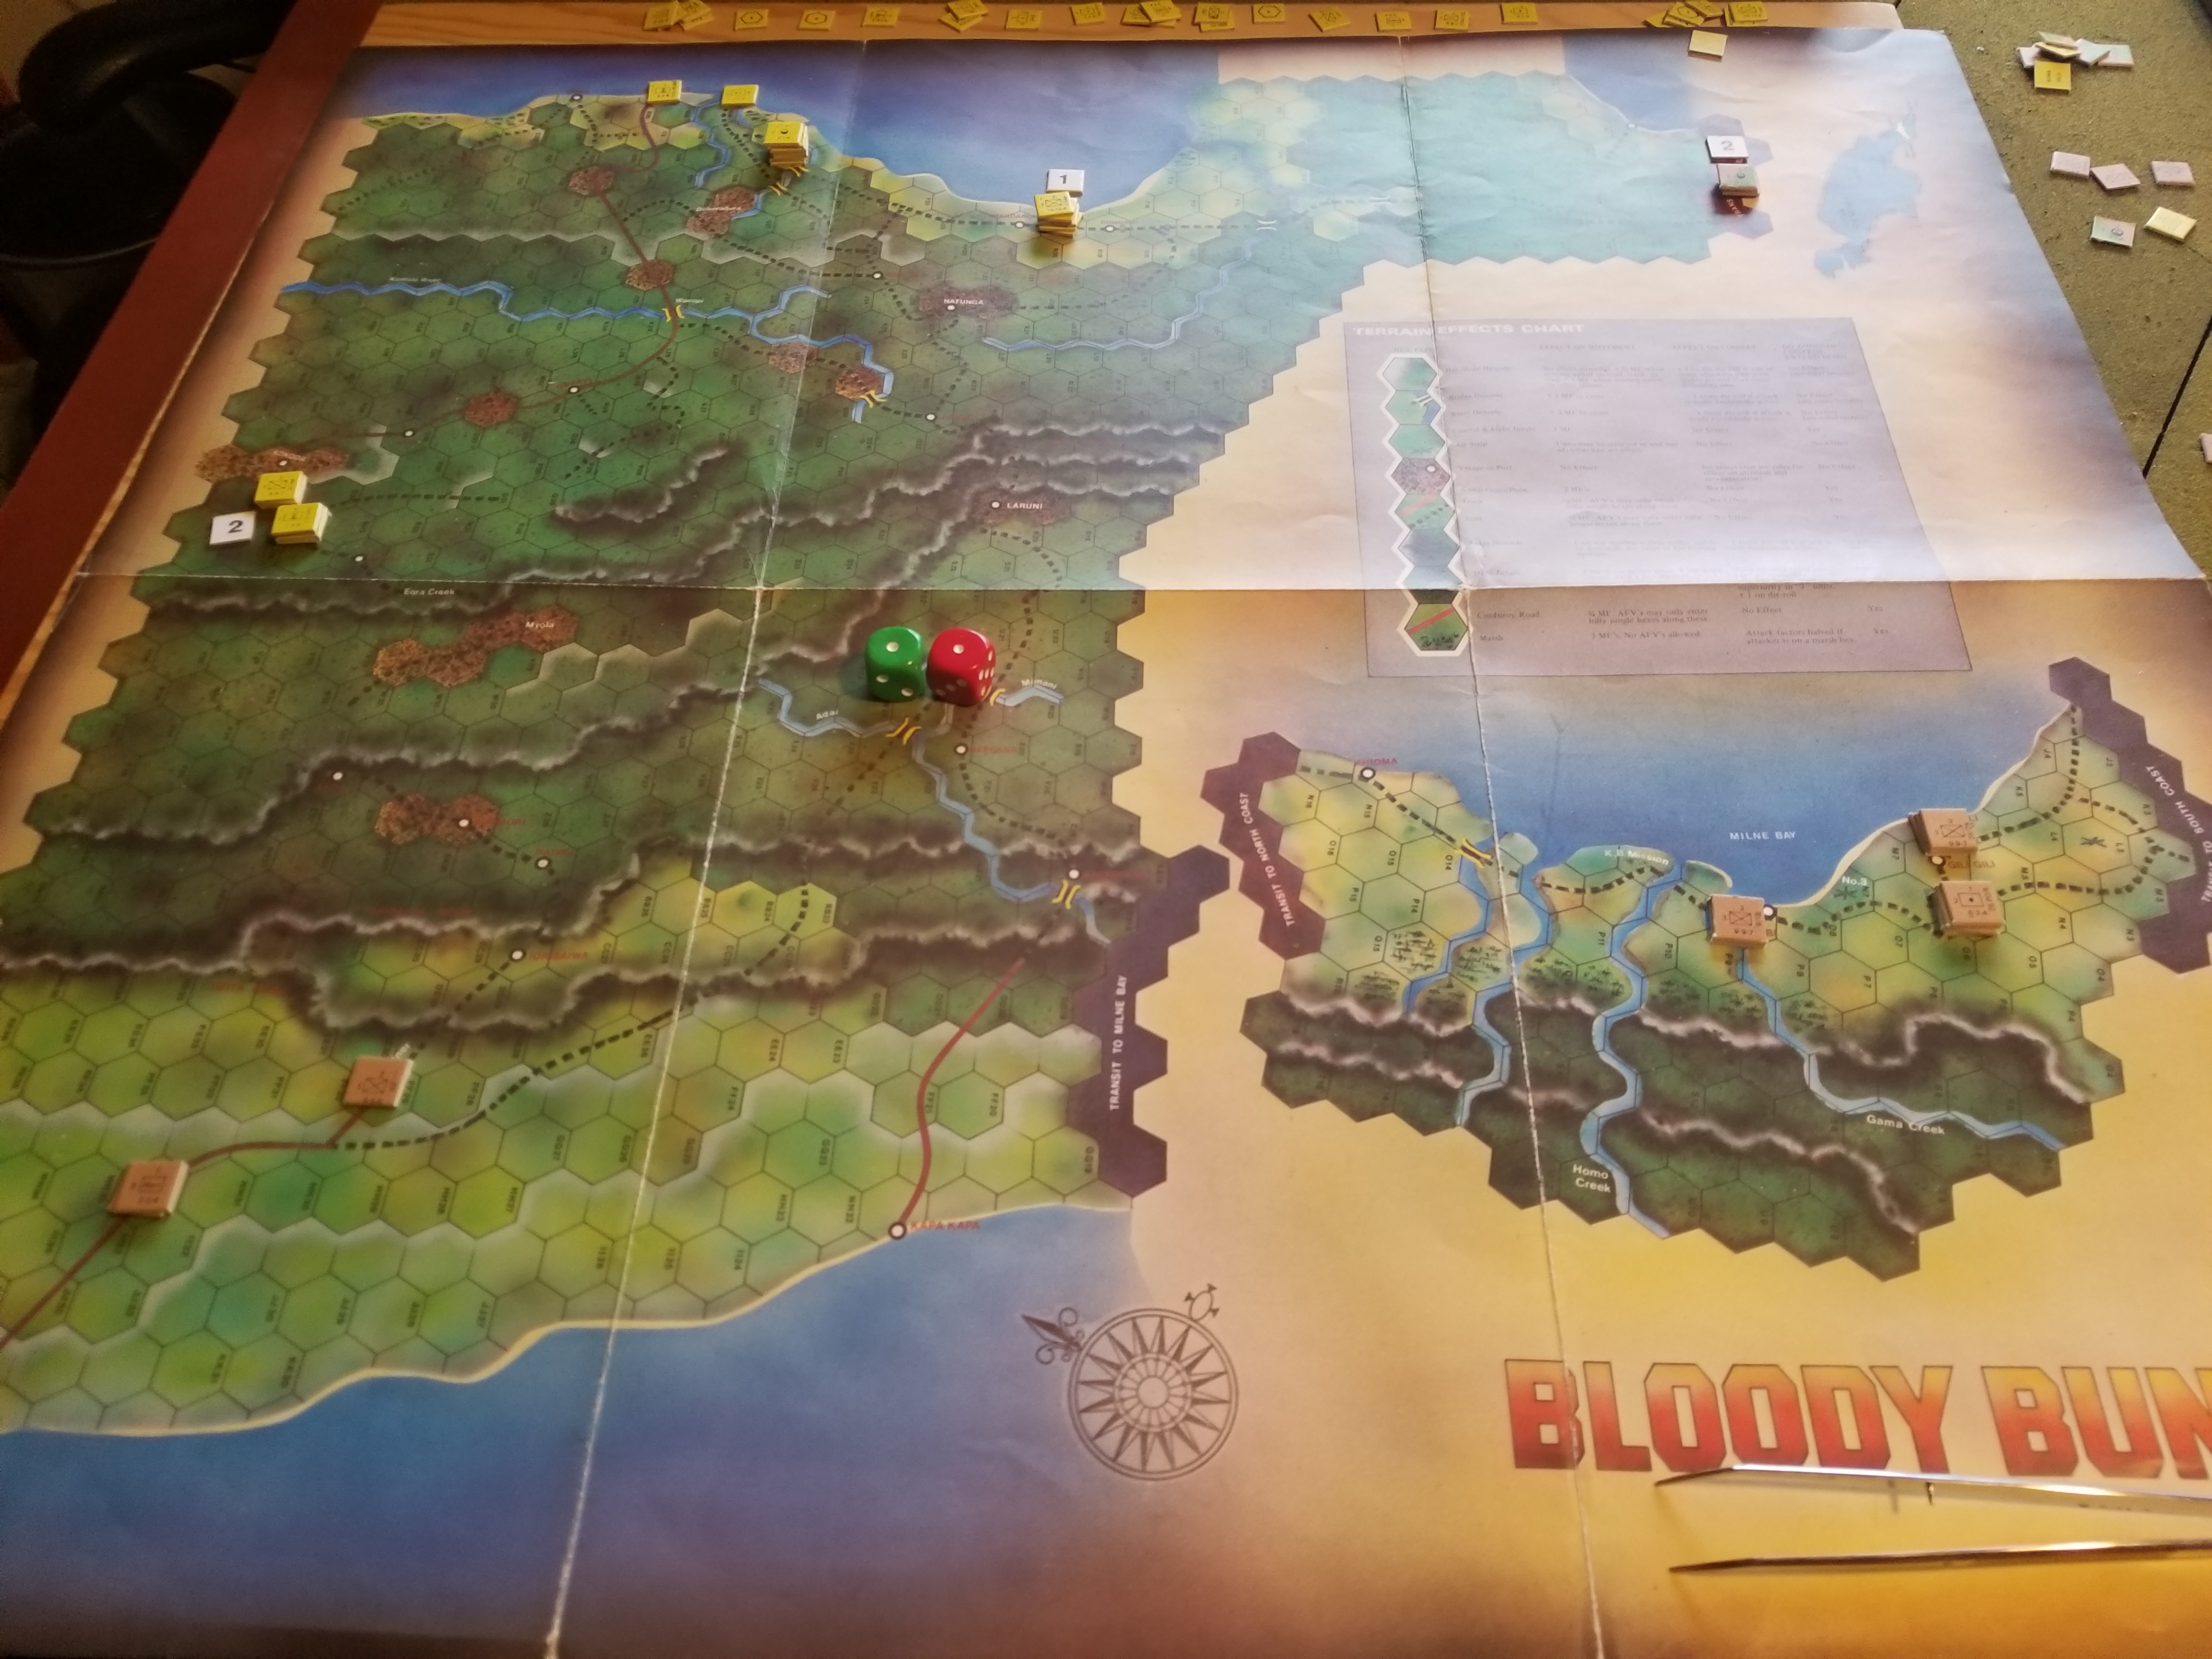
Was able to get through about 12 turns of Bloody Buna before I left for latest elder-care iteration.
It’s easy to understand why the response to this game was muted. Supply is everything, and there isn’t enough of it. Unlike many games where new supply counters are generated every turn, or MSRs linking supply sources to units are lengthy and developed, this game has short MSRs (2-4 hexes), and a very limited number of supply counters.
The result is the need to accept attrition die rolls as the cost of conducting business. While Allied units can huddle in defensive positions near supply sources, they will have to conduct operations far from these sources in order to win. The Japanese face a dwindling level of supply as the campaign progresses, and will have to hold on to their gains in order to eke out at least a marginal victory.
This isn’t the Western Desert. No booming and zooming.
So far, the Japanese were able to advance to Kokoda, eliminating Australian units that were tasked with a delay/defend mission. However, the Japanese are now on half-supply.
Another Japanese force moved east of Buna to cut off Allied forces that had moved west from Milne Bay. Again, both sides will soon be out of supply and subject to random attrition and accompanying loss of combat power.
I’m charmed by this game, if only because of the limitations created by factors taken for granted in so many other games.
Here’s a couple of bad pics depicting the Japanese attack on Kokoda, and the situation when I left. Number chits indicate supply turns remaining.
Resperitory ailment, snow and an empty house makes for interesting decisions.
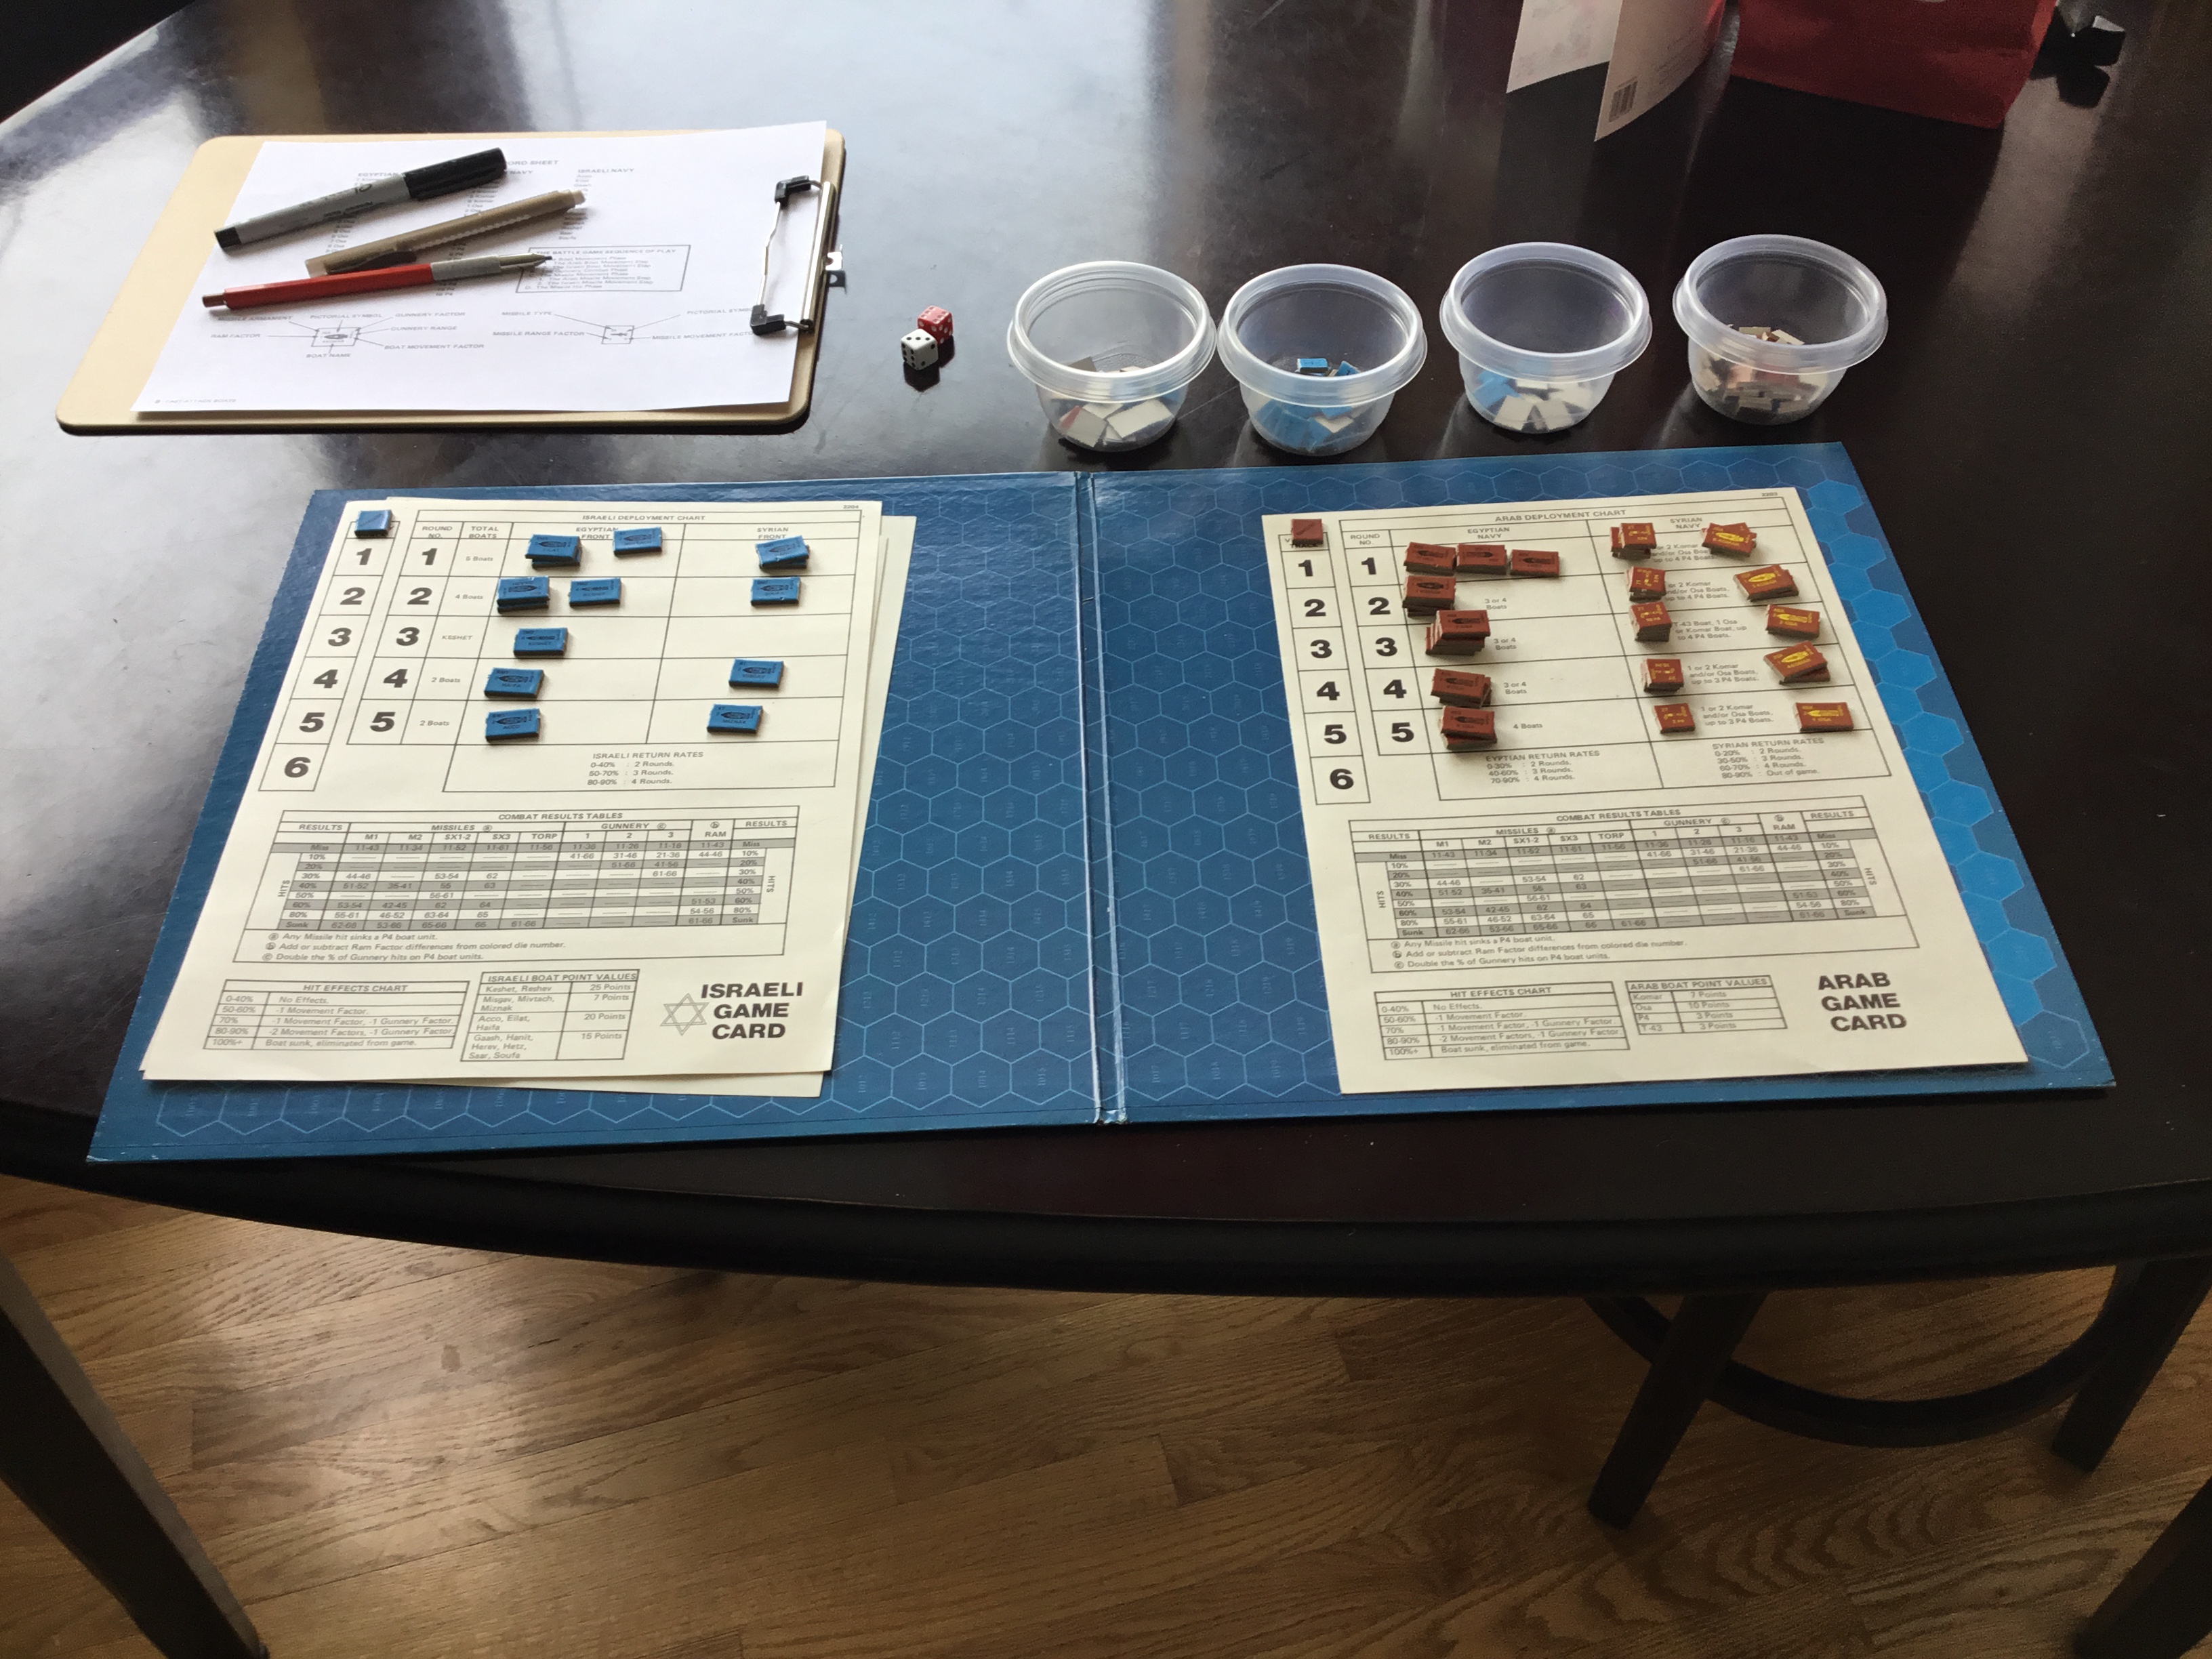
Grabbed a copy of Yaquinto’s Fast Attack Boats (FAB) and set it up. Reviews aren’t that kind, but there is some agreement that the campaign game shows FAB in its best light.
Agreed. Plus there are some other attributes. Game is quick to set up, has plenty of action, minimal bookeeping and poses some real tactical quandaries.
I’m not a big naval wargamer, despite my fetish for Avalanche Press’ Great War and Second World War At Sea series(s). Tactically, it all seems a bunch of line ‘em and go at ‘em. While GWWAS and SWWAS provides an operational context for battle scenarios, FAB does not.
I tried finding doctrinal information on modern fast boat tactics, but it’s pretty slim out there. What I did discover within the context of this game’s play is that it’s “shoot and scoot”. Crank off missiles at max range and get the hell out of the way.
Problem is, and this is a nice design feature, that victory in each of the five segments comprising the campaign game are based on last force to have craft on the board. While this would lend itself to all kind of gamesmanship in a FTF contest, when playing solo it requires a level of steadfastness and willingness to accept damage.
Egyptian and Israeli boats have their respective advantages. The Egyptian boats are more numerous, can be faster, and have a longer missile range. On the other hand, the Israeli boats can launch more missiles per turn, and have greater hitting power at longer ranges.
Each force will get hit with missiles. The CRT is simple, but for this type of game, reasonable. The longer the range, the less the effect. Even at close range, the chances of a miss approximate 40 percent. Missile fire is “fire and forget”, as they will hit a target if it is in range. Missiles have a running time of three turns.
Boat maneuver is simple, but, again, fitting for this game. All ships must move their maximum distance each turn. Any turn must occur after one hex of straight-ahead movement, and is limited to 60 degrees (or a change in hex orientation). This leads to some interesting group maneuvers.
My first campaign finished as a marginal Egyptian victory. The Israeli’s got shy and decided to get ready for the next go-around. I’m looking forward to it.
Fortify Montreal……Fortify Montreal. The object of the game is to prevent Montreal from being captured…………
If you ever play this game, please, please, please fortify Montreal. Here’s why…….
The British have the strategic advantage, with the ability to advance on five fronts simultaneously . However, the French have the operational advantage in that they can attack both during their phase and the British Advance phase . Tactically, it’s a push. Both sides have special tactical cards which influence not only tactical advantage but also the total number of battalions used in the battle.
Tactical advantage is critical . The side with this advantage toss their “bucket of dice” (one die per battalion in the fight) first with any enemy casualties (battalions) removed immediately . In many cases the side without tactical advantage is simply wiped out before being able to inflict casualties of their own. While this system has its shortcomings, it is appropriate in a game of this scope and size .
During my first real play thru the British were hampered by a lack of leaders, advancing on two fronts and making it easy for the French to use their action points not only to stop any advances, but also construct Forts and Trading Posts .
Trading Posts provide the French with valuable replacements each turn. While Forts prevent the use of light troops for tactical advantage and offer an advantage themselves.
Once there were British leaders for each of their five axes of advance towards Montréal, the French were hard-pressed.
Just as the British were ready to enter Montréal , and end the game, I drew the Montcalm Leader Card.
Montcalm has extraordinary capabilities , and almost turned the tide for the French. But the simultaneous advance of the British armies , combined with some less than favorable die rolls, resulted in the eventual removal of Montcalm and two other French leaders. This re-opened the door to Montréal. And, of course I made it just that much easier by not placing a fort there.
Game Play was relatively smooth . It took a while to figure out which cards to trash and which to discard, rather than place back in the recycle deck . It also took two turns to figure out that the recycle deck is shuffled into the active deck at the end of each turn , or in what is called the Housekeeping Phase.
This is fine addition to the States of Siege series . While the playing time is extended compared to other offering, this trade off is well worth it in terms of depth of play .
My first try at Finnish Civil War ended a Red marginal victory. Nothing went right for the Whites. Random events were usually bad, and they never made the necessary progress on the Peace Negotiations track. This progress leads to a withdrawl of Soviet forces and German intervention. The Finns needed both because the Red Guard units just keep coming and coming in the reinforcement phase and the Soviets have mobility, and the ability to coordinate multi-hex attacks.
Planned on writing a summary of the last three Brian Train designs played, but FCW is just too different to lump in with Freikorps and Konarmiya. So that will wait.
One reason is scale. Nothing but ants. And, that’s OK. But, restrictive terrain, and the requirement for all units to perform the same action in each segment, leads to an entirely different operational mindset. Oh, and did I mention the need to make bloody low-odds attacks? If you wait for a juicy 3:1 or 4:1, you will just have to wait and wait. And if you don’t get that progress on the Peace Negotiations track?
Higher odds attacks take time to develop. Both Red and White Guard units cannot move through woods until after the Spring Thaw. They are restricted to clear hexes and rail lines. Any envelopments, which also require an adjacent headquarters , can only be conducted with Finnish National Army (FNA) or Soviet units. At best, these envelopments are local because axes of advance are channelized by forests.
The great force multiplier is artillery (or armored trains if using optional rules). Each artillery counter adds/subtracts one from the die roll (as appropriate). There is no restriction to the number of artillery units that can be brought into play as reinforcements. Each unit with an attack factor can have an accompaning artillery counter.
That’s the popular name for Operation Cerberus, Germany’s plan to sneak two battlecruisers from Brest to Wilhelmshaven. It’s also the topic for an Against the Odds Magazine Pocket Battle Game.
It’s an area movement game, with the Germans having to fight off multiple air and surface unit attacks while moving through the English Channel. However, the German player can use his air assets to attack threatening British surface units.
It’s a fun little game, but, as one reviewer observed, with relatively little replay value. Why? The options for each side are very limited. On the other hand, it’s dicetastic, so any number of situations might arise. This randomness also makes it a good game for solitaire play.
This pocket battle really pushes the envelope when it comes to rules and chart density. It is what it is, a game on a postcard. Lots of information in very small print. I’m thinking about enlarging it along the lines of a Minden Games footprint. My only reason for this is that it came with die-cut counters, making it less of a print-and-play type offering which I usually put on thin card stock.
Worth getting at the right price – free with an ATO purchase.
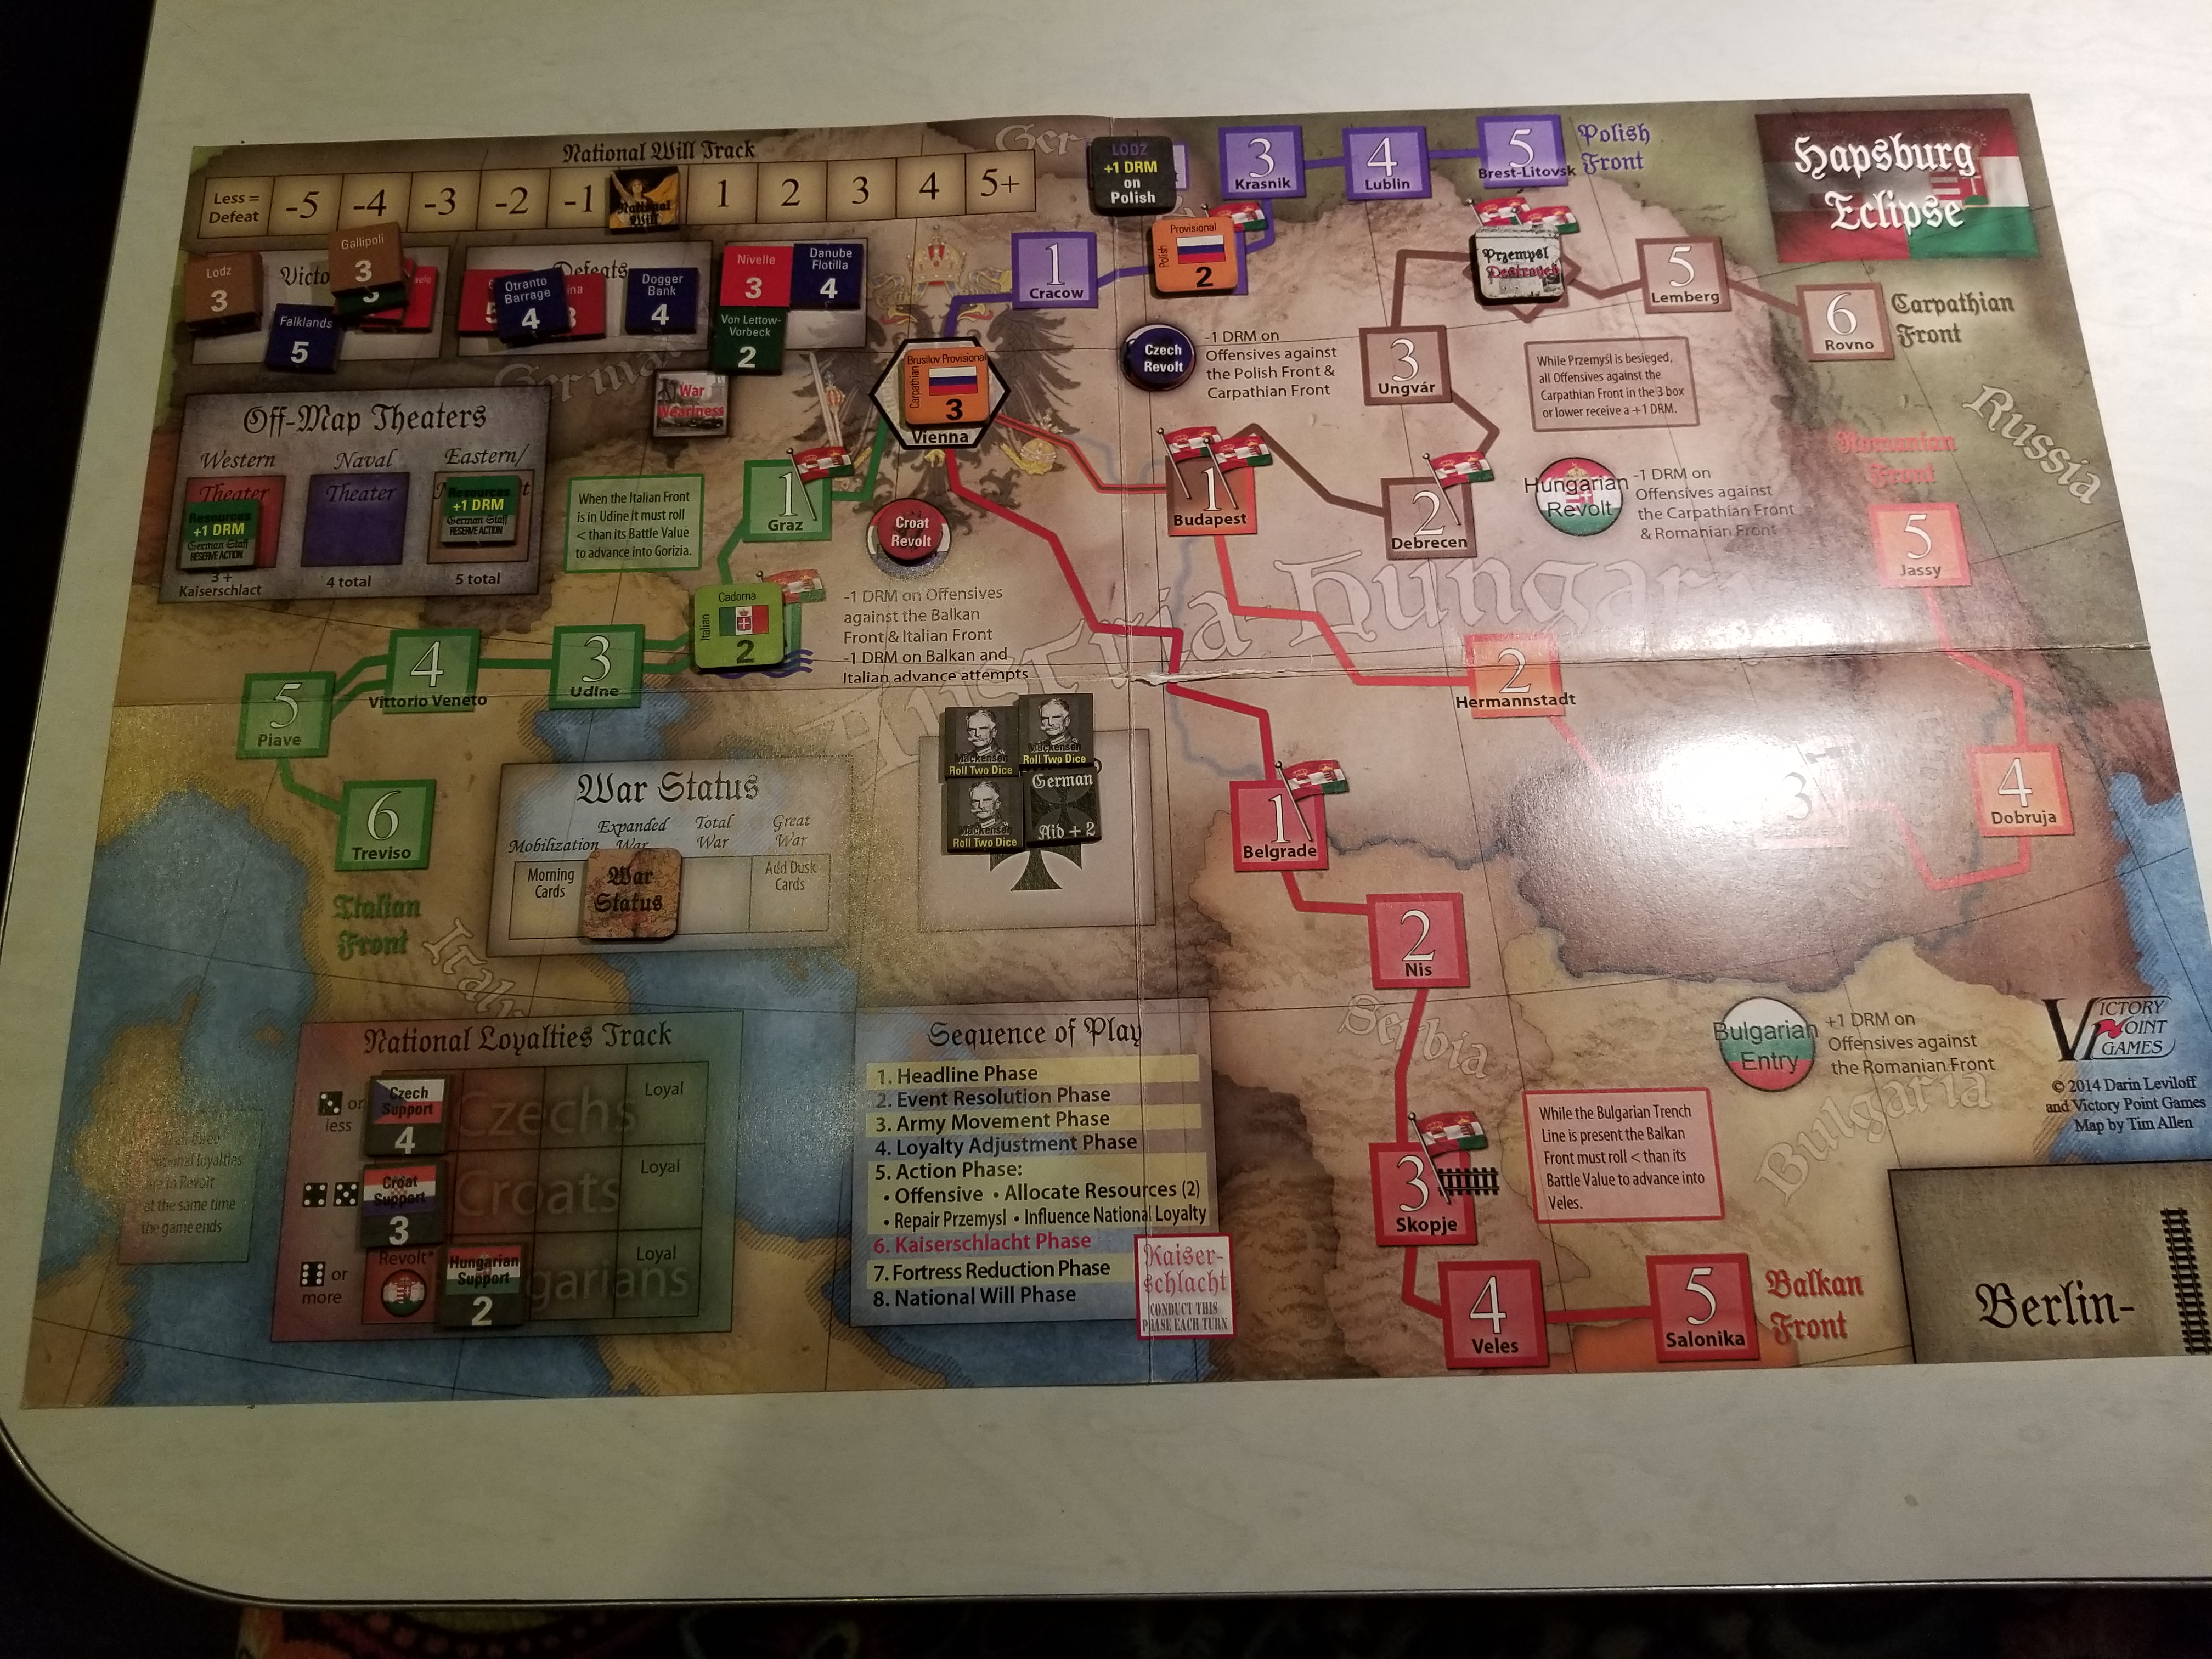
Have also able to get in a couple of games of Hapsburg Eclipse (HE), the “sister” game to Ottoman Sunset (OS). Been trying to work up a stand-alone review, but these games are so similar physically and mechanically that I’ll just cover salient differences. Must not be alone in this. No reviews in BoardGameGeek, but plenty of comments.
The Austrian have to fight on the Carpathian, Romanian, Polish, Italian and Balkan fronts. Three battles in Serbia are considered Out of Theatre and handled the same way as battles in Europe or the Near East, with defeats or victories effecting National Will.
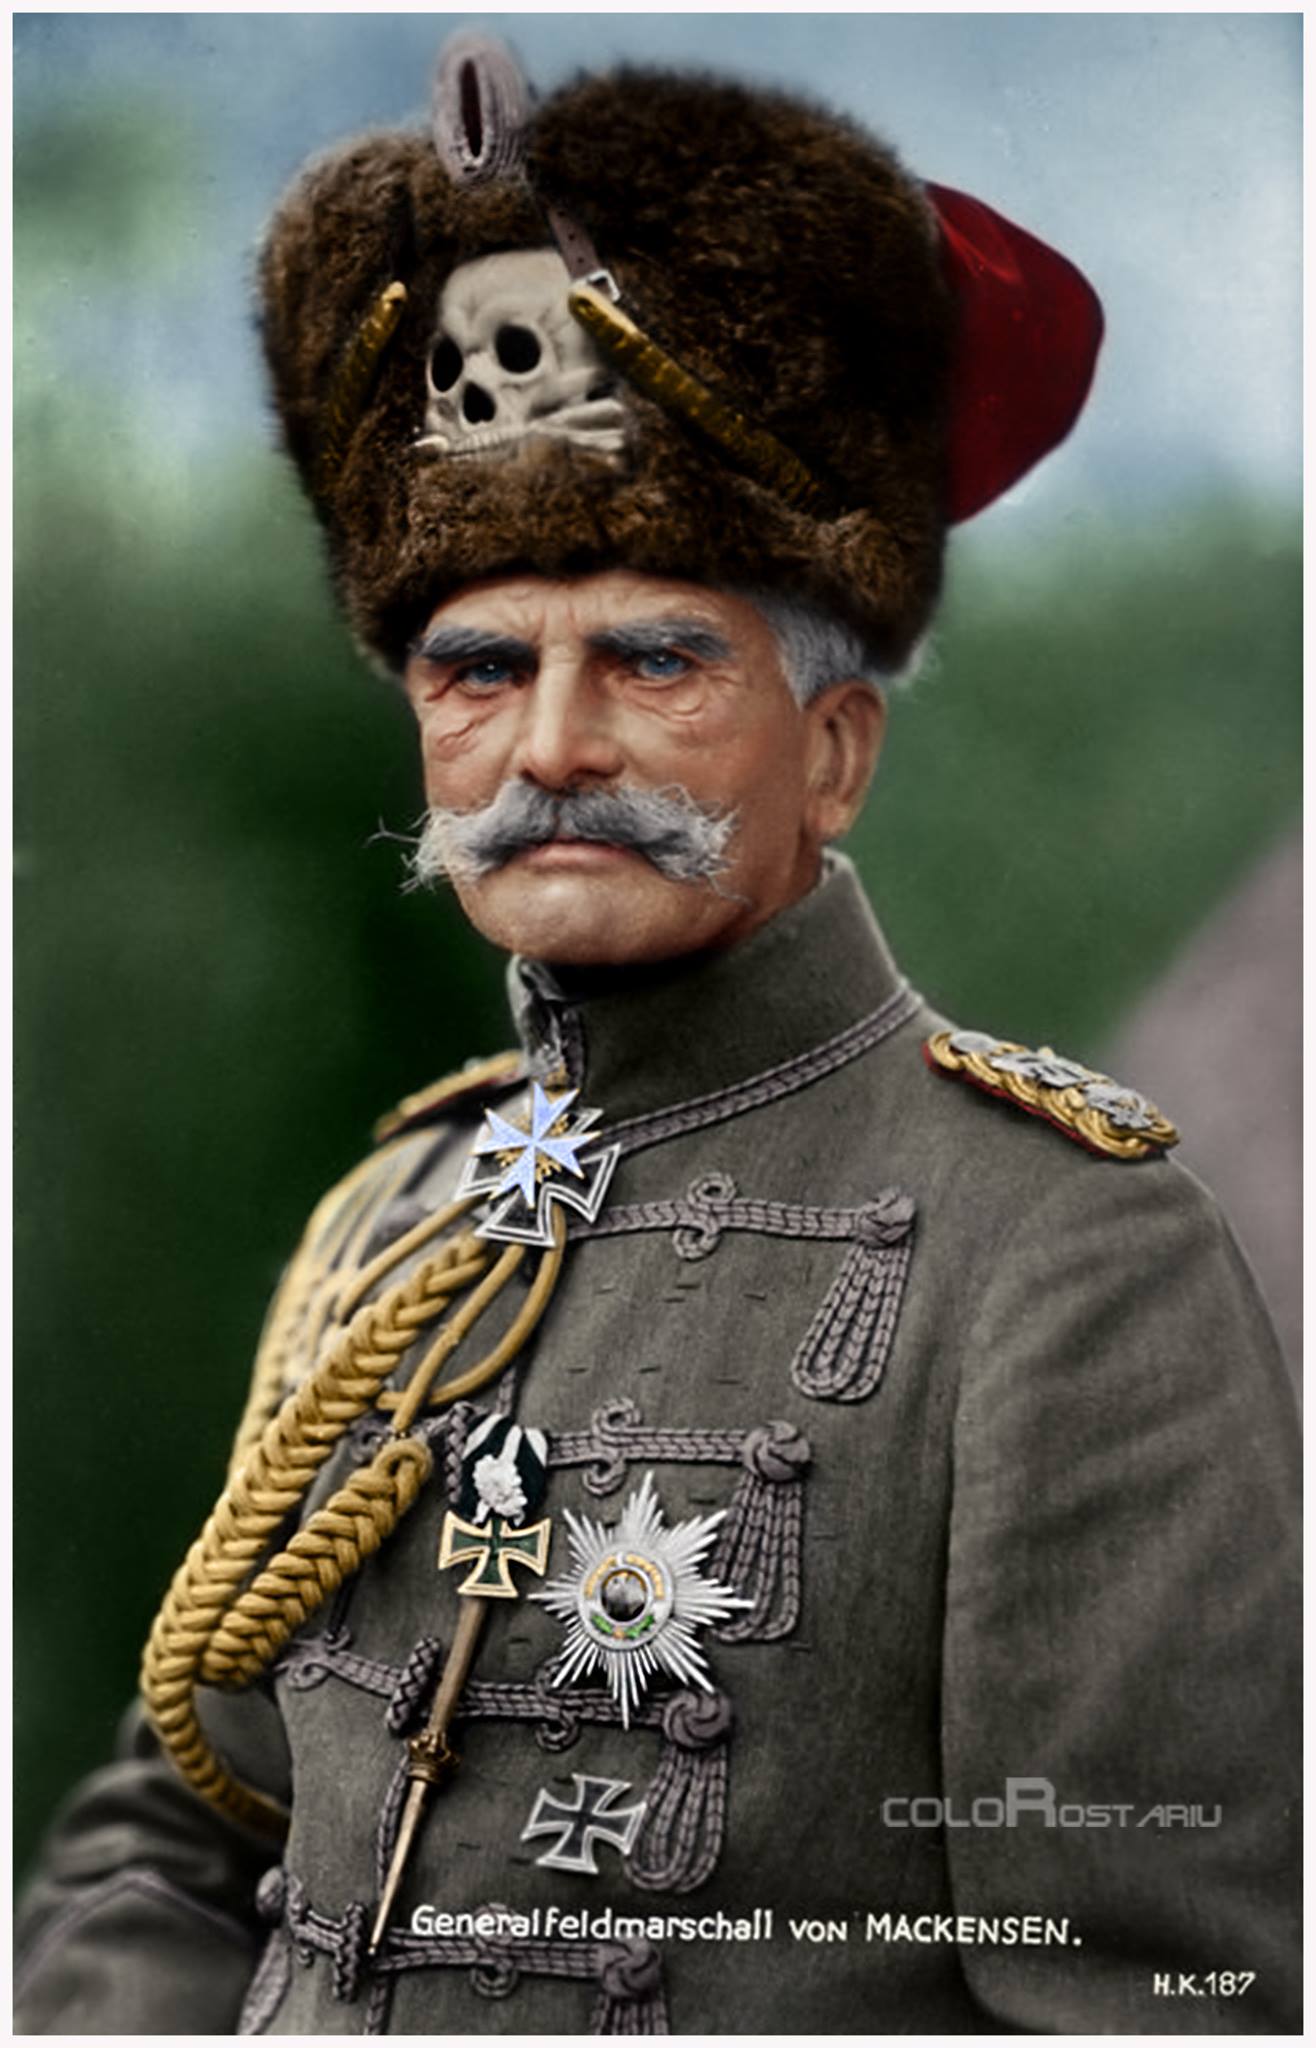
The Hapsburg player receives three Radio Intercept tokens which can stop enemy advances. German aide is more extensive in his game. Besides providing staff DRMs, five Mackensen counters allow the player to take the higher of two dice rolls. Would you mess with him?
Another interesting aspect is the Hapsburg player can literally “shut down” the Polish front by trading victories or actions to initiate the historical Russian “Great Retreat” from Poland.
The biggest difference is that Event cards have an additional “Trigger” section indicating which of three nationalities (Croat, Czech, Hungarian) must be checked (no pun) for loyalty. On a roll lower than the loyalty rating, the nationality moves closer to revolt. When a nationality is in revolt, there is a negative DRM for specified fronts. If all three are in revolt at the same time…game over
I really like the addition of this aspect to the game. It’s historically relevant and creates more a lot more tension.
Again, a fun and challenging game. At some point I’ll link them up and try the campaign. Here’s another trailer (trash) photo of the map. This one is a bad defeat. I left too many Mackensen chits on the table, and those foreign defeats didn’t help either.


