Renaissance Skirmish – Moves 1-10

Finally started playing the game.

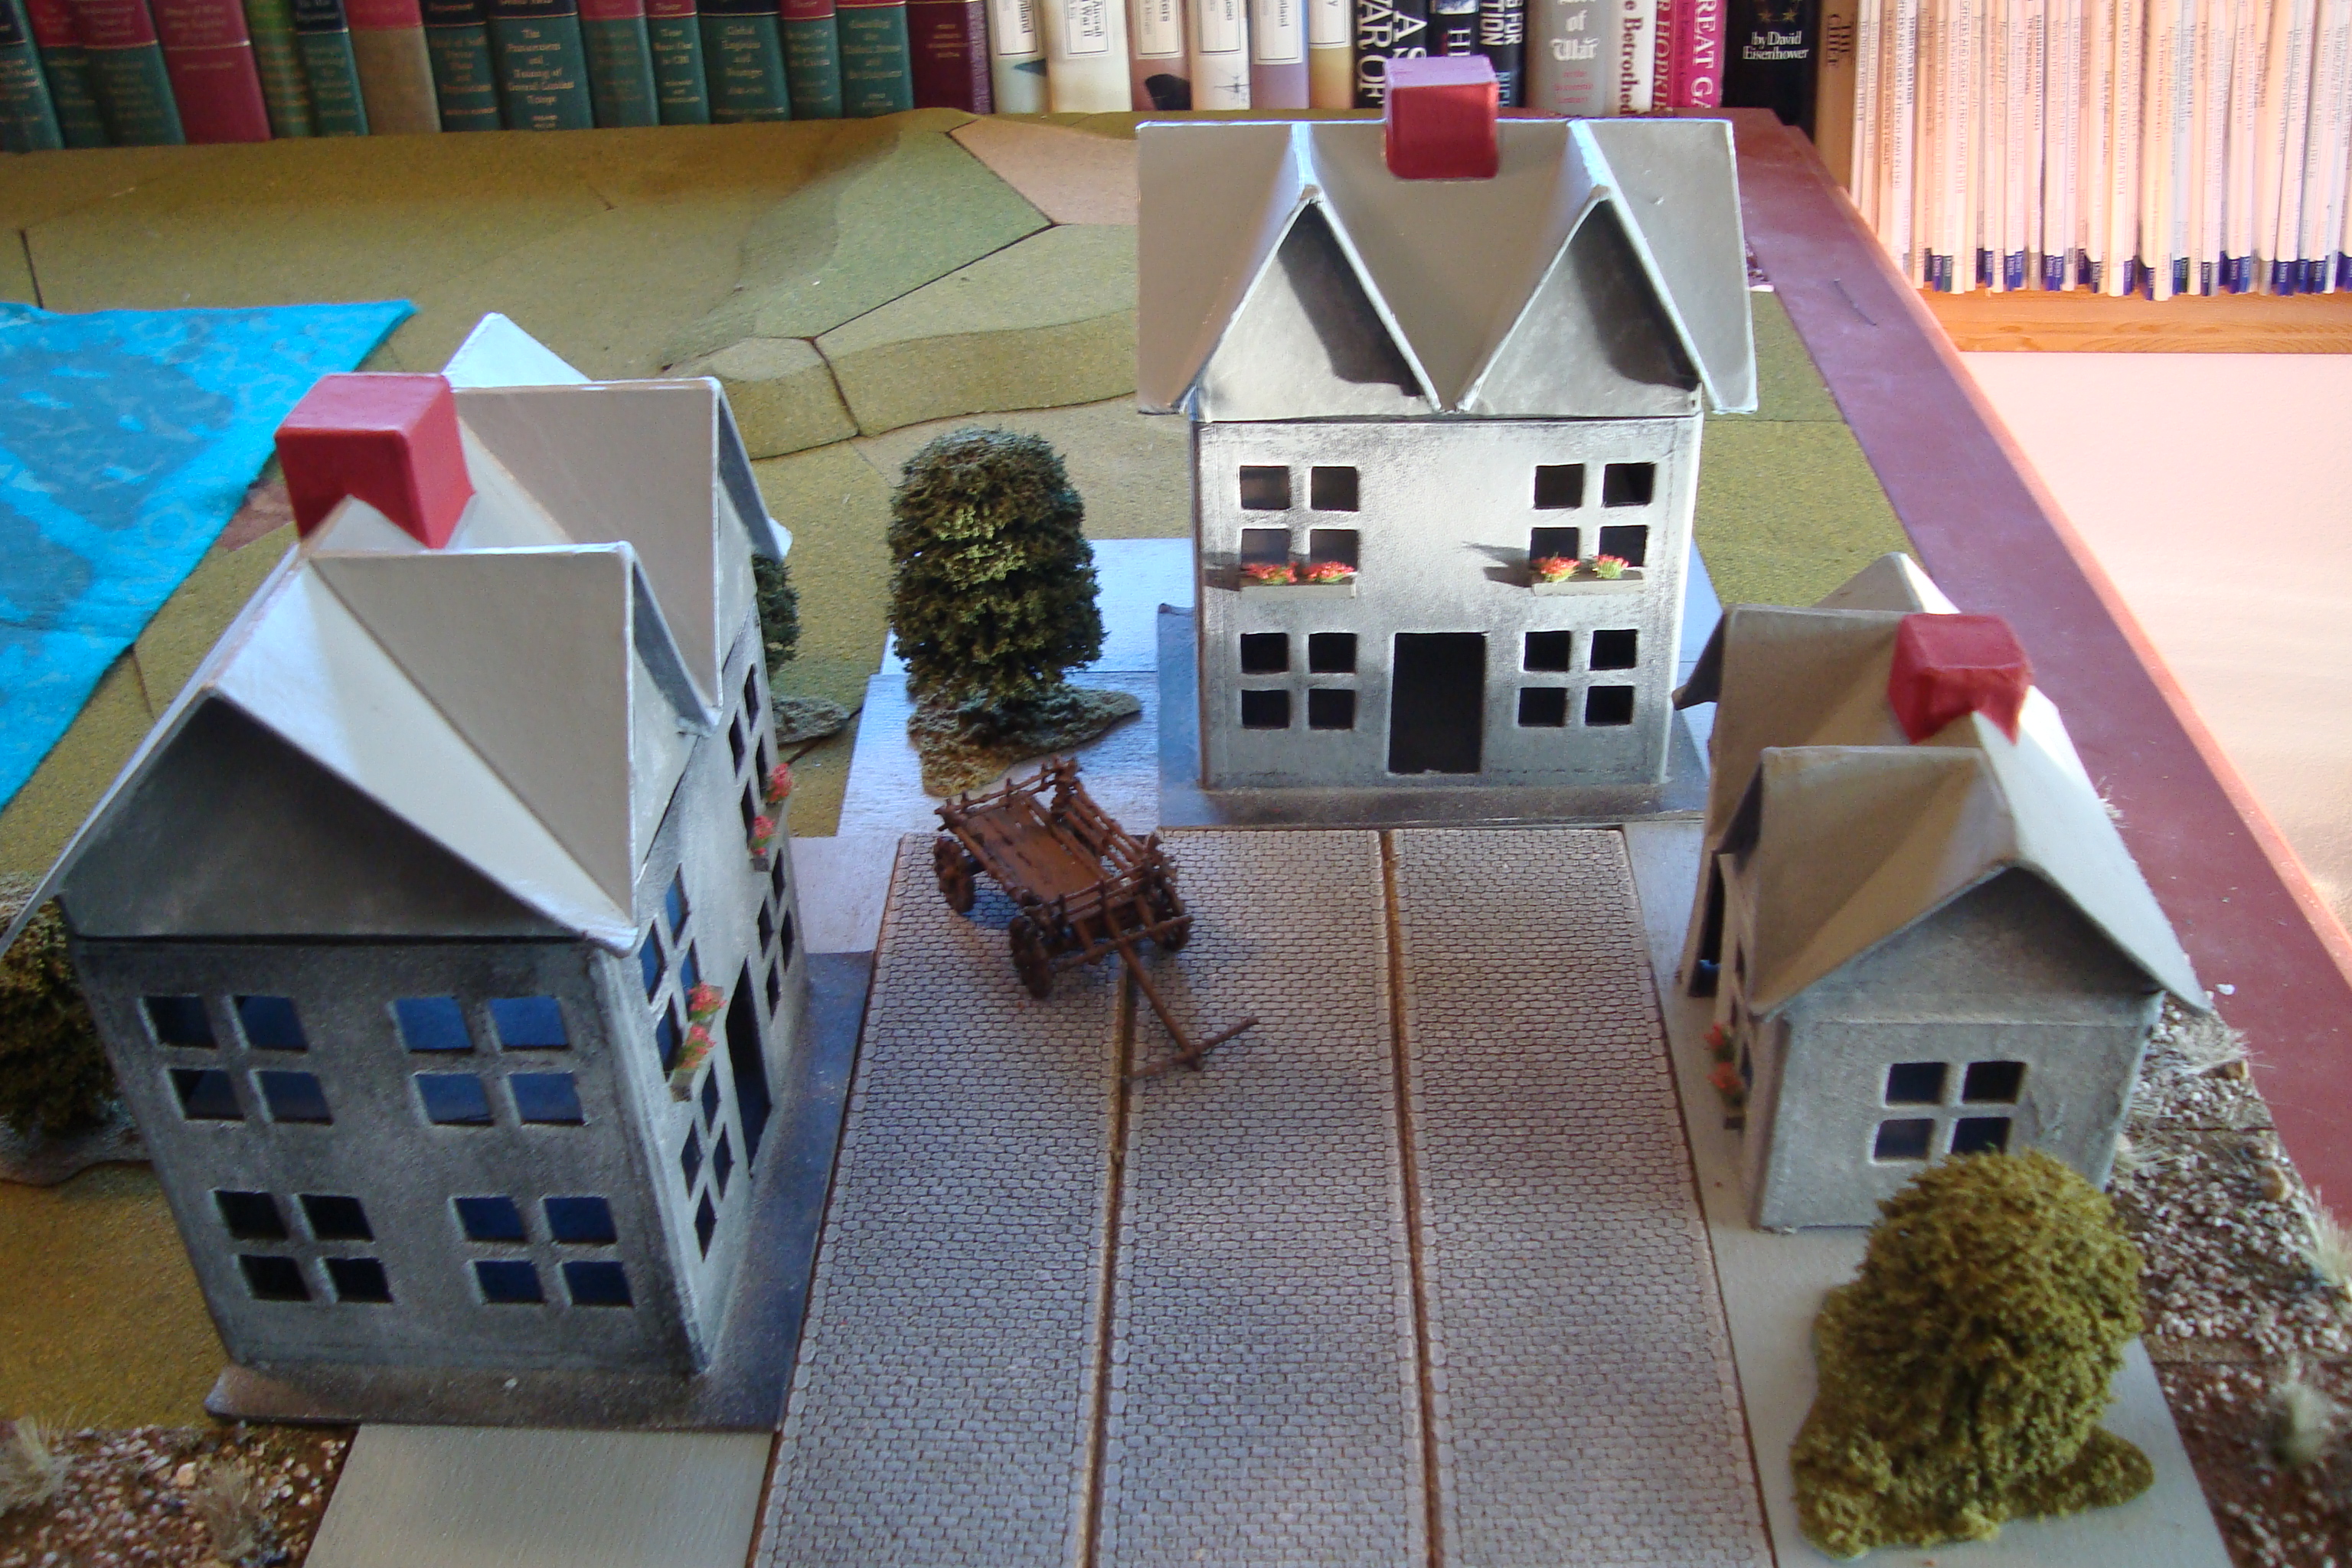
Scenario involved an attack on the village. Directional Die (DD) indicated the attack was to come from the Northeast, with the “Yes, No, Maybe” die (YNM) roll indicating the Defenders were not alert (If the result is a “Maybe”, I use two percentage dice, with result of 51% or more a “Yes”). This allowed the Attackers to move within 6 inches of the first building before another spotting attempt could be made.

Both sides had Greed and Fear ratings of 7, each. Rules As Written (RAW) state highest Greed has movement initiative, if tied roll for initiative.   I decided to let the Attackers have the initiative until the turn after they were spotted, then work with RAW.

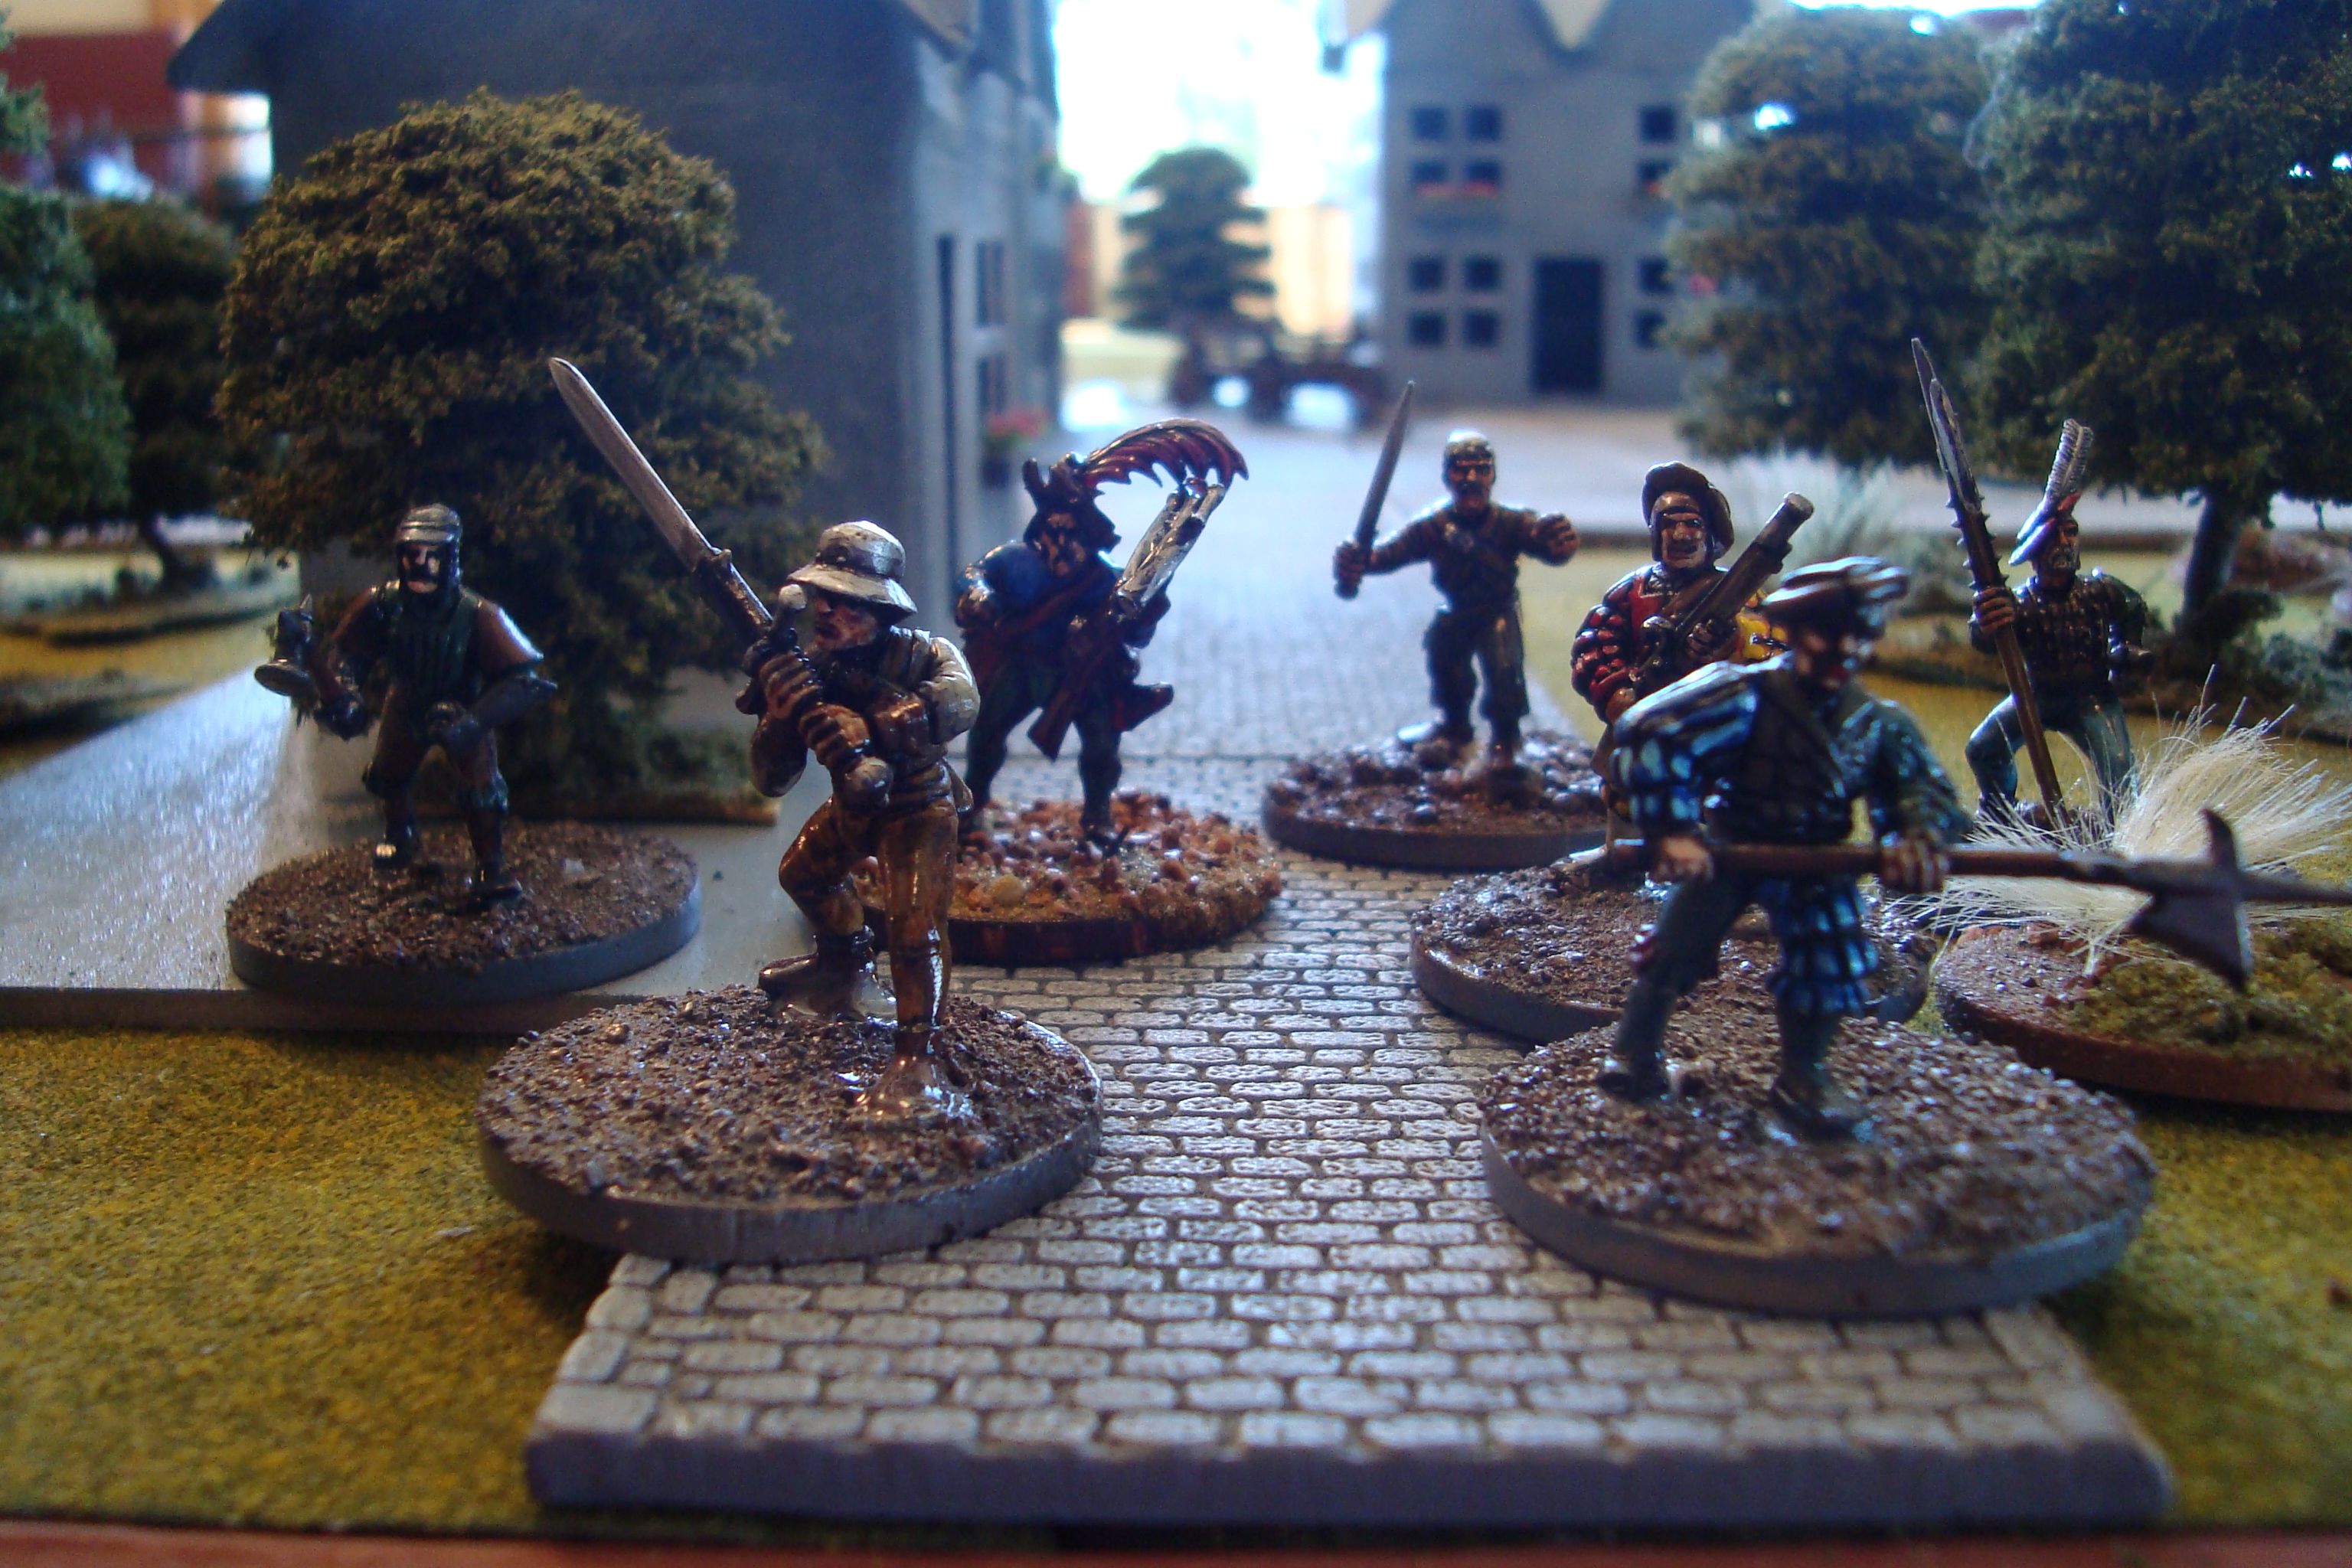
The Attackers included ten troops, three of which were armed with arquebuses. The Defenders totaled eight soldiers, three of which were armed with crossbows. Each soldier was assigned a number for identification and, in the case of the Defenders, which building they would occupy.

The game sequence is Spotting/Morale Check, Shooting, Movement, Melee.

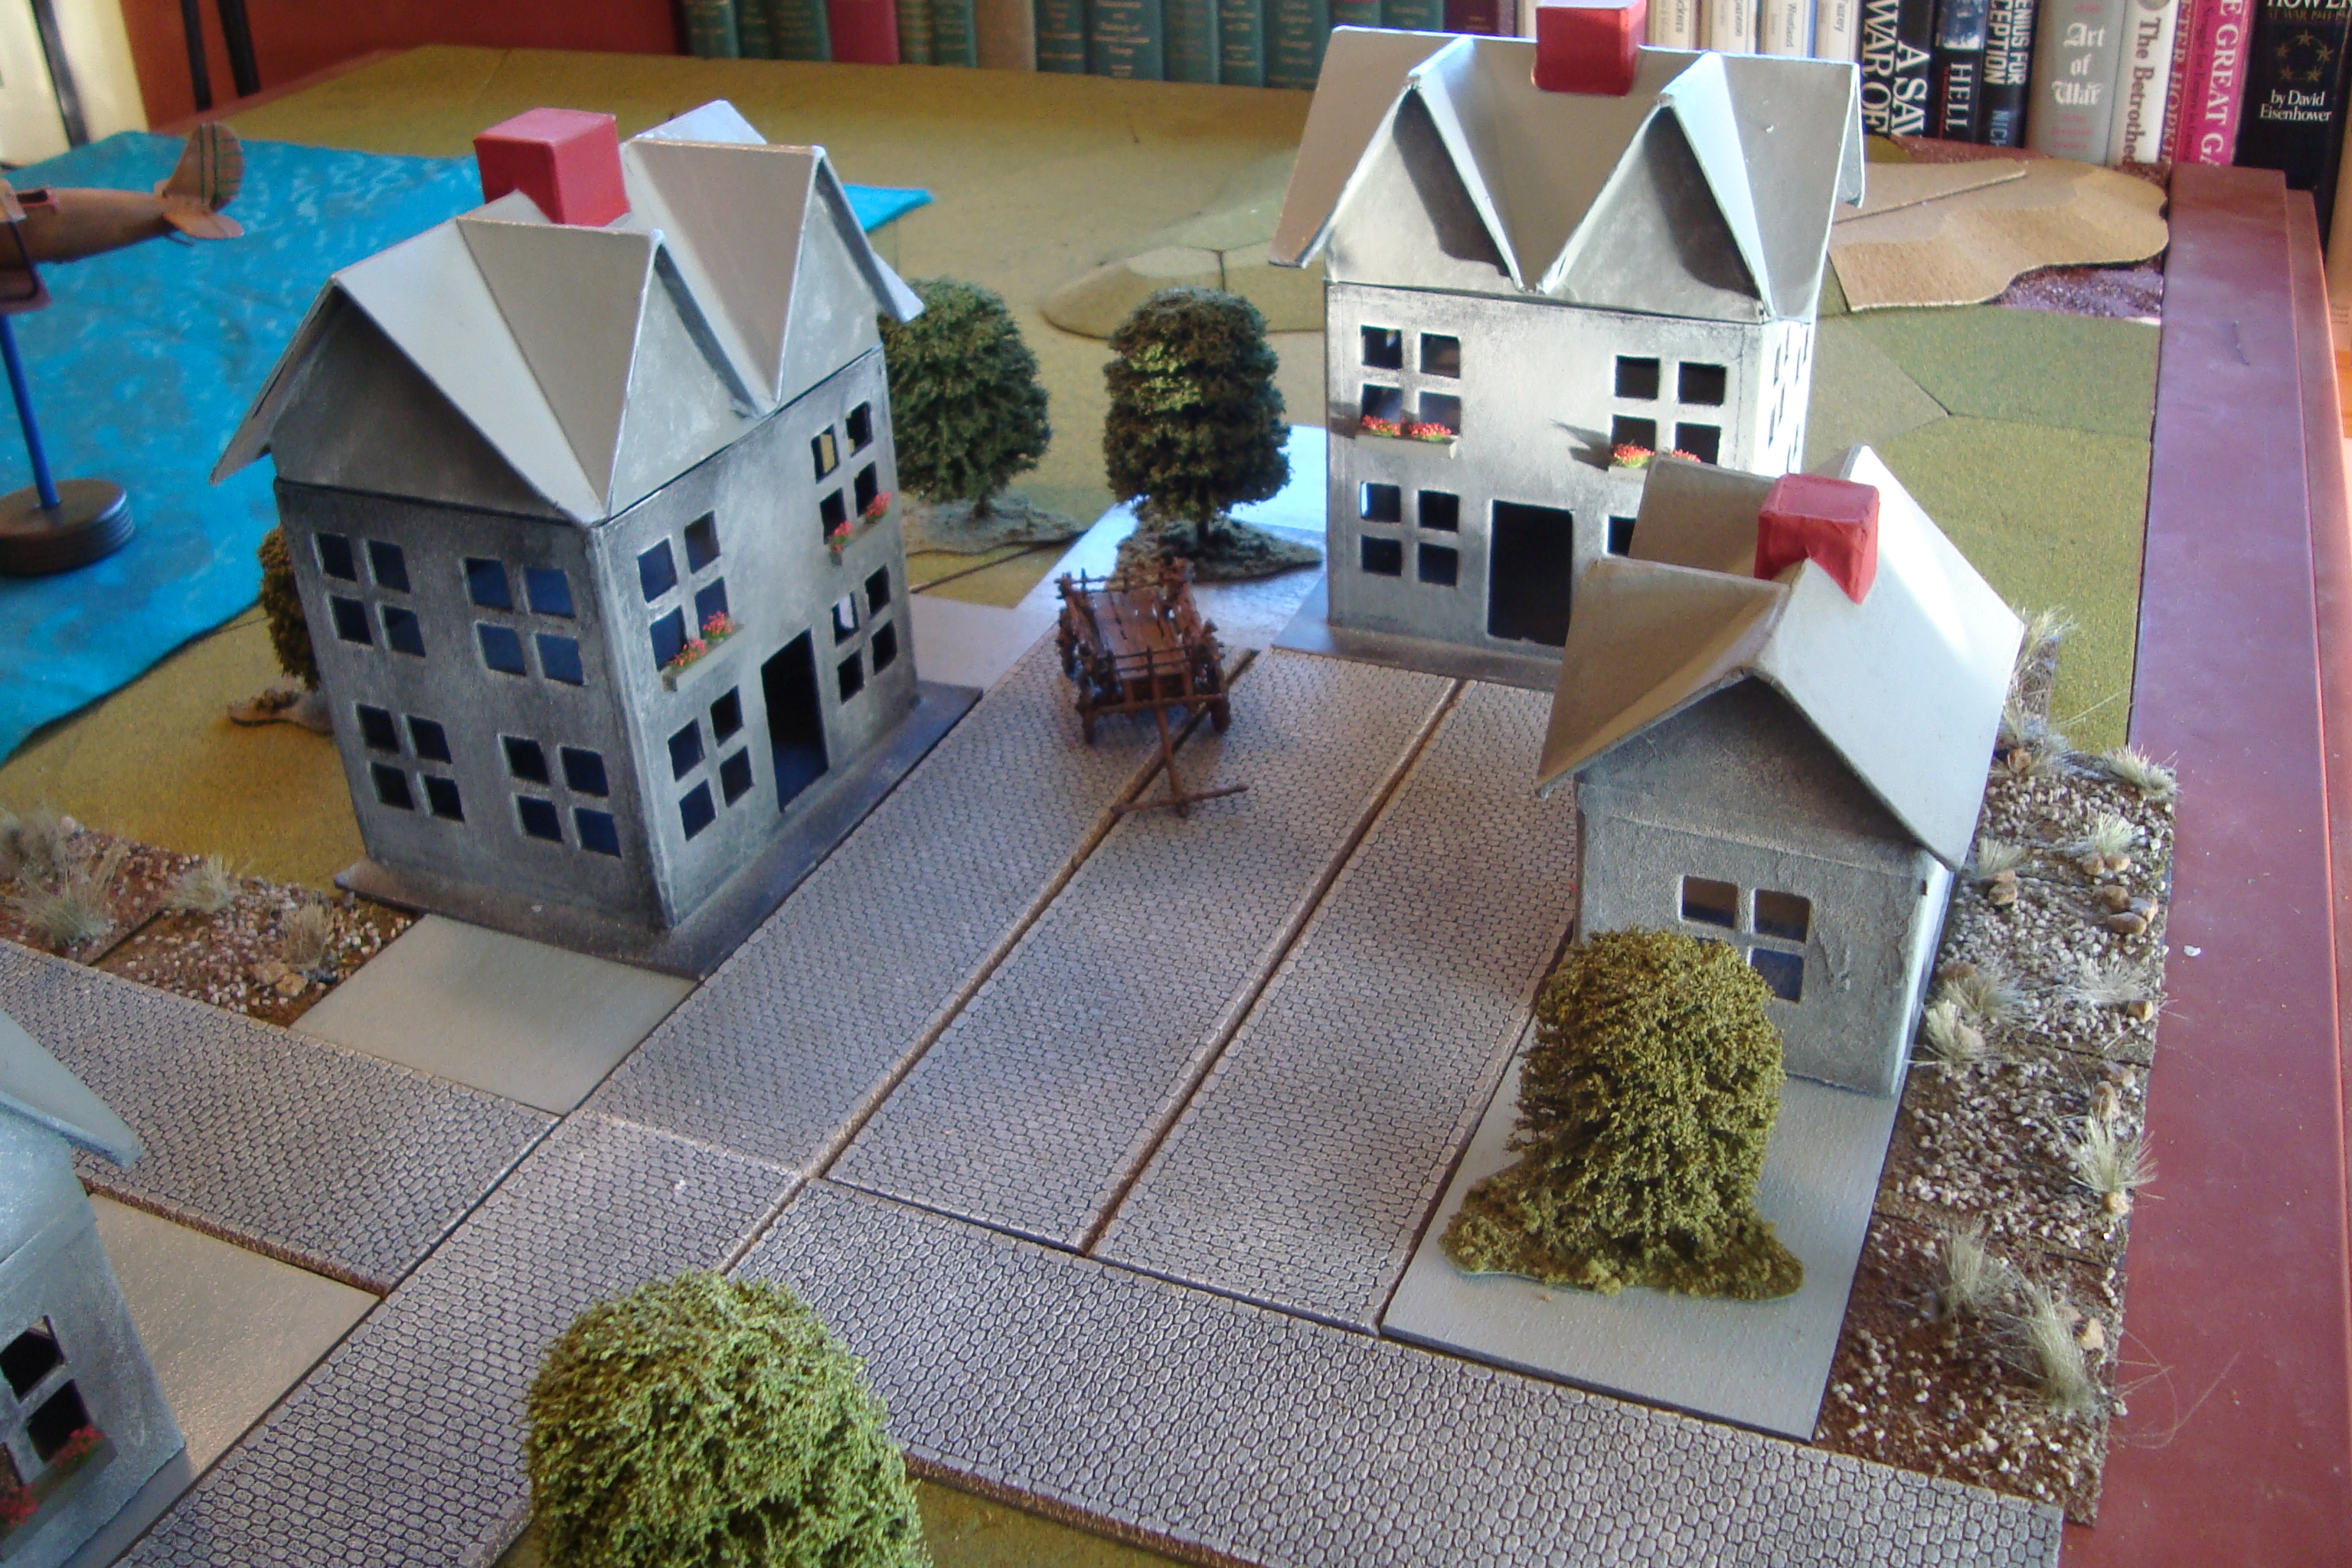
Turn 1: Three attacking scouts moved to within 6 inches of the northern two-story house. Not spotted.

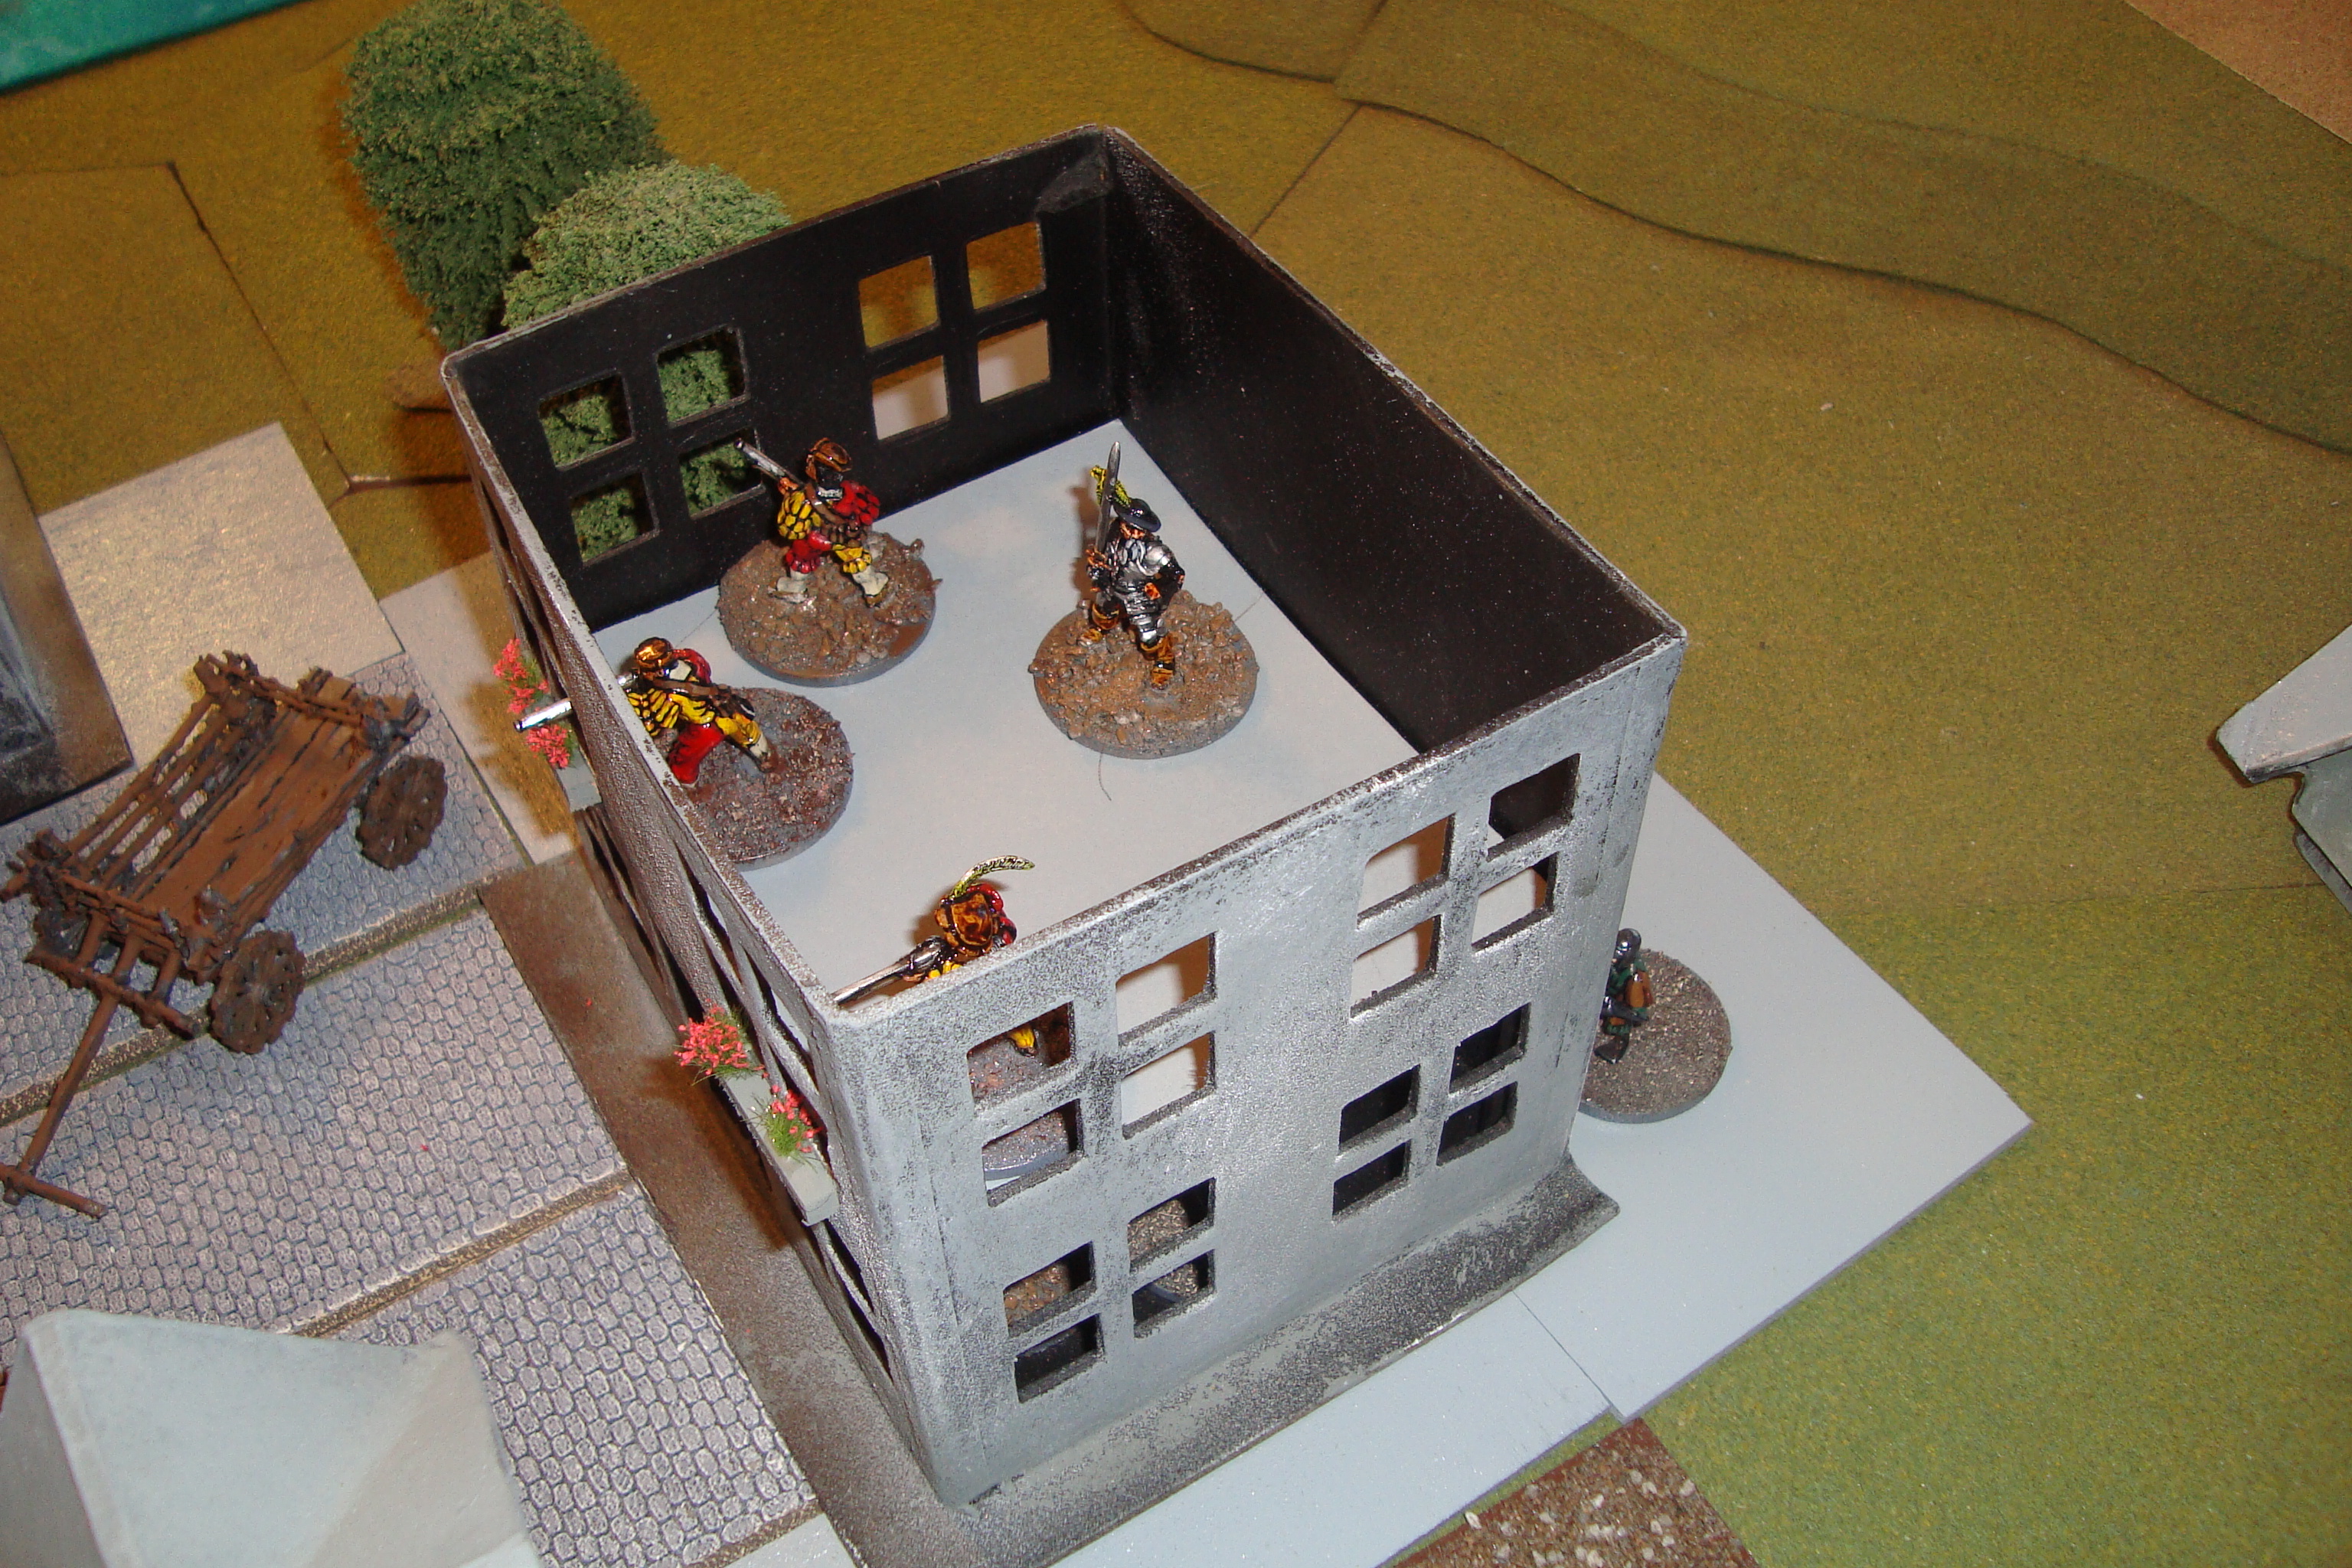
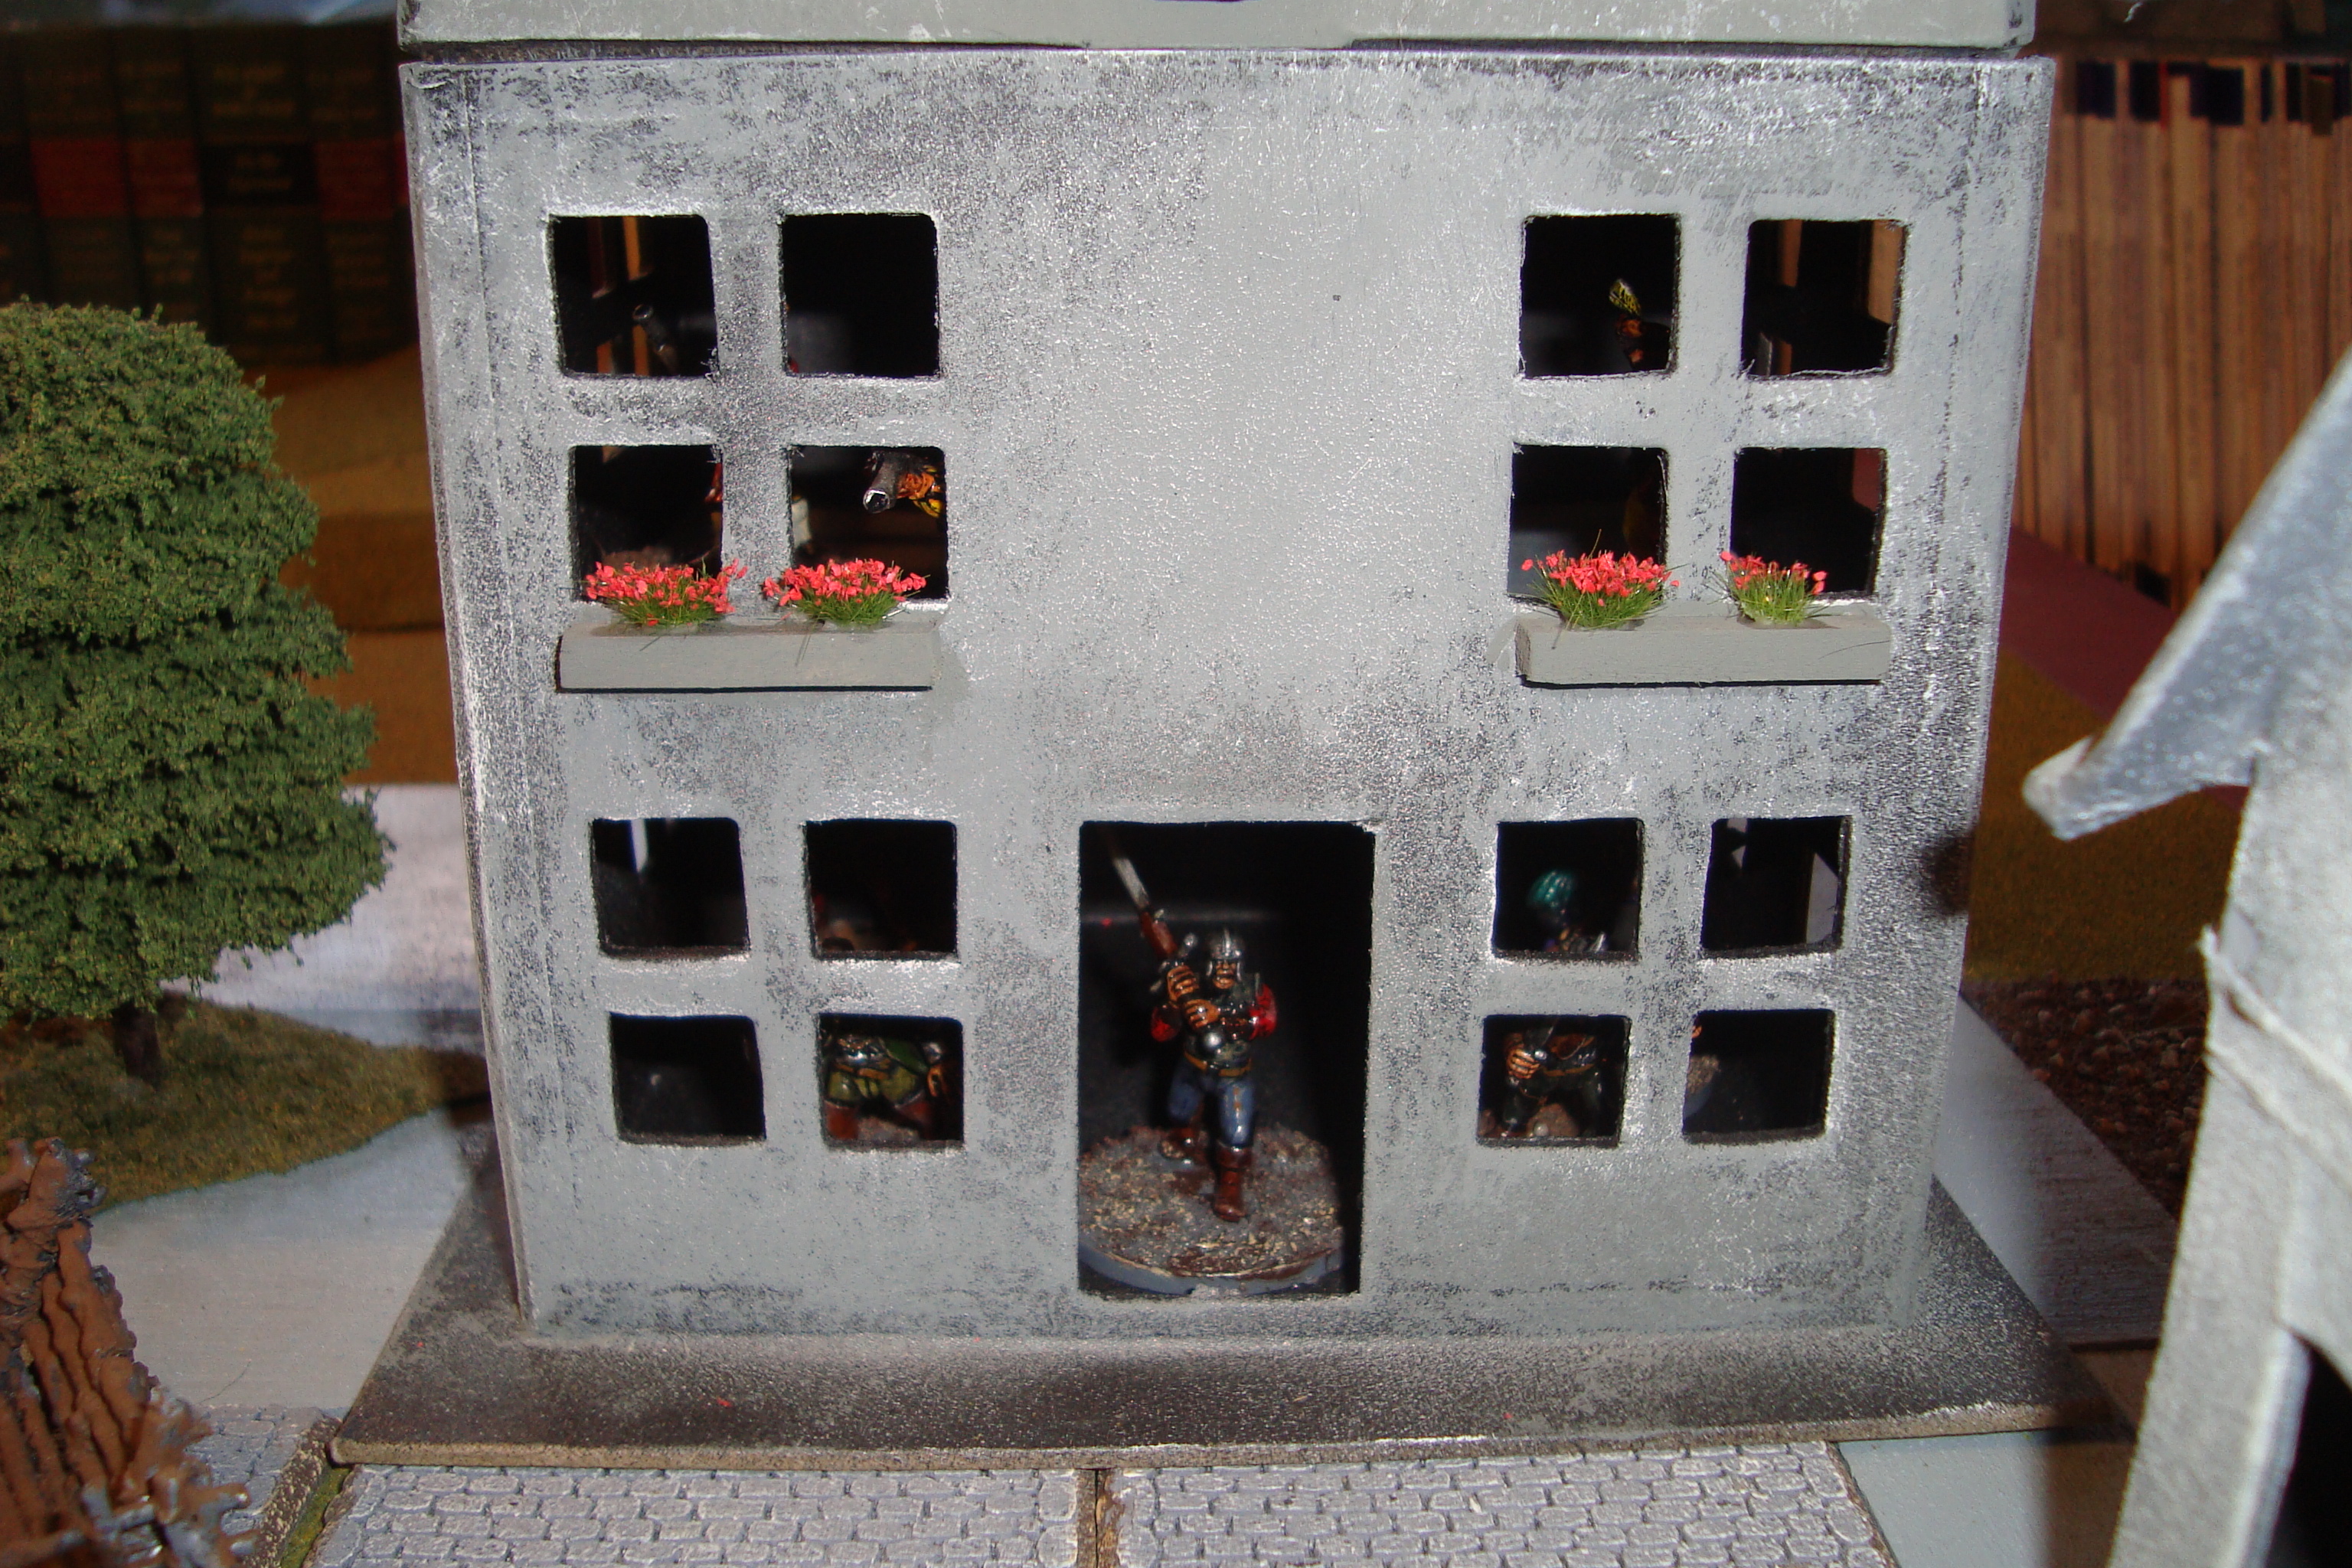
Turn 2: Scouts move to within 2 inches of the house. Spotted. Rolled 4-sided die to determine how many Defenders were in the house. Roll was for two defenders. Die roll indicated Defenders 1 and 3 (cutting weapons, one with pistol), and a YNM roll for each placed them both on the second floor.

Turn 3: Two Scouts enter house, Defender fires and misses with pistol.

Turn 4: One Scout moves upstairs, engages Defender. Draw.

Turn 5: Another Scout moves upstairs. Both Defenders engaged. One Attacker falls back, one Defender killed.

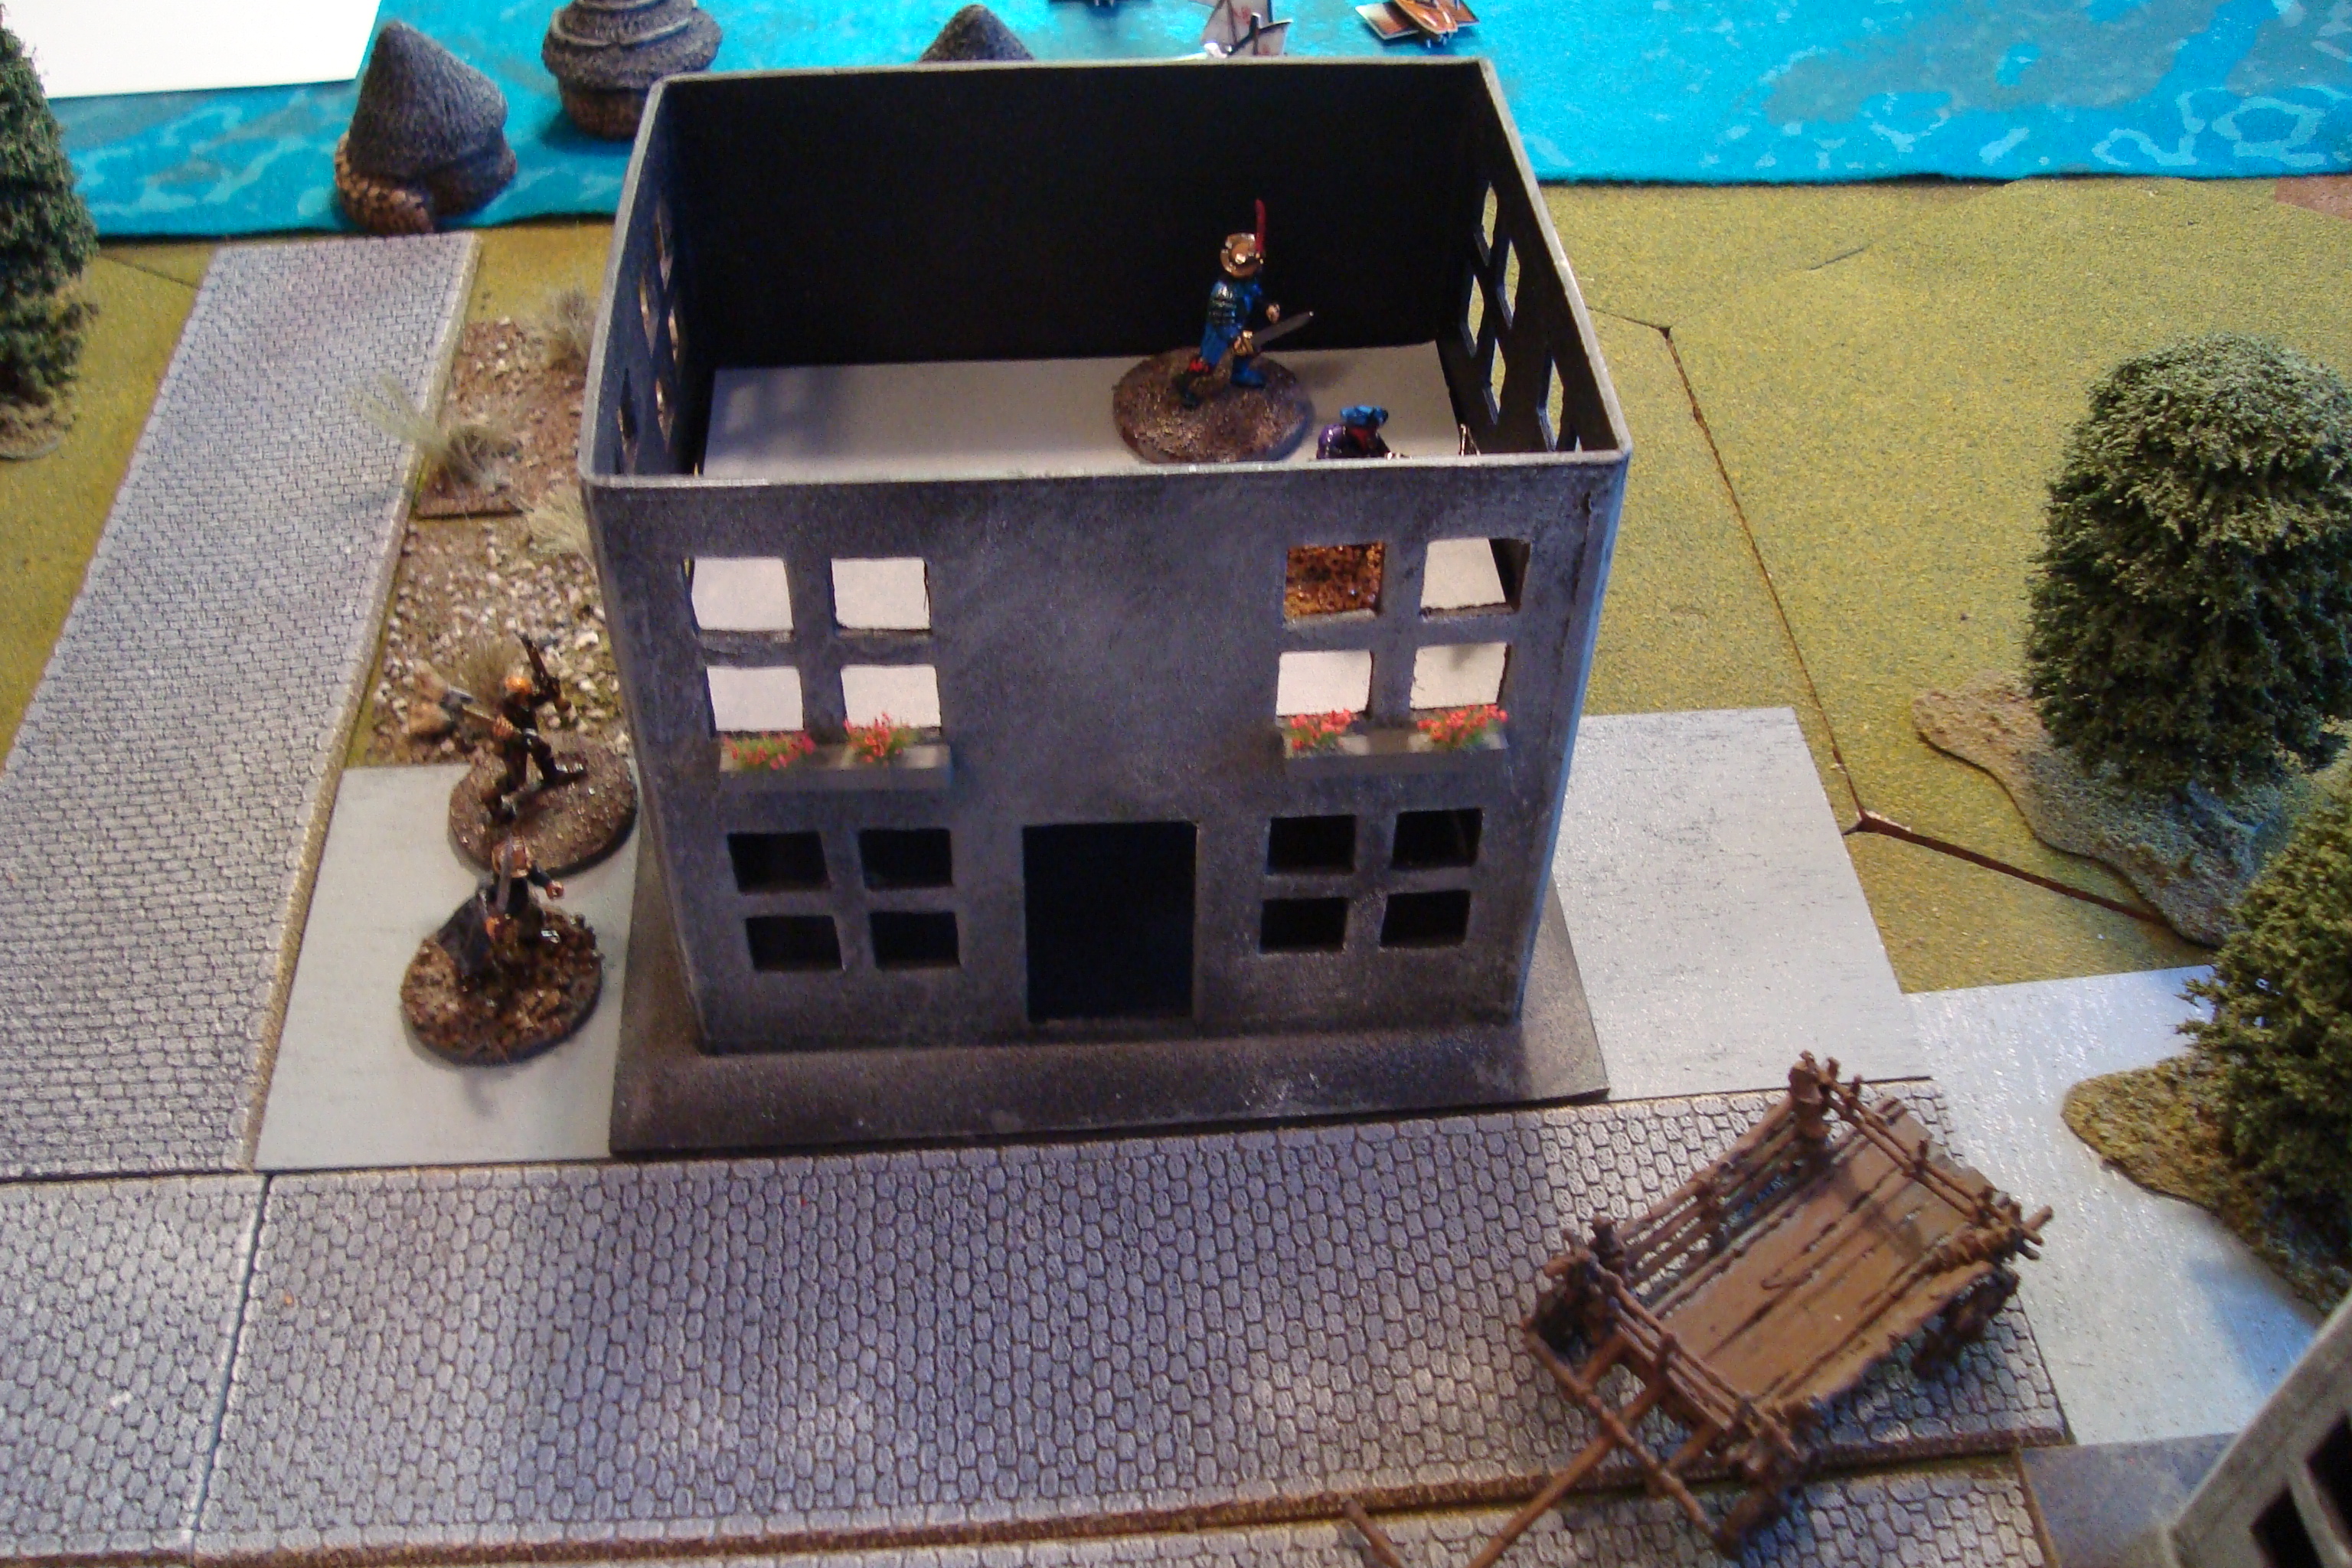
Turn 6: No change in Fear Level due to death of Defender. Main Body of attackers spotted by occupants of North single story building. Die roll results in it being defended by two Crossbowmen. Main Body advances after being signaled by Scout outside of two-story building. Melee continues in two-story house with both Attackers ganging up on the remaining swordsman. Defender is killed.

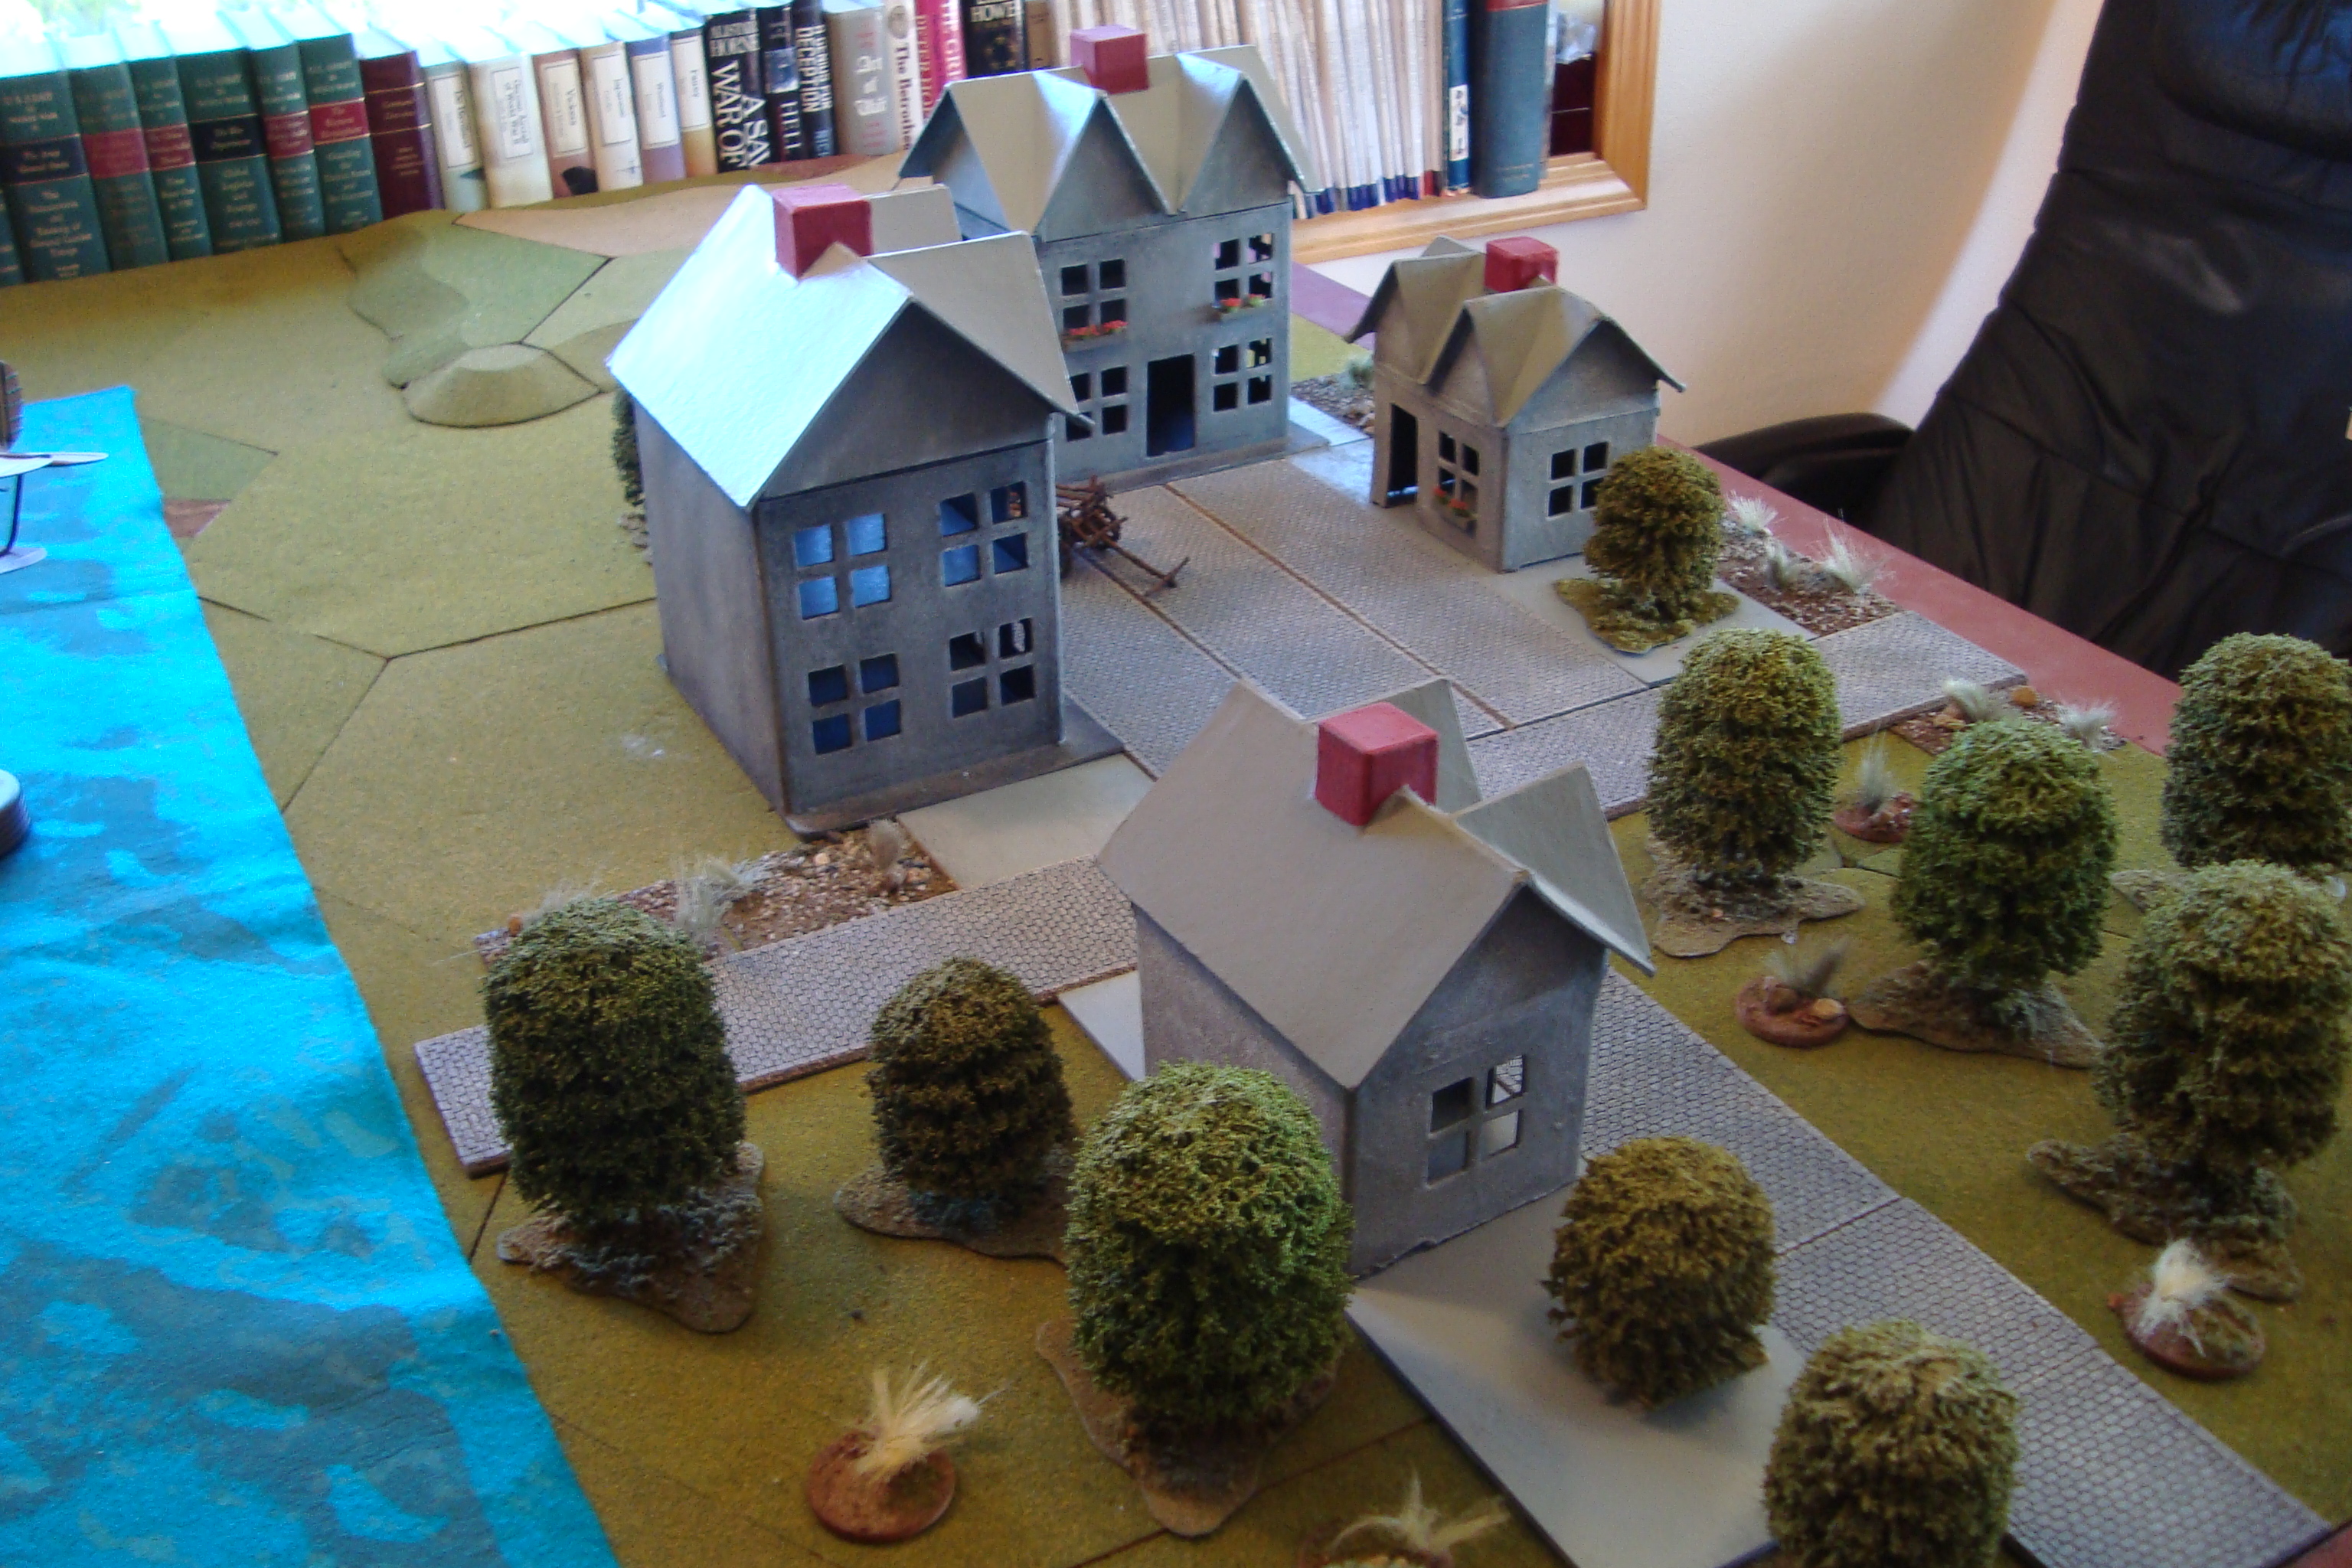
Turn 7-10: Defenders Fear Level increases by one due to death. Main Body continues to advance into the two-story house , with crossbowmen denied opportunity to shoot due to blocked line of site. Attacking arquebusiers occupy second floor.

Turn 11: Firefight between Arquebusiers and Crossbowmen. Realize nobody can make a hit because a D10 result of 10 is needed, and the houses have a minus modifier of two due to cover. Four Attackers move into single-story house. Engage defenders in melee. One Defender killed.

Turn 12: No change in Fear Level. Remaining four Defenders occupy West Two-Story House, with two in upper floor.  Melee in single-story house continues. One Defender killed.

I stopped at this point and pondered the ineffectiveness of shooting. The quick fix is to make a D10 roll of 10 an automatic kill (no saving throws as per RAW). A D10 roll of 9 is a hit, with saving throw as per RAW (cover or armor). Shooter receives a +2 D10 mod if target is stationary. Will see how this works.


With North Two-Story Building Reported Secure, Attacker Main Body Advances.


Attackers Occupy Second Floor of North Two-Story Building


Attackers Ready To Assault One-Story House (on right)
Attackers Ready To Assault Single-Story House (on right)


With Two Buildings Captured, Defenders In East Two-Story Building Await the Onslaught.
With Two Buildings Captured, Defenders In West Two-Story Building Await the Onslaught.

More Progress

OK, now fishing is in the way of the Renaissance Skirmish, but I did finish up my Ford Flivver.  Check out the photo of how small it is.  Here’s the story on it.

220px-Ford_Flivver_in_air

Saw it when scanning through E-Bay for planes.  So adorable I had to take it home.  Figure it will make a great personal aircraft for the Mercenary Commander.  Maybe use it to scare the locals, buzzing them and throwing hand grenades.  Again, hopefully adding some pulp elements to the Back of Beyond campaign (whenever that starts??!?).

DSC01519DSC01520

Renaissance Skirmish – Initial Concepts

Ran through the rules last night using a few figures.  Play is quick and straightforward.

Planning to use my random dice to generate the tactical situation for the scenario.  The scenario parameters will include defender alertness, number of defenders outside of buildings etc. (whatever the etc is).

Will use directional dice to dictate where the attackers come from.

Next step is to determine the plan of attack.

When attackers within 8 inches (two moves) Yes/No/Maybe dice will determine if a building is occupied by defenders.  A “Maybe” result will require another role with the building occupied if second roll is a Yes or Maybe.

A four-sided die will be used to determine how many defenders in a building.  Once all defenders have been placed, any remaining buildings cannot be occupied except by defender movement during the scenario.

Should work for starters.  Will give it a go over the weekend.

Renaissance Skirmish – The Players

Here’s a quick shot of a few of the figures.  These are all Warhammer Empire figures purchased on E-Bay either painted or unpainted.

Original thought was to augment my Renaissance armies, but they were just too large, especially compared to the smaller 25mm Hinchliffes which make up the bulk of those forces.  Scale for these figures is roughly 30-32mm.

Great looking, which would make sense since they were sculpted by The Perrys, and they paint up well.

DSC01499


Renaissance Skirmish – Basics

Set up the table for a skirmish game using the “On The Seven Seas” rules by Osprey.  Yes, I know, these are pirate rules.  But, when I purchased these rules, Osprey’s latest and period applicable offering “En Garde,” was not available.  While the reception for “Seven Seas” has been mixed, I do like the faction/greed/fear mechanics, and the simplicity.  We’ll see how they work on the table.

The game will be a village fight between two factions.  One will hold the village, the other intending to loot and plunder.

I’m using houses from Hobby Lobby.  These are cardboard and very close to scale for my larger Warhammer Empire figures.  More on them in a followup post.  I kept the four houses a neutral gray, with only red chimneys and add-on flower basins for color.

I’ll use a few figures and push through a quick couple of turns this PM.

DSC01497DSC01498DSC01490

Battle Over Britain – Iraq 1941 Campaign


Too much time on my hands, so I started working on some variant rules for a Habbinaya campaign. Here’s a general outline. Overarching idea is to add a bombing option without layering on too many additional rules, chrome, or charts.

Aircraft Pool – Similar to BoB. Iraq pool includes German/Italian after “x” number of rounds (role for intervention each “turn”?).

Morale Points – Each side receives points which are reduced by successful bombing attacks. British morale roughly 2 times that of Iraq.

Bombing – Targets are either Iraq ground units, Habbinaya, or either side’s aircraft. Bombing resolved on fire combat table’s one resolution line using six-sided die. For aircraft hit role die for type destroyed. Ground unit/installation hit, reduce morale by “x” point(s). If bombing at Diamond altitude, get +1 on die roll.

Flak – Role six sided die on fire combat table’s one resolution line. If target at Diamond altitude get +1 on die roll. If hit, role on fire combat table’s eight resolution line.

Air Combat Rounds – This is where it gets real sketchy….critical to keep track of ammo use/short burst optional rule.,

Mission lasts “x” card plays.
Determine if mission is escorted or not escorted.
Determine if mission is intercepted or not intercepted.
Defender must disengage from escort in order to attack bomber.
Bomber must survive “y” of “x” mission card plays in order to bomb.

I’ll keep fooling around with this until I return home and can do some research on OB.

Battle Over Britain – Iraq 1941

Still playing Minden Games’ Battle Over Britain. After several solo plays, decided that a campaign is the best way to enjoy the game. Similar to B-17, where the “one-of” games are fun, but a couple in a row get boring.

Along those lines, I put together aircraft ratings for the 1941 air campaign over Habbinaya, Iraq for those aircraft not available in the Battle Over Britain series. I’ve always been fascinated by that campaign and the use of antiquated aircraft to defend the RAF base.

I don’t have access to a word processing program that constructs a grid, so the ratings will be linear in the following sequence. Speed, Agility, Fire/Fire Rear, Performance and Damage.

These ratings are based on aircraft data from various sources, and comparisons of ratings in both the Minden game and Perry Moore’s Sonderkommando, an interesting simulation of the campaign.

Northrup A-17 1,1,-1/-2,1,10
Hart/Audax 2,2,-2/-2,2,8
Oxford 2,1,-2/-2,2,11
Vincent 1,1,-2/-2,1,8
Breda 65 2,1,-1/-2,1,10
DH 84 2,1,-1/-2/2/10

The next step will be to come up with the campaign parameters.