Finally set up my Kriegsspiel maps and blocks. Long story.
Components were purchased as a Xmas gift for me from Command Post Games, Photo Cutters Studio, and Two Fat Lardies. Shipments went astray, problems happened. The first two providers were fantastic, while the latter provider’s reaction to a lost shipment was (and I’ll use British understatement) less than cooperative and gave me deeper understanding into Vinegar Joe’s phobias.
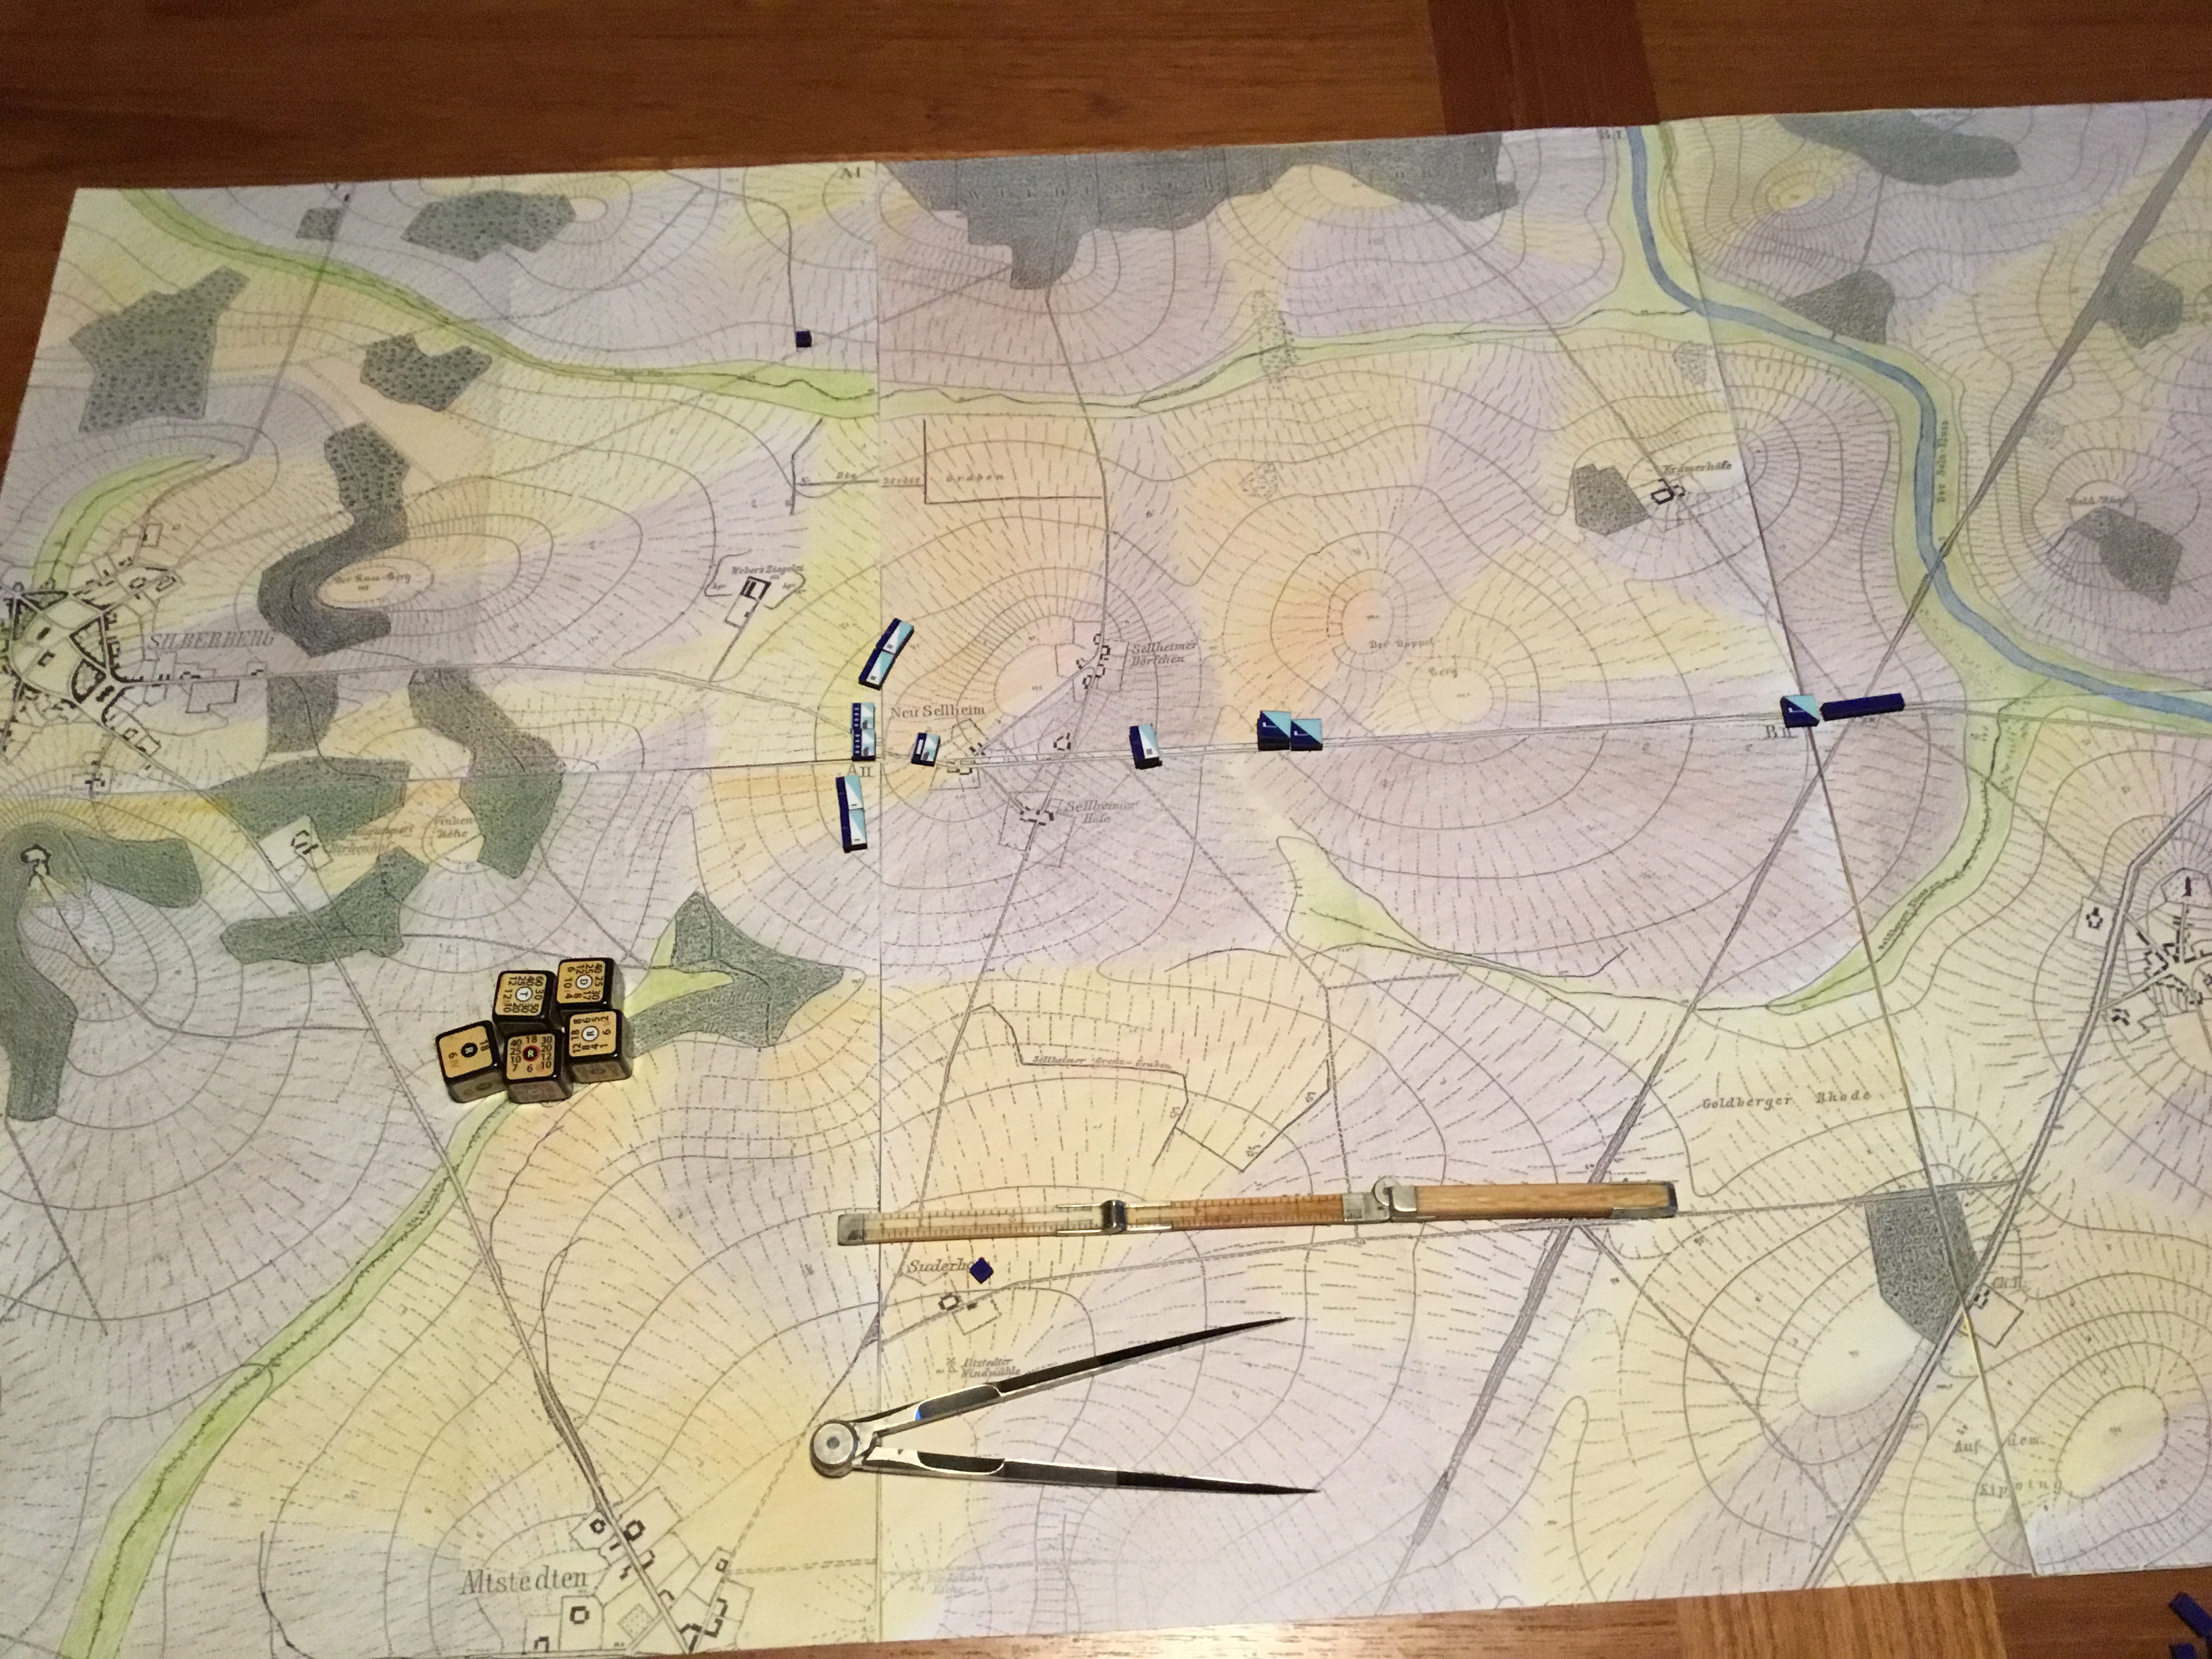
Anyway, had the maps printed out and used spray adhesive to affix to large card. Bought a unfinished box, stained it, and added a couple of dividers for a storage space. The final touch was adding my Grandfather’s civil engineering drafting instruments to help with measurements.
Aesthetically very pleasing.
The rules are fun. I purchased the 1860’s version, rather than the 1820’s Napoleonic rules. Very common sense, and the Kriegsspiel dice eliminate a great deal of chart reading.
Command Post has expanded their Kriegsspiel product line to include blocks and maps, building on their fun Pub Battles Series.
With this system, the player is free to set up scenarios and explore them to his liking. It’s all about command problems, without any need for an umpire. After so many years of gaming, and military experience, it’s fun to just mess around with an open system.
Here’s a quick shot of the maps, with a regimental defense, supported by 6lb artillery and cavalry set in. The bone folding ruler’s been in the family for who knows how long.
