Category Archives: Sessions

Clear The Woods – Pt 2

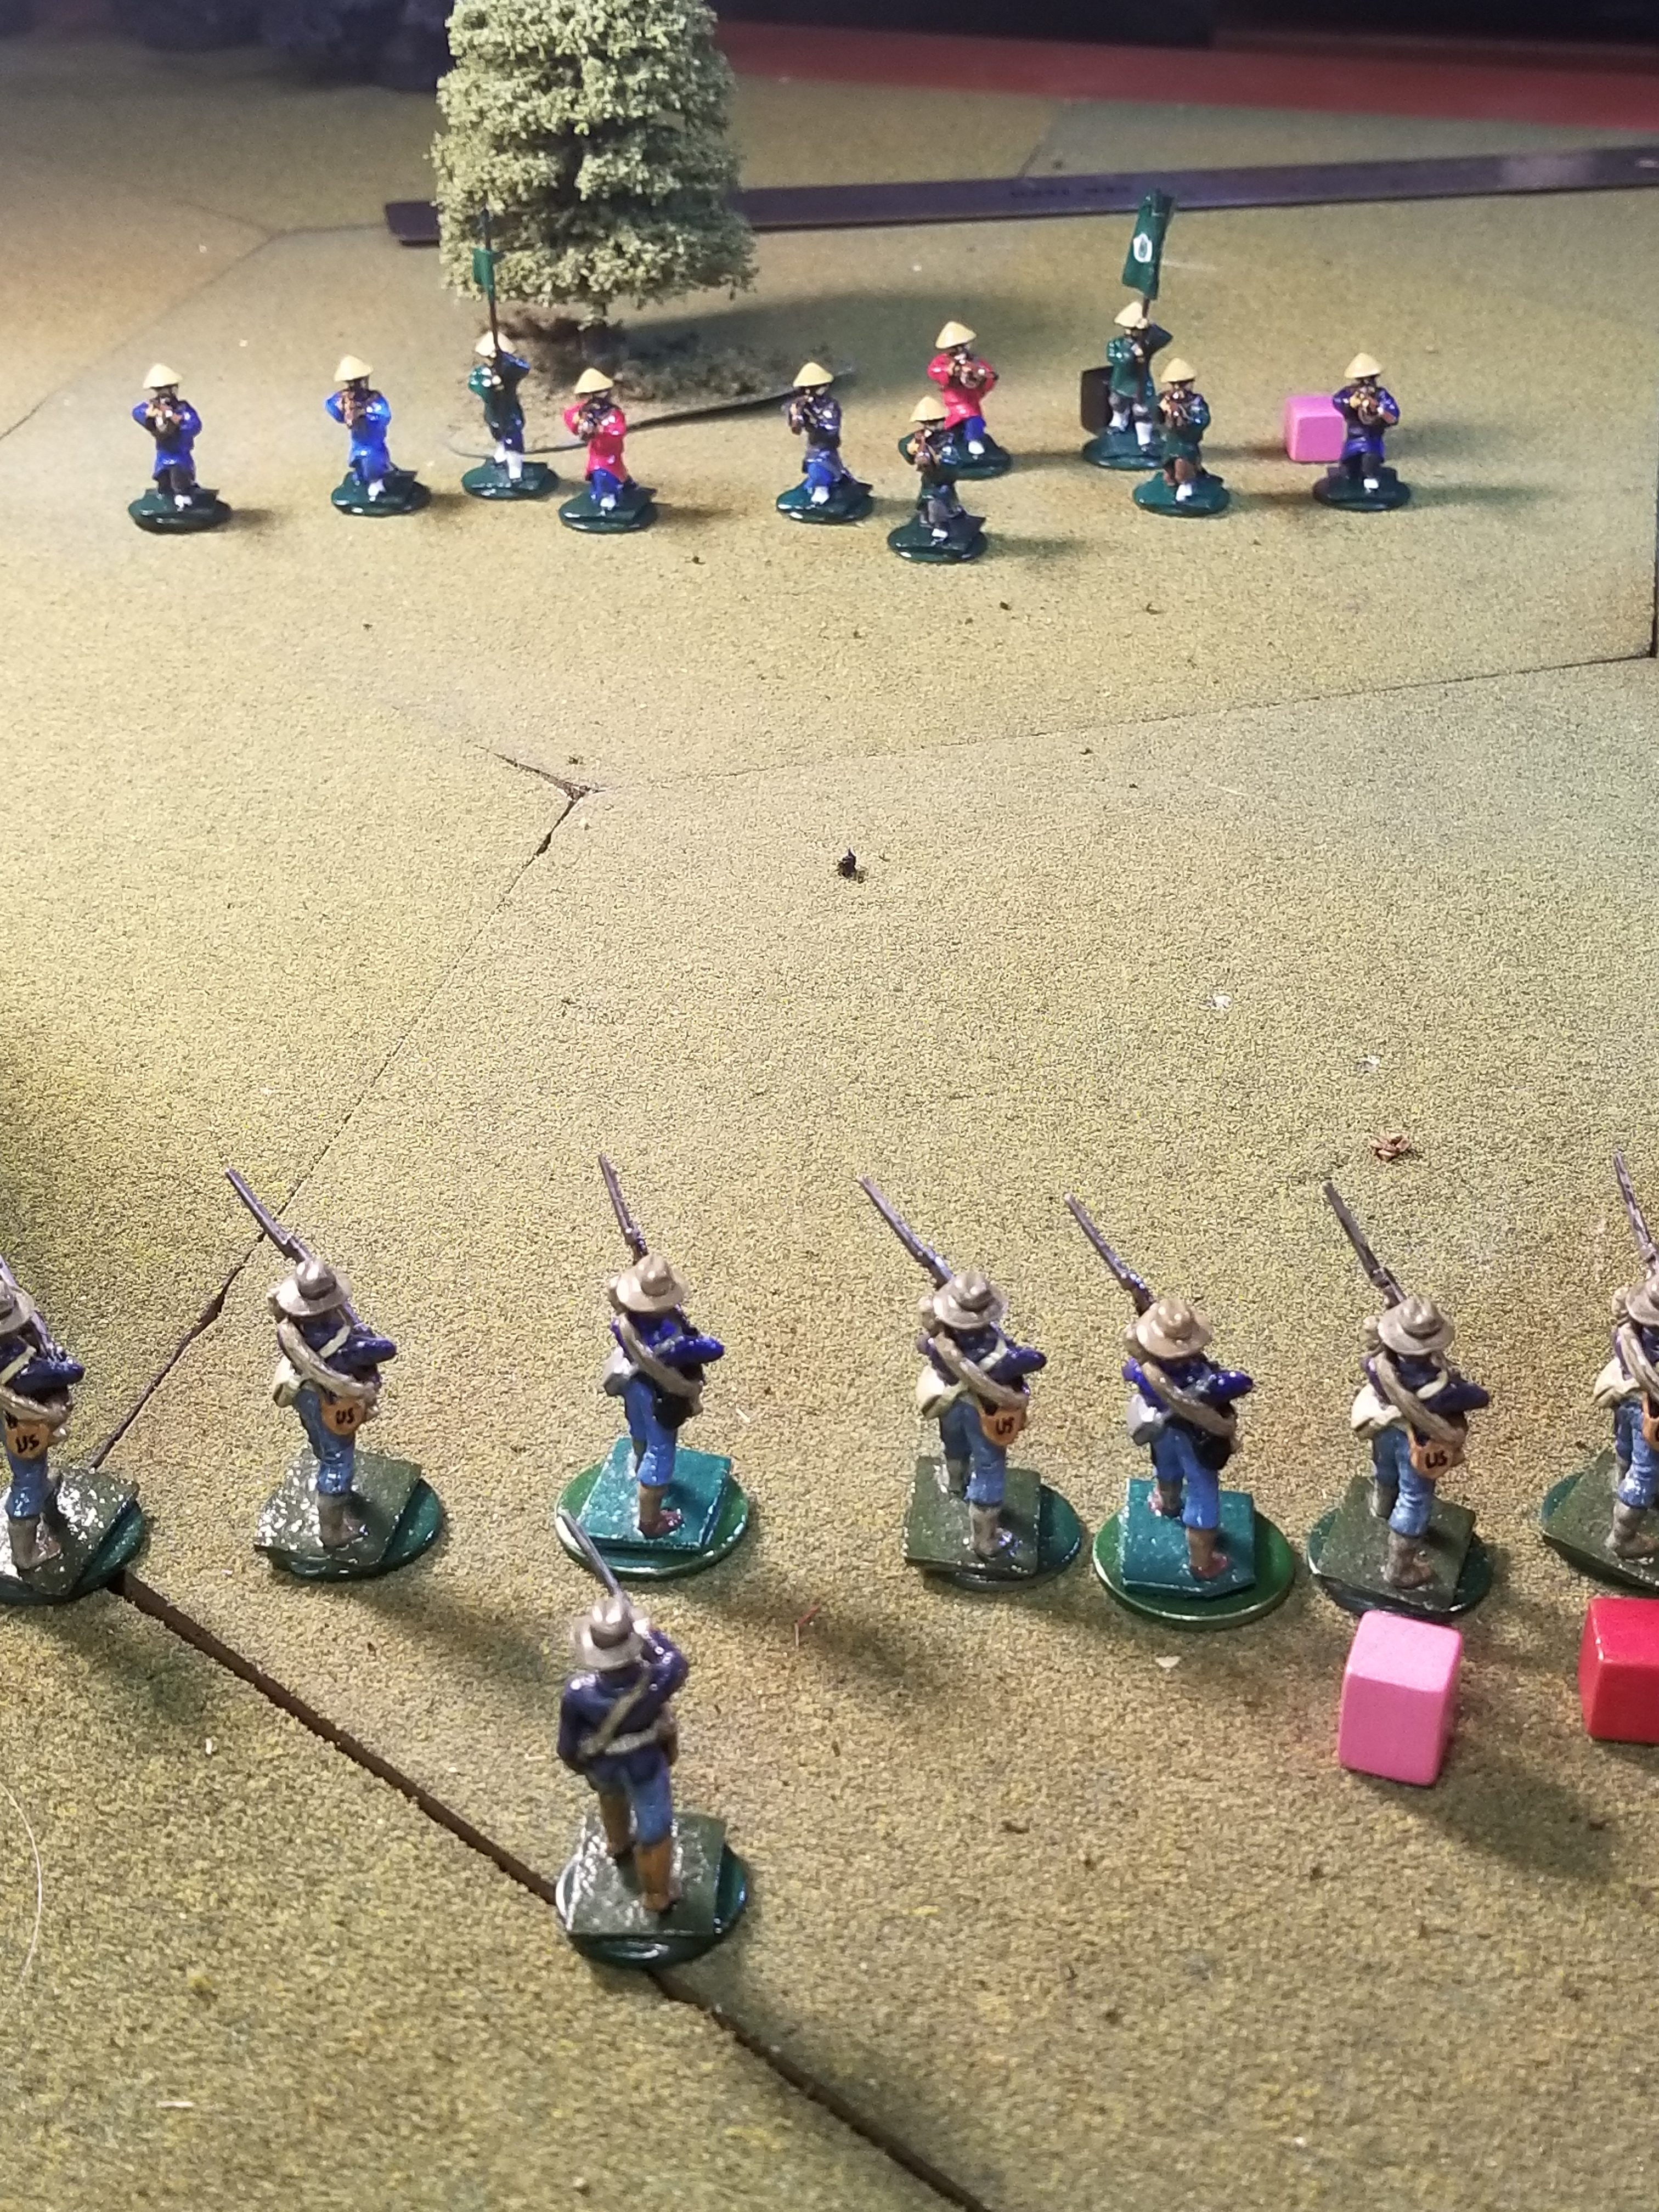
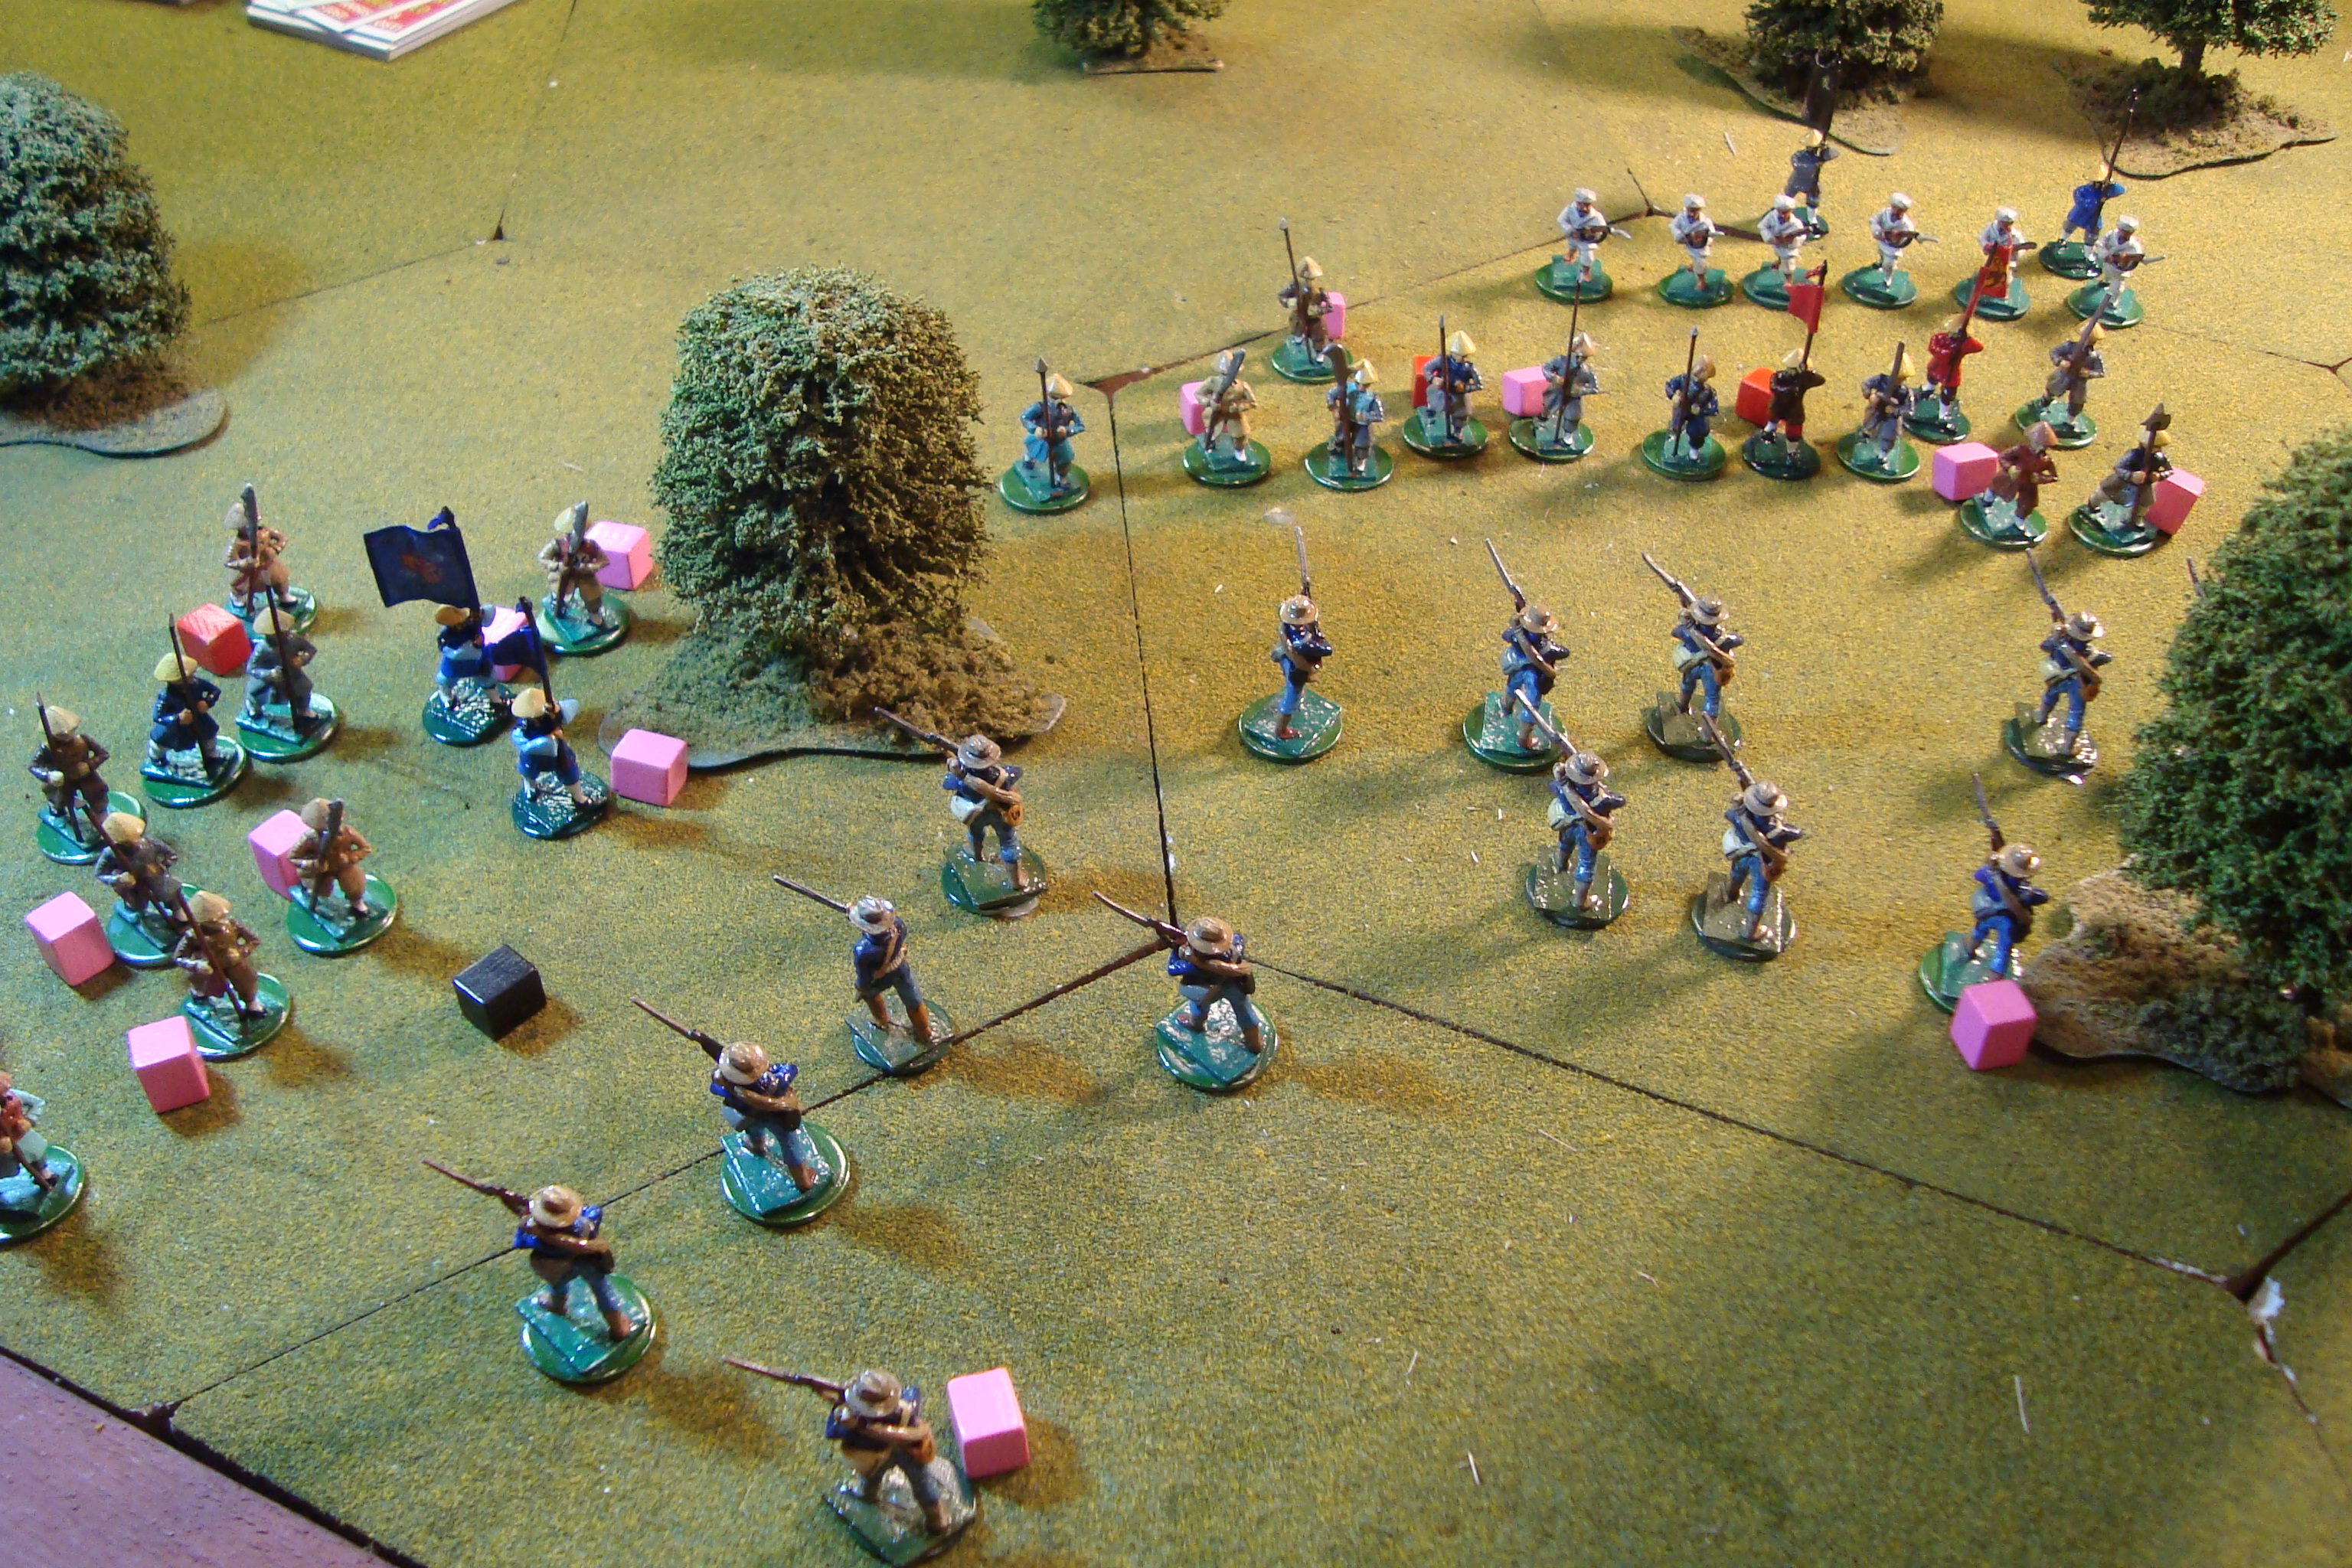
The Boxers took 80% casualties, most of them lightly wounded, during the melees.  Both Boxer groups and the fanatic riflemen fell back into the woods.

The Marines suffered two dead and three lightly wounded.  Treating the wounded and burying the dead, they pushed on.

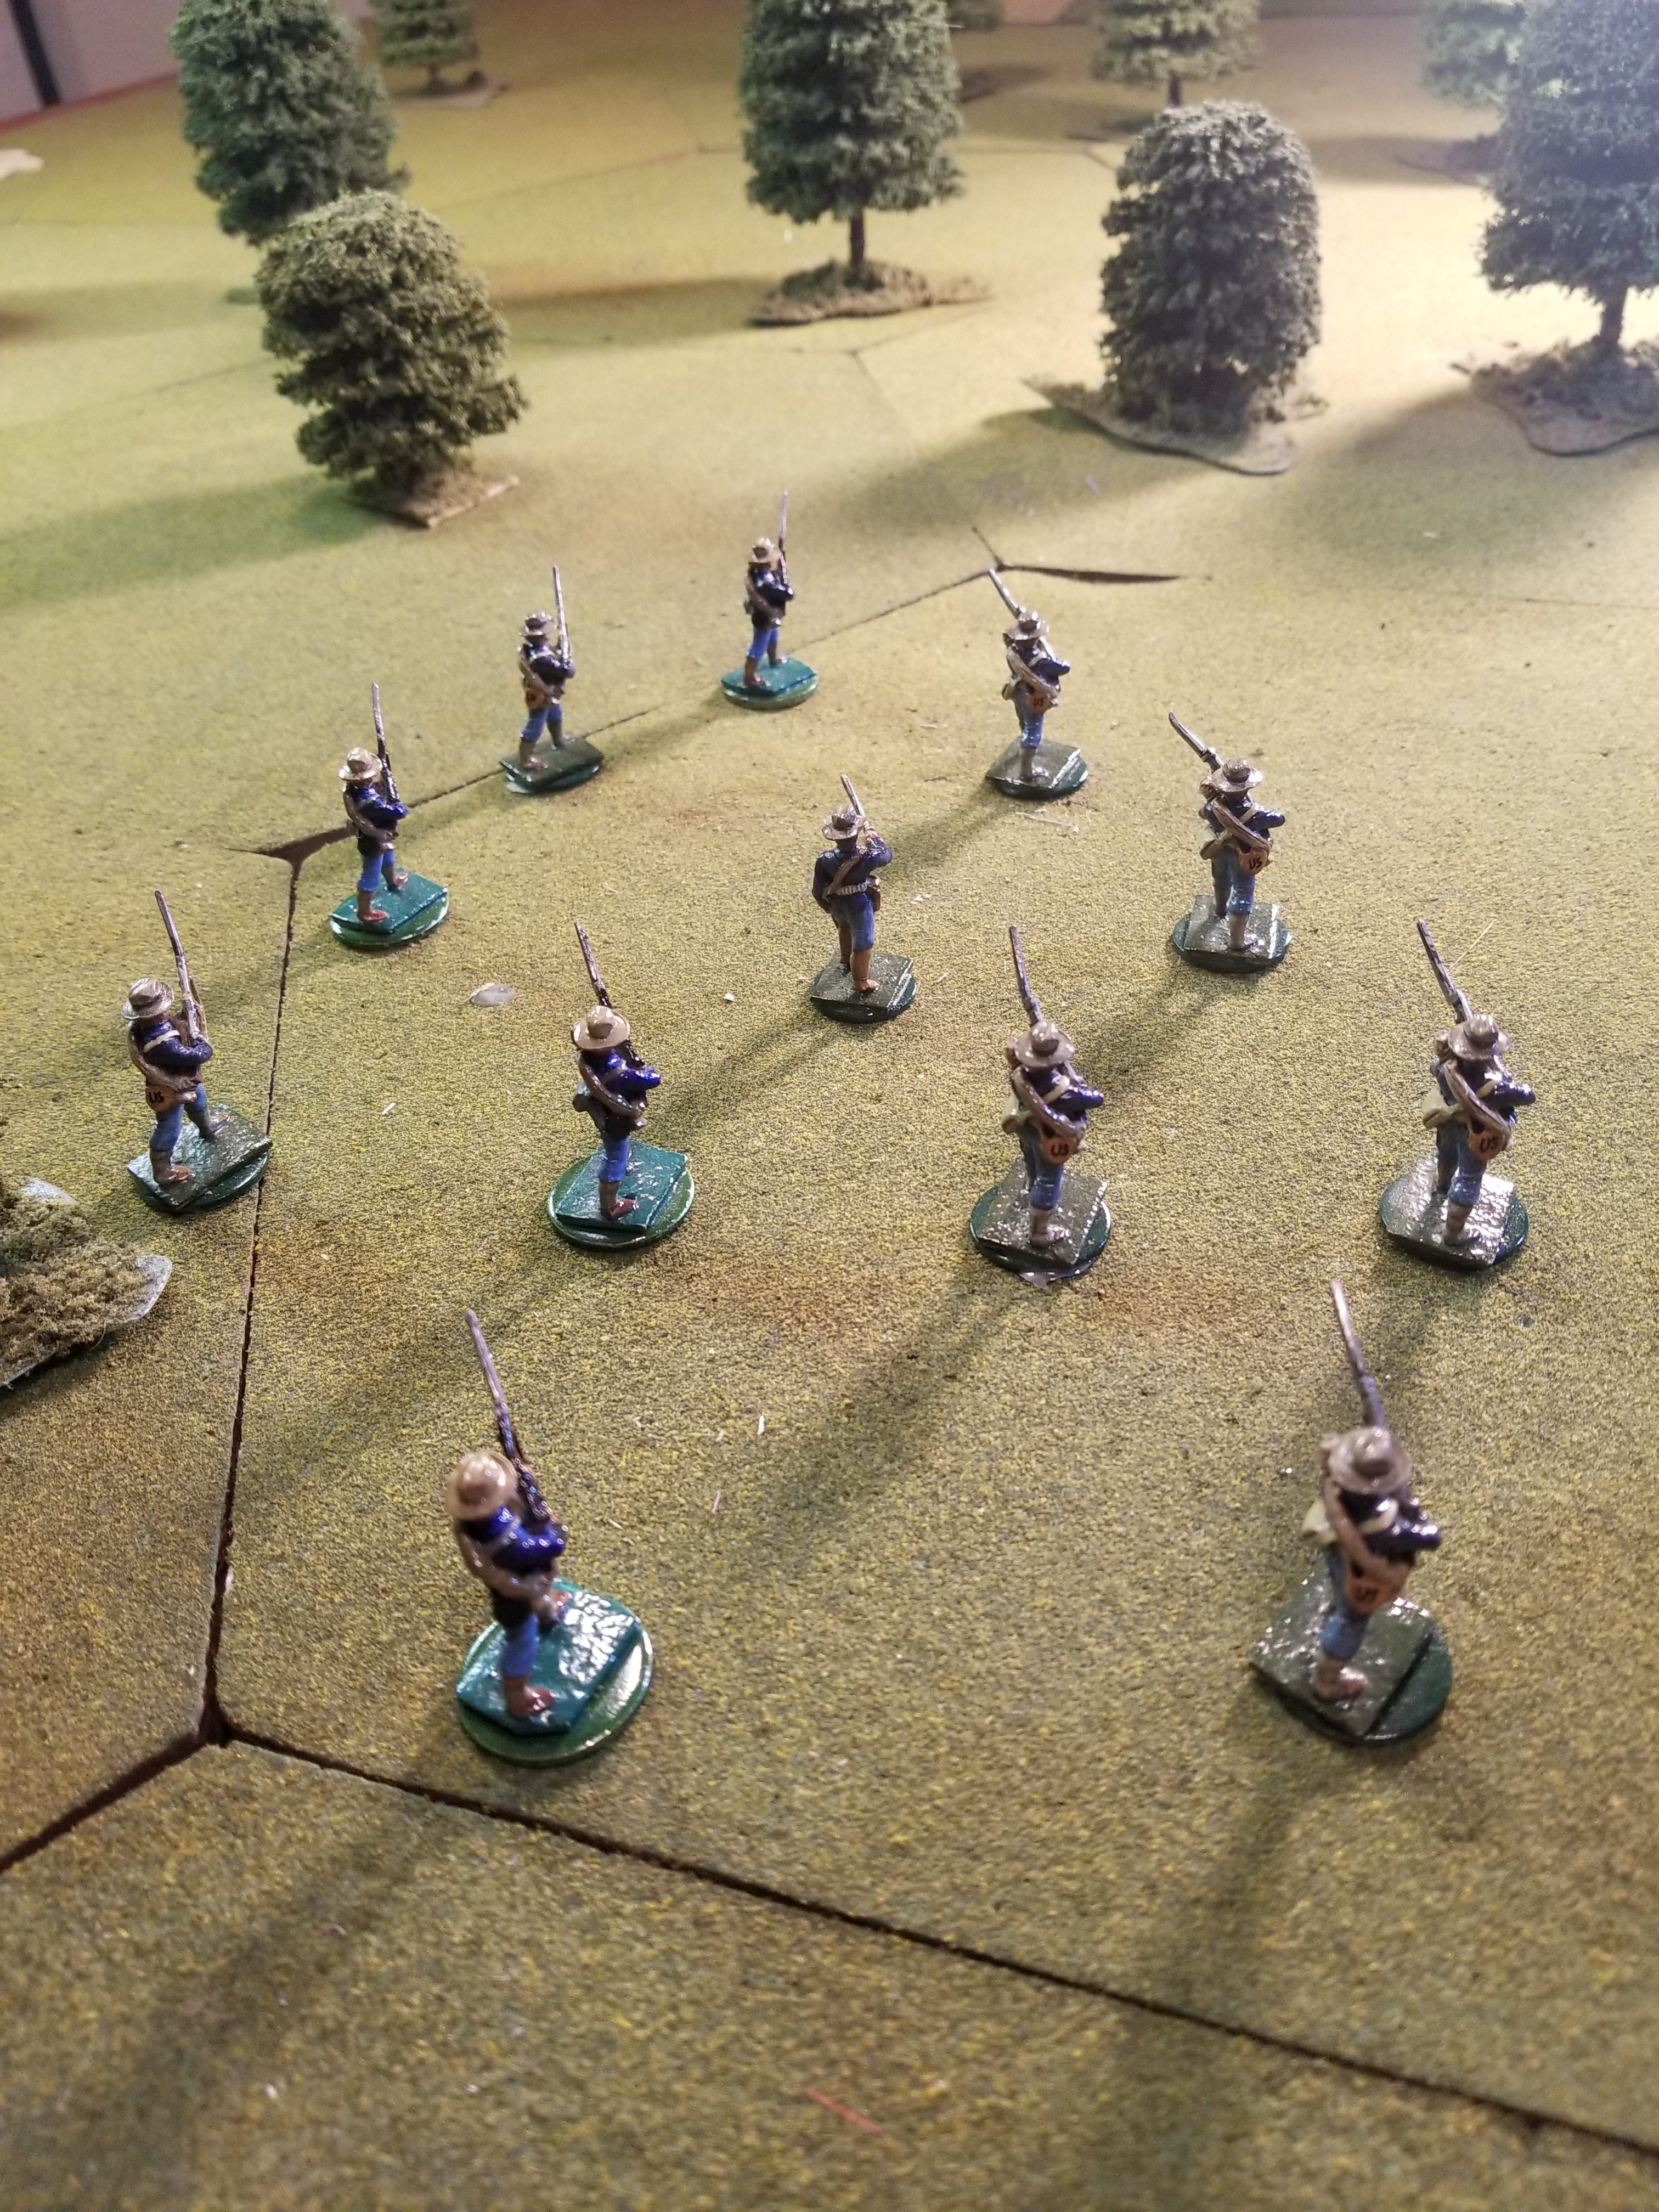
The new Terrain Effects Card indicated a rifle range of 15 inches and a maximum movement of two D6 +3 inches in the woods.

The chance of new contact was 20% .  A percentage die roll of 80 resulted in no contact, and the Marines pushed deeper into the woods.

After that move, the chance of contact increased by 20 basis points, now at 40%. No contact again, on another roll of 80.

The next Marine movement die roll included a six, triggering an Event Card draw.  The card was not appropriate and disregarded.

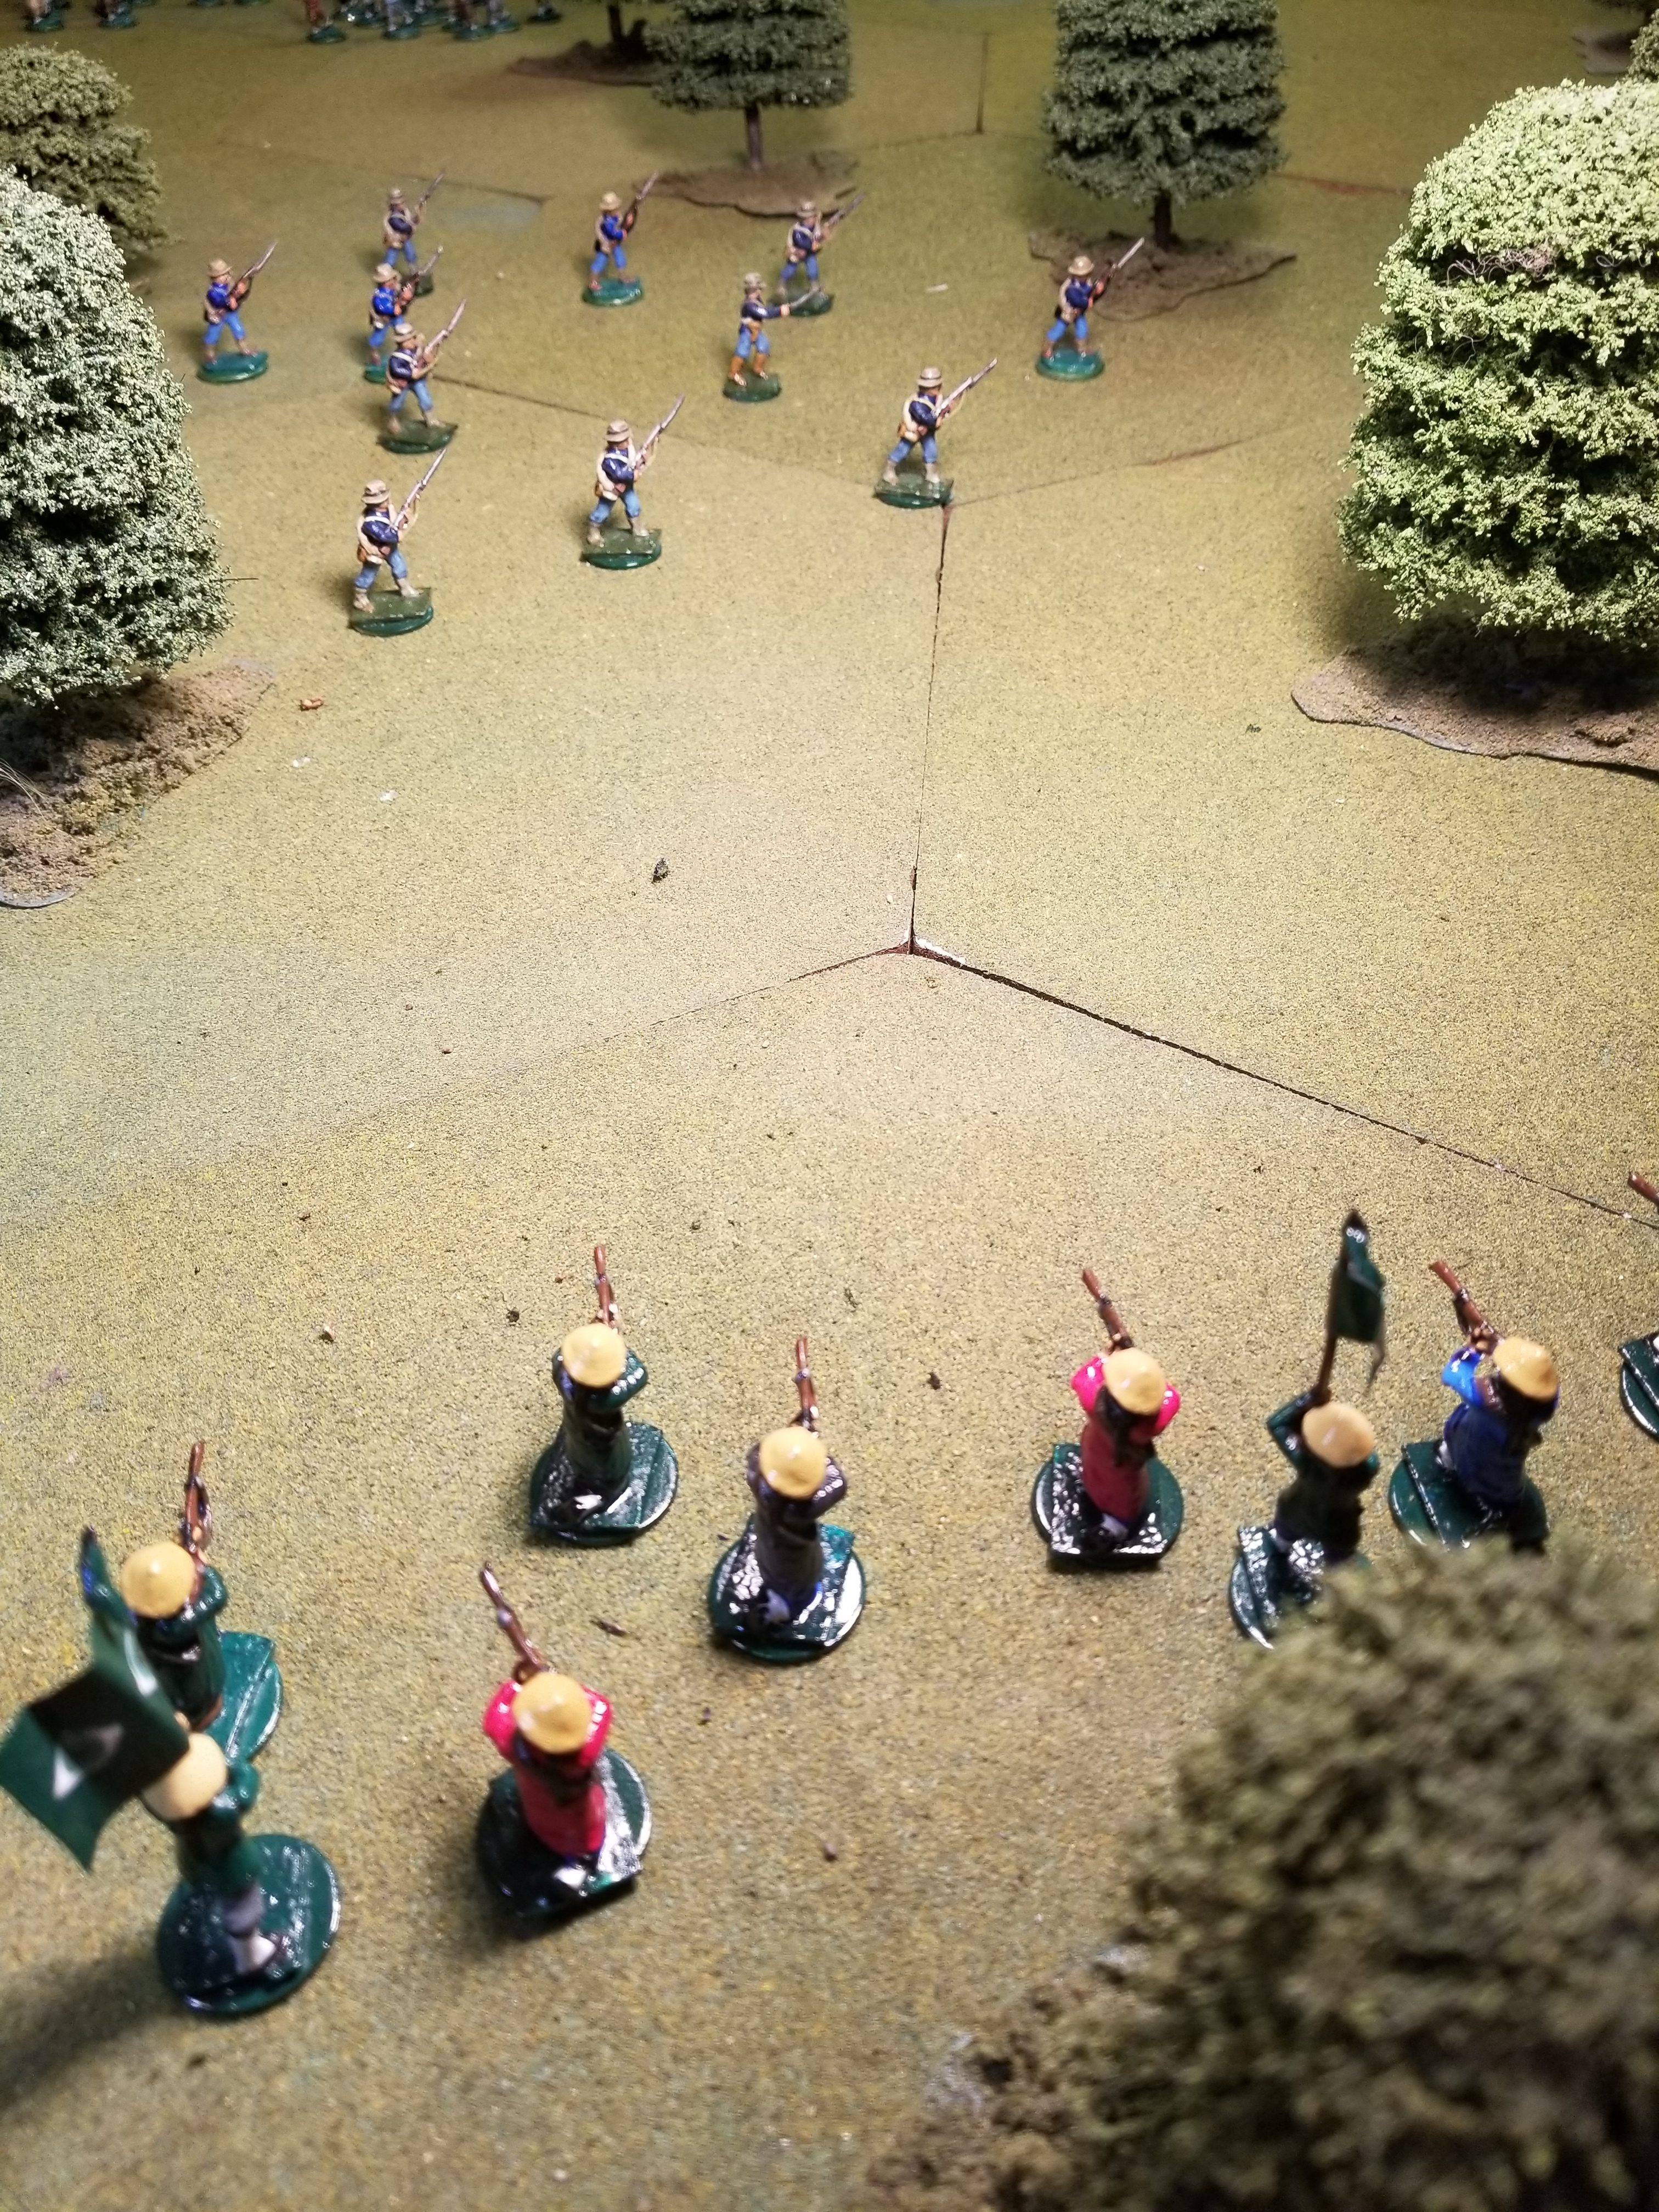
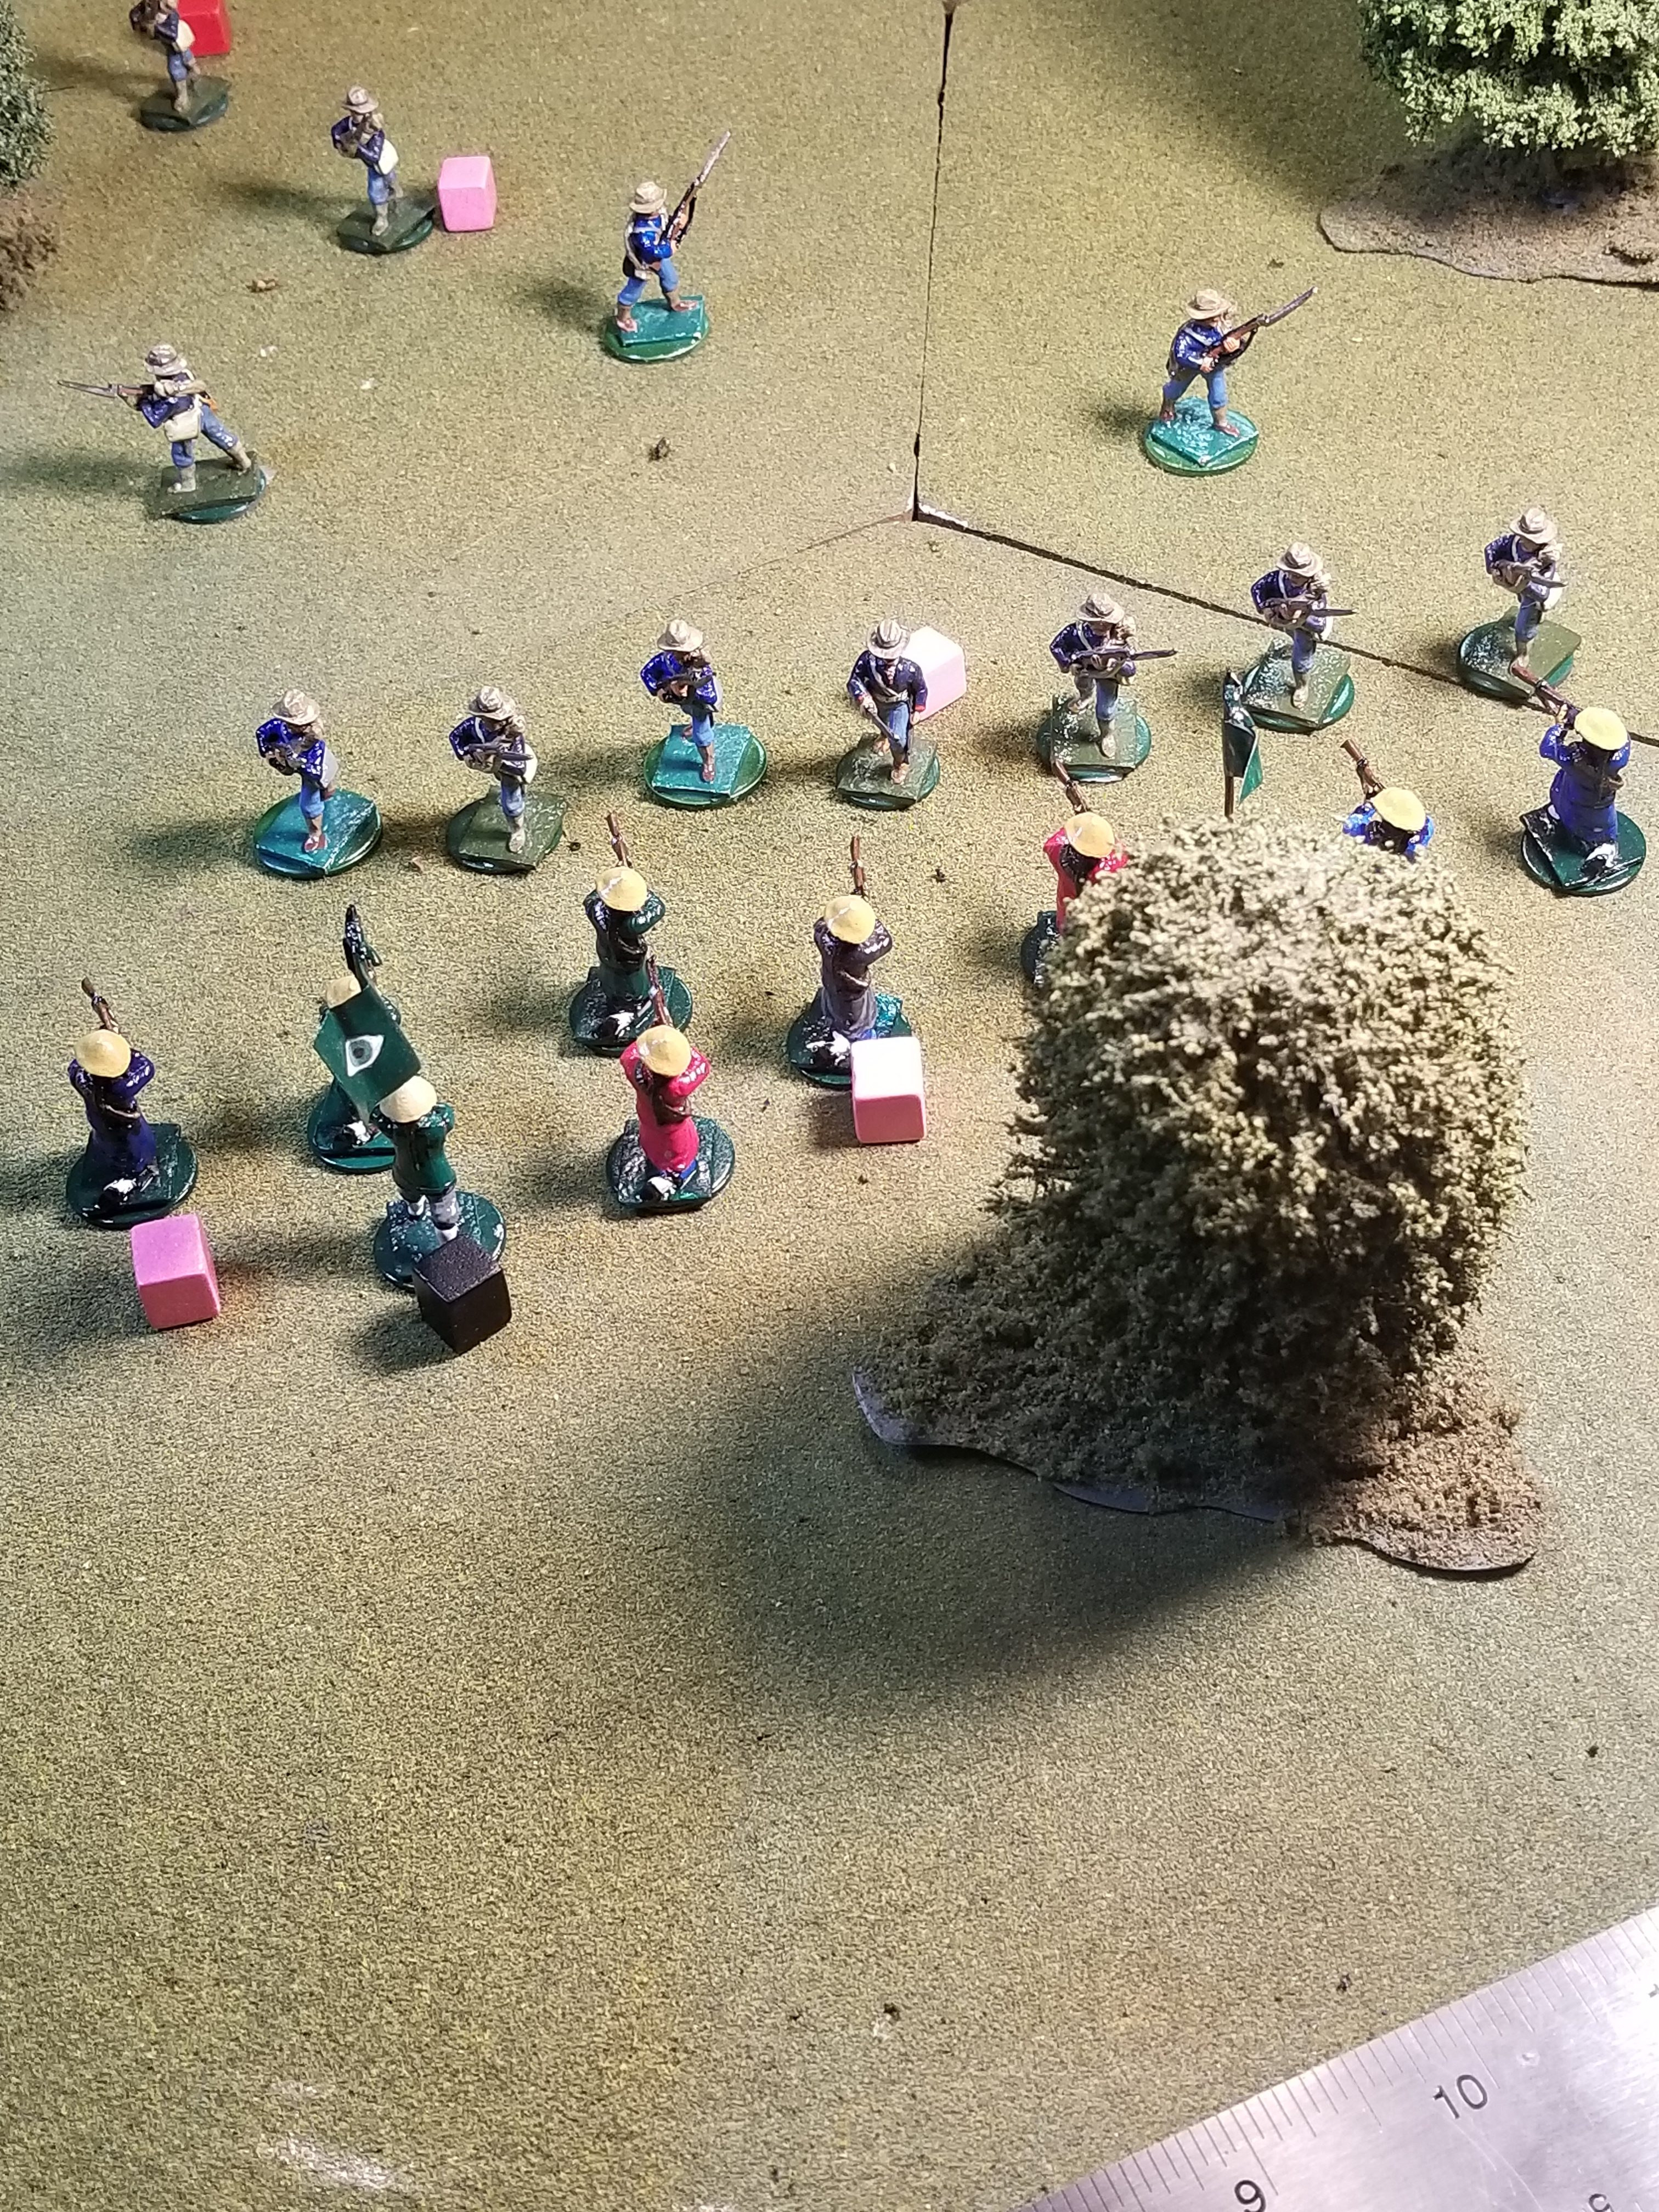
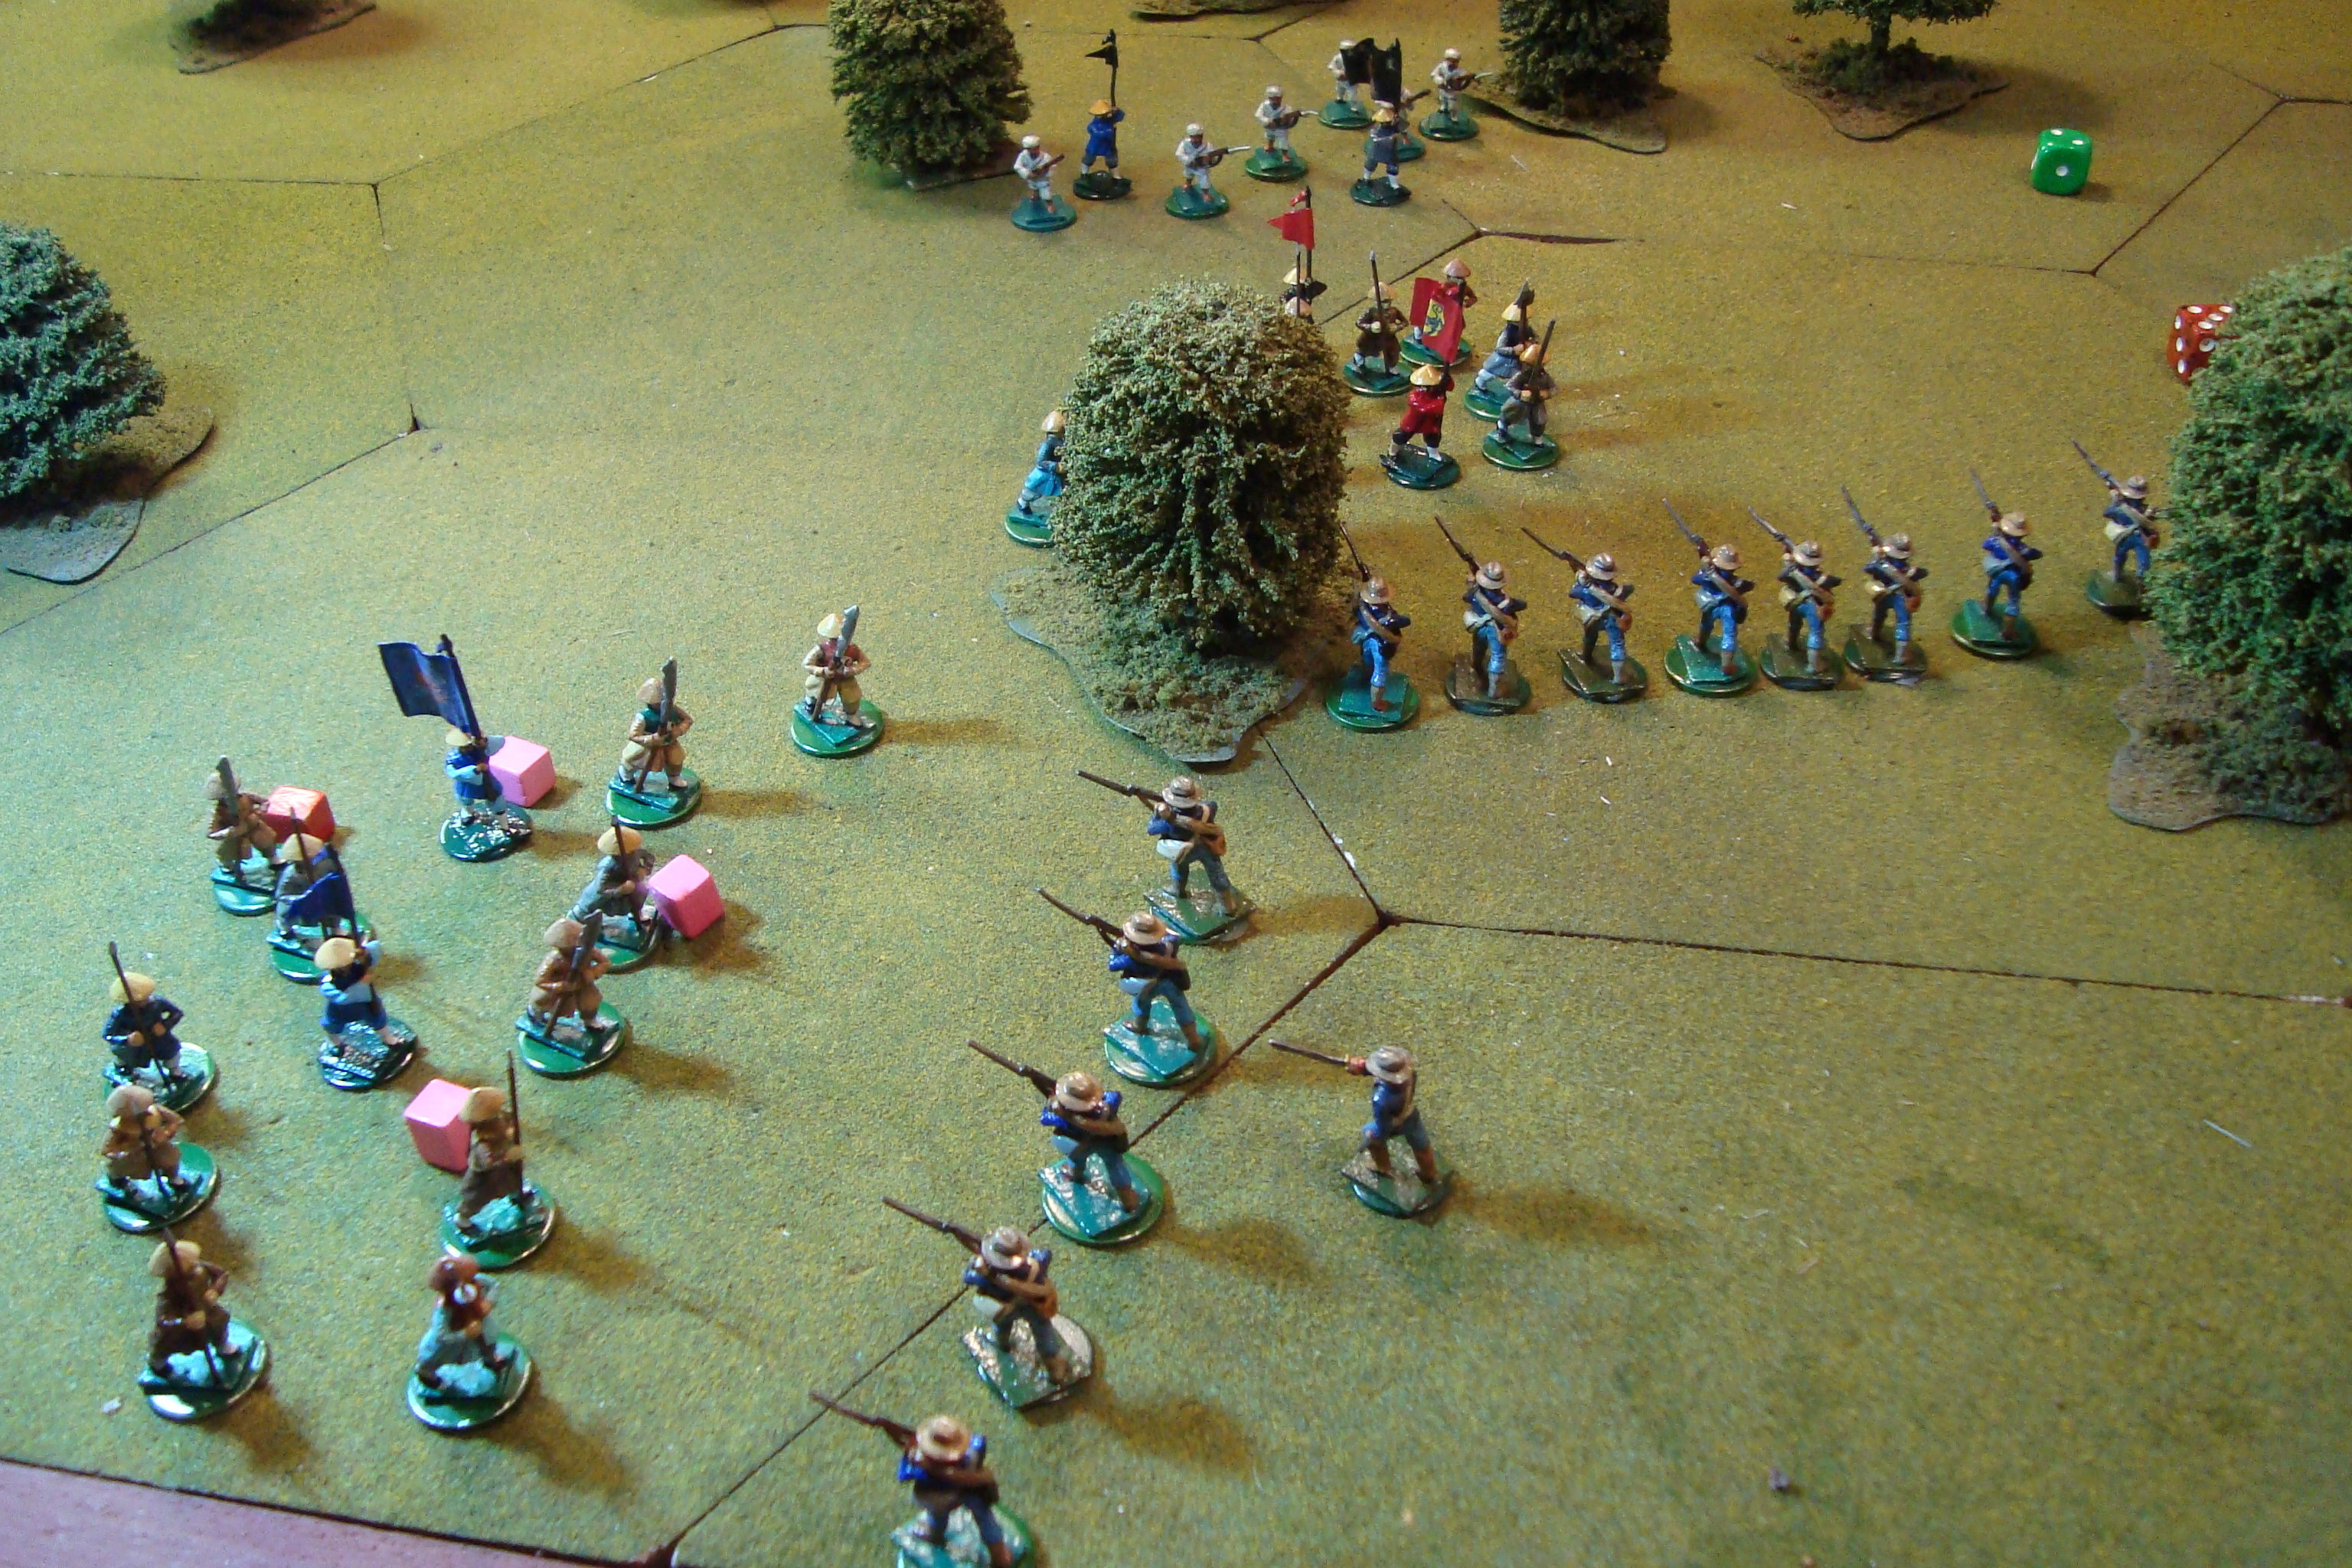
With the chance of contact now at 60%, the die roll was a 10, resulting in a contact.  A D6 roll of 2, divided by two, resulted in one Boxer unit emerging in the woods.  The question was “A rifle or other unit”.  The die roll of “Yes” indicated a rifle unit, with a subsequent Directional die roll of approaching from the East.  With a 3x D6 roll of “7” indicating 7 inches from the Marines.

The well disciplined Marines conducted an immediate action move facing the Boxer threat, and, luckily drew a “Fire” card from the Action deck.

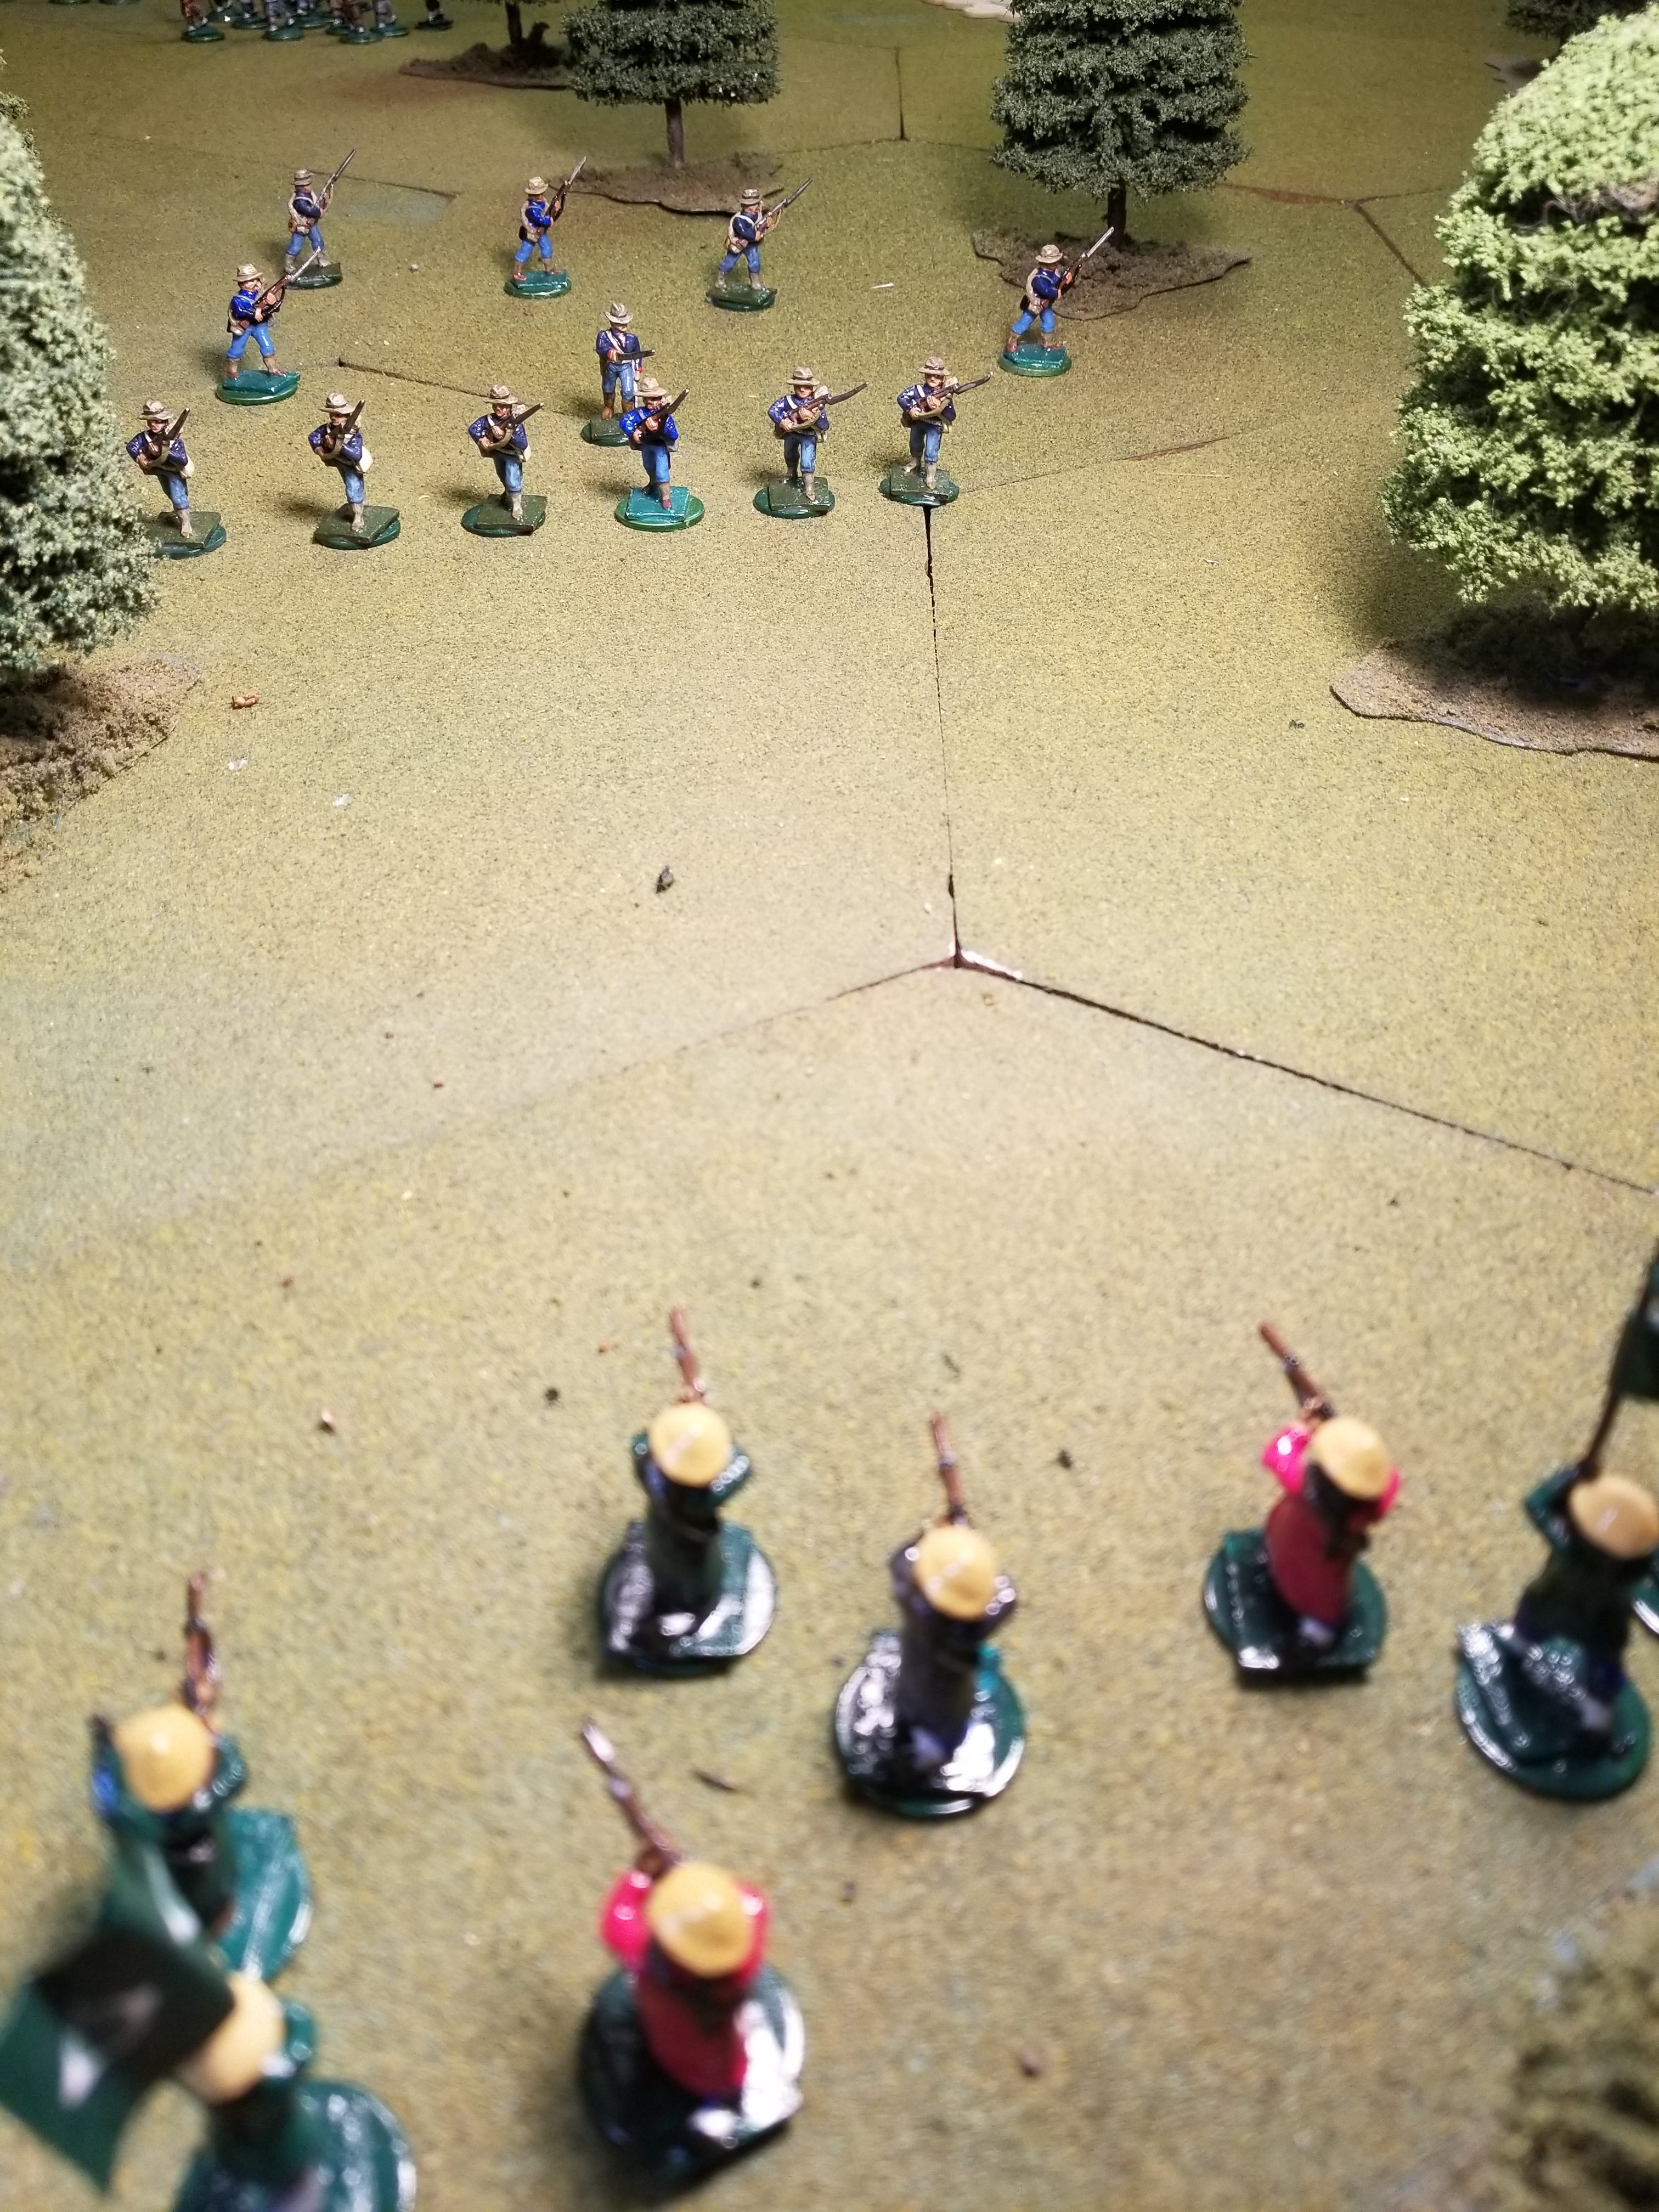
In the ensuing fire fight, both sides took casualties.  After two exchanges, the Marines charged.  The Marines closed to contact, and the Boxers rolled a withdrawl, fleeing off the table.

The Marines detailed one lightly wounded Marine to take a more seriously wounded comrade back to camp.

The mission continues…….

Classic Wedge Formation
Boxer Riflemen Emerge From The Woods
Immediate Action Drill. Contact Right. Marines Away From Contact Maintain 360 Watch
Firefight. Both Sides Take Casualties. Boxer Leader Killed.
Despite Wound To Leader, Marines Close To Contact. Still Maintain Overwatch. Boxers Flee.

Clear The Woods

Been slowly but steadily working with the game.  Solo play requires a lot of imagination, assisted by “Yes, No, Maybe” dice and directional dice.

A simple scenario.  A Marine squad is tasked with clearing a wooded area known to contain groups of Boxers.  For the Marines, it wasn’t a wooded area, but a hornet’s nest.

Random die rolls generated three groups of Boxers the moment Marines entered the woods.  It was a wild melee.

I’m using old wooden Risk cubes to denote light (pink) and serious (red) wounds.  Pinned troops are marked with a brown cube, with shaken troops getting a yellow cube.  Deaths are shown with black cubes.

The Marines fought well, and the Boxers were resilient….maybe because I messed up the retreats from melee.  It was an entertaining slugging match, allowing me the opportunity to work with both Action and Terrain decks.

The two large groups of Boxers withdrew after heavy casualties.  However, the one band of fanatical riflemen remain.

Initial Contact To The Left
Boxers Rallying For Second Attack

Lost Weekend?

The bad news came on Thursday.  Tim couldn’t make it to our annual Labor Day Weekend wargaming/college football blow-out.  His pup, Crater, was not doing well and putting her in a kennel was out of the question.

Had just finished setting up the maps and sorting the counters for Storm Over Scandanavia’s Campaign for Sweden Scenario.  Might as well make the best of it.

This is a hypothetical German attack after the Fall of Fance.  The timeframe is July-September 1940.

An infantry affair, with very limited armored resources for both sides.  The Germans do have air superiority and a wealth of General Support air assets.  This advantage is mitigated by wooded/lake terrain.  To make things even more challenging, much of the German commander’s combat power is in the extreme north of Norway, and will have to work its way south, or be railed to a more central position.

The Swedish set-up is mandated by their mobilization region (MR).  There are also garrisons in each region.  They are immediately activated once Germans enter the area, or activiated during the initial phase if the Germans are adjacent to the region.

All victory point calculations aside, the Germans must take Stockholm.  The Swedish deployment has made an amphibious attack (using rail ferries!), implausible.  As mentioned, a northern axis of advance will take too much time.  So the main effort, using three corps, will be through west-central Sweden with axes of advance channelized by lakes and terrain.

Should be interesting.  Here’s a quick photo of the setup.


Weekend At Tim’s

Real pleasant couple of days in Portland.  Hotter than Hell, but we stayed refreshed and hydrated.

Maybe that’s one reason not a lot of gaming took place.  Also a perceived need to view a few action films outweighed the desire to push cardboard.

We played “Operation Exporter” from  War In The Desert.  This is an operational simulation of the  Allied invasion of Syria.  Not exactly Tim’s cup of tea – low counter density, only a small portion of the map used and….gasp…..no real tanks (only a couple of Vichy light tank units with attack strengths of 1).  The Allies will win, it’s just a matter of time.  However, the victory point schedule makes time of the essence

Nonetheless, Tim did a great job as Allied Commander.  He used his one motorized asset to harass the Vichy flanks and optimized the use of his limited air assets and naval gunfire.  He also quickly assembled the two divisions available to him, with their enhanced combat power and zones of control.  The regiments and brigades that make up all the Vichy forces cannot be formed into divisions.

I played my part by having a (typical) cavalier approach to victory conditions.  While Tim didn’t win on VIPS, he certainly won the game.

I didn’t fare as well when we switched sides.

This is a good little scenario.  It’s viewed as excellent starter game as it has all of the Europa food groups, but without the counter density to make the experience overwhelming.

He’ll be out at The Pinecone Lodge around Labor Day for Storm Over Scandanavia’s hypothetical scenarios involving the invasion of Sweden.

Old Itch Scratched

One of the lost games that I have fond memories of is SPI’s Oil War.  Don’t know where it went, but probably in a late 70’s purge along with the also lamented World War I.

Been looking for both on E-Bay but the high prices were off-putting.  Recently found a reasonably priced folio game and snapped it up.

Fairly quick to set up, moves along at a brisk pace, but there is one problem.  The Western nations have to really screw it up to lose.  Why?  Airpower.  Air attacks simply crush the combined Arab forces.  It will take time….but  victory conditions will be attained.

My approach was to establish airheads in southern Saudi Arabia, reducing logistical demands, snap up the Saudi oil fields, then gradually move north.  Yes, Kuwait has to be captured to assure a substantial victory, but that is an eventuality.

Arab forces need to defend airbases to deny the West their logistics benefits, and to give ground grudgingly, hoping that the game will end before losing the 25 oil fields signifying a substantial Western victory.

At the time, it was a challenging and fun game, dealing with a very current topic.  Now…..not so much, but I enjoyed playing it, and that’s the main thing.  Here’s a couple of photos.

First Time Through: Aggressiveairlanding  on the coast. Air units staged to savage Saudis defending oil fields. Significant assets attacking Qatar.
First Time Through: Too aggressive. Coastal unit just before ZOC kill.
Second Time Through: Slow and Steady.  No distractions and no sudden moves.


What’s Not To Like?…..Revisited

In May I posted up about my positive impression of Avalon Hill’s old Arab-Israeli War.

Since then, I’ve played a couple of the advanced scenarios and confirmed why the game isn’t that well regarded.

The first is line-of-sight.  It can be hard to envisage, especially if the player does not have any experience with map countours, military crest, reverse slope and dead ground.  For that player, it’s a puzzler.

The second is the slow pace of play.  Slow, if the Israeli’s want to win.  The Israeli’s have to advantage of the ground, and maintain their ability to stand-off and destroy the Arab units piecemeal.  This takes patience.  No charges up any valleys.  Slow and steady working on the flanks.

The Arab player’s best hope is to delay/defend and reduce the level of Israeli victory by having the game end before objectives can be achieved.

While not necessarily action-filled armor fun, this type of play makes it an interesting challenge for both sides.


Common Sense Wargaming

Really enjoyed starting up a Kriegsspiel scenario.

Used the old Programmed Wargame Scenarios book.  One of the first to introduce random events and personalities into a solo-friendly context.  Also used a log to keep track of events.


KSpiel is intuitive to me. Work with the maps, the contours, basic concepts involving reconnasiance, and security, as well as some period knowledge about Prussian tactics.  The latter is covered in the Two Fat Lardies rules.

This allows you to just play the game.

I used a company scale, with three to a battalion, three battalions to a regiment, with three regiments to a  division.  Each side had one division of infantry, along with attached cavalry squadrons.

The scenario called for Blue to have an advance force at a river crossing and to hold that crossing until reinforcements arrived.  Red’s mission was to take the crossing.  Both Red and Blue reinforcements (variable timing) had to enter the map from a programmed point (die determined).

I changed the scale from the prescribed 2 minutes per turn to 15 minutes, with an adjustment to movement rates.  Risk game blocks designated regimental and division commanders.

Here are a few photos.  As always, had to pack it up to go somewhere else.

Red Cavalry Occupying Village While First Regiment Advances. Note Blue Cavalry Picquets.


Red Continues Advance.


Red Infantry Deploys In Town. Red Block Is Divison Commander
Red Skirmishers Out For Firefight To Prep Objective. Second Regiment Advancing.
Blue Reinforcements Advancing. Red Third Battalion In Column For Assault. Note Blue Has Been Attrited. Solid Red Block Indicates Loss Of Half Strength. Small Red Block Is Messenger To Cavalry Unit To Scout For Ford.

Last Stand

Finished up the fourth turn of The Alamo:  Victory in Death.

Figured out the casualty rules that had baffled me.  Silly me, just read the rules and interpret them literally.  Things will work out.

Crockett’s attempt to push out beyond the walls was a foolish.  Now surrounded and locked in , he’ll eventually be killed.  The west wall has been overrun and now all that is left is the time consuming chore of isolating each Texan unit and destroying it.  Reorganized Mexican units are flooding back onto the battlefield, and there seems little chance that the Texans can last another ten turns.

The initial setup is everything.  The Texans have to react quickly to stop any massed Mexican attacks, and the Mexicans, in turn, must be creative to exploit any Texan attempt to reinforce a threatened area by judicious of their reserve units.

It’s a tense contest for the first several turns.  Worth the time to play.

Crockett Surrounded Outside The Church. Church Isolated. North Wall Defenders Surrounded. Plenty of Mexican Replacement Units Ready To Come On Map. Pick It Up.


Fast Attack Boats AAR

During Round One the Israelis aggressively engaged the Egyptian ships, while the Egyptians fired just one missile and turned away . Both tactics seem to work. The Egyptians enjoyed some good luck and sank two of the Israeli boats . The Israelis also sank two vessels and had one boat remaining on the map. By the rules this is a victory for the Israelis. But, give in an asterisk.

Round Two also went to the Israelis . Both sides fired at maximum range and moved off the board. After two rounds the Egyptians have lost three boats and the Israelis have lost two.

The Egyptians changed tactics in Round Three, aggressively pursuing the Israeli boats. This tactic backfired, with three vessels sunk, with only one Israeli boat lost. This loss required rolling cosmic boxcars for a missile on the third leg of its flight. However, the round went to the Egyptians for remaining on the board.

Incoming Missiles. Turned counters are on their third – last – leg of flight.

Both sides husbanded their resources during Round Four. The Israelis sent out only one boat against three opponents. Both sides were cautious. The Egyptians launched only two rounds of missiles before turning away, with the Israelis launching only one round of missiles. Ironically, the sole Egyptian boat remaining on the board was sunk by the last Israeli missile. By RAW, it’s a draw.

Round Five was a a decisive defeat for the Egyptians . They lost four boats to only one Israeli boat. The fifth Egyptian boat suffered significant damage. Once again, the Israeli tactic of staying far away enough to allow Egyptian missiles to hit at maximum range paid off. The Israeli missiles retain their destructive punch even on the third and last leg of flight.

Saturating Targets

Overall, the Israelis were the winners, but the Egyptians still have a operational fleet ready for more.

Time Won’t Let Me

Great song……where is the horn section?

My attempt to combine Konarmiya and Freikorps can now be considered a failure. But, not from a lack of trying, no matter how misguided my obstinance was. In Freikorps, the game begins on the August 1 weekly turn and assumes Warsaw has fallen, with only scattered remnants of the Polish national army still fighting

The problem was Warsaw. Never captured it. The Poles held out, and with only four turns to take Germany, it was just too much. I did advance the Konarmiya Cavalry to the German border, but it wasn’t going to be enough.

There were Spartacist uprisings, and the French forces were withdrawn by a skittish government. A German advance into Poland was forbidden as a condition of Entente involvement. Despite these favorable outcomes, the Soviets just didn’t have the time.

Too many Soviet units were still falling back from the North, and also trying to hold off desperate bypassed Poles trying to get to Warsaw, or just west of it.

Their one excuse is that the Polish units, though out of supply, retained their full defensive factors. There offensive strength was halved. As long as they didn’t attack, remained stacked and were able to skirt Soviet units, the Poles had a good chance of making their way west. With the bulk of the Soviet army surrounding Moscow, the outliers just didn’t have the strength for attacks greater than 2:1, and lacked the number of units to surround and prevent retreats.

Still, an interesting exercise and one that I will try again.

Freikorps Map is the “inset” bottom left. Used Warsaw as common point of entry, along with hexes to the North. Konarmiya units advancing to Posen. Warsaw holds out, and stragglers head West.