Category Archives: Boardgames

Byzantium Reborn Review

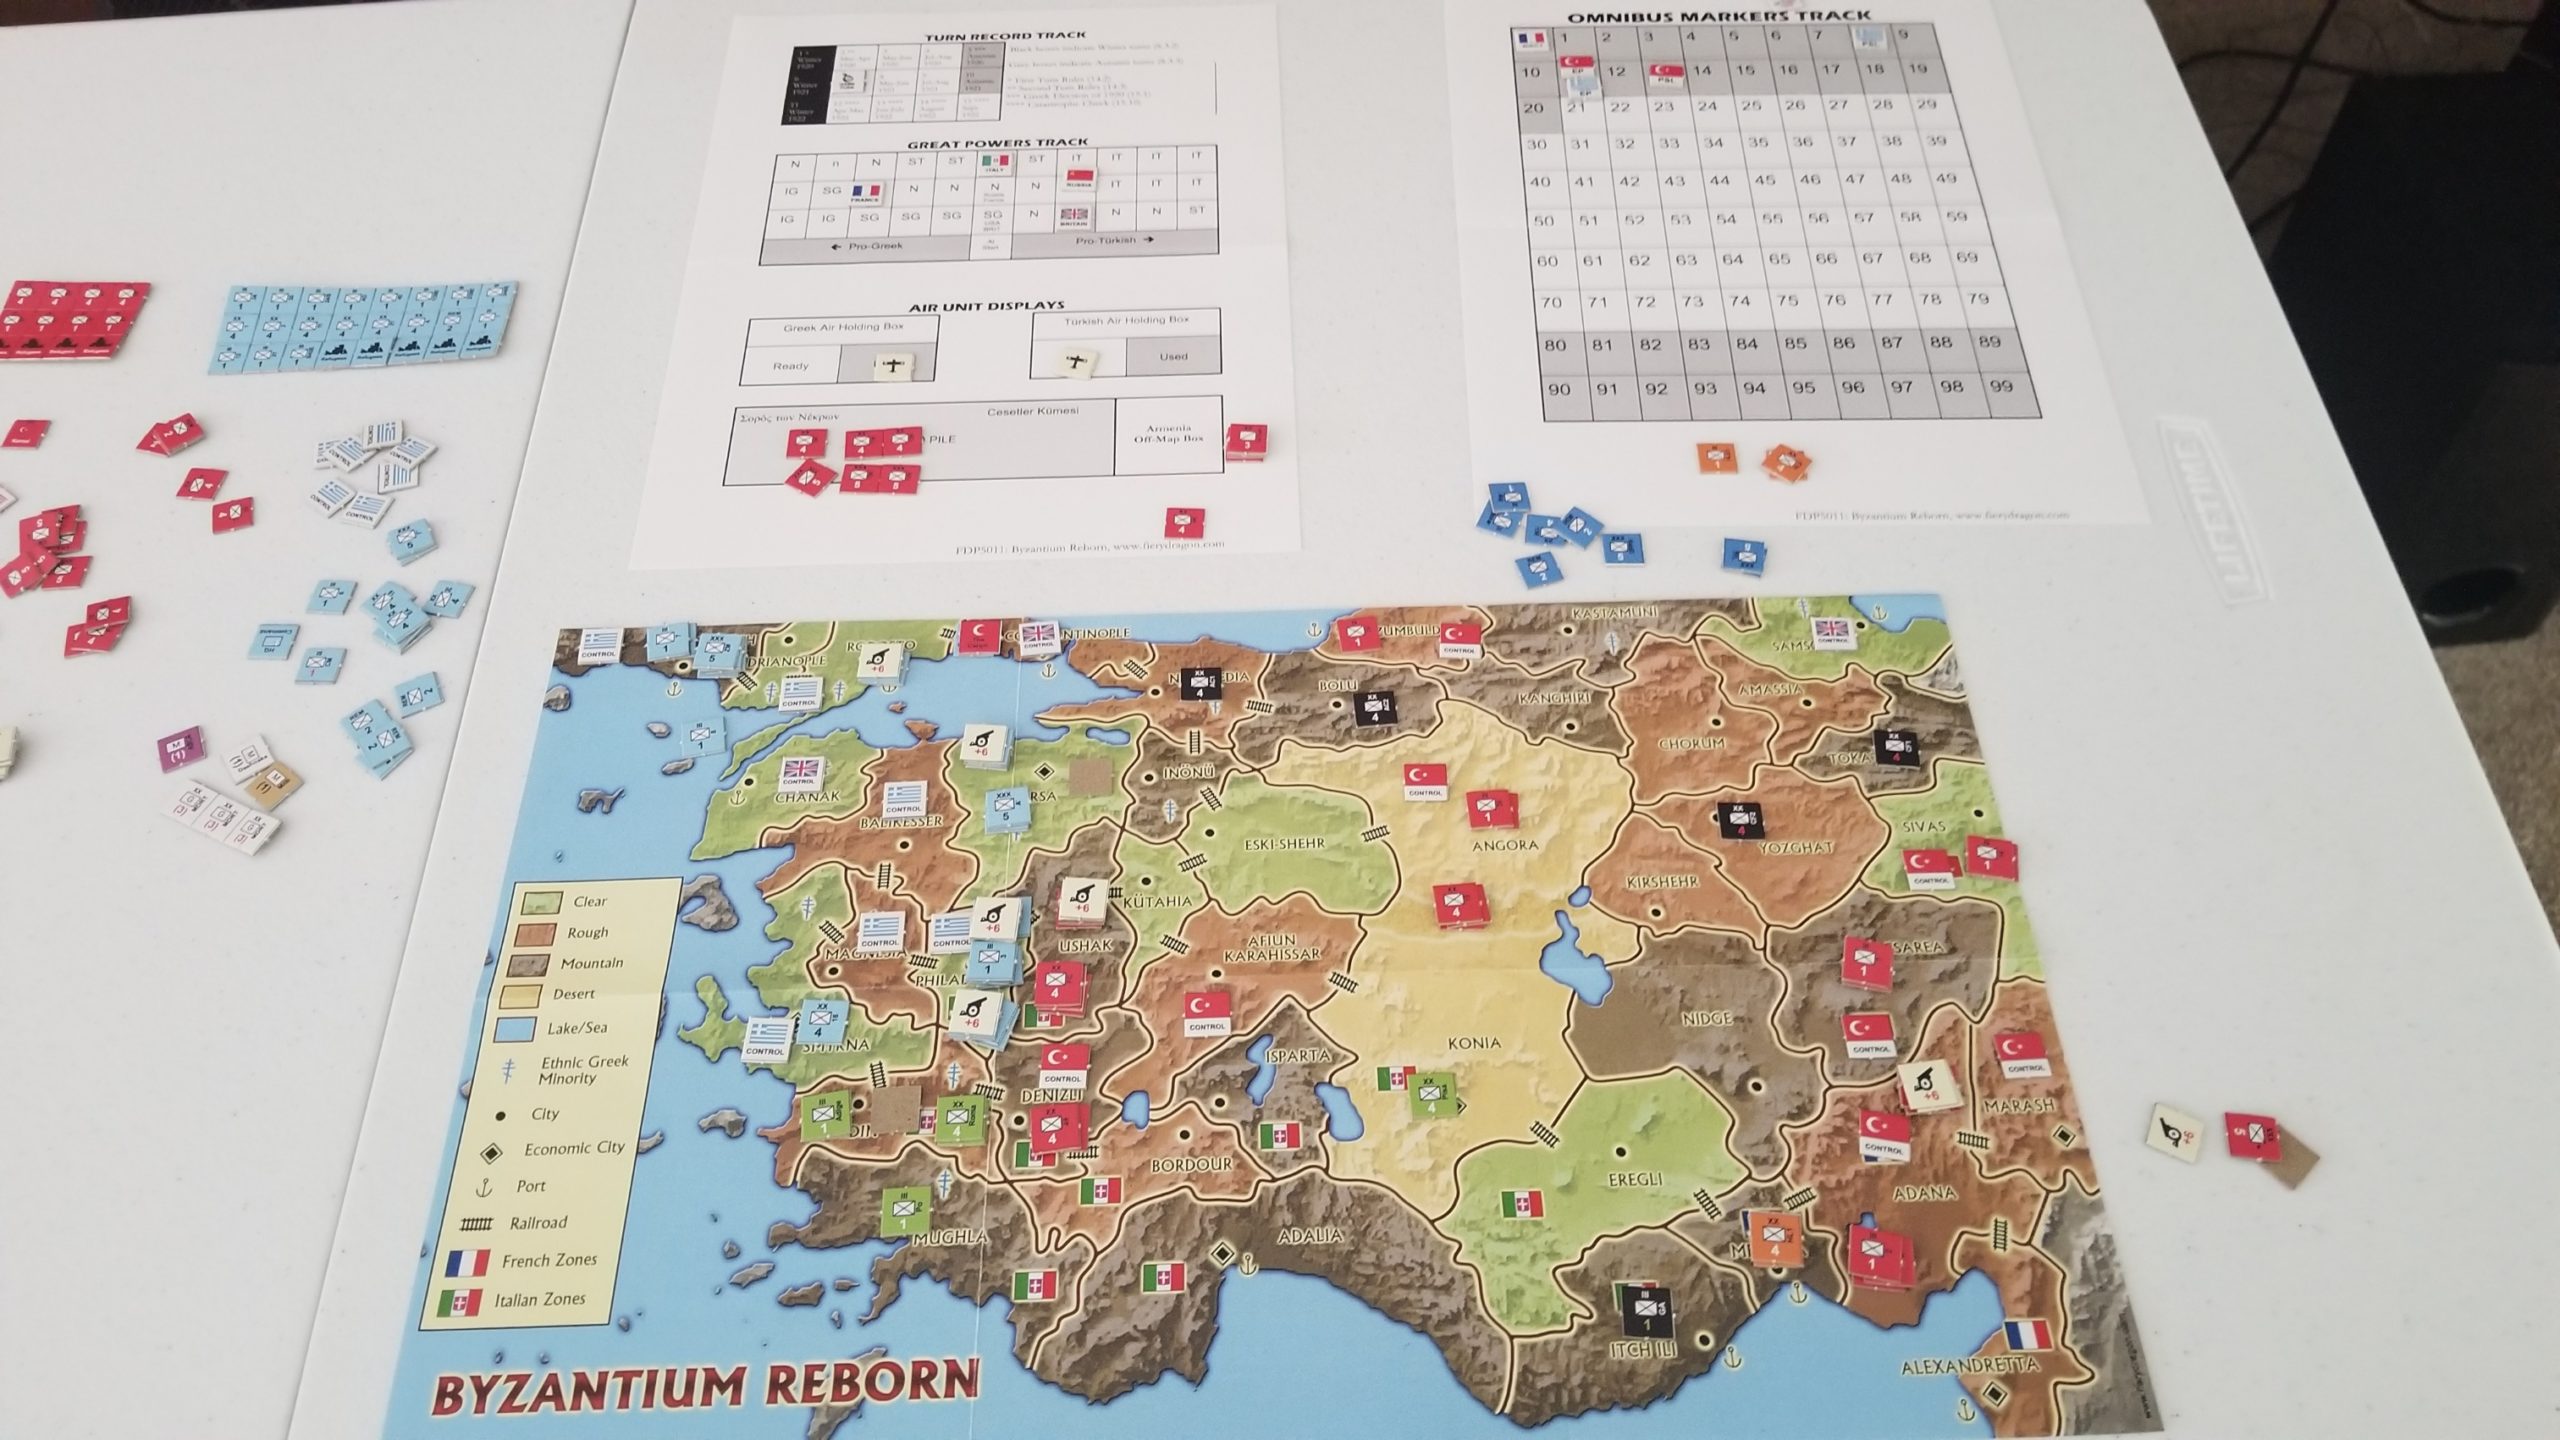
This “mini-game” published by Fiery Dragon covers the 1920-21 fighting between Greece and Turkey.  The game was originally published by Micro Game Design Group.  Here’s link to the BGG page:  https://boardgamegeek.com/boardgame/13290/byzantium-reborn

This interesting R. Ben Madison design  lends itself to solitaire play.  Small footprint, not many counters, but real breadth to the rules.  Well, maybe not breadth as much as layers of chrome.  But it is good chrome.  The examples of play are done in a narrative style.  I prefer procedural examples.

It is a different type of system, and although the rules are laid out in game turn squence, there is quite a bit of page flipping early on to get comfortable with terminology, minor pieces of chrome, and general game flow.

The game isn’t as much about combat, but resource and allies management.  Combat is a means to increase your resources through occupying regions (Vilayets), but the real challenge is to gain allies that will intervene in the conflict and/or deny your opponent this support.  Your allies provide Equipment Points (EPs) used for the purchase of combat units/assets.

Each turn consists of a Random Events Phase, Political Phase, Greek Player Phase – which includes Battlegroup Step, Strategic Movement Step, Movement Step, Combat Step and Recovery Step.  There is a Second Random Events Phase, Strategic Phase, and then the Turkish Player Phase, which repeats the Greek Player’s steps.

Random events influence potential Ally behavior and the ability to gain/lose Political Support Points (PSPs) and EPs.  During the Political Phase, players can expend PSPs to “buy” increased support, or reduce their opponents political support.  Again, this support influences the ability to gain EPs which can be used to build or rebuild ground units, or bid for Asset Points (APs), represented by air and artillery units which serve as force multipliers during combat.

This purchase of APs is done on a bidding basis which I initally had trouble with. Likewise, the increased allocation of PSPs can be used to enhance the chances of moving one of the European powers involved in the conflict (Italy, Great Britain, France, Soviet Union and, to a much lesser extent, The United States), from Neutrality to Support and finally to Intervention.  Support and Intervention generate different levels of EPs 

The Battlegroup step is simply organizing one’s forces for combat in each of the Vilayets (regions) controlled.  Strategic movement involves rail or naval movement, and Movement is between Vilayets to either occupy for resources or to set up combats.  Combat is a dice fest, without the use of a Combat Results Table (CRT).  The Recovery step involves rallying unit disrupted in combat.

As pointed out in an earlier review, the game does involve a significant amount of luck, as embodied in the Random Events table.  But, the events are based on historical actions or probabilities/possibilities, and for solitaire play that’s not a bad thing.

As you might sense from my description of the game, it took some time to grasp the differences between PSPs, APs, and EPs as well as the methods for their use.  The bidding for assets and use of dice for combat also involved a learning curve.

However, the effort was worth it.  This is a good game, with an interesting system, that provides an enjoyable gaming experience.  

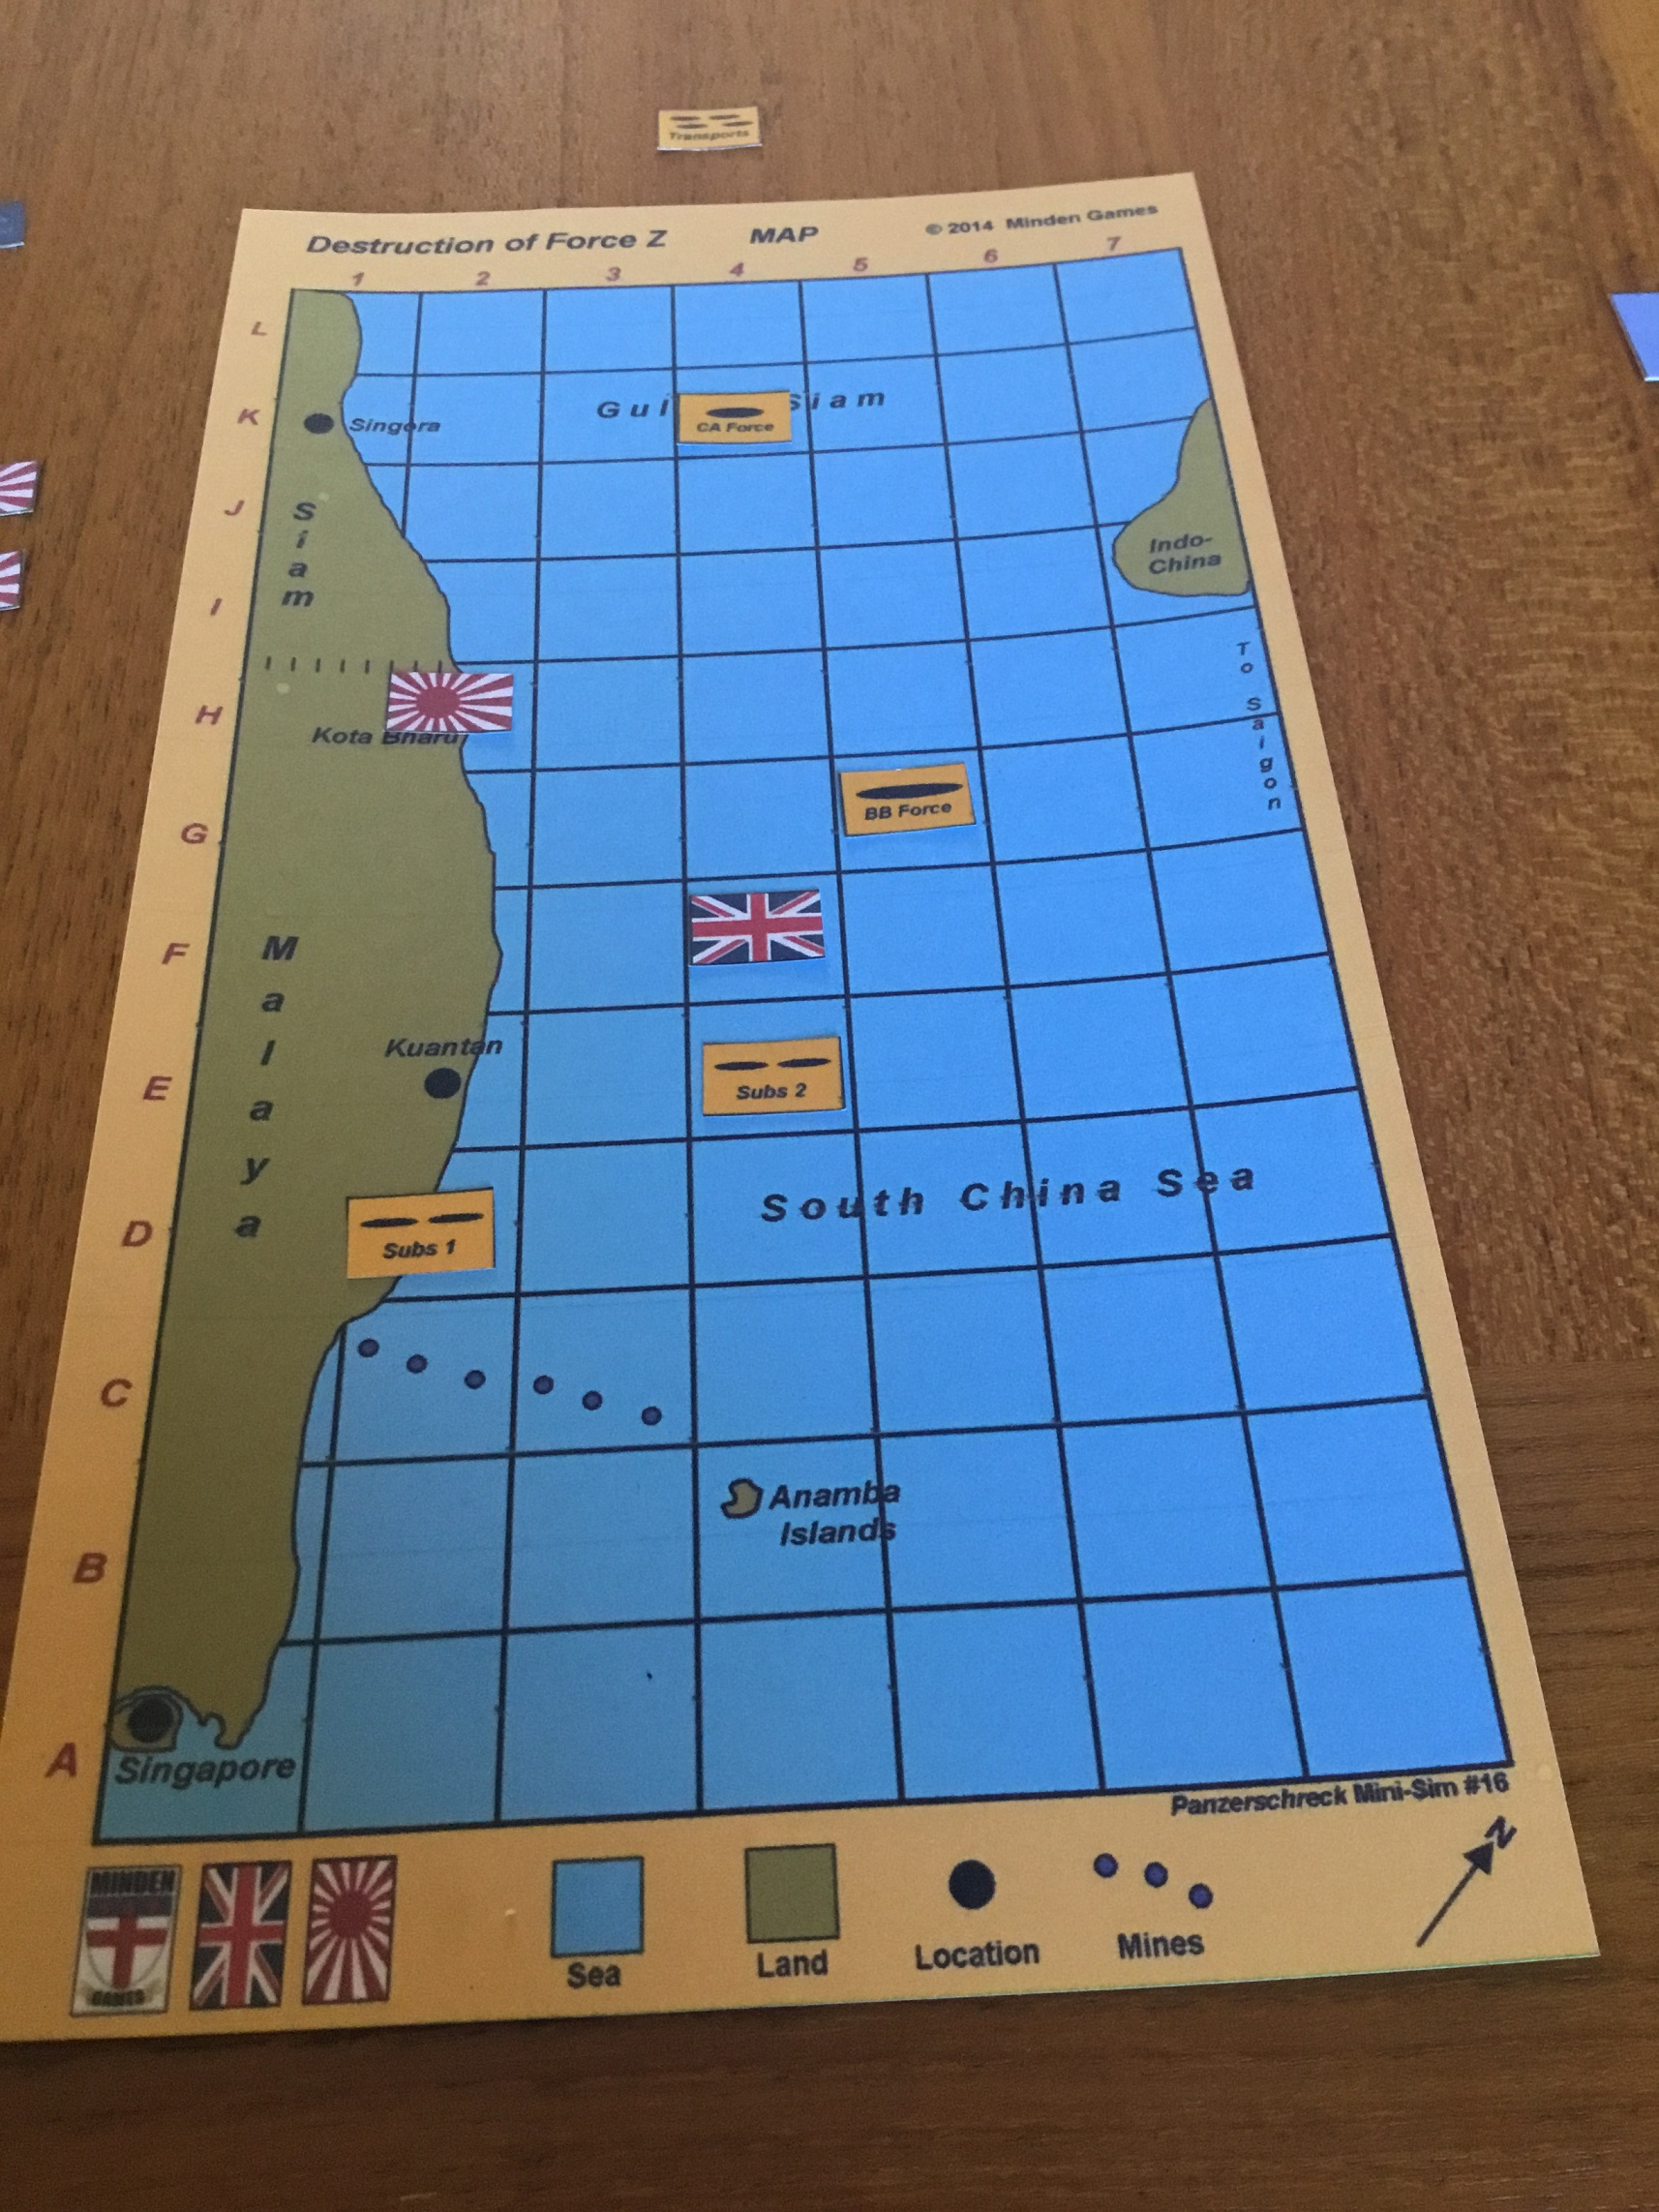
Here’s a picture of it on a card table.  Gives a sense of size.

Pursuit of Glory AAR

Finished up a weekend session with Tim.  We made it to Summer 1917 (I think), and then packed it up.  While my Central Powers armies were not defeated, we certainly weren’t in good shape.

For some reason, I couldn’t get the Caucasus Theater figured out, and Tim’s Russians were able to grab some crucial victory points, stalling the Russian Revolution.  That event is critical for the Central Powers’ fortunes, as it will knock Russia out of the war, and the Ottoman Empire’s dwindling resources can be used to  stop the British Empire.

The Empire got off to a good start Its naval units ran the gauntlet of forts guarding the approaches to Constantinople, destroyed them and even bombarded the city.  Tim followed this success up with a landing,  and prevailed in a long series of battles in and around Gallipoli.

Although I was able to knock Serbia out of the war, and open a rail connection to Germany’s resources, I couldn’t capitalize on this success, or maintain any pressure along the eastern periphery of the British Empire.  My revolts in Persia and approaches to Afghanistan never amounted to much, and Tim was able to deploy sufficient Russian units to turn that into a strategic cul-de-sac.

Here’s a quick situation picture before the wheels started coming off.

By the way, although he and I have played the game several times, I’ve never posted up about it.  Here’s a link to this highly regarded game’s  page.


Don’t Want To Look

Playing Fall of France (it’s that time of year) with Tim using Jet (JET?) software.  He finally talked me into it after years of cajoling.

Jet is quite an accomplishment.  While the graphics are rudimentary, and the program has its quirks, in the final analysis it is quite an accomplishment.  I marvel at how it eliminates much of the cardboard and paper drudgery.

I have the results of his German May II combats downloaded to the computer, but I can’t open it.  I’m playing the French side.  I have gained new insights as to how General Gamelin must have felt.  Nothing but bad news.  Wake up in the morning, look at the situation map and go right back to bed.  I almost did that last week after I received his May I turn combats.

I feel the same way about opening this file as I do when I hear a loud 3 AM Thump downstairs.  I would prefer not to investigate and am loathe to get the shotgun.

What makes it worse is that his well intended informational snippets contained in the body of the email are, to me, not informational but loaded with ill portent.

This apprehension  is so acute that I promised to watch a movie with my Wife this evening………


Another New System

The Sun Never Sets (TSNS) has been languishing on the shelf for a number of years. Tried its Gallic Brother In Arms – French Foreign Legion – a few years back, but that effort didn’t even make it to the punch counters phase.

Some 45 Minutes later……

Did some quick checking and there are a number of games in this series. Not only French Foreign Legion, but also The Sun Never Sets II and First Afghan War. Each of the games was published in Strategy & Tactics magazine. After rummaging through  boxes stashed under the gaming table, I discovered the latter two. So, I have the entire set. At times like this I feel like an aging acid-addled rock star who, when an interviewer plays an obscure track, mutters “Did I play on that”?

To continue this digression, I’m now faced with a standard gaming conundrum. Since I’m immersed in the common rule set, do I start working through the entire set of games? Or, will this only result in a feeling of obligation and avoidance, with a yearning to try something else?

TSNS has an interesting system. It can’t be considered a hex and counter simulation, but it has more depth than initially meets the eye. The campaigns covered appear to be push-overs for the British Empire. But distances, logistics and objectives can make each campaign a challenge.

Units are categorized by weapon type and morale. Weapons include five different types of artillery (rockets!), two types of machine guns, and four different types of rifles. For morale, units are classified as Veteran, Line, Fanatic and Rabble. The first three receive positive die roll modifications for both fire and melee combat.

Individual units can be organized into Forces. Headquarters (Leaders) can be assigned to Forces. A Headquarters has a tactical rating effecting Battle (combat) and Rally, with a strategic rating influencing Movement. Larger forces have a greater combat strength, which is reflected in the Combat Results Table (CRT). Force organization also effects Logistics.

The basic turn sequence is straight-forward, even though I’ve had some real problems keeping the mechanics straight. These Turn Segments are:

  1. Events
  2. Reinforcement/Replacement
  3. Movement
  4. Battle
  5. Logistics
  6. Rally

Events are randomly generated by 2xD6 rolls applied to a chart. Some results are campaign specific, others generic for the colonial period. Reinforcements and Replacements are game specific and involve either the deployment of specific units or strength factors by unit type.

While movement rates are printed on the counters, the ability to move and length of move is determined by a D6 roll for each Force at the beginning of the segment. Possibilities include no movement allowed, regular movement, forced march with an increased movement allowance, forced march with attrition (elimination of one unit in the force) and “Mad Dash” with even greater maximum movement. A Headquarter’s strategic rating may be added to modify the die roll.

The Battle Segment is somewhat involved. Tactical Initiative (comparing each side’s D6 roll modified by tactical rating of the Headquarters) determines which side proceeds first. This is important since results are applied immediately. Battle has three rounds, two of which involve fire combat. The third round is melee. During fire combat, units with the same morale rating, weapon and unit type are grouped to fire a “Volley”. Artillery fires during the first round, with rifles (all small arms) during the second round. Many native units do not have small arms, and can only “volley” during melee combat. Units with small arms also “volley” during melee. Specific modifiers are applied to the D6 rolls for results on a CRT specifying the number of units eliminated and/or demoralized. The side with the greater losses during a Battle may have to retreat if those losses exceed fifty percent. Forces retreating through an enemy controlled Zone of Control take additional losses.

Forces are supported by either Supply Trains or Foraging. Foraging Forces must roll to determine if they suffer demoralization. Supply Trains are expended after providing support. The number of trains is limited, and their staging/sequencing is important for a steady advance with minimal attrition.

Demoralized Forces may Rally. The ability to rally is influenced by their morale and Headquarters.

I’ve started the March To Peking scenario, covering the 1860 Arrow War. The basic game and scenario specific rules have provided a good experience, and after a number of fits and starts I am getting comfortable with the game’s flow.

I am looking forward to incorporating the optional rules in this and other scenarios. These include Engineering operations, Sieges, Fog of War, Attack From March, Ambush, Evasion, Atrocity and Fair Play, Negotiations, and Civillians.

My next post will offer an After Action Report (AAR).

No Wonder It Seemed So Easy…….

Finally got around to continuing my play of  Romania – The Transylvania Gambit. 

As previously posted, the Romania Army’s plan was badly flawed, and the scenario certainly reflects that.   The availability of German reinforcements to bolster the Austro-Hungarians effectively stops any offensive across the Carpathians.

Despite the slow operational tempo of mountain fighting and Romania’s desperate-from-the-start prospects,  I was settling down for another session when a  casual glance at the rule book moved the game from the possibly forgettable to another memorable rules gaffe.

Tim’s been on me to compile and post a list of our grotesque errors of rules omissions and commissions.  I have consistently demurred.  Not out of personal shame, but because the compilation would be a very lengthy and time consuming process.  So Tim, here’s one in real time.

All those German reinforcements hustled south using the Austro-Hungarian rail network, which has a capacity of three units per turn phase.  It took a few phases, but the Romanian attacks were quickly blunted.  Well, that was too quickly.  While the entire rail capacity is three units, the capacity for any one rail line in that network is only one unit per phase.  Whoops………..

The poor Romanians were not only fighting a flawed initial deployment and the mountainous terrain, but also some very tough units that should not have been there – at least not so quickly.

Well, that put paid to the game.  It was going to be some time before the  operational tempo accelerated past “slog” speed, especially with Winter just around the turn track corner.  My current impatience is not the best mood to enjoy a scenario which accurately represents the time and resources required to build up combat power in this theater of operations.

So, despite my high regard for the system, I decided to pack it up, and move on to another game.

Here’s a photo taken right before it all went back in the box.  Note all those gray German units in the North Central portion of the map.


Islamic State – Libya War

This  game is published by One Small Step Games (OSS) in  Counterfact Magazine.  I downloaded it from Wargame Vault.  It is solitaire, the contemporary topic is of some interest, and the format seemed to lend itself to download and DTP construction. The forum section of the game’s  Boardgamegeek page is essential reading as are the revised rules found at OSS’s game page.

The map printed out fine and looks good.  The counters were difficult to cut because the colors of the various factions’ units are similar shades of drab and lack visible guide lines.  The result was a grotesque lack of uniformity.  I decided to use Risk blocks in lieu of some of the counters/chits.  This improved appearances.

The game’s topic is the war against Daesh in Libya.  Allied forces are tasked with controlling key cities and oil fields as portrayed on the point-to-point map.   Each of the game’s eight turns is broken down into five (or six based on a turn-end roll), IGO-UGO action rounds.  Victory is determined by how many areas Daesh controls, number of active leaders, negative press coverage (due to collateral damage) received by the Allies, and hostages and downed pilots executed.

Allied forces can perform any one of several actions during their phase.  These are conventional unit movement into a Daesh controlled hex which triggers combat, “snatch and grab” operations using special forces to seize Daesh leaders for interrogation  or hostages, landing (amphibious) operations, heli-borne assault, reconnaissance, and strike missions with aircraft.

Daesh actions are generated using a table listing ten possible actions including kidnapping, terrorist attacks, and sabotage.

Combat is performed on a display arraying  Allied units against a Daesh counterpart randomly drawn from the Daesh force pool.   Each Allied unit can be supported by aviation, drone or artillery assets.  Allied forces never eliminate their opponents.  A positive combat result will have the Daesh unit ineligible to be activated again during the current turn, or unable to return to the Daesh unit pool until after the next game turn.  Intelligence concerning the whereabouts of hostages or Daesh leaders can also  result from combat.  Any Daesh force that survives an attack  “fires back” at their opponent and, in certain situations there is a combat modifier due to special weaponry. These units are returned to the force pool.

Here’s an imaginatively framed shot of the game in-progress.

I used traditional blue and red blocks to identify friendly and Daesh controlled areas instead of counters.  At bottom right is the combat display.  Both types of Allied units (combat on top and support at bottom) can fire at Daesh units.  The Allied force pools are located above the combat display.  The red lozenges are for Daesh leaders.  I substituted pink blocks for the hostage counters, blue lozenges for pilots and a yellow block for media.  These were placed on a hand scribbled holding area card, which also had the turn phase track.  Daesh victory points were tracked by a red block, allied casualties by a blue block and collateral damage by a black block.  Turns were marked with another green block, along with stacks of destroyed Daesh counters by a result calling for their re-entry to the force pool sometime later in the game.   The containers were used to hold conventional Allied units not on the map, and the Daesh force pool.  Support units can be used only once per game turn.  In the absence of specific guidance I treated parachute and special forces units as support units since it would take some time to re-brief, re-organize these types of specialized units.

The rules were criticized in a now-deleted post over at Boardgamegeek.  I would say that the layout could be better, perhaps more along the lines of the solitaire Destruction of Force Z, which presented the rules and, most importantly, charts in  game turn sequence.  After flipping back and forth between Islamic State’s eight pages, I did a cut-and-paste to reduce the rules to a manageable, more sequential  and flippable four pages.  Unlike the redacted reviewer, I cannot see playing the game in 60 minutes or less.  Not a bad thing, but there are  too many moving parts. Still, the pace is brisk with plenty of decisions and actions in every turn.

In my game the  Allies lost by Turn 5, probably due to my misreading of the collateral damage rules.  The Combat rules section indicates that collateral damage should be checked after combat – but is that individual combat or turn phase combat?  The Collateral Damage table indicates after all turn phase combats have been completed.  The latter significantly reduces the potential point gain for Daesh.

I enjoyed the game, and don’t regret the cost of purchase, time taken to construct the components, and understand the rules.  It is an intriguing system.  For me, on a cost-benefit basis, the returns on investment seem marginal.  I don’t imagine replaying it right now, or in the near future.  For someone else, this might be a go-to game, but not for me.

Romania: The Transylvania Gambit

This treatment is included with Serbia The Defiant and covers Romania’s August 16 entry into World War 1.

Rather than cooperate with Entente forces in Salonika and attack Bulgaria, the Romanians opted to limit operations against Bulgaria and focus on regaining Transylvania.

This threat was quickly matched by  Austro-Hungarian (A-H), German, Bulgarian and even Ottoman forces.

A-H troops offered stiff resistance  in Transylvania, while a composite force of the latter three nations,  under the command of the redoubtable General Von Mackensen, attacked Romania from the south.  Romanian reverses on both fronts forced the already hard-pressed Russians to send reinforcements to bolster their new ally.

Romanian resistance collapsed, with an Armistice signed in April 1917.

The game is set up and ready to go.  I’ll start pushing cardboard this evening.


Destruction of Force Z – Wrap Up

My immediate interest in the game was triggered while reading The Royal Navy in Eastern Waters:  Linchpin of Victory, 1935-1942 by Andrew Boyd.  This is a very interesting and well researched examination of the events leading up to the Force Z debacle.  The author dispels many of the convenient myths surrounding the event.  Well worth the time and effort, especially if you can pick it up when on Kindle sale for $1.99 or so.

The game reminds me of In Magnificent Style, where you have to push your luck to the limit in order to achieve the intent of Force Z’s sortie.  I did this, especially when I reversed course and sailed towards the Japanese battleships, rather than “game” the system and eek out a minimal victory of just a few points.

To compound the British player’s problems, the chances of sinking the Japanese battleships is fairly low, and seemingly not worth the risk, despite the lucrative victory points.  Also, the odds of fighter cover actually materializing is relatively low, and anti-aircraft fire is fairly ineffective.  In this regard the game reflects the operational and tactical  factors leading to Force Z’s destruction.

The optional rules allow the British player some relief; limiting Japanese bomber availability on a per day basis, increasing the Repulse’s capability to avoid torpedoes, and including the carrier Indomitable to provide available and increased air cover.  I would consider a house rule making British surface attacks more effective and, perhaps, increasing the victory points awarded for bombarding the Japanese landing sites, since this was the mission of Force Z.

The rules are comprehensive and structured to guide the player.  This is good as there are simply too many charts and die rolls to remember.  This also enhances replayability because the player can just break out the game, dial up the rules, and start grinding through each turn’s eleven phases.  On the other hand, this grinding slows game play.  But, a typical game will probably not last too long if Japanese searches are effective.  In my instance, the British enjoyed ideal conditions (overcast weather, radio silence, and poor search rolls) and still had little success.

I like the random events and movement charts, and plan to use  variations  in other gaming situations.  The tactical display was fun because it reminded me of playing Midway back in (as it was called then) Junior High.

I’m now thinking about breaking out Avalanche Press’ Strike South and work through the scenario with more detail to reflect the different operational options historically explored by the British before 1942.  A comparison of the two systems will be interesting.

In summary, this is an engaging game providing excellent value and replayability.


Destruction of Force Z – Session Report

The game set up, along with the initial dispositions of both forces, is shown in the following photo.  The Japanese flag represents the amphibious landing at Kota Bharu.  Placement of the Japanese convoy, battleship and cruiser squadrons is determined during the Random Events Phase.  Force Z is represented by the British flag in Singapore.   The index card and colored blocks are used to keep track of weather and ship damage.

For the first three turns, Force Z moved east of the Anamba Islands,  then turning north towards the landing.  The Japanese were unable to locate Force Z, which was maintaining radio silence in the overcast weather, until it attacked the Japanese battleships (7 VPs) at night (Turn 4).  I couldn’t find anything specific in the rules, so I decided  Japanese surface units appearing during a turn couldn’t move, also.  Despite hitting the Japanese ships, no damage was inflicted.

After this inconclusive encounter, the British sailed at flank speed towards Kota Bharu to bombard the the landings.  The Japanese were still unable to locate Force Z, and could not prevent the destruction of  their offshore convoy which had appeared off Kota Bharu during the Random Events Phase (Turn 5).

After this success, the British steamed south towards Singapore, breaking radio silence to request RAF air cover (Turn 6).

At this point, the Force Z commander decided take advantage of darkness (Turn 7),  steaming north to again engage the  VP-rich Japanese battleships.  The Japanese cruisers entered the northern part of the map during the Random Events Phase.

Force Z moved into the Japanese square, forcing a surface engagement.  It was here that British luck ran out, as the Japanese search was a success, and no RAF fighter cover appeared to help fight off a massive level bomber and torpedo bomber attack.

The following photo shows how I handled the “tactical” aspect of the game.

Both British ships were in the square, so each can be attacked by bombers.   D6 rolls determine the number of attackers and what ship(s) they attack.  The rolls indicated a mixed force of 12 torpedo and 25 level bombers, all of which  concentrated on the Prince of Wales.  The first attack was by the level bombers.  Each ship has a maximum of 10 d6 anti-aircraft rolls.  These rolls either eliminate attackers, or are indicate to hit modifiers.  Bombers need a modified roll of 10 to score a hit.  A further damage die roll is made for each hit.  The rolls are shown below.  I use the dice, rather than the tally sheet included with the game to record rolls, and then use the result to determine hits.  A die that “hits” is then placed above the “tactical display”, as a reminder of the rolls needed for determine damage.

The torpedo bombers were handled in a separate series of rolls.

The Prince of Wales somehow survived, taking five hits, two less than the number to sink. Five hits reduced its movement rate to one square per turn.  After this mayhem, a surface action occurred.  The Japanese battleships and Prince of Wales were unaffected, but the Repulse took one damage hit.

The Repulse was ordered back to Singapore, while the stricken Prince of Wales could only hope for a failed Japanese search, or the intervention of the RAF.  The ship was located and the RAF again failed to provide air cover.  The level bombers did not find the Prince of Wales, but the torpedo bombers did.   An attack by 27 aircraft sank the ship.

The Repulse continued south during the night (Turn 10), while the Japanese made another landing at Singora.

Repulse was able to return to Singapore before the Japanese Turn 11 Search Phase.  This ended the game.

The Japanese victory point total breakdown was:

  • +8 Points for sinking Prince of Wales
  • +1 Point for one hit on the Repulse
  • +1 Point for each Japanese landing
  •  -2 Points for the sunk convoy

The net is  9 Japanese victory points.  The historical total was 18 points.

Wrap-up in the next post.

Destruction of Force Z – Overview

Downloaded this  awhile ago over at Wargame Vault, based on reviews at Boardgame Geek.  It’s a Minden Games solitaire offering  originally published in Panzerschreck Magazine #16.

As is the case with most solitaire games, there are  lots of charts and wristage.  I skimmed the rules and decided to just start playing.  The rules are laid out in turn phase sequence, so I just set up the IPad beside the game and went at it.

Each turn consists of up to eleven phases.  These are:

  1. Weather – Roll 1d6 for either clear or overcast conditions.  Overcast is a +1 modifier for Japanese Search.
  2. Radio – British player can break radio silence.  In doing so loses a -2 drm during Japanese Search.  But, gains possibility of Air Cover to help attrit attackers.
  3. British Ship Movement – Can move up to 4 squares (cannot move diagonally) three times a game, or one-three squares.  Damage reduces movement.  During movement British ships can be attacked by minefields and/or submarines if in same hex.
  4. Random Events – Dictates appearance of Japanese transports, cruiser or battleship units.  Can also effect movement of Japanese submarines, shore landings or allow “shadowing” which is a -1 drm for Japanese Search.
  5. Japanese Ship Movements – Ships on map roll 2d6 for random one to two square movement.
  6. Japanese Search – Rolls 1d6 (3 or less) to sight British ship(s).
  7. British Air Cover – If Radio silence is broken, presence of air cover over British ships determined by die roll.  If present, roll 3d6 for number of fighters.
  8. Japanese Bomber – Includes both level bombers and torpedo bombers.  Roll 1d6 for contact.  If contact make separate 1d6 roll for number of level and torpedo bombers.
  9. Combat Phase – Roll 1d6 for individual attacks by Air Cover, then 1d6 Anti-Aircraft fire to eliminate/abort/or effect aim of bombers.  Then roll 1d6 for success by individual level bombers and torpedo bombers.
  10. Surface Battle – Takes place when opposing force ships in same square.  Roll 2d6 for hits and then 2d6 for effect(s).
  11. Bombardment – British in same hex can shell Japanese landing sites, automatically gaining victory points.

There are 18 different situations where wristage and charts are involved,  in addition to  Air Cover attacks, Anti-Aircraft, and Bombing attacks handled on an individual aircraft basis.

Having Second Front air phase flashbacks and may need this to get through a session.